Help - Search - Members - Calendar
Full Version: I was given a Metal Lathe.
914World.com > The 914 Forums > 914World Garage
Pages: 1, 2, 3, 4, 5
nathansnathan
I haven't tried using carbide on my lathe so take it for what it's worth, but there are a number of disadvantages to carbide.

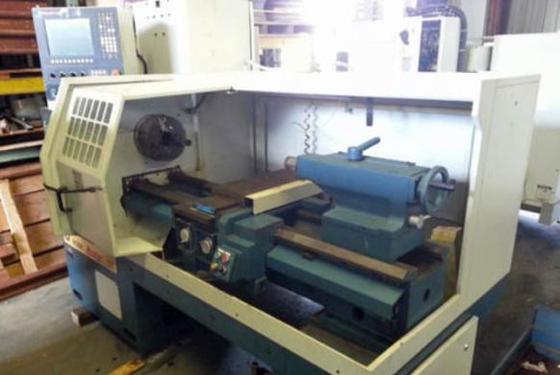
I'm not sure how fast your machine will turn or if it's got the horsepower to sustain recommended feed rates at higher speeds, but I can say that mine doesn't come even close.

Carbide doesn't like sudden changes in temperature, which means running full coolant is preferable. If you stall out your spindle which carbide, you are going chip your tool. In my experience running production lathes with indexable carbide tooling, it's just a different word as far as rigidity. HSS is going to be much more forgiving of chatter, any flexation. Also the nature of using turn screws to manually feed vs even a jog wheel much less cnc control makes hss seem more at home on a toolroom style manual lathe.

HSS can be sharpened easily in whatever grinder, carbide is going to be more difficult to sharpen. At lower spindle speeds of a manual lathe, you're going to chip and dull carbide bits a lot more than if you could go 3x faster, which is where carbide shines. There may be a sweet spot for heavy cutting if you are turning large material (high surface feet per minute) where a carbide insert tool would be handy, but it will probably come down to if your lathe has the heft to maintain that. Like I said, stall the spindle and you'd be flipping the insert.

We never ground carbide when I did production. With indexable turret style tooling, you flip the insert when it gets dull. Each insert has like 2 -4 sides, and they are expensive, like $20 for each insert - and you don't buy just 1.
IPB Image

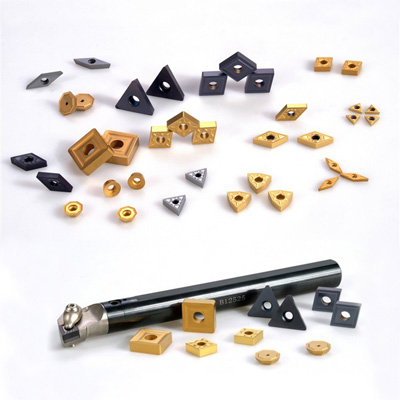
So problems with carbide are need to run flood coolant ideally, not enough spindle speed, not enough spindle power at higher sfm, difficult/not possible to sharpen depending on what style you get, and more expensive.

Like I said, I don't have any carbide tooling for my little lathe. Based on my reading/research, it wouldn't be worth it.
Series9
QUOTE(mbseto @ Feb 23 2016, 09:18 AM) *

This is turning into a pretty cool thread!


(see what I did there?)


sunglasses.gif
Mueller
http://blog.cnccookbook.com/2016/02/17/peck-parting-lathes/


More info on parting.

Yes the story is mainly for CNC, but still some good reading. Also check out the comments as there is some good information there as well.

Darren C
QUOTE(Series9 @ Feb 23 2016, 02:12 PM) *

Fantastic information. Some of the tools have a wax-like protective coating on the tips. That's probably what you're seeing as "poor resolution".


Again you’re most welcome!
The wax on the tool ends comes on new HSS tools to protect them in transit and storage, so hopefully if the cutting edge is intact, they should be good to go.
As Nathan says Carbide, Ceramic tool tips come in box sets 6, 10 12 etc and at $20 a tip it’s a big initial expense. You also need the correct tool holder that can be anything from $50 to $200 to fit them in.
Yes you flip them once the edge is chipped so you get 2 or 3 cutting sides per tip but you CANNOT sharpen them, just throw them in the trash can. Speed, feed, material, angle and depth of cut need to be right for these type of tools (as Nathan has said) they chip and break real easy.
Generally used for high spindle speed turning 1000rpm upwards by operators with a good knowledge.
This is why I’m steering you away from this type of tool as a beginner. Besides you can do pretty much everything you need at home with HSS tools for less cost and lower lathe speeds.
Series9
Here's a close up of some of the tools that were unclear in the larger picture:

Darren C
The top two have most probably been ground for detail undercutting or for cutting a square thread. I’m drawn more to under cutting due to the side clearance. Both are RH tools which cut using topslide (in and out at 90 degrees to lathe only) An example of undercutting would be where you make a machine thread or basic bolt and a small area under the bolt head is undercut to the thread core diameter for the thread tool to exit into at the end of a cutting stroke. Or basically the area at the end of any machine cut thread (particularly against an obstruction like a bolt head or shoulder) that has no thread.
Basic Bolt threads that are rolled not machine cut, don’t have an undercut.
DONT be tempted to try and part off using these tools, they're not going to be strong enough or have the correct clearance angles and relief.


The bottom larger tool is a LH knife. Looks a nice tool, good for turning steel (has a good side and front angle for steel) ideal for turning and facing off in a LH situation.
Series9
CAUTION: THE FOLLOWING CONTENT MAY HAVE ENTERTAINMENT VALUE.


So.....my titanium wedding ring has always had annoying sharp edges at the top.

I know you told me to not put the small chuck in the large chuck, but it helped me solve my problem.

My ring is much better now. Chamfered on both edges, nice and smooth.

happy11.gif

r_towle
Divorce coming soon?
Series9
QUOTE(r_towle @ Feb 23 2016, 11:20 AM) *

Divorce coming soon?


Nope. I'm going to do the same to hers when she picks up the baby.
Darren C
I'd have kept the sharp edges....

In the same way as those dog collars that gives the dog a small electric shock so it knows when its done wrong.... :-)
Series9
QUOTE(Darren C @ Feb 23 2016, 11:28 AM) *

I'd have kept the sharp edges....

In the same way as those dog collars that gives the dog a small electric shock so it knows when its done wrong.... :-)


What? That's it?

You're not going to chastise me for major lathe safety violations?

You know: "kindergarten with a loaded gun"...

sunglasses.gif
Darren C
You just know I wouldn't be able to resist a photo like that... ;-)

Wrong on so many levels....
Series9
QUOTE(Darren C @ Feb 23 2016, 11:48 AM) *

You just know I wouldn't be able to resist a photo like that... ;-)

Wrong on so many levels....


There you go. Now I feel better.....oh, that's probably because I fixed my ring.... biggrin.gif
Darren C
"Turning" to the dark side you are… (see what I did there) ;-)

Travelling through a hypermill lathe ain't like dusting crops, boy! Without precise calculations we could fly right through a starter tool set or bounce too close to the chuck, and that'd end your trip real quick, wouldn't it?

Much to learn you still have…my old padawan. … This is just the beginning!

Use the Course…............A lathe course.
Series9
QUOTE(Darren C @ Feb 23 2016, 01:36 PM) *


Use the Course…............A lathe course.


There is no course. The closest one I can find is in Houston (Dagobah System), and that's like you flying to Berlin to go to class.

I'm desperately needed elsewhere, so I have to do it on my own, just like Luke.

Who says the British don't have a sense of humor? smile.gif Well...me, mostly.
Series9
"Darkside Turning" is now the name of S9's machine shop department.

happy11.gif


Who wants a T-shirt?
nathansnathan
I remember this time they had me turning these pistons - J&E pistons is right accross te street from HUntington Beach Machining where I worked. The boss man set up the 1st one as we were using the toolroom lathe for whatever reason, had a 3 jaw universal chuck instead of a collet setup. He does the math, and I'm like, "are you sure?" People like to run aluminum really fast and take these big cuts... apparently these were some special alloy. First one I try to run, BAM! tear a jaw right off the chuck, the piston blank hitting the guard, the lathe jumped off the ground. You learn certain things with an experience like that - keep your hand on the emergency shut off, don't mess around with how you chuck stuff up. Chucking the taper of another chuck is retarded tongue.gif
Darren C
“Darkside Turning” good name!

I’ll have the first T shirt ;-)

Will it have your face on it, like when Vader takes his helmet off to show your lathe scars?

As for British “sense of humor”, I think you’ll find its spelt “Humour”, we invented the language..

That's what you call….”The Empire (British Empire) Strikes Back” :-) :-) :-)
Series9
QUOTE(Darren C @ Feb 23 2016, 03:19 PM) *

“Darkside Turning” good name!

I’ll have the first T shirt ;-)

Will it have your face on it, like when Vader takes his helmet off to show your lathe scars?

As for British “sense of humor”, I think you’ll find its spelt “Humour”, we invented the language..

That's what you call….”The Empire (British Empire) Strikes Back” :-) :-) :-)


lol-2.gif

Darren, you and I are now officially friends.
Series9
QUOTE(nathansnathan @ Feb 23 2016, 03:08 PM) *

Chucking the taper of another chuck is retarded tongue.gif


But I needed a small chuck and there's no other way to mount it. And, it's only retarded to you because you have followed the instruction of an old machinist from when you were trained.

I don't have anyone to tell me no, so I have to use my own logic and common sense. Placing that small chuck in the lathe makes perfect sense to me. How is it different than chucking any other piece of metal?


If there's a defense, the small chuck's shaft is not tapered. smile.gif Only the end close to the chuck had a taper. I was able to set it up so it rotated with a .002" runout.

It might be a silly thing to do, but give me a real reason it's dangerous.

"Because I said so" and "Because it isn't done that way" are not acceptable answers.
Darren C
QUOTE(Series9 @ Feb 23 2016, 08:22 PM) *


Darren, you and I are now officially friends.


Ditto !
nathansnathan
Somehow it looked like the 1st chuck was clamping on a taper and you were using a live center in the tailstock to hold it concentric. -I see now that's not the case. If it was, well yeah that would be really unsafe.

3 and 4 jaw chucks aren't nearly as secure as a true collet system, 3 jaw especially - and to run 2 doubles the risk. I've pulled some plastic parts right out of a 3 jaw, like deforming the part. No gaurds on these old school lathes, one becomes wary. You need to develop a healthy respect for the lathe whatever size. Here's the Bridgeport EZ path I crashed. It was never the same after that. I can say, "picture it leaping off the ground" but there's no substitute for actually crashing a lathe to instill the fear that is required to run one with the proper mindset.
IPB Image
Series9
QUOTE(nathansnathan @ Feb 23 2016, 03:08 PM) *

keep your hand on the emergency shut off,


I never keep my hand on that switch. To do so would mean that my head is in line with the chuck.

Yeah, I'm not doing that. If something flings off, it might make a hole in the wall, but my head will not be a target.

They should put the switch at the tailstock end...
Series9
QUOTE(nathansnathan @ Feb 23 2016, 03:40 PM) *

Somehow it looked like the 1st chuck was clamping on a taper and you were using a live center in the tailstock to hold it concentric. -I see now that's not the case. If it was, well yeah that would be really unsafe.

3 and 4 jaw chucks aren't nearly as secure as a true collet system, 3 jaw especially - and to run 2 doubles the risk. I've pulled some plastic parts right out of a 3 jaw, like deforming the part. No gaurds on these old school lathes, one becomes wary. You need to develop a healthy respect for the lathe whatever size. Here's the Bridgeport EZ path I crashed. It was never the same after that. I can say, "picture it leaping off the ground" but there's no substitute for actually crashing a lathe to instill the fear that is required to run one with the proper mindset.
IPB Image


It's a wedding ring. I was using the live center to push it up against the (assumed) square jaws of the small chuck in order to create enough friction for the ring to continue spinning when I started cutting.

And, WOW, you saw that lathe hop around?!!

I hope to never see that.
nathansnathan
QUOTE(Series9 @ Feb 23 2016, 12:46 PM) *

It's a wedding ring. I was using the live center to push it up against the (assumed) square jaws of the small chuck in order to create enough friction for the ring to continue spinning when I started cutting.

And, WOW, you saw that lathe hop around?!!

I hope to never see that.


Boss man used to say, "Things go south real quick". Words to live by as a machinist. I wouldn't chuck anything like that ever again. biggrin.gif You're lucky it didn't get mangled, seriously. It's kind of hard to turn something like that without a collet system, but i'd chuck it in the lathe and use a stop to make it sit flat against the chuck. A dial test indicator, like I said before, is handy to check that it's actually running true. 3 jaw is finicky though, too much feed, you mangle the part. I haven't turned much Titanium, seems tough.

Lathe hopped once. It hadn't hit the ground before I hit the cutoff switch - I guess that's another better thing about a cnc lathe, when you do the hard cuts nothing else to do but cover the switch.

I remember turning some sensors from big ass stainless hex stock. Was running like 5 lathes, but when this one got to that operation, I'd cover the cutoff through the whole operation - ridiculous cost when things do go south, taking out inserts, tool holders, chuck jaws, stuff gives you nightmares. In production, you watch your offsets, if they start moving, can be a false edge, things can go wrong real quick, check your tool for burn. With 1 time setups, every cut is one to be wary of.
Series9
QUOTE(nathansnathan @ Feb 23 2016, 04:11 PM) *

I wouldn't chuck anything like that ever again. biggrin.gif


I wish I could tell you that will never happen again. biggrin.gif And, the ring wasn't chucked. It was "friction confined" (my new proprietary term).
Series9
Darkside Turning's first T-shirts will be called the 10-finger edition. I will put an impression of my hands on each sleeve.

Don't be left holding the bag when the 9-finger edition comes out. Get yours now.

smile.gif


If you pre-order your 9-finger shirt, I guarantee the first three will be stained with my actual blood. I'm sure they will sell well in the UK.
Series9
QUOTE(Series9 @ Feb 23 2016, 03:22 PM) *

QUOTE(Darren C @ Feb 23 2016, 03:19 PM) *

“Darkside Turning” good name!

I’ll have the first T shirt ;-)

Will it have your face on it, like when Vader takes his helmet off to show your lathe scars?

As for British “sense of humor”, I think you’ll find its spelt “Humour”, we invented the language..

That's what you call….”The Empire (British Empire) Strikes Back” :-) :-) :-)


lol-2.gif

Darren, you and I are now officially friends.


Here you go:


veekry9
icon8.gif
veekry9
Click to view attachment

You're a ginger too! laugh.gif
What a fluke,no relation to Sith,I'm guessing.
Looks like that fla sun is a little harsh on that northern complexion.
That was too easy,a kind of rip,lacking originality.
How bout Serious9 Turning,a subsidiary of Series9.
That way serious people will flock to your door rather than to the flimflam flybynight con artist shop,down the street.

QUOTE(toolguy @ Jan 2 2016, 11:42 PM) *

Find an old retired machinist to teach you how to first-
1. grind cutter edges
2. set up a cutter in the toolpost at correct height and angles. . that's a 4 way toolpost and requires shimming cutters to correct height
3. show you the correct chuck rpm speed and correct cutter feed speed. The tendency is to turn too fast.
4. after all those, start on PVC or wood. . .
5 remember no matter how fast you think your reactions, hands and fingers are,
the chuck is always faster and a lot stronger.

It's not rocket science but it's easy to hurt yourself badly. . You might want to start
by positioning the machine and leveling the bed. Then make sure the headstock is parallel and perpendicular to the bed and center of tailstock. Determine the off center runout of the chuck. .Those Chinese chucks are usually spec'ed at .003 off center as the normal limit when new . If not set up properly, no matter what you do, your finished project will have taper and be out of square and off center.


Some good experienced advice,then,'secure' the machine to the floor.
An unbalanced load may tip the machine over.
A mod we did with the Hardinge toolroom turret lathes was 'pan' them.
A sheetmetal steel pan braked and welded watertight,large enough for the machine's footprint,3-4" dp.
The pan should not intrude into the operators footspace,the pan's floor sloped to the back,the rear of the pan's lip sloped.
A giant pool of swarf and sour coolant on the floor is thus avoided.
When he says level and square,he means dead level perfect,not merely carpenter.
Sit it down on 3 points,2 at the headstock end,to minimize twist.
Shim to interference all around for good stability and drill for anchors into the concrete.
You'll need an accurate level in your toolbox eventually,for serious work.

http://www.penntoolco.com/mitutoyo-digital...o-360-pro-3600/
950-318 Mitutoyo Pro 3600 Digital Protractor Level $385.00

A laser level can get it close,a laser transit will do better.
http://www.exactmachineservice.com/cnc-laser-alignment/
They may know someone in fla.
/
Series9
The moment you learn to speak English/American/Canadian, I would love to hear what you have to say. smile.gif
r_towle
Shirts should say "turning stuff into shit"
Or "turning shit into stuff"
veekry9
From the Latin.
Plagiarism:plagiarism is the "wrongful appropriation" and "stealing and publication" of another author's "language, thoughts,ideas,
or expressions" and the representation of them as one's own original work.https://en.wikipedia.org/wiki/Plagiarism
'It isn't brass you ass',an observation by journeymen of apprentice's errors.
Not knowing the difference is a signal of ignorance and or negligence,a result of lack of knowledge.
Attempting to machine and sell an aircraft part without the oversight and endorsement of an Engineer is a felony,punishable by life imprisonment.
The material selection of vital automotive components likewise,requires an engineer's approval,as a failure of control parts causing harm,may be grounds for prosecution.
Discovering a trig error in a preliminary ruf op,it was determined that the entire 900kg lot of S5000 was scrapped.
The machinist responsible was questioned,he attempted to cover his ass,not wishing to be held accountable,he was.
I learned a few years later from a disgruntled journeyman,a former employee,that they had replaced the material with 4340,the availability of that specified,untimely.
The switch was discovered by the client,a suit was brought,the vendor forced into surrender and loss.Military helicopter flight control components.
http://asm.matweb.com/search/SpecificMater...?bassnum=M434AE
https://en.wikipedia.org/wiki/Mass_spectrometry
http://www.dtic.mil/dtic/tr/fulltext/u2/a231588.pdf
http://standards.sae.org/amss5000/
Caveat emptor.
http://www.goltens.com/in-situ-machining/f...ing-on-schedule
https://en.wikipedia.org/wiki/Babbitt_(alloy)
To something like this,actually,exactly like this,steel mill shears to heavy crushers and their power transmission gears,shafts and boxes.
Hydrostatic conversions are economical life extenders,for heavily loaded shafts,on legacy large capital equipment.
Several decades later,I recall,a 44"ID bearing was repaired in record time,prompting the prez to remark to the gm,"Now he's a machinist!".
He made it worth my while,we continued until he retired the chair and passed away shortly afterwards,a decent selfmade man,100M+.
Having had the privilege of working with these men over the course of four decades and more,a common attribute is a low tolerance for bs.
Clearly,some of the 'advice'extended here by charlatans and neophytes is of that nature.
/
Mueller
QUOTE(Darren C @ Feb 23 2016, 06:55 AM) *

QUOTE(Series9 @ Feb 23 2016, 02:12 PM) *

Fantastic information. Some of the tools have a wax-like protective coating on the tips. That's probably what you're seeing as "poor resolution".


Again you’re most welcome!
The wax on the tool ends comes on new HSS tools to protect them in transit and storage, so hopefully if the cutting edge is intact, they should be good to go.
As Nathan says Carbide, Ceramic tool tips come in box sets 6, 10 12 etc and at $20 a tip it’s a big initial expense. You also need the correct tool holder that can be anything from $50 to $200 to fit them in.
Yes you flip them once the edge is chipped so you get 2 or 3 cutting sides per tip but you CANNOT sharpen them, just throw them in the trash can. Speed, feed, material, angle and depth of cut need to be right for these type of tools (as Nathan has said) they chip and break real easy.
Generally used for high spindle speed turning 1000rpm upwards by operators with a good knowledge.
This is why I’m steering you away from this type of tool as a beginner. Besides you can do pretty much everything you need at home with HSS tools for less cost and lower lathe speeds.


If you ever see a pot of this stuff don't be tempted to stick your finger into it like one could do with a melting candle!

Much, much hotter and it doesn't come off as easily...and no, I didn't do it. Some other knuckle head did it a few years ago in our tool cutter and grinder shop.
Series9
QUOTE(Mueller @ Feb 24 2016, 09:51 AM) *


QUOTE(Series9 @ Feb 23 2016, 02:12 PM) *

Fantastic information. Some of the tools have a wax-like protective coating on the tips. That's probably what you're seeing as "poor resolution".


If you ever see a pot of this stuff don't be tempted to stick your finger into it like one could do with a melting candle!

Much, much hotter and it doesn't come off as easily...and no, I didn't do it. Some other knuckle head did it a few years ago in our tool cutter and grinder shop.


Is he on the "9 Finger Edition" of his T-shirts? laugh.gif


You guys are warning and warning me about how dangerous machine shops can be, but they appear to be filled, at least partially ( smile.gif ) with idiots.
Series9
Got the new tool post.

Now I have to take the base to a machine shop with a mill to cut the base of the T nut.

Dammit.

Series9
Two questions:

Given a narrow bushing, like a clutch pulley on a 914:

How do you accurately chuck something so thin?

How do you chuck this in a way that you can machine the outer diameter?

I have a feeling that the answer is to make a tool to insert in the chuck and then mount the bushing with a bolt.
Series9
Perhaps a better route to this question:

If I were going to make this bushing from brass, I think the steps would be:

1. Chuck up some solid brass stock.

2. Face the end.

3. Bore the inner diameter.

4. Turn the outer diameter.

5. Create the contour on the face (although it's not necessary to the finished piece).

6. Groove the OD for the cable.

7. Part the pulley from the parent stock, leaving a small amount to turn the other face.

8. Then what? How do I put it back in the lathe in a way that I can turn a parallel face on the parted side?
toolguy
How to hold something on the inside with a small diameter
Use expanding arbor collets, just another in the line of the many tools you'll need. .

How to hold thin wall tube. . . 6 jaw chuck is best, make percision inside bushing so you don't distort the tube.
914forme
QUOTE(Series9 @ Feb 27 2016, 11:18 AM) *

Got the new tool post.

Now I have to take the base to a machine shop with a mill to cut the base of the T nut.

Dammit.


Wow that is an old school Apple Mouse
Mikey914
You have the right idea, we did leave off the grove detail on the delrin ones as it's not necessary, and would require a second operation to add to the back side. We finish off the back side on the part off.
Series9
QUOTE(Mikey914 @ Mar 6 2016, 03:47 AM) *

You have the right idea, we did leave off the grove detail on the delrin ones as it's not necessary, and would require a second operation to add to the back side. We finish off the back side on the part off.


So, is that a parting tool that contains the profile?
Darren C
Joe,

You have 2 options here.

Face off the bar stock.
Machine the "hub" profile on front face.
Machine large diameter and cut cable groove.

Here's where you choose option 1 or 2

Option 1

Using parting tool cut reverse of pulley down the the Largest diameter of hub profile.
Second run with parting tool closer to the chuck (and to the overall width of the pulley at the hub and to the smaller size of pulley hub bevel NOT hole size)
Grind a thin tool for hub bevel, fit down double width parting slot and cut Hub profile on reverse of pulley nearest chuck.
Now drill hole through centre (left until near the end to retain strength).
Finally part off to over all width.

Option 2

Buy some reverse jaws for your chuck

IPB Image

Part pulley off fully extra wide, flip and cut hub profile in reverse jaw chuck.

Hope that makes sense?
Mikey914
QUOTE(Series9 @ Mar 6 2016, 06:21 AM) *

QUOTE(Mikey914 @ Mar 6 2016, 03:47 AM) *

You have the right idea, we did leave off the grove detail on the delrin ones as it's not necessary, and would require a second operation to add to the back side. We finish off the back side on the part off.


So, is that a parting tool that contains the profile?

Yes, and it's possible to and the detail on the bacside, but you waste more material handling have more machine time per unit.
Series9
QUOTE(Mikey914 @ Mar 6 2016, 05:58 PM) *

QUOTE(Series9 @ Mar 6 2016, 06:21 AM) *

QUOTE(Mikey914 @ Mar 6 2016, 03:47 AM) *

You have the right idea, we did leave off the grove detail on the delrin ones as it's not necessary, and would require a second operation to add to the back side. We finish off the back side on the part off.


So, is that a parting tool that contains the profile?

Yes, and it's possible to and the detail on the bacside, but you waste more material handling have more machine time per unit.


I have no intention to compete on this part, so for my education as a machinist, may I see a picture of the parting tool that you use to accomplish that in one pass?

Please. beerchug.gif
Series9
QUOTE(Darren C @ Mar 6 2016, 04:01 PM) *


Option 2

Buy some reverse jaws for your chuck


I infer from this that the lands on the jaws on the chuck should be perfectly perpendicular to the X axis (or turning axis).

I assumed this at first, but have found this assumption to not be true (no pun intended). That assumption ruined that brake rotor I first turned last month.

I actually faced the outside of the jaws on my chuck in an attempt to be able to simply chuck a piece up square with the jaws. I haven't had any real success in that respect.
mbseto
Hey if you're still looking for projects to make, I have a 4" telescope objective lens with a fine thread. Need to thread a tube for it, or at least a short section I can weld on to the end of a tube. If you're game for something like that, I'll come up with exact measurements.
Darren C
QUOTE(Series9 @ Mar 7 2016, 02:21 AM) *


I actually faced the outside of the jaws on my chuck in an attempt to be able to simply chuck a piece up square with the jaws. I haven't had any real success in that respect.


Jeeez Joe...That's a bit harsh!!!

Standard orientation chuck jaws can clamp around the metal bar in the most conventional way; but also open outwards to clamp inside large tube. (subject to it being a short length of tube or supported in a lathe steady. or have a rotating centre at the other end)

With a reverse jaw set you can clamp around the outside of larger diameters (that conventional jaws wont open up far enough to hold) or where the metal doesn't need to pass through the eye of the chuck. The beauty of the reverse jaws is that you use the shoulder "step or land" of the jaw to push up against and get the "job" flush and square. (Ideal with your pulley example where its too thin once parted off to clamp and get it running true without great effort to machine the reverse side)

I'm not sure what condition your chuck is in but you should NEVER need to turn down chuck jaws! Besides, good quality jaws are hardened steel and at best you'll ruin your lathe tool.

What you need is a good 4 jaw chuck with conventional jaws and a good 3 jaw with conventional and reverse jaw set and you should be able to turn most things.
Anything big, you need a bigger lathe and faceplates which is completely different territory that you aren't ready for just yet and to be fair I doubt you'll ever need in a garage.
Series9
QUOTE(mbseto @ Mar 6 2016, 10:10 PM) *

Hey if you're still looking for projects to make, I have a 4" telescope objective lens with a fine thread. Need to thread a tube for it, or at least a short section I can weld on to the end of a tube. If you're game for something like that, I'll come up with exact measurements.


I am not up to threading yet.
Series9
Lathe update: I still have ten fingers!


I'm still not up to threading, but I do get much more reliable results these days.


Here's a little thing I did today that saved me at least five days of waiting. I'm working on making a fuel injector kit for Vanagons where I'm going to use EV6 injectors and CB fuel rails. Well, good fittings to go in the rails are hard to find here, so I went to Lowe's and got four crappy barb fittings and then "fixed them".

smile.gif

This is a "lo-fi" version of our main content. To view the full version with more information, formatting and images, please click here.
Invision Power Board © 2001-2024 Invision Power Services, Inc.