Full Version: Home made tools
Your tongue would stick to it like Victor Christmas in "Dumb and Dumber"
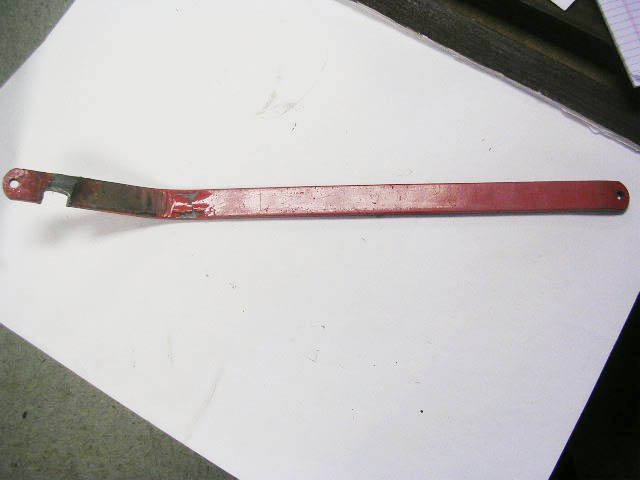
Someone asked ....... Torsion Bar Tool

:lol4:Your tongue would stick to it like Victor Christmas in "Dumb and Dumber"
Here is my homemade tube notcher. There is a piece of shafting with a linear rail bearing. I am not sure how it will hold up to the rotation so time will tell. Just so happens the vice centers my 1.5" tubing to the hole saw perfectly. The hole saw is replaceable of course.
Bolts down to the table and the vice is slotted so I can get it on any angle.
Click to view attachment
Click to view attachment
Bolts down to the table and the vice is slotted so I can get it on any angle.
Click to view attachment
Click to view attachment
Case Splitter:
I had a hard time splitting cases. First one was a PITA and the second one just didn't want to part. I was about to order an oil pump case splitter but didn't want to wait to get it.
Inspired from the classic VW oil pump case splitter, I made a short trip to Home Depot an got:
1. One 2 1/2 PVC pipe coupler
2. 3/8x2" bolt
3. 3/8 nut
4. Washer
5. 3/8x1" spacer
Total $3.50
I cut a 1 1/2" slice of the PVC part and then cut a slit into it.
Installed it and voila!
Works like a charm!!
Click to view attachment
Click to view attachment
Nice ... 
QUOTE(clow @ Apr 9 2012, 05:07 PM) 
Here is my homemade tube notcher. There is a piece of shafting with a linear rail bearing. I am not sure how it will hold up to the rotation so time will tell. Just so happens the vice centers my 1.5" tubing to the hole saw perfectly. The hole saw is replaceable of course.
Bolts down to the table and the vice is slotted so I can get it on any angle.
Click to view attachment
Click to view attachment
Sure look like it'll do a great job on that cardboard roll!

I hate to admit it but I just spent $2.50 too much.
The shortest bolt with nut that holds the case and a small socket are a perfect substitute for the hardware. You'll just need the PVC pipe coupler.
Case Splitter:
I had a hard time splitting cases. First one was a PITA and the second one just didn't want to part. I was about to order an oil pump case splitter but didn't want to wait to get it.
Inspired from the classic VW oil pump case splitter, I made a short trip to Home Depot an got:
1. One 2 1/2 PVC pipe coupler
2. 3/8x2" bolt
3. 3/8 nut
4. Washer
5. 3/8x1" spacer
Total $3.50
I cut a 1 1/2" slice of the PVC part and then cut a slit into it.
Installed it and voila!
Works like a charm!!
Click to view attachment
Click to view attachment
The shortest bolt with nut that holds the case and a small socket are a perfect substitute for the hardware. You'll just need the PVC pipe coupler.
QUOTE(Valy @ Apr 16 2012, 06:42 PM)
Case Splitter:
I had a hard time splitting cases. First one was a PITA and the second one just didn't want to part. I was about to order an oil pump case splitter but didn't want to wait to get it.
Inspired from the classic VW oil pump case splitter, I made a short trip to Home Depot an got:
1. One 2 1/2 PVC pipe coupler
2. 3/8x2" bolt
3. 3/8 nut
4. Washer
5. 3/8x1" spacer
Total $3.50
I cut a 1 1/2" slice of the PVC part and then cut a slit into it.
Installed it and voila!
Works like a charm!!
Click to view attachment
Click to view attachment
QUOTE(Phoenix-MN @ Aug 12 2010, 05:23 PM)
Let's kick it up a notch This isn't 914 specific but it can be used with any Porsche. I always wanted a set of scales for corner balancing but couldn't quite justify ~$1500,00 to buy a set. So I set out last winter to design and build a set. Using Ax-Man surplus store parts and Digikey I came up with this
 They're not "gnats-ass" perfect but will do the job. Total investment was about $275.00.
Click to view attachment
Hey Paul,
I'm running my 914 V8 at open track events and have been adjusting corner-weight with a big lever arm and a bathroom scale. It's a bunch of work and accuracy is uncertain.
So I'm over the moon about your 4-scale system. Can you share what all is involved in reproducing what you have? I'm guessing you're an E.E. and have designed this yourself. Any chance you have a schematic & Parts list?
Thanks,
Terry
a foot long screw driver with the last inch of the tip bent at a 30 degree angle makes a great valve cover remover tool.
QUOTE(carr914 @ Jan 9 2009, 08:32 PM)
This thread would not be complete without FourBlade's RockingChair Rotisserie

T.C.
Click to view attachment
I like this rocking chair idea for working on the bottom side of the car. I wanted to make one out of steel, but it would be big cost. This is probably only a one or two time use before the weather starts taking it apart.
Dave
Don't know what happened to the attached picture. 
El cheapo torque wrench calibration method
I fixed the wrench head in a vice so it can rotate up-down. Set the wrench at an angle parallel to the floor. Then I stepped on my old mechanical bathroom scale holding the wrench handle exactly 1 foot from its head (this is to offset the weight of the wrench). Note the reading on the scale.
Now I pushed down on the handle until it clicked and subtracted my new weight from the previous reading. This is the torque in foot*lb that the wrench is set to.
All I had to do is adjust the scale to that value and test again at different values.
BTW, I anticipate that some will claim the bathroom scale precision is sh**t. That's partially true since the total reading might be wrong but the delta between the two readings is pretty accurate.
After buying bulk 3/8" stainless fuel line from Jegs and not knowing how much work it would be ...... I bought a double flare tool to create a 'bubble' on the ends of the lines ........ that did not work, apparently the stainless was too rigid as it was just getting squashed and slid through the clamp with no resultant bubble ..... 
Knowing eventually I wanted to go with fuel injection, I needed to have some sort of 'bead' on the lines for the higher pressure. I looked online and found bead rollers ......... but none sold locally and I was in the midst of doing this job and did not want to stop until I was completed ....... after seeing the bead roller pics online, I thought I'd try making one ....... I went to the local hardware store and got a 5/16" bolt ..... some loose bearings, a heat treated 10-24 allen bolt and a tap ....... I put the 5/16 bolt on the lathe and drilled a hole through the head and tapped it for the allen bolt ...... selected one of the 1/8" dia. bearings and drilled a hole for it on the side of the bolt and put the bearing into the side hole .... I cut the threaded portion of the 5/16" bolt off ......... I used steel for the 5/16 bolt to prevent the 'stainless on stainless' galling possibility and of course some lube.
I then tapered the tip of the allen bolt on my sander while chucked and spinning it with a drill ....... the taper would force the bearing out when screwed in. The 5/16 bolt needed to be reduced in diameter a bit to fit into the fuel line ....... because when the line was cut with the tubing cutter it reduced the line diameter a bit.
Looking back now, I should have just bought some pre-made lines from the available sources ........ nonetheless I got it done and am happy with the result
That's great thinking!
 Very ingenious
Nice! If I remember correctly you can only put a single flare on stainless as it is too brittle for double.
wanted to add this tool - helpful for alignments maybe?
Solid shock replacements.
http://www.914world.com/bbs2/index.php?sho...6791&st=500
Solid shock replacements.
http://www.914world.com/bbs2/index.php?sho...6791&st=500
QUOTE(jimkelly @ Sep 8 2013, 03:36 PM)
wanted to add this toll - helpful for alignments maybe?
Solid shock replacements.
http://www.914world.com/bbs2/index.php?sho...6791&st=500
Those look familiar. Not only are those dummy shocks they are also my hub/bearing pullers. Two tools in one!
i like what is c
I call my "Tool", THUMPER 
I was using one of Dr. Evil's videos (shameless plug for the Doc), and after the 2nd trany rebuild I decided I had to have an easier tool like I spotted in one of his feeds
"THUMPER"is just over 3' tall and just a bit wide at the business end. Too much weld had me using the torch and some files to get it to fit the 1st time - now it works PERFECT!

Click to view attachment
I was using one of Dr. Evil's videos (shameless plug for the Doc), and after the 2nd trany rebuild I decided I had to have an easier tool like I spotted in one of his feeds
"THUMPER"is just over 3' tall and just a bit wide at the business end. Too much weld had me using the torch and some files to get it to fit the 1st time - now it works PERFECT!
Click to view attachment
While changing my sparkplugs yesterday I discovered a multi-use tool of great simplicity.
As ya'll are aware, cylinders 1 & 3 sparkplugs are slanted toward the rear of the car and sometimes make insertion of a plug difficult to get a start on when threading in.
This is usually due to carb linkage interference and/or the interference from the maze of tubes, wires, fittings, hoses, cables, and cable housing retainers (if injected).
Simply pluck the cap off of a Sharpie and push it on to your sparkplug / voilà! Just long and snug enough to not lose the plug assuring no stripped threads and easy removal of the "tool" after use.
Further: While replacing my newly turned vented rotors/hubs to the spindles (which requires removal of the caliper bolts) I used the other end of the sharpie to locate the top bolt holes and to make a tight alignment so as to allow easy location of the bottom bolt hole and threads (first) with the bolt and washer. No more thrashing around fighting the brake line resistance and weight of the caliper while searching for the receiving threads.
A spent sharpie is now in the tool pouch.......
It's not a 914 tool, but it is for a mid-engine Porsche. This is the rear strut compressor I made for my old 987, which lets you remove the rear struts without disassembling virtually the entire rear suspension and having to get a full alignment afterward. Turns a nasty all-day job into a fairly easy 2-hour job.
Click to view attachment
Click to view attachment
Click to view attachment
Click to view attachment
it been a while since this was updated
Click to view attachment
Click to view attachment
Click to view attachment
Click to view attachment
Click to view attachment
Click to view attachment
Here's the tools I've made for building/repairing 996/7 engines.
@Mark Henry - dude, you are a beast! Nice work!!
So when I did my first engine swap I thought a lot about having a very stable
method of supporting the car. The small footprint of jack stands at that height was a concern. I came up with 4 inch by 6 inch wood blocks that are 13 and 19 inches long. The blocks are interleaved at the point where they support the car. The set up is incredibly stable; the body will not budge even if you try to push it hard. If you want to make a set you will need (3) 8 foot timbers that are each cut into (3) 19 inch lengths and (3) 13 inch lengths. The folks at Home Depot are happy the make the cuts.Click to view attachment
Click to view attachment
Sort of a tool, an engine stand I made for the specific purpose of being able to lift a motor onto it directly from my 3 1/2 ton jack that I use to drop motors. I didn't make the yoke, just the rest. There are 3 bronze bolts that act as adjustable bearings in the yoke pivot. Shown with a bus type 4 motor here.
Click to view attachment
Click to view attachment
Click to view attachment
Click to view attachment
Reviving this old but good thread. This thread is worth reading if you have never seen it
before.
I needed to weld up 15 holes in the firewall of my car. The metal is paper
thin there so a copper backer was needed. There being no way to reach both sides
at once, I made up this "prop" to hold the copper backer:
Click to view attachment
It has a piece of copper pipe flattened out into the shape you see. Bolted to a piece of
1/8 by 1 inch steel, tight enough to not flop around but loose enough to pivot as needed.
The other piece of steel has a vacuum cap with the top cut off and wired to one end
using thin welding wire. The prop works like this:
Click to view attachment
This worked great, allowing me to weld all these unneeded holes closed.
John
Can we call this "American Ingenuity"?
Great job to all
Great job to all
Flat head screw driver for doing valve adjustments. You can actually hold the adjuster in place while tightening the lock nut!
This is a "lo-fi" version of our main content. To view the full version with more information, formatting and images, please click here.