After re-reading part of this thread I made a assumption that the timing red mark on the fan was a factory mark vs a mark that you made.
Click to view attachment
Is this what you saw last night? You should also have a 0 mark for TDC. It would be nicer if you can find the 0 mark on the fan. Depending what fan you have, the red mark could mean 7.5 degree or 27 degree BTDC. This is why the 0 TDC mark is better to set your static timing.
Click to view attachment
I know your 1911 is tight to turn right now, mine was a PIA to turn. You may be able to wedge a screw driver between the bell housing inspection port and a fly wheel tooth, which would spin the engine one tooth at a time.
Find that 0 timing mark on the fan, and verify that both rockers (intake and exhaust) wiggle freely.
Full Version: 75 LJet will not fire
QUOTE(malcolm2 @ Jul 9 2013, 09:57 PM) 
QUOTE(timothy_nd28 @ Jul 9 2013, 09:47 PM)
K, can you remove the valve cover and wiggle the rocker arms for the number one cylinder. Do they wiggle ?
I did that on the other side, to see if I was getting movement. Give me a minute and I'll check #1 for wiggle.
the left one wiggles. the right does not... just thought of something.... should I have the rotor button pointing at #1? It is not in this picture.
Click to view attachment
Looking at your pic, that is #1. The exhaust valve is open. You are not timed correctly. My guess is the diz drive gear is not in correctly.
Do as Timothy suggested. raise the drivers wheel, trans in 5th gear, get under the car and look at the rockers while moving the drivers wheel as if it were going forward. When both rockers are relaxed with some play, you are at tdc for # 1. If there is no play, your valves are incorrectly set. When you get both closed, go look at the rotor. Use the plug tower where the rotor is pointing. That will be "alternate"# 1. If that is not the tower closest to the driver, your drive gear is off. It may be that it will run if you reposition your wires with the "alternate" #1 tower as # 1 position, However, you might not be able to get full timing cause of the limited movement of the distributor. In that case, you will have to pull the diz and drive gear to reposition it.

I just went through a similar issue with my 2.0L rebuild; had the dizzy drive gear skip one tick off and
I couldn't get it started. I finally realized I needed to verify TDC #1 and make sure my drive gear was in
correct place. After doing that, it started right up.....
QUOTE
you might not be able to get full timing cause of the limited movement of the distributor. In that case, you will have to pull the diz and drive gear to reposition it.
No, you should not need to pull the drive gear.
You can move the #1 position in the cap by 90 degrees either way to get your adjustment back.
This is when you get good at using the meter to set the static timing.
Oh, and not all fans have a 0 degree TDC mark.
On my recent build I had to Add one.
However there should be the #1 TDC mark on the flywheel that you can see through the bottom.
Stu
QUOTE(Java2570 @ Jul 10 2013, 10:31 AM)
I just went through a similar issue with my 2.0L rebuild; had the dizzy drive gear skip one tick off and
I couldn't get it started. I finally realized I needed to verify TDC #1 and make sure my drive gear was in
correct place. After doing that, it started right up.....
You sir have given me hope! But I plan to start from scratch this evening. 1st off I need a way to turn the engine by hand. My wheels and axles have not been installed yet.
I plan on using a long bar and bolting it to the axle flange on the P-side, then finding something that will give me leverage and a full rotation on the D-side flange so I can turn the engine by hand and watch the rockers.
QUOTE(timothy_nd28 @ Jul 10 2013, 09:30 AM)
After re-reading part of this thread I made a assumption that the timing red mark on the fan was a factory mark vs a mark that you made.
Click to view attachment
Is this what you saw last night? You should also have a 0 mark for TDC. It would be nicer if you can find the 0 mark on the fan. Depending what fan you have, the red mark could mean 7.5 degree or 27 degree BTDC. This is why the 0 TDC mark is better to set your static timing.
Click to view attachment
I know your 1911 is tight to turn right now, mine was a PIA to turn. You may be able to wedge a screw driver between the bell housing inspection port and a fly wheel tooth, which would spin the engine one tooth at a time.
Find that 0 timing mark on the fan, and verify that both rockers (intake and exhaust) wiggle freely.
No, the marks are marks I made. Now I don't remember exactly what they were, I may have made notes. Also I wondered if there was a way to "re-mark" using the keyway in the fan as HOME. In your picture, it looks like the area of the fan in the V window is FLAT. IIRC I see a rounded area in mine. currently at work and can't check.
Is the V notch on the fan belt side or the engine side of the housing? Probably impossible and a bad idea to take the fan off with the engine in the car, right?
I forgot about the flywheel access from the bottom. There is a mark there too, right?
I guess one tooth at a time is better than tweeking the starter and hoping it stops on what I think is the mark. Can't watch the rocker that way either.
I am not productive here at work today, so I will probably get home early and start from stratch.
I can't thank you enough, at least I am hoping all this is leading to a smoke filled garage....sooner than later. If nothing else I am learning more and more.
QUOTE(malcolm2 @ Jul 10 2013, 01:50 PM)
QUOTE(Java2570 @ Jul 10 2013, 10:31 AM)
I just went through a similar issue with my 2.0L rebuild; had the dizzy drive gear skip one tick off and
I couldn't get it started. I finally realized I needed to verify TDC #1 and make sure my drive gear was in
correct place. After doing that, it started right up.....
You sir have given me hope! But I plan to start from scratch this evening. 1st off I need a way to turn the engine by hand. My wheels and axles have not been installed yet.
I plan on using a long bar and bolting it to the axle flange on the P-side, then finding something that will give me leverage and a full rotation on the D-side flange so I can turn the engine by hand and watch the rockers.
Yep, not having the axles and wheels on really makes it harder to turn over the engine! Good luck!!
I have come up with a way to manually rotate the engine. While doing that i can look straight accross the #1 rockers. I can perfectly see when the springs extend and close the valves. I then try to insert my feeler gauge. There is NOT a time when I can insert the .006 gauge under both swivel feet.
I can get .006 under the exhaust or outer foot, .005 seems to fit a bit better.
But the best I can do at the intake is .003.
At this location of the # 1 rockers the rotor button is pointing just past the location we made #1 last night.
My fan housing has the v notch on the fan belt side, I see NO marks because the marks are on the engine side.
Forget the mark you made. Where does the rotor point? At a plug tower? Which one?
Valves are too tight, bit should still run.
Valves are too tight, bit should still run.
QUOTE(The Cabinetmaker @ Jul 10 2013, 07:19 PM)
Forget the mark you made. Where does the rotor point? At a plug tower? Which one?
Valves are too tight, bit should still run.
Pointing between the 2 "towers" on the passenger side. That is very close to where we THOUGHT TDC would be. As I shine a bright light in the hole I can see that I wrote on the blades and I see a big "O". So I am close. another 1/4 inch of fan turn and that will be it and the button will be pointing at the right rear tower.
I made the right front my temporary #1 last night.
Number one plug wire still on the right rear tower? Remove the cold start valve connector and spin the dizzy CCW max.
When you think you are at TDC based on valves, check the flywheel hole in the tranny and position the white mark at the case split line.
Stu
Stu
QUOTE(timothy_nd28 @ Jul 10 2013, 08:08 PM)
Number one plug wire still on the right rear tower? Remove the cold start valve connector and spin the dizzy CCW max.
It was on right front last night, still there. But after moving manually and finding the spot where the valves are loosest, I think I should move it to right rear.
But the dizzy is maxed CCW and touching the cold start valve.
QUOTE(stugray @ Jul 10 2013, 08:10 PM)
When you think you are at TDC based on valves, check the flywheel hole in the tranny and position the white mark at the case split line.
Stu
I can't see anything in that hole. I guess I could get a helper and have them look as I turn the engine.
Move the number one at the right rear tower and start the car. Use a bit of ether for easy starting
should I go ahead and adjust the valves on the drivers side, since I know they are a bit tight?
Are you using aluminum or chrome moly pushrods?
QUOTE(malcolm2 @ Jul 10 2013, 08:17 PM)
QUOTE(timothy_nd28 @ Jul 10 2013, 08:08 PM)
Number one plug wire still on the right rear tower? Remove the cold start valve connector and spin the dizzy CCW max.
It was on right front last night, still there. But after moving manually and finding the spot where the valves are loosest, I think I should move it to right rear.
But the dizzy is maxed CCW and touching the cold start valve.
That is exactly what I said on my first post . Stop stalling
Pull the diz, , reposition the drive gear. 180 degrees. Start that puppy up.
QUOTE(timothy_nd28 @ Jul 10 2013, 08:50 PM)
Move the number one at the right rear tower and start the car. Use a bit of ether for easy starting
No change. Starter turns over, but never sounds like anything fires, even with the starting fluid.
QUOTE(The Cabinetmaker @ Jul 10 2013, 09:04 PM)
QUOTE(malcolm2 @ Jul 10 2013, 08:17 PM)
QUOTE(timothy_nd28 @ Jul 10 2013, 08:08 PM)
Number one plug wire still on the right rear tower? Remove the cold start valve connector and spin the dizzy CCW max.
It was on right front last night, still there. But after moving manually and finding the spot where the valves are loosest, I think I should move it to right rear.
But the dizzy is maxed CCW and touching the cold start valve.
That is exactly what I said on my first post . Stop stalling
Pull the diz, , reposition the drive gear. 180 degrees. Start that puppy up.
I was wondering if we would ever get to put the dizzy where is belongs. Is moving the plug wires correcting a wrong that has not been found yet?
QUOTE(timothy_nd28 @ Jul 10 2013, 08:59 PM)
Are you using aluminum or chrome moly pushrods?
Purchased awhile back from the type 4 store and cut to fit. I will have to double check, but I am thinking chrome moly.....
Yes chmly w/tips uncut
I will be traveling to Nashville next Tuesday to give a presentation. I hope you are not still struggling with it by then but I could lend a hand before I head back to Knoxville.
I went through all of the steps you have done with the same results almost. But I think I was able to move the dizzy a little more and get it to fire a bit.
I went through all of the steps you have done with the same results almost. But I think I was able to move the dizzy a little more and get it to fire a bit.
QUOTE(Mblizzard @ Jul 10 2013, 09:30 PM)
I will be traveling to Nashville next Tuesday to give a presentation. I hope you are not still struggling with it by then but I could lend a hand before I head back to Knoxville.
I went through all of the steps you have done with the same results almost. But I think I was able to move the dizzy a little more and get it to fire a bit.
thanks for the offer. I will be gone Friday to Friday, so next week the car will sit, whether I get it running or not.
Timothy, what's on you mind to do next?
If you truly found TDC, I do like the idea of pulling the drive gear and putting it back in the correct spot.
QUOTE(timothy_nd28 @ Jul 10 2013, 09:59 PM)
If you truly found TDC, I do like the idea of pulling the drive gear and putting it back in the correct spot.
But do that with the valves at TDC?
I can get there again, but just to be sure. Which valve will close last just before TDC, engine turning forwards.....Exhaust, (the outer)?
And 2ndly, what are my pit falls in pulling the dizzy? It has been too long since I put it in, and hear rumblings of the spring or the washer falling in... Is there a perfect method to this?
I'll be honest, every time I split the case, I make sure everything is aligned before bolting back together. I have never attempted to pull the drive gear with the engine all together. Maybe others will give advise to what to do.
The intake valve should be last to move before tdc. At tdc you have a power stroke then the exhaust stroke.
QUOTE(timothy_nd28 @ Jul 10 2013, 10:27 PM)
The intake valve should be last to move before tdc. At tdc you have a power stroke then the exhaust stroke.
That was my thought too and the haynes manual confirmed, "TDC position with #1 piston on it's firing stroke"
I just went through this entire process.
Can you turn the dizzy at least 90 degrees (back & forth total rotation)?
If so, then you should not need to pull it.
You can position the #1 wire at any one of the four rotor cap positions.
So you should be able to get it to adjust wherever the drive gear is positioned.
First you must find TDC - Beyond the shadow of a doubt.
Here is my procedure I posted on another timing thread:
Pull off the 1/2 side valve cover.
Rotate the engine while watching the #1 valves.
As soon as the #1 intake valve closes, watch through the triangular hole between the engine & tranny.
As TDC comes around you will see a white mark on the flywheel.
When that mark is lined up with the case split line and both #1 valves are slack, that is TDC #1.
At that point you might find a mark on the fan through the timing hole (maybe not)
You will probably need to rotate the engine through a few full rotations to "get" the valves on #1 so use the starter at first.
Once the engine is guaranteed to be at TDC #1, then:
Rotate the dist. back and forth through the full rotation and then put it back near half of that travel.
Put the rotor cap on and plug the #1 wire into the cap closest to the rotor position.
Then follow the procedure for setting the static timing using a DMM.
http://www.pelicanparts.com/techarticles/9.../914_timing.htm
Search that link for "Now, we need to check the wire orientation in the cap. " and follow the instructions for setting static timing from there.
Stu
QUOTE(timothy_nd28 @ Jul 10 2013, 10:19 PM)
I'll be honest, every time I split the case, I make sure everything is aligned before bolting back together. I have never attempted to pull the drive gear with the engine all together. Maybe others will give advise to what to do.
I guess I am going to need some input. I have #1 on TDC. I removed the nut on the hold down clamp and even loosened the adjustment bolt on the hold down clamp, but the dizzy will not come out. It rotates, but something is holding it in the engine.
Anyone have any ideas?
You may need to pry the hold down bracket while pulling on the dizzy.
Read my post above first, and the link then IF that fails (it should not), then.......
Search under the dizzy. There is a nut holding down the adjustment bracket.
You have to remove that nut before you can pull the dizzy.
If you go and pull the dist drive gear and the "special washer" is not on the end, then what are you going to do?
If you do not know what the "special washer" is, then you need to do a little more research.
Some have pulled and replaced the drive gear for years with no problems.
Others have either lost the washer in the case, or there wasnt one there to start with and then ????
Stu
QUOTE(stugray @ Jul 10 2013, 11:00 PM)
Read my post above first, and the link then IF that fails (it should not), then.......
Search under the dizzy. There is a nut holding down the adjustment bracket.
You have to remove that nut before you can pull the dizzy.
If you go and pull the dist drive gear and the "special washer" is not on the end, then what are you going to do?
If you do not know what the "special washer" is, then you need to do a little more research.
Some have pulled and replaced the drive gear for years with no problems.
Others have either lost the washer in the case, or there wasnt one there to start with and then ????
Stu
I have heard the stories, and did not really want to pull the dizzy because of the possible problems.
We went thru just about all your suggestions above. The last and probably most important did not get done, static timing.
Since I could not get the dizzy out easily, I will go back and verify all the other steps and follow the pelican instructions on that. I have read thru them.
1 issue I did notice from your steps, I do not see the white mark on the fly wheel. I will also get me a helper and see if I can't watch for the mark as he turns the engine manually.
I get the intake closing and some lash on both rockers, I get my homemade marks on the fan close to the right place and the rotor is pointing toward the passenger side. All that is left is the flywheel mark and the Pelican check. Sound correct?
That is a job for this (Thursday) evening. Thanks for all your help
There is no white mark unless someone else made one there. If you are truly at tdc # 1, The factory notch will be visible in the hole at the top of the trans where it mounts to the case. You will have to pull the rear tin back to see it. You can also feel it with your finger if you reach up from the bottom of the trans. Yes, your arm and hand will fit up there.
On another note, You installed chromolly pushrods, but did not cut them? That tells me you did not do the geometry. You may have more problems than you realize.
BTW, chromolly rods run 0 lash.
On another note, You installed chromolly pushrods, but did not cut them? That tells me you did not do the geometry. You may have more problems than you realize.
BTW, chromolly rods run 0 lash.
QUOTE(malcolm2 @ Jul 10 2013, 09:29 PM)
Purchased awhile back from the type 4 store and cut to fit. I will have to double check, but I am thinking chrome moly.....
Yes chmly w/tips uncut
Ok, First sentence says 'cut to fit". Second sentence says "uncut". So which is it?
QUOTE(The Cabinetmaker @ Jul 11 2013, 07:51 AM)
There is no white mark unless someone else made one there. If you are truly at tdc # 1, The factory notch will be visible in the hole at the top of the trans where it mounts to the case. You will have to pull the rear tin back to see it. You can also feel it with your finger if you reach up from the bottom of the trans. Yes, your arm and hand will fit up there.
On another note, You installed chromolly pushrods, but did not cut them? That tells me you did not do the geometry. You may have more problems than you realize.
BTW, chromolly rods run 0 lash.
So what is it that tells you I did not do the geometry? I have an adjustable pushrod and spent alot of time on the geometry. Even at that, IIRC, I was not 100% confident in my results.
I did cut the push rods. I went thru the proceedure provided. Measured several, several times and cut once. I am 99% sure I did that as prescribed. I will have to look in my notes, but the NEW pushrods did not end up being that much different in length than the ones I took out, which I still have.
Clark
QUOTE(The Cabinetmaker @ Jul 11 2013, 08:26 AM)
QUOTE(malcolm2 @ Jul 10 2013, 09:29 PM)
Purchased awhile back from the type 4 store and cut to fit. I will have to double check, but I am thinking chrome moly.....
Yes chmly w/tips uncut
Ok, First sentence says 'cut to fit". Second sentence says "uncut". So which is it?
I was meaning that I did the cut-to-fit. Jake's invoice said "uncut". So once I got the invoice out I knew what I had and I edited my post.
You probably know but, but they come alittle longer with one tip installed and the other end is to be cut to fit and the tip installed.
Ok, I understand. you will be ok. just remember the 0 lash. I was kinda intimidated too on my first one. I breathed much easier when it started for the first time and made no weird noises.
QUOTE
There is no white mark unless someone else made one there. If you are truly at tdc # 1, The factory notch will be visible in the hole at the top of the trans where it mounts to the case.
Ok, so there might not be white paint on the mark, but it is a notch that is cut (machined) into the flywheel.
And at TDC, the notch is visible in the BOTTOM of the tranny, not the top.
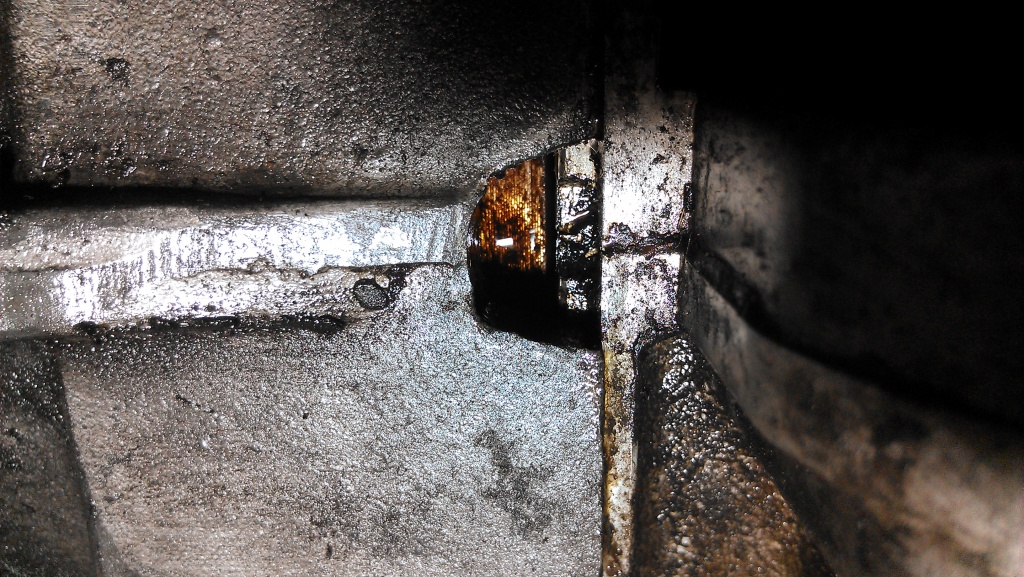
The timing mark is not visible in this pic, but it is there.
Stu
I just did a search and found some say that the mark will be at the top of the trans at #1 TDC.
So....Either
The info I found in the search is wrong,
I am loosing my mind,
Or someone put another mark on my flywheel.
Stu
So....Either
The info I found in the search is wrong,
I am loosing my mind,
Or someone put another mark on my flywheel.
Stu
If it were my old ass, I'd just go with option 2 and forget it. Oh wait, I forgot. what were we talking about?
Factory notch will be at the top of the trans @ TDC #1.....I added a paint mark 180 degrees from that notch for reference on my flywheel.
So to verify TDC, I need to look for or feel for the flywheel mark. I remember something about a flywheel mark during assembly, so I have one. And since I see nothing from the bottom I am betting I will feel it on top.
With that, the rocker position on #1 just after intake closes and the homemade marks and writing on my fan, I feel pretty good about TDC. So I will proceed with Stu's "alternate #1" Dizzy cap wiring and the Pelican static timing, all that after I put the champange on ice, cause this is going to do it, right?
I was almost positive that I had EVERYTHING lined up for #1 at TDC during assembly. Anyone have an idea of how this happened? Is the only answer that I got the distributor drive gear 180 degrees out?
I re-read thru the manuals and the directions are clear. The drive gear slot is off-set to one side, they show the proper angle with the case seam, they have pictures and everything. Maybe since the engine was not on the car, I somehow was looking at it upside down? Damn this really sucks!
Confusion resolved: I have the notch (visible at the top with #1 @ TDC) AND a white mark 180 degrees from that like Java mentioned.
So I can see the white mark from below when the engine is at TDC #1.
So I am not losing my mind, just my memory.
However I struggled to get the timing right repeatedly until I found TDC #1 and then set the static timing with the volt meter.
The engine would backfire and act like it wanted to start after 5 times trying to set it the wrong way.
Once I found REAL TDC #1 and set timing using the static method, the engine fired up on the first crank.
I also realized that in my setup (carbs & temporary 009 dizzy) I have a lot of rotation of the dizzy available.
I can essentially turn it all the way around if I want.
So since you do not have as much adjustment available with the SVDA, it might be possible to get the dist drive gear installed with a clocking such that you might never get it to work without pulling the gear.
Stu
QUOTE
Is the only answer that I got the distributor drive gear 180 degrees out?
I re-read thru the manuals and the directions are clear. The drive gear slot is off-set to one side, they show the proper angle with the case seam, they have pictures and everything. Maybe since the engine was not on the car, I somehow was looking at it upside down?
I re-read thru the manuals and the directions are clear. The drive gear slot is off-set to one side, they show the proper angle with the case seam, they have pictures and everything. Maybe since the engine was not on the car, I somehow was looking at it upside down?
I followed Jake's video and installed the drive gear and dist while the engine halves were still split.
Even verifying it looked exactly like in Jake's video and a helper verifying it, I still did not get the clocking right.
However in my application, it does not matter.
Stu
Malcolm,
Have you tried the #1 wire on the right rear tower? you were asked if if it was on the right rear and answered that it was "still on the front".
Maybe I missed it but I don't see in the conversation where you did that. It sounds like the dizzy is off by 180Deg but with #1wire on the right front you're still off by 90.
Did you ever check your compression?
This is a "lo-fi" version of our main content. To view the full version with more information, formatting and images, please click here.