Help - Search - Members - Calendar
Full Version: Rusty bucket into Solo toy
914World.com > The 914 Forums > The Paddock
Pages: 1, 2, 3, 4, 5, 6
Han Solo
I had a nice day cleaning and putting some parts back on the car. It was a good change of pace from metal work. The steering rack was one last parts I pulled off the car so it's appropriate that it should go back on first. From the grease around the inspection plate it's apparent it had been leaking so I opened that up and filled it with gear oil. Sealed that up and cleaned it well. The boots responded well to a good treatment of Armor All. Now putting that rack back on without a helper was a challenge. I used a couple of bungie cords to hold it in place while I attached the steering column links. I stripped the key switch-turn signal assembly off the column before re-installing. That makes the column a little wibbly-wobbly at the steering wheel. I'll need to find a bushing to tighten that up. Then I started disassembling the front suspension. The tie-rod ends are shot and will have to be replaced. I got those off and then took off the rotor-hubs. The bearings on those looked good but the rotors are heavily worn. That's okay, I've got new rotors and bearings from Just Porsche Parts. Then I pulled the caps on the strut tubes and guess what... blue KYB shocks but they're both shot. I was able to free up the adjuster screws on the torsion bars and got those off. Those bushings will need to be replaced. The last thing I did was get the ball joints out of the control arms. I had to consult a book to see what was going on there with the threaded ball joint. They where really corroded but after a lot of PB blaster and a big pipe wrench - I was able to get that large nut off the ball joint. So I'm looking at all new bushings, tie rod ends, ball joints and shocks. Ouch!

IPB Image

IPB Image

IPB Image

IPB Image
Han Solo
Last few evenings have been cleaning and painting front suspension parts. I did the front axle first. Then the brake rotor shields. At this moment I've got one strut stripped and another waiting. I see now how to lower the front. Grind that off the weld holds the spindle in place, slide that joker up and then weld 'er back! This would be a great time to do that but I think I'll wait. I want to get everything back together with the fresh bushings, shocks, etc. and test drive. Perhaps in the future lowering will be along with installing camber plates. Those are not in the budget at this time but sooner or later I'll have to get them!

IPB Image

IPB Image

IPB Image
Han Solo
Saturday I needed to take advantage of what time I had to work on the car. I decided to paint the strut tubes. strip the control arms and test fit the fiberglass fender flares. So you'll notice by the photos I'm kinda bouncing from one thing to another. It worked out well though. The struts were already half painted so I masked up the last one and got that done. Note that I painted the tubes school bus yellow so everyone will know there's Konis inside smile.gif As those were drying I got the torch out and started cooking up the control arm bushings. Before that, I scribed some marks on the bushing collars so I can get them back on exactly as they came off. As a diversion, I also got out the fender flares and started mocking up how I would mount them. Once I had them mounted with painters tape, I went around them with a maker. I took them off, followed the trace line with 2" painters tape and then traced that. That's my over-lap and cut mark. Meanwhile, the control arms are soaking in the parts washer. I got them out, rinsed and let them dry in the sun. Back to the fenders, I have enough time to cut the right rear wheel arch off. Man, is that going to make cleaning all that under-coating and seam sealer easier! There was also a nasty, rusty dent that mostly got cut out. I didn't get to the right front as I'll need to move my lift or have the car on wheels. I did get the control arms cleaned and painted by dark. In between trips to the garbage dump, hardware store, etc.

IPB Image

IPB Image

IPB Image

IPB Image

IPB Image

IPB Image
Han Solo
I HATE the seam sealer used on these cars! Last night, after painting the bushing collars, I dove into that right rear wheel house to dig out the undercoating and seam sealer. It was easier with the wheel arc cut out but not much. The guys that have done this know what a brutal job it is. If you can get to it with vibrating scraper, it really helps. But the stuff in the tight corners really s**ks! Second photo shows just how thick they laid it in. Then, as I'm working my way to the rear of the car - Foam! I've read that they used foam in these cars but this is the first I've found. You can see the spot it occupied in the third photo at the very top and most rearward corner. About 8" long and wedged into that long opening. Apparently it did it's job as all that was nice clean metal. It had a hard shell and I literally had to dig it out one small piece at a time with a long flat head screw driver. The last portions would only come out with one of those long flexible pincer type extractors used for lost screws and such. Then I worked back to the front and into the space behind the striker plate. My car has some paint bubbles above the door handle recess (typical) and I found out why. That's another tight area that they filled with seam sealer. Of course it starts to crack after time, water, dirt and salt gets thrown in there from the rear wheels - and then there's rust! While digging that crap out, I poked through and that will have to be a patch. The same will be true on the left side I'm sure. Two hours of that was all I could handle last night. I estimate 6 - 8 hours to strip, treat and paint each of these rear wheel houses. A word of warning for all you teeners though - unless your car never saw rain and road grim - this is probably happening to it. The good news is 80 - 90 percent of the seams come clean with shinny metal. It's the corners and areas where it's cracked that get the rust. Rant over!

IPB Image

IPB Image

IPB Image
Han Solo
Last night was one of those...

I got a tip on a great deal for turbo tie rod ends, ball joints and control arm bushings last week. That package arrived and during this week I got the bushings installed. Yesterday evening I got the strut assemblies mounted without shock inserts (getting Konis at a later date). The package had the odd bolt that mates with the ball joint but I couldn't get the bolt to insert completely (the head was flush when I took everything apart). On the right side I took an impact wrench to the nut trying to suck that all the way in and of course the bolt twisted off That was an hour drilling that out. Thankfully one of the original bolts was still in good shape so I reused that. Then I'm back in that right rear wheel house trying to dig out more seam sealer. Even with the wheel arch cut out my arm is all the way in there trying to reach forward. I've gotten as much out as I physically can so I decide to patch the exterior where holes have opened up over the door handle recess. While I'm cleaning with the wire brush more holes open up in the recess (sometimes you just can't get a break). I got the original problem patched but the recessed area will have to wait until this thing is off the lift. That's my current goal. Get this joker on wheels so I can finish the exterior. And I can't get the rear suspension on until I treat the wheel houses. Unless I have more set backs, I should have the right rear treated this weekend.

IPB Image

IPB Image

IPB Image

IPB Image

IPB Image
Han Solo
Last Saturday was all about yard work and I busted it out good. So Sunday I was in good shape to finish up the right rear fender. I stripped all the exterior paint and that really confirmed what I've suspected - this car has been over-sprayed at some point. I'm finding a thin layer body filler on some areas. Beneath that is a red primer (probably enamel) which makes it difficult to figure out where the paint ends and the rust begins. Perhaps even that nasty dent on the rear was body filled and that came off due to poor prep. Whatever! Anyway the bottom of the sail and door handle recess had rust through that had to be cut out and patched. I took detailed photos of the sail cut-out so everyone can see what's in there. The wheel house extends up into the sail about 2". There's a seam on the backside running horizontal that has loose foam pressed between it and the exterior metal. You can see the vent duct that comes up and terminates in the passenger compartment. Between that duct and the door casing there's seam sealer that's very tough to dig out. Above the horizontal seam (which you can't see) there's loose foam (like Dave stated). I suspect they put that in there to keep that sail from acting as a sound resonator. All those areas will absorb moisture and rust. It took me a couple hours to patch those areas for a total of three. I got all those welds ground off. Then treated and painted the wheel house and exterior. I've got one more fender to do and I'll be glad. I might take a diversion and mount the right rear suspension. Followers might remember that's the side that I replaced the suspension console on and I REALLY want to confirm that everything lines up. I'd also just like to see ONE wheel on this car!

IPB Image

IPB Image

IPB Image

IPB Image

IPB Image

IPB Image

IPB Image
Han Solo
I guess it was last Thursday that I had some time in the morning to devote to the project. The right rear wheel house was ready for suspension so I installed the control arm (purchased rebuilt and strengthened) and Bilstien shock with autocross spring. Thank goodness all the dimensions on the RD suspension console I installed appear to be correct. I did find some play in the hub (with fresh bearings) but I believe that's because the CV axle is not installed. So I'm thinking, "why not remove the axles from the original hubs and see if they have the same play?". The problem is, I dropped the control arm, shock and axle all in one piece. So I found getting the axle nut loose with out have weight on a wheel and e brake on, is going to be REALLY difficult. I started another thread and got some good suggestions. I moved on to cleaning up the transmission which actually took three applications of de-greaser and some scraping with a putty knife.
Then Saturday I'm back at it. I'm in the left rear wheel house with a heat gun, scraper and elbow grease digging out under-coating and seam sealer. This side was actually a bit better than the right because I was able to get my right arm deep into the cavity. But first I cut out the wheel arch. You'll see in the 3rd photo several different lines as I had to adjust my original marks to get the left flare in the same position as the the right. Also, the left flare was about 2" wider than the right and that had me scratching my head for awhile. The 4th photo shows the rear of the left wheel well after digging out. I found a new tool for rooting out the seam sealer (and foam insert) in those tight spots - a Dremel tool with a reamer tip. Much quicker on that stupid foam. The 5th photo shows the front of the wheel hose (behind the boor jamb) with all the undercoating. And the last photo shows the same area cleaned up. You can see the same rust areas up under the sail and door handle recess. There's rust bubbles on the exterior between the sail and the door handle recess so I'll be patching that soon. Perhaps I'll have a few hours this week in the evening to finish this fender up.
Also, some bad and some good news on the transmission. I was able to get the fill plug our but the drain plug is REALLY tight and the 17mm hex is starting to wallow out. But there was gear oil up to the fill hole (no leaks!) so I just grabbed the tranny, flipped it on the side and drained the oil. That actually looked pretty good with no solids or metal so I'm really hopeful the internals are good.

IPB Image

IPB Image

IPB Image

IPB Image

IPB Image

IPB Image
Han Solo
Almost done with the left rear fender. I stripped all the paint last night and had two patches. That same bad area over the door handle recess. That corrosion has actually crept into the passenger compartment near that rear vent. I just treated the metal from the inside to stop it. I noted that the Metal Prep does a good job of dissolving the seam sealer. Anyway, I'll get over to the body shop supply store for another can of POR 15 and get this fender covered in the next few days.

IPB Image

IPB Image

IPB Image

IPB Image
Han Solo
Huge progress today. I got the front wheels on the car! Mid week I finished painting the left rear fender and had a visit from another 914 enthusiast. He picked up the front windshield and left a couple red Koni front shocks. I think they need rebuild but I put them in the struts today so I could get the front bearings and hubs done (I've got new Konis planned but waiting on $$$). Those will be easy to swop later. After I got the bearings in the hubs I discovered that I mounted the brake disk shields backwards. That's odd that they would bend away from the disk instead of over it. That doesn't seem like it would shield very good so I just took them off. Anyway, I got the hubs on, slid on the 20mm spacers and mounted the 10" race wheels. Big fatties! Those have some tired Hoosier road race tires but even with the pinched tires, there's clearance on the struts. I'll use those tires for testing and tuning, then switch to autocross tires when the car is dialed in. Then I moved to the left rear and mounted the suspension. Earlier I had gotten the CV axles off the original suspension by using a 3' piece of angle iron. I drilled two holes to match lugs and bolted it to the hub. That gave me a fulcrum to break loose the axle nuts with a cheater bar. So with the CV axles loose, I'm thinking I need to re-build those. Oddly, when I was buying some motor oil this morning at the auto parts store, I take a long shot and ask the clerk if he can get the CV axle boots - he can! Unfortunately I forgot to ask about the gaskets. So I spent the rest of the afternoon taking the axles apart and those are soaking in the parts cleaner tonight.

IPB Image

IPB Image

IPB Image

IPB Image
Han Solo
A very busy Sunday. I started off with an oil change on the F250. Then I diagnosed a problem with the trailer lights (fuse). Then I was in the process of cleaning the CV axles when the wife messages that she's got a flat on her Boxster at work! Of course I dropped everything to take care of that but after swopping cars and plugging the tire - I'm back to the 914. As mentioned in yesterday's post - I got one axle put back together and it's in the right rear hub. Three wheels on the beast! I also found some time to strip paint off the underside of the rear trunk cross member and I started along the rear trunk exterior. Next treat and paint season I'll do both areas and then the car should be ready to set down. That is, baring any difficulties with the left CV axle.

IPB Image

IPB Image
Han Solo
I finally got around to finishing the rear. It took a little longer because I also painted POR 15 on the underside of the rear trunk cross member and the rear pan. Fabricating and welding in the tail light covers was quite easy and fun. No rusty metal to tip-toe around. I'll have to do some doctoring up with body filler to get everything nice and smooth. I decided to just put the rear trunk button back in just to fill that hole. The trunk lid will be secured with Druz locks.

IPB Image

IPB Image

http://i1336.photobucket.com/albums/o644/t...zpseybhvnj9.jpg

IPB Image
Qarl
Wow. Awesome revival!

piratenanner.gif
Han Solo
This week has been all about the doors. I took both of them off. Stripped the interior light switches. Then started stripping the exterior paint off the passenger door. And then there was body filler. The most I've encountered on this car yet but no more than 1/4" deep. And the bottom of that door was pretty rusty. When those bottom drain holes clog and then window scrapers fail, bad things happen. I decided that trying to strip the door molding and patch the rust was more trouble than worth on a race car. Someday this car may have fiberglass doors anyway. First I cut long strips of sheet metal and covered the window opening. Then I treated and painted the exterior with POR 15. On the inside the rust was minimal so I pulled the door opener hardware, cleaned and over-sprayed with grey primer. I cheated and did the same on the door jamb also. Any paint I use on this car will be off the shelf and easy to touch up. I got the drivers side door stripped last night and welded the window opening up. That's when my trusty grinder bit the dust. Oh well, it's served me well and I think I got at least 10 years out of it. This weekend I should have the doors finished and I think I'll get the front wheel arches cut out and paint that small segment on the passenger side. I probably should go ahead and get the A pillars and window cowl also.

IPB Image

IPB Image

IPB Image

IPB Image

IPB Image
Han Solo
Exterior done! Well, stripped and painted with POR 15 that is. I got the front wheel arches cut out, stripped the window cowl and top sail. Then I got all those areas covered with POR 15. So the only original paint left on this car is on the walls of the trunks, under the sail and the trunk lids. I think I'll leave those for later and move on to getting the engine together. There'll be some down time as I wait on parts (REALLY need a good set of 44 Webers) so I might get those last areas painted then. At this point I'm pleased with my progress.

IPB Image

IPB Image
Han Solo
This took less than an hour. Removed the heater control boxes. Stripped the heat exchanger tins. Cleaned up the headers with wire brush and marine clean. Painted with high heat flat black. As rusty as the heater control boxes were - they still function!

IPB Image

IPB Image

IPB Image
Han Solo
After a real treat Memorial Day weekend, I'm back working on the rusty ant nest. We went to the SCCA Spring Nationals and won AS in the Cayman S. Weather had a lot to do with the win but I'll take what I can get.
So this weekend I've been putting exterior parts on the long block. About two weeks ago I got delivery on a boat load of great parts from Just Porsche Parts. Part of that shipment were REALLY nice powder-coated engine tins. Those saved a lot of trouble cleaning and patching the original tins. I did use the original fan shroud and that needed cleaning and painting. I also cleaned up and painted the engine mount bar.
Oddly, the hardest thing this weekend was getting the block mounted on the engine stand. I used my Bobcat with forks and lifted the block. Of course the lift cylinders leak down and it was a real challenge to get the bolts lined up before the forks were too low. Later, I found that the mount was binding the flywheel so I had to add spacers for clearance. I used a come-along and ratchet strap for that dance. Everything went on pretty well as I was following Jake Raby's type 4 video. Engine oil filter mount, oil cooler, engine mount brackets, etc. I'm pretty sure I got the distributor indexed correctly as Brothers Machine Shop left the engine set at TDC. After the tins, I got the intake manifolds installed and spark plug wires on.
Next will be getting the engine off the stand and putting the transmission on. I've got the new clutch and throw out bearing ready to go. I also dropped off the starter and alternator for re-build last Friday at ASE. The guys at that shop always do a great job and I'll post before and after photos when I pick those back up.

IPB Image

IPB Image

IPB Image

IPB Image

IPB Image
Han Solo
I did pick up the alternator, starter and voltage regulator. The guys at ASE said that the parts to rebuild the alternator and starter were more expensive than just buying new assemblies. So that's what I got! They put the OEM rear cap on the alternator and the regulator accepts the three conductor connector off the alternator. All I have to do is connect the red wire with large terminal to the starter (and be sure the regulator is grounded). All those parts cost less than $350.

Original...

IPB Image

Replacement...

IPB Image

I hope to have those parts and the transmission on by the end of this weekend.
Han Solo
Sunday night and it's been a fairly productive weekend. Saturday I installed the alternator. That took longer than I expected because I couldn't get the pulley to align as it should. I tried adding the extra sheet metal pieces on the front but that didn't stiffen the alternator up. The belt tension kept pulling the alternator crooked. Then finally I realized I was missing the lower bracket. So I pulled the alternator back off and got that in - quite the difference! This morning I installed the clutch on the flywheel and changed the throw-out bearing. Then I got the Bobcat to get the engine stand off, put the engine and transmission on a rolling case. The transmission stabbed nicely but I'm missing the long bolt for the top of the starter. Then I blocked everything up and attached the engine mount bar. That gave me enough room to put on the headers. I used a couple of ratchet straps to secure everything snugly to the case. That will be my test jig. All that's lacking are the carbs, fuel system, wiring and gauges.

This afternoon I decided to try and get the seats in. I'm using the originals until I confirm structural integrity of the chassis. I'm bolting the original seat bracket to the floor pan but not installing the tilt bracket. That required adding some material to the seat bracket for two front bolts per seat. I welded a thin plate, drilled a hole and that gave me four bolts per seat. I'll need to re-do that as it's not strong enough. I'm also going to use cap screws for ease of installation and removal.

IPB Image

IPB Image

IPB Image
Han Solo
Tonight I went back in and re-did my seat mounts. I had the right idea - just the wrong hardware. I pulled the mounts out and ground off the thin metal plates. Then I cut 7/8" of 1/4" bar stock and fit that in between the edges of the seat mount. I cranked the flux core mig welder up to 4 and had some fun. It was really nice to stay on the puddle and work a bead. No worries about burning through that metal! With those thicker plates in, ground down and primed, I put the mounts back in, and marked the plates from under through the holes that I'd already drilled in the floor pan. Then I took the mounts to the drill press and drilled those out. The new hardware was 6 mm x 20 mm hex head caps screws, flat washers and larger fender washers for under the pans. It's a really tight fit getting those screws in between the sides of the mounts but the hex head enables you to get at it through the square holes in the track. Everything lined up pretty good and it's a good solid mount. I had to drill 8 holes in those new pans but if and when I put some proper race seats in - I can fill or patch those if not used. These seats will get me by for testing and tuning.

IPB Image

IPB Image

IPB Image
Han Solo
There won't be much to report on this weekend. Much of today was spent on yard work. I did get the original console instrument panel out of storage and started looking at mounting it back in the car. Why not use the original console? I did remove the clock from the panel. I was also wondering about oil pressure. The OEM instruments only had a low oil pressure warning light. So will that sender work with a proper gauge? I'm also reusing the original seat belts for testing and tuning. I got the female ends installed but the retractors weren't working so well. I decided to open one up and what a nice surprise - exploding clock spring! I fought with those for about an hour but got the exploded one back together and both lubricated, working well. That's going to be it for the weekend. We've got regional autocross tomorrow in a co-owned ASP Boxster. It's mid-engine heaven here!
Han Solo

Temps have been in the 90's all week and I managed to get some things done to the race car despite a really busy work schedule. Early in the week I decided I couldn't stand looking at the front trunk any more. I stripped it, treated the metal and painted with POR 15. This weekend I pulled out the fiberglass kick panels I traded for months ago. Those were a bit beat up, so I got some fiberglass bondo, doctored them up and painted. This morning I got side tracked by a repair job on the wife's Boxster but I got the passenger side panel installed before it got too hot in the garage. Most of the bottom screws were rust froze and sheared off when I took the original metal panels off. So I used the large head pop rivets I got for the fender flares. Three on top and two on the bottom for now. We'll see how these non-flare kick panels work with the flares.

IPB Image

IPB Image

IPB Image

IPB Image
Han Solo
My progress over the last week or so... Although this car will need quite a bit of body work, I decided to go ahead and put the fender flares on. Same thought process - get as much together as needed for testing and if the car holds together - move forward with more improvements. I started by drilling the rear flares for pop rivets. A center line hole and then every 5 inches. Some of the spacing near the bottom of the flare was adjusted to keep from getting too close to the edge. After drilling, I painted them satin black. Next day I started mounting by centering the passenger side flare up with the wheel opening, marking the center three holes to be drilled and drilling those out in the fender. That enabled me to hang the flare loosely and confirm alignment before marking the remaining holes. Then I pop riveted the top three holes and worked my way around the sides to the bottom of the flare. Drilling, riveting and moving to the next. Satisfied with the passenger side - I then did the drivers side. The front fenders needed some POR 15 touch up before mounting those. So I decided to strip the rear trunk walls and treat that area while I had the can open. That was a two week night process that I completed last night. The only untreated area on the car now is under the sail and around the top sides of the engine compartment opening. I'm considering over-spraying all the exterior areas with primer but I need to make sure that enamel primer will adhere to the POR 15 properly.

IPB Image

IPB Image

IPB Image

IPB Image

IPB Image
Han Solo
Front flares installed last night. Sweet!

IPB Image

IPB Image

IPB Image
Han Solo
To strip the front hood I decided to get out my media blaster. I use the black diamond material. It's messy but inexpensive. My blaster is the 5 gal portable type. Anyway I just figured it would be so much easier to take the hood outside and blast it as opposed to the wire brush on a mini grinder. I got the two sacks of the medium grind, some fresh tips and started fiddling around trying to find the right pressure, tip, etc. Eventually I found it and was stripping paint like a charm. This hood had minimal rust but the under structure would have made it tough to wire brush. Of course I ran out of material with a small area left so I had to brush that. I'm not spending a lot of time on the hoods because they'll probably be replaced with fiberglass if everything works out. What I will have to figure out though is how to get the headlight covers mounted without the mechanism.

IPB Image

IPB Image
Han Solo
The end of a three day weekend and another trip to Tractor Supply for more Black Diamond. I blasted the two rear lids. The trunk lid has some pin holes from inside rust along the rear most edge but I'm not going to patch. The POR 15 should stabilize that until I get fiberglass. On the engine lid I masked off the sheet metal and PORSCHE letters. Then I painted the underside and grill satin black. The underside of the rear trunk lid got primer grey (same as front trunk lid) and the tops of all the lids got POR 15. Yesterday I cleaned up the brake master cylinder. I really didn't think it would be salvageable but after soaking in the parts cleaner and liberal application of PB Blaster I opened up the cylinder and the plunger came right out. The little seals look pretty good and it seams to be working well. I bolted the master cylinder to the rebuilt peddle cluster and I'm pleased to report that the metal work I did in the floor board is working good. The base of the peddle cluster sits off the floor pan about an inch but I believe that's because I don't have the additional sheet metal support that's suppose to be there. My fix for that will be some spacers cut to fit where the two bolts pass though the floor board. It's been a productive weekend and things are moving forward!

IPB Image

IPB Image

IPB Image

IPB Image

IPB Image

IPB Image
Han Solo
Earlier in the week I took delivery of the Redline dual Weber 44 kit from DRD Racing Heads. I went with them for the setup per engine build specs. Installing those took a couple of evenings and several attempts on the linkage. There's instructions included but the illustrations aren't the greatest and I suspect those apply to several different engine types. I did get just about everything mounted by Friday evening and Saturday morning I was back in the garage.

I've been advancing on two fronts this weekend - body work and brakes. Saturday I actually rolled the poor beast out of the garage. That's the first time it's been outside since I rolled it off the trailer! Reason... to media blast the final bits of exterior for treatment. I got under the sail, around the engine cover area and the engine compartment side of the rear trunk bulkhead. The black diamond material I'm using is really messy and there was no way I was going to do that in the garage. That went well and after extensive vacuuming, I rolled it back in for treatment and POR 15. As that was setting up I put all the removed brake hard lines on the wire brush and cleaned them thoroughly. I noted that all those appeared to have a thin plastic coating that probably prevented them from corroding more than they had. Those all cleaned up very nicely but the long line for the rear passenger side had broken off when I pulled that caliper. I salvaged the fitting out of the rubber hose and had to drill out the fragment of hard line. The net loss was about 1" of hard line so I figured if I could straighten that tube out and double flare the end - it was worth the effort. The double flare kit was $29 from Harbor Freight and I learned a new useful skill. Getting that 3/16" tube to flare like OEM took a while but I think I got a decent flare. I'm also using small segments of old fuel hose split for padding on the tube retainer tabs. A local O' Reilly's had the rubber brake hoses (surprisingly) and after I got all the hard lines back in, I installed those. I will have to get a few more of the retainer tabs as 3 or 4 were completely rusted through. I also got some more fuel hose, heater hose and clamps to complete the plumbing on the engine. The Weber linkage is installed as best as I can get it but I will have to get a vacuum fitting for either one or both carbs for the vacuum advance distributor. What's the recommendation on that? A single hose off one carb or T the two carbs together and then run to the advance?

IPB Image

IPB Image

IPB Image
Han Solo
Not a lot of time in the evenings this week but I did get the head light covers mounted. It was actually quite challenging without having the lift mechanisms in the buckets. The first thing I did was blast most of the top coat off the covers and eyebrows. Those had been painted and skimmed with body filler multiple times so it was pretty thick. No rust through holes though. Then I welded the eyebrows to the covers after bending the joining surfaces for a tight fit and sprayed with weld through primer. There's a slopping contour to the eyebrow edge for the arc of the cover opening. Those of you that have pulled them off know the eyebrows are just held on by three rubber stoppers that mate with holes in the top sides of the buckets. I used those for alignment but that's certainly not strong enough to hold the two joined parts in place. Then I got the idea to use the adjusting bolt to hold the top of cover. I fabricated a right angle bracket out of sheet metal and welded that to the underside of the cover. After aligning the cover/eyebrow, I marked a hole and drilled that out on those brackets to accept the adjusting bolt. That worked fairly well but still wasn't strong enough to hold the assembly securely. I needed a day or so to figure out how to proceed so that gave me time to treat and POR 15 the cover/eyebrow. This evening I got inspired, drilled one hole between the two stoppers that join on the trunk side and pop riveted that. That helped quite a bit but I'd still like to get another fastener on the fender side. The problem is I can't get inside the bucket and the space inside of the fender is really tight for drilling for another pop rivet. I'll figure something out...

Tomorrow, a buddy who's an auto repair shop owner and race car builder is coming over and we're going to wire the engine and instruments. I don't think we'll get as far as starting it up but it's getting close to that time.

IPB Image

IPB Image

IPB Image

IPB Image

IPB Image

IPB Image

IPB Image
Han Solo
Huge day today! My buddy and I bench tested the engine and it's strong! I started the morning putting the engine on my come-a-longs, raising it off the dolly and draining the shipping oil. Filled it up with Mobile1 10-30 and then set it back down on the dolly. That's about when Jim showed up and after reviewing the perimeters of the build - we started making cables to connect the ignition, oil pressure sender and fuel pump. I had a really handy racing panel with a disconnect switch, start button and a couple of indicator lights which was perfect. We wire the coil, oil sender and fuel pump to the disconnect switch. Returned the oil sender to the yellow light. There's a jumper from the disconnect to the start button which connects to the starter. For fuel supply we just stuck the hose into a gas can (I know, just a little dangerous). Then we disconnected the coil wire and started turning it over looking for the oil pressure light to go out. It took a couple of minutes of cranking (we pulled the plugs also) and sure enough - oil pressure! We then checked for spark from the coil but none. Jim traced that down to the points. We pulled the points and after some quick work with a small file, put them back in and gaped. The plugs go back in, distributor back on and coil wire in - we crank it again and it fires immediately. A couple of blips on the throttle lever and we got that sucker running like a champ! The Webers came dialed in pretty darn close. I made some adjustments to the linkage and idle screws, it settles right down. The only feeling I've had close to this is when I got the floor pans in. The progress today gives me real hope and expectation for this race car. All the hard work is starting to pay off!

1st start!
Han Solo
With renewed vigor and interest I'm back into the build. After our successful bench test I'm thinking what's next is to get the gauges and instruments into the car. First I got the car back on the hillbilly lift and raised it enough to get the engine on the dolly under it. Then I start making a wire harness to go from the dash into the engine bay and have enough extra to reach the engine on the dolly. In fact, I think I'm going to keep the wires just long enough to drop the engine and keep it hooked up. That will be very handy for adjustments and service that's hard to get to inside the engine compartment. Using the hookup info from our bench test and changing a few of the colors I taped up the bundle (with appropriate labels) and ran that down the original path on the tunnel. Then I went to work fabricating some brackets for the switch panel. I got that mounted under the dash with pop rivets, crimped on the terminals and connected everything. Next I mounted the tachometer above the dash and ran the three wires from it to the switch panel. When I got home this evening, I went to work mounting the two gauges (head temp and voltage). Sticking with my Use What You Got principles, I simply used the same panel from the OEM console with some brackets. It took a little while to wire that end as I decided to add a ground bus bar behind the switch panel. I wanted to insure good grounds on the instruments and the panel itself. Added a couple of cable brackets to keep the wires in place and it's not looking too bad so far.

Next will be to continue wiring back into the engine compartment, down to the engine and prepare for one more bench test before putting the engine in. I'm also taking delivery on a carb synchronizer in a few days so I'll attempt that at the same time.

IPB Image

IPB Image

IPB Image

IPB Image

IPB Image

IPB Image
Han Solo
It's been a couple weeks since the last post, so those of you with interest - let's catch up!

The wiring project is mostly complete. I finished the hook-up on the racing panel and OEM gauge panel. I did add two 4-way terminal strips under the dash. The two toogle switches were just too cramped with all the leads. The main switch has the battery positive home run and a jumper to the first terminal strip. From there I wired the starter button, oil pressure sensor, and tach. The first switch also feeds the second switch which connects to the second terminal strip that has fuel pump, head temp gauge and voltage gauge. Pretty handy that I can kill the fuel pump without turning off ignition. I've decided to put the battery in the former gas tank compartment so there's #2 welding wire running from the starter, through the firewall, along side the cable harness on the tunnel and up through the right side foot-well vent. A short segment of welding cable grounds to the under dash bulkhead.

With all that done I ran several tests to meter charging voltages and there's something wrong. I'm seeing 16-17 VDC at the gauges and battery terminals while running. When I meter at the starter it's really weird, anywhere from 6 to 50 VDC and jumping all over the map. I checked grounding on the voltage regulator and that's good. But the case of the voltage regulator is quite warm. I called the guys at Alternator Starter Exchange and they said the first thing to check is the battery. Apparently a bad battery can cause high charging voltages. So I'll take my battery to the parts store and get it checked this weekend. I'm also going to check the extensions I had to make to the voltage regulator harness to get that where I wanted it.

I've got two electric fuel pumps I can choose from and I've found neither likes being above fuel tank and carb elevation. I had planned on mounting one near the OEM battery tray position but it's going to have to be lower to self-prime. If I can get this electrical sorted this weekend, I'll start running the braided fuel lines from the front trunk tank position to engine compartment. I think the best path for those will be along side the drivers side long where the vapor lines once were.

I'll catch up on photos next post guys!
Han Solo
After two weekends of motorsports I'm back in the garage this morning. Earlier this week I rebuilt one of the rear brake calipers while watching the PMB Performance You Tube video. It was very informative and I highly recommend anyone considering that task watching it. I had handed off all the calipers from this car to a buddy but family issues caused his progress to stall. The rears were mostly dis-assembled and cleaned. Same with the fronts but the pistons were stuck. I didn't have any luck getting those out so I'm getting rebuilt fronts. Anyway, the rears turned out pretty good and I saved quite a bit doing that myself. So this morning I finished the second rear caliper. Then I went back to the electrical issue. I rebuilt the extension on the voltage regulator harness, getting rid of the butt splices and soldering the connections instead. I also ran a chassis ground from the voltage regulator to the body ground. I fired the motor back up and I'm still getting 17 VDC at the battery and starter. I still haven't replaced the battery so that's next. I'm going to get a Optima and that will be $250. A little frustrated with that issue, I decided to fit the fuel cell in the front trunk. That required cutting some of that lovely front pan which I didn't mind at all because of those horrible welds. I raised the tank with some spacers from Lowe's and the out-flow hose passes over the front axle. I had thought of running that hose down the drivers side long behind the kick panel but I decided to run the braided hose down the inside of the tunnel. That required drilling a 3/4" hole in the firewall by the clutch tube but all that turned out pretty good. So I'll probably mount the fuel filter on the firewall and follow with the fuel pump mounted to the passenger long near the suspension console. I was cooked after those tasks with temps in the 90's and I'm glad to be in air-conditioning this evening!

IPB Image

IPB Image

IPB Image

IPB Image

IPB Image

IPB Image
Han Solo
I returned home about noon Saturday from a business trip and worked on Porsches pretty much the remainder of that day and Sunday. First on the list was a nagging issue with the wife's Boxster that had me remove the intake manifolds looking for vacuum leaks. I finished that job up this morning and went right to the 914. It's odd that a rusty race car is more enjoyable to work on that a modern daily driver. Maybe that's because I'm building the car the way I want it and not sticking to a form that's complex and highly engineered.
Anyway, I had painted the front calipers Saturday in between wrench turning on the Boxster so those were dry this morning. I loaded up the pads and installed them. They look pretty sweet with those Koni yellow strut tubes. Then I'm back into the fuel delivery system. I drilled a 3/4" hole in the pan to get a better insert on the braided fuel line going through the tunnel (that hole and the firewall will need grommets). After I fished that through, I put the AN fitting on and started looking at how I was going to tie that into the fuel pump. I have a nice Fram fuel filter that I wanted to use but there was a couple of brass fittings that were needed to mate that up so that's a trip to the auto parts store. Another thing I wanted to do was put a primer bulb in-line because the fuel pump is above the tank level. Did you know they have those at Walmart? So with a couple hands full of parts here's what I ended up with...
fuel tank to fuel filter - steel braided 3/8" hose
fuel filter to primer bulb - 3/8" fuel line
primer bulb to fuel pump - 3/8" fuel line
fuel pump to tee fitting - 38" fuel line
I did have a fuel pressure regulator after the pump before the tee fitting but it failed and started leaking badly. So I eliminated that and I suspect I won't need one. After I plumbed all that up and used padded clamps to tiddy everything up - I gave the bulb a couple of squeezes and fired the engine up. Nice! I've got a combo timing/dwell/RPM/volt meter on order so next up will be to get dwell and timing set. Once I've done that, I'll sync the carbs and the engine should be ready to go into the car.

IPB Image

IPB Image

IPB Image

IPB Image

IPB Image
Han Solo
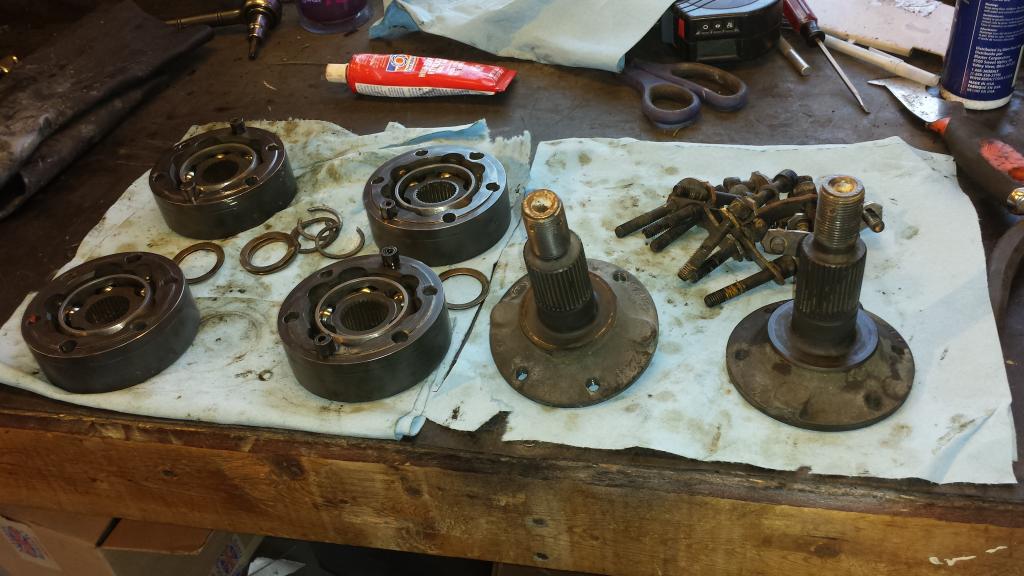
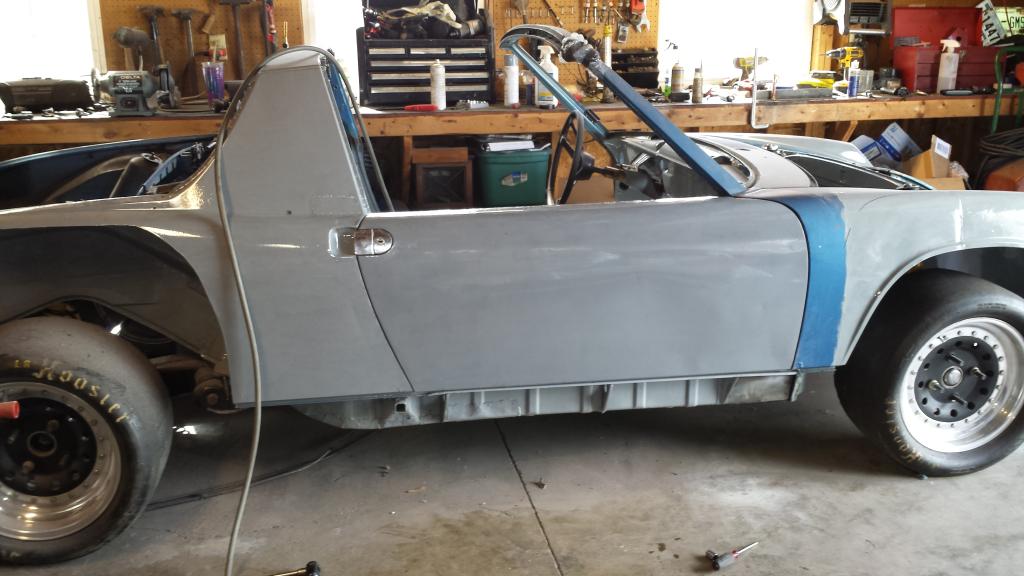
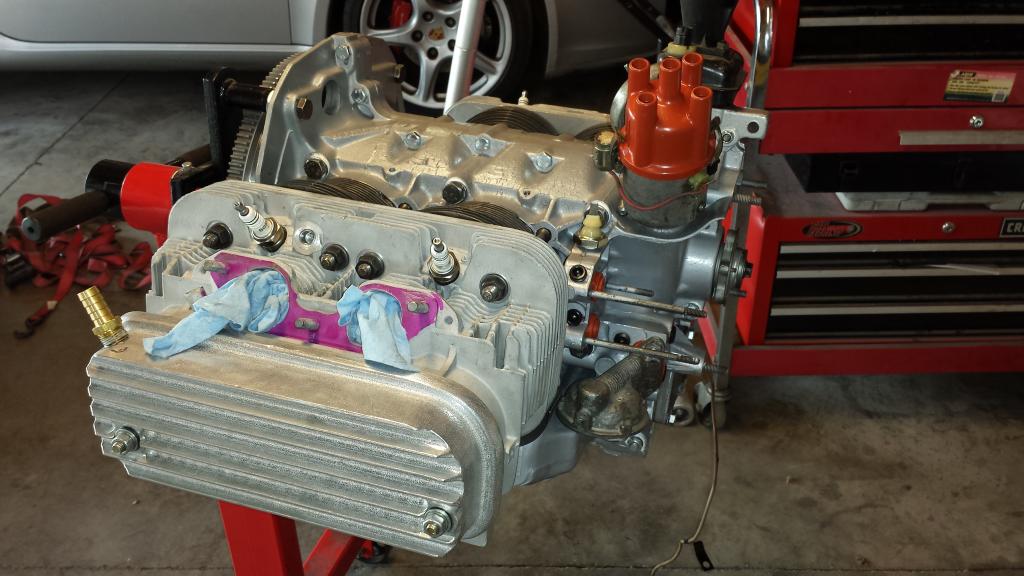
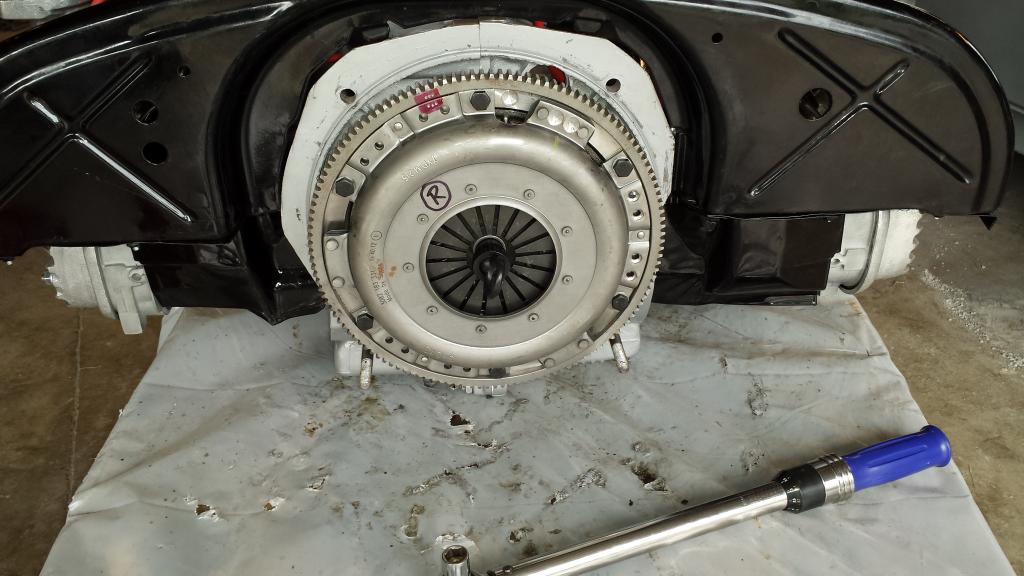
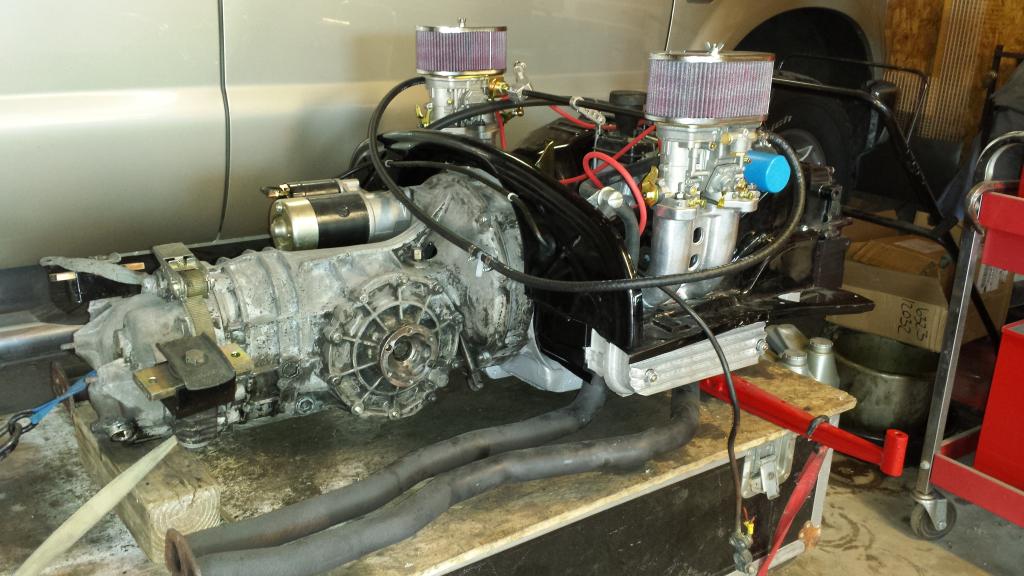
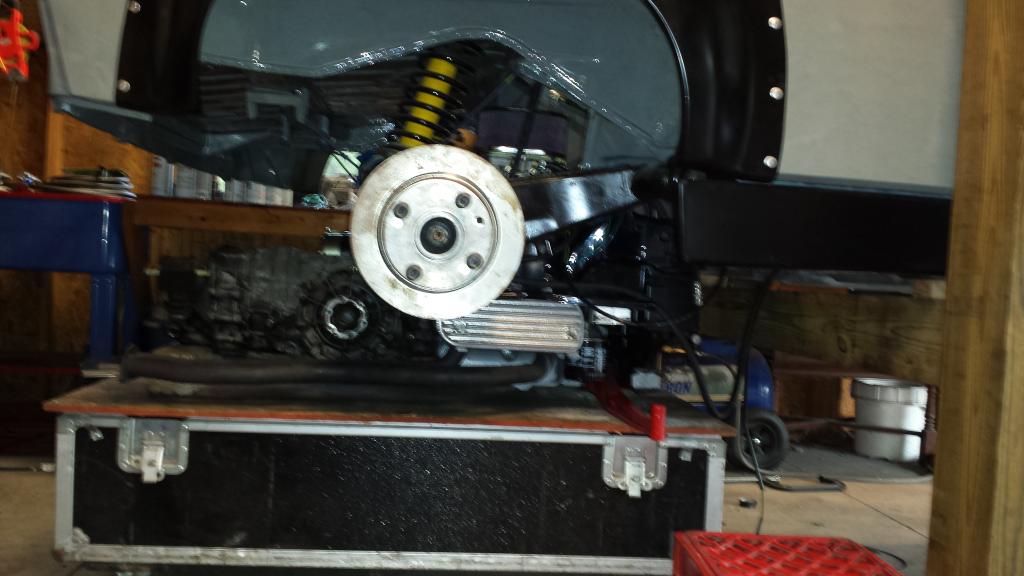
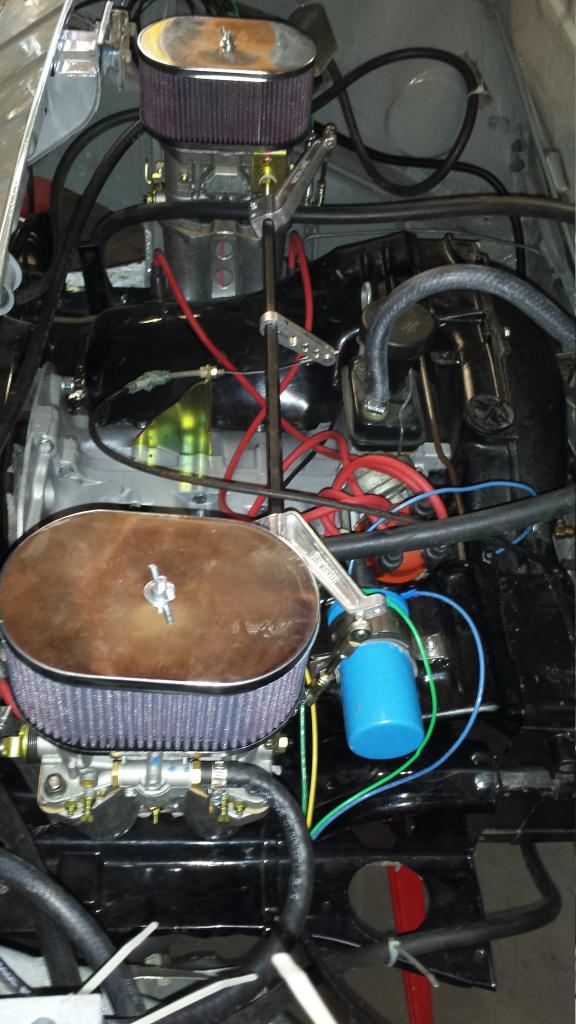
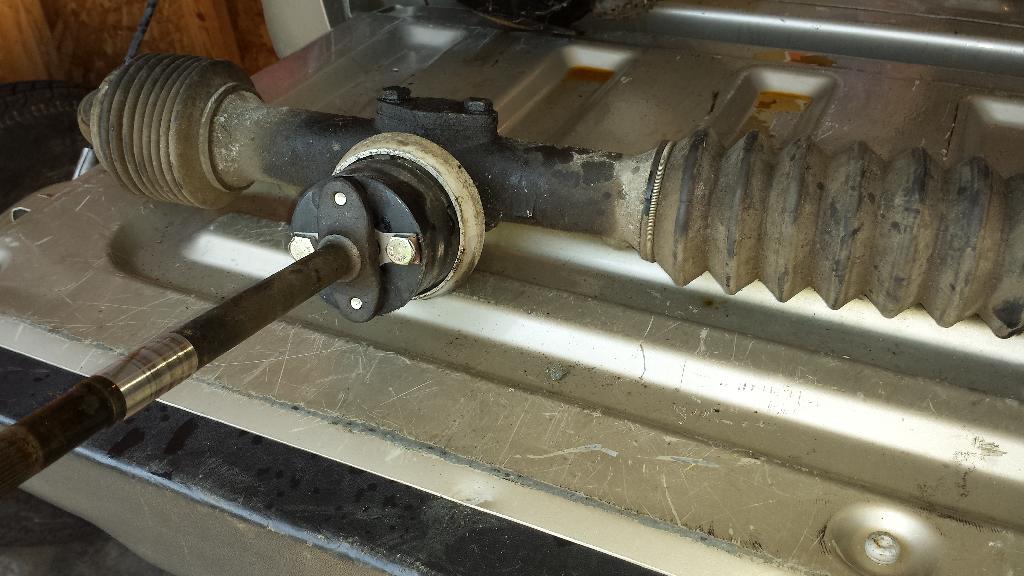
Mid week I got the combo dwell/timing light and I'm glad I spent the extra cash over a simple timing light. This unit has the digital display with volts, rpm, dwell, timing and advance timing. I had a couple hours in the evening to take a look. When I first checked dwell, it was actually really close, 43. I tried to tweek it but loosening the screw just made it much worse. So I used a feeler gauge and got it back to 43. Then I set the light to zero advance and got the engine running about 850 rpm and the timing mark was right on the money. Then I set the advance timing to 27 and rev'd up to 3500 rpm, again, right on the mark. Having the rpm display right on the light is great! Then I got out my flow meter for the carbs to see how those were breathing. With the linkage off the passenger side is 7 and the drivers side is 3.5. That's with the idle adjustment 1 1/2 turns out like the Redline manual recommends. Tweeking that adjustment enough to move the flow meter on the drivers side only makes the engine run rough. Also, with the engine on the bench stand, it's bouncing about and hard to get a good flow reading. I set my target on this weekend to get the engine in the car.

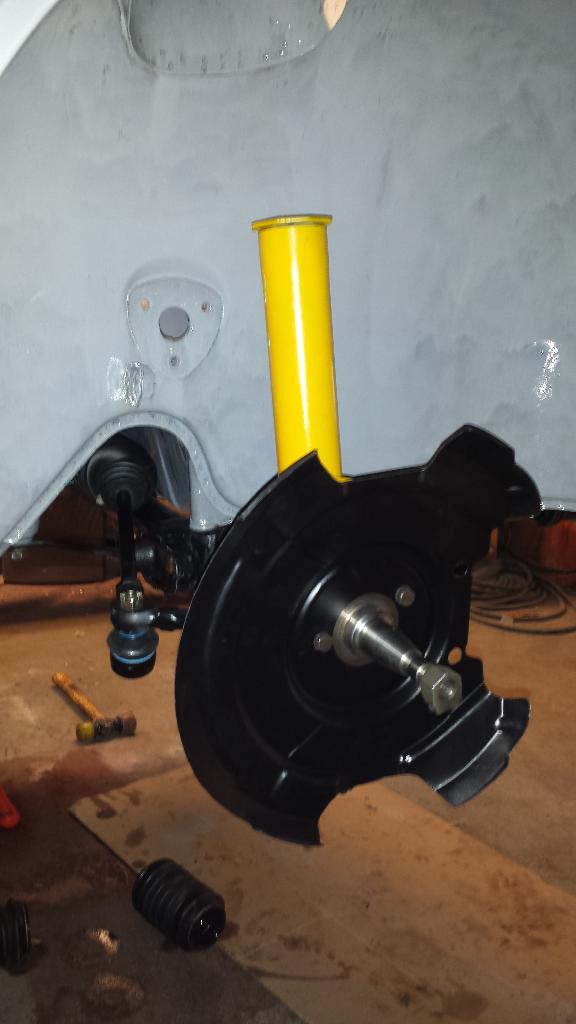
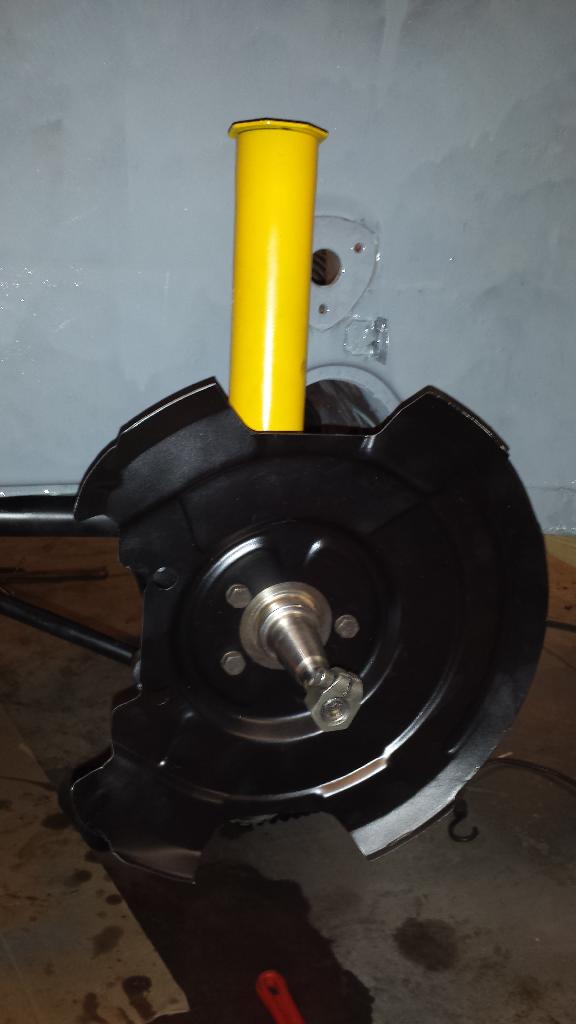
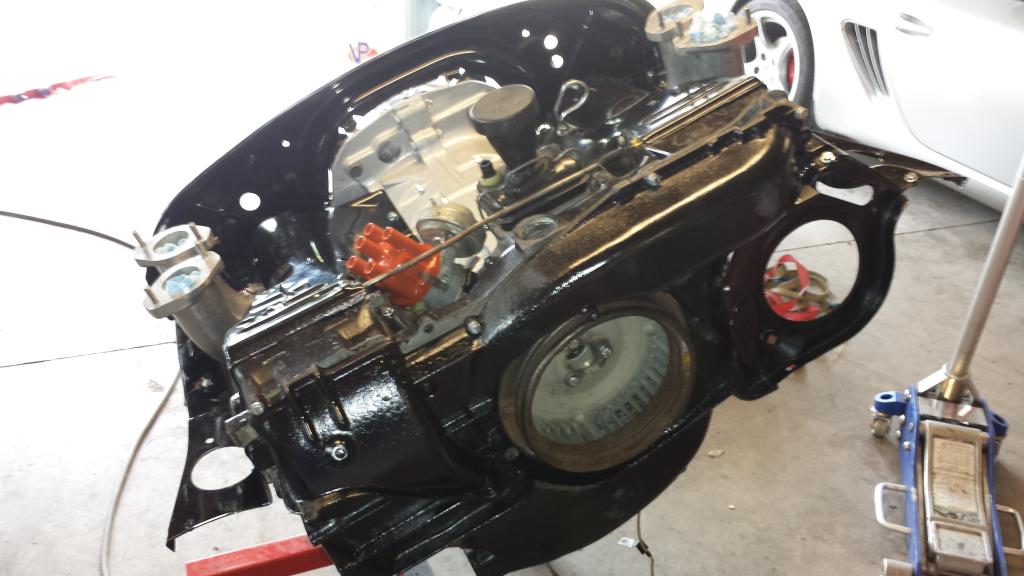
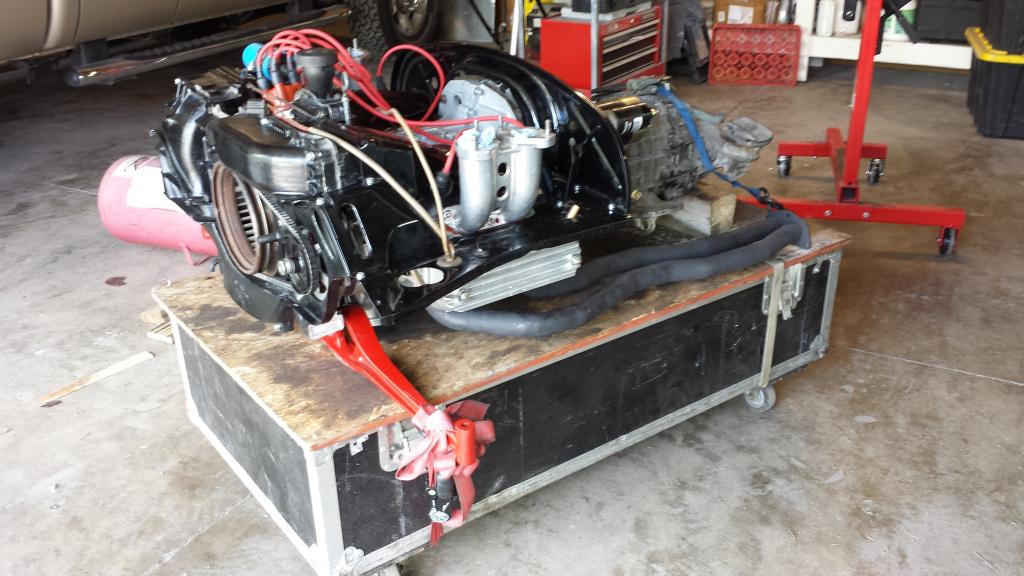
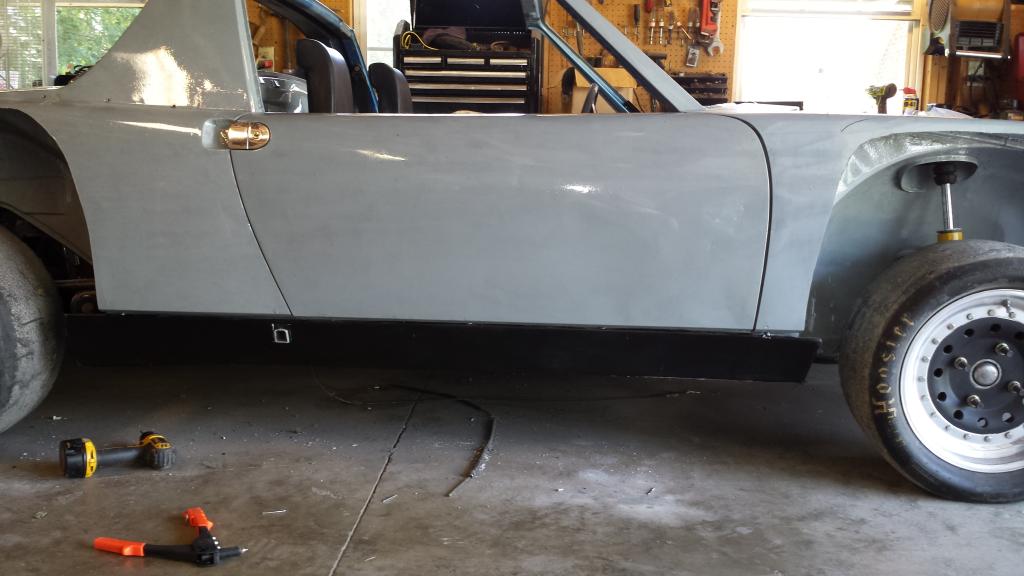
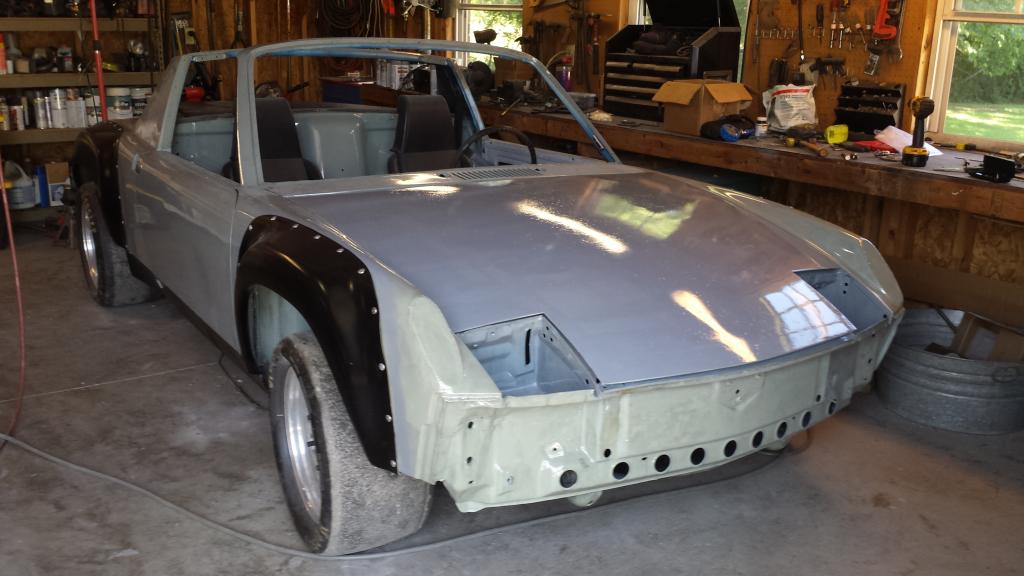
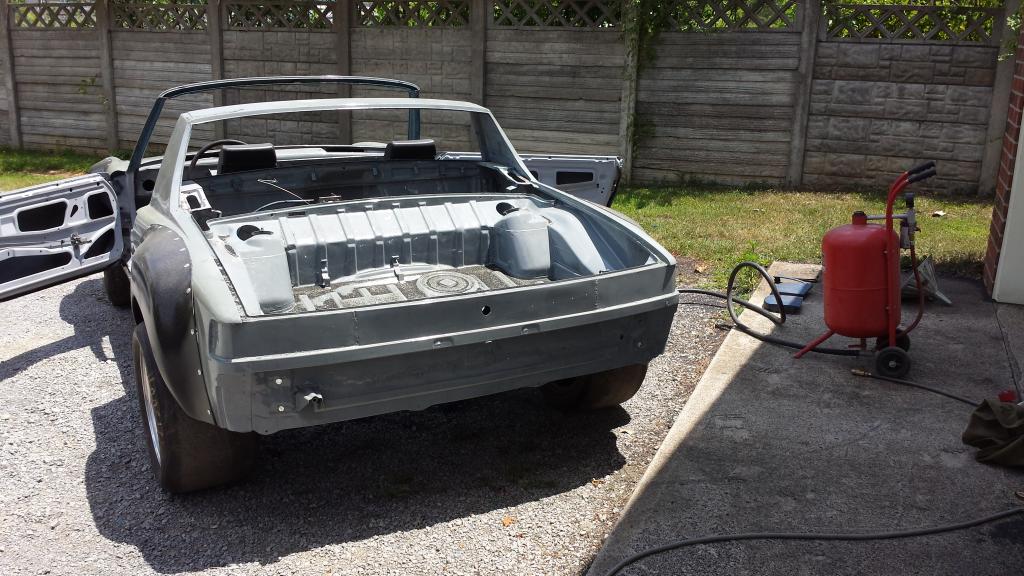
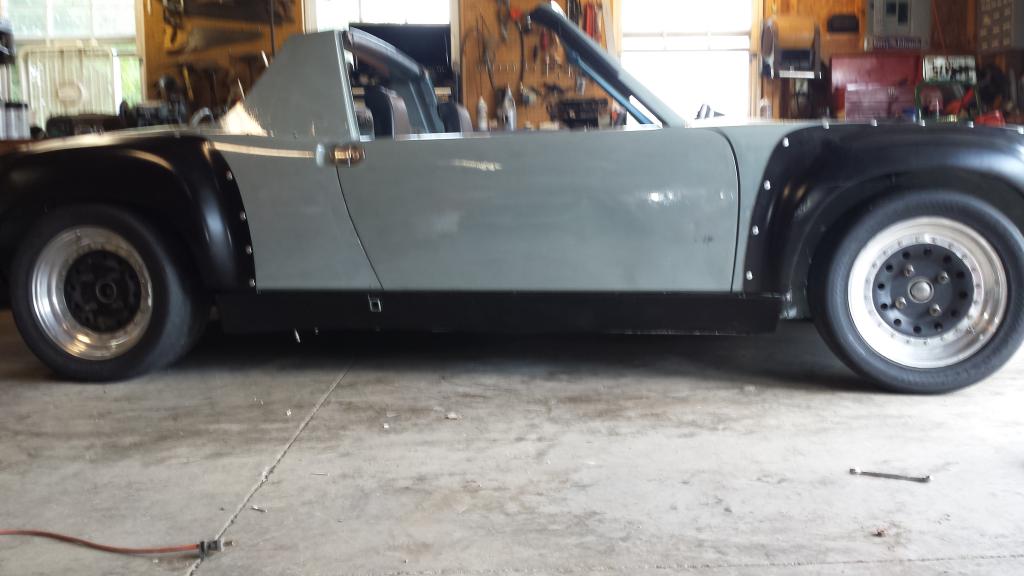
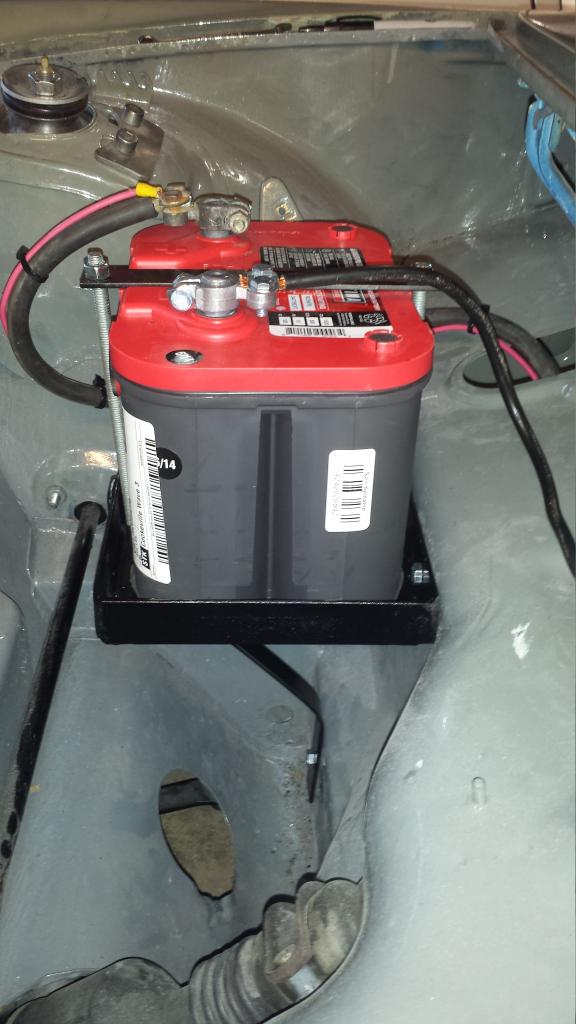
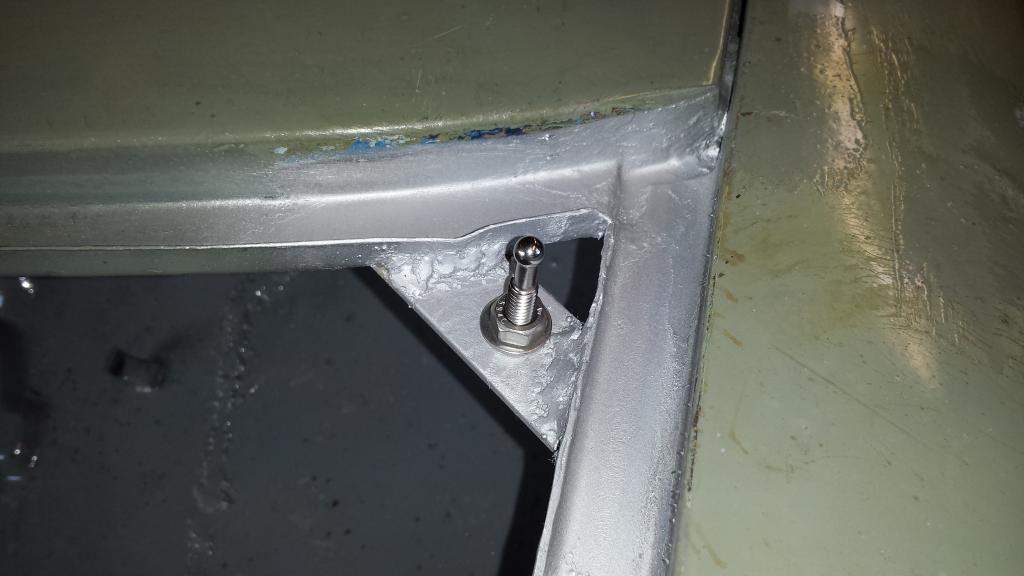
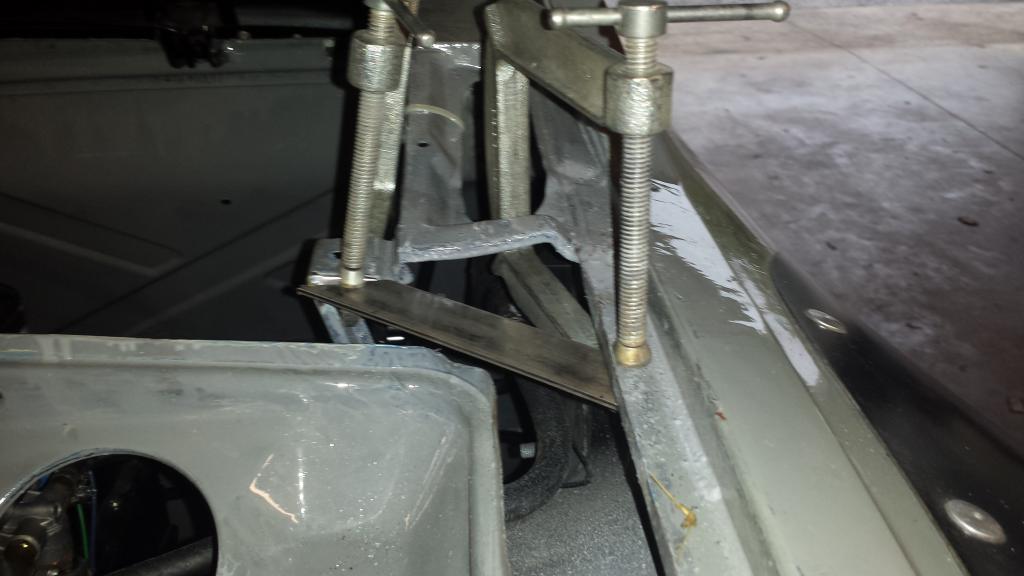
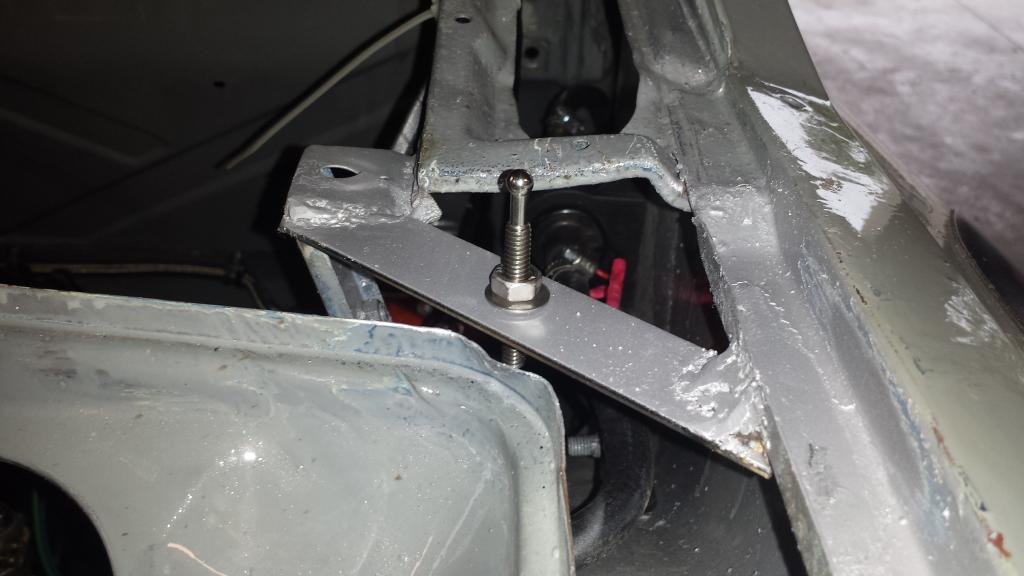
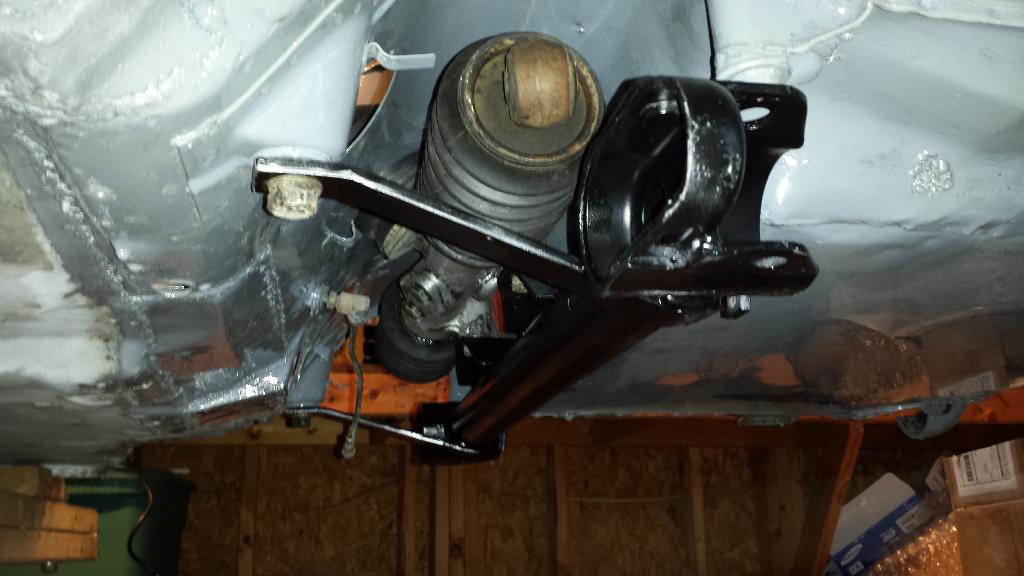
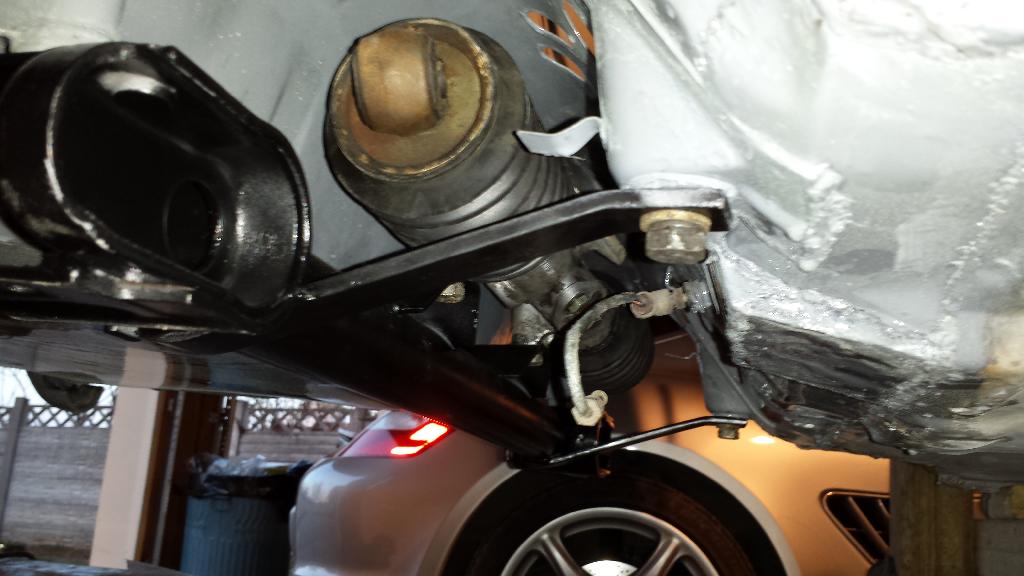
I'm up early today to beat the heat. I get the hardware together for transmission and motor mounts and start lower the car down over the engine. That goes well and I bolt up the new solid transmission mounts first. Then I lower a bit more to get the engine mount bar to line up and bolt that to the chassis. I've also got the solid motor mounts so I loosened up the old rubber mounts, put a jack under the sump and swopped the mounts. After tightening everything up and making neat coils out of the electrical and fuel lines (those are a little long so I can drop the engine and test) I get in the car a fire it up. What a difference having the engine solidly mounted! Idle is much smoother because the linkage isn't floping about. I get the flow meter out again and I'm able to bring the drivers side carb up to 7 by carefully adjusting the linkage. Smooth!

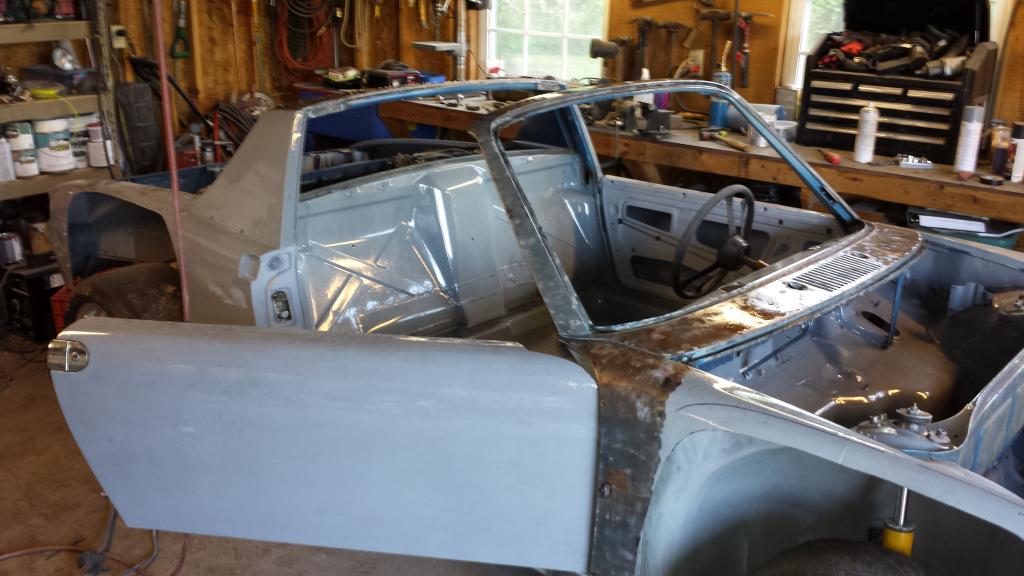
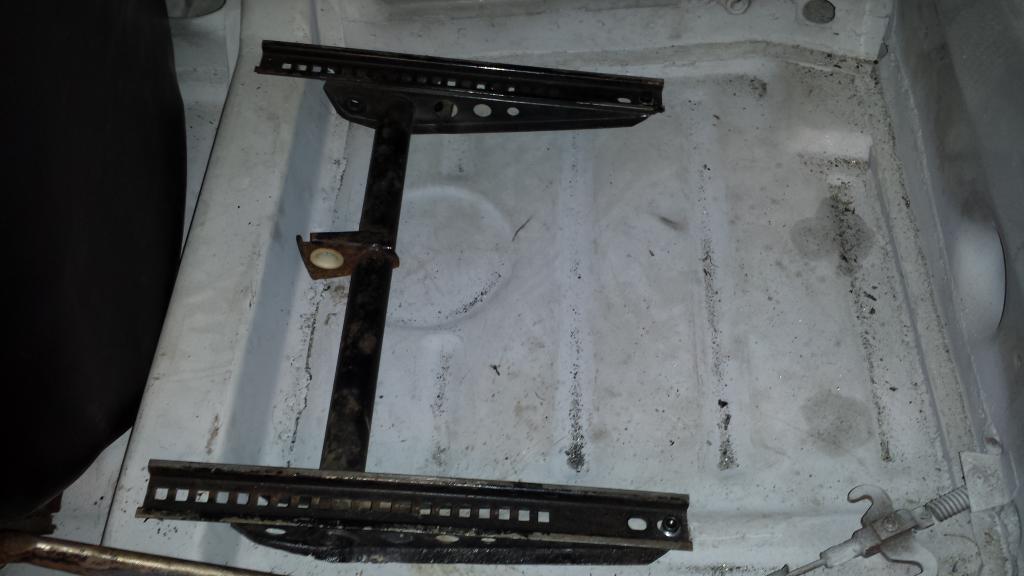
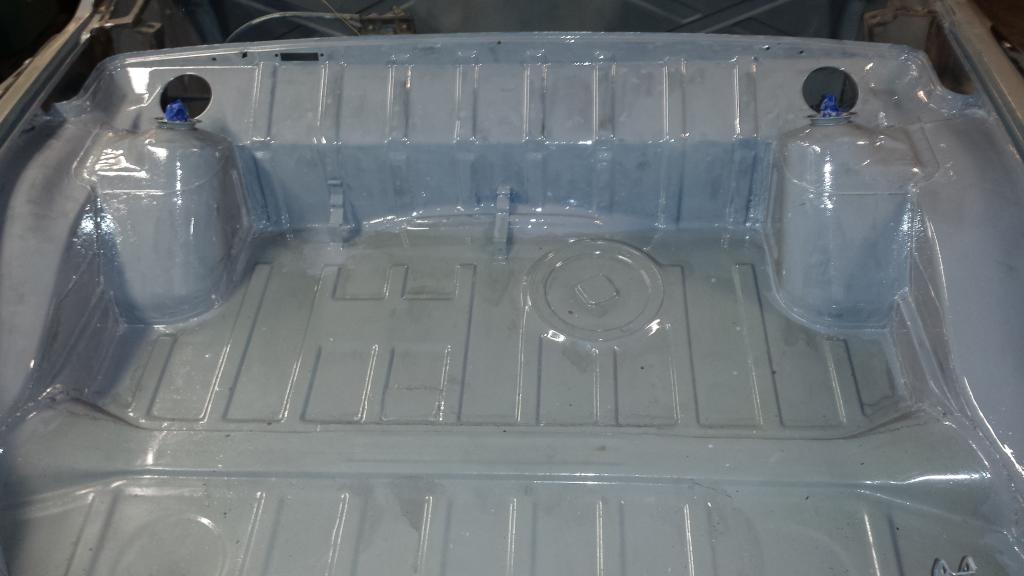
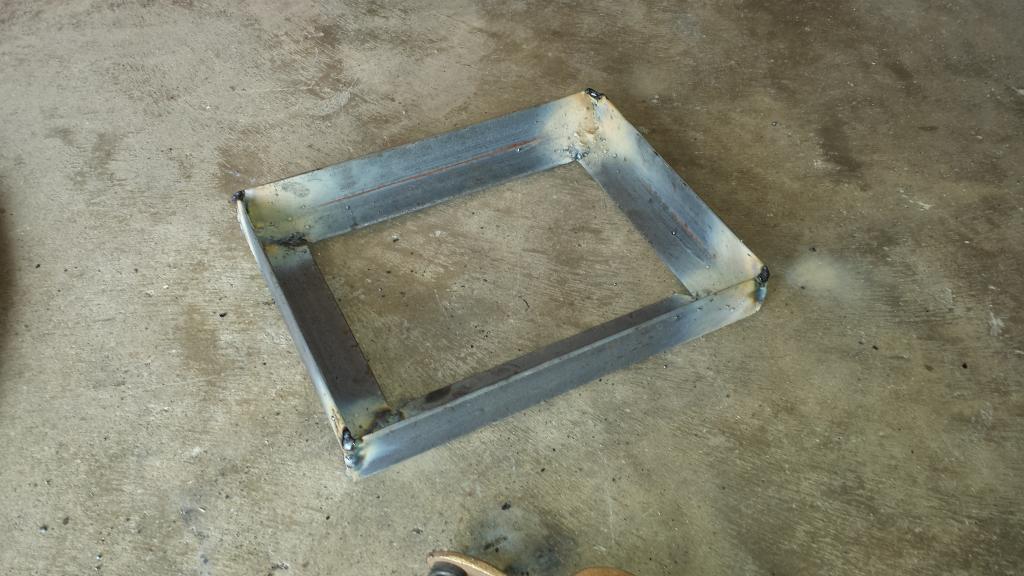
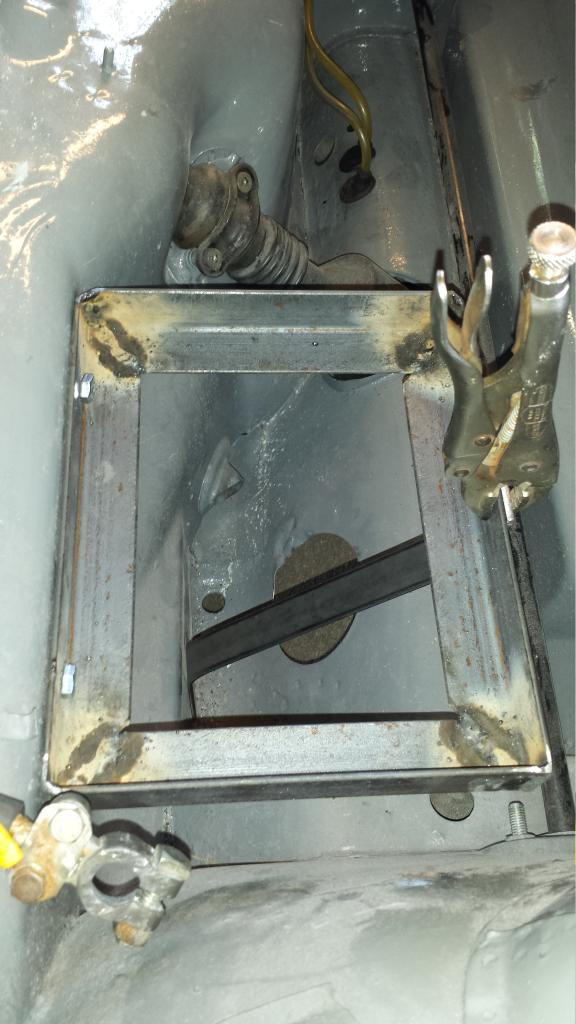
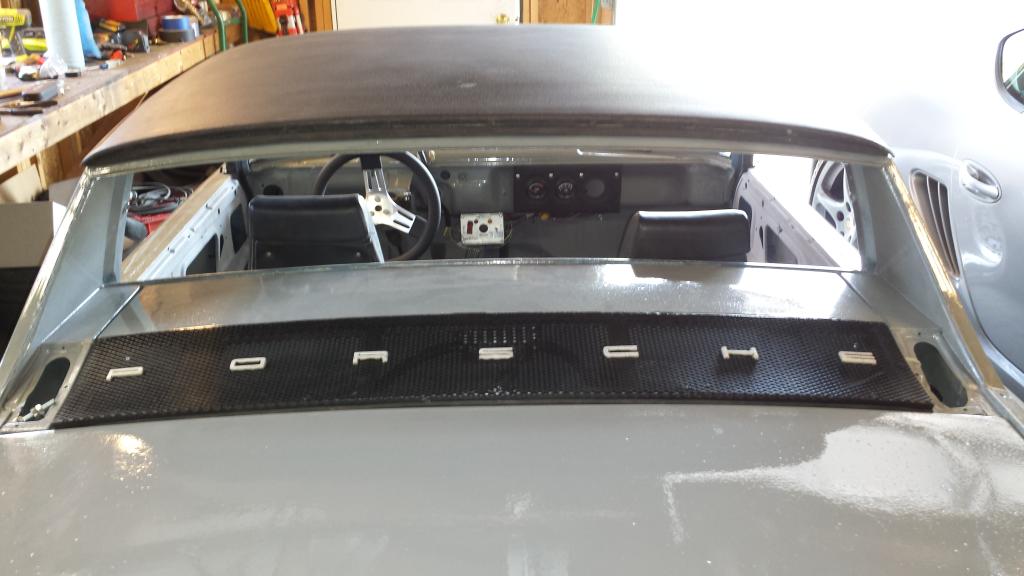
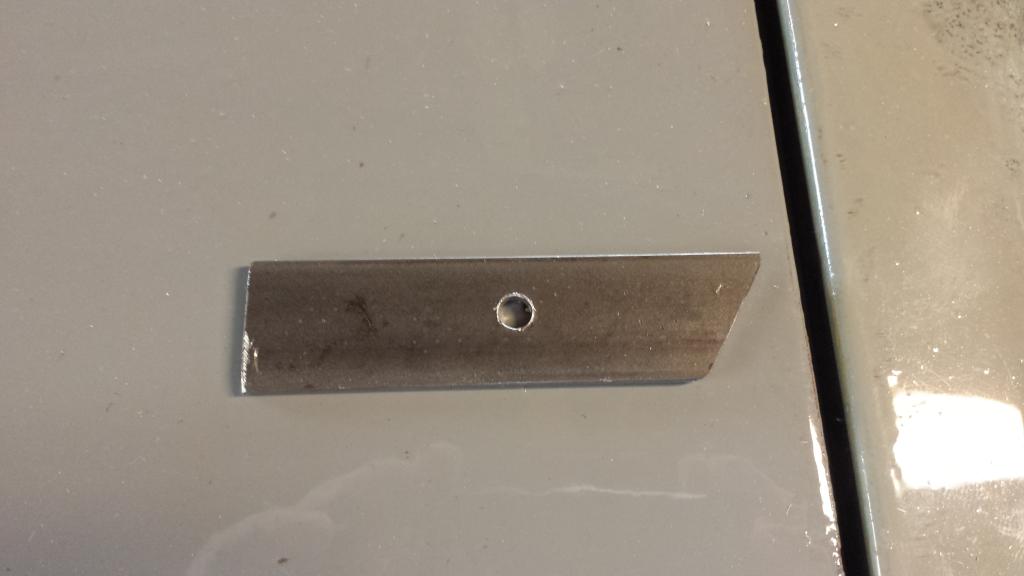
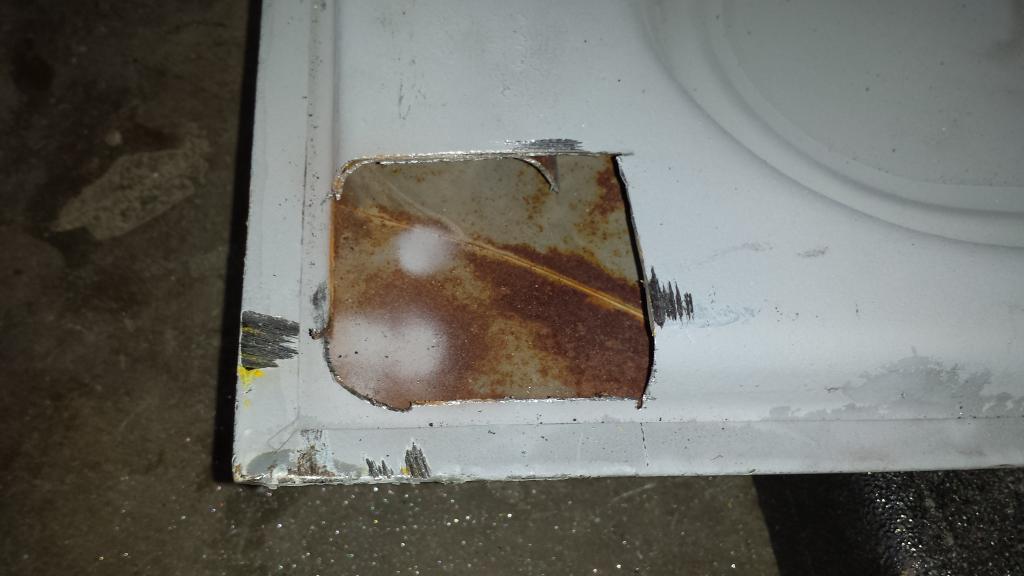
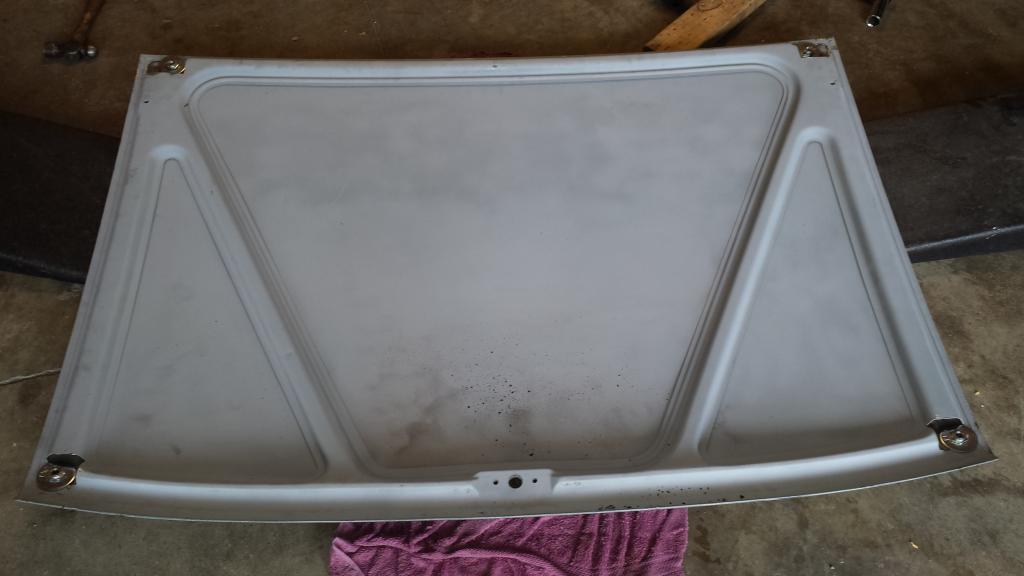
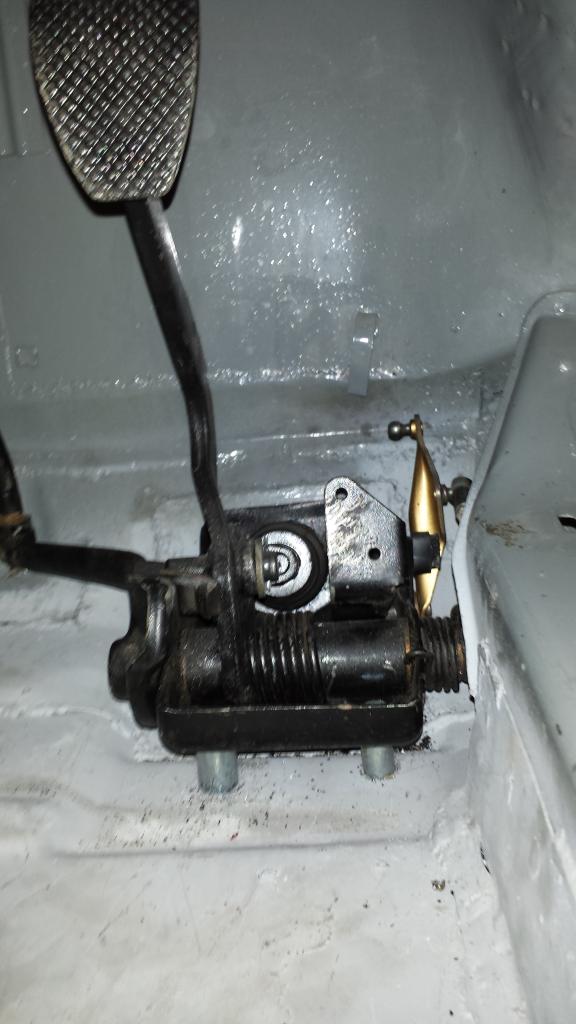
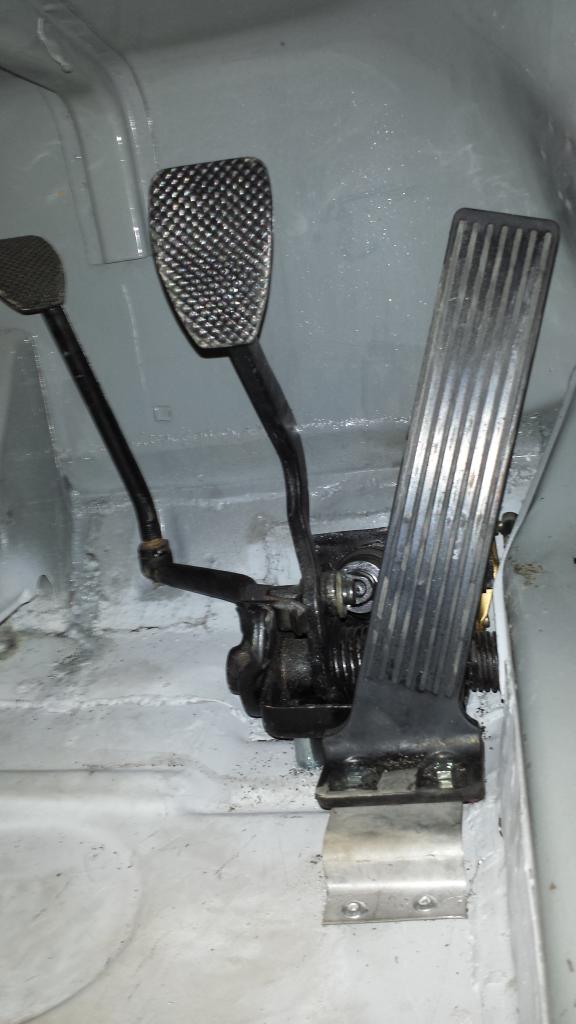
Now that the car is quite a bit lower, I decide to finish the peddle mounts. This floor pan is missing the peddle riser so there's a gap under the peddle assemble. I trim a couple of spacers to fit and bolt that proper to the pan. So now the gas peddle needs the same elevation. Instead of using more spacers, I had a piece of sheet metal that was a perfect shape (it's a segment of the floor pan cross member). I bolted the gas peddle to it and then pop riveted the sheet metal to the floor pan. Eventually I will need a large plate for my heels to rest on but that can wait.

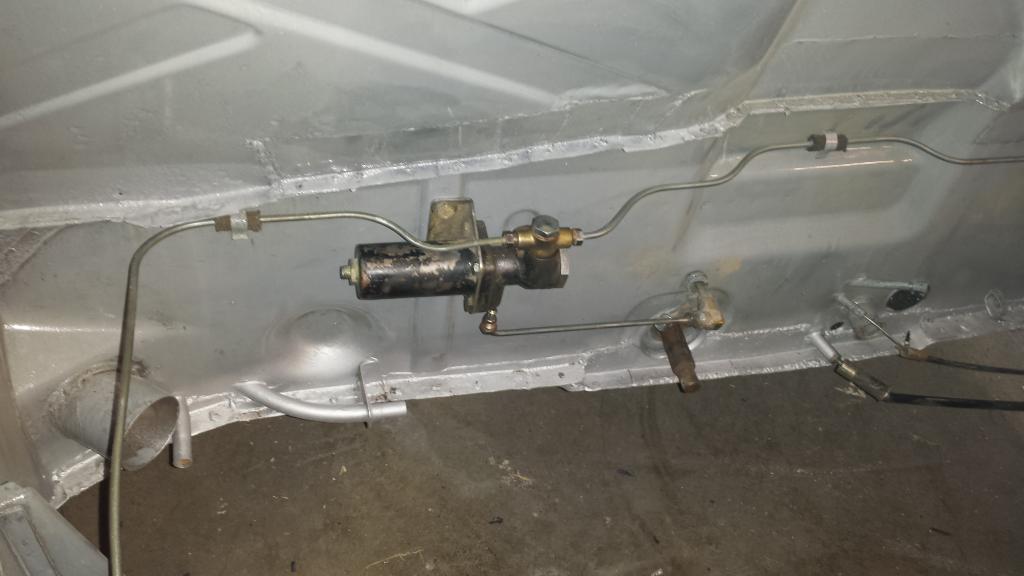
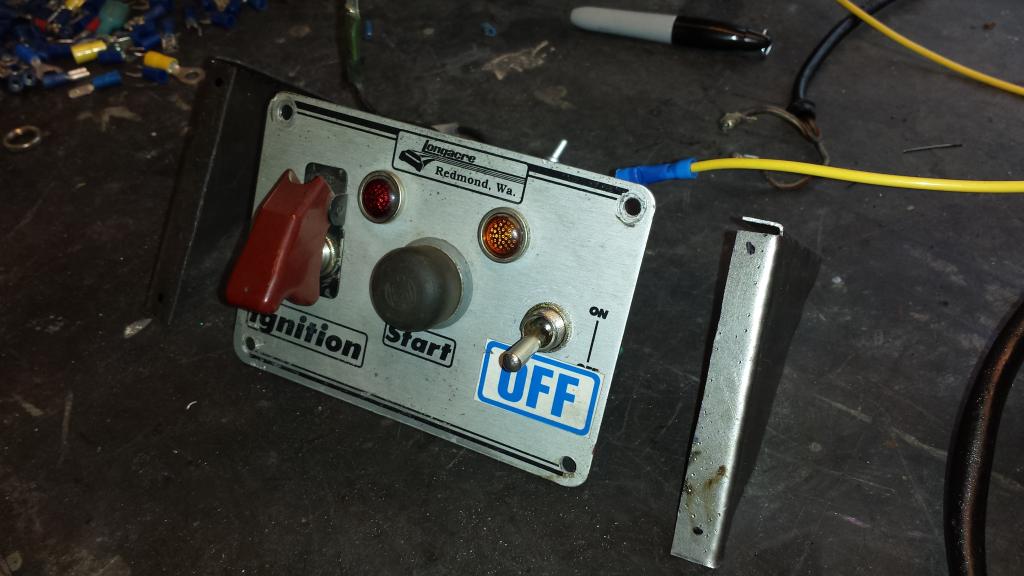
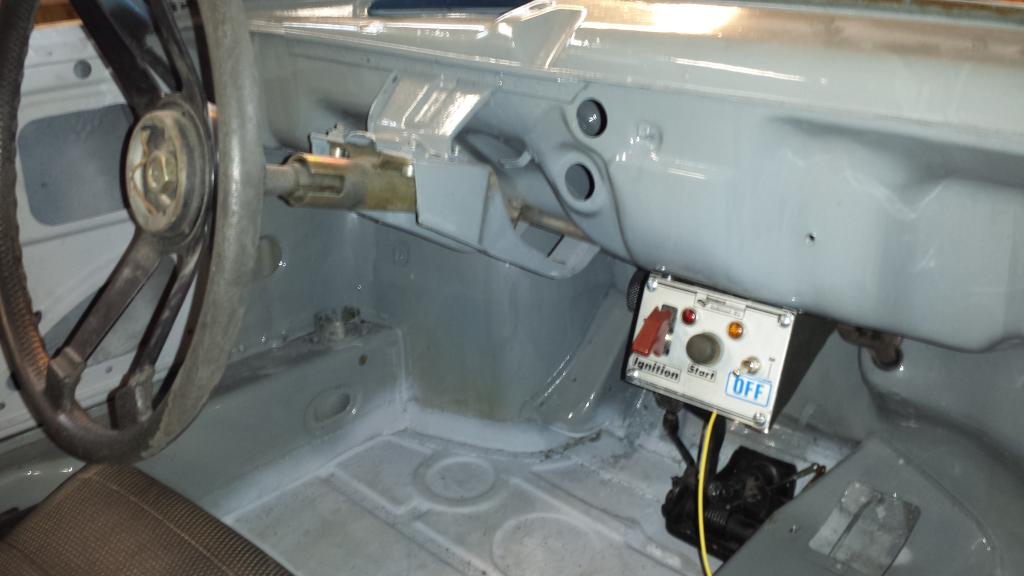
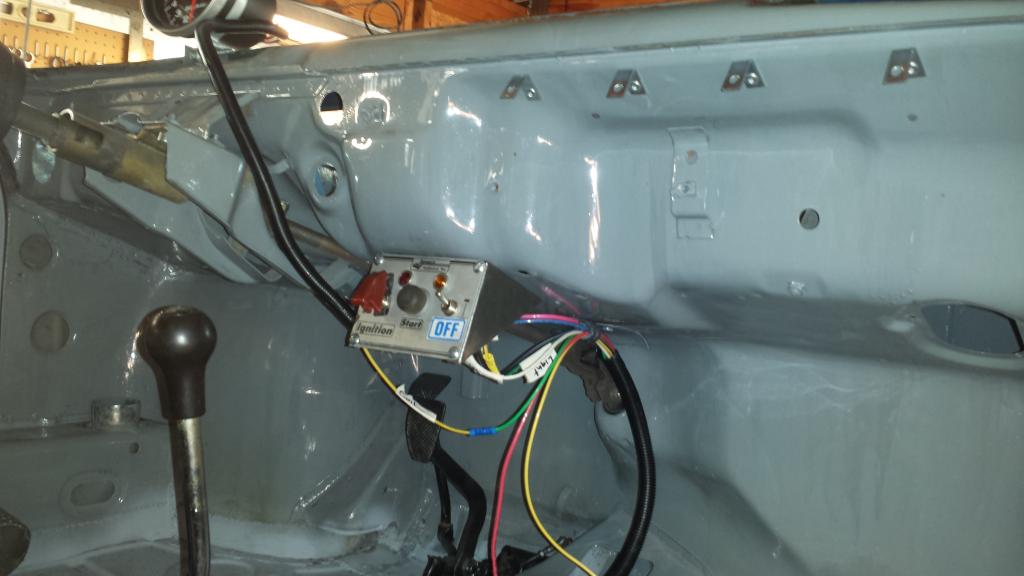
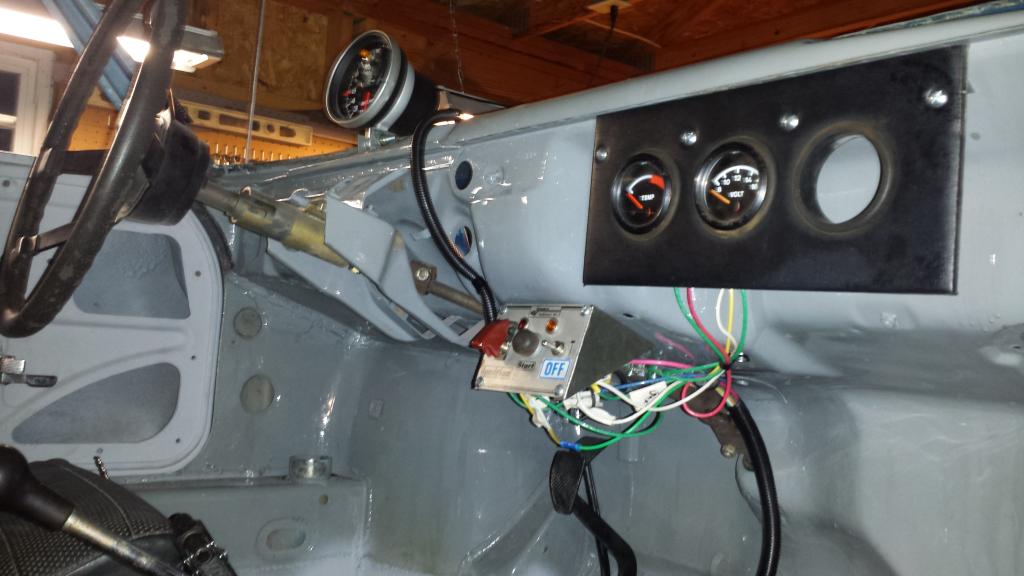
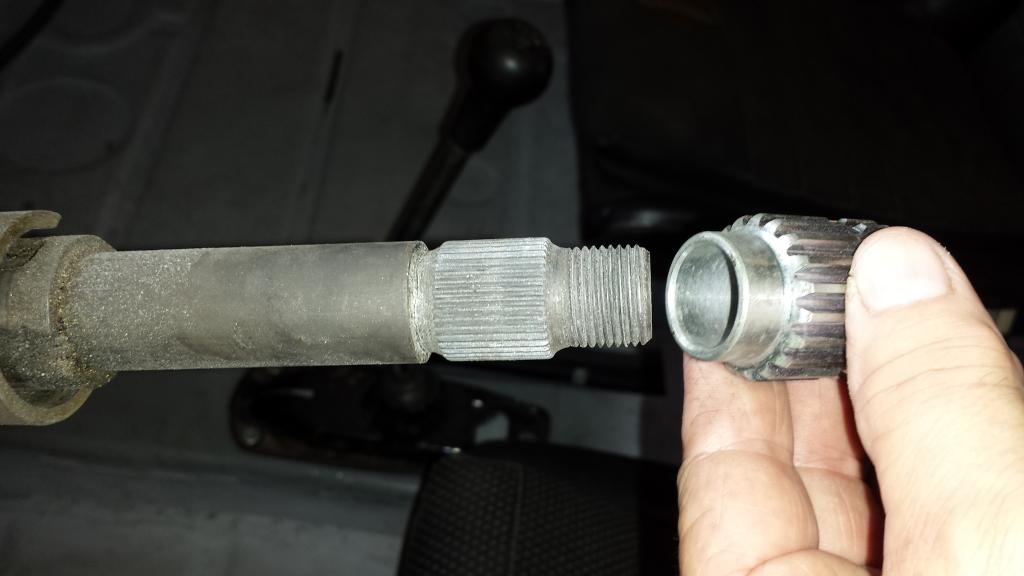
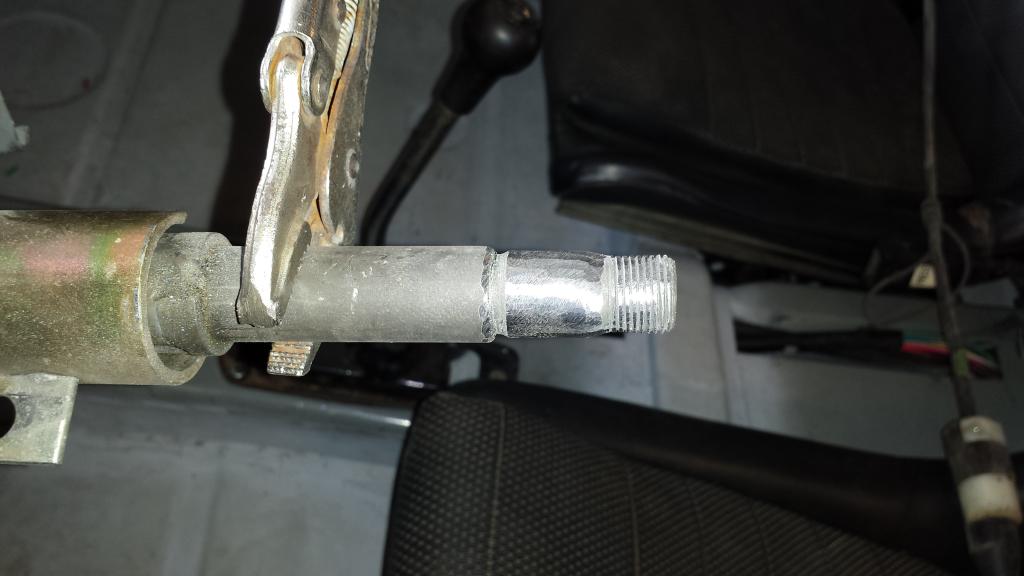
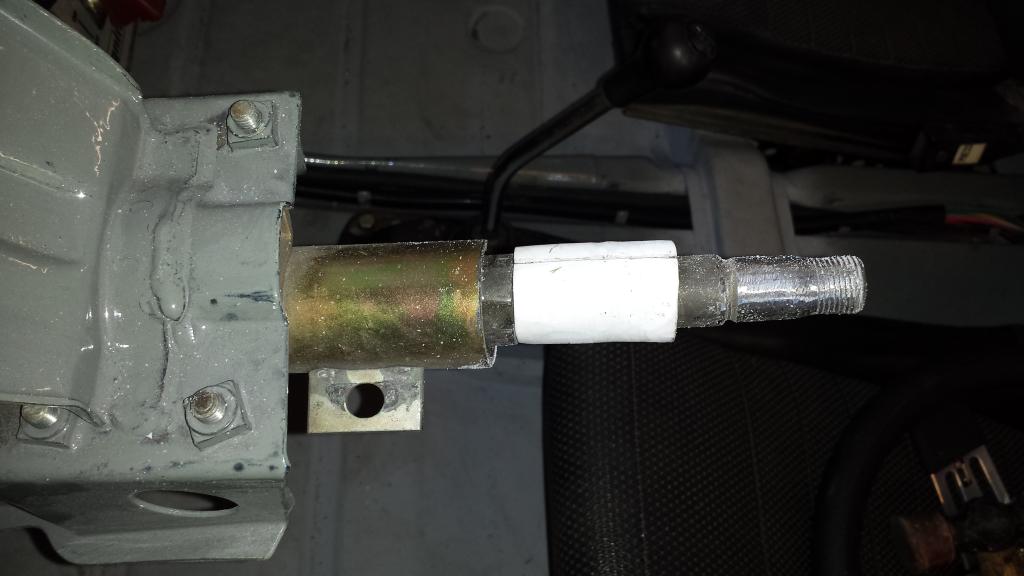
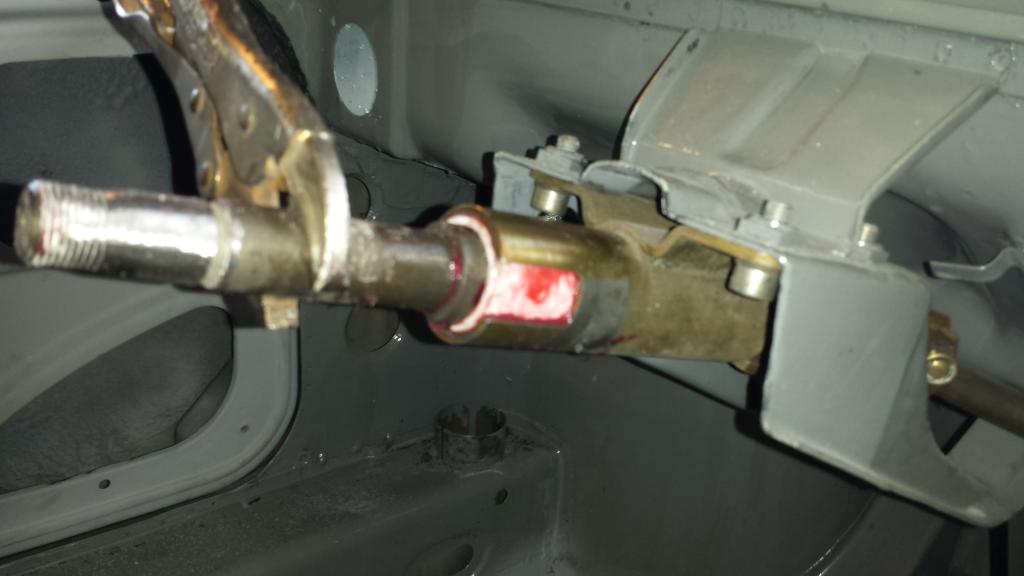
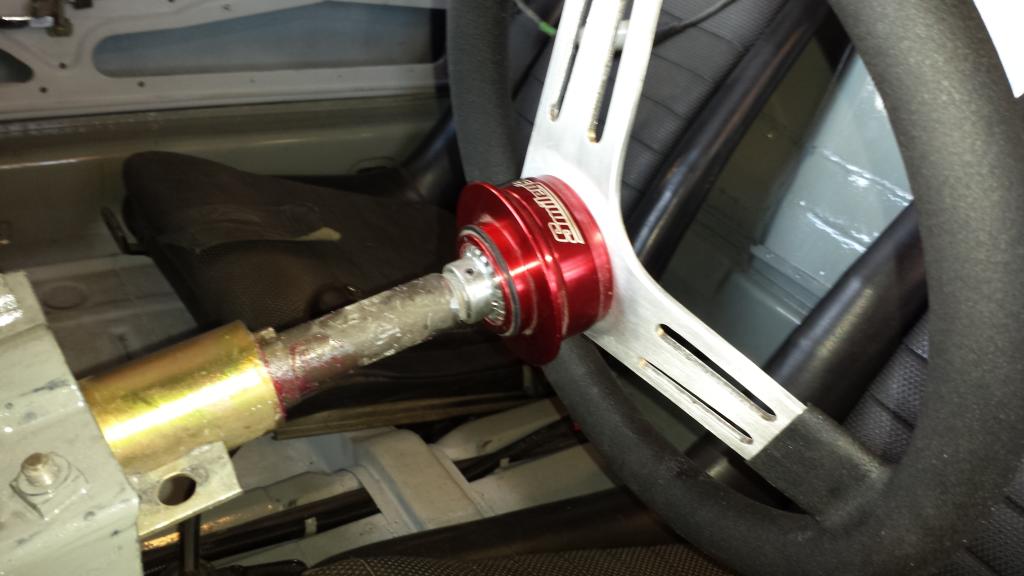
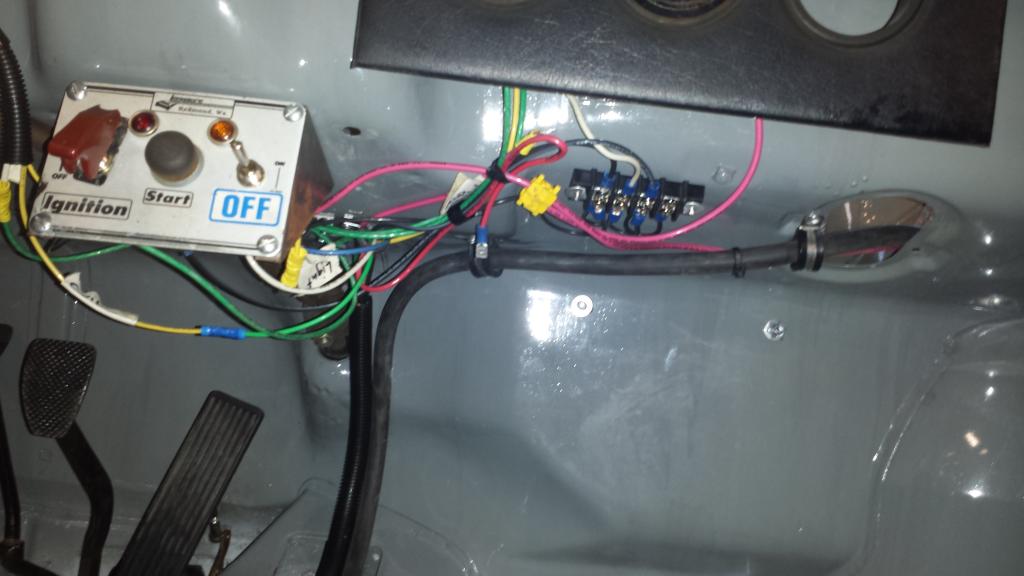
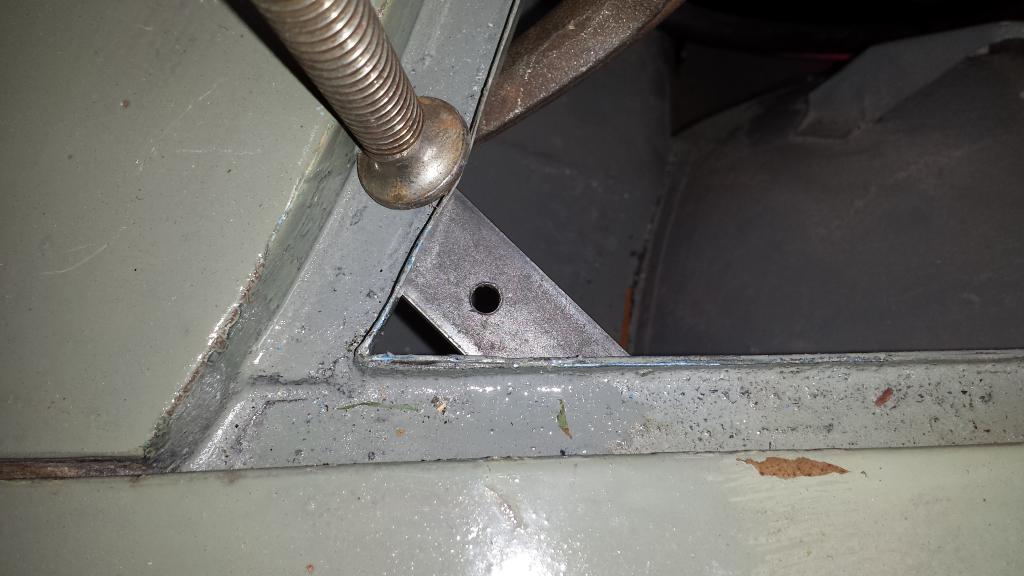
Before I gave into to the sweltering heat, I got under the transmission to look at the shifter linkage and clutch cable. I had gotten a refurbished shifter coupler and I installed that on the the rear bar. I got that bar inserted into the correct position but I'm missing some linkage at the transmission. I also put on the clutch cable pulley and housing on but the cable itself is too far gone. Tonight I'm getting a list of parts together for clutch and shifter linkage.

All in all a very productive day!
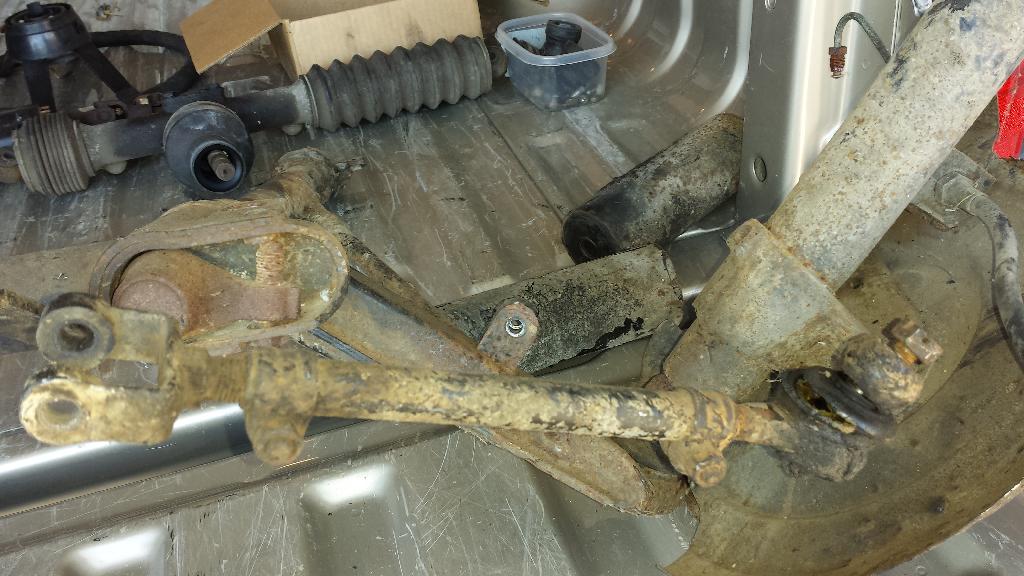
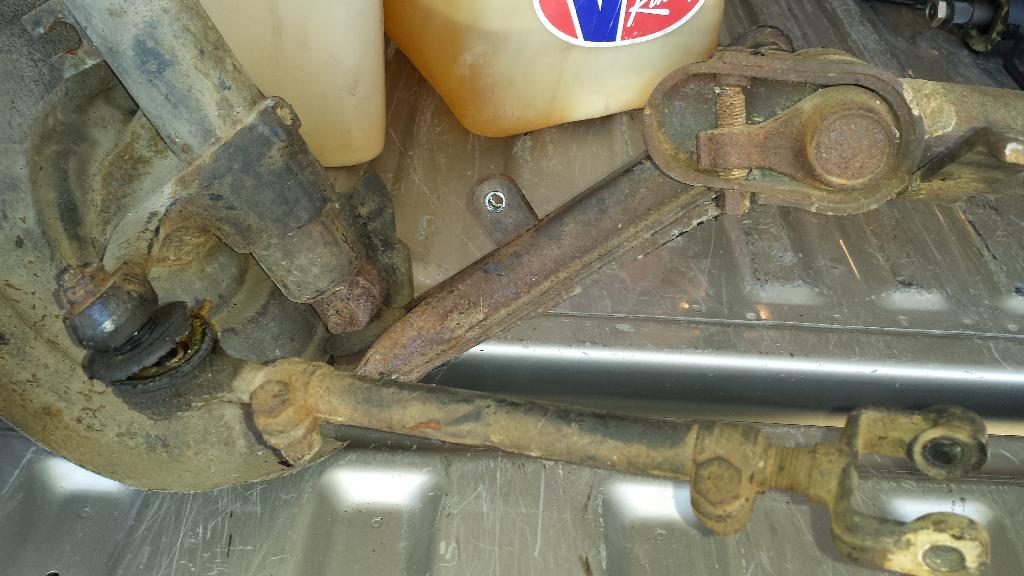
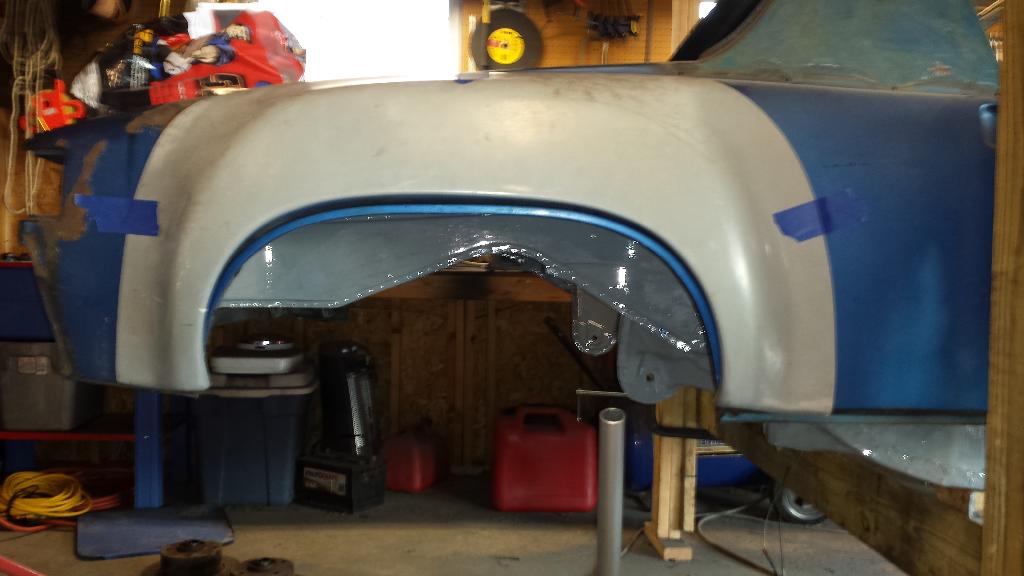
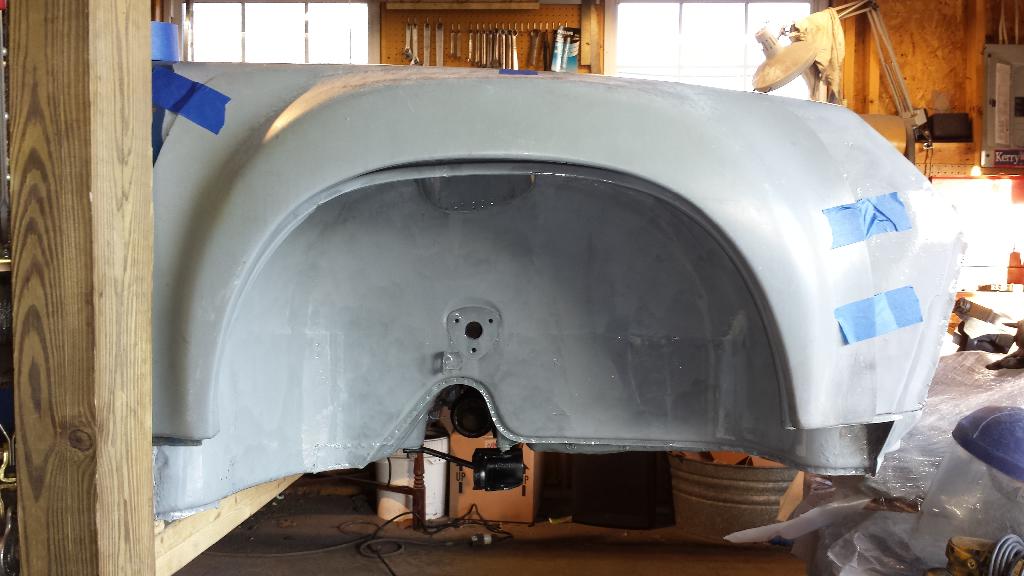
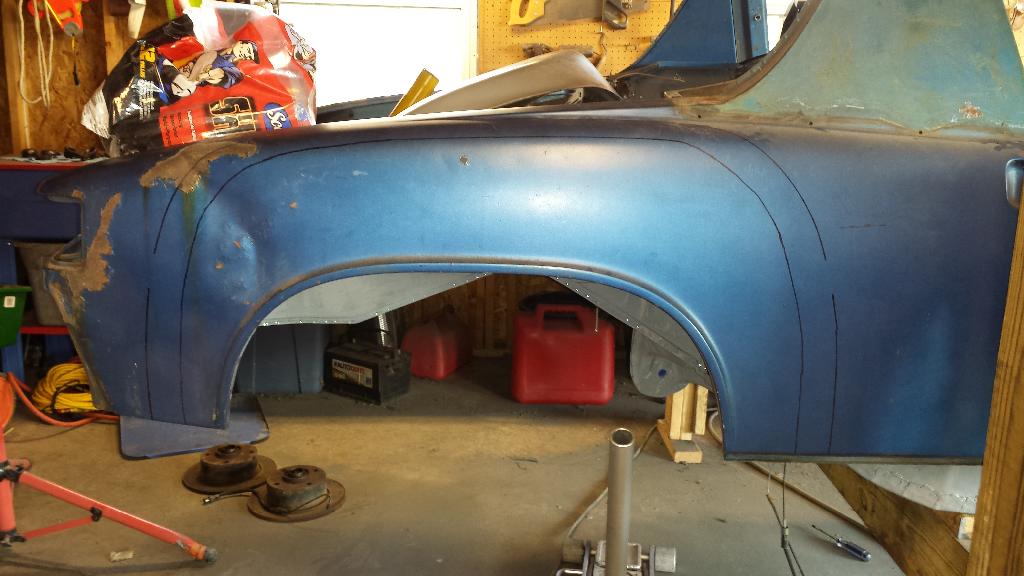
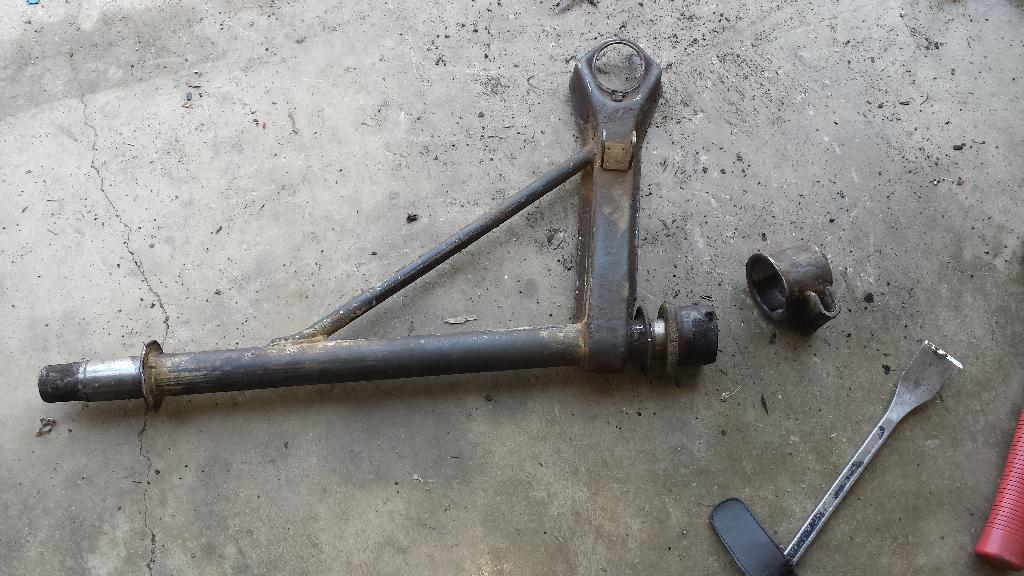
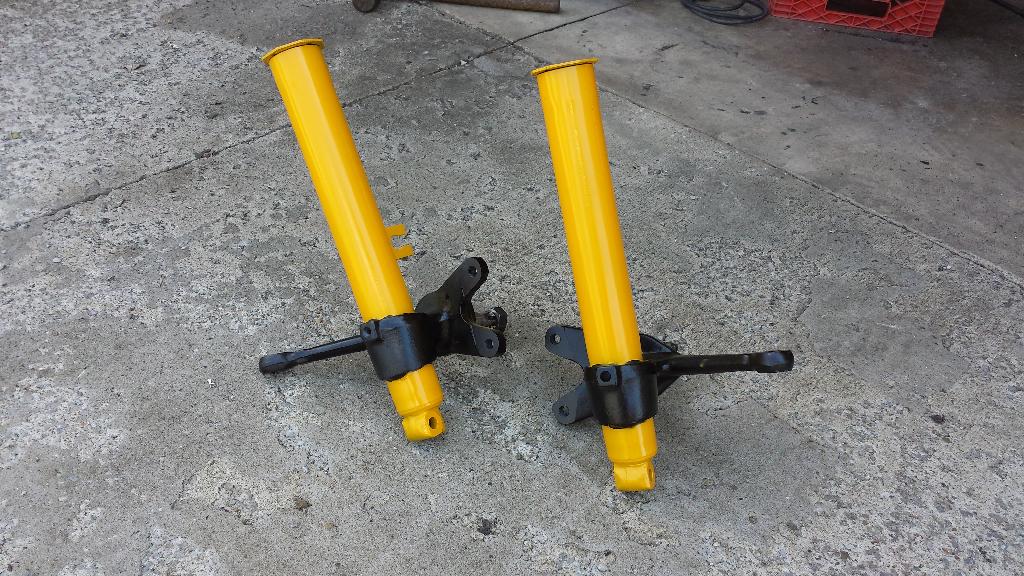
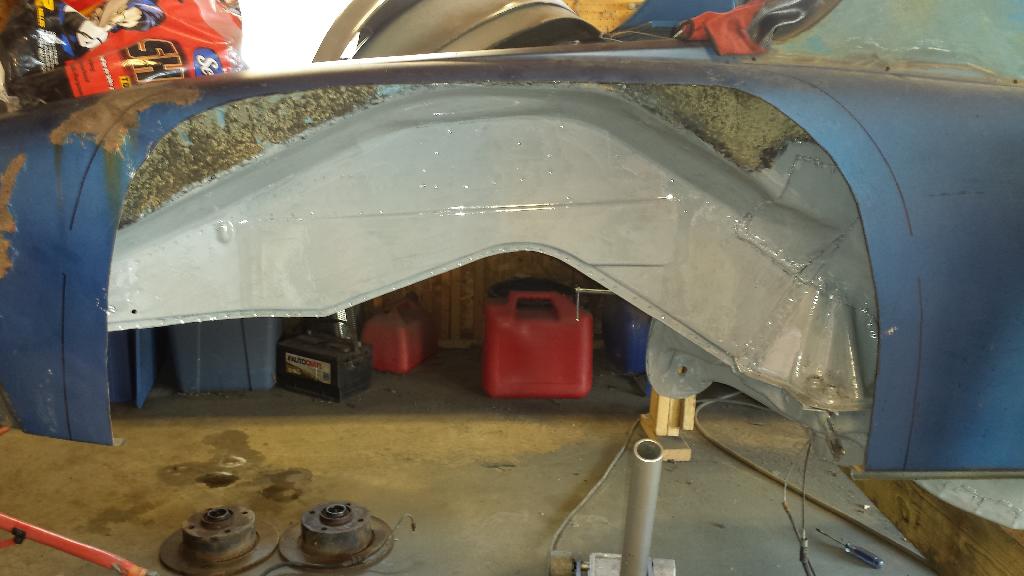
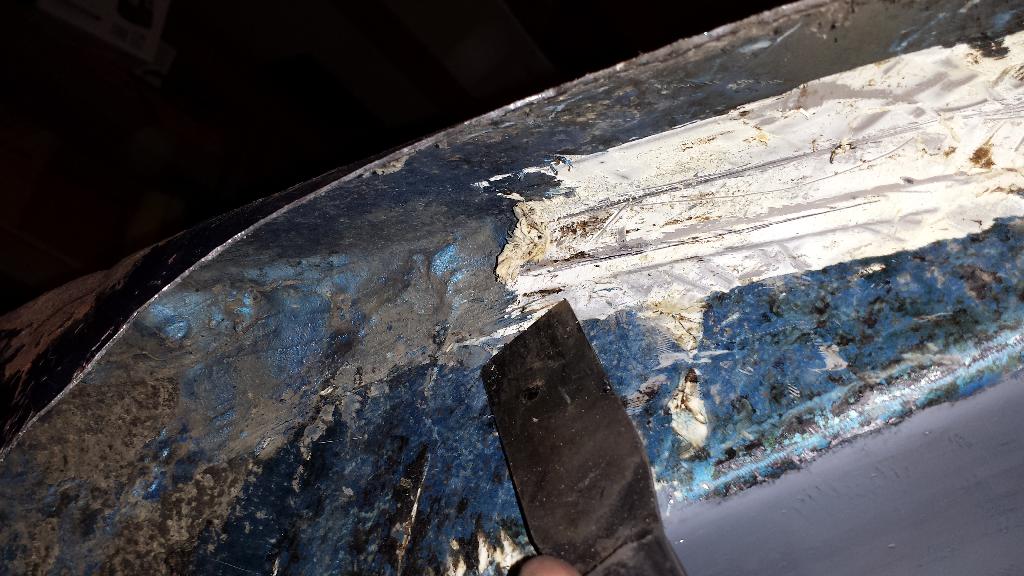
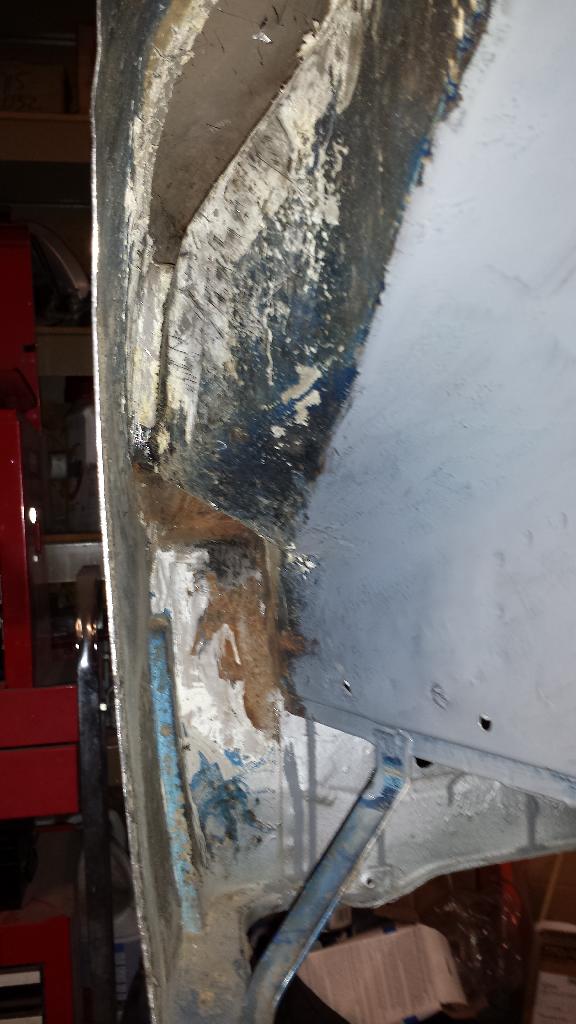
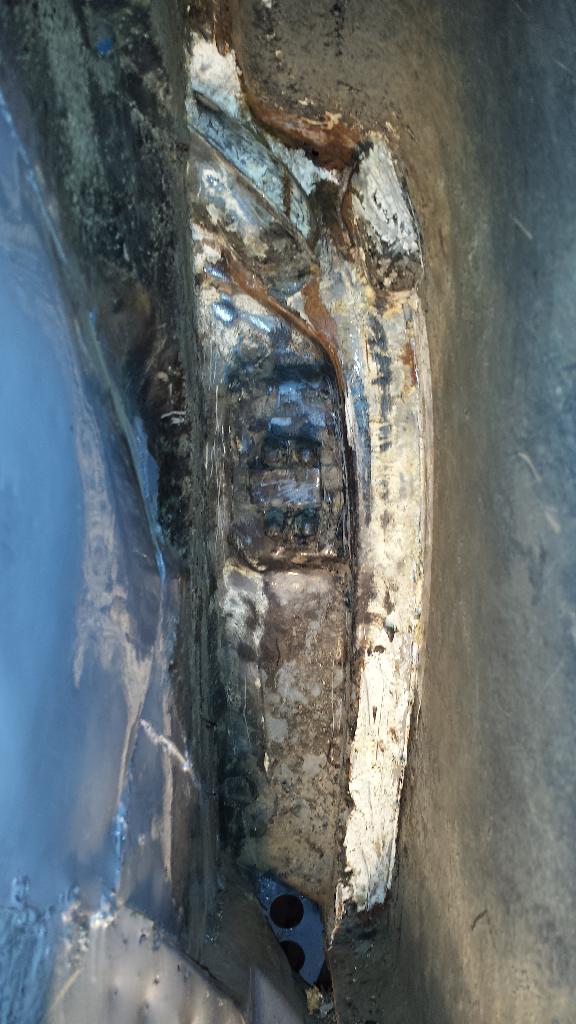
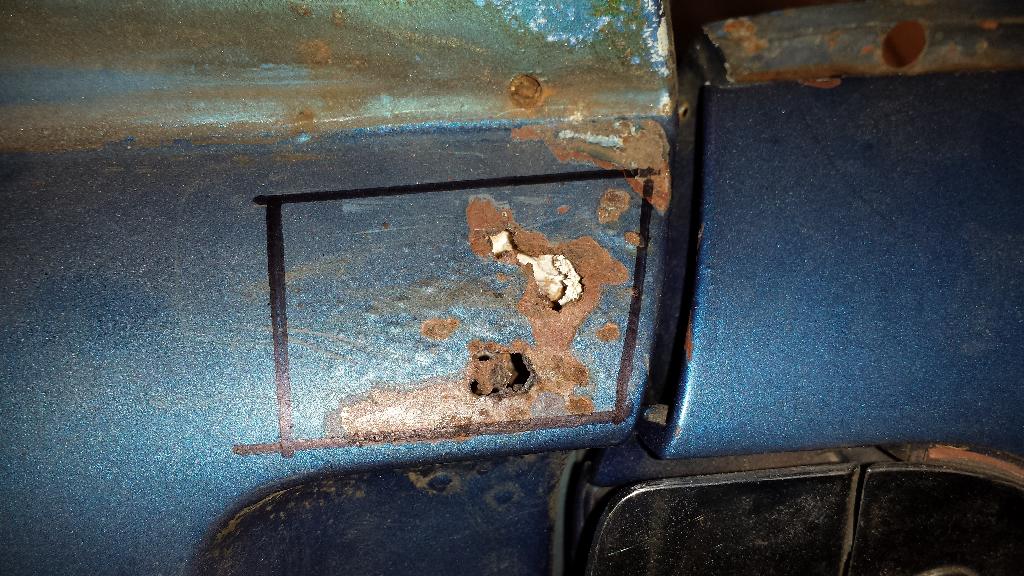
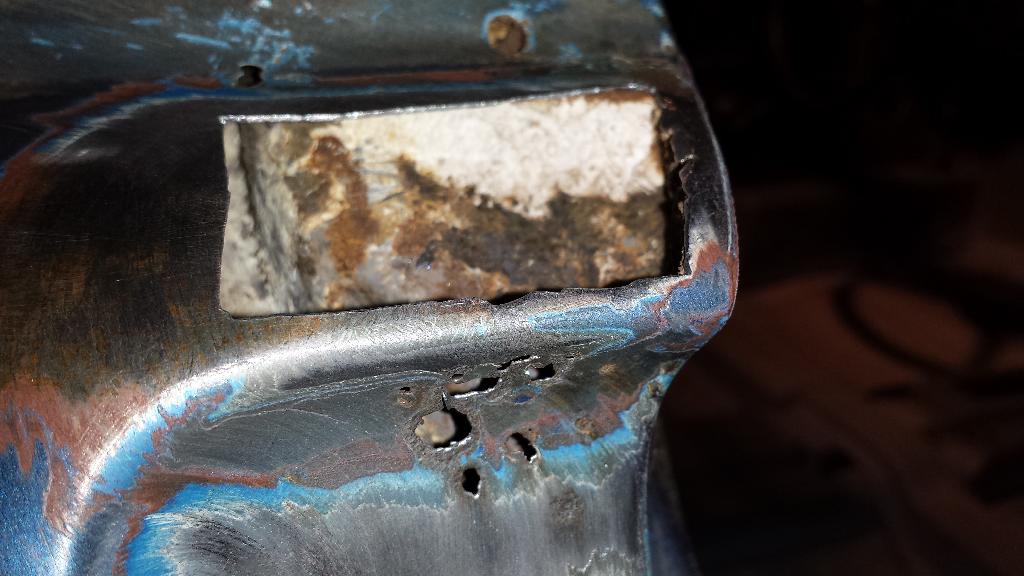
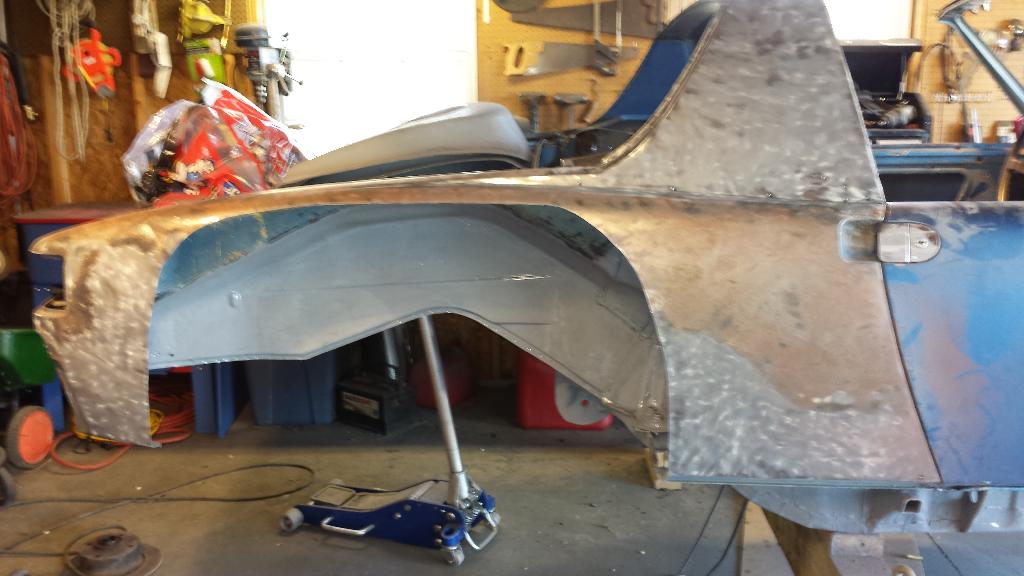
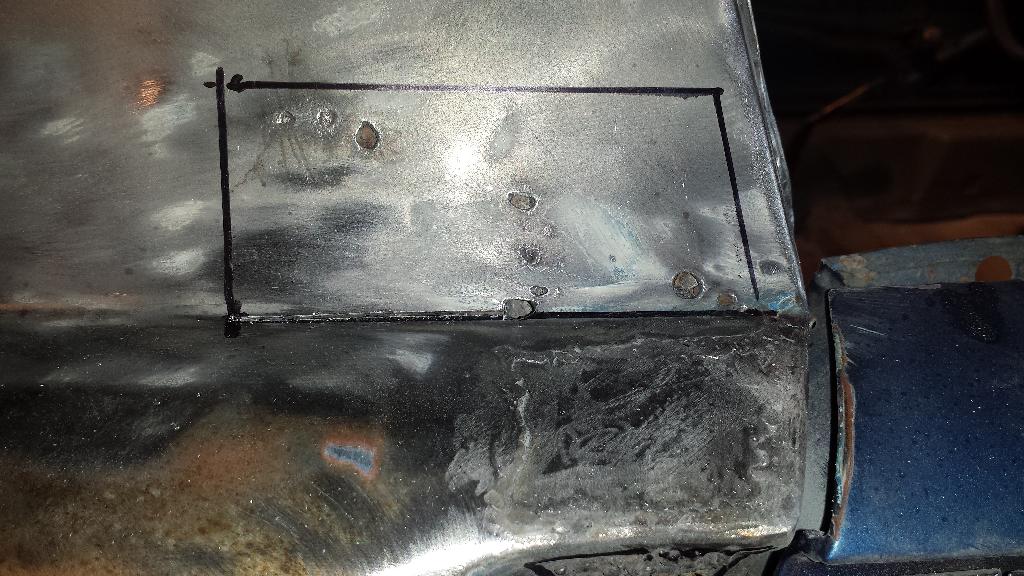
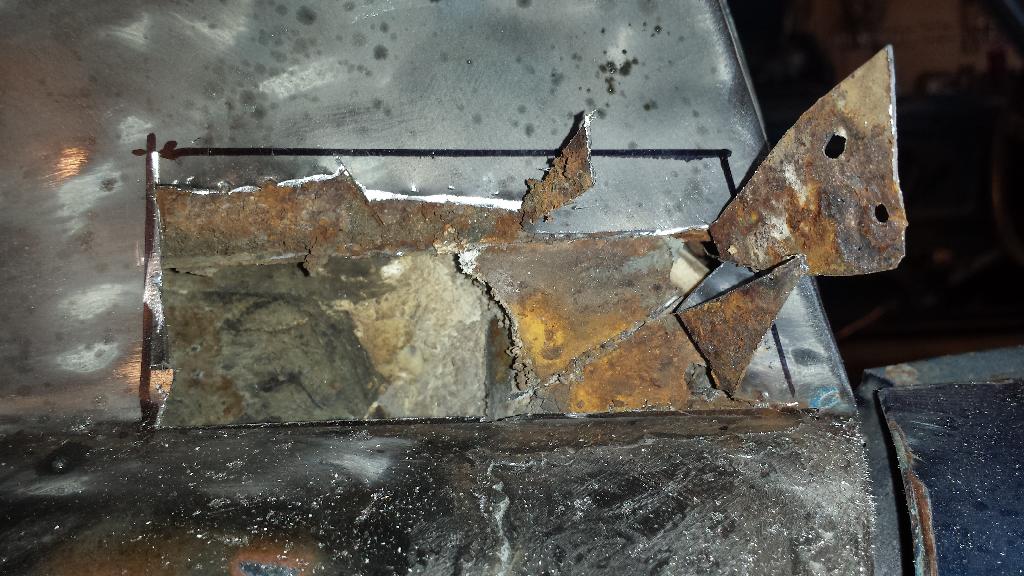
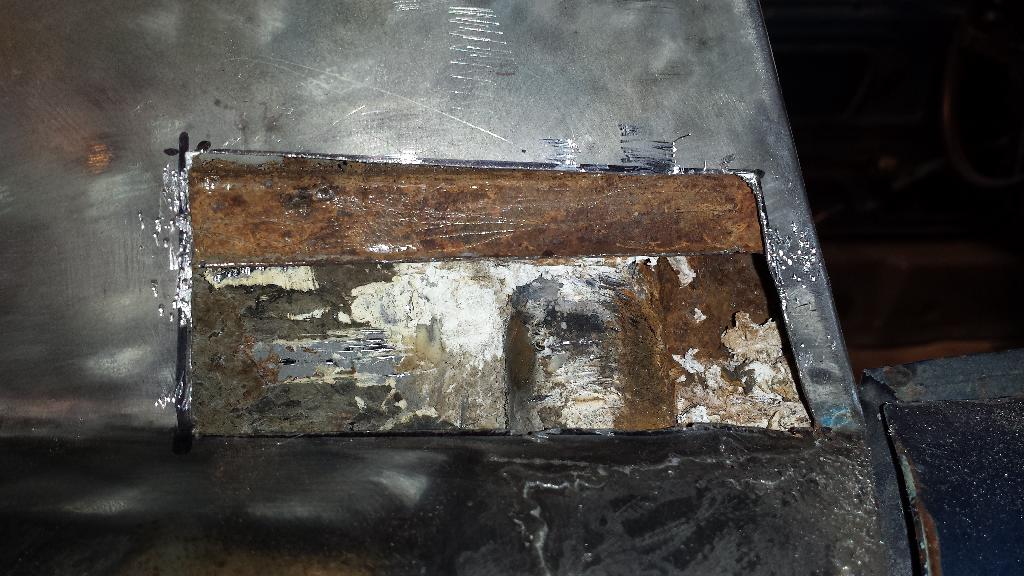
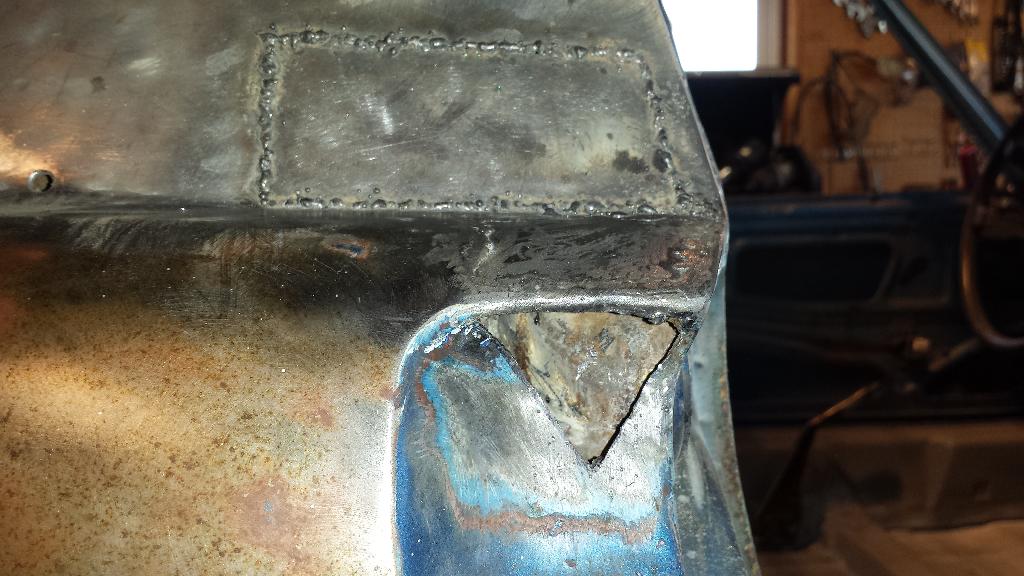
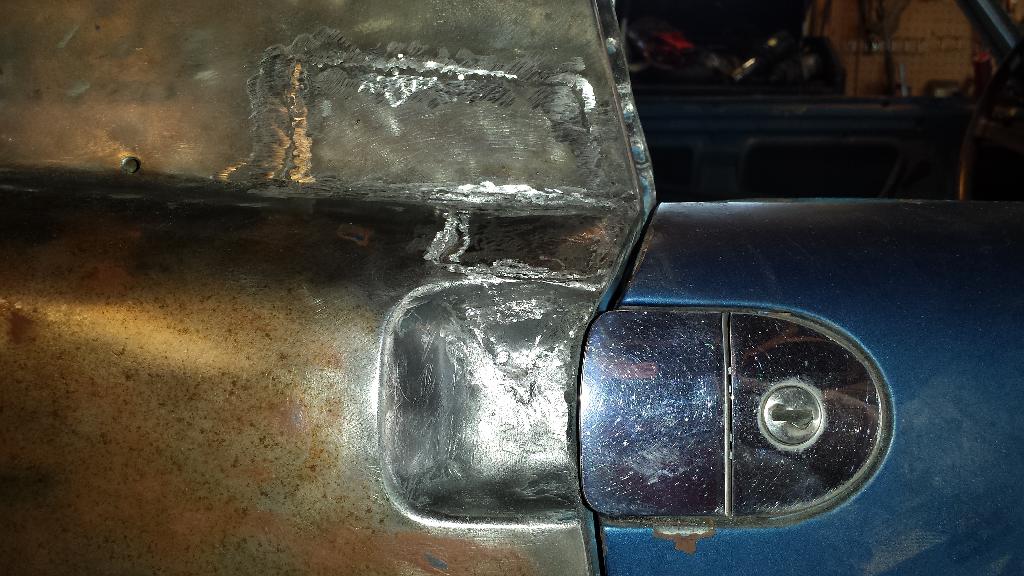
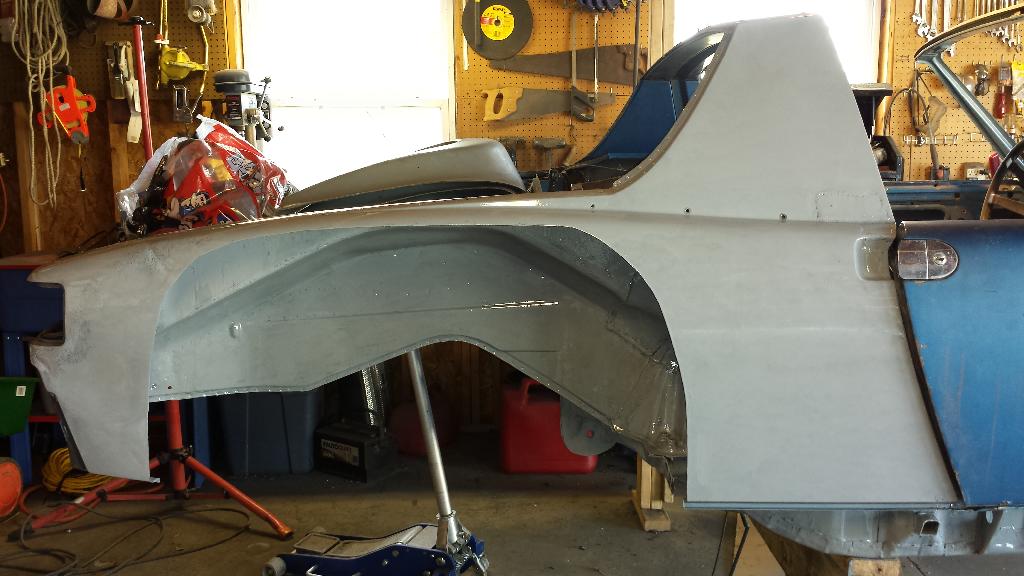
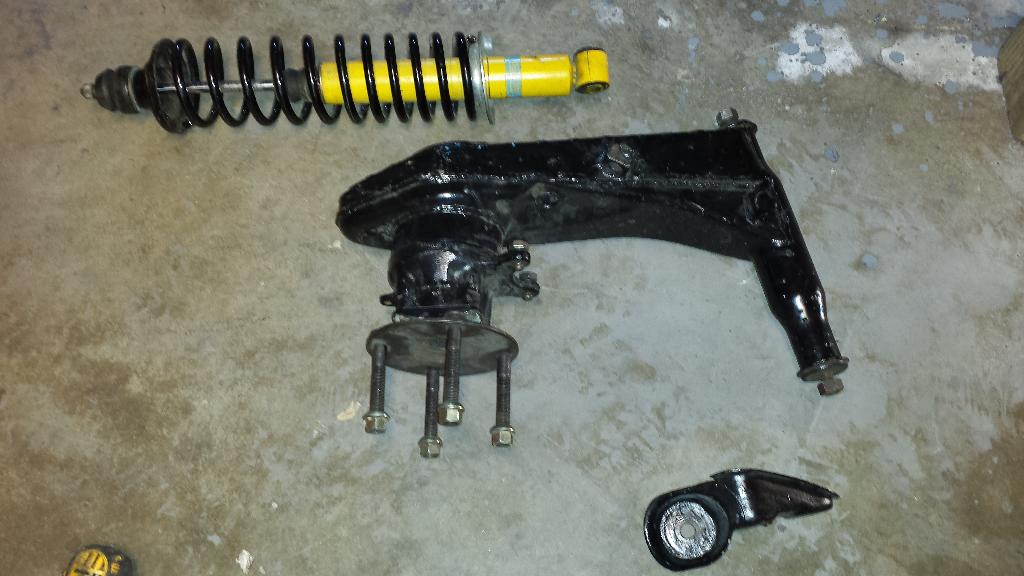
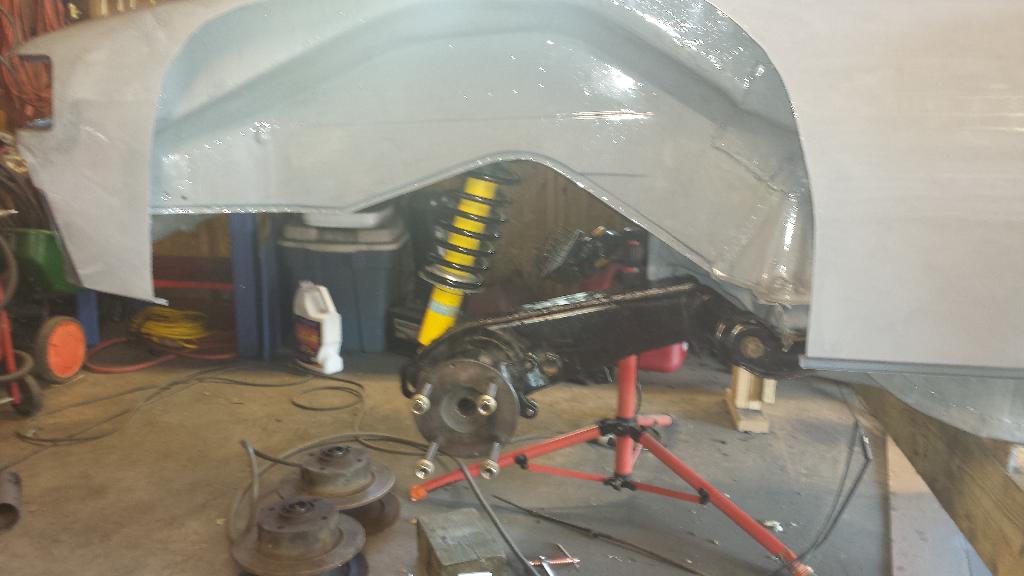
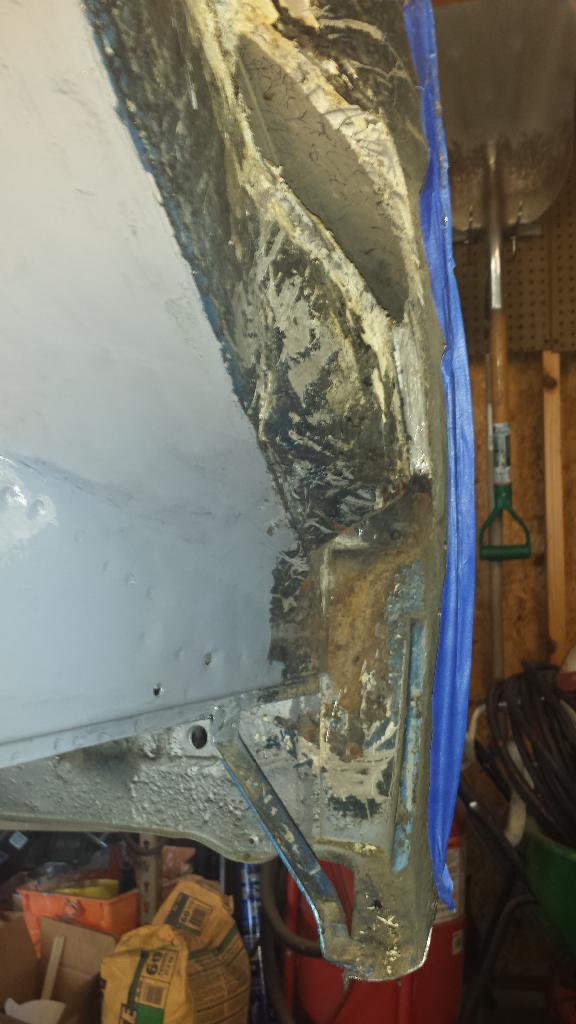
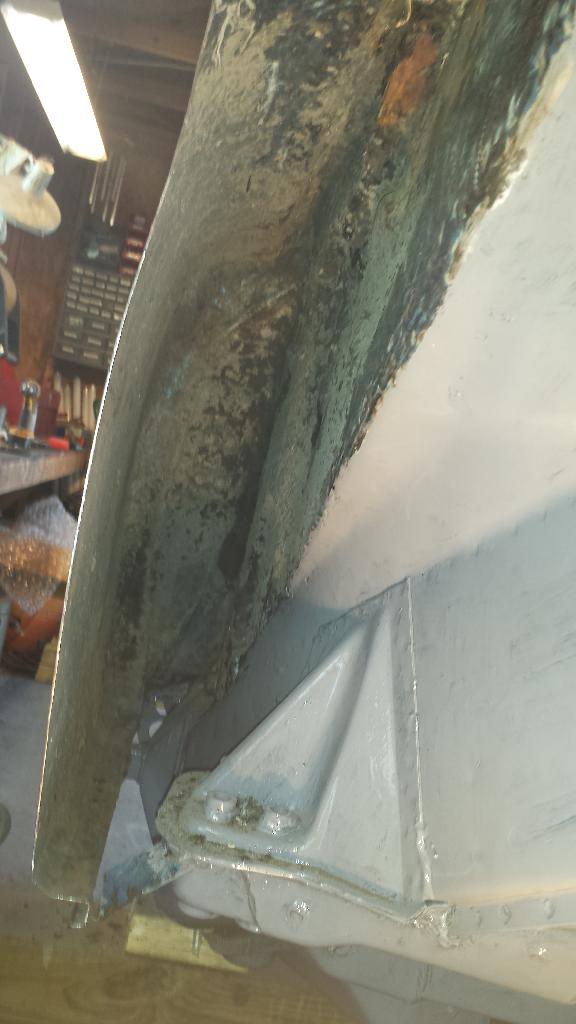
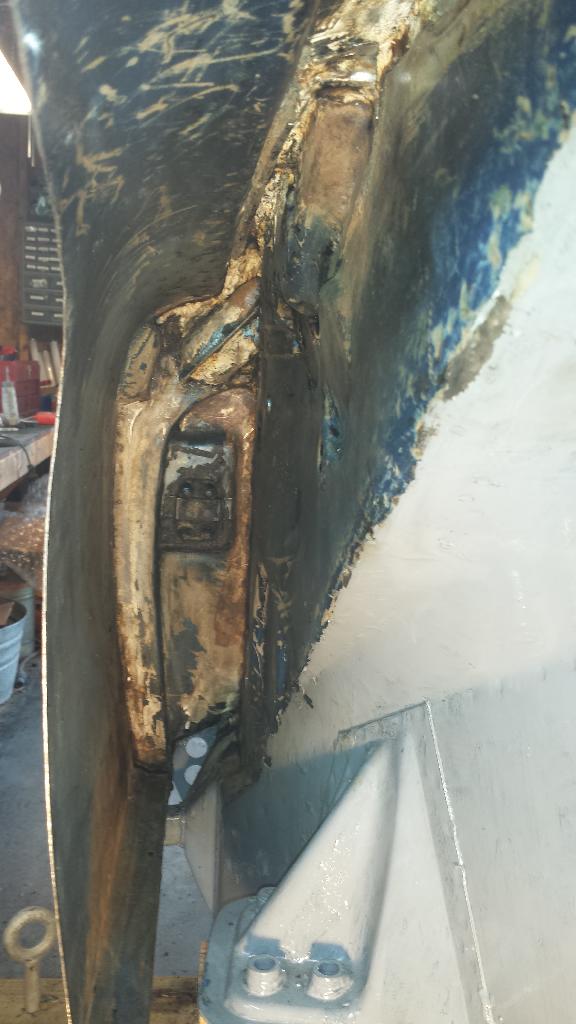
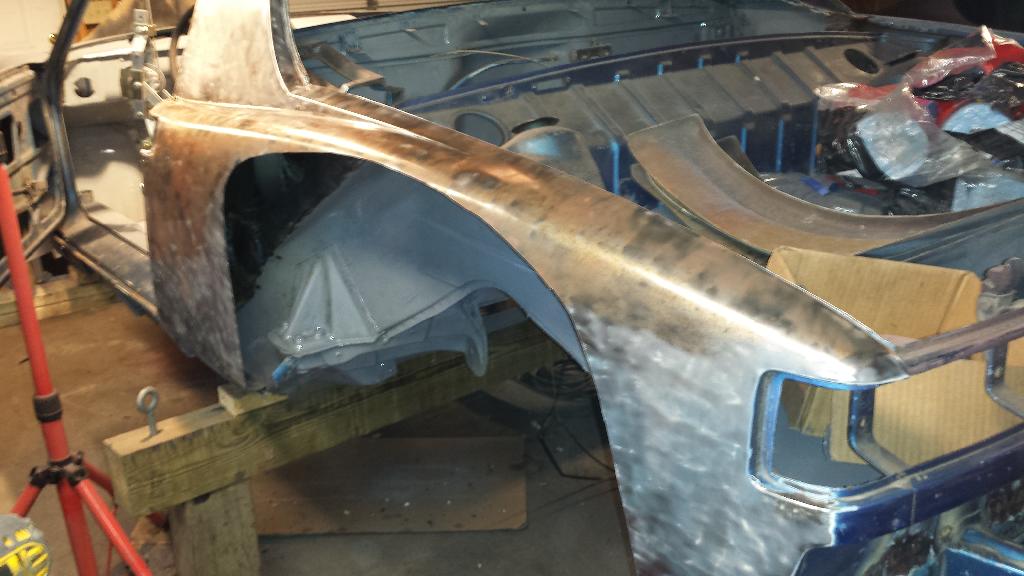
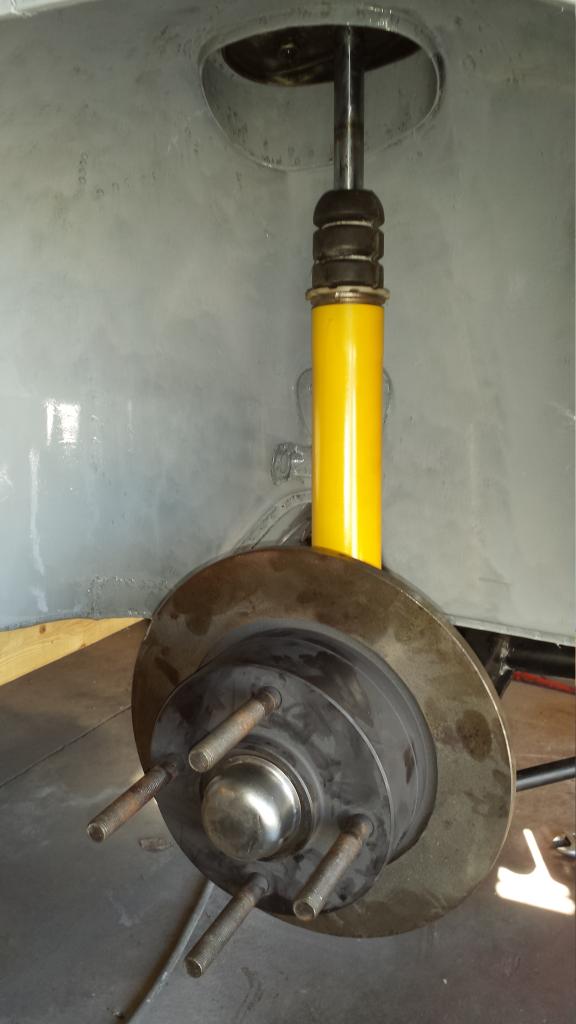
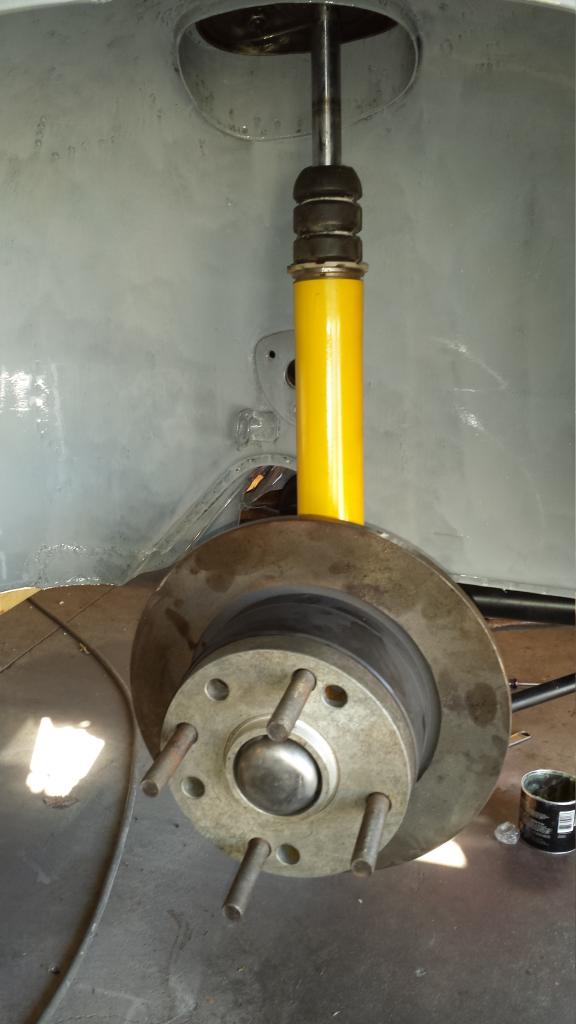
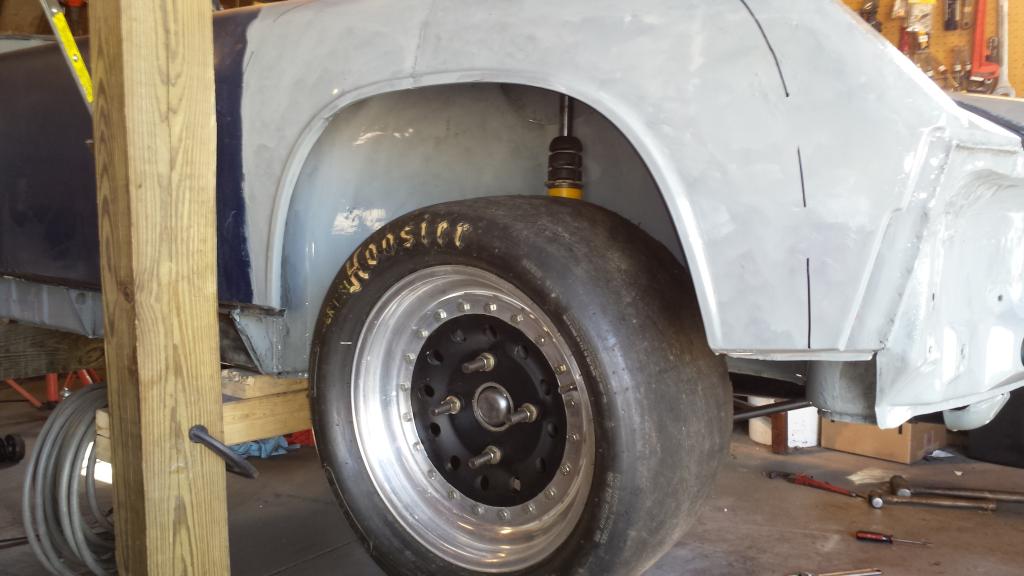
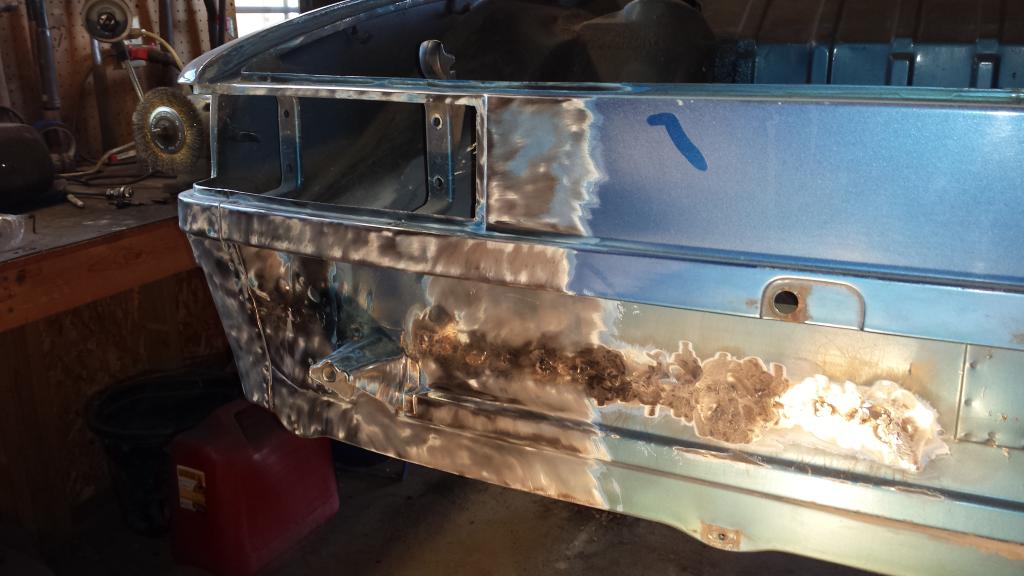
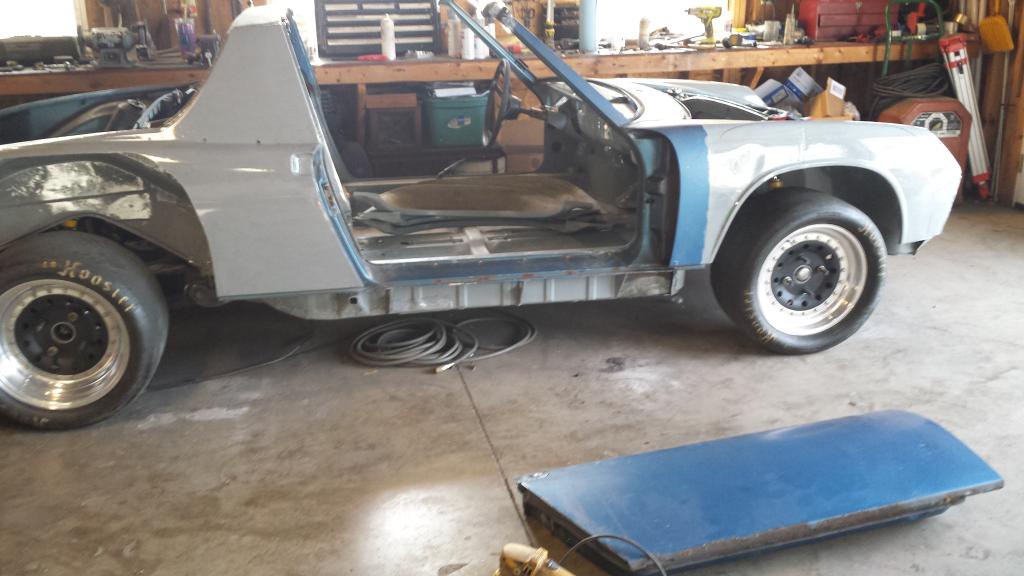
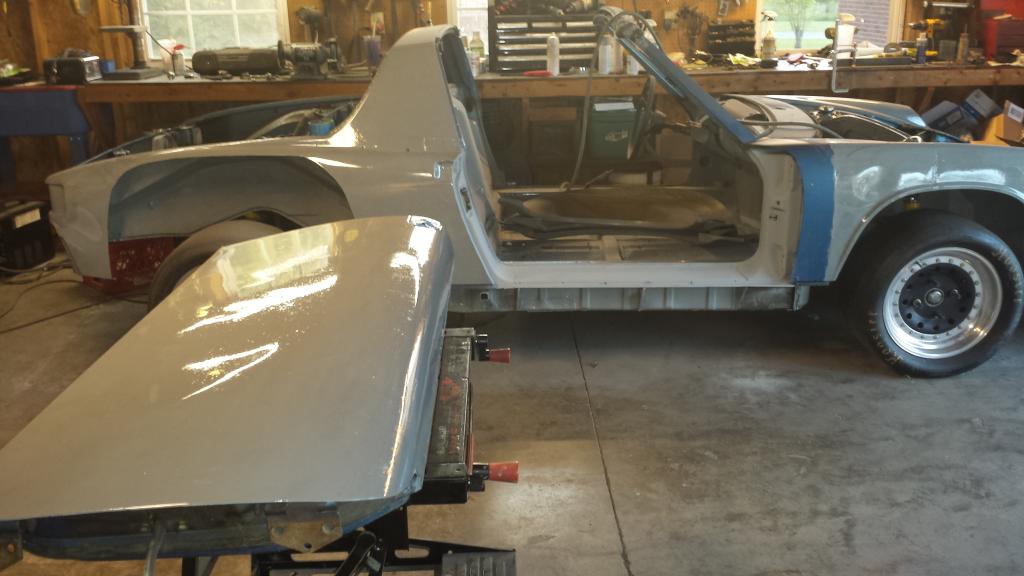
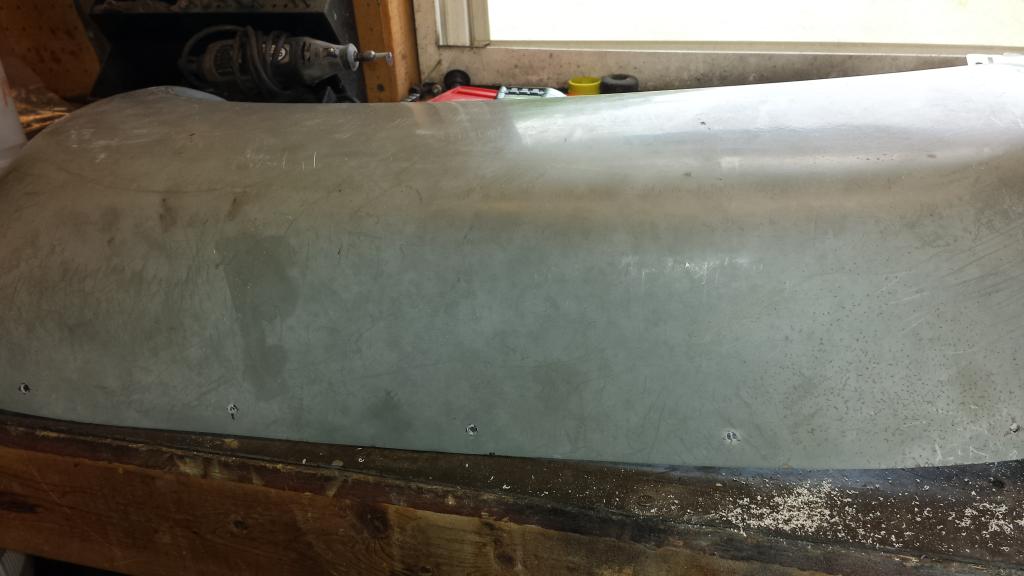
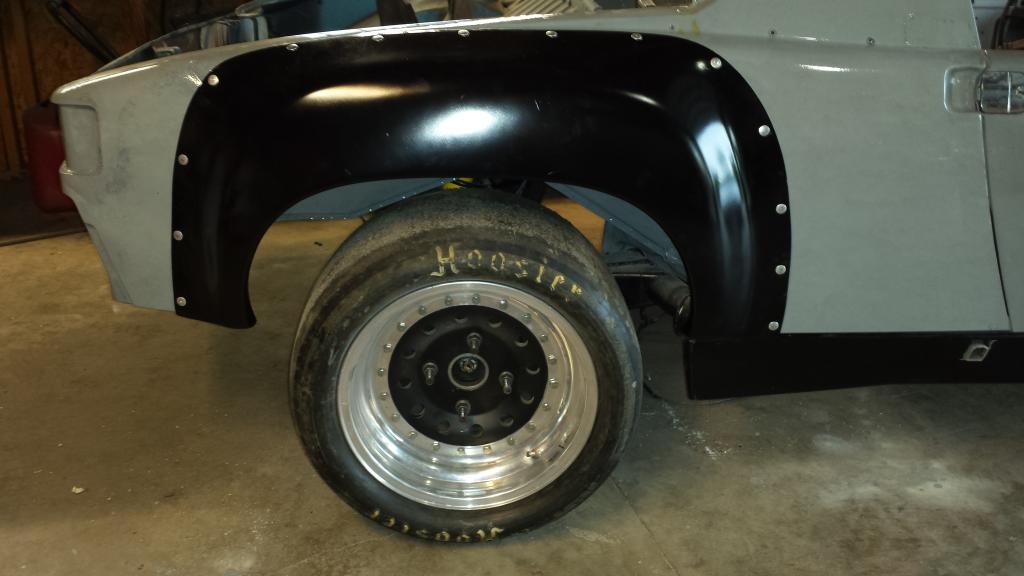
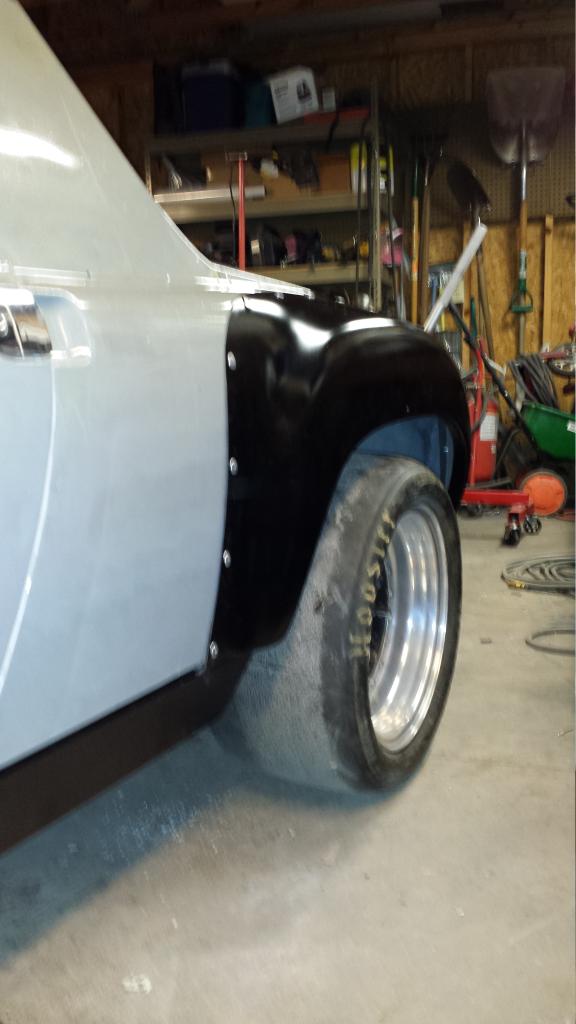
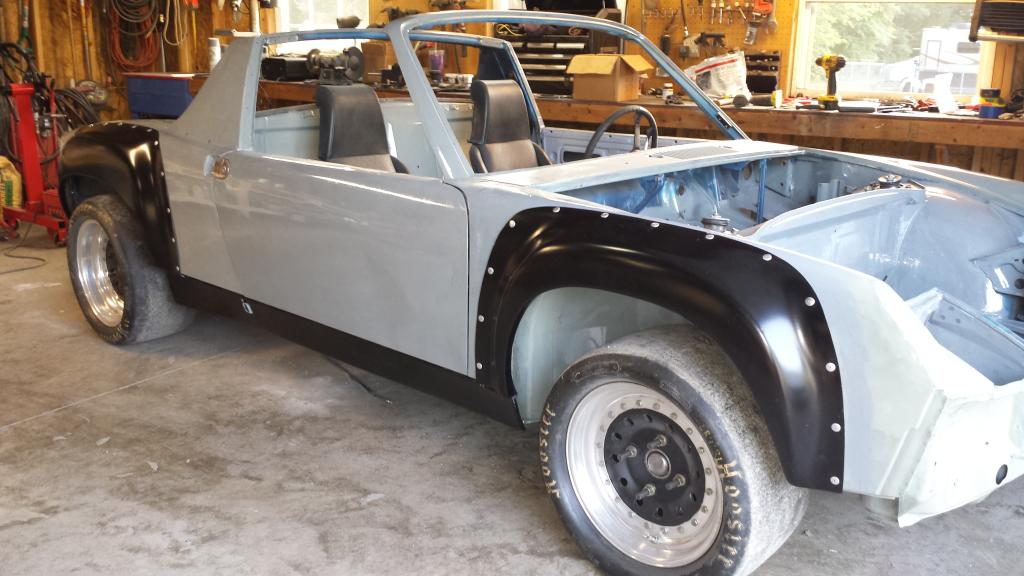
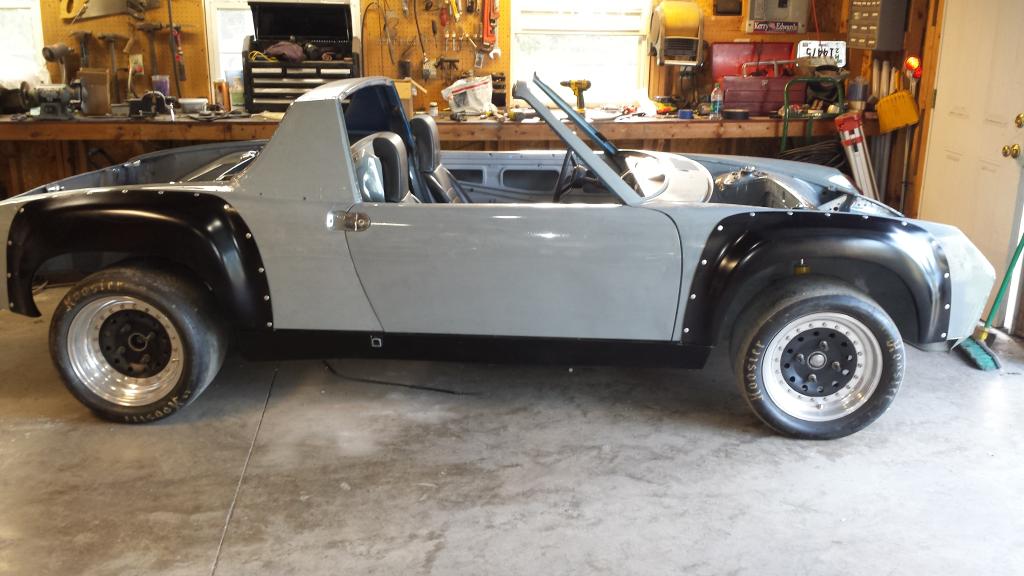
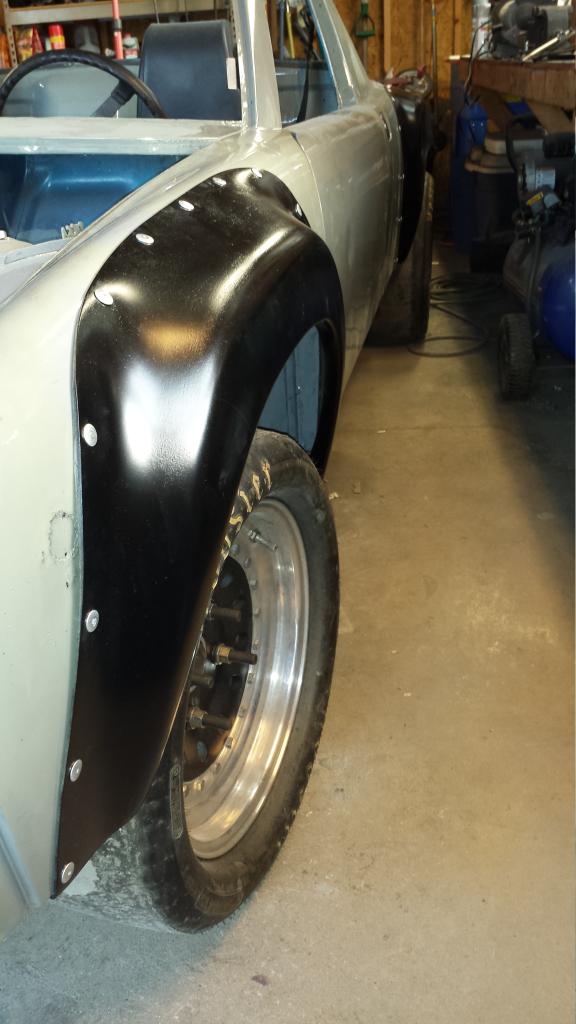
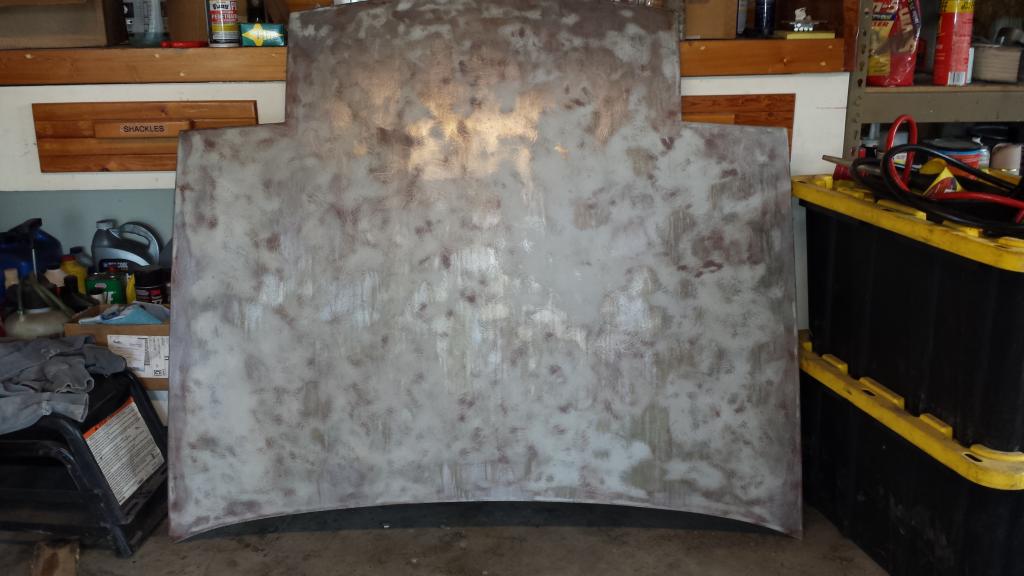
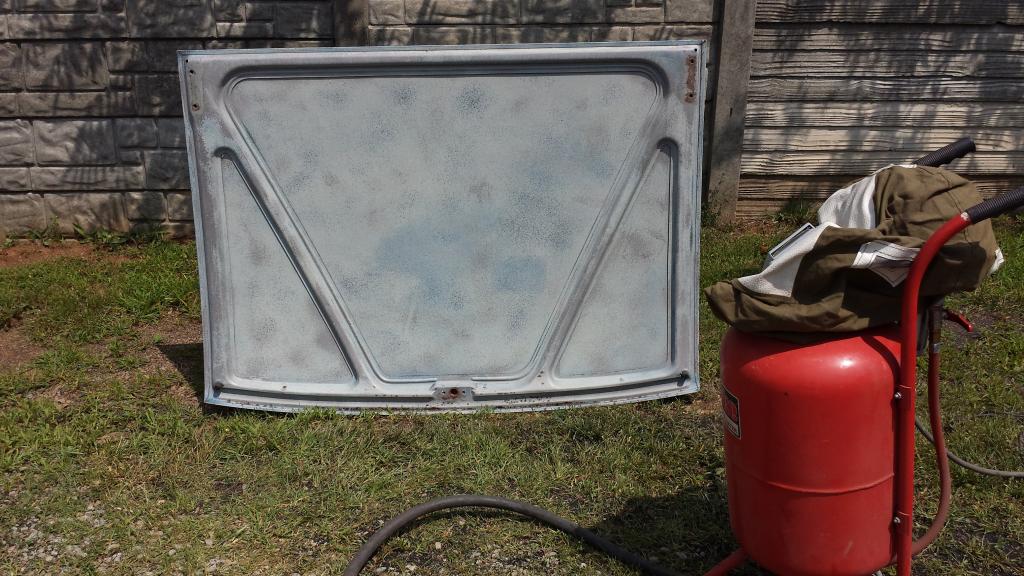
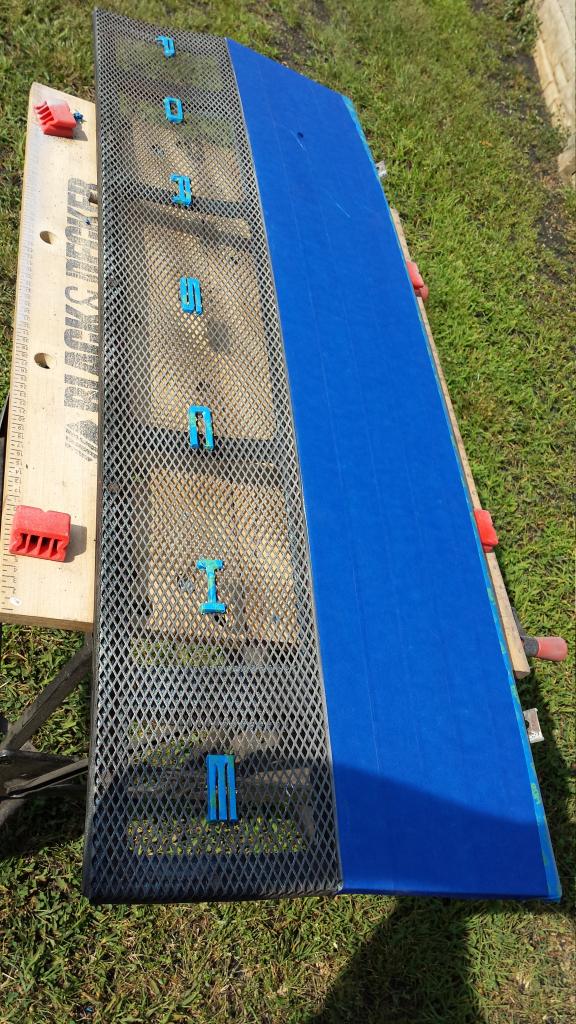
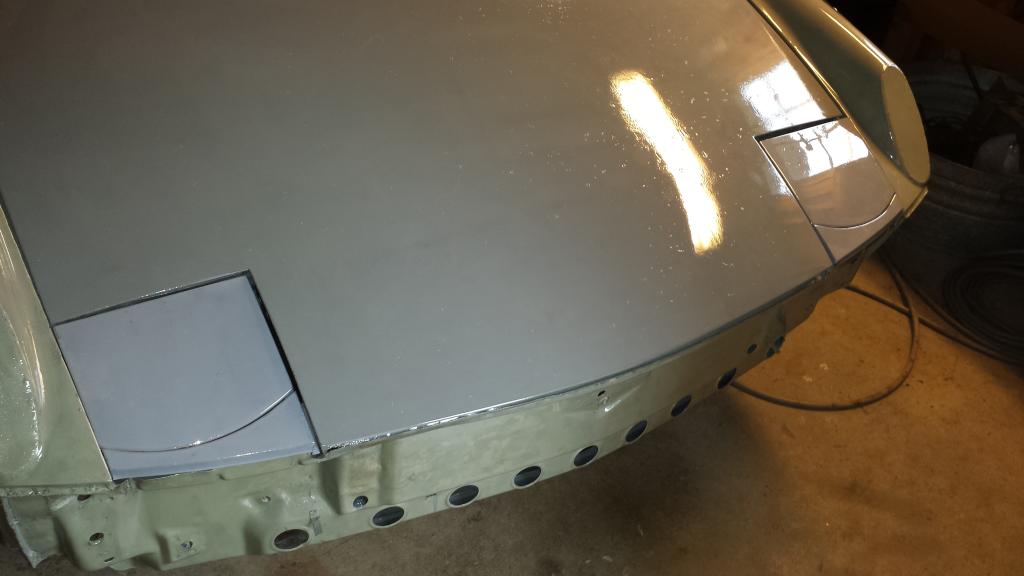
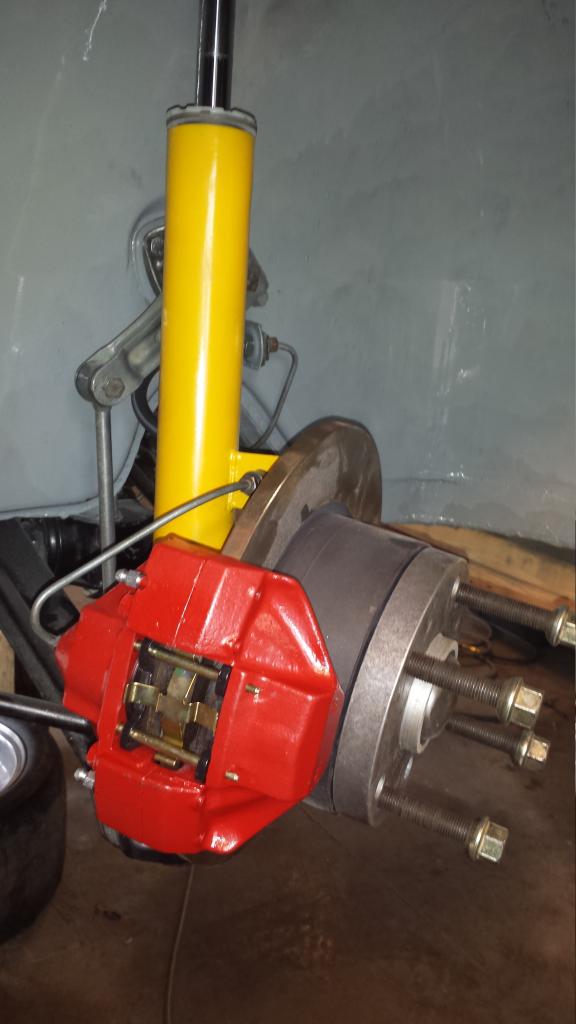
IPB Image

IPB Image

IPB Image

IPB Image
Han Solo
Another productive day whilst the wife shops with a friend. I put the race wheels with the new (to me) Hoosier A2s on the car this morning and got it off the hill-billy lift. I put the Bilstien shocks on the lowest ride setting and re-indexed the torsion bars to achieve about 6" to the bottom of the kick panels. The left rear tire is contacting the flare so I'm probably going to have to raise the rear one notch. Then I went to work mounting the racing steering hub to the OEM steering rod. The opening on the splined adapter was 19mm and the splines on the rod were 21mm. So I set about with a mini grinder to remove those splines for a bare shaft that would match the adapter. Another issue in that area is the rod has play in it when you remove the turn signal/wiper assemble because that has a bushing that tightens the shaft up. So I got a 2" piece of 1" ID schedule 40 PVC pipe. The inner dimension was just a tad tight so I split it and the outer had do be thinned as well. Basically I formed that PVC to fit as a bushing on the steering shaft. Put a little grease and it works quite nicely. I had to do so very careful material removal to get the adapter to fit snugly. When I was satisfied with that fit, I followed up with a 1/8" hole and roll pin through the adapter and shaft. The steering wheel is a 14" aluminum cart wheel and I love it! My last task for the weekend was to fabricate a battery tray for the former fuel tank compartment. Using 1 1/2" x 1/4" angle iron I cut and welded up a base for the Optima red top battery. I actually used the old Lincoln buzz box and it was interesting to note how much easier I can weld on that after hundreds of sheet metal welds. I fitted the tray into the best spot in the compartment and bolted that for fitting a support. That was simply some 1/4" flat stock bent to conform. That's drying this evening after paint. It was a hot but very productive weekend in the shop!

IPB Image

IPB Image

IPB Image

IPB Image

IPB Image

IPB Image

IPB Image

IPB Image

IPB Image

IPB Image
wndsnd
Nice build but I advise you to scrap that throttle linkage and get Tangerine's set up.

You will know why when you start tuning.

One of the best things I did to the car.

John
Han Solo
QUOTE(wndsnd @ Aug 25 2014, 07:32 PM) *

Nice build but I advise you to scrap that throttle linkage and get Tangerine's set up.

You will know why when you start tuning.

One of the best things I did to the car.

John


Thanks John. I have looked at the Tangerine throttle system and it does look like a better way to go. I'll include that with other improvements should this chassis hold together. We'll find out soon.

Han Solo
Just a couple of quick photos to show the finished battery tray. I'm very pleased with the look and rigidity. All cables neat and tidy. I'm considering a master cut-off switch. Positive or negative lead on that?

IPB Image

IPB Image
wndsnd
My guess would be positive.

John
Phoenix914
QUOTE(wndsnd @ Aug 26 2014, 09:17 PM) *

My guess would be positive.

John

agree.gif
brant
excited to see what your total weight ends up at.
stownsen914
Nice setup on the quick release steering adapter. One thing though - are you sure a 1/8" roll pin is up to the task of handling the force you can apply through the steering wheel? It might be, but then again it sure would suck if it broke while you're driving ....
Han Solo
QUOTE(stownsen914 @ Aug 28 2014, 11:35 AM) *

Nice setup on the quick release steering adapter. One thing though - are you sure a 1/8" roll pin is up to the task of handling the force you can apply through the steering wheel? It might be, but then again it sure would suck if it broke while you're driving ....


I did think about that pin diameter. I had to pound the adapter on pretty hard due to the imperfect grinding of the shaft down. If I had had the shaft machined and the adapter easily slid on, yes, definitely a larger pin. I will monitor the tightness closely however.
Han Solo
I've had a few hours after work the last few days to start installing hood latches. I picked mini Quick Latches for size and cost. There's You Tube videos from the manufacturer but I thought I'd show how well it worked on the 914. On the rear trunk hood I started with the rear two latches because there's a great mounting spot already in the trunk. That's where the rubber stoppers fixed to the hood contact the body. After carefully measuring I drilled those plates out and put in the posts. Now the hardest part is measuring and cutting the holes for the receiver mechanism. There's supporting structure under the hood that has to be cut away. A hole saw will do the job but it's odd because you're cutting a contoured surface. That hole also has to be large enough to get a 20 mm socket to tighten up the retaining nut on the receiver. Once you've done that you can remeasure for the 3/4" hole in the hood top that the receiver fits in. I drilled a small pilot hole first and laid the hood down to see that the pin was in visible. If you've made a small error, you can correct as long as it's within the 3/4" area. After drilling that out, I put the receiver in and found a design flaw. The threaded portion of the receiver body doesn't allow the locking nut to tighten on thin metal. There's a 1 or 2 mm shoulder. That's dumb! Anyway, I found some large copper washers that fit fairly well and added the thickness needed to tighten. I'll get some proper washers when I do the top latches. Those will need some structure added inside the front and rear trunks for a mounting position for the posts. I'm thinking 1" x 1/4" flat stock cut to fit in the corners. The front trunk pins had a nice mounting point where the rubber bumpers are pushed in. Running out of garage time I got the engine lid and targa top on. The engine lid is a nice fit but the targa top will need that molding along the windshield top frame to fit tightly.

IPB Image

IPB Image

IPB Image

IPB Image

IPB Image

IPB Image

IPB Image

IPB Image

IPB Image
Han Solo
I've finished up the mini latch install. Last Monday I did the top two on the front hood and today I did the top two on the rear hood. I had to weld in bar stock for those posts. I'm fairly pleased with the results but it turned out to be a little more difficult than I thought it would be. I also opened up the supporting under-structure to install large flat washers. That's some real butchery but the receivers are now very tight. Note the rust inside of this structure. That just gives everyone an idea exactly how far one would need to go to have a truly rust free 914. I also installed a new throttle cable and the OEM seat belts. The new throttle cable has help settle down the idle even more.

IPB Image

IPB Image

IPB Image

IPB Image

IPB Image

IPB Image

IPB Image

IPB Image
Han Solo
I hit a set back last night. Over the last few evenings I finished the prep and paint on the rear calipers. Last night I got those installed and started bleeding the system. I was using a power bleed but progress was slow. The rear calipers bled out fairly quickly but I was really struggling to get fluid out of the fronts. Then I found a loose fitting on the master cylinder. After getting that secure, finally I began to get fluid out of the front bleeders. After getting all the bubbles out bottom and top, I'm thinking "oh boy, stiff brake peddle" - not so much. It's apparent that the OEM master cylinder isn't creating much (if any) pressure. So I'm biting the bullet and ordering a new master cylinder. It's going to be a 19mm which I really wanted to see how well the car braked with the OEM 17mm but those are $$$. I'm also not looking forward to pulling the master cylinder and fighting those grommets again. Just a small bump in the road...

IPB Image
Phoenix914
Your calipers look nice. Please post your opinion of the 19mm MC after you get it installed. I am thinking the same job may be in my near future.
Han Solo
QUOTE(Phoenix914 @ Sep 12 2014, 12:35 PM) *

Your calipers look nice. Please post your opinion of the 19mm MC after you get it installed. I am thinking the same job may be in my near future.


I may not be a good judge having never driven a 914 before. However, we've got lots of other mid-engine Porsches around here and I love the braking on those!
Han Solo
I'm waiting on the new master cylinder but I couldn't resist taking the car our on the lawn. I'm glad I did because the suspension settled and the rear tires were rubbing the flares. I shaved as much off the flare inner arch as I comfortably could. It's still really close on the drivers side. I may need to have rear wheel spacers machined down 10mm. I also adjusted toe and ride height on the rears. I think the drivers side is lower than the passenger side. That may be due to the replacement suspension console on the passenger side. I ended up with the rear Bilstiens set 2 notches above lowest on the drivers side and 1 notch above lowest on the passenger side.

1st drive '73 914
Han Solo
I also fixed that snarly mouth with a 2 1/4" x 37 1/2" cut of 20 gauge cold rolled sheet metal. $10 in metal and some pop rivets verses the plastic plugs. More cash for go fast parts!

IPB Image
malcolm2
Hey, I just noticed that you are in Middle Tennessee. Me too. There are a few of us around. I am in Mount Juliet. Looks like you have done lot of work, but if you ever need any help, let me know. I have a daily driver, no racing for me. I've had mine in driving shape for about 16 months and put 4500 miles on it.

Clark
615-504-1086
This is a "lo-fi" version of our main content. To view the full version with more information, formatting and images, please click here.
Invision Power Board © 2001-2024 Invision Power Services, Inc.