Help - Search - Members - Calendar
Full Version: Rusty bucket into Solo toy
914World.com > The 914 Forums > The Paddock
Pages: 1, 2, 3, 4, 5, 6
IGTARD
icon_bump.gif icon_bump.gif icon_bump.gif icon_bump.gif Nice shades.gif shades.gif shades.gif shades.gif
Han Solo
Another patch done at the center of the firewall and I even formed this one correctly. Made the flange bend back towards the engine bay and I'll weld that up when I'm thrashing around in there. Note that I've been ripping out the metal "shelf" that seals the cooling tin on the front of the engine. That was completely rotted near the hell hole and is not much better shape as I work my way from passenger to drivers side. I don't think this piece is absolutely needed anyway. Last night I started in on the last patch but with temps in the lower 20's my air tools were starting to freeze up. So I had to stop before I fitted the last patch. We'll get a little reprieve on Sat. and I'd REALLY like to have this firewall sealed before it gets into single digits on Sun.

IPB Image

IPB Image

IPB Image

IPB Image

IPB Image

IPB Image
Han Solo
Before...

IPB Image

After...

IPB Image

That last patch was a real PITA. There is a contour to the top of the lower inner firewall so making that bend and the bend to the middle "hump" was very difficult. I made a long rectangle, bent the flange, split the flange for the hump bend and then made several splits for the contour bend. It's not a pretty patch but it will work. In addition to the spot welds on the engine bay side where the two flanges meet, I also seam welded the middle and drivers side patches along the bottom. At the factory they only welded about 3' on each side and the rest of that area was seam sealed. That's were all the rust started. I cleaned everything up, treated with metal prep and slathered on the POR 15.

Next up will be to raise the car some with my hillbilly lift and start cleaning up the engine compartment. It's dark, dirty and that process is not going to be pleasant.

IPB Image

IPB Image
Han Solo
Last day of mild weather here so I'm back out in the shop first thing this morning. I figured I needed to move my rigging beam to the rear of the car for good access to the outer firewall and engine bay. The best spot I could find was under the trunk support between the sway bar brackets. It took a couple of attempts but I eventually found the right combo of blocks. So I raised it up to 48" garage floor to floor pan (if it was there).

IPB Image

IPB Image

That made for a very comfortable position when I'm standing inside the engine compartment. I repositioned my work lights and it's time to get going with the wire brush. Here's what it looked like prior to cleaning...

IPB Image

IPB Image

IPB Image


You can see where the PORT 15 has worked it's way through my patches on the firewall. You probably wouldn't want me welding gas pipe dry.gif Anyway, I can weld a bead along those on this side before painting. So, to get some real cleaning done I remove the trunk lid brackets, brake lines, brake splitter, blower, circuit board, fuel pump and FPR. I cut the fuel pump bracket and blower bracket out also as I won't be needing those. The firewall cleans up better than I expected. The only rust holes are along the lower flange but the enough left to give me a really good idea on what I need to fabricate. The rear floor pan joins both the inner and outer firewall so I'll have to fix that edge. The driver side long is in pretty good shape. There's a little pan with a drain (clogged of course) just behind the firewall that's pretty rusty but no holes. Of course the battery tray area is a mess. That long has a rust hole on top just behind the fire wall and the side metal has that hole that I partially fixed on the other side. There's another rust hole on the side where the tray attaches. So quite a bit of work on that long. What's really funny though is how the PO fixed the suspension console when the "ear" broke off. It's a piece of 1.5" angle iron cut and fitted with three nuts and bolts. I've already got a replacement piece that looks like it will work very nicely. I'll probably cut out the rest of the engine shelving on the sides and rear to speed the structural work up. Something tells me I'll be working in this area till spring sad.gif

IPB Image

IPB Image

IPB Image
Han Solo
It finally warmed up enough Thurs. for me to get a few hours in. I decided to go ahead and strip what was left of the right suspension console. I started by cutting some of the engine shelving out to the rear of both suspension consoles. There was some rust in those areas and I'm not worried about keeping that intact anyway. Then I drilled out the spot welds at the rear of the assembly. There appeared to be more spot welds along the top edge and the front but the corrosion made it really hard to ID those. I just got busy with the grinder and within two hours had that joker off. That assembly wraps under the long and joins where the trailing arm bracket attaches. It appears that is all one piece fitted at the factory (there must have been a notch where the seam under the long passes). However, the fine replacement part from RD stops at that seam but more on that later.

I got back into grinding this morning and cleaned up the area under the long. There's a pretty good rust hole under there and that will have to be fixed. In fact, the underside of the long is missing from about 10" forward of the firewall to close to the suspension bracket. I'm going to attempt one long patch under there but first I'm dealing with the top in the hell hole. There's a rust hole in the wheel house I patched first. That went well and hopefully tomorrow I can patch the top of the long.

IPB Image

IPB Image

IPB Image

IPB Image

IPB Image

IPB Image

IPB Image

IPB Image

IPB Image

IPB Image
Han Solo
Back at it today and at first I'm focusing on the top of the long. I remember TR's post about two layers of metal so I go easy and start peeling back the top layer with a wide chisel. The bottom layer is mostly intact except right against the firewall. So I trimmed that layer square only loosing about 3". Note that the top layer appears to be thicker. Anyway, I peel that back to the same rear line as last night's wheel house patch. While preparing the area, I'm digging out all the seam sealer around the stupid heater pipe (really fearing more rust) and of course there is. It's a crack where the outer firewall joins the side of the long. That looks pretty structural to me so it's got to be fixed well. I cut the pipe off as close as possible and took the grinder to the stump. That left a round hole with thin compromised metal so I squared that off. Then I sprayed weld through primer over the whole area (and on the back sides of the two patches). To form both patches I'm finally getting smart and making templates out of construction paper. I use spot welds for strength and follow up with lap welds in strategic areas. To fix the large patch on the top of the long (really no way to clamp there) I started welding in the corner by the firewall, beating the metal close, pushing with my pry-bar and making another weld. It's not a very pretty patch but I was able to keep it nice and tight as I welded to the rear.

Next will be the hole in the wheel house. That's going to be a real challenge with two bends but I don't think that's a stress area (the battery will be located elsewhere) so butt welds will be fine.

IPB Image

IPB Image

IPB Image

IPB Image

IPB Image

IPB Image

IPB Image

IPB Image

IPB Image

IPB Image

IPB Image
J P Stein
My cage builder would be me. I did it twice.
Running down tubes to the shock towers the second time.......the best mod I ever did to the shitbox......live & learn, eh? The halo was more dangerous than no cage at all. ........Click to view attachment

Click to view attachment

J P Stein
I did start with a a car as rust free as possible then statred seam welding, end to end.

Good luck, yours is much more challenging. Mine was about 6-8 years start to finish. ....
Click to view attachment
Han Solo

Last night's patch was tough. The battery tray area of the wheel house had two holes. At first I was going to just cut that area out but I enlarged the patch to join up with a previous patch in the lower corner. Three sides were butt welded and on the bottom I lapped into the good metal inside the wheel house with spot welds. Making the bends was very difficult. Trying to beat the sheet metal in the small space of the wheel house was not fun. I worked the tack welds from the front to the back and had to split the patch to make the rear bend.

I think next I'm going under the long to patch the hole that was under the suspension console. Then I'll be ready to attach the RD suspension console new part.

IPB Image

IPB Image

IPB Image

IPB Image
CptTripps
Dude...you're killing it.

It's a lot of HARD work some days, but in the end, it'll all be worth it. Great thread. You really "saved one" here. There are a lot of people that would have just crushed the thing and been done with it.

Bravo!
f1rocks
Where are you in middle Tennessee?
ablesnead
This thread is driving me nuts...I mean ...jeez buy a decent tub would ya ! ..your skill is awesome your patients is astounding , but your decision making process could use some therapy....I end up admiring you ...kinda
J P Stein
I paid 4500 bucks for that green car back in the late 90s. It looks better than it was having taken hits in each corner (fender benders) and the paint was falling off in sheets

"The plan" didn't include making it a full ime race car.......but there is the "slippery slope" personified.

By the time I was done selling parts off the car, it maybe cost (WAG) $1K, minus the agravation and had a solid chassis (for a 914) to boot. .....

Click to view attachment
Han Solo
QUOTE(f1rocks @ Jan 16 2014, 12:54 PM) *

Where are you in middle Tennessee?


Near Lebanon TN. About seven miles from the track facility that hates sports cars.
Han Solo
QUOTE(ablesnead @ Jan 16 2014, 05:07 PM) *

This thread is driving me nuts...I mean ...jeez buy a decent tub would ya ! ..your skill is awesome your patients is astounding , but your decision making process could use some therapy....I end up admiring you ...kinda


Let's see... I paid $900 for the piece of junk. Sold probably $400 - $500 in parts. Bought some tools. Learning to weld. I've mostly enjoyed all the problem solving and learning so far with this project. I wouldn't call my skills awesome at all. Perhaps marginally effective. This chassis very well may fall to pieces the first time on an autocross course but you know what... I'll just laugh and either walk away from it or fix it. If that means my decision making process is f**ked up then I'm okay with that. I appreciate your admiration (kinda).
Han Solo
So today I did the small patch under the long. This area is over-laid by the suspension console and has two layers of sheet metal. You'll see in the fourth photo where I laid the console over the finished patch. After making the patch I was preparing to treat the area and dug out all the seam sealer in the corner by the firewall. Probably my least favorite procedure but a heat gun definitely helps root that mess out. I then treated the wheel house side, the long and got treatment up inside the long. I also metal prep'ed the replacement suspension console from RD. That's a really nice stamped and welded part. After rinsing and drying everything I sprayed weld through primer on the surfaces covered by the console and the inside of console. I looked very carefully at how that new part will fit and made some measurements. I thought that I would be able to align that by using the original position (drilled out spot welds and paint). But there's too much room for mis-alignment. I'm going to make a jig of some kind using the drivers side. So I moved to the underside of the long. The last photo shows the carnage there. That's going to be my largest patch yet. I'm planing on one long piece of sheet metal for max strength.

IPB Image

IPB Image

IPB Image

IPB Image

IPB Image

IPB Image

IPB Image

IPB Image

IPB Image

IPB Image
J P Stein
Well, if you must.......
You are into an area that is a well known weak spot of the 914....race car or not, they have been known to rip that ear right off.

"while you're there" you may want to make a fix to prevent this. If you're not interested in my input, just say so and this will be the last you'll hear from me.

Click to view attachment

Over the top of this went a 3/16 plate & on the sides

Click to view attachment

Weld the hell out of all seams & everything.

Click to view attachment

Paint to match

Click to view attachment


Han Solo
Definitely want your input and advise JP. I can see that area is inherently weak and I do like your fix. The stiffener pipe looks like a great idea. It does pass through where the motor mount is so what did you do instead?
Han Solo
This next patch is going to be REALLY tough. It's going to cover the underside of the long from about 12" forward of the firewall to almost to the out-board suspension attachment point. It took me 1 1/2 hour just to make the template. I'm still thinking one continuous piece of metal is the best way to go. But if I start to really struggle forming this - I may have to chop it into segments.

IPB Image

IPB Image

IPB Image
J P Stein
I removed the 4 banger engine mounts when I put in the 6. There are a number of ways to brace the ears other than what I did.
Cupomeat
agree.gif
I was just thinking that myself, that you deserve Kudos for saving this one.

Thanks from the 914 community
Han Solo
MLK day and I've got four hours to do this monster patch. I got it cut out last night during playoff half times. The first half hour today I'm bending, fitting, trimming, repeat. I'm actually able to get clamps on most of this one. Once I'm satisfied that it will conform properly I start under the long and passenger door.

IPB Image

IPB Image

Note that I wrapped into the passenger side of the long and made a flap that went up in between the firewalls. This is the area where I cut out the heater pipe and there was structure missing.

IPB Image

IPB Image

I worked my way to the rear of the car. Bending, shaping, clamping, tack welding, repeat. Everything is lining up good but it looks like I'll have to make one split to get the last wrap up into the engine bay. I also needed some ground support to press the metal up to get that contour.

IPB Image

IPB Image

IPB Image

Once I'm done, I'm fairly pleased with the results. The spot welds combined with seam welds should be very strong. I've tied in several areas that I've already repaired so I think this should make this long good to go.

IPB Image

IPB Image

This last photo shows that segment that goes up in between the firewalls. I was able to get some corner welds up in there and I think this will help the strength of this area immensely.

IPB Image
Han Solo
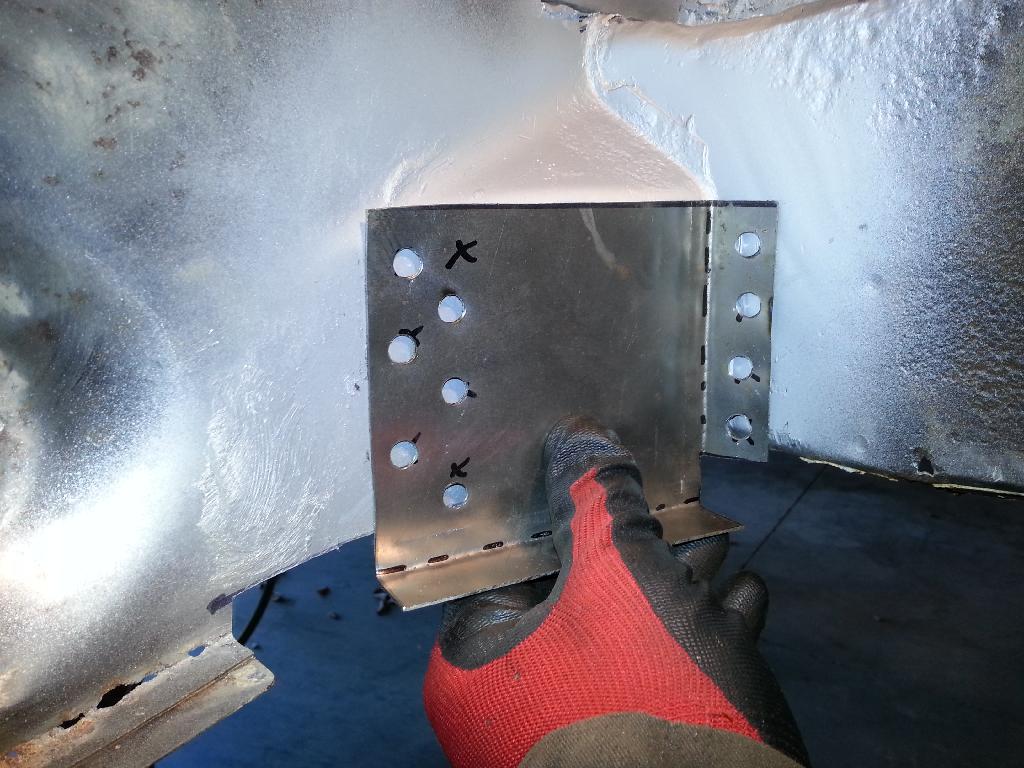
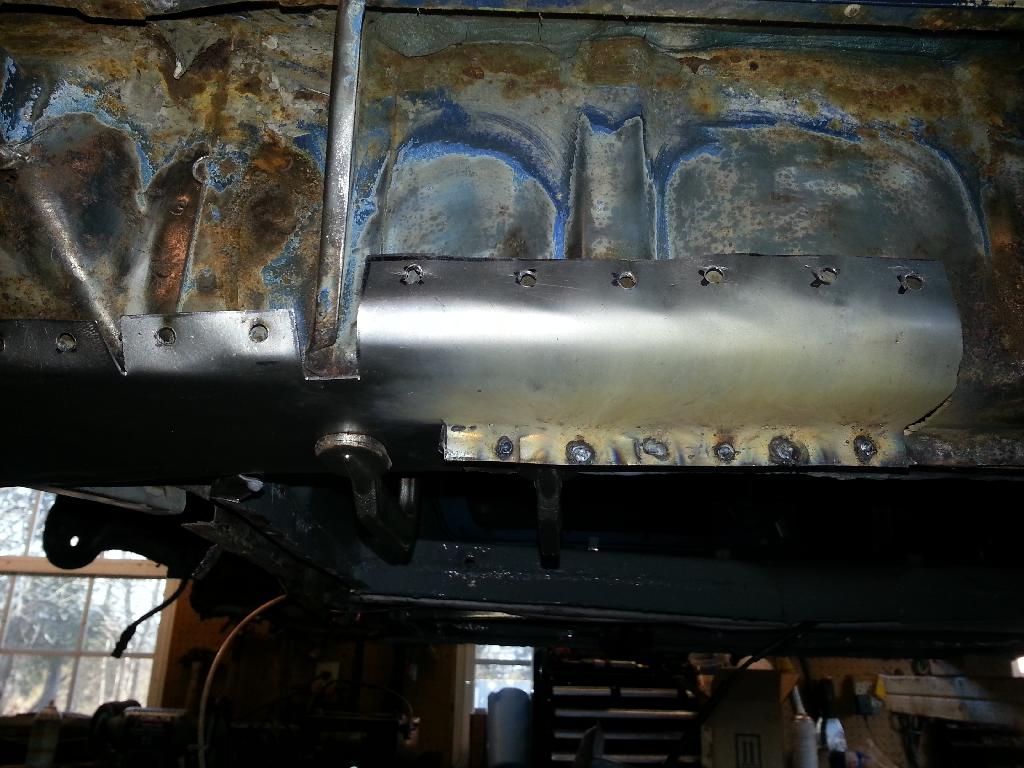
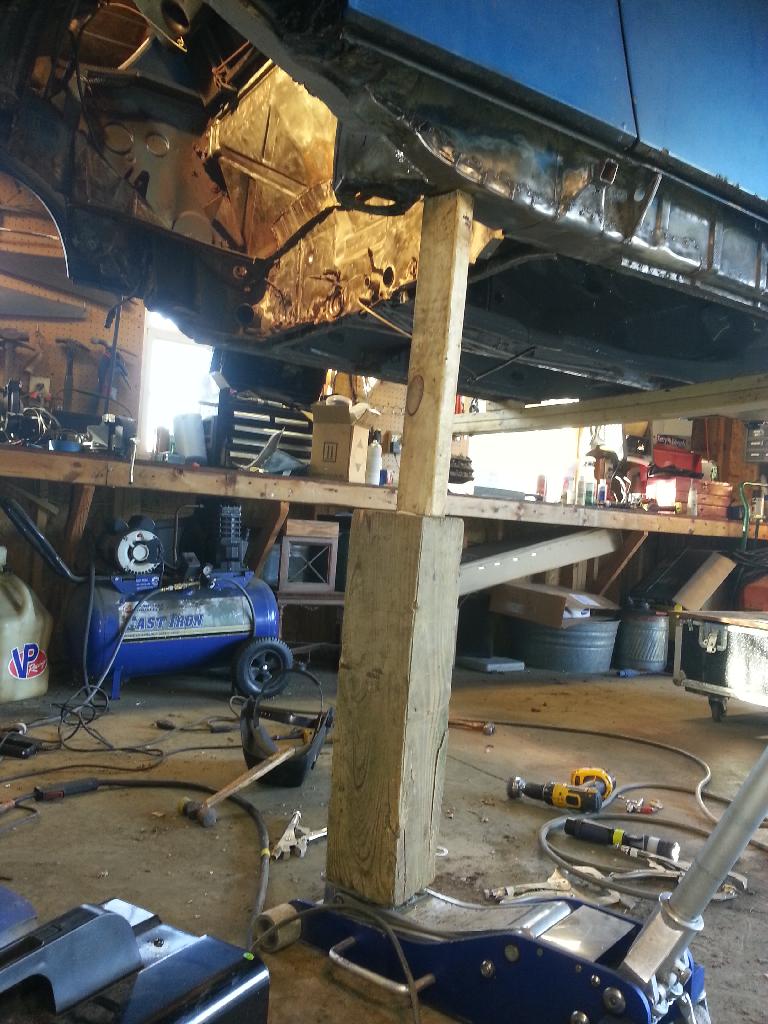
I've been thinking about how to make a jig for aligning the replacement suspension console and came up with what I think will work. I wanted a device that I could build and set up on the drivers side - then take it over to the passenger side. That meant something I could flip over and keep the same dimensions. I started with the plates that secure the outboard attachment point. Those can't be flipped over so I'm going to use both as alignment points and mark them the same.

IPB Image

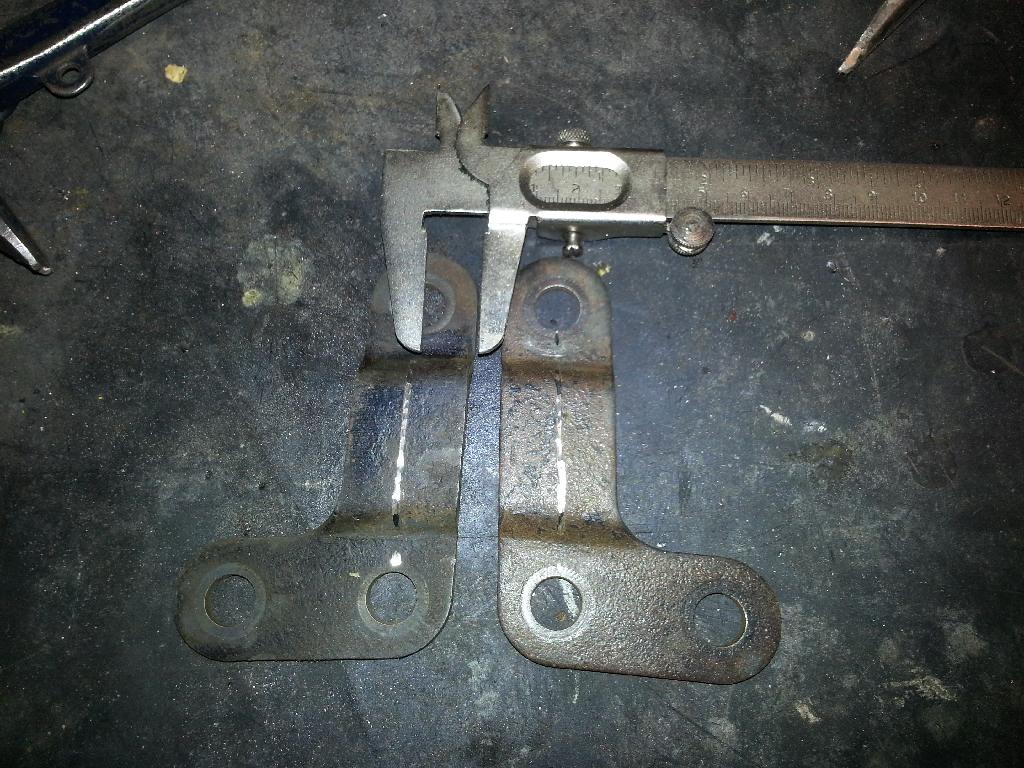
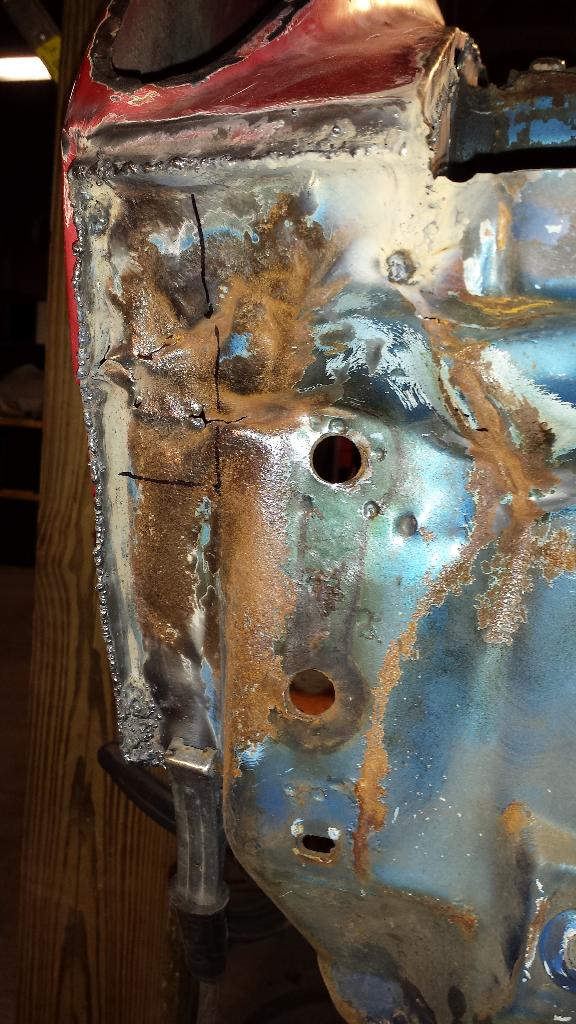
I scribed the plate down the middle (1/2" from either edge).

IPB Image

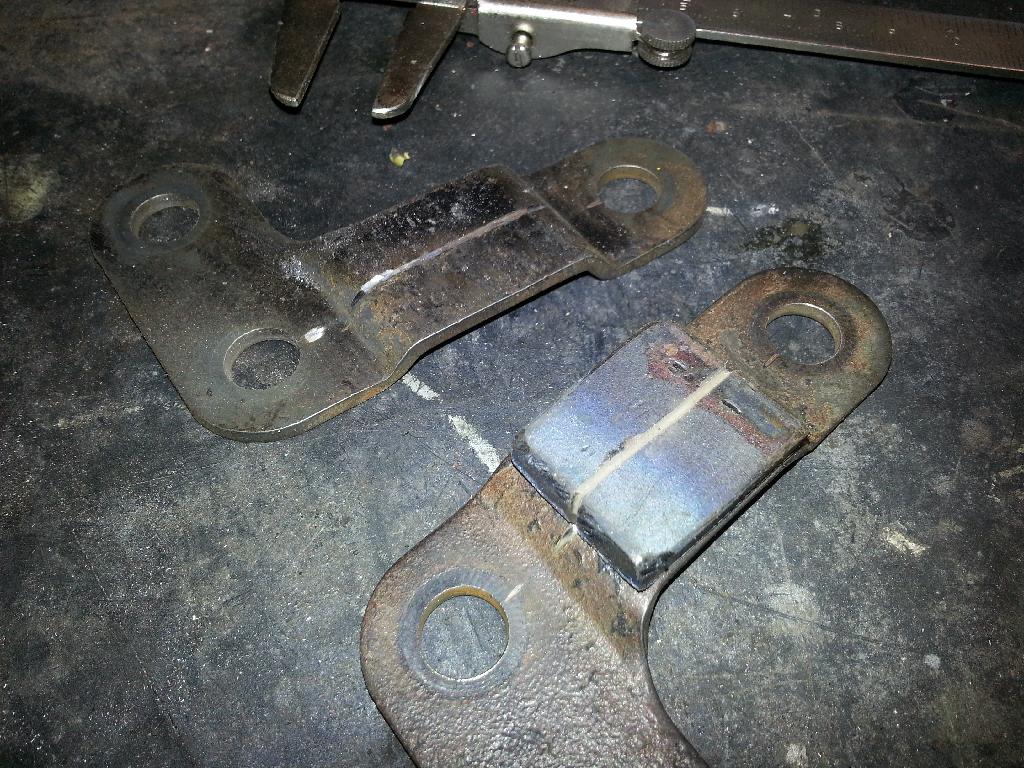
Then I cut a piece of flat stock to fit on top of the plate and made a scribe mark down the middle of it. Note that the mark goes down the side which will be important later.

IPB Image

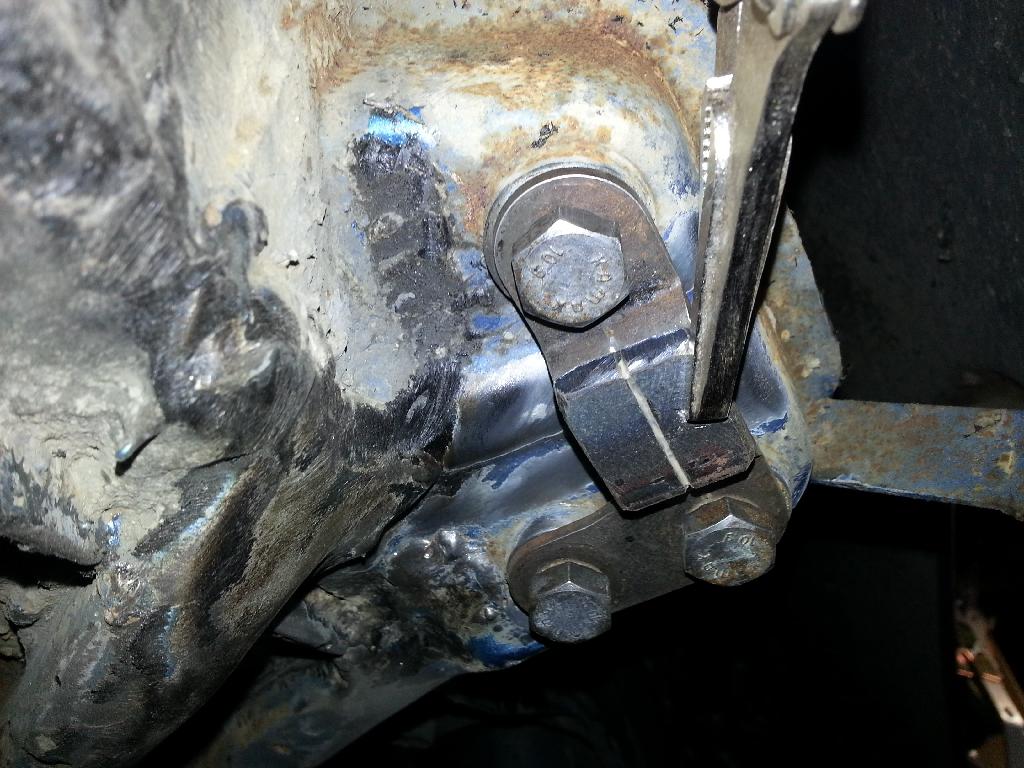
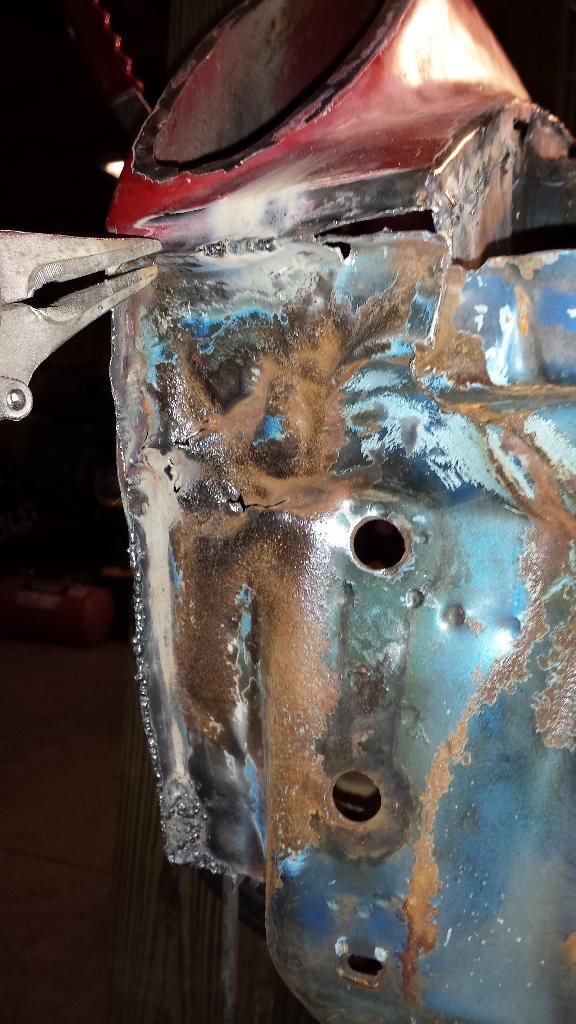
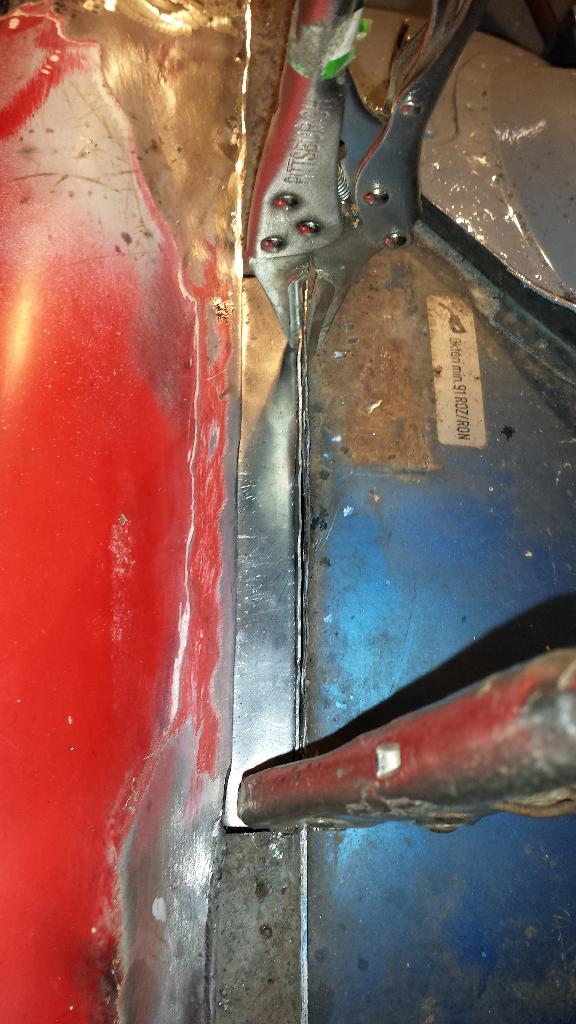
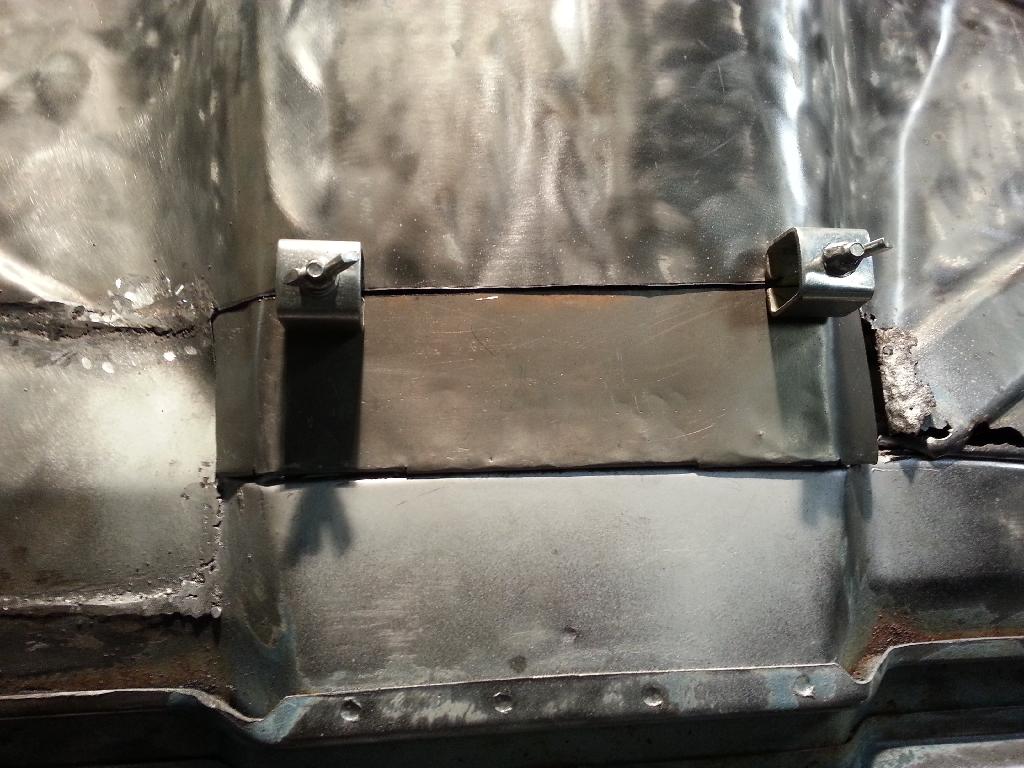
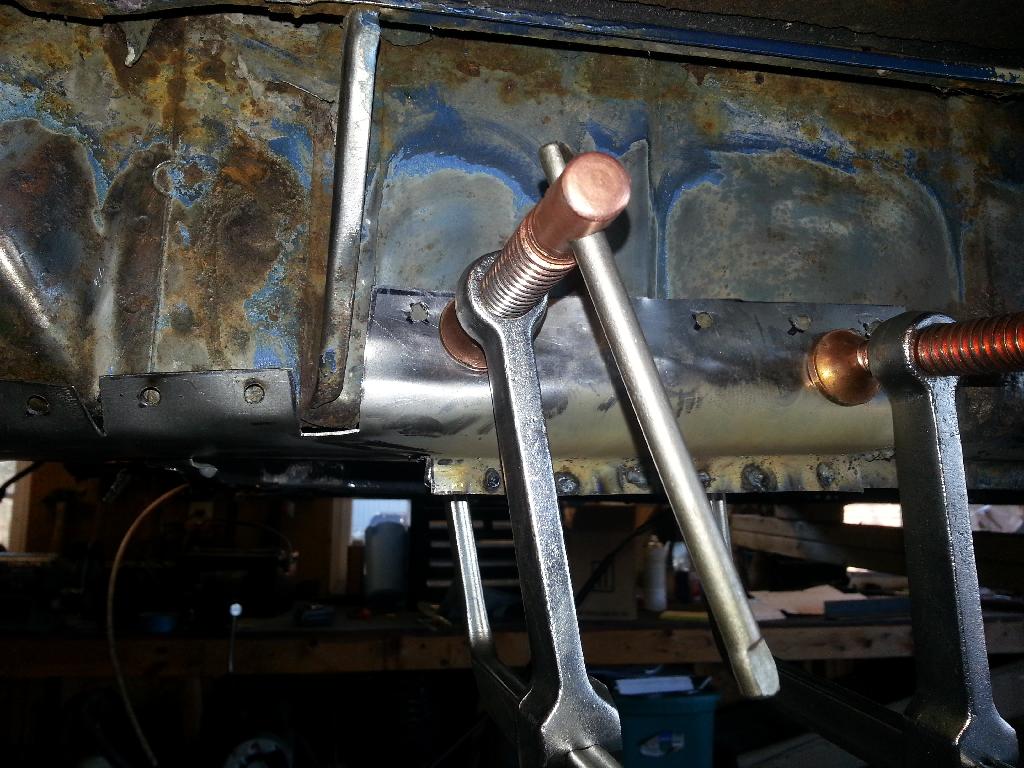
Next, to build the jig on the good drivers side, I needed to figure out how to clamp the flat stock to the mounting plate now on the car. Small needle nose vise grips work well in the confined area. Align the flat stock's marks to those on the suspension plate.

IPB Image

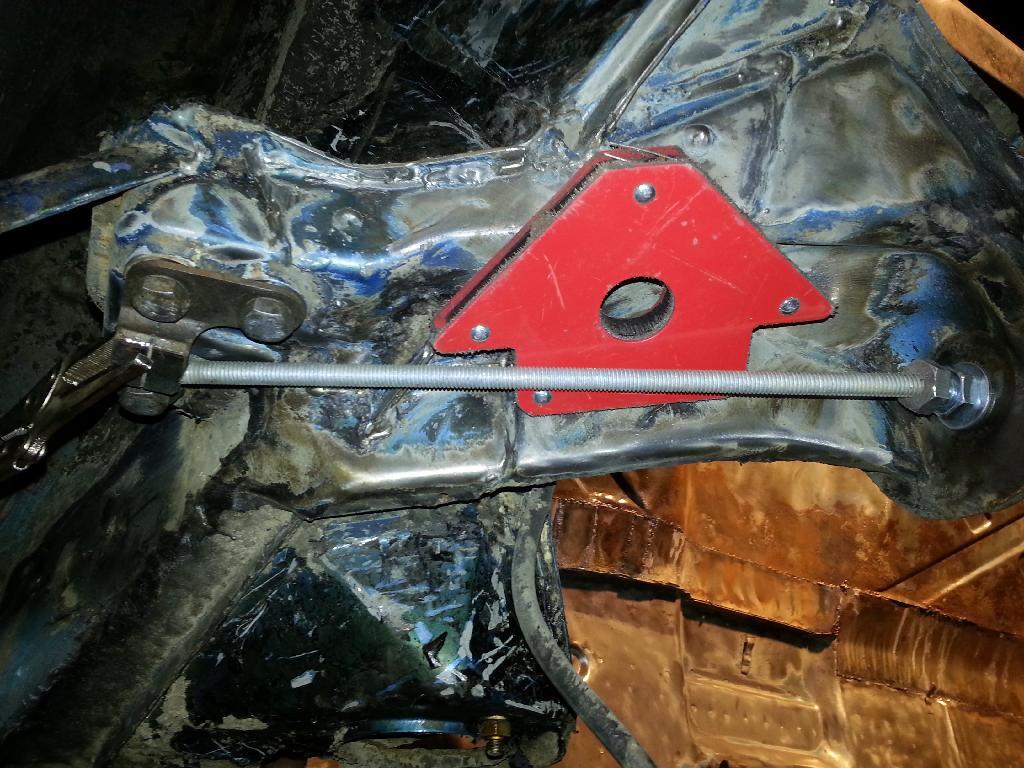
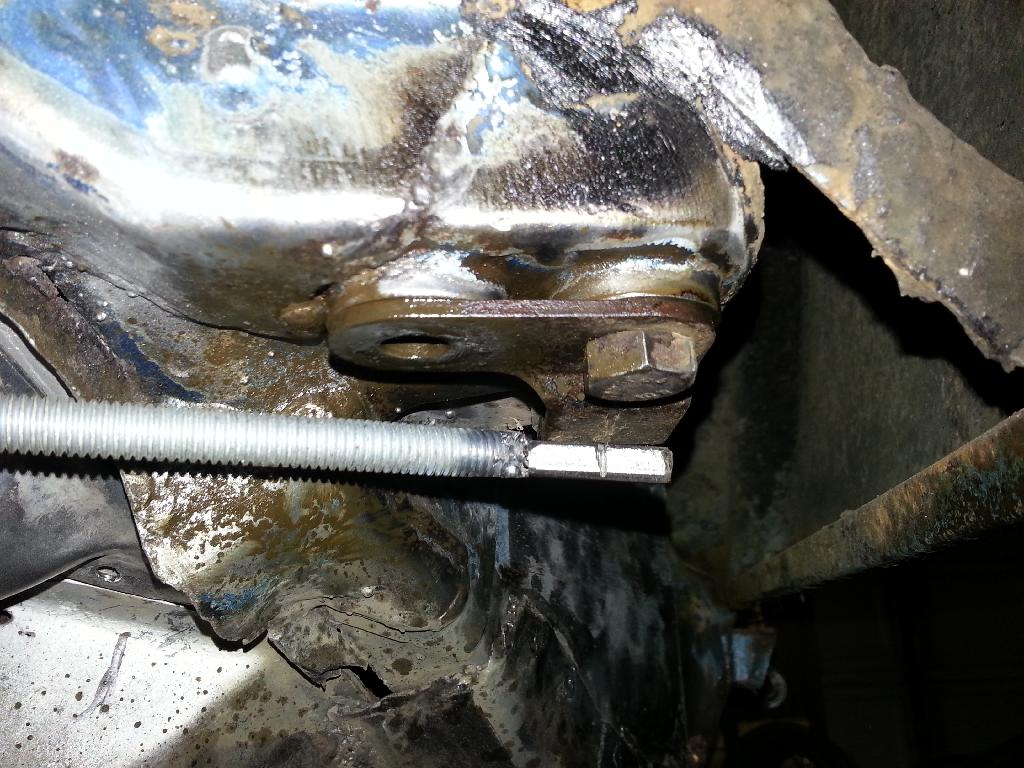
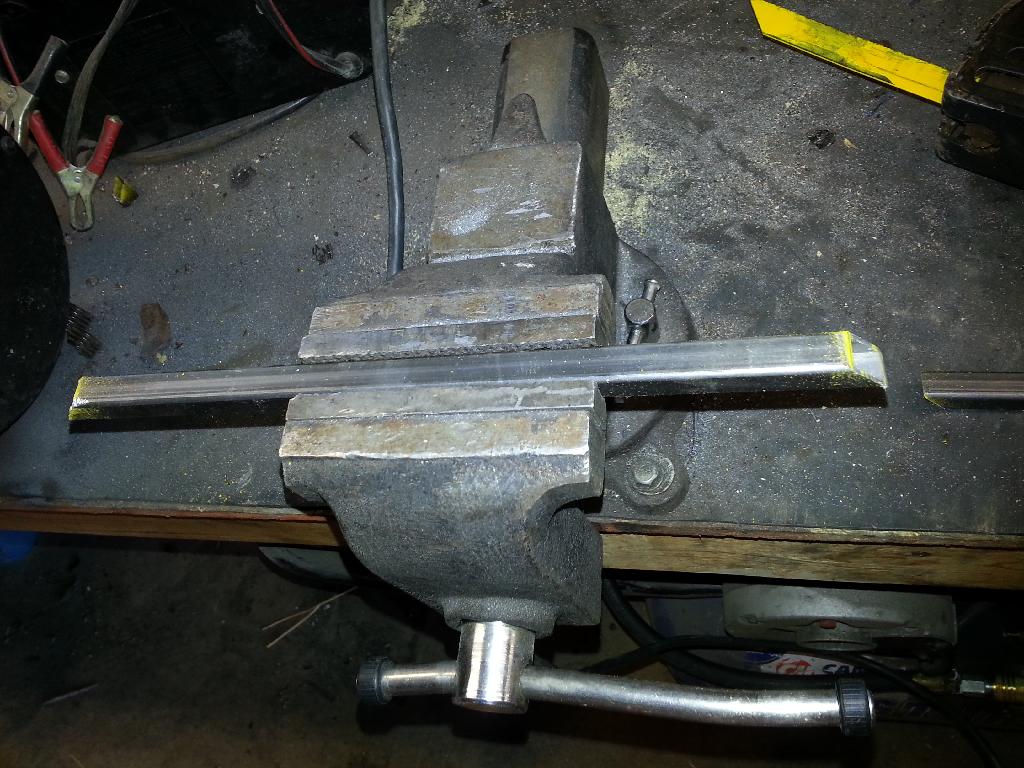
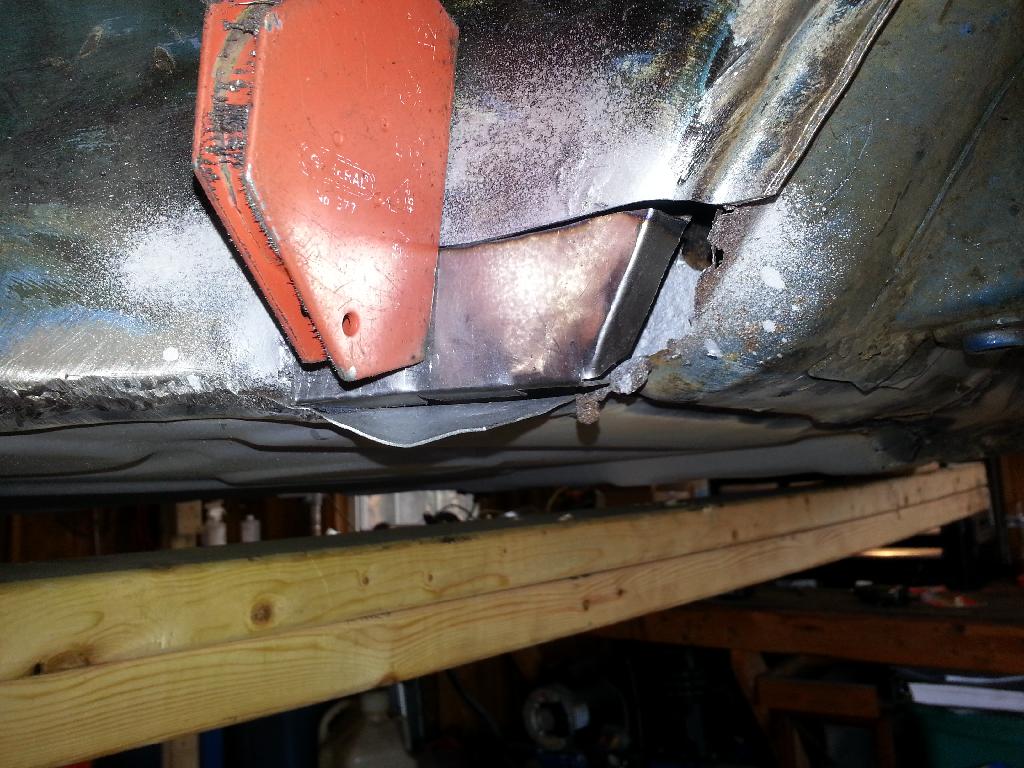
The other components of the jig are a section of 3/8" threaded rod, a 1/2" x 2" bolt with two flat washes and two nuts. I used one nut and washer as a backing, ran the bolt through the inner mounting point and tightened. Note that a 9/16" bolt will work better but of course Home Depot or Lowe's didn't have them. Then I started trimming the threaded rod to fit in-between the bolt head and the fixed piece of bar stock. Try to have the rod mate right in the center of the bolt head and the middle of the flat stock plate on the side. I used a large magnet to assist in this process. Trimming, grinding, checking till it fit just right. Once I got everything just right, I took the mig welder to the two joining points (bar stock to threaded rod and threaded rod to bolt head).

IPB Image

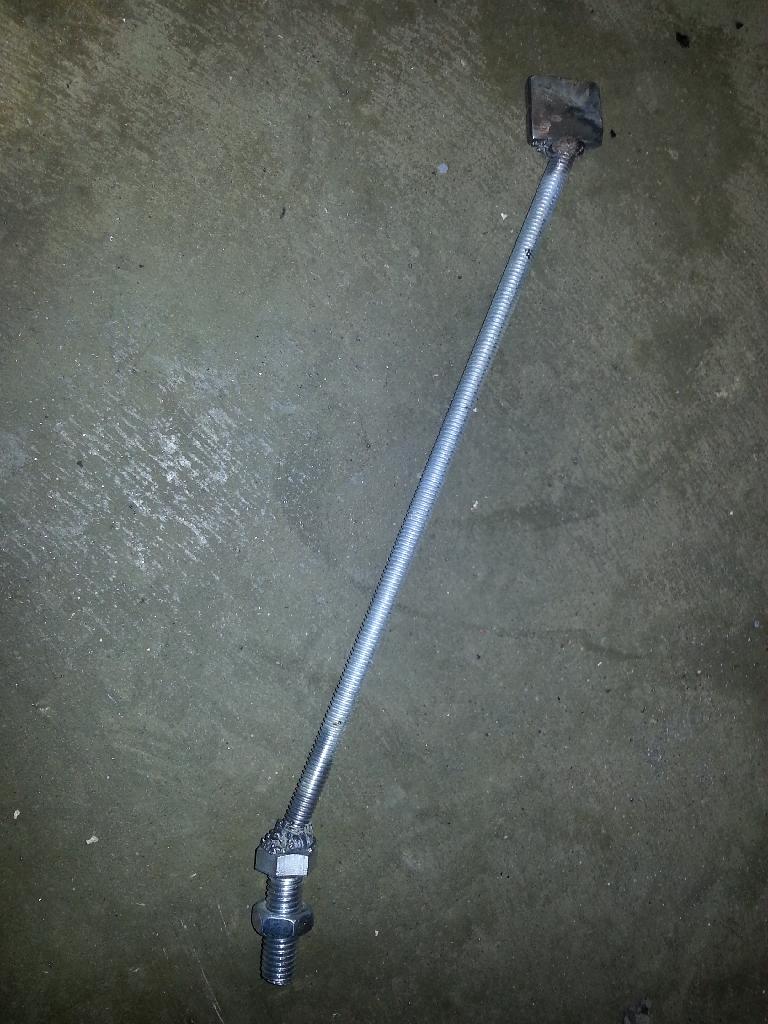
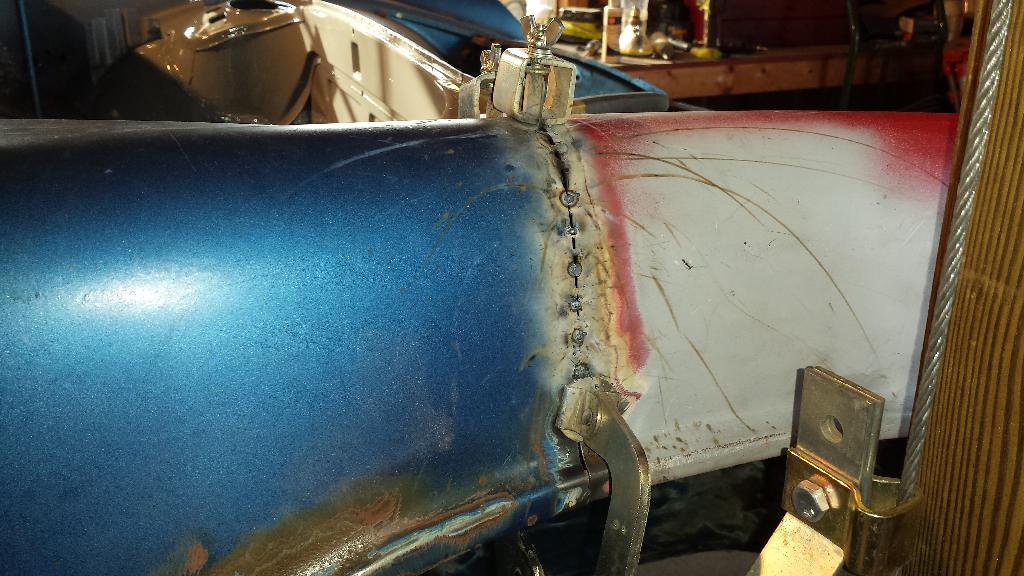
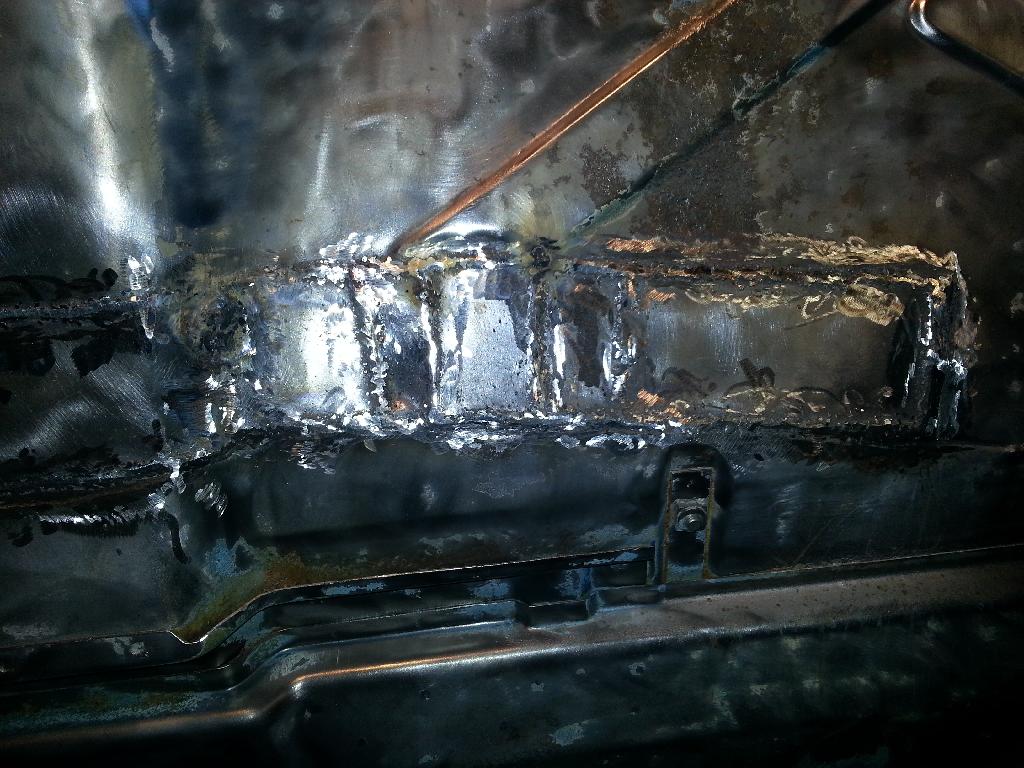
A couple of tack weld and then finish the welding with the jig in a vise. Note that my first attempt I didn't get good penetration on the bolt head and that weld failed later. Crank up the amps and feed when you weld that.

IPB Image

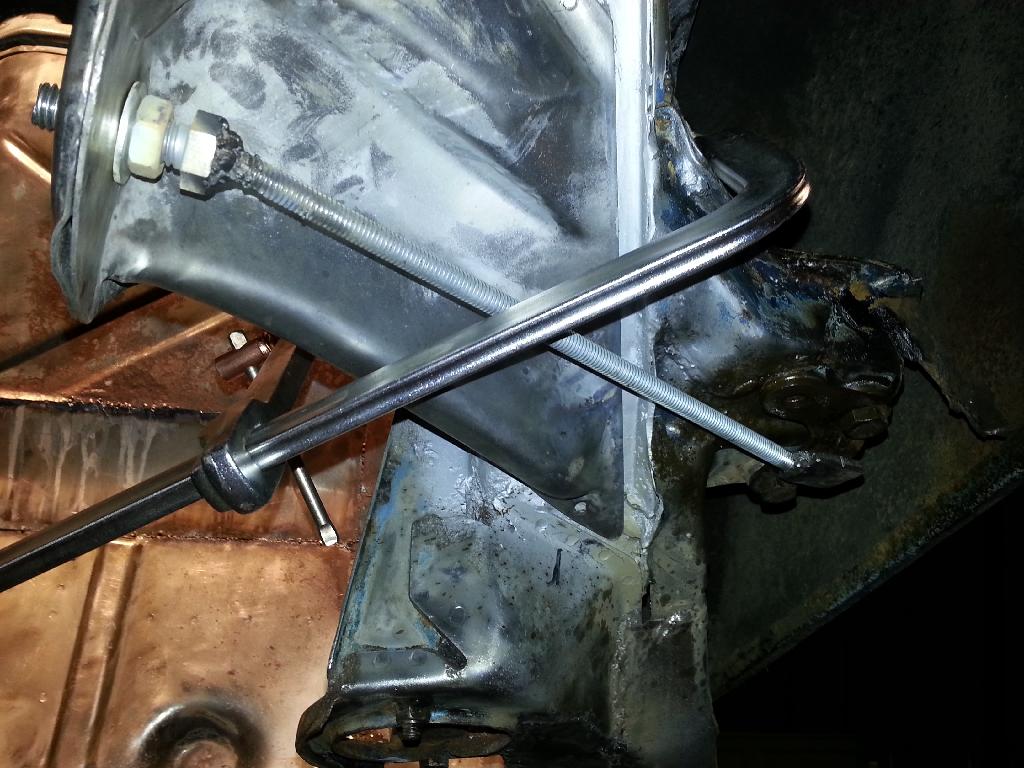
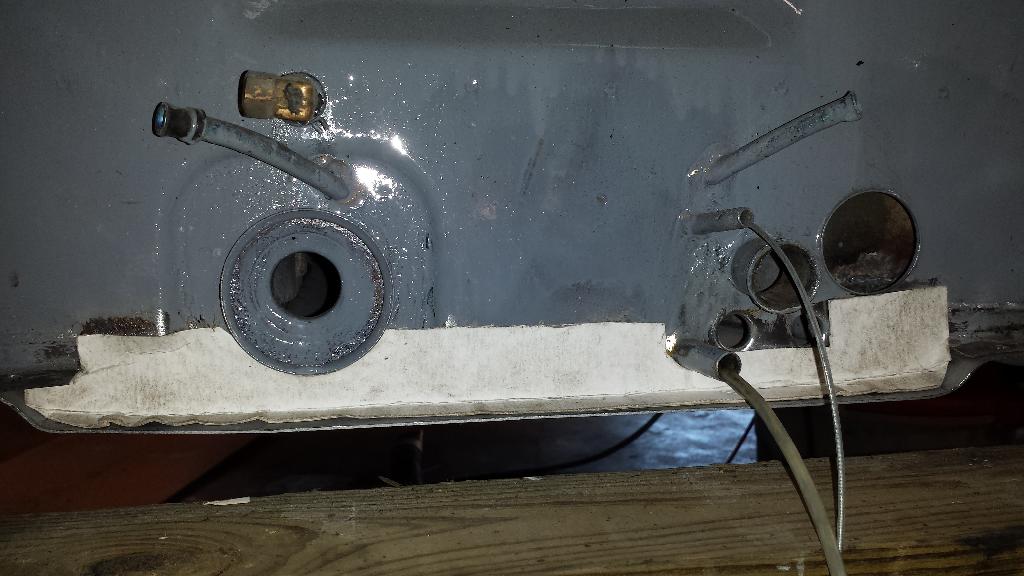
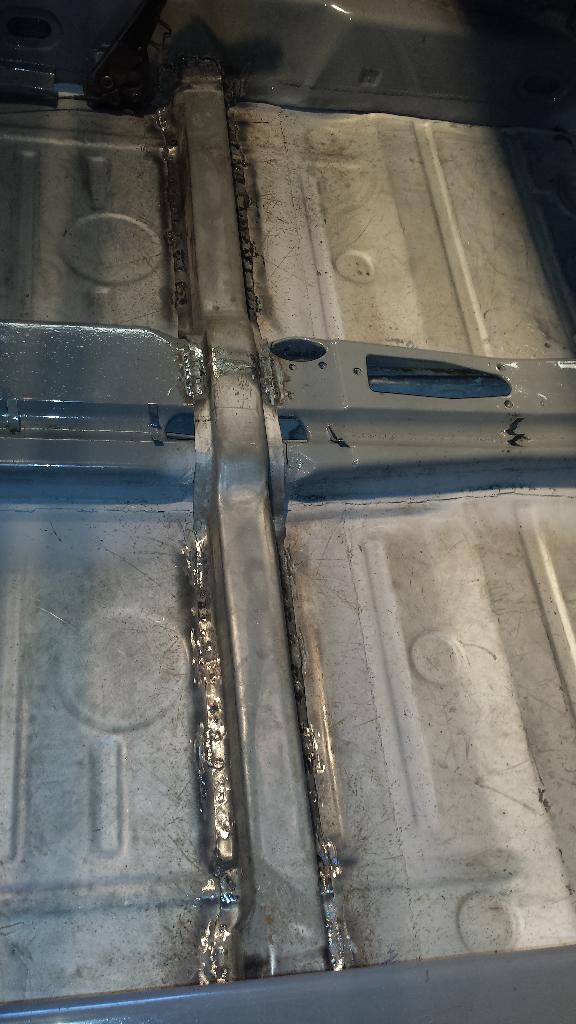
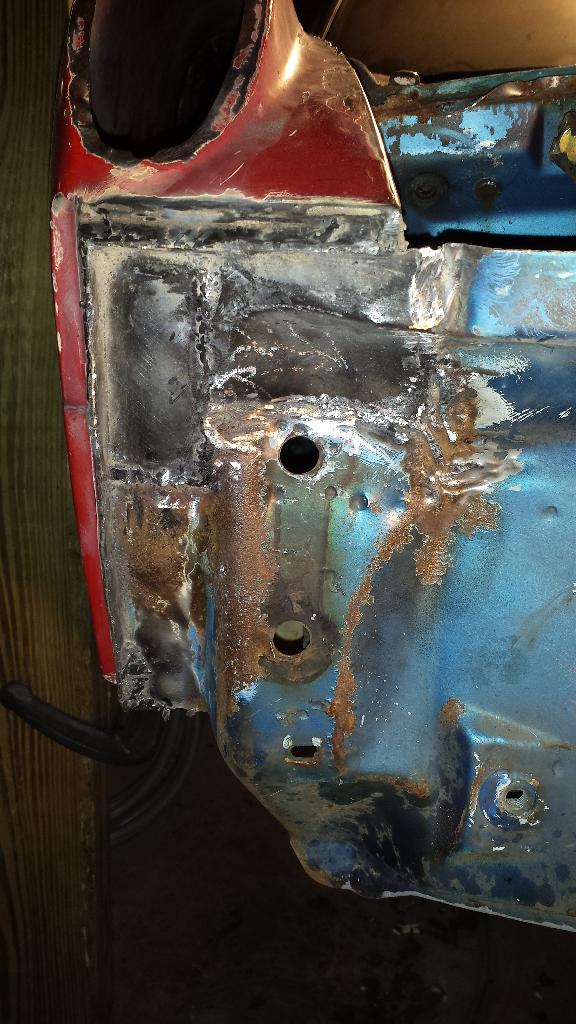
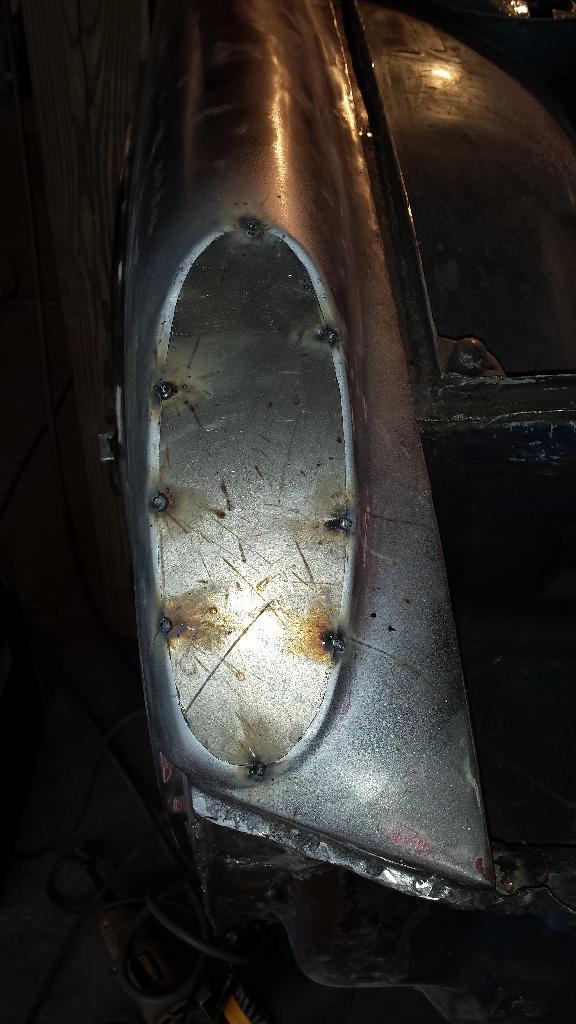
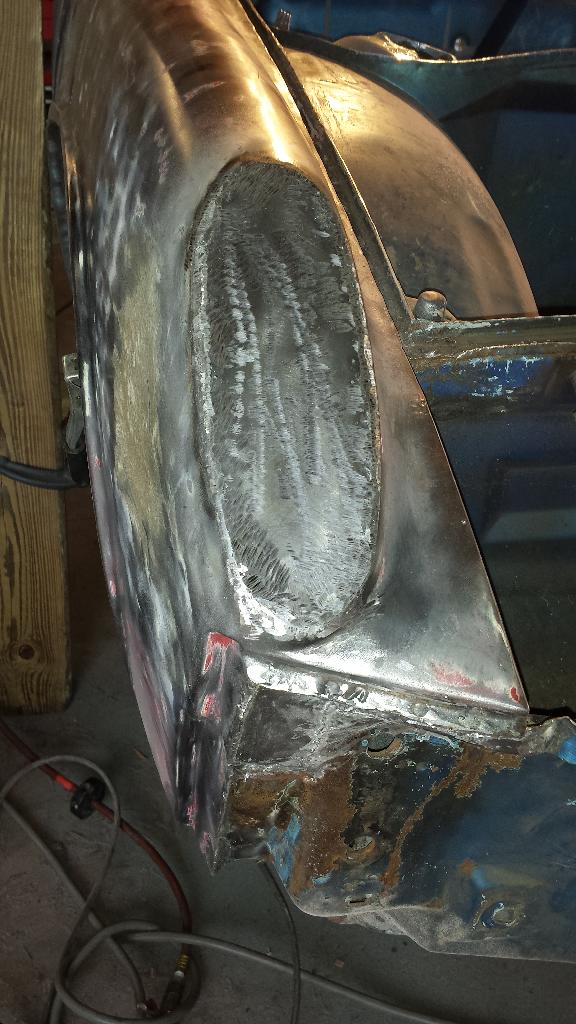
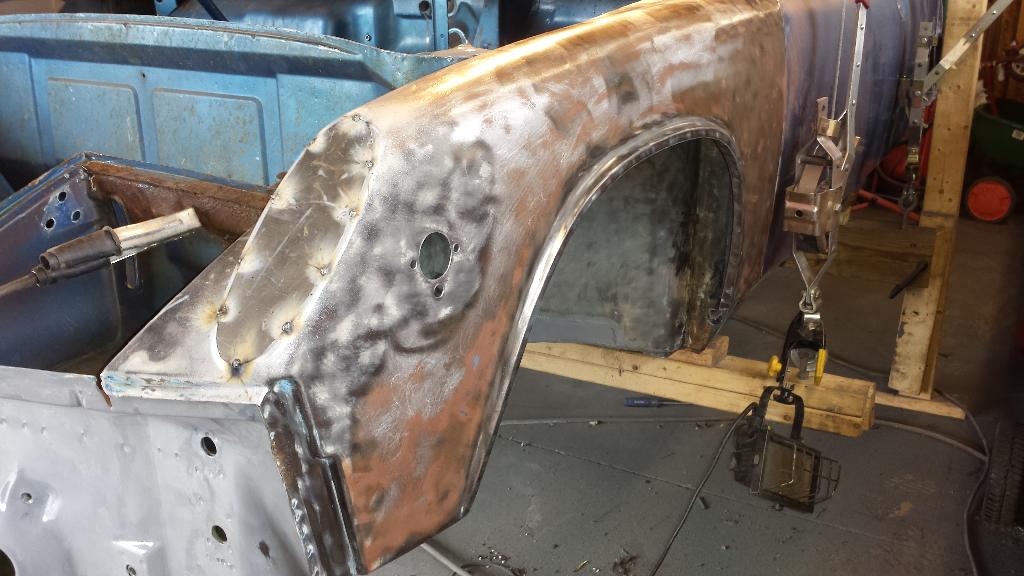
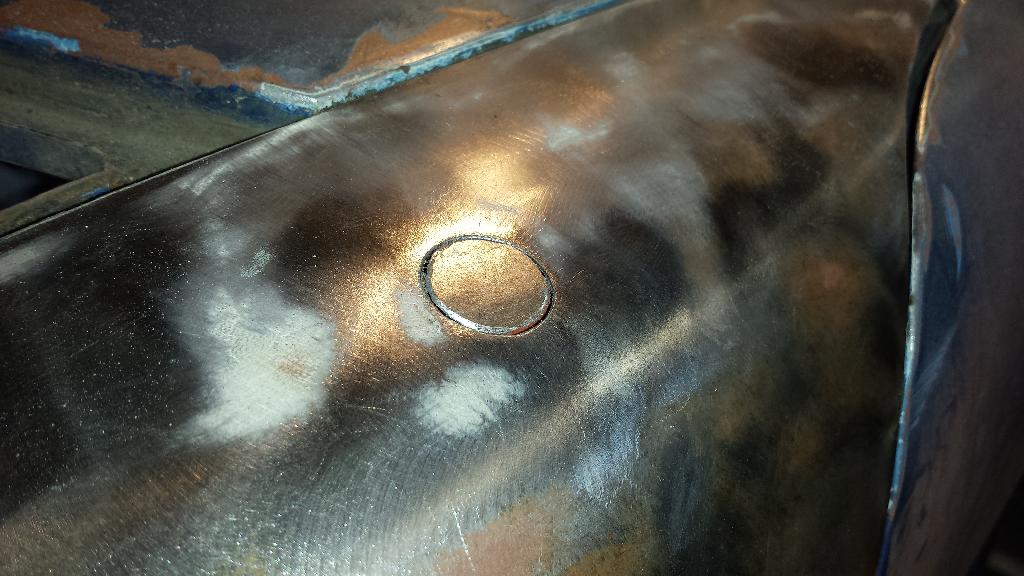
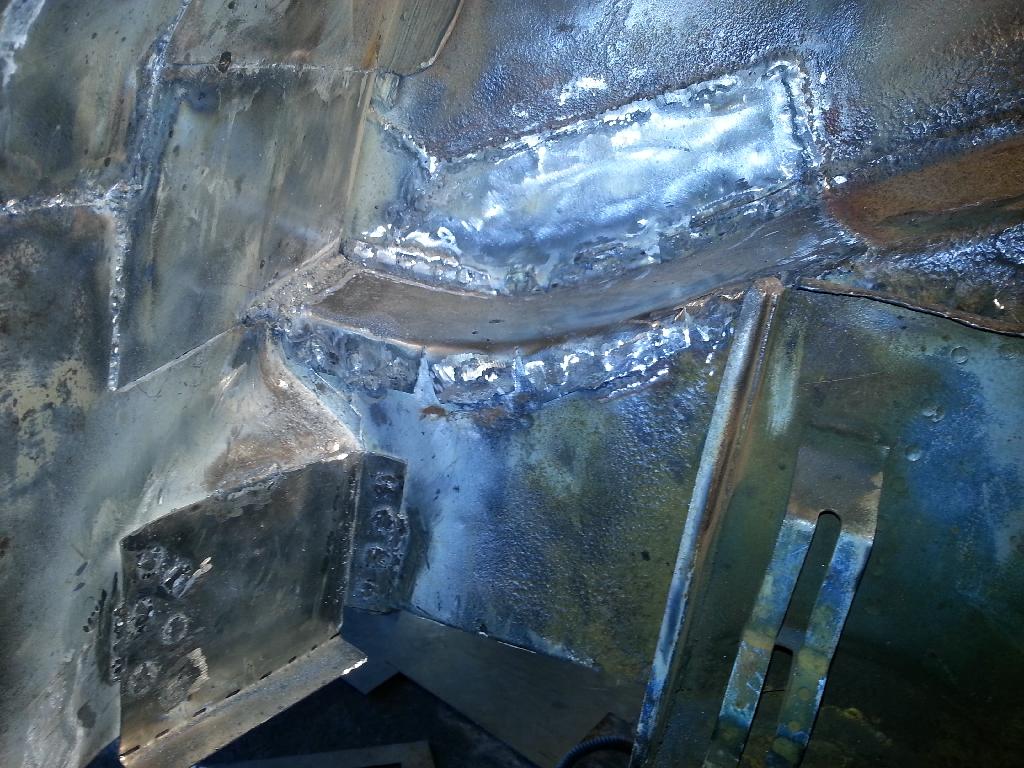
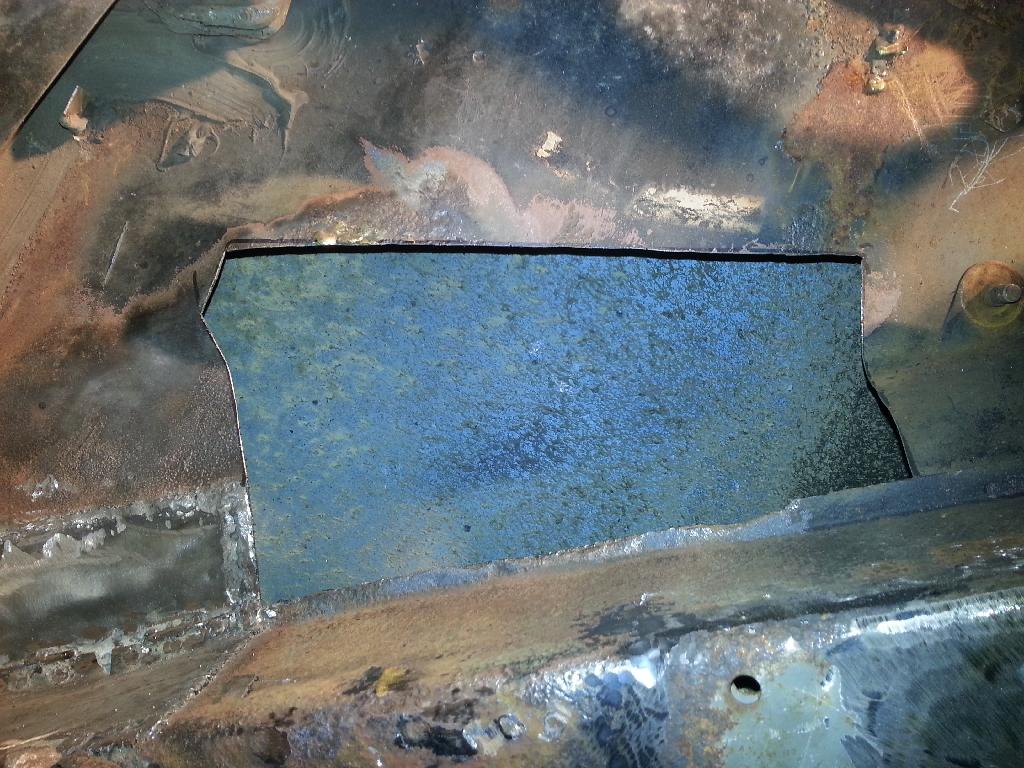
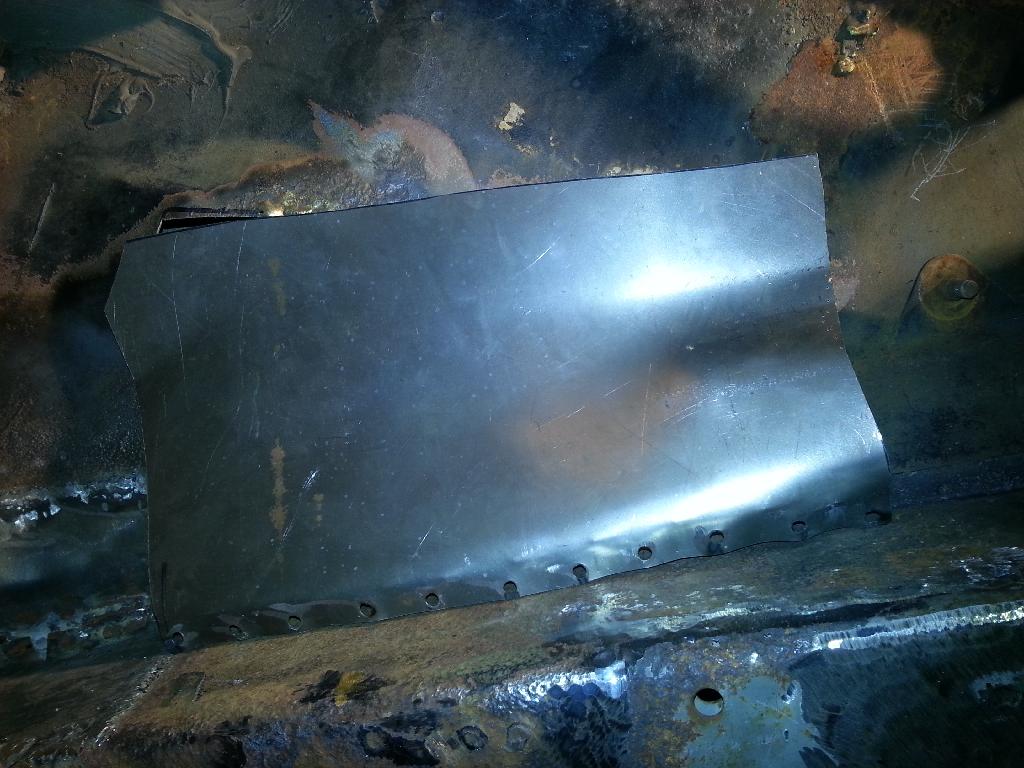
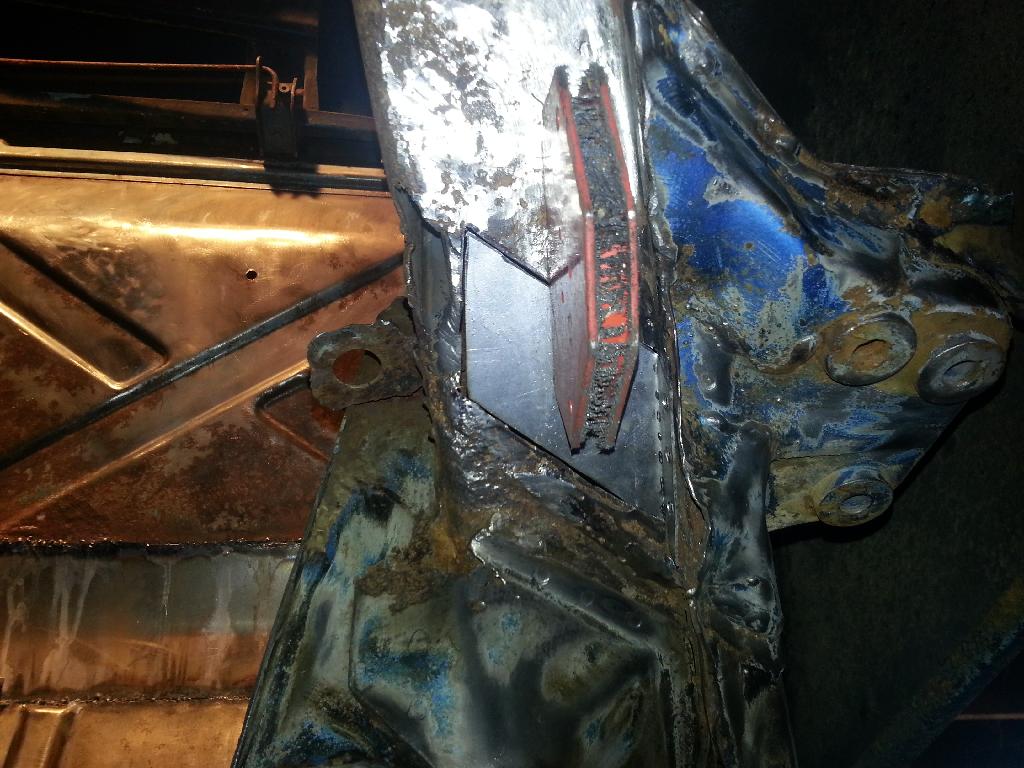
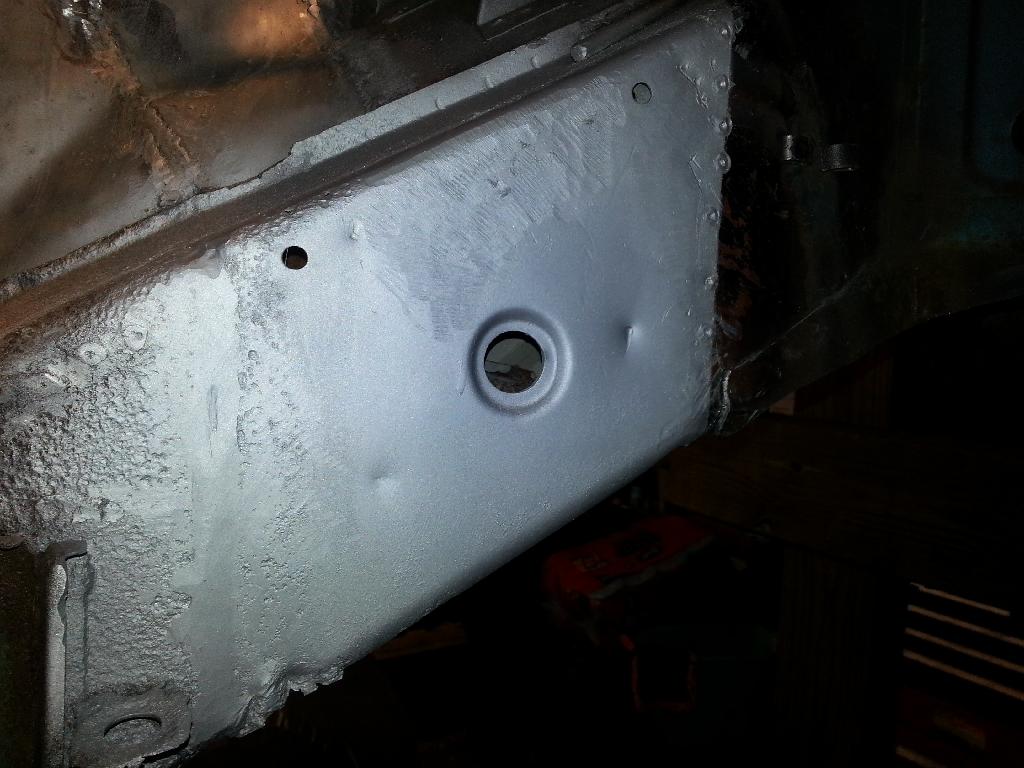
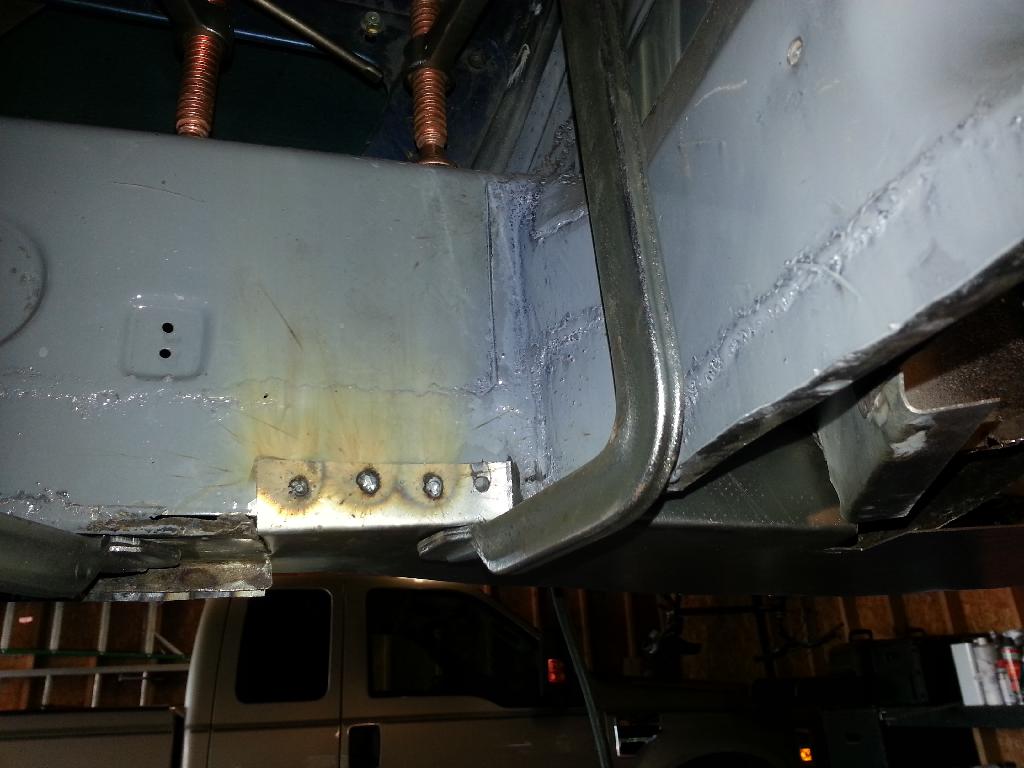
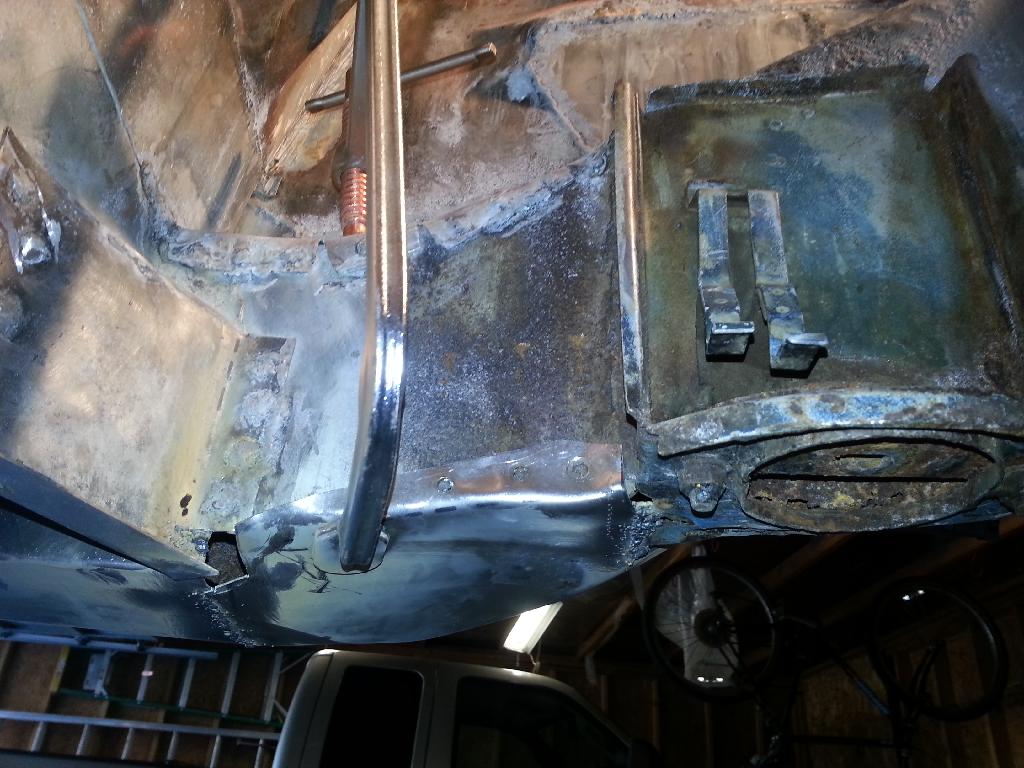
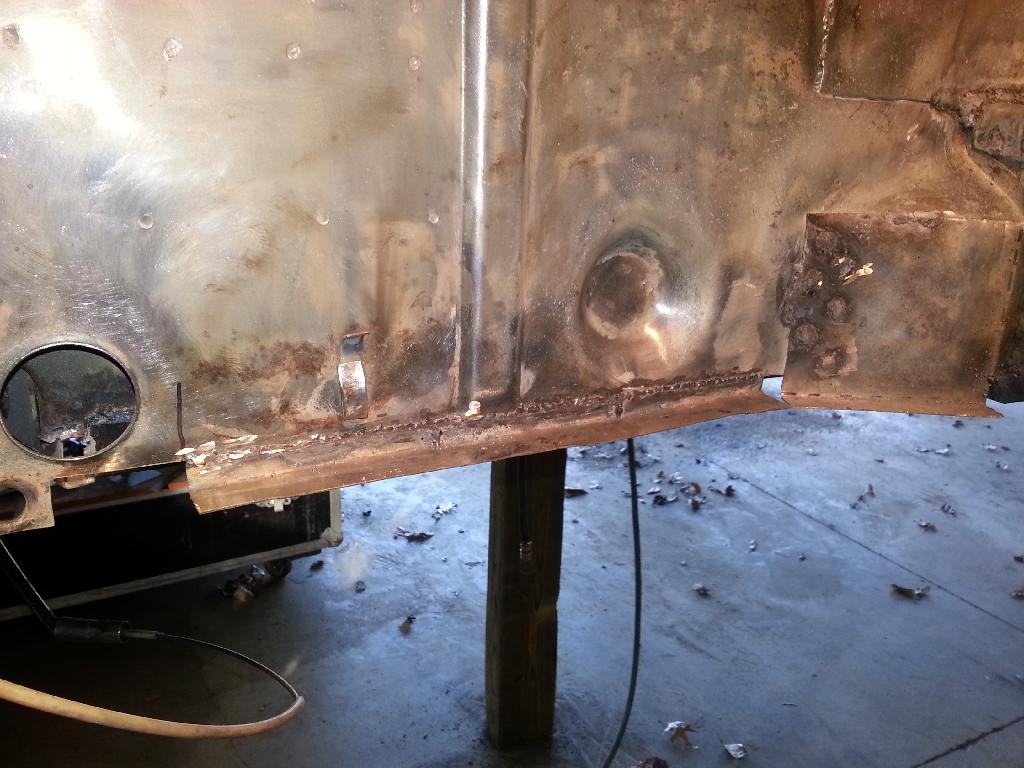
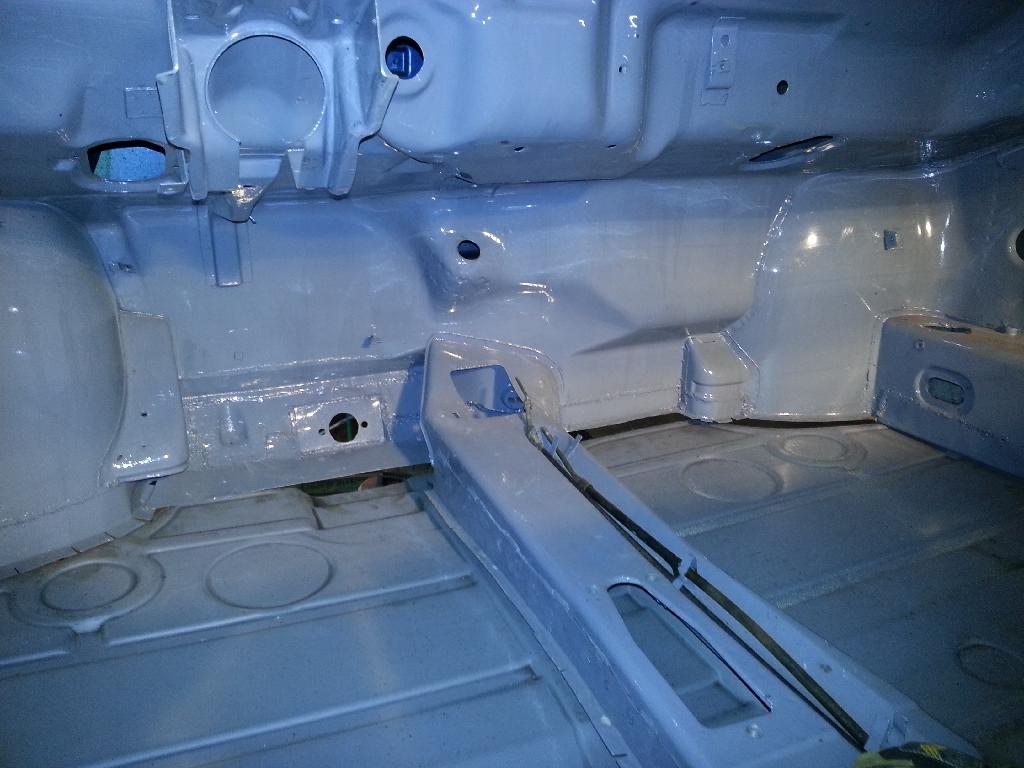
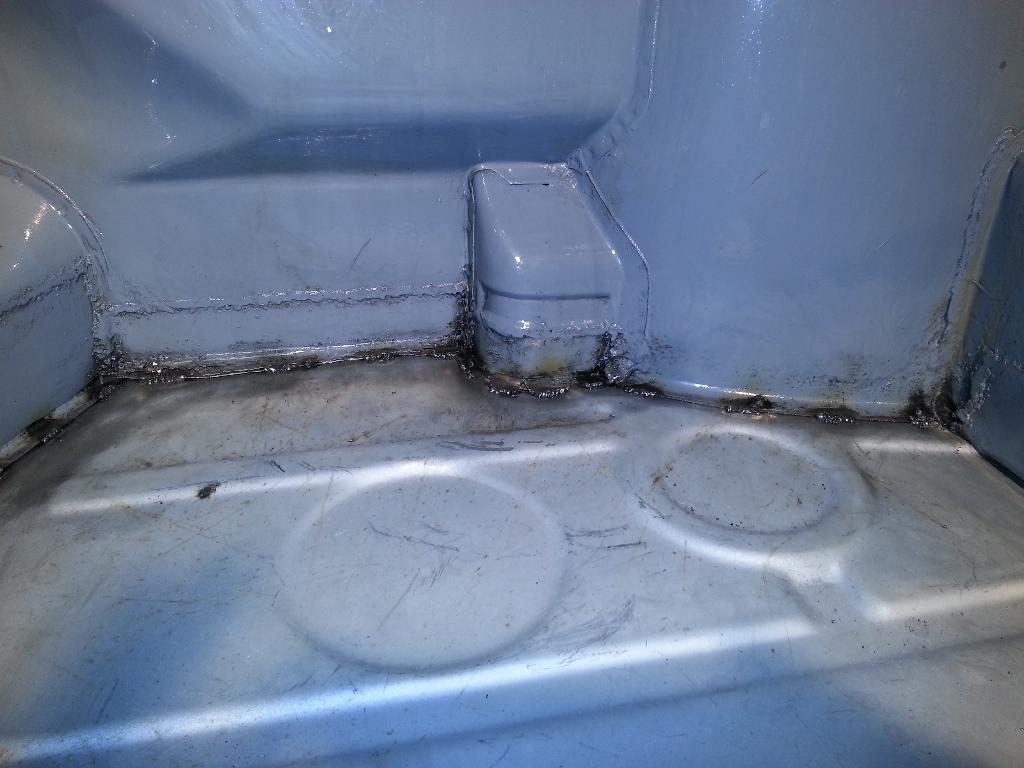
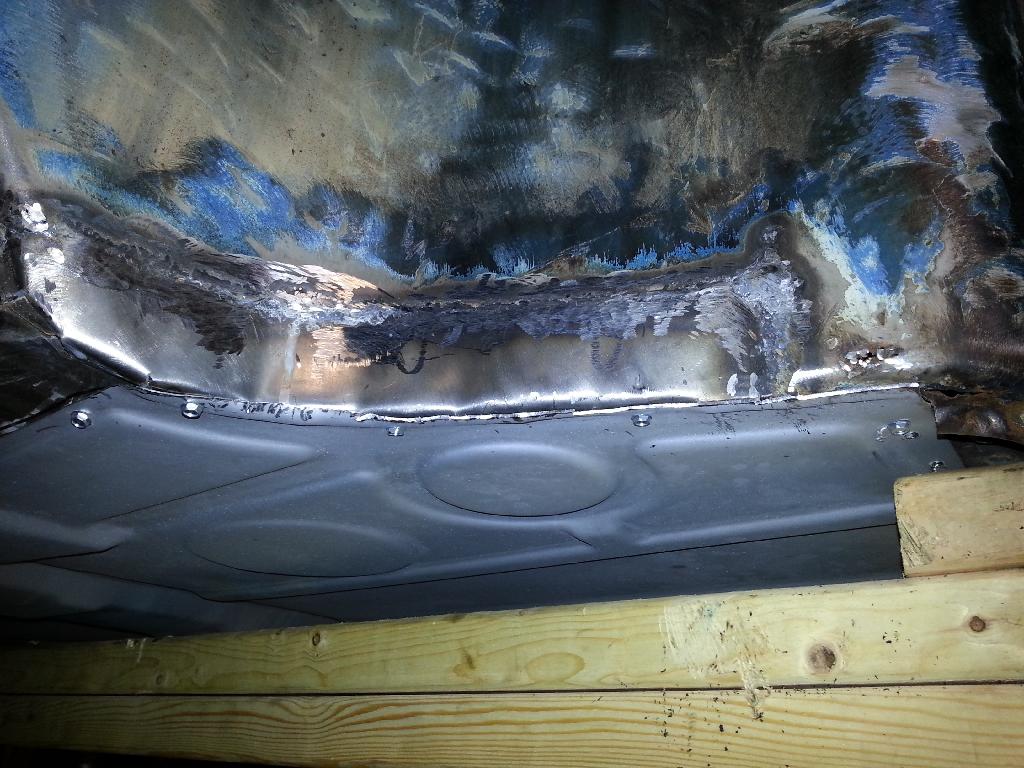
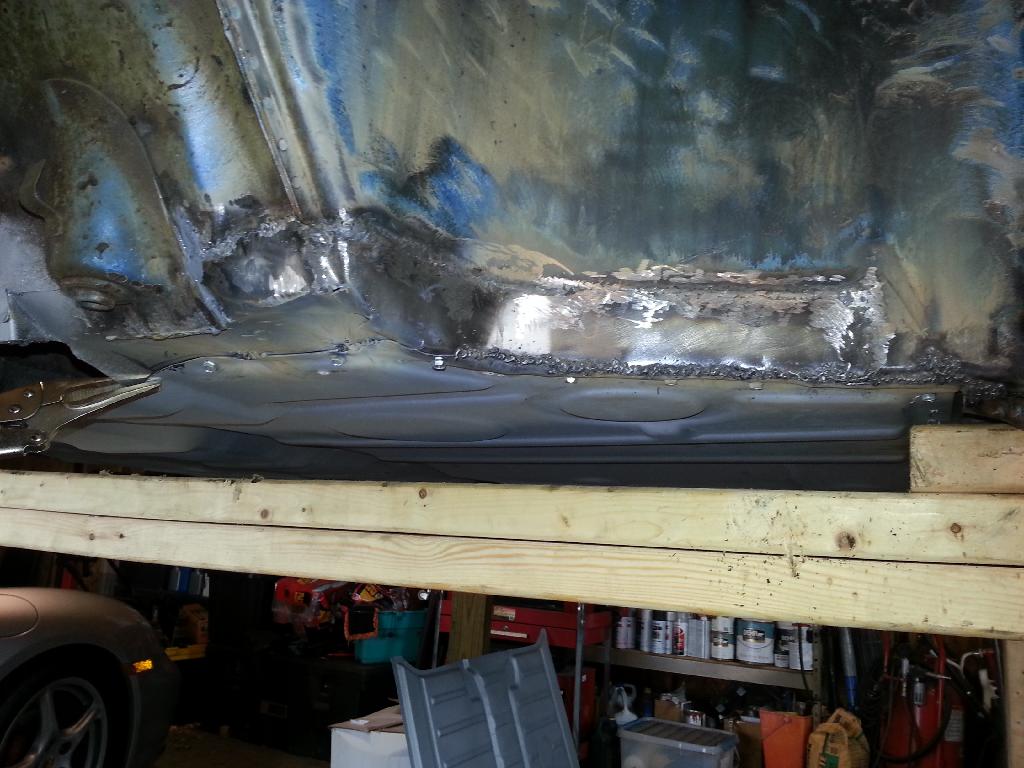
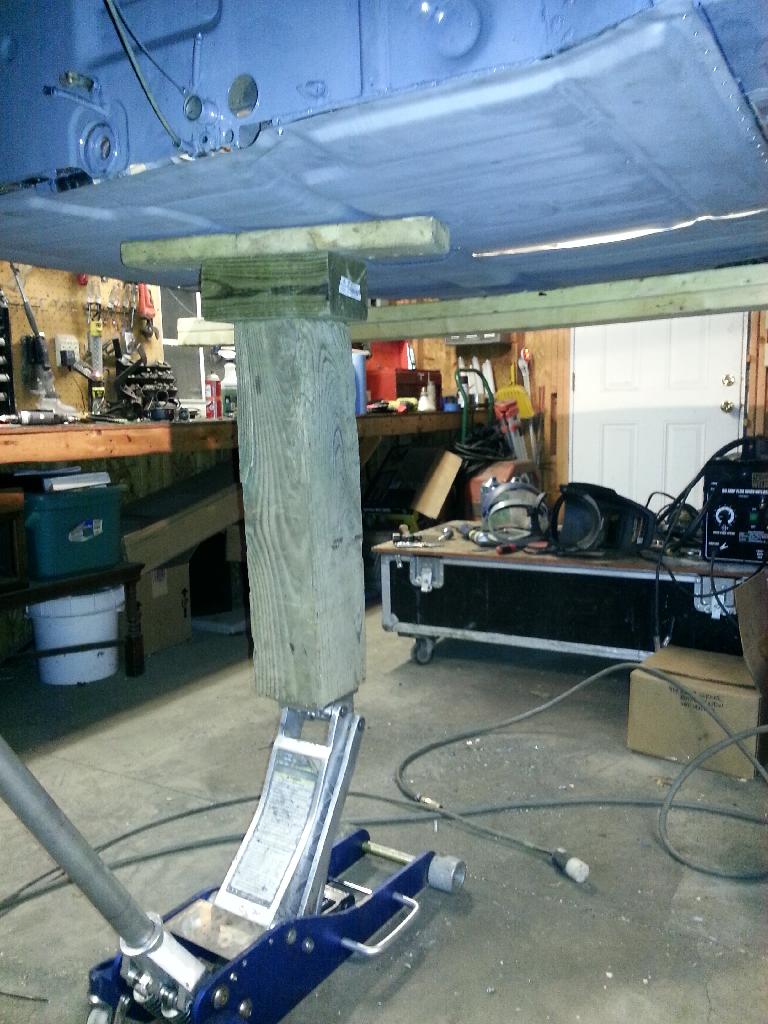
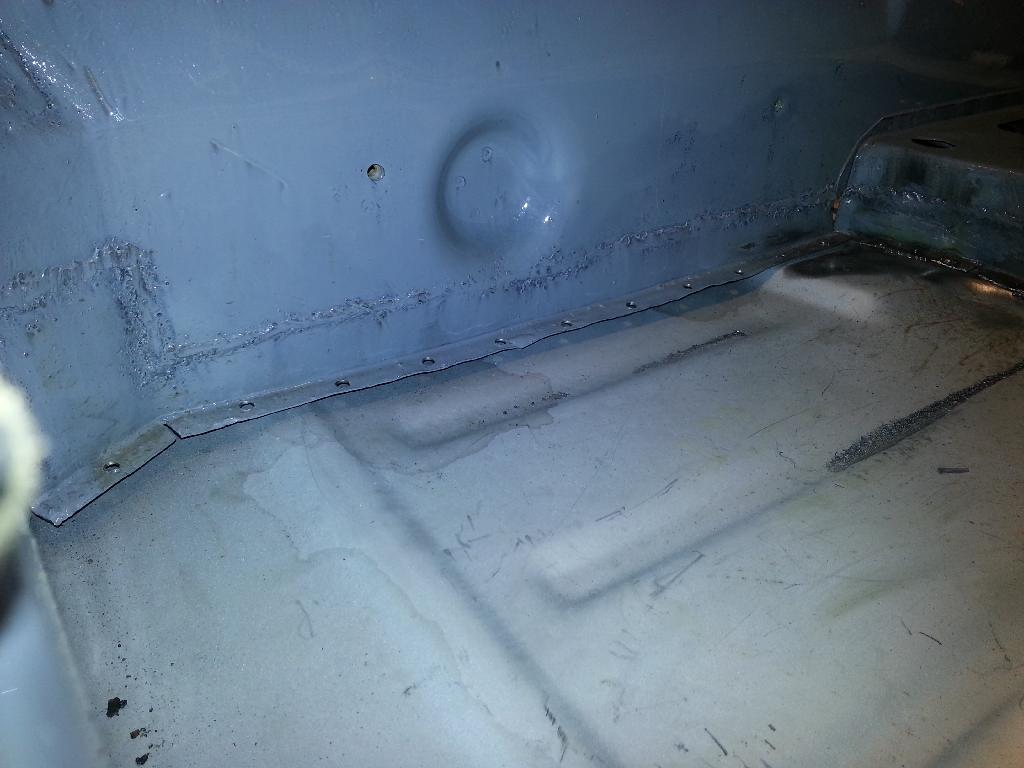
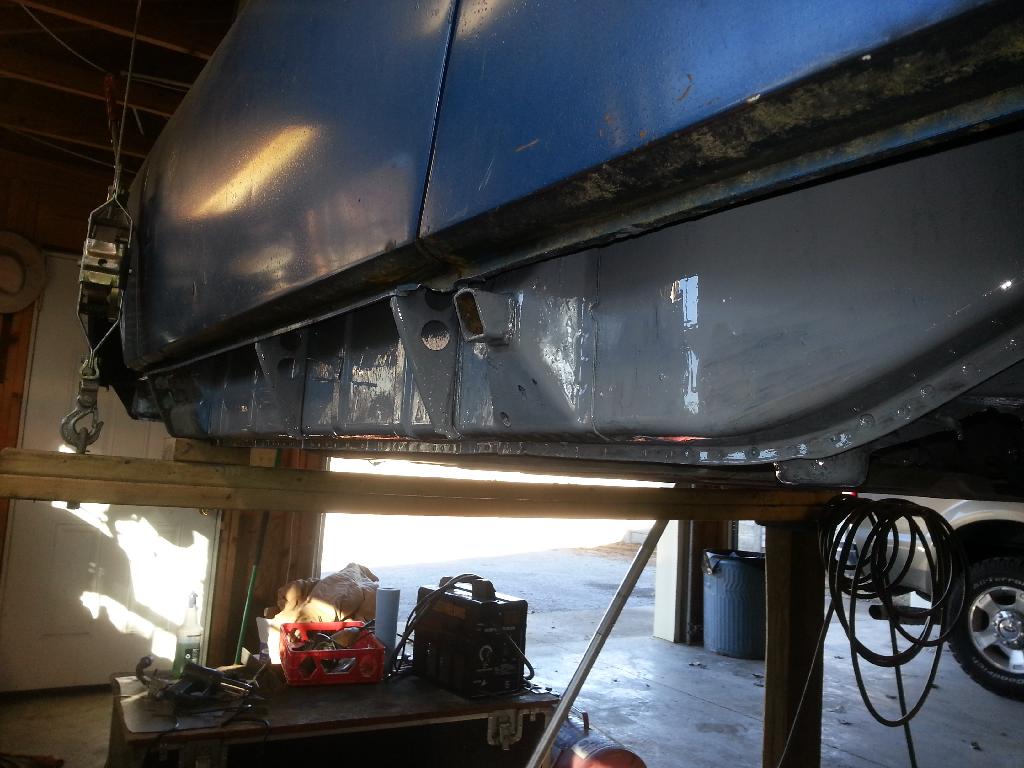
I clamped the new suspension console to the long using the old spot welds for rough location. Then I put the jig in the suspension hole and started tapping the console with a nylon hammer to get the plates aligned. It took another clamp in-between the console and motor mount to suck the console tight against the long.

IPB Image

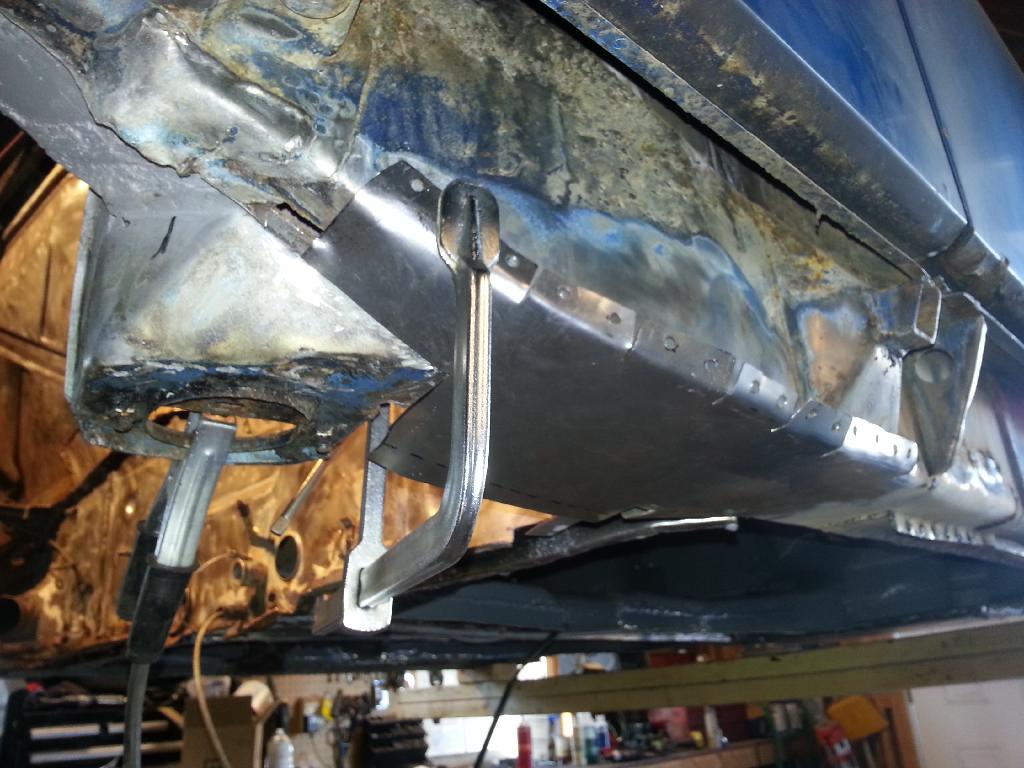
The cool thing about this little jig is when you flip it over for the other side - all the dimensions and angles are the same - almost. There's is a slight difference in the elevation of the mounting plate and the inner mount hole. So when you flip the jig over, the alignment plate is a little lower (about 1/2") but you can still get an eyeball on the center lines and the location of the bar stock to the mounting plate (side to side and front to back).

IPB Image

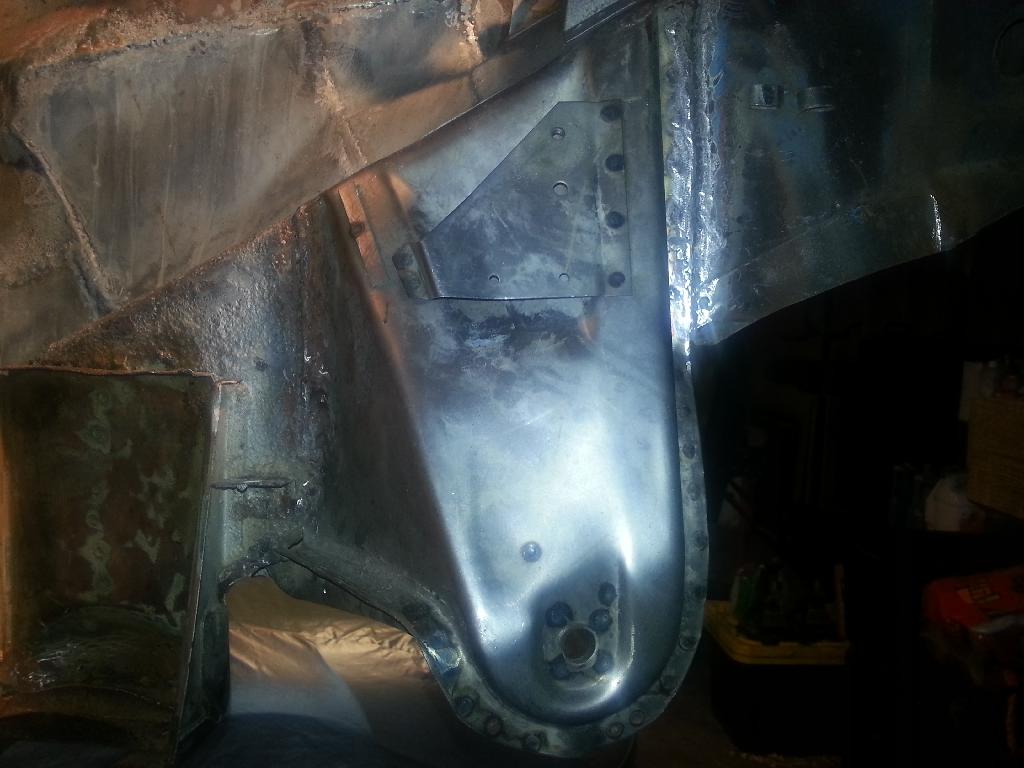
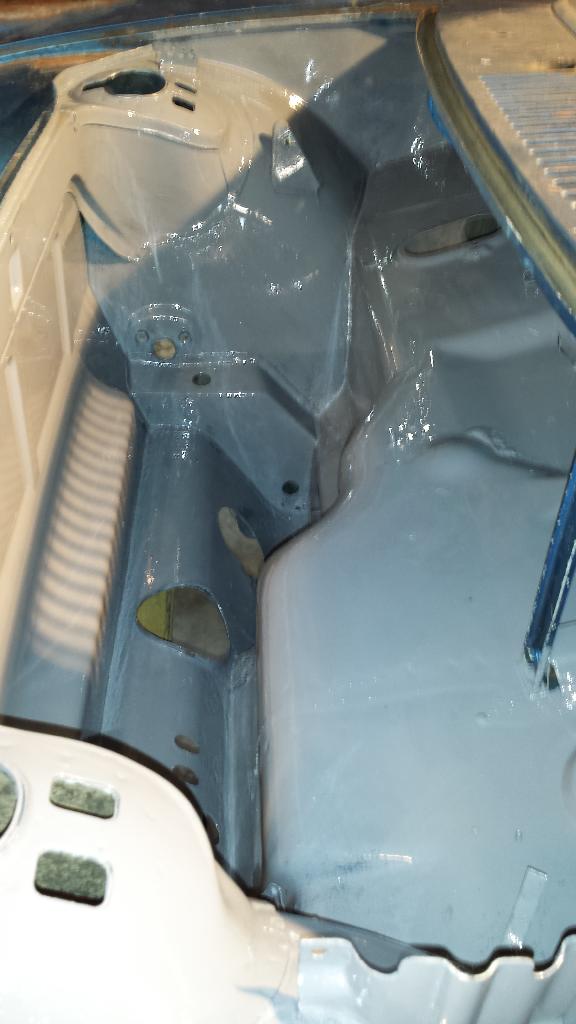
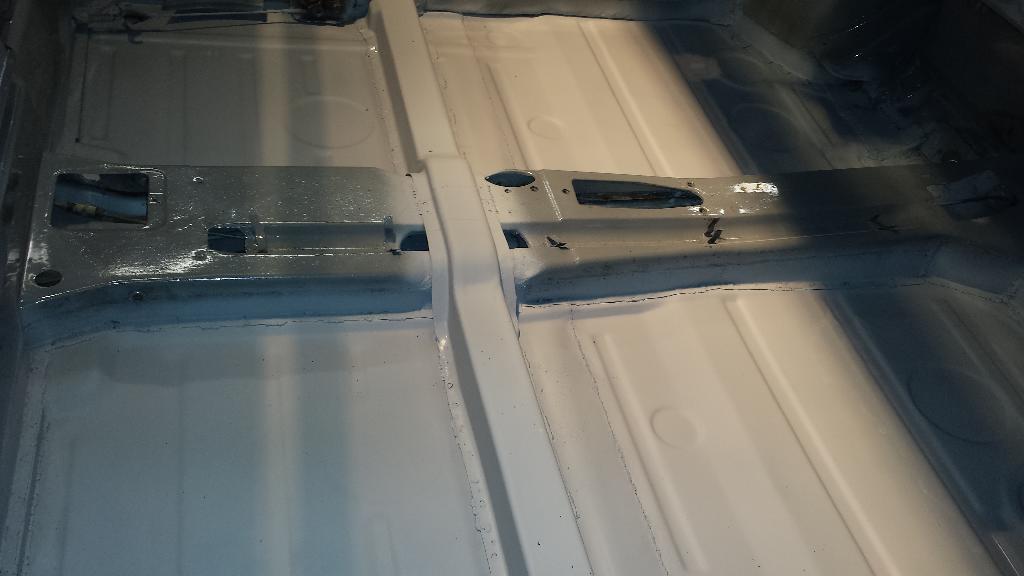
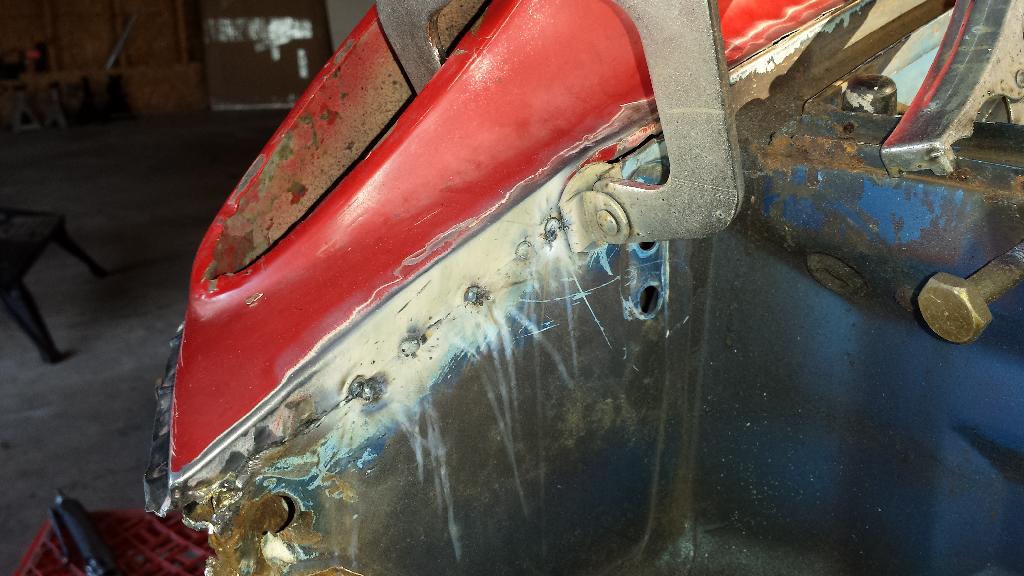
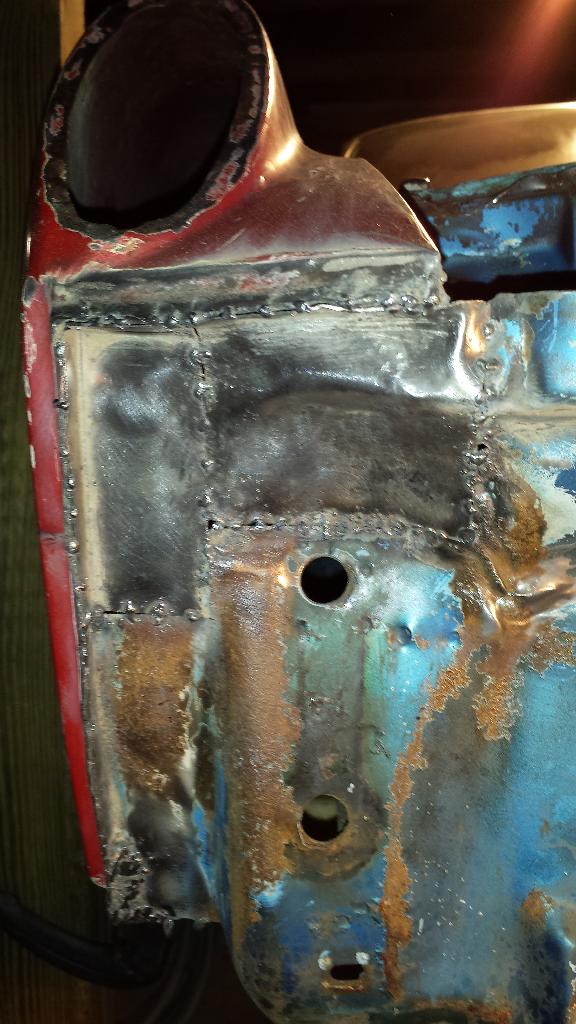
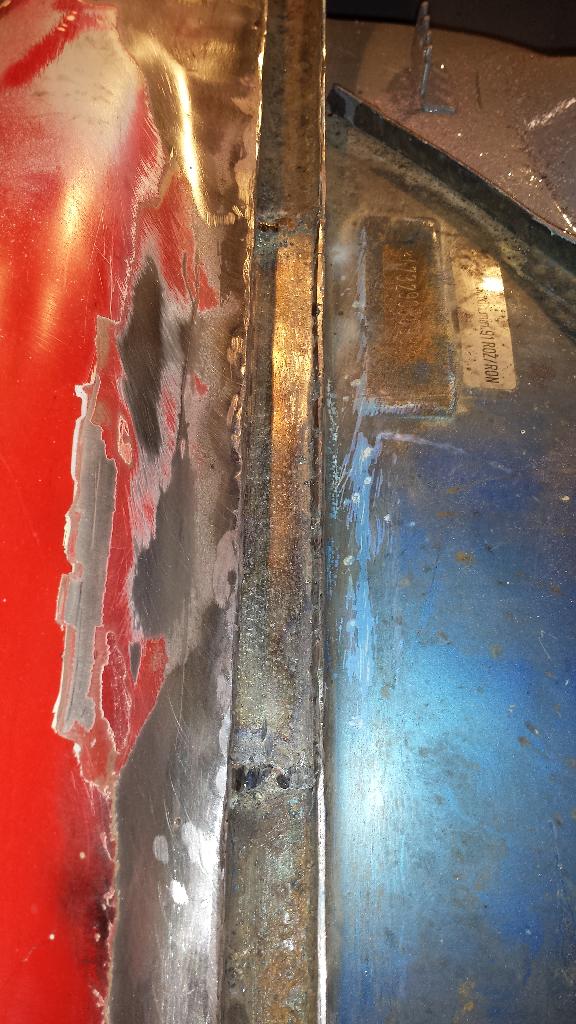
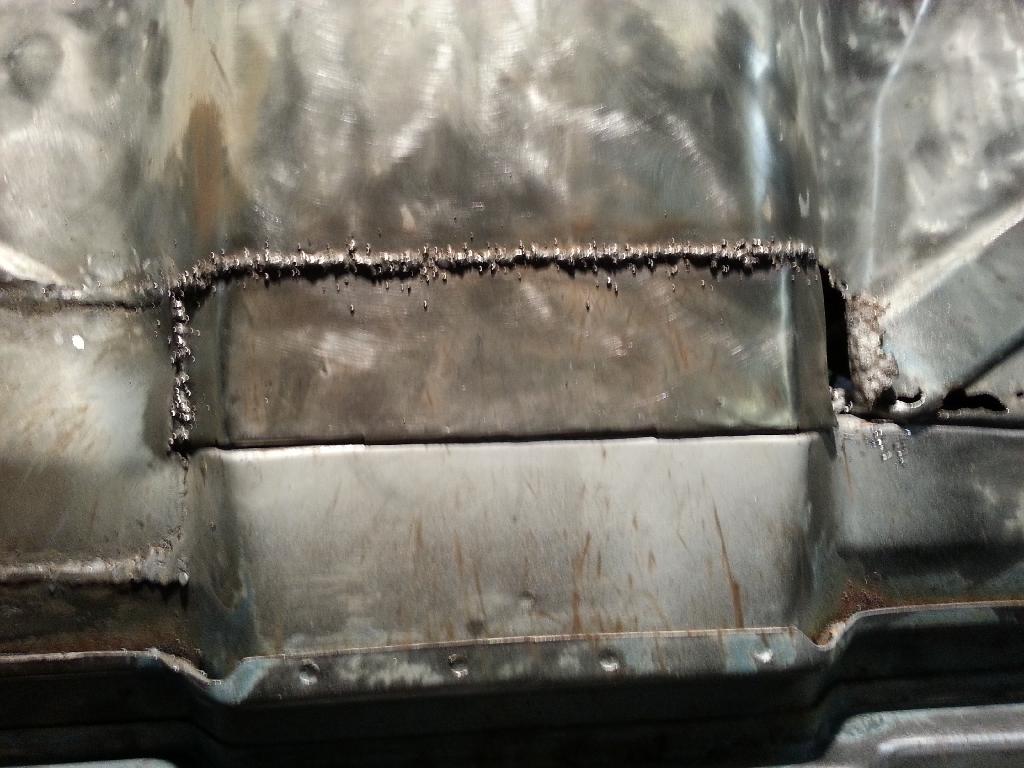
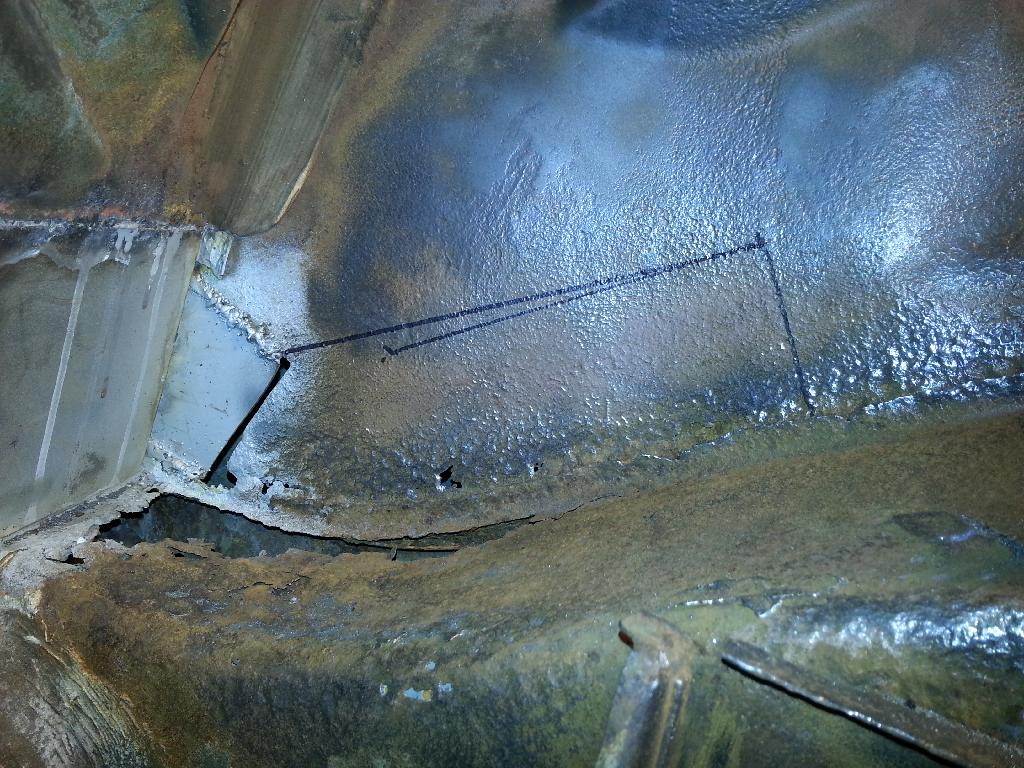
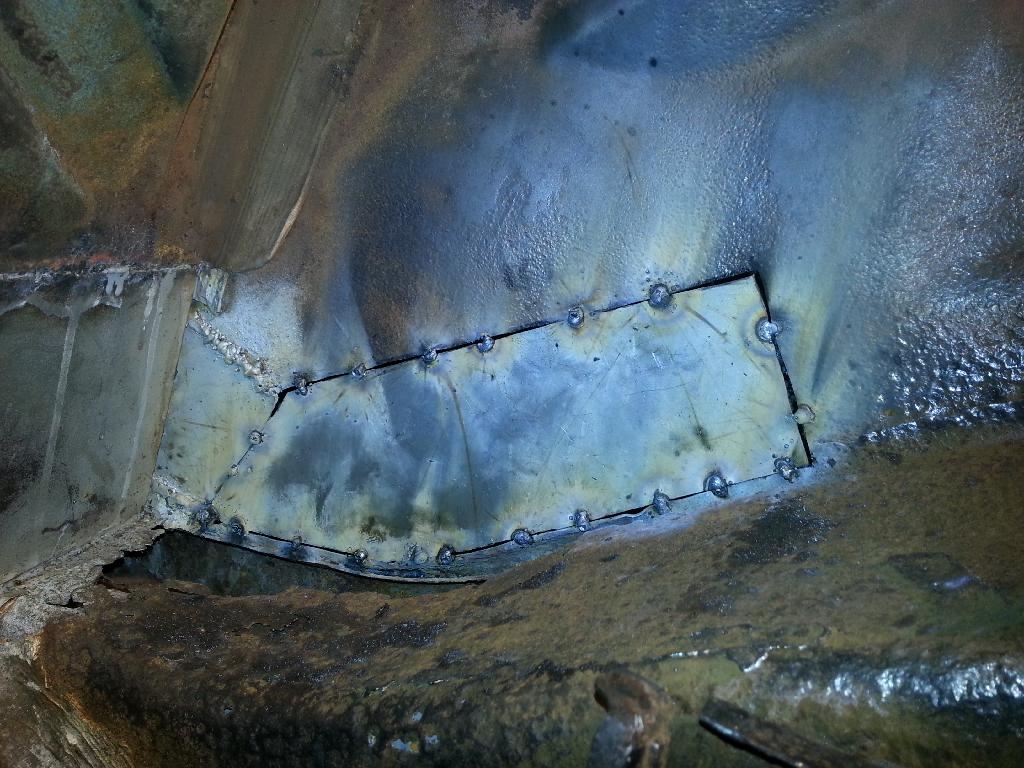
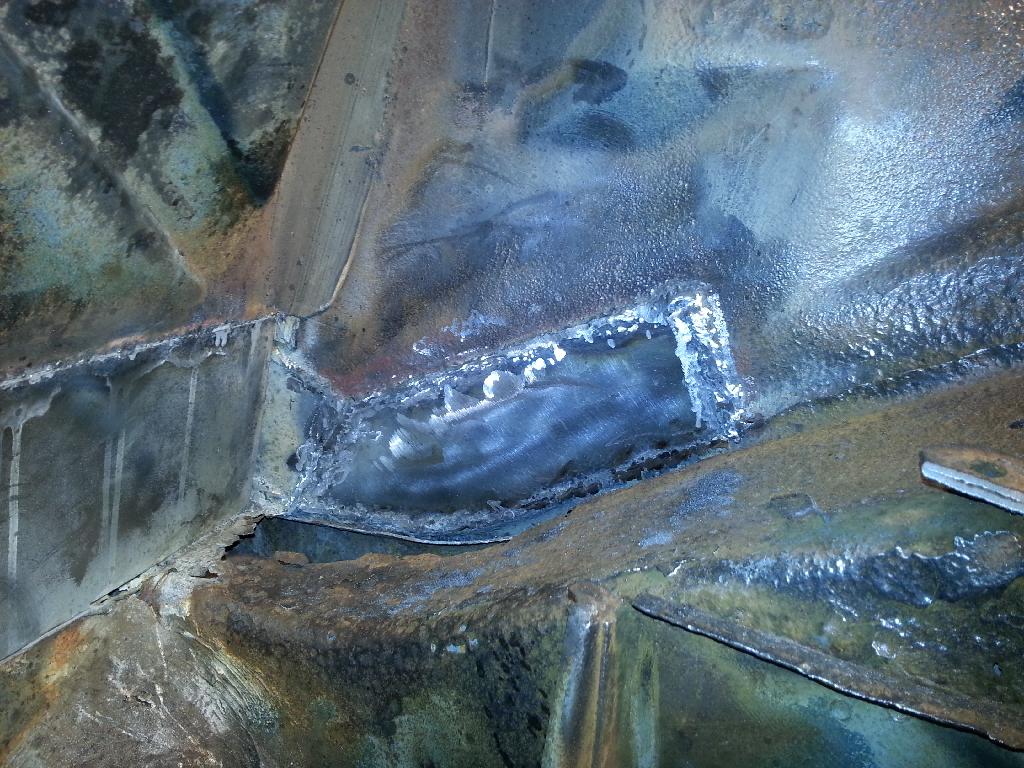
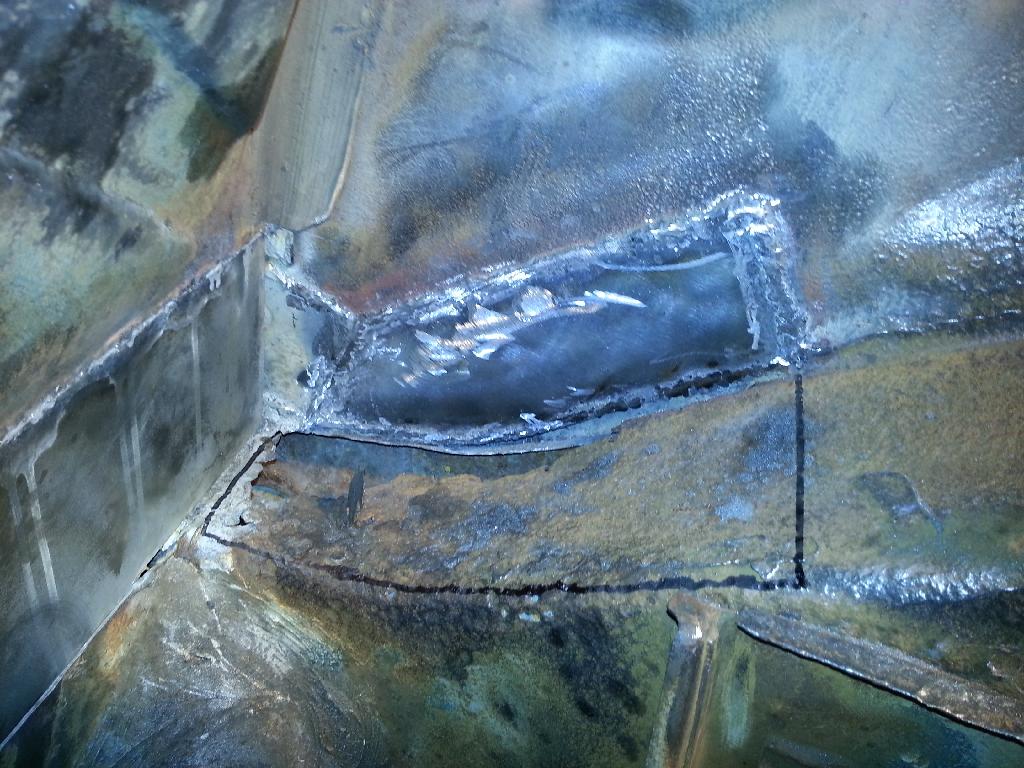
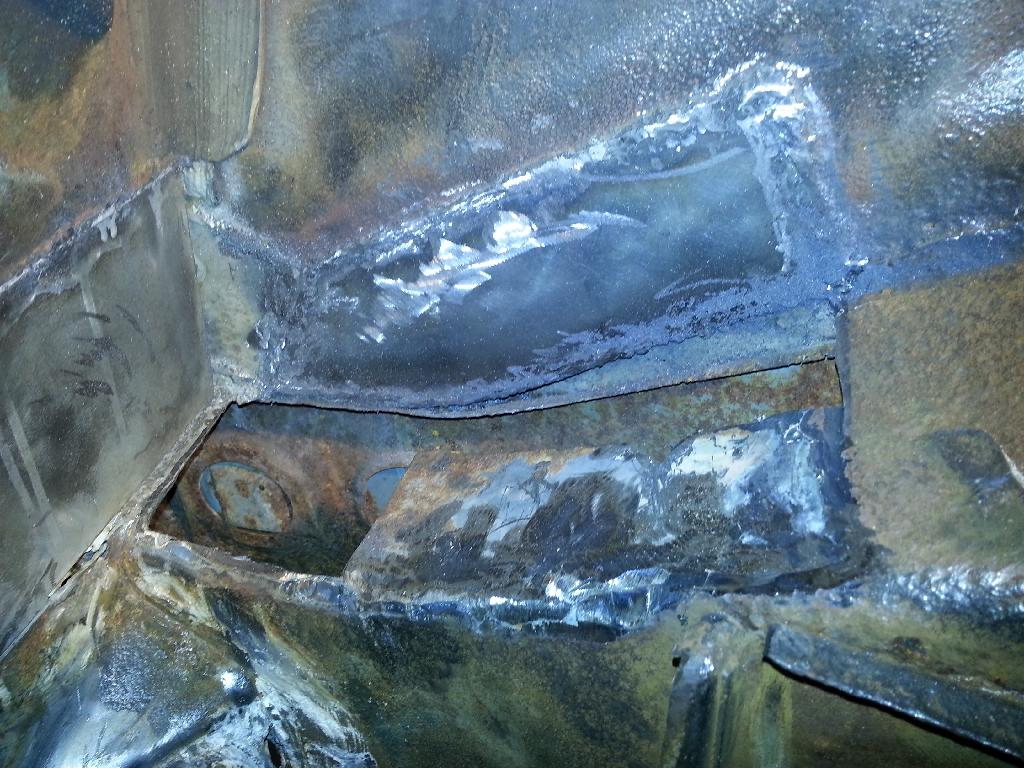
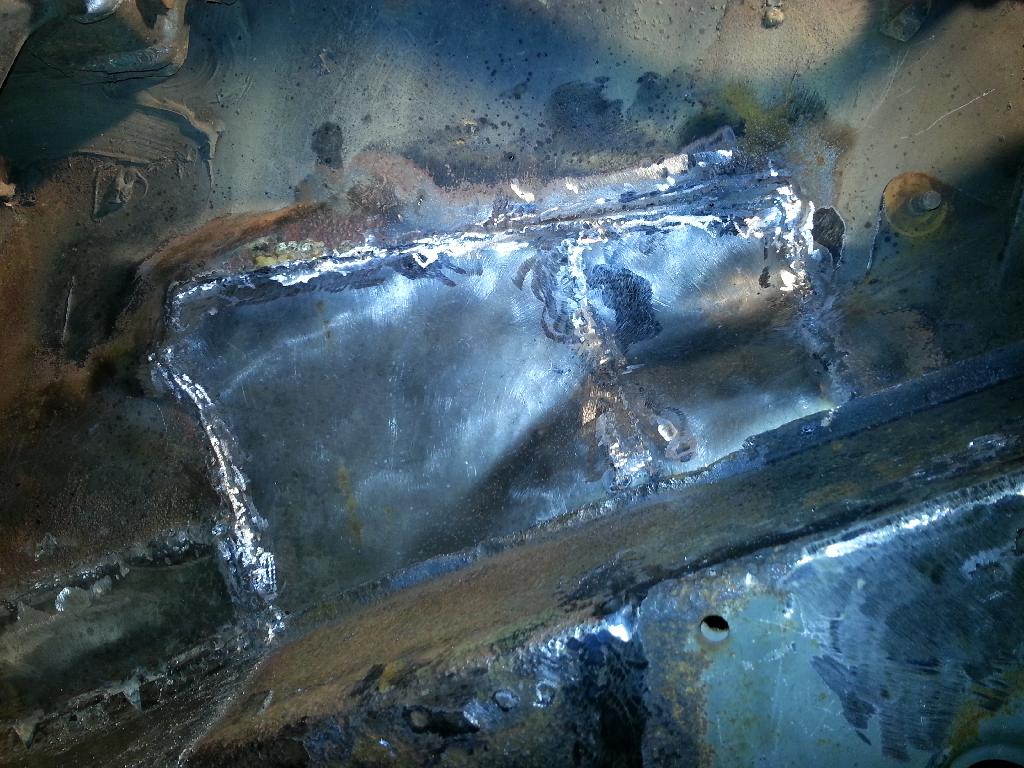
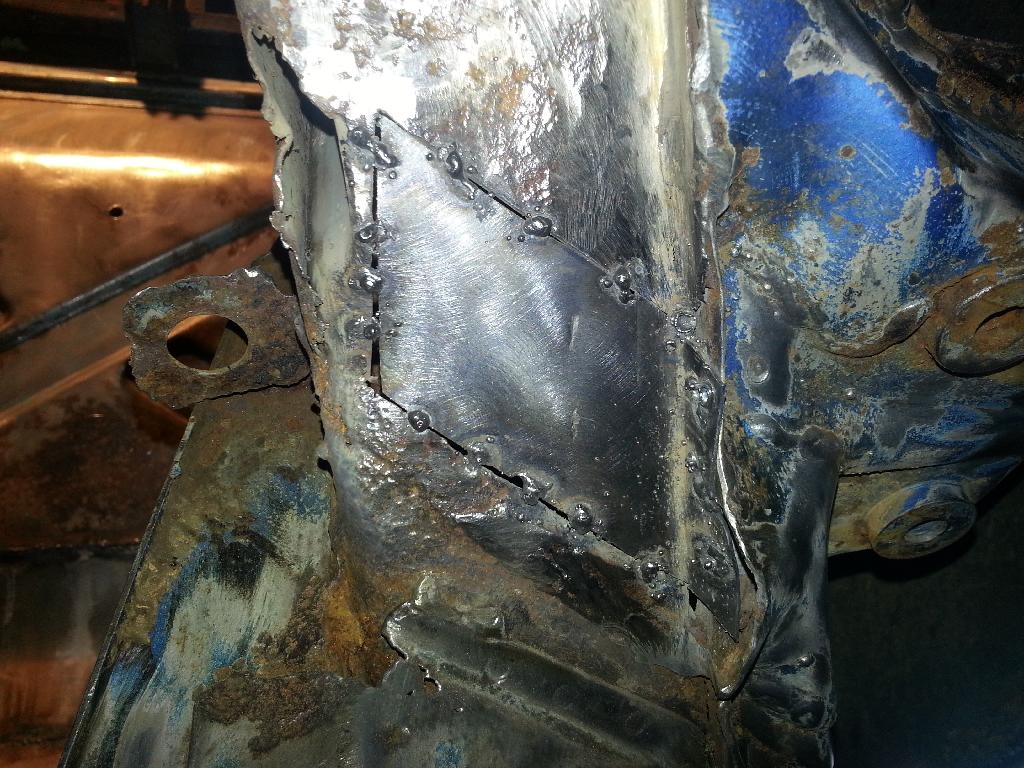
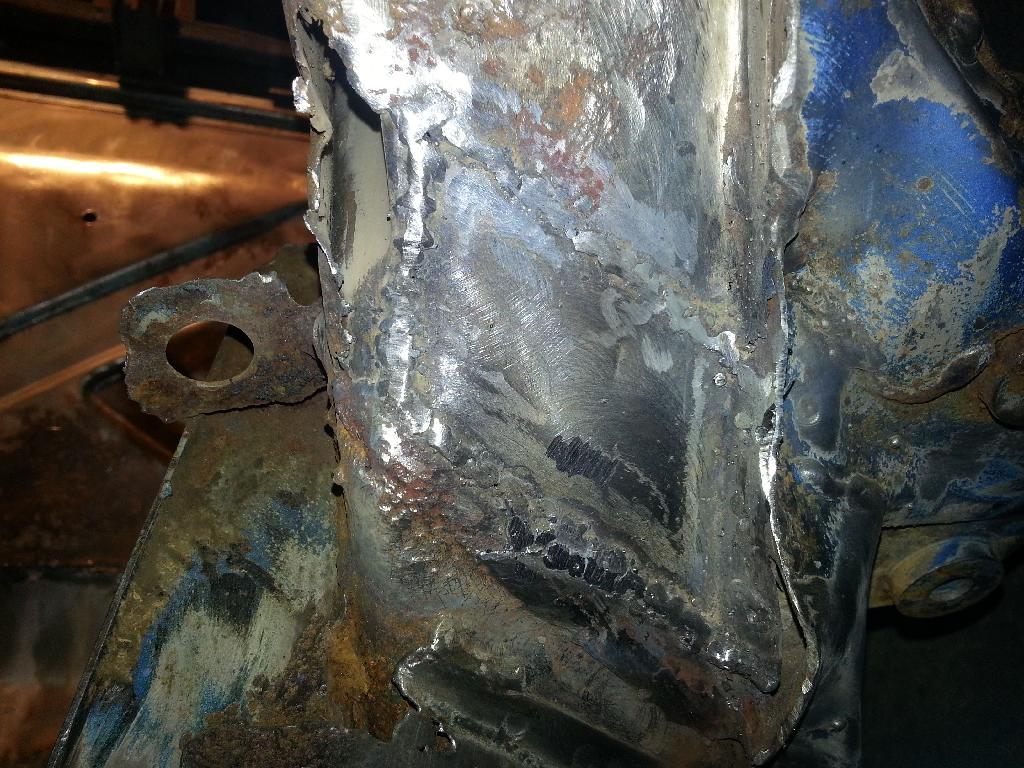
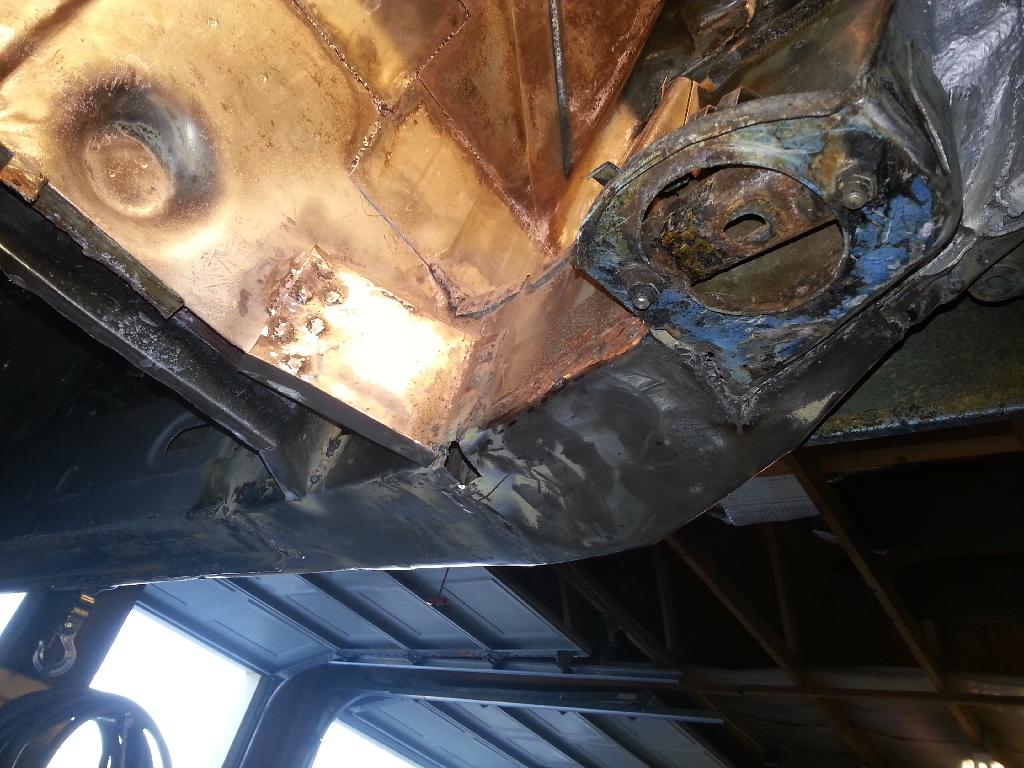
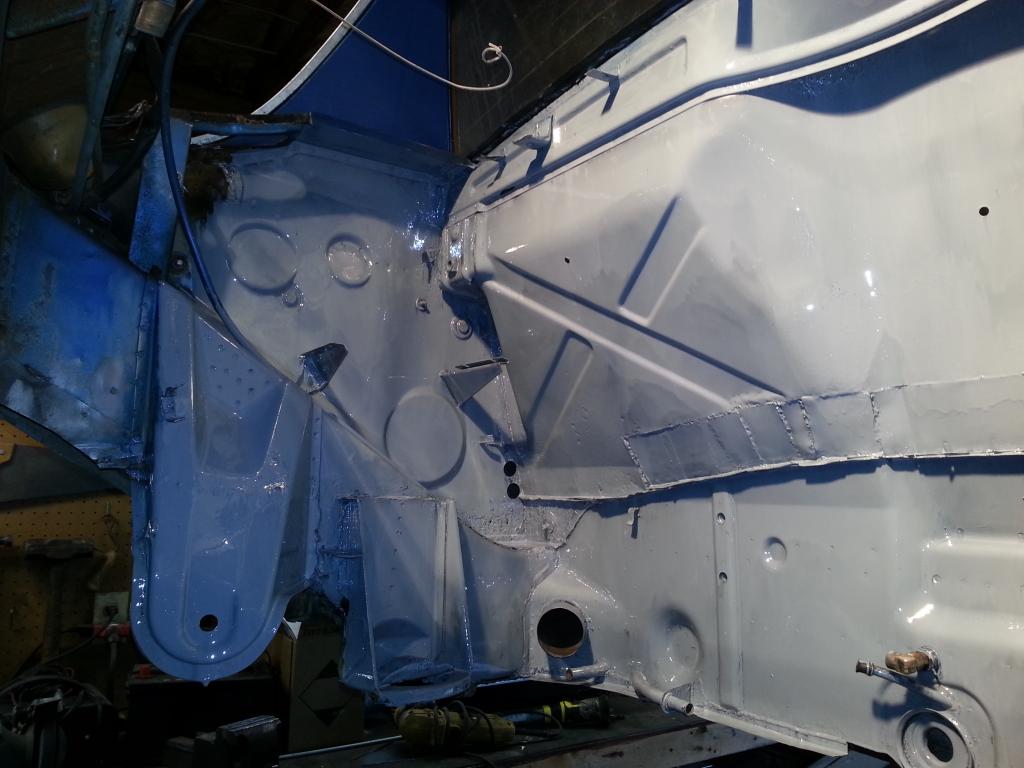
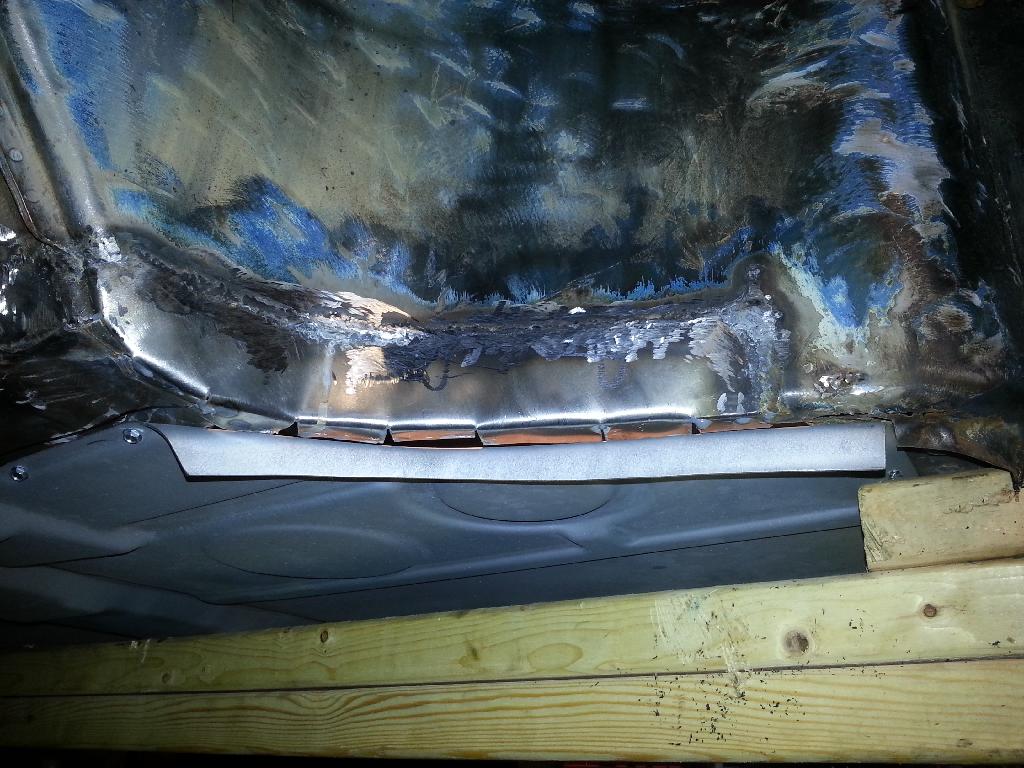
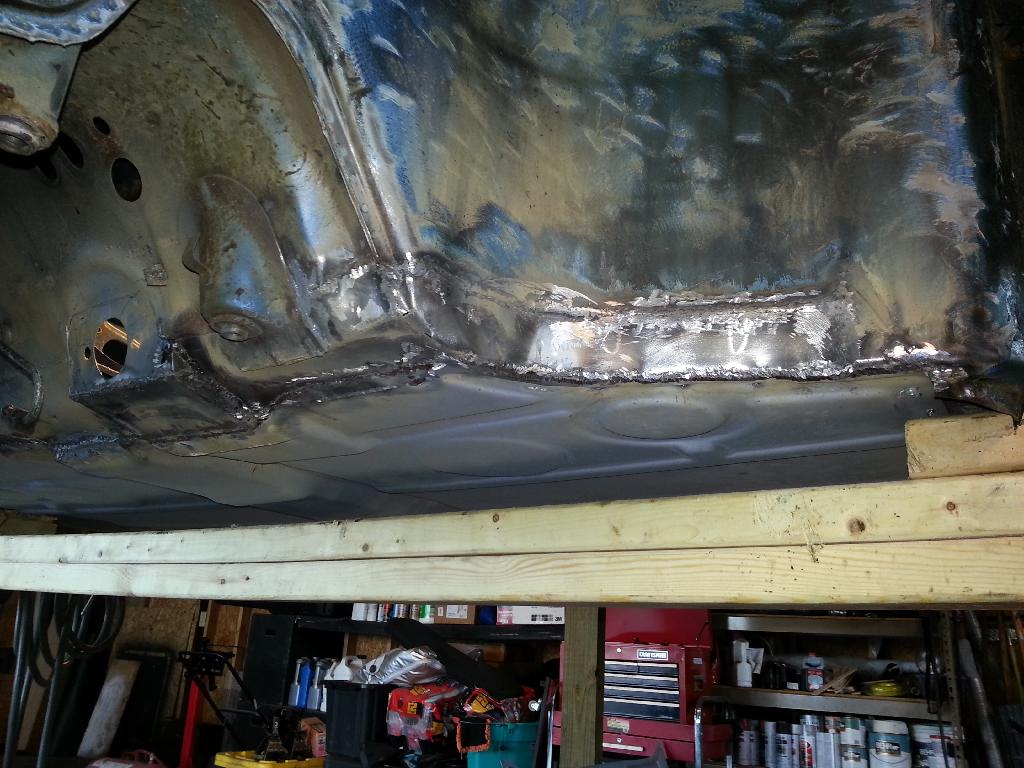
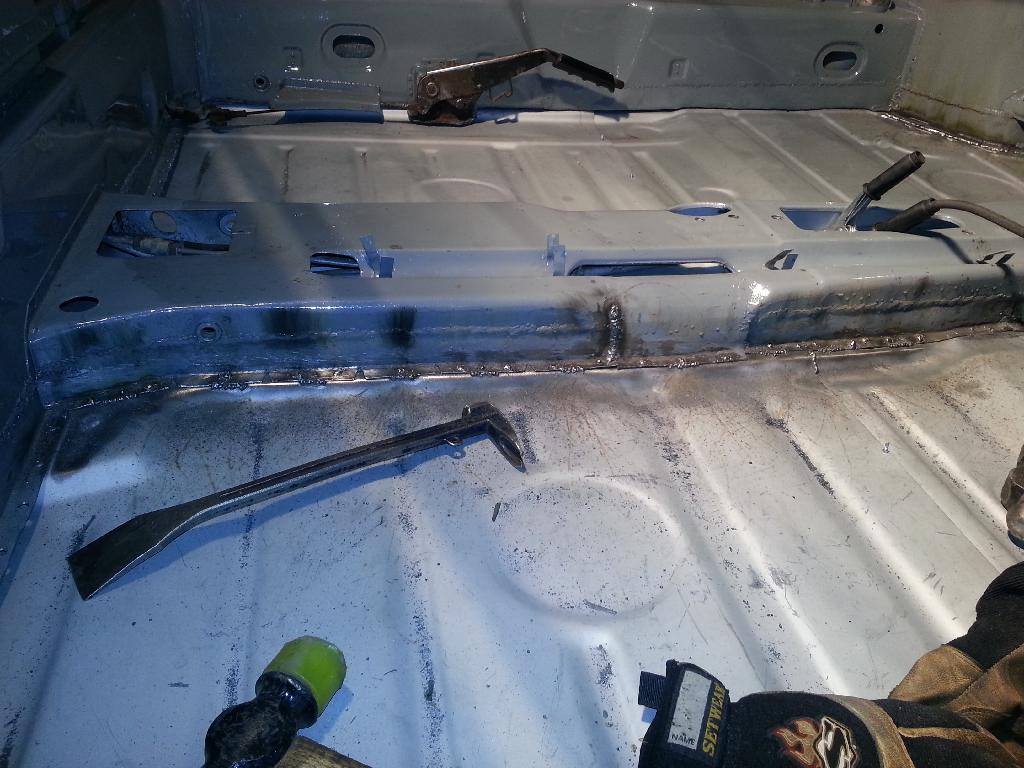
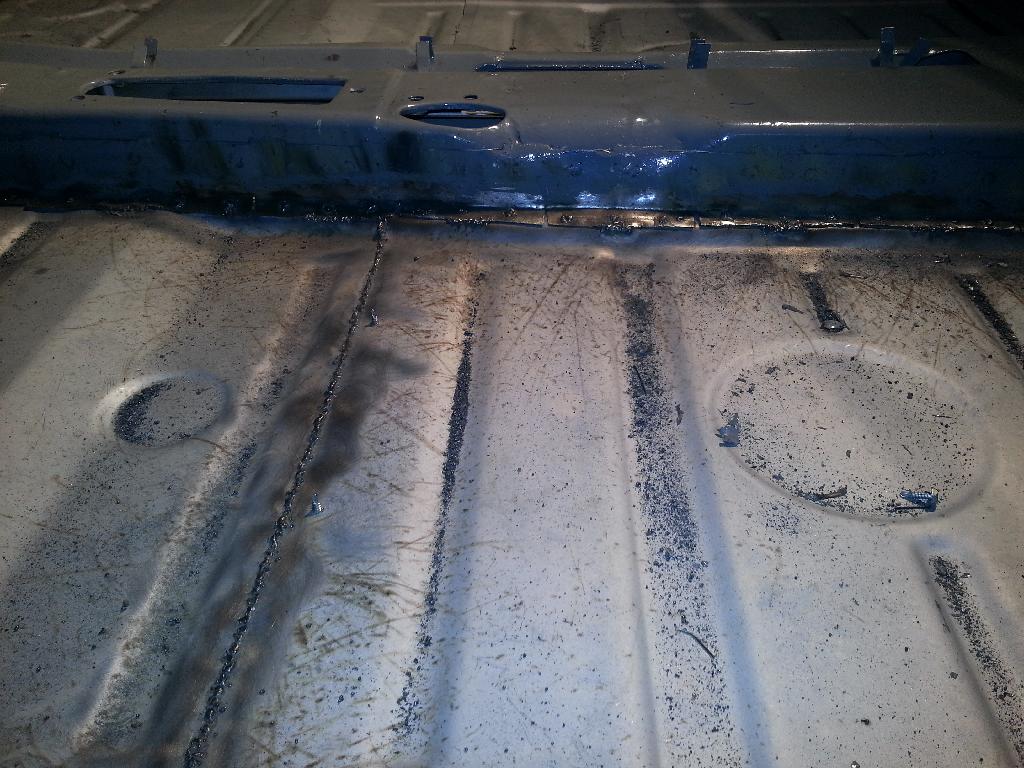
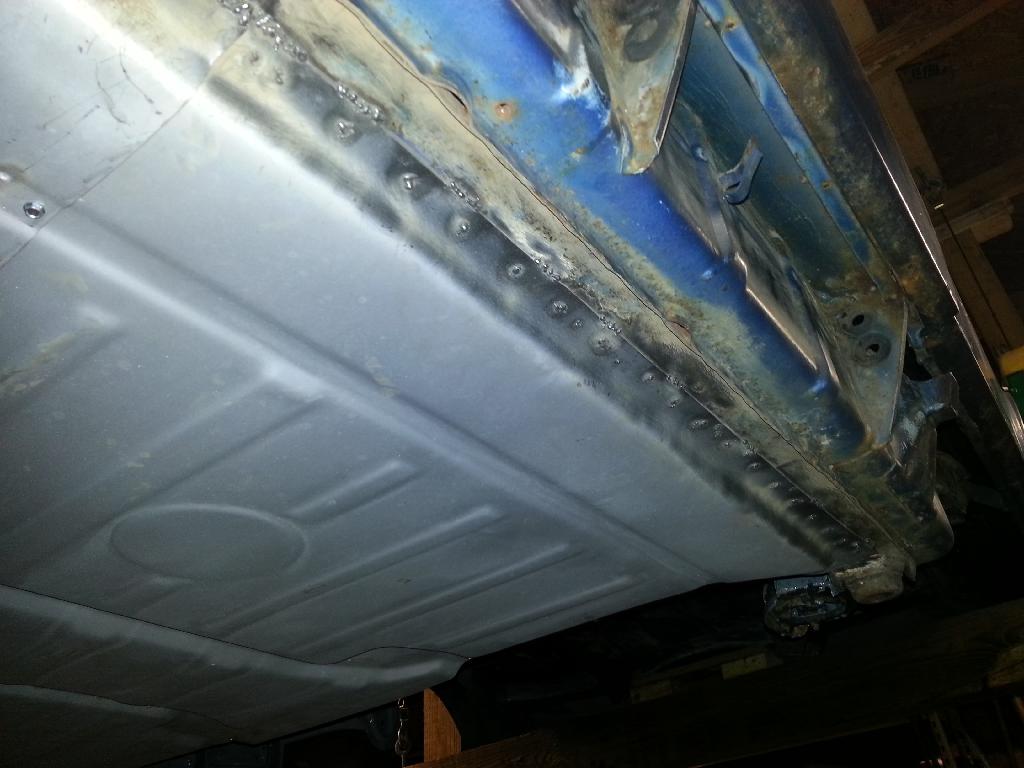
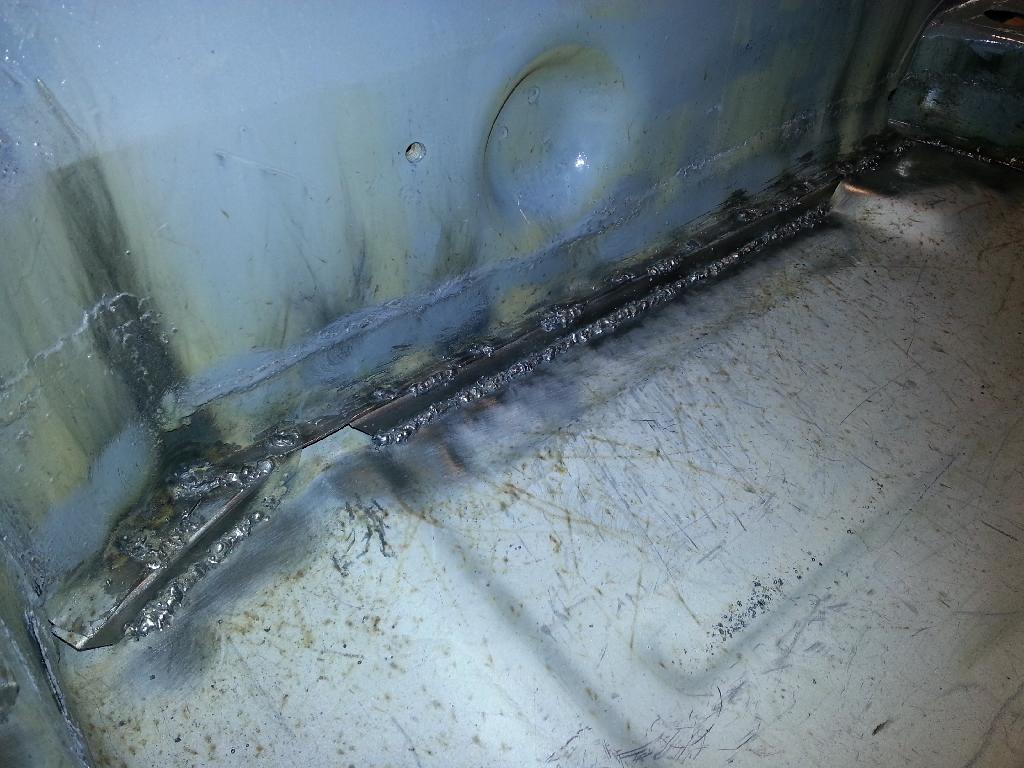
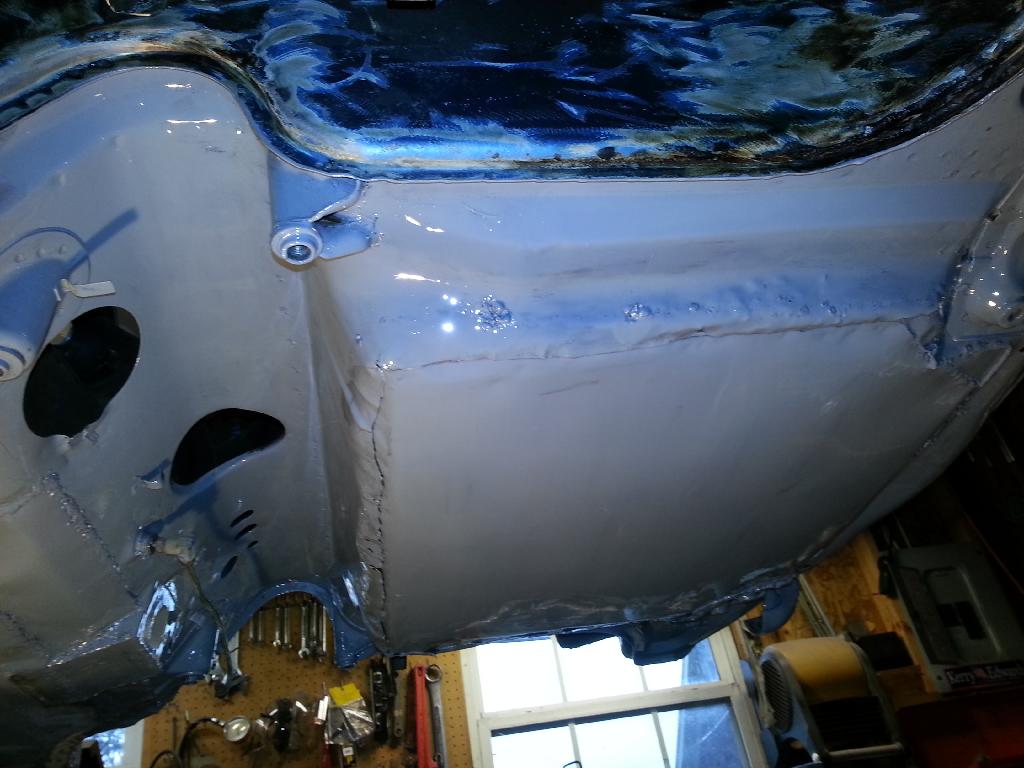
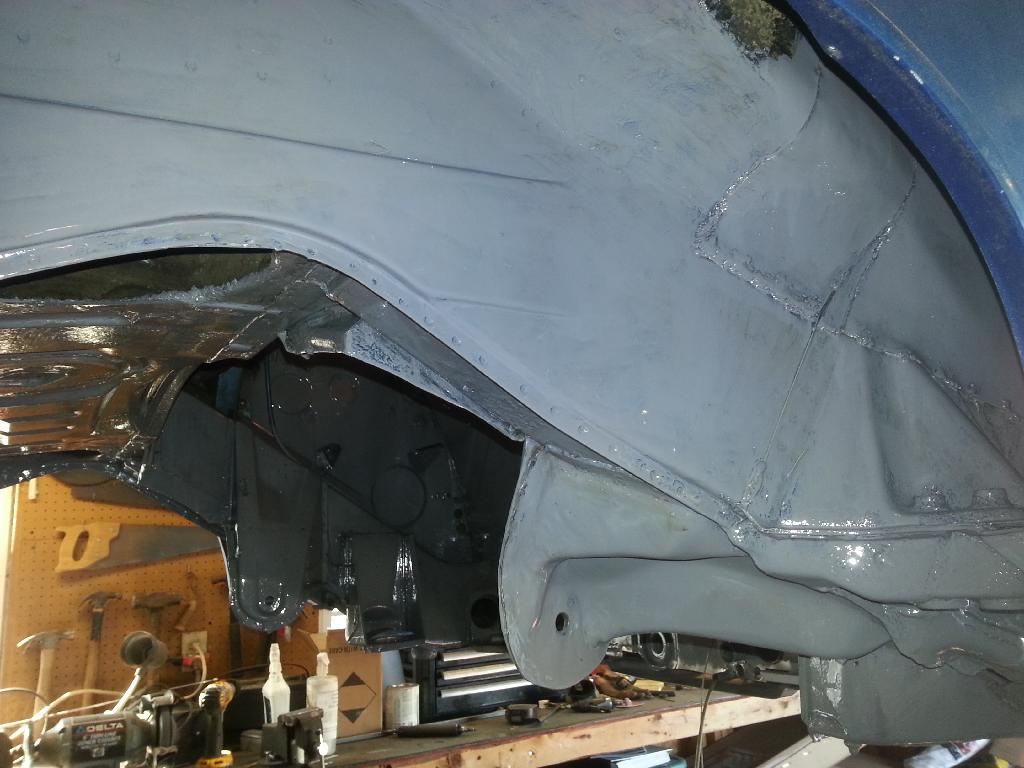
I had already drilled the console for spot welds on the sides, top and bottom. The only place you can't get spot welds is down the long seam under the long but after spot welding (and checking the jig repeatedly) I followed up with seam welds along all sides.

IPB Image

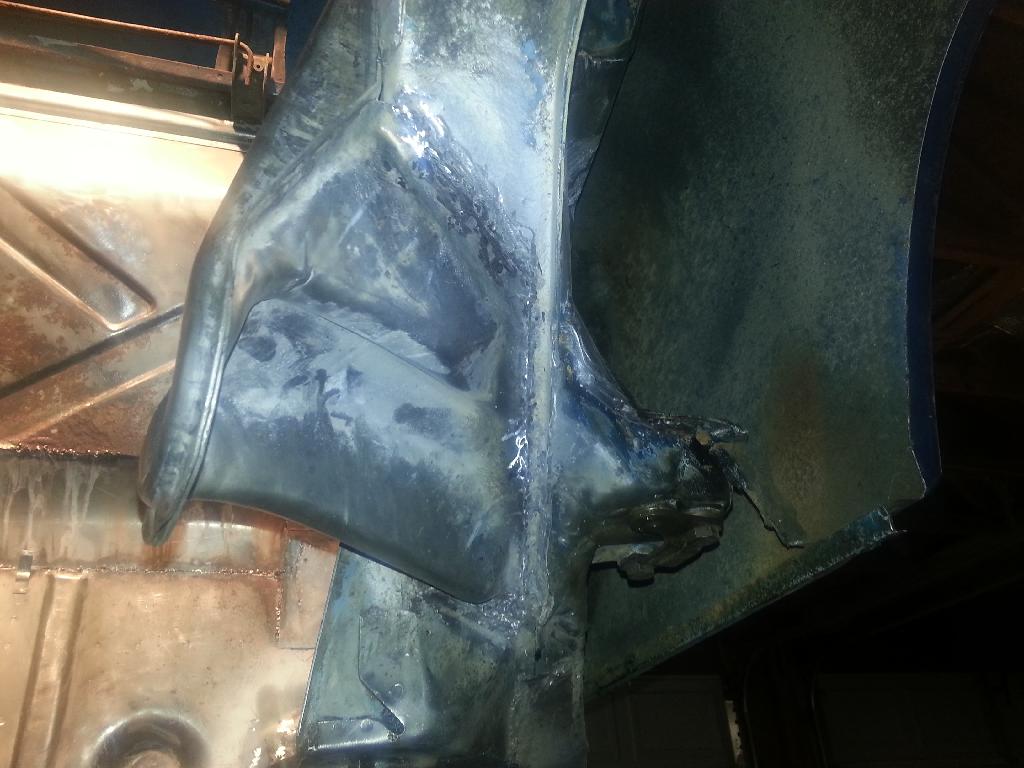
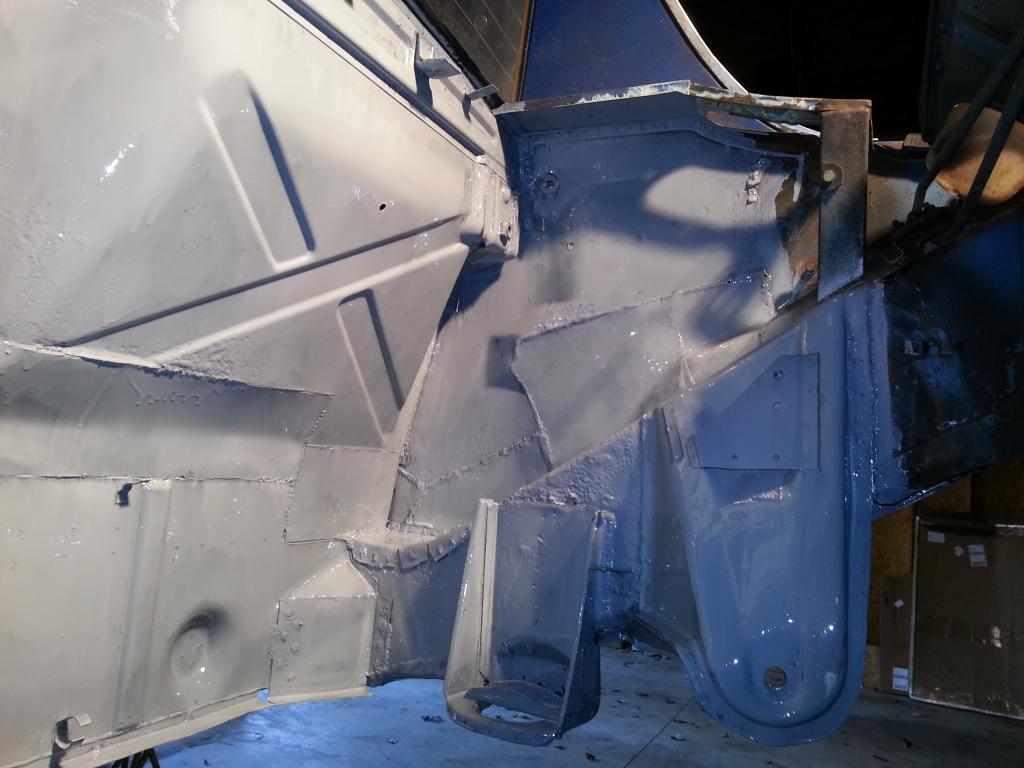
Although not a perfect alignment tool, I believe this jig got me well within the tolerances for good rear alignment. With how the RD suspension console is made - I think the deficiencies of elevation are not a factor. It would be really hard to change the elevation without effecting the other dimensions. I guess I'll find out when I get the suspension and wheels back on this joker.
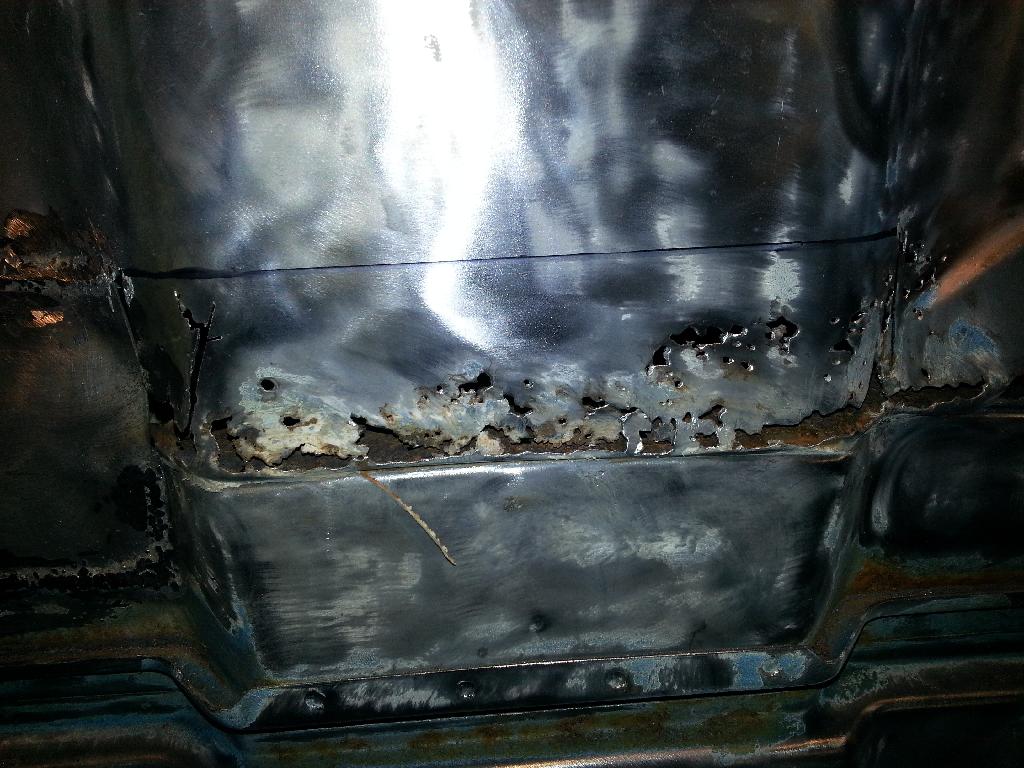
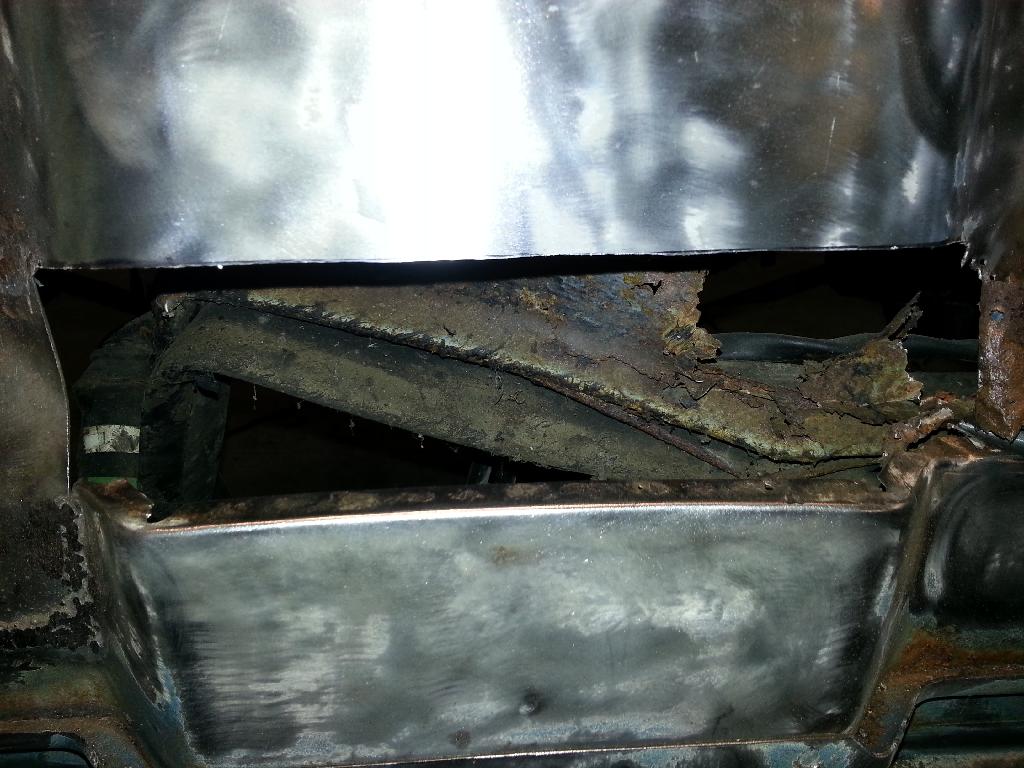
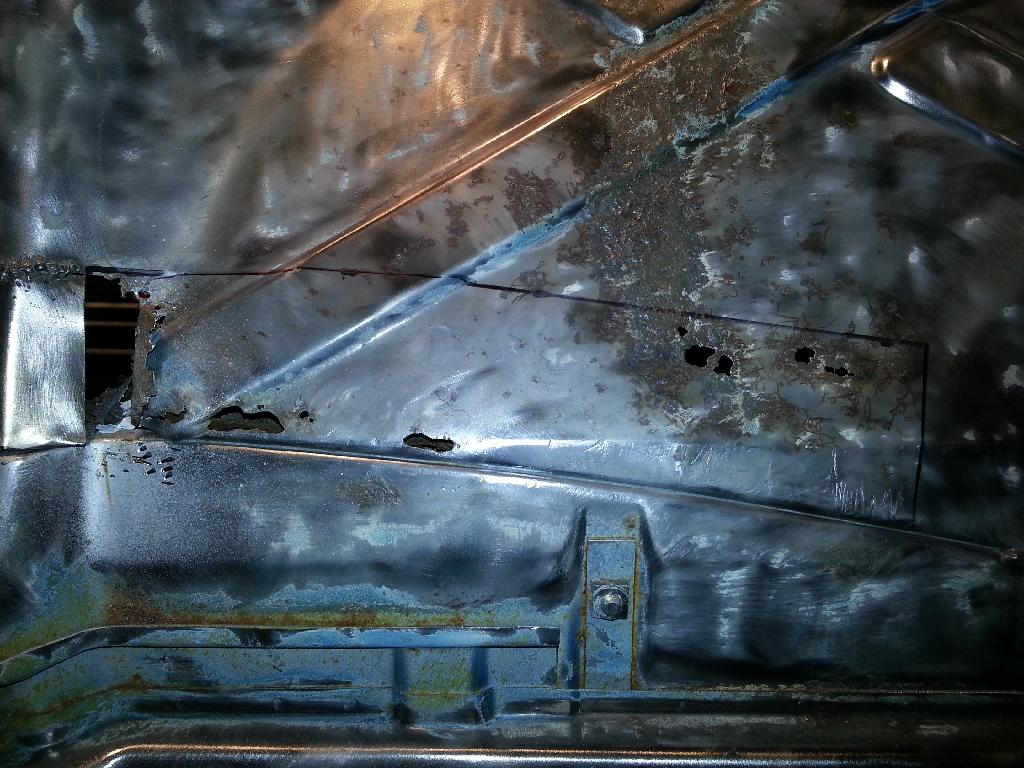
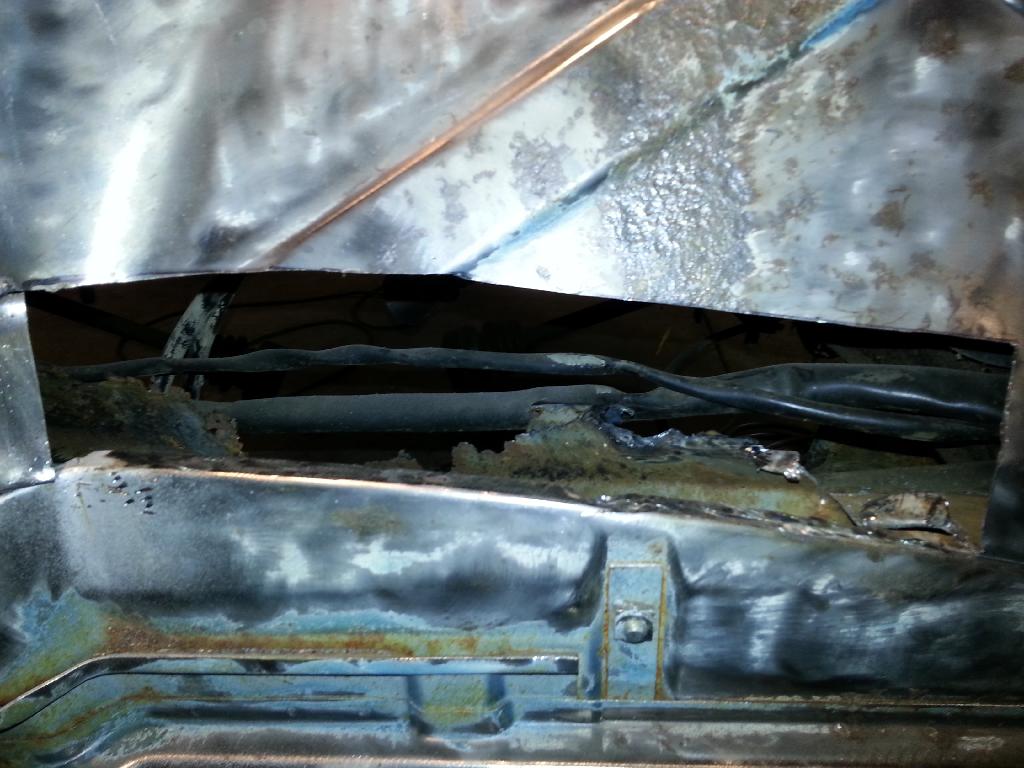
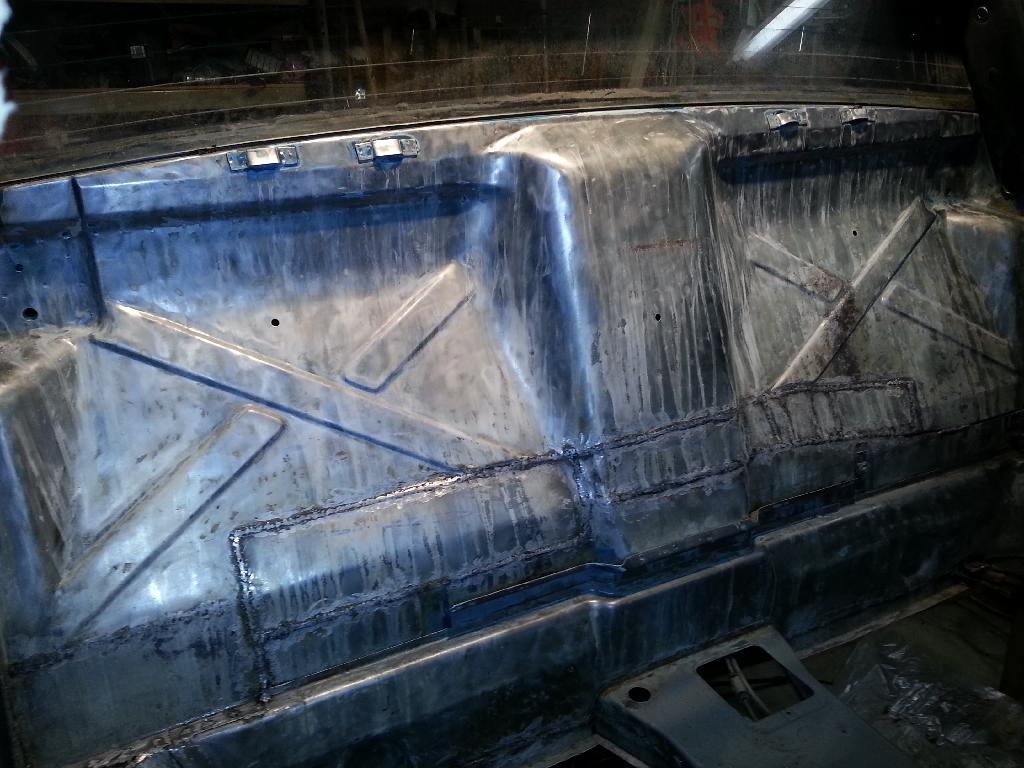
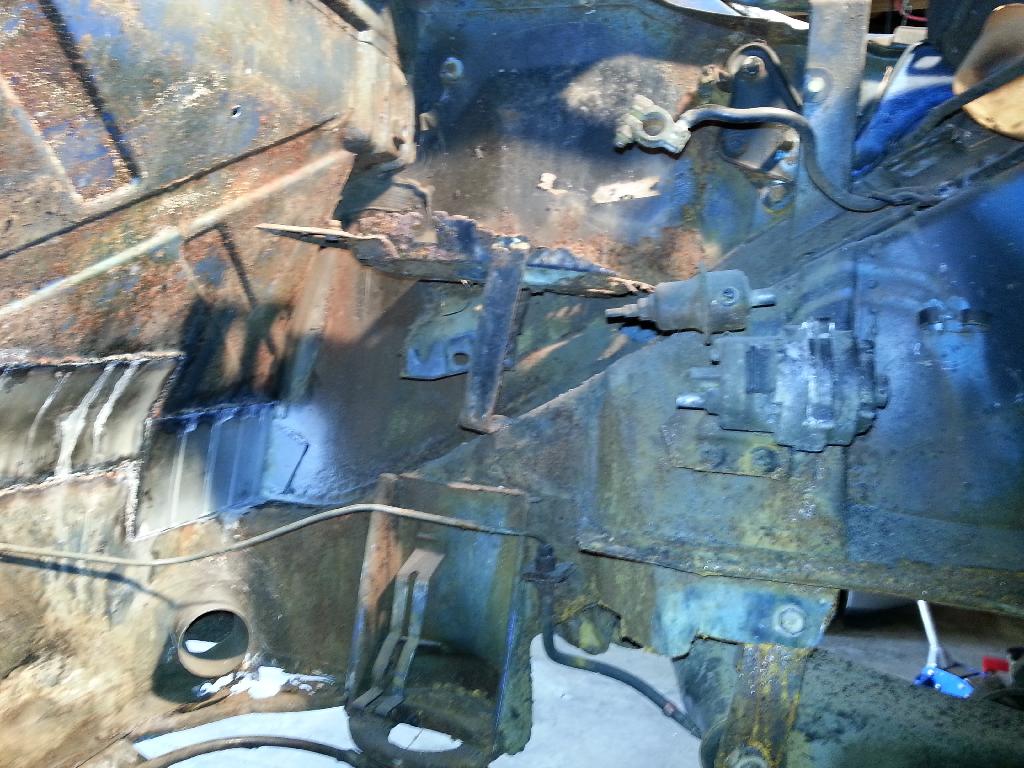
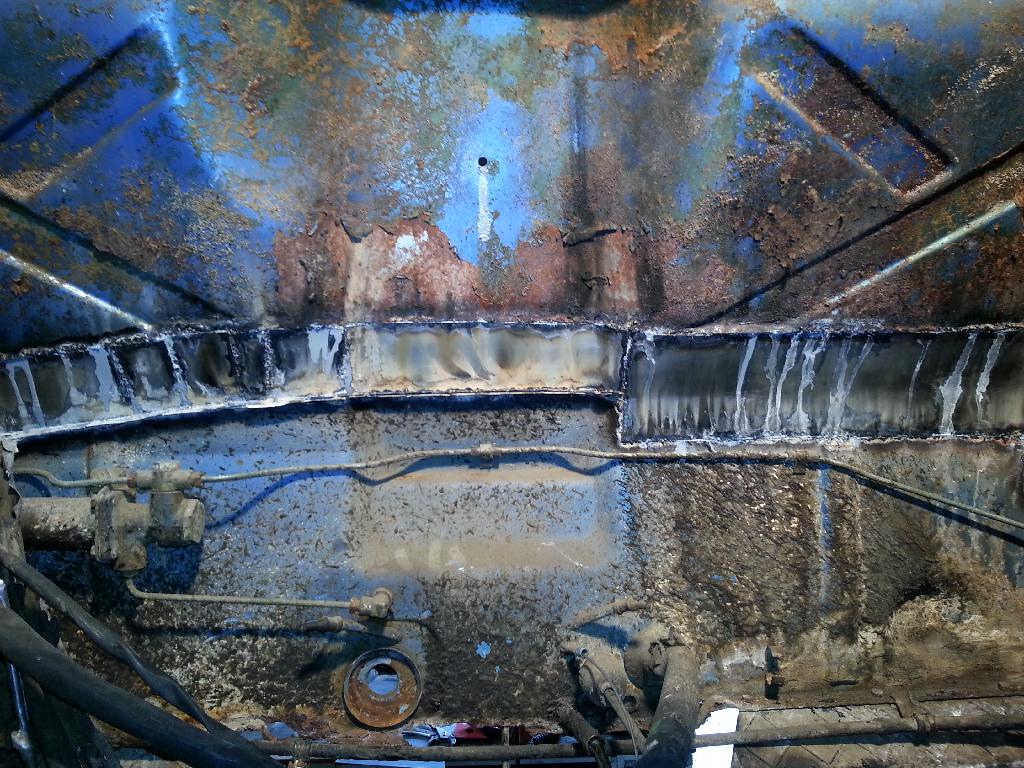
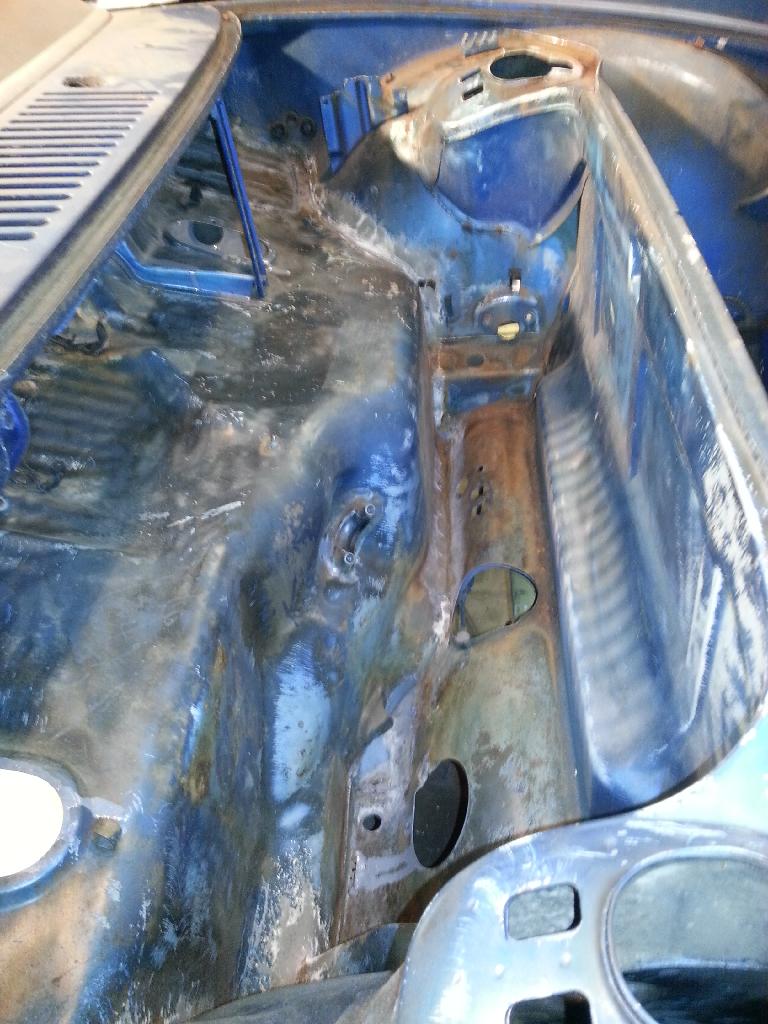
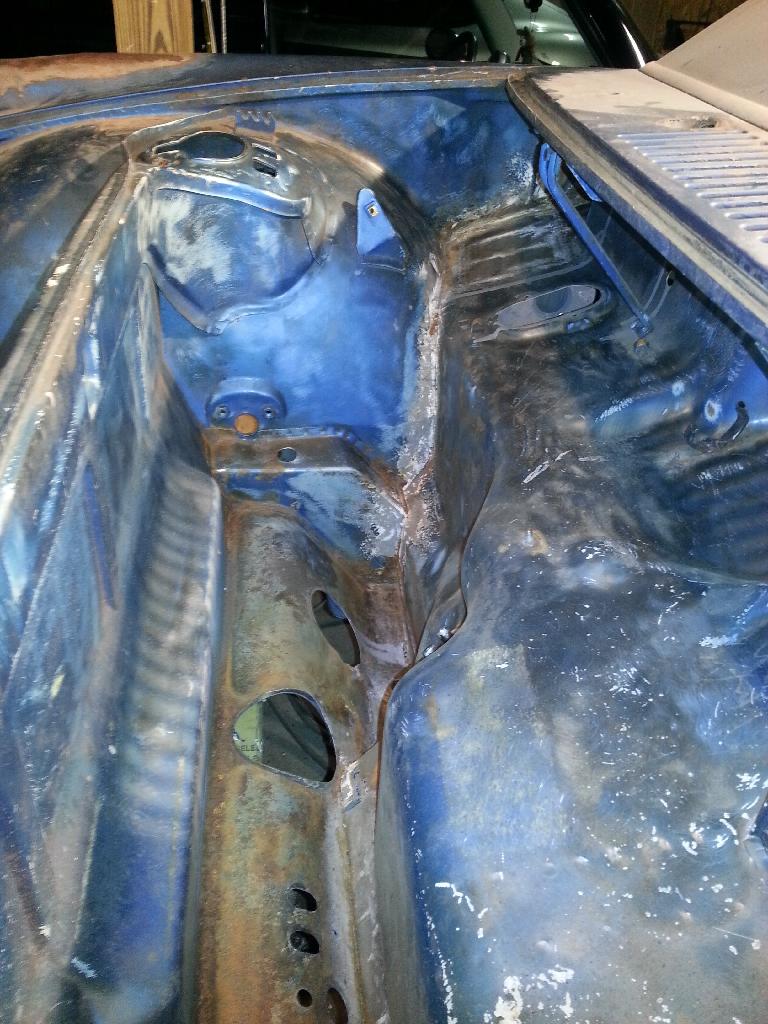
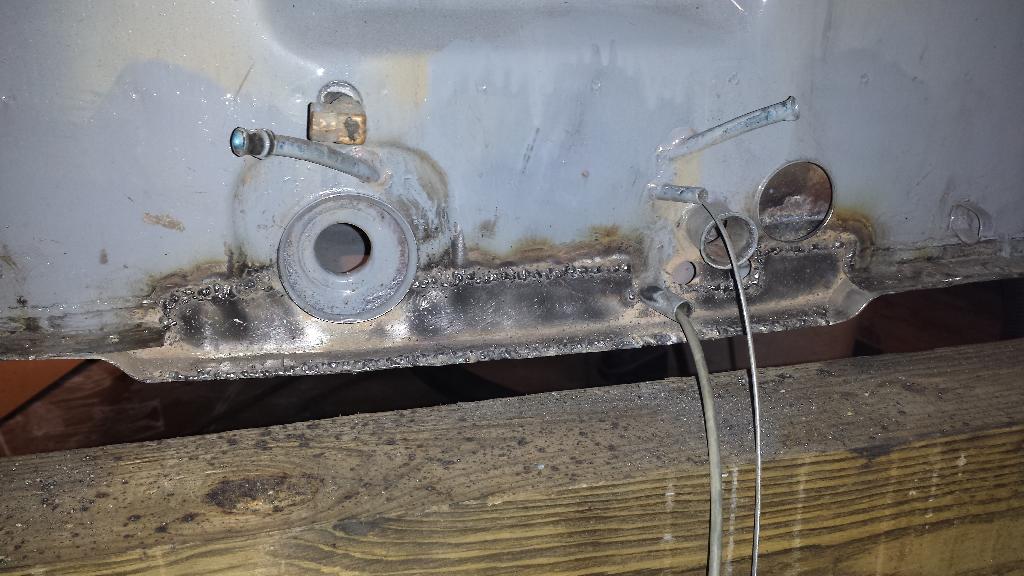
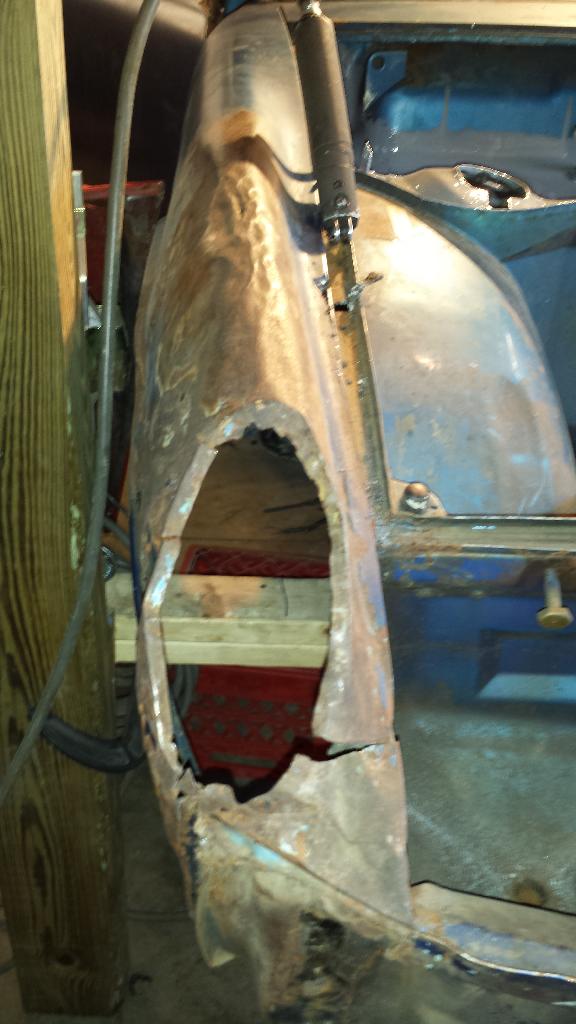
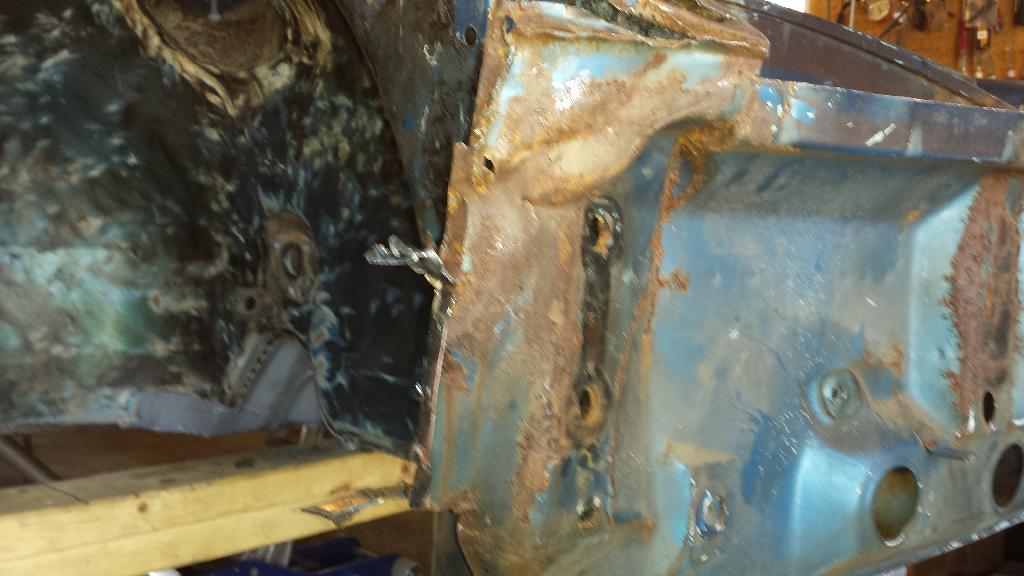
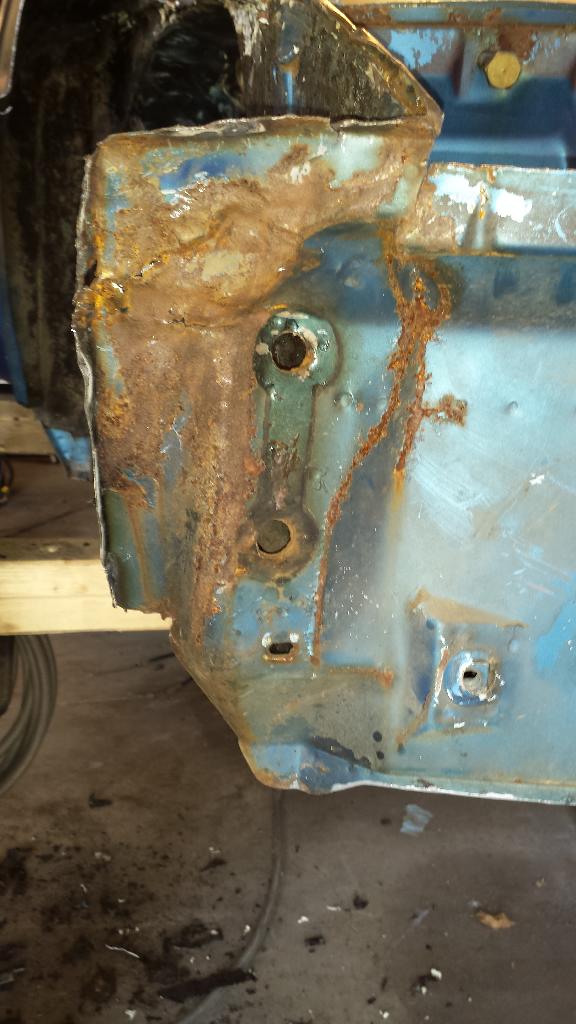
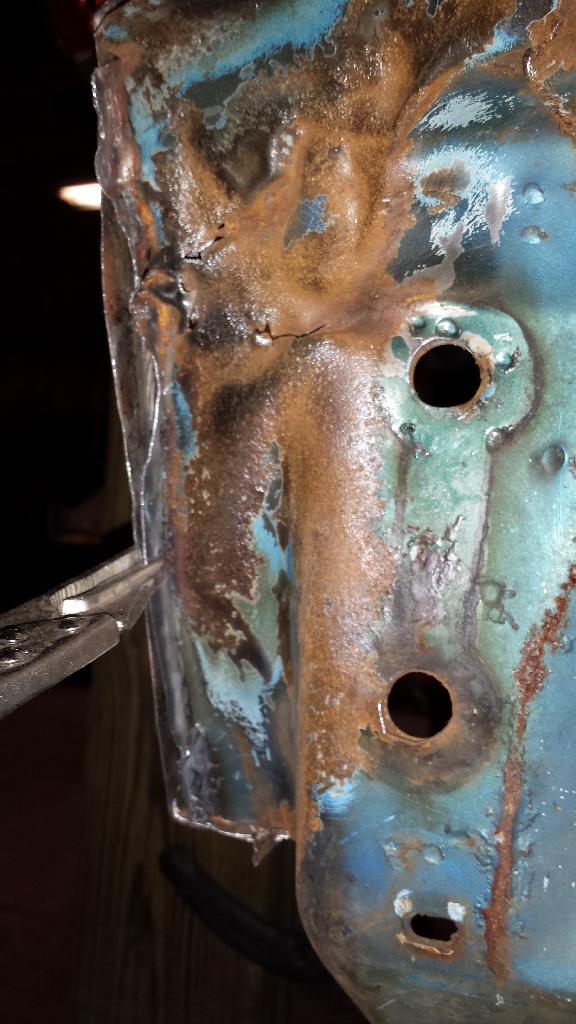
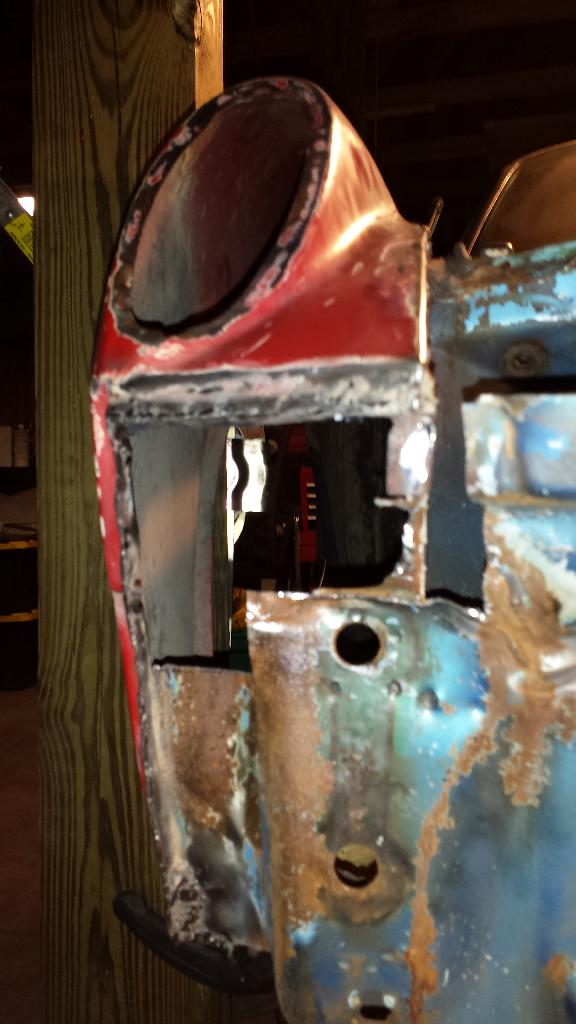
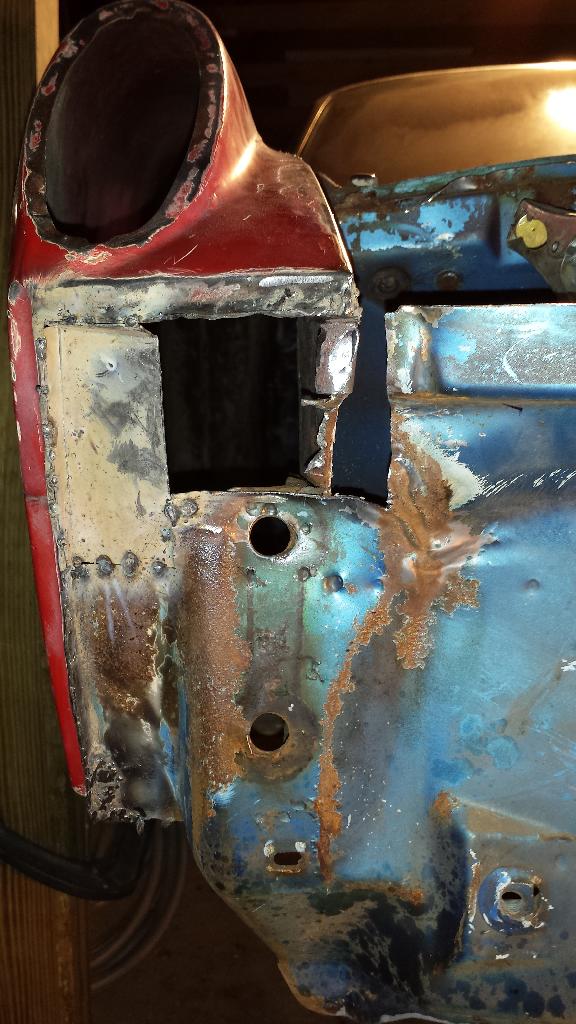
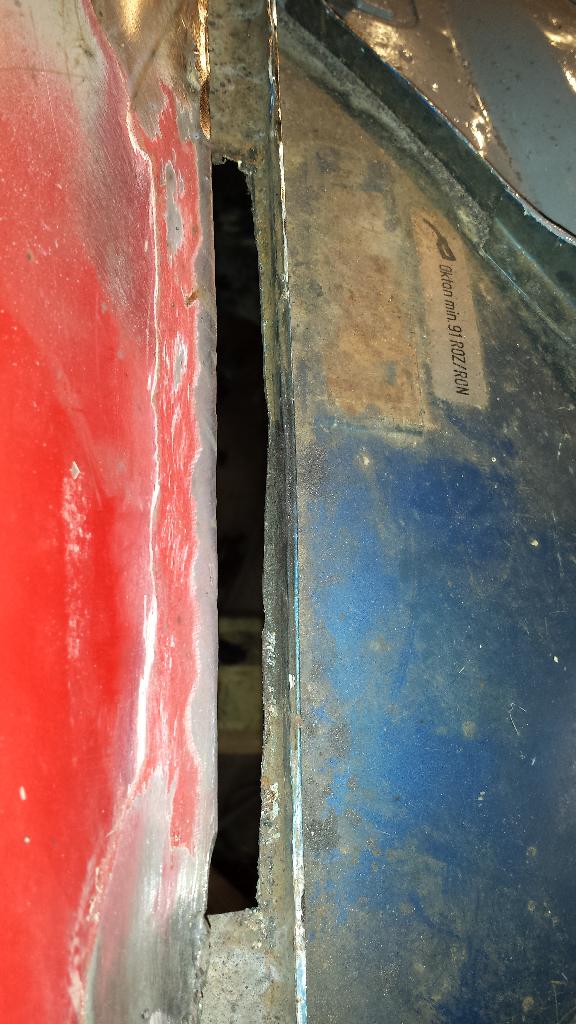
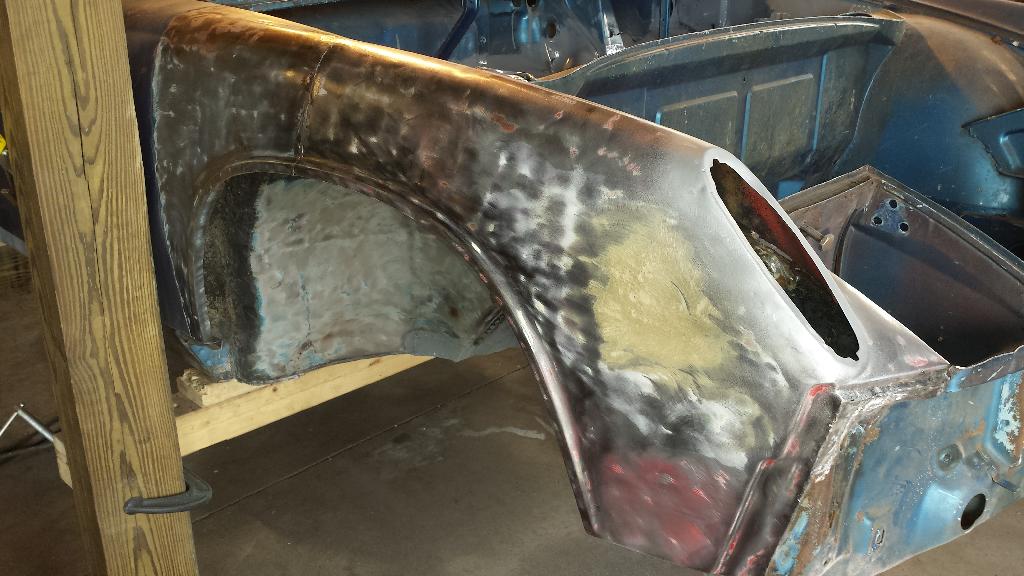
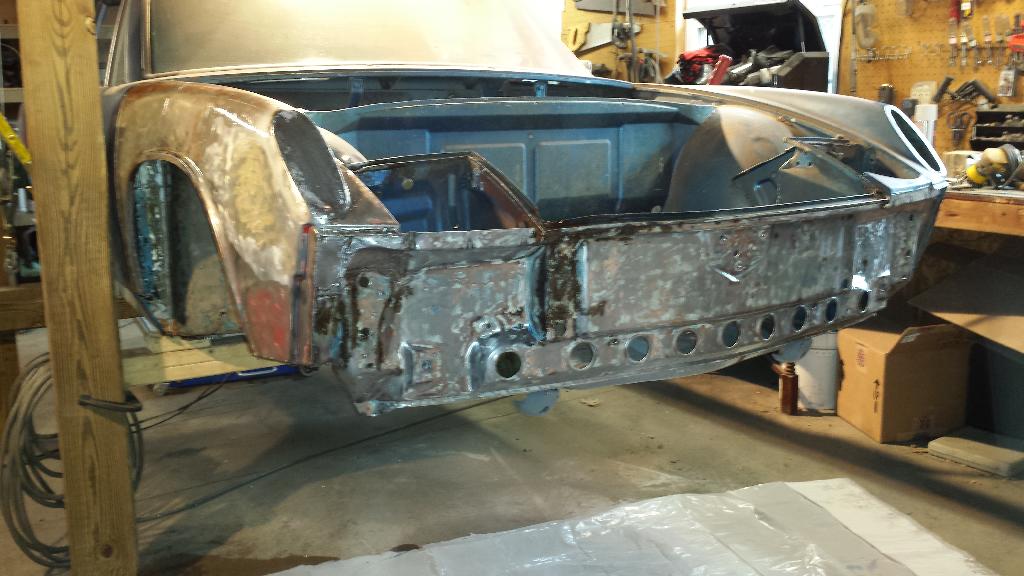
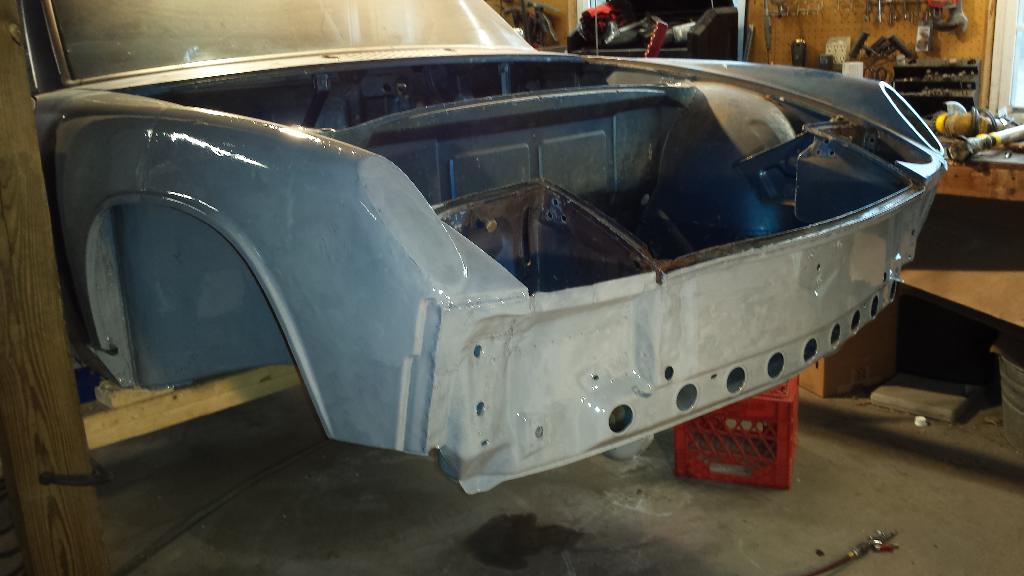
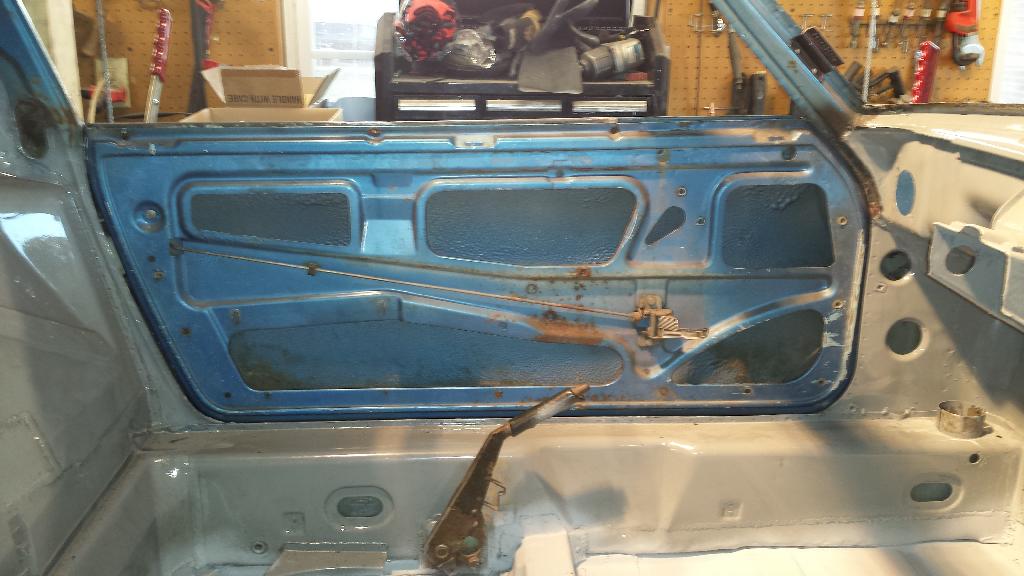
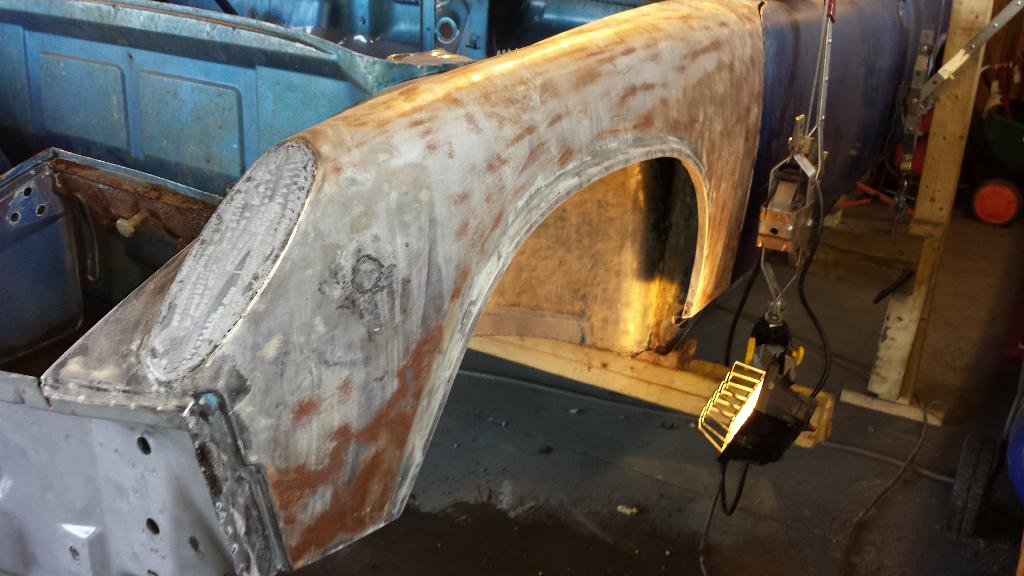
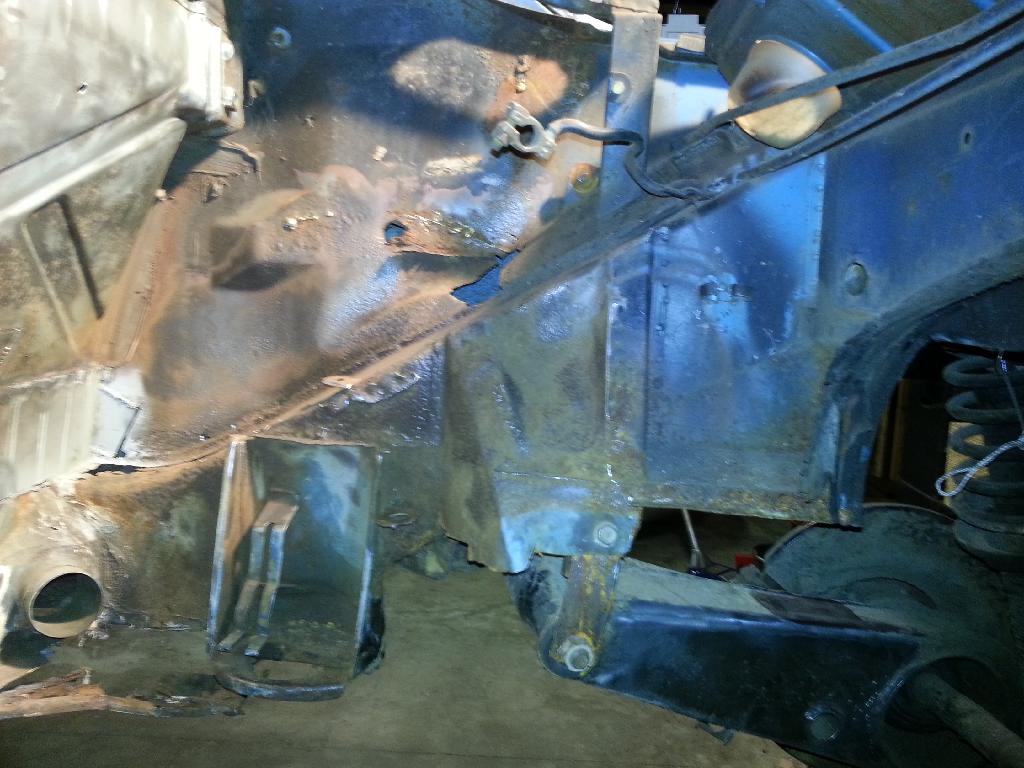
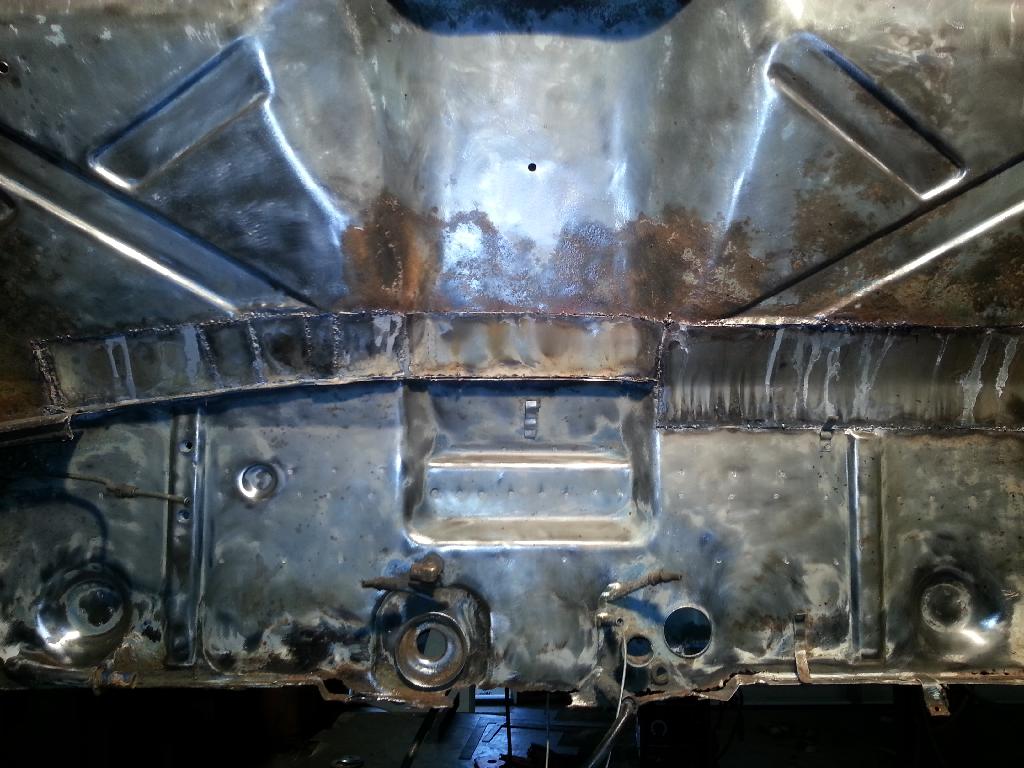
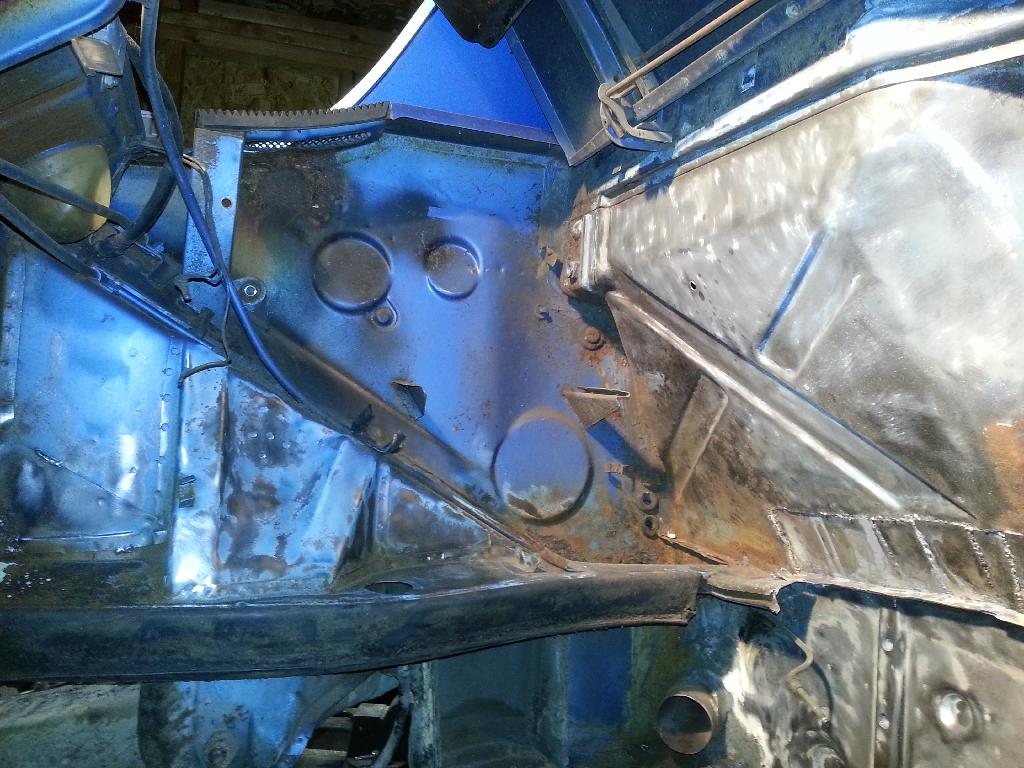
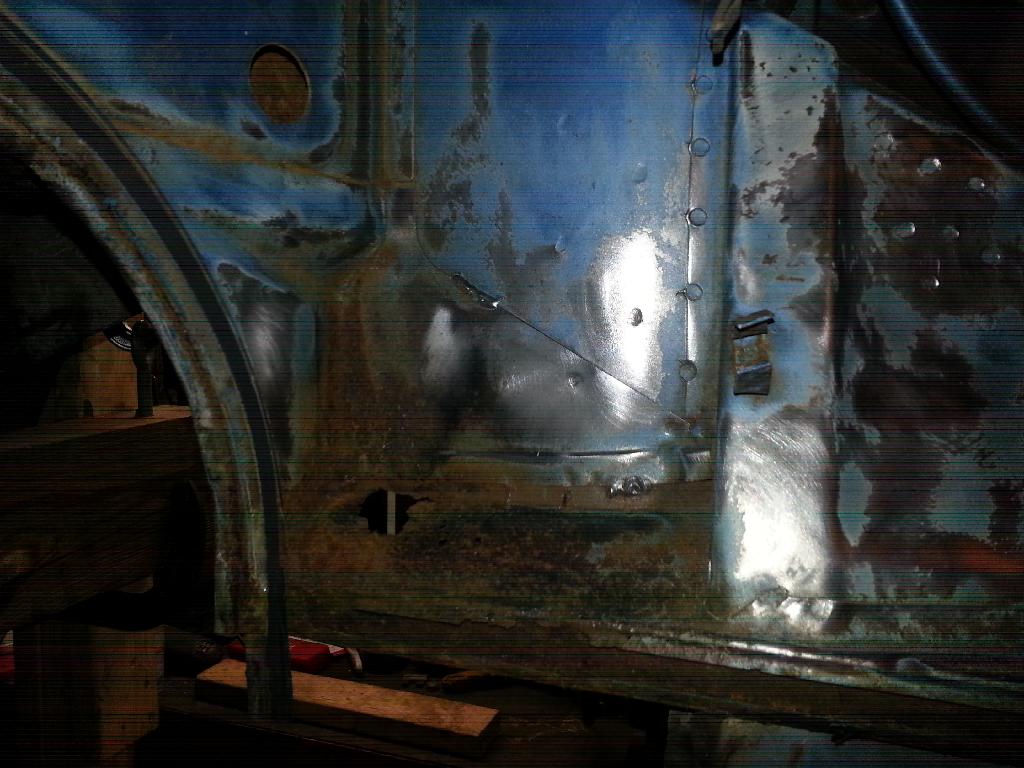
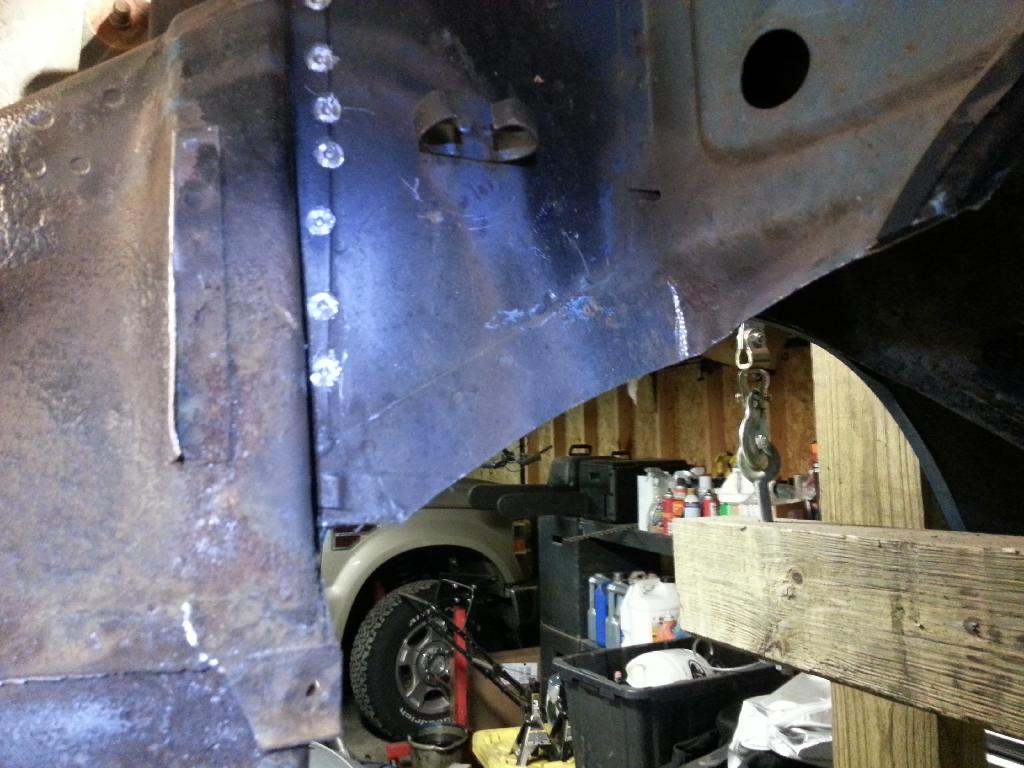
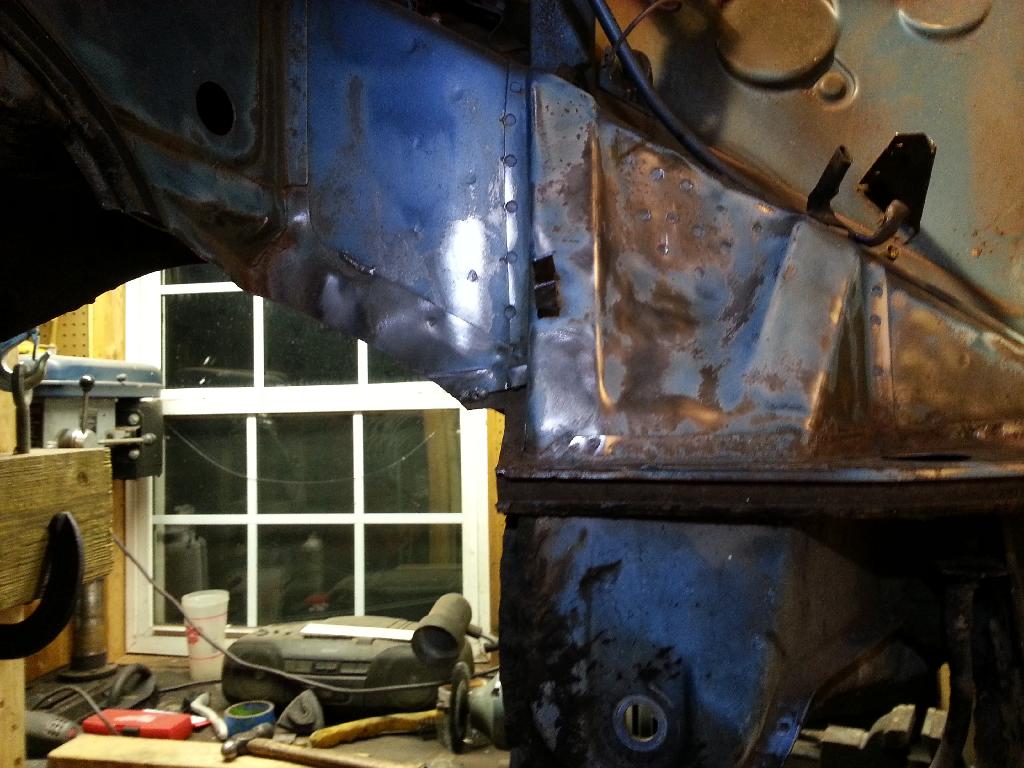
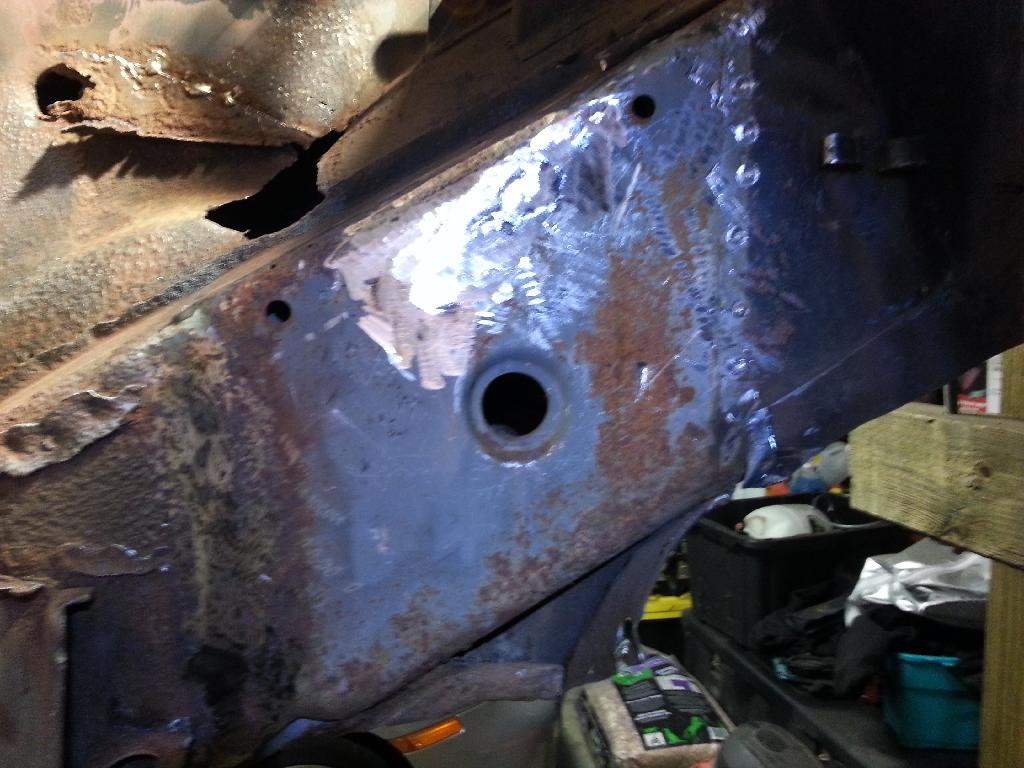
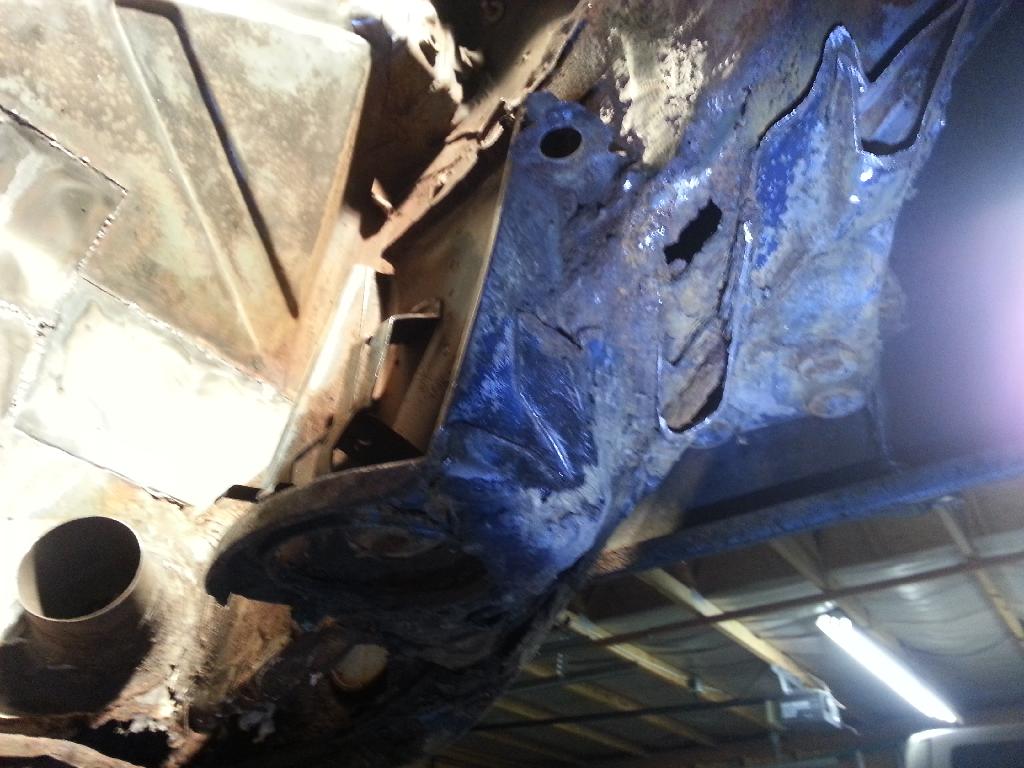
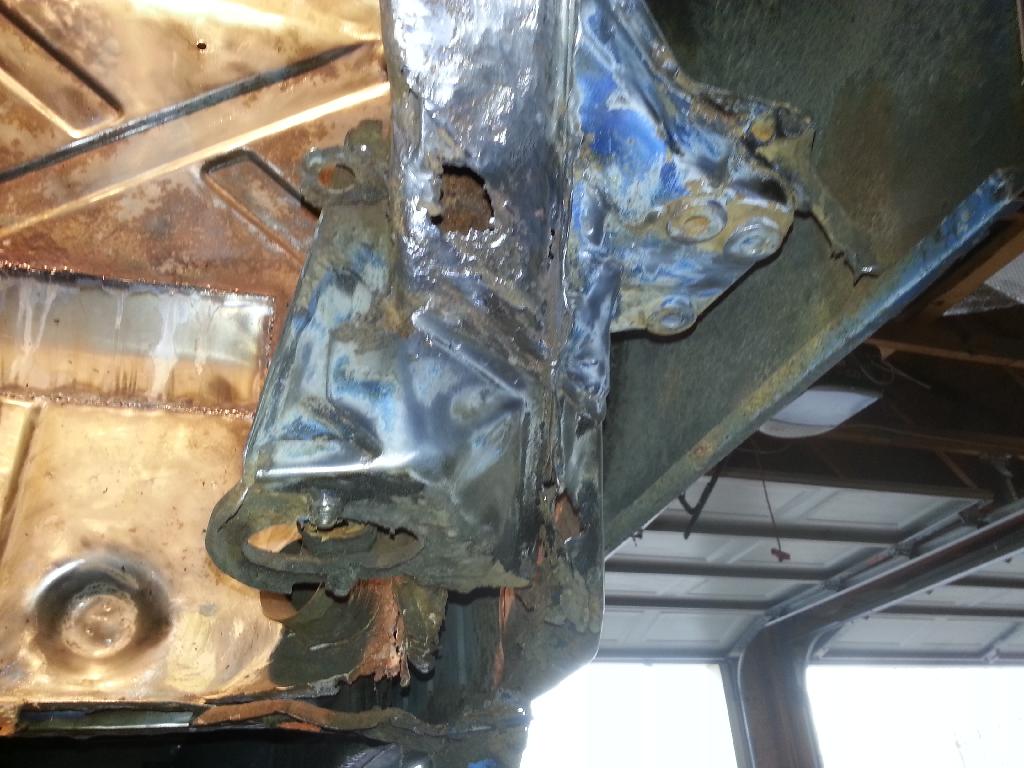
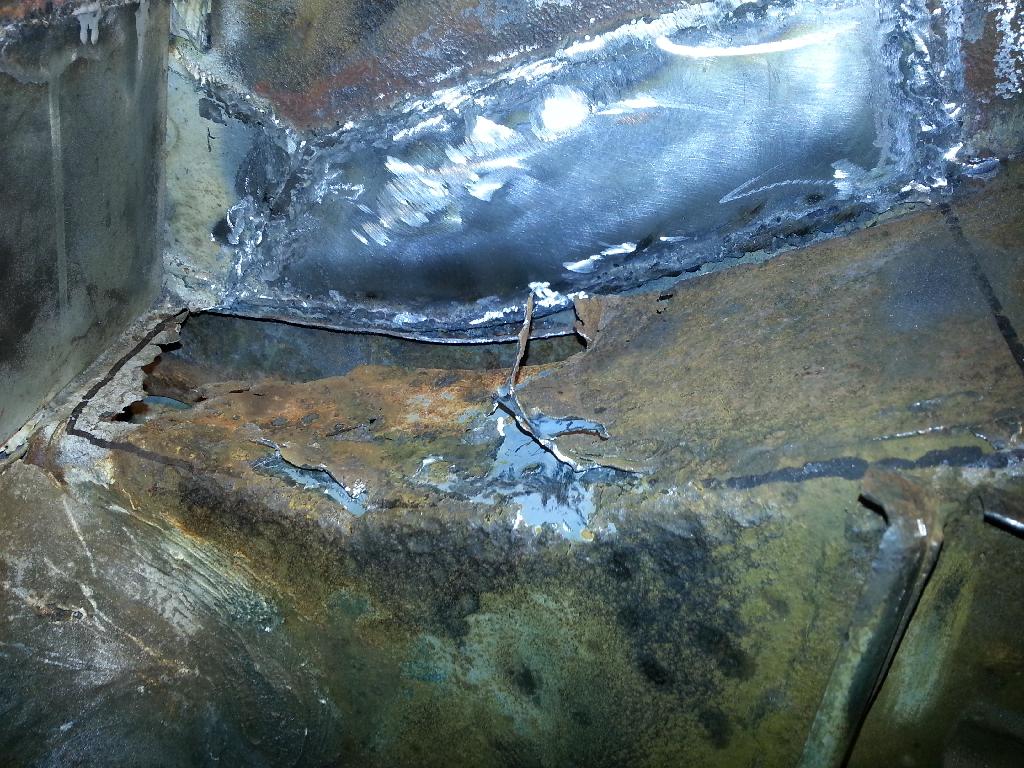
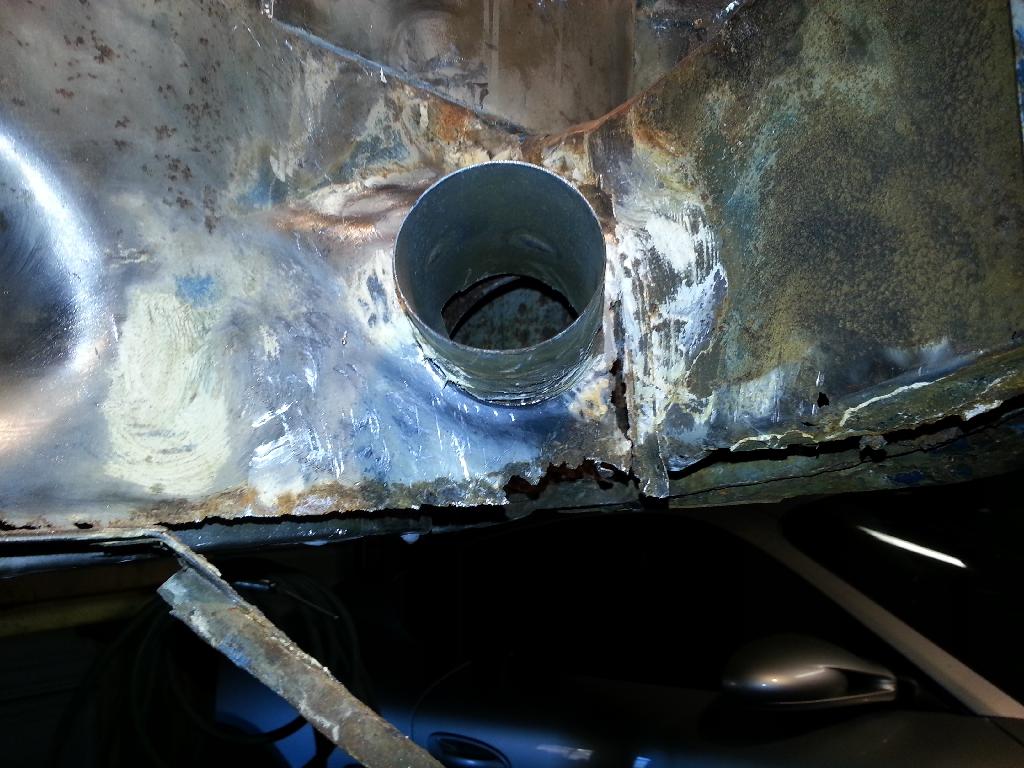
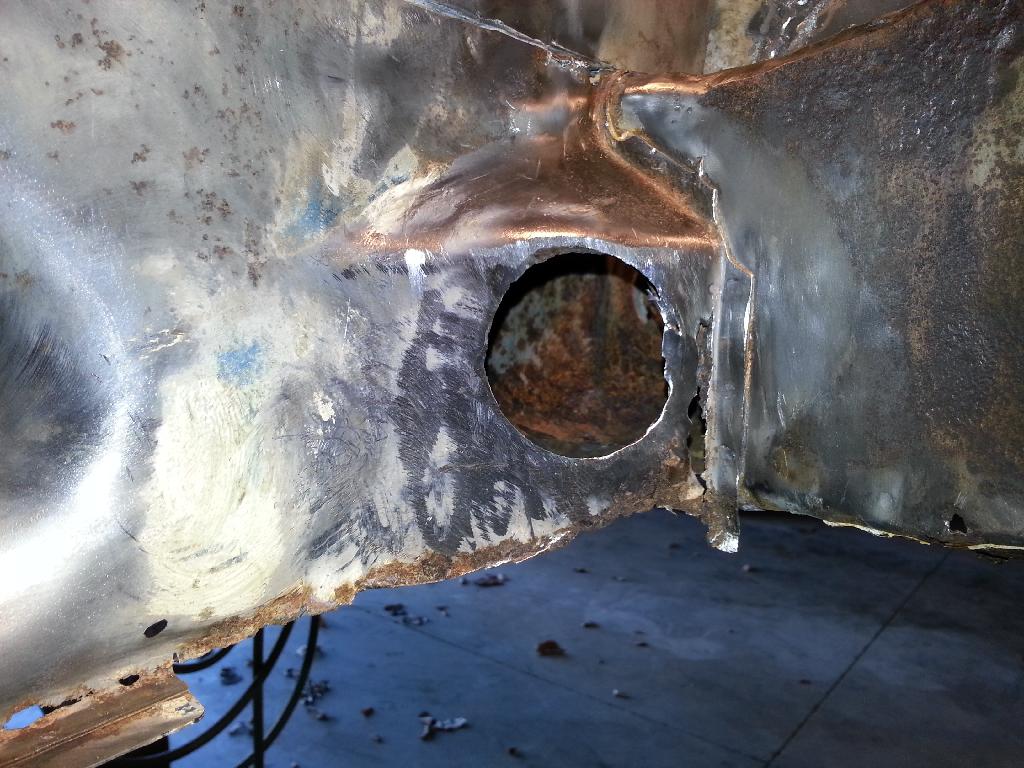
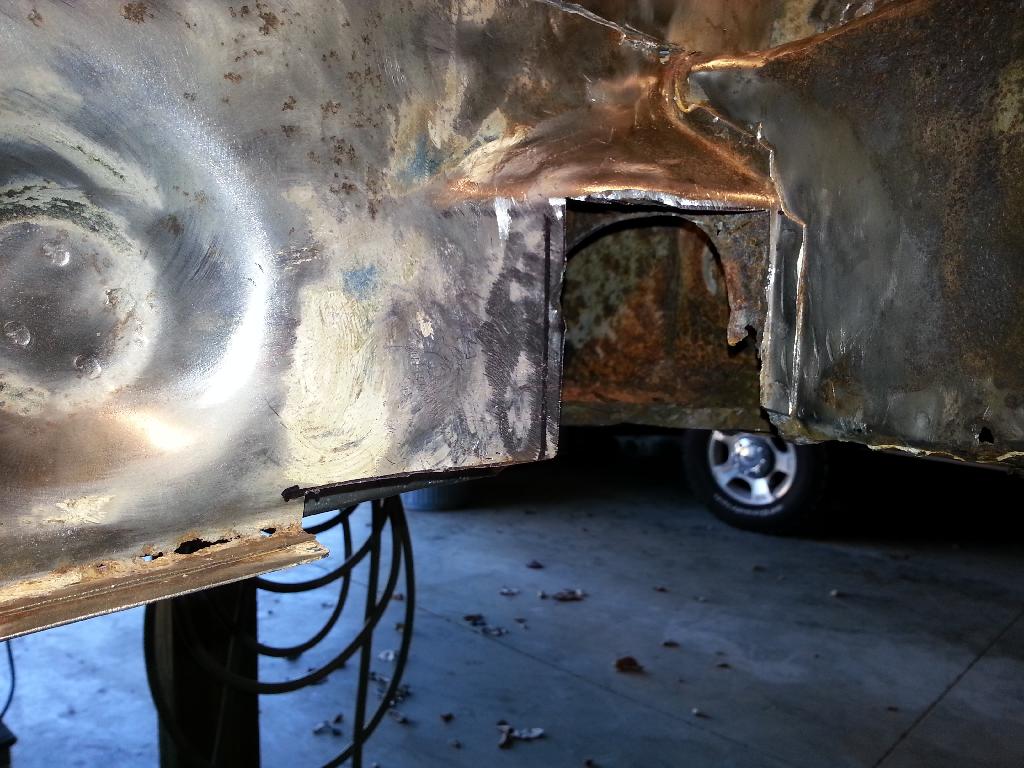
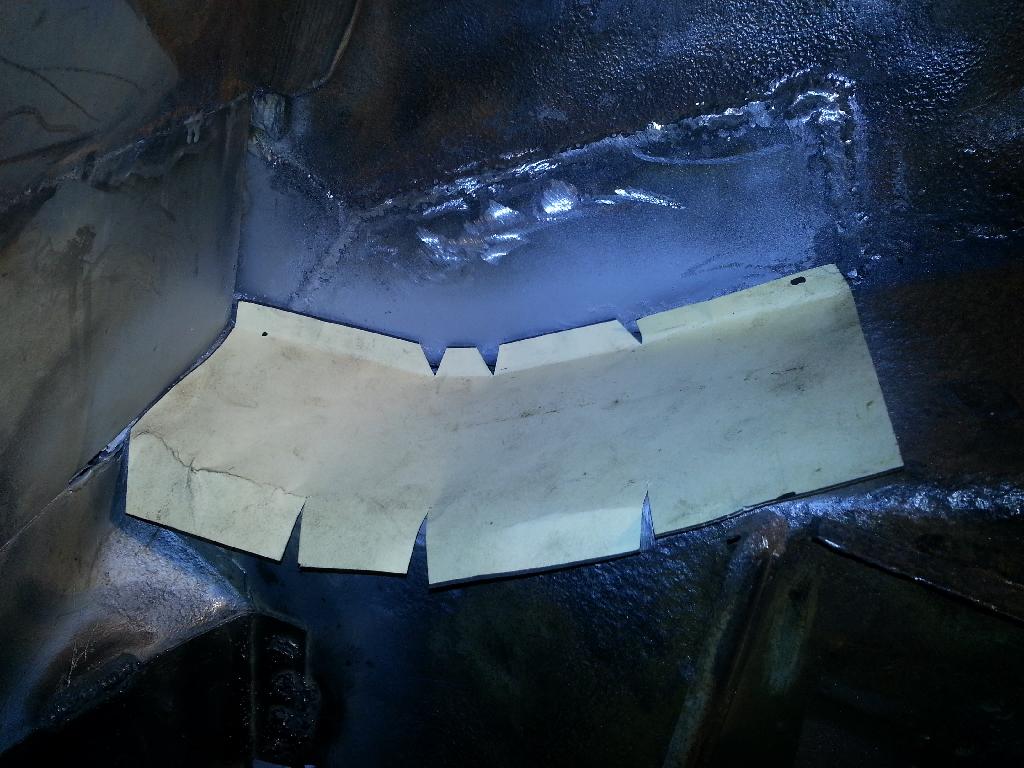
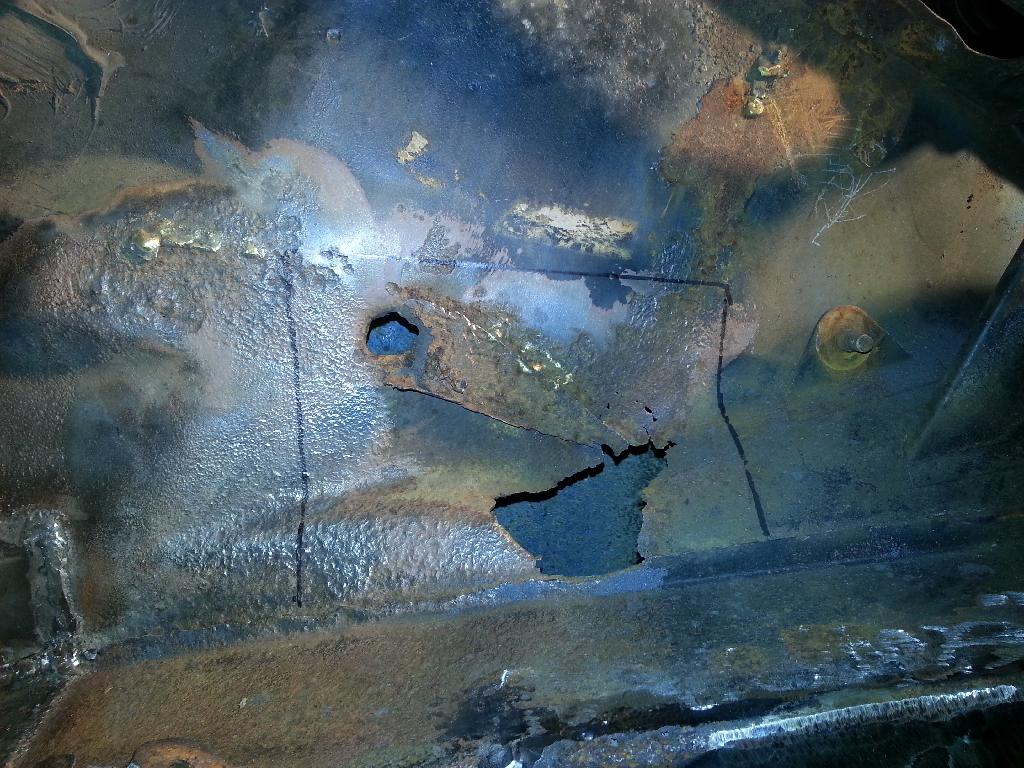
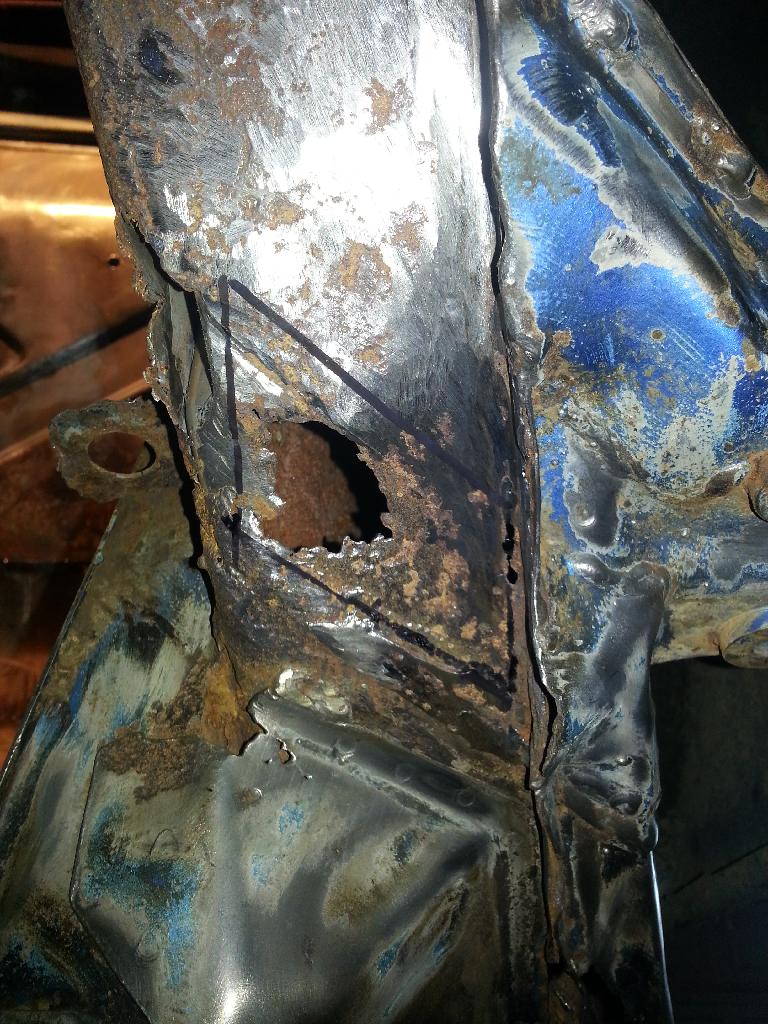
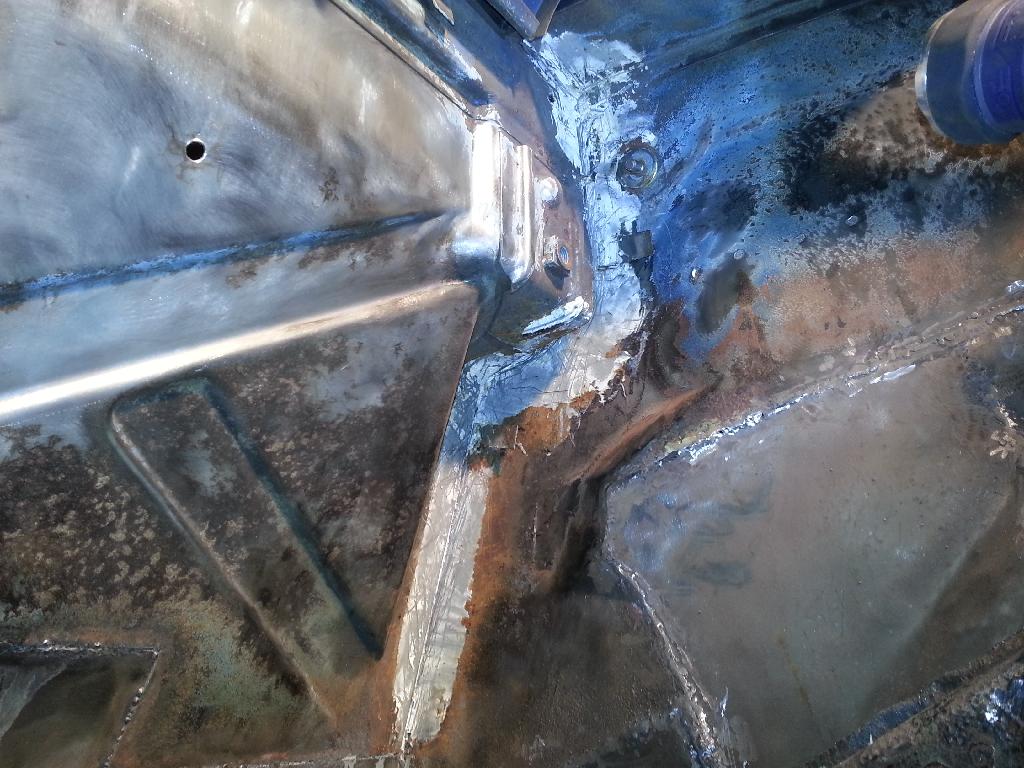
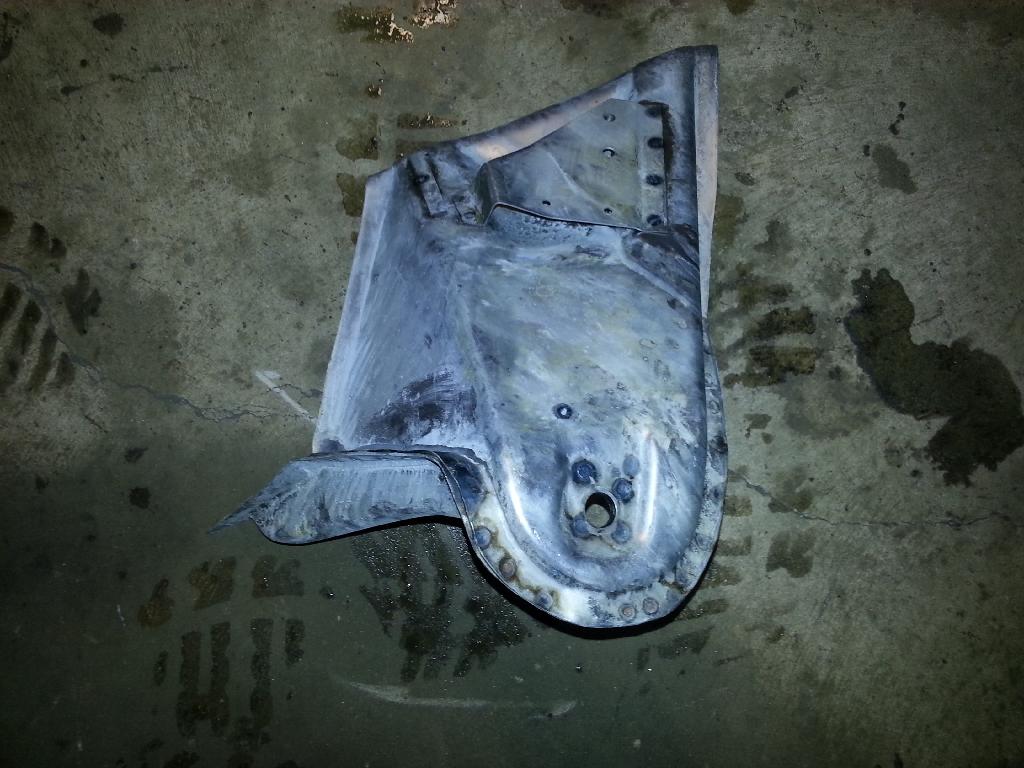
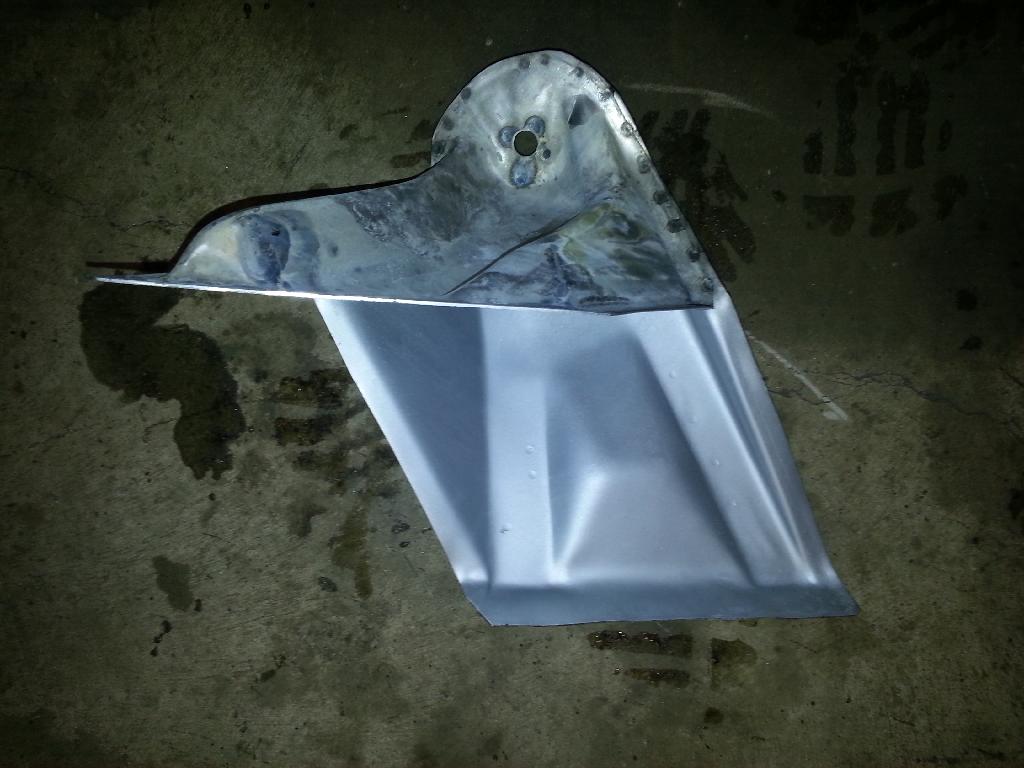
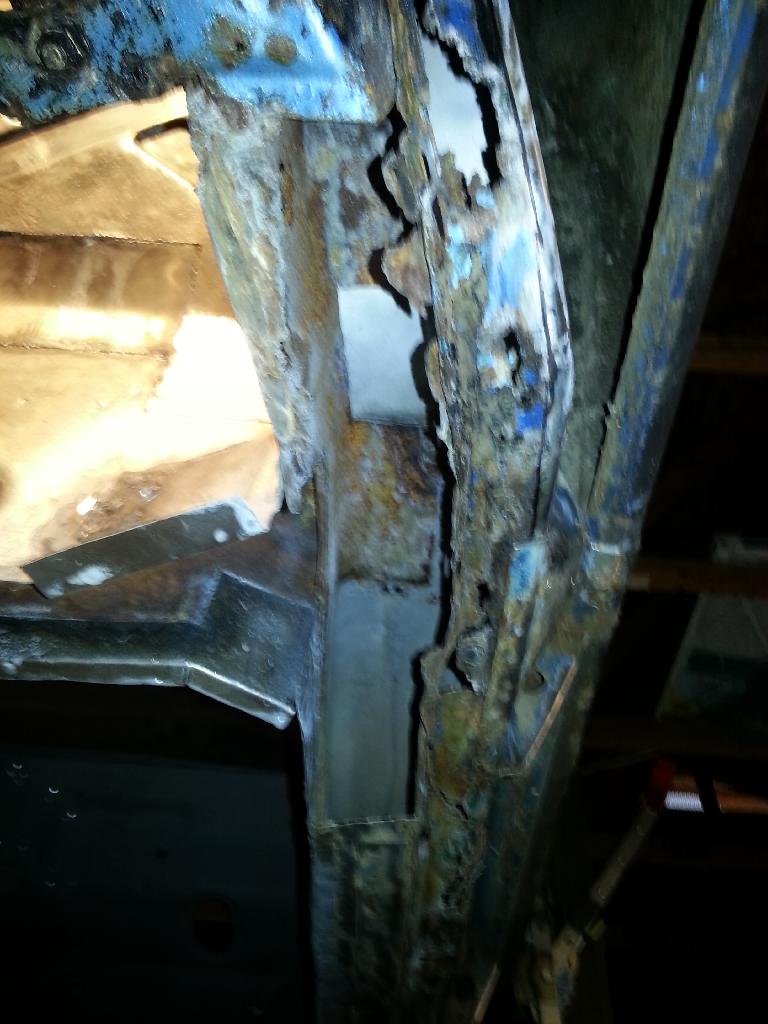
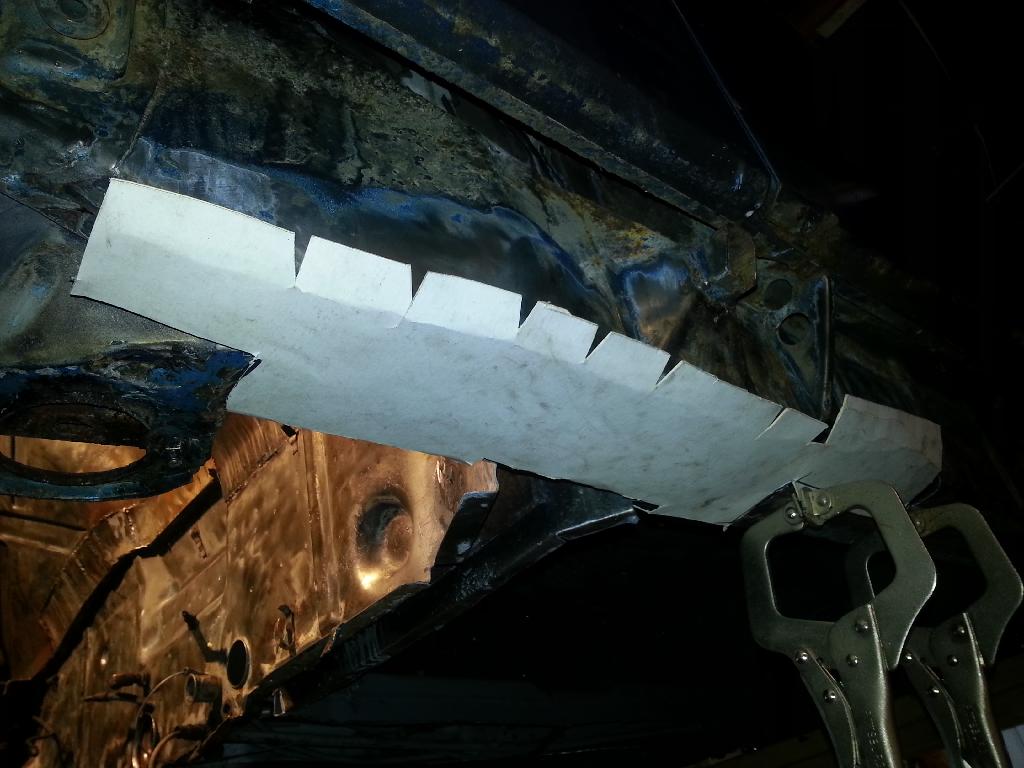
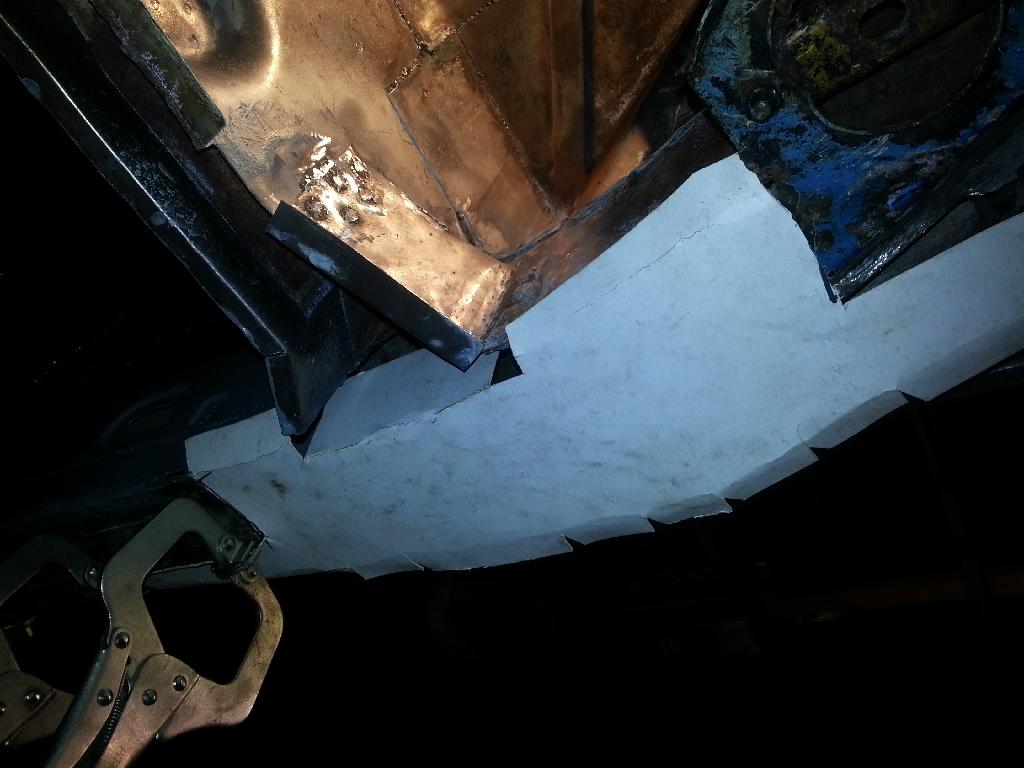
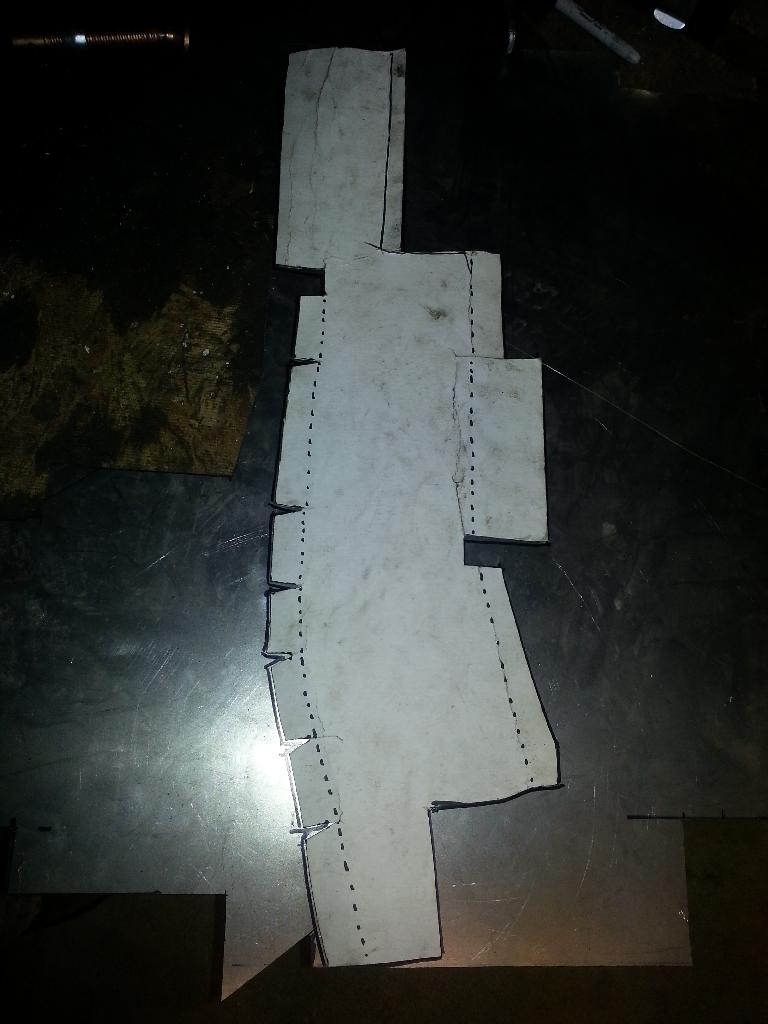
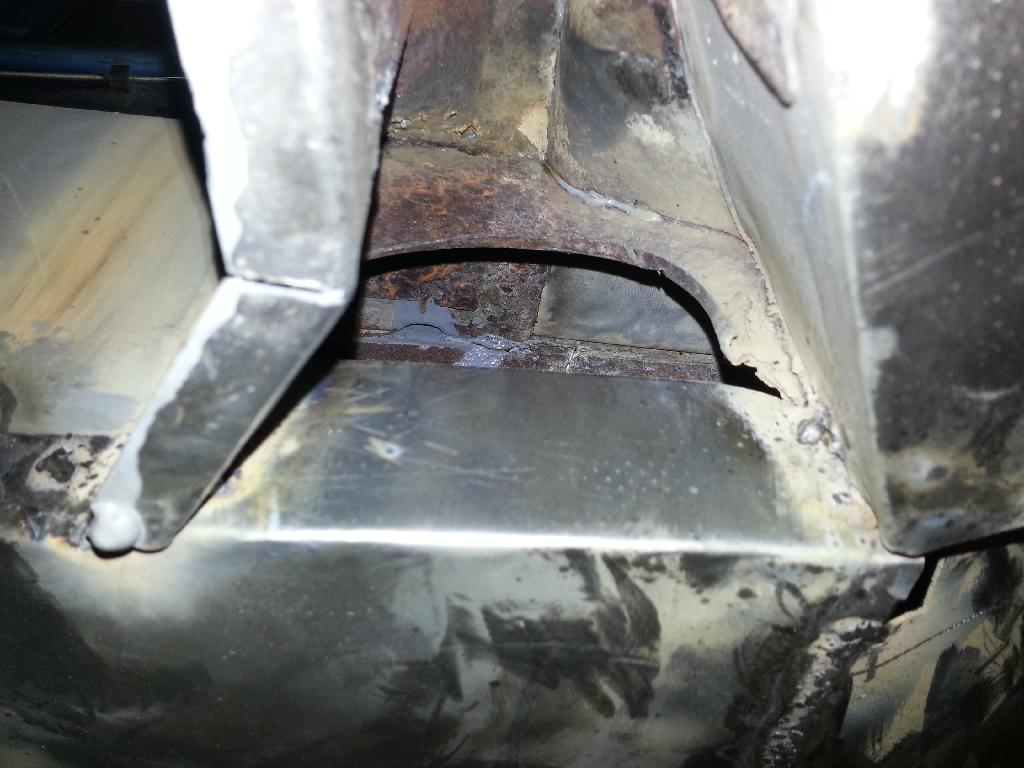
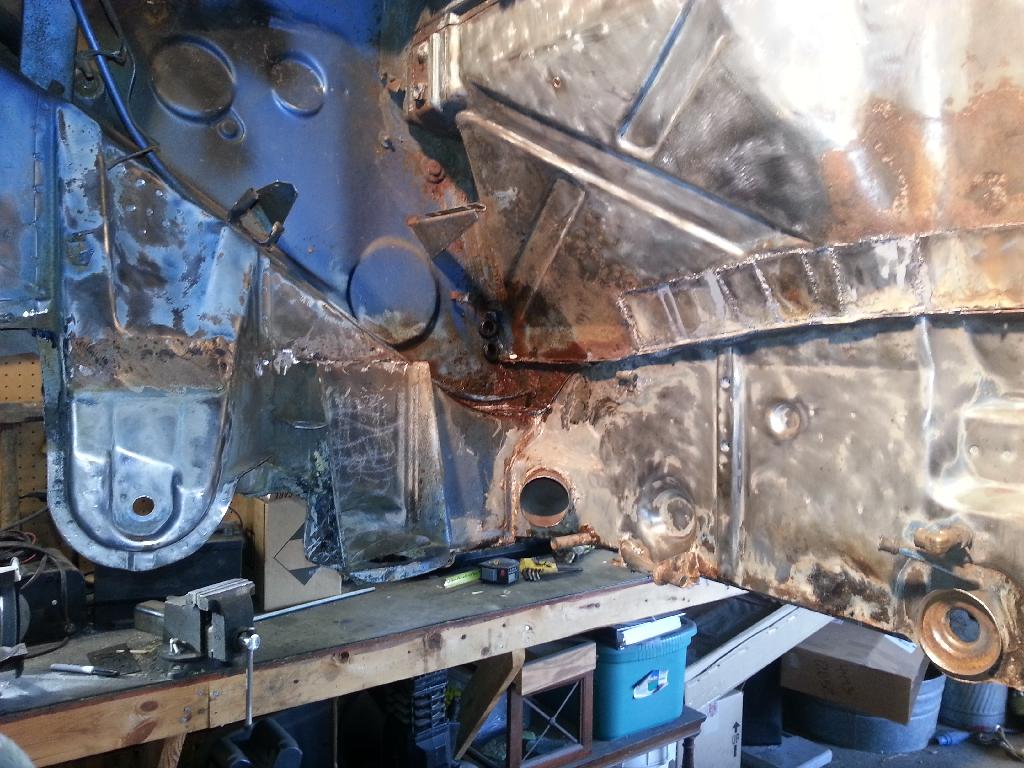
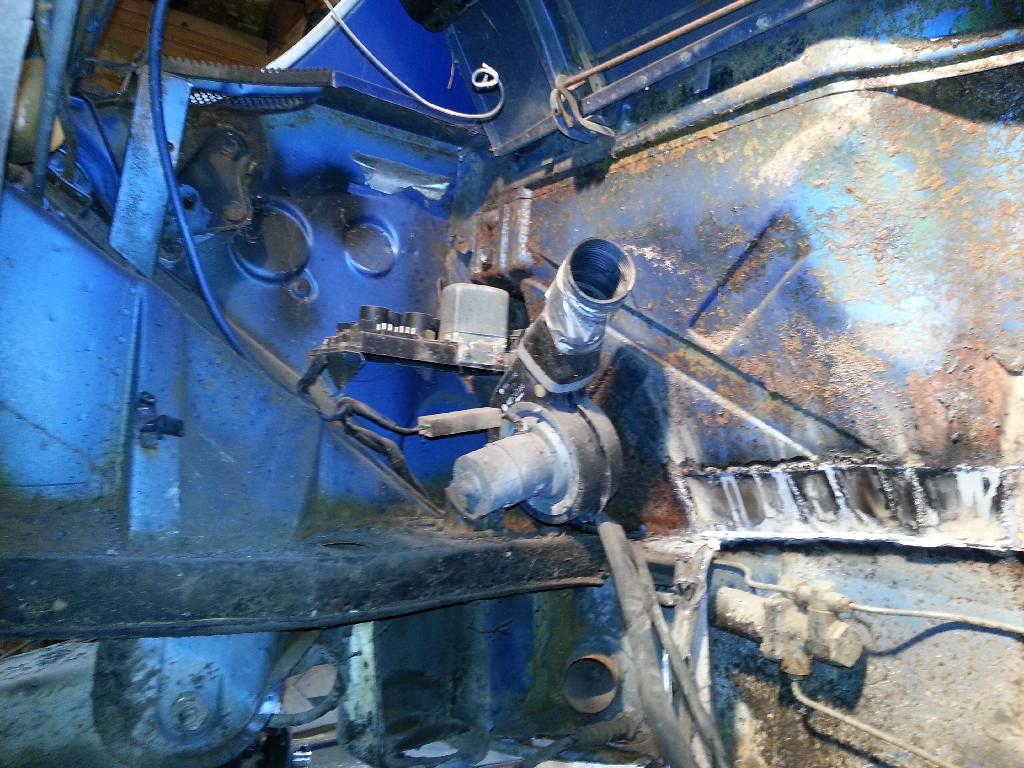
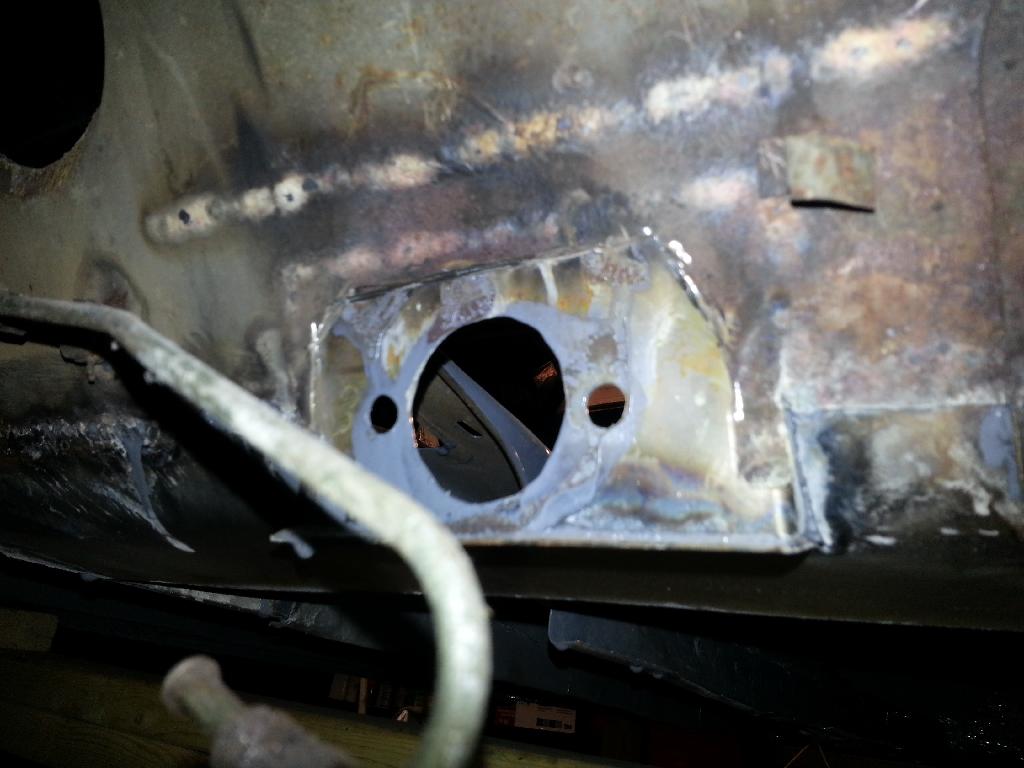
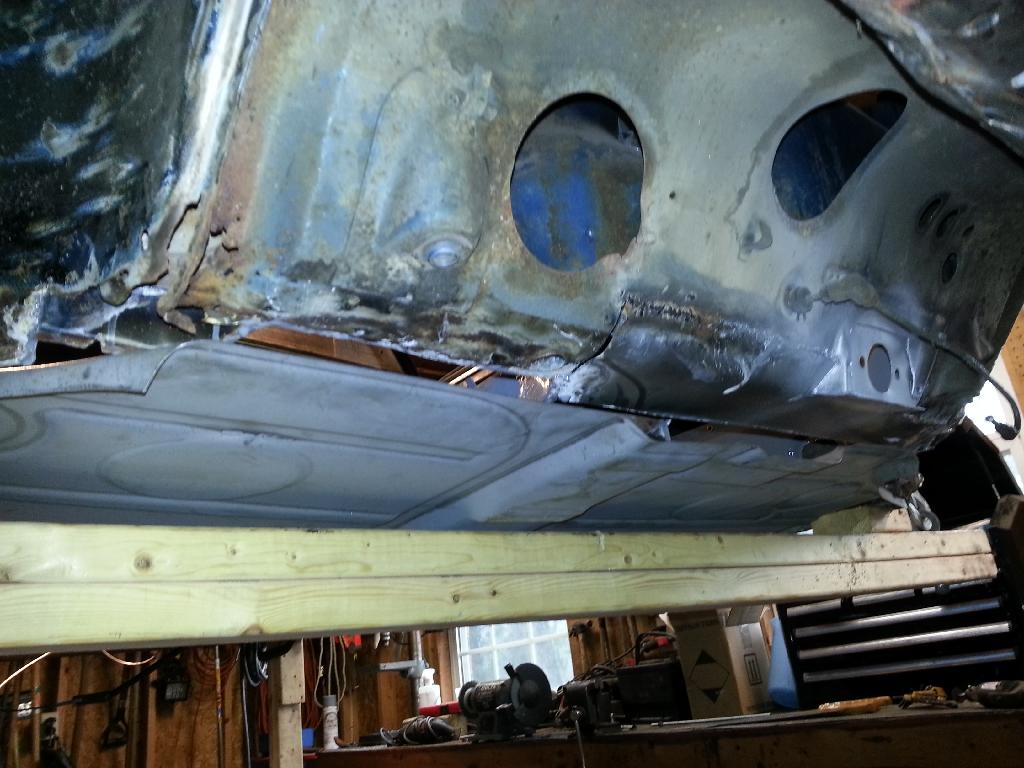
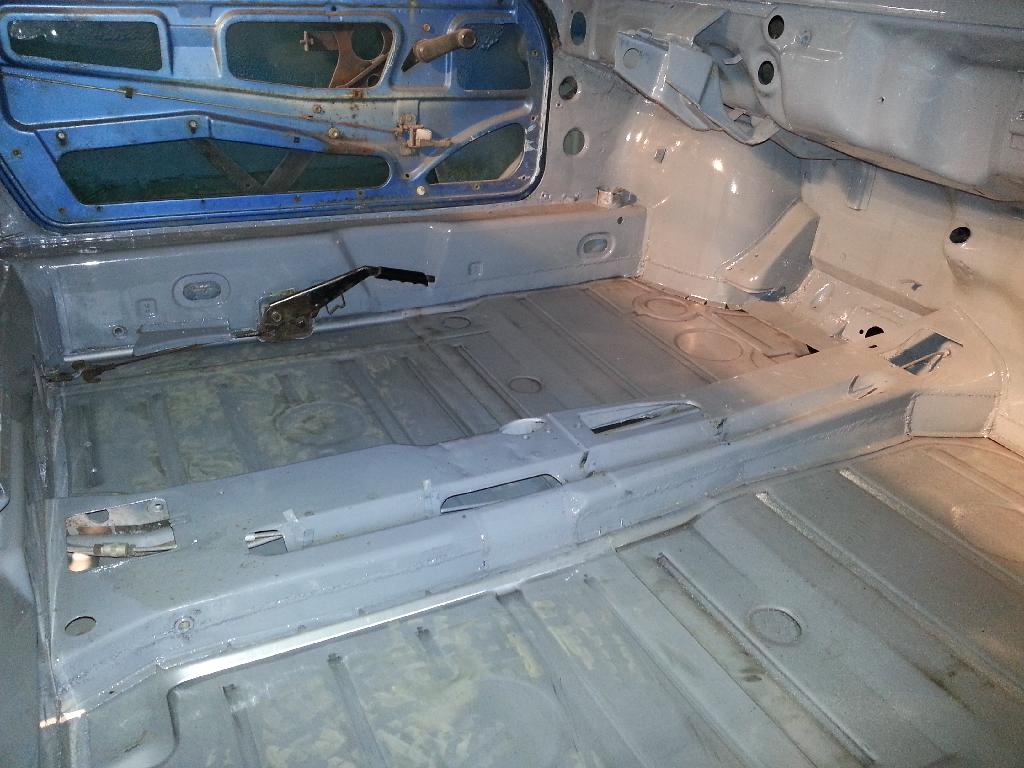
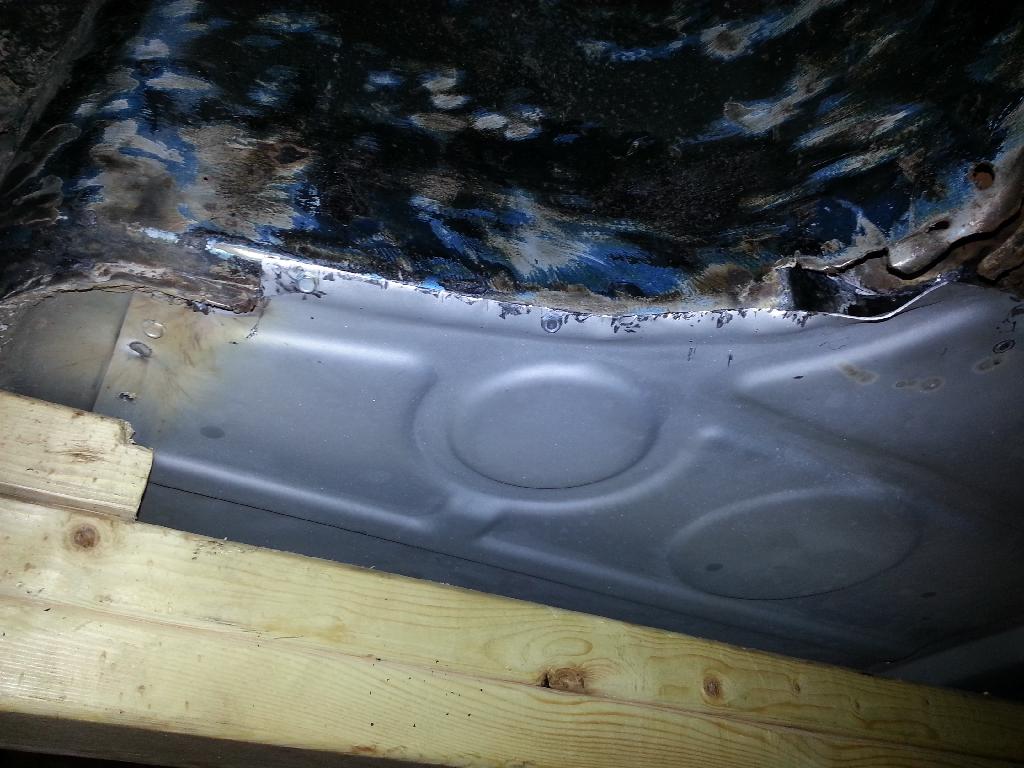
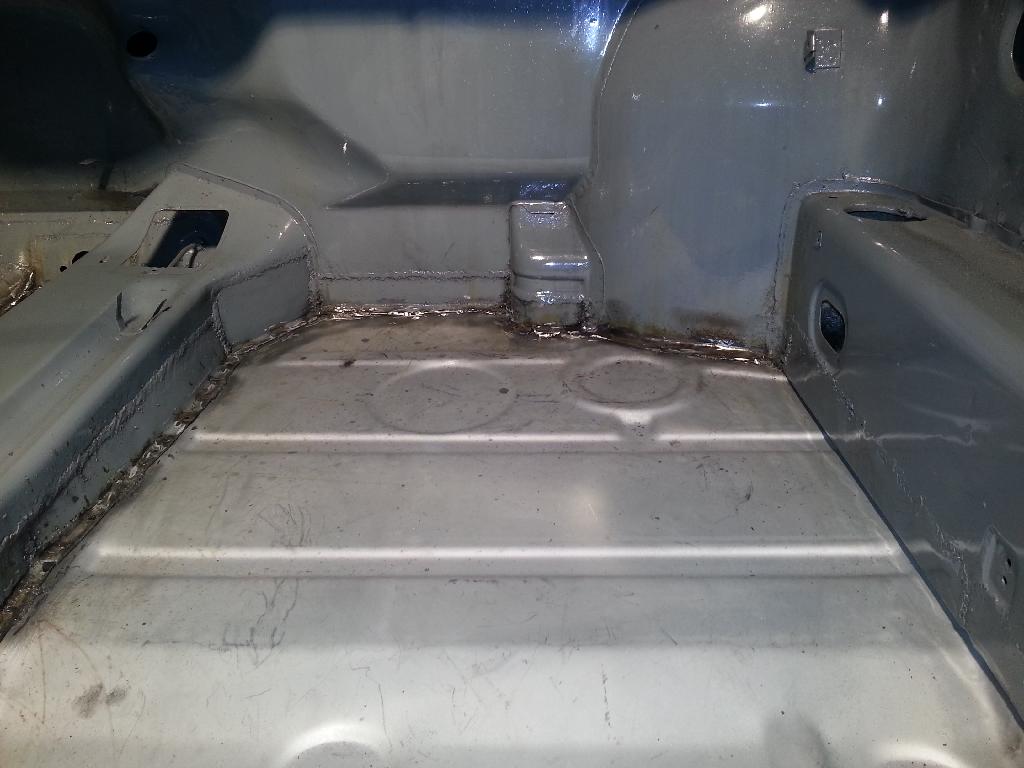
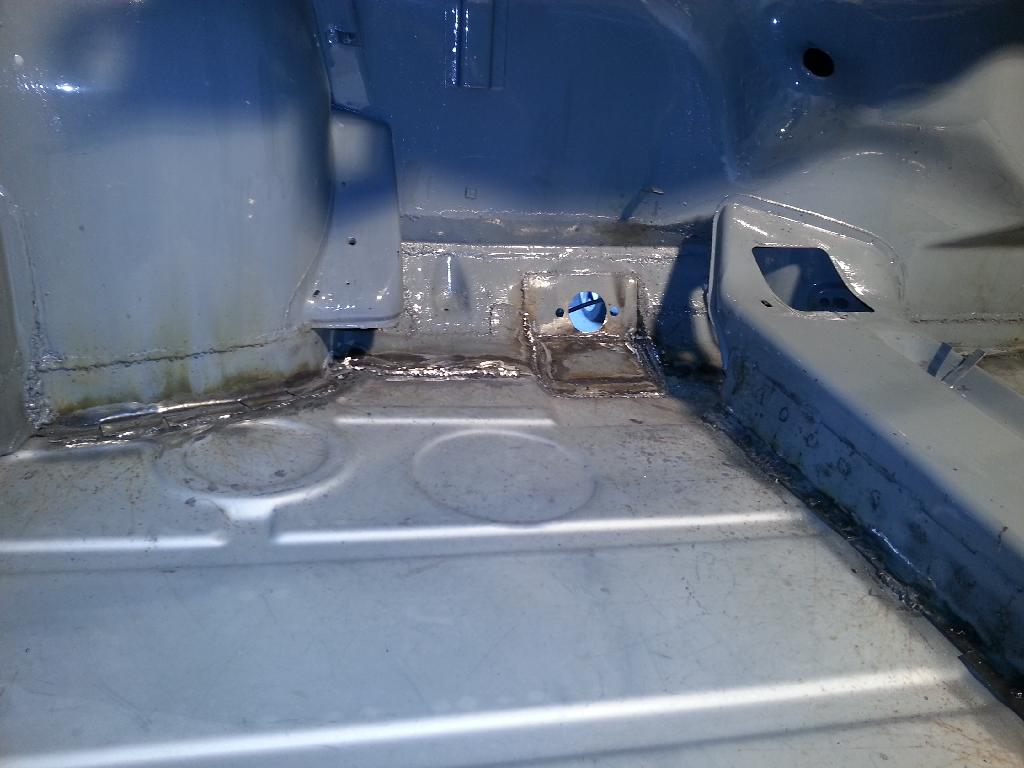
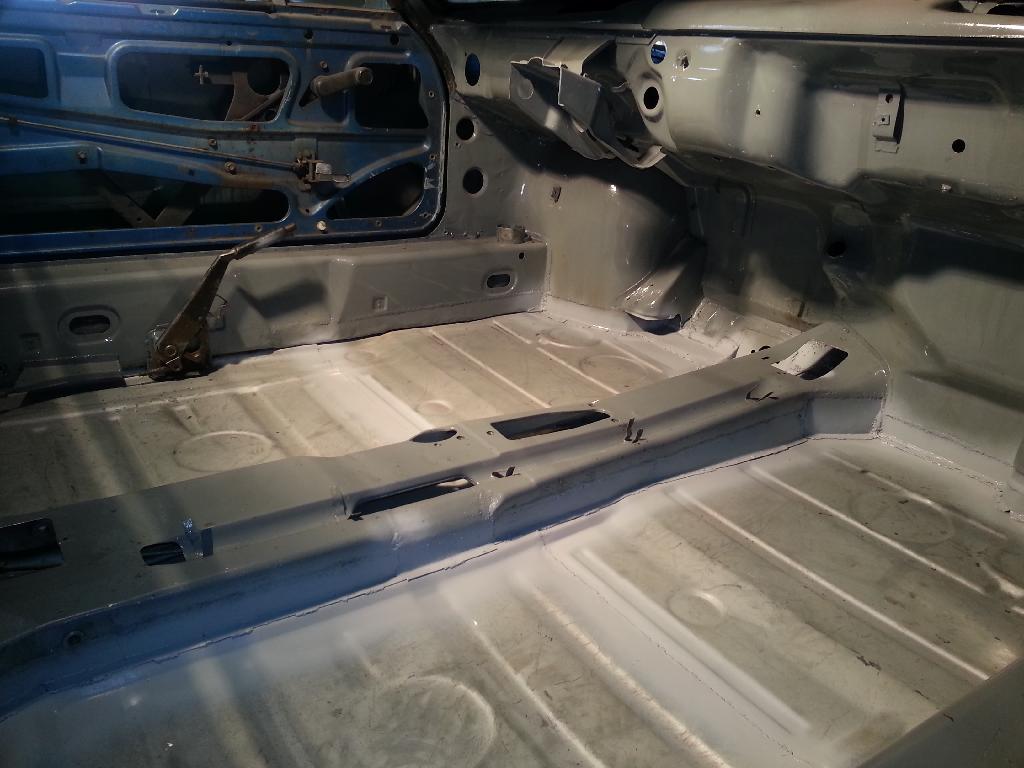
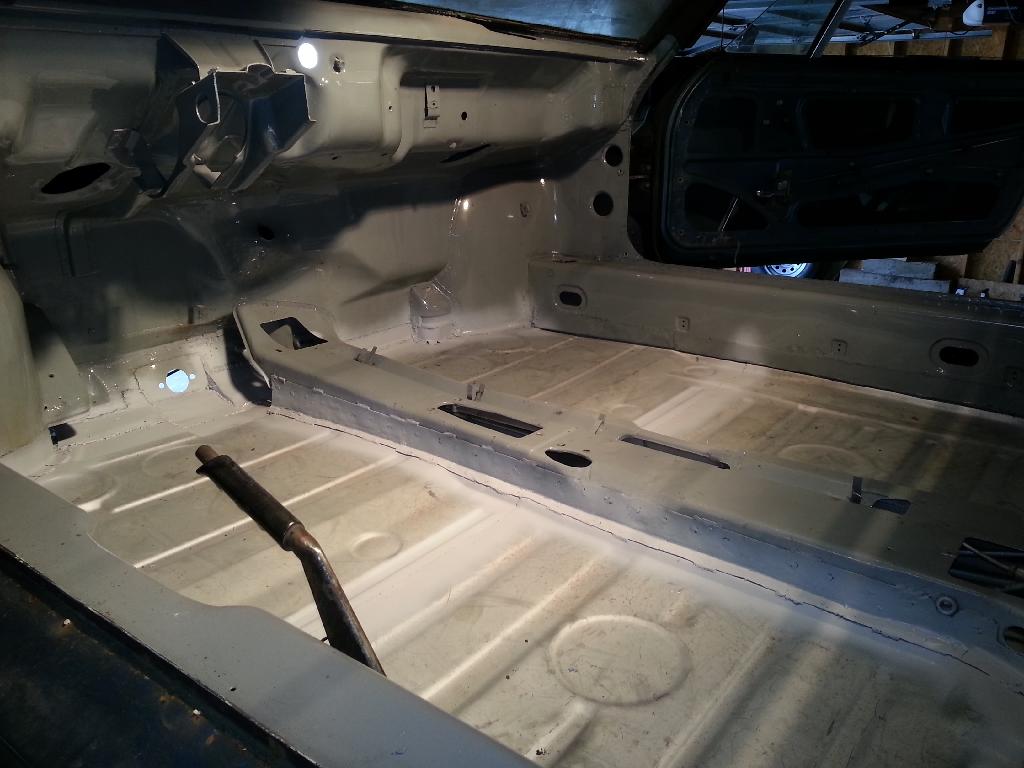
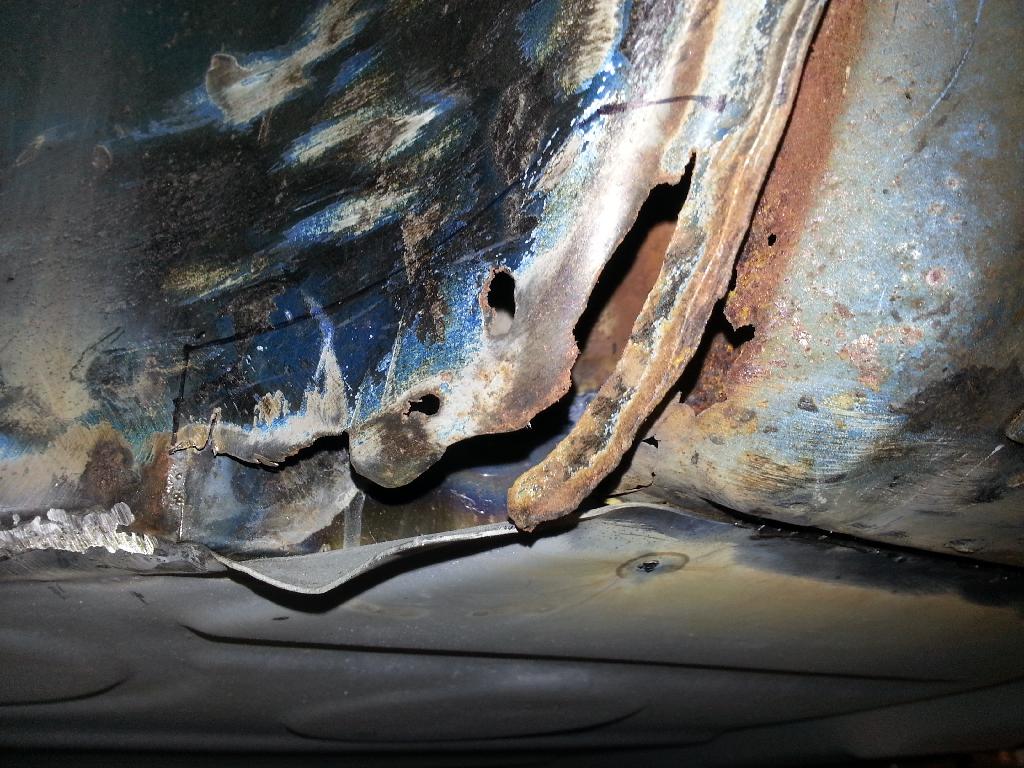
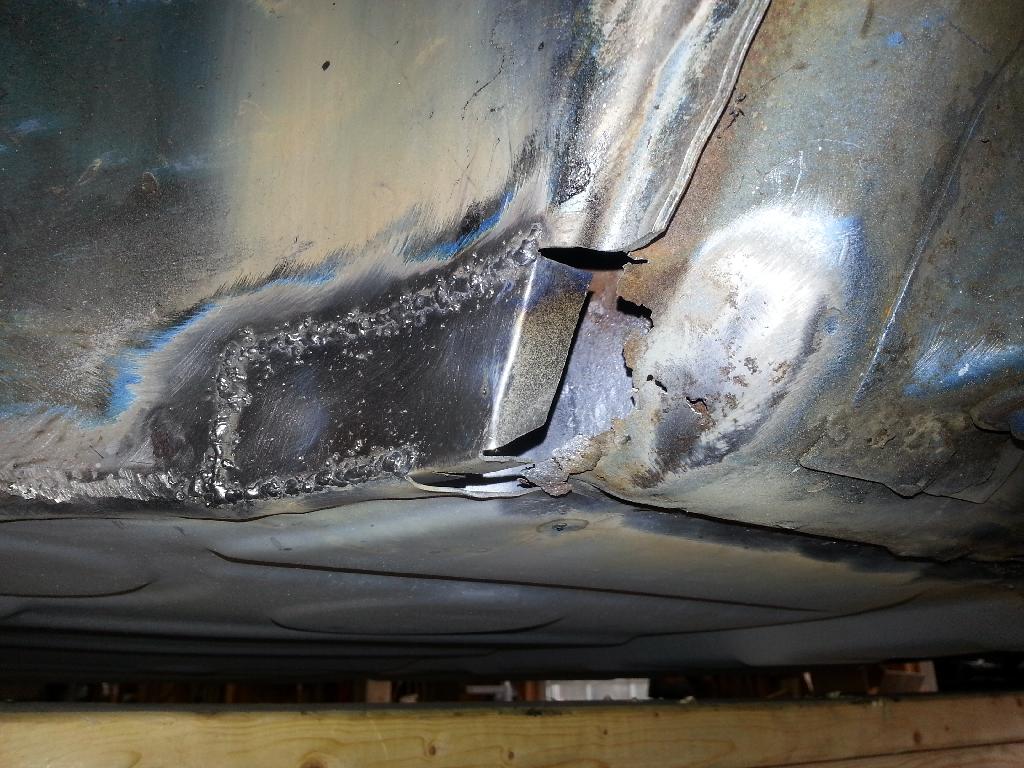
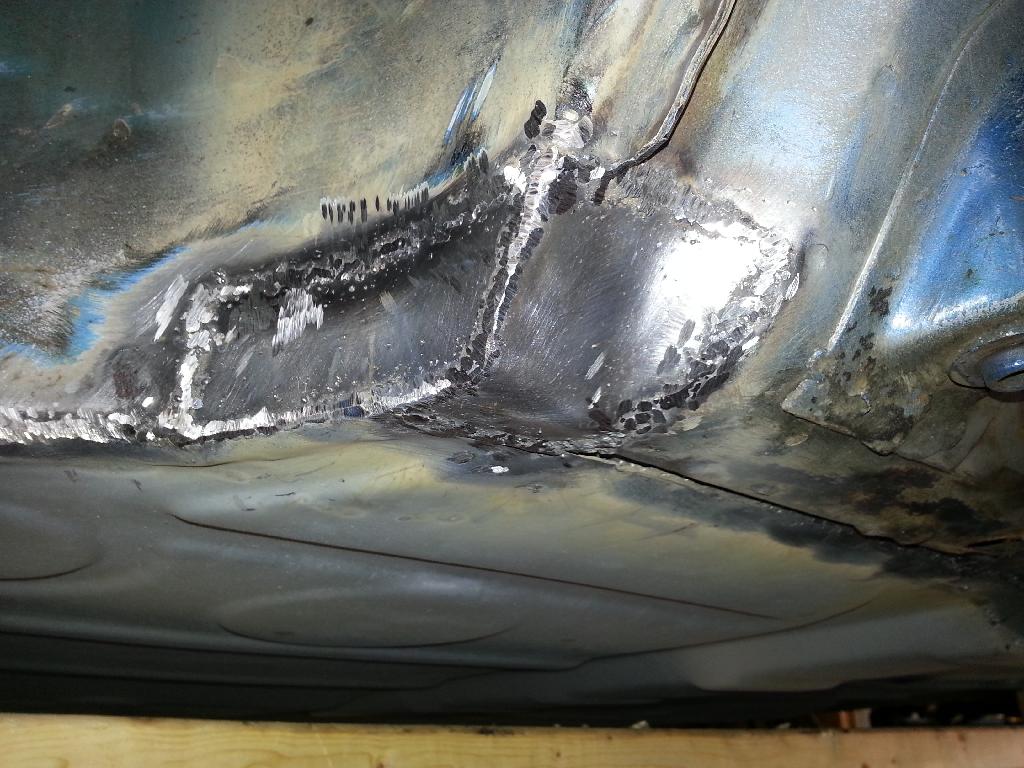
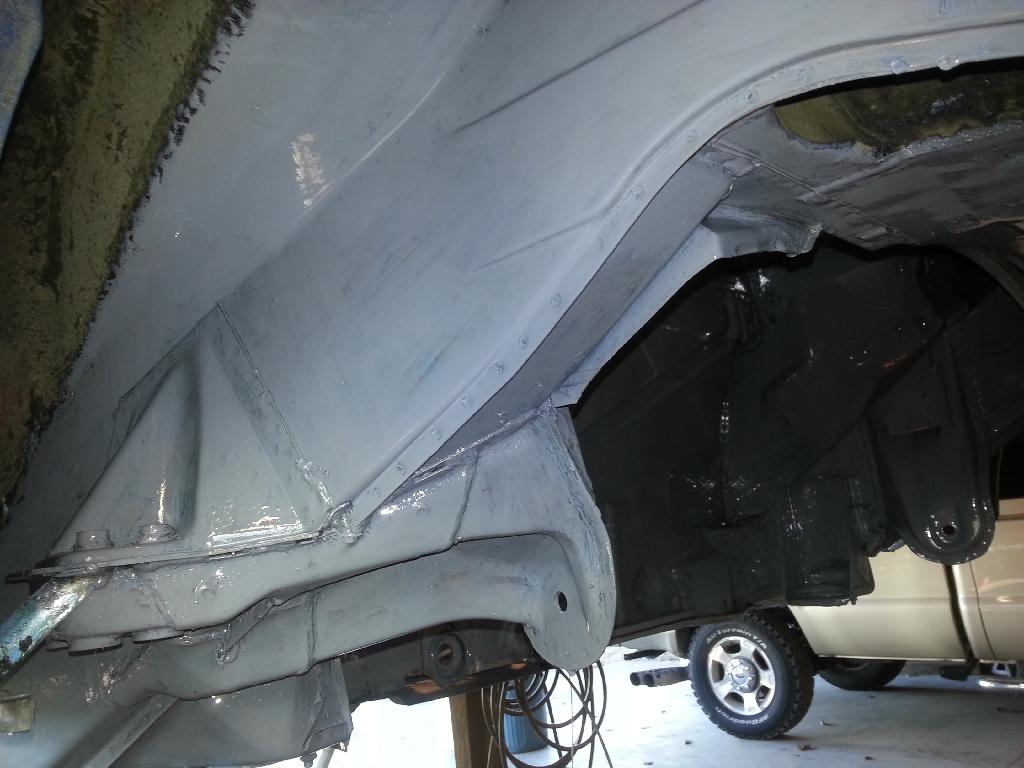
Han Solo
Fabulous weather today and I put a few hours into the project. I'm working the bottom of the outer firewall. Trimming 3/8" of rust off the bottom, fabricating patches, welding, grinding, you know the drill. I'm really low on welding wire so after the first patch I decide to clean up the drivers side long. I finally was able to get the flex brake line loose so with that and the hard line removed - I'm cutting out the engine shelf on that side. With that out of the way, I've got really good access to the anti-hell hole. There's some rust on that side but no major holes. I also cut what was left of the jack point triangle out but the donut itself is still there under the long. So last thing I sprayed the area with metal prep and also some up in between the inner and outer firewalls. If I can stabilize the rusty metal, I might punt on this side and just coat with POR 15.

IPB Image

IPB Image
f1rocks
QUOTE(Han Solo @ Jan 18 2014, 07:43 PM) *

Near Lebanon TN. About seven miles from the track facility that hates sports cars.


Well it's not like we're missing much with the "sports car" portion of the track! That track eats tires.

It was good to do some test and tune and not have to haul 3 hours to get there.

I will be enjoying the new Corvette track in Bowling Green though. Less than an hour will be nice.

You ever come over to the Cars and Coffee events in Franklin?
Han Solo
QUOTE(f1rocks @ Jan 27 2014, 11:00 AM) *

QUOTE(Han Solo @ Jan 18 2014, 07:43 PM) *

Near Lebanon TN. About seven miles from the track facility that hates sports cars.


Well it's not like we're missing much with the "sports car" portion of the track! That track eats tires.

It was good to do some test and tune and not have to haul 3 hours to get there.

I will be enjoying the new Corvette track in Bowling Green though. Less than an hour will be nice.

You ever come over to the Cars and Coffee events in Franklin?


I'm with the Tennessee Region SCCA and we used the parking lot and access road for autocross. It was a pretty good site for those purposes and we even did a National event that was a morph between autocross and time trail on the road coarse. I've got little good to say about Dover Motorsports.

We too are looking forward to the Corvette facility. Supposedly, it will have a ten acre autocross pad driving.gif

I haven't made it to the cars and coffee. That's a PCA event, right?
f1rocks
QUOTE(Han Solo @ Jan 28 2014, 11:15 AM) *

I haven't made it to the cars and coffee. That's a PCA event, right?


Nope, just a bunch of guys bringing a very wide variety of cars.

I saw one of the original batmobiles there a few months back. Had the Barris badges etc....

Had a Veyron floating around Brentwood recently I'm sure it will show up one of these days.
Han Solo
Engine compartment mostly done.

Before...

IPB Image

After...

IPB Image

Before...

IPB Image

After...

IPB Image
Han Solo
I've been working for this for a long time. Getting floor pans in this car will be a HUGE accomplishment for me. And I want to take my time a do it right. So today I started test fitting the front and rear pans. My hillbilly lift actually help keep the front pan in place with just enough space between lifting beam and longs to slide the pan in from the front. I discovered what one reader mentioned back when I was patching the front bulkhead. There is a recessed area under the peddle assembly. I'll have to do some modification to the sheet metal I've added there to make that conform. I cut out some of the leading folded edges under the bulkhead because the RD front pan has them and that was helpful for placement. I also trimmed the dead metal off the back off my replacement master cylinder mount. Then I tacked the front pan in with some self-taping screws and then used my floor jack with some lumber to support the rear pan and tacked it in position. There's about 3/4" of overlap with both pans in position so I'll have to trim one. I also found that I lost elevation on some of the inner firewall lower patches. I'll have to trim that area and re-bend the metal. Being satisfied that everything will line up well, I took the pans off, cleaned and prepped the metal then spray painted both sides with weld through primer.

IPB Image

IPB Image

IPB Image

IPB Image
Han Solo
Installing the front floor pan took about 8 hours. Mostly screwing in sheet metal screws, beating with a hammer, welding and grinding. It was nice to get a break from cutting patches. I started in the middle welding the tunnel. I had drilled for spot welds on the edges of the tunnel. I filled those and added some lap welds for extra strength. I'm leaving the rear 6" un-welded because I've decided to lap the rear pan instead of butt weld. Then I moved to the outer edges under the longs. I had drilled the pan for spot welds there and that was the most difficult area. Next I brought my attention to the front areas. You may remember when I was patching the bulkhead under the dash that much of that metal was missing and I fabricated a peddle assembly mount from what little was remaining The RD front pan had the recessed area for the peddles and my fabrications didn't quite match up. So I removed the bottom metal and made some adjustment. Also note that the RD pan front edges under the wheelhouses are turned down. If one was doing a proper restoration these would be crimped up to join but much of that was missing on this car so I simply turned it up, trimmed and welding to the bottom of the wheel house. There's a rust hole on the passenger side I'll come back to later. I worked from the outboard sides towards the middle - leaving the peddle area to last. I had to add a couple slivers for the adjustment but everything welded up nicely. All the joints at the front were lap welding top and bottom for maximum strength. Finally I ground everything down and I'll hopefully have the rear pan started soon.

IPB Image

IPB Image

IPB Image

IPB Image

IPB Image

IPB Image

IPB Image

IPB Image

IPB Image

IPB Image
Han Solo
I'm about 4 hours into the rear pan install and it's going fairly well. Lifting the pan into position required a bit of help from my trusty floor jack. As reported in the previous post, I left the rear 6 - 8" of the front pan loose to slide the rear pan over for lapping. Once into position, I used the sheet metal screws to pull the edges and center up against the longs, tunnel and firewalls. As with the front pan, I started spot welding the tunnel edges first and followed the bead welds ever 6" on so. After completing both sides of the tunnel, I proceded along the lapped edge on the drivers side. I'm actually feeling pretty good about my welding skills when I have plenty of light, space and can get close in. Note that this is where you have to be careful of metal tempratures and spread your welds out to let surfaces cool. The last hour or so last night, I went under the drivers long welding from the junction of the two pans back. This is where it gets tough. Trying to keep the hanging pan metal tight and welding upside down. I'm using up a lot of wire (on my 4th spool now) and I think my little welder is starting to bind the wire occasionally. Maybe the tip which I try to keep clean (difficult when upside down) or perhaps the flexible conduit that feeds the wire. The goal is to have the pans completed and primed by the end of this weekend.

IPB Image

IPB Image

IPB Image

IPB Image
Han Solo
I never thought I'd get so much gratification just sitting in a car - even without seats smile.gif
This morning I had to correct a mistake I made when patching the inner firewall. I didn't know that the firewall bottom dipped into the pan (again, no original metal to see). I had already drilled the flange for spot welds so bending the patch out wouldn't work. So instead of making an extension out of sheet metal, I found sticks of 1/2" x 1/2" (1/6" wall) square tubing at Home Depot. That was just the right dimension to wedge into the gap. Spot welded the top and corner welded the bottom. I've got another spot at the bottom middle of the outer firewall that I'll use the same tubing. That fix went quickly and then it's all about grinding. Probably three hours to grind the bottom, rear and interior welds. Then I shot some grey primer over the interior welds after cleaning. I've got the cross member on order from RD so hopefully I can install that soon. While I'm waiting on that, I'll clean the belly above the steering rack, patch the right front wheel well, grind those welds and the front pan welds, then treat that area with POR 15. I'll probably spend some time on the underside of the front trunk pan. It looks hideous and I have no idea what hack welded that rolleyes.gif

IPB Image

IPB Image

IPB Image

IPB Image

IPB Image
Han Solo
I had the day off and was able to get the right front wheel house patched. Although it was a fairly complex area, I was able to get all the bends done with two patches. Got that area ground down and then I cleaned all the under coating off the front belly. Treated all that with Marine Clean and Metal Prep. Then I'm off to the body shop supply for the 3rd pint of POR 15. Next I'll have to move the front lift beam forward to finish the front pan welds under the longs. I might move the rear lift beam forward at the same time to prepare for engine install. Brothers VW Motorworks is shipping the long block tomorrow smile.gif

IPB Image

IPB Image

IPB Image

IPB Image

IPB Image
914pipe
Keep going dude!!! Love to see it running!!! piratenanner.gif
Han Solo
Before I lower the car, strip and treat the gas tank compartment - I decided to treat the under-side of the rear trunk pan, rear wheel houses an drivers side outer long. So about three hours wire brushing, scraping and cleaning. The POR 15 goes on well and I'm feeling like the more of this metal I get covered - the better. Once the POR 15 sets up - I'll lower the car, reposition the lifting beams and take care of the "pit".

IPB Image

IPB Image

IPB Image

IPB Image
Han Solo
I got the car re-hung last Sunday and started prep'ing the gas tank "pit". That will take a while to get down to bare metal. But a nice little surprise Tuesday. The long block arrived and I picked it up yesterday morning. It sure looks nice and tiddy I just inspected everything and wrapped it back up. It will be awhile before I'm ready to bench test that joker.

IPB Image

IPB Image
J P Stein
I just had my new Lincoln welder puke......4 months old and I was sruggling to get decent welds out of it. They looked like yours....I know it's a bit brutal, but well intended.

While replacing the blown amperage switch, the repair tech told me that the polarity
was backwards for MIG. The factory sets the machine for flux core. He said it will "kinda weld" MIG.....new info for me......DUH.

Got it home and lit the fire.....Voila!!, decent (not great) welds.....I knew I was better at welding than what had been coming out of the stinger for 4 months. biggrin.gif My intense welding experience comes along every 4-5 years and it ain't like ridding a bicycle....I have to re-learn each time....the new machine dosen't help. The 3 I've used are all a bit different.

Not trying to be a hard ass, but your welding is pretty bad. You've had enough practice to make me feel you have a a basic problem. Reversed polarity may be it.

Also, an .025 wire called "easy grind" is the cats ass for thin sheet metal. It is a special order wire that my weldshop's supplier doesn't carry.....from the factory only, says them. Pro body men use it. It is about 30-40% softer (WAG) than normal wire.....and grinds easier.
Han Solo
QUOTE(J P Stein @ Feb 28 2014, 09:15 AM) *


Not trying to be a hard ass, but your welding is pretty bad. You've had enough practice to make me feel you have a a basic problem. Reversed polarity may be it.


Constructive criticism always appreciated JP. I agree that my welding is pretty crappy and should be getting better. My excuses are...

A. The $99 flux core welder doesn't have a polarity switch (that I'm aware of).

B. The sheet metal I'm welding is thin. Add with surface corrosion in some spots it's as thin as paper. If that's an area that I consider cosmetic and I'm burning through a lot, I'll try to bridge and fill with weld. Otherwise I'd have to add anther patch. If it's more structural, then yes, add another patch or make a larger patch. Either way, it's not pretty.

C. I really don't have anyone looking over my shoulder instructing me to the finer art of welding. I've read quite a bit but I don't think that's a substitute for hands on experience with a master welder slapping the student around.

Thanks for the tip on the small gauge wire. I'm using .030 which may be the smallest usable for this welder. I'll see if that's an option.

Again, this is a budget build for autocross so the test runs will tell how badly I've botched this project. If the whole chassis falls apart, I'll find a good, rust free roller and move all the goodies over to it. Or sell everything and go back to the modern cars. It's not like we don't have more Porsches around here smile.gif


Alphaogre
Having a MIG welder with gas will be a huge help and worth the investment. Even if you just start with a cheap harbor freight one. They even have a 220 that has no problem penetrating thicker things like tubing for cages. For your sheet metal you can get away with a 140, that can run gas. I think they are only $150 or $200 at HF...

They will be much cleaner and save you loud back breaking time later with the grinder, you will also be more confident that the weld penetrated better. welder.gif
Han Solo
Just an update...

Looks like it will be hands off the 914 project for a few weeks. Last weekend we did two days of SCCA Solo. Saturday in the Cayman S and Sunday in the co-owned Boxster. I needed the seat time after a long winter. This weekend I'll be working long hours in a cave (long story) and then the following weekend - we're headed to an SCCA Solo Championship Tour with the Cayman S.

I have taken delivery on a bunch of parts though. Aside from the rebuilt long block, I also ordered ignition parts (plugs, wires, distributor cap, coil, etc.). I also got a mother-load of almost-new suspension parts from a great source. So when I get some time there's plenty to do!

My focus will still be the sheet metal stabilization when I get back at it. Treating the fuel tank pit, finishing welds on the floor pans and getting everything on the underside painted. I think then I'll be ready to start dealing with the passenger side front fender and stripping the exterior. I already have started stripping the chrome pieces off the sails when I had a few minutes yesterday. So far, nothing but solid metal under the vinyl smile.gif
Han Solo
It was nice to get into the project yesterday and today for a few hours in the evenings. I had already stripped the fuel tank pit and so last night I treated and painted. Turned out pretty good except for one area that bubbled. I think that was from moisture after rinsing. Typically I go over every inch with a heat gun but I must have missed one small area. Oh well, there will be plenty more applications of POR 15 yet and I'll touch that up. Tonight I finished the underside welds on the floor pans, cleaned, treated and primed the cross member RD pieces. Once those are welded in and primed, I'm probably going to start looking hard at that right front fender. Also, I stripped the remaining sail trim pieces and they all look quite nice. Those will be for sale for anyone wanting the appearance package sail details smile.gif

IPB Image

IPB Image

IPB Image

IPB Image
Han Solo
Finally got around to that small area under the clutch rod bushing. Fairly simple. Knocked it out in a couple hours.

IPB Image

IPB Image

IPB Image
Han Solo
This evening brings the end of a very productive weekend. Saturday morning I went to work first thing test fitting and drilling for rosette welds. The RD cross member comes in two segments. You have to bend the out-board ends out which is simple enough. I was going to lap the left piece over the top of the right piece were they come together over the tunnel (about 2" of over-lap). But I found that the floor pan needed to be pushed up to be flush with the cross member flanges. That extra 1/16" created if I lapped wouldn't be helpful. So I trimmed the left piece end over the tunnel. I used rosette welds along the pan, on top of the tunnel and where the "ears" join the longs. I also seam welded those areas (every 4" on the pans). The net result was a really solid feeling floor pan with zero give when you stand in the compartment. I finished up this morning and primed the pans and cross member. Then I went head first into the right front fender...

IPB Image

IPB Image

IPB Image
Han Solo
I am sure glad I waited to tackle the right front fender until after all the interior patches. The task was much less daunting and I methodically worked through the process. A month after I got this car another Pelicanite sold me a donor fender. I hadn't really looked that close at it but casual inspection had it straight with little rust. There was some bondo but the backside revealed no large dents so I figured the PO had just skimmed it for appearance.

I initially thought I'd replace the complete fender. The donor fender had been cut from wheel house behind the seams so it would be completely possible to do a proper replacement. However, after looking at how much work that would be, I decided to cut the fender midway in the wheel arch. I also thought I'd cut out the existing molding channel but the donor fender had be doctored up in channel with some material (bondo, seam sealer, ???) and trying to dig all that out would have really s**ked. So I decided to make that cut along the edge of the channel. The front corner of the car is a real mess. Really crumpled. But I wanted that structure to help me get the donor fender in the correct spot. So after I cut the bulk of the fender off, started grinding off excess material and straightening out as best I could. I did the same with the donor fender and made the same cut through the wheel arch. Once everything was cleaned up on the donor part and the car, I used a wire brush to remove the paint in the welding areas. I also cleaned out gobs of under coating and seam sealer from the wheel house. Test fitting, cutting a little here, test fit again and everything is lining up good. I started butt welding in the arch area using the butt weld clamps. Then I moved down to the head light tub and lap welded in there. Working me way back up the channel tacking the fender. That's as far as I got but what a difference this makes! It's finally starting to look better than a rusted wreck! During the week I'll take my time finishing up the welds and grinding. The front area is going to require some real work to get it straightened out. I might just cut some of that wasted metal out and fab up a nice patch. I can knock that out much faster than struggling with bent and rusted metal sunglasses.gif

IPB Image

IPB Image

IPB Image

IPB Image

IPB Image
Han Solo
Last couple of evenings I've been working on the mangled front panel. I started by attaching the original metal to the donor fender. Working the metal with hammer and pliers, I was able to get it welded around the top and side. I wasn't happy with the end result though. It was just too bent and rusty to get back into shape. Part of the problem was it is pushed in below the head light pan so there's no way to punch it out without removing that. So I decided to cut out and patch an L shaped area. Now that involved several bends that was going to be very difficult with one patch. So I divided the area into two patches and went to work. First I did the mostly straight area attached to the side of the fender. Then I tackled the upper portion with the bend. I worked that from bottom to top. Tack welding, beating with hammer, trimming, etc. That actual came out pretty good. Note that there's a section of the wheel well that joins there and that helped get the proper contour. There's still some folds in the original metal but I think everything will dress up fairly well with body filler.

IPB Image

IPB Image

IPB Image

IPB Image

IPB Image

IPB Image

IPB Image
Han Solo
Beside the replacement fender there was a rust through in the hood molding channel. I cut that material out prior to attaching the fender. Last night I cleaned up the cut out, fabed up a patch and got that welded in. I think I'm about ready to start dressing up the fender, wheel well and front panel. Probably going to use POR 15 on all that.

IPB Image

IPB Image

IPB Image
Han Solo
Blazing ahead. During the week I stripped the donor fender and the original that it was mated to. Then I went ahead and fabed up a quick patch over the turn signal hole (and marked the sheet metal for another). That went on nicely. Today I got down and dirty - stripping the wheel well of gobs of under-coating and rooting out all the seam sealer I could get to. Reaching back towards the rear of the car inside of the fender, heating and scraping was especially brutal. But I got the majority of the paint and sealer removed. Then I worked my way around to the front panel and stripped it. Much easier going there. After cleaning everything with Marine Clean, I treated it all with Metal Prep. I read in the POR 15 instructions that body filler can be applied over POR 15 when tacky. However, other posts indicate you can rough it after it's cured and get good adhesion. That's what I'll do later to dress up the seam in the fender and the rough areas on the front panel. I did try a new application technique with the POR 15. On the large areas I used a small disposable, short napped roller (the one that comes in the disposable trey). That material lays down so well I'm confident that it will look just as good as using a brush. I followed up in the tight areas with a brush. I think next I'll remove all the glass and seals from the car. I'm ready to take a break from wire brushing for a while (at least my sore arm is).

IPB Image

IPB Image

IPB Image

IPB Image

IPB Image

IPB Image
Han Solo
Last two evenings I've been pulling the all the glass, window regulators, window guilds and interior trim pieces. I got all the glass out without cracks smile.gif The front windshield came out fairly easily. I was pleased to not find any rust under the molding there - just dirt. The A pillar trim actually looks pretty good but the top trim has cracks. Then I moved to the doors. Getting the glass out of the window regulators was a bit troublesome. After I fished the regulator mechanism out, then I went for the scrapers and guilds. The front guild holds the quarter glass and has an interesting adjuster at the bottom. The hardest piece was the rear guild with the two screws coming up through the bottom of the door. Those were pretty rusty and required a lot of PB Blaster. I left the door handles and latches in place. Overall the doors are in okay condition with moderate rust along the bottom. I think I'll be able to treat, paint and be fine. I'll probably seal the glass slot with a welded sheet metal strip. I finished up this evening pulling the rear interior trim and glass. That glass didn't need much prying at all - it practically fell out on it's own. Now I see why the firewall was in such bad shape with all the rain coming in behind the back pad. The areas around the rear glass and top of the roll structure are rust free though. Except for the rear roof latches that are somewhat rusty.

IPB Image

IPB Image

IPB Image
jaxdream
This thread reminds me of Veltor's 914 over in England , lots of patches , but with a goal in mind - sally forth !!!!! You are gaining some great experience out of this project .
piratenanner.gif

Jack
Han Solo
I am glad to have these front fenders treated. The drivers side was certainly much quicker than the other. Without any dents, it was just a matter of stripping the paint, closing up the holes, cleaning, metal prep and POR 15. I covered the turn indicator hole with a duplicate cut of sheet metal like the passenger side. The donor fender on that side has the side marker hole already covered so I had to do that on this side. That's actually four holes so I made a 3" square patch and welded it to the back side. That left a bit of an indentation so that will need some body filler. When I covered the antenna hole, I cut the sheet metal to fit and welded it flush. The hardest part about these fenders is scrapping off the under-coating and digging out the seam sealer. Getting this done opens the door for putting the front suspension on smile.gif

IPB Image

IPB Image

IPB Image

IPB Image
This is a "lo-fi" version of our main content. To view the full version with more information, formatting and images, please click here.
Invision Power Board © 2001-2024 Invision Power Services, Inc.