
Full Version: Optimusglen's build off challenge
That engine really looks nice. Are going to clean up the transaxle a bit when you get a chance?
QUOTE(Cairo94507 @ Aug 11 2021, 12:36 PM) 
That engine really looks nice. Are going to clean up the transaxle a bit when you get a chance?
Yeah, not likely before the install and the big road trip in September, but maybe over the winter, or if I can find someplace local that does the dry ice blasting. The under-side of the rear trunk area (above the trans) is pretty filthy too, so it might work best to have the whole area blasted at once.
Glen I'm a little bit behind you and making a big push right now to get where you are. Sent you a PM with contact info if you wouldn't mind giving me a call. Thanks and great progress.
Glen - exciting times!! Engine looks great; am eager to see how the Streetfire / 123 combination works out. I run a Streetfire on my 2.2, but with a stock disty. I looked in to 123 a while ago, but at the time the documentation gave the impression that it would not play nice with a CDI box (seemed to want to drive coils directly?). Things change of course, so am keen to see how your installation performs - that ease of setting advance is attractive on the 123
BTW: Post start up video or I'll just assume its all CGI....!
- Tony
BTW: Post start up video or I'll just assume its all CGI....!
- Tony
More progress today. My box from Pelican arrived early so I was able to get the pedal cluster back together and hook up the throttle and clutch cables.
I went with the Patrick Motorsports cable, heard nothing but good thoughts on it. Installation went well but it's just too long. Both ends are adjusted to be as short as possible, likewise with the sheath end that's bolted to the bellhousing. I couldn't figure anything out so I just tied a knot near the end to take up some length.
Oil tank is in now that one of my new hoses came in. Really nice piece but a bit too long. I think it'll be fine as I have a decent mounting concept.
I also finished the dash wiring. I'm using a 911 oil pressure/temp combo gauge. Thankful I have a '71 and already had the green/black wire for the pressure sender. It was just bundled into the harness behind the left gauge. The green/brown (or green/ reddish) that used to trigger the oil pressure panic light will now feed the oil temp. Both wires will be fed through the new 12 pin connector
I extended the wires for the fuel gauge down to a new 2" gauge. And while I was in there I finally wired in my 2" clock.
Oooh that steering wheel. Need a better pic from the side to really get the whole effect.
Yeah I need some new pictures in the car!
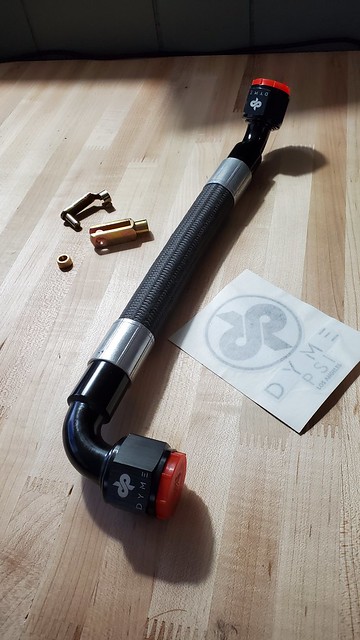
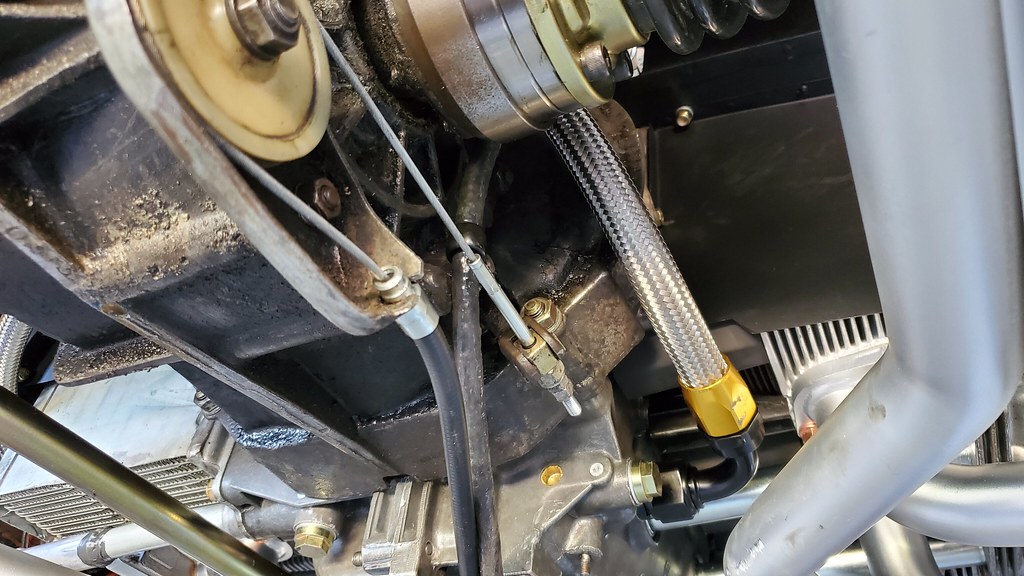
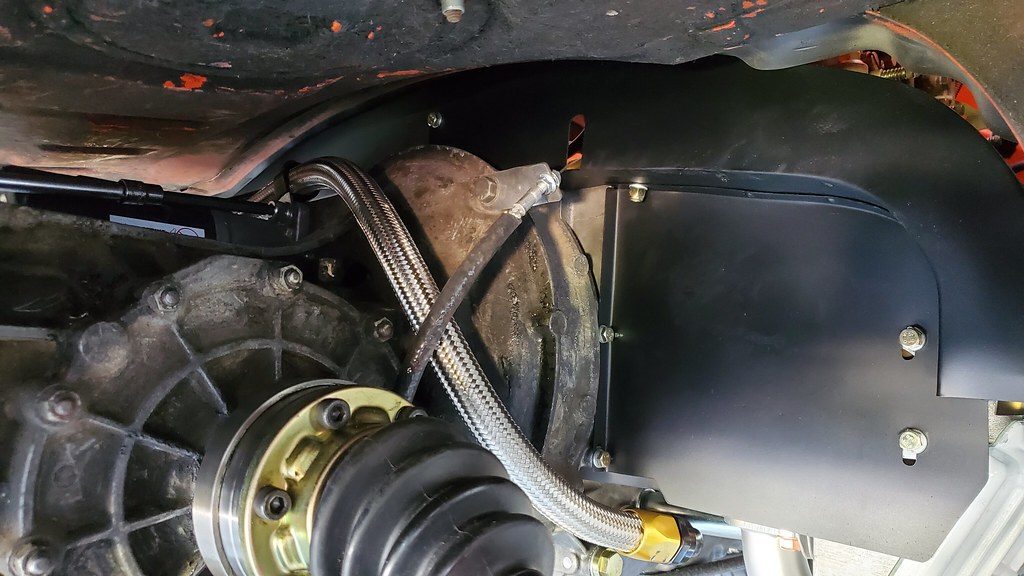
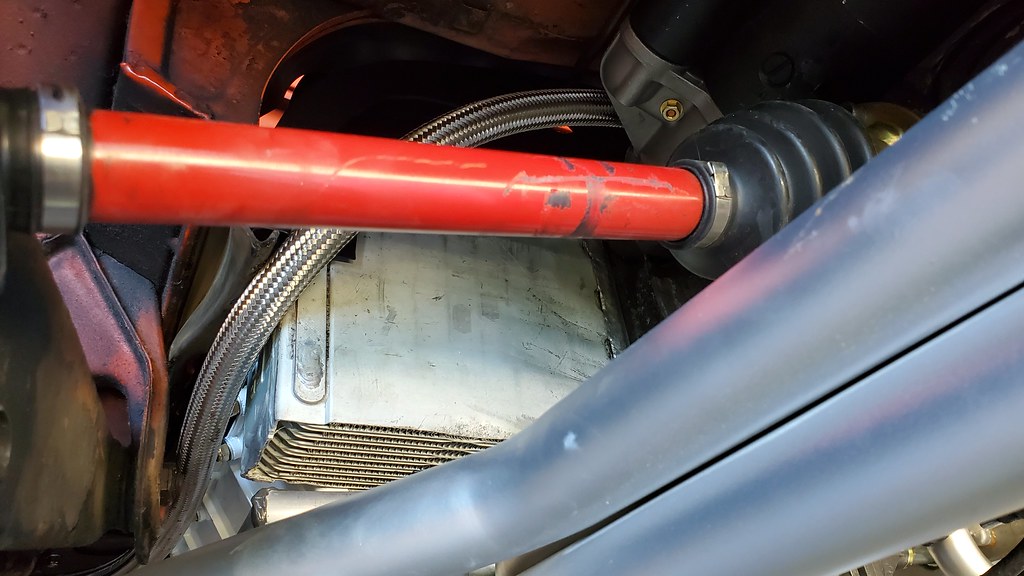
Another productive day, a bunch of supplies from Jegs arrived. Originally I was going to measure and have Dyme make my other 2 hoses, but I've always wanted to try out making AN hoses, and it was much cheaper as a DIY.
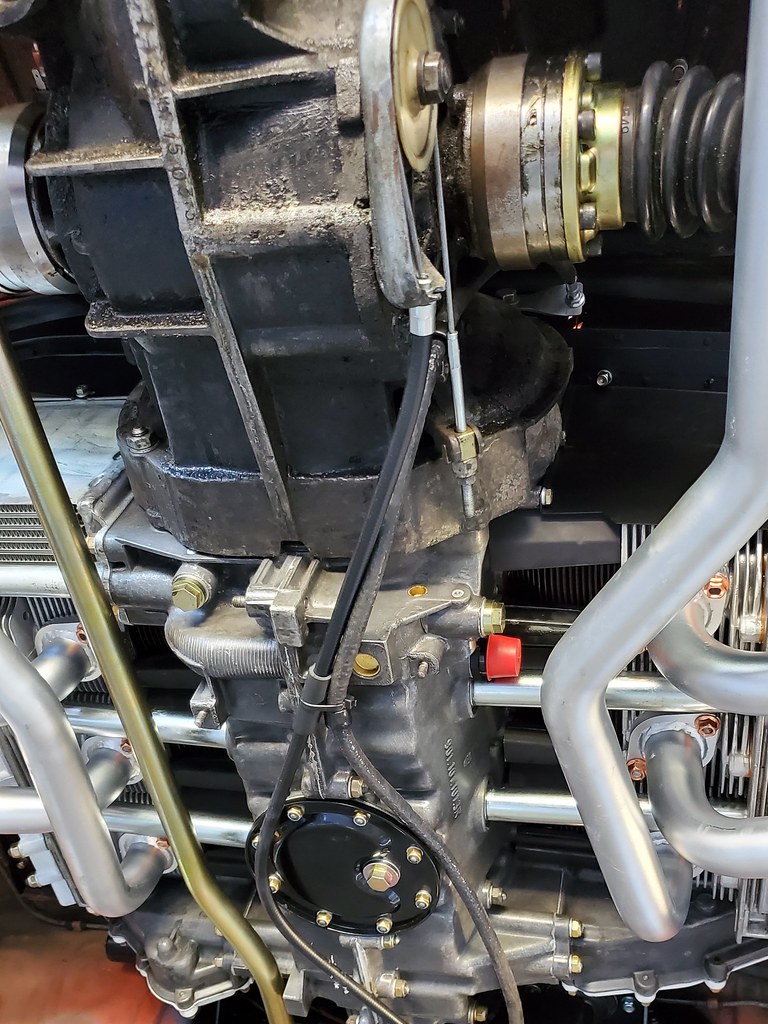
For the hose coming off the case, I took the advice of Ben and did a 90 going back, then looping up and over the bell-housing. I like this method because dangling oil hoses looks bad, and also I'd be terrified of some piece of road debris really ruining my day.
I have one rubber coated bracket off the top starter bolt that keeps the hose in place. The pictures make it look close to the axel but it's got plenty of clearance. I'll probably put something else at the corner by the oil cooler to keep it off the engine tin edges though.
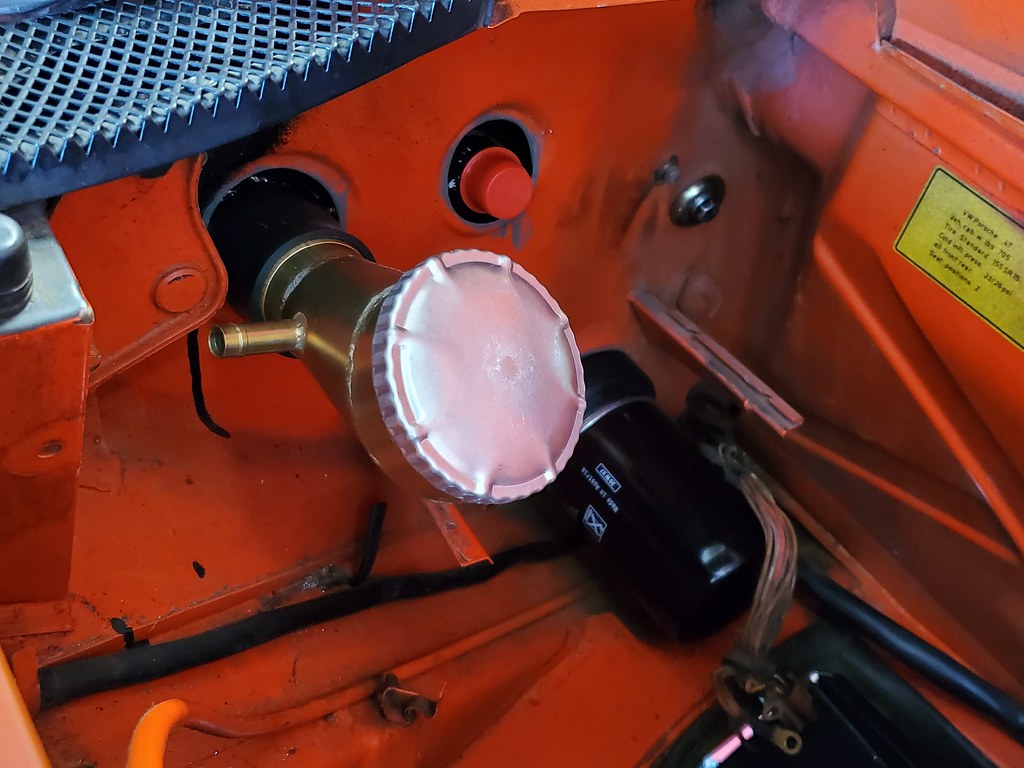
I also found a clean way to cap the heater tubes in the engine bay. Another product from McMaster
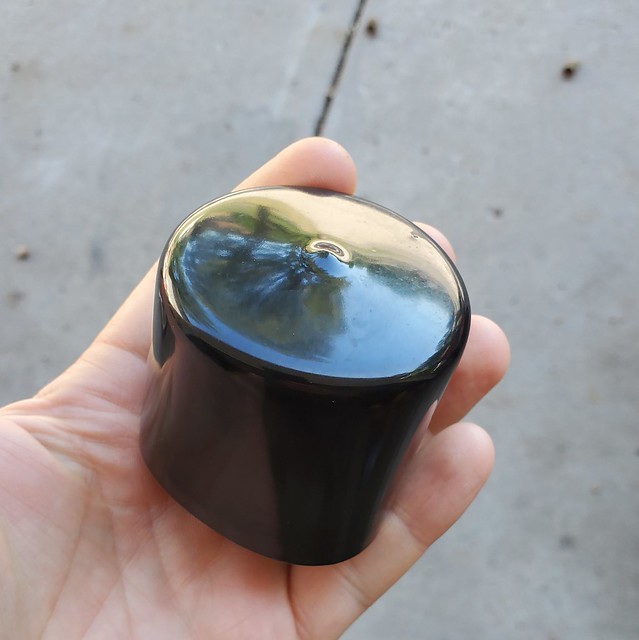
Flexible cap stretches over the tube. Could probably add a tie or two for extra hold, but I think it feels pretty good. Better than zip-tied spray paint caps anyway.
https://www.mcmaster.com/catalog/40005K57
Another productive day, a bunch of supplies from Jegs arrived. Originally I was going to measure and have Dyme make my other 2 hoses, but I've always wanted to try out making AN hoses, and it was much cheaper as a DIY.
For the hose coming off the case, I took the advice of Ben and did a 90 going back, then looping up and over the bell-housing. I like this method because dangling oil hoses looks bad, and also I'd be terrified of some piece of road debris really ruining my day.
I have one rubber coated bracket off the top starter bolt that keeps the hose in place. The pictures make it look close to the axel but it's got plenty of clearance. I'll probably put something else at the corner by the oil cooler to keep it off the engine tin edges though.
I also found a clean way to cap the heater tubes in the engine bay. Another product from McMaster
Flexible cap stretches over the tube. Could probably add a tie or two for extra hold, but I think it feels pretty good. Better than zip-tied spray paint caps anyway.
https://www.mcmaster.com/catalog/40005K57
Glen what are using for a throttle cable?
QUOTE(mb911 @ Aug 14 2021, 06:46 AM)
Glen what are using for a throttle cable?
The Patrick Motorsports one
Cool.. I may try one of those in the future. I have the factory setup and it works but not as free as I would like.
QUOTE(mb911 @ Aug 14 2021, 09:37 AM)
Cool.. I may try one of those in the future. I have the factory setup and it works but not as free as I would like.
I dunno... mine was too long even with all adjustments maxed. And the feel isn't as smooth as I was expecting. Maybe you're not supposed to run the pivot at the back of the carb with it? But then it seems way short...
QUOTE(Optimusglen @ Aug 14 2021, 06:56 AM)
QUOTE(mb911 @ Aug 14 2021, 09:37 AM)
Cool.. I may try one of those in the future. I have the factory setup and it works but not as free as I would like.
I dunno... mine was too long even with all adjustments maxed. And the feel isn't as smooth as I was expecting. Maybe you're not supposed to run the pivot at the back of the carb with it? But then it seems way short...
Just answered your other thread but the car I speak of had incredible smooth throttle. It did not use the pivot.
I pulled the cable and tried a few different setups, I tried it without the bell-crank pivot and it was WAY too short. Eventually landed on an old SAE long socket placed over the cable tube as it exits the firewall, this acting as a spacer. Only then was I able to get it to line up.
I bled the brakes again since I had the line apart at the bulkhead. Once I wrapped that up I did a few other small housekeeping things on the underside and then put the wheels back on and lowered it down.
Then I rolled it back inside and adjusted the ride heights at each corner.
Still some wiring to do, and a handful of other things.
I'm a bit paranoid, so I'm going to disconnect the oil feed hose and try to flush it out to make sure there's no little bit of anything inside.
QUOTE(Optimusglen @ Aug 16 2021, 10:30 AM)
I pulled the cable and tried a few different setups, I tried it without the bell-crank pivot and it was WAY too short. Eventually landed on an old SAE long socket placed over the cable tube as it exits the firewall, this acting as a spacer. Only then was I able to get it to line up.
I bled the brakes again since I had the line apart at the bulkhead. Once I wrapped that up I did a few other small housekeeping things on the underside and then put the wheels back on and lowered it down.
Then I rolled it back inside and adjusted the ride heights at each corner.
Still some wiring to do, and a handful of other things.
I'm a bit paranoid, so I'm going to disconnect the oil feed hose and try to flush it out to make sure there's no little bit of anything inside.
 me as well. My car starts at such a low rpm it takes a split second to build oil pressure and that drives me nuts. But always want to be careful.
I didn't want to keep worrying about it, so I pulled both ends off and ran a new plastic-coated steel cable with a piece of oil-soaked microfiber through the whole length of it, to pick up any loose bits that may have found their way in there. I was pleased with it and buttoned everything back up.
then I finished soldering the pins on the 12pin connector, and any other wiring that I had to do. Wiring is now DONE (excluding a 12v outlet that I may or may not add...)
I then filled the gearbox with oil and filled the oil tank/engine as well with my initial oil fill.
It's SO close now.
Tonight I'll get the alignment set (I can get it about 98% of the way there at home) and then maybe hook up the battery and start getting the distributor set up.
I also need to mark the flywheel with the TDC (and other marks) while it's all clean. Wish I did that before I installed the motor...
Oh very cool . I will be MIA for the next 4 days in Nashville but can't way to hear updates.
I was going to start the alignment, then couldn't find my string, and spent 3 hours cleaning my garage. Eventually accepting defeat and went to bed.
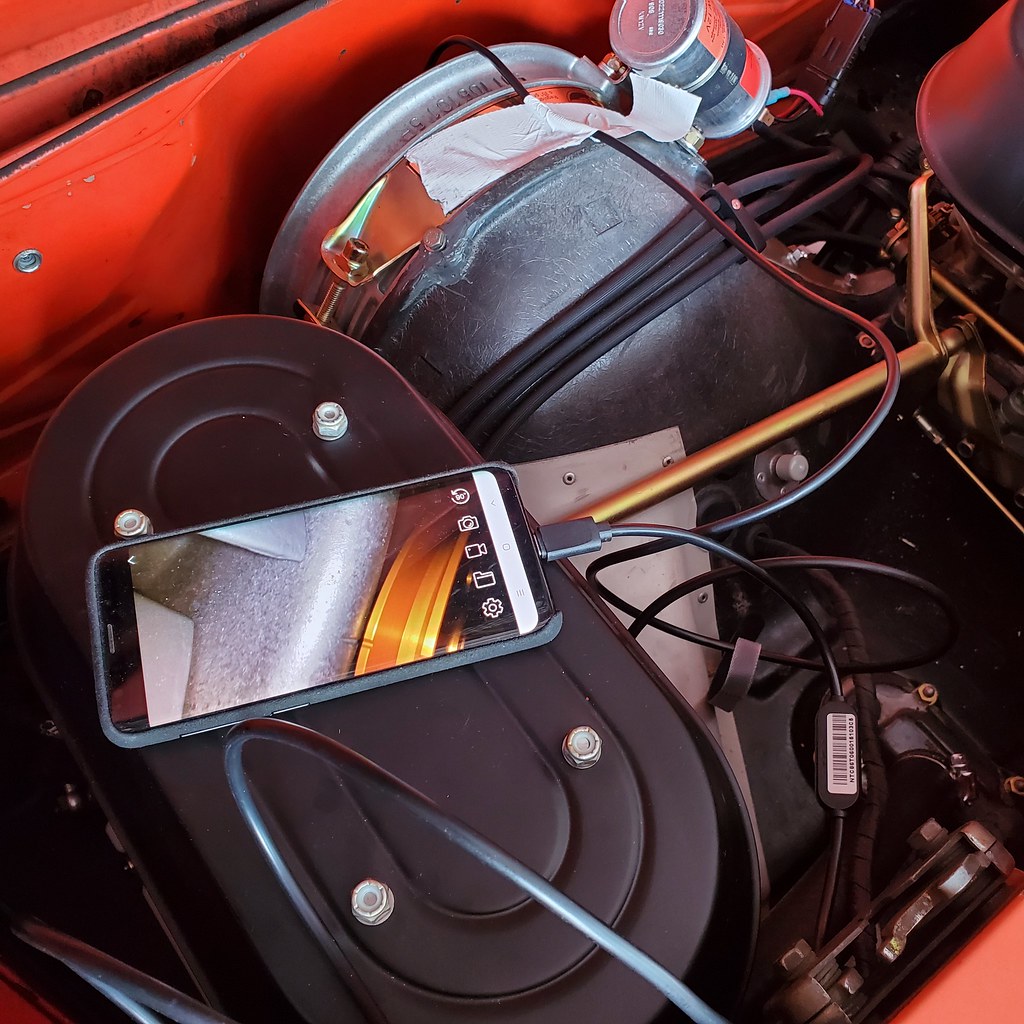
Yesterday I used my $30 Amazon boroscope and made new marks on the flywheel, duplicating all the marks from the crank pulley. I'm using an early 911 flywheel so no conflicting marks to deal with.
I should have done this before I put the engine in...
Once that was done I went out and picked up a new battery and put it in. Rolled the car out on the driveway and hooked up the leads. No smoke or sparks so that was a good sign.
Turned the key and both oil temp and oil pressure gauges were pegged (without turning over) After some digging I discovered that I had the sender wires flipped, temp to pressure gauge etc. I straightened that out then both needles would sit at 0 just off the needle with the ignition on.
Cranked it over with the fuel disconnected and plugs out, turns smoothly. I did 4-5 30-second pulses, about 3 minutes apart. So far pressure gauge isn't moving. Then I discovered a small oil leak at the intermediate shaft cap area
Glen - that was a cliffhanger last post!!
Did the green oil light go out? re: gauge not moving, could it be the gauge not working or sender connection not making contact? If you ground the sender wire on the engine case, does the gauge flick to full scale?
How big was the oil leak - enough to stop pressure building up? How much oil did you put in the tank as initial fill?
- Tony
Hahaha, it was a cliffhanger. Good Car-ma to you
QUOTE(Retroracer @ Aug 20 2021, 09:33 AM)
Glen - that was a cliffhanger last post!!
Did the green oil light go out? re: gauge not moving, could it be the gauge not working or sender connection not making contact? If you ground the sender wire on the engine case, does the gauge flick to full scale?
How big was the oil leak - enough to stop pressure building up? How much oil did you put in the tank as initial fill?
- Tony
I only have an oil pressure gauge and an oil temp gauge, no idiot light.
I'll check the wire/grounding next. I pinged a couple of Porsche engine builders I know and they both said it sometimes takes a while when only turning over with the starter.
The oil leak wasn't huge, but more than I'd like (which is zero oil leaks!)
The initial fill was 9qt.
I should note, I have an appointment at Further Performance for next Tuesday. They're the guys that tuned the Type-4 when I installed it, and they pulled the Type-4 out when it was done for. I enlisted their help for the first start and tune on the 6-cyl to have some experienced eyes and ears on it, and make sure the carbs are set and adjusted nicely.
I'll be climbing all over the car between now and then to make sure it's at a good starting point. Regarding the oil leak, I don't think it's big enough to warrant me pulling the motor right now, but when I drop the motor for the first valve adjustment I will definitely pull the intermediate shaft cover off, flatten the surface and re-install.
QUOTE(Retroracer @ Aug 20 2021, 09:33 AM)
Glen - that was a cliffhanger last post!!
Did the green oil light go out? re: gauge not moving, could it be the gauge not working or sender connection not making contact? If you ground the sender wire on the engine case, does the gauge flick to full scale?
How big was the oil leak - enough to stop pressure building up? How much oil did you put in the tank as initial fill?
- Tony
@Retroracer when I disconnect the sender wire from the sender it peggs without even touching the wire to ground.
I ran a standalone wire from the sender through the window and to the gauge and had the same result. I then tested the continuity from one end of the sender wire at the sender to the other end behind the gauge (both ends disconnected) and it was good.
Then I tested continuity between the disconnected sender wire at the sender, and the ground post in the engine bay, there was a connection there. This was with the sender wire attached to the gauge. I tried it again with the sender wire disconnected from the gauge and did not have a connection to ground.
My assumption then is that the oil pressure gauge is bad. Does anyone agree?
When you ground out the sender wire to the case does it peg? If so then the sender is bad.
re: "when I disconnect the sender wire from the sender it peggs without even touching the wire to ground."
So that sounds like you may have the wrong sender / gauge combo; NOT necessarily a bad unit. The stock 911T (press / temp) combo gauge and sender works as follows: If the sender is disconnected, the pressure reads zero; if you short the sender wire to GND the gauge should "peg" at full scale. The action of the sender is high resistance for zero/low oil pressure, lower resistance as pressure increases.
I'd suggest double checking the gauge <> sender match and wiring to the gauge before drawing conclusions. Adding the idiot light (if you have the dual terminal 911 pressure sender) is worthwhile as a sanity check; plus "eye catching" if you get a low oil pressure situation when driving.
- Tony
PS. feel free to PM me if you want to talk through debug
I did verify that the sender and the gauge are both correct for a '71 911T
And that was my understanding on how it functions, which is why I thought there was a short to ground inside the gauge itself?
Also, I found the old pressure sender that came on the motor and tested that as well, with the same result as the new URO sender I was using at first.
I have another gauge from a friend I'll pick up tomorrow and see.
good test for oil is to crack loose the cam oil lines at cam tower. You can then crank until you see oil seeping and know things are getting lubed as this is the last locations with easy access to get oil.
Click to view attachment
Some times takes longer cranking than you would think.
john
Click to view attachment
Some times takes longer cranking than you would think.
john
QUOTE(targa72e @ Aug 20 2021, 07:59 PM)
good test for oil is to crack loose the cam oil lines at cam tower. You can then crank until you see oil seeping and know things are getting lubed as this is the last locations with easy access to get oil.
Click to view attachment
Some times takes longer cranking than you would think.
john
@targa72e I had a mild freak out when I looked at the diagram you posted, the 914 tank is plumbed differently.
I cracked the banjo on the 4-5-6 side cam tower and flicked the starter, lots of oil came out. So that's a good sign. I'm guessing my starter just doesn't turn the motor fast enough to register oil pressure on the gauge yet, at least for the stretches I gave it.
QUOTE(Optimusglen @ Aug 21 2021, 01:41 AM)
QUOTE(targa72e @ Aug 20 2021, 07:59 PM)
good test for oil is to crack loose the cam oil lines at cam tower. You can then crank until you see oil seeping and know things are getting lubed as this is the last locations with easy access to get oil.
Click to view attachment
Some times takes longer cranking than you would think.
john
@targa72e I had a mild freak out when I looked at the diagram you posted, the 914 tank is plumbed differently.
I cracked the banjo on the 4-5-6 side cam tower and flicked the starter, lots of oil came out. So that's a good sign. I'm guessing my starter just doesn't turn the motor fast enough to register oil pressure on the gauge yet, at least for the stretches I gave it.
Glen I had the exact same reaction !
The bottom nipples are in opposite positions 911 vs. 914 6 tanks.....!!!!!
I've been around both for many years and never noticed.
Now I've got to go back to settle my nerves about my 911 thermo/ 914 6 GT cooler
plumbing.
QUOTE(Optimusglen @ Aug 20 2021, 04:45 PM)
I did verify that the sender and the gauge are both correct for a '71 911T
And that was my understanding on how it functions, which is why I thought there was a short to ground inside the gauge itself?
Also, I found the old pressure sender that came on the motor and tested that as well, with the same result as the new URO sender I was using at first.
One final thing is to check the connections to the gauge and make sure B+ and G (sender) are not swapped. Also that there is a case GND/chassis connected.
Good luck - you must be itching to get that thing running!
- Tony
I checked using a known good gauge and had the same result, on top of that I still had an oil leak near the intermediate shaft cap, so this morning I dropped the motor again.
I'm going to pull the cap and resurface, check everything over up there and try to get it back in today.
My theory is that the oil leak is releasing any pressure that my little starter is able to build.
I did check and recheck wiring connections, and checked the sender wire itself for continuity and shorts.
Gotta get it back together today, I'm working tomorrow and my appointment to get it running is Tuesday!
My guess Is that you will not be able to read oil pressure with the starter. Only be able to see it with the idiot light. This is from many many 911 engine builds worth of experience.
That's good to know @mb911 , thanks!
When I dropped the motor I found that there was MUCH more oil in the sump than what came out of the line/tank. Maybe a side effect of all the engine cranking I did? Does anyone care to speculate?
I surfaced the intermediate shaft cap and reinstalled the engine, then got it back up and in. The car is back in one piece and ready for tomorrow. Although now I'm really worried about oil pump seals. I was very careful when getting the case halves together, but you know how the mind works when nearing the end of an engine build and finding something you didn't expect...
I've had the appointment set for about a month. When I made it I wasn't sure if I would be ready, but it was a date that was available. Heck, I wasn't even sure if I would have them do it or if I would end up doing it all myself. Right now though, I'm pretty burned out on working on it and I'm glad I have it.
So, lets hope the next project update I post here is me driving the car.
QUOTE(Optimusglen @ Aug 23 2021, 08:08 AM)
That's good to know @mb911 , thanks!
When I dropped the motor I found that there was MUCH more oil in the sump than what came out of the line/tank. Maybe a side effect of all the engine cranking I did? Does anyone care to speculate?
I surfaced the intermediate shaft cap and reinstalled the engine, then got it back up and in. The car is back in one piece and ready for tomorrow. Although now I'm really worried about oil pump seals. I was very careful when getting the case halves together, but you know how the mind works when nearing the end of an engine build and finding something you didn't expect...
I've had the appointment set for about a month. When I made it I wasn't sure if I would be ready, but it was a date that was available. Heck, I wasn't even sure if I would have them do it or if I would end up doing it all myself. Right now though, I'm pretty burned out on working on it and I'm glad I have it.
So, lets hope the next project update I post here is me driving the car.
You will have a good amount of oil in the case until its running. Also did you rebuild your pump or replace or just clean. It's really hard to get those seals out of place so I think you will be just fine. The biggest issue I see on these conversions is lack of understanding of the oil flow path and clocking the oil filter console correctly which is just sometimes over looked. I suspect you are all good to go so just be patient.
Yes, a 4-rib oil pump was purchased and rebuilt by Henry at Supertech. I believe a 4 rib is the minimum requirement for the oil bypass case mod to work.
Thanks again for your input!
Thanks again for your input!
QUOTE(Optimusglen @ Aug 23 2021, 09:53 AM)
Yes, a 4-rib oil pump was purchased and rebuilt by Henry at Supertech. I believe a 4 rib is the minimum requirement for the oil bypass case mod to work.
Thanks again for your input!
Same guy that did mine. Works great in my car with very little drain back to the case and very little smoke on start up.
The engine will always fill with oil from the tank when sitting. The oil pump has clearances and the oil will go right thru. When the oil level in tank is higher than the engine it drains out of tank until level. The scavenge side of the pump (which returns oil to tank) is much larger than pressure side. When the engine is running there is more oil volume being pumped to the tank so the tank is full. This is why you have to check the oil level with engine running.
On the GT3's the scavenge side of the pump is large enough that it pulls a vacuum in the engine. GT3's have valving to maintain this vaccuum which reduces windage. I believe on some GT3's the rear main seal is installed the reverse of normal to aid in vacuum retention.
On the 2.4 in my -6 conversion I do not get enough pressure for the gauge or oil light to go out when just cranking. Once started light and gauge move off zero.
john
Thanks guys, from talking me back from the proverbial ledge. I can't wait for tomorrow!
Now, do I hitch a ride with the tow driver down to the shop, Uber down, or take my daily and go back for it at a later date? Decisions decisions.
Now, do I hitch a ride with the tow driver down to the shop, Uber down, or take my daily and go back for it at a later date? Decisions decisions.
We have the car at the shop now, I'll be doing live updates throughout the day on my Instagram
@glen_in_the_garage
So far, we weren't getting power at the fuel pump. My best guess is the wiring that I spliced in, it's right at the snorkel and buried under the firewall engine mount. For now we're jumping it and I'll dig into that at home.
Then the passenger side carb was a geyser, maybe a stuck float? Currently pulling it apart to see.
We did some more cranking earlier on, before fuel, and I did see the pressure gauge move a bit, so that's nice.
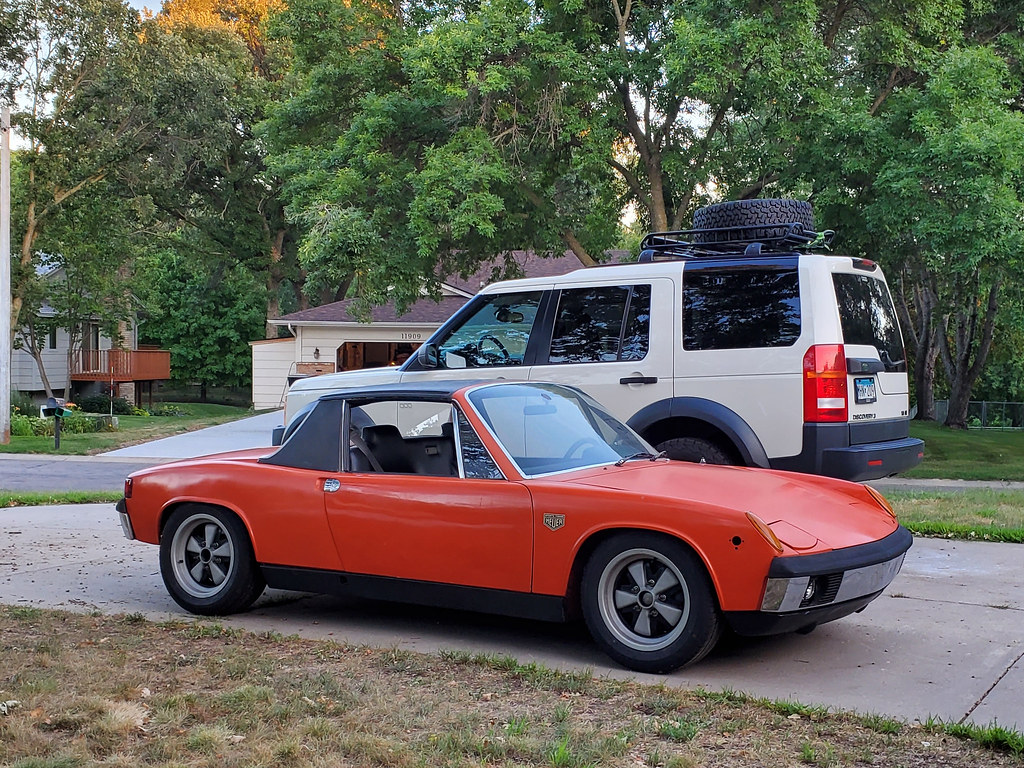
It's running!
Currently doing the 20 min run and the guys are monitoring it closely.
Currently doing the 20 min run and the guys are monitoring it closely.
Cheers !¡!


Marty
Marty
The four rib is the ultimate.
On early cars the oil light can be on at idle when at elevated temp (engine & ambient)
and not be a big cause for concern.
Cranking speed with plugs out will usually turn OP light off.
Can take some time and cranking sound changes noticably when OP comes up.
Great milestone Glen! Congratulations !
Rory
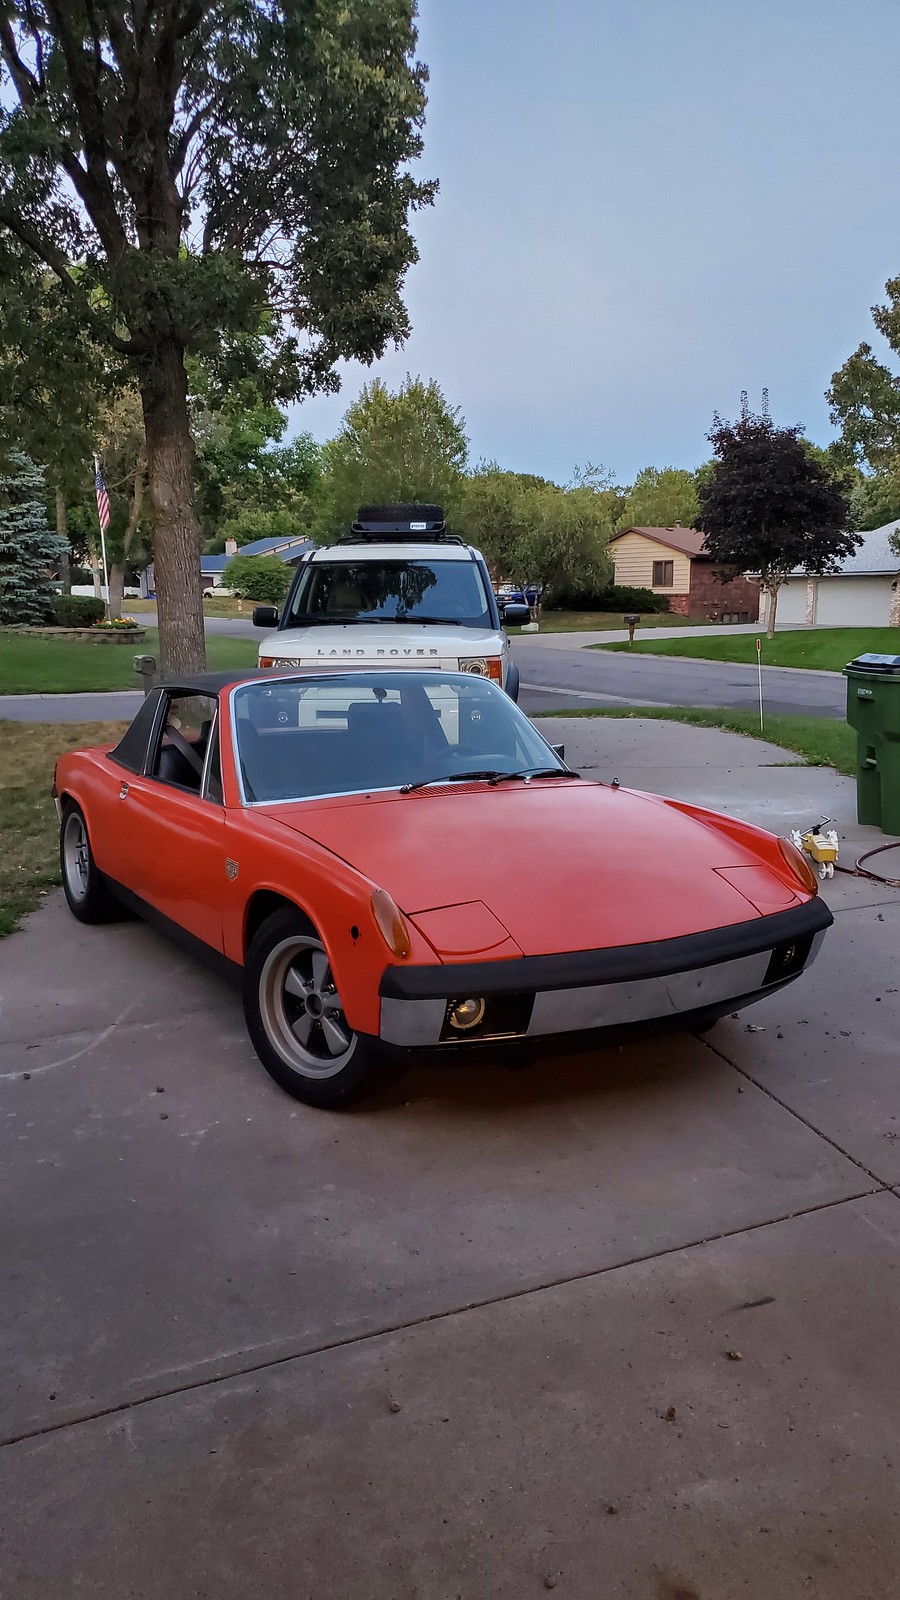
Well it's running and I drove it home. A few things I need to address:
-brake light switch at pedal is stuck on
-oil pressure gauge worked when initially cranking this morning, currently not. Need to dig back into that
-need a real alignment, I got it pretty close but it needs some love
-fuel pump power is cut somewhere, probably right where I spliced the wire in all those years ago, which is basically where the snorkel is buried under the mount. We got it going with a wire routed outside of the car and a toggle to turn it off/on.
It sounds good, but will be better with Ben's muffler in place.
And I need to figure out why the tach isn't going.
Yay! ![popcorn[1].gif](http://www.914world.com/bbs2/style_emoticons/default/popcorn[1].gif)

Congrats, Glen!!
Awesome!
Great story !
!
Result!! Nice job Glen.
- Tony
- Tony


That's some great news there.
Bask in your glory...you deserve it.
Congrats, well deserved!
VROOM! Isn't it the greatest when you drive it for the first time?
BIG congrats!
BIG congrats!
I figured out what the issue was with the fuel pump wiring, but a bit late.
When I originally moved the pump to the front I followed this guide
http://www.914world.com/specs/SirAndyCarbFuelPumpRelay.php
One item that I failed to remember when putting this all back together was the wire added to ground to replace the FI brain. So we couldn't get the fuel pump to go and I didn't knoiw why. We rigged it to get me home.
Last night I was digging into it, and I was following a guide that tested the relay boar traces, and everything seemed exactly right but I still wasn't getting power through the fuel pump relay (tested the relay, swapped known-good relays, had +12 at pin 30 on the relay, etc)
Eventually, I pulled +12 switched power from the 4-pin FI plug, ran it to the front with an inline 10A fuse near the fuel pump, and was hoping that would be acceptable.
Lo and behold today I re-discover the walkthrough that SirAndy posted, the link above, and it all came flooding back from all thos eyears ago. To my amusement, the solution I had found was also described in his post as a "last resort"
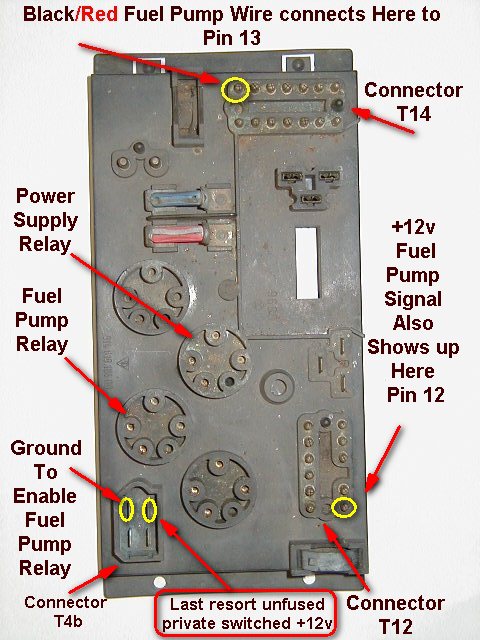
I'm a bit upset that my wiring isn't as original and clean as it could be, but I'm glad I have a working solutuion at least and I know what the problem was.
When I originally moved the pump to the front I followed this guide
http://www.914world.com/specs/SirAndyCarbFuelPumpRelay.php
One item that I failed to remember when putting this all back together was the wire added to ground to replace the FI brain. So we couldn't get the fuel pump to go and I didn't knoiw why. We rigged it to get me home.
Last night I was digging into it, and I was following a guide that tested the relay boar traces, and everything seemed exactly right but I still wasn't getting power through the fuel pump relay (tested the relay, swapped known-good relays, had +12 at pin 30 on the relay, etc)
Eventually, I pulled +12 switched power from the 4-pin FI plug, ran it to the front with an inline 10A fuse near the fuel pump, and was hoping that would be acceptable.
Lo and behold today I re-discover the walkthrough that SirAndy posted, the link above, and it all came flooding back from all thos eyears ago. To my amusement, the solution I had found was also described in his post as a "last resort"
I'm a bit upset that my wiring isn't as original and clean as it could be, but I'm glad I have a working solutuion at least and I know what the problem was.
This is a "lo-fi" version of our main content. To view the full version with more information, formatting and images, please click here.