Help - Search - Members - Calendar
Full Version: A Texas Sized Project - 1975 2.0L
914World.com > The 914 Forums > 914World Garage
Pages: 1, 2, 3, 4, 5
aggiezig
QUOTE(porschetub @ Sep 11 2017, 01:28 AM) *

Very impressed have been following progress....POS to really nice car is my thoughts,well done.


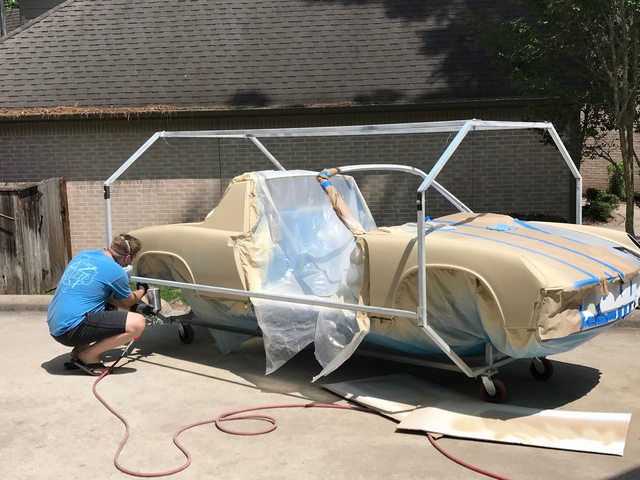
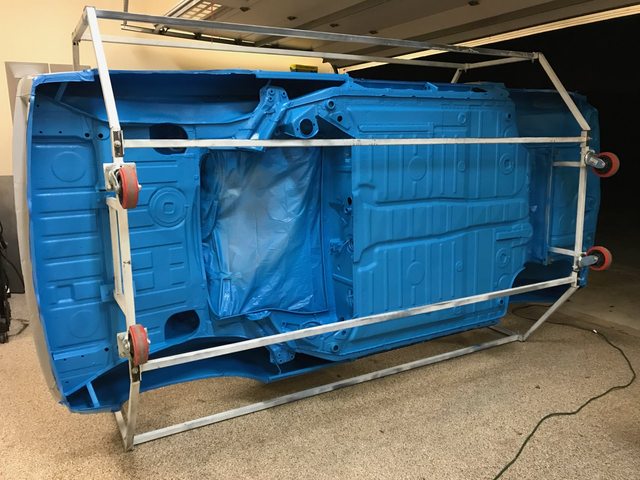
Thanks for the kind words, they help to keep me motivated sawzall-smiley.gif

QUOTE(Tbrown4x4 @ Sep 11 2017, 04:09 AM) *

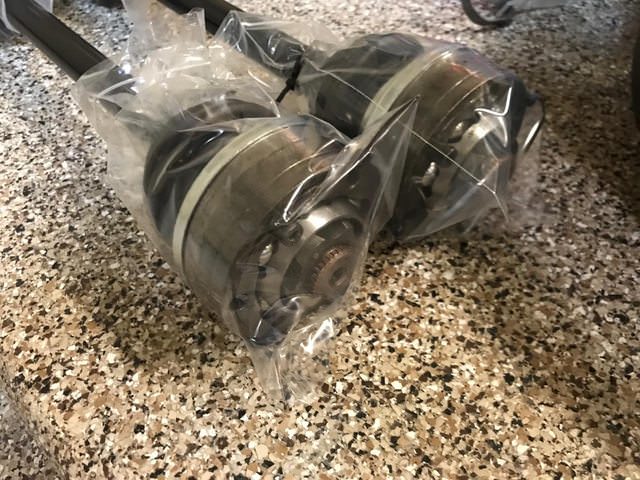
I didn't see if anybody answered your question about removing pushrods to build oil pressure. Never heard of such a thing.

Adjust your valves. Remove your sparkplugs and disable the ignition. Crank until you get oil pressure, then install spark plugs, connect ignition, and fire it up. Maintain 2000 RPM for 20 minutes to beak in the cam. (Or whatever the cam MFG recommends.)


That's exactly what I was planning to do. Good to hear some confirmation from someone else that my break-in plan was sufficient without pulling the pushrods.

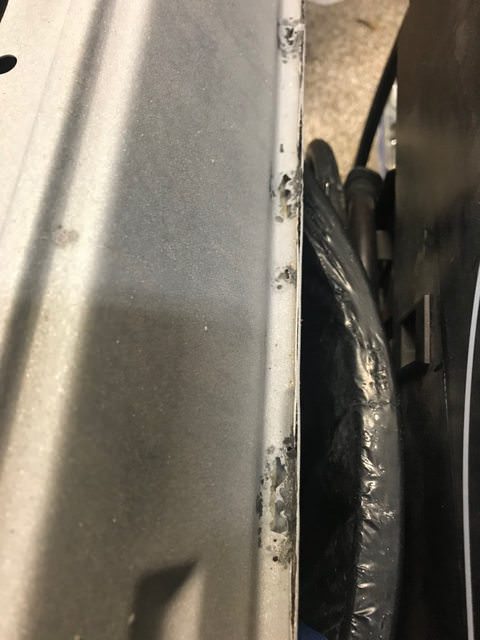
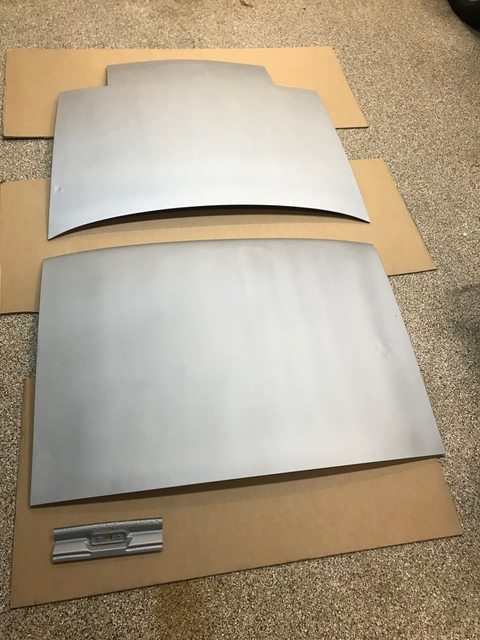
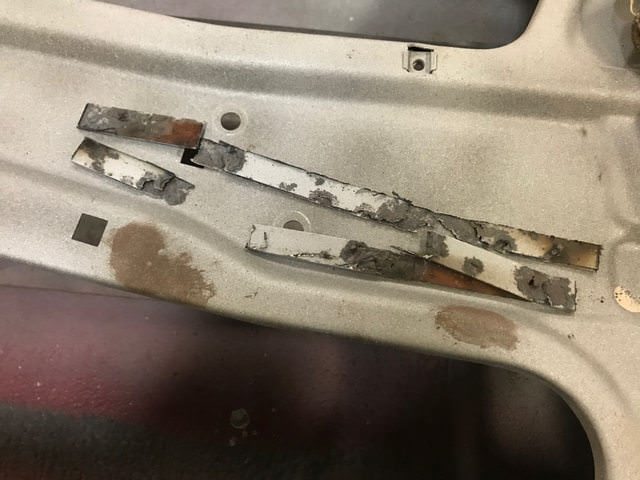
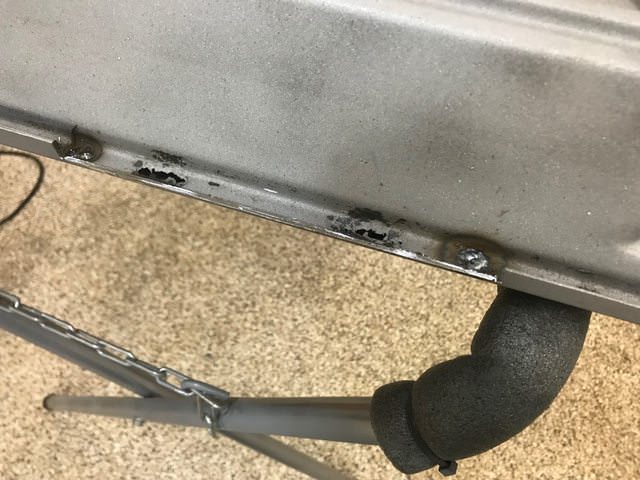
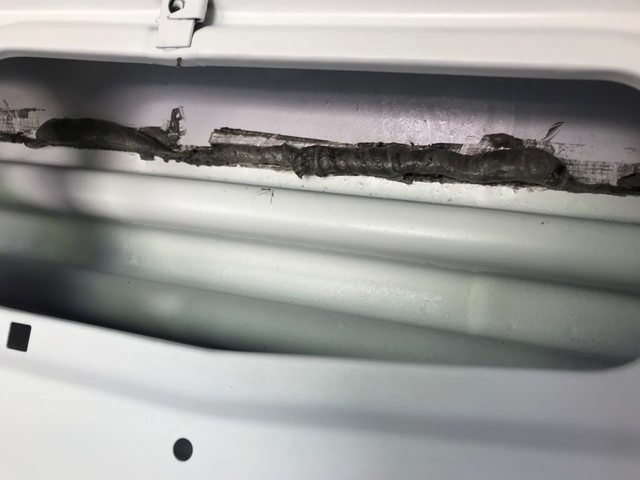
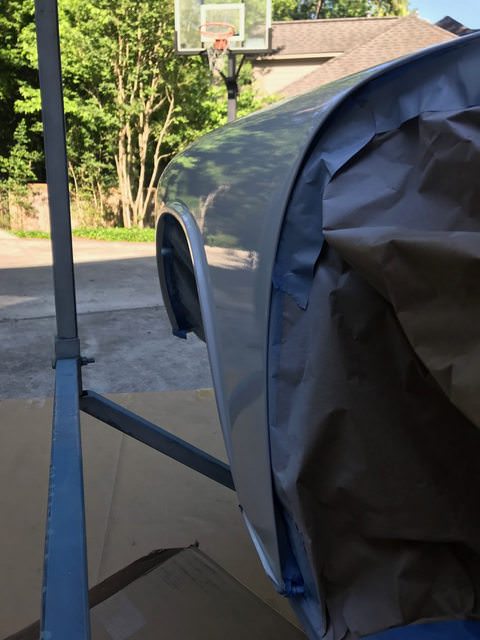
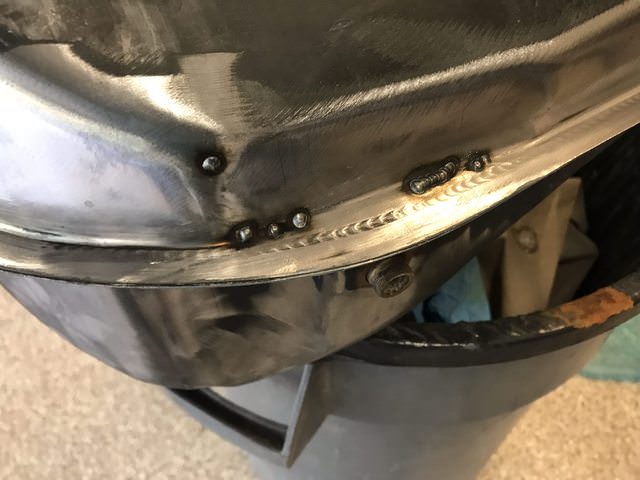
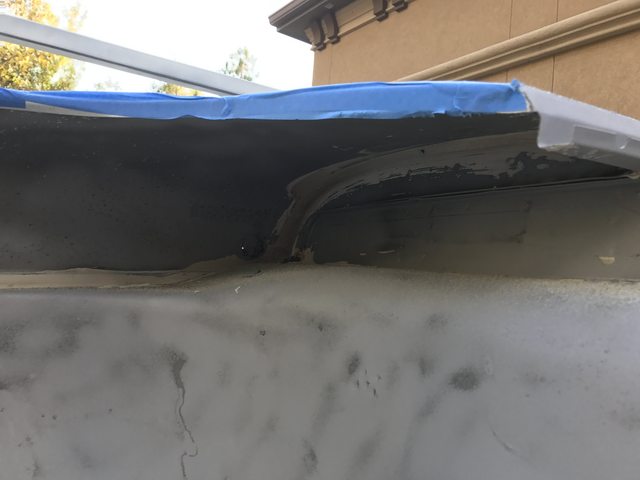
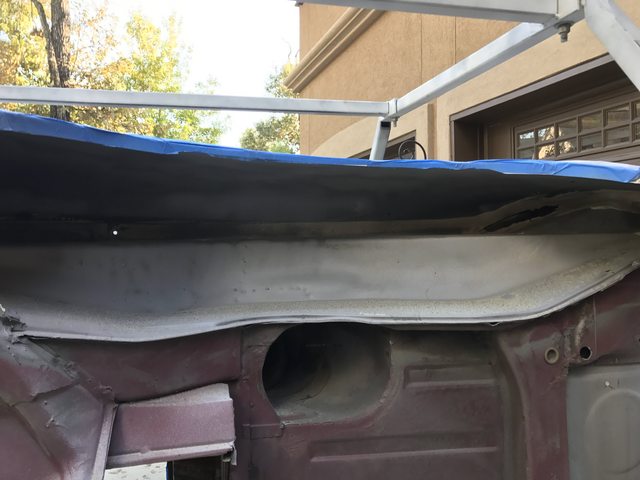
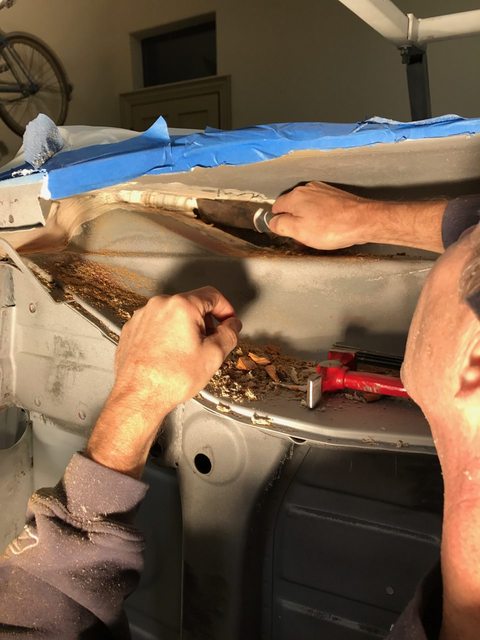
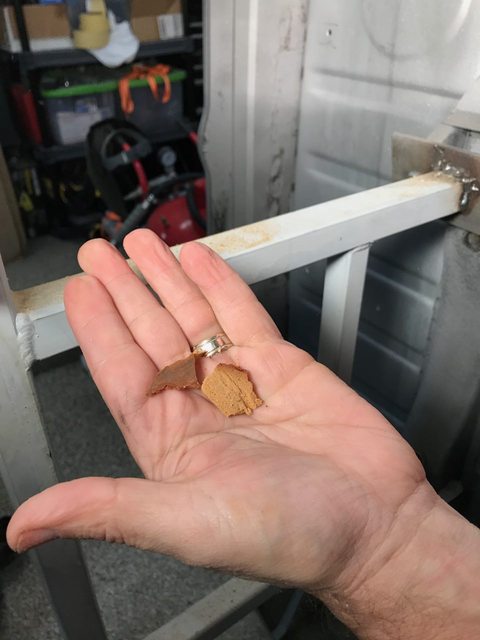
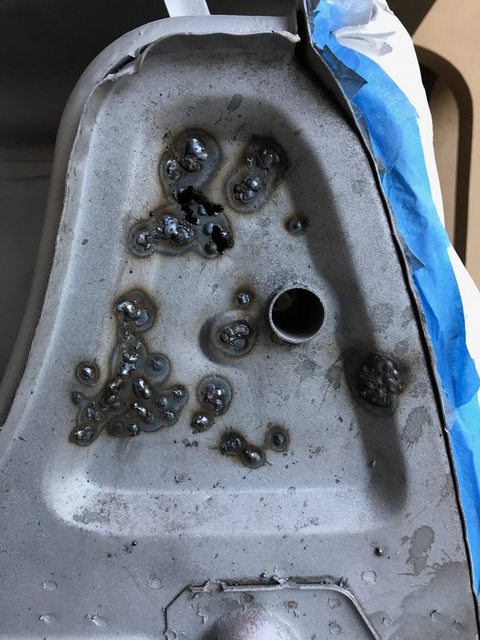
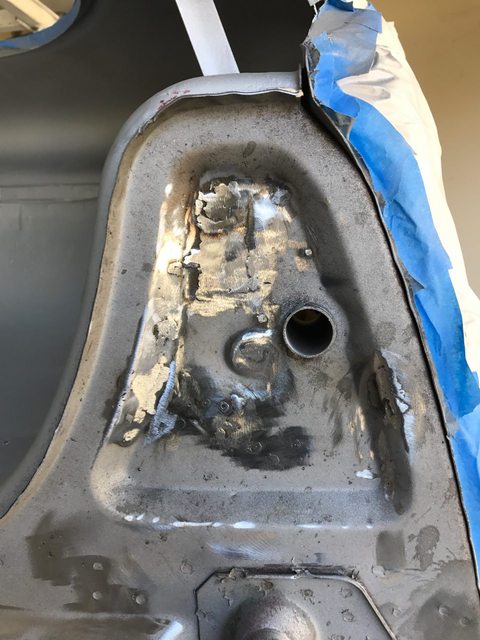
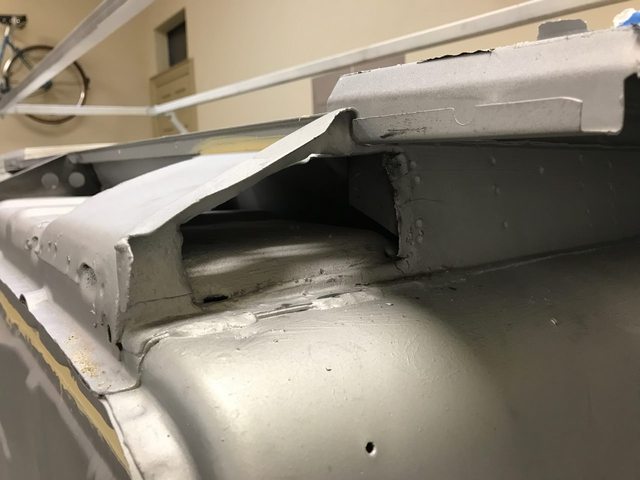
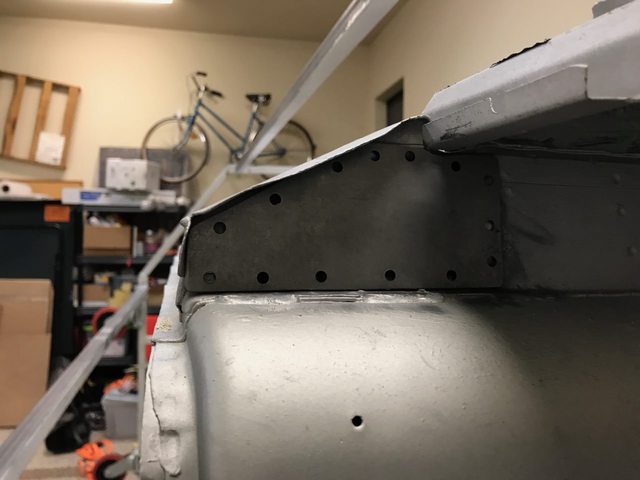
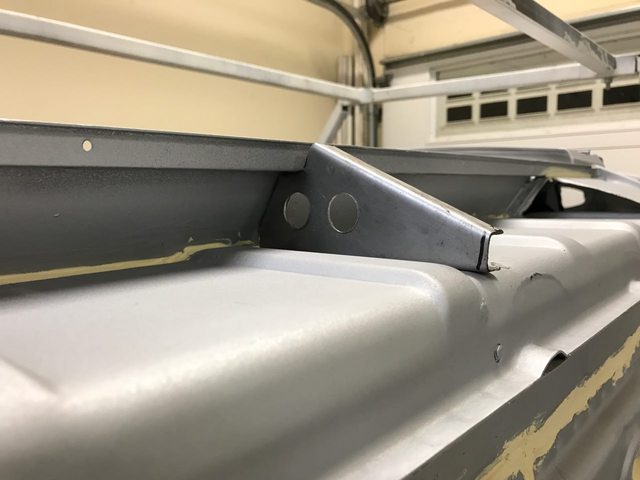
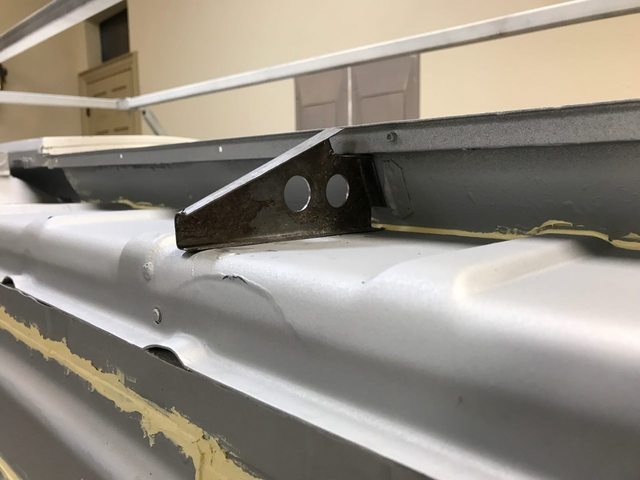
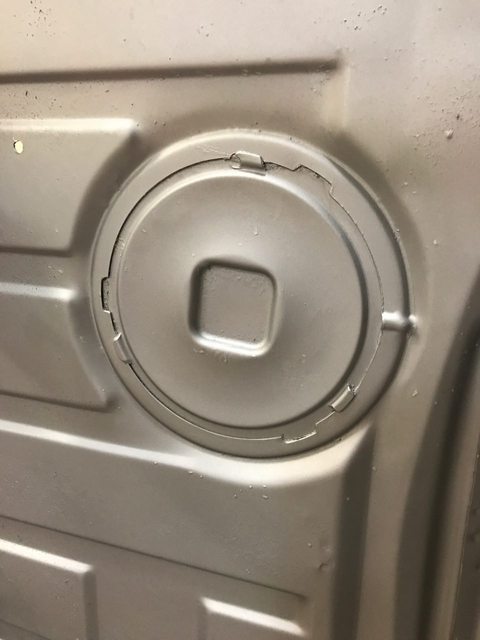
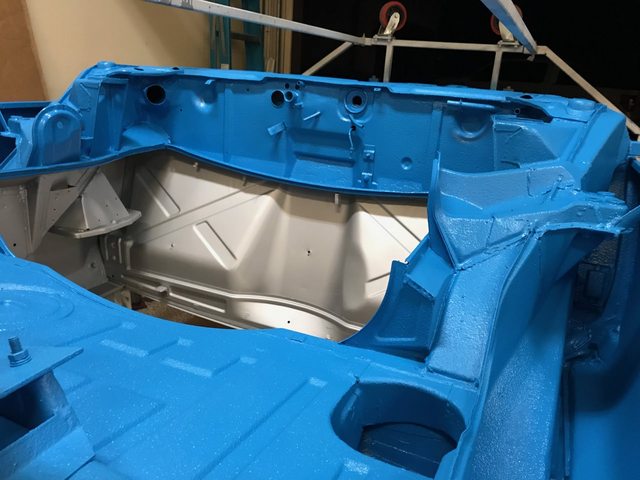
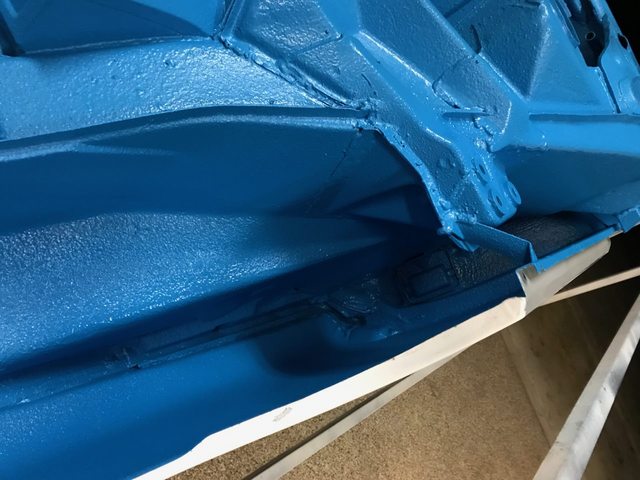
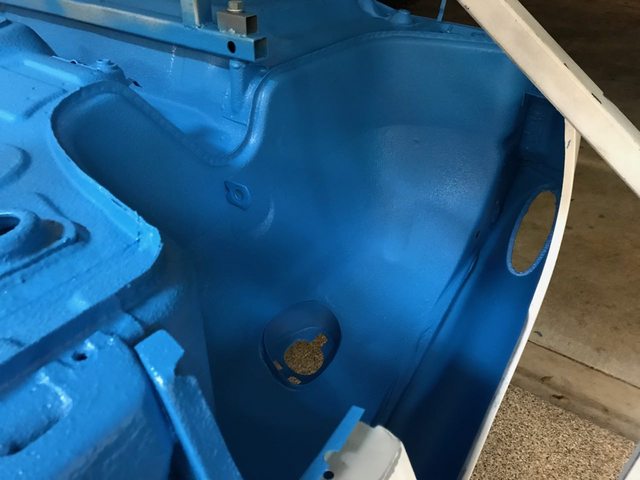
QUOTE(barefoot @ Sep 11 2017, 05:46 AM) *

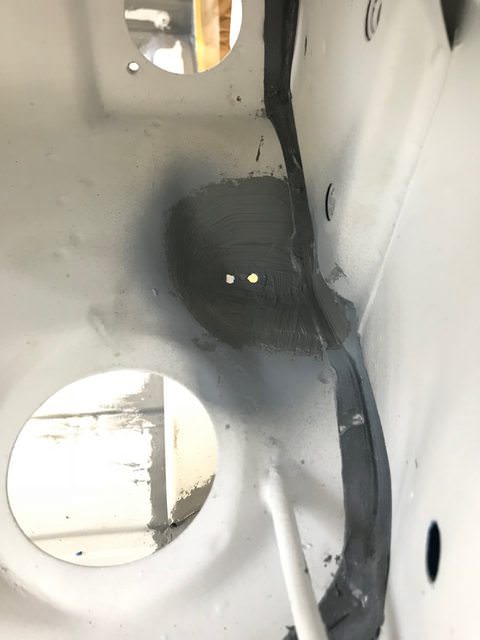
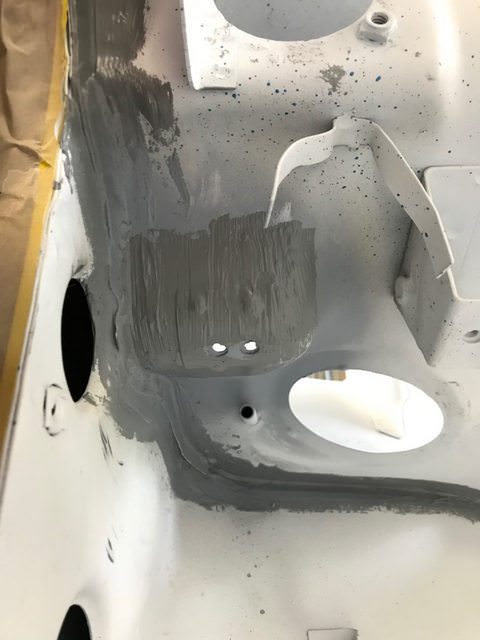
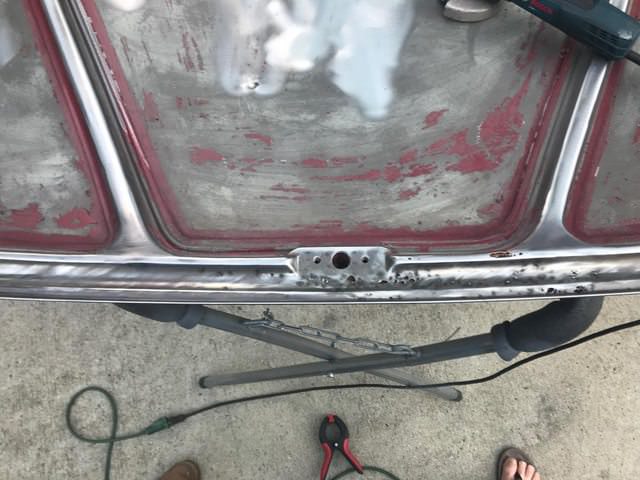
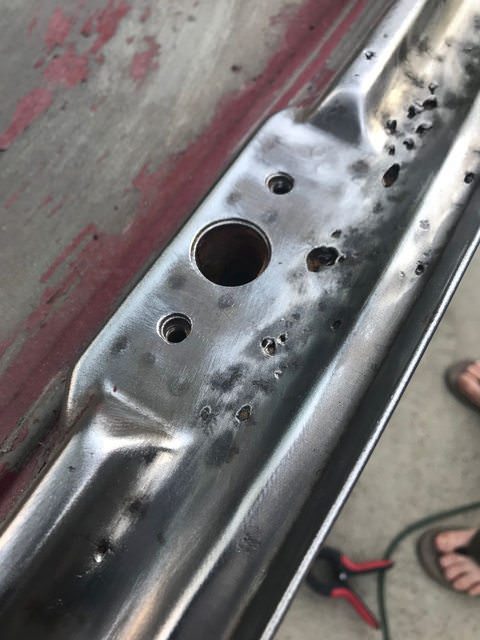
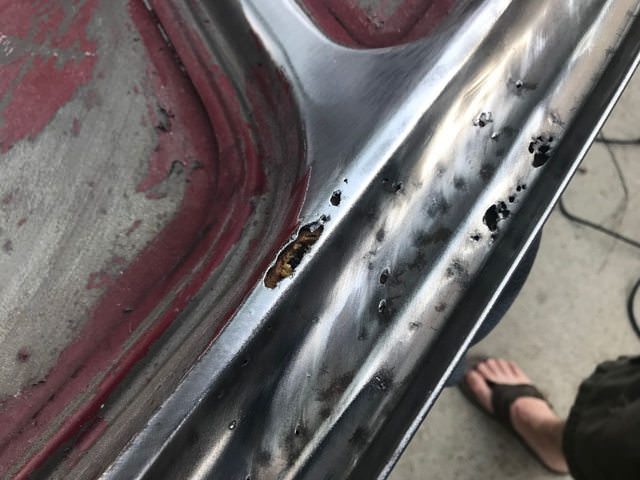
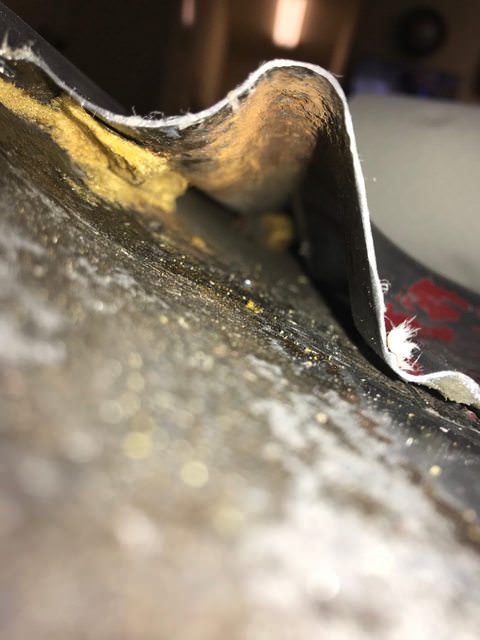
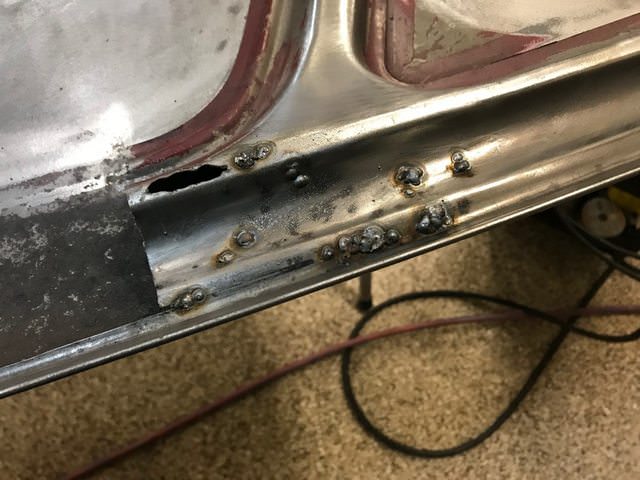
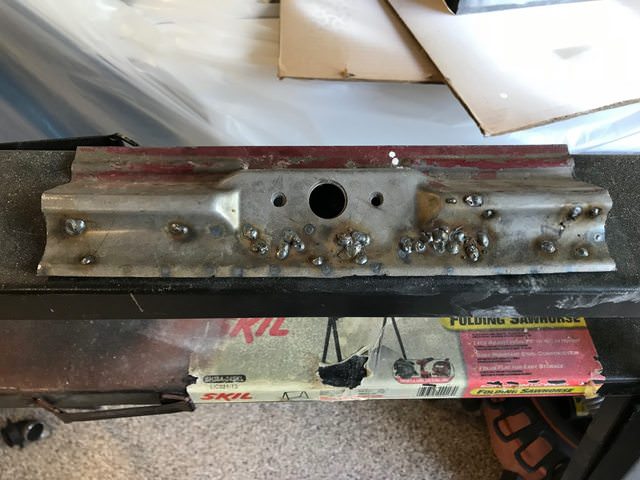
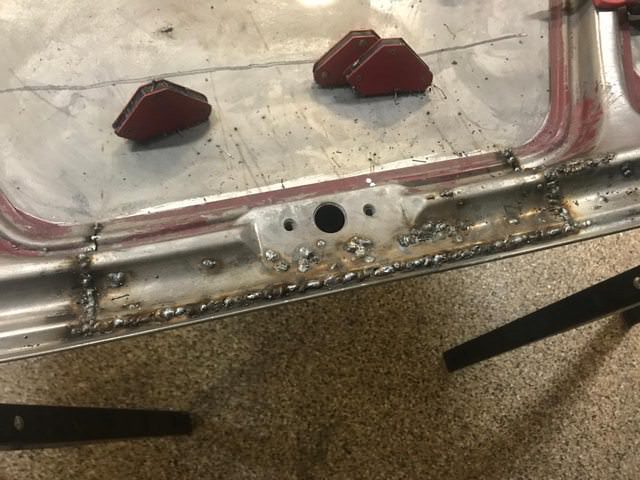
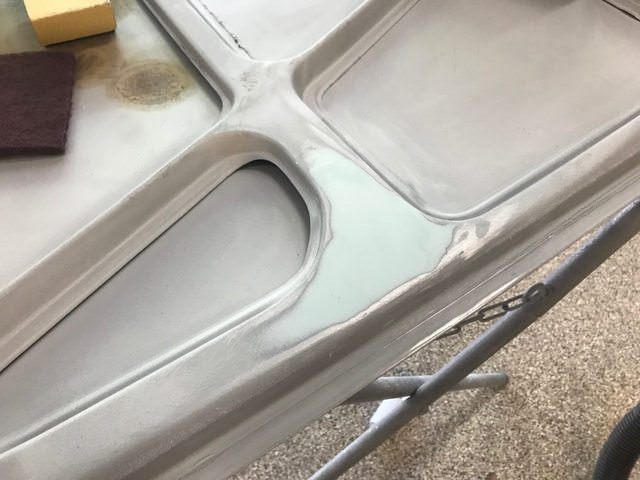
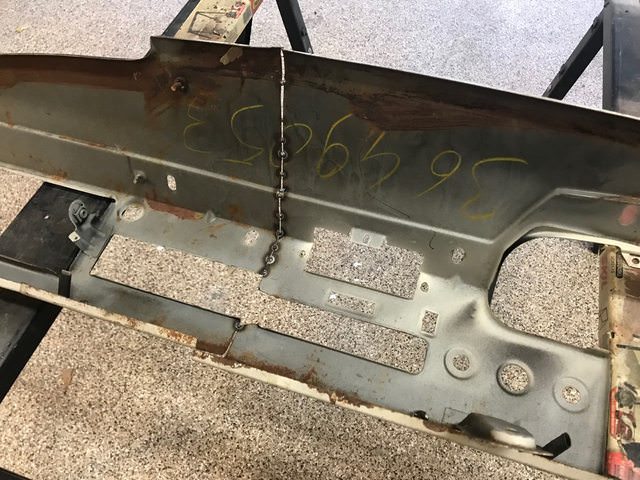
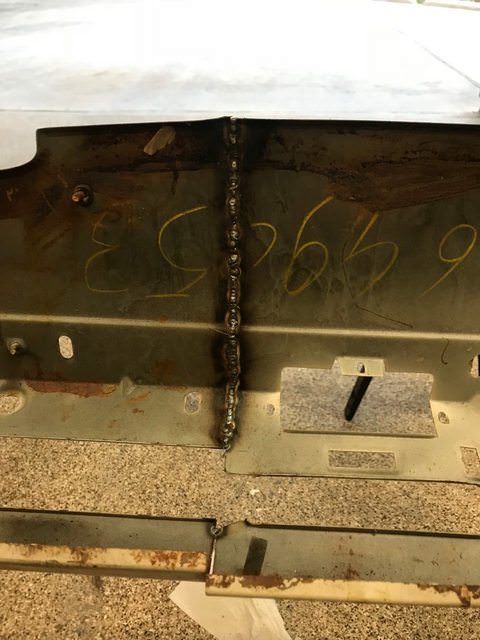
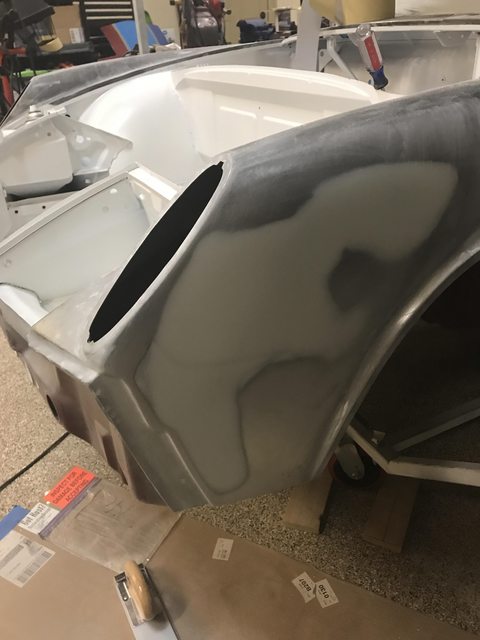
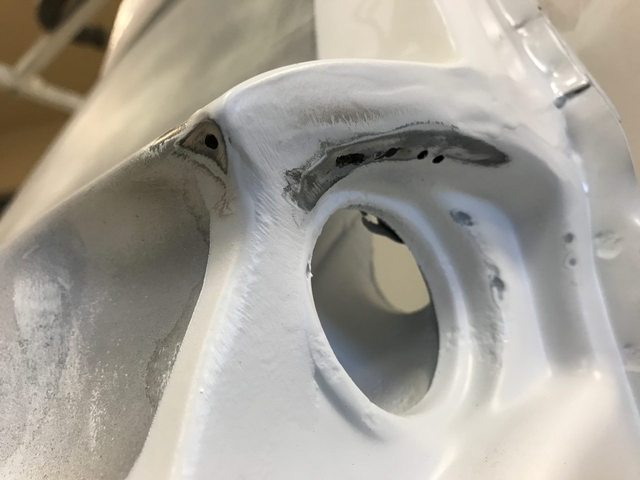
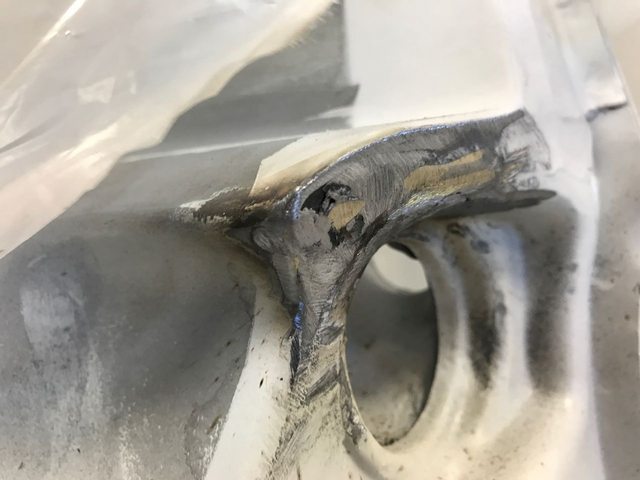
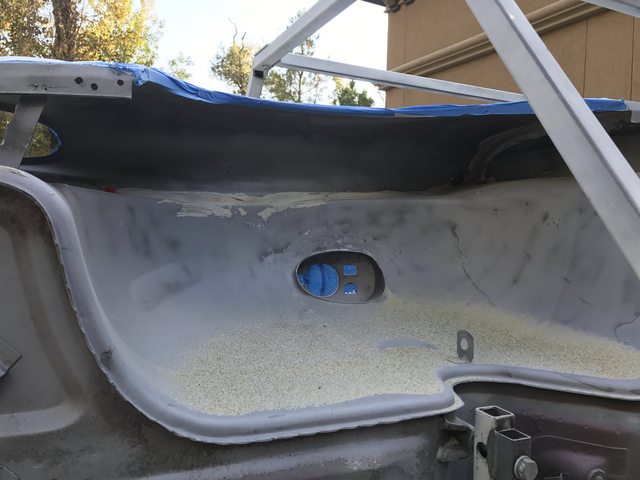
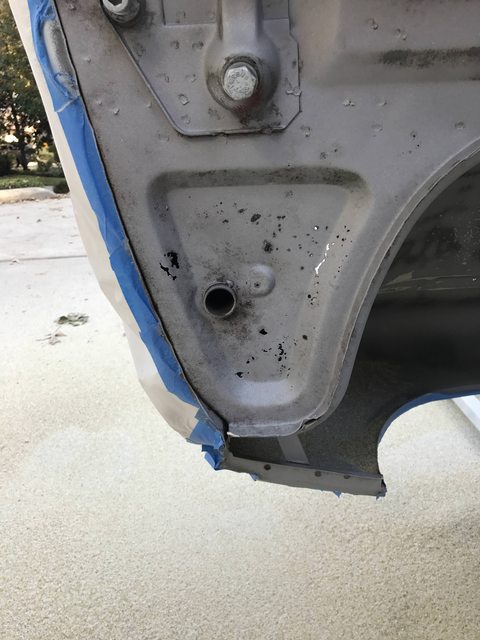
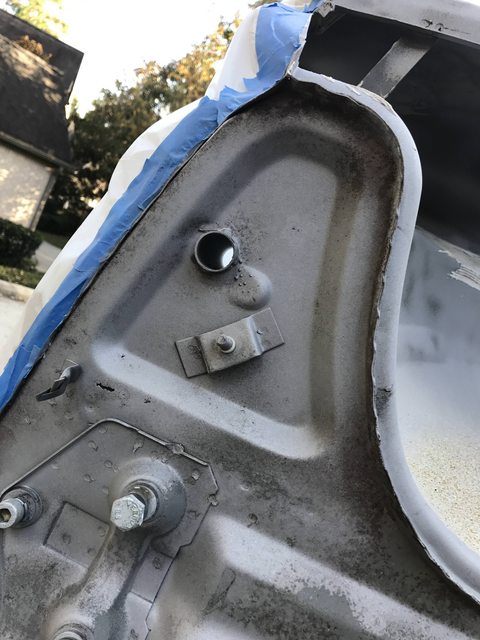
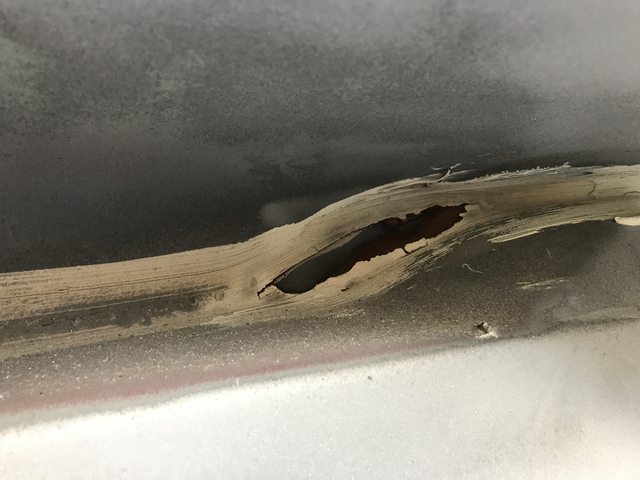
The probable reason your tin was hacked up is that the coil mounted in that location often creates cracks due to heavy coil mounted on flimsy sheet metal. Mine was cracked badly in these locations as well.
You should mount the coil on the fan housing where it's much stronger as sone years were done.


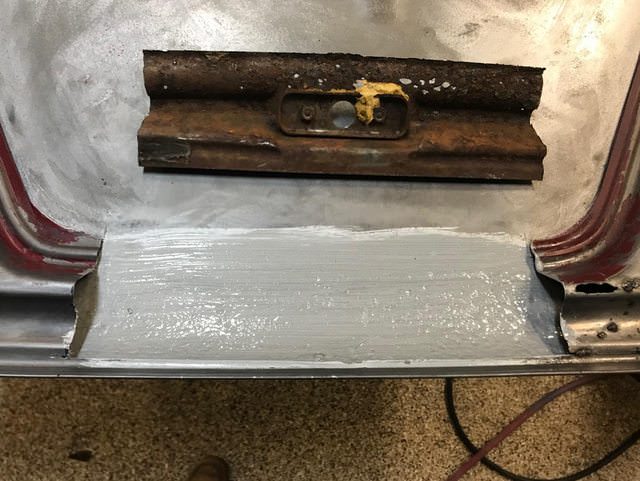
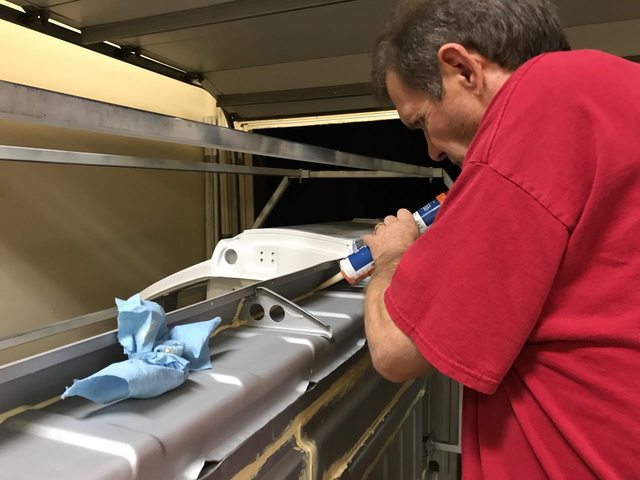
Good catch & good advice. I will see if I can find a better place to mount the coil
aggiezig
Well, I can finally say that the whole topside of the car is in epoxy primer. It took a lot longer to get here than I originally anticipated, but that's probably a true statement of most projects.

I noticed some black specs on my nice, new white epoxy primer in the front trunk. Turns out I'm an idiot and should have covered up the fresh paint before continuing with grinding, sanding, etc. So I forced myself to scuff down the entire front trunk and clean all of the mess off in order to re-spray another coat of epoxy on top. My fear is that those hot grinder sparks that melted through the original epoxy primer could have one day rusted through the top coat. Hopefully now I have abated that issue.

It was also a good chance to spray the front fenders and front area under the bumper while I was at it. I decided to spray essentially the whole front clip in one go.

I did a little bit of body work on my fenders prior to spraying the epoxy as the metal had warped where we filled in the wart holes. There is still some more filler work that will need to be finessed on top of the epoxy, but at least now I don't have to worry about the bare metal sitting out and rusting.

I was using eastwood fast etch to help mitigate the flash rust, but I noticed that even after cleaning with PRE (as recommended prior to painting), I still had adhesion issues with any type of filler. So in my paranoia I decided to go ahead and put a light coat of master series over the bare metal and under the epoxy primer. This should prevent any rust from coming through. I know... probably overkill.

Here are some pictures of cleaning / prepping and painting:

IPB Image

IPB Image

IPB Image

IPB Image

IPB Image

IPB Image

IPB Image
bbrock
Thanks for the update. thumb3d.gif

You have been one of my several mentors as a follow behind and do my best to mimic the quality. It is a high bar to leap!
aggiezig
QUOTE(bbrock @ Oct 3 2017, 02:30 PM) *

You have been one of my several mentors as a follow behind and do my best to mimic the quality. It is a high bar to leap!


Wow, that's one heck of a compliment. Much appreciated!


I decided it would probably a good idea to seam seal the car before blasting the bottom side so that I can try to keep too much sand from getting into the cabin / trunks. I'm using Eastwood brushable seam sealer in gray. It's not the easiest to work with and starts to get tacky really quickly. However, it can be molded / re-shaped if you spray some of their PRE paint prep on top of it before it fully cures. This makes it easier to smooth out hard tape lines after the fact.

I went ahead and masked around all of the seams to try to create the cleanest looking result possible:

IPB Image

IPB Image

It's not perfect, but looks great from 5 feet. I decided some of the pinholes from blasting the rust in the trunk aren't worth my time to cut out & replace. Especially when they are going to get covered up by bedliner / carpeting. This isn't "perfect" but I think it will do the job. The rust has already been neutralized with the blaster and fast-etch, so shouldn't be a recurring problem.

IPB Image

IPB Image

I've also done the front trunk but forgot to take pics... will get those posted soon.

While I was working, I went ahead and took a look at some of the surprise rust I found when blasting.

IPB Image

I tried to fill these holes with MIG weld, but there seems to be brazing and lead filler here as well... Not sure if from a previous repair or from the factory? At any rate, I will likely turn to aluminum filler once I know it's structurally sound.

IPB Image

I think I've decided to blast the underneath in two stages. First, I'll tackle the wheel wells and get them in epoxy primer or master series. Then, I'll do the rest under the floors. That way I can work in stages and bedline the underside all at once.
aggiezig
Making progress....

This weekend we tackled blasting the fender wells an outer rockers as a part of the effort to blast the underside of the car in two stages. There is just so much factory seam sealer on the bottom of the car that I decided it wasn't feasible to remove every last bit.

Instead, we focused on removing seam sealer anywhere it appeared to be cracked or rusted through. This resulted in removing about 50% of the factory sealer. There are some nooks and crannies where it just wouldn't be feasible to take it all off unless you were cutting fenders off.

After removing as much as we could, we masked up over the fresh epoxy paint to prevent sand from getting everywhere during blasting.

IPB Image

IPB Image

Then, it was time to start blasting...

IPB Image

(enthusiasm quickly faded after this picture)
IPB Image

After a couple of hours of blasting and about 400lbs of abrasive, we knocked out the inner fenders. We even managed to blast the backsides of the fenders. I was on a mission to remove any remaining trace of red paint as the car will be a color change. Here is the end result:

IPB Image

IPB Image

IPB Image

IPB Image

Now, what's left to blast is the "center" section or the flat bottom of the car (and the engine bay). Hopefully, what's left will go quicker as it's easy to access and the paint appears to not be as thick.

I also found some nice swiss cheese rust holes under the headlight buckets. These were full of mice droppings when I got the car. The insides have already been cleaned and encapsulated, but now I have these to deal with:

IPB Image

IPB Image

It amazes me to see what engineers at the time thought were good ideas for longevity. Up in the far corner in the rear of the vehicle, under the factory seam sealer appears to be open cell foam. This will have to come out...

IPB Image

With all of that said, I now have a big section of the underside clean and in Master Series rust encapsulating primer as a preventative measure (pics to come). My goal is to do the remaining portion in a couple of weekends and prime it as well. Once the whole bottom of the car is clean and primed, I will cover it in color-matched raptor liner bed liner. That means I have to actually pick which color blue I want to go with soon...

More to come.
76-914
Looking good. It's a great time of the year for working in TX. beerchug.gif
barefoot
Also bought a 3-4 side passenger tin as the one I had was a 1.7/1.8 and the plug holes were in the wrong spot. It needed some repairs as a PO had hacked up the coil bracket mount. My repairs are rough, but good enough for engine tin:

IPB Image

IPB Image

[/quote]
Put you coil where God intended on the fan housing, Mounted on the top tin will just result in future cracking in the same place (ask me how i know)
(photo borrowed from someone else's engine)
Click to view attachment
aggiezig
It's time for a big and long overdue update. In the last couple of months I've been making steady progress trying to button up the bottom side of the car. I think half of this whole car restoration thing is a psychological game. So, I figured that if I can get at least half of the car in color, it'll mentally push me closer to the finish line. With that goal in mind, work started on prepping the bottom of the car for color matched raptorliner bedliner paint.

First up was picking away at the foam material that the factory hid up inside the rear fender-wells. I'm very thankful that Dad decided to take on this job, picking away at the nasty stuff with a variety of different tools. We didn't get all of it out, but as much as we possibly could.

IPB Image

IPB Image

Next up was knocking out some of the remaining metal work. After blasting, we found some pinholes under the headlight buckets. I really wanted to avoid having to make and shape this piece, so I worked slowly trying to fill in the holes with mig weld. Almost all of it was fixed this way, just leaving a small area I cut out and patched later.

IPB Image

IPB Image

I also fixed the gaping holes left by the dealership that installed the air conditioning in this car. From what I can tell, they butchered open this area to use as a pass through for lines. I just made a patch and plug welded it in place.

IPB Image

IPB Image

In the process of running of hacking away original metal, they also removed a door sill support. I'm guessing so they'd have more room to run some sort of lines. I fabricated a piece to replace what was missing based on the original support on the other side of the car. I think it turned out pretty good.

IPB Image

IPB Image

After the metal repairs were complete, the entire bottom side of the car and the engine bay were coated in master series rust encapsulator primer. Even though it was freshly blasted metal, this should keep anything from ever coming through the paint. It should also keep any rock chips from ever growing into a rust spot.

IPB Image

IPB Image

IPB Image

All original factory seam sealer was removed and will be replaced. I wanted to have a good primer underneath the seam sealer first.

IPB Image

IPB Image

I'm going to break this update here before it gets too long. Keep reading below…
aggiezig
Now that the bottom side of the car was covered in primer, I started to plan out the remaining steps. First up was sealing all of the underside seams before spraying anything else on top. I used Eastwood seam sealer and to be honest, wasn't too satisfied with the results. Their brushable stuff is a lot easier to use that the kind you squeeze out with a caulk gun. It was hard to smooth and really didn't turn out too great in my eyes. At least it will all be covered up with bedliner.

IPB Image

IPB Image

IPB Image

You won't be able to tell from reading this forum post, but it was at this stage that the car sat for several weeks while I waited on the weather to play nice so I could spray paint. It's been unusually cold and very rainy here in Houston. I spent the time prepping the silver primer and masking off the car. UPOL also recommends (and I did) spraying etch primer over any bare metal before spraying the raptor. Worth noting, I think this is the first time the car has been completely inverted while in my octagon rig.

IPB Image

I decided to first spray single stage color over the areas that I didn't want a high build of bedliner. This included anywhere that was a mount point for something. I also sprayed color around the "edges" where it will later blend with the color coat on the top of the car. This car actually has a lot of really great places to create break lines for paint.

IPB Image

IPB Image

After the single stage color was down, I would follow up with the color matched raptor liner and overlap to blend where necessary. In practice, I made two mistakes. First, was not allowing enough flash time after the single stage paint. I think some of my raptor liner runs came from issues here. Second, was not paying attention when spraying raptor and I ended up getting it some places I was trying to avoid. The third mistake was not starting earlier in the day…

IPB Image

IPB Image

IPB Image

IPB Image

IPB Image

IPB Image

In case you hadn't noticed, yes - the car will be Mexico Blue. And yes, it is that bright in person.

A few thoughts for anyone considering going this route…
  • I used a standard bedliner kit from UPOL. This included (4) bottles of liner, which was exactly enough to cover. I wish I had another bottle or two to do a second light coat. It's by no means thin anywhere, but it would be nice knowing there is another coat on it.
  • Also, the UPOL instructions are very unclear on a few things… If you fill up the containers exactly as they say, you will overfill their bottles. I ended up dumping everything out and measuring in cups, then pouring what would fit back in bottles. It should be 250ml of activator and roughly 100ml of color (approx. 10% by volume).
  • Make sure to purchase your tinting color without binders. My paint shop had no issue mixing it this way for me. I used PPG JAU Single Stage Acrylic Urethane paint to tint and one quart ran me about $30.
  • You can adjust your air pressure to achieve the desired texture. I ended up shooting somewhere around 65-70 PSI.
I'm really pleased with the color and mostly pleased with the results. It's not 100% perfect and there are a few places where I got a little heavy handed and the texture shows accordingly. I think for a weekend warrior like myself, it turned out about as good as can be expected.

The plan now is to cover the fresh bedliner with plastic so it doesn't get trashed while I move on to bodywork. I'll get the car flipped back over later this week and start working on areas that need filler. Hope you all enjoyed the update, I'll be back with more soon.
jd74914
That looks great! Awesome color! piratenanner.gif

Thanks for adding some tips. I'm planning on going the same way when mine finally gets to this point so its nice seeing what works for others. smile.gif
djway
Everyone has that problem with the color tint UPOL. You did the right thing. I will be going the same route on the 914 I am working on. I did this on the 59 Ghia and it is really quiet. Good to know how many bottles to get. Love the color, it is on my final 10 list. One thing I have noticed with the epoxy is that if you get a chip in the exterior color it tends separate at the epoxy. I actually used a rougher grit before I spayed primer over it the second time I used the epoxy and that is where it chips so we know one thing. The epoxy really sticks to the metal!
Cairo94507
Nice work and nicely detailed progress. Mexico Blue is a great color. Keep up the great work. smilie_pokal.gif
bbrock
Nice! I've been waffling between using 3M Body Schutz or Raptor on mine but have been leaning more and more toward Raptor. I'll be referencing this when the time comes. Thanks for posting details and tips! beerchug.gif
Shadowfax
Thanks for the update. Car is looking really good. Love Mexico Blue!

turk22
very enjoyable to watch your progress, thanks for all the detail, and keep on going!

beerchug.gif
aggiezig
I really appreciate all of the kind words, it helps keep me motivated!

I picked up some PPG Concept DCC Single Stage paint last week. Man, that stuff is pricey but supposed to be miles ahead of Shopline. I guess we'll see! I'm working now on prepping my trunks, cabin and engine bay for two or three coats of color.

I figure that will probably take me the rest of this month as each section has to be sanded, seam-sealed and then masked off before painting. I'm hoping that seeing the color inside of the car will really motivate me to knock out the remaining filler work on the outside so that I can get the whole thing in color.

More pics to come soon, hopefully.
aggiezig
Lately I've been dreading the last two areas I have to seam seal (the cabin and the engine bay). I knew both were going to be a pain in the a$$ to mask off and when it comes to seam sealer I must have some sort of perfectionist complex. I decided to tackle the cabin this week, hoping that I could get enough done to consider spraying color inside the car.

I bought a new tube of SEM seam sealer and gave it a shot earlier this week. Long story short, I would not recommend this product. It dries (for my use) way too quick and gums / balls up very easily. By the time I went back to pull the tape off of a section, it had dried so much that I ended up pulling the whole seam off. After a frustrating few hours with this stuff, I decided to try another route.

It was also at this point that I realized I was being a perfectionist about this area of seam sealer for no reason. The cabin is going to be covered in sound deadening and then carpet / trim. So, none of this will ever be seen... With that in mind, I decided to go back to brushable sealer. This time, I tried Evercoat's product. I think I found a winner. This product is a little bit thinner than the Eastwood stuff and easier to spray. It takes longer to tack up and skim so you have plenty of time to work with it. I will probably mask the seams in my engine compartment and use this stuff when the time comes.

Here are some pics of the seam sealer inside the cabin:

IPB Image

IPB Image

IPB Image

IPB Image

And some pics of the much cleaner seam sealer lines in the front trunk:

IPB Image

IPB Image

I'm hoping to be able to spray color in the front trunk and also the cabin this weekend. Everything is scuffed so it just needs to be cleaned and masked for paint. I think I will have to set up my canopy in the driveway because the pollen is still really bad down here. Wish me luck!
bbrock
popcorn[1].gif Can't wait to see your next update. Good luck! beer.gif
914forme
Great work with the Raptor I am liking this one aktion035.gif
Shadowfax
Great progress! Pollen is bad here too sniff sniff biggrin.gif
Mueller
Awesome amount of work, it looks great. The "next" owner of my car can do all that work, mine will never be torn down to that level and I'm okay with it smile.gif

aggiezig
Well, it was a productive weekend for us! Progress was slow as usual, but the front trunk and cabin are in Mexico Blue and that is a big step forward. No, it's not show quality paint but I think it looks pretty great for parts of the car that will never be seen.

Before I could lay any paint, there were a few things to attend to besides scuffing and cleaning. One of those tasks was reinforcing the front trunk pull area. When stripping paint, we noticed rust around this area that led to a couple of holes. After trying to fill the holes with mig wire, I had no luck. I decided the best course of action was to put a doubler in place to strengthen the area. After securing it in place using plug welds, I seam sealed over the patch to hide it.

IPB Image

IPB Image

We built the canopy to try to keep the wind and pollen out. It was a beautiful day but the wind was blowing pretty good. After pushing the car under the tent, I gave everything a final wipe down. One thing that I didn’t plan on was that the wax & grease remover I've been using (shopline) started to soften the seam sealer. This made things messy when I was trying to prep for paint. I'm not sure if the seam sealer didn't have enough dry time (3-4 days) or if it's permanently soluble. At any rate, I cleaned the best I could with that obstacle and while trying not to wipe off too much sealer in the process.

IPB Image

IPB Image

Next up was paint. I'm using PPG Concept DCC Single Stage paint in Mexico Blue. It's a 4:2:1 (base : reducer : hardener) with the activator I purchased (DCX61). I tried to spray some of the tighter areas with my touch up gun first, but ended up just using my full size gun for almost everything. I sprayed using a Devilbiss Starting Line gun at 28-30 PSI or so with a 1.3mm tip. First I laid down a lighter but full coat and then followed up with a medium-heavy wet coat. The only place that didn't receive two coats were the floor panels as they will be completely covered.

IPB Image

IPB Image

IPB Image

IPB Image

I'm really impressed with this DCC paint - the color is deep and the gloss is outstanding. With proper prep work, this paint is going to really stun on the outside of the car. These areas that I shot look good enough for what they are. The finish definitely isn't perfect and there was obviously plenty flying around in the air when I was spraying and there are some fuzzies in the finish. I only put a couple of coats on so I don't think it's enough to color sand and buff nor do I think it'd be worth the effort. Because all of this is under hoods or carpet and covered up, I'm not too worried about it.

IPB Image

IPB Image

IPB Image

IPB Image

There is one area that I will have to sand and re-coat because of solvent pop. I'm not really sure what happened here as it's the only place with this issue. I was using a slower reducer than probably was needed and this may have led to the issue, but again it only occurred in one spot on the driver side fender top.

IPB Image

I think I'm going to let the paint sit for a week or so and gas off before I wrap everything up in plastic to keep it from getting dirty or damaged. I still have to spray the engine bay and the rear trunk but I think I may take a slight detour and work on getting hoods and doors in epoxy primer first as they are still sitting in bare metal after being stripped. I'm really hoping (and needing) to see this car in color over the summer, so this is a good push in that direction. Thanks for reading so far and thanks for all of the encouraging words!
bbrock
Lordy that's blue!!! That is going to look fantastic. Good to know you liked the Concept DCC, that's probably what I'm going to spray on my interior areas. Keep up the great work. smilie_pokal.gif
jesse7flying
Man, that is looking really good. That DCC is pretty expensive isn't it? Can't wait to see color on the outside.
914Sixer
Mexico Blue aktion035.gif
aggiezig
QUOTE(jesse7flying @ Mar 26 2018, 01:57 PM) *

Man, that is looking really good. That DCC is pretty expensive isn't it? Can't wait to see color on the outside.


It's great stuff but yes, very expensive. A gallon plus reducer & activator ran me $700+. It's really great stuff and easy enough for a novice like me.

----

I started cleaning up the remaining paint on the trunk lids tonight after work so I can get them covered in epoxy primer. Unfortunately, it looks like more rust repair on the rear trunk lid. Why did the folks at Porsche put open cell foam inside of these lids...

IPB Image

IPB Image

IPB Image

I really don't want to, but I think the best course of action is to cut a section open to clean out the foam and rust treat. Then seam weld it back in place. Not going to be fun... But I don't really think I have another option. Hopefully there isn't any foam in the front trunk lid...
aggiezig
Alright, I made the plunge and cut into the trunk lid. There was a lot of pitting, deeper than I expected where the foam sandwiched the metal. It can be saved, but still a major PITA.

Cut lines laid out:
IPB Image

Revealing the rust underneath:
IPB Image

After lots of clean up and chemical rust conversion:
IPB Image

Looking down the framework:
IPB Image

IPB Image

Filling some smaller holes with mig wire. I think the larger one will need a patch.
IPB Image

And finally, coated with Master Series rust encapsulator:
IPB Image

I'm going to take a break here before tackling the other half. The rust is much worse on the bottom half and I really hope I don't end up making compound curve patches for such a small area. We'll find out soon. Anyone know if the front trunk lid also has foam in it?
Cairo94507
That is a beautiful color. Nice work and you will love the finished project. Rust hides everywhere on these old babies. Glad you are addressing it now. It would surely rear its ugly head in a couple years otherwise. beerchug.gif
aggiezig
Small update, but was able to finish blasting everything that was once Malaga Red.

IPB Image

Of course, in the process I found some more rust...

IPB Image

IPB Image

These will be fun to fix because 1) I'll have to re-create that c-channel by hand and 2) some of the rust is in spots that are double layered.

IPB Image

While I was at it, I also coated the trunks in master series primer. I decided to put this down under the epoxy because of the spots of rust on the trunk skins (I don't want it to break through the epoxy even though it was treated). I also found some oil-canning on the rear trunk lid that will need fixing. Gonna be fun...
aggiezig
Okay, spent a decent amount of time on the teener this weekend and have some progress to report. The rust in the bottom of the door seal track has been repaired. I used a copper spoon and filled with MIG wire. Concours guys would probably cut out and weld back in a new channel, but I blasted and treated the rust before welding so we should be good.

IPB Image

IPB Image

I cut out the areas that were completely rusted through on the bottom of the door and replaced with new 18ga metal. The original metal here is double walled but my replacement is just one piece. Again, not concours but looks great and no one will see the difference, especially after the seal is in place. After the repairs, I treated with master series and then seam sealed.

IPB Image

IPB Image

Lastly, I prepped and cleaned the doors and engine decklid and got everything in some epoxy primer. Today just the back sides and tomorrow will likely do the fronts.

IPB Image

IPB Image

IPB Image

IPB Image

Progress, progress, progress. I'm moving to the West Coast this Fall, so I'm extremely motivated to have this thing in paint and on its own wheels before I move in September.
Cairo94507
Nice progress. At the rate you are moving, your goal seems reasonable and attainable. beerchug.gif
aggiezig
QUOTE(Cairo94507 @ Apr 9 2018, 04:50 PM) *

Nice progress. At the rate you are moving, your goal seems reasonable and attainable. beerchug.gif


Thank you, I hope you are right!

-------------


I have a little more progress to report. I was able to get the top sides of the doors and decklid painted in epoxy. While the epoxy was still glossy and curing, it was a good chance to scope out the state of the panels and track down all of the dents and waves. There are a couple of decently large dents and lots of little ones. I'll see if I can pull the big ones but the little ones will likely be filled. I'm no metal man and as long as I'm not laying on the filler too thick, I think everything should work out ok.

IPB Image

IPB Image

IPB Image

IPB Image

I also started working on the front hood. First some guide coat to see what I was working with. This revealed a lot of lows and I ended up finding an area that wasn't quite oil-canning but on its way there. I pulled out the torch and got to shrinking as best as I know how (heat, hammer, quench). After an hour or so I had it to a point where there was no more flex and only some minor valleys that could be filled.

IPB Image

IPB Image


So, next was a coat of Evercoat Rage Extreme over the whole panel. I let this cure overnight and today after work started blocking the panel down. I roughed it up using an air inline sander and then pulled out the 24" durablock and some 80 grit. Here's where I stopped for the night. I'm starting to see the beginning of some "metal islands" so only a little more blocking to go before re-applying filler in a couple of low spots. Overall, the panel is really shaping up with this first coat and block. I was thinking I'd need to follow up with polyester but honestly might skip straight to 2k after blocking the filler smooth.

IPB Image

IPB Image

IPB Image

While I've been working away on the body, my mind's been racing forward thinking about everything I'm going to need to get the car back on its own wheels after paint. Unfortunately, it sounds like about $1500 worth of new parts.... shocks, ball joints, bushings, bearings, rebuilt calipers, etc. It amazes me the cost of some of these P-car parts.

I've also been thinking about the hardware I'm going to need. I've already started tumbling and stripping back hardware. At this point I think I have everything set aside that I'll need to get re-plated. I'm having a hard time finding a shop that will even both returning my emails or calls. I think a lot of operations are pretty picky about what type of jobs they take on. Hopefully I can find someone soon-ish and have work started on that element of the rebuild.
KBMAN
aktion035.gif wow, that is really amazing....looking at the beginning pics, I was thinking to myself, 'who would want to fix THAT?' But I tip my hat to you guys, and what lovely work you are doing to that 'Smurfet'...JOB WELL DONE SO FAR
autopro
Man great job on your car and on this thread, it's great you are providing all the details of the tools, products and procedures you are using. It really makes it easy for others to do the same. Awesome beerchug.gif
aggiezig
Appreciate the feedback!

I took another look at the rear trunk lid section that I cut out. It was really toasty. I thought about making a patch panel but with the complex shape, I just don't think I have the metal working skills to make it look right. So I decided the next best thing would be to repair the OG piece. I cut some 18ga steel to act as a patch behind the holes. This way there would be structure behind the holes when I try to fill them with mig wire. In all honesty, it worked out pretty well and will be hidden. I just need to finish grinding everything down.

IPB Image

IPB Image

I'm still chugging away on bodywork over here... I skimmed both doors and started blocking down the passenger door. I'm using evercoat rage extreme. It spreads a lot easier if you thin it down some with "plastik honey" which can be bought on amazon. I switched to thin metal spreaders and they are way easier to work with than plastic spreaders. After using, they clean up really nicely with just a bit of thinner.

IPB Image

IPB Image

I start by using my air sander to rough level the filler, then move on to the durablock and hand blocking. On the doors I didn't go for the big 24" durablock because of the size of the panel and curve. Instead, I used a smaller block and some 80 grit to shape. This Evercoat Rage Extreme feathers out pretty nicely.

IPB Image

I tried to fill the void between the crash bar and the door skin with 3M flexible foam. The idea is to provide something to keep the door skin from flexing while still allowing for movement as the metal expands and contracts. I splurged and bought the fancy gun and all but this stuff was still a pain in the a$$. The foam is a 2-part mix and it was hardening in the tip before it could reach the end. I'm talking mere seconds. I tried using two different tips before giving up. Basically I ended up having to mix on some cardboard and spread with a bondo spreader. It's messy but will be hidden.

IPB Image

IPB Image

Cleaned & ready for 2K

IPB Image

IPB Image

IPB Image

I also sprayed epoxy and 2K on the front trunk lid hood. My goal is to get the filler work done and everything in primer before moving on.
aggiezig
I finally got back around to stitching the trunk lid back together. It's not pretty but it's there. I was fighting crappy metal the whole time so ended up using more mig wire than one would hope. Good news is you'll never know the difference after I grind it all down:

IPB Image

I am in a little over my head with the rear trunk lid. There is a decent amount of flex in the middle of the skin where there is no support structure underneath. From what I can tell, it's very straight and doesn't ever look like it was dented or hit. However, if you push anywhere in the upper middle section of the trunk lid you can get the metal to flex. I'm scared to try to shrink anything here as it's a huge section and I don't think I have the skillset to fix it without toasting the piece. Will have to do more research.

Also, finished up with the driver's door. About 90% of the filler ended up on the ground and just a skim coat was left. I prepped the headlight covers too and shot everything with 2k:

IPB Image

IPB Image

Not sure where I'm going to turn next. I've continued to work on cleaning up and stripping parts for plating. I tried to disassembly my calipers over the weekend with some luck, but a lot of frustration. I will probably take another look at these and see if I can't get everything together for plating.

I also found an issue with the epoxy primer on the engine decklid. There are some areas of bubbling in paint, and I think it's from the wax & grease remover I've been using that was still on the panel when I sprayed. I'm going to have to strip and re-spray that panel before it can continue. Nothing like doing something over again.

One of these days I will finish the seam sealer in the engine bay and prep the rear trunk for blue paint. It would be nice to have all of that done and sealed off while shaping and sanding the exterior body.
aggiezig
I keep chugging along over here, slowly but surely. It's taking a lot longer to clean up and prep hardware for plating than I thought it would. First, everything is soaked in degreaser for a day or two. Then, smaller parts are tumbled. Next, I drop everything in diluted muriatic acid (about 10-15% HCL) for a quick pickle. Lastly, I coat everything with WD-40 to ward off the flash rust. The problem is, I keep finding more hardware to clean!

Here's a bucket of parts after acid dip and WD40.
IPB Image

Here are some of my parts laid out. I have a lot of duplicates thanks to the parts car I disassembled last year. Might as well re-plate everything.
IPB Image

I still need to finish cleaning up the brake caliper halves so that they can be plated at the same time. I'm hoping to get everything sent out this week to the platers. We'll see if I'm that lucky.

It looks like someone had shut the hood on tools before, so I had a small area to pull & fill on the underside of the front hood:
IPB Image

IPB Image

Then a coat of epoxy primer to seal it in while it sits until everything else is ready:
IPB Image

IPB Image

The rear hood is still on pause until I can talk with someone who has more metalworking experience than me about the skin flex. Now that most of the removable pieces are in 2K, I will probably try to shoot some polyester on the body and start blocking. I'd really like to be spraying color in June, we'll see if I'm that lucky.
aggiezig
It was a productive weekend over here. I picked away at all sorts of small things and made a decent amount of progress. Last week I pulled a few pieces out of the attic that would need to be prepped for paint including: the fuel tank, the rocker covers, and the front / rear bumper chin valence pieces.

First up was the fuel tank. I tried using the chemicals included with the KBS coating kit to remove the rust in the tank but no luck. It was built up pretty good so I ended up setting up the tank for electrolysis rust removal. I used washing soda for my salt and a piece of square tubing as an anode. I let it run all weekend and the tank is much cleaner inside now.

IPB Image

I also worked the dents out of the rocker covers and bumper chins and stripped them down to bare metal. No pics right now, but will take some once they are in primer. I think I am going to paint them in either raptorliner black or SEM chip guard.

You may recall that the PO cut my dash in half for some reason. So I worked on fixing that, too.

IPB Image

IPB Image

Finally finished cleaning and sorting parts and everything is boxed up to go to the plater in Dallas. This is one of (3) large USPS flat rate boxes.

IPB Image

Threw a coat of SEM trim black on these u-joints:

IPB Image

Lastly, I finished shaping the body filler on the driver front and rear quarters. Because I sanded through the epoxy, I decided to put another thin coat on. This made for a really good opportunity to wet check the quarters before applying polyester primer.

IPB Image

IPB Image

Looking good so far. After the epoxy flashed, I sprayed three wet coats of Evercoat Feather Fill G2, un-thinned. This is a polyester primer filler that will be a great base for me to do all of my blocking on to take care of the small imperfections that weren't worth body filler.

IPB Image

I'm going to try to get the driver's quarters in poly primer this week as well. In hindsight, I don't think I would tackle paint and body work in stages like I have been so far. Yes, it's helpful to keep motivated and see progress. But, I spend a sh*t ton of time masking, cleaning, and re-doing things because everything is sectioned off in different stages. Oh well, live and learn.

More to come, soon!
TravisNeff
Great thread!
bbrock
Great progress. Thanks for the insight on staging the paint job. As I inch slowly toward painting my car, I've been wondering about how to approach this. I really appreciate you sharing your experience.

BTW, do you remember roughly what it cost to have your Raptor bedliner tinted? I'm leaning in that direction but haven't decided.
aggiezig
QUOTE(bbrock @ May 6 2018, 11:10 PM) *

Great progress. Thanks for the insight on staging the paint job. As I inch slowly toward painting my car, I've been wondering about how to approach this. I really appreciate you sharing your experience.

BTW, do you remember roughly what it cost to have your Raptor bedliner tinted? I'm leaning in that direction but haven't decided.


Thanks Brent, you've got a great thread as well.

The tint was cheap. I want to say $30-40 for a quart of color at my local Tasco (which is more than enough). I just used PPG shopline for the tint color. Make sure to ask for them to mix it without binders.
aggiezig
Small update for this weekend:

I picked away at a few little things. First up was stripping the gas tank. In the process I found a couple of pin holes at the bottom. I had no idea they were there before, but went ahead and welded them up. Hopefully these are it. I'm going to see if I can rig up some way to pressure test.

IPB Image

IPB Image

Next was getting the other side of the car (passenger side) in poly primer:

IPB Image

After a day of curing, I reluctantly started block sanding. This evercoat featherfill sands really nicely. It also changes color when sanded (well, lightens up) so that it's really easy to find your highs / lows without needed guide coat.

IPB Image

IPB Image

IPB Image

I'm going to keep at it and get all of this poly sanded out to 220 grit and then coat with 2k primer. I'll take the 2k up to 600 grit before a sealer coat and color.

I think the game plan is to get the car back on it's own wheels so it can be easily transported for paint. I'd like to rent a booth if possible for spraying color. We'll see!
aggiezig
Well, it's been a few weeks since my last post. I was traveling both of the last weekends so progress has been slow but hoping to get back at it now. Lots and lots of sanding... I need to finish taking the poly primer up to 220 grit and then I will spray 2k on top of everything and wet sand up to 600 before paint.

In the mean time... I have some parts porn to share with everyone. I sent all of my hardware out to Texas Precision Plating up near Dallas. They did three flat rate USPS boxes for me in two colors for $270 which included rack plating & baking some pieces.

Overall, I am very pleased. There are a few parts I should have cleaned up better. The cleaner you get the part, the shinier the coating ends up being. Of all the parts, I am least pleased with the calipers. In retrospect, I should have blasted these with some fine sand or something to get them really clean before plating. They're going to be hidden under the car so I'll be ok, but they could have been better if I did more prep work.

IPB Image

IPB Image

IPB Image

IPB Image

IPB Image

IPB Image

IPB Image

IPB Image

Only one faux pas. For easy shipping, I slid the stub axles into the hub plates. One set was plated together as a unit and is now stuck together. I talked to TPP and they said they will re-plate after I am able to get them apart.

IPB Image

I went ahead and bought new bolts for some "critical" places but I still re-plated all of my old hardware. This pic is before sorting, which took a good 2-3 hours.

IPB Image

I'm hoping this will be a productive weekend for me so I can keep moving forward with paint / bodywork. Will post more progress soon!
aggiezig
Well, lots of sorting later and only identified a few missing pieces. Luckily I sent spare parts from the other car I disassembled so I should be OK. Here are some pics:

IPB Image

IPB Image

I spent some time on assembly this weekend to (hopefully) have everything ready to go together so I can trailer the car to a booth for painting color.

Rebuild rack & turbo tie-rod kit:
IPB Image

Re-plated hardware:
IPB Image

New Koni Shocks front & rear:
IPB Image

I also worked on pressing new front rubber suspension bushings for the A-Arms from 914rubber. I followed Ian Karr's youtube video and got them pressed on. Had a couple of issues with the rears (small tears) & sent Mikey914 a PM to get his thoughts.

New bushings pressed into carriers:
IPB Image

Made sure to sand smooth carriers & arms:
IPB Image

Heated in boiling water:
IPB Image

Pulled on using all-thread & LOTS of soap:
IPB Image

Also spent some time doing body work. I finished sanding the poly primer on the rear of the car up to 220. I used spot putty in a few places to fix a couple remaining lows. I was happy with everything and went ahead and sprayed 2k primer on top. I did a couple of wet coats but had real issues with the 100+ TX heat flashing the primer instantly out of the gun. The finish isn't quite as smooth as I was hoping for but a lot of it will be sanded off anyways.

Before w/ self-etch over bare metal:
IPB Image

After:
IPB Image

IPB Image

Going to try to pick up some slower reducer and get the front half in 2K soon as well. After that, I will probably get the trunk & engine bay in blue and allow some time for the 2k to fully cure and shrink up.

More to come!
Tdskip
Great thread!

A bit late to the party but subscribing.

Thanks for keeping it going.
aggiezig
Thanks, tdskip.


Small update, I put the pedal assembly back together last night with new bronze bushings from Pelican. Overall, not too hard of a job and I consulted the write-up from Eric Shea.

IPB Image

IPB Image

IPB Image

IPB Image

Obviously still needs accelerator arm installed, rubber pedal covers, brake pushrod & switch. But, the "hard" part is done now.

I may tackle the CV joints, boots & axles tonight. Reassembling components is a nice break away from sanding.
xperu
QUOTE(aggiezig @ Jun 5 2018, 11:56 AM) *

Thanks, tdskip.


Small update, I put the pedal assembly back together last night with new bronze bushings from Pelican. Overall, not too hard of a job and I consulted the write-up from Eric Shea.

IPB Image

IPB Image

IPB Image

IPB Image

Obviously still needs accelerator arm installed, rubber pedal covers, brake pushrod & switch. But, the "hard" part is done now.

I may tackle the CV joints, boots & axles tonight. Reassembling components is a nice break away from sanding.

Hi, I sent you a PM. Mike
aggiezig
Tiny update, still pecking away at reassembly jobs to avoid sanding. Rear axles are reassembled and just need grease. The axle shafts were powdercoated and the original CV joints were just cleaned and reassembled with new boots.

IPB Image

IPB Image

It feels great to have clean parts ready to go back on the car. Next up is getting the calipers rebuilt and ready to roll.
914Sixer
Was your plating done at Del's Plating in west Houston?
aggiezig
QUOTE(914Sixer @ Jun 7 2018, 02:22 PM) *

Was your plating done at Del's Plating in west Houston?


No, I ended up using Texas Precision Plating in Garland. I tried contacting Del's a couple times via their website and never got a reply. I spoke with another shop in Houston called Delta Specialty Coatings prior to choosing TPP. I think they would have done a good job, but they would not plate my latches and mechanisms as complete units without disassembling first and that was a deal breaker for me as I'd never get them back together right.
This is a "lo-fi" version of our main content. To view the full version with more information, formatting and images, please click here.
Invision Power Board © 2001-2024 Invision Power Services, Inc.