Help - Search - Members - Calendar
Full Version: Bee Jay's 914-six Conversion
914World.com > The 914 Forums > 914World Garage
Pages: 1, 2, 3, 4, 5, 6, 7
Bee Jay
One of my favorite lines from a Dirty Harry movie is "Hey man, I got's to know". I had the 914 on the lift installing engine and tranny mounts and a few odds and ends getting ready for the engine. I just had to know how the engine was going to fit. So I roll the engine dolly under the car and start lowering it. The tranny lined up with the tranny mounts just beautifully, but I coudn't get the engine close to the motor mounts because the trailing arm bolts were impacting the side engine tin. I only need about 1/4" more clearance on each side. I didn't want to crack my fiberglass engine tin so I didn't force it. I guess when I'm ready to install the engine for real, I'll need to remove the trailing arm bolt nuts and push in the bolt a little either on each side or just one side. That won't be for a while. I need to get my lower valve covers back from being machined, and I would really love to find carbs before installing the engine.
Bee Jay

IPB Image
IPB Image
IPB Image
IPB Image
IPB Image
IPB Image
IPB Image
moparrob
Bee Jay,

Have you checked Pelican for carbs? There is a set for sale right now:

Weber 40's

Rob
davesprinkle

IPB Image

I think it's awesome that you have TWO port-a-potties.
Ericv1
This is just an observation, but you are going to have to cut off that blower mount on the drivers side engine shelf before you can put your oil filter on. Otherwise, you won't be able to screw it on.

IPB Image

patssle
Why did you plug your oil temp and pressure senders? Don't you want to be able to monitor those?

Also why buy a new flywheel? Can't you use the one off the 3.0 with an adapter plate and ring gear?

I'm doing the same conversion (3.0 to 901) and that's what I was told.

Looking great! Nice to watch somebody chronicle their conversion before I do mine!
moparrob
I just got off the phone with the folks at Kennedy Engineering, since I am at that stage as well.

You have two options:

1) Keep the stock 228mm flywheel (which they call 9 inch) and buy their ring gear part number 9-915. These are $170.

or

2) buy a new one-piece flywheel from them (with proper ring gear machined into flywheel) made of 1045 steel. Price $300.

Either way you will need a pressure plate, clutch disc and throw out bearing. That costs an additional $356 (for their stage 2 package).

The benefit to the one piece, new flywheel is that you can run a stock 215 mm disc and plate (lower cost, available at any parts store). You can still run the larger 228mm parts with the new flywheel also.

With the ring gear option you are required to use their 9 inch clutch which is more expensive than a stock 215 clutch and must be purchased thropugh them.

The advantage to the larger size (228) aside from the obvious size increase is that they offer up to a stage 4 for that plate, capable of over 600 ft. lbs. of torque, if you are so motivated.

They recommend that you re-surface you old flywheel if you are going to run only the ring gear, and I do not know what that procedure costs from a reputable machine shop. I'd venture the cost is pretty similar between using the ring gear and machining your old flywheel versus buying the new flywheel and avoiding the machining costs.

Ring gear plus clutch =$526

New flywheel plus clutch = $656


The only other benefit I can think of if you use your old flywheel is that you could have it lightened - if that is actually a benefit.


But then again, if you buy a new flywheel you could probably sell your stock one for around $100.00

confused24.gif
BKLA
I installed the engine side sheet metal AFTER installing the motor. Cleared the suspension no problem, and I didnt worry about banging them up

(I also cut out the -4 mounts and patched the longs where the mounts were removed.) that helped with install as well.
Bee Jay
QUOTE(moparrob @ Mar 22 2011, 11:56 AM) *

I just got off the phone with the folks at Kennedy Engineering, since I am at that stage as well.

You have two options:

1) Keep the stock 228mm flywheel (which they call 9 inch) and buy their ring gear part number 9-915. These are $170.

or

2) buy a new one-piece flywheel from them (with proper ring gear machined into flywheel) made of 1045 steel. Price $300.

Either way you will need a pressure plate, clutch disc and throw out bearing. That costs an additional $356 (for their stage 2 package).

The benefit to the one piece, new flywheel is that you can run a stock 215 mm disc and plate (lower cost, available at any parts store). You can still run the larger 228mm parts with the new flywheel also.

With the ring gear option you are required to use their 9 inch clutch which is more expensive than a stock 215 clutch and must be purchased thropugh them.

The advantage to the larger size (228) aside from the obvious size increase is that they offer up to a stage 4 for that plate, capable of over 600 ft. lbs. of torque, if you are so motivated.

They recommend that you re-surface you old flywheel if you are going to run only the ring gear, and I do not know what that procedure costs from a reputable machine shop. I'd venture the cost is pretty similar between using the ring gear and machining your old flywheel versus buying the new flywheel and avoiding the machining costs.

Ring gear plus clutch =$526

New flywheel plus clutch = $656


The only other benefit I can think of if you use your old flywheel is that you could have it lightened - if that is actually a benefit.


But then again, if you buy a new flywheel you could probably sell your stock one for around $100.00

confused24.gif

I sent my 2.0 four lightened flywheel to Kennedy to be modified for my 3.0. After inspecting it, they determined it was junk, so I bought a new 3.0 to 901 flywheel from them. I already had a good clutch and throwout bearing from the 2.0 and the new flywheel they made up will allow me to use my low milaege clutch.
Bee Jay
patssle
Nice info, thanks!

Can you also comment on my other question please (in case you missed it with the flywheel talk):

Why did you plug your oil temp and pressure senders? Don't you want to be able to monitor those?
moparrob
That is not what was plugged. The plugs were to cover openings left by unused sensors from the now-defunct CIS injection system. Gotta love those $2.00 Napa plugs.. aktion035.gif
patssle
On the 4th page, he posted pictures of the sensors and 9146986 replied with:

QUOTE
You can pull and plug the senders on the chain covers. The canister type sender on the front is oil pressure, the nearest sender to that is oil temp, and the one on the case next to the case breather is oil pressure sender for warning light. The senders on the breather can be pulled and plugged.


Are those just for the CIS? Where are the real oil temp/pressure sensors? Or are there none?
moparrob
QUOTE
Are those just for the CIS? Where are the real oil temp/pressure sensors? Or are there none?


Your question is rhetorical. If you analyze the quote, you will see:


QUOTE
You can pull and plug the senders on the chain covers. The canister type sender on the front is oil pressure, the nearest sender to that is oil temp, and the one on the case next to the case breather is oil pressure sender for warning light. The senders on the breather can be pulled and plugged.


Those ARE the senders.
patssle
So then there are 6 senders?

QUOTE
You can pull and plug the senders on the chain covers (1+2). The canister type sender on the front is oil pressure (3), the nearest sender to that is oil temp (4), and the one on the case next to the case breather is oil pressure sender (5) for warning light. The senders on the breather can be pulled and plugged. (6)
moparrob
QUOTE(patssle @ Mar 23 2011, 01:07 PM) *

So then there are 6 senders?

QUOTE
You can pull and plug the senders on the chain covers (1+2). The canister type sender on the front is oil pressure (3), the nearest sender to that is oil temp (4), and the one on the case next to the case breather is oil pressure sender (5) for warning light. The senders on the breather can be pulled and plugged. (6)


My '79 only had the first 5 senders mentioned above. I don't have one on the breather, only the oil pressure light sender next to it.
patssle
Ok. I was confused by having redundant sensors, but I guess it makes sense if they talk a different language to the gauges or CIS.

Do you have a product # on the NAPA plugs? (sorry if I missed it)

And sorry for semi-hijacking the thread!
moparrob
I bought three of these from NAPA. Oil Drain Plug part # 704-1379. $2.00 each, comes with crush washers.
Bee Jay
I'm waiting to find carbs, manifolds, linkage, etc. before installing the engine inside the engine bay. So I kept busy cleaning the engine compartment and mounting my CS style door pulls. Here is a before picture:
IPB Image
And here is the after picture:
IPB Image
I won't have to yank the window cranks to close the door anymore.
Bee Jay
Bee Jay
I worked on the 914 some more today. Still waiting on carbs, so I did more non-conversion work. I installed the AA European Tail Light lens. The left lens did not fit so hot so I broke it forcing it. AA prolly won't replace it since I broke it installing it. Oh well, it's mounted. The new lens are very transparent from the side. You could not see the bulbs from the side with the originals.
Bee Jay
Before:
IPB Image
After:
IPB Image
IPB Image
IPB Image
Bee Jay
I got the exhaust side valve covers back tonight. Not as much metal taken off as I expected, but I guess enough.
Bee Jay
IPB Image
campbellcj
QUOTE(Bee Jay @ Apr 3 2011, 10:16 PM) *

The new lens are very transparent from the side. You could not see the bulbs from the side with the originals.

IPB Image


Looking good! IIRC there is a separate little reflector piece inside the stock housings that covers the bulb from the side, so you can't see it like that. Or am I confusing it with the 911 tail lamp?
mepstein
QUOTE(campbellcj @ Apr 6 2011, 11:54 PM) *

QUOTE(Bee Jay @ Apr 3 2011, 10:16 PM) *

The new lens are very transparent from the side. You could not see the bulbs from the side with the originals.

IPB Image


Looking good! IIRC there is a separate little reflector piece inside the stock housings that covers the bulb from the side, so you can't see it like that. Or am I confusing it with the 911 tail lamp?


Chris - you are correct. Mark
jimkelly
believe it or not - the dmv inspector guy here in delaware noticed mine were missing and dinged for not having them.

Bee Jay
I have carbs! Woohoo! piratenanner.gif aktion035.gif cheer.gif av-943.gif w00t.gif 
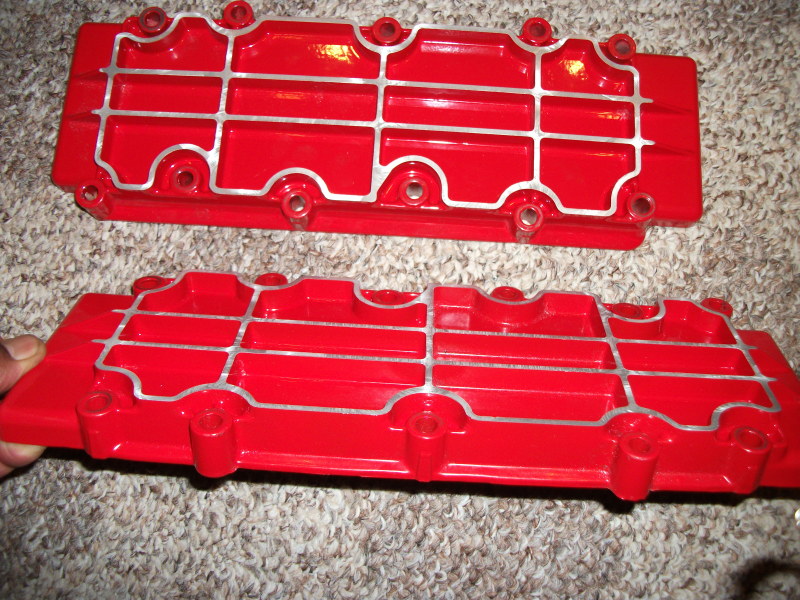
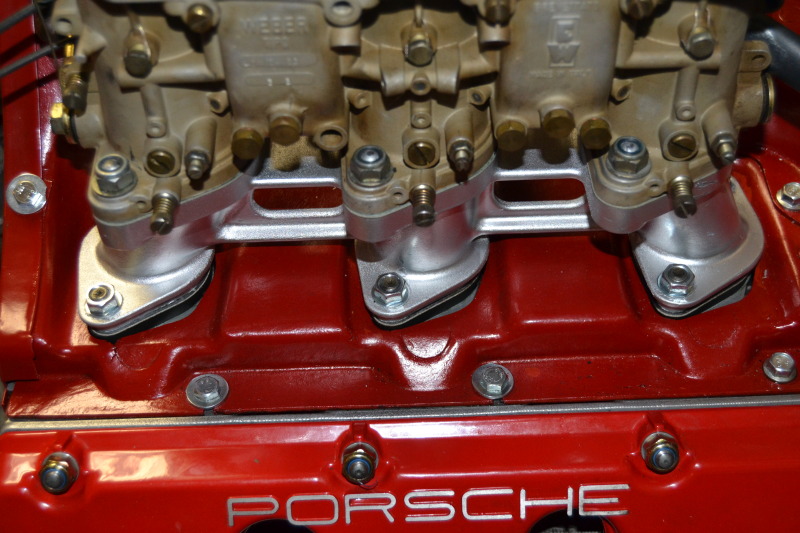
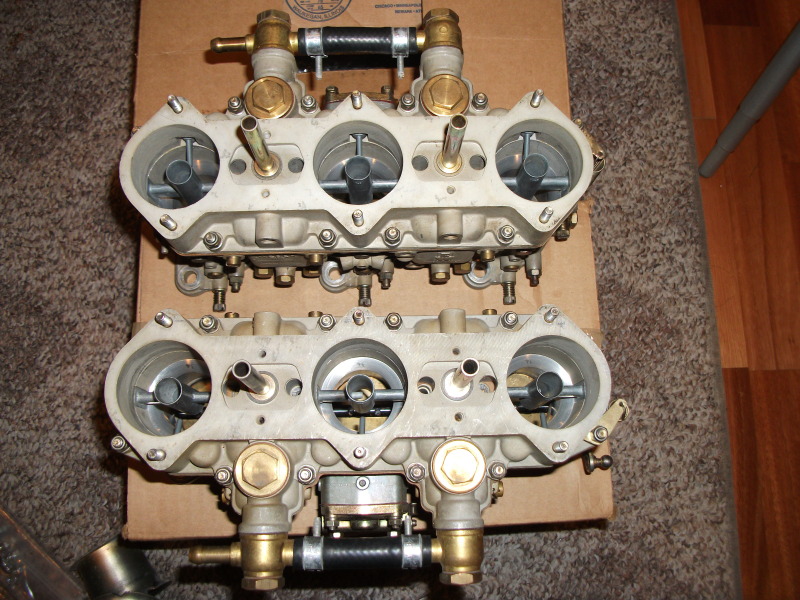
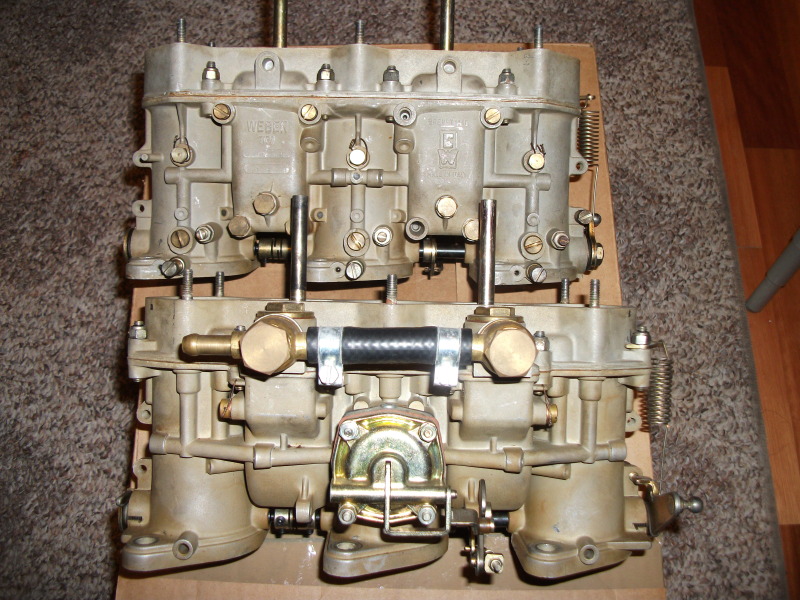
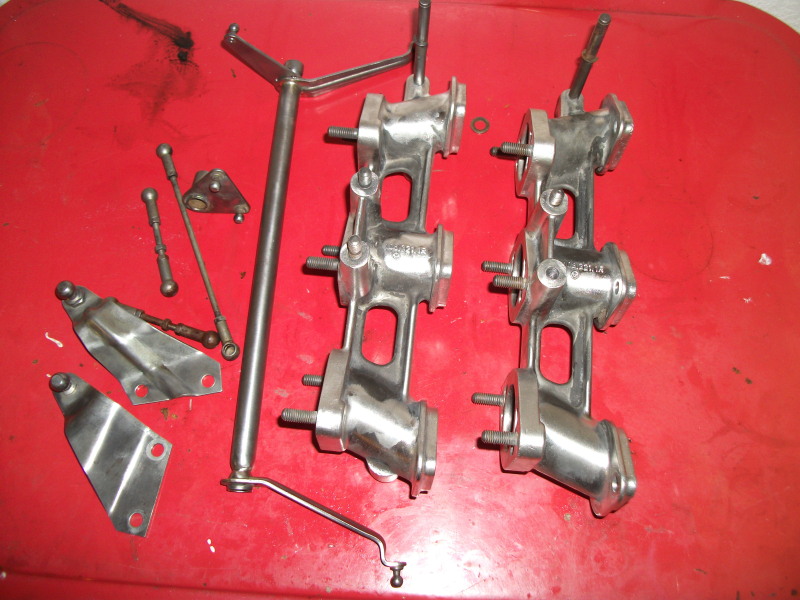
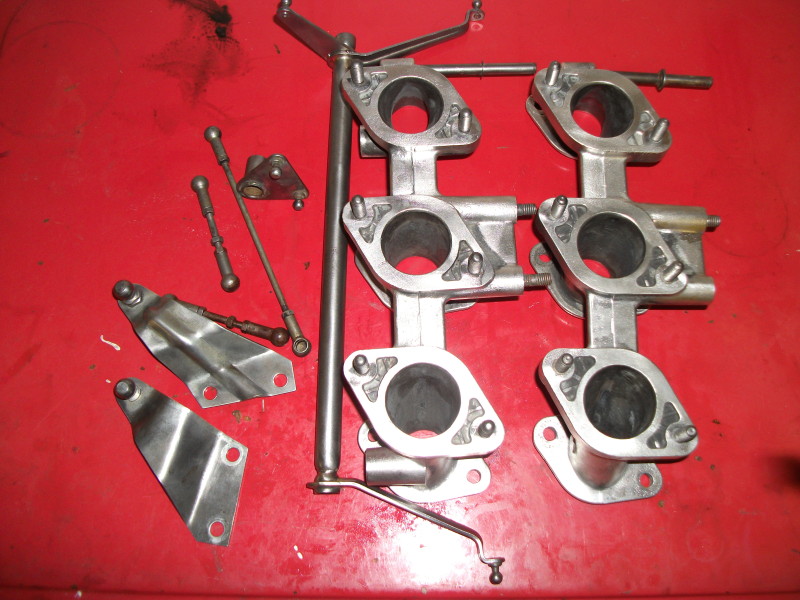
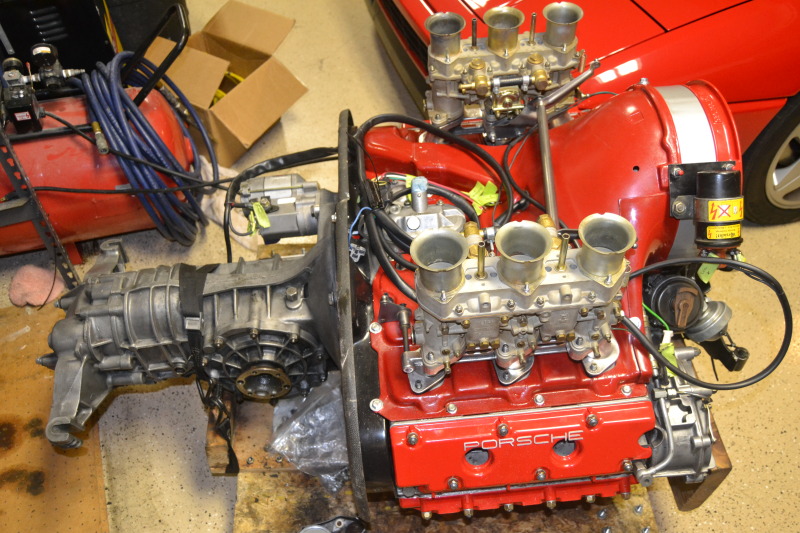
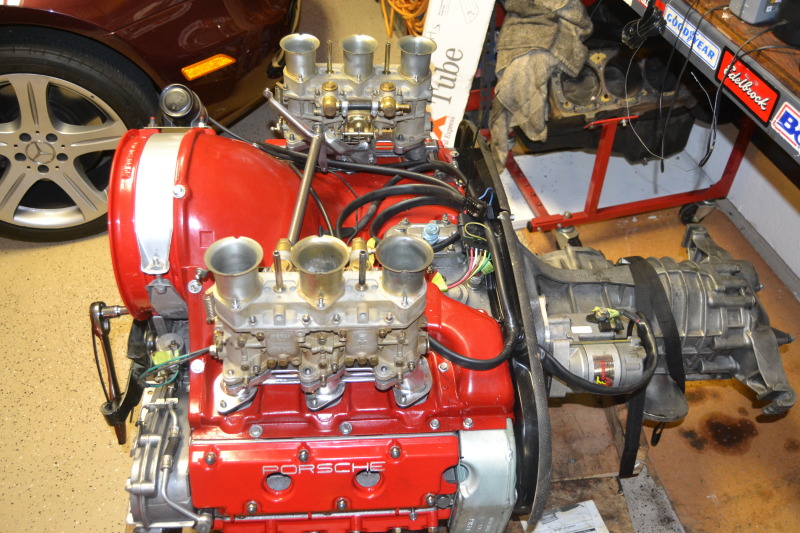
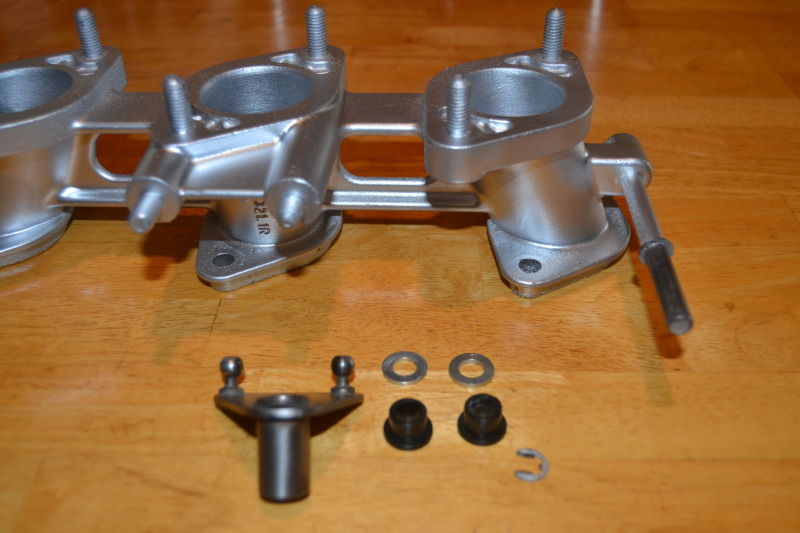
Thanks Perry. Much, much, cleaner than I expected. These things are clean. I thought I was going to have to de-gunk and clean for days. These are ready to go. Manifolds and linkage are on the way.
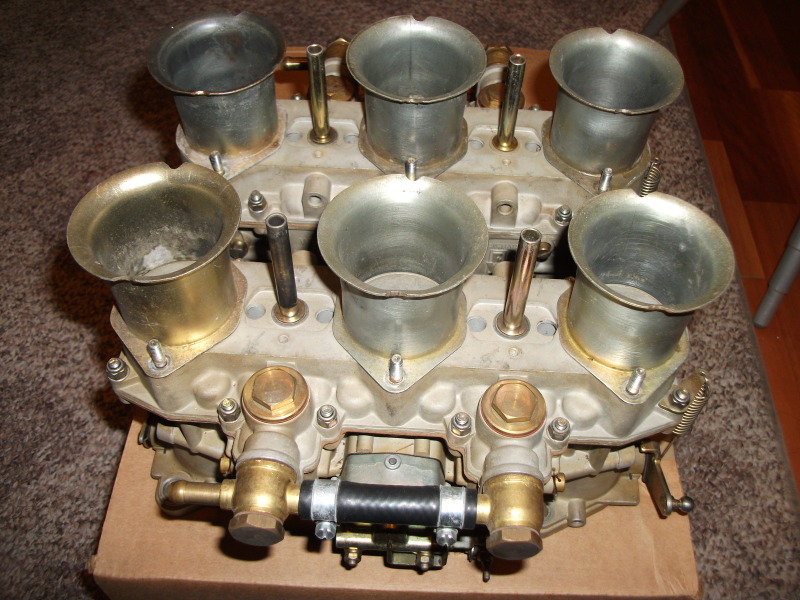
Bee Jay
IPB Image
IPB Image
IPB Image
IPB Image
IPB Image
IPB Image
Bee Jay
Good news. As promised the Carbs are set up perfectly for a 3.0 liter.
The carb set up Anderson recommends is:

40IDA-3C carbs
34 mm venturis 34mm
F3 emulsion tubes F3
160 main jets 155
175 air correction jets 175
60 or 65 idle jets, maybe even bigger to avoid part throttle surge 65

I'm waiting on intake manfolds to mount the carbs to the engine. In the mean time, I have a few questions.
What spark plugs should I run with a carbed 3.0 with stock cams?
Where do you get affordable (cheap) spark plug wires?
What oil filter do you run on a Velios Oil tank like I have?
I need to buy new distributor cap and rotor too.
I guess I should make this engine as complete as possible before mounting it into the car.
Bee Jay
Bee Jay
I've got intake manifolds. They didn't look like this when I got them. I let them soak overnight in the parts washer, then I attacked them with my wire brush wheel. One small problem, these are two right side manifolds. The supplier said I simply make a left side manifold by removing the shaft from one of the manifolds. How do I do that? Do the shafts just pull out? Do I have to have them pressed out?I plan to paint them silver.
Bee Jay
IPB Image
IPB Image
Bee Jay
OK. I have webers and I have factory 911 carb manifolds. I assumed all I needed were PMO insulators to put the manifolds onto my 82 3.0CIS heads. But when the Cap'n called PMO to order the insulators, the PMO guy poo poo'd my plan and said that the only way to do it properly was to use the insulators with PMO manifolds or have the injector notches welded up in the heads. what do you Guy think or recommend? Is there a way to make these manifolds work?
rfuerst911sc
I'm running 911 manifolds with Weber carb's on my 1978 3.0 with just insulators and gaskets with no problems.
moparrob
Why wouldn't it work? The insulator covers the injector notch and seals the manifold....
Bee Jay
I now have 33mm PMO insulators/spacers. They do cover the fuel injection notch rather nicely and I don't see how a PMO manifold would do any different than this factory manifold. I could not resist the temptation to mock up the manifolds and carbs. I have to paint the manifolds and find the bushing that goes inside the bellcrank toward the back of the engine compartment, the bushing goes on the rod extending from the manifold. Also, the stock studs are long enough.
Bee Jay
IPB Image
IPB Image
IPB Image
IPB Image
IPB Image
IPB Image
patssle
I thought I had read that you're suppose to take out those studs when converting to carbs. But from your pictures, it seems unnecessary, plenty of room for locking nuts.

It seems the spacers are required? Where did you get them, direct from PMO?
Bee Jay
QUOTE(patssle @ May 6 2011, 08:04 AM) *

I thought I had read that you're suppose to take out those studs when converting to carbs. But from your pictures, it seems unnecessary, plenty of room for locking nuts.

It seems the spacers are required? Where did you get them, direct from PMO?

I got them form Bruce, FLAT6PACnc@aol.com on Pelican, a pleasure to deal with. Yes, they are PMO.
Bee Jay
mepstein
QUOTE(Bee Jay @ May 6 2011, 12:58 PM) *

QUOTE(patssle @ May 6 2011, 08:04 AM) *

I thought I had read that you're suppose to take out those studs when converting to carbs. But from your pictures, it seems unnecessary, plenty of room for locking nuts.

It seems the spacers are required? Where did you get them, direct from PMO?

I got them form Bruce, FLAT6PACnc@aol.com on Pelican, a pleasure to deal with. Yes, they are PMO.
Bee Jay


Small world. Bruce helps me with advice and parts. He used to live in DE. I think he said he once sold a 914-6 GT to Brumos. Anyway, he know these cars and engines.
Bee Jay
Where can I find the bushing that goes on this bellcrank. Is it a Porsche dealer item? Or can I find it in any FLAPS?
Bee Jay
IPB Image
Cap'n Krusty
At a FLAPS? You're kidding, right? If you think they don't have 914 parts, they REALLY don't have 911 stuff. I have them. Bring the bell crank with you. I'll be here tomorrow.

The Cap'n
Bee Jay
QUOTE(Cap'n Krusty @ May 6 2011, 04:19 PM) *

At a FLAPS? You're kidding, right? If you think they don't have 914 parts, they REALLY don't have 911 stuff. I have them. Bring the bell crank with you. I'll be here tomorrow.

The Cap'n


Yea, I was kidding. I'll swing by tomorow after the Pismo Beach Coffee and Donuts Derelects. Do you have carb to manifold gaskets?
Bee Jay
Bee Jay
The Cap'n had the bellcrank busings. This is what they look like and how everything assembles. I figure someone else may be as clueless as me.
Bee Jay
IPB Image
IPB Image
IPB Image
IPB Image
J P Stein
I agree with the PMO guy. You do not want any leakage there....ever. Tuning the Webers is tough enough without any variables built in.
....but do what you want.
Bee Jay
I'm already in the search for PMO manifolds mode, but I still can't see how they will seal the spacers any better than the factory manifolds. Actually I think he preferred the heads be welded up.
J P Stein
QUOTE(Bee Jay @ May 8 2011, 10:55 AM) *

I'm already in the search for PMO manifolds mode, but I still can't see how they will seal the spacers any better than the factory manifolds. Actually I think he preferred the heads be welded up.


Plastic (or phenolic) is flexible. Bolt it to a semi-compressible surface (gasket) and the plastic will bend if not supported or squeezed. The phenolic spacer will
(by itself) not compress the gasket to the same thickness as under the manifold.
This could cause a gap to open up immediately or over time. A back fire could also blow out the gasket is not squeezed between two solid surfaces. Back fires & Webers while tuning are inseparable. Either way, it will cause a vacuum leak.
Personally, I like my stuff as bullet proof as I can make it.

I think you will find the welding & milling of the heads more expensive that PMO manifolds.
Bee Jay
QUOTE(J P Stein @ May 8 2011, 12:49 PM) *

QUOTE(Bee Jay @ May 8 2011, 10:55 AM) *

I'm already in the search for PMO manifolds mode, but I still can't see how they will seal the spacers any better than the factory manifolds. Actually I think he preferred the heads be welded up.


Plastic (or phenolic) is flexible. Bolt it to a semi-compressible surface (gasket) and the plastic will bend if not supported or squeezed. The phenolic spacer will
(by itself) not compress the gasket to the same thickness as under the manifold.
This could cause a gap to open up immediately or over time. A back fire could also blow out the gasket is not squeezed between two solid surfaces. Back fires & Webers while tuning are inseparable. Either way, it will cause a vacuum leak.
Personally, I like my stuff as bullet proof as I can make it.

I think you will find the welding & milling of the heads more expensive that PMO manifolds.

OK, I think I actually understand what you are saying now. So the PMO manifolds will do a better job of covering the entire gasket and spacer and not leave any exposed like this?
IPB Image

Bee Jay
J P Stein
Yes, got a pic that shows the area not specifically for that but you can see the shape of the PMOs. I went thru the same quandry some years back.
campbellcj
Another pic for ya. The manifold base is noticeably larger.

IPB Image
914R Engine bay by cjcam, on Flickr
campbellcj
dupe
moparrob
QUOTE

IPB Image


Bee Jay,

Are those intake studs long enough? It doesn't seem like the nylon part of the Nylock nut is actually engaging the threads. Is that an illusion or do they not protrude through?
Bee Jay
QUOTE(moparrob @ May 8 2011, 07:14 PM) *

QUOTE

IPB Image


Bee Jay,

Are those intake studs long enough? It doesn't seem like the nylon part of the Nylock nut is actually engaging the threads. Is that an illusion or do they not protrude through?

The nylon part of the nuts are engaged, but I may remove the washers to get even more. What is the torque spec for the manifold to head nuts with phenolic spacers underneath? The picture was taken right after glueing the spacer gaskets in place. I'll retorque to the number I find out and I bet I get even more nylon.
Bee Jay
eric9144
popcorn[1].gif Awesome!
Cap'n Krusty
Glue? Nope. Don't need it. Most of it isn't fuel proof, anyway. Nylocs? Naah. Use no glue, get rid of the flat washers, use spring (AKA "wavy") washers and plain nuts. Torque them to 15 ft/lbs (or 18 if you want to).


The Cap'n
Bee Jay
QUOTE(Cap'n Krusty @ May 9 2011, 05:20 PM) *

Glue? Nope. Don't need it. Most of it isn't fuel proof, anyway. Nylocs? Naah. Use no glue, get rid of the flat washers, use spring (AKA "wavy") washers and plain nuts. Torque them to 15 ft/lbs (or 18 if you want to).


The Cap'n

I got wavy washers and normal nuts from the Cap'n tonight and replaced the regular flat washers and nyloc nuts on the manifold. Torqued them to 15 ft/lbs. This is the result. Look OK? I am very glad that I'm doing this with the engine in my lap. I can't imagine doing this with the engine in the car.
Bee Jay
IPB Image
IPB Image
patssle
Are those the PMO manifolds? I don't see too much of the gasket exposed in your last pictures vs your #129 post.
Bee Jay
QUOTE(patssle @ May 19 2011, 05:06 PM) *

Are those the PMO manifolds? I don't see too much of the gasket exposed in your last pictures vs your #129 post.

No, that's the same factory manifolds. Do you know where I can find some PMO manifolds, I mean other than brand new from PMO.
Bee Jay
This is a "lo-fi" version of our main content. To view the full version with more information, formatting and images, please click here.
Invision Power Board © 2001-2024 Invision Power Services, Inc.