moparrob
Nov 9 2010, 10:12 PM
Looks great! My engine is at about the same stage yours is. Valve covers and fan going to the powder coater this month. I also am running ceramic coated headers.
I can't wait to get it running.

Did you fab that hard oil line under the engine yourself? If not where did you get it?
Also, where will you be venting your crank case to? Does that breather vent to the oil tank?
Cairo94507
Nov 10 2010, 07:12 AM
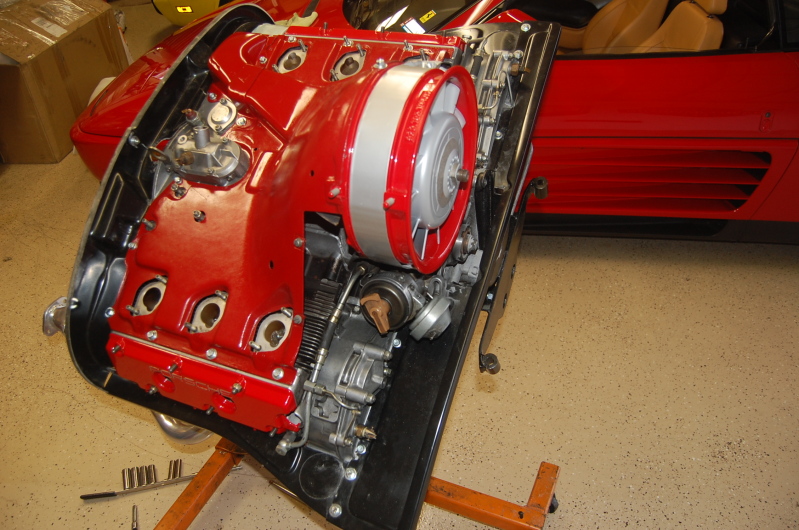
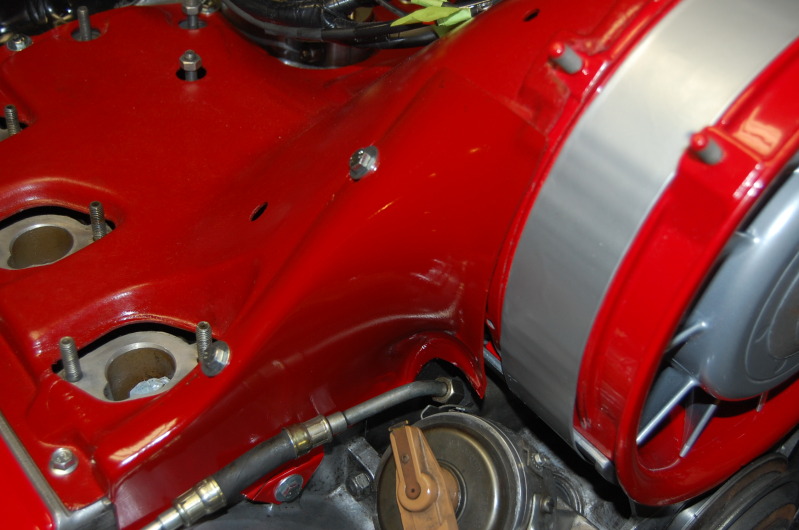
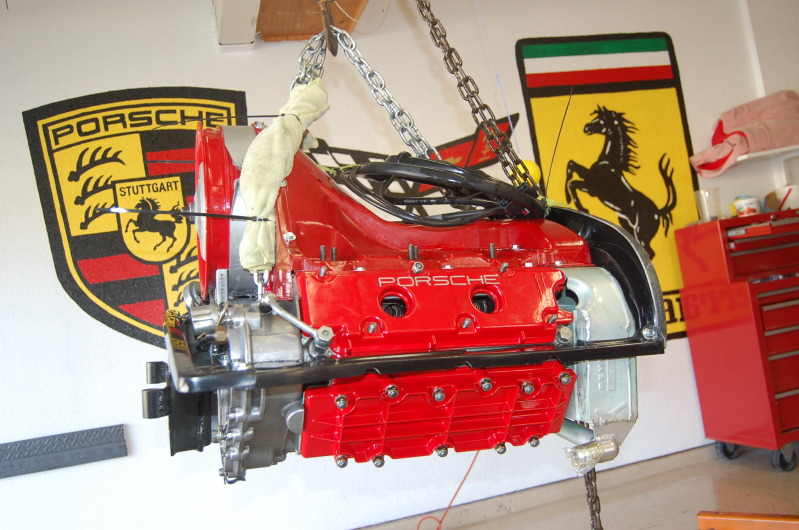
That is looking sweet; I would definitely remove and paint the engine tin. Very clean job.
Bee Jay
Nov 11 2010, 09:40 AM
QUOTE(moparrob @ Nov 9 2010, 09:12 PM)

Looks great! My engine is at about the same stage yours is. Valve covers and fan going to the powder coater this month. I also am running ceramic coated headers.
I can't wait to get it running.
Did you fab that hard oil line under the engine yourself? If not where did you get it?
Also, where will you be venting your crank case to? Does that breather vent to the oil tank?
The hard line came with the engine. It gets in the way. I'm new to 911 engines and I don't know yet where this line goes. Can it be replaced with -12 braided hose? I'm going to need help plumbing this puppy to the oil tank. I got the oil tank temporarily mounted inside the fender, but with no lines to it.
Bee Jay
Eric_Shea
Nov 11 2010, 10:02 AM
Glenn works at Pelican.
Ronnie... do tell about the wild weekend at SEMA.

RFoulds
Nov 11 2010, 10:38 AM
Wait. 70's Corvette, ferrari, AND a 914-6?? Soory. two toys per customer. gonna have to give one up.
And I'll take the vette off your hands. Is it L-82 4 speed??
Bee Jay
Nov 12 2010, 12:53 AM
QUOTE(RFoulds @ Nov 11 2010, 09:38 AM)
Wait. 70's Corvette, ferrari, AND a 914-6?? Soory. two toys per customer. gonna have to give one up.
And I'll take the vette off your hands. Is it L-82 4 speed??
It's an L-82 with four speed alright, 700 R4 four speed. I bought it new in 1979. Check it out here:
http://forums.corvetteforum.com/garage/197...268-BeeJay.htmlBee Jay
moparrob
Nov 12 2010, 01:02 AM
I still haven't figured out what the best option will be regarding that hard oil line, either. I'm using a stock 914-6 oil tank, so I guess once I get the tank mounted and have the engine installed I will have a better idea of how to connect the two.
Do you know where the crankcase breather connects to??
sawtooth
Nov 12 2010, 01:03 AM
QUOTE(Bee Jay @ Nov 9 2010, 08:33 PM)
That is beautiful, crazy nice work.
rfuerst911sc
Nov 12 2010, 05:12 AM
QUOTE(moparrob @ Nov 11 2010, 11:02 PM)
I still haven't figured out what the best option will be regarding that hard oil line, either. I'm using a stock 914-6 oil tank, so I guess once I get the tank mounted and have the engine installed I will have a better idea of how to connect the two.
Do you know where the crankcase breather connects to??
On my six conversion I used -16AN braided hose from the tank to the engine mounted cooler. I also added a tee so I can drain the tank by simply removing the tee cap. The rest of the oil lines I used -12AN. I have a front mounted cooler with a Mocal thermostat mounted near the engine and this setup ran cool in the Florida summers.
jt914-6
Nov 12 2010, 06:01 AM
QUOTE(SLITS @ Oct 30 2010, 07:56 AM)
Carbs = 12 mpg
CIS = 22 - 27 mpg
I have Weber 40's on my 3.0 RS spec engine and am getting 21 mpg....a friend with a stock injected 3.6 isn't getting much better......
EDIT.....took a weekend trip and on the two fill ups using GPS for milage I got 21.9 and 21.2 mpg driving some freeway, two lane roads with some sprited driving mixed in....
Bee Jay
Jan 4 2011, 10:07 PM
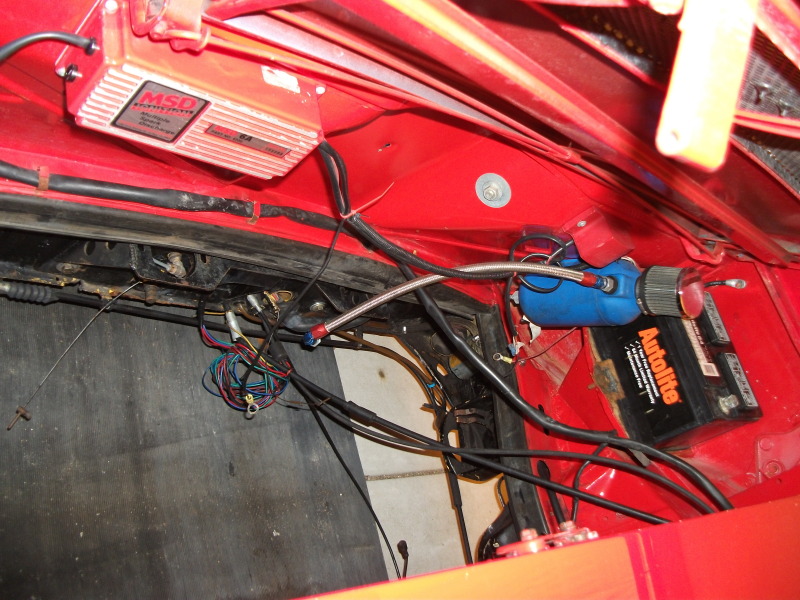
I got my wire harness back from Perry Kiel today. Excellent job Perry. It wasn't cheap, but quality costs. Check it out. Now I can permanantly mount my shroud and alternator and fan. I may need a little help wiring the alternator.
Bee Jay
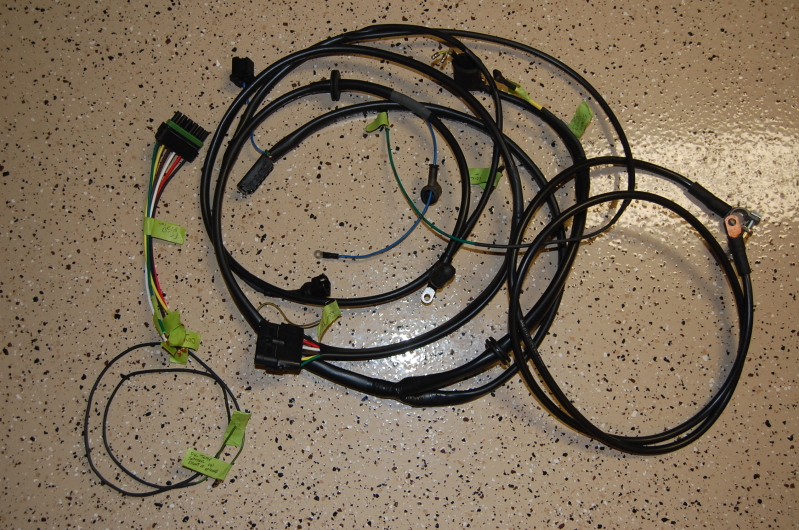
moparrob
Jan 4 2011, 10:52 PM
Wow, the harness looks great. That is what I need next. Where would one locate Perry?
Here are a few random threads I have saved recently for the same reason you are inquiring. Some are more useful than others:
link1link2link3link4Have fun!
Scott S
Jan 5 2011, 11:43 AM
Yep, Perry is the man. I see you did what I did and had him include the MSD wiring into the harness. I love that there will not be a pile of random wires in the engine compartment. He also included the wiring for my Pertronix - all color coded perfectly.
His harnesses really are a work of art.
Right before Christmas I was able to finally do the final install of my shroud and intakes as well. That felt really good.
Good luck with the project. I like reading your thread (I am too lazy to take pics of my own!!)
JmuRiz
Jan 5 2011, 12:49 PM
Quick question, what's this wiring harness for? Is it just for the alternator etc, or is it for more stuff. It sure looks neat and tidy!
Just wondering if I need to contact him as well.
Still not sure about what ignition and/or MSD I need on my carb'd 2.7 CIS engine.
Scott S
Jan 5 2011, 01:06 PM
It is for everything in the engine compartment, as well as the starter wiring, and reverse lights. It plugs right into the main plug on the factory harness after the relay board is removed - well, at least mine does. Perry builds them based on your specific needs. I my case, he even went through where things were going to be mounted in the engine compartment, as well as little details like the best way to route the temp gauge wiring. Very cool product - totally worth it. I hope I dont screw it up when I do my final install!
Bee Jay
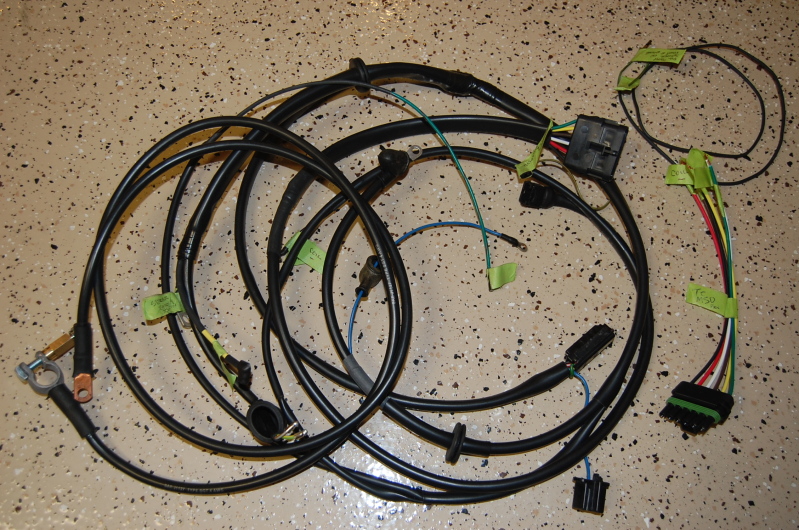
Jan 5 2011, 01:29 PM
I asked for help too soon. I opened up Perry's invoice this morning so that I could mail him a check, and there are two full pages of complete instructions. It tells me where every wire, by color, should go. As you can see, most of the connectors are labeled. I sent him an oily dryed up and brittle mess, and he sent me a like new, good looking harness. Perry is the man for wire harness'.
Bee Jay
Justinp71
Jan 5 2011, 05:56 PM
Hi Guys, I did my 81 3.0 conversion a few years ago, here a few comments/suggestions, hope they are useful.
Fuel Delivery- I went to carbs bc my CIS system was not as complete as I originally thought and you are limited to upgrades (and carbs are sexy

). Also I was worried that with an all original CIS system it could be prone to failures over the years. (however I know that CIS can be reliable).
I do love the carbs, but my preference would be a motronic system, which unfortunately can't be installed on a 3.0 without milling the heads. I believe this system would give better low end torq, reliability and efficiency, probably be less stinky too... The carbs are very reliable the only problem is the occasional idle jet clogging, which can be solved with a very clean fuel and air system.
Cam- I had my cams re-ground by
http://www.drcamshafts.com/911profiles.htm, I am very happy with them, I went with the dc19 grind. A little more aggressive than the 964 but works with cis and cis pistons.
Mileage- I typically get 15-17 mpg, 20 on the highway. Its fine for me since I don’t put a ton of mileage on the car. I also started tuning the carbs with the air screws one turn out, I had read somewhere that this will give you better mileage.
Tuning- I don’t remember all my jets off hand (they are close to what’s posted here). But I run 55 idle jets, with 60's for some reason it seemed to run to rich, not sure why as some people run 65's must be the tuning and year of motor... Also I had my dizzy re-curved by rennsport in Oregon, I highly recommend them, very knowledgeable.
Overall the car sounds great, motor looks good and is a blast to drive.
Good Luck

Justin
Bee Jay
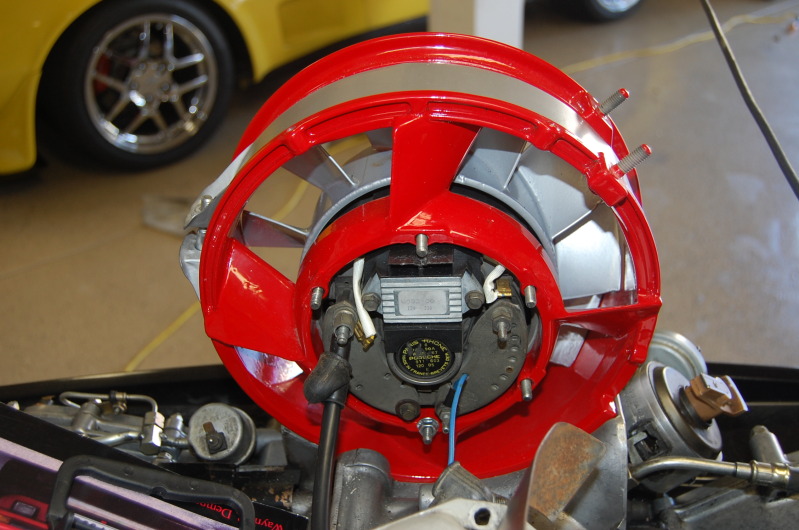
Jan 8 2011, 02:01 PM
I need help afterall. Here is my alternator. Do I have it mounted correctly. I assumed it belonged with the print right side up and regulator up. Correct???
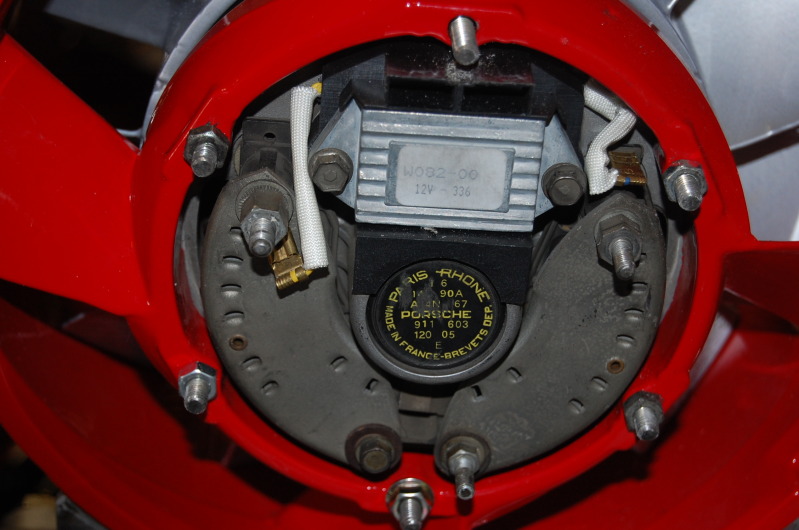
Next, I'm hooking up Perry's beautiful wire harness to the alternator. It came with a slim blue wire, and a fat black wire. I did not take the alternator out, so I have no pictures of before. Do I have it right?????
Also, I don't have the alternator to ground strap, but I can build one easily. Where does it hook up?
Thanks
Bee Jay
sixnotfour
Jan 8 2011, 07:20 PM
check your belt alignment , you may have a mismatch fanhousing / alternator.
I believe it is upisde down, but really does not matter, You may have to notch the air cone that goes on back. The ground attaches to one of the six alternator bolts.
Bee Jay
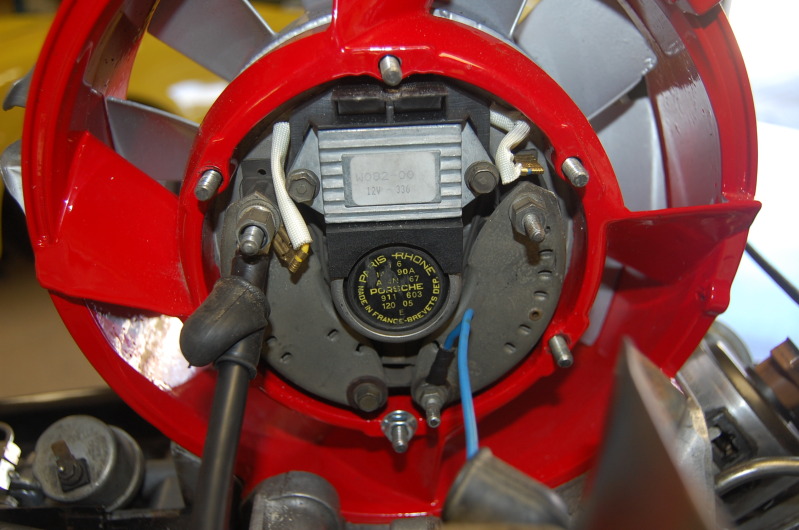
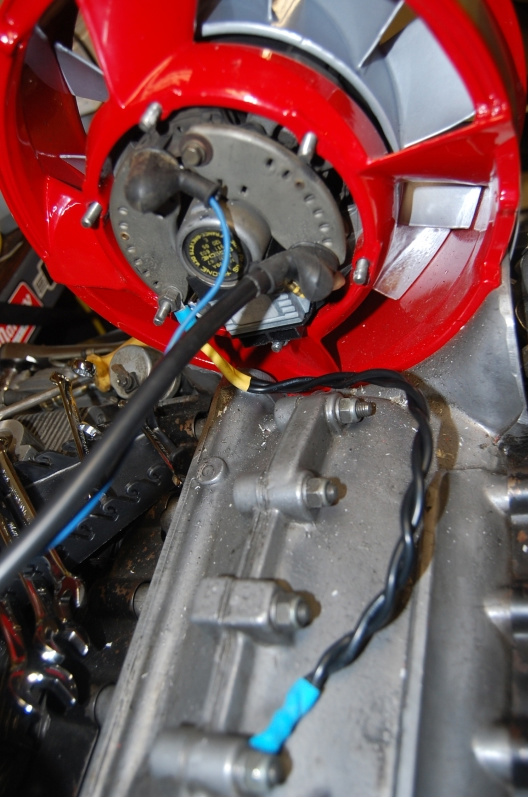
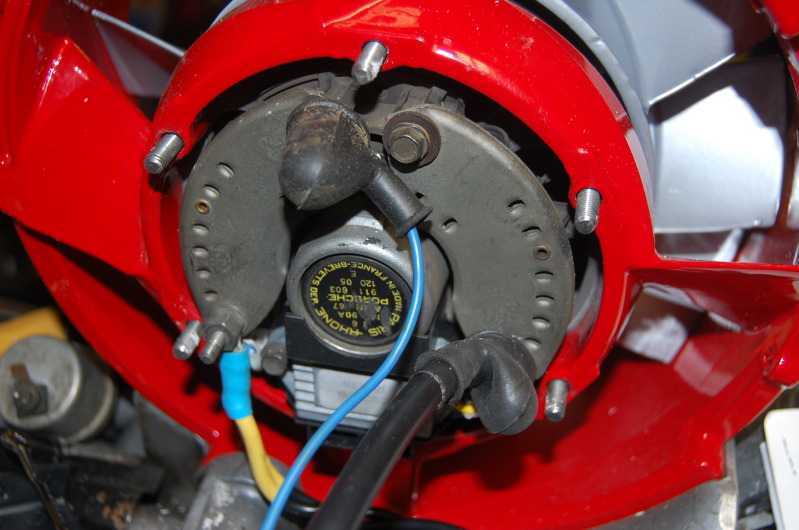
Jan 11 2011, 12:53 AM
The voltage regulator needed to be inverted and I needed to create a ground wire. I'm ready to install the fan shroud.
Bee Jay
Bee Jay
Jan 17 2011, 12:06 AM
First, my welding sucks eggs, big time. So, now that you know that, the motor mount is in. First I bolted it in with six grade eight bolts to 100 ft lbs of torque. The Captain, John Larson, and Gill Paszek instisted that the motor mount still needed to be welded in, so I welded it in. Did I mention my welding sucks. Well, it's welded in really good, it's just not so pretty. But this motor mount isn't going anywhere.
Bee Jay
mepstein
Jan 17 2011, 06:10 PM
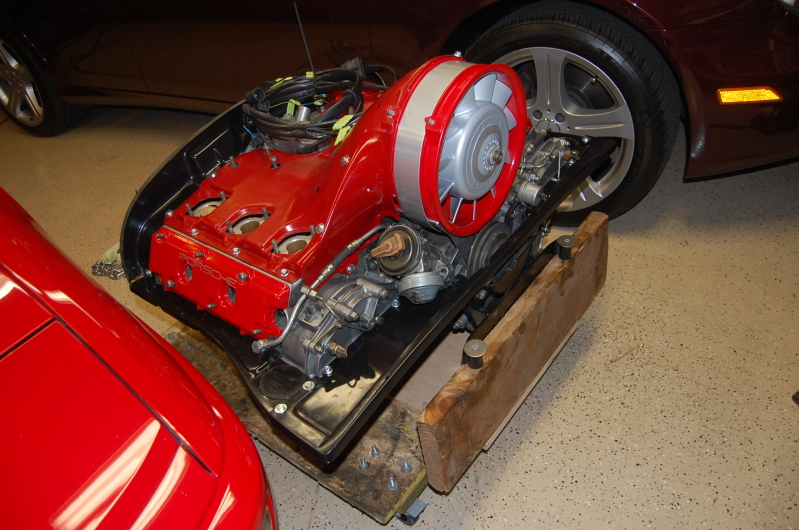
How did you get your engine so clean? Looks great!
Bee Jay
Jan 31 2011, 12:10 AM
QUOTE(mepstein @ Jan 17 2011, 04:10 PM)
How did you get your engine so clean? Looks great!
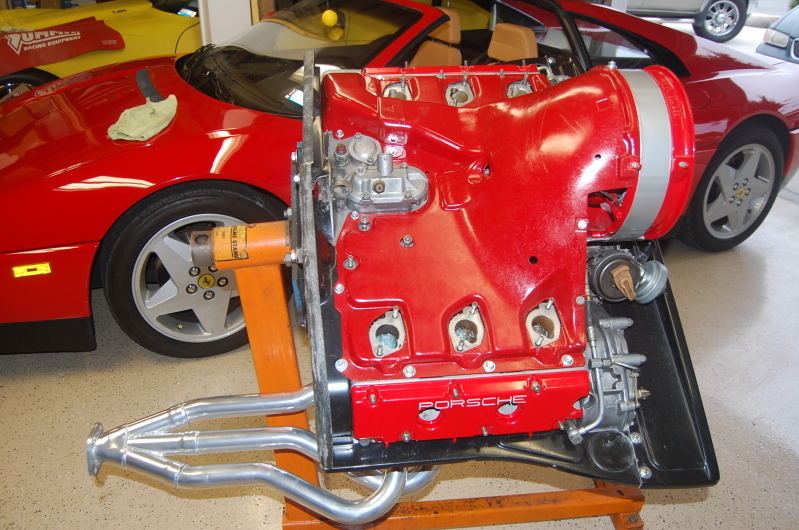
I used a gasoline/kerosene mix, wire brush wheels on my cordless drill, and lots of compressed air. Be sure to plug the intake and exhaust ports with paper towels.
Bee Jay
Bee Jay
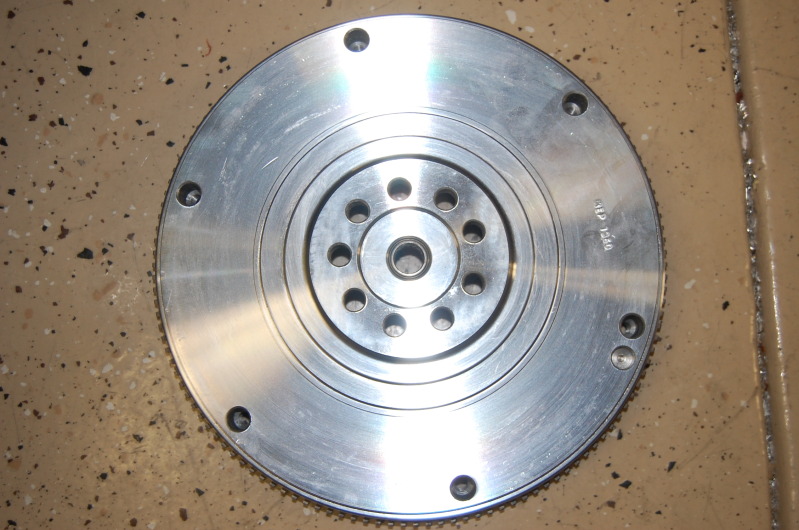
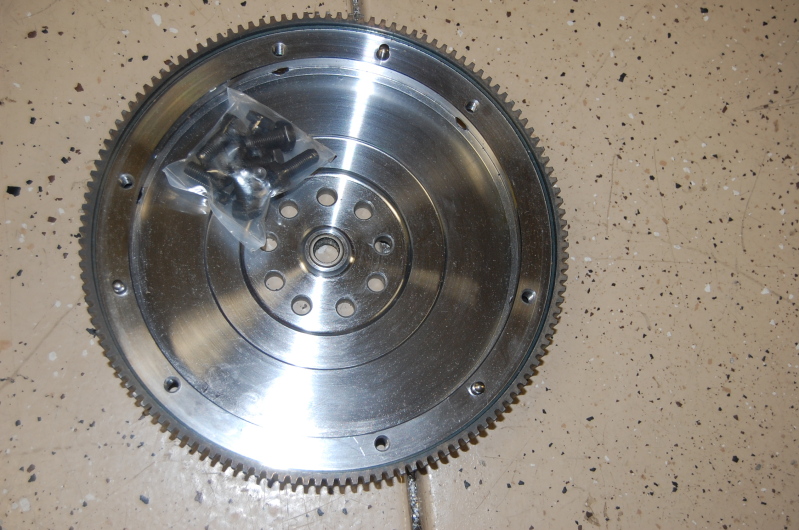
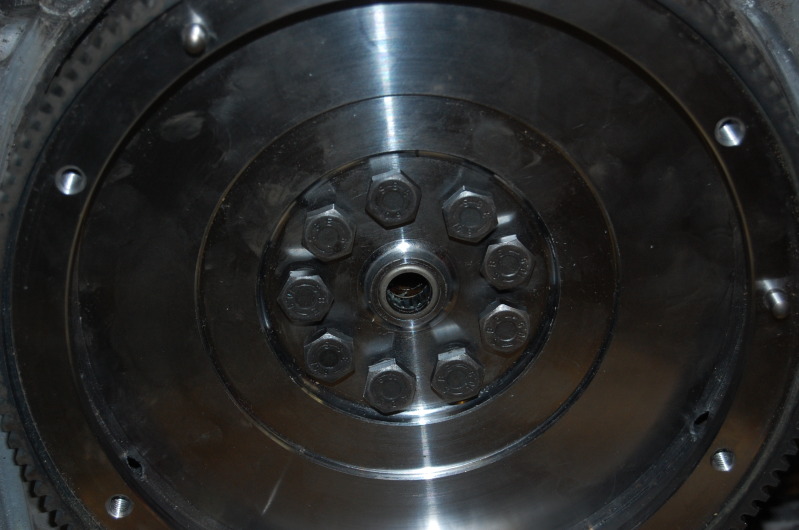
Jan 31 2011, 12:12 AM
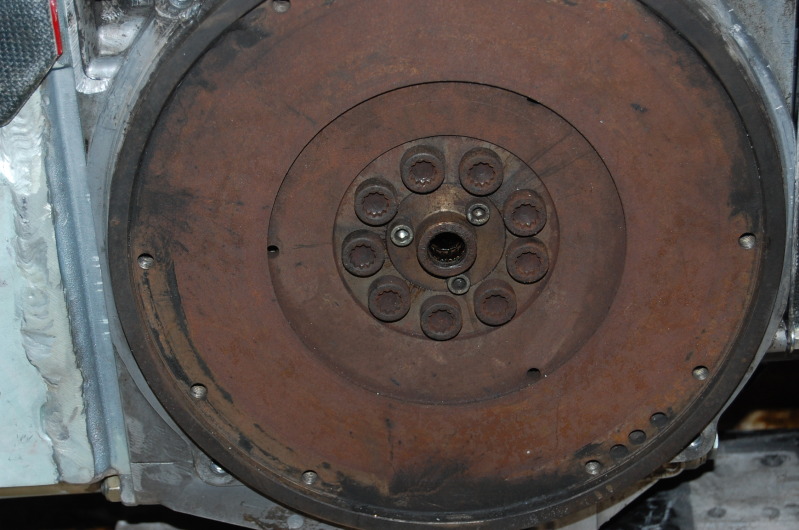
I got something in the mail last week. It's my 901 to 3.0 flywheel from Kennedy Engineering. They do good work. The flywheel came with bolts.
Also, while in LA last week, I stopped by Earl's plumbing to pick up a couple of 3/4' to -12 adapters for my Velios oil tank.
The only thing I acomplished this weekend was to adjust the valves, so that I can gasket the valve covers in place. I got the hang of it once I bent my .004" feeler gage 90 degrees. I can't imagine doing this with the engine in the car. All valves were loose. I'm about ready to install the engine except a few items I need to find and buy. Any help in locating these items would be very much appreciated.
engine tin/fiberglass block off plates, since I am not running heat.
a single belt crank pulley to replace the two belt pulley I have
a set of Webber Carbs, manifolds, and linkage
a 914-6 side shifter straight linkage bar
and a few other things I can't think of or don't know I need yet.
I wish I had the talent and time to work on my very basic 3.0 liter six conversion that ankelbiter has. I'd finish the car this weekend. I still hope to have this running by summer.
Bee Jay
Bee Jay
Feb 5 2011, 11:50 PM
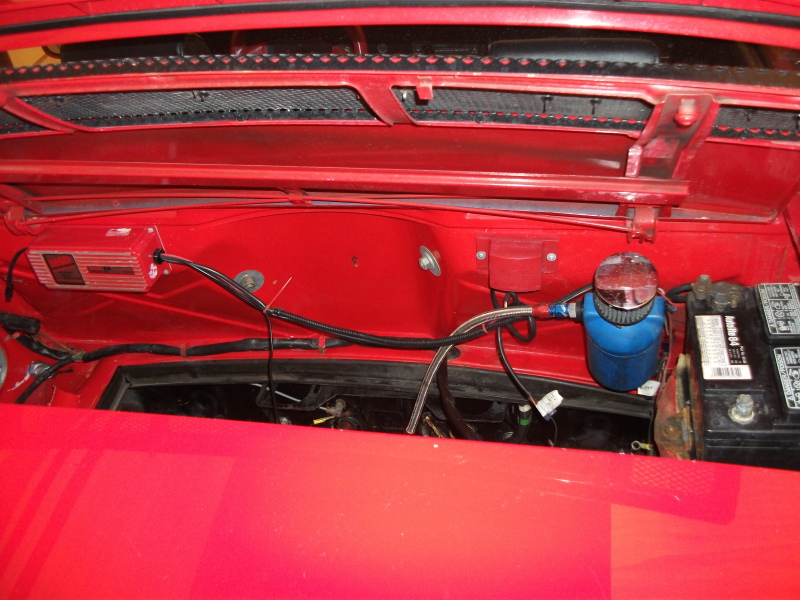
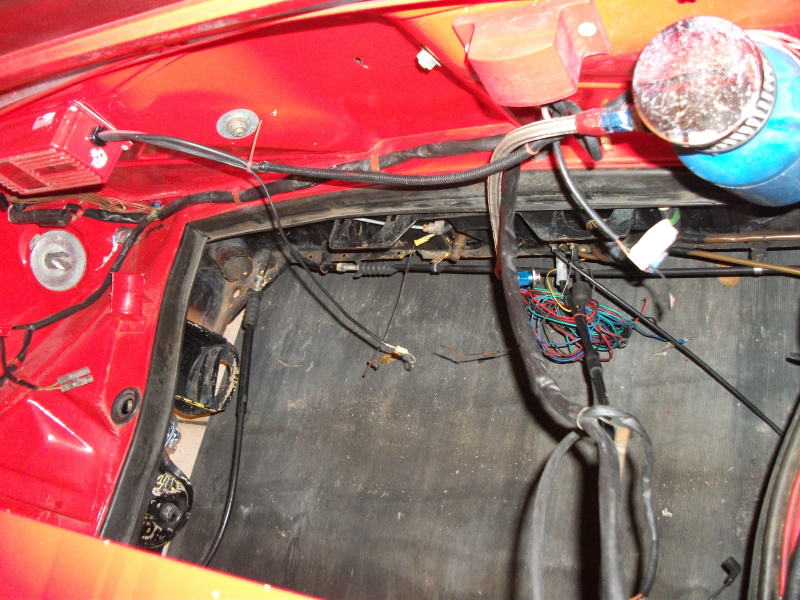
The Oil Tank is in.

What a PAIN IN THE ASS. I know, Porsche made it easy, just cut holes that are marked, then slip in the oil tank. Sounds really easy huh? Anyways, after all day, the oil tank is in.
Bee Jay
Bee Jay
Feb 10 2011, 09:22 PM
hwgunner
Feb 10 2011, 09:36 PM
Looking great! I am close enough, I hope i get to see it in person some day.

moparrob
Feb 10 2011, 11:11 PM
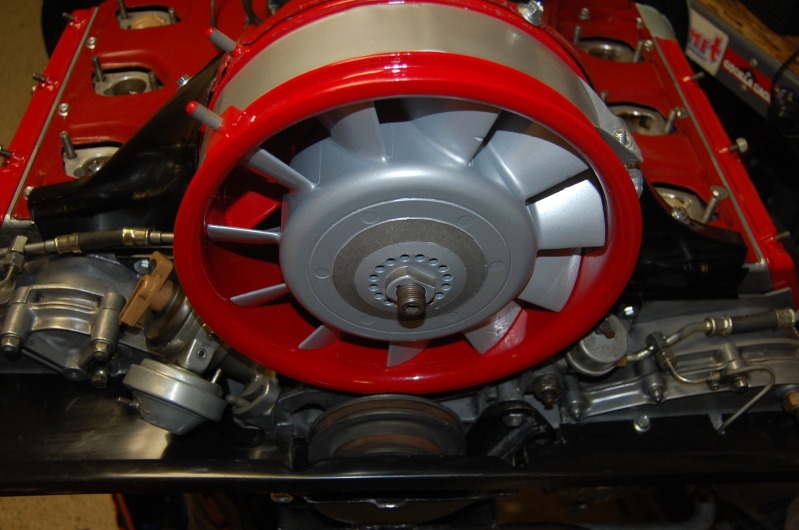
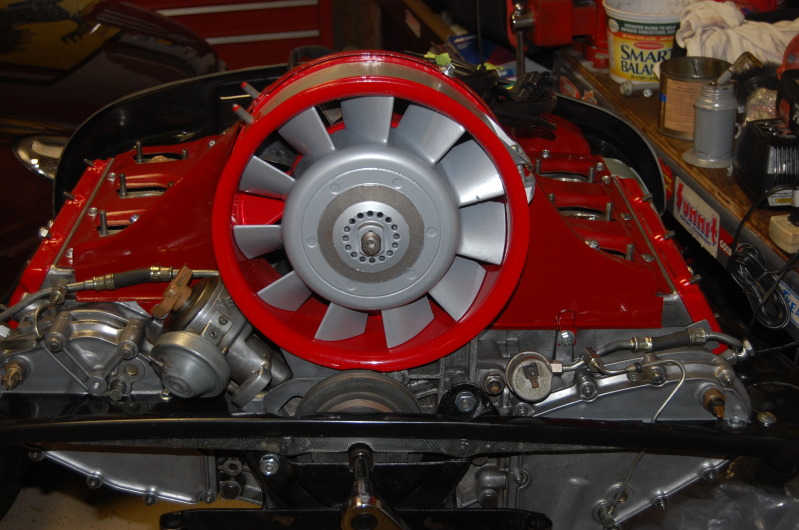
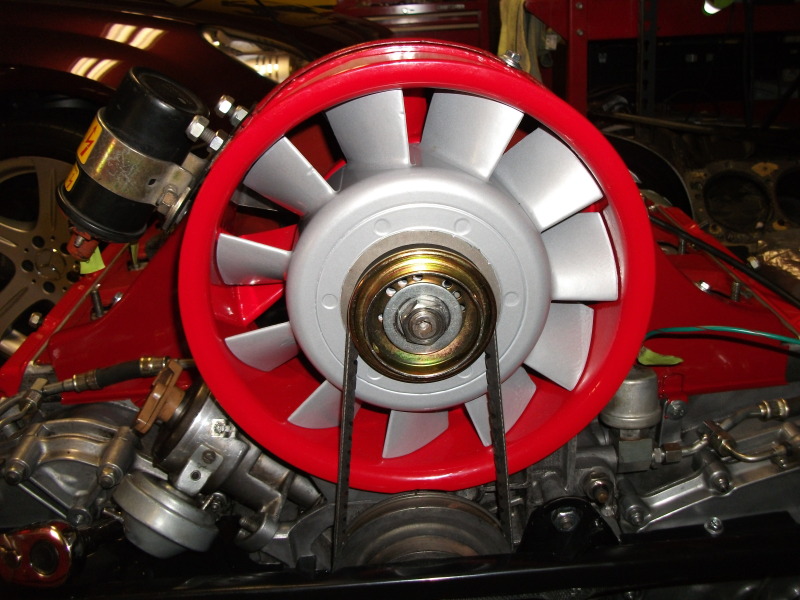
Looking good. Make sure you get the correct fan pulley. In case you weren't aware, the stock sizes for an early SC engine with the 226mm fan are 134mm for the crank pulley and 84mm for the fan pulley. This will give you a ratio of 1.8:1.
moparrob
Feb 10 2011, 11:12 PM
by the way, what did you use on your fan strap to get that nice finish?
mepstein
Feb 11 2011, 08:04 AM
[quote name='Bee Jay' date='Feb 10 2011, 10:22 PM' post='1429772']
Look at what came in the mail today from Mark Epstien. Heater block off plates. I expected used up, beat up, oily, need painting tin. What arrived was practically new and so clean, so I just bolted them on. One is tin, the other is fiberglass. I think I will take them off and paint red to match the shroud. Thanks Mark. A pleasure doing business with you. Now as you can see, I need an alternator pulley half, nut, key, and shims. I'm almost ready to bolt the engine to the tranny.
Bee Jay
Bee Jay
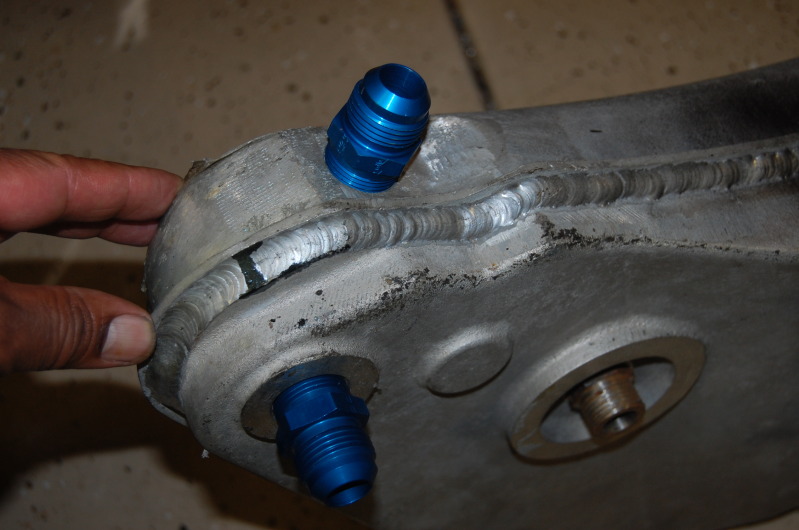
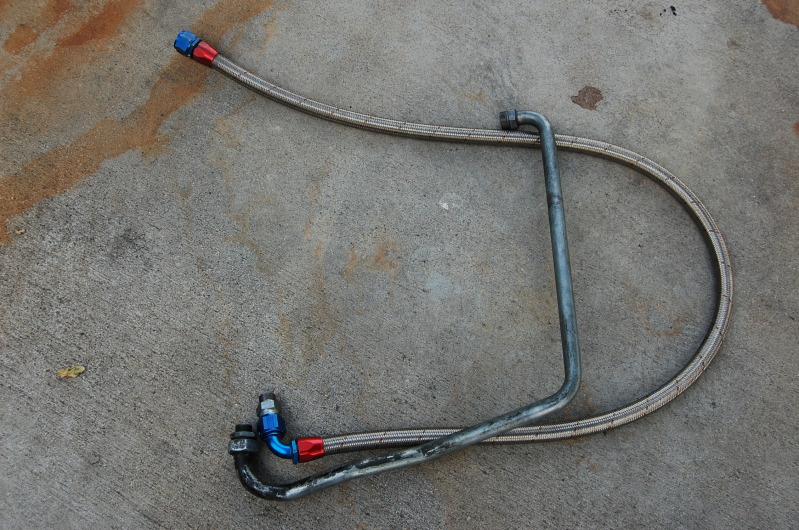
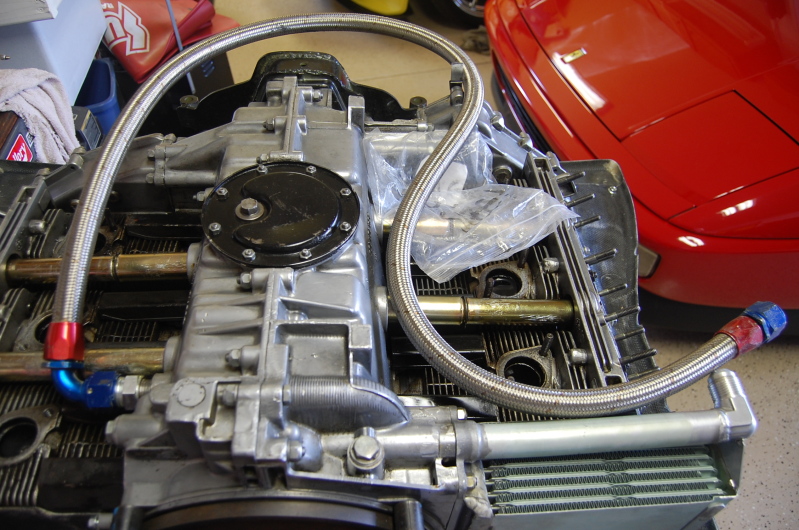
Feb 12 2011, 10:42 PM
OK, I'm trying to figure out the oil lines. I assume that this long oil line
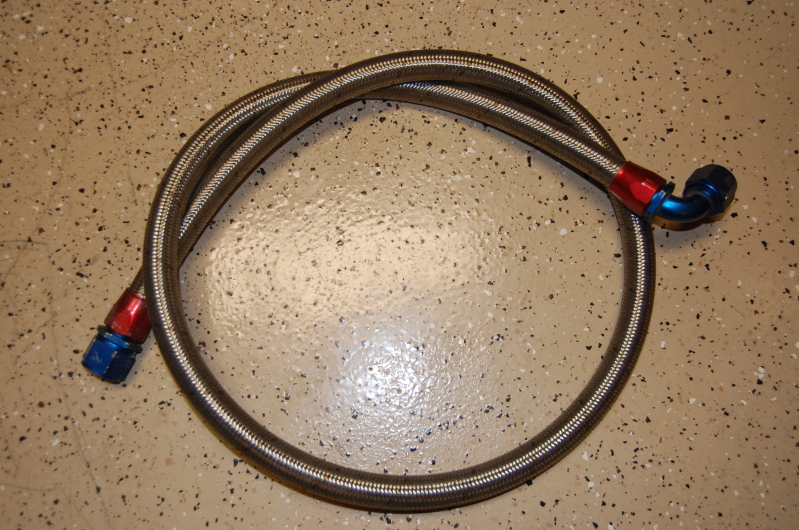
replaces this long hard oil line
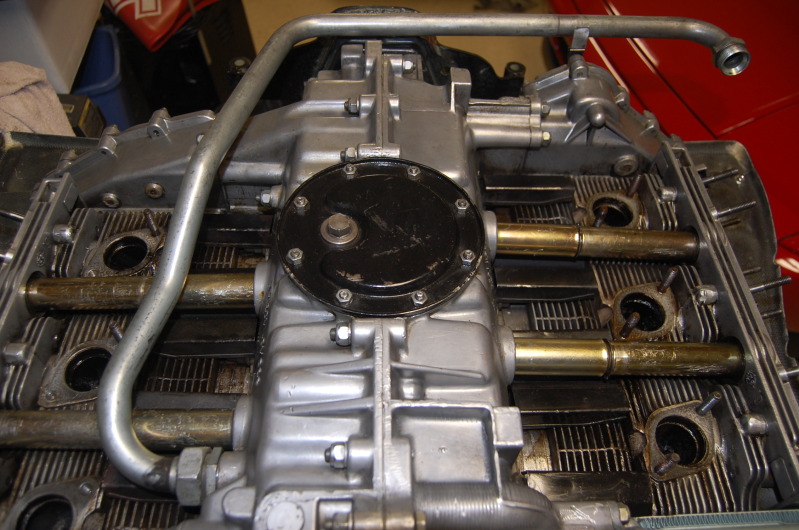
So, I need to remove this line and I can only get this much movement from the line and connecting nuts
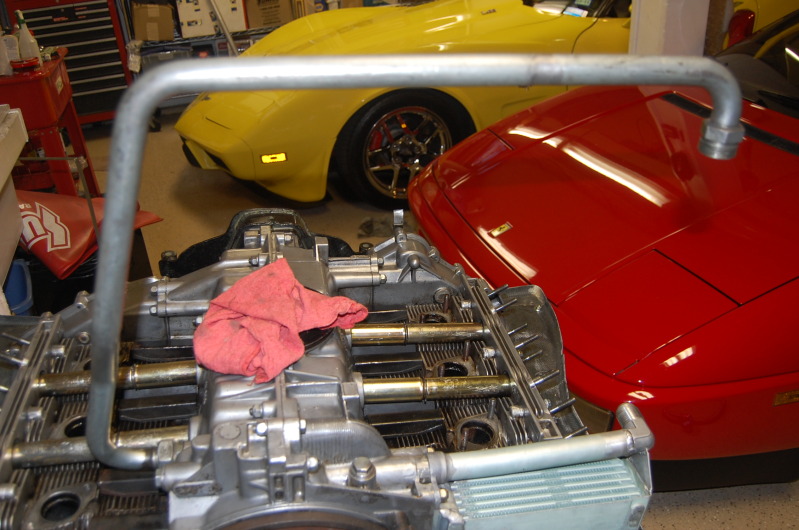
I can hack saw the hard line close to the nuts and get it off. But I just want to make sure, this long flex hose oil line plugs into here
on one end, and the side of the oil tank on the other end. I guess I need another adapter. What is the size of the metric connection into the bottom of the engine?
Thanks to everyone for their help on my project,
Bee Jay
brp986s
Feb 12 2011, 11:56 PM
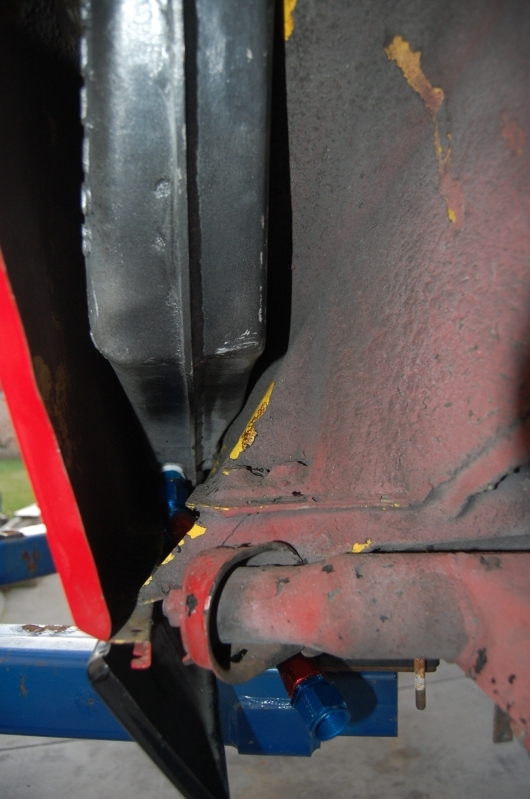
If the 90 deg. end of your flex line will screw on to the open end of your hard line, then it will also fit onto the case fitting. If the straight end of your flex line fits onto the tank, then I guess you're set, assuming it's long enuff and clears the engine mount and exhaust. If not, then you're in a pickle, because I don't recognize that flex line.
A caveat - the beauty of that hard line is that it has the funky bends in it to clear the oil tubes and headers. It's a high heat area where I'd prefer not to use a flex line. If possible, maybe you could hack off the 90 deg open end of the hard line and move it to replace the upstream 90 deg bend. Weld it on, then adjust your flex line to suit. That's what I did, except that I put in an external cooler so the welded-on 90 deg thing was sent off in another direction. You have an after market engine mount and mine's OE, so that may affect things - dunno. Good luck.
mepstein
Feb 13 2011, 07:20 AM
Here's a 914-6 oil line and a 911 line that was modified by PMS for a 914-6 conversion. Modded line uses a flex line to fit and is a larger diameter. I think 16 vs 12. Total length of 914-6 hardline is 44" +/-
IronHillRestorations
Feb 13 2011, 10:44 AM
Cut the hard line and silver solder or braze a AN fitting on it. You can get a steel 3/4" NPT /-12AN fitting, cut off the pipe threads and drill the fitting to accept the steel oil pipe, and braze it on. I've done a few like that.
Another option is to put a metric to AN adapter right on the case (where the oil pipe connects) and go with flex lines from that point. It's easier an less exposure to heat if you put a 90* fitting on the hose end that's going to connect to that fitting on the case, and then route the hose rearward, wrap it around the passenger side of the engine and then back to the tank, or to a t-stat if you are running an aux oil cooler.
Bee Jay
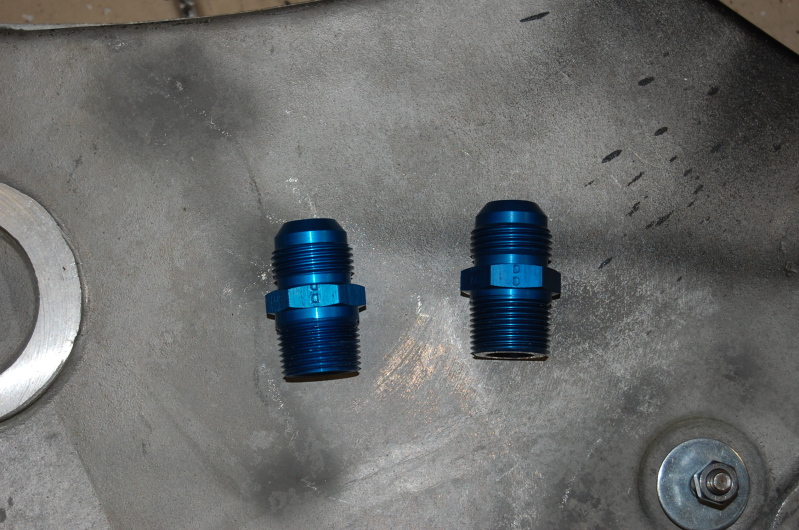
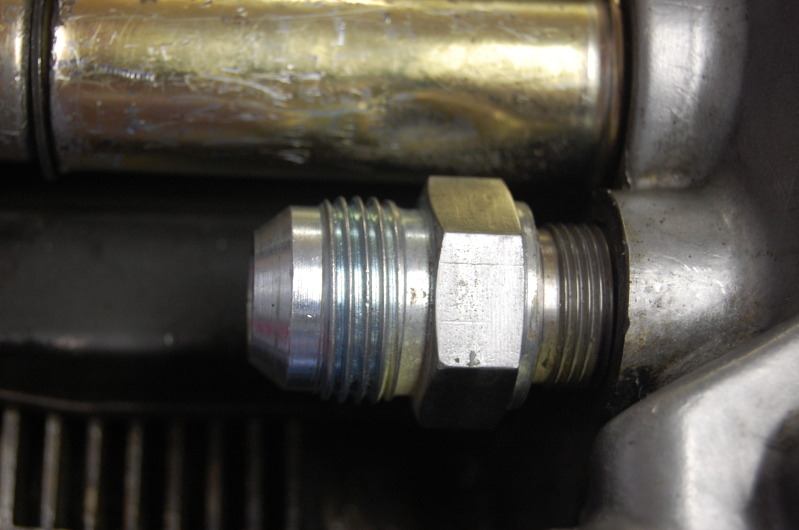
Feb 13 2011, 08:40 PM
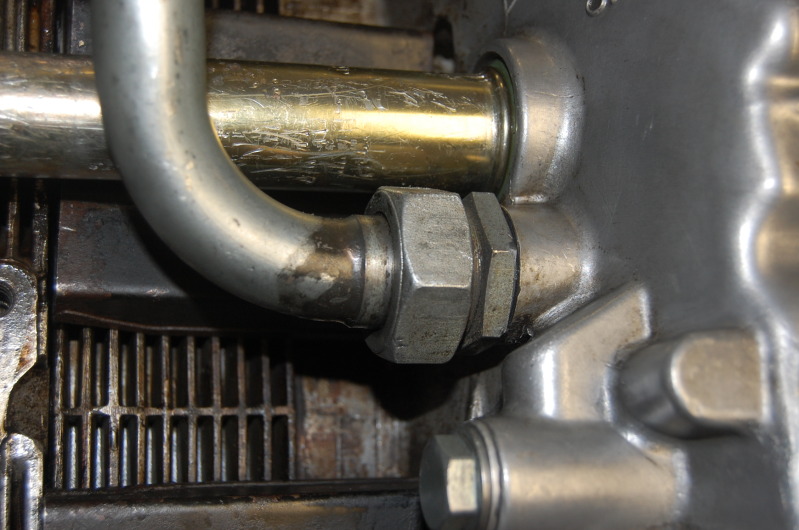
Ok, I figured it out. First, I found this fitting at the bottom of my oil tank and lines box.
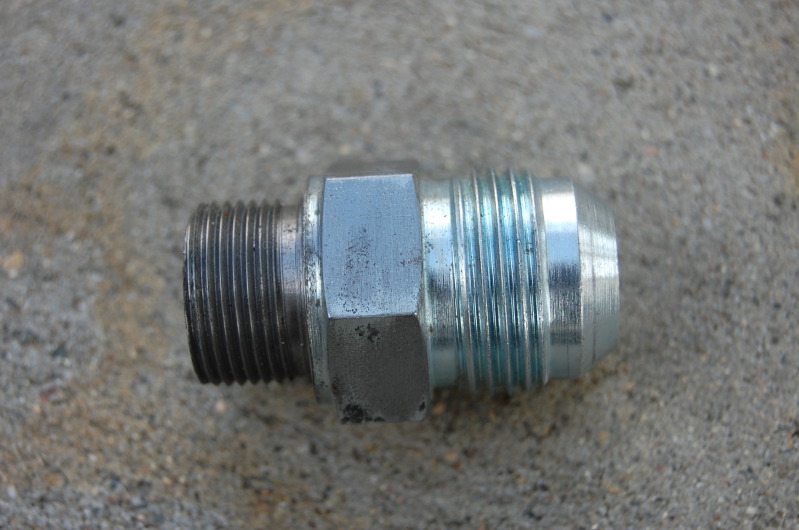
Then using a very large adjustable cresent wrench I got the hard line out.
The fitting goes into the side of the engine, and the oil line attaches. The other end of this line will go to the oil tank for now, but toward RX-7 oil cooler in the nose of the car after I get things working.
Bee Jay
Bee Jay
Feb 18 2011, 10:59 PM
Bee Jay
Feb 21 2011, 11:39 PM
brp986s
Feb 22 2011, 10:01 AM
The flywheel bolts use a triple square, not torx. I don't remember if 10 or 12 mm, but I got mine from performance products (for too darn much). You can probably get them from Baum or Stahlwille.
Maybe not what you want to hear having got those valve covers all spiffed out, but the ribs look deep like they haven't been shaved. If so, they can't be taken off with the engine installed.
There is something about the torque spec for those flywheel bolts. The spec may be insufficient. I believe Bruce Anderson recommends thread locker on those bolts. I've heard of cases where they've backed off in-situ - not nice.
dion9146
Feb 22 2011, 10:08 AM
QUOTE(9146986 @ Feb 13 2011, 11:44 AM)
Another option is to put a metric to AN adapter right on the case (where the oil pipe connects) and go with flex lines from that point. It's easier an less exposure to heat if you put a 90* fitting on the hose end that's going to connect to that fitting on the case, and then route the hose rearward, wrap it around the passenger side of the engine and then back to the tank, or to a t-stat if you are running an aux oil cooler.
EXACTLY the route that I took, except I also have a thermostat on the right side of the engine compartment leading to an external cooler. Routing the flex line rearward and over the headers kept it away from the heat between the headers/heads.
And here I thought that I was the only one who took that bonehead route....

Dion
db9146
Feb 22 2011, 02:40 PM
Have you looked at using Starlite hose? It is considerably lighter if you are using a lot of flex lines rather than hard lines.
Bee Jay
Feb 23 2011, 08:20 PM
The Captain, John Larson, lent me the 12 point tool to get the bolts of the old flywheel off. After I got it off, I tried to test fit the Kennedy Engineering flywheel. Dang thing would not bolt up. After much head scratching, I figured it out. The flywheel will on bolt on one way, you have to rotate it untill all bolt holes line up. I never read that anywhere. But now I know.
Bee Jay
Bee Jay
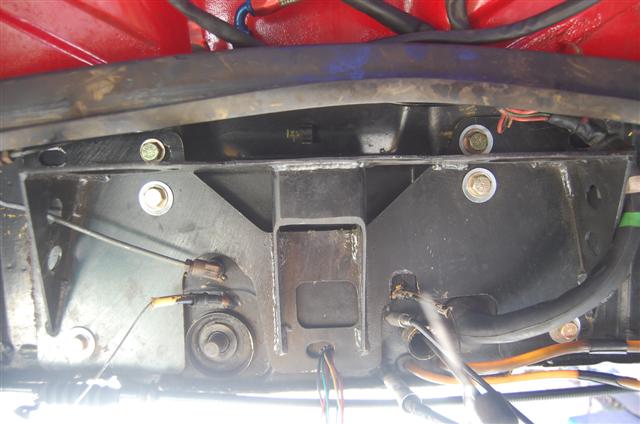
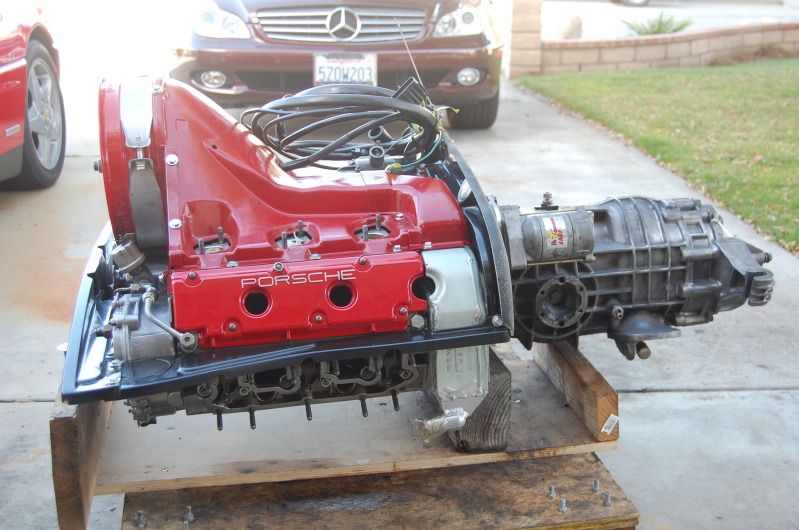
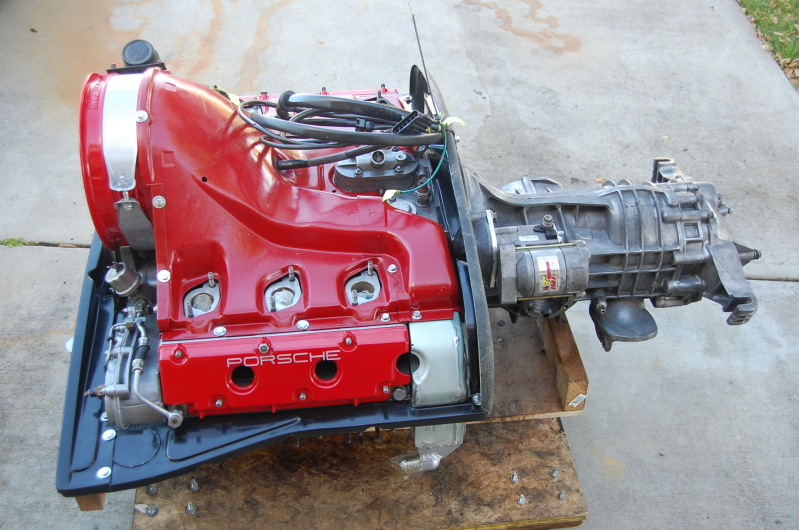
Feb 27 2011, 10:24 PM
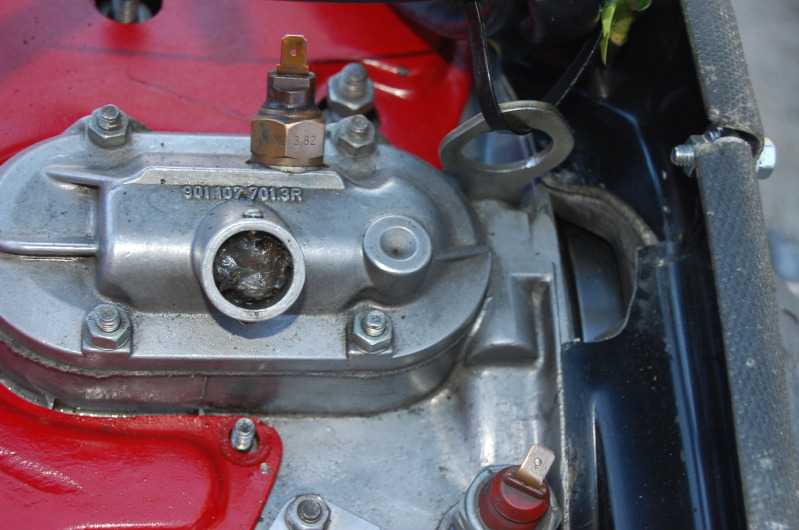
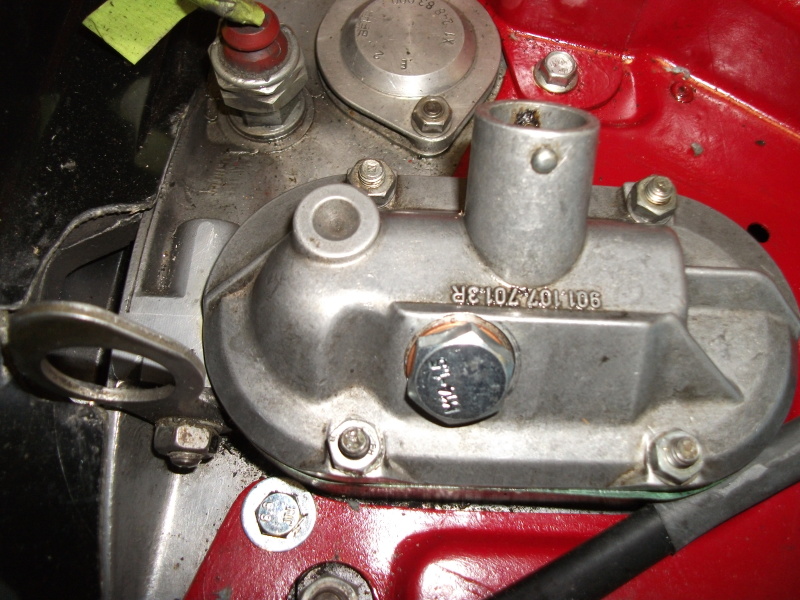
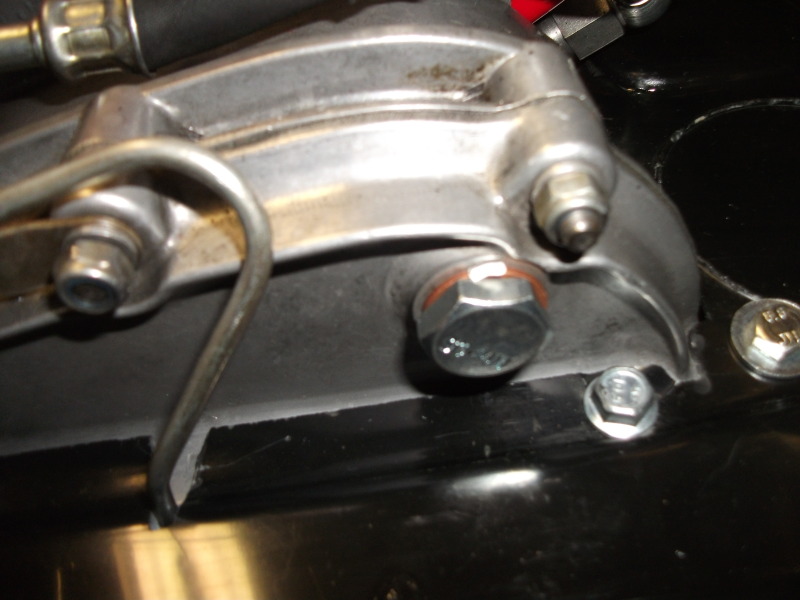
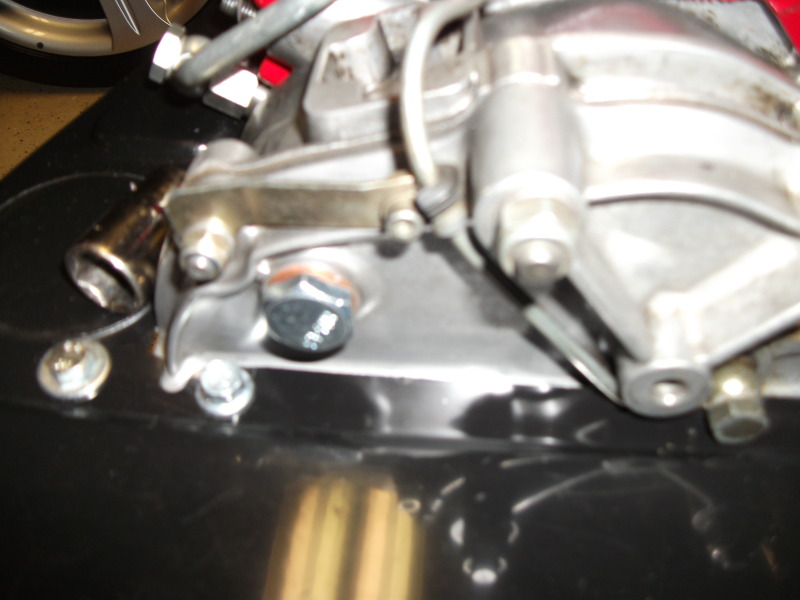
This weekend I cleaned the tranny, and bolted the flywheel, clutch, pressure plate, starter, and tranny to the engine. I like visual progress. I will now start wiring Perry's harness to the engine. I'm going to need help figuring out what sensors to use, and what sensors to ignore. I got plenty of sensors, but I'm going carbs, so I don't think I need all of them. Also, you will notice the lower valve covers are gone. I gave them to the Captain to be shaved down. I hope they can do it without messing up the powdercoat.
Bee Jay
Three sensors in this picture of the drivers side front.
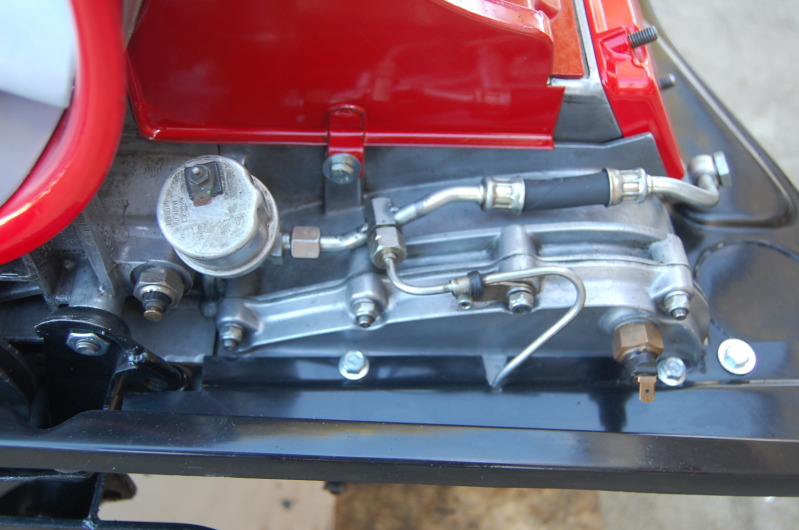
One sensor on the passenger side front.

Two sensors here by the oil breather hole.
moparrob
Feb 27 2011, 10:36 PM
Looking good! I'm right behind you. I ordered my harness up after seeing yours and am waiting for it to arrive.
I'm looking forward to hearing how you end up dealing with those sensors, since I have a '79 3.0 with the same exact sensors - and I am also going with Webers and MSD.
Does one need to buy an entirely new flywheel from Kennedy if using a 3.0 with a 901 trans? I thought you could use a flywheel ring or something.
Did you go with a Stage II pressure plate?
IronHillRestorations
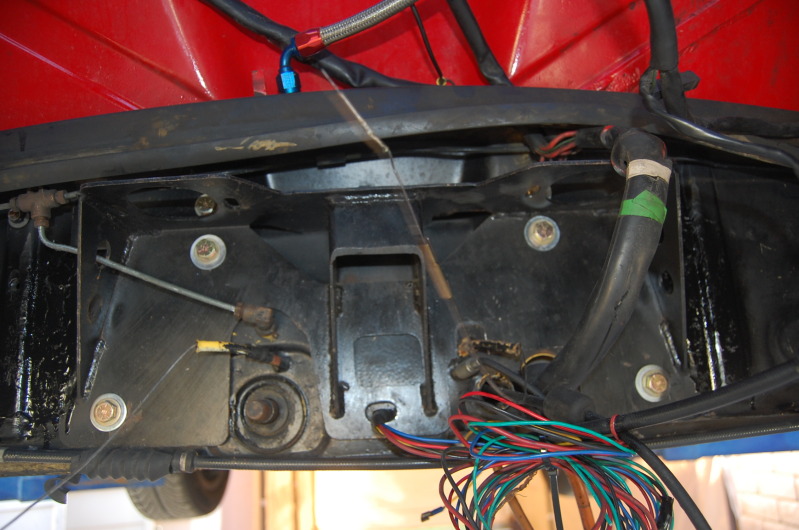
Feb 28 2011, 08:16 AM
You can pull and plug the senders on the chain covers. The canister type sender on the front is oil pressure, the nearest sender to that is oil temp, and the one on the case next to the case breather is oil pressure sender for warning light. The senders on the breather can be pulled and plugged.
moparrob
Feb 28 2011, 09:52 AM
Ahh, good information - thanks.
What is that other sensor below the breather in the bottom right corner of the last picture?
BTW - anyone know the thread on the sensors so that they can be plugged?
Bee Jay
Feb 28 2011, 05:13 PM
QUOTE(moparrob @ Feb 27 2011, 08:36 PM)
Looking good! I'm right behind you. I ordered my harness up after seeing yours and am waiting for it to arrive.
I'm looking forward to hearing how you end up dealing with those sensors, since I have a '79 3.0 with the same exact sensors - and I am also going with Webers and MSD.
Does one need to buy an entirely new flywheel from Kennedy if using a 3.0 with a 901 trans? I thought you could use a flywheel ring or something.
Did you go with a Stage II pressure plate?
you can either send your Type IV flywheel to Kennedy Engineering to be modified for $200, or buy a new one from them for $300. I sent my old flywheel to be modified, but they called me and said it was junk. It was lightened and abused. So I had them make me a new one. I had just bought a 911 clutch and presure plate for the Type IV 2.0 liter and it didn't have hardly any wear, from Pelican Parts, so I'm using them again.
Bee Jay
moparrob
Mar 3 2011, 10:08 PM
QUOTE
BTW - anyone know the thread on the sensors so that they can be plugged?

Bee Jay
Mar 7 2011, 11:36 PM
Bee Jay
Mar 10 2011, 12:09 AM
QUOTE(moparrob @ Feb 27 2011, 08:36 PM)
I'm looking forward to hearing how you end up dealing with those sensors, since I have a '79 3.0 with the same exact sensors - and I am also going with Webers and MSD.
I bought three of these from NAPA. Oil Drain Plug part # 704-1379. $2.00 each, comes with crush washers. How does it look?
Bee Jay
moparrob
Mar 10 2011, 03:08 PM
Perfect! I'm on my way over to Napa now...
Thanks
This is a "lo-fi" version of our main content. To view the full version with more information, formatting and images, please
click here.