Wow that cage makes the car look so much better. Glad you HAD to get rid of the old one. Work looks good.
WOW any resemblance to a 914 is purly accidential. you will scare a lot of the high priced racers to DEATH
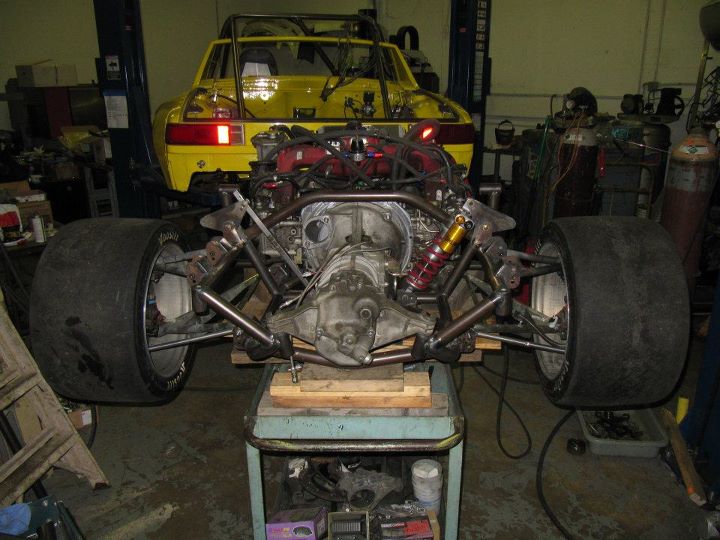
Good progress on the car this last weekend. Got the rear suspension geometry all worked out and the shocks mounted, fuel tank enclosure done, most of the cage welded in and bolted up all the suspension components to the car and actually put the car on the ground.
The goal is to get the car out for shake-down runs on my next trip down there. We shall see if that happens, still need to get a couple of custom components made and I am hoping everything fits.
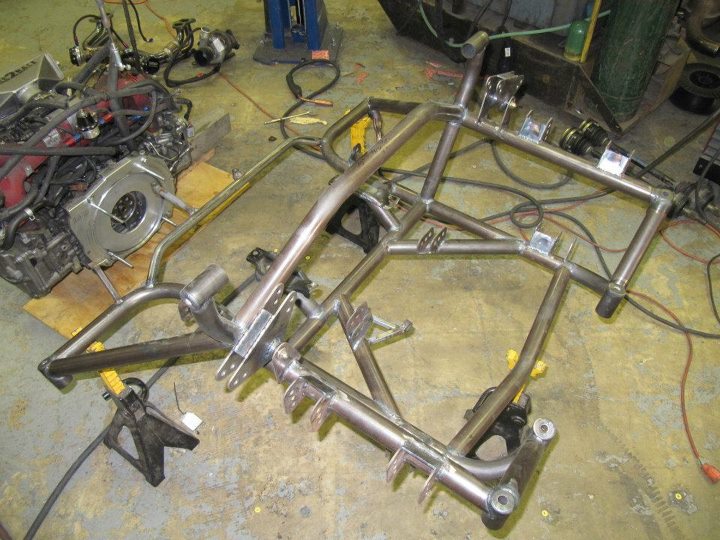
Here is the rear sub-frame completed with the rear shock mounts in place and the control arms all bolted on. Sitting on the bench, it looks awesome.
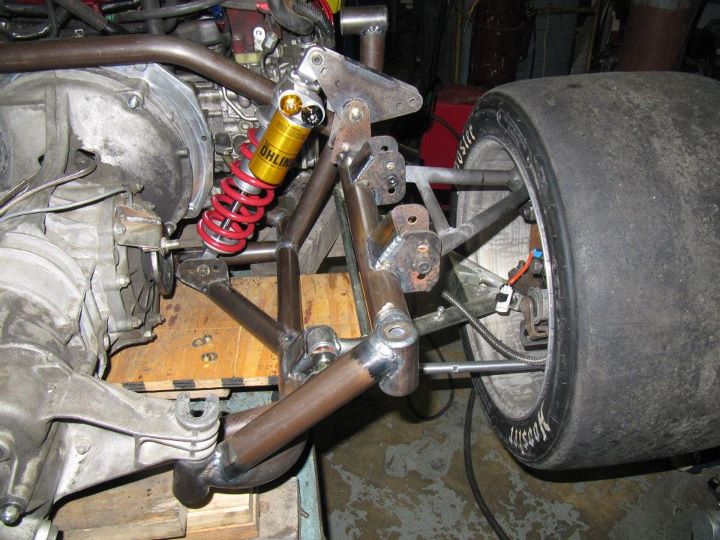
Rear rocker mount completed and shock in place. The final shock length will be longer for the correct motion ratios.
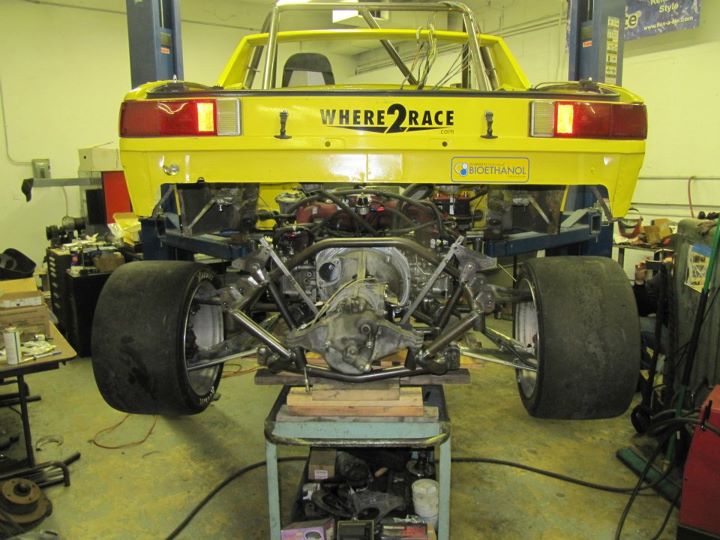
Rear sub-frame going back into the car. We will put quick-disconnects on various lines to make the process a bit easier.
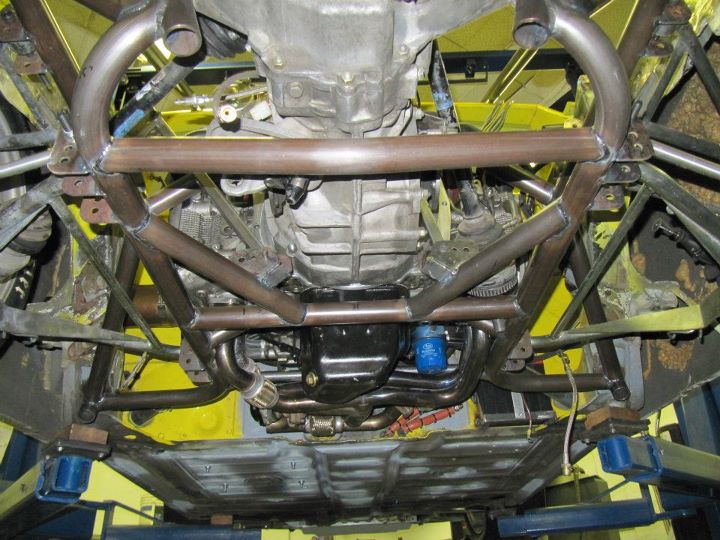
Rear sub-frame assembly from underneath. Two bars added to support the shock mounts. The assembly is very strong and comes in and out with ease.
The goal is to get the car out for shake-down runs on my next trip down there. We shall see if that happens, still need to get a couple of custom components made and I am hoping everything fits.
Here is the rear sub-frame completed with the rear shock mounts in place and the control arms all bolted on. Sitting on the bench, it looks awesome.
Rear rocker mount completed and shock in place. The final shock length will be longer for the correct motion ratios.
Rear sub-frame going back into the car. We will put quick-disconnects on various lines to make the process a bit easier.
Rear sub-frame assembly from underneath. Two bars added to support the shock mounts. The assembly is very strong and comes in and out with ease.
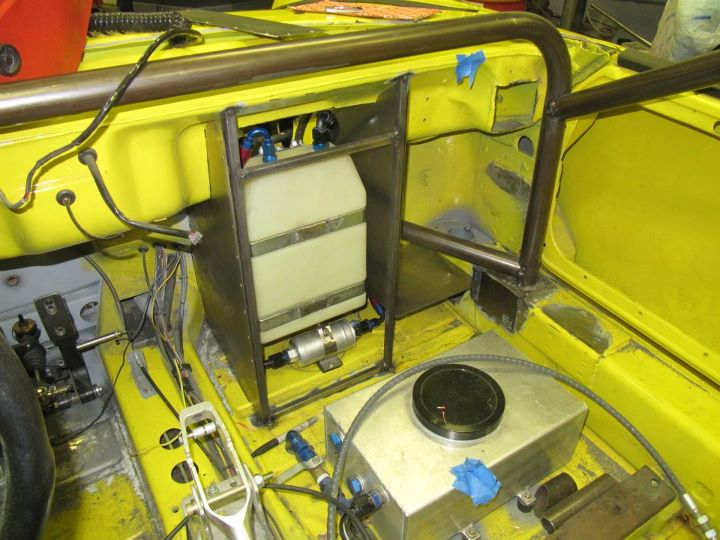
Due to lack of space in front trunk and the fact that I need to keep the fuel away from the hot radiator air, I move the fuel tank into the passenger compartment and built an enclosure since it must be fully sealed.
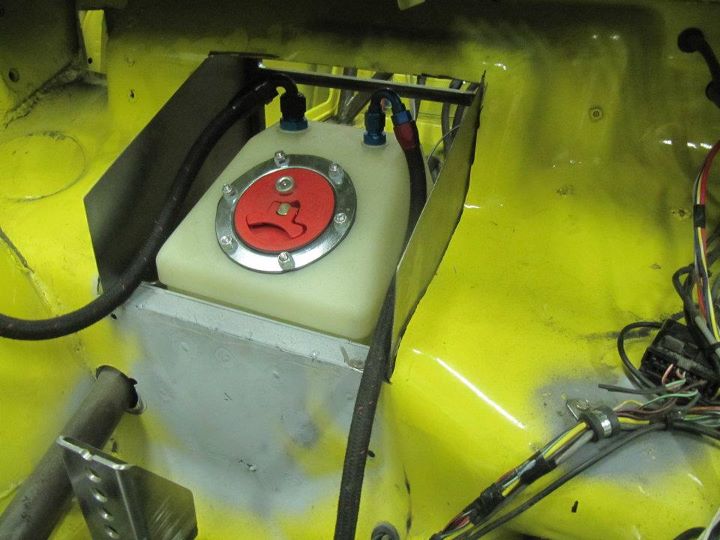
View of the enclosed fuel tank from the front trunk.
Another view of the fuel tank enclosure. You can see that it is also enclosing the passenger side radiator line and just inside of the cage bar going to the front suspension.

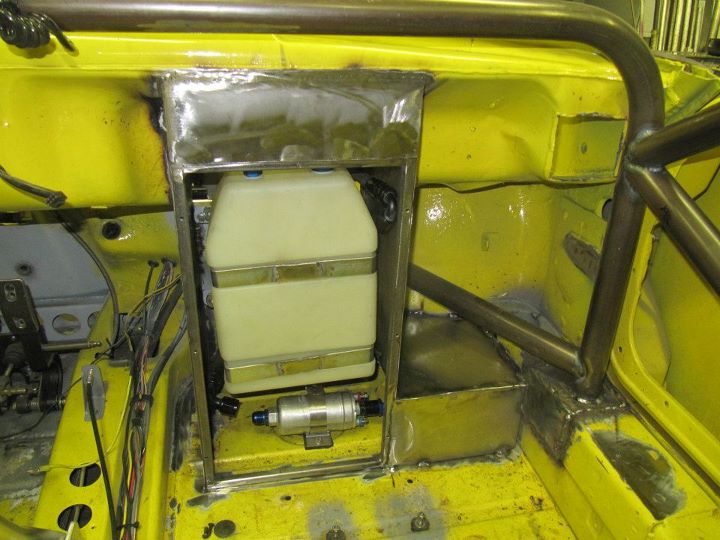
Fuel tank enclosure all welded up.
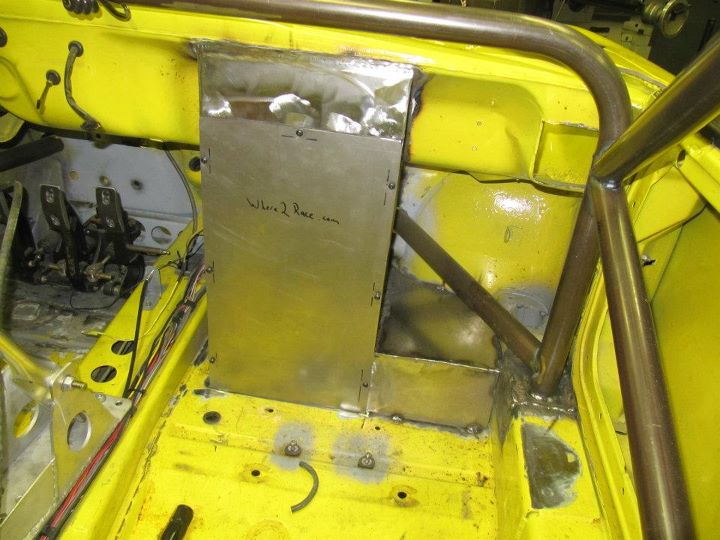
Fuel tank enclosure with the access door mounted.
View of the enclosed fuel tank from the front trunk.
Another view of the fuel tank enclosure. You can see that it is also enclosing the passenger side radiator line and just inside of the cage bar going to the front suspension.
Fuel tank enclosure all welded up.
Fuel tank enclosure with the access door mounted.
Most of the cage welded in. Still need to weld in the petty bar, the harness bar, and two bars to the top of the front suspension assembly.
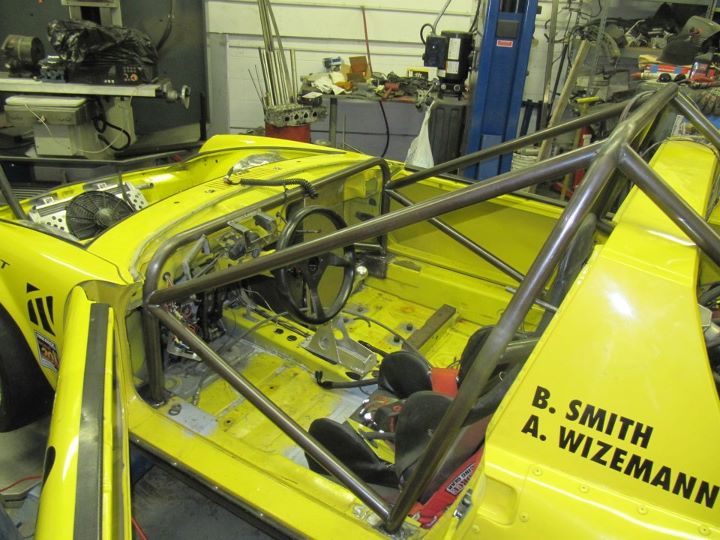
Another view of the cage and the kick-ass Rothsport Quick Disconnect for the steering wheel.
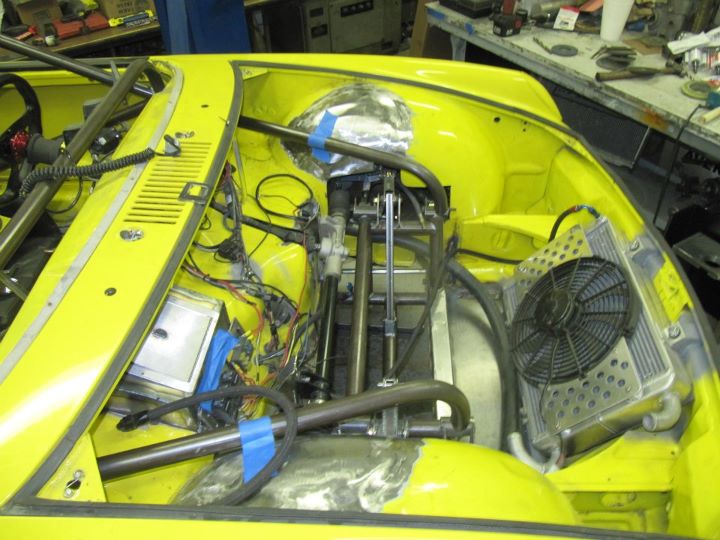
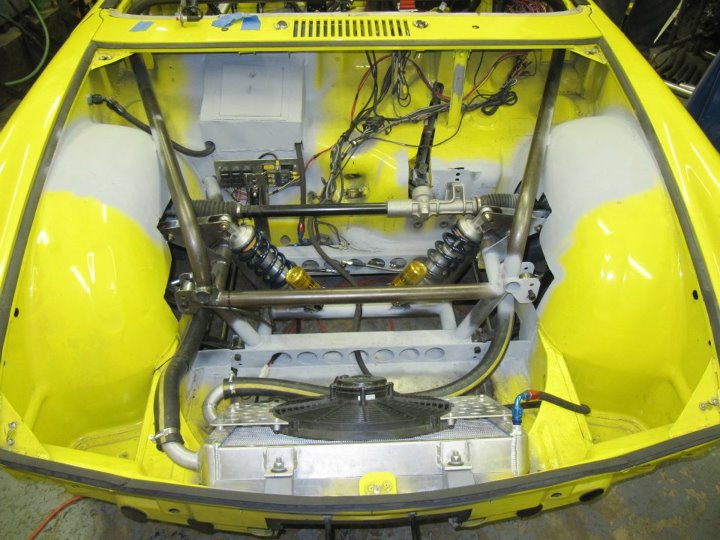
Front view of the cage and front suspension.
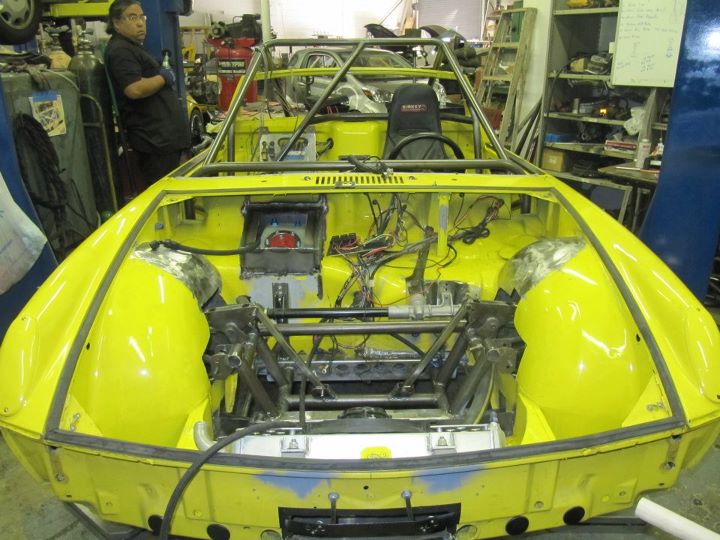
Front suspension installed with the steering rack in place. Need to decide where I am going to mount the electrical panel and tidy up the radiator lines. You can also see the fuel tank enclosure door in place.
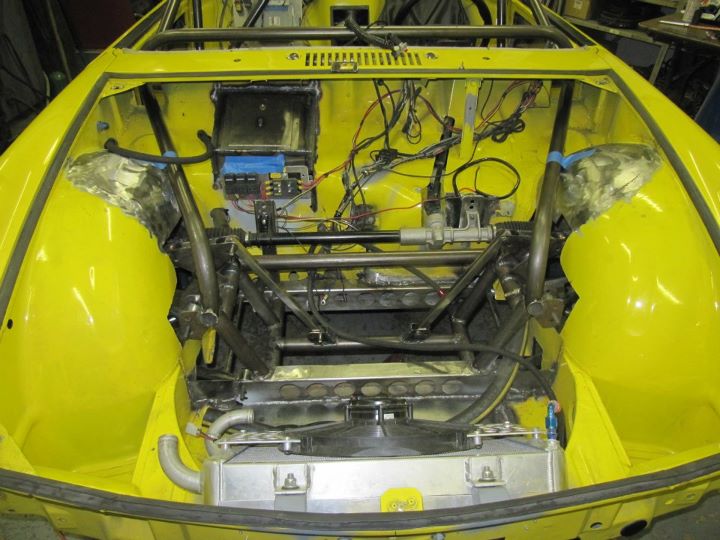
Side view of the front trunk.
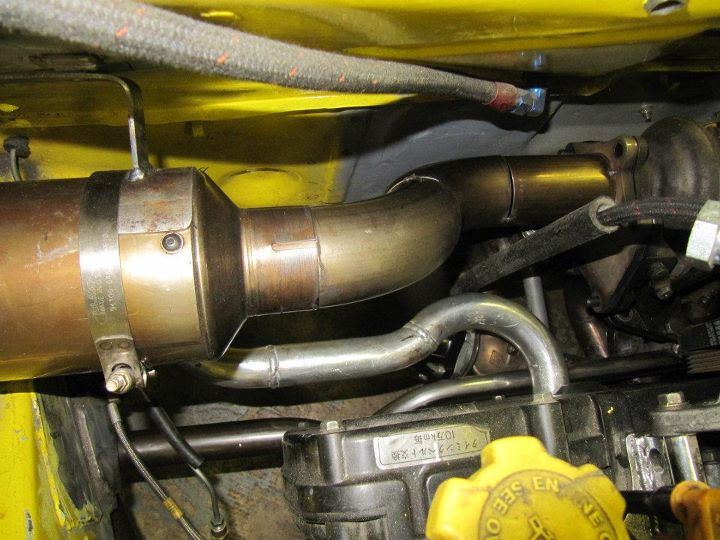
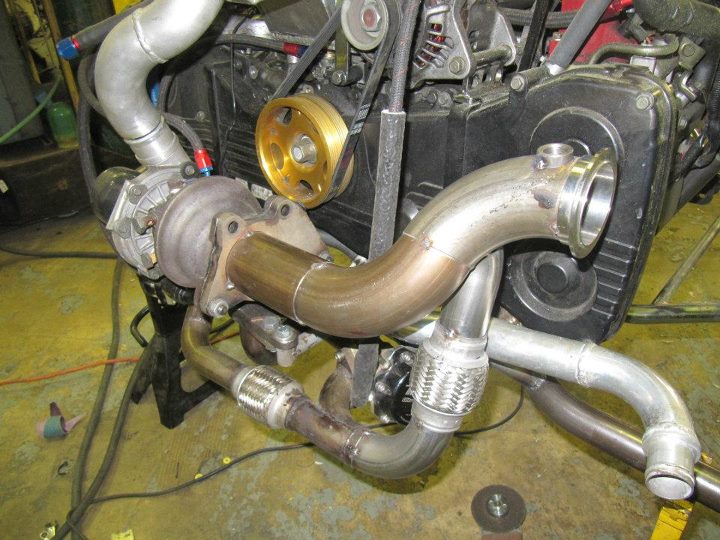
First iteration of exhaust routing. I don't have room to go backwards thru the suspension area so this seems to be the best route.
View of the exhaust routing with the water line in place. Still need to complete the wategate dump back into the exhaust stream.
Exhaust routing into the fender well area. It will dump outside the fender and allow for additional mufflers to meet sound regulations.
Top view of exhaust routing.
Still a lot of work to get done, but progress has been steady and I can't wait to drive it.
-Britain
Another view of the cage and the kick-ass Rothsport Quick Disconnect for the steering wheel.
Front view of the cage and front suspension.
Front suspension installed with the steering rack in place. Need to decide where I am going to mount the electrical panel and tidy up the radiator lines. You can also see the fuel tank enclosure door in place.
Side view of the front trunk.
First iteration of exhaust routing. I don't have room to go backwards thru the suspension area so this seems to be the best route.
View of the exhaust routing with the water line in place. Still need to complete the wategate dump back into the exhaust stream.
Exhaust routing into the fender well area. It will dump outside the fender and allow for additional mufflers to meet sound regulations.
Top view of exhaust routing.
Still a lot of work to get done, but progress has been steady and I can't wait to drive it.
-Britain
You know Britain, most people understand "going down a slippery slope" to be a warning. You appear to have embraced it as a recommendation. Amazing work, from concept through execution.
QUOTE(DBCooper @ Feb 29 2012, 04:36 PM) 
You know Britain, most people understand "going down a slippery slope" to be a warning. You appear to have embraced it as a recommendation. Amazing work, from concept through execution.
Ha...you know I can't stop once I start falling. As an engineer, I love this stuff. The chance to build something and learn along the way is very fulfilling to me....especially when you get to drive the stink out of it when you are done.
-Britain

When its done, are you going to bring it back up north or leave it where its dry, get more exposure and can run nearly year round?

Great Job!
QUOTE(BKLA @ Feb 29 2012, 06:53 PM)
When its done, are you going to bring it back up north or leave it where its dry, get more exposure and can run nearly year round?
Great Job!
I plan to run it down in So-Cal till about June and then bring it back North for the Packwood National Tour at the end of June.
-Britain
Britain,
Can you give us a heads-up on when and where you will be running in SoCal? Would be great to check out the car in person to admire the nice and innovative work.
Andys
Can you give us a heads-up on when and where you will be running in SoCal? Would be great to check out the car in person to admire the nice and innovative work.
Andys
QUOTE(andys @ Mar 1 2012, 09:03 AM)
Britain,
Can you give us a heads-up on when and where you will be running in SoCal? Would be great to check out the car in person to admire the nice and innovative work.
Andys
Yea, will do. Once the car is ready to go, I will just search for local events at El Toro on Where2Race

-Britain
Holy crap! This modification is stunning!!! 
QUOTE(Hontec @ Mar 2 2012, 09:48 AM)
Holy crap! This modification is stunning!!!
Many Thanks!
-Britain
Aweomse build! Can't wait to see more pregress.
Thanks. I will be down in So-Cal this weekend starting tomorrow morning and the plan is to have it driving around for some shake down runs. That all depends on if I receive the last few custom parts. I will have some good pictures to post in a few days.
-Britain
-Britain

waiting for new pictures and updates!
b-b-b-b-b-b-bad to the bone!
I look forward to seeing it in action
I look forward to seeing it in action
QUOTE(Rand @ Jan 3 2011, 06:21 PM)
#1675
I'm in at #1610, JP...
Man that's coming along nicely, Britain...

Some great updates as we get closer and closer to having the car on the track.
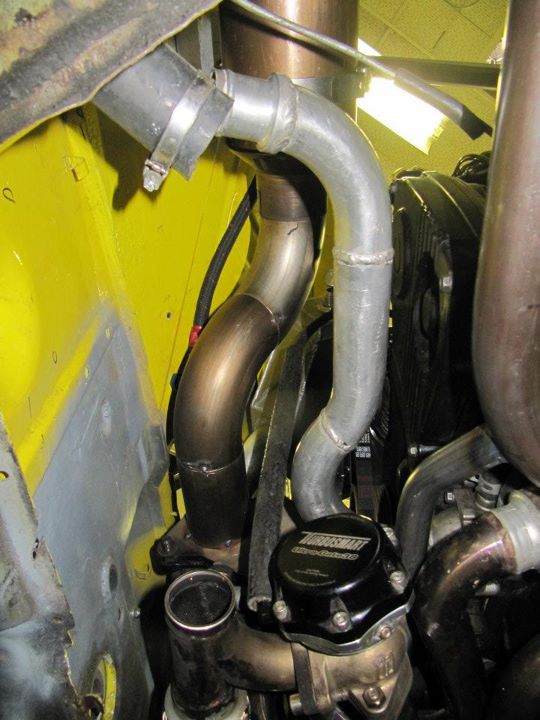
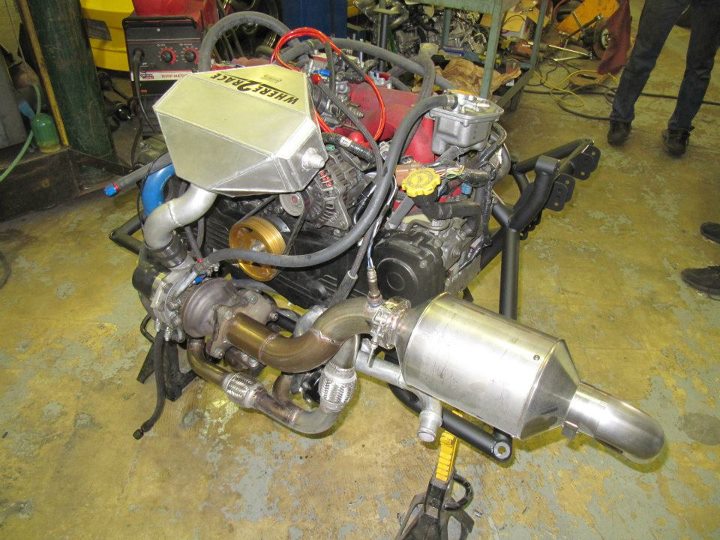
First up, exhaust. Since we ran out of room to route the exhaust out the back of the car, I had to modify the arrangement to allow it to be routed out the side of the engine bay. Here is the new wastegate plumbing completed. I added a second flex joint to make installation on the second wastegate a bit easier. Also got the nice V-Band for the muffler connection.
Another view of the wastegate plumbing. Getting the joints to line up took quite a bit of time.
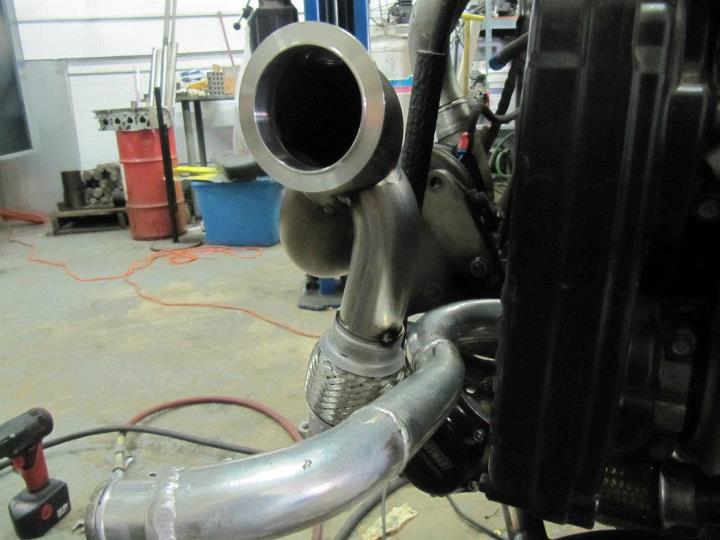
With the muffler attached.
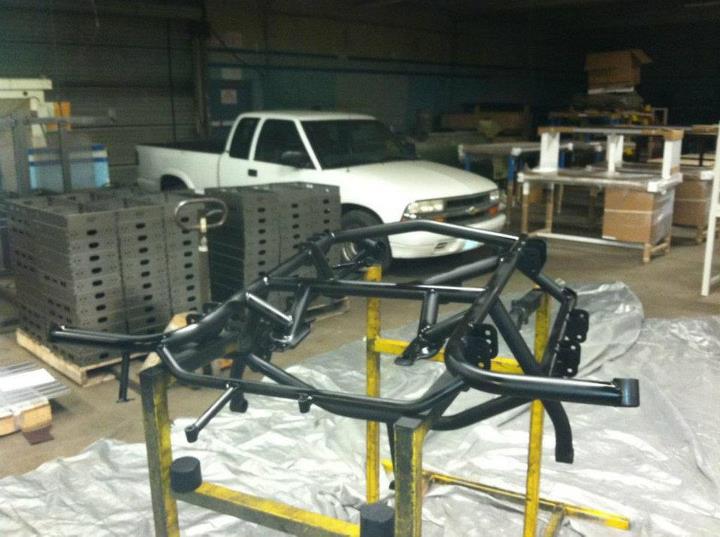
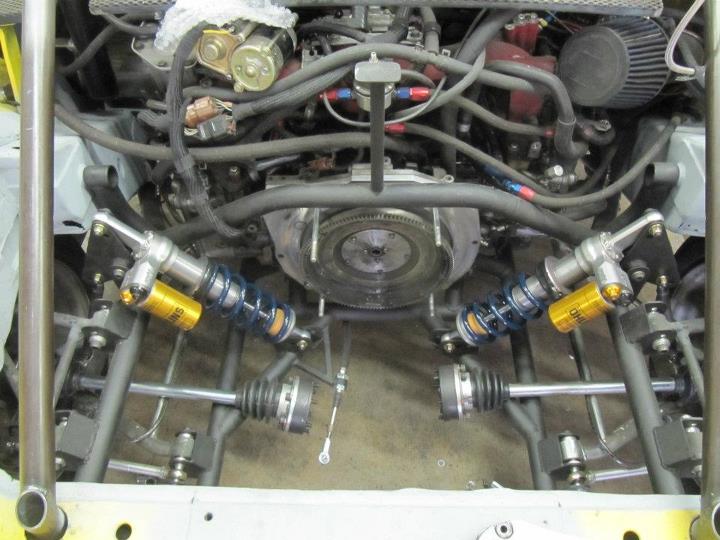
Here is the complete Sub-frame back out of the car ready for final welding, painting, and then reassembly.
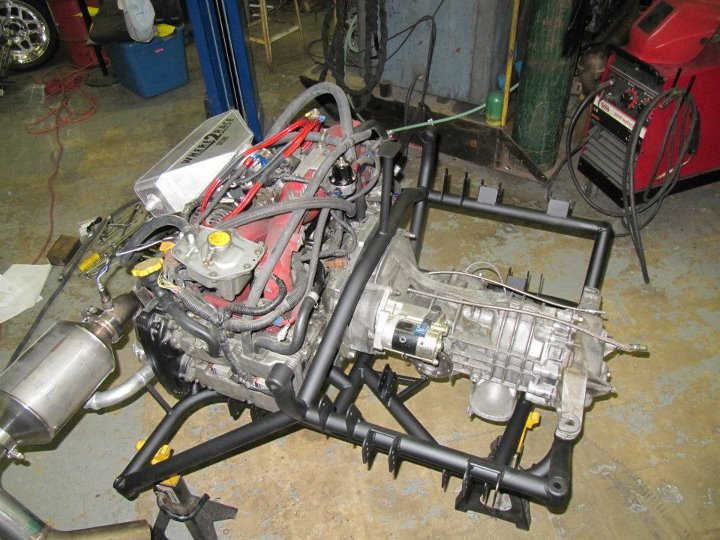
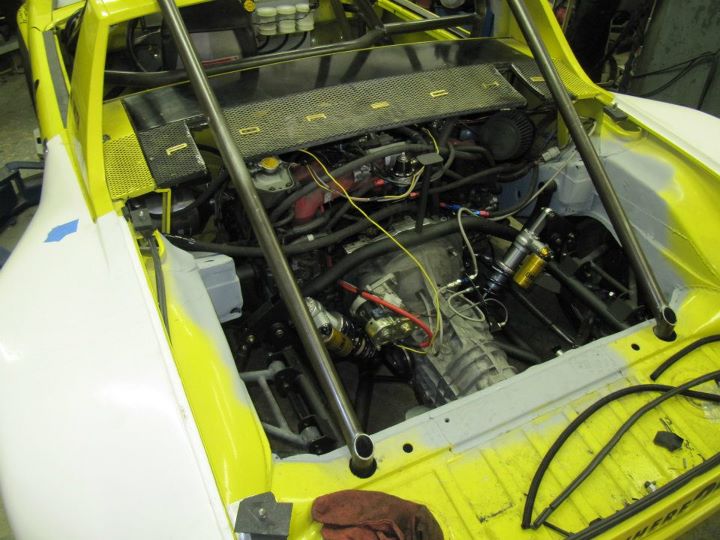
Engine and transmission reinstalled in the sub-frame.
First up, exhaust. Since we ran out of room to route the exhaust out the back of the car, I had to modify the arrangement to allow it to be routed out the side of the engine bay. Here is the new wastegate plumbing completed. I added a second flex joint to make installation on the second wastegate a bit easier. Also got the nice V-Band for the muffler connection.
Another view of the wastegate plumbing. Getting the joints to line up took quite a bit of time.
With the muffler attached.
Here is the complete Sub-frame back out of the car ready for final welding, painting, and then reassembly.
Engine and transmission reinstalled in the sub-frame.
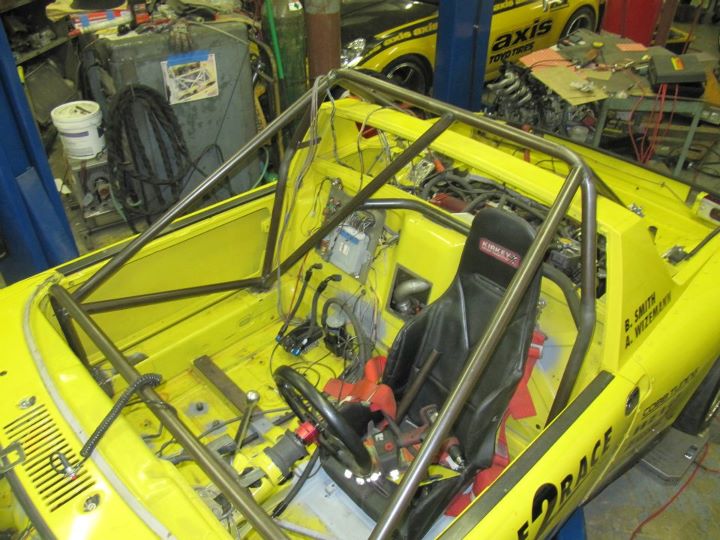
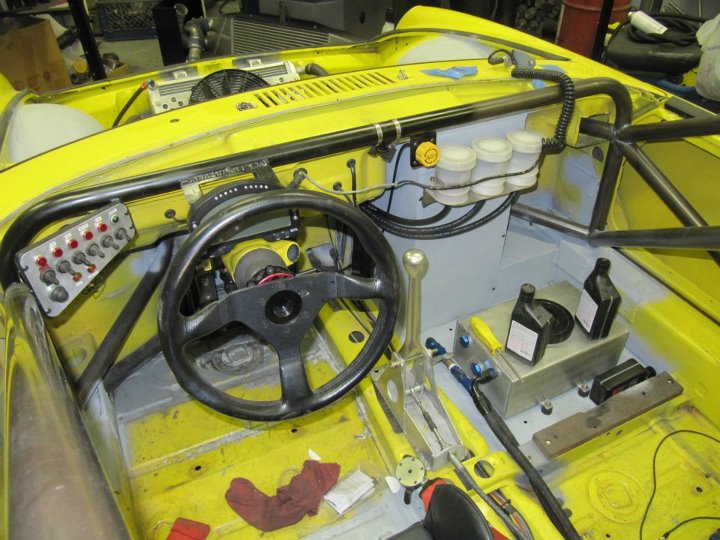
On to the interior...or cockpit I guess since there is not much interior.
Cockpit is all ready to go. Switches mounted, remote brake bias adjuster installed, dash mounted...
Fuel tank enclosure completed and tank/fuel pump mounted.
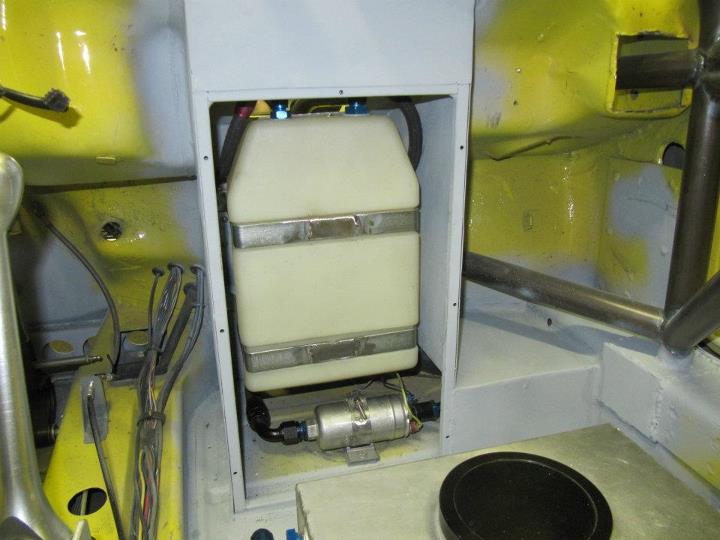
View of the fuel tank enclosure from the front.
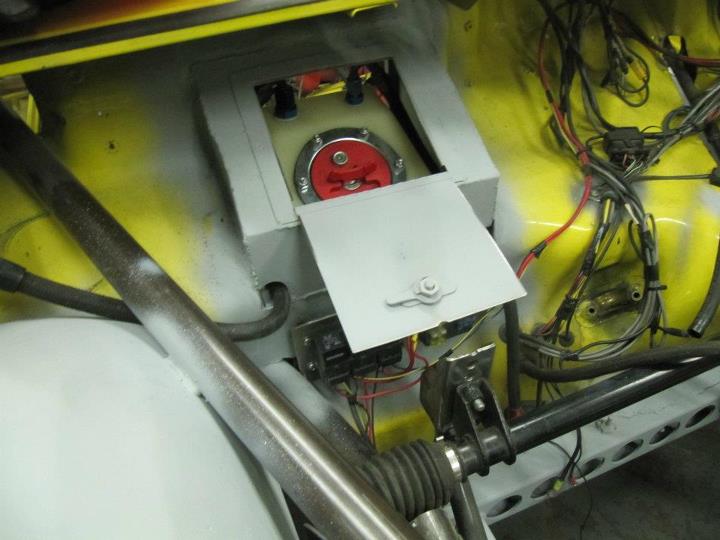
Fuel tank enclosure door closed and tank seals from inside the car completely.
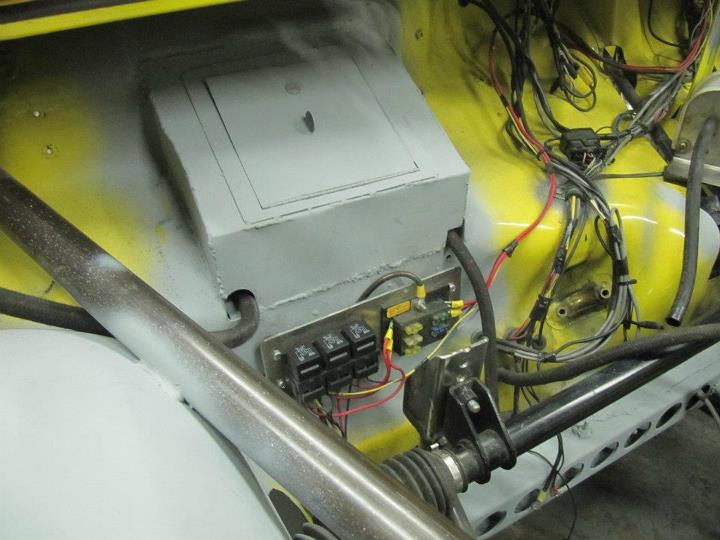
Cockpit is all ready to go. Switches mounted, remote brake bias adjuster installed, dash mounted...
Fuel tank enclosure completed and tank/fuel pump mounted.
View of the fuel tank enclosure from the front.
Fuel tank enclosure door closed and tank seals from inside the car completely.
Now the exciting bits.
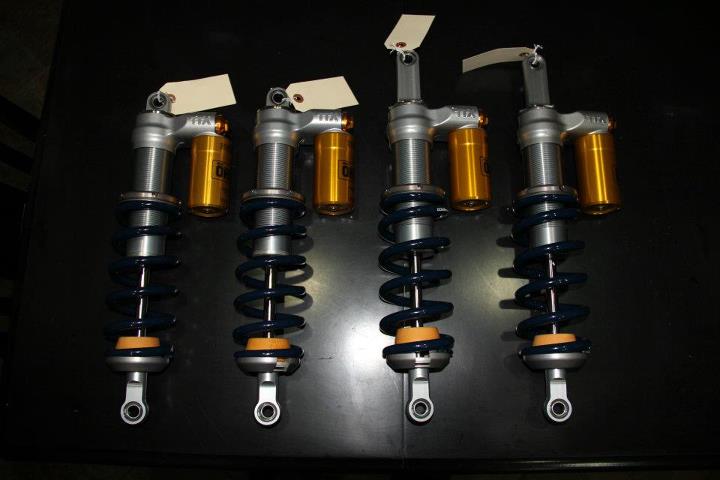
Got the custom set of Olhin shocks.
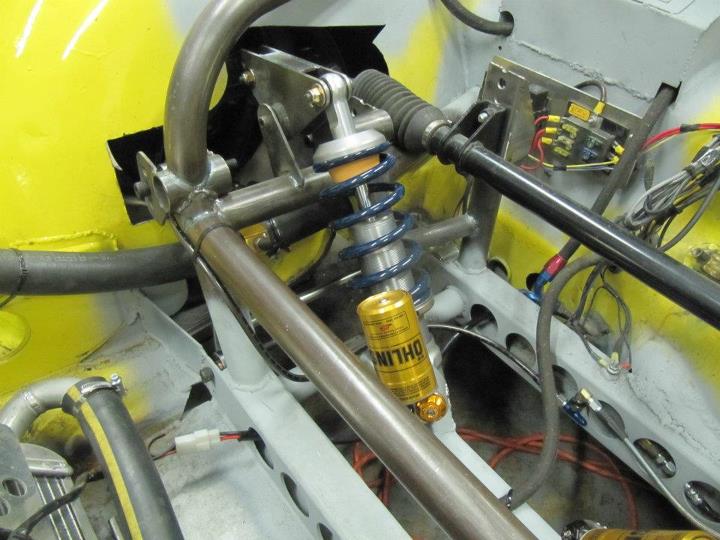
Front shocks installed on the inboard rockers.
Close-up view of the front shocks installed.
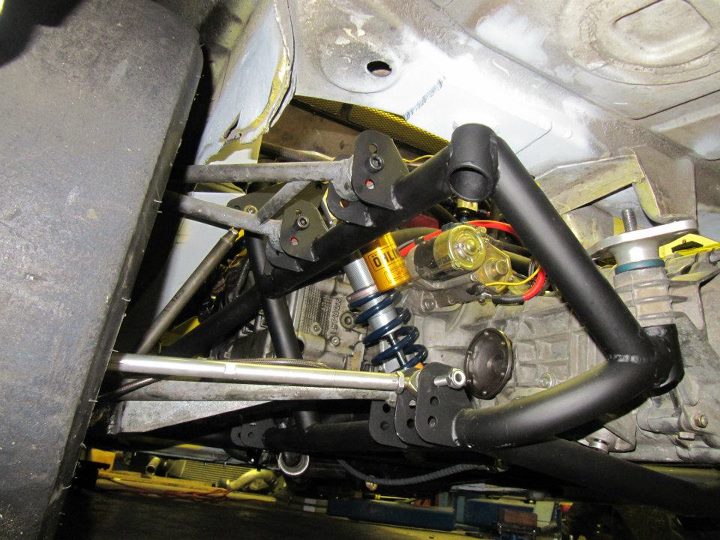
View from below of the rear shock and suspension.
Clearance the rear trunk lid for the new cage bars. The holes are not as bad as I thought they would be.
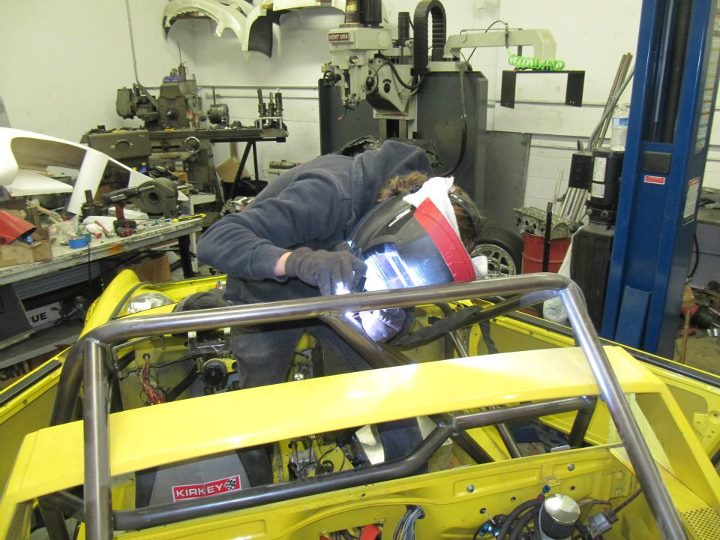
Master Welder Evan working his magic on the last few cage bars. As of now, all the major welding is completed.
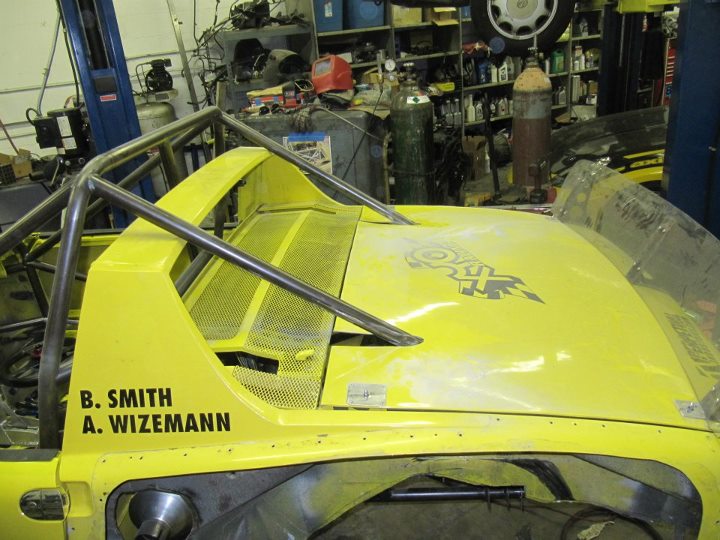
Due to the new position of the cage I had to find and modify another engine lid to clear the bars.
View of the modified engine lid in the up position.
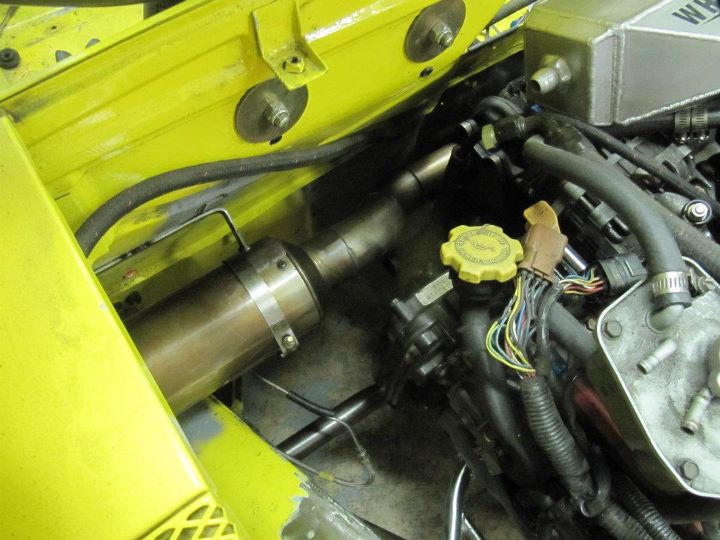
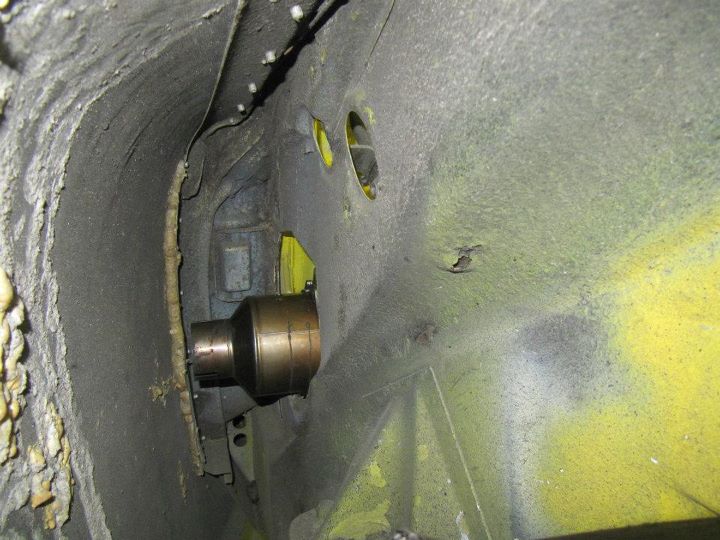
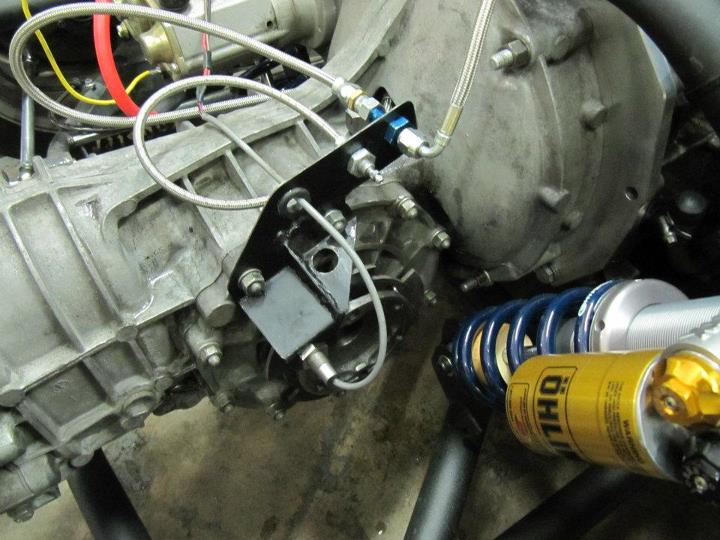
I previously mounted the vehicle speed sensor to the outside of the inboard CV, however this interfered with the springs. Therefore I had to weld it to the inside of the transmission output shaft and reverse the sensor mounting. Also added a mount for the hydraulic clutch lines.
Got the custom set of Olhin shocks.
Front shocks installed on the inboard rockers.
Close-up view of the front shocks installed.
View from below of the rear shock and suspension.
Clearance the rear trunk lid for the new cage bars. The holes are not as bad as I thought they would be.
Master Welder Evan working his magic on the last few cage bars. As of now, all the major welding is completed.
Due to the new position of the cage I had to find and modify another engine lid to clear the bars.
View of the modified engine lid in the up position.
I previously mounted the vehicle speed sensor to the outside of the inboard CV, however this interfered with the springs. Therefore I had to weld it to the inside of the transmission output shaft and reverse the sensor mounting. Also added a mount for the hydraulic clutch lines.
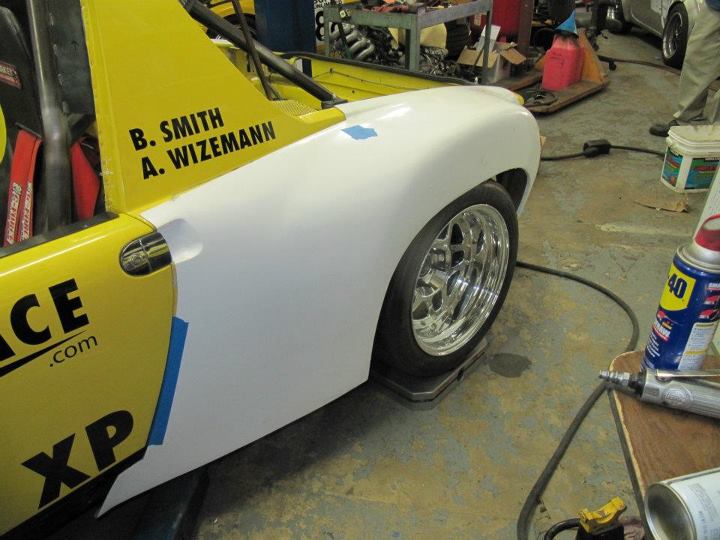
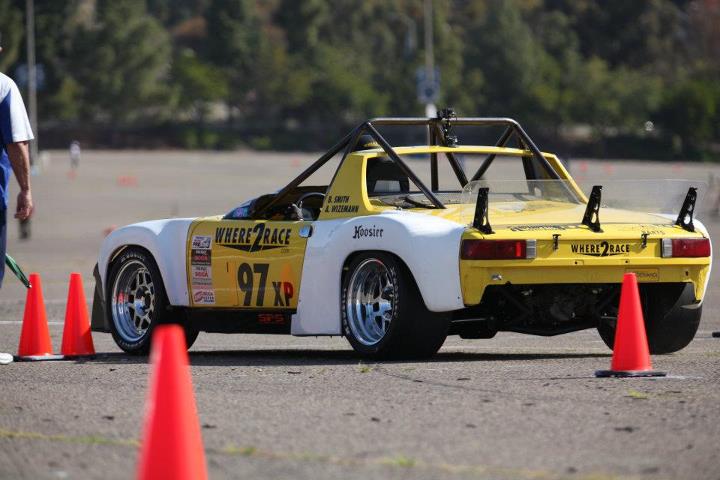
New GT Racing rear flares installed. Might need some slight modification, but at least they clear the wide wheels.
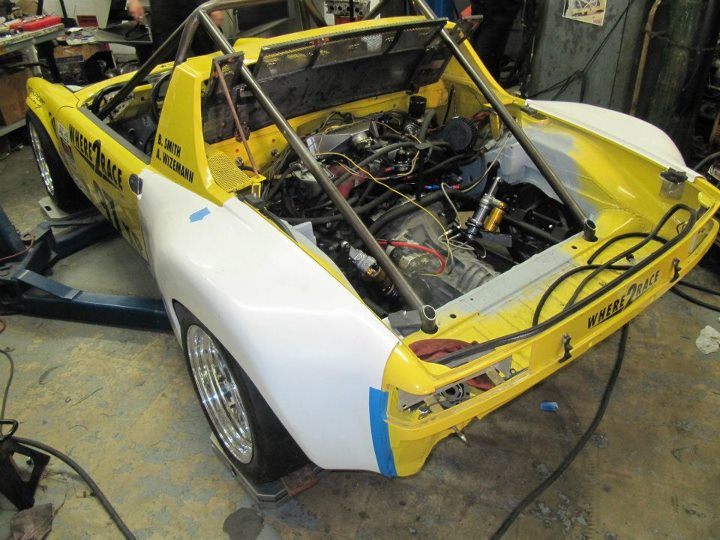
Back view of the car with the rear flares installed.
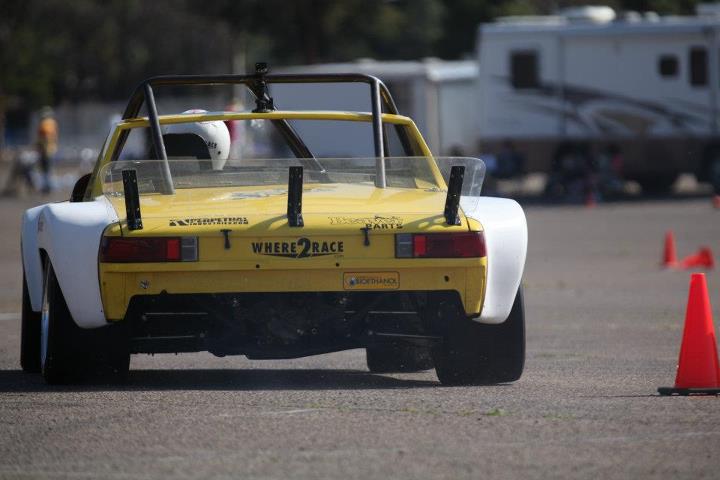
Top view of the rear fender width.
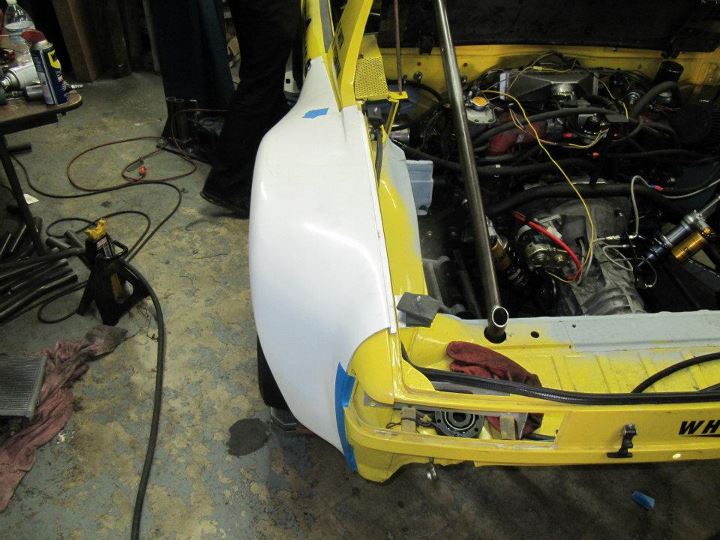
Good lower view.
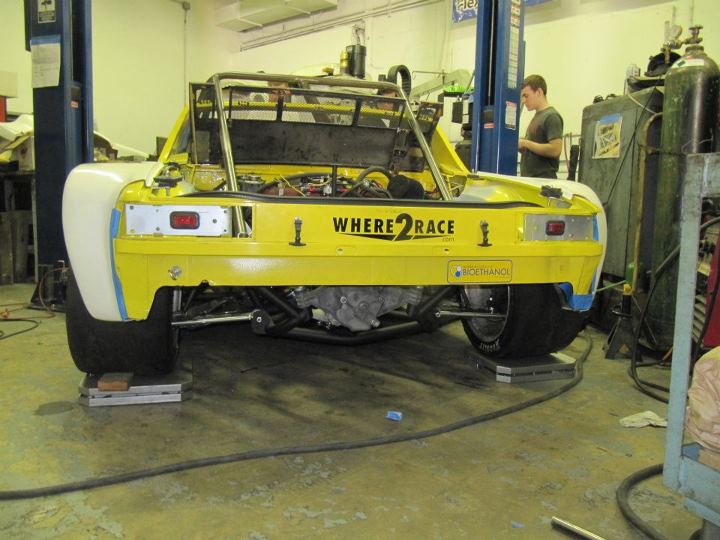
This is one of my favorite views....talk about wide!
Back view of the car with the rear flares installed.
Top view of the rear fender width.
Good lower view.
This is one of my favorite views....talk about wide!
truely fantastic. I hope you will post track videos - cant wait to see it go.
So, are you now going to take it all apart and throw a $20k paint job on it?!!
So, are you now going to take it all apart and throw a $20k paint job on it?!!
That is a $20K paint job...
Anyway, I will paint it later this year, probably over next winter. It will take some time to get it sorts and that is a higher priority for the time being.
-Britain
Anyway, I will paint it later this year, probably over next winter. It will take some time to get it sorts and that is a higher priority for the time being.
-Britain
what do the scales say now....
a lot of tubes on that bad boy
a lot of tubes on that bad boy
QUOTE(brant @ Apr 4 2012, 04:42 PM)
what do the scales say?
They say 1815lb with ballast (minimum for XP)
Let's just say that it is lighter than it was.
-Britain
QUOTE(Britain Smith @ Apr 4 2012, 04:44 PM)
QUOTE(brant @ Apr 4 2012, 04:42 PM)
what do the scales say?
They say 1815lb with ballast (minimum for XP)
Let's just say that it is lighter than it was.
-Britain
very good!
Ayup, that paint can wait till the latter part of Sept. or early Oct.
You wanna get er' done before the rain/cold set in......IMO.
Till then you would just be following precedent.
You wanna get er' done before the rain/cold set in......IMO.
Till then you would just be following precedent.
What a machine! And great work as well.
When do you think you'll be running an event (and where)?
When do you think you'll be running an event (and where)?
holy hell that thing is wide! that should be an absolute monster!
Looks great. And to think it started off as a 914
Looks great. And to think it started off as a 914
Those flairs look great!! That view from the back will look even better when the rear deck lid is in place!! Don't let them wide tiars knock over any cones. It must be hard to remember they're out there!
Thanks guys.
It is really not that much wider than it was with the old set-up...maybe 1.5inch per side. The flares just make the butt look big
-Britain
It is really not that much wider than it was with the old set-up...maybe 1.5inch per side. The flares just make the butt look big
-Britain
I thouht they were data aquistion stations for your lap top.
Hi Britain,
Your project looks fantastic! But, where are you going to put the intercooler? You may not need a muffler. I have a short pipe from the turbo and the most I have registered is 95 db on the track.
I finally got the Subaru 5 speed installed and track tested. It works fantastic. Now I hope it will hold up.
When are you coming to Norcal?
Click to view attachment Click to view attachment Click to view attachmentClick to view attachment
I run an Air/Water intercooler right on top of the motor....very efficient.
As for the muffler, I need to ensure that I hit 93db at 50ft in San Diego. Remember, my motor spins to 8500rpm and is a bit louder than the US Spec engines.
-Britain
As for the muffler, I need to ensure that I hit 93db at 50ft in San Diego. Remember, my motor spins to 8500rpm and is a bit louder than the US Spec engines.
-Britain
Oh never mind
Are the bearing carriers from a Lotus? Did you ever look at C5 suspension parts for this project? I've been daydreaming about an LS conversion with a C5 based pushrod suspension for the last few months and had not seen these updates. The pictures of the subframes on your car are really helpful
Just had a chance to go back through the thread on my computer instead of the phone. This is very nice work 
Britain, would you be willing to share about what the track width will be with those wheels & tires? Or, even the hub-to-hub width if that's easier to guess or measure. Did you try to use all of the Lotus dimensions?
TIA for any info.
Britain, would you be willing to share about what the track width will be with those wheels & tires? Or, even the hub-to-hub width if that's easier to guess or measure. Did you try to use all of the Lotus dimensions?
TIA for any info.
IIRC, the cone guts used to start about 1/3rd of the way along the then new HPH fenders. They were "not that much wider" also.
She is alive!
I didn't get to drive it yet, but the car successfully made it through a set of shake down runs at El Toro this past weekend. Still needs proper bodywork, ride height lowered, sway bar, new tires, proper brake pads, cage painted, replacement ball joint, and some spring changes...but it is getting closer.
-Britain
Brit,
Since the motor is a Porsche licensed design, you should be able to class it and run for points if you want to come to some GGR events!
Some fantastic fab work, hope the sorting goes quickly and smoothly for you!
Since the motor is a Porsche licensed design, you should be able to class it and run for points if you want to come to some GGR events!
Some fantastic fab work, hope the sorting goes quickly and smoothly for you!
Absolutely amazing work! Have fun driving it.
QUOTE(DanT @ Apr 16 2012, 08:50 PM)
Brit,
Since the motor is a Porsche licensed design, you should be able to class it and run for points if you want to come to some GGR events!


Looks like fun!
What are you planning on for your final ride height?
What are you planning on for your final ride height?
Similar to what it was last year...which is quite a bit lower than the picture.
-Britain
-Britain
QUOTE(Britain Smith @ Apr 17 2012, 01:23 PM)
Similar to what it was last year...which is quite a bit lower than the picture.
-Britain
You mean SLAMMED?
You could run a bunch lower than the Porsche suspension would allow, right?
Congratulations on getting the car out.
It has been a few weeks since I last posted, but in that time we have ran the car at the San Diego National Tour and the El Toro Pro Solo. Both weekend were not without issues, but we are getting much closer to completion.
I will start out with the San Diego National Tour weekend. I arrive a day early to get everything sorted out on the car and ensure that it was ready. We spent quite a bit of time on the small stuff, including several hours to get the car corner weighed and aligned. There are just so many adjustments that it takes a while to get them all working together.
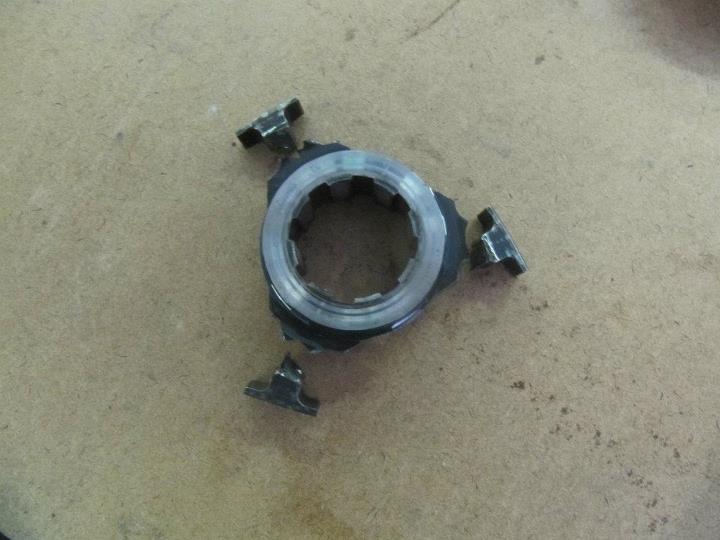
Once we had everything completed, it was time to test drive it up and down the street in front of the shop and get it loaded up. Just as we were about to load it in the trailer, the transmission decided to grenade and no longer function. We pushed it into the shop and were able to pull out the transmission, rebuild it, and reinstalled in 1hr and 9mins....it ended up just snapping the arms off the slider hub and we upgraded to a later model 915 slider which is much thicker.
With that fixed, we headed to San Diego.
Since the shake down runs, we added a front blade adjustable sway bar, lower the spring rates, upgraded to racing brake pads, and put on the new tires. It was basically a new car at this point. We basically spent the entire event making set-up adjustments and reteaching our brain how to drive this think. It is odd to get into a car that you have been driving for so long and to break all those habits that it took to make the previous set-up work.
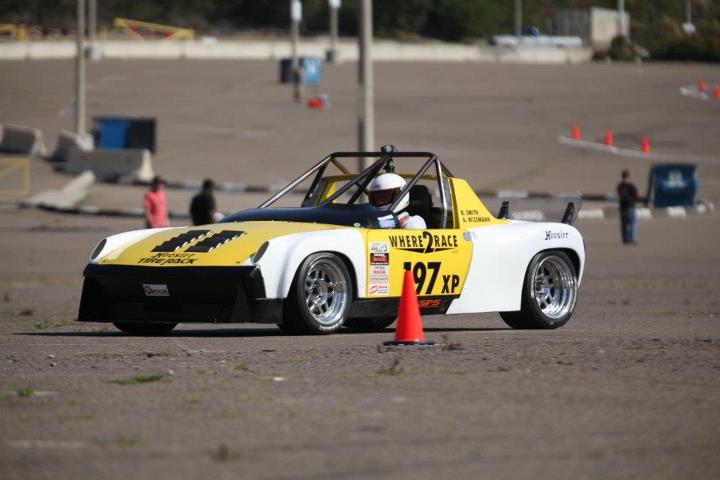
Here are some pictures of the car in San Diego. The ride height is about 2.5inchs higher than optimal because the front wheels would hit the fender thru the turning arch. The set-up that I went with is QRS Fiberglass front fenders widened about 1.5" and GT-Racing Rear Fenders.
The next weekend I returned to So-Cal to run the El Toro Pro Solo. This time around we had time to cut the front fenders for more tire clearance and lower the car to the desired height.
Unforeseen issues with this new ride height was that the front lower control arm was hitting the sway bar bracket under bump and therefore resulted in the car having basically "infinite" front spring rate. This explained the bad corner entry push and corner exit snap-oversteer that occurred the first day of the event. We returned to the shop to relocate the front sway bar to a higher location to gain the necessary clearance.
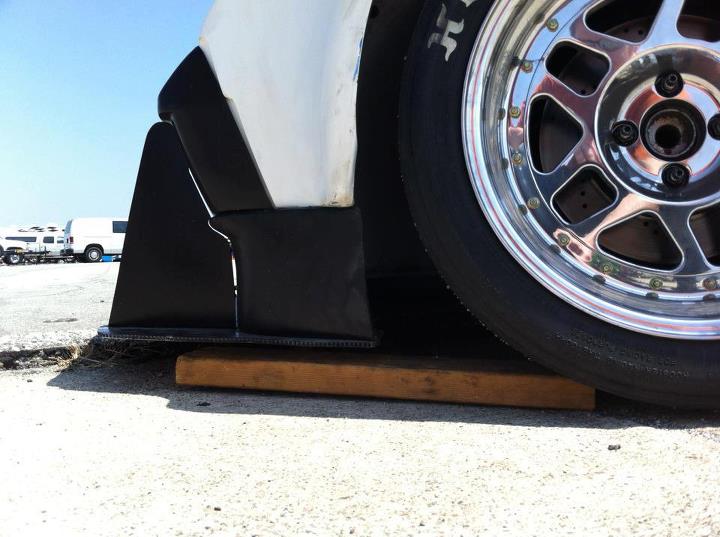
The car showed much improvement while running the next day. However, now under hard breaking on corner entry we had the splitter hitting the ground and the wheels rubbing the inside upper fender well due to the car sitting too low. This really cause the car to get upset on low-speed corner entry and greatly effected my run times.
I have since raised the front end, reset the bump steer, set the toe and I am ready to go racing again this weekend for further development time.
I will get some more pictures posted soon, I have spent most of my time underneath the car with dirty hands.
-Britain
I will start out with the San Diego National Tour weekend. I arrive a day early to get everything sorted out on the car and ensure that it was ready. We spent quite a bit of time on the small stuff, including several hours to get the car corner weighed and aligned. There are just so many adjustments that it takes a while to get them all working together.
Once we had everything completed, it was time to test drive it up and down the street in front of the shop and get it loaded up. Just as we were about to load it in the trailer, the transmission decided to grenade and no longer function. We pushed it into the shop and were able to pull out the transmission, rebuild it, and reinstalled in 1hr and 9mins....it ended up just snapping the arms off the slider hub and we upgraded to a later model 915 slider which is much thicker.
With that fixed, we headed to San Diego.
Since the shake down runs, we added a front blade adjustable sway bar, lower the spring rates, upgraded to racing brake pads, and put on the new tires. It was basically a new car at this point. We basically spent the entire event making set-up adjustments and reteaching our brain how to drive this think. It is odd to get into a car that you have been driving for so long and to break all those habits that it took to make the previous set-up work.
Here are some pictures of the car in San Diego. The ride height is about 2.5inchs higher than optimal because the front wheels would hit the fender thru the turning arch. The set-up that I went with is QRS Fiberglass front fenders widened about 1.5" and GT-Racing Rear Fenders.
The next weekend I returned to So-Cal to run the El Toro Pro Solo. This time around we had time to cut the front fenders for more tire clearance and lower the car to the desired height.
Unforeseen issues with this new ride height was that the front lower control arm was hitting the sway bar bracket under bump and therefore resulted in the car having basically "infinite" front spring rate. This explained the bad corner entry push and corner exit snap-oversteer that occurred the first day of the event. We returned to the shop to relocate the front sway bar to a higher location to gain the necessary clearance.
The car showed much improvement while running the next day. However, now under hard breaking on corner entry we had the splitter hitting the ground and the wheels rubbing the inside upper fender well due to the car sitting too low. This really cause the car to get upset on low-speed corner entry and greatly effected my run times.
I have since raised the front end, reset the bump steer, set the toe and I am ready to go racing again this weekend for further development time.
I will get some more pictures posted soon, I have spent most of my time underneath the car with dirty hands.
-Britain
Making great progress Brittain! Congrats & keep up the fight. You'll have it all dialed in soon enough. Can't wait to see you run that beast once it is 
How tall are you? What was the reasoning behind the super tall cage?
Car is looking good. Can't wait to see it in action.
Car is looking good. Can't wait to see it in action.
This is a "lo-fi" version of our main content. To view the full version with more information, formatting and images, please click here.