Help - Search - Members - Calendar
Full Version: Project Time! 71 garage build
914World.com > The 914 Forums > 914World Garage
Pages: 1, 2, 3, 4, 5, 6
dfelz
Cool, ya i think thats what my roommate said too.

Just measured the stroke, its 66mm dry.gif Was definitely hoping it was a 71mm... oh well.

I still dont feel comfortable blasting those parts, I just went out and bought some oven cleaner and a scotch bright 6pack, so hopefully along with some elbow grease i can get those puppies nice and shinny!
'73-914kid
It's still a 1911, And those are fun Revvy little motors. I think most people would describe them as Peppy... beerchug.gif But I still bet those carbs are over jetted for it. Once you have it all running, weld a bung in the exhaust collector, and We'll throw my AFR on it to see what needs to be done to the jetting.

If the oven cleaner doesn't work, dissasembling the heads if you know someone with a valve spring compressor, and soda blasting them won't provide any issues down the road. Baking soda dissolves completely in water.
dfelz
QUOTE('73-914kid @ Jan 31 2013, 10:48 PM) *

It's still a 1911, And those are fun Revvy little motors. I think most people would describe them as Peppy... beerchug.gif But I still bet those carbs are over jetted for it. Once you have it all running, weld a bung in the exhaust collector, and We'll throw my AFR on it to see what needs to be done to the jetting.

If the oven cleaner doesn't work, dissasembling the heads if you know someone with a valve spring compressor, and soda blasting them won't provide any issues down the road. Baking soda dissolves completely in water.


Ahh ok thats why baking soda is good for this application, good to know. I may be coming to your place then doug if i cant get access to the one on campus in the foundry.

I attempted to clean them, got the basic shit off, but they definitely need some serious blasting!

Here is the dirtier of the two
IPB Image
Here was the cleaner of the two
IPB Image

so where do i get giant pales of baking soda???

Also anyone have a good source for piston rings, since i may have a busted one, or two...
dfelz
I'm done for the night! my eyes are screaming at me to shut them for a few hours, so i must listen to them. I managed to finally cut and place the new fuel filter and fuel pump up front on the front side of the gas tank firewall. I removed the old plastic fuel lines last night, they slipped right on out. Next i need to get enough wiring for the two FP wires to head through the tunnel to the front of the car. Once i have the wire lengths cut, I can tape them to the SS tunnel line and push it through!

IPB Image

I like those spots for drilling my holes cause they are at an angle and wont force the lines to make a 90 degree turn to get past the firewall.

On my way back from dawn patrol saturday I will get the some spools of wire, HB will be on my way home!
'73-914kid
Call these guys AA pistons

They were the ones who made those pistons and cylinders in the first place, so they should be able to sell you a set of Hastings rings
dfelz
Ethan, that helps a lot, thank you. I will call them on monday to order a set of rings.

I have a big exciting day planned for tomorrow.
First i am going to bruces (bdstone) place to cut out an engine shelf he said i could have. sawzall-smiley.gif
Then i am off to dougs (mrbubblehead) place to soda blast some parts!

WOooo, cant wait smilie_pokal.gif
mittelmotor
David, I have a perfectly good starter that I'll donate to the project if you pick it up (don't want to hassle with shipping). I'm in South OC (Laguna Hills). PM me if you want it.

--Doug
dfelz
Today i also received two packages, one with a pair of front turn signal buckets and the other with one of my front hubs back from Eric.
I plugged in the turn signal buckets, hooked up the battery, put in some light bulbs in and tested out the functionality. Anyone got a picture of the wiring to the bucket or can tell me which of the three wires go where???? Because some things were a little off. when headlights were on the DS TS would be on but not blink, and the PS TS would not be on but would blink. With the lights off, both of them would blink when commanded to.....

Doug (mittelmotor), I will gladly pick up the starter from you, thank you very much for the offer, i really appreciate it. It will be good assurance for me to know that i have a strong working one. Can you please PM me your cell# so i can text you for your address and a convenient time i can swing by and pick it up.

Thanks!
dlee6204
Here's the wiring for the bucket...

Click to view attachment
http://bowlsby.net/914/Classic/zTN_Elect_F...TurnSignals.jpg

mittelmotor
QUOTE(dfelz @ Feb 2 2013, 12:40 AM) *

Today i also received two packages, one with a pair of front turn signal buckets and the other with one of my front hubs back from Eric.
I plugged in the turn signal buckets, hooked up the battery, put in some light bulbs in and tested out the functionality. Anyone got a picture of the wiring to the bucket or can tell me which of the three wires go where???? Because some things were a little off. when headlights were on the DS TS would be on but not blink, and the PS TS would not be on but would blink. With the lights off, both of them would blink when commanded to.....

Doug (mittelmotor), I will gladly pick up the starter from you, thank you very much for the offer, i really appreciate it. It will be good assurance for me to know that i have a strong working one. Can you please PM me your cell# so i can text you for your address and a convenient time i can swing by and pick it up.

Thanks!

Sure will!
dfelz
Thanks Doug (dlee6204), (man there are a lot of Dougs helping me out on here) for the front turn signal wiring diagram, i had two wires wrong on the DS. Next time i plugin the battery ill test it out to make sure its all bueno.

This past saturday i went over to Dougs (mrbubblehead) place to soda blast my heads, got a lot of it done, but i will have to go back soon to finish up the job, mainly on the valves. But they look good so far!

IPB Image

IPB Image

IPB Image

IPB Image

Also got my front hub back from Eric for some stud adjustment. After a little sanding of the lug holes on one of my rims, it slid on. So i now have a fully rolling 5-lug 914! piratenanner.gif

IPB Image
dfelz
Yesterday I removed all of the heater controls and blowers, came out a lot easier than i originally anticipated. They wont be going back in the car since i am building for racing/weekend fun car.

I got my horn situation figured out as well. Since the wheel that came with the car had no dash pad and my momo wheel and hub adapter wont work for this car (hub adapter is for 72 or later car that i got when my project involved a 72 and not the current 71.) My roommate brought me a button from his work and i wired to the brown/white wire and grounded to steering column. It worked! yay. first attempt was short circuiting and when the key was turned the horn was on, with no stopping, haha, forgot to put heat shrink around the terminal ends on the button!

Tonight I also started the prepping for the installation of the new 911 FG dash. I really do dislike the task of removing the OEM dash, what a pain to get all those damn nuts off on the underside! I unhooked all the gauge wires (took lots of pictures prior to removal) but the only thing i cannot get off is the trip reset cable (the one with the nob on the underside of the dash) I know its supposed to unhook on the nob side and not the gauge side, but i cant get anything to move down there, not even the nob will turn with pliers... suggestions would be appreciated for this task.

Picture time!

Underside of cowl area with all the heater blowers and air box removed (and then scrubbed with a wire brush)
IPB Image

Horn button wired up (with important heat shrink added)
IPB Image

Button and wheel mounted and tested
IPB Image
dfelz
I am extremely swamped with school work this weekend, been working on senior project stuff from friday morning till now, basically the entire time! headbang.gif Therefore i cant do any physical work on the teener for a few days... but i can sure surf the forums on my 5 min breaks here and there!

But over these past two days i received two packages in the mail piratenanner.gif

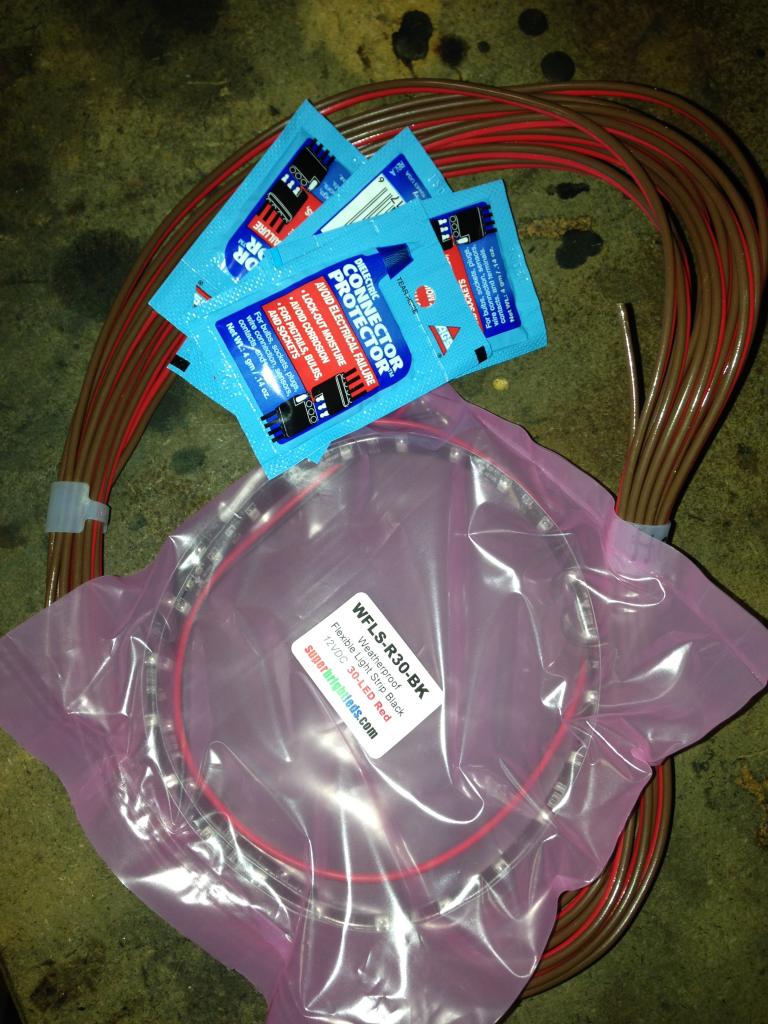
First package was from superbrightLEDs.com, ordered my red LED strip for third brake light, after i saw Dougs in person last weekend i was 100% on board with that product. it was $11 for the 50cm strip, cant beat that! While i was making the order from them i also threw in some dielectric grease packets for application to all my connections, again, recommended by Doug. Also ordered a 25' roll of +/- 18 AWG wire, some of which will be used for sure on the wiring of the fuel pump from the stock harness wires through the tunnel to the new front location.

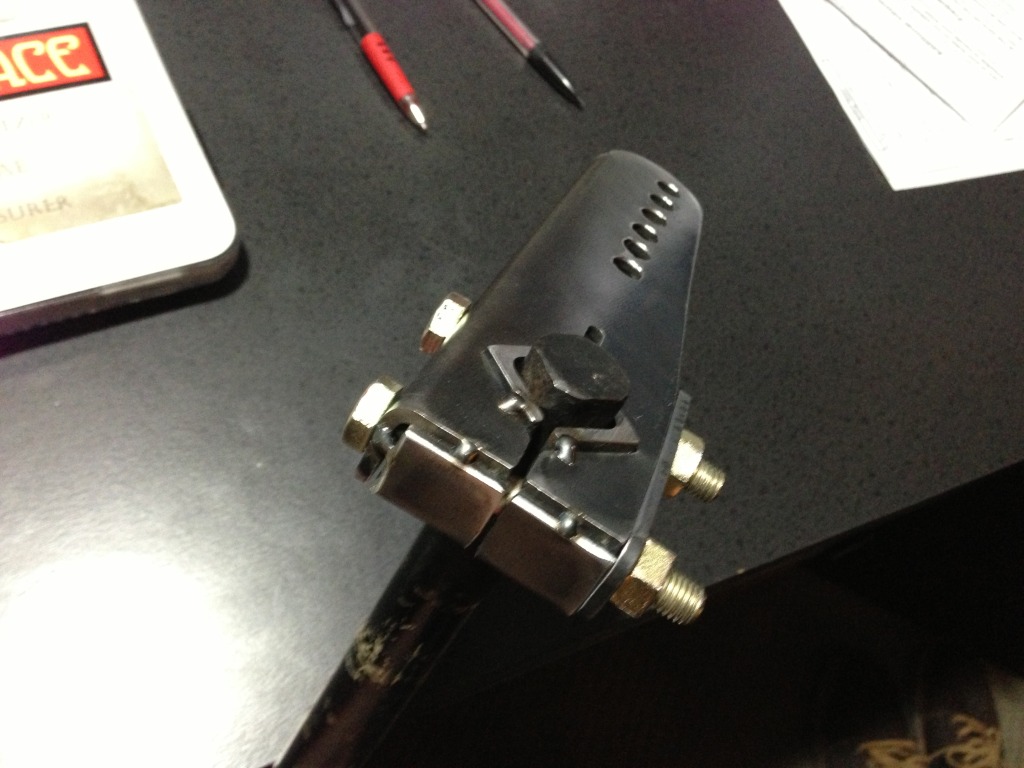
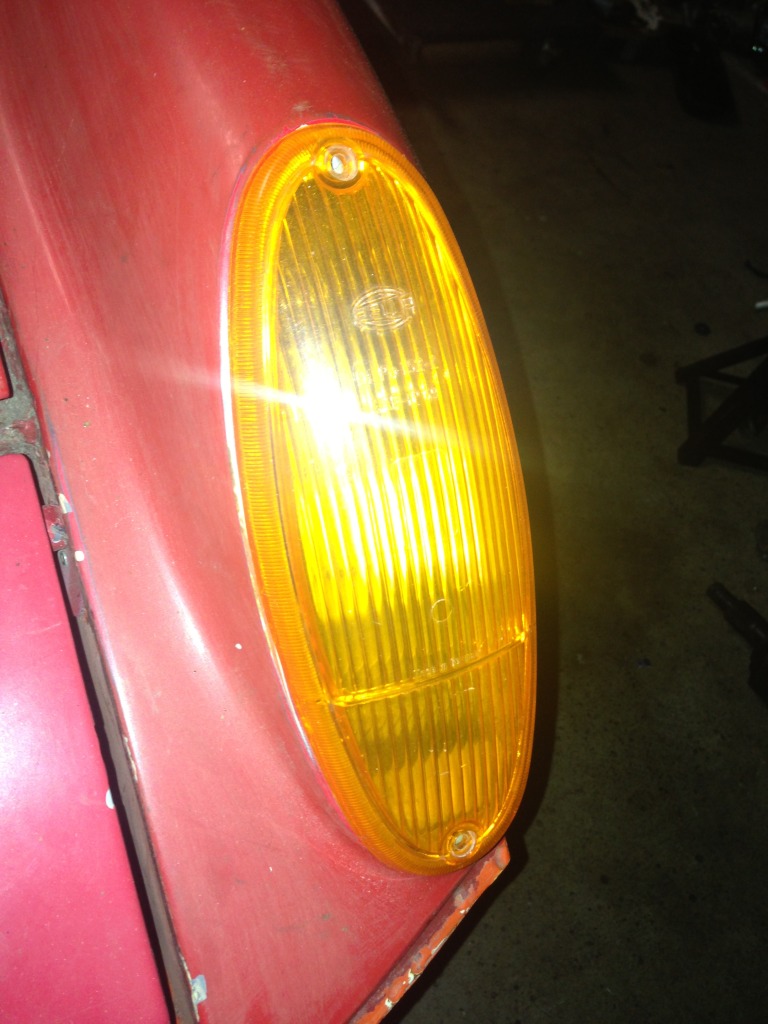
Second package was from 70-914nut, i purchased his front turn signal lenses and gaskets from is car part out. I obviously opened that package as well so i could see how they look biggrin.gif

Third new item to the garage..... I picked up the starter motor from Doug (mittelmotor), thanks again for that! Your 914 was f**king SWEET!!! that LS1 V8 looked (and sounded) amazing in there, and the sleeper status is off the charts, no one would ever see that coming! (2.0L badge, one of two exhaust pipes hidden, narrow body...) love it.

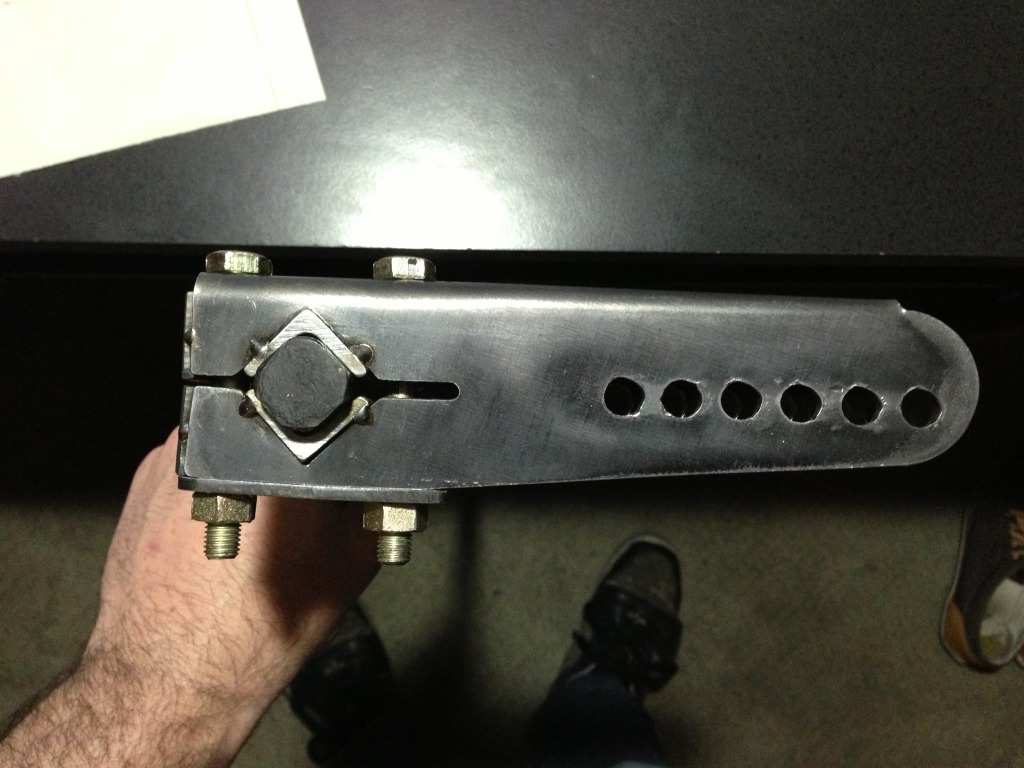
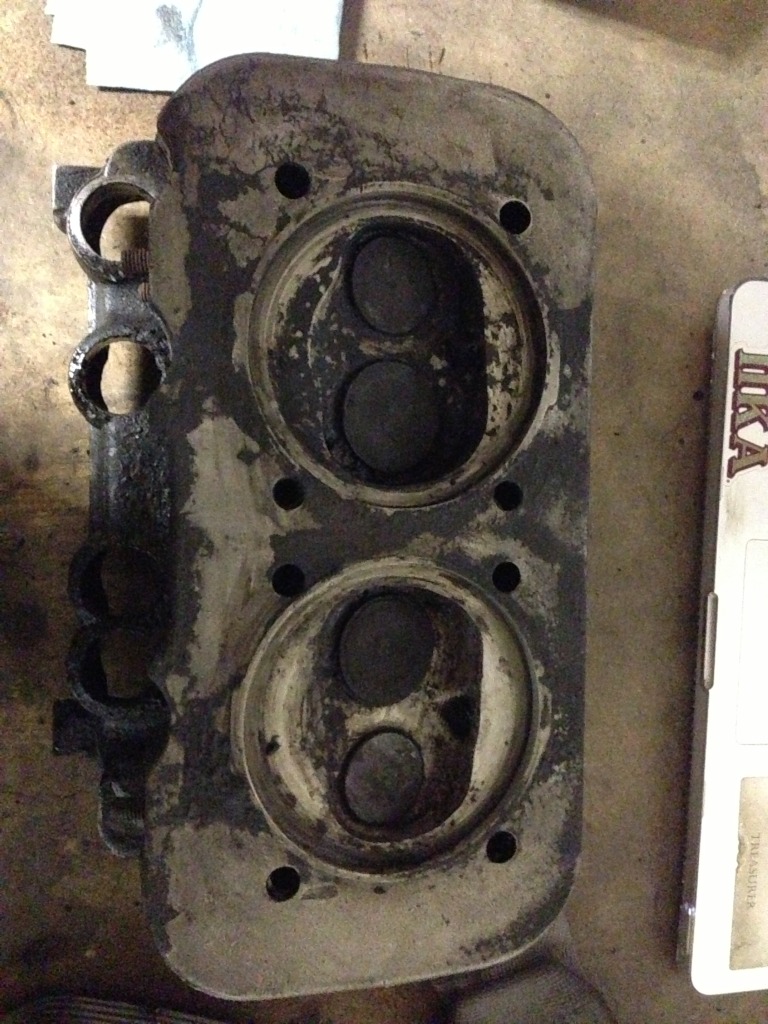
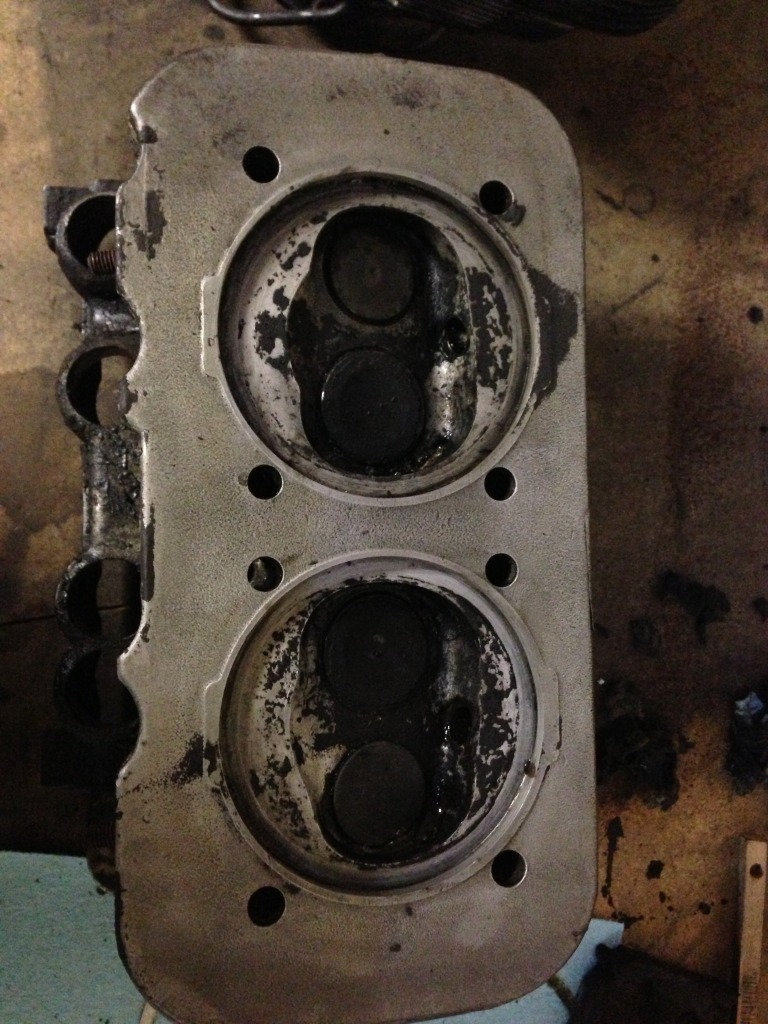
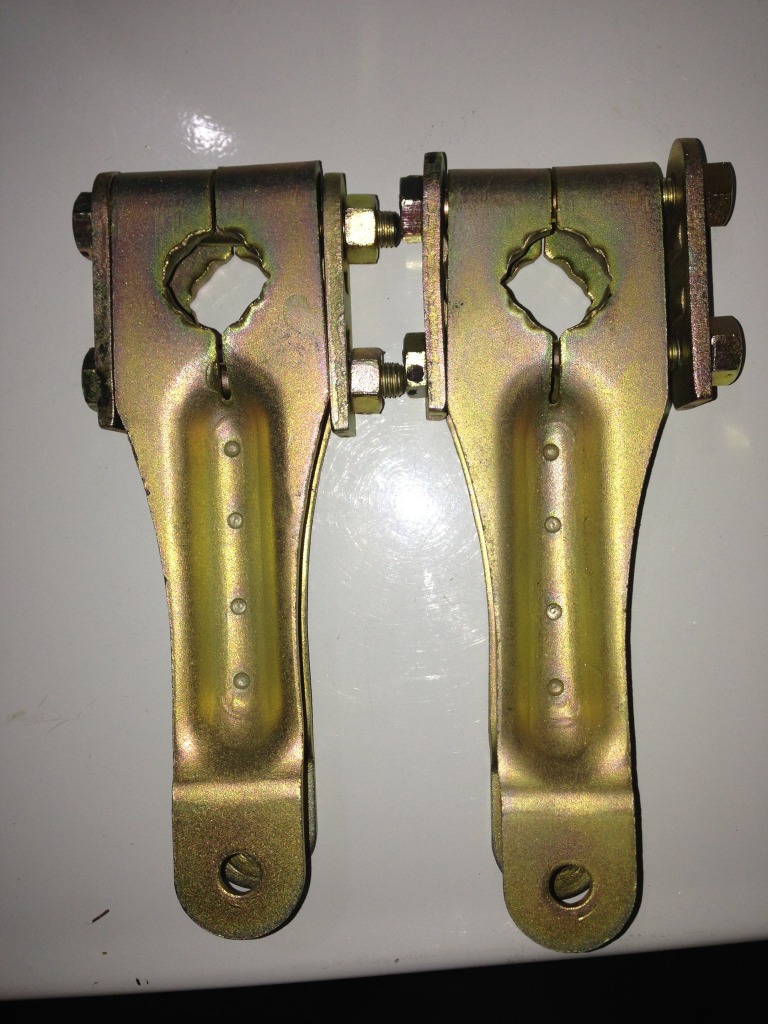
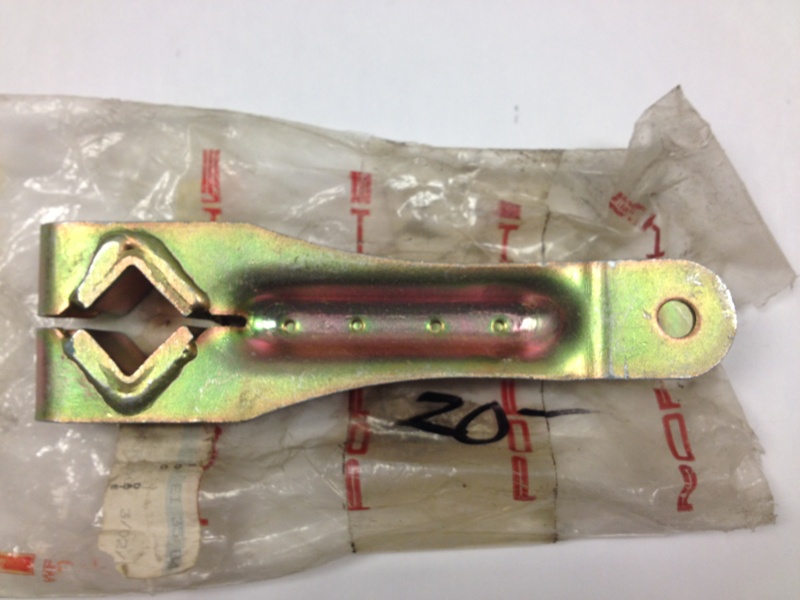
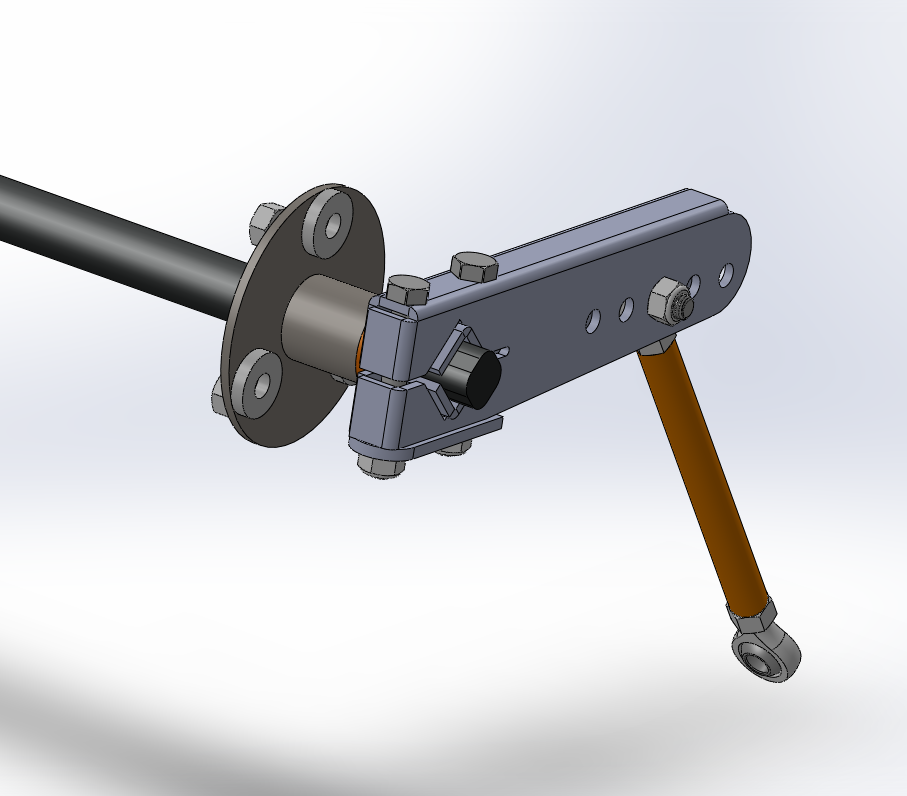
Next topic.... so since i have been stressed with all my school work i did some cleaning of the garage yesterday, i usually resort to cleaning when i need to blow off steam (either garage, room, or one of my fish tanks haha.) This time though i ran across one of the parts that was left in the trunk of my new roller when i got it, when i originally pulled it out i thought it was a rear sway bar, i then put it away for later use. I was moving it and then noticed that it was different than the rear sway bar i already had, and then it hit me, its a front under body sway bar, stoked. i was happy because my 71 doesn't have the holes drilled on the chassis for the thru body type, and the linkages i have for my thru body bar off my 72 are ovaled as sh*T. So since i dont need the adjustability or have the $$ for an aftermarket thru body (for now at least, next few years wont be racing, it isnt necessary at all) the underbody will be perfect! I asked Bruce today if he had any of the brackets/mounting tabs for that style bar, and sure enough he does! so i will pick those up from him this up coming saturday on my way to Dougs for more soda blasting.

If only it were this easy to fill up a few paragraphs with words when i was writing my advanced measurements lab report! bs.gif

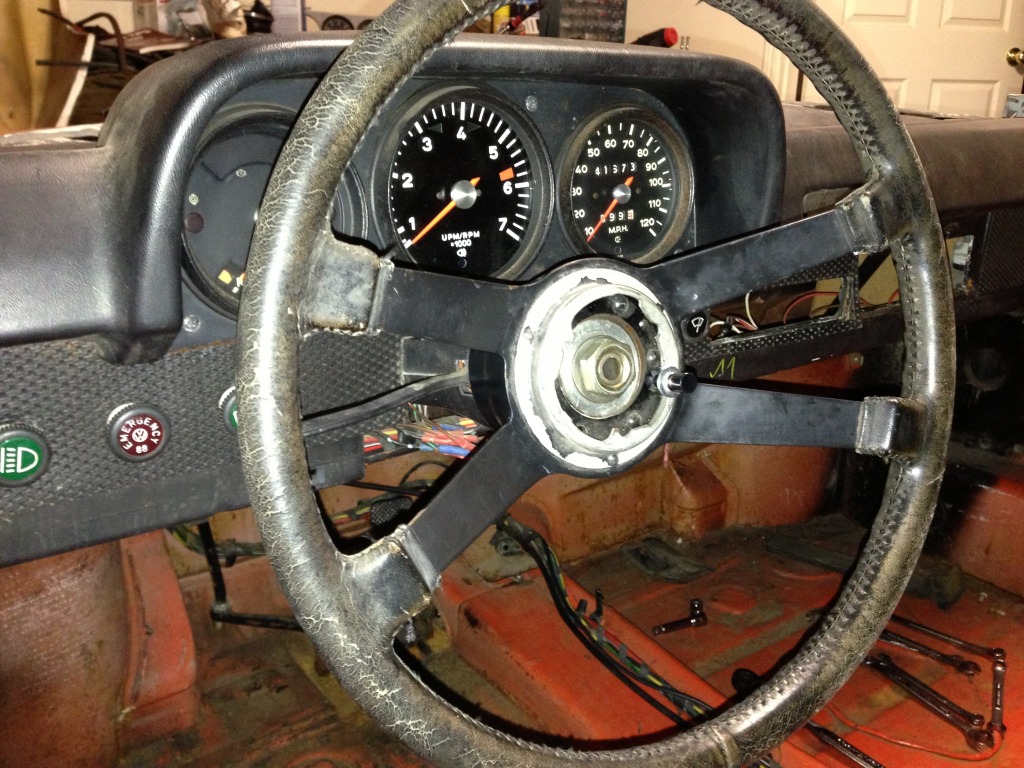
I love pictures, and even though i dont have much to show for this post, i still have some pictures! Talk to you all later
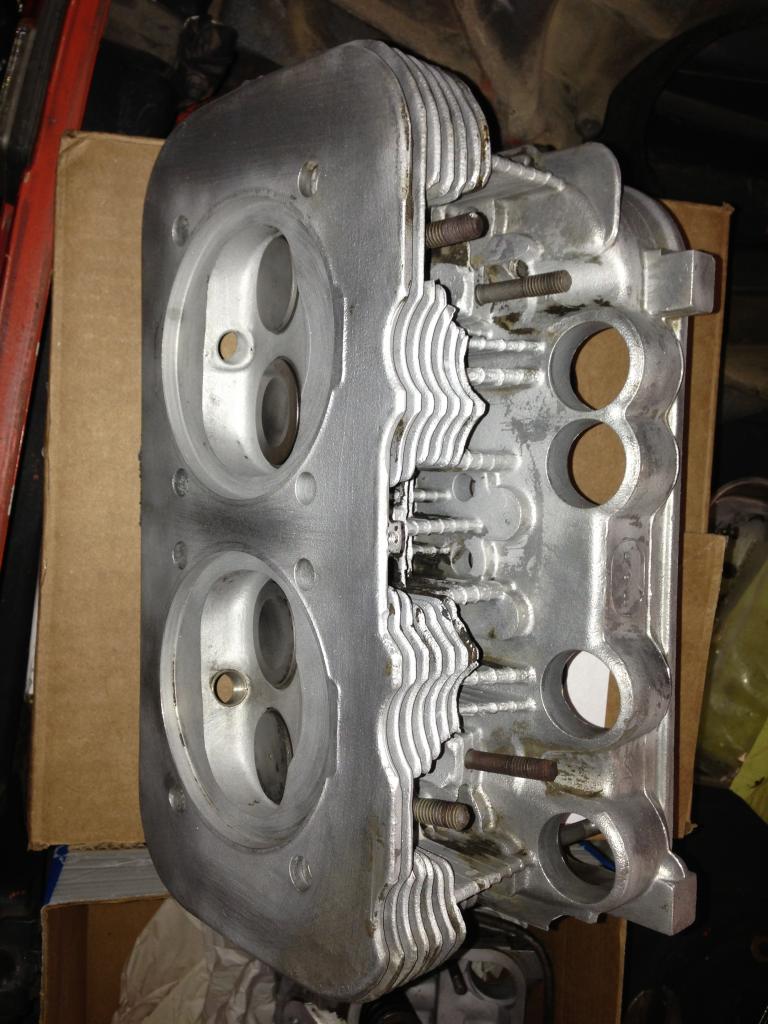
 beerchug.gif

IPB Image

IPB Image
GaroldShaffer
QUOTE(dfelz @ Feb 7 2013, 03:33 AM) *

Tonight I also started the prepping for the installation of the new 911 FG dash. I really do dislike the task of removing the OEM dash, what a pain to get all those damn nuts off on the underside! I unhooked all the gauge wires (took lots of pictures prior to removal) but the only thing i cannot get off is the trip reset cable (the one with the nob on the underside of the dash) I know its supposed to unhook on the nob side and not the gauge side, but i cant get anything to move down there, not even the nob will turn with pliers... suggestions would be appreciated for this task.


Were you able to get the trip reset cable off? This is a 71 car, yes? if so then the knob should be a metal nurled (sp?) knob with a small set screw that holds it it on. Remove the set screw, pull knob off if it doesn't fall off then you will see a chrome ring that screws into the dash frame. Unscrew that and the cable will come out.

Sometimes that set screw won't come out so I just use a very small drill bit and drill it out.
dfelz
QUOTE(Garold Shaffer @ Feb 10 2013, 04:24 AM) *

QUOTE(dfelz @ Feb 7 2013, 03:33 AM) *

Tonight I also started the prepping for the installation of the new 911 FG dash. I really do dislike the task of removing the OEM dash, what a pain to get all those damn nuts off on the underside! I unhooked all the gauge wires (took lots of pictures prior to removal) but the only thing i cannot get off is the trip reset cable (the one with the nob on the underside of the dash) I know its supposed to unhook on the nob side and not the gauge side, but i cant get anything to move down there, not even the nob will turn with pliers... suggestions would be appreciated for this task.


Were you able to get the trip reset cable off? This is a 71 car, yes? if so then the knob should be a metal nurled (sp?) knob with a small set screw that holds it it on. Remove the set screw, pull knob off if it doesn't fall off then you will see a chrome ring that screws into the dash frame. Unscrew that and the cable will come out.

Sometimes that set screw won't come out so I just use a very small drill bit and drill it out.


Correct, its a 71. I was looking at it last night again really quick to see if i saw anything i didnt see before, and did notice that small set screw on the knurled nob. I am pretty sure it will have to be drilled out then, cause the nob wont turn freely at all. I will attempt later, thanks Garold!
mrbubblehead
good move on the dielectric grease david. put that shit on every connector you take off. i put it on every single connector in the whole car. i even fill up the turn signal and windshield wiper levers. they operate super smooth afterward.
dfelz
I like your style Doug!

Well i woke up this morning with a text from Mr. Shea, and he was questioning my decision for the underbody sway bar. After many texts, mainly from his end since he is the knowledgable one, he convinced me to drill the holes for the thru body, and fix the links i have by converting them into 930 style ones, which actually shouldn't be too bad. To sum up his arguments, which are very convincing, the under body bar was designed for a car 1000lb heavier than our 914s, and since i will only be doing around the town shit for the next couple of years, it will be a harsh ride with no adjustability from the sway bar. I trust Eric very much, he has done my entire suspension system for the most p thus far, and when i got a text from him a 8:30am this morning, only 6 hours after my post, with his concerns, i knew i should just listen to what the man has to say! drunk.gif Cause if there is one thing i know, i dont know sh*t about these cars.

So i will be going "thru"(play on words, haha) with the modifications shown in the pictures below. First picture is the current condition of my linkages (thanks PO) and second is Erics inspiration picture for this side project. I have the hallow bar stock that be able will get the job done too, just have to do some grinding and welding sawzall-smiley.gif smash.gif I'll be sure to keep you posted! hope everyone had a wonderful weekend! I know i didn't stromberg.gif

IPB Image

IPB Image
dfelz
Ok so I have my thru body sway bar modeled up in Solidworks (So wish I had ProE, my last job used it and it was sooooo nice, too bad its a 10K license and my student edition of SW is free.99) I am also going to model the control arms so that i can do a motion simulation and geometry analysis at the different linkage holes. If this was next quarter i could also do a full fledge FEA analysis in Nastran, but since i am not taking finite element analysis until next quarter, the basic knowledge i have of solidworks FEA simulation should give me a good idea of week points in the components and where all the stress concentrations will be.
My design concept was to take the OEM arm, make it adjustable, add the 930 style 90 degree through brackets for more stiffness in part and less chance of rounding the square design, and use spherical bearings on the drop link (top spherical bearing will be right hand thread, bottom will be left hand thread, this will make adjustment super easy by just having to loosen the jam nuts on both sides and then just spinning the drop link tube to adjust the tension/compression.) The clamping method is the same style the stock one uses, i like it more than other methods i have seen on aftermarket ones that have just one bolt on the end. Two bolts with the bar in between distributes the clamping force to ensure all four flats on the bar receive equal forces. I also designed a new bushing bracket so that i could use a a custom oil-impregnated brass bushing. its a simple flange style bushing but it will be pressed in from the wheel side. I will also have some kind of rubber washers in between the back of the bushing bracket and the frame sheet metal. Since the car this will be going on without a stock thru body bar i will be making a backing plate for the gas tank side with the nuts welded on for capture of the 3 M8 bolts.
The backing plate, bushing bracket and link arm will all be laser cut 1/8" 1018 cold rolled steel (with the link arm obviously being bent into formation and then tig welded together. Will hopefully have them normalize since all the components will see some welding time, and will then be plated.

Please keep in mind this is my first run at this system and would love everyones input and considerations that i may have overlooked. Just for reference, there are 5 holes for adjustment, the middle one is the exact distance the single stock one is at. I worked in the medical device industry for 6 months full time for an internship and i was doing hardware and tooling design (designing components for the manufacturing line and testing systems for pacemakers and implantable defibrillators) so i have some experience doing design work, am also on the SAE electric team. But like i said, i really want your input, so feel free to ask any questions you like and give any commentary.

IPB Image

IPB Image

IPB Image

I can get more snap shots too! beerchug.gif
sixnotfour
Impressive wish drawing , Buy some H&H arms from like 30yrs ago, same but cheep.
Ya Im 52 and own the arm in your pic... 76 Turbo 1yr only
mittelmotor
Mad computer skillz, David! biggrin.gif pray.gif 
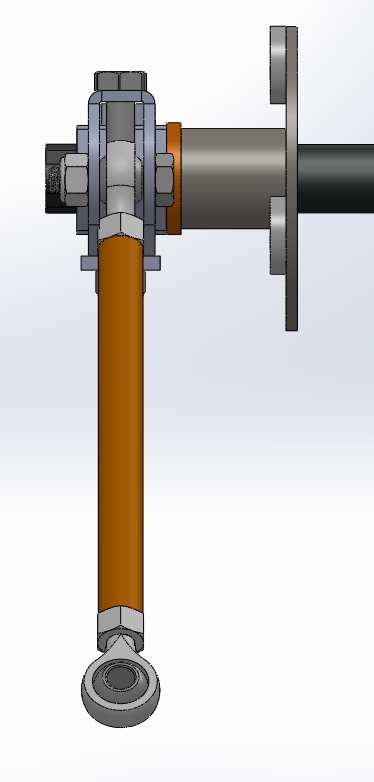
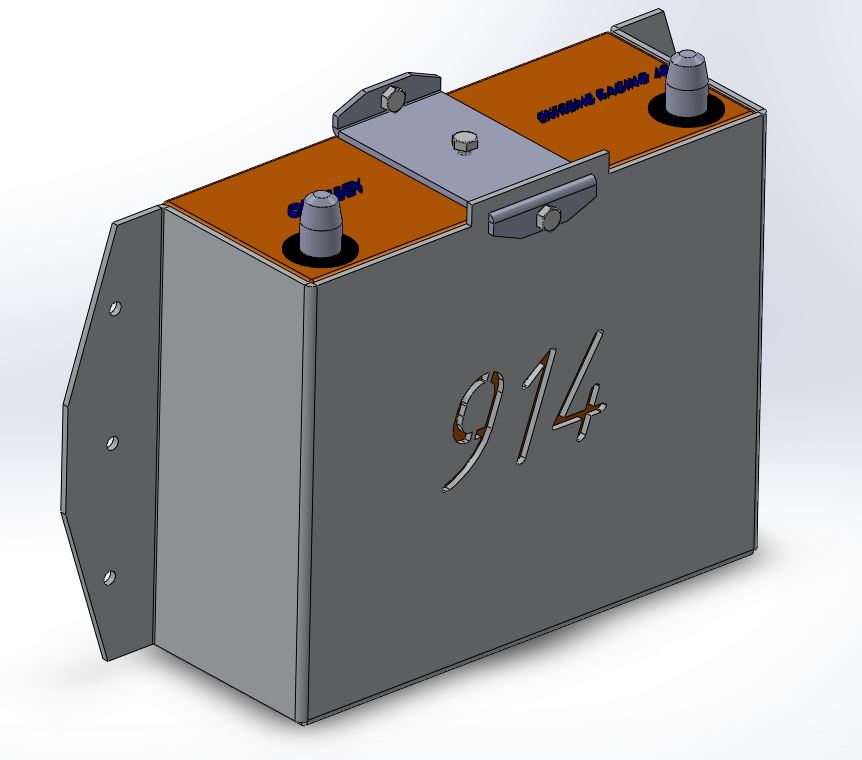
I still sketch things out on paper.

That U-channel arm looks plenty robust. So nice to have the adjustability.
euro911
We used SolidWorks to design and G-code the mill work for numerous custom cycle parts. Cool tool smile.gif

Let me know when you get around to making a set (or more) of those arms happy11.gif
dfelz
Thanks guys for the compliments.
Ya G-code and other programs like master-cam are on my bucket list too. CNC programing is a very helpful trait.
I actually designed the parts in the mind set that i could sell them to members that have stock bars and want some adjustability or their stock links are worn out (like mine) and in need of replacing but dont want to spend the $$$ on the $400 aftermarket kits. I priced out all the components and i think i could sell it all for under $100 for sure. BUT i will NOT sell this product to a single sole prior to me putting some many road miles on the system in my own car first! Although I dont currently have a running car and many of you do, including you Mark...and you seem interested in trying it, so maybe when i have the first batch made, i could have one extra made for you (or more for others interested) and if you were willing to pay only the at cost price to make the parts (basically just laser cutting and BOM, i do the welding and assembling) you could be a product tester and put some miles on it driving.gif and give feedback and suggestions .... just a thought idea.gif
euro911
Cool biggrin.gif
dfelz
I started a cost analysis and for the link arm, with all the nuts and bolts, the 90 degree angle bar, drop link tube and rod ends (those are the most $$ piece at $7 a pop) it comes out to just under $40, mainly of which is the $28 from the rod ends. This number does not include the sheet metal the arm will be cut out of or the cost of laser/water jetting the piece. If i only make two or three i may be able to have it cut for free from my friend. If not though, and more people are interested in being product testers... the price shouldn't be too much to have them cut if we had 5 people or so interested....
Still need to look into it more..
Time to go to my next class dry.gif
dfelz
Oh ya i forgot to post yesterday...but I picked up an AFR digital gauge the other day. Picked it up from a local drag car company, Bismoto Engineering, in Ontario. They have a SWEEEET ass 911 that, twin turbo 771 hp, insane and sooooo sexy looking.
The guy waas selling them new for $155 and i need one badly so i figured i would take the opportunity now.

IPB Image

piratenanner.gif
euro911
QUOTE(dfelz @ Feb 14 2013, 10:17 PM) *
... They have a SWEEEET ass 911 that, twin turbo 771 hp, insane and sooooo sexy looking.
The guy was selling them new for $155 and i need one badly so i figured i would take the opportunity now. piratenanner.gif
So you bought a twin turbo 771 hp 911 for $155. confused24.gif

laugh.gif
dfelz
QUOTE(euro911 @ Feb 14 2013, 11:10 PM) *

QUOTE(dfelz @ Feb 14 2013, 10:17 PM) *
... They have a SWEEEET ass 911 that, twin turbo 771 hp, insane and sooooo sexy looking.
The guy was selling them new for $155 and i need one badly so i figured i would take the opportunity now. piratenanner.gif
So you bought a twin turbo 771 hp 911 for $155. confused24.gif

laugh.gif


HAHA, ya i wish, i just saw a picture of the car happy11.gif

Ya i typed that in the wrong order oops, i was obviously referring to the AFR gauge
Eric_Shea
Very nice arm and drop link design smilie_pokal.gif
dfelz
QUOTE(Eric_Shea @ Feb 15 2013, 10:09 PM) *

Very nice arm and drop link design smilie_pokal.gif


Thanks Eric, I am glad i have your support.
Sway bar question, what was the stock bar size? cause I am calipering my bar at 19.5 mm.

Since I will eventually be doing AX and DE and other racing of sorts, my battery can not be located in the stock location in the engine bay, according the the rules i looked up. So i have decided to move it to the front trunk. I am going to be using an Odyssey ER 40, which I already have, and now have my custom battery holder modeled up in solidworks. That top center bolt will be screwing into a rubber pad mounted on the battery top surface to prevent me from over tightening it and cracking the battery plastic. This part will be laser cut out of 6061 T6 (the easier to weld aluminum)

IPB Image

Also sometime this weekend I will post a separate thread requesting a few product testers of the sway bar arm and drop link, need to get a feel for how many people would be interested (want to send them out next week for cutting).... after laser cutting costs and me doing the bending and welding at school i think they will come out to around $60 total for material/manufacturing cost, with no profit to me. So if anyone is interested feel free to let me know.... beerchug.gif
dfelz
Had a 914 work day this Saturday!
First stopped at Bdstone's shop to drop off/trade some non-plated for plated versions of a few miscellaneous parts. Also picked up a powder coated muffler bracket from him.
Then I went to mrbubblehead's place to finish up cleaning my heads. They look really good now! We used a fine lapping compound and lapped each valve to its own valve seat to make a really nice seal, then reassembled them, springs and all. Then we completely disassembled one of my webber 40s, Doug was showing me what all the parts were and inspecting them to see if anything need replacement, aside from all the gaskets and bits that come in the rebuild kit.

Hopefully tuesday night after my THREE midterms that day i will take off the cylinders and clean the piston tops and inspect the piston rings.

Picture of one of the heads

IPB Image
euro911
QUOTE(dfelz @ Feb 16 2013, 01:26 AM) *
...
Also sometime this weekend I will post a separate thread requesting a few product testers of the sway bar arm and drop link, need to get a feel for how many people would be interested (want to send them out next week for cutting).... after laser cutting costs and me doing the bending and welding at school i think they will come out to around $60 total for material/manufacturing cost, with no profit to me. So if anyone is interested feel free to let me know.... beerchug.gif
Looking good David thumb3d.gif

In case I miss seeing the thread, put me on the list popcorn[1].gif
dfelz
QUOTE(euro911 @ Feb 18 2013, 10:56 AM) *

QUOTE(dfelz @ Feb 16 2013, 01:26 AM) *
...
Also sometime this weekend I will post a separate thread requesting a few product testers of the sway bar arm and drop link, need to get a feel for how many people would be interested (want to send them out next week for cutting).... after laser cutting costs and me doing the bending and welding at school i think they will come out to around $60 total for material/manufacturing cost, with no profit to me. So if anyone is interested feel free to let me know.... beerchug.gif
Looking good David thumb3d.gif

In case I miss seeing the thread, put me on the list popcorn[1].gif


You are definitely on the list! And i believe Doug is on the list too...

The parts are being cut this wednesday and will be bent and welded shortly after that. Still need to place my McMaster order for the drop link tube stock, 90 degree angle pieces and rod ends, but having them local i will be able to place order in the morning and pick up later that day. I will have final manufacturing pricing once its all ordered and assembled.
For this first run I am making 6 pairs (2 link arms and 2 drop links), leaving 3 extra sets up for grabs at the moment! (since the current list is me, mark and doug)
These will be ready in time for the BBQ/Swap meet, so that will be a good time give them to the drivers that are interested.

Also, Mark, I am still interested in the set of 8 plated pushrod tubes that you offered to me earlier. Can i get them from you at the BBQ/swap meet weekend??

Its an all nighter kind of night so i better be getting back to my studying! chair.gif type.gif

Sorry no pictures this post, nothing to really show for...
mrbubblehead
hey david, are you makeing the drop links too?
dfelz
QUOTE(mrbubblehead @ Feb 19 2013, 08:29 AM) *

hey david, are you makeing the drop links too?


Yup! will be given as a package.
The drop links are really easy to make, just have to cut each one to size from the 5ft bar stock then thread each end, one with RH tap and the other with LH tap. The bar stock i selected has an ID inside the min-max range for hole diam to tap an M8 thread, and has a wall thickness of .12" so plenty of material left on the wall with the threads and the only "machining" done to the piece after its length is cut is the tapping.

Was also hoping once I finished all six i could swing by your place and powder coat them to make them look even prettier biggrin.gif
mrbubblehead
QUOTE(dfelz @ Feb 19 2013, 08:50 AM) *

QUOTE(mrbubblehead @ Feb 19 2013, 08:29 AM) *

hey david, are you makeing the drop links too?


Yup! will be given as a package.
The drop links are really easy to make, just have to cut each one to size from the 5ft bar stock then thread each end, one with RH tap and the other with LH tap. The bar stock i selected has an ID inside the min-max range for hole diam to tap an M8 thread, and has a wall thickness of .12" so plenty of material left on the wall with the threads and the only "machining" done to the piece after its length is cut is the tapping.

Was also hoping once I finished all six i could swing by your place and powder coat them to make them look even prettier biggrin.gif


sure, we can powder coat em here. no prob. my drop links will have to be custom because my car sits so low. i will have to give you measurements. we used FK (iirc) heim joints on our offroad cars. they are the best. kartek in corona stocks them. are you useing metric hiems or american?
dfelz
QUOTE(mrbubblehead @ Feb 19 2013, 08:59 AM) *

QUOTE(dfelz @ Feb 19 2013, 08:50 AM) *

QUOTE(mrbubblehead @ Feb 19 2013, 08:29 AM) *

hey david, are you makeing the drop links too?


Yup! will be given as a package.
The drop links are really easy to make, just have to cut each one to size from the 5ft bar stock then thread each end, one with RH tap and the other with LH tap. The bar stock i selected has an ID inside the min-max range for hole diam to tap an M8 thread, and has a wall thickness of .12" so plenty of material left on the wall with the threads and the only "machining" done to the piece after its length is cut is the tapping.

Was also hoping once I finished all six i could swing by your place and powder coat them to make them look even prettier biggrin.gif


sure, we can powder coat em here. no prob. my drop links will have to be custom because my car sits so low. i will have to give you measurements. we used FK (iirc) heim joints on our offroad cars. they are the best. kartek in corona stocks them. are you useing metric hiems or american?


they are metric, male thread specs are M8 x 1.25 x 25 mm
Heres the link to part

I will ask kartek for their price and specs (cause the current link arm has been designed around the rod ends from McMaster, didnt want spacers or bungs so i made the ID of the channel just wide enough to fit the rod end in there nice and snug.)
dfelz
Had all the parts CNC plasma cut today and will probably bend them on Friday. Am planning on having at least three done before BBQ as well as all the backing plates for Eric.

As stated earlier, I will have six complete pairs (arm and rod end drop links)
IPB Image

Before and after cleaning shot
IPB Image
euro911
Nice. Not wasting any time aktion035.gif

Yep, I'll bring the tubes to the BBQ. Let me know if there's anything else you need while I'm rooting through boxes 'o stuff ...
dfelz
QUOTE(euro911 @ Feb 21 2013, 01:14 AM) *

Nice. Not wasting any time aktion035.gif

Yep, I'll bring the tubes to the BBQ. Let me know if there's anything else you need while I'm rooting through boxes 'o stuff ...


Haha, ya i dont like wasting time, which is why i prefer to always have something to do instead of just sitting around. Hence why i dont sleep much during the school year, cause i have too many things to do, aka its currently 4:20am and i just now finished my second cup of coffee beer.gif

Hmmmmm, well if your offering and you happen to have a DS seat mount bracket, i would love to borrow one until i fab up some mounts for my sparco seats.....
Eric_Shea
QUOTE(dfelz @ Feb 16 2013, 02:26 AM) *

QUOTE(Eric_Shea @ Feb 15 2013, 10:09 PM) *

Very nice arm and drop link design smilie_pokal.gif

Sway bar question, what was the stock bar size? cause I am calipering my bar at 19.5 mm.

Since I will eventually be doing AX and DE and other racing of sorts, my battery can not be located in the stock location in the engine bay, according the the rules i looked up.


Are you micing the ends or the bar itself? The bar should be 15mm. The ends??

The battery thing is cool but, I've never heard of any rules that don't permit the battery in the sock location. I'm one of those that likes the stock location but...
dfelz
QUOTE(Eric_Shea @ Feb 21 2013, 06:12 AM) *

QUOTE(dfelz @ Feb 16 2013, 02:26 AM) *

QUOTE(Eric_Shea @ Feb 15 2013, 10:09 PM) *

Very nice arm and drop link design smilie_pokal.gif

Sway bar question, what was the stock bar size? cause I am calipering my bar at 19.5 mm.

Since I will eventually be doing AX and DE and other racing of sorts, my battery can not be located in the stock location in the engine bay, according the the rules i looked up.


Are you micing the ends or the bar itself? The bar should be 15mm. The ends??

The battery thing is cool but, I've never heard of any rules that don't permit the battery in the sock location. I'm one of those that likes the stock location but...


My bar must have been upgraded by the PO.... But the square section on all bars is the same, all are 17mm at each end to the best of my knowledge (i check some that bruce had at his shop too.)

Once i have a little time to spare (aka my english class later today, if i dont end up falling asleep in class after tonights all-nighter) i will find the rule section that i read it in. But for now anyways i will still be using the stock location since this car wont see the track for a few years...
dfelz
QUOTE(Eric_Shea @ Feb 21 2013, 06:12 AM) *

The battery thing is cool but, I've never heard of any rules that don't permit the battery in the sock location. I'm one of those that likes the stock location but...


Just looked up it, I misread it, which i do a lot, it says "may" be relocated, not what i thought it said "must" be relocated
Thank you for making me double check that.
euro911
QUOTE(dfelz @ Feb 21 2013, 04:20 AM) *
QUOTE(euro911 @ Feb 21 2013, 01:14 AM) *
Nice. Not wasting any time aktion035.gif

Yep, I'll bring the tubes to the BBQ. Let me know if there's anything else you need while I'm rooting through boxes 'o stuff ...
...

Hmmmmm, well if your offering and you happen to have a DS seat mount bracket, i would love to borrow one until i fab up some mounts for my sparco seats.....
The part that bolts to the floor? ... I think I have one
rsrguy3
Dave, I wouldn't waste the money on pwder coat for your wheels. Just take the time to properly sand and paint those puppys, just put on plenty of clear and you'll be fine.
dfelz
QUOTE(rsrguy3 @ Feb 22 2013, 06:38 PM) *

Dave, I wouldn't waste the money on pwder coat for your wheels. Just take the time to properly sand and paint those puppys, just put on plenty of clear and you'll be fine.


Doug has an a blast cabinet and oven for powder coating, both just big enough to fit a 15" rim inside them! So i just have to buy the powder and put in the elbow grease to blast the current coating off...
Otherwise your right i wouldnt pay to have it done, got a quote for all four, blasted and everything for $200, so ya ill do it myself biggrin.gif
dfelz
Small update.
Got all the plasma cut pieces cleaned up and buffed. Then cut the angle brackets down to 1" size pieces, and the drop link tubes down to size as well, then started taping the tubes for the rod ends.
Then this morning me and Grant (my roommate) started bending the link arms, but ran into some troubles since the channel is so skinny, only a half inch. So we decided to first shear them at one of the long bends and then bent them, so its now a two piece part that will be welded at three seams instead of two. We got to use the BIG BOY hydraulic press and hydraulic shears. They dont get used very often, the lab tech had never even used the press, only knew how to turn it on, so it was fun. Here are some pictures from this morning.

Two Piece Part
IPB Image

Hydraulic Press for bending the pieces
IPB Image

Hydraulic Shear (can cut up to .25" steel)
IPB Image
euro911
QUOTE(dfelz @ Feb 25 2013, 01:08 PM) *
... We got to use the BIG BOY hydraulic press and hydraulic shears. They dont get used very often, the lab tech had never even used the press, only knew how to turn it on ...
Click to view attachment
laugh.gif They use a 'Clapper' to power it on and off? confused24.gif

Click to view attachment
dfelz
Haha, good one mark.

Got one arm tacked together to test fitment, and it fits, very nicely too! It clamps on very well, holds the bar tight in there. We forgot our welding mask at school, so we could only tack tonight, but we will have it tomorrow so will probably finish it up then.
I am very excited to see it coming together though!

Now that i have all the parts ordered and in hand, i have a final manufacturing cost. One thing i changed from the original plan was getting the high strength rod ends instead of the regular ones, which are $5.50 more a piece, so that bumped up the price a little bit... Total comes out to $77.73

Mark, Doug, i hope this price still interest you enough to take one... let me know.

Even though i had enough pieces plasma cut to make 6 pairs, i new i would need a few to use as trial and error setting up the bending process, and am i sure glad i did!! went through 3 arms on the first run of bending before we decided to shear it first prior to bending. then also jacked one up on the shear the first run. I also only order enough rod ends to make 3 pairs (less upfront investment to me if it all went down the drain.) So if mark and doug take theirs, i will have one pair left up for grabs, if anyones interested, just say the word!

IPB Image

IPB Image

beerchug.gif
mrbubblehead
those look really good david. im glad you chose to go with the better heims.
euro911
Oh yeah mueba.gif

I'm still waiting on a pair of Engman (or =) reinforcement plates before I can install everything else ... so take your time welder.gif
This is a "lo-fi" version of our main content. To view the full version with more information, formatting and images, please click here.
Invision Power Board © 2001-2024 Invision Power Services, Inc.