Full Version: Project Time! 71 garage build
OK. I haven't pulled the heads off on mine. I thought they were like the exhaust.
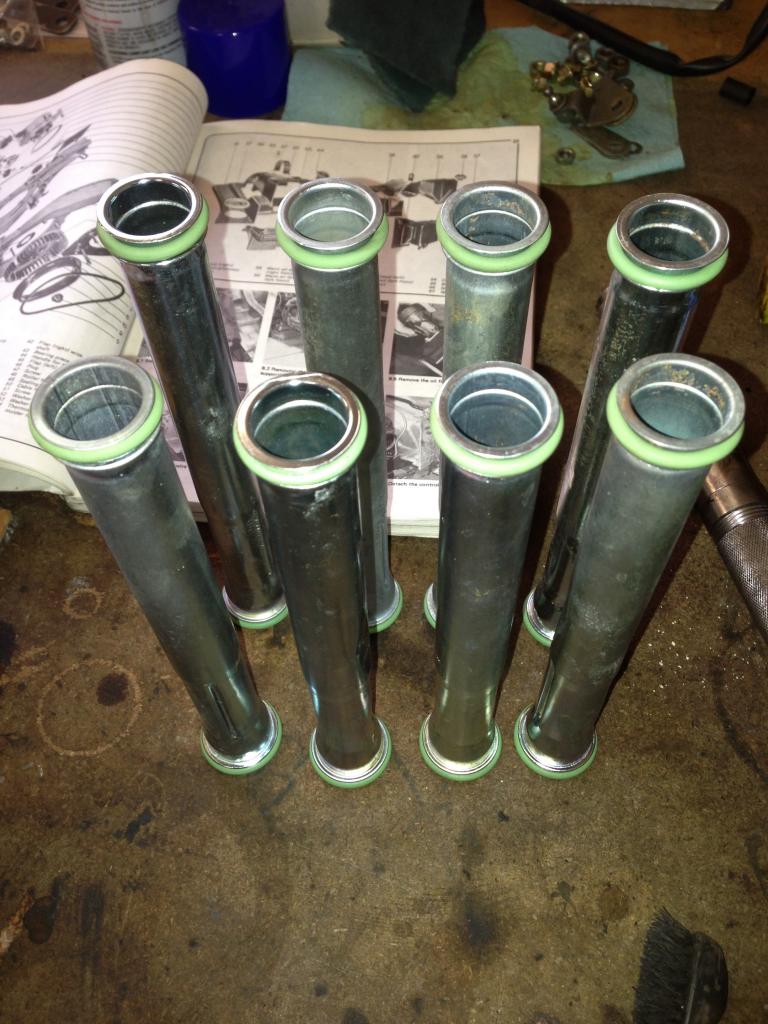
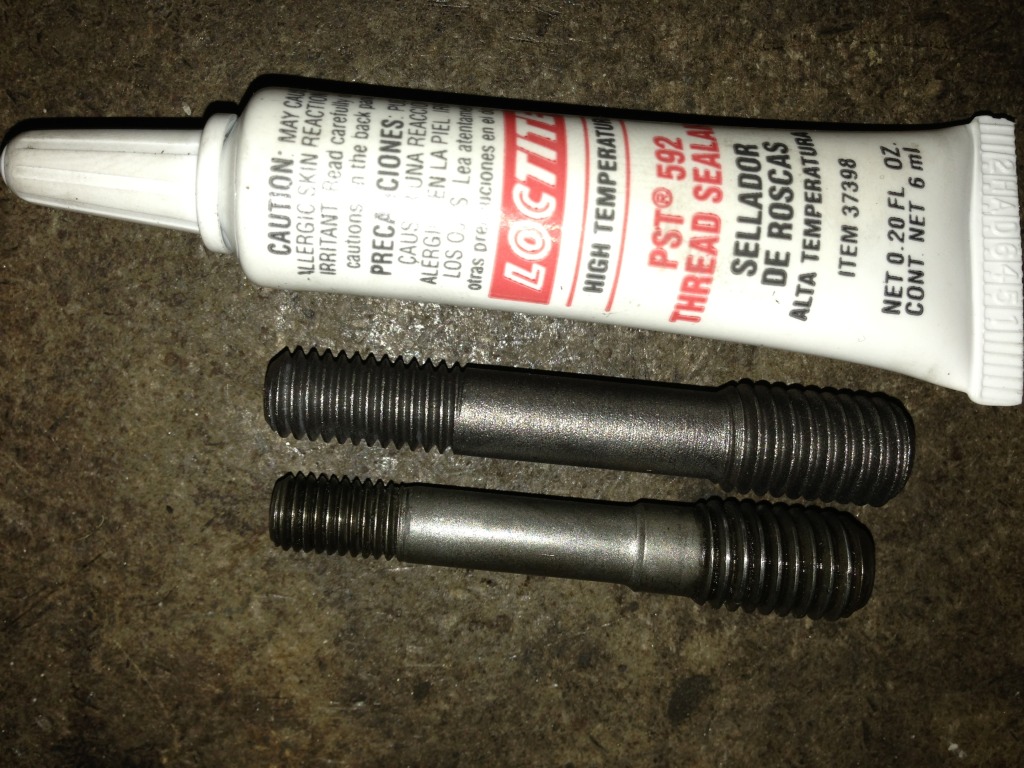
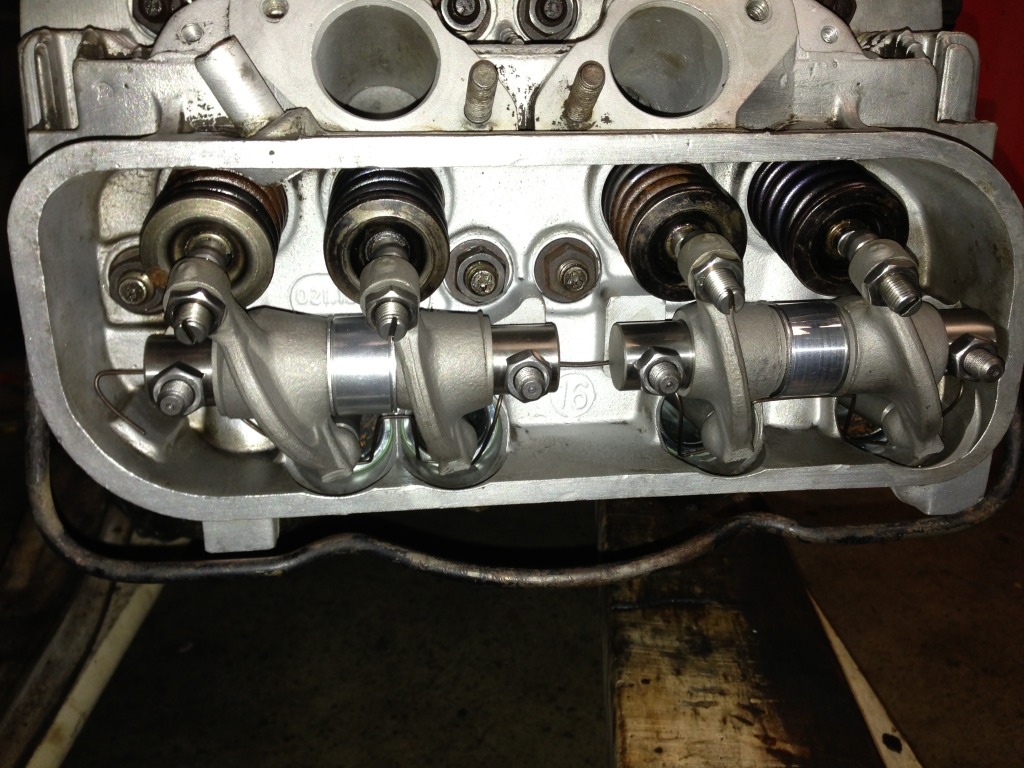
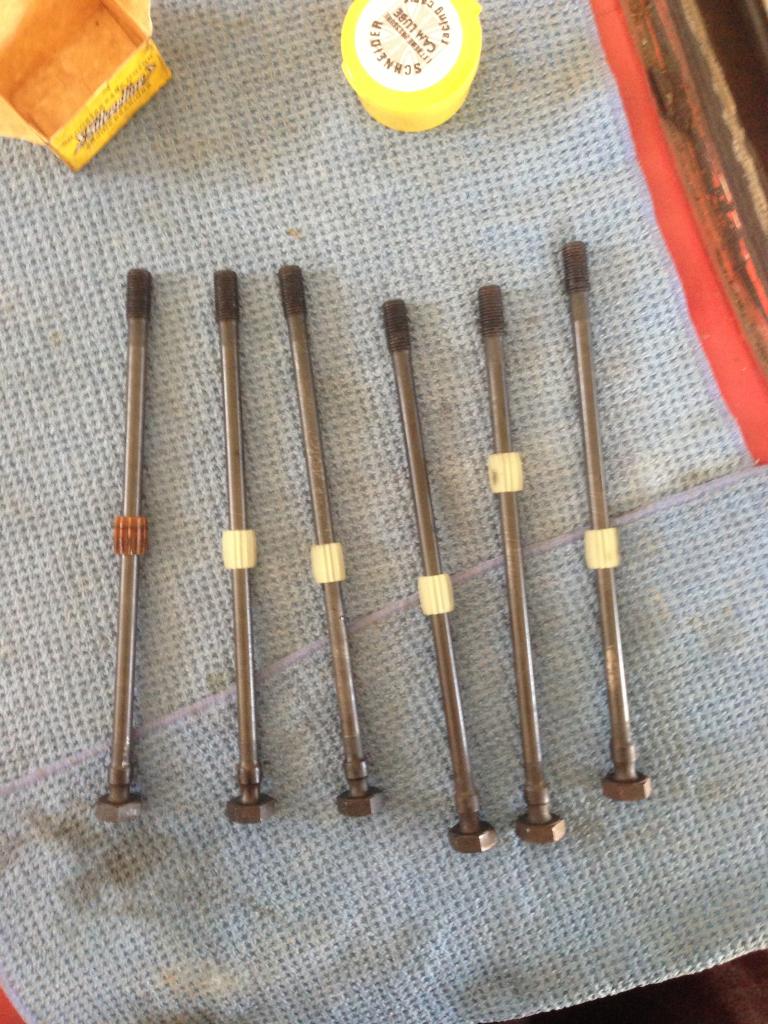
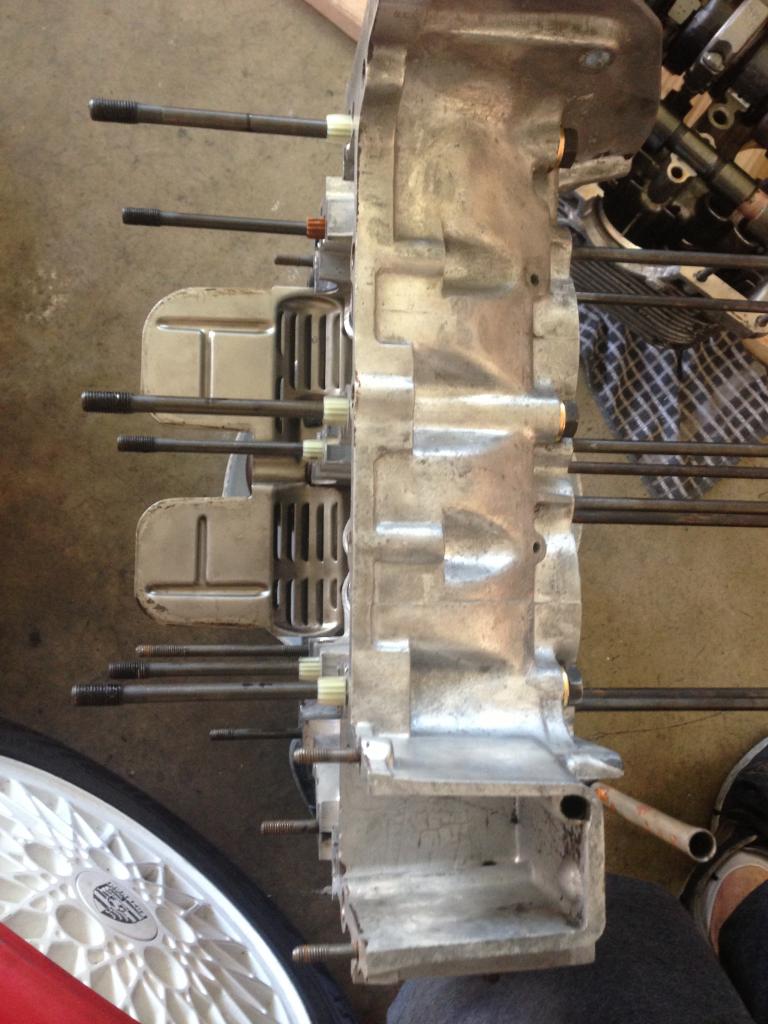
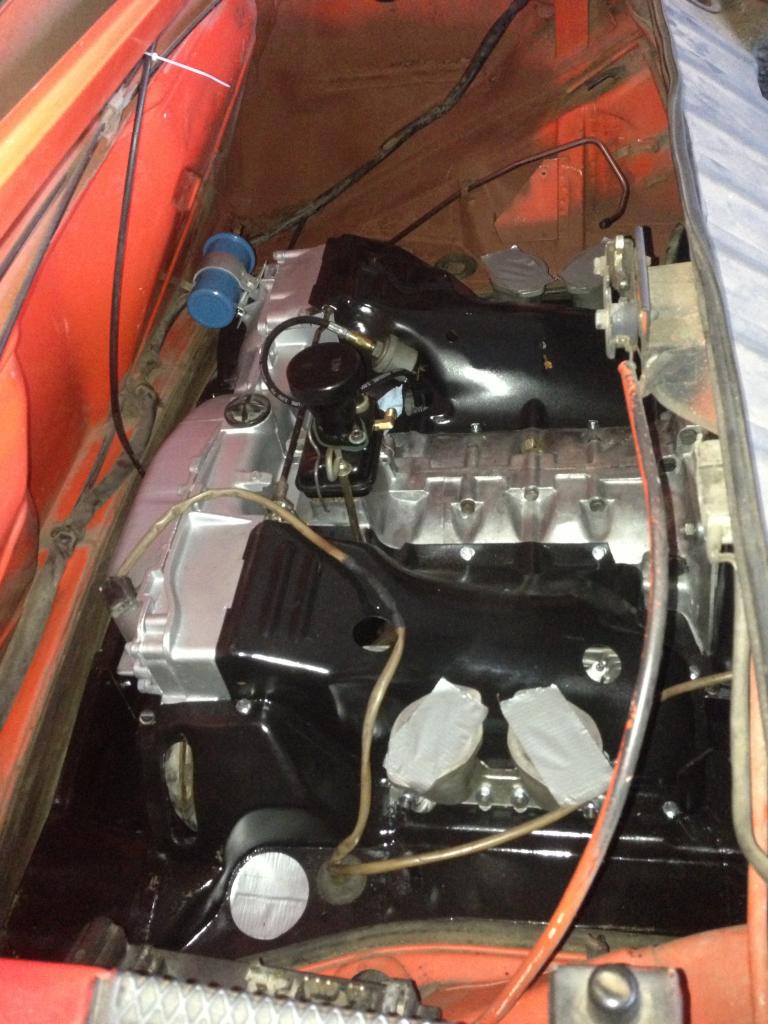
Mocked up the valve train tonight to see what im working with, and just become more familiar with how it goes together, not much too it really. First i swapped out the original rocker studs for the chromoly ones, which has a thicker stock and uses an M8 nut instead of an M7 (I red loctited the new studs in the heads, hope thats good practice.) I then put the pushrod tubes in with the new vitol o-rings and then the pushrods and retainer spring. Next I put the rocker assemblies on. The rocker assem is brand new, with HD shafts, solid alum spacer, and the elephant feet adjusters (also just realized i think i am missing the blocks that go on the ends of the shaft  .) Because of the geometry change using the elephant feet i will probably be getting cut-to-length chromoly pushrods to replace the stock alum ones. Anyone have experience using the stock alum ones WITH the elephant feet adjusters in place???
Time for sleeeeeep!![yellowsleep[1].gif](http://www.914world.com/bbs2/style_emoticons/default/yellowsleep[1].gif)
.) Because of the geometry change using the elephant feet i will probably be getting cut-to-length chromoly pushrods to replace the stock alum ones. Anyone have experience using the stock alum ones WITH the elephant feet adjusters in place??? 


Time for sleeeeeep!
Oh, I almost forgot to mention... the Solid shaft spacers have to be sanded down so you can fit a feeler gauge in between the rockers and the spacer. I forget what the number is off the top of my head though..
Lookin good Flezy !!!! keep those pix coming 
Oh, and steal the rocker shaft mounting blocks of your old set of rocker arms...I'm pretty sure I remember seeing them in that bag of old rocker assemblies.
Yup, the old end blocks were there. I cleaned them up and put them on the rocker assemblies. I now have both sides of the valve train on and ready to go, just need to adjust the valve screws now per the specs. It looks like i may be able to just barely get away with using the stock pushrods, but ill leave that up to Ethan for a final decision.
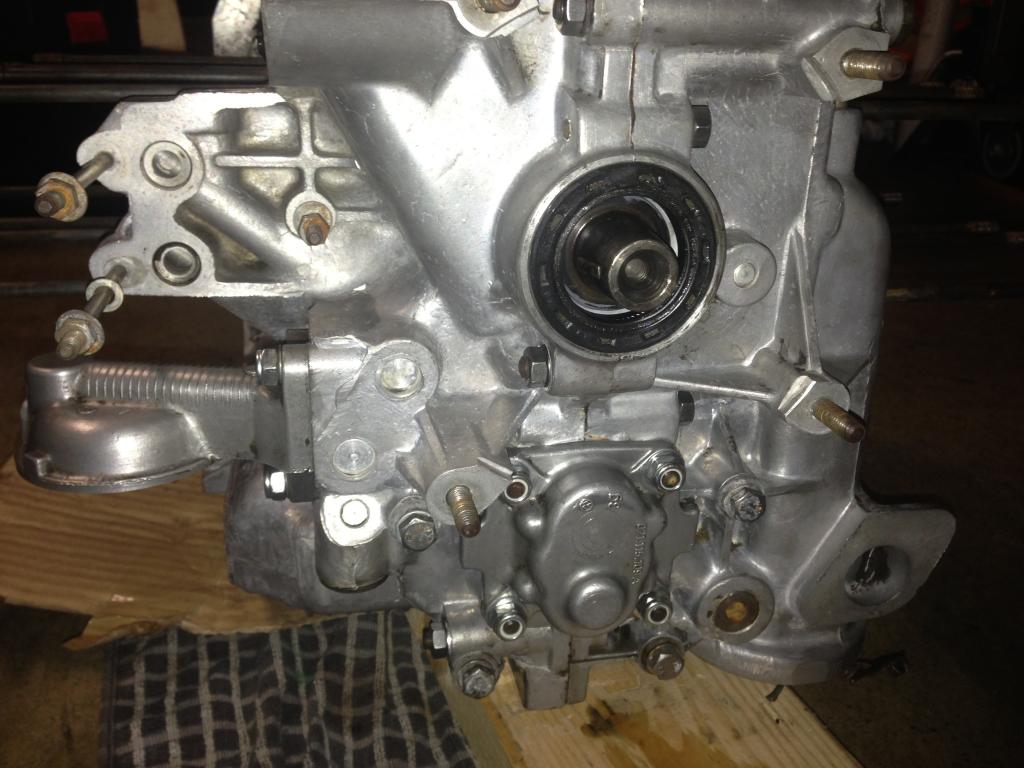
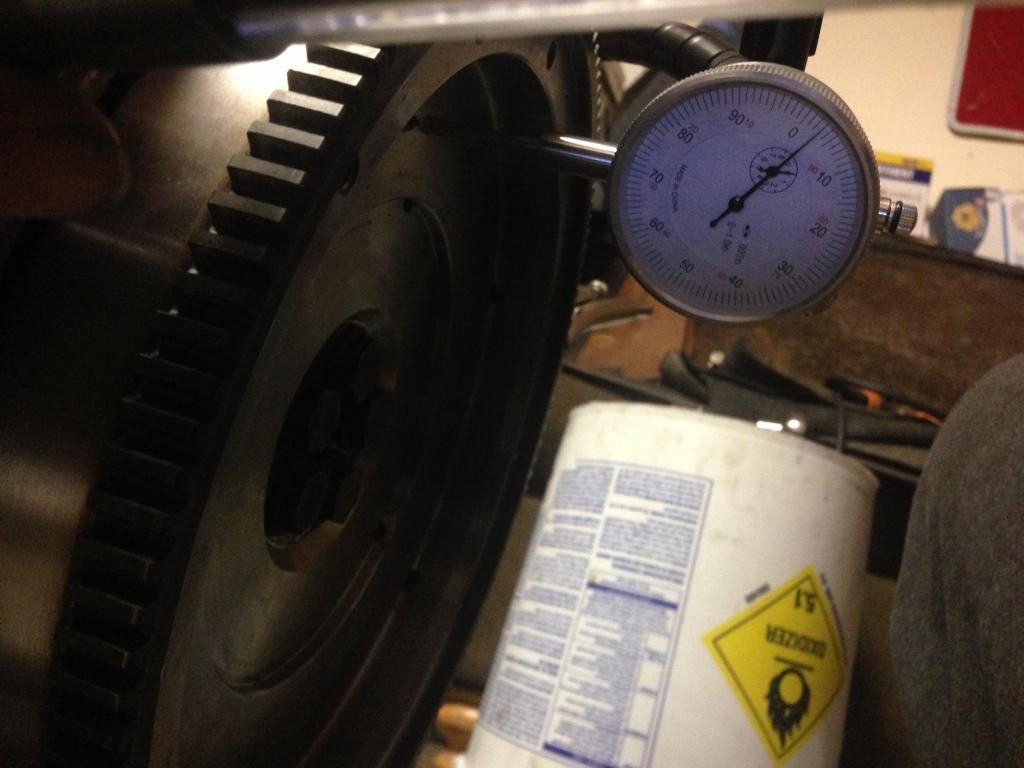
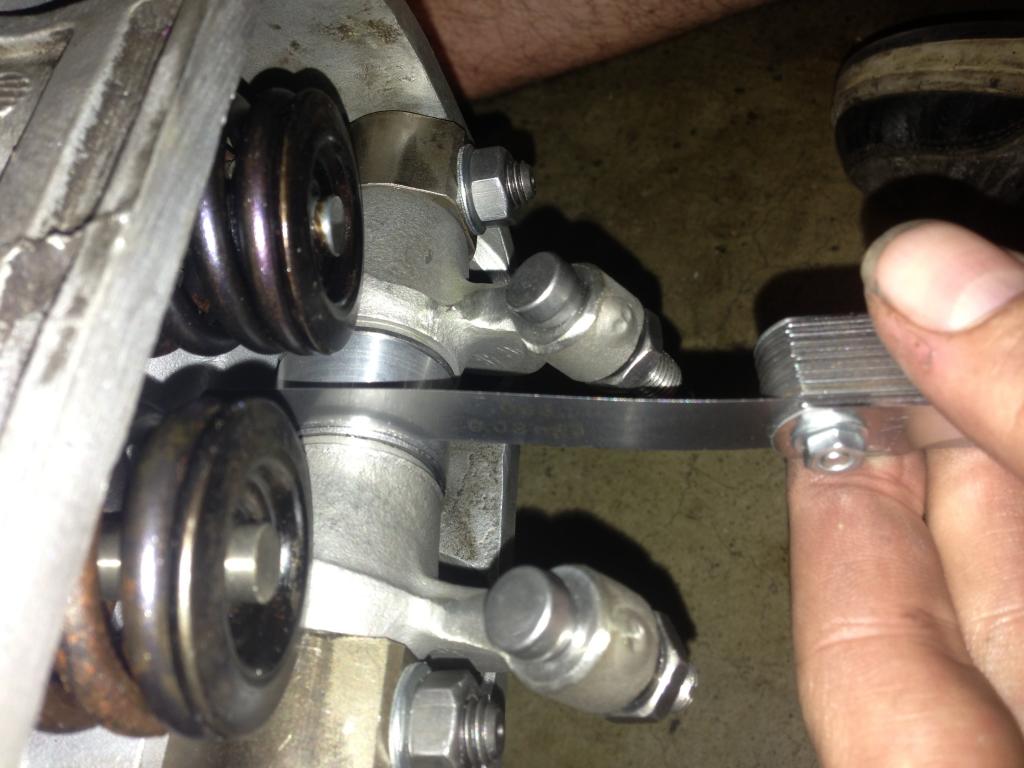
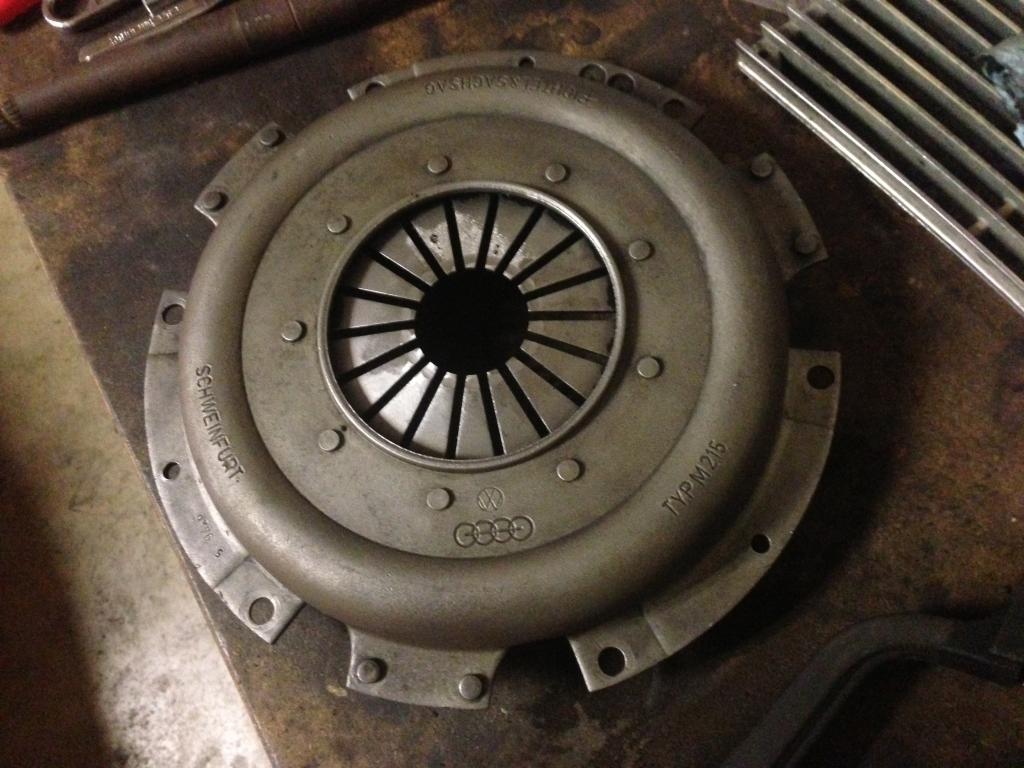
I picked up my new flywheel this week and put that sucker on there. Fit like a glove!! Its a brand new 215mm flywheel from AA performance products. Before i took out the main oil seal and three stock shims, i bolted the flywheel up and the endplay was completely eliminated, absolutely wouldn't budge at all. I then took it off, took out the oil seal and shims, measured the shims and put the two thickest ones back in and bolted the flywheel on again (no oil seal present). I then measured the end play with my new clamping dial indicator, and the endplay was then .063", which is weird cause the shim removed was .011" thick.... and since i believe i want a few thou of end play i am going to try and get the next shim size down, which was the smallest one made, at .0095"
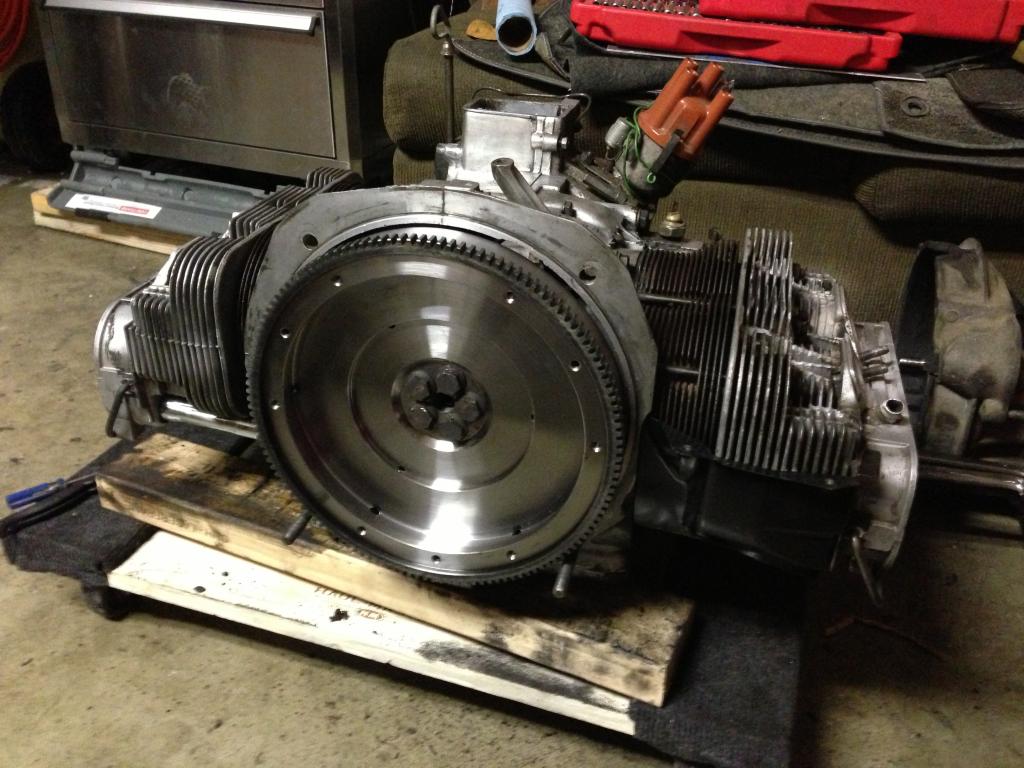
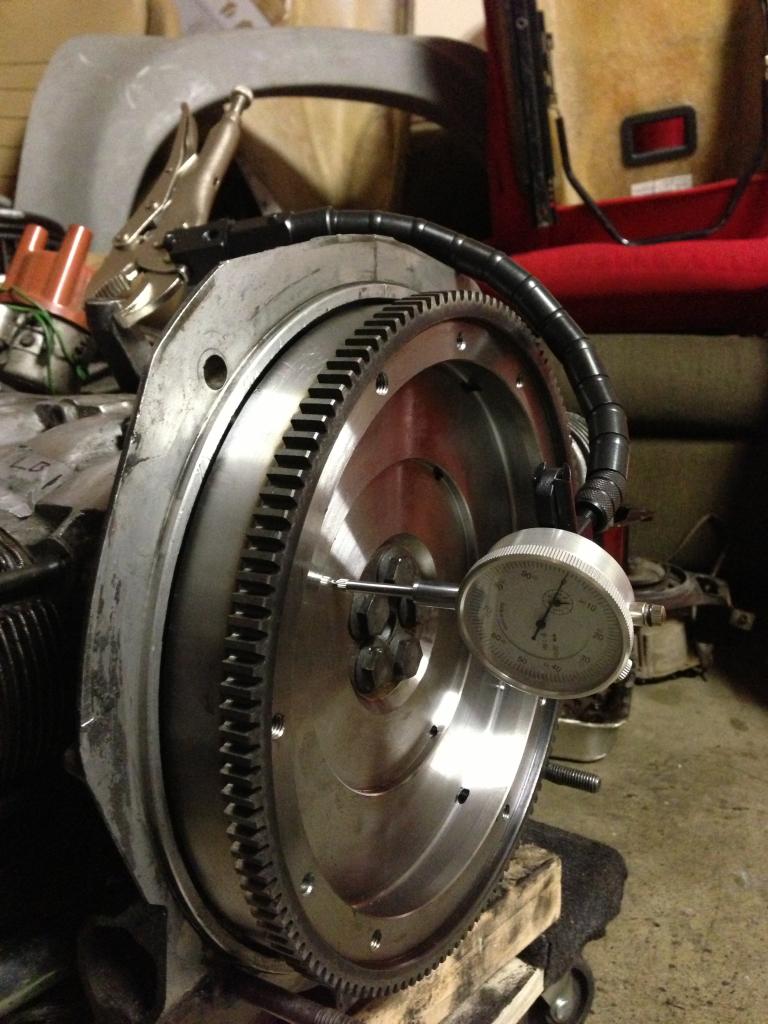
I picked up my new flywheel this week and put that sucker on there. Fit like a glove!! Its a brand new 215mm flywheel from AA performance products. Before i took out the main oil seal and three stock shims, i bolted the flywheel up and the endplay was completely eliminated, absolutely wouldn't budge at all. I then took it off, took out the oil seal and shims, measured the shims and put the two thickest ones back in and bolted the flywheel on again (no oil seal present). I then measured the end play with my new clamping dial indicator, and the endplay was then .063", which is weird cause the shim removed was .011" thick.... and since i believe i want a few thou of end play i am going to try and get the next shim size down, which was the smallest one made, at .0095"


Don't forget the spring pushrod tube keeper. It's not in the picture so just a reminder. Great looking motor!
Thanks for the complement Bill, Actually the pushrod tube keeper is in there though, you can see it in the pic too. What i thought was weird though is that it prevents the rocker shaft end blocks (not pictured) from sitting flush against the face of the head where the studs are screwed into... is that right??
the retaining clips get clipped in after the studs are all torqued and seated. i think theres a picture of it somewhere around here...
QUOTE('73-914kid @ May 11 2013, 11:25 PM) 
the retaining clips get clipped in after the studs are all torqued and seated. i think theres a picture of it somewhere around here...
Hmm, cause the haynes book said put it in first, but it probably assumed you would get it out of the way of the valve train when torquing it down... which i didnt, this time at least
Put a bunch of hours in today cleaning and prepping. Not that it can be seen once all together, but i got the entire half thats behind the fan case is now clean and shinny! Then prepped and painted some more of the tins.

MAJOR UPDATE
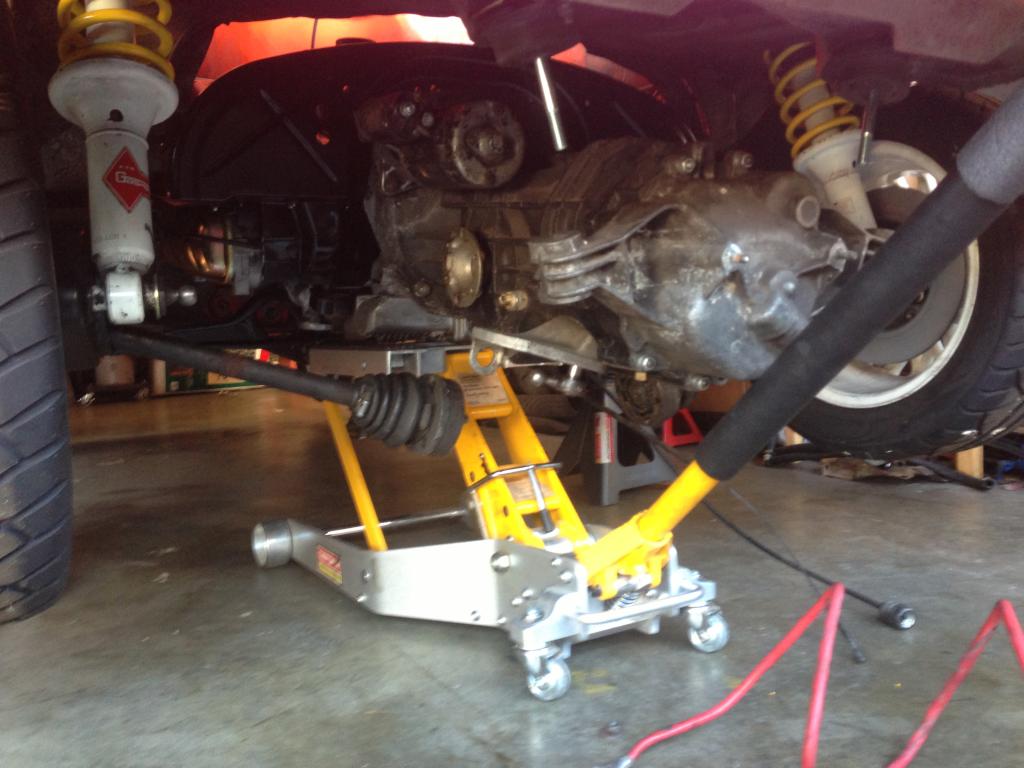
While Ethan and I were trying to figure out the excessive amount of end play, we made a grueling find, the main bearing on the flywheel side (and possibly others) were shot and completely out of spec. We then performed a cost/benefit analysis on the situation to way all of our options. Figuring that if we ran it as-is the motor would probably blow-up after 10,000 miles, and make much of my valve train unusable after (which i just got new) because the wear would be so great. We landed on the best solution being that we should split the case, get it hot tanked and line bored, new bearings and journals, re-grind cam/lifters for a carbonated engine, and any other misc. things that must be done when splitting the case. Ethan has good shops to go to that he has personally used and recommends in San Diego, so since he was going there this morning, he took my case, crank, and cam with him to drop off for machine work.
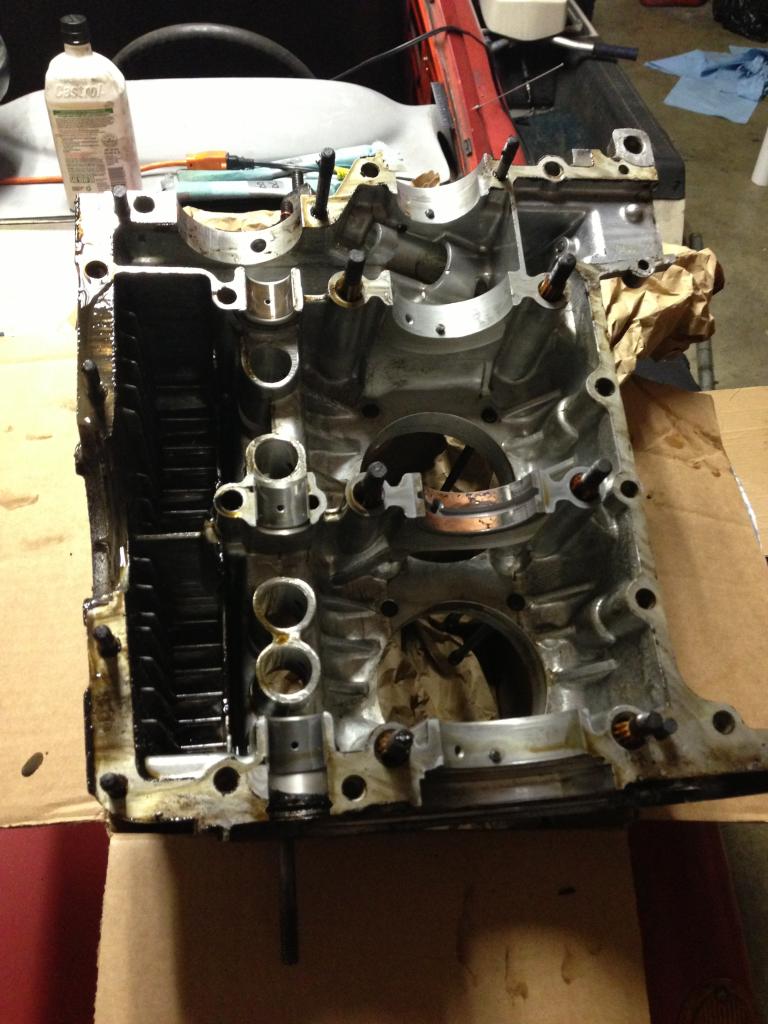
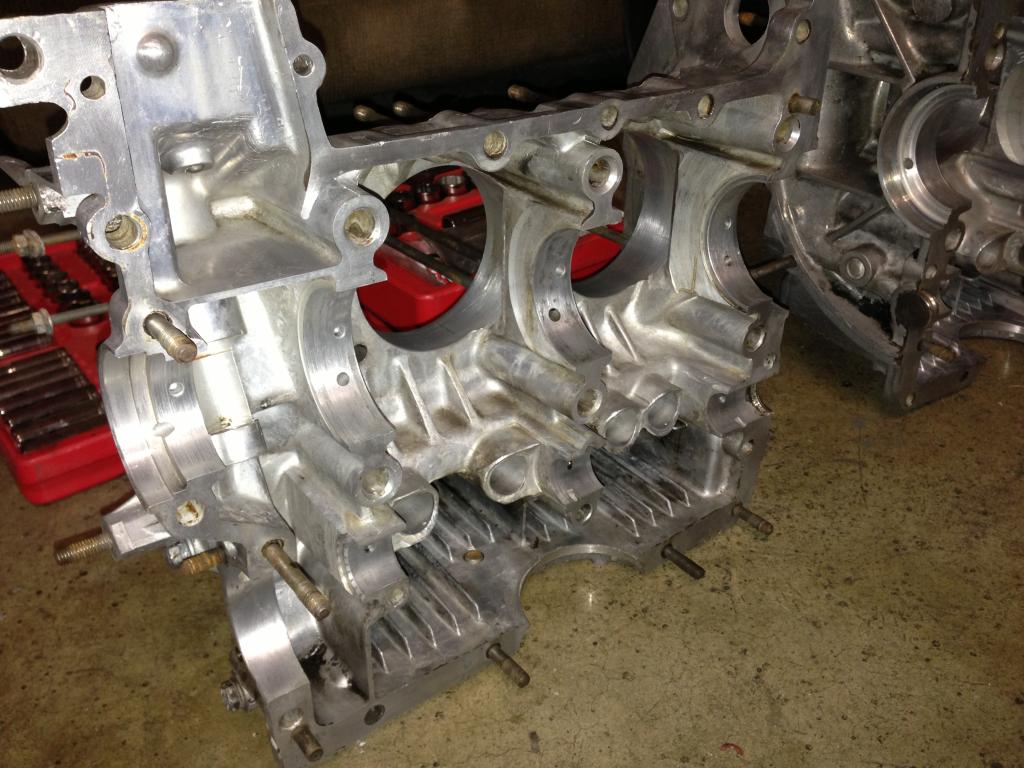
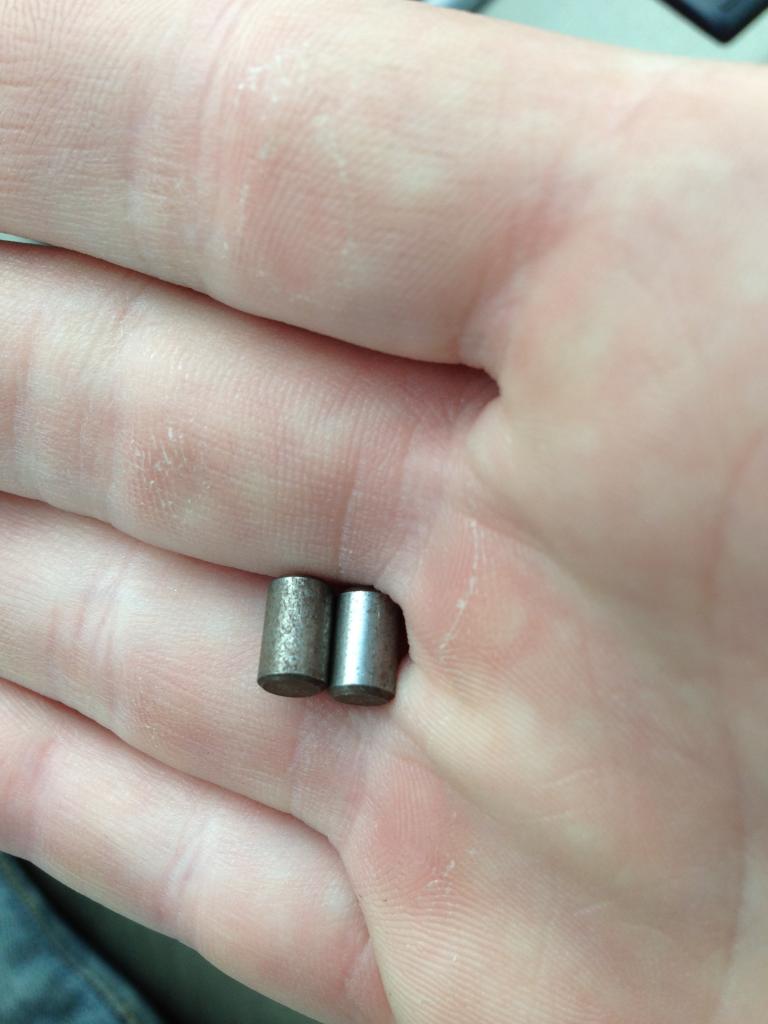
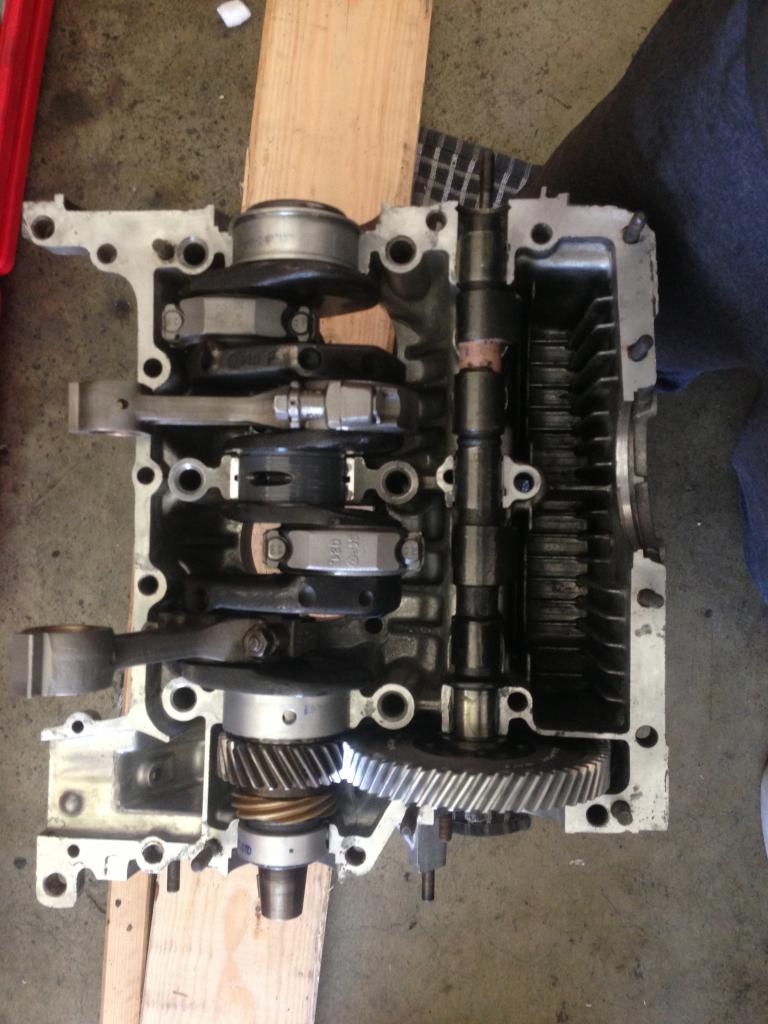
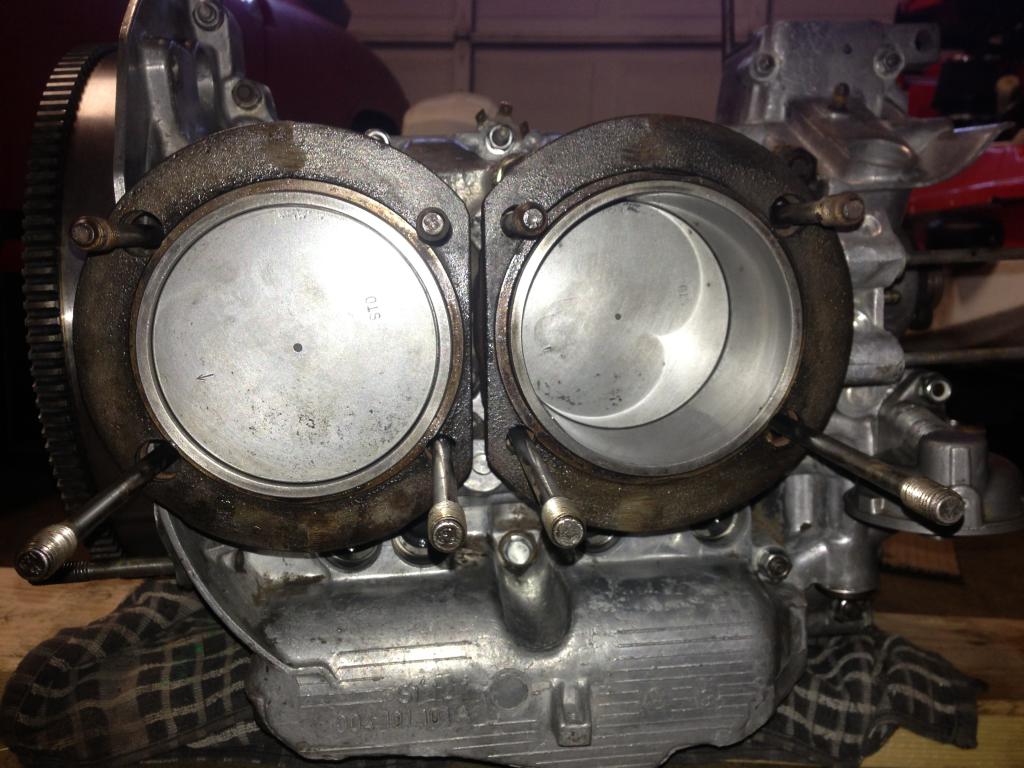
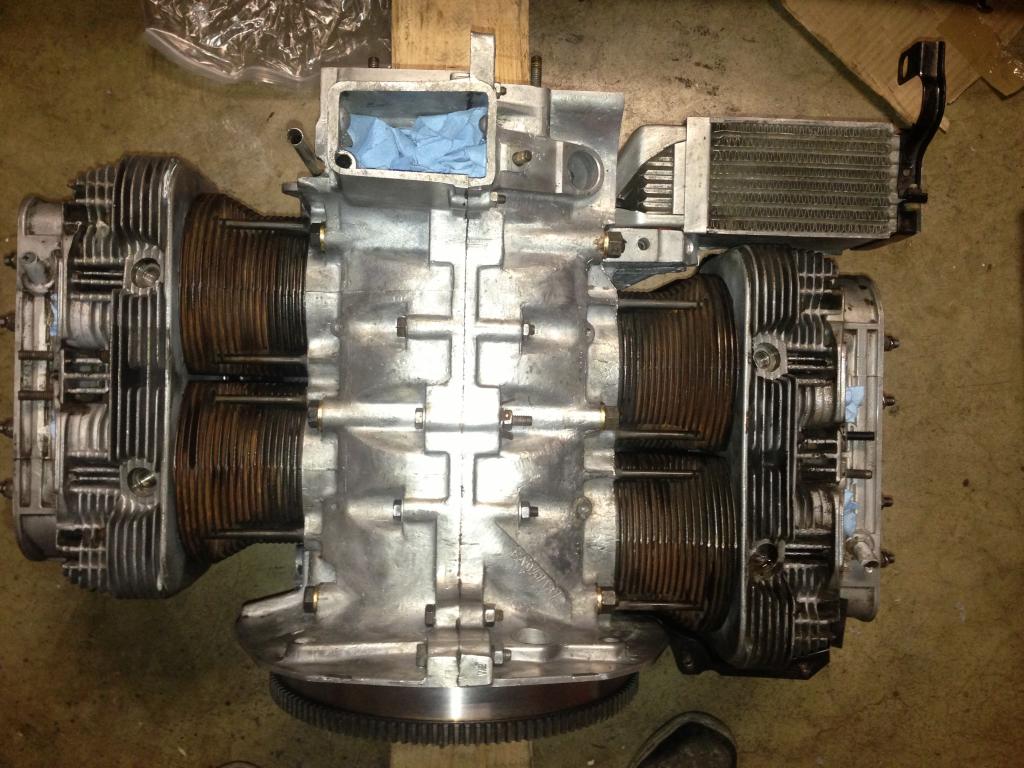
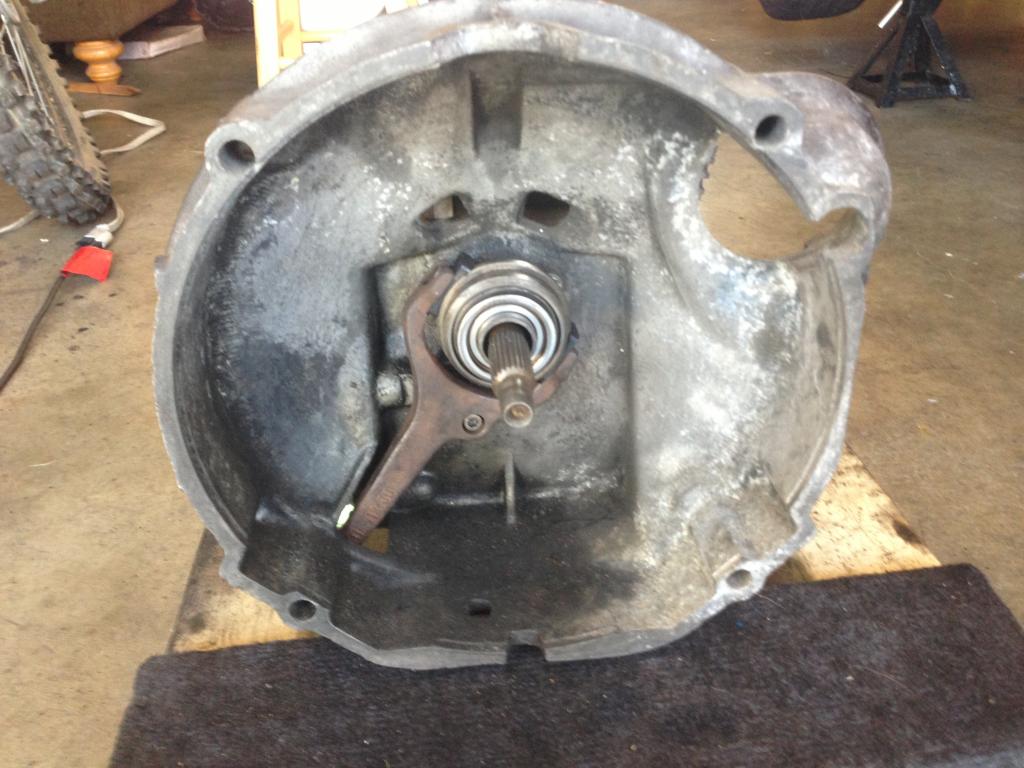
Once the case was split, it was discovered that condition was much worse. Some of the bearing journals were being eaten up and our OG estimate of the engine lasting 10k went down the drain. So I am very happy we decided to go this route. Will hopefully have it all back in two weeks for reassembly. I obviously documented the process and will post pics below; I have some questions regarding specifics noted in some of the pictures so please see my individual comments on the photos to help me out.
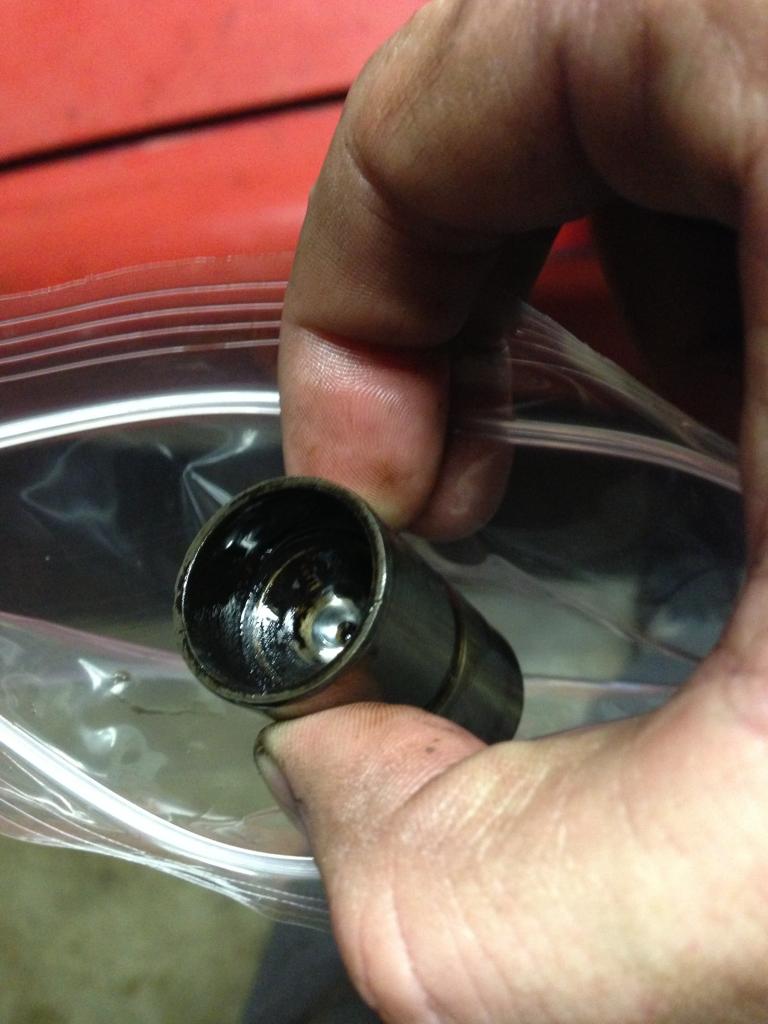
This one cam follower only had a much thicker layer of carbon build up inside... mean anything to take note of?
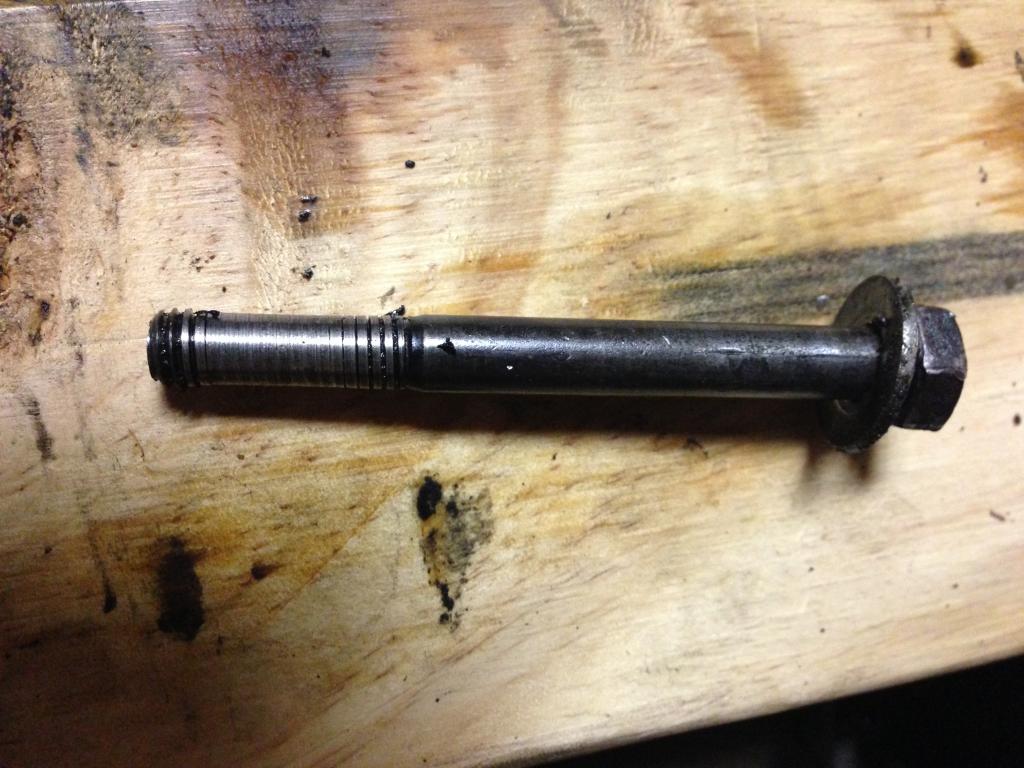
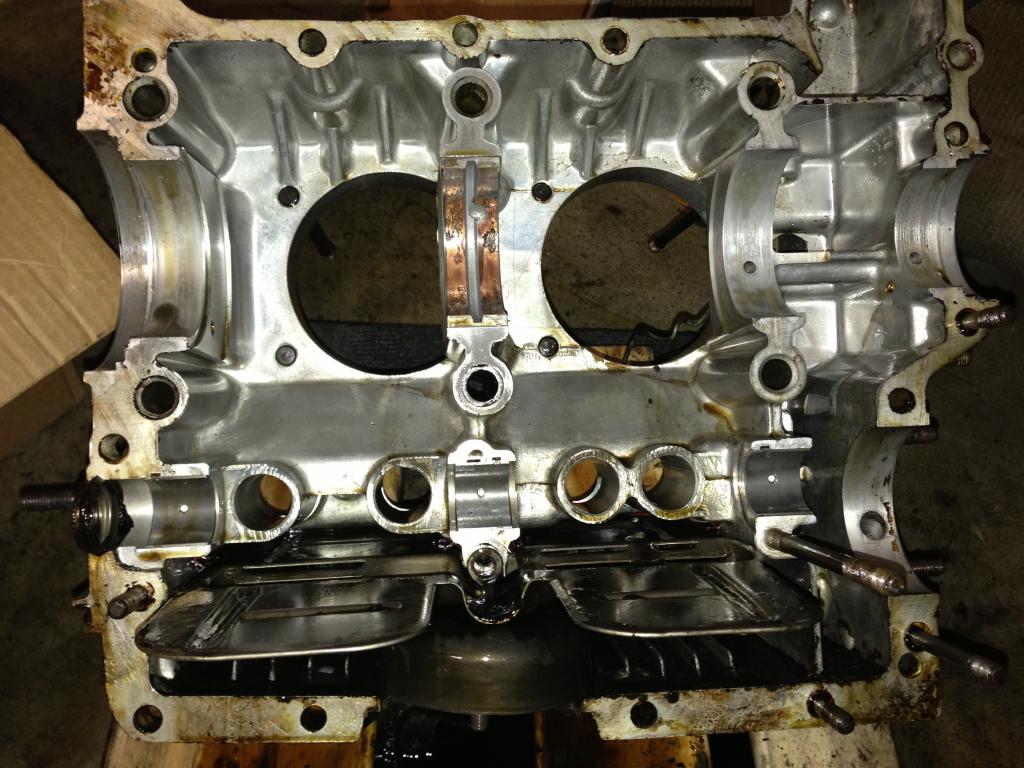
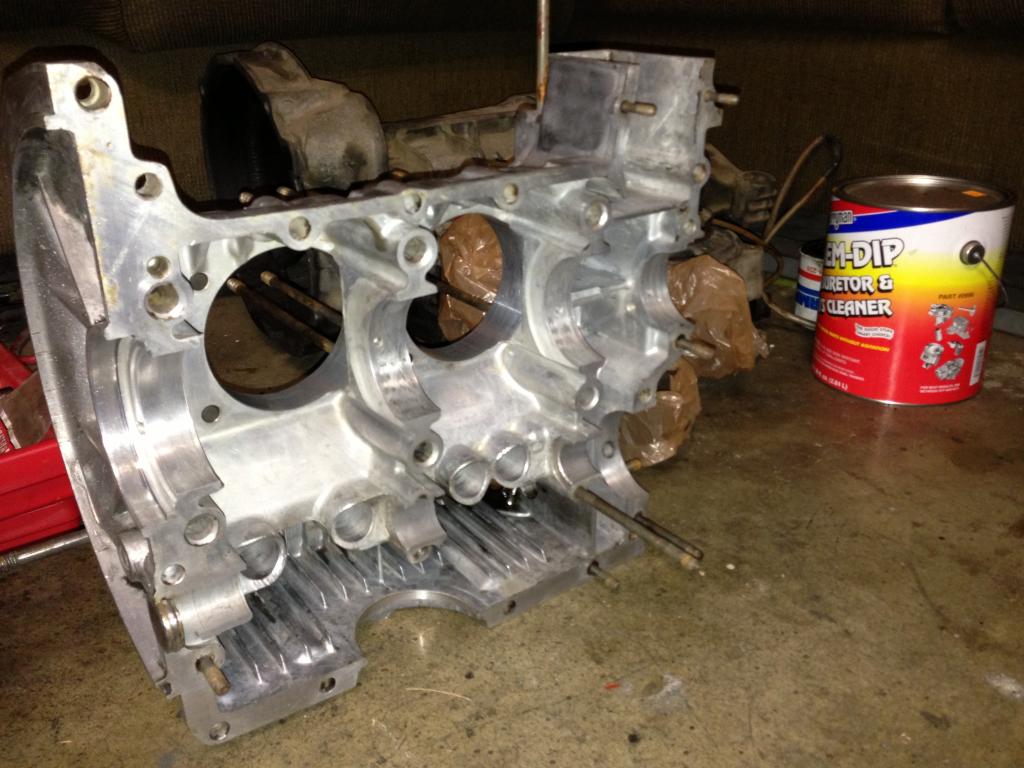
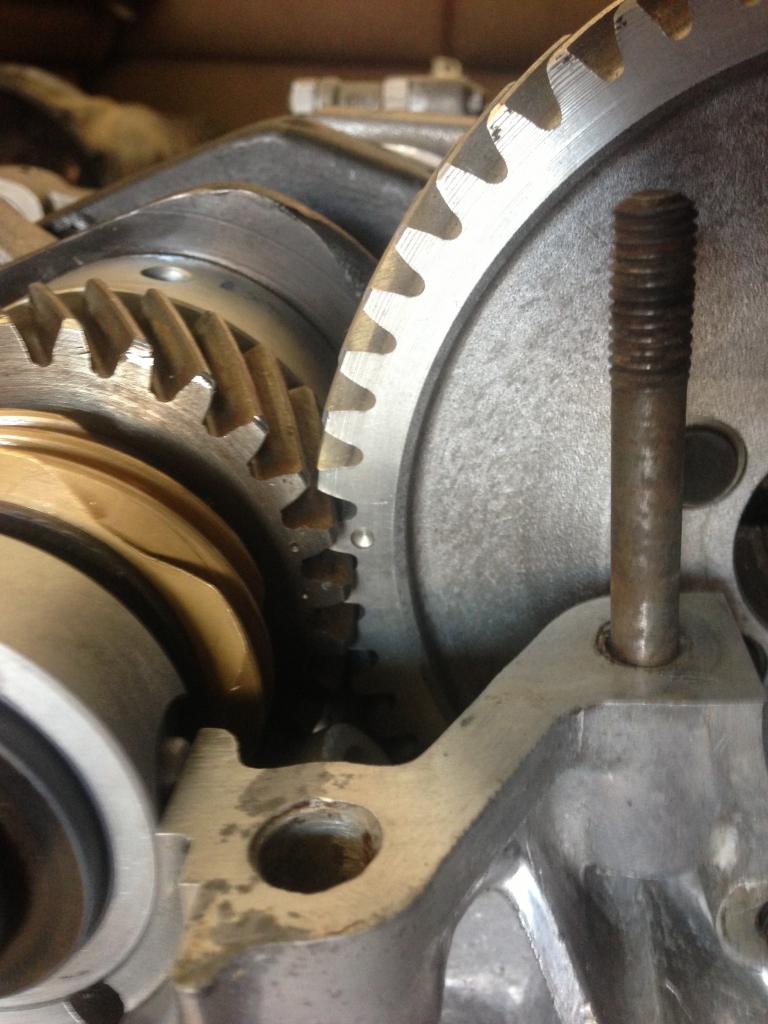
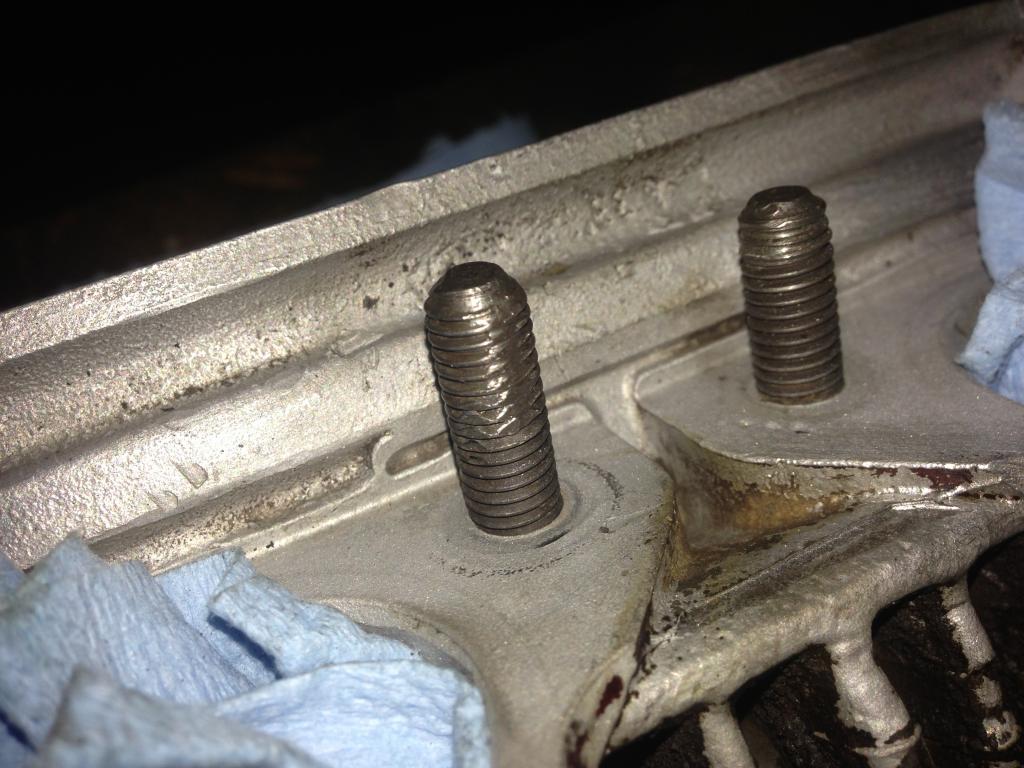
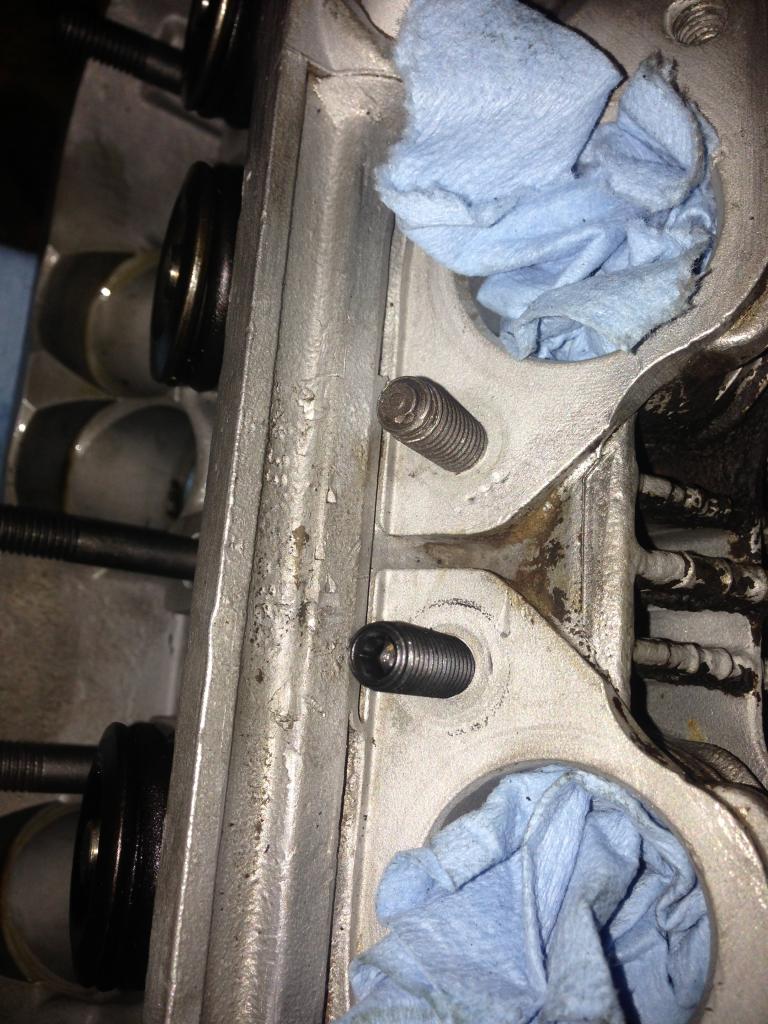
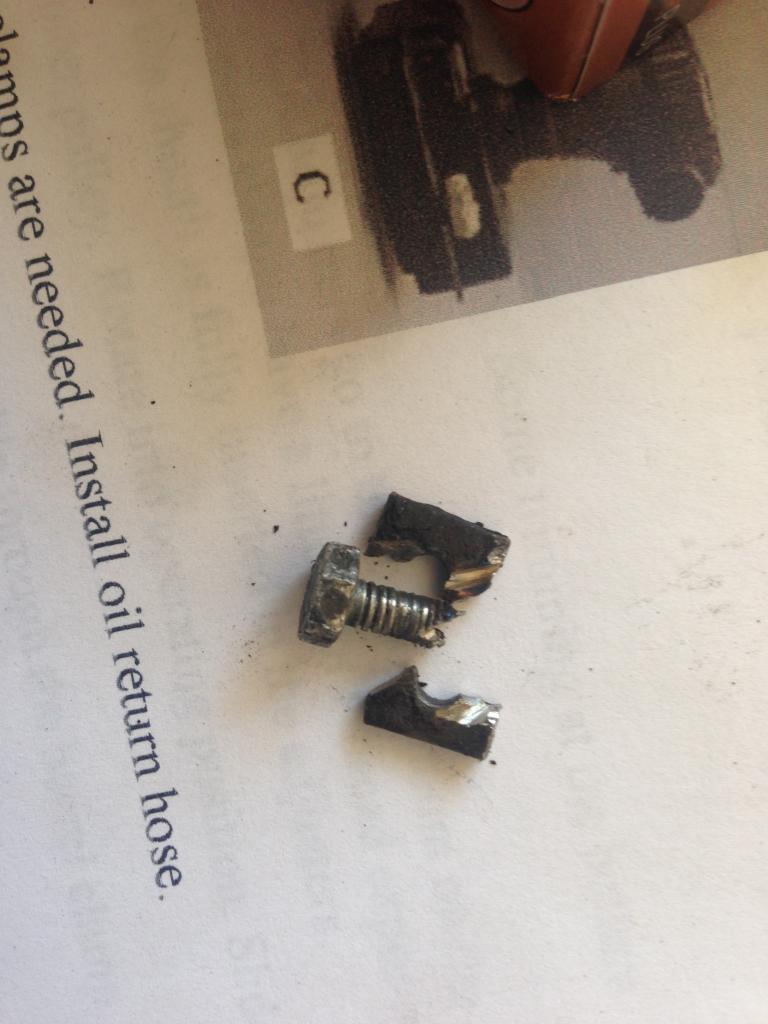
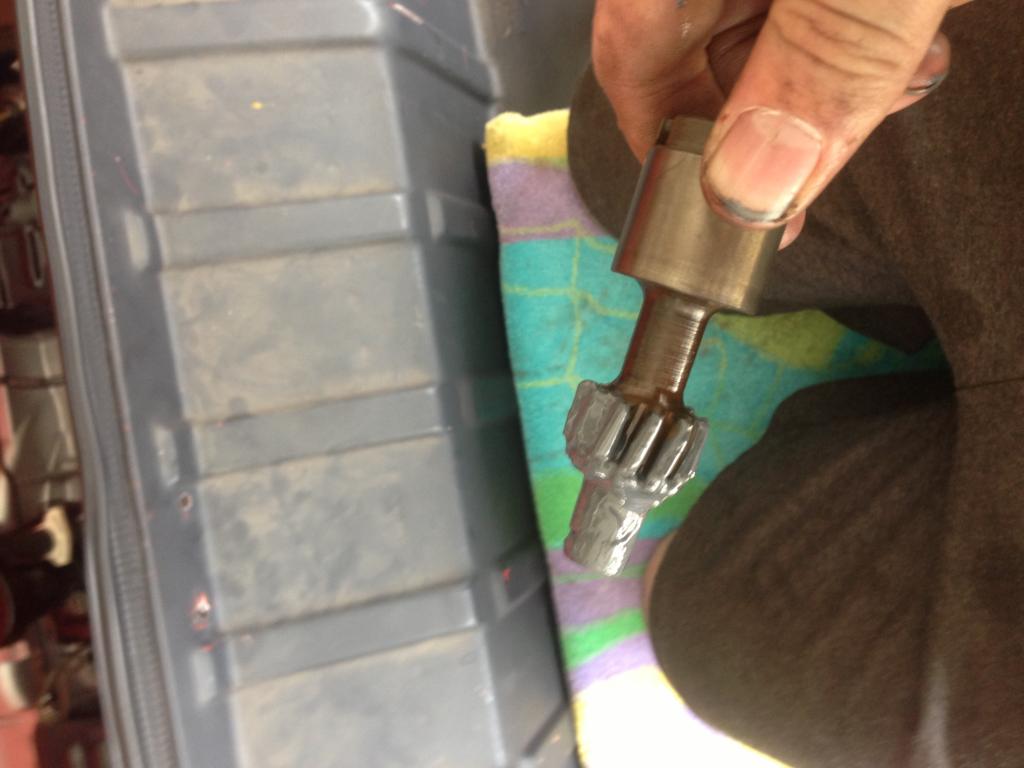
This bolt came out of the bottom butt crack just below and in between the pushrod tube entrance (only on one side) and i figured this isnt good. Ethan will be notifying the machinist to take a look and see if it needs drilled and time-sert, will obviously be getting the bolt replaced at the least. (anyone got a spare?)
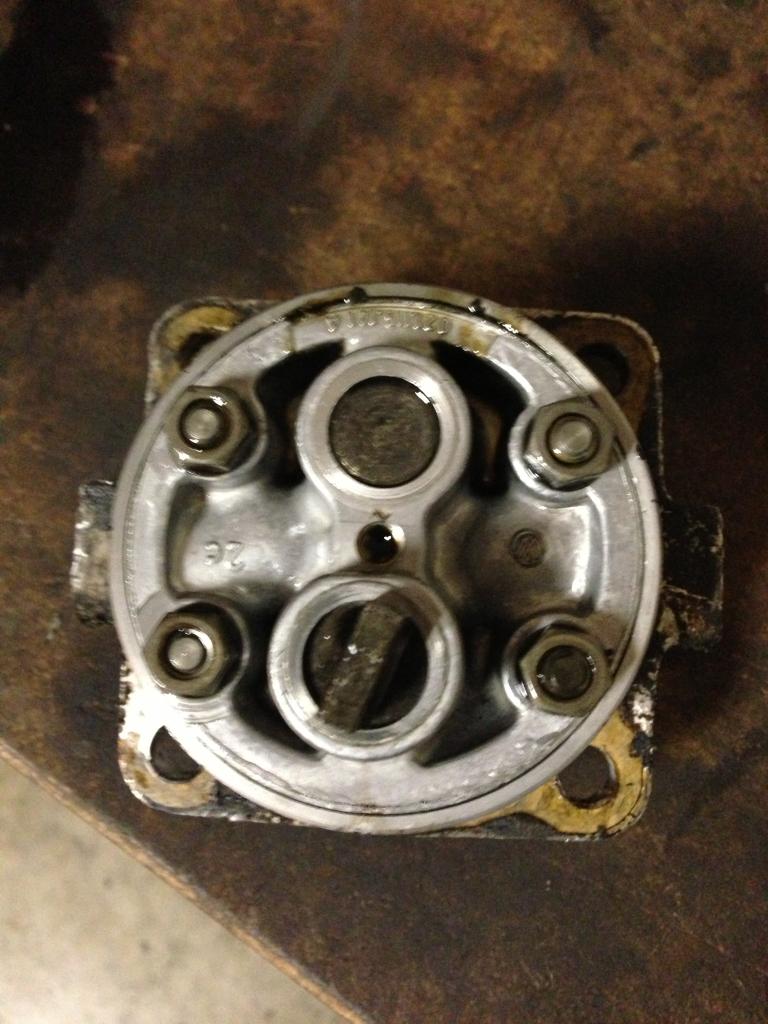
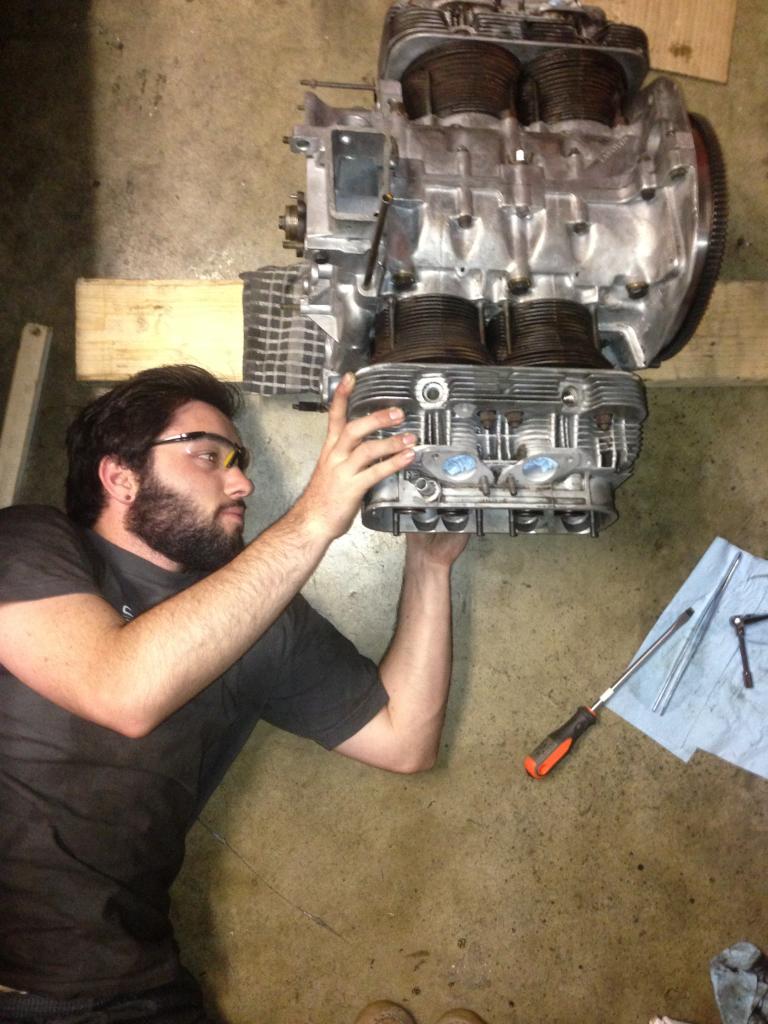
Oil pump was a bitch and a half to get off, case nuts had be loosened, which i knew, but even with them all loose, i really had to put my back in to it to get that sucker off there.
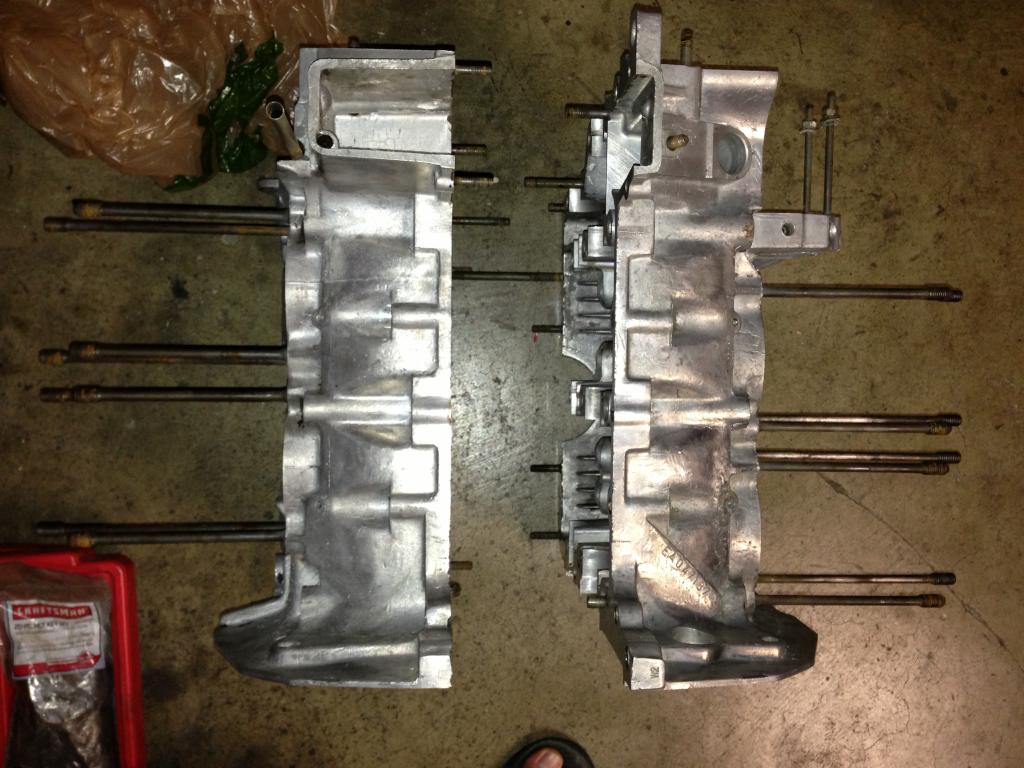
And split!
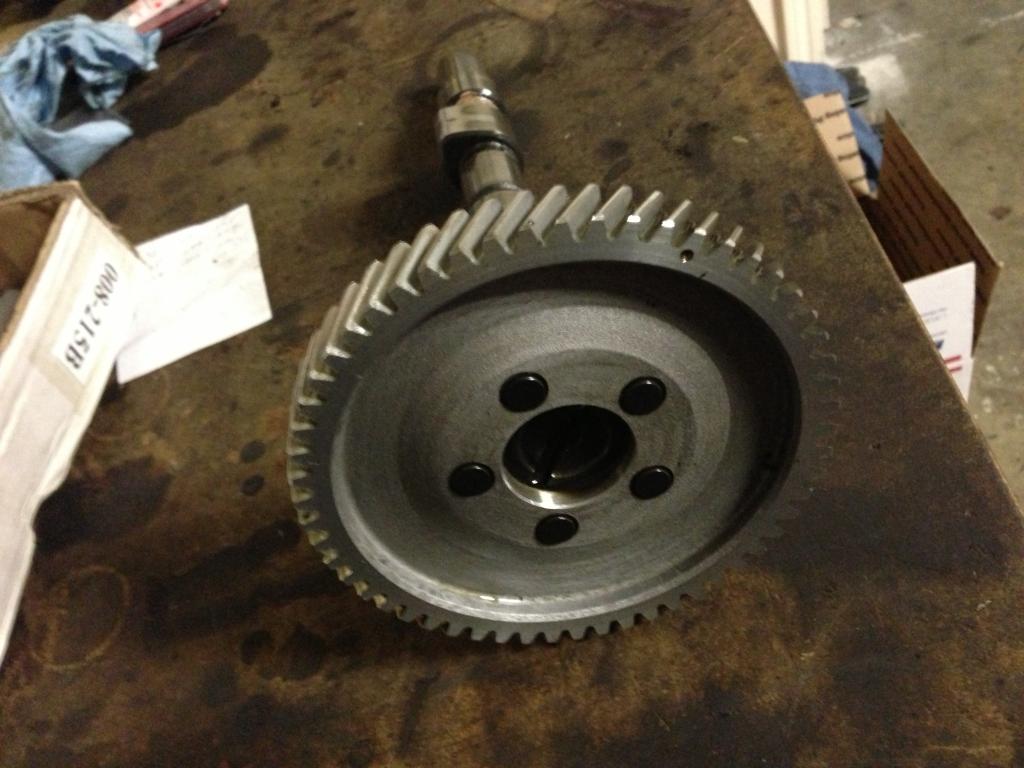
Cam looks to be in decent condition from what my newbie eyes could tell
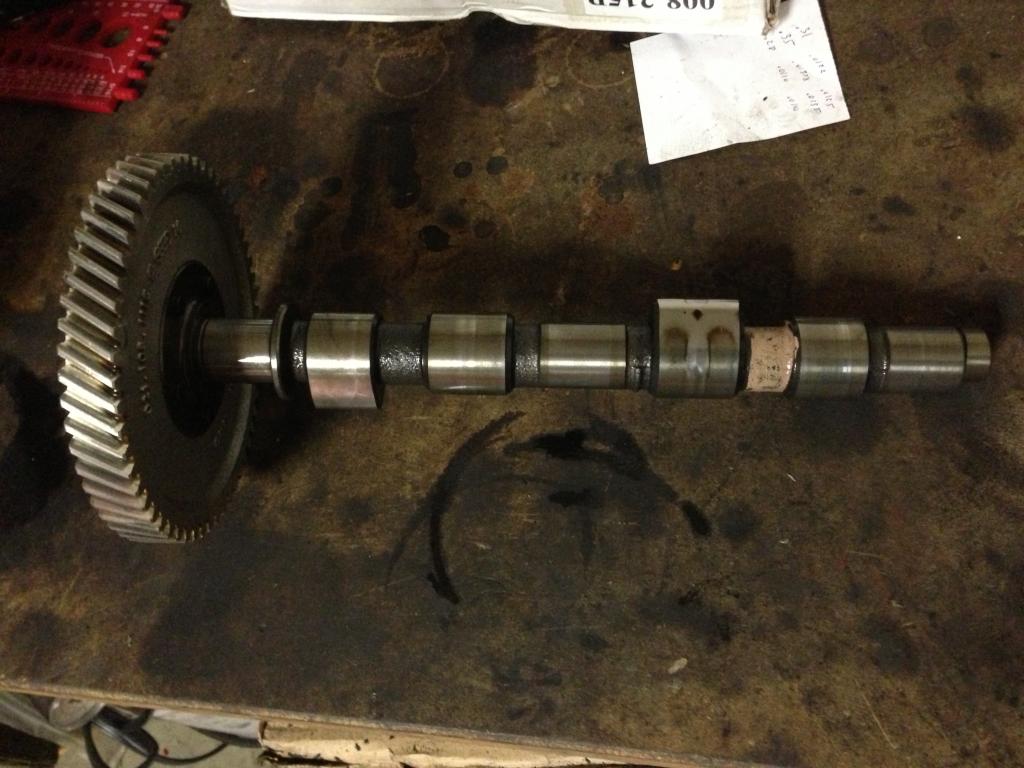
Picture didnt turn out that great, sorry
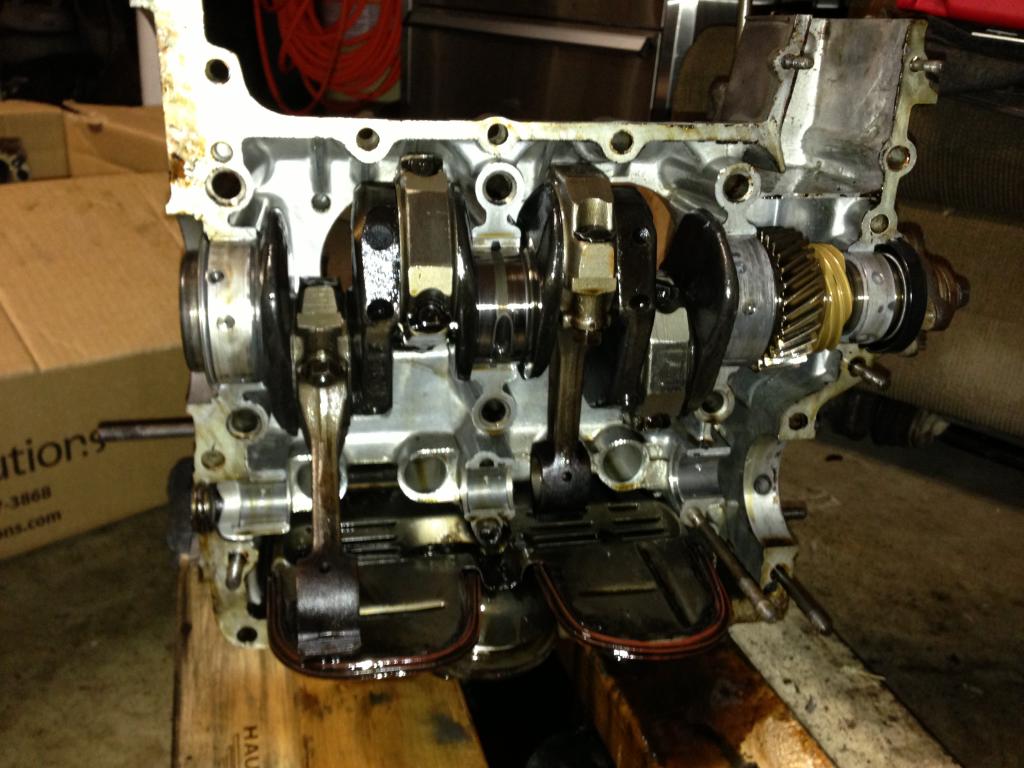
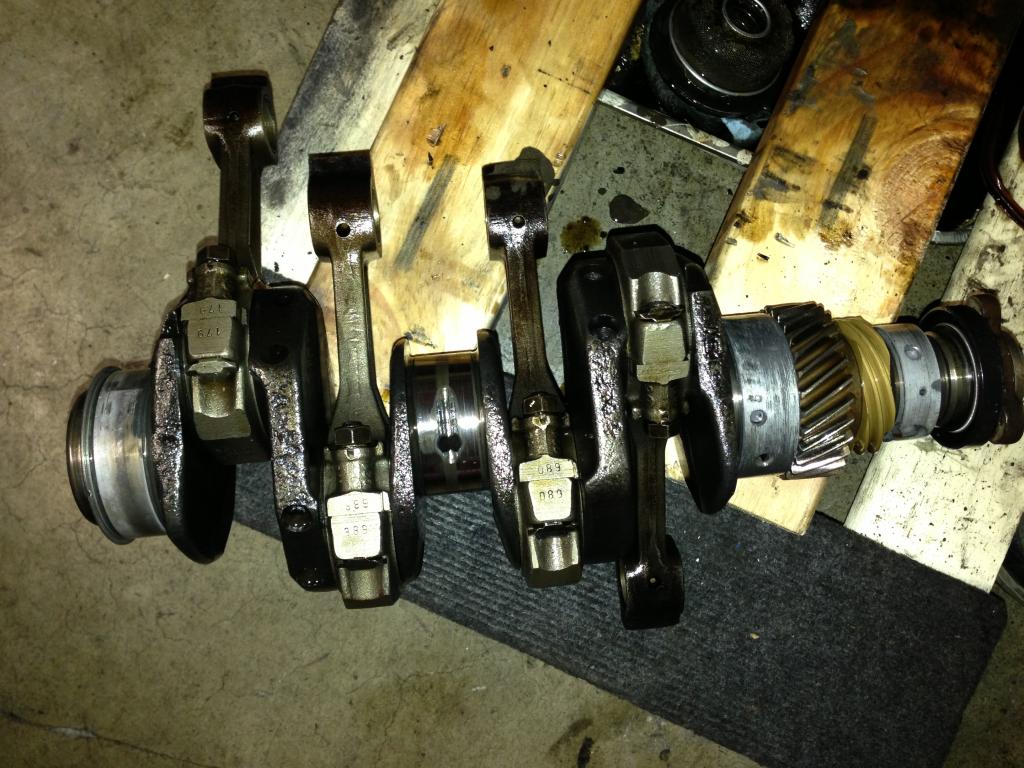
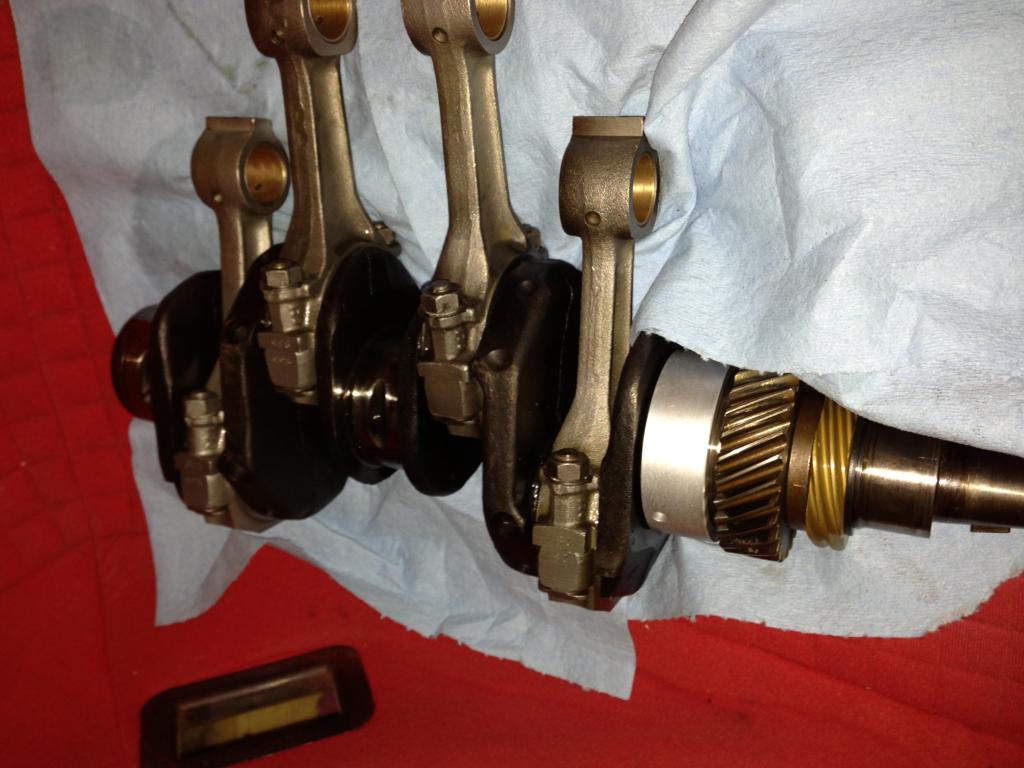
Crank
hmmmmmm

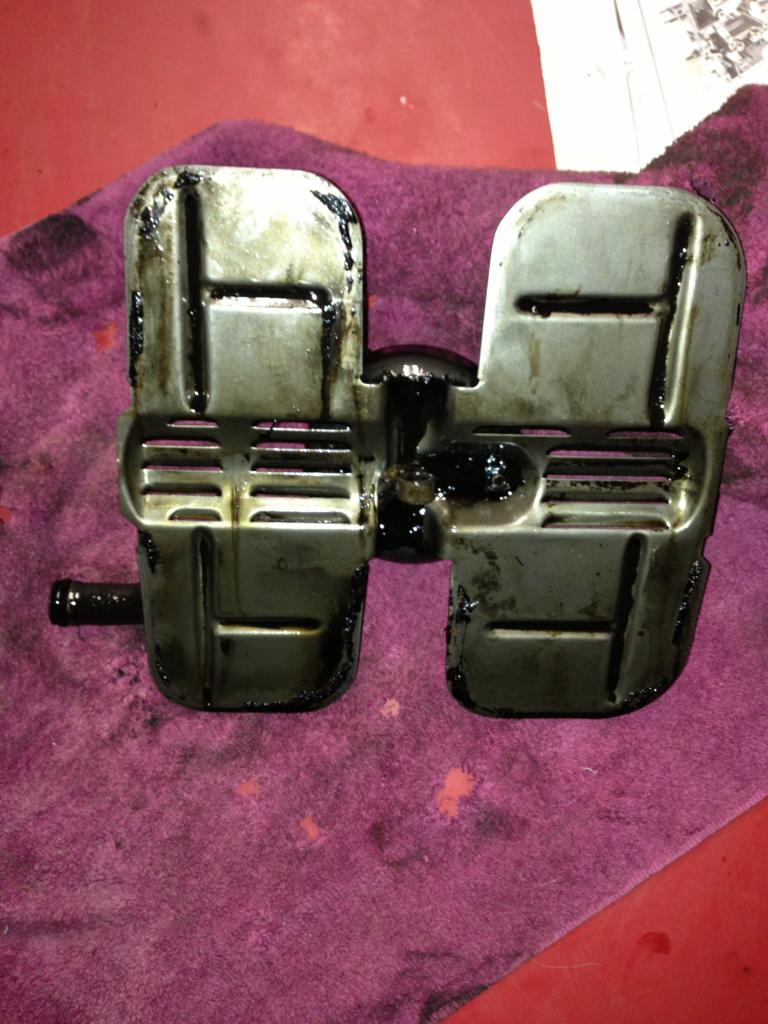
oil baffle, and inside the case below the oil baffle was a large content of thick grey sludge all around the bottom
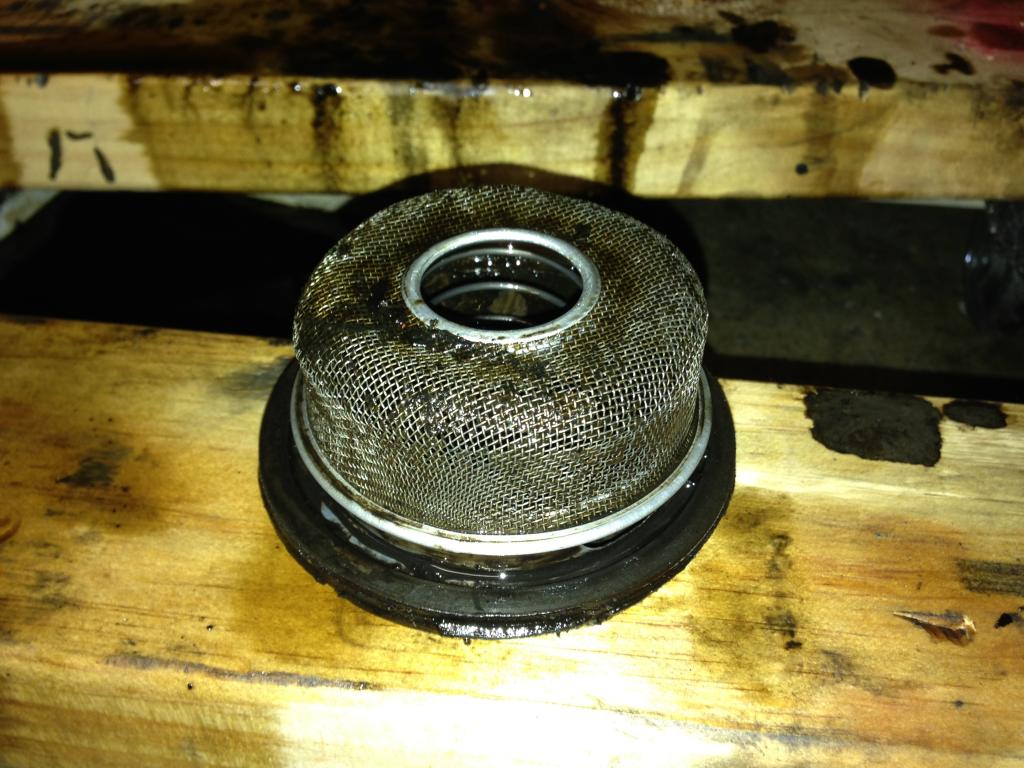
So, when i rebuild i will be installing my new tuna can that i got from the GB, can someone tell me whether it uses a mesh screen like the OG one??
All in all, once we decided to split the case it took around 4 hours, with the last 2 and a half hours being done solo (which is why is took so long.) But i enjoyed it very much, and this depth of penetration into my motor will be a good learning experience!
Thanks in advance for your input on the questions listed above!
While Ethan and I were trying to figure out the excessive amount of end play, we made a grueling find, the main bearing on the flywheel side (and possibly others) were shot and completely out of spec. We then performed a cost/benefit analysis on the situation to way all of our options. Figuring that if we ran it as-is the motor would probably blow-up after 10,000 miles, and make much of my valve train unusable after (which i just got new) because the wear would be so great. We landed on the best solution being that we should split the case, get it hot tanked and line bored, new bearings and journals, re-grind cam/lifters for a carbonated engine, and any other misc. things that must be done when splitting the case. Ethan has good shops to go to that he has personally used and recommends in San Diego, so since he was going there this morning, he took my case, crank, and cam with him to drop off for machine work.
Once the case was split, it was discovered that condition was much worse. Some of the bearing journals were being eaten up and our OG estimate of the engine lasting 10k went down the drain. So I am very happy we decided to go this route. Will hopefully have it all back in two weeks for reassembly. I obviously documented the process and will post pics below; I have some questions regarding specifics noted in some of the pictures so please see my individual comments on the photos to help me out.
This one cam follower only had a much thicker layer of carbon build up inside... mean anything to take note of?

This bolt came out of the bottom butt crack just below and in between the pushrod tube entrance (only on one side) and i figured this isnt good. Ethan will be notifying the machinist to take a look and see if it needs drilled and time-sert, will obviously be getting the bolt replaced at the least. (anyone got a spare?)

Oil pump was a bitch and a half to get off, case nuts had be loosened, which i knew, but even with them all loose, i really had to put my back in to it to get that sucker off there.

And split!

Cam looks to be in decent condition from what my newbie eyes could tell


Picture didnt turn out that great, sorry

Crank


hmmmmmm

oil baffle, and inside the case below the oil baffle was a large content of thick grey sludge all around the bottom

So, when i rebuild i will be installing my new tuna can that i got from the GB, can someone tell me whether it uses a mesh screen like the OG one??

All in all, once we decided to split the case it took around 4 hours, with the last 2 and a half hours being done solo (which is why is took so long.) But i enjoyed it very much, and this depth of penetration into my motor will be a good learning experience!
Thanks in advance for your input on the questions listed above!
Seems like this is the wrong bolt, like too short. I think you are saying this is the one that holds up the oil pickup tube? The 'loop' on the pickup tube, this bolt goes through it. When they say "type 4 syndrome" it is over-tightening the oil pickup/strainer bolt at the bottom, which cracks the boss that bolt (that comes from the side) threads into. It looks like either the pickup tube loop is resting on the threads instead of the shoulder or it could have happened if you took out the bolt from the side before take off the sump plate/ taking the 'pull' off the pickup. It seems it should be threaded in further to the boss in the case, though -no way aluminum boss would strip out a steel bolt like that. Make sure those threads are good in the case and that you don't have 'the syndrome'.
Ethan arrived at my place this afternoon bearing gifts! He brought home my hot tanked/line boarded case, journal bearings, crank with new tid bits on it, and febi lifters. I then went to town on the case with a scotch brite pad before power washing it with water and drying it off with compressed air. Wanted to get all the little machining scraps out of any holes and corners. The engine and components are ready to be assembled, but i first have to get my hands on two more journal bearing case dowel pins, I only have 3/5 required, the other two must have abandoned ship during take-down. Gonna give the VW shop down the street a call, they should have some.
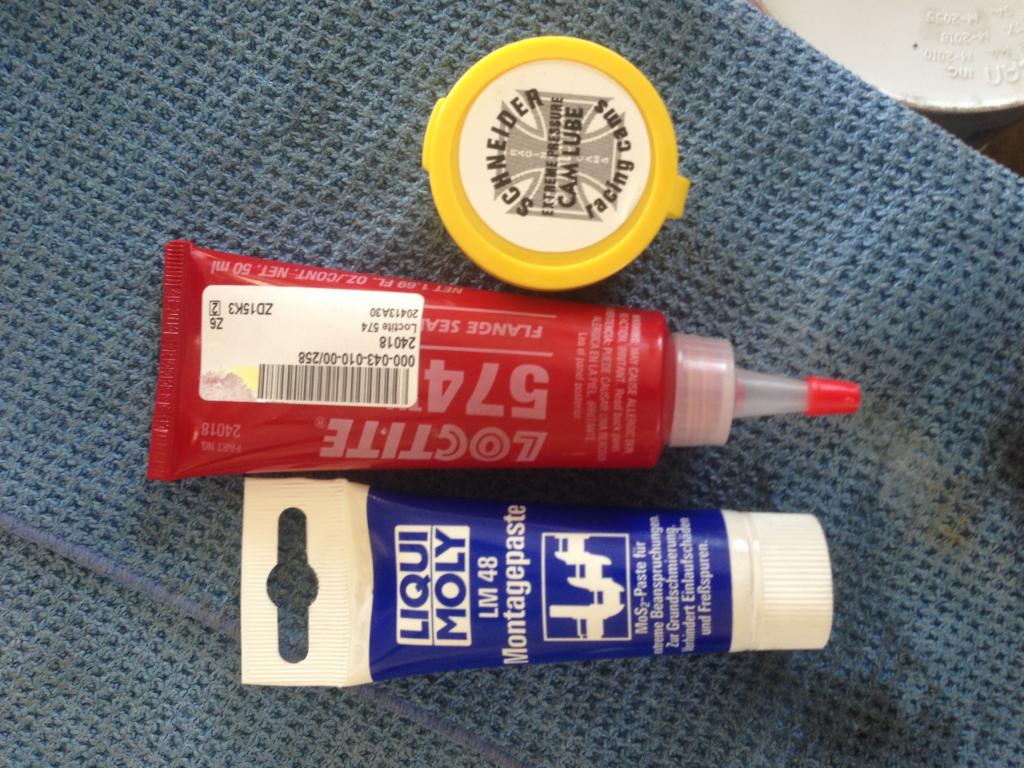
Once i get those two little buggers after class i will start the assembly, i have engine lube, cam lube, and case sealant, hoping it goes smoothly!
Once i get those two little buggers after class i will start the assembly, i have engine lube, cam lube, and case sealant, hoping it goes smoothly!


You are doing it right. You will be much happier knowing the whole engine was gone through.
QUOTE(Cairo94507 @ Jun 3 2013, 05:19 AM)
You are doing it right. You will be much happier knowing the whole engine was gone through.
I completely agree! I would have been F**KED if i didnt too, the guy who did the machining on the case said it wouldn't have lasted long enough to tune the carbs before blowing.... yikes!
Well I pretty much worked on the car ALL day today, got home from class at 11am, had a meeting from 3-5, and then right back to it, now off to bed!
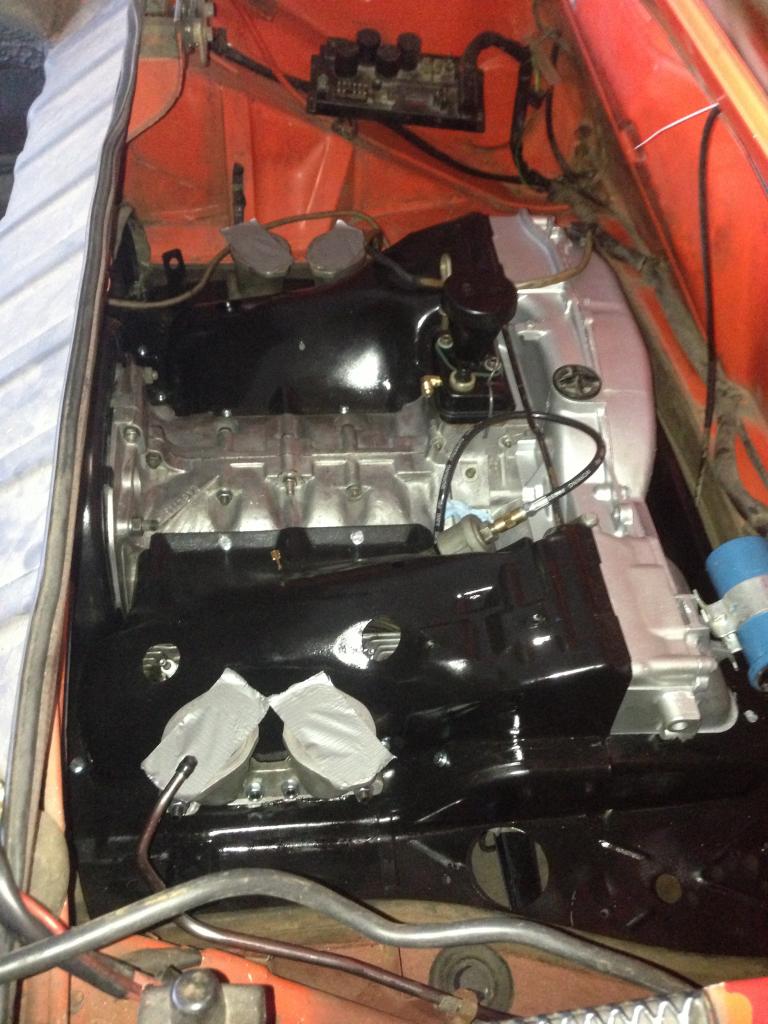
To sum it up, the case halves are together and the 1/2 piston/cylinder and head is on! Heres a picture book of the day:
Picked up these two journal dowel pins from Dave's Little VW shop on my way to school (free ) nice guy
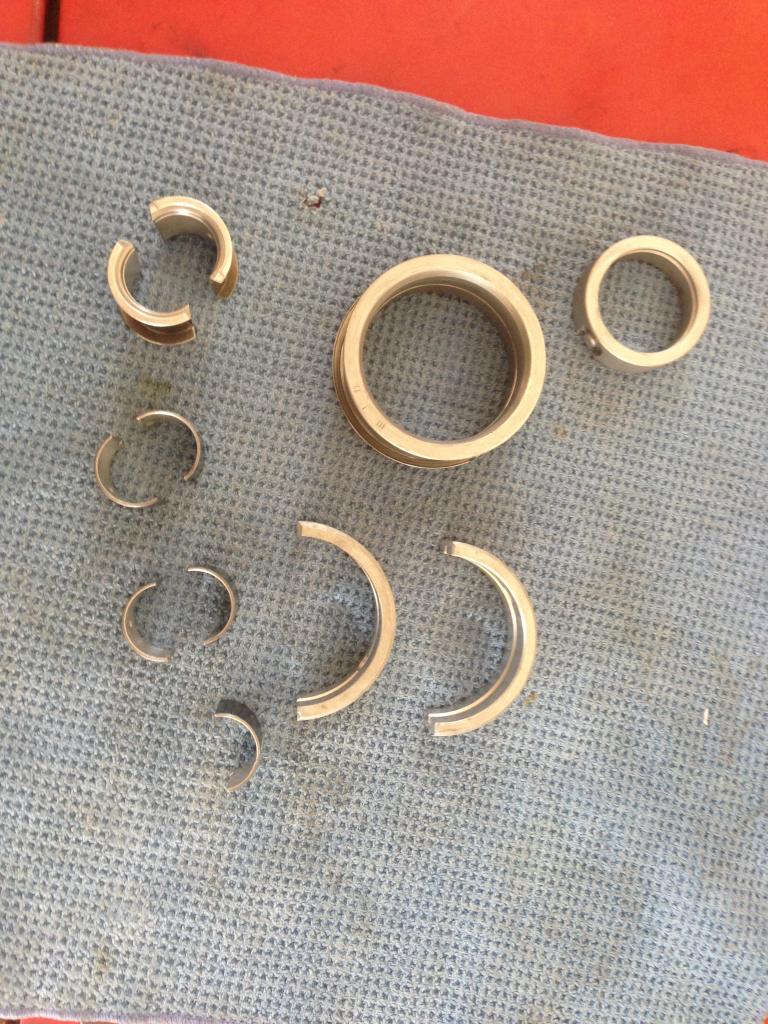
Laid out all the journal bearings to make sure all was there, for a minute i freaked out thinking i was missing half of one, then Ethan told me i had one extra, phew!
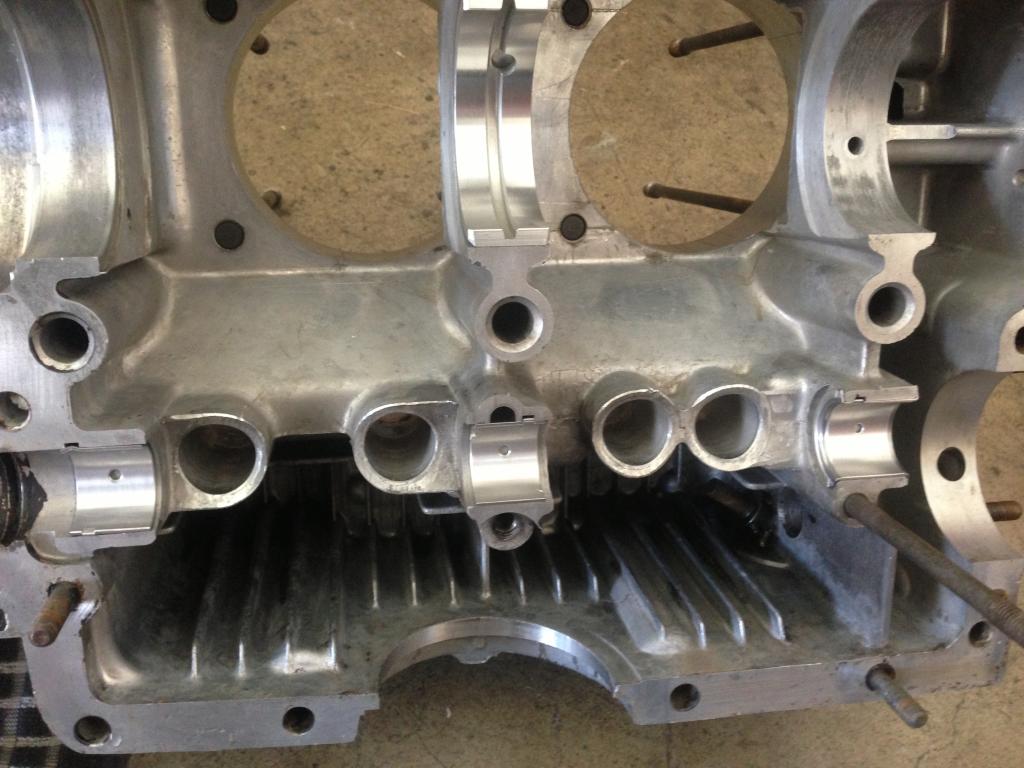
Placed the journal halves in there, fitment was spot on.
Got out my lube and case sealant
Played connect the dots
Took a few spins to ensure everything was seated properly
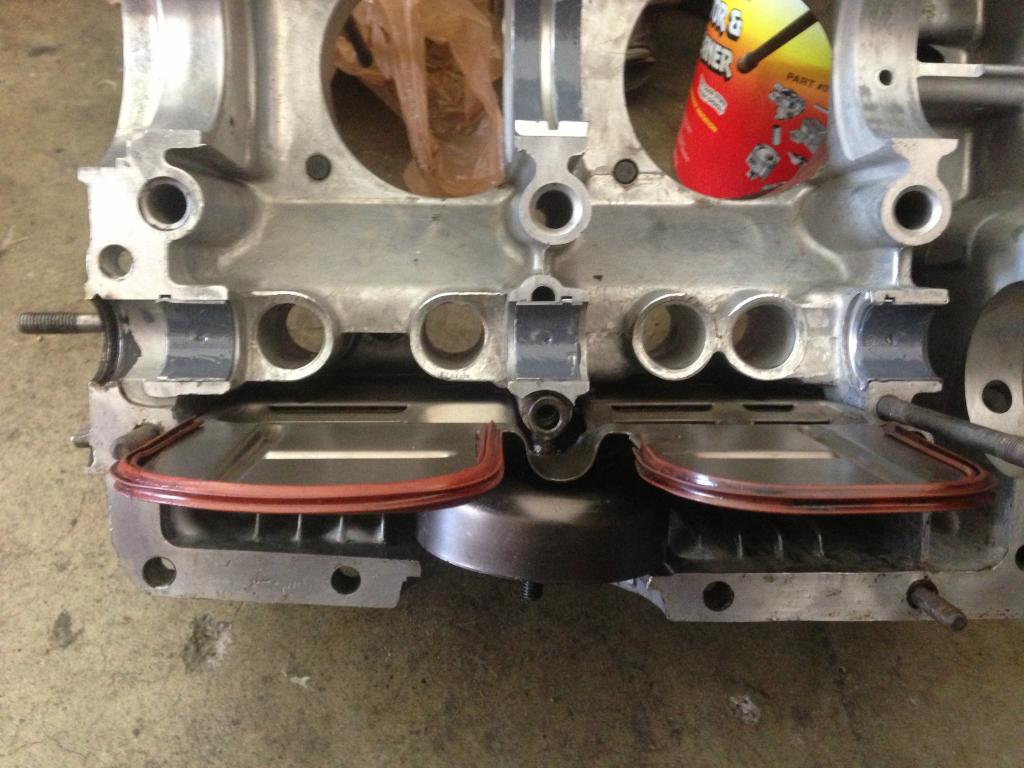
Installed the oil baffle to the other half (was kind of a PITA)
Realized i only had 5 vibration dampeners....? luckily i dont take the garage trash out very often and was able to dumpster dive to find one old good one
Installed the M10 bolts and washers, then the vibration dampeners to the inside. For some reason the Haynes manual does not tell you to do that before putting the halves together...
Diligently put the two halves of the case together and torqued down all 24 nuts/bolt combos. Then inserted the two pressure relief valves with new crush washers.
(Insert picture here)

Installed the oil pump and oil filter neck with new gaskets. Filled the oil pump with oil before installing to help with start up priming, per Ethans suggestion. Oil pump was a really tight fit and had to be with my rubber mallet (softly) to slide in.
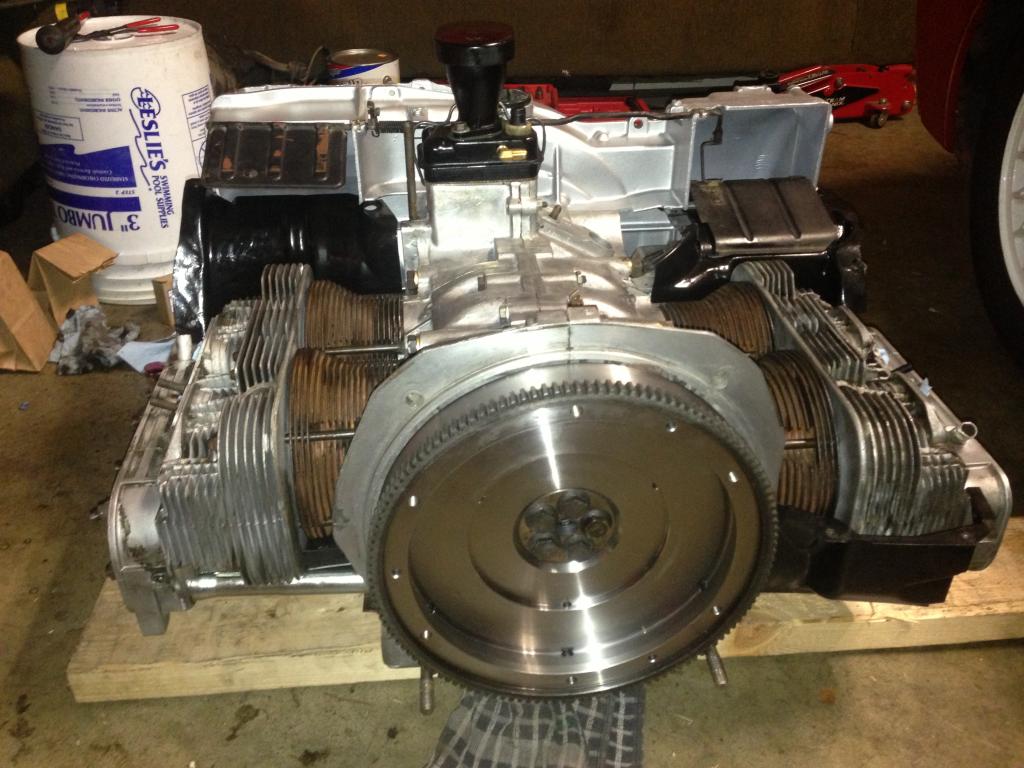
Installed the flywheel with three shims (approx thickness: .014, .012, .012) and measured endplay, came out around .0035, perfect!
Installed the 1 and 2 p/c, then the head. No problems there, seeing it was my second time in the last few weeks
And now 
I'll be back with more tomorrow, should have the 3/4 side on and will start working on valve train
Oh ya, also, so that oil baffle case bolt that was torn to shreds! The case threads looked perfectly fine and that is the correct bolt size/length so i got a new one, and when i installed it i had no problems, threaded in normally with no extra resistance or anything. So problem still semi unsolved i guess, but wont be worrying too much about it... should be just fine. thanks for your help though Nathan.
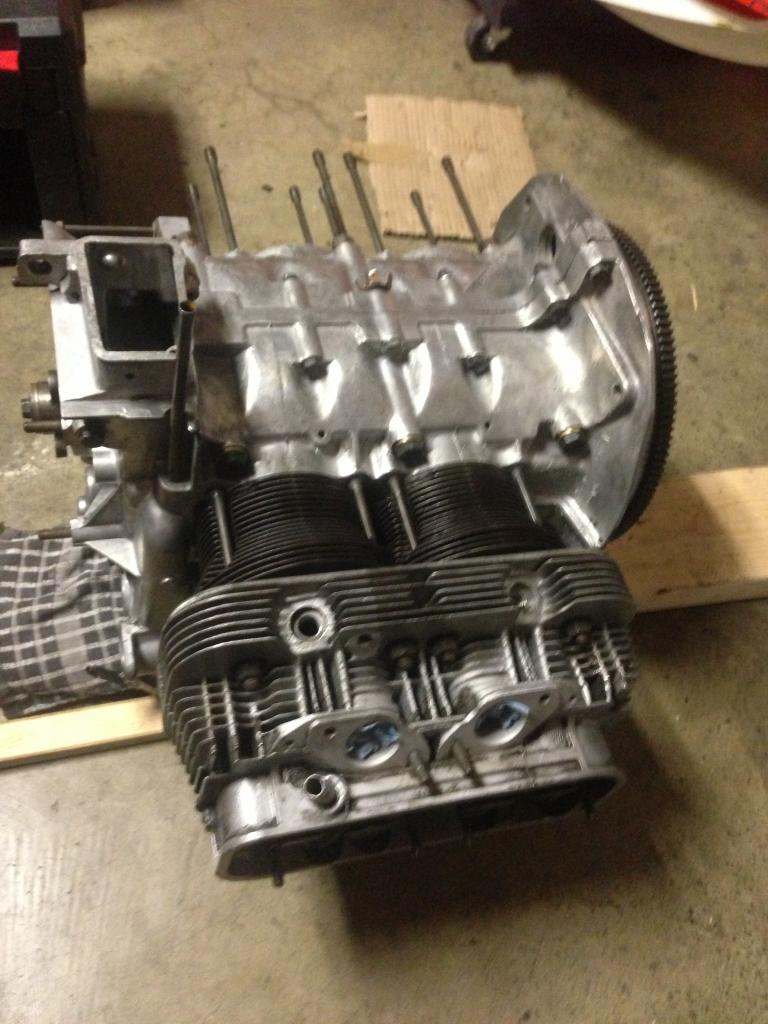
To sum it up, the case halves are together and the 1/2 piston/cylinder and head is on!
Heres a picture book of the day:Picked up these two journal dowel pins from Dave's Little VW shop on my way to school (free
) nice guy
Laid out all the journal bearings to make sure all was there, for a minute i freaked out thinking i was missing half of one, then Ethan told me i had one extra, phew!

Placed the journal halves in there, fitment was spot on.

Got out my lube
and case sealant
Played connect the dots

Took a few spins to ensure everything was seated properly

Installed the oil baffle to the other half (was kind of a PITA)

Realized i only had 5 vibration dampeners....? luckily i dont take the garage trash out very often and was able to dumpster dive to find one old good one

Installed the M10 bolts and washers, then the vibration dampeners to the inside. For some reason the Haynes manual does not tell you to do that before putting the halves together...

Diligently put the two halves of the case together and torqued down all 24 nuts/bolt combos. Then inserted the two pressure relief valves with new crush washers.
(Insert picture here)
Installed the oil pump and oil filter neck with new gaskets. Filled the oil pump with oil before installing to help with start up priming, per Ethans suggestion. Oil pump was a really tight fit and had to be
with my rubber mallet (softly) to slide in.
Installed the flywheel with three shims (approx thickness: .014, .012, .012) and measured endplay, came out around .0035, perfect!

Installed the 1 and 2 p/c, then the head. No problems there, seeing it was my second time in the last few weeks

And now
I'll be back with more tomorrow, should have the 3/4 side on and will start working on valve train
Oh ya, also, so that oil baffle case bolt that was torn to shreds! The case threads looked perfectly fine and that is the correct bolt size/length so i got a new one, and when i installed it i had no problems, threaded in normally with no extra resistance or anything. So problem still semi unsolved i guess, but wont be worrying too much about it... should be just fine. thanks for your help though Nathan.
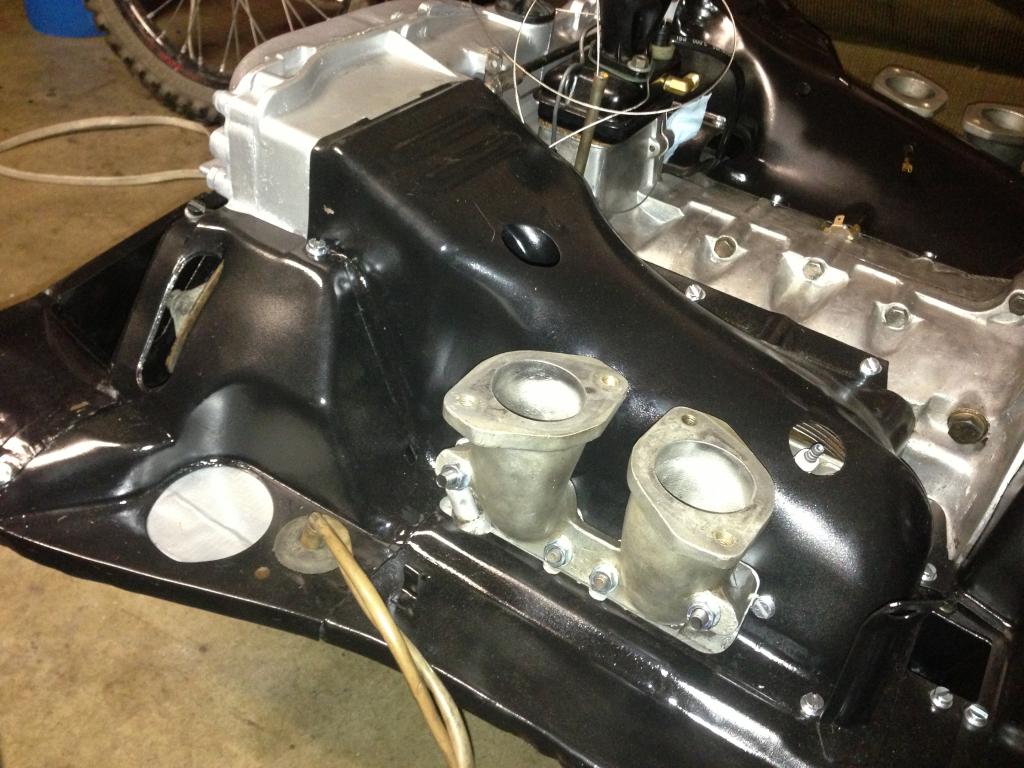
Engine is almost now back together, I just finished getting the 3/4 p/c and head on then moved onto the valve train. Got the pushrod tubes in there and mocked up the rocker assemblies with pushrods to see how the elephant feet adjusters would work using the stock pushrods. Before i had split the case when i was doing this, it was cutting it very close, but since the cam was reground, that took some material off, making the pushrods sit inside the engine a little bit further. I believe they will work now, so thats good (saves me money!)
3/4 side on
the carb manifold stud on the head didnt look so hot....
So i replaced it!
Girlfriend snapped a pic while i was screwing in the tiny M5 x 5 bolt for the deflector plate
With the solid spacer on the rocker shaft, there has to be a .003" gap when cold, so they had to be lightly sanded with a really fine grit. The gauging was done without the pushrods in there.
looking better every time, i am getting really excited.
sleep time!
3/4 side on

the carb manifold stud on the head didnt look so hot....

So i replaced it!

Girlfriend snapped a pic while i was screwing in the tiny M5 x 5 bolt for the deflector plate

With the solid spacer on the rocker shaft, there has to be a .003" gap when cold, so they had to be lightly sanded with a really fine grit. The gauging was done without the pushrods in there.

looking better every time, i am getting really excited.

sleep time!
Looking good.
You the man!
Thanks for posting all these step by step pictures.
Should help other people down the road.
John
Thanks for the compliments guys, and John that is exactly my reasoning for posting all the steps, I want to show that rebuilding these T4s is a job that can be done even by a novice, it just takes time and patience.
I logged another 5 hours just now and got a fair amount accomplished.
Started out by finishing the valve job, with gaps set to .006" on all valves, intake and exhaust alike.
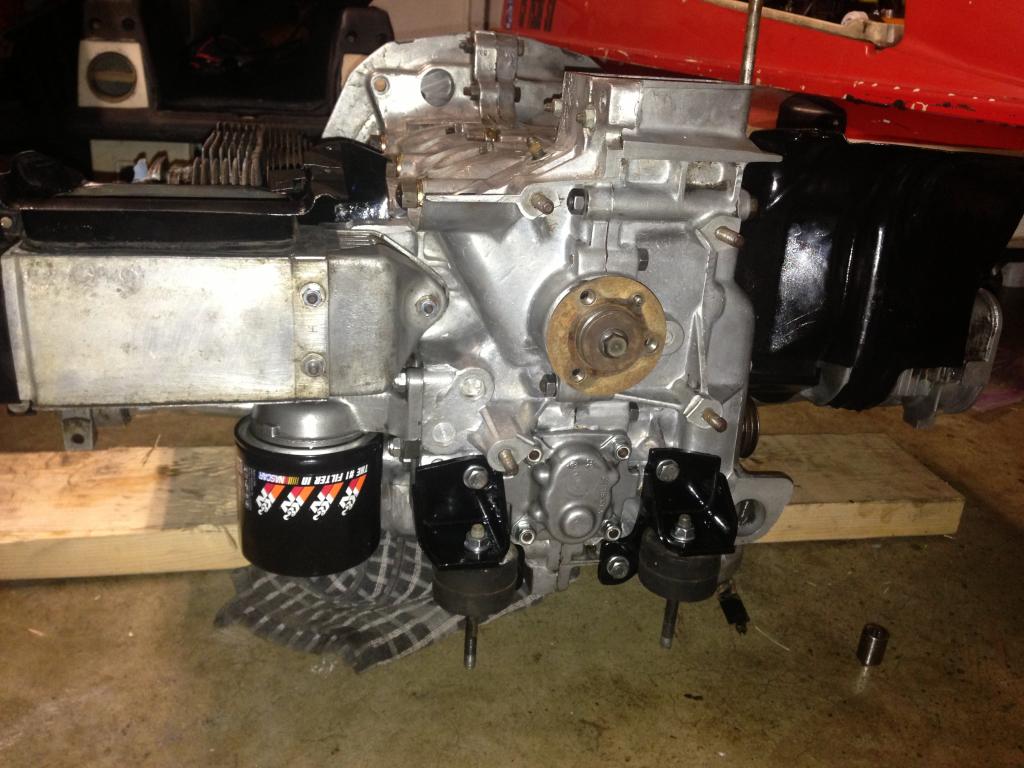
Then installed the engine support bar case brackets and the dampeners, then the thermostat and cable pulley, a new oil filter, the warm air guides for both sides on the oil cooler half of the engine.
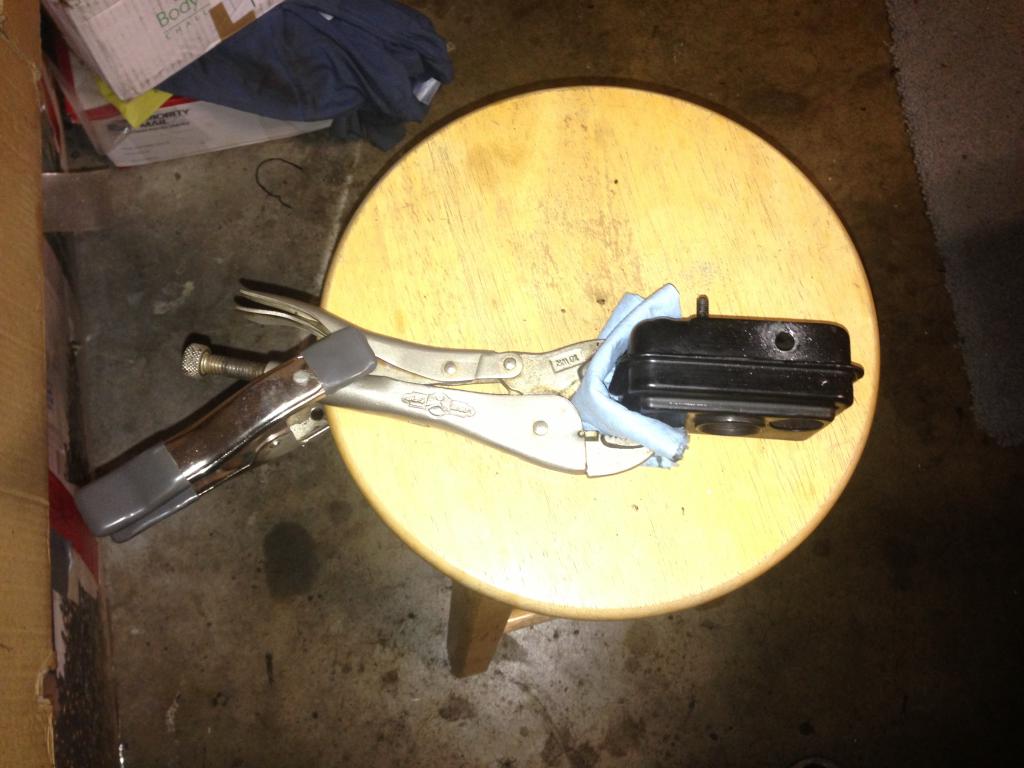
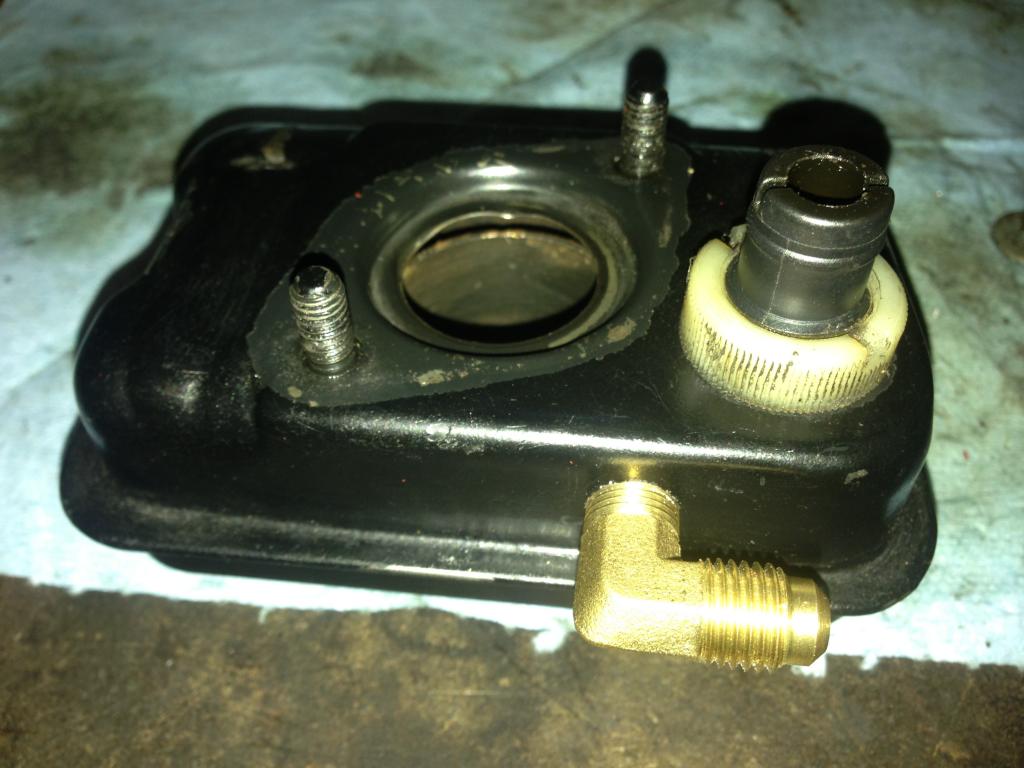
I have the Tangerine Racing breather can so following the instructions I had to drill a hole in the filler box which was then tapped to 1/8" NPT. I dont have a vise...so for the actual drilling part, i had to get a little creative.
And voila!
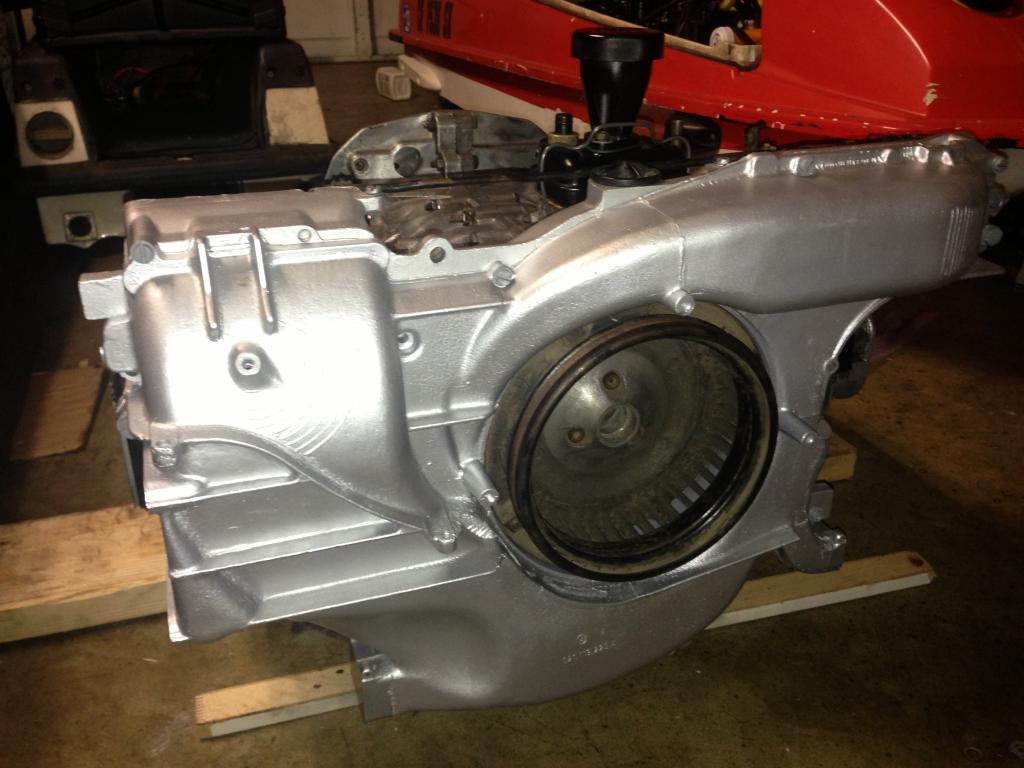
Attached the filler neck and then put the fan housing and fan impeller on
Attached the cold air flaps
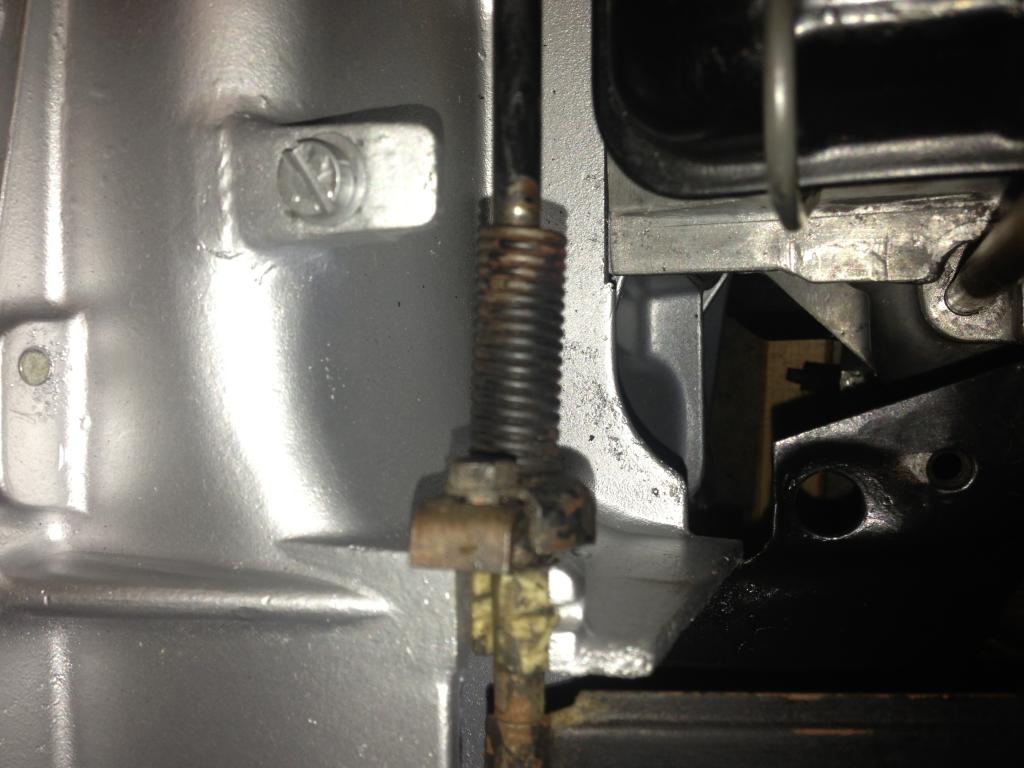
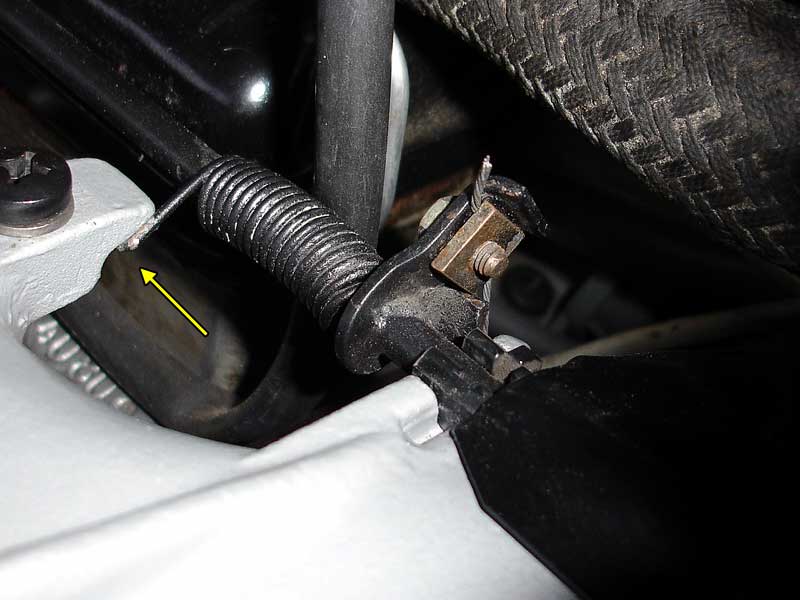
Anyone have some good pictures of how this spring is properly mounted to actually be useful??? Also i think the warm air guide on that side is not fully situated because that flap wont go all the way down...or is it not supposed to???
Only a few more things to do before this engine is ready to rock and roll. I still need to put the flywheel oil seal and pilot bearing in, assemble the distributor, finish painting and then attach the tins, bolt down the carbs and manifolds, assemble the CFR carb linkage.....and maybe a few other small things. But that list is just for the engine unfortunately, still have some work on the car side before the install (SS fuel lines, pedal cluster, shift console and tunnel shift rod, then some electrical stuff...) Good thing I have finals week next week, i will have sooo much time to do all the above, NOT. oh well, i will try and be patient.
I logged another 5 hours just now and got a fair amount accomplished.
Started out by finishing the valve job, with gaps set to .006" on all valves, intake and exhaust alike.
Then installed the engine support bar case brackets and the dampeners, then the thermostat and cable pulley, a new oil filter, the warm air guides for both sides on the oil cooler half of the engine.

I have the Tangerine Racing breather can so following the instructions I had to drill a hole in the filler box which was then tapped to 1/8" NPT. I dont have a vise...so for the actual drilling part, i had to get a little creative.

And voila!

Attached the filler neck and then put the fan housing and fan impeller on

Attached the cold air flaps

Anyone have some good pictures of how this spring is properly mounted to actually be useful??? Also i think the warm air guide on that side is not fully situated because that flap wont go all the way down...or is it not supposed to???

Only a few more things to do before this engine is ready to rock and roll. I still need to put the flywheel oil seal and pilot bearing in, assemble the distributor, finish painting and then attach the tins, bolt down the carbs and manifolds, assemble the CFR carb linkage.....and maybe a few other small things. But that list is just for the engine unfortunately, still have some work on the car side before the install (SS fuel lines, pedal cluster, shift console and tunnel shift rod, then some electrical stuff...) Good thing I have finals week next week, i will have sooo much time to do all the above, NOT. oh well, i will try and be patient.
QUOTE(dfelz @ Jun 6 2013, 03:13 AM)
Anyone have some good pictures of how this spring is properly mounted to actually be useful???
Here you go
I will call you Friday about the engine stand. I have it ready, but I don't think I can get it in the truck by myself. You may need to drive down and help me load it.
QUOTE(nathansnathan @ Jun 6 2013, 05:28 AM)
QUOTE(dfelz @ Jun 6 2013, 03:13 AM)
Anyone have some good pictures of how this spring is properly mounted to actually be useful???
Here you go
Thanks Nathan, any chance you have a pic of were the the hook on the other side is going??? And am i correct in saying that the flap is supposed to be able to go completely flush with the opening in the cold position?
QUOTE(dfelz @ Jun 6 2013, 06:25 PM)
Thanks Nathan, any chance you have a pic of were the the hook on the other side is going??? And am i correct in saying that the flap is supposed to be able to go completely flush with the opening in the cold position?
Hopefully this shows the spring. The other was a photo off Ratwell's site. These I took of some parts lying around. Pardon the crustiness. You can see the little hook go under the 'arm' by the white bushing there.
Click to view attachment
The pivot beam is quite pliable so you can tweak it a bit to close up the gap some. The nub on the fan housing should act as a stopper, rather than the other side pulling the connector piece apart. The fan has to hit that nub because there is a flange on the other side of the pivot beam that the other bushing locates it with.
As the pivot beam rotates through its axis, it seems like it should not cock out as it closes, but stay parallel in its axis to the lip of the fan housing. You may have to (un)bend the beam to get it moving freely. The spring pressure is pretty strong, but get the beam smooth, and oil the spring, and may sure the beam is not bent so it binds in the bushings or in the tin. Make it so it moves real easy. -unlike the crusty one I've got mocked up here. The one in my bus doesn't take nearly as much force to hold closed. Seems the smoother it functions, the longer the thermostat will hold up.
Click to view attachment
Thank you very much Nathan! Great walk through! Ethan came over last night too and helped me situate it (I didnt see your wonderful tutorial till now,) he fixed the spring positioning and told me the flap was going down to the correct spot. And now that that's taken car of, i started prepping the cylinder/head tins for paint. Also put the flywheel bearing and felt washer on along with the flywheel main oil seal.
Went over to Jims pad (monkeyboy) and grabbed an ATV jack, tranny drain plug tool, and a tranny main shaft to act as a clutch alignment tool. I ordered the clutch alignment tool from pelican, and the bag it was in had the sticker of the right part, but the part said FORD on it???... and it obviously did not fit, so ya gonna contact them about that...
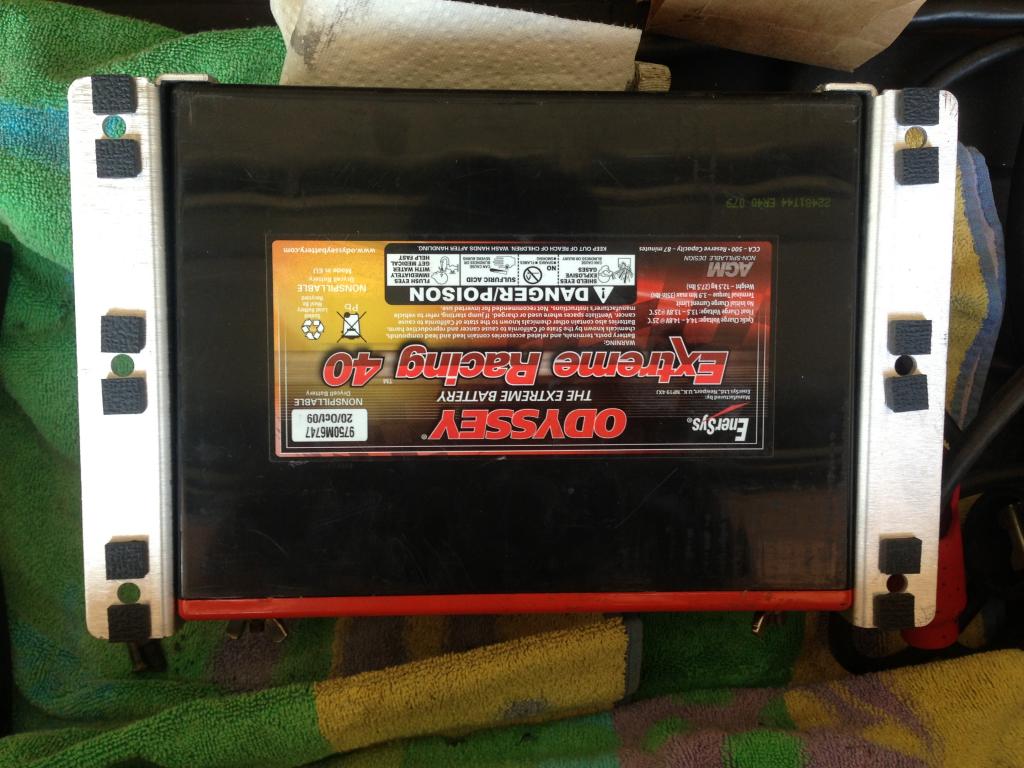
Gonna go into the machine shop today and jump on the lathe to fab some battery terminal adapters. I am using an Odyssey ER40 that has M6 studs for terminals, so i need to make something to screw on that with an OD of the battery connect ID, shouldnt take too long, just have to take the correct measurements!
I'll post up later today how it goes!
Went over to Jims pad (monkeyboy) and grabbed an ATV jack, tranny drain plug tool, and a tranny main shaft to act as a clutch alignment tool. I ordered the clutch alignment tool from pelican, and the bag it was in had the sticker of the right part, but the part said FORD on it???... and it obviously did not fit, so ya gonna contact them about that...
Gonna go into the machine shop today and jump on the lathe to fab some battery terminal adapters. I am using an Odyssey ER40 that has M6 studs for terminals, so i need to make something to screw on that with an OD of the battery connect ID, shouldnt take too long, just have to take the correct measurements!
I'll post up later today how it goes!
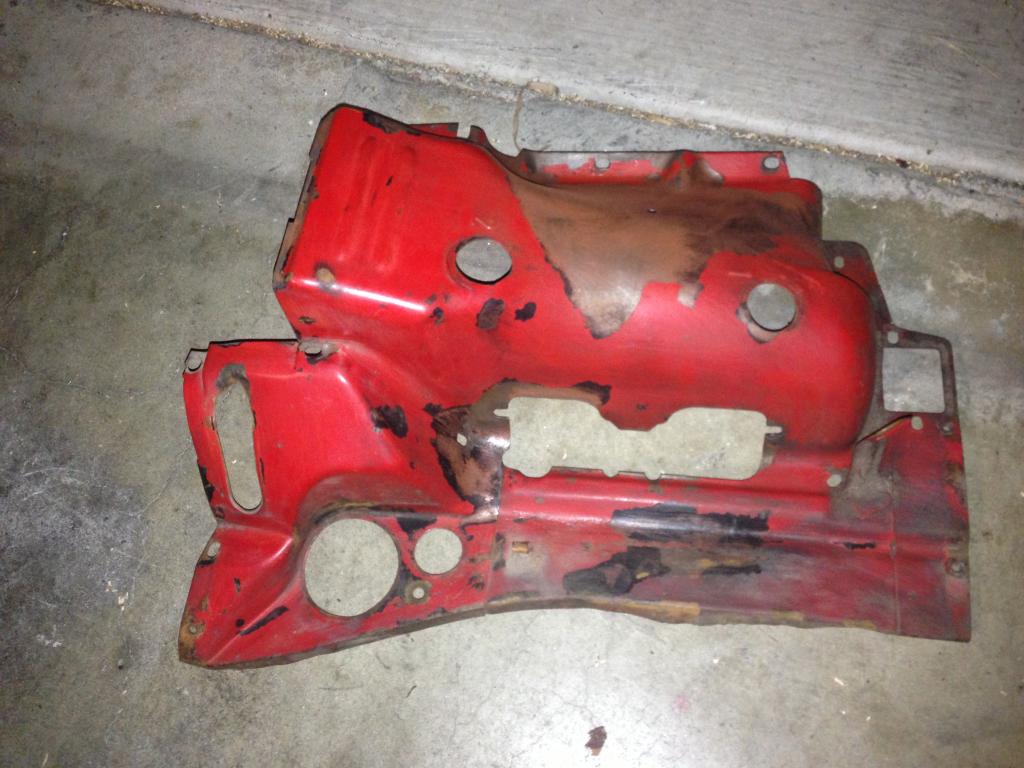
I have now almost completed the cleaning and repainting of all the engine tins. Wire brushed by hand to get all the dirt grime build up, mainly off the bottom side, then moved onto the paint striper to finish up the job with a drill wire brush cup. Final stage was hand sanding to get the tough crevasses.
Start
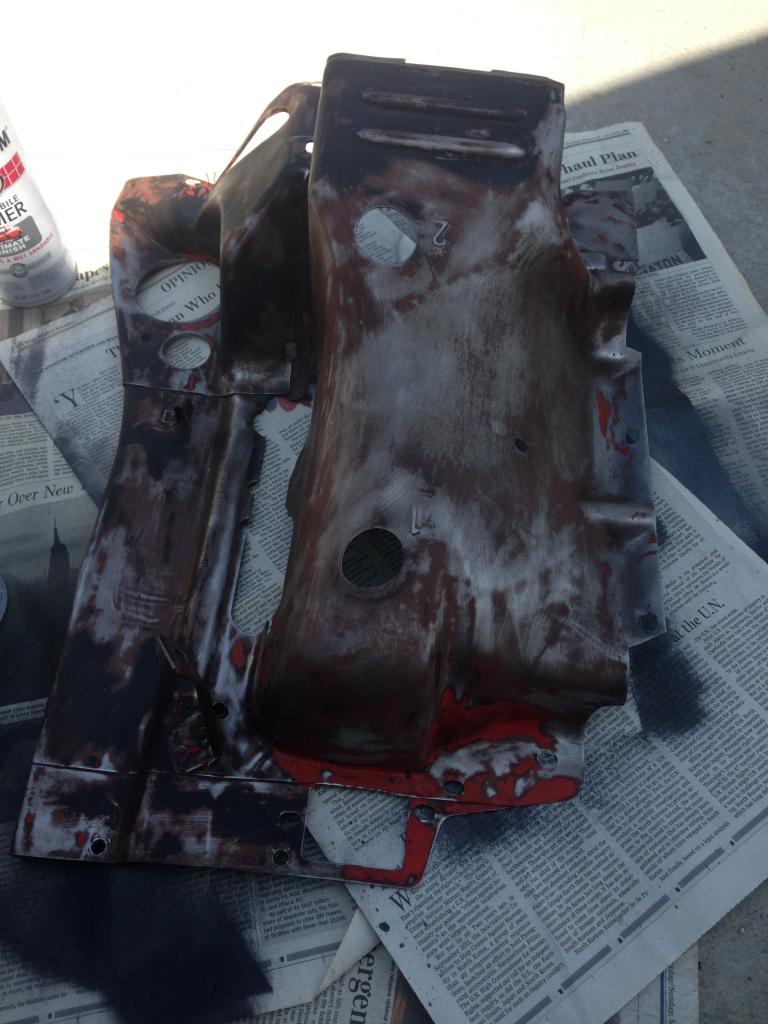
Middle
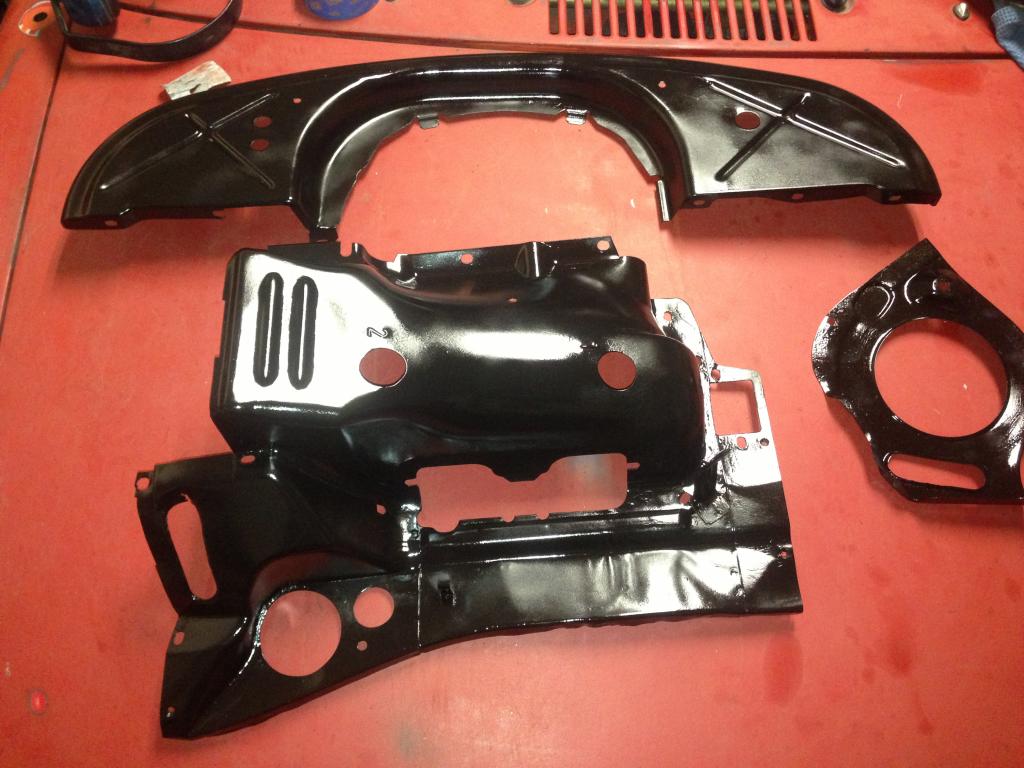
Finish, still have the 3/4 tin and two others though
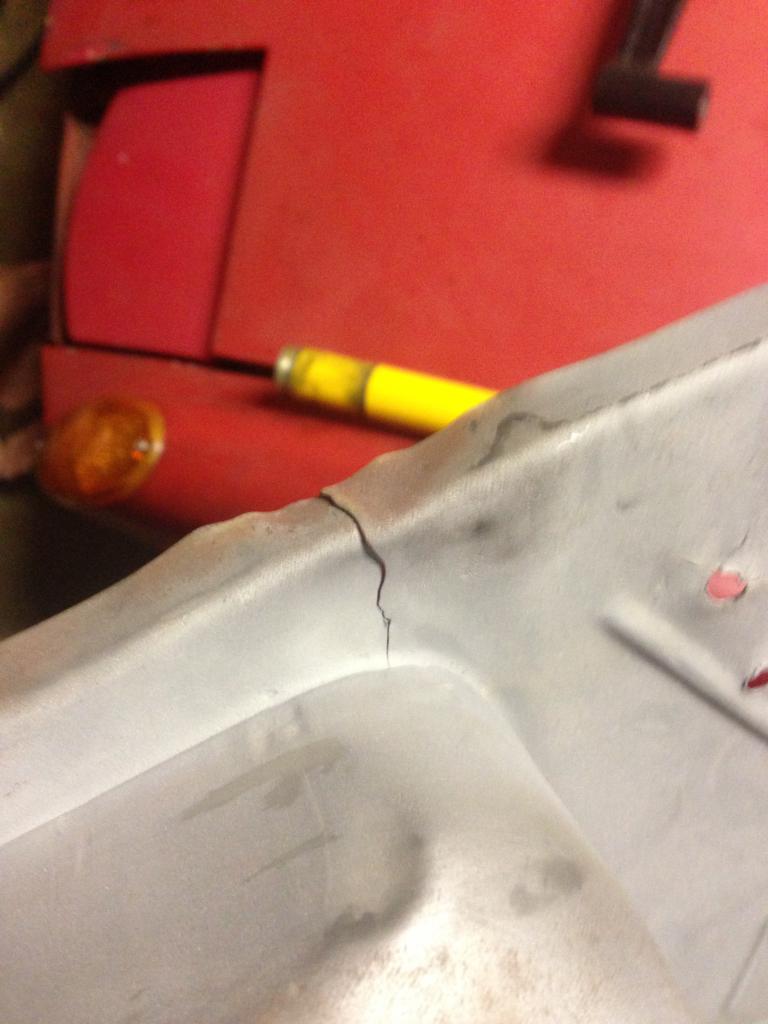
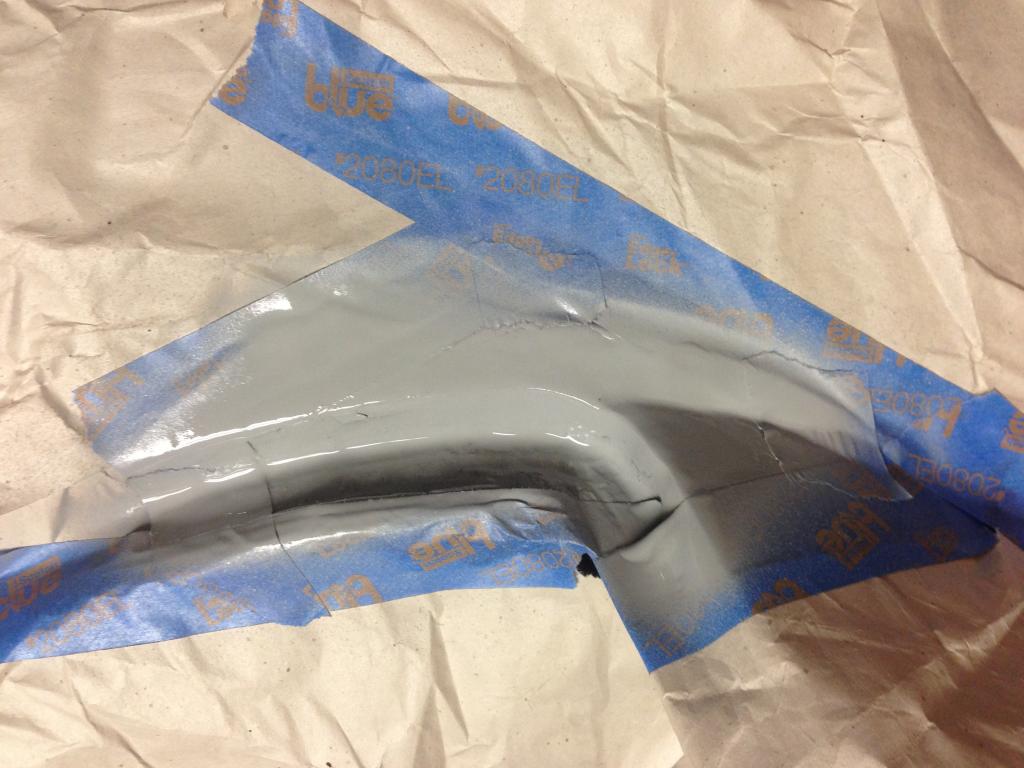
Had to weld up this crack before moving on with paint on this guy
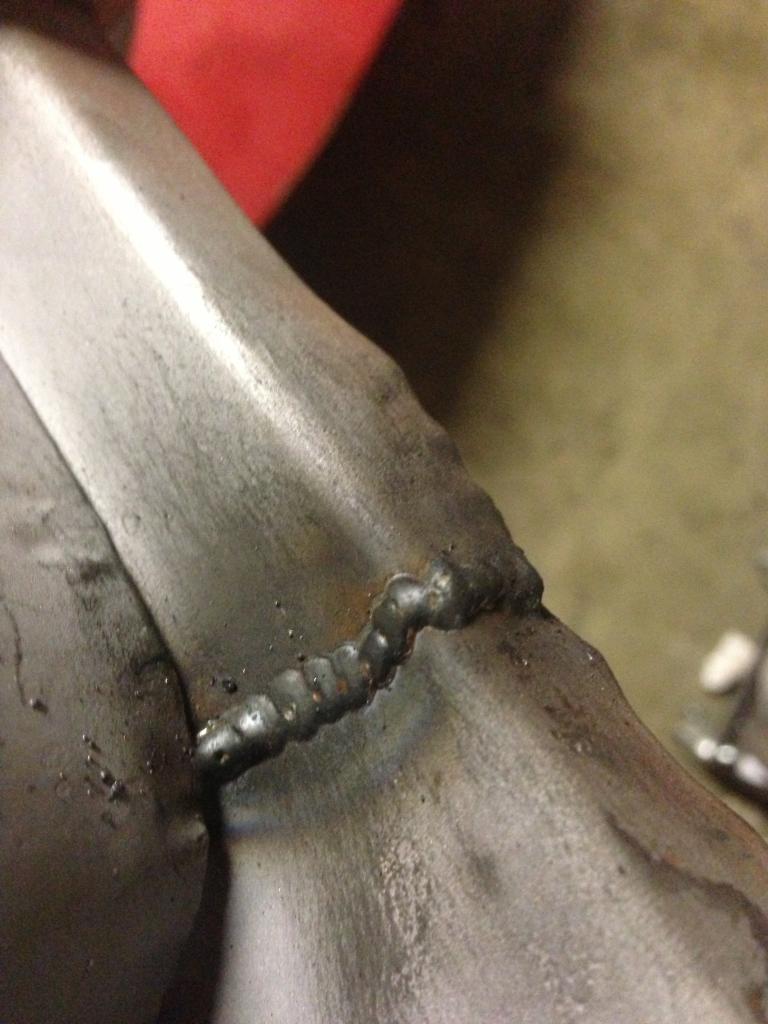
All done
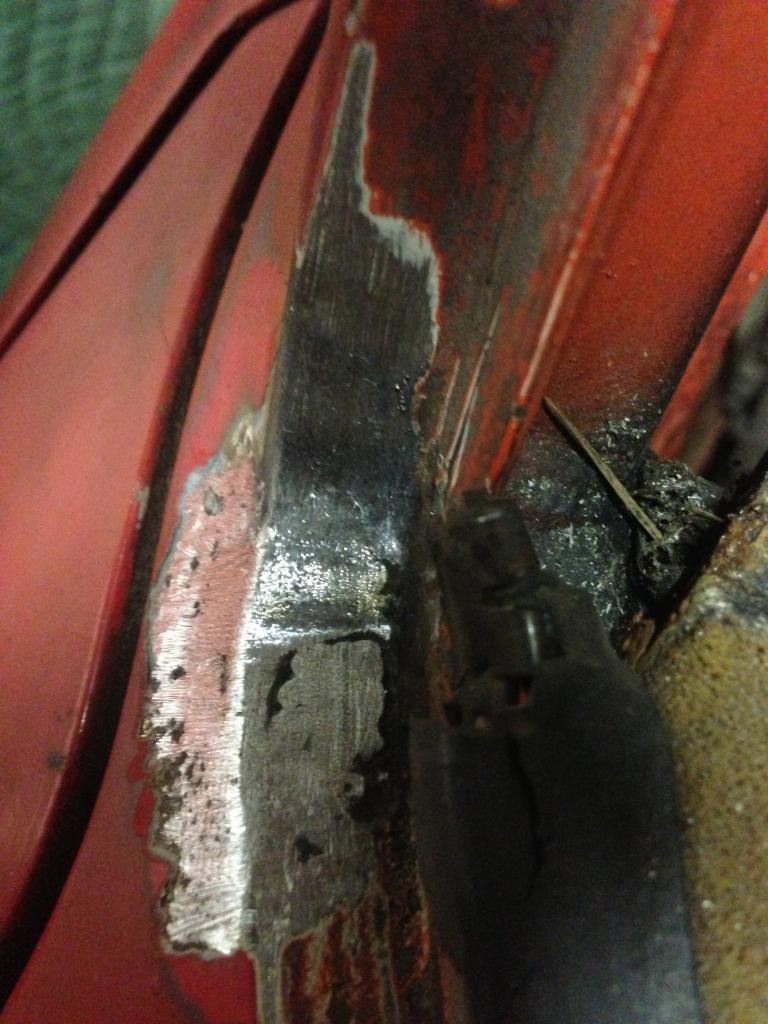
Since i will be sealing in my windshield soon, i had to attend to this small rust spot on the bottom passenger side corner. This was as is
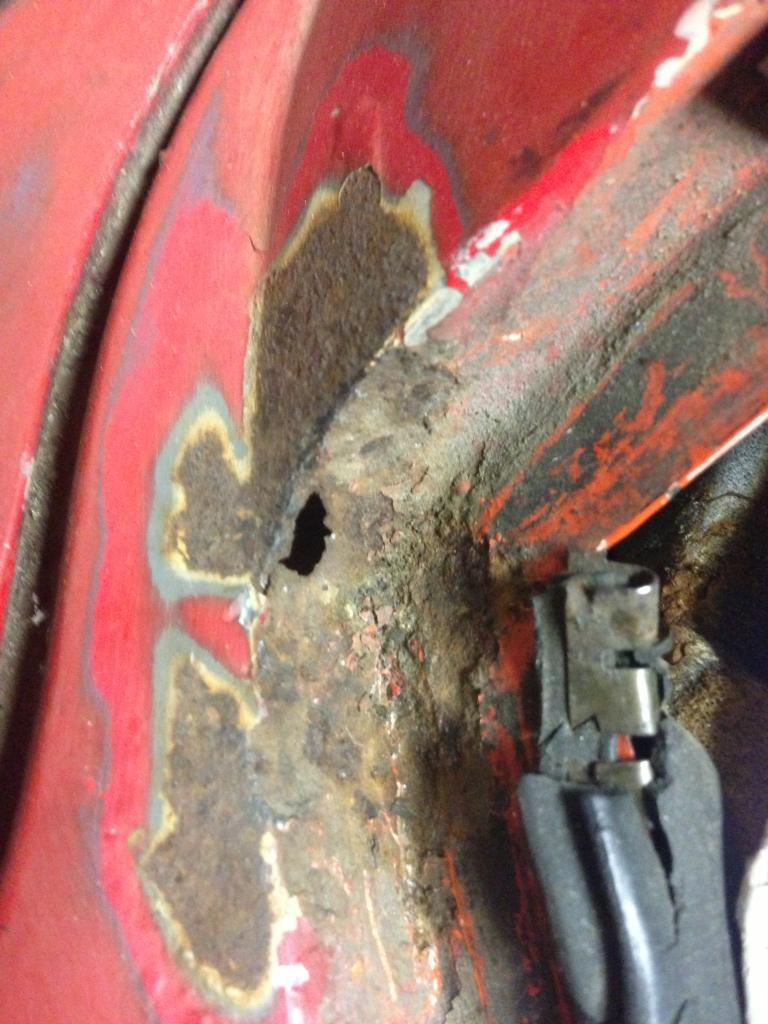
This was after the dermal, prepping for weld, hole grew a little but that was expected, had to remove the cancer

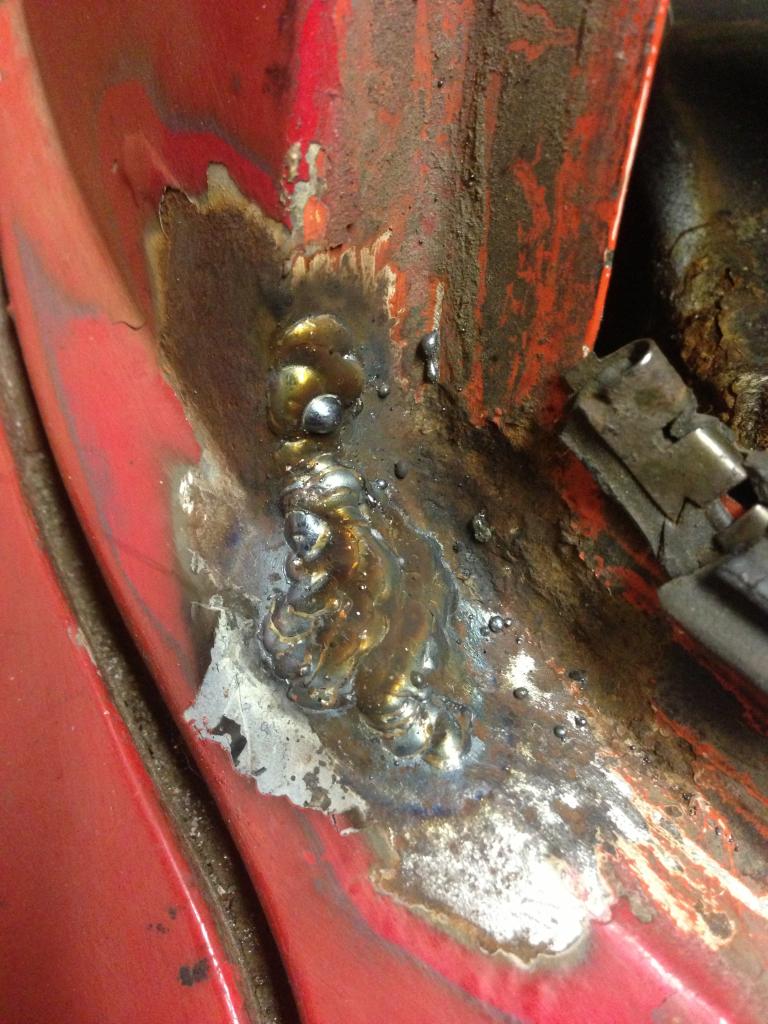
Welded, area was very thin and difficult, had the mig turned all the way down on everything, still burned holes right through, had to do really quick bursts on the edges and worked inwards.
Grounded down to finished contour
Primed with rustoleum
I attached the thermostat cable to the flaps too, no picture though. Progress will slow down heavily until thursday unfortunately, its finals week, my time to shine, no excuses for slacking!!
Start

Middle

Finish, still have the 3/4 tin and two others though

Had to weld up this crack before moving on with paint on this guy

All done

Since i will be sealing in my windshield soon, i had to attend to this small rust spot on the bottom passenger side corner. This was as is

This was after the dermal, prepping for weld, hole grew a little but that was expected, had to remove the cancer

Welded, area was very thin and difficult, had the mig turned all the way down on everything, still burned holes right through, had to do really quick bursts on the edges and worked inwards.

Grounded down to finished contour

Primed with rustoleum

I attached the thermostat cable to the flaps too, no picture though. Progress will slow down heavily until thursday unfortunately, its finals week, my time to shine, no excuses for slacking!!
I wasnt supposed to be working on the car this week because of finals, but when i got home last night from studying in the library at 1am, i had just finished my last cup of coffee, so i wasnt about to just go to bed!
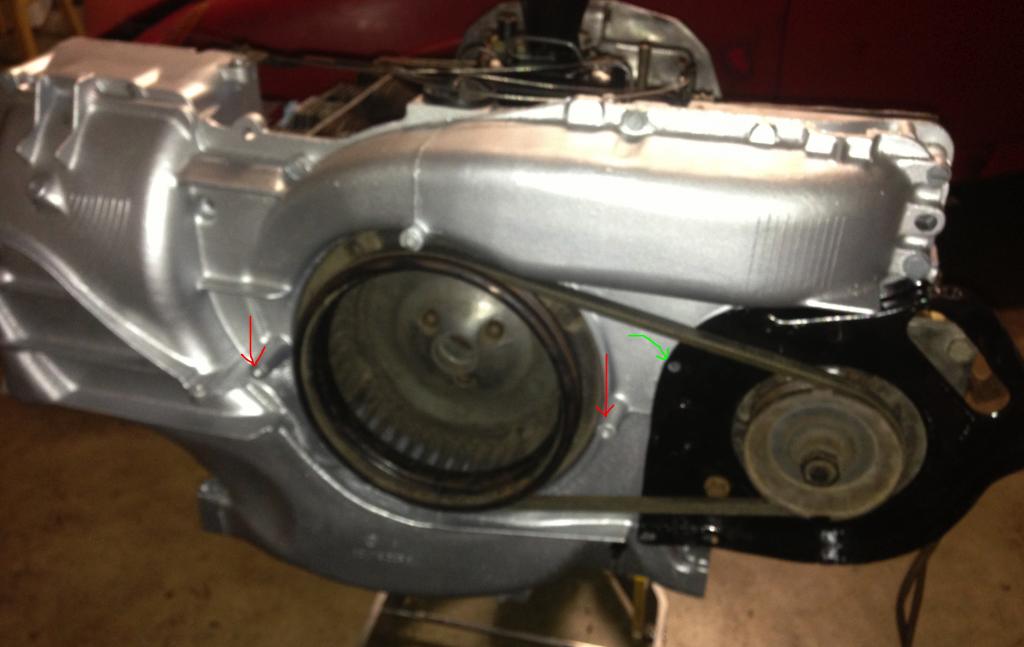
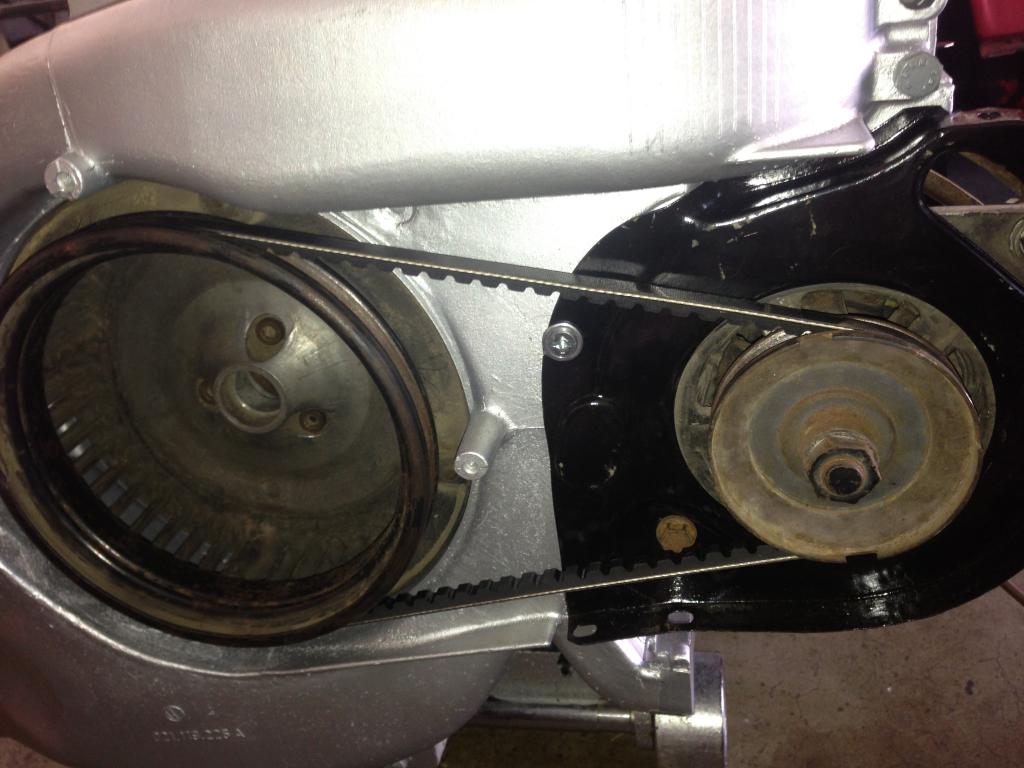
First thing i worked on was the alternator mounting, I have the two brackets, the one half square and the curved one. For the square one, it had, as well as the shroud a square hole on one side and the haynes book labeled the bolt going through there as "special bolt," but the bolt i have is just a normal hex head with flange. Is the shank supposed to be square???
Next, how do i properly tension or know if the belt is at an acceptable tension?
Also, what screw is used on the hole with the green arrow and what screws into the threaded posts with the red arrows??
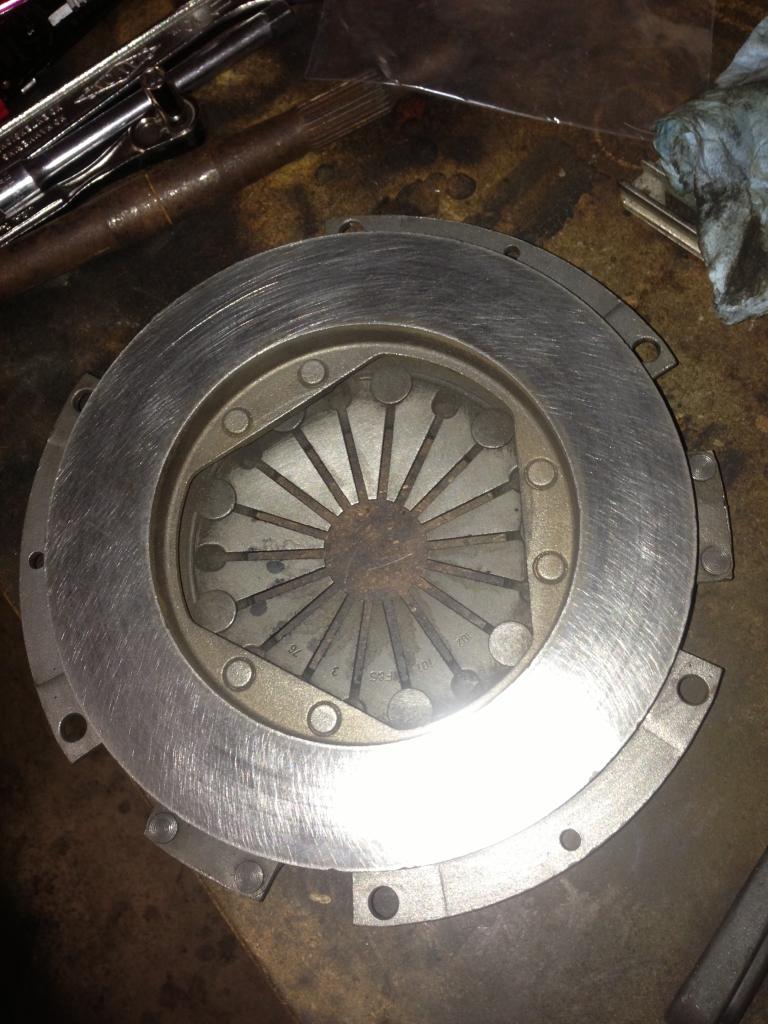
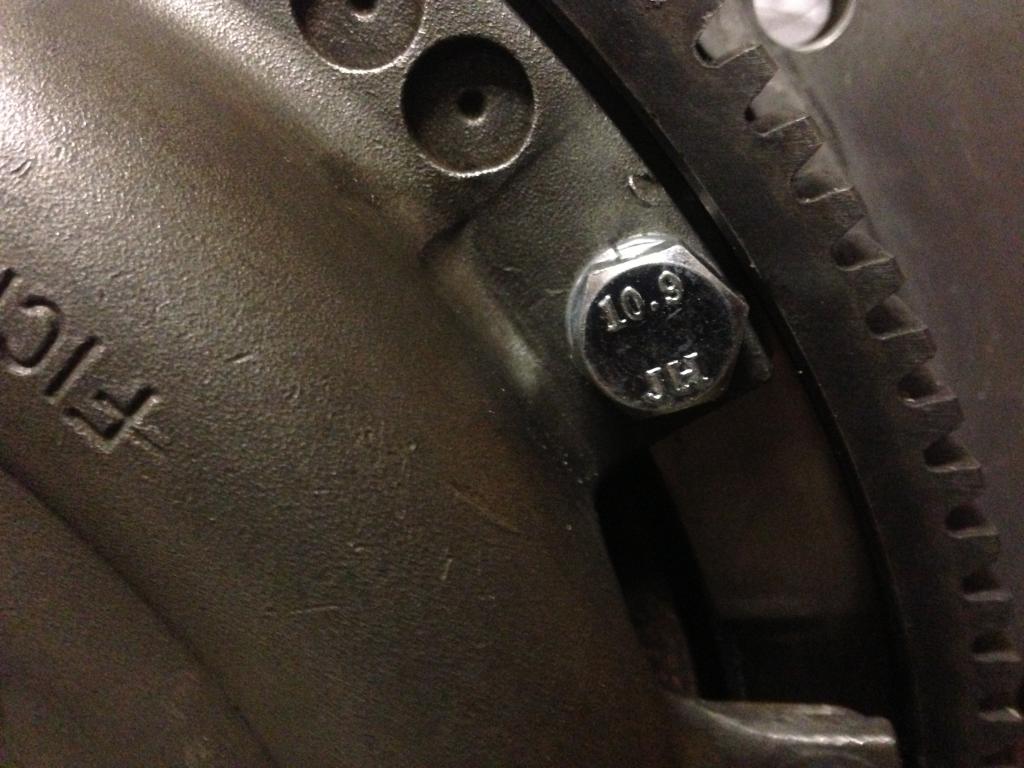
After i did that shit worked on the pressure plate and clutch disk. Cleaned up the pressure plate and roughened up the flat surface that contacts the clutch disk with some sand paper. Then using the alignment tool Jim is lending to me, i bolted the combo to the flywheel with new M8 X 20mm grade 10.9 hex bolts and split lock washers. Dont know if i mention earlier but before mounting the flywheel for good, i hammered in new dowel pins to the flywheel after letting them sit in the freezer. I bought a bag of them from McMaster so i have extras if anyone is in need.

Also did a final check of the adjuster screw clearance to the valve stems using Ethans method, so they are all at .006" and good to go, then the valve covers went on with new cork gaskets from the rebuild kit (did those need to be slightly oiled before assem to the head??)
thats all i got for now!
First thing i worked on was the alternator mounting, I have the two brackets, the one half square and the curved one. For the square one, it had, as well as the shroud a square hole on one side and the haynes book labeled the bolt going through there as "special bolt," but the bolt i have is just a normal hex head with flange. Is the shank supposed to be square???
Next, how do i properly tension or know if the belt is at an acceptable tension?
Also, what screw is used on the hole with the green arrow and what screws into the threaded posts with the red arrows??

After i did that shit worked on the pressure plate and clutch disk. Cleaned up the pressure plate and roughened up the flat surface that contacts the clutch disk with some sand paper. Then using the alignment tool Jim is lending to me, i bolted the combo to the flywheel with new M8 X 20mm grade 10.9 hex bolts and split lock washers. Dont know if i mention earlier but before mounting the flywheel for good, i hammered in new dowel pins to the flywheel after letting them sit in the freezer. I bought a bag of them from McMaster so i have extras if anyone is in need.


Also did a final check of the adjuster screw clearance to the valve stems using Ethans method, so they are all at .006" and good to go, then the valve covers went on with new cork gaskets from the rebuild kit (did those need to be slightly oiled before assem to the head??)
thats all i got for now!
QUOTE(dfelz @ Jun 10 2013, 12:20 PM)
Is the shank supposed to be square???
It's a special bolt, like a carriage bolt but with part of the head missing so it is a D shaped head. The D part fit's the recess in the tin. the square part goes through the square part of the bracket. It makes it so you can loosen your alternator to put a belt on from underneath instead of needing 2 people. -No clue where you'd get one, part #021903231
QUOTE
Next, how do i properly tension or know if the belt is at an acceptable tension?
It's supposed to have 5/8" play iirc.
QUOTE
Also, what screw is used on the hole with the green arrow and what screws into the threaded posts with the red arrows??
Just a m6x30 hex, 10mm head in the one. The others, I don't think 914's use those other holes; they are for the fan screen in a bus. I could be wrong here...
QUOTE
did those need to be slightly oiled before assem to the head??
I would use a small amount of silicone to hold the gasket to the cover, dry on the head side.
As always, thank you Nathan for the wealth of helpful information.
I haven't updated the last few days but have done a good bit of work.
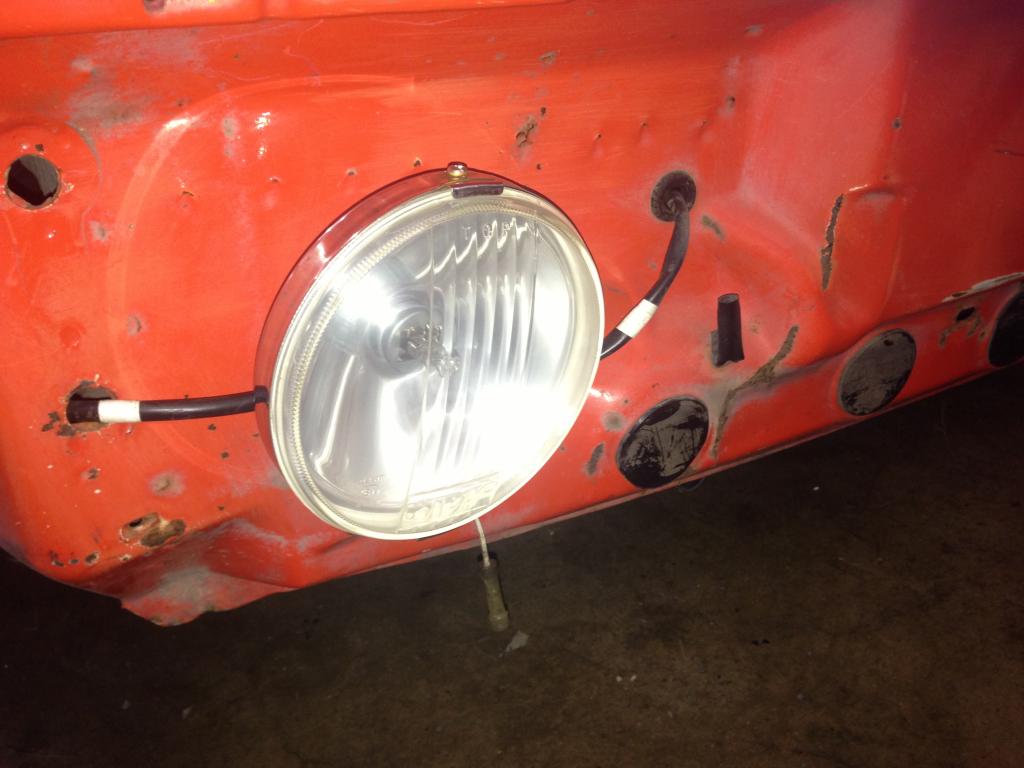
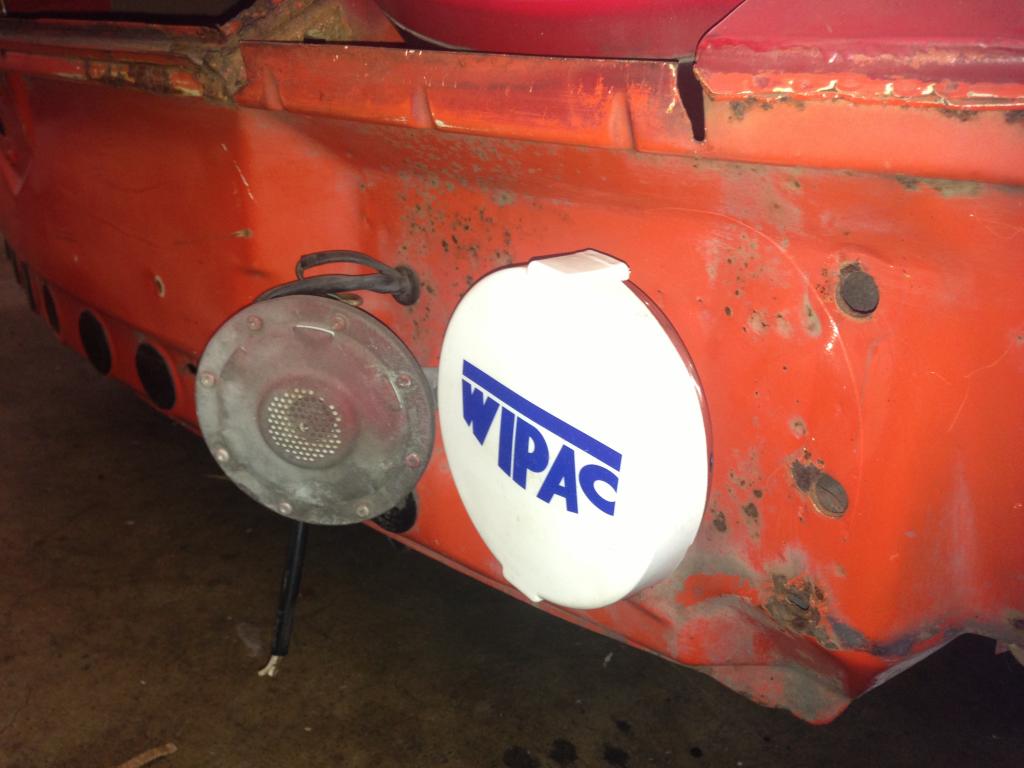
First, I received my new fog lights in the mail the other day, picked them up in the pelican 914 classifieds, I love them! Cant wait to see how they look on!
Put the new belt on there
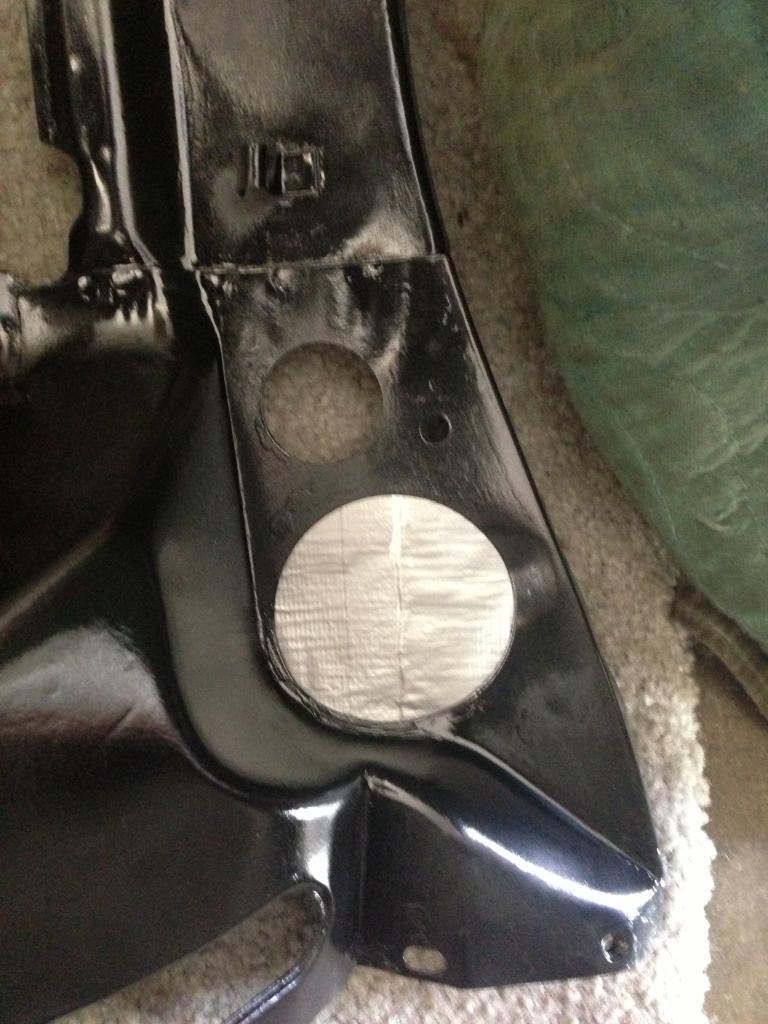
Plugged the hole that wont be needed
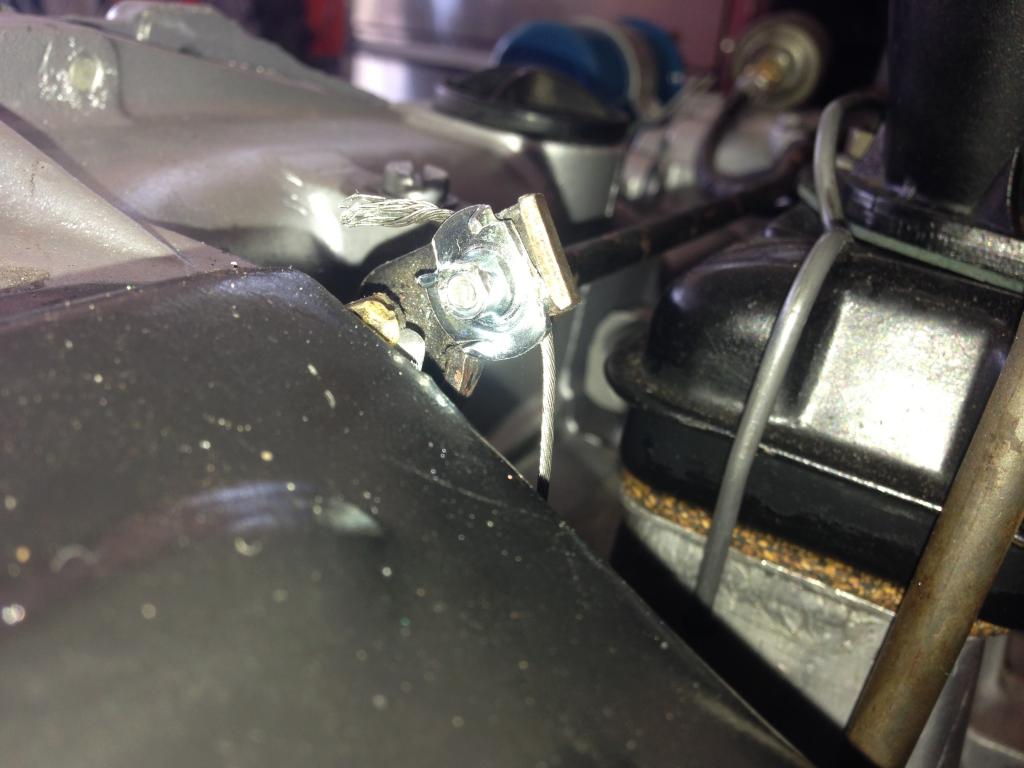
When i was trying to tighten down the bolt that clamps the end of the thermostat cable to the flaps i was noticing it not doing anything but spinning. it was stripped and had the cut the fucker off!
Alternator harness had been cut from PO so i decided to undo their twist and tape together method and use my twist, solder, shrink wrap method
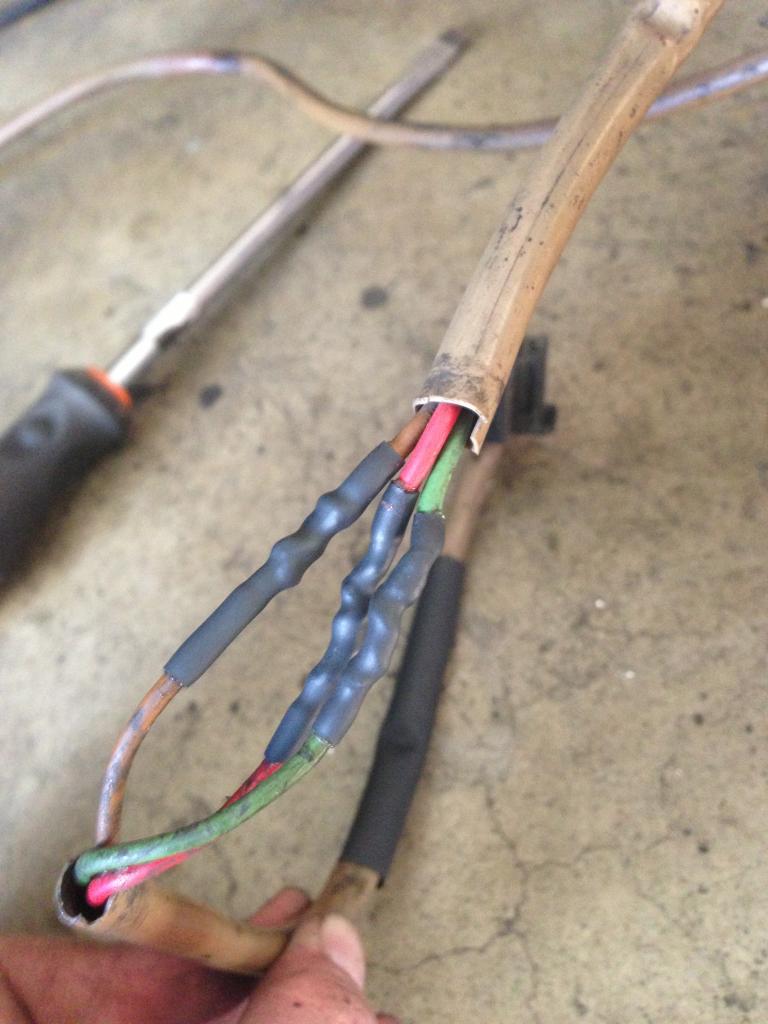
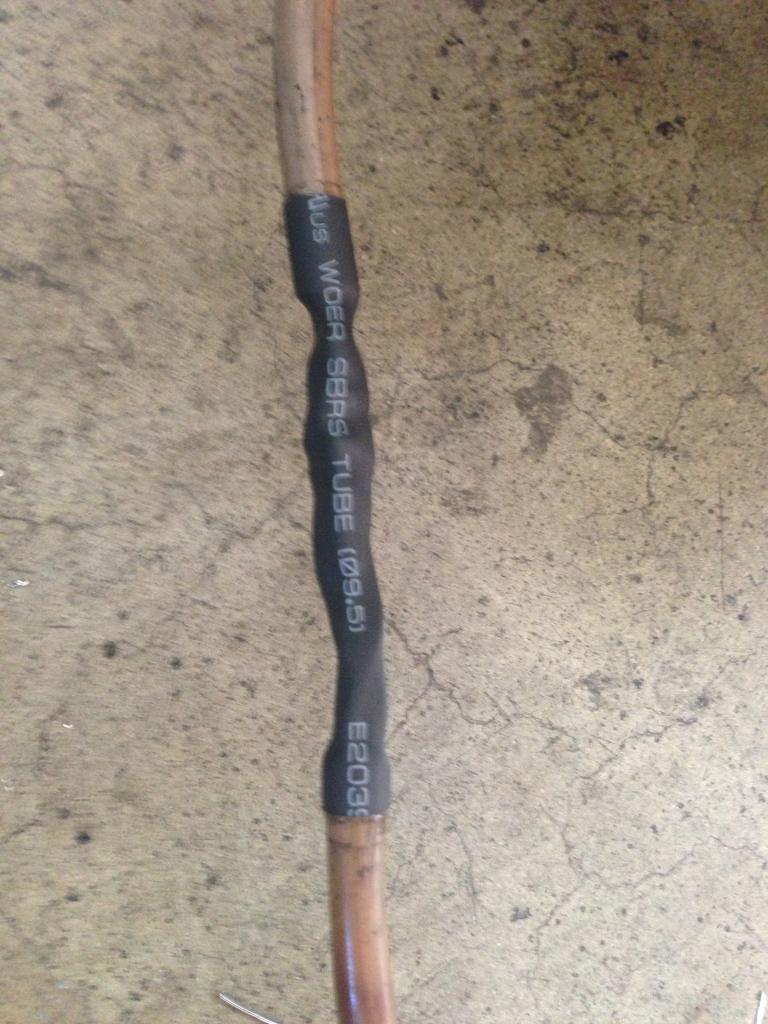
This guy was also all mangled up... and leaving plenty of wires exposed
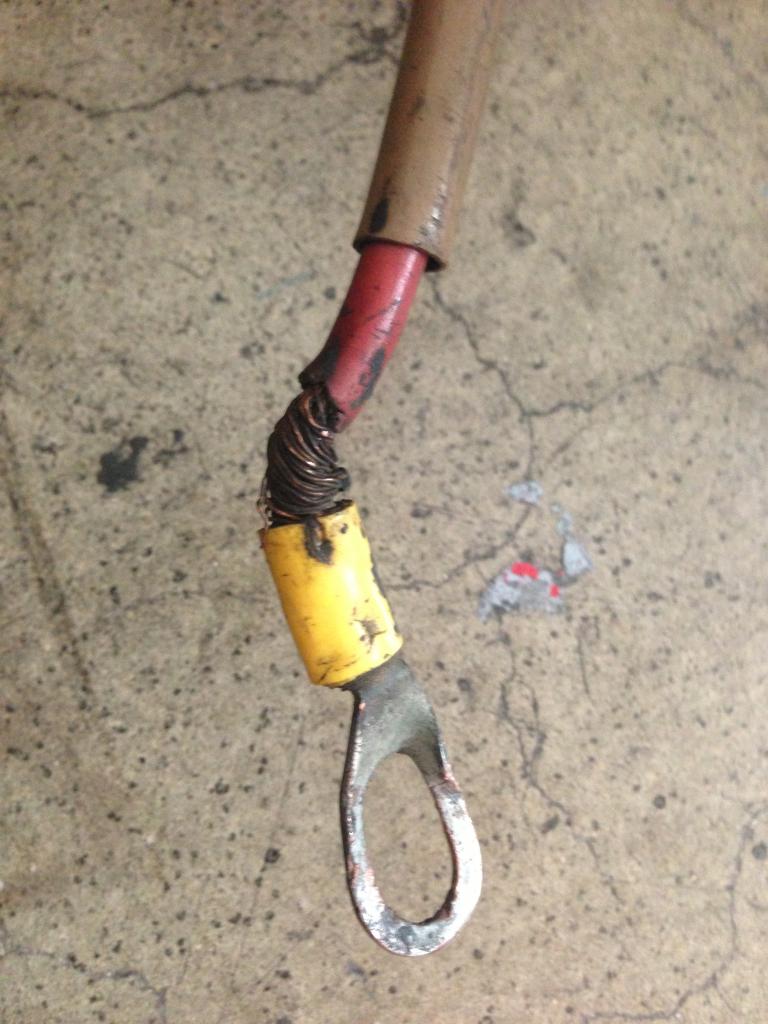
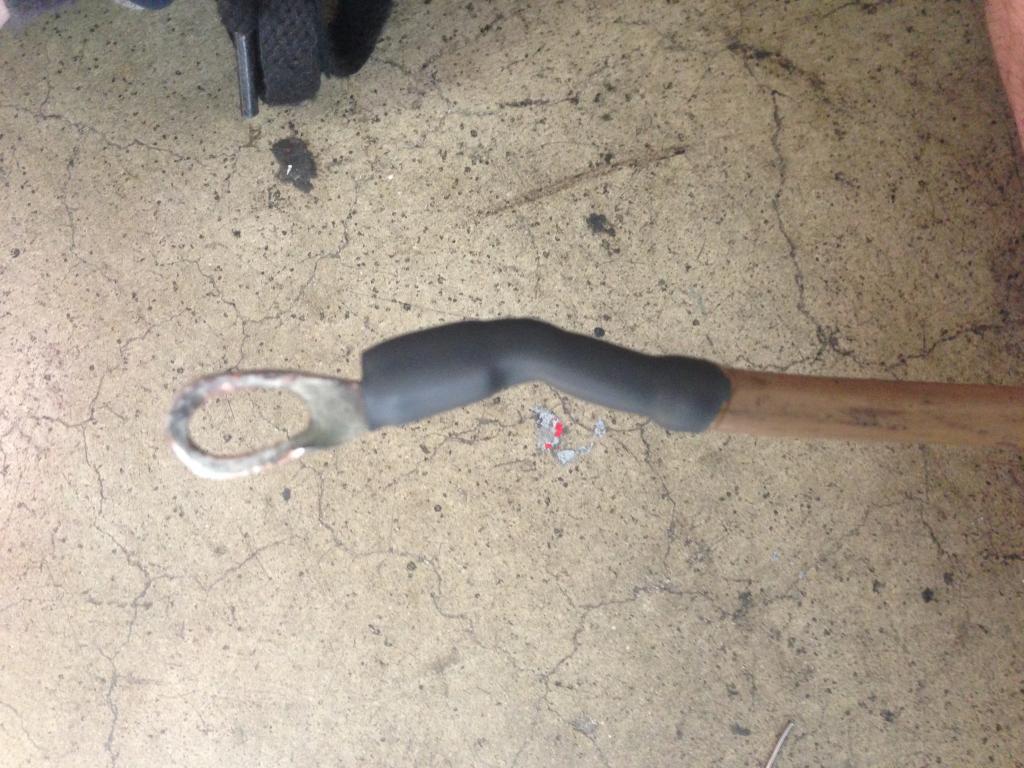
All better
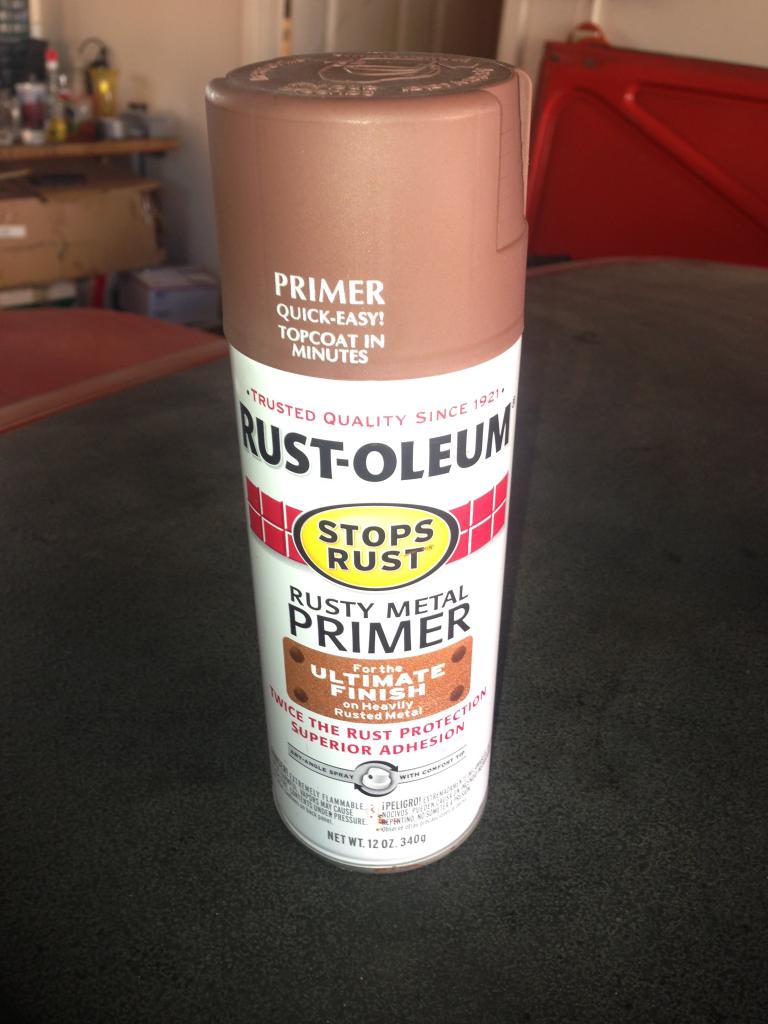
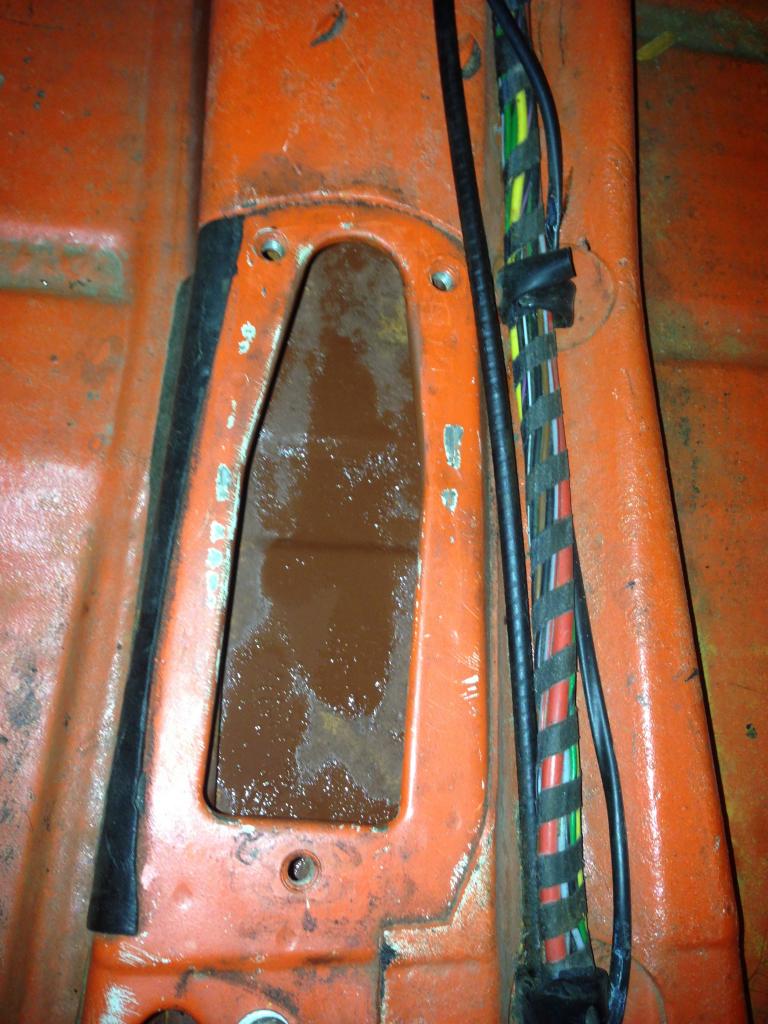
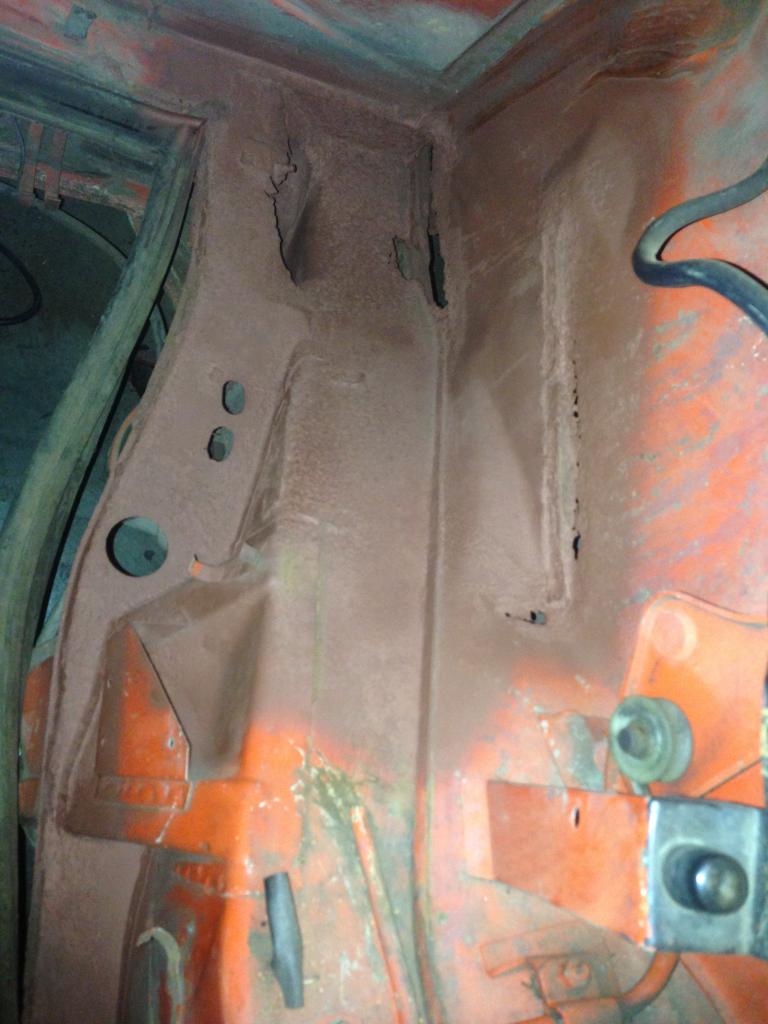
Scrubbed the pedal area with a wire brush to remove the top layer of rust dust, then sprayed the area with a "heavy rusted primer"
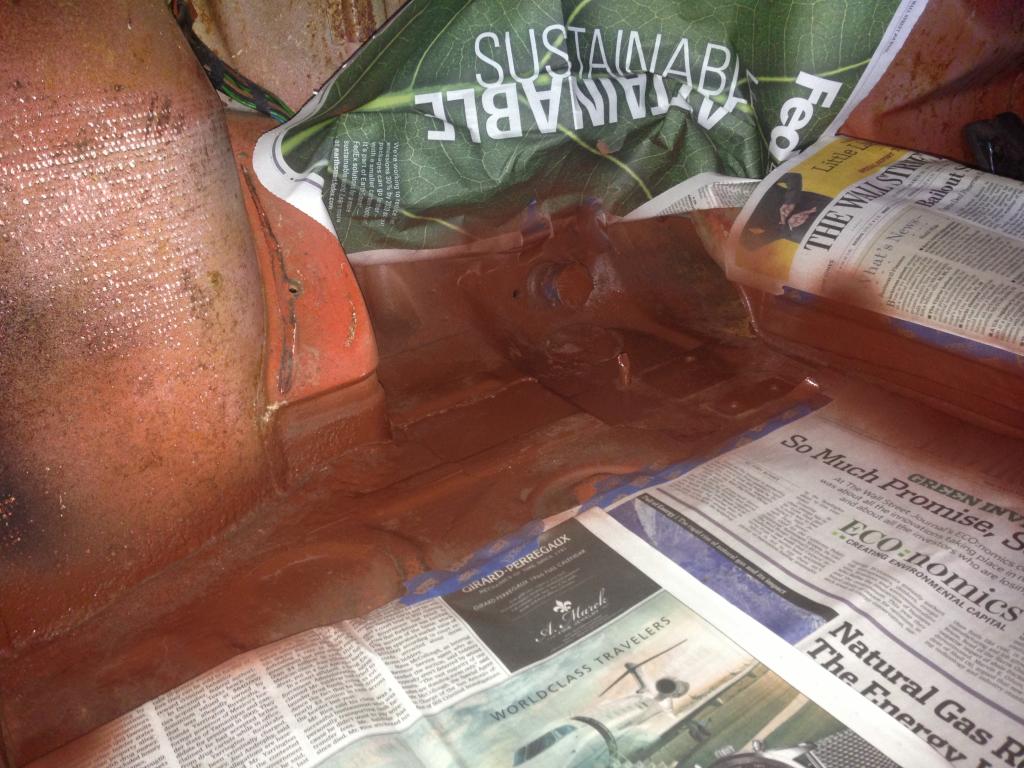
Kinda blends in
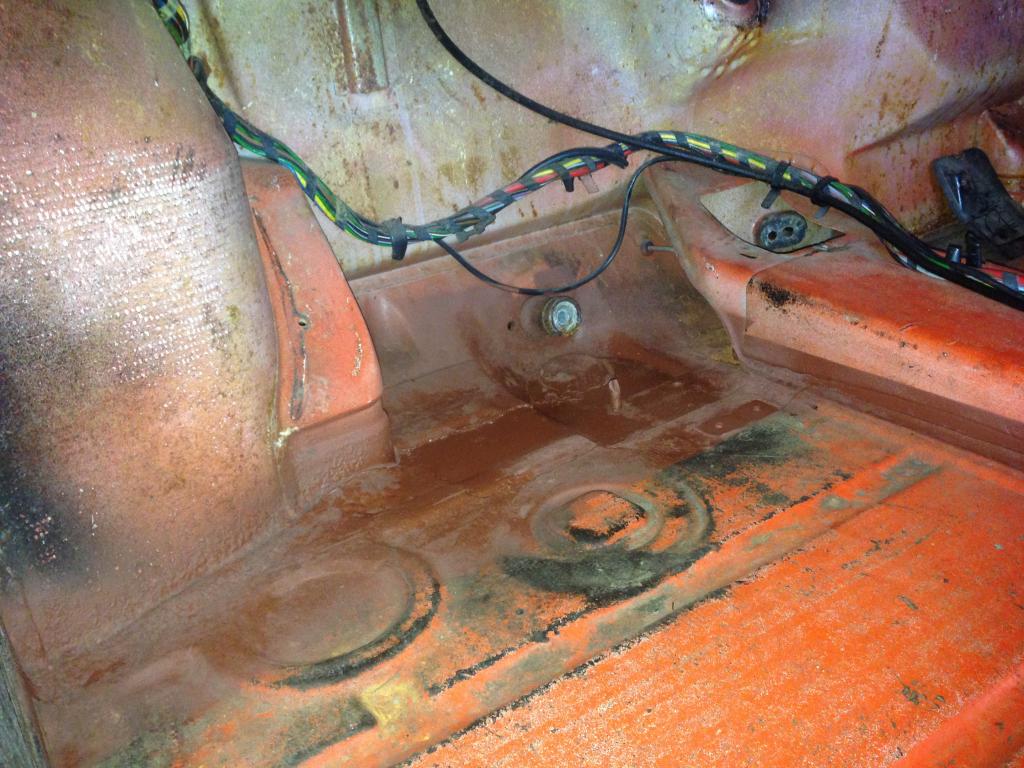
Sprayed inside the tunnel too, it was all yellow with rust dust
What was left of old battery tray
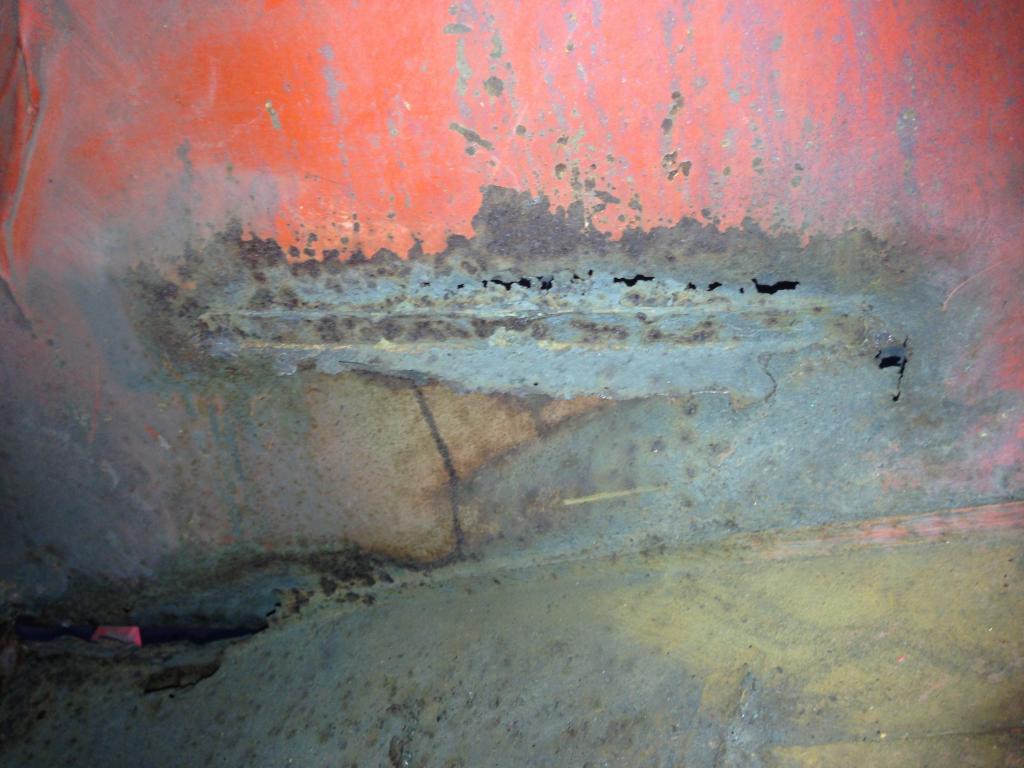
Hell hole area
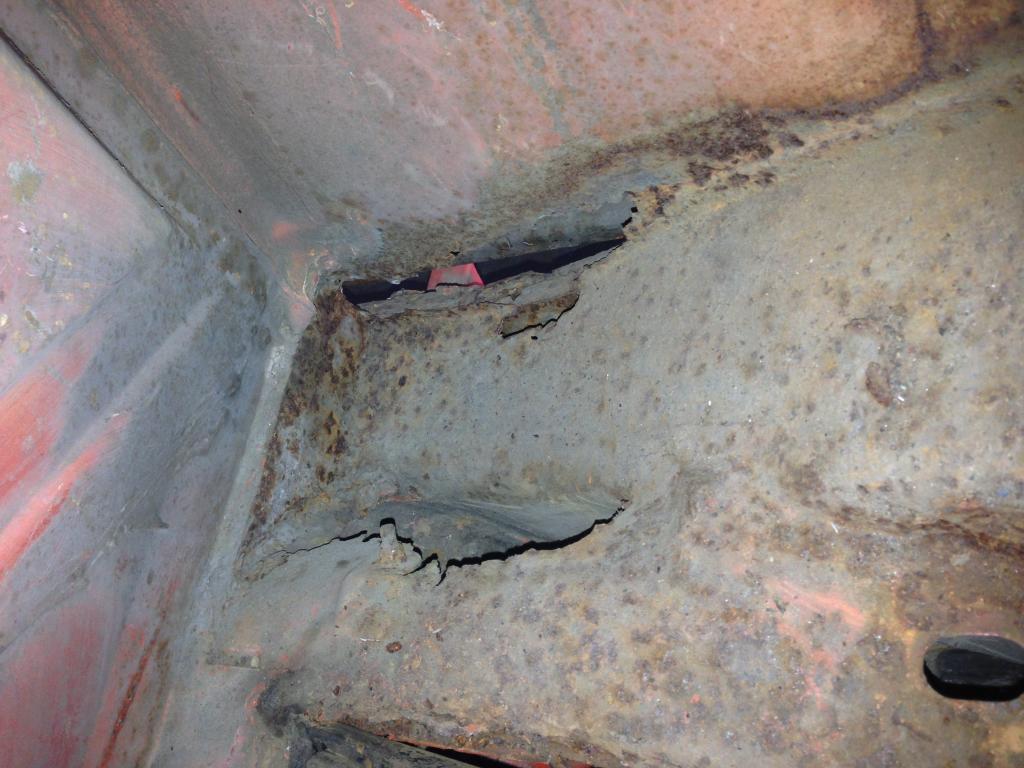
Sprayed it with the rust primer, best i can do for right now. Will actually fix at a later time
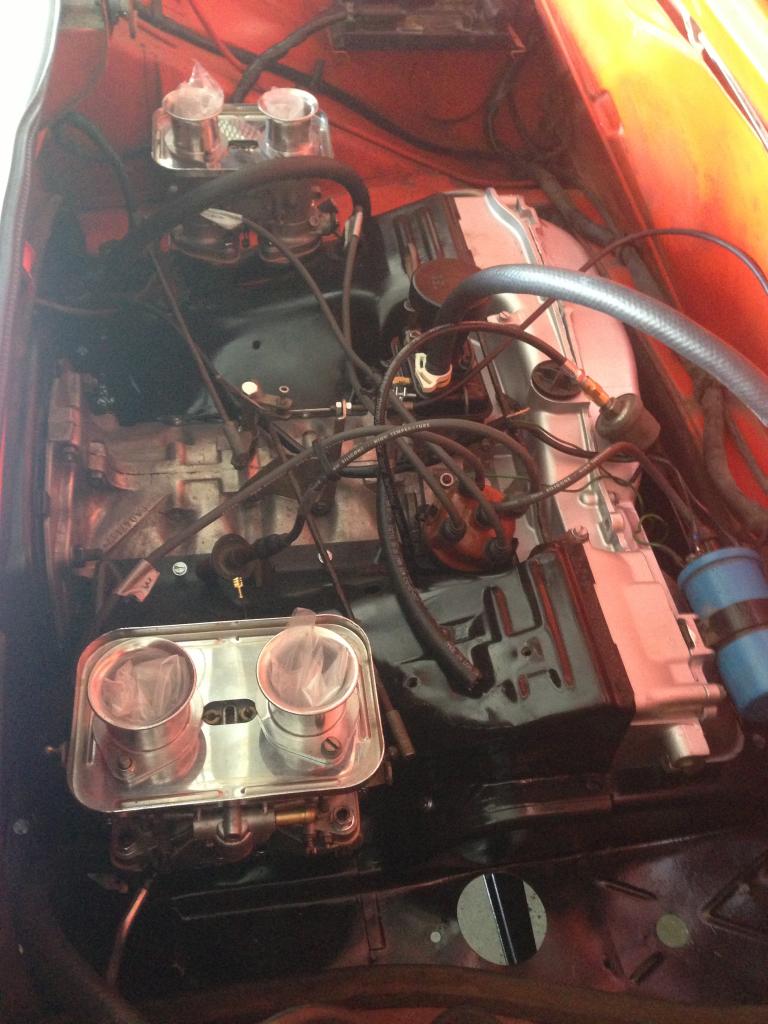
Engine is all together and ready to rumble! cyl head temp sensor in, spark plugs in, oil pressure/oil light sender hooked up, all tins on. Once installed will set up the dual carbs
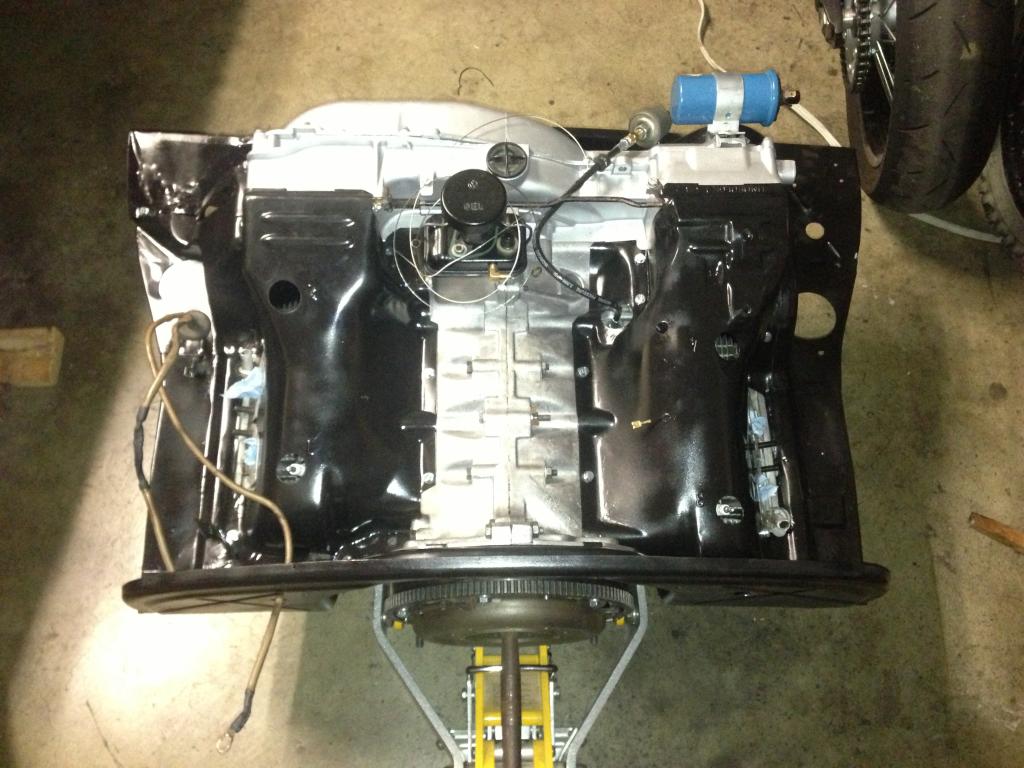
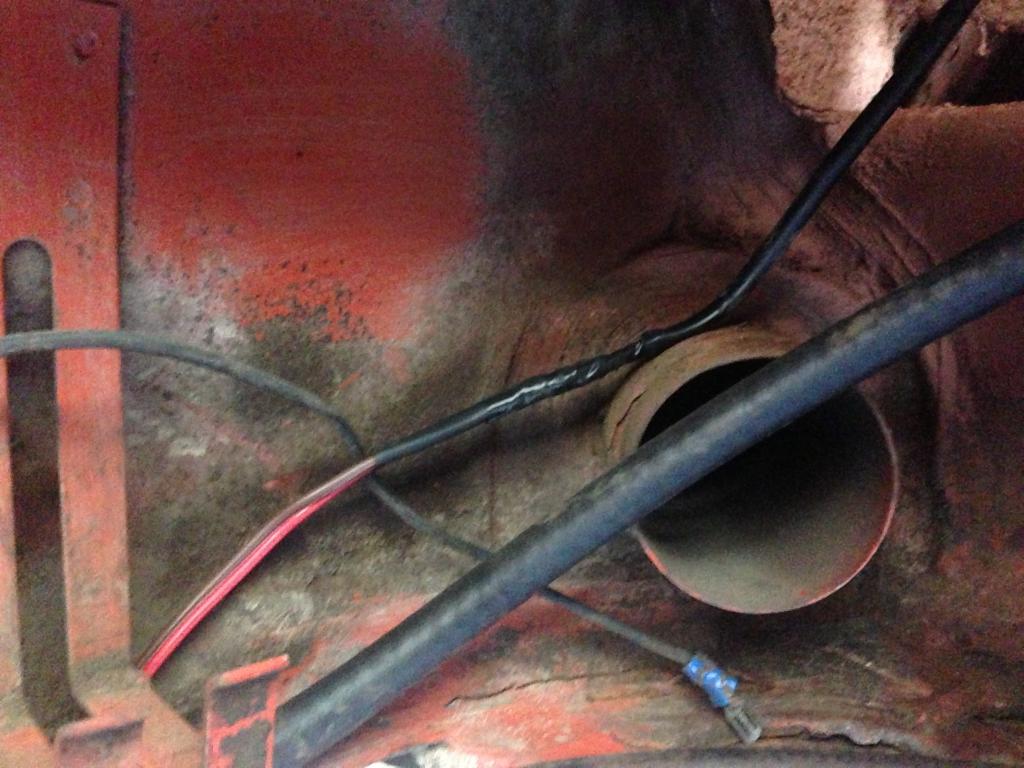
Installed the SS fuel lines - feeding the line through the tunnel was CAKE, slipped in like a charm! thanks chris!
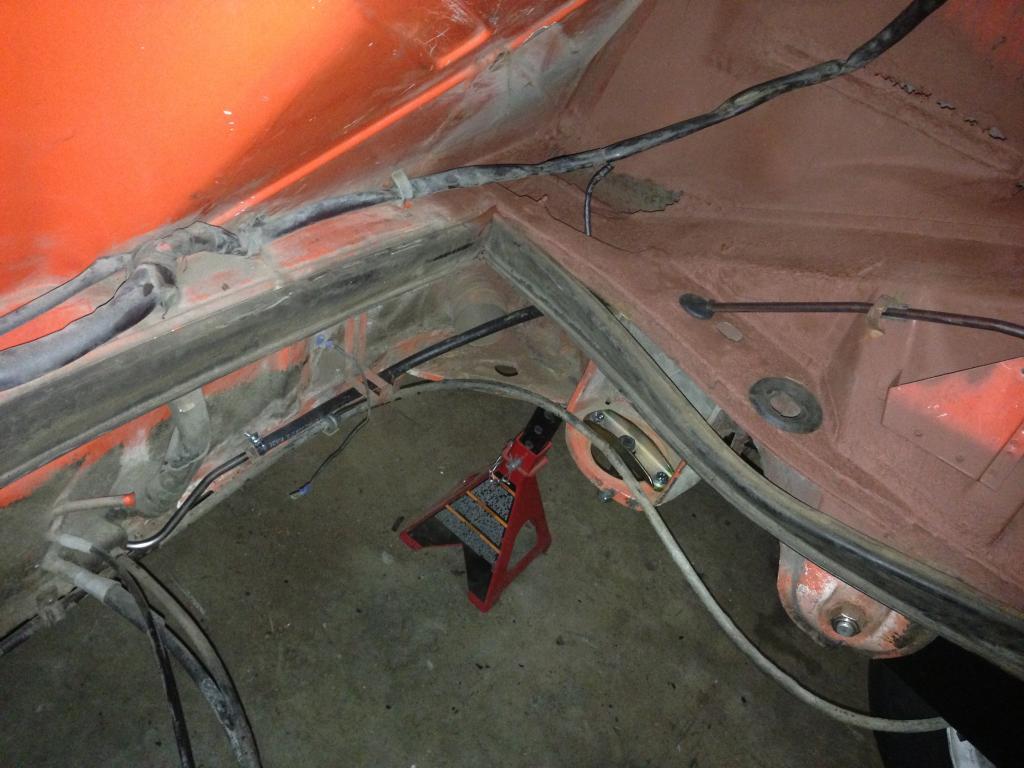
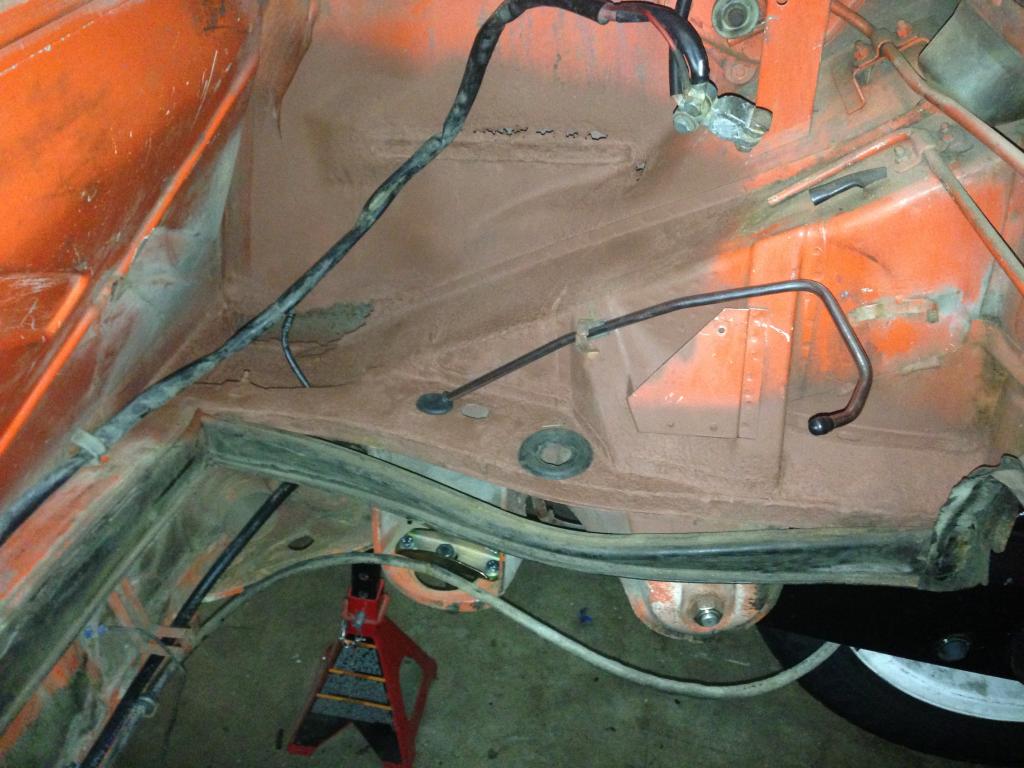
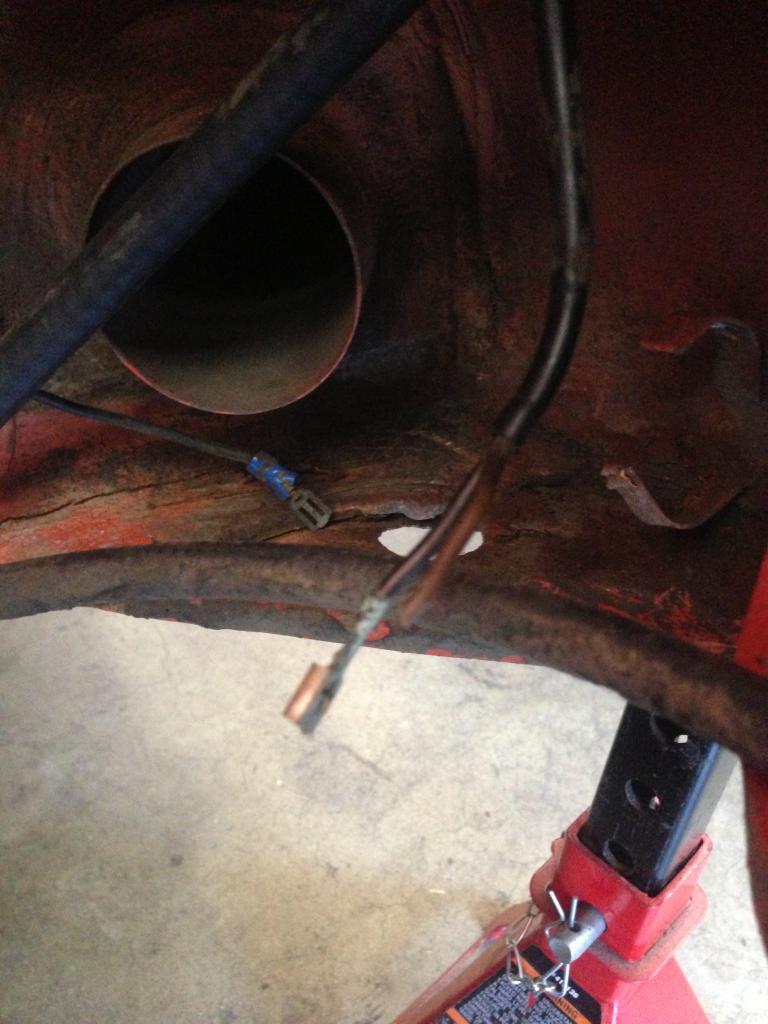
Located the fuel pump lines, cut the terminals off them and attached new wire to them that was routed to the front
Had to take a break to go to friends graduation party, but am going to slip back into the garage again right now!
I haven't updated the last few days but have done a good bit of work.
First, I received my new fog lights in the mail the other day, picked them up in the pelican 914 classifieds, I love them! Cant wait to see how they look on!


Put the new belt on there

Plugged the hole that wont be needed

When i was trying to tighten down the bolt that clamps the end of the thermostat cable to the flaps i was noticing it not doing anything but spinning. it was stripped and had the cut the fucker off!

Alternator harness had been cut from PO so i decided to undo their twist and tape together method and use my twist, solder, shrink wrap method


This guy was also all mangled up... and leaving plenty of wires exposed

All better

Scrubbed the pedal area with a wire brush to remove the top layer of rust dust, then sprayed the area with a "heavy rusted primer"


Kinda blends in

Sprayed inside the tunnel too, it was all yellow with rust dust

What was left of old battery tray

Hell hole area

Sprayed it with the rust primer, best i can do for right now. Will actually fix at a later time

Engine is all together and ready to rumble! cyl head temp sensor in, spark plugs in, oil pressure/oil light sender hooked up, all tins on. Once installed will set up the dual carbs

Installed the SS fuel lines - feeding the line through the tunnel was CAKE, slipped in like a charm! thanks chris!


Located the fuel pump lines, cut the terminals off them and attached new wire to them that was routed to the front


Had to take a break to go to friends graduation party, but am going to slip back into the garage again right now!
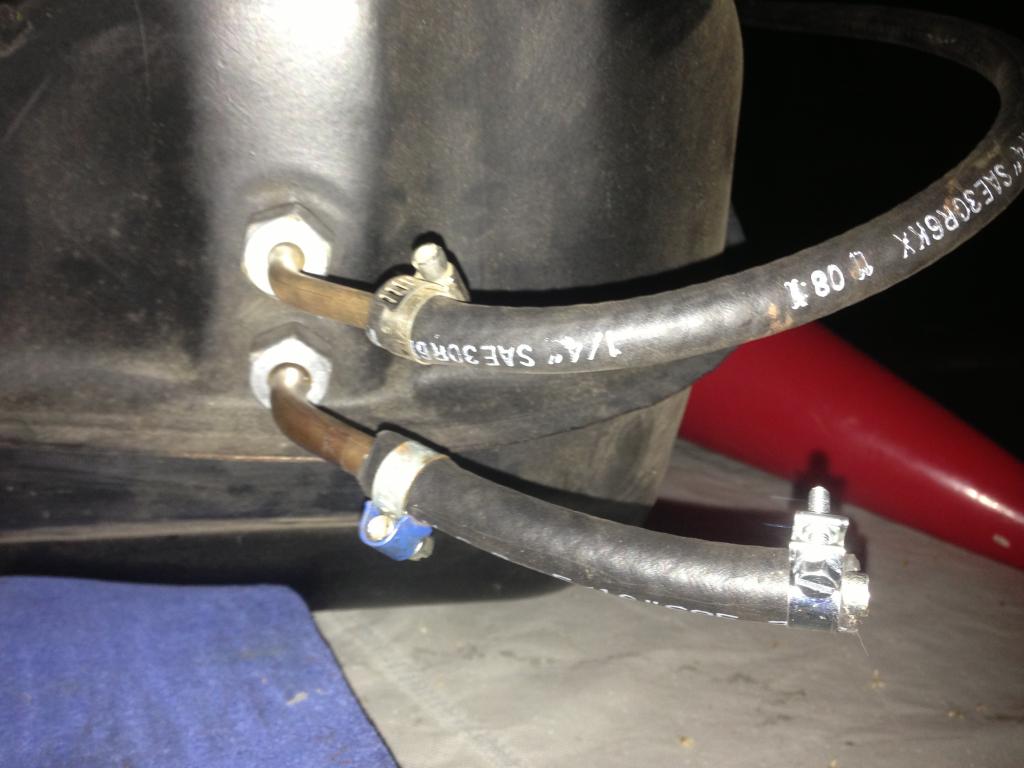
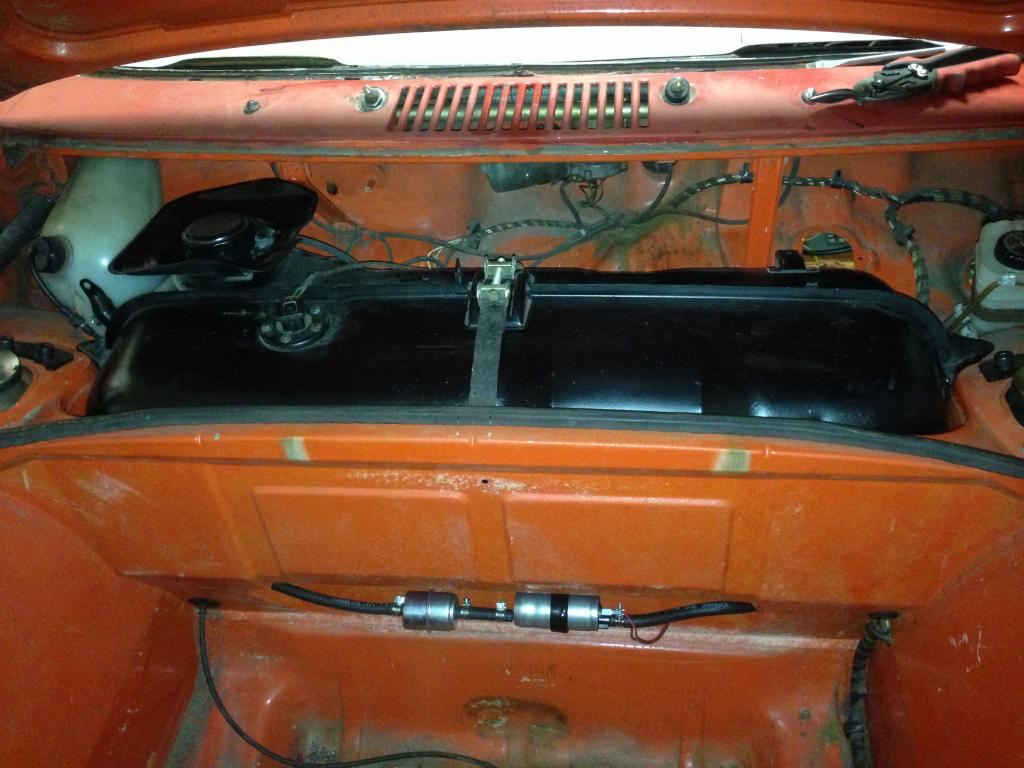
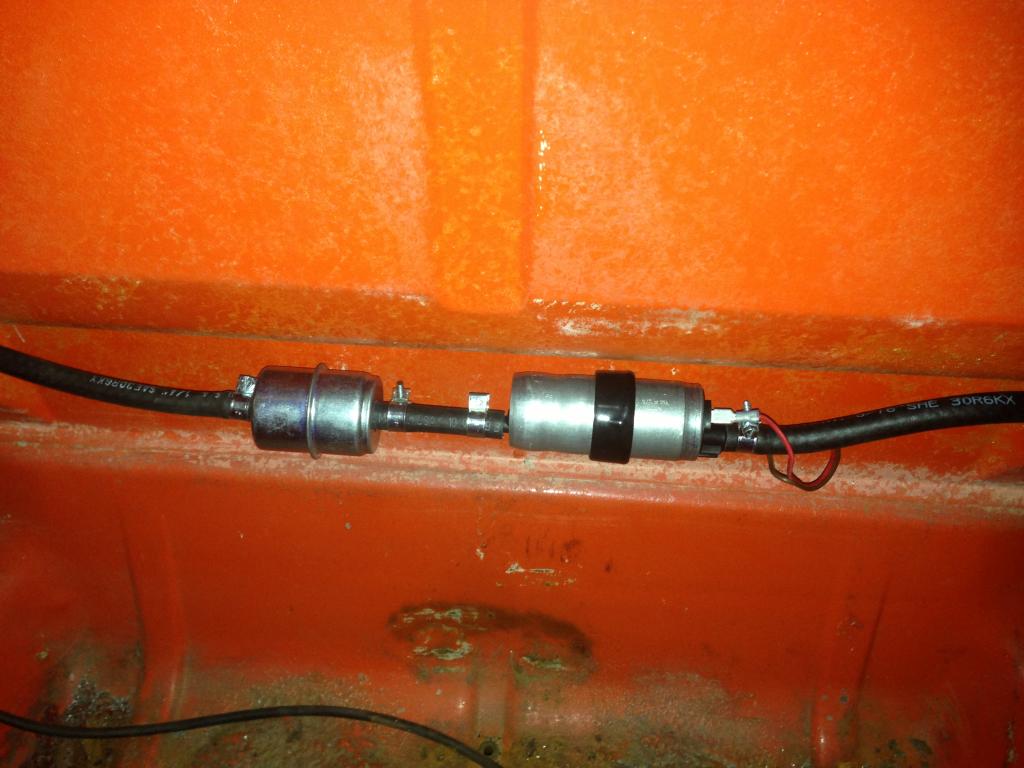
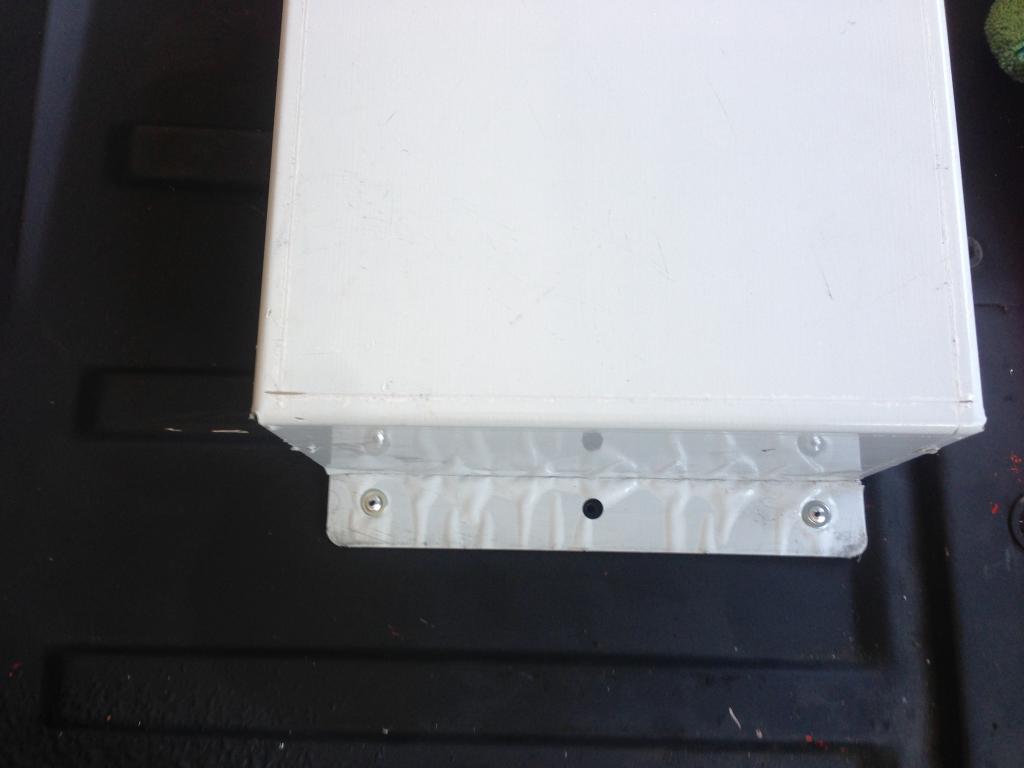
Once back in the garage, I sorted out the gas tank. Since I only need one supply line, the other line needed to be plugged. The SS kit that i got from chris had a shank in one of the lines on delivery so it was perfect, clamped that guy into a short 5/16" fuel line that went to the unused nipple. I switched around the original position of the nipples, using the smaller OD one on the outer side, with a new fuel stock filter in there, and the larger OD nipple is the one being plugged. This is so I would not have to step down the fuel hose prior to getting to the fuel filter.
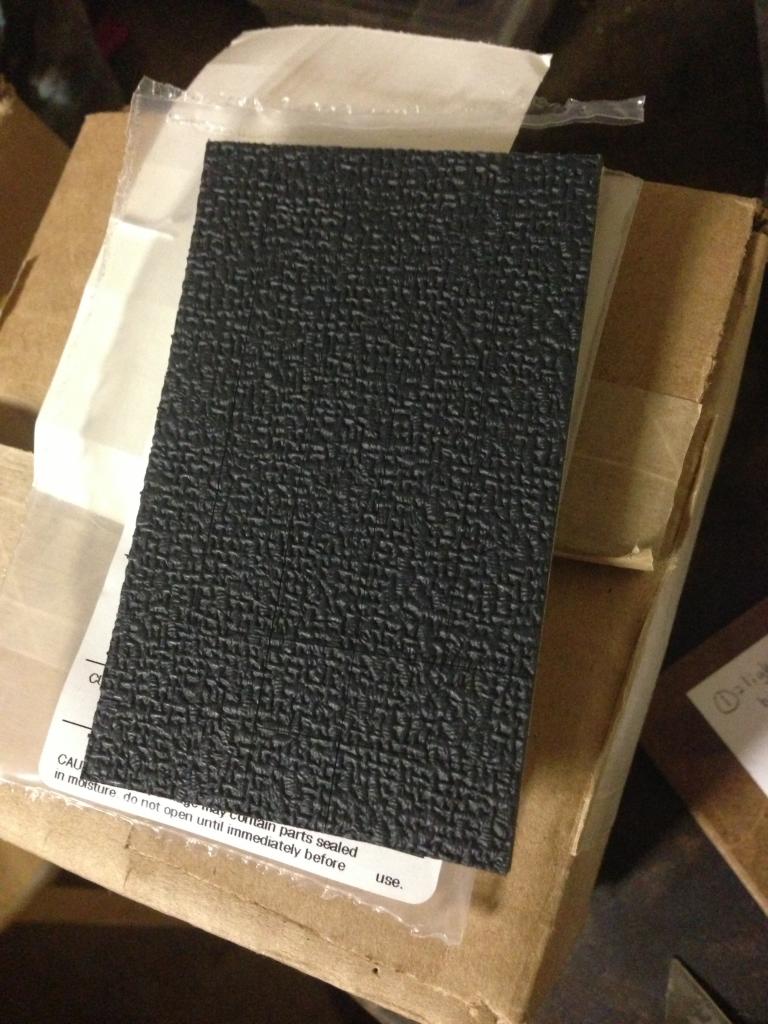
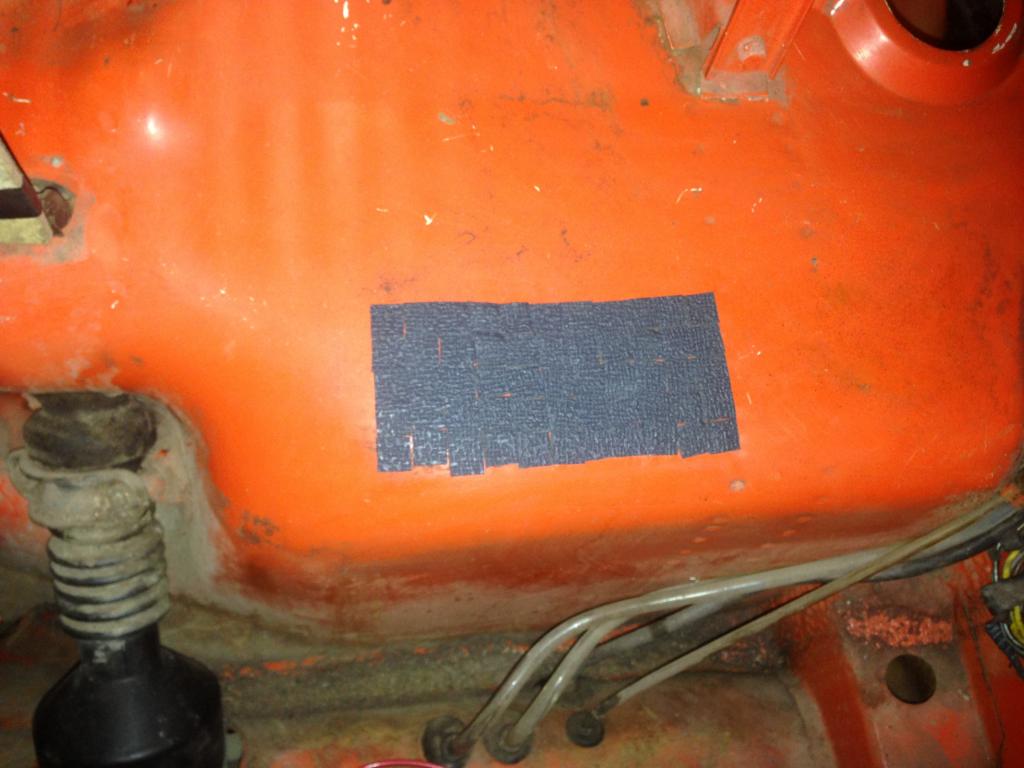
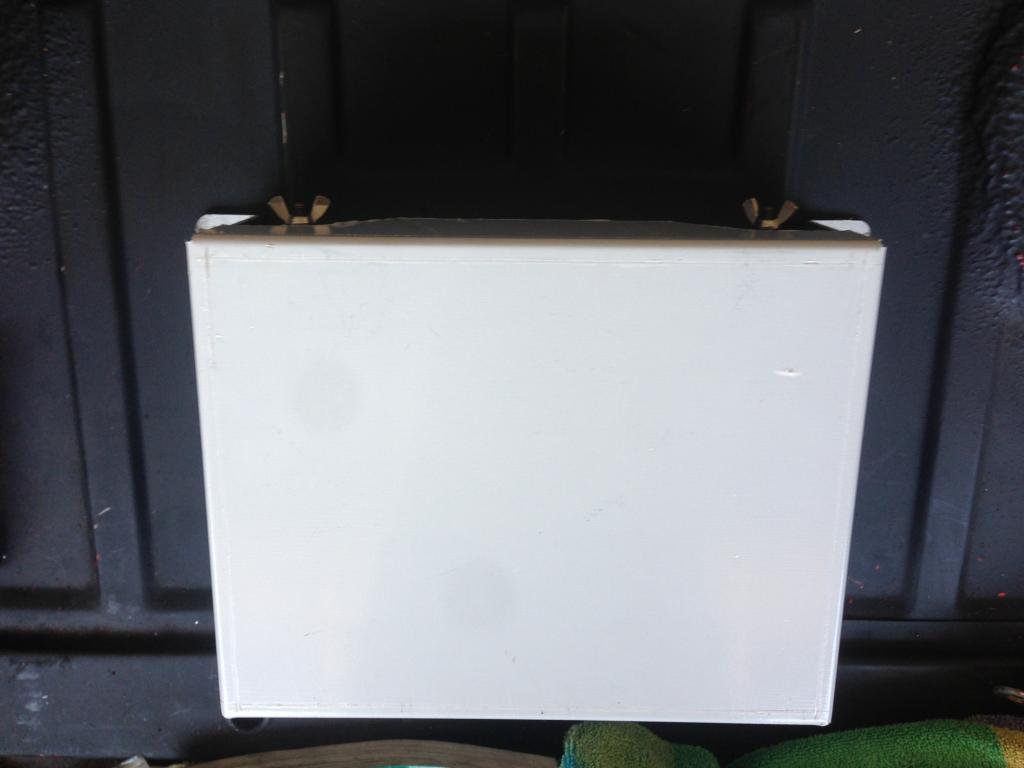
I also came up with a solution for the vibration pads that the tank sit on. Found this rubber adhesive backed pad on McMaster for $3 for two pads. The problem was that it was a bunch of smaller squares, which i knew prior to ordering, but i was hoping they woud stay together better when i removed the backing, that was not the case. Each square had to be individually laid down, hence why it looks like shit, but i dont really care since it is never visible!
Installed the short carb manifolds i have. Will set up the carbs and dual linkage today, then install the engine/tranny!


I also came up with a solution for the vibration pads that the tank sit on. Found this rubber adhesive backed pad on McMaster for $3 for two pads. The problem was that it was a bunch of smaller squares, which i knew prior to ordering, but i was hoping they woud stay together better when i removed the backing, that was not the case. Each square had to be individually laid down, hence why it looks like shit, but i dont really care since it is never visible!


Installed the short carb manifolds i have. Will set up the carbs and dual linkage today, then install the engine/tranny!

Well to start with the good news, this engine is in the car!!!! Was working on the car all of sunday, literally all day before i had to depart for SD to start my new job monday morning. Ill start at the beginning of the day:
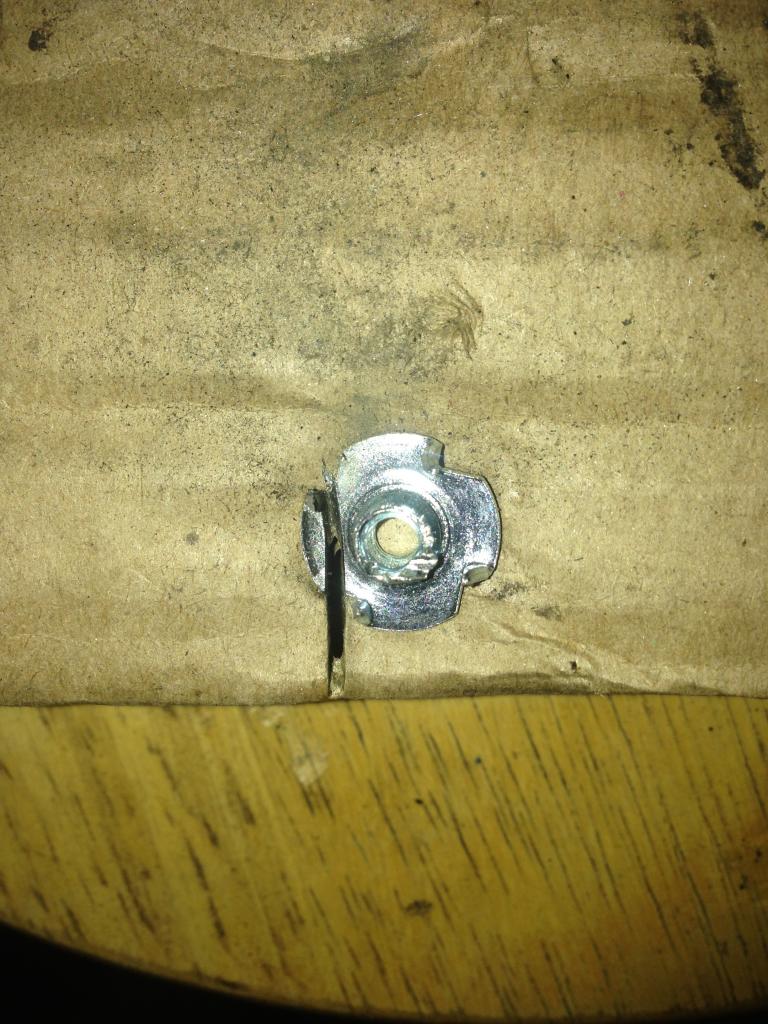
As i showed earlier, the bolt/square nut to clamp the thermostar wire had stripped and need replacing. I had to do a makeshift replacement but it worked out well. Used a t-nut and cut a section off to create a flat area, and so it could fit in the tight spot period.
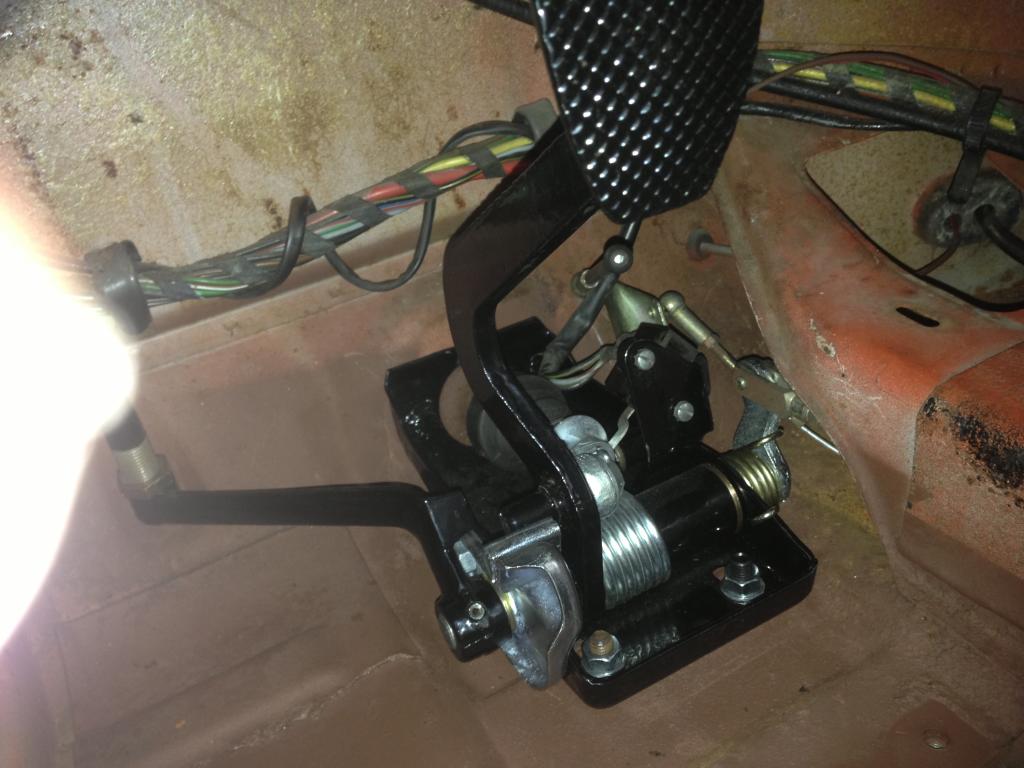
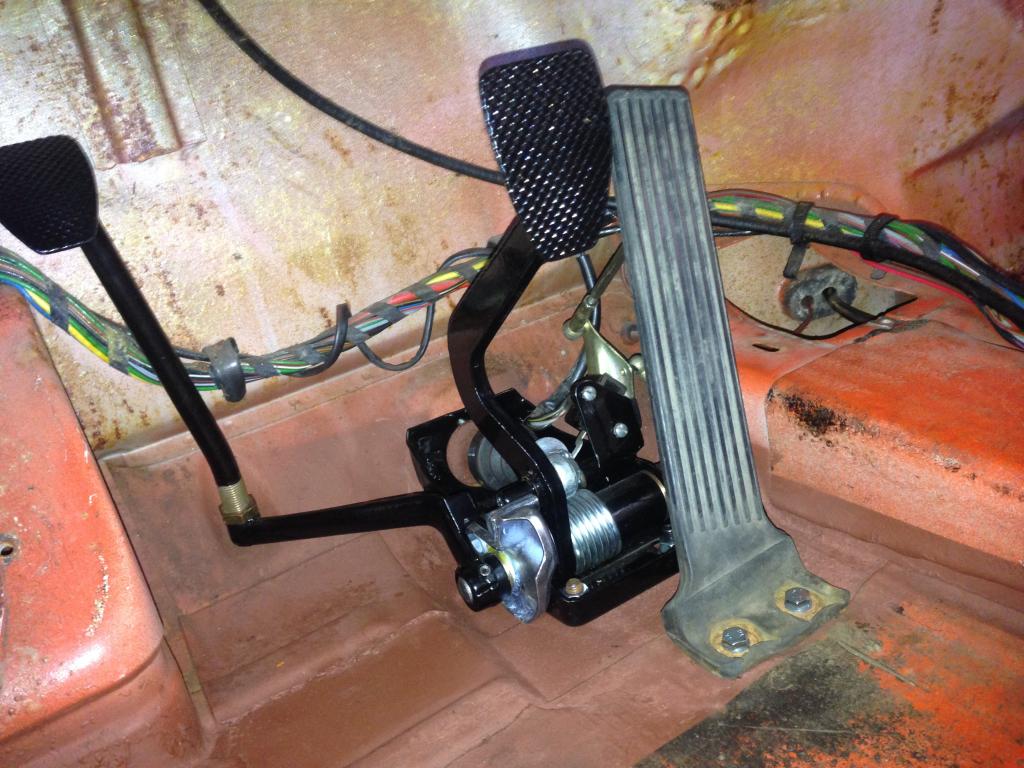
Next i installed the bdstone rebuilt pedal cluster. As you can see the right floor bolt isnt stock, the original one became rusted to the nut and sheared off upon removal. I drilled it out to just the right size to squeeze an M8 set screw in there; its nuted on the top and bottom. Clutch cable and accelerator cable are hooked up.
Next moved onto the shift rods. for the bushing shown below, I only had one, but realized i was supposed to have two... so i used an old oil cooler gasket on the other side; it fit nicely and seemed to accomplish the job. If this is a huge no-no, please dont be afraid to tell me. If this should get the job done for a bit, also please let me know!
Installed the clutch fork and throwout bearing, new cup bushing on the fork and vibration dampeners on the bearing.
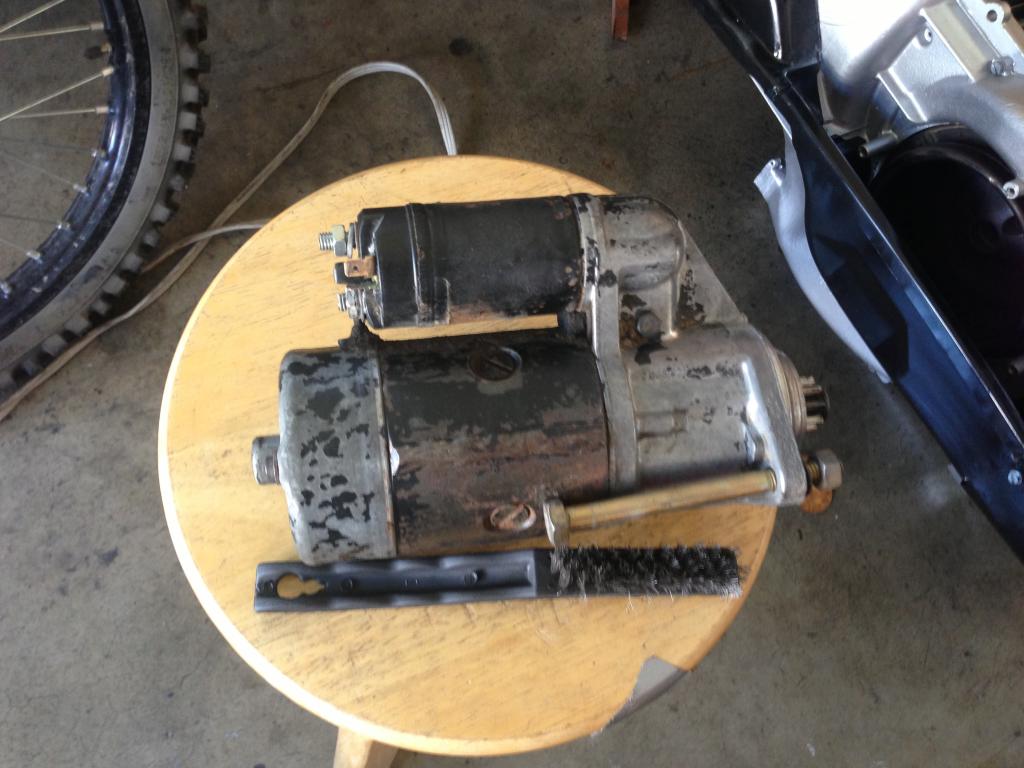
cleaned up the starter motor
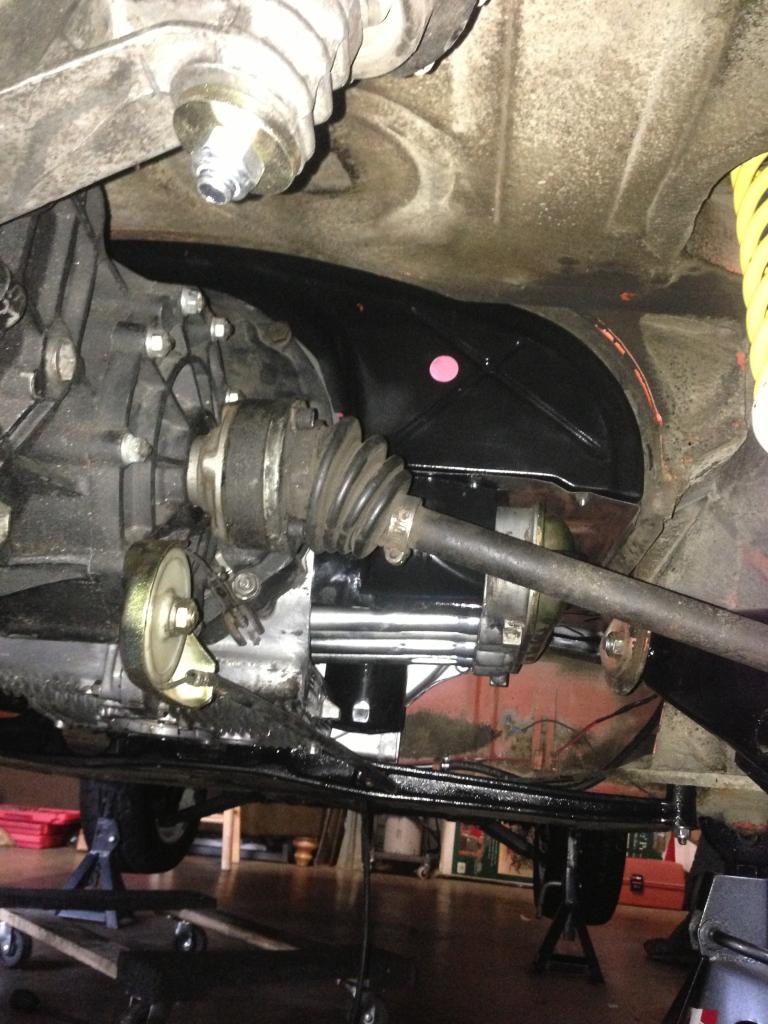
mated the tranny to the case, please keep in mind i was by myself the whole day, so this task deemed to be tricky, especially seeing that the case was on wheels and slightly kilter at a downward angle...i had to get inventive.
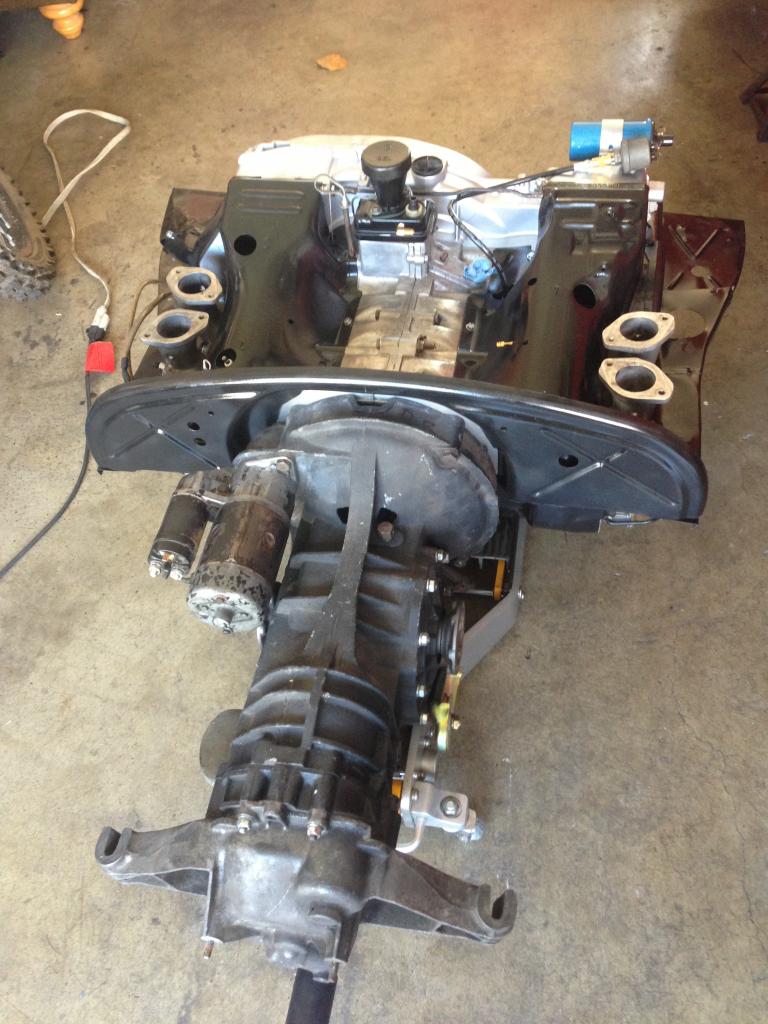
I still cant believe that this replaces all that was removed when using the tail shift components...looks so not upto par
lifted the engine into place, and checked location after every pump of the jack to make adjustments, once again i only had myself to double check everything was lining up
she's all in, the shift rod assemblies are in place and everything
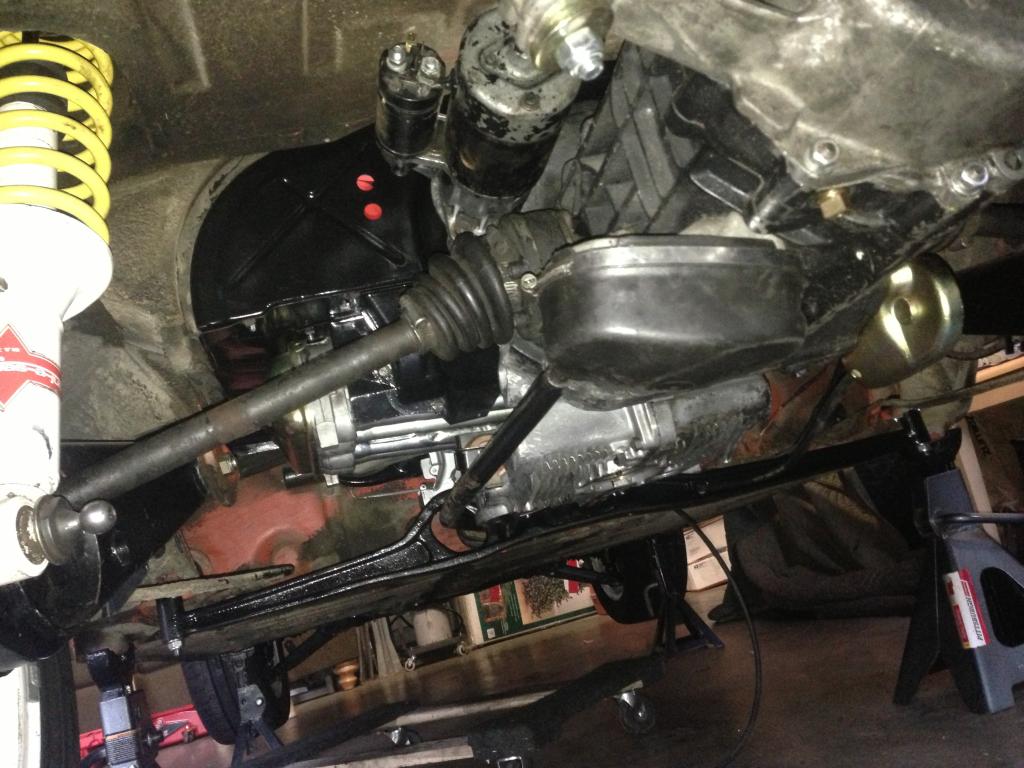
As she sits for the next week until i go back for the weekend to attempt start-up!
I do have a few questions though!....
first, how do i transfer all the parts of the spedo angle drive from the tailshift to the sideshift...i couldnt get that unit out...?
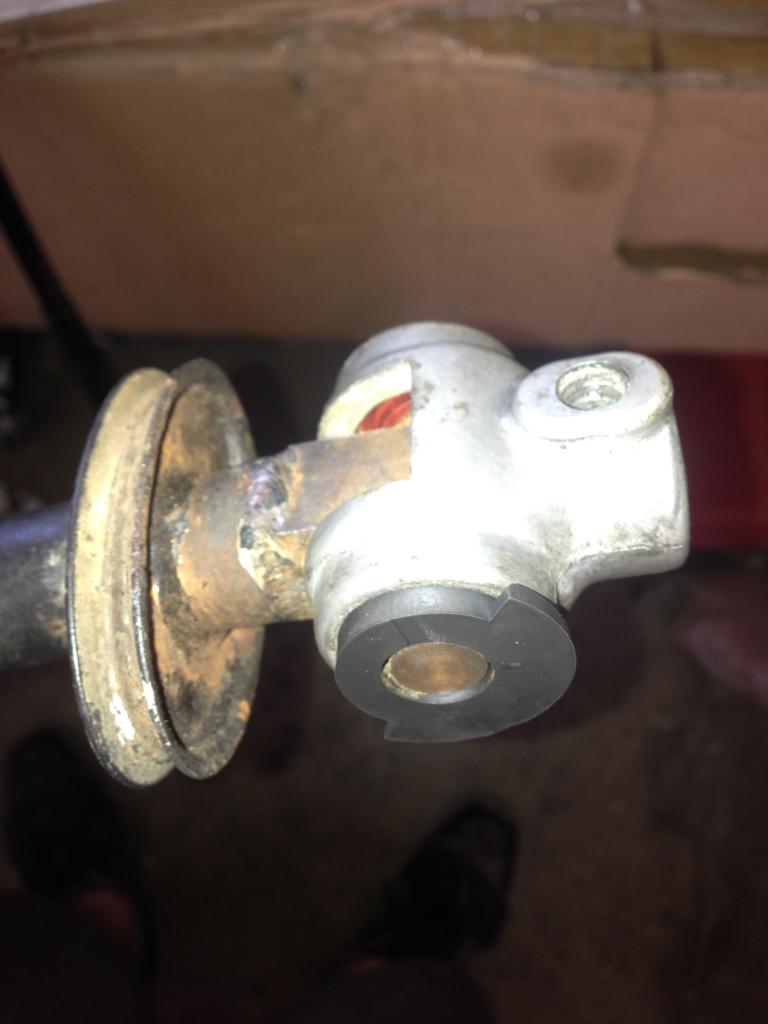
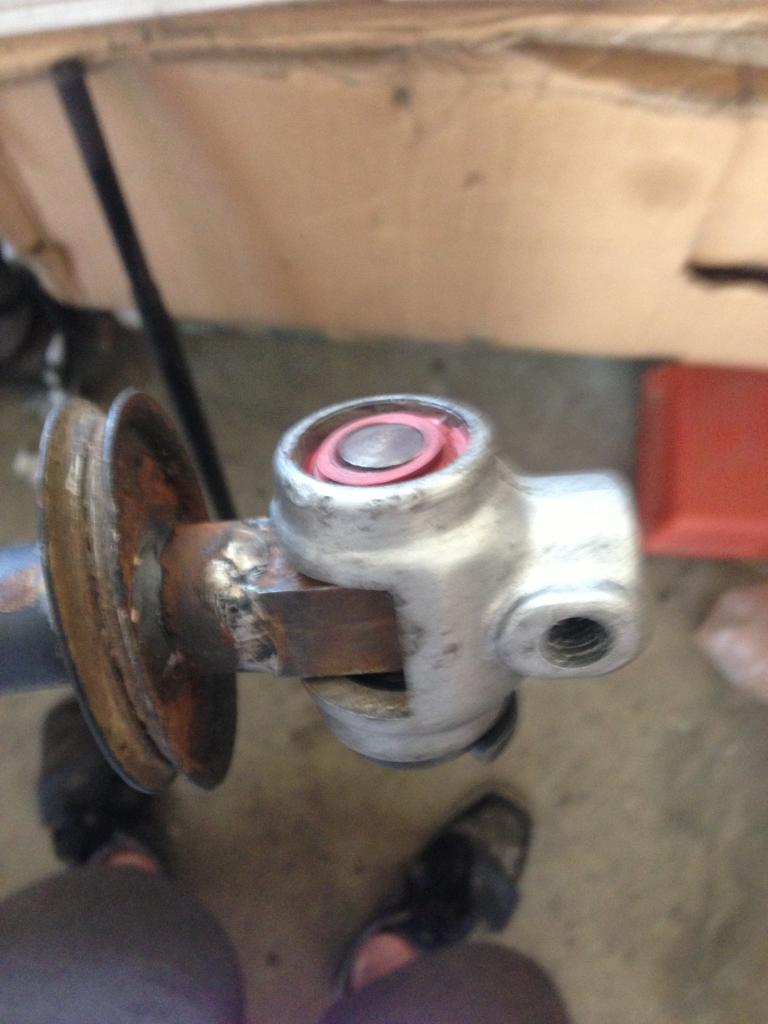
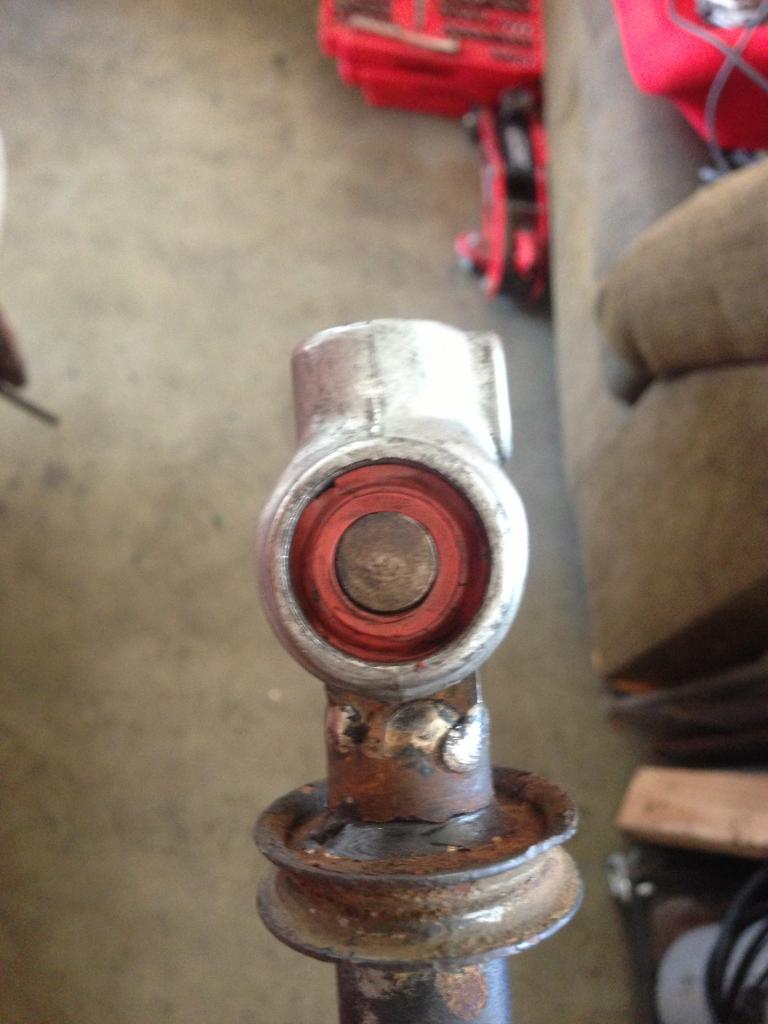
Can someone please provide me with some good pictures of the two connection points of the sidesift rods, right behind the firewall at the rod coupling and at the stock (without that cover there obviously). I have all of it hooked up as of now, but it didnt feel right when trying to move around the shifter, and i think i forgot the friction ring bushing... so i will be redoing all that but would love some quality pics for reference.
Thanks everyone for all your help, dont think i would have gotten this far without your aid, but hang in there, i think the biggest challenge is coming up, STARTING it, and then tuning it!
Was working on the car all of sunday, literally all day before i had to depart for SD to start my new job monday morning. Ill start at the beginning of the day:As i showed earlier, the bolt/square nut to clamp the thermostar wire had stripped and need replacing. I had to do a makeshift replacement but it worked out well. Used a t-nut and cut a section off to create a flat area, and so it could fit in the tight spot period.


Next i installed the bdstone rebuilt pedal cluster. As you can see the right floor bolt isnt stock, the original one became rusted to the nut and sheared off upon removal. I drilled it out to just the right size to squeeze an M8 set screw in there; its nuted on the top and bottom. Clutch cable and accelerator cable are hooked up.


Next moved onto the shift rods. for the bushing shown below, I only had one, but realized i was supposed to have two... so i used an old oil cooler gasket on the other side; it fit nicely and seemed to accomplish the job. If this is a huge no-no, please dont be afraid to tell me. If this should get the job done for a bit, also please let me know!


Installed the clutch fork and throwout bearing, new cup bushing on the fork and vibration dampeners on the bearing.

cleaned up the starter motor

mated the tranny to the case, please keep in mind i was by myself the whole day, so this task deemed to be tricky, especially seeing that the case was on wheels and slightly kilter at a downward angle...i had to get inventive.

I still cant believe that this replaces all that was removed when using the tail shift components...looks so not upto par

lifted the engine into place, and checked location after every pump of the jack to make adjustments, once again i only had myself to double check everything was lining up

she's all in, the shift rod assemblies are in place and everything


As she sits for the next week until i go back for the weekend to attempt start-up!

I do have a few questions though!....
first, how do i transfer all the parts of the spedo angle drive from the tailshift to the sideshift...i couldnt get that unit out...?

Can someone please provide me with some good pictures of the two connection points of the sidesift rods, right behind the firewall at the rod coupling and at the stock (without that cover there obviously). I have all of it hooked up as of now, but it didnt feel right when trying to move around the shifter, and i think i forgot the friction ring bushing... so i will be redoing all that but would love some quality pics for reference.
Thanks everyone for all your help, dont think i would have gotten this far without your aid, but hang in there, i think the biggest challenge is coming up, STARTING it, and then tuning it!
Last weekend on sunday i worked on the car for the entire day with the assistance of Jim We were hoping to fire it up....but that'll have to wait till this weekend.
Once we found TDC (was actually 180 of TDC, but still worked just had to keep that in mind) we lubed the shit out the distributor driveshaft gear and washer and dropped that sucker in there (carefully). Then installed the distributor, but pior to that we checked the gap in the rotor contact.
Before Jim came over I was working on my CFR parts. positioned the breather can where i want it and cut all the hoses to length, then removed the can while the rest of the work was done on the engine, didnt want to scratch it, its so nice looking. Then moved onto the throttle cable pulley linkage. Got some bad news there, my manifolds are apparently to short, so it will be impossible to use with my current set up, the brackets that hold the cables interfere with the tins and dont come close to lining up the the holes they are supposed to bolt to..... So for now, I am using the old swivel type pull bars....
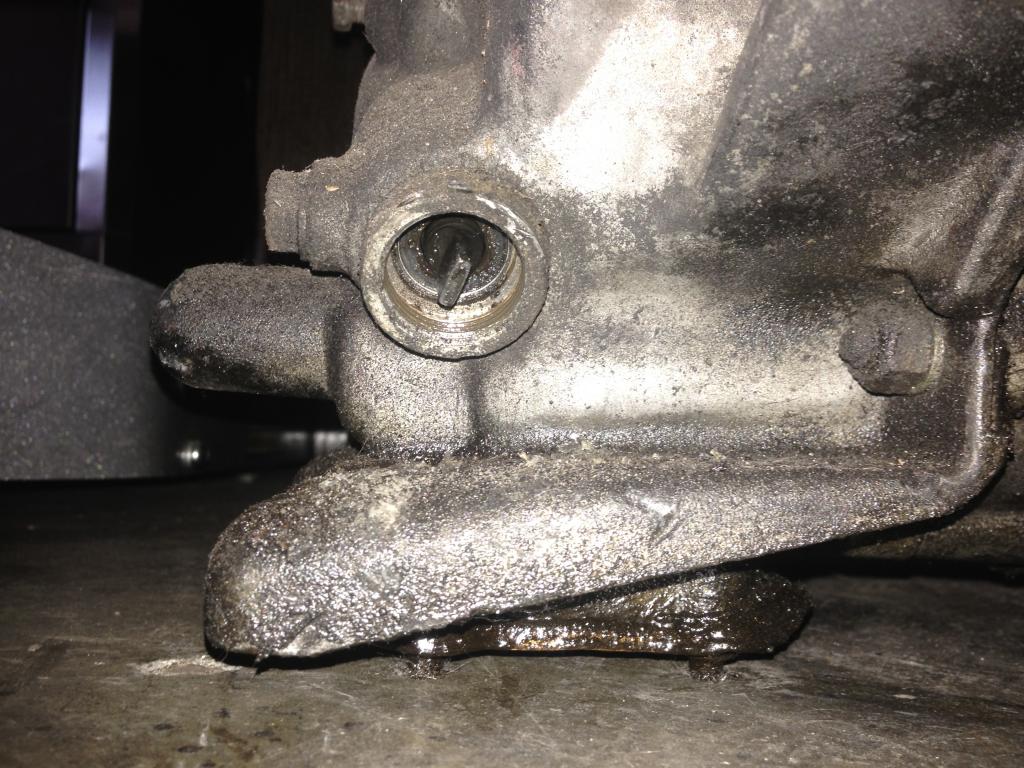
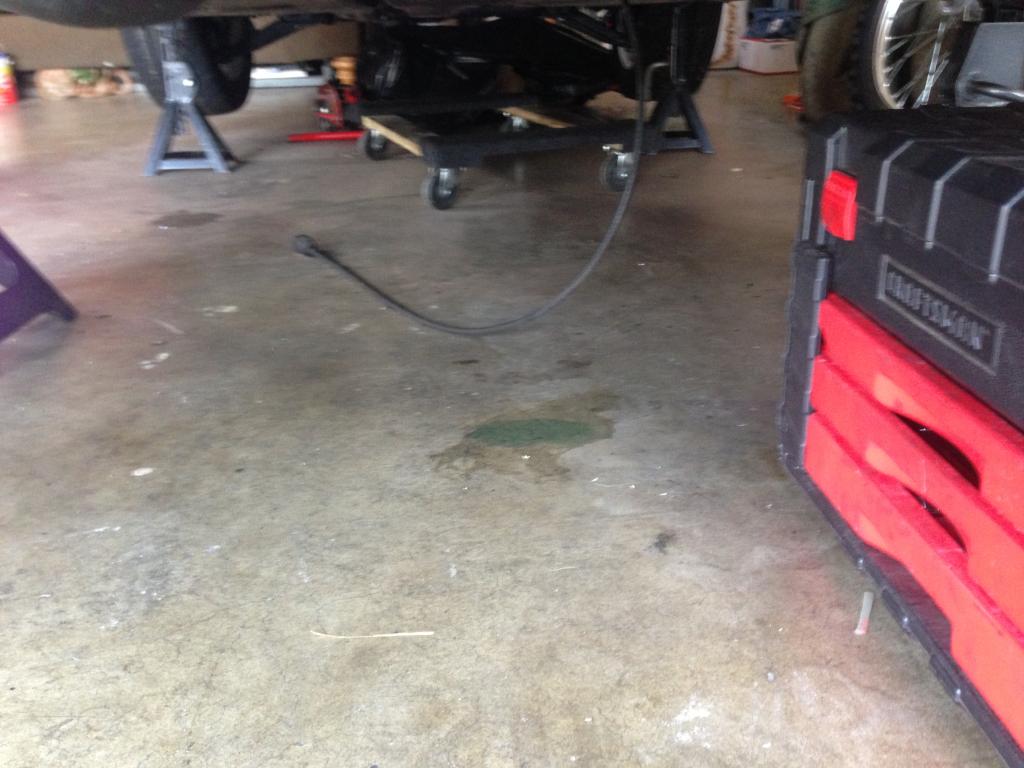
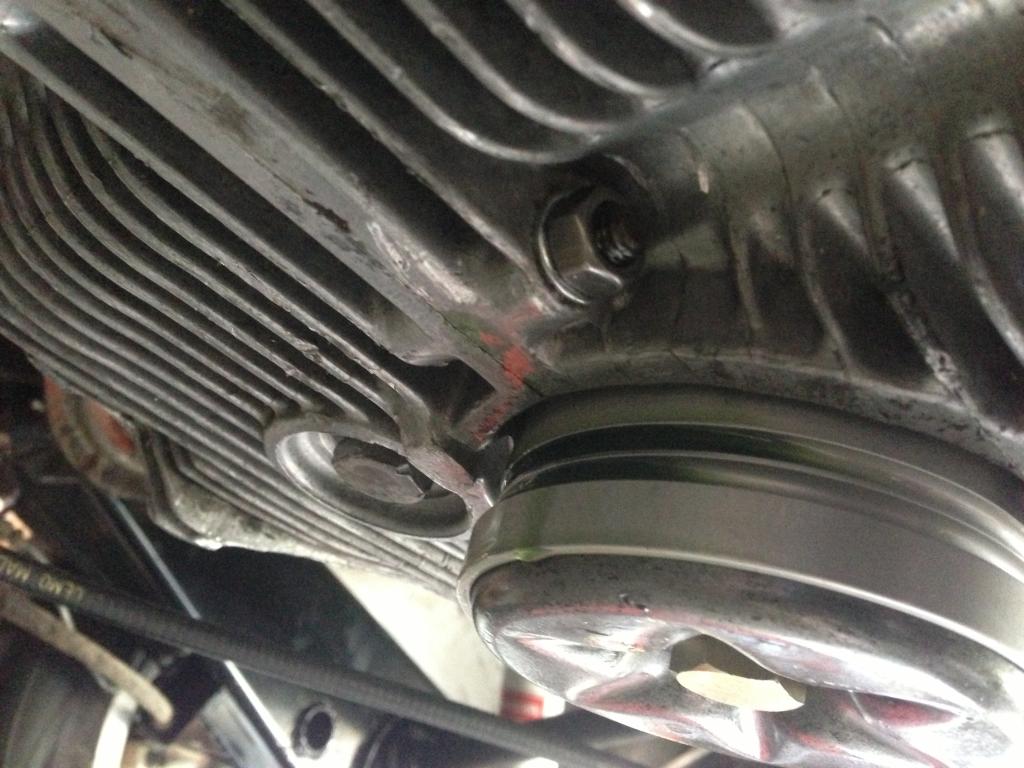
Before going to grab some in and out for our lunch break, we poured in the brad penn break in oil, came back, and had a leak, i officially own a 914. Leak was coming from between the tuna can and case, was leaking a substantial amount! Going to drain the oil (save it and reuse it), pull the tuna can off and put some RTV gasket stuff on there, should seal it up, hopefully
Will be back up at the house starting tomorrow to work on the car, taking a half day at work to go up early and avoid LA traffic!
Will hopefully be uploading a nice video this weekend of the car running, lets pray
We were hoping to fire it up....but that'll have to wait till this weekend.Once we found TDC (was actually 180 of TDC, but still worked just had to keep that in mind) we lubed the shit out the distributor driveshaft gear and washer
and dropped that sucker in there (carefully). Then installed the distributor, but pior to that we checked the gap in the rotor contact.
Before Jim came over I was working on my CFR parts. positioned the breather can where i want it and cut all the hoses to length, then removed the can while the rest of the work was done on the engine, didnt want to scratch it, its so nice looking. Then moved onto the throttle cable pulley linkage. Got some bad news there, my manifolds are apparently to short, so it will be impossible to use with my current set up, the brackets that hold the cables interfere with the tins and dont come close to lining up the the holes they are supposed to bolt to.....
So for now, I am using the old swivel type pull bars....
Before going to grab some in and out for our lunch break, we poured in the brad penn break in oil, came back, and had a leak, i officially own a 914. Leak was coming from between the tuna can and case, was leaking a substantial amount! Going to drain the oil (save it and reuse it), pull the tuna can off and put some RTV gasket stuff on there, should seal it up, hopefully


Will be back up at the house starting tomorrow to work on the car, taking a half day at work to go up early and avoid LA traffic!
Will hopefully be uploading a nice video this weekend of the car running, lets pray
SHE LIVES!!!!
The engine is now alive, cam break in is complete! Will need to finishing the timing with a timing light and then further tune the carbs before a first test drive around the block, but i am super happy right now that i have a running engine!
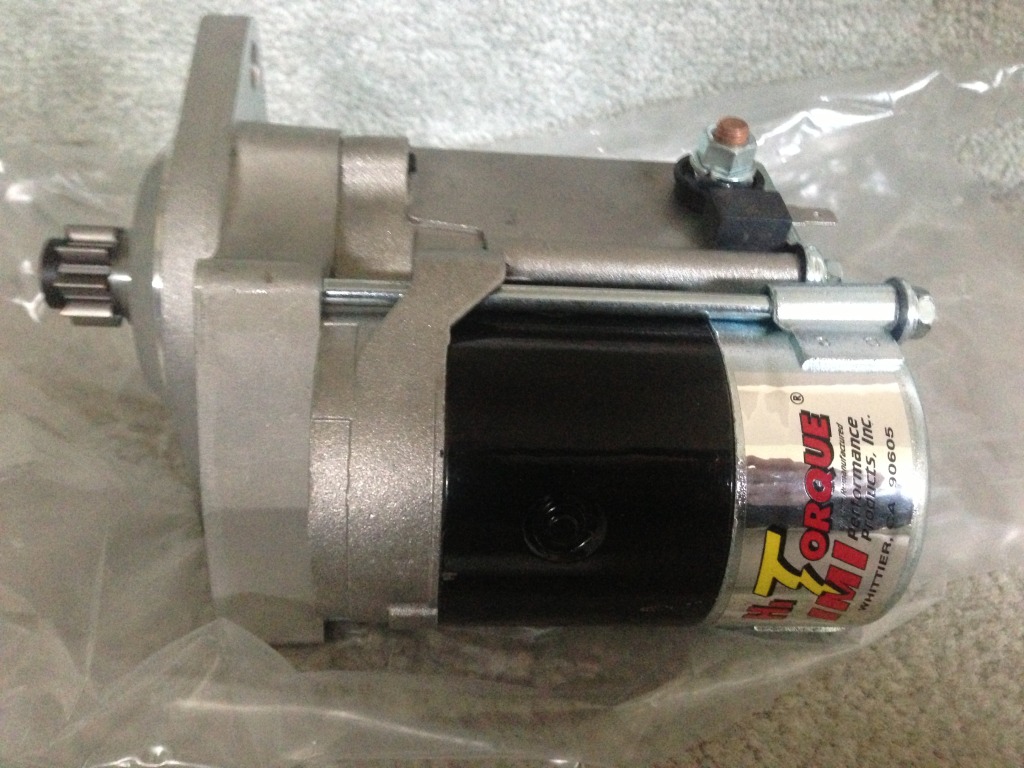
We had some hiccups along the way the to say the least! Previously, both stock starter motors i had on hand weren't powerful enough to turn over the newly rebuilt engine, even with 1600 crank amps connected (had two F-250 diesel truck batteries hooked up in series.) I purchased a new IMI hi-torque starter motor and am supper happy with it!
But even yesterday when we were trying to fire it up, we made many attempts before realizing that the fuel pump had somehow been unhooked, probably my fault, but hey we all make mistakes! So once that was taken care of, and with a little futzing with the distributor to get the timing in line enough to fire, she woke up from her 23 year nap. That was yesterday, and at that point we had no muffler on, just stock headers, was painfully load, and were getting burst of fire out of the carbs during backfires. ran it for just a few minutes, let it sit all night and then this morning checked all the valve clearances, one needed adjusted and the rest were just re-tightened down. Then attached the muffler and after that is what you see in the video!
![popcorn[1].gif](http://www.914world.com/bbs2/style_emoticons/default/popcorn[1].gif)
video #1
video #2
If someone could tell me how to get the actual video box to show in the post that would be great!
The engine is now alive, cam break in is complete! Will need to finishing the timing with a timing light and then further tune the carbs before a first test drive around the block, but i am super happy right now that i have a running engine!
We had some hiccups along the way the to say the least! Previously, both stock starter motors i had on hand weren't powerful enough to turn over the newly rebuilt engine, even with 1600 crank amps connected (had two F-250 diesel truck batteries hooked up in series.) I purchased a new IMI hi-torque starter motor and am supper happy with it!

But even yesterday when we were trying to fire it up, we made many attempts before realizing that the fuel pump had somehow been unhooked, probably my fault, but hey we all make mistakes! So once that was taken care of, and with a little futzing with the distributor to get the timing in line enough to fire, she woke up from her 23 year nap. That was yesterday, and at that point we had no muffler on, just stock headers, was painfully load, and were getting burst of fire out of the carbs during backfires. ran it for just a few minutes, let it sit all night and then this morning checked all the valve clearances, one needed adjusted and the rest were just re-tightened down. Then attached the muffler and after that is what you see in the video!
video #1
video #2
If someone could tell me how to get the actual video box to show in the post that would be great!
Wow, that is super cool!
Great work getting to this point.
Soon you can enjoy the best part of these cars, driving them.

John
Thanks John, I appreciate the kind words, I am super excited to be at this point and even more excited to be one step closer to my next objective....DRIVING IT.
I also forgot to mention a funny story from this past weekend. Jim pointed out a "minor discrepancy" in my carb jetting... Both mains on the 1/2 side had a 110, but both mains on the 3/4 side had a 115. Then we also noticed it looked as though the idle jets had been brazed and then re-drilled, most likely to get a smaller hole, but i don't know what size it is now, and the hole wasn't centered... like i said, "minor discrepancies" haha

So i am working on fixing those in the near future.
I also forgot to mention a funny story from this past weekend. Jim pointed out a "minor discrepancy" in my carb jetting... Both mains on the 1/2 side had a 110, but both mains on the 3/4 side had a 115. Then we also noticed it looked as though the idle jets had been brazed and then re-drilled, most likely to get a smaller hole, but i don't know what size it is now, and the hole wasn't centered... like i said, "minor discrepancies" haha
So i am working on fixing those in the near future.
Dude I just went through all your post...very cool, It make's me think I can rebuild the 2 motor I have sitting 
Lots of progress. It's been fun to help you.
Now lets get her off the jack stands and back on the road!
Now lets get her off the jack stands and back on the road!
Jamie with some love, your engines could be troopers again too!!
Jim we are on the same page! Ill be at the house working on the car this wed and thurs afternoon this week plus the weekend, so it is doable for sure. I really do appreciate all you help though, thank you!!
Jim we are on the same page! Ill be at the house working on the car this wed and thurs afternoon this week plus the weekend, so it is doable for sure. I really do appreciate all you help though, thank you!!
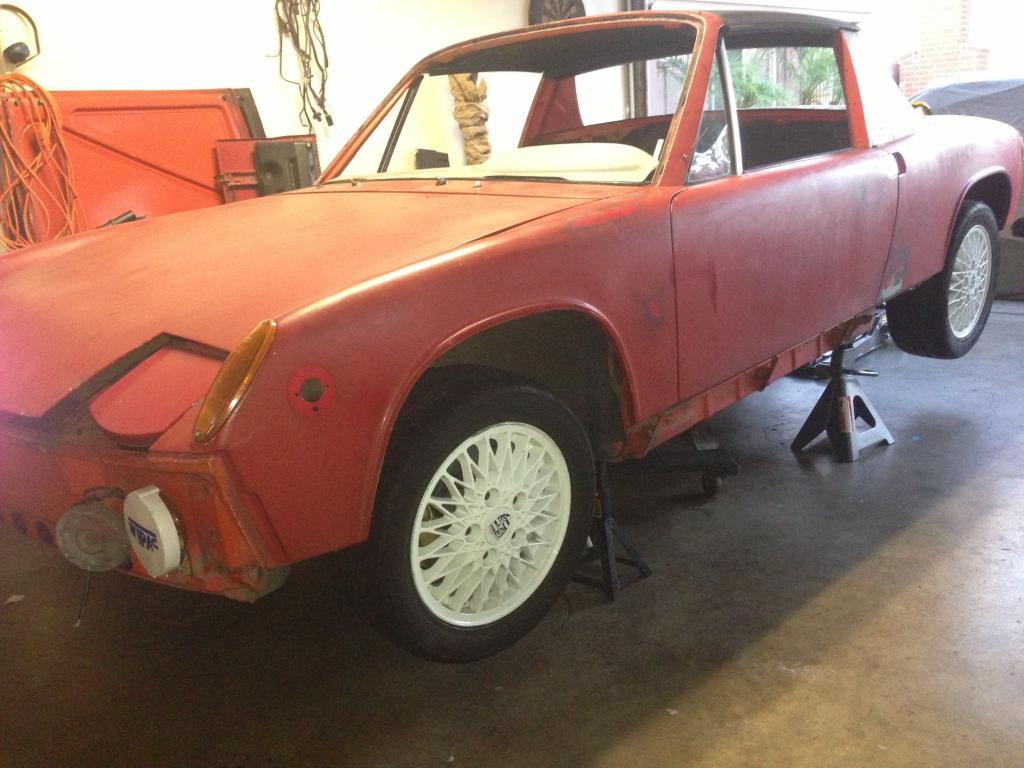
For the first time ever, I drove my 914 around my neighborhood for a few victory laps! It was extremely exhilarating and fun. But there are some "issues" that need attended to and adjusted.
Here are the issues that i noted:
-Pops out of second gear. Will engage and drive but within 15 seconds or so it gently pops out of gear. It stays in first just fine.
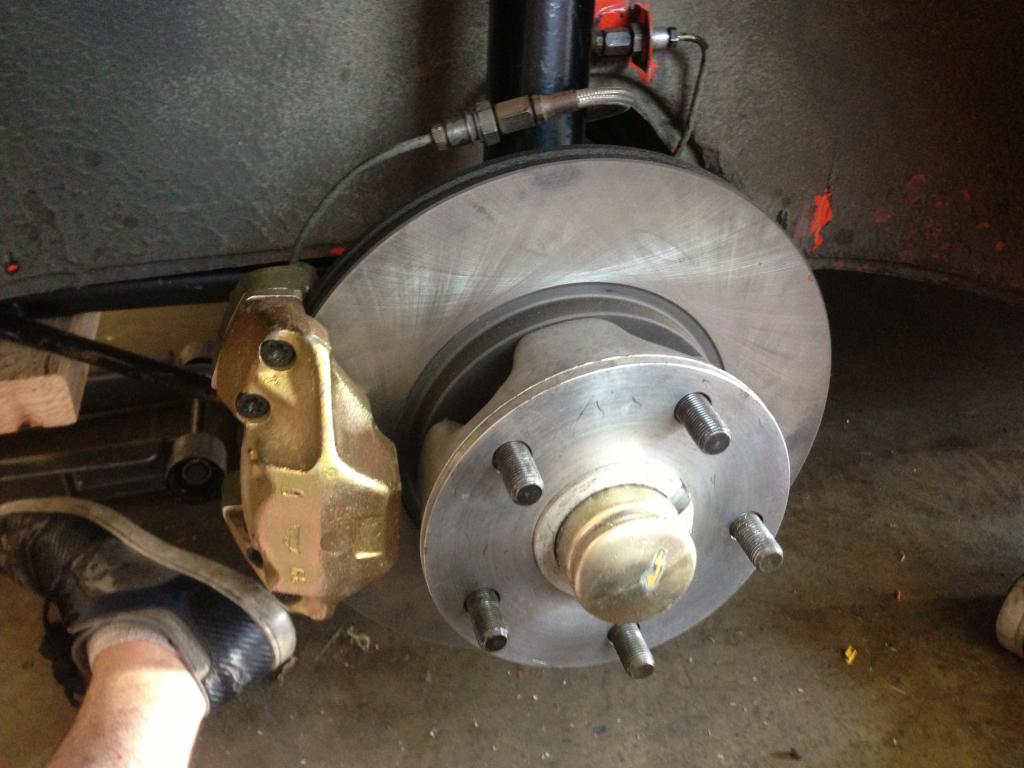
-Brakes have to be pumped like 3 times to feel strong throughout the whole pedal travel, but i have to do it almost every time before i want to actually stop the car. So basically it looses pressure pretty fast is what it seams like to be, does this mean the MC has bad seals and needs replaced? I will bleed the brakes again and see if that helps.
-lights on the DS dont work (for the most part). with the headlights turned on: headlight works, brake light works when braking only, fog light does not work, turn signal only works when turn signal is on. Reminder, all lights on PS are working as they should, so is there a fuse or relay that should be checked that operates just the DS?
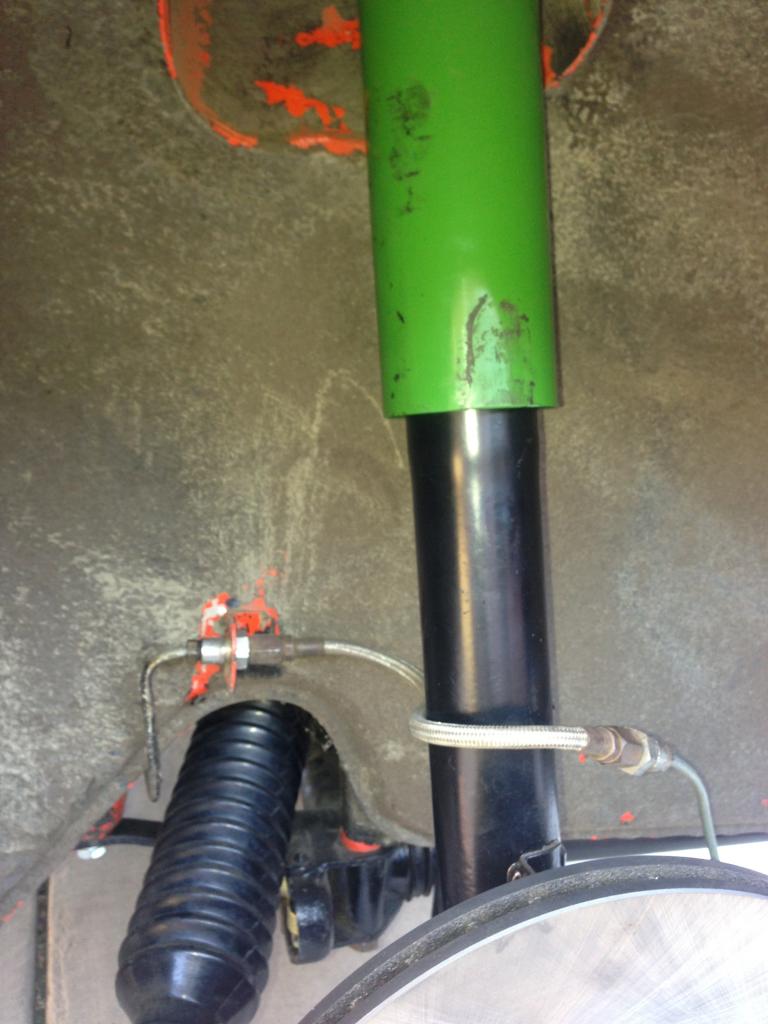
-Both PS tires rub, both DS tires do not?? front rubs on strut dust cover, back rubs on the inside wheel well. both front hubs now have 8mm spacers with 50mm studs, no more rubbing. pass rear now has two 5mm spacers and does not rub. For the rears, does the trailing arm just need some shims? Reminder, i have 944 rims, and the fronts are 911 hubs, so the offset is a bit different, but not much. My main concern is why its only on one side and not the other...
-Car fires up real quickly when cold, but when its already been on recently it just cranks for awhile (quickly because of my high power starter )
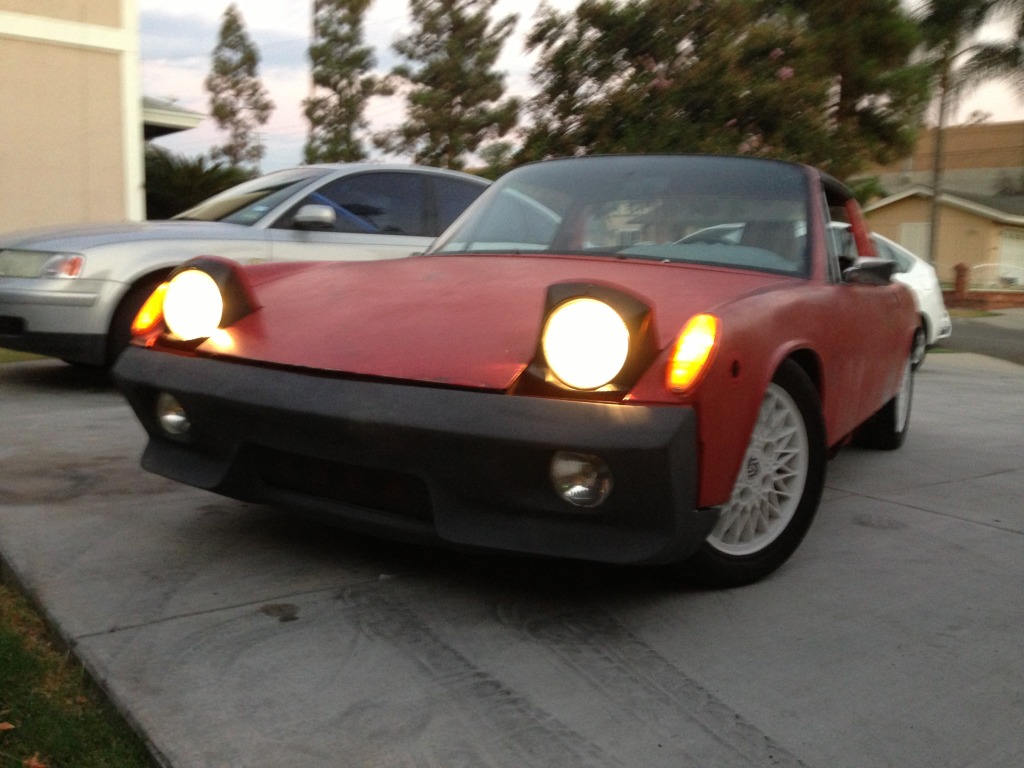
Thats all i can think of right now, so here are some recent pictures:
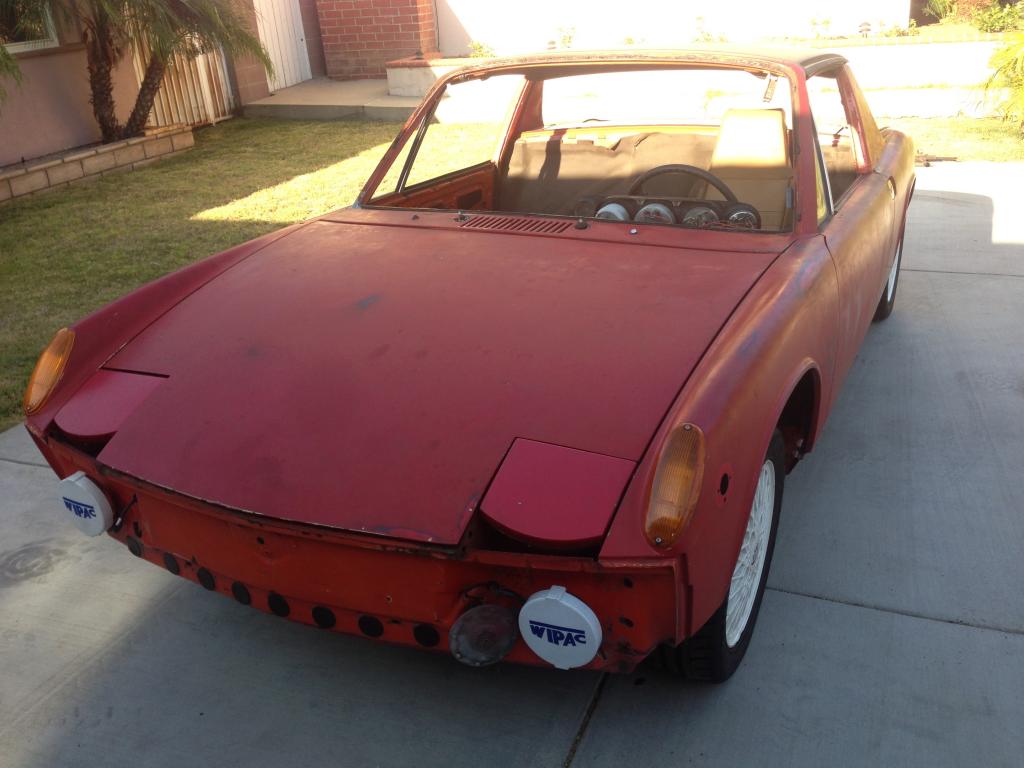
(front ride hight has been adjusted from where it sat in this pic)
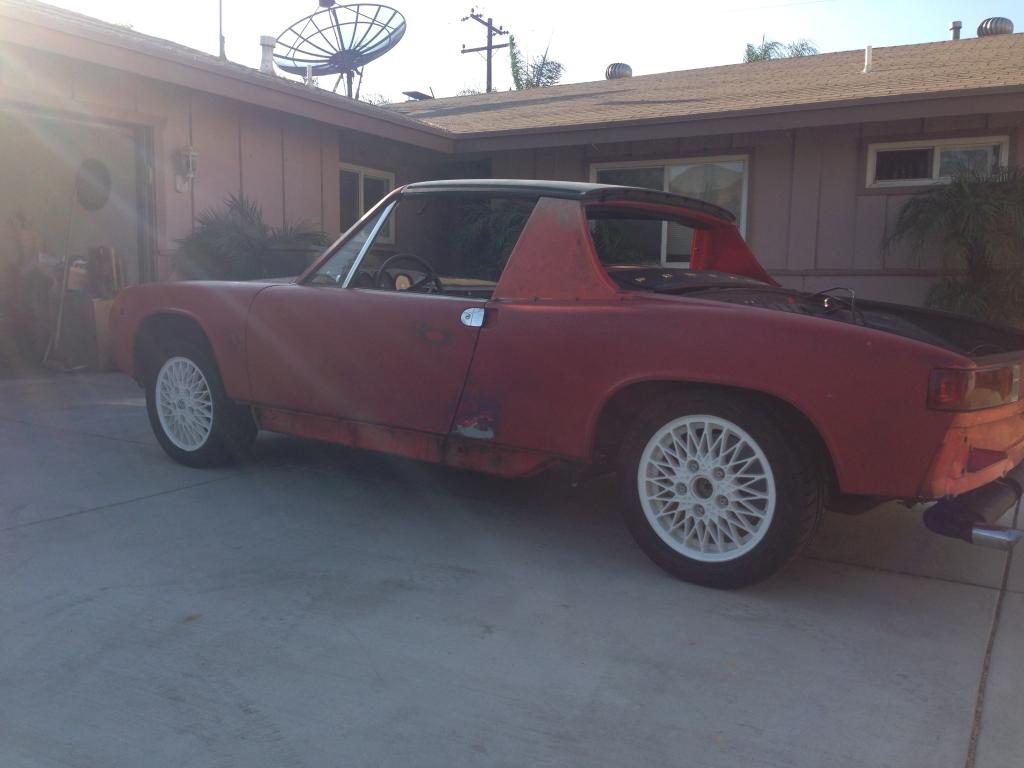
Cheers
It was extremely exhilarating and fun. But there are some "issues" that need attended to and adjusted.Here are the issues that i noted:
-Pops out of second gear. Will engage and drive but within 15 seconds or so it gently pops out of gear. It stays in first just fine.
-Brakes have to be pumped like 3 times to feel strong throughout the whole pedal travel, but i have to do it almost every time before i want to actually stop the car. So basically it looses pressure pretty fast is what it seams like to be, does this mean the MC has bad seals and needs replaced? I will bleed the brakes again and see if that helps.
-lights on the DS dont work (for the most part). with the headlights turned on: headlight works, brake light works when braking only, fog light does not work, turn signal only works when turn signal is on. Reminder, all lights on PS are working as they should, so is there a fuse or relay that should be checked that operates just the DS?
-Both PS tires rub, both DS tires do not?? front rubs on strut dust cover, back rubs on the inside wheel well. both front hubs now have 8mm spacers with 50mm studs, no more rubbing. pass rear now has two 5mm spacers and does not rub. For the rears, does the trailing arm just need some shims? Reminder, i have 944 rims, and the fronts are 911 hubs, so the offset is a bit different, but not much. My main concern is why its only on one side and not the other...
-Car fires up real quickly when cold, but when its already been on recently it just cranks for awhile (quickly because of my high power starter
) Thats all i can think of right now, so here are some recent pictures:


(front ride hight has been adjusted from where it sat in this pic)

Cheers
Okay, some answers so most of your questions.. haha
1. The popping out of second gear is due to a bad synchro on second gear. Easy enough to replace with the gearbox in the car and just pull the stack. Hell, I even have a shift fork alignment jig to set it up
2. Definitely bleed the brakes again. Be methodical about it and do it old school with a buddy. Start at the far corner and move around the car. The low pedal is sometimes caused by the brand new seals in the calipers being stiff and pulling the pistons back immediately. So, bleed them again, and see if it improves. If it doesn't seem to, Stand on the pedal in the driveway. If the pedal slowly falls, then the MC is bad or the you have a leak in the brake lines.
More driving will break in the seals, so go drive it.
3. I can't remember if they're fused separately, but check fuses, and check for burned out bulbs, discontinuity in the system due to burned bulbs does weird things in these cars.
4. Check camber. One side may have too much positive camber or negative camber causing rubbing..
5. When you crank it once it's running, do you get a puff of gray smoke out of the exhaust? Once it's running and warm, shut the car off and look down the throat of the carb to see if the fuel is boiling over into the venturi due to heat soak.
Congratulations, that is very exciting!

You got this far in your restoration very fast compared to most of us.
You just need to be methodical now about finishing it up.
John
Good show! Glad to see you were able to drive it.
Text me if you have anything you need help with. I wish I could help more, but it looks like the only weekend I will be in two for the rest of the summer is Labor Day.
Congrats Dave!
Text me if you have anything you need help with. I wish I could help more, but it looks like the only weekend I will be in two for the rest of the summer is Labor Day.
Congrats Dave!
Thanks guys for all the help and support, having this amazing support group is really helpful!!
Ethan, thanks for all the responses.
1. For the syncro, we will have to figure out a time to get that sorted out using your awesome and wonderful jig and expertise for now i will just hold the shifter in its position, haha
2. i will have to re-bleed when i have a buddy again. Me and Jim did it together the first time and did back PS to front DS (the correct way as you pointed out) we even went at it for two rounds. When i was driving around a bunch this weekend i came to the realization i could just be being a pussy when it comes to braking and just used to power Brembo brakes but i will definitely want to re-bleed anyways! But as you said the seals need breaking in, and i think after this weekends adventures it started to feel a little better already.
3. The lights are fused separately, the fuse for the DS lights was blown! what a coincident! replaced the fuse with a good one and all was well, except the fogs, i am still having problems with those, now both wont go on???
4. will have to check next time...
5. didnt check this weekend, will next time. Could it be from the battery being warm?... the batter is laying on the rear trunk floor and i felt the metal around it after a drive and it was warm, not scolding, but warm, could that be aiding in the not start when warm issue?
NEW:
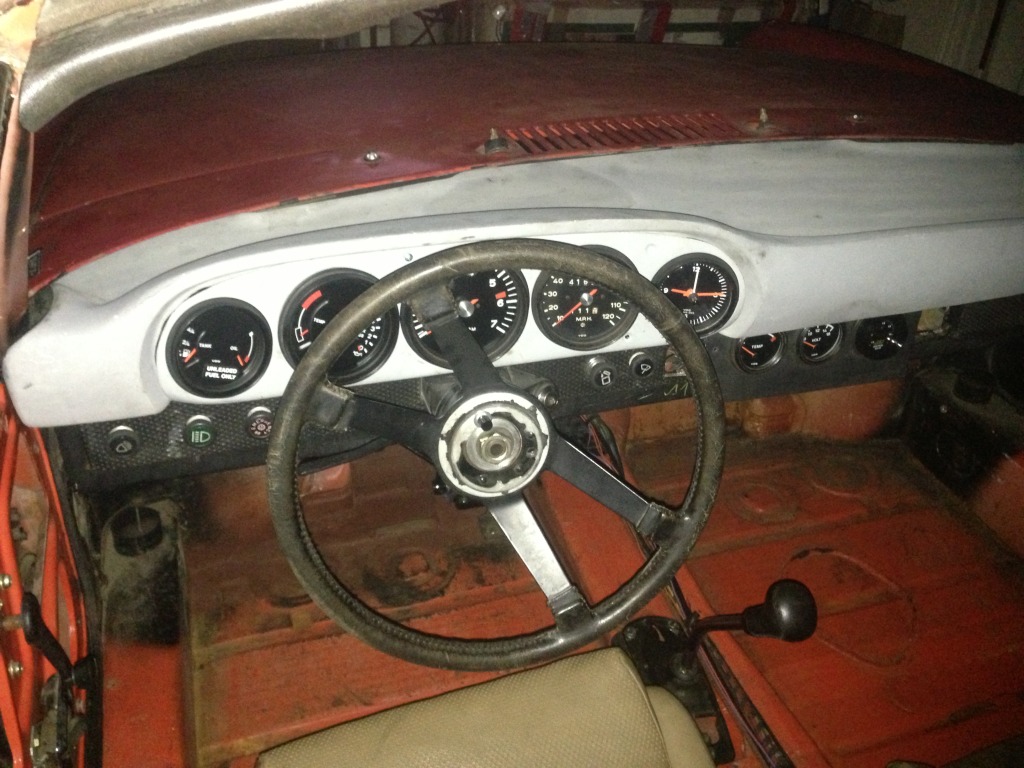
Finished the mounting of the 911 FG dash! Question for the clock though, anyone know what terminal (if any) on a 71 fuse panel always has 12v power for me to tap the clock into? I inspected with my volt meter and it didnt seem to have one that would work. How would i go about getting a line directly from the battery to power the clock that wont fuck shit up (aka light my car on fire from f-ed up electrical planning)
Mounted the chrome bumper from my 72 (i think someone pointed out it is off a 74 though) it doesn fit completely right... is there a big difference between the 74 and 71 rears that would make it not fit correctly on the sides?? I got the license plate on there too From this angle in the pic, you cant really see the fitment issues. ALSO if anyone has a rear rubber top that i could have that is in any kind of condition, please let me know.

I bolted in the bottom half of the passenger seat this weekend and took three of my roommates for spins, they enjoyed it a lot for just going around our neighbor hood a few times! I did go on a "more" main road (one with a light at the end of it) and passed a cop going the other way... I didnt have seat belts installed, a windshield, any mirrors, or a front license plate... so when he dove past looking at his comp screen not even noticing us, i would say i got a little lucky!! phew!
I cant wait to take this thing on the twisties!!
Ethan, thanks for all the responses.
1. For the syncro, we will have to figure out a time to get that sorted out using your awesome and wonderful jig and expertise
for now i will just hold the shifter in its position, haha2. i will have to re-bleed when i have a buddy again. Me and Jim did it together the first time and did back PS to front DS (the correct way as you pointed out) we even went at it for two rounds. When i was driving around a bunch this weekend i came to the realization i could just be being a pussy when it comes to braking and just used to power Brembo brakes
but i will definitely want to re-bleed anyways! But as you said the seals need breaking in, and i think after this weekends adventures it started to feel a little better already.3. The lights are fused separately, the fuse for the DS lights was blown! what a coincident! replaced the fuse with a good one and all was well, except the fogs, i am still having problems with those, now both wont go on???
4. will have to check next time...
5. didnt check this weekend, will next time. Could it be from the battery being warm?... the batter is laying on the rear trunk floor and i felt the metal around it after a drive and it was warm, not scolding, but warm, could that be aiding in the not start when warm issue?
NEW:
Finished the mounting of the 911 FG dash! Question for the clock though, anyone know what terminal (if any) on a 71 fuse panel always has 12v power for me to tap the clock into? I inspected with my volt meter and it didnt seem to have one that would work. How would i go about getting a line directly from the battery to power the clock that wont fuck shit up (aka light my car on fire from f-ed up electrical planning)

Mounted the chrome bumper from my 72 (i think someone pointed out it is off a 74 though) it doesn fit completely right... is there a big difference between the 74 and 71 rears that would make it not fit correctly on the sides?? I got the license plate on there too
From this angle in the pic, you cant really see the fitment issues. ALSO if anyone has a rear rubber top that i could have that is in any kind of condition, please let me know.
I bolted in the bottom half of the passenger seat this weekend and took three of my roommates for spins, they enjoyed it a lot for just going around our neighbor hood a few times! I did go on a "more" main road (one with a light at the end of it) and passed a cop going the other way...
I didnt have seat belts installed, a windshield, any mirrors, or a front license plate... so when he dove past looking at his comp screen not even noticing us, i would say i got a little lucky!! phew! I cant wait to take this thing on the twisties!!
Hot no start is a ground issue. Make sure the tranny grnd is clean. New ones can be had for dollars at your flaps.
Bleed from passengers rear to drivers rear to passengers front and end with drivers front. Bed the pads as per the tech tip on our site. It will bed the pads and help break in the new seals.
Bleed from passengers rear to drivers rear to passengers front and end with drivers front. Bed the pads as per the tech tip on our site. It will bed the pads and help break in the new seals.
Great job Dave, that's coming along great you lucky bastardo !!! 
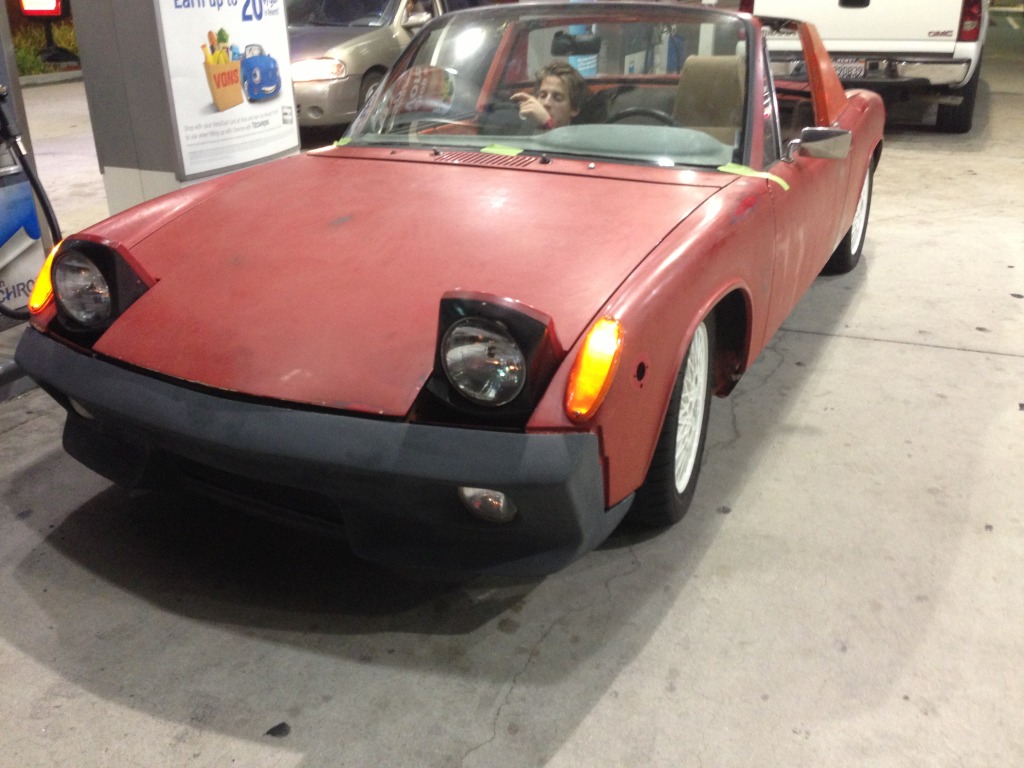
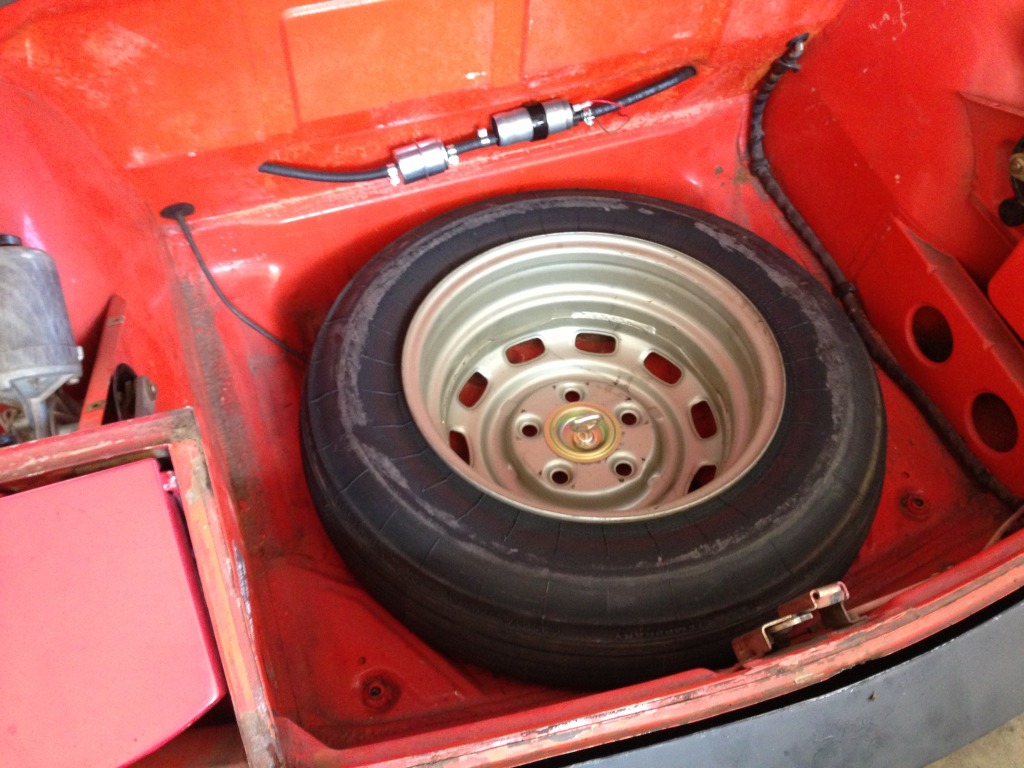
Had a great week/weekend! First step was having my front and rear windshields installed, was hooked up by Scott (boogie_man) with his glass guy to get it handled. Next in line was replacing the ball joint taper pin bolt with a new one from Bruce, the first one I installed on the passenger side got hung up and then bent while i was hammering it in. I then installed my new "space saver" spare tire i got from Bruce. I put that in quotations since i am installing it in the car fully inflated so i dont have to have a compressor on site if the time comes when i need it! Then installed the 916 front bumper i picked up on tuesday from another member here. I really like the look, and since i have aftermarket fog lights that are a half inch larger in OD than stock they fit perfectly in the round cutouts on the bumper. Now i just have to figure out where in the fog light wiring is being tripped up, since at one point just the passenger side fog would go on, now neither go on when the switch is activated.... I then moved onto hooking up the e-brake, always a good idea! Last but not least, i installed the seat belts and went for a drive!!!
When i went for a drive on wednesday i had a strange issue occur at the end of the drive. I had been driving for about 10-15 min before this incidence, all seemed fine, and then somewhat suddenly the engine started holding at a constant 3k during neutral idle. Previously the engine would idle under 1k. When i would put the car in gear and drive off from a stop the engine would act perfectly normal, but even in between shifts (while the engine was in neutral) rpms would jump and hold at 3k before engaging the next gear and going back to normal. I checked vacuum leaks, none to be found. Next day i started her up, and it idled just fine with no adjustments made from the previous night when this happened.
Also, can someone please give me a list of all the things to check for hot start problems. Starter cranks quickly as it always does but just doesnt catch. What gives!!??
Here are some pictures from the past few days!
Her first time filling up at the gas station! (with me)
spare installed
e-brake connection (i know thats not how the stock setup goes, but i couldnt find the OEM pieces...)
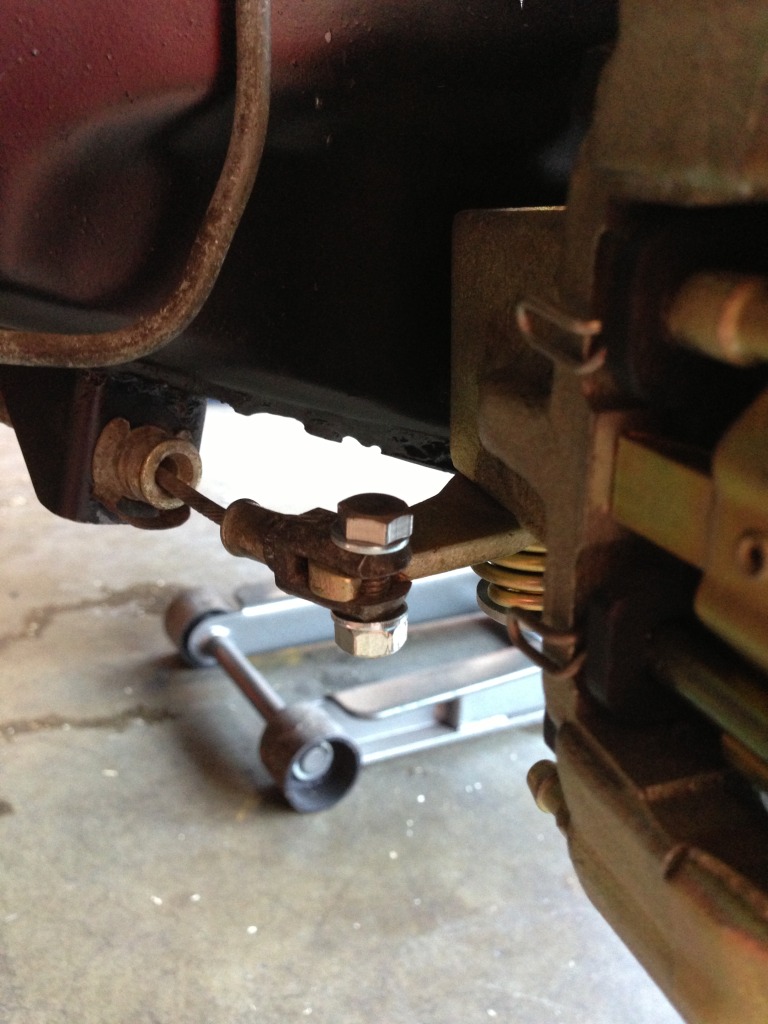
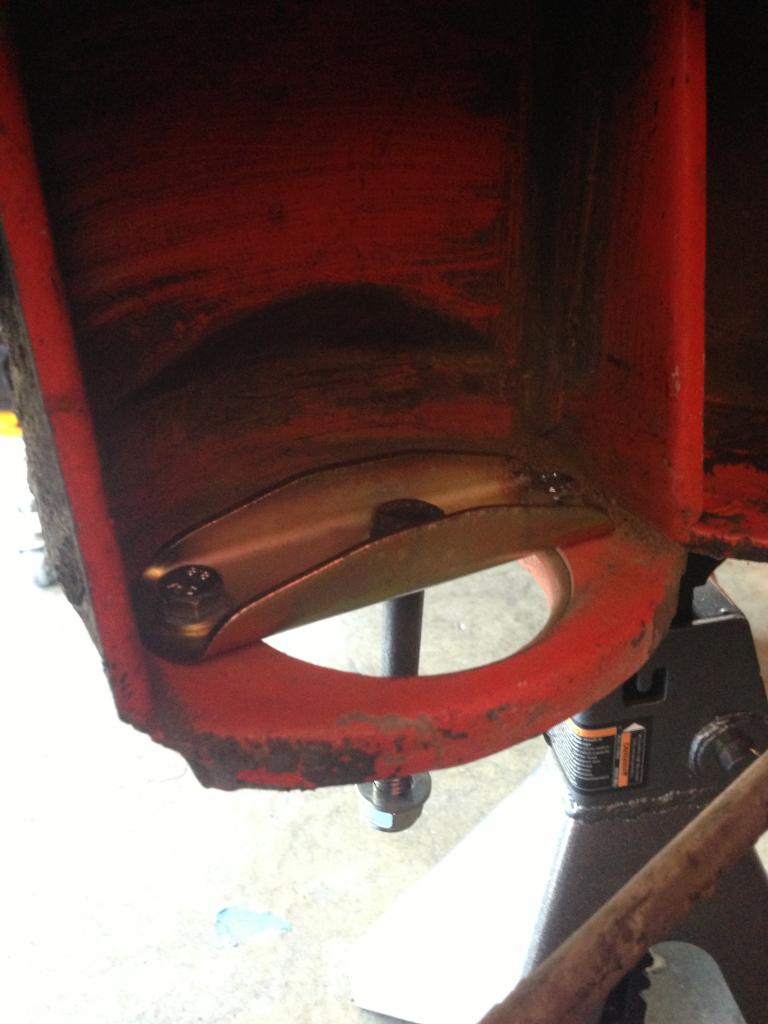
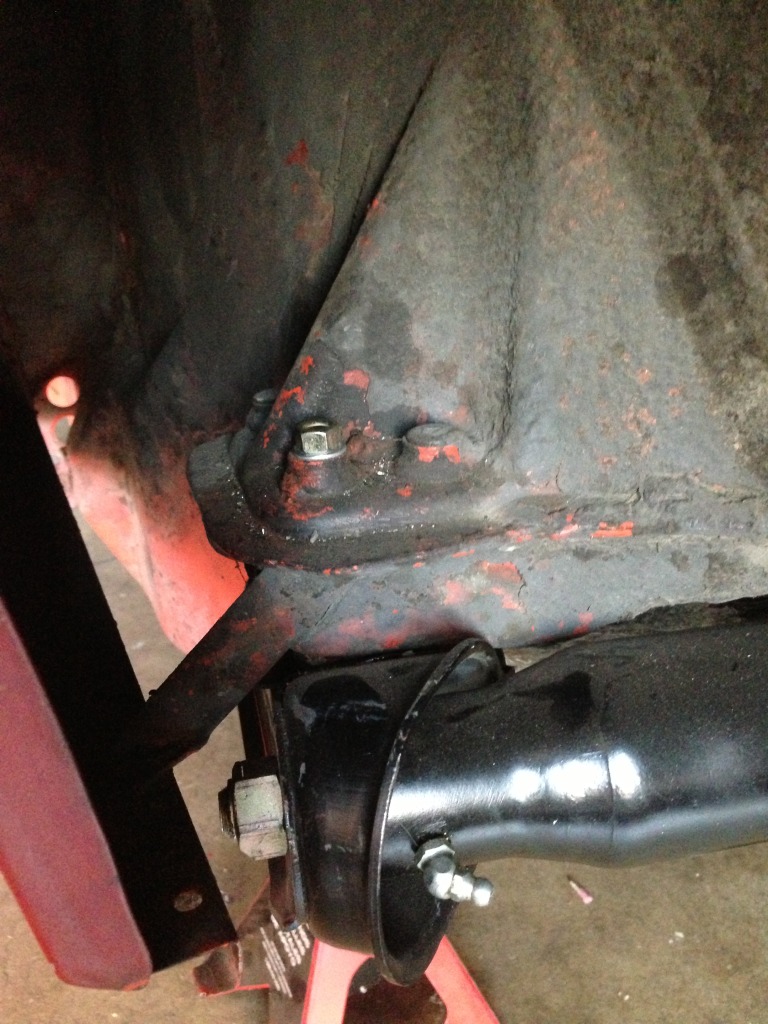
Forgot to mention, I installed my temp fix for the sheared rear control arm bolt, a thru bolt. Need to get a little longer bolt though
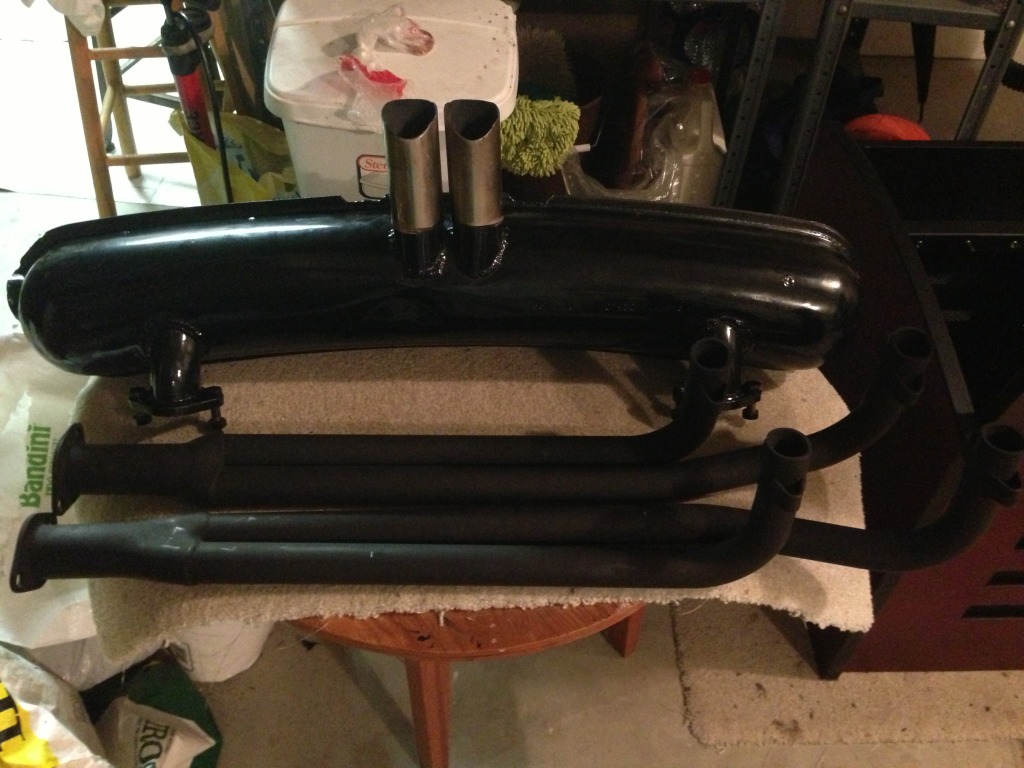
also picked up this sexy exhaust this morning. 2.0L straight pipe headers to a 911 muffler. The muffler had its original single side outlet cutoff and welded shut, then a dual tip center outlet weld on. I cant WAIT to mount this puppy!
Sorry for the long post, hope you enjoyed!
Thanks for all the help and support everyone!
When i went for a drive on wednesday i had a strange issue occur at the end of the drive. I had been driving for about 10-15 min before this incidence, all seemed fine, and then somewhat suddenly the engine started holding at a constant 3k during neutral idle. Previously the engine would idle under 1k. When i would put the car in gear and drive off from a stop the engine would act perfectly normal, but even in between shifts (while the engine was in neutral) rpms would jump and hold at 3k before engaging the next gear and going back to normal. I checked vacuum leaks, none to be found. Next day i started her up, and it idled just fine with no adjustments made from the previous night when this happened.
Also, can someone please give me a list of all the things to check for hot start problems. Starter cranks quickly as it always does but just doesnt catch. What gives!!??
Here are some pictures from the past few days!
Her first time filling up at the gas station! (with me)

spare installed


e-brake connection (i know thats not how the stock setup goes, but i couldnt find the OEM pieces...)

Forgot to mention, I installed my temp fix for the sheared rear control arm bolt, a thru bolt. Need to get a little longer bolt though


also picked up this sexy exhaust this morning. 2.0L straight pipe headers to a 911 muffler. The muffler had its original single side outlet cutoff and welded shut, then a dual tip center outlet weld on. I cant WAIT to mount this puppy!

Sorry for the long post, hope you enjoyed!
Thanks for all the help and support everyone!
Well, since David hasn't updated this yet, I figured I would for him..haha
Proof that it can be done on a college students budget! woooooo!
Car is now driving around without too much issue.. I think the car is still fighting a small vacuum leak at the head, but that should be fixed soon.

Proof that it can be done on a college students budget! woooooo!
Car is now driving around without too much issue.. I think the car is still fighting a small vacuum leak at the head, but that should be fixed soon.

Sweet! Congrats David! Looks like us young guys might know what we're doing afterall, though we have a long way to go to learn all of the ways of the force from you more senior folks
Cool guys! You need to head out west for a drive.
That's just awesome
This is a "lo-fi" version of our main content. To view the full version with more information, formatting and images, please click here.