
It can be a slippery slope once you start digging into the rust. I hope your rust is minor and you can patch it and get your 914 back on the road to enjoy it.
QUOTE(Cairo94507 @ Aug 12 2021, 06:27 AM) 
It can be a slippery slope once you start digging into the rust. I hope your rust is minor and you can patch it and get your 914 back on the road to enjoy it.
You're absolutely right.. We'll see when the engine is out how it looks like from the inside, suspension console,..
 I want to drive it again as fast as possible but I want a safe car that is not going to suffer from any bump on the street.. Better be safe and take the time to do it properly now
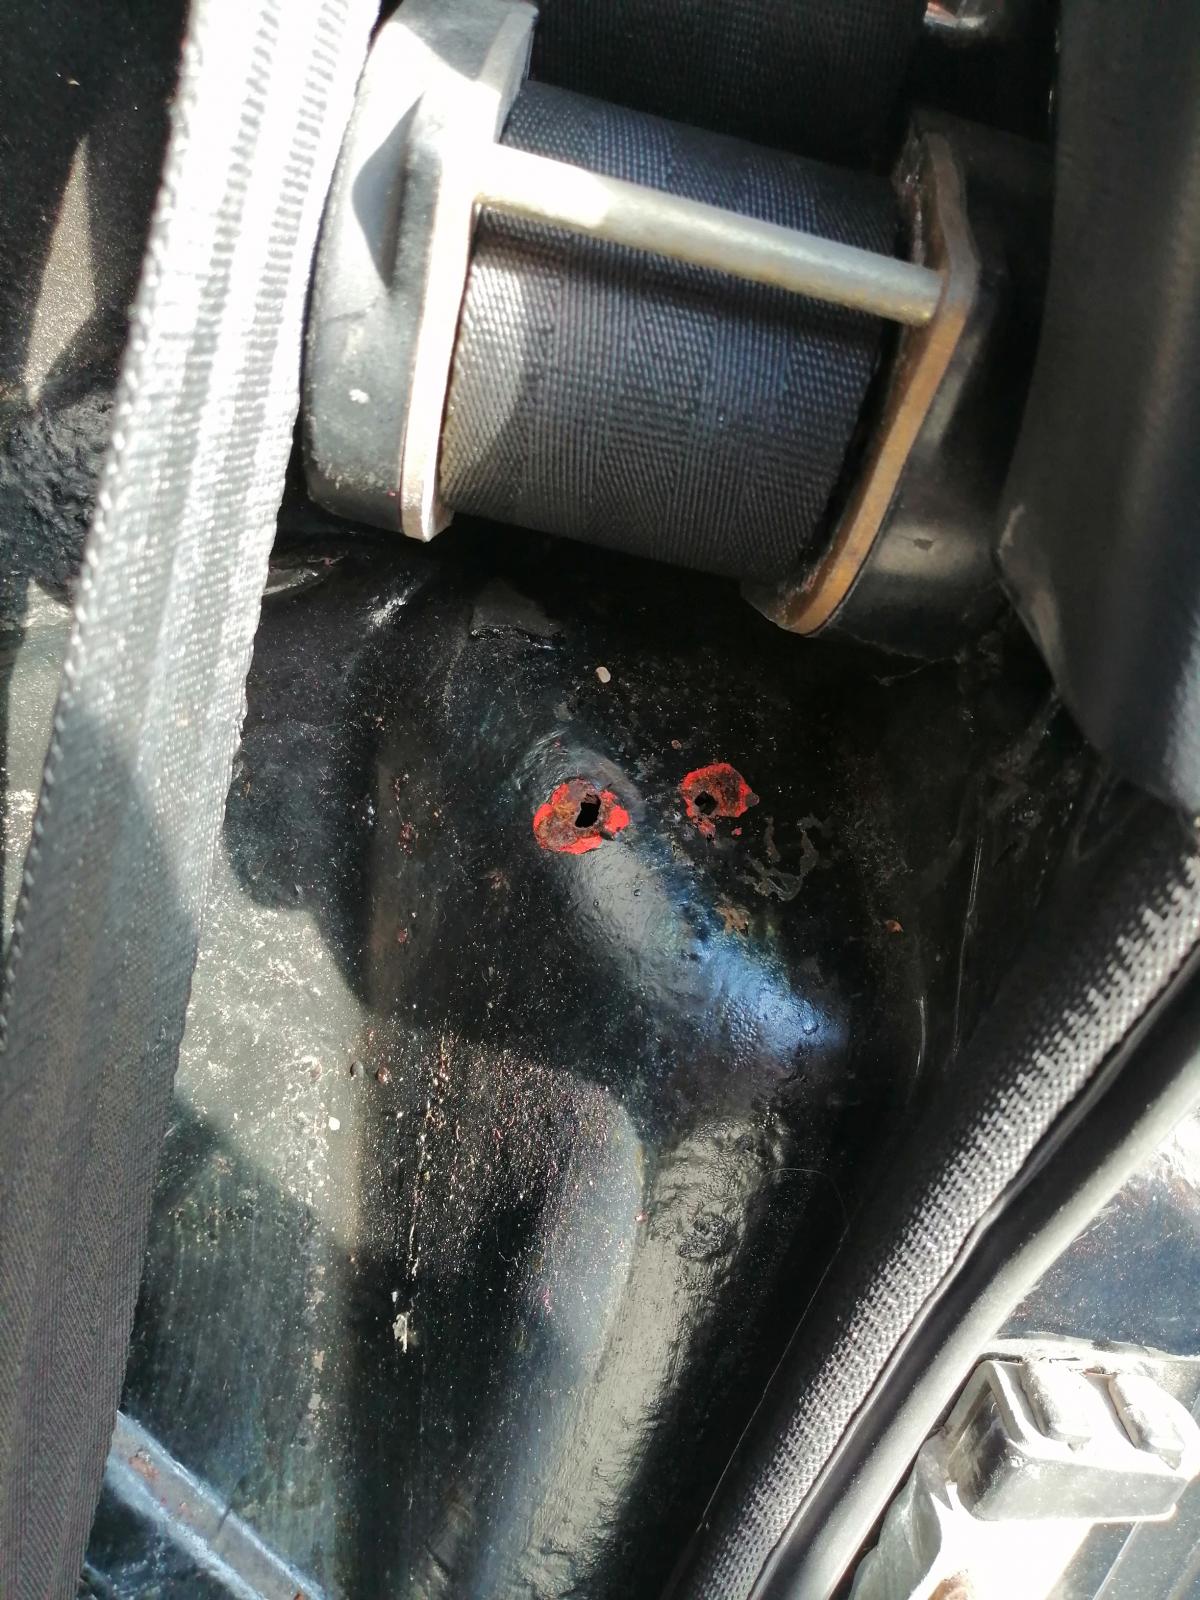
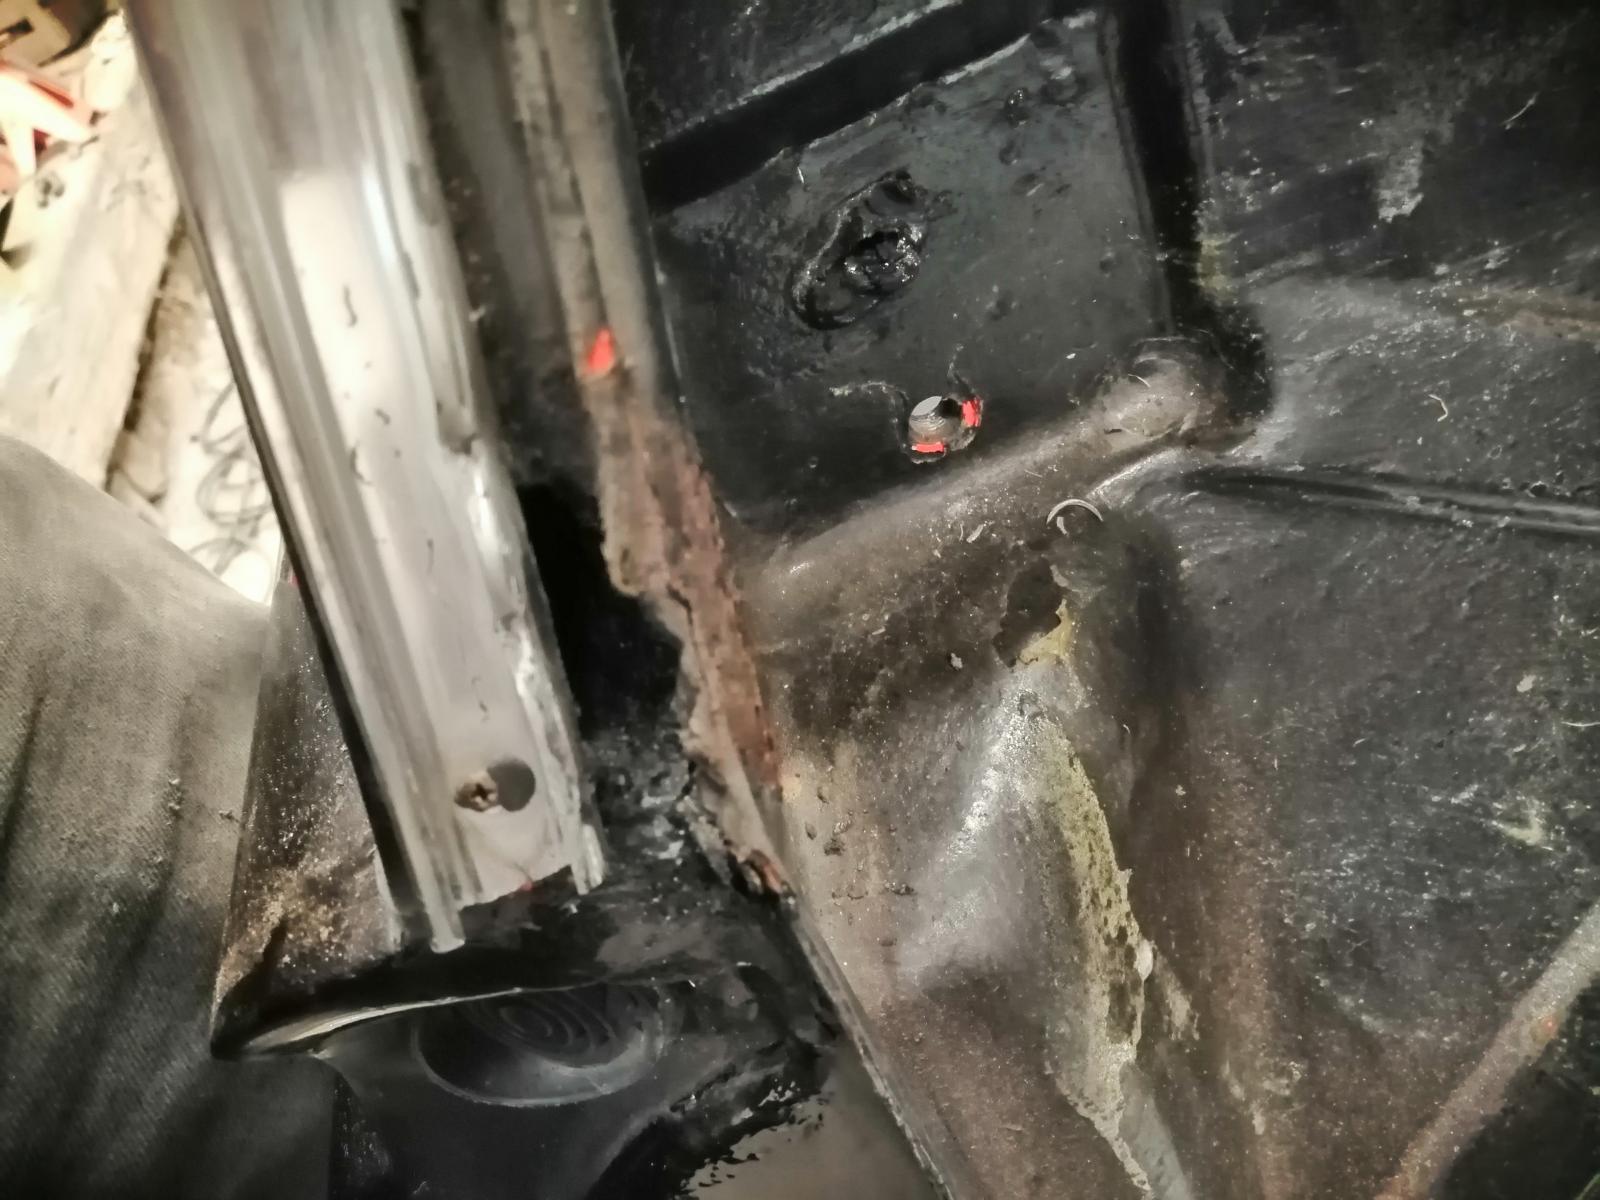
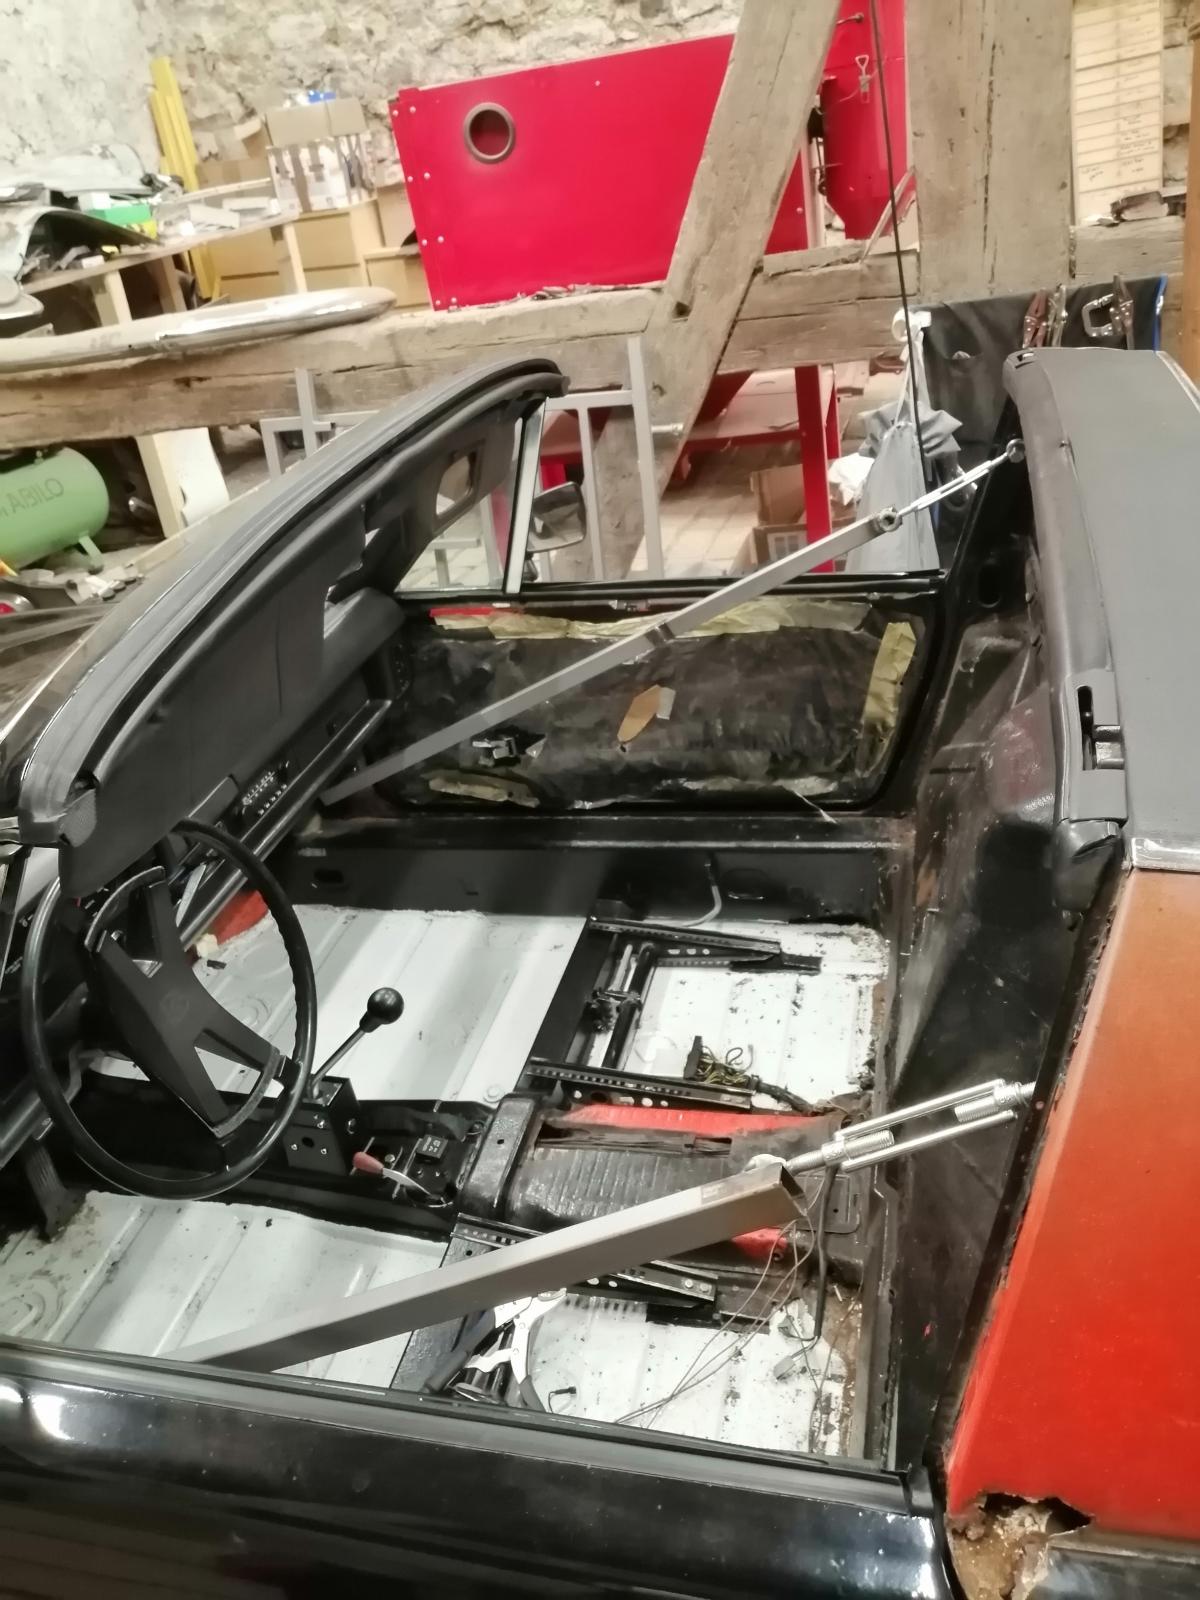
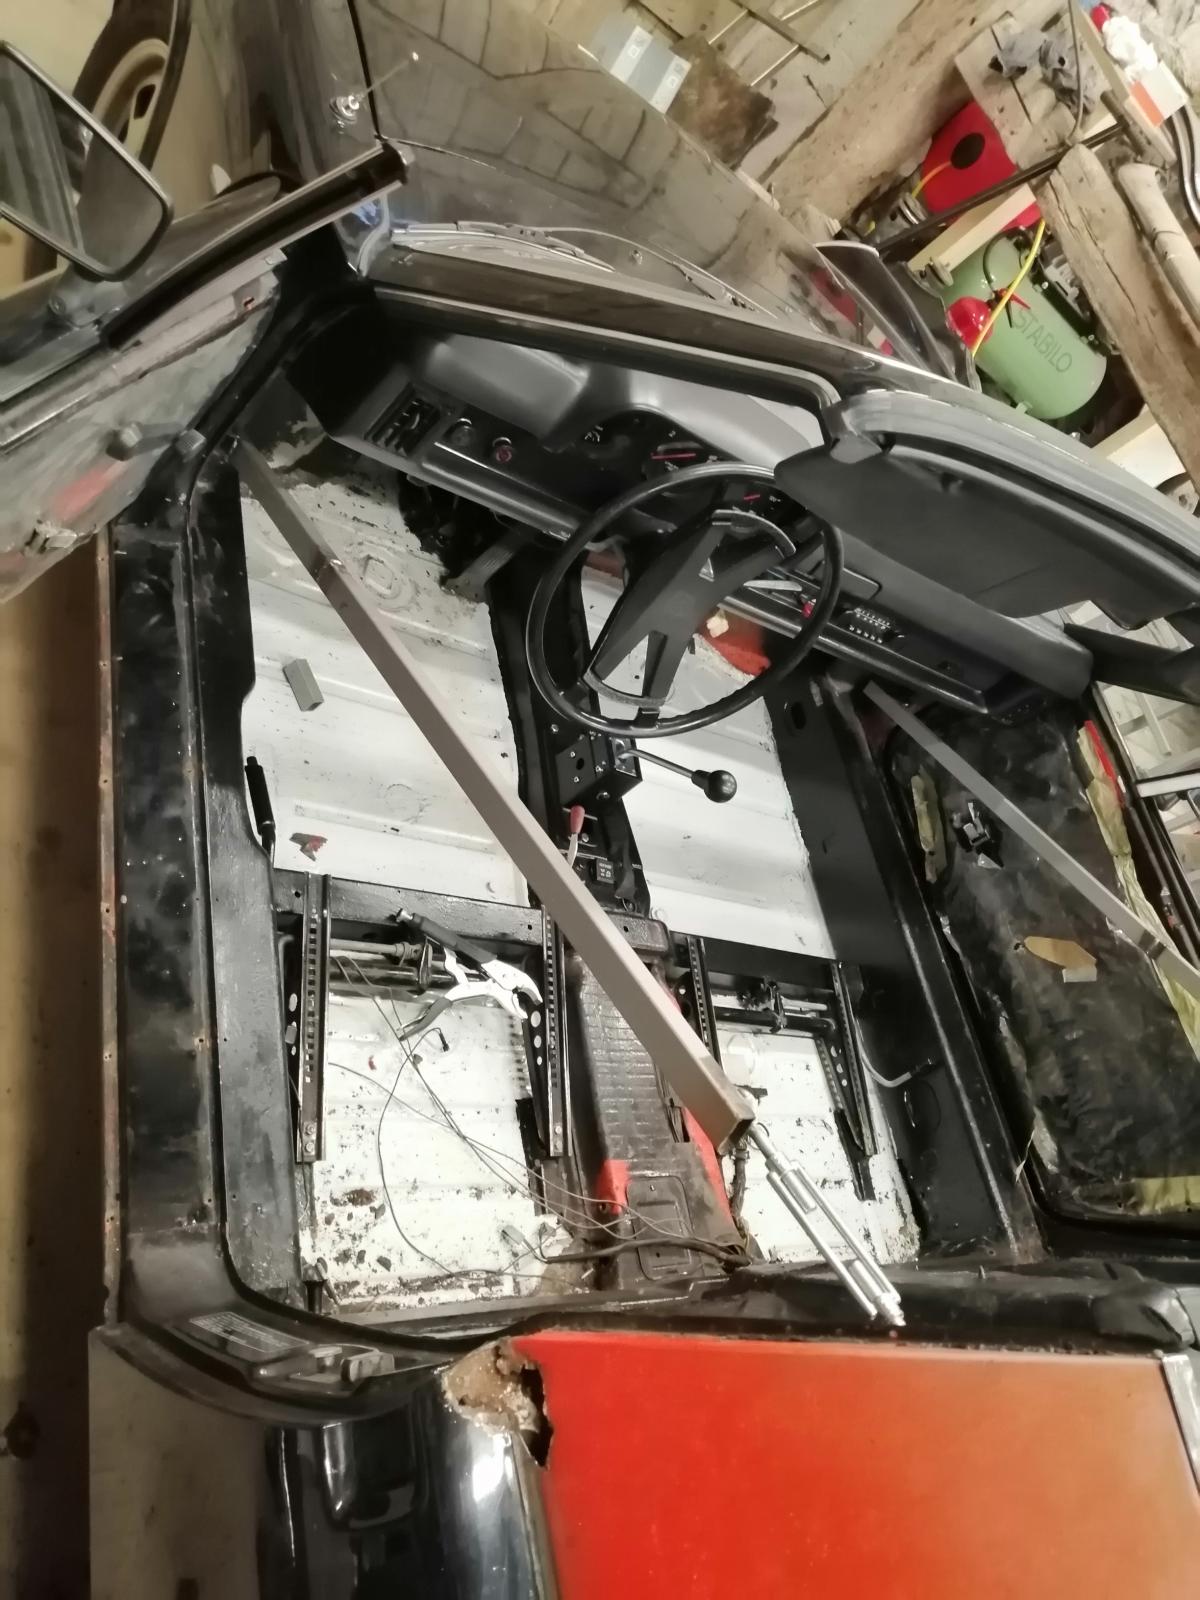
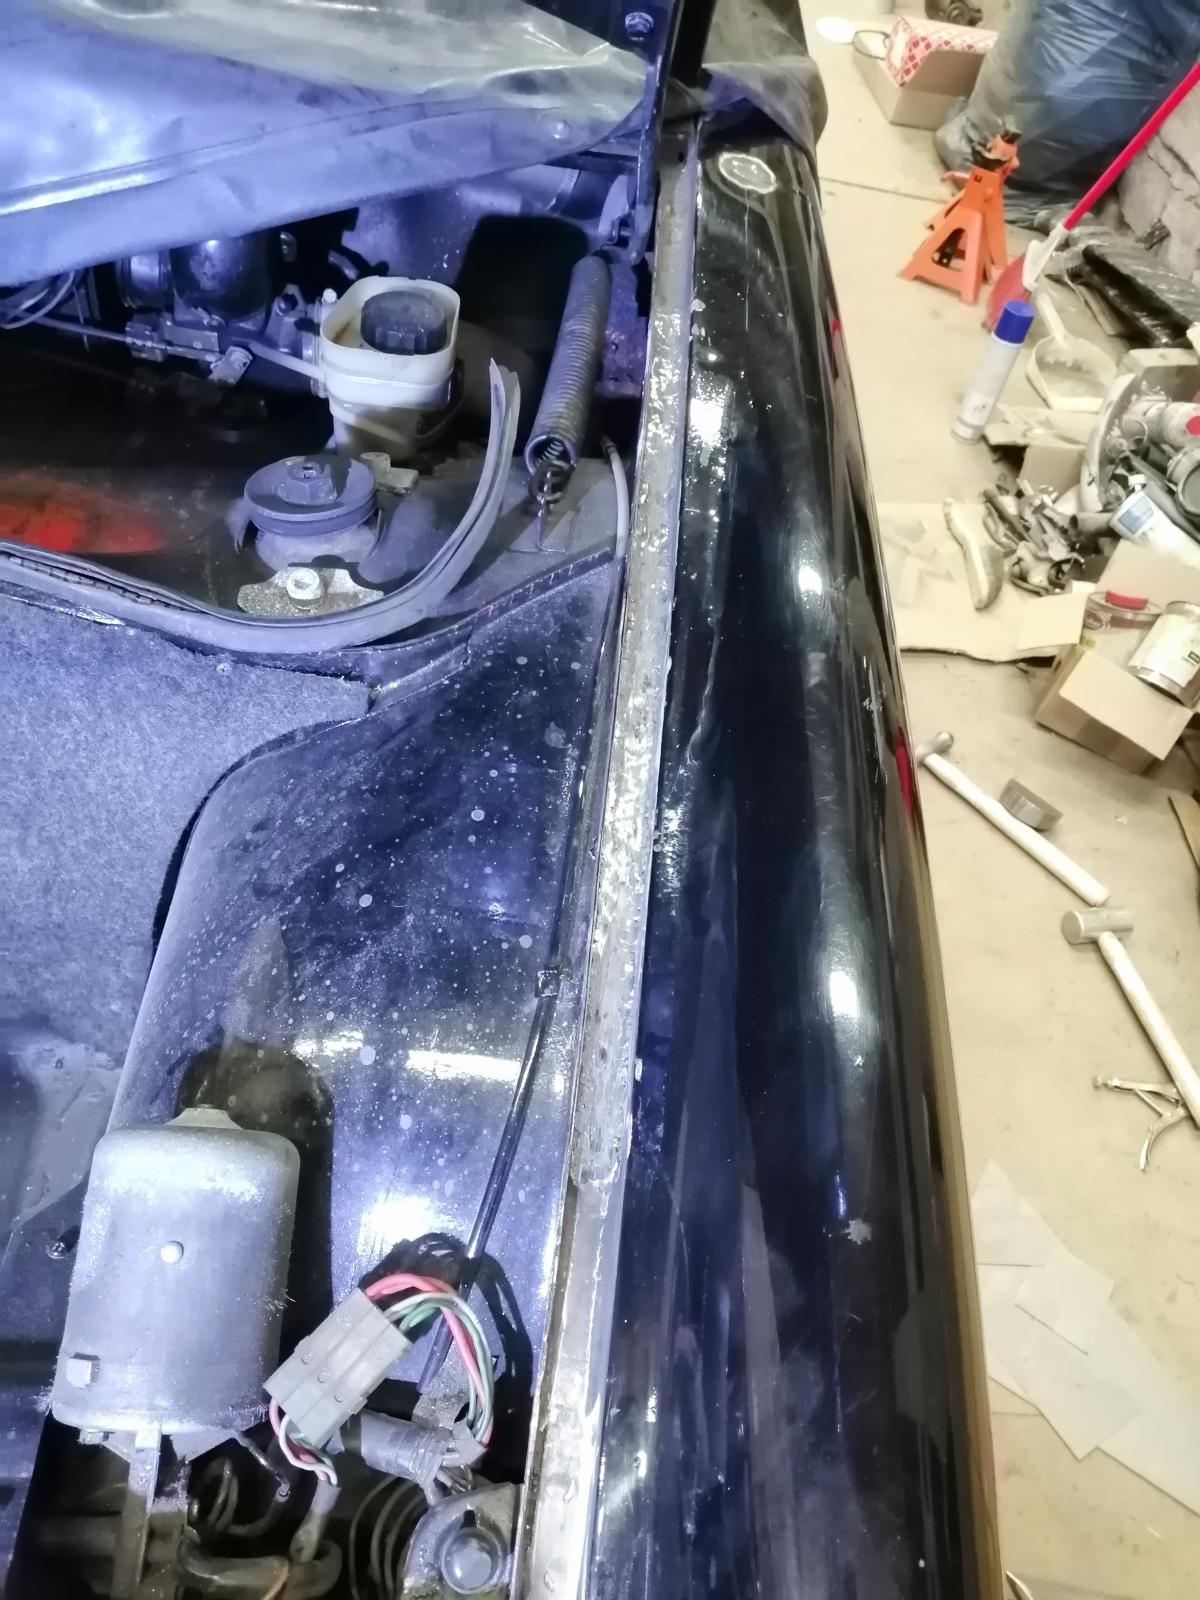
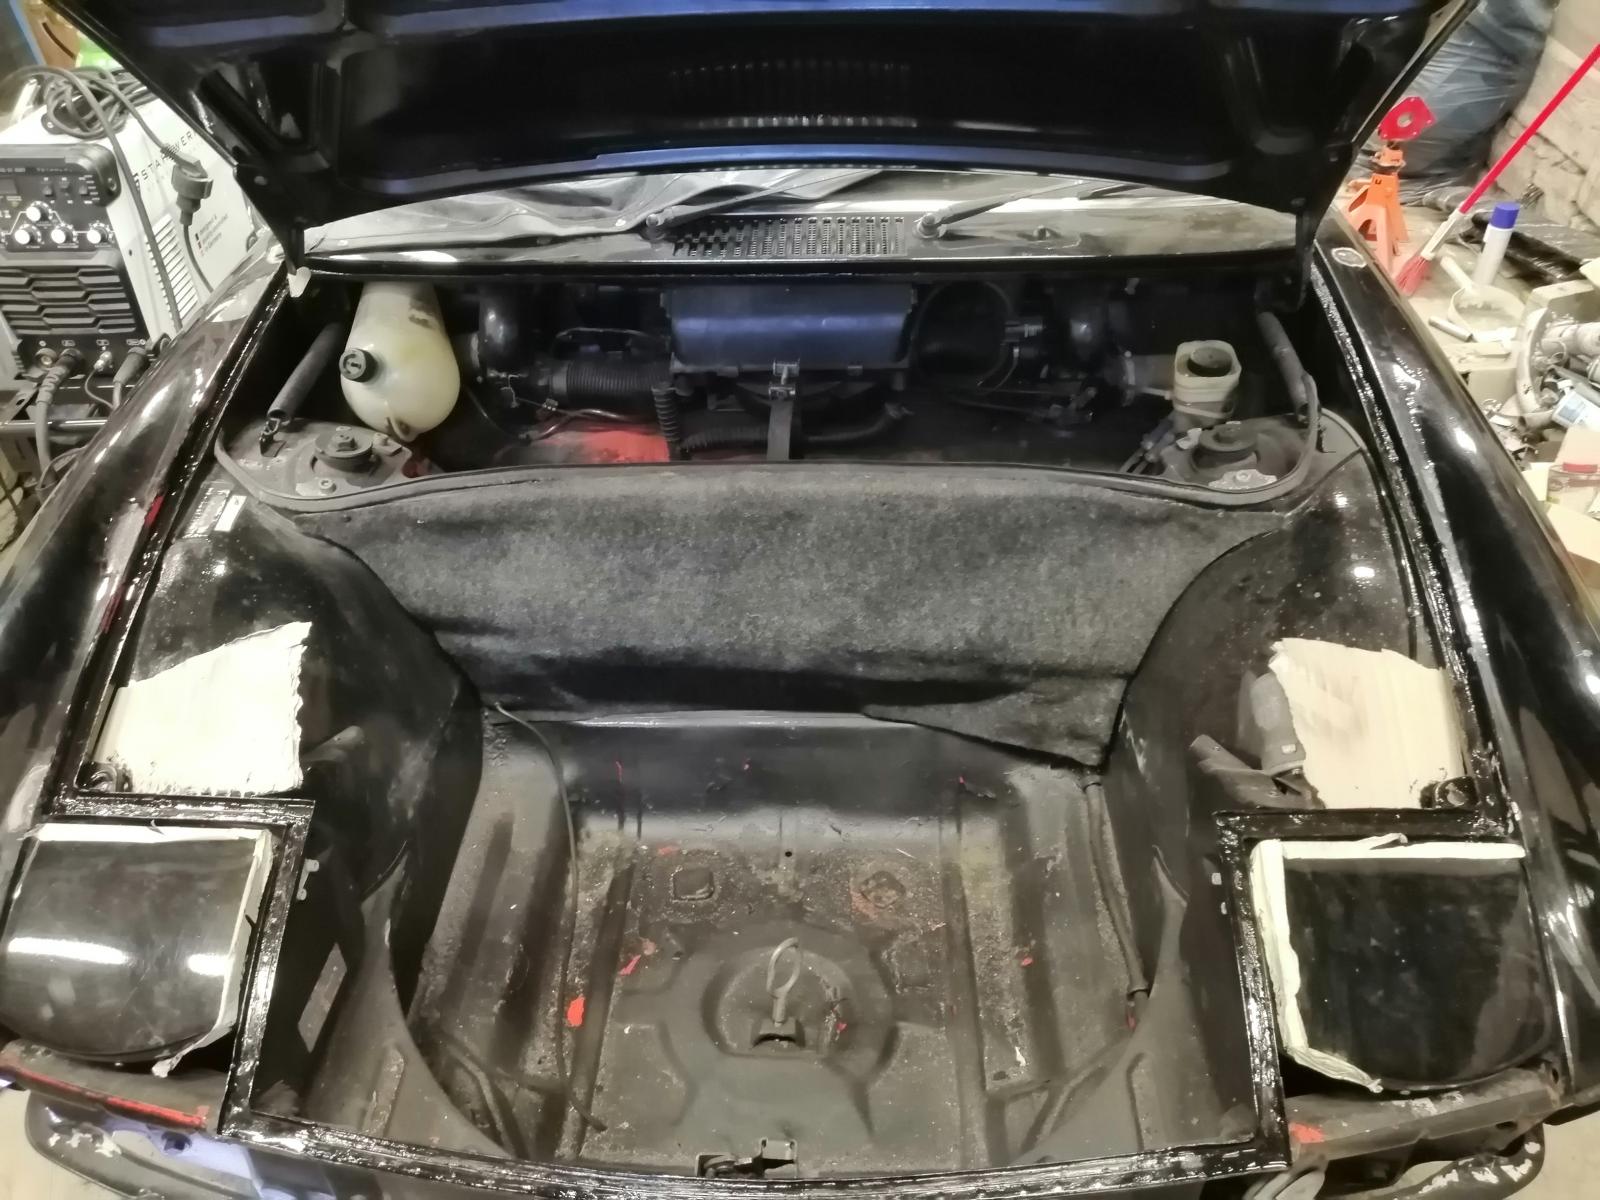
So, I asked my qualified employee (aka my 5 years old boy who is already wrenching with me as much as possible !) to remove the interior (except the driver's seat to drive it to my shop tomorrow) to better see what we got.. Well, rust


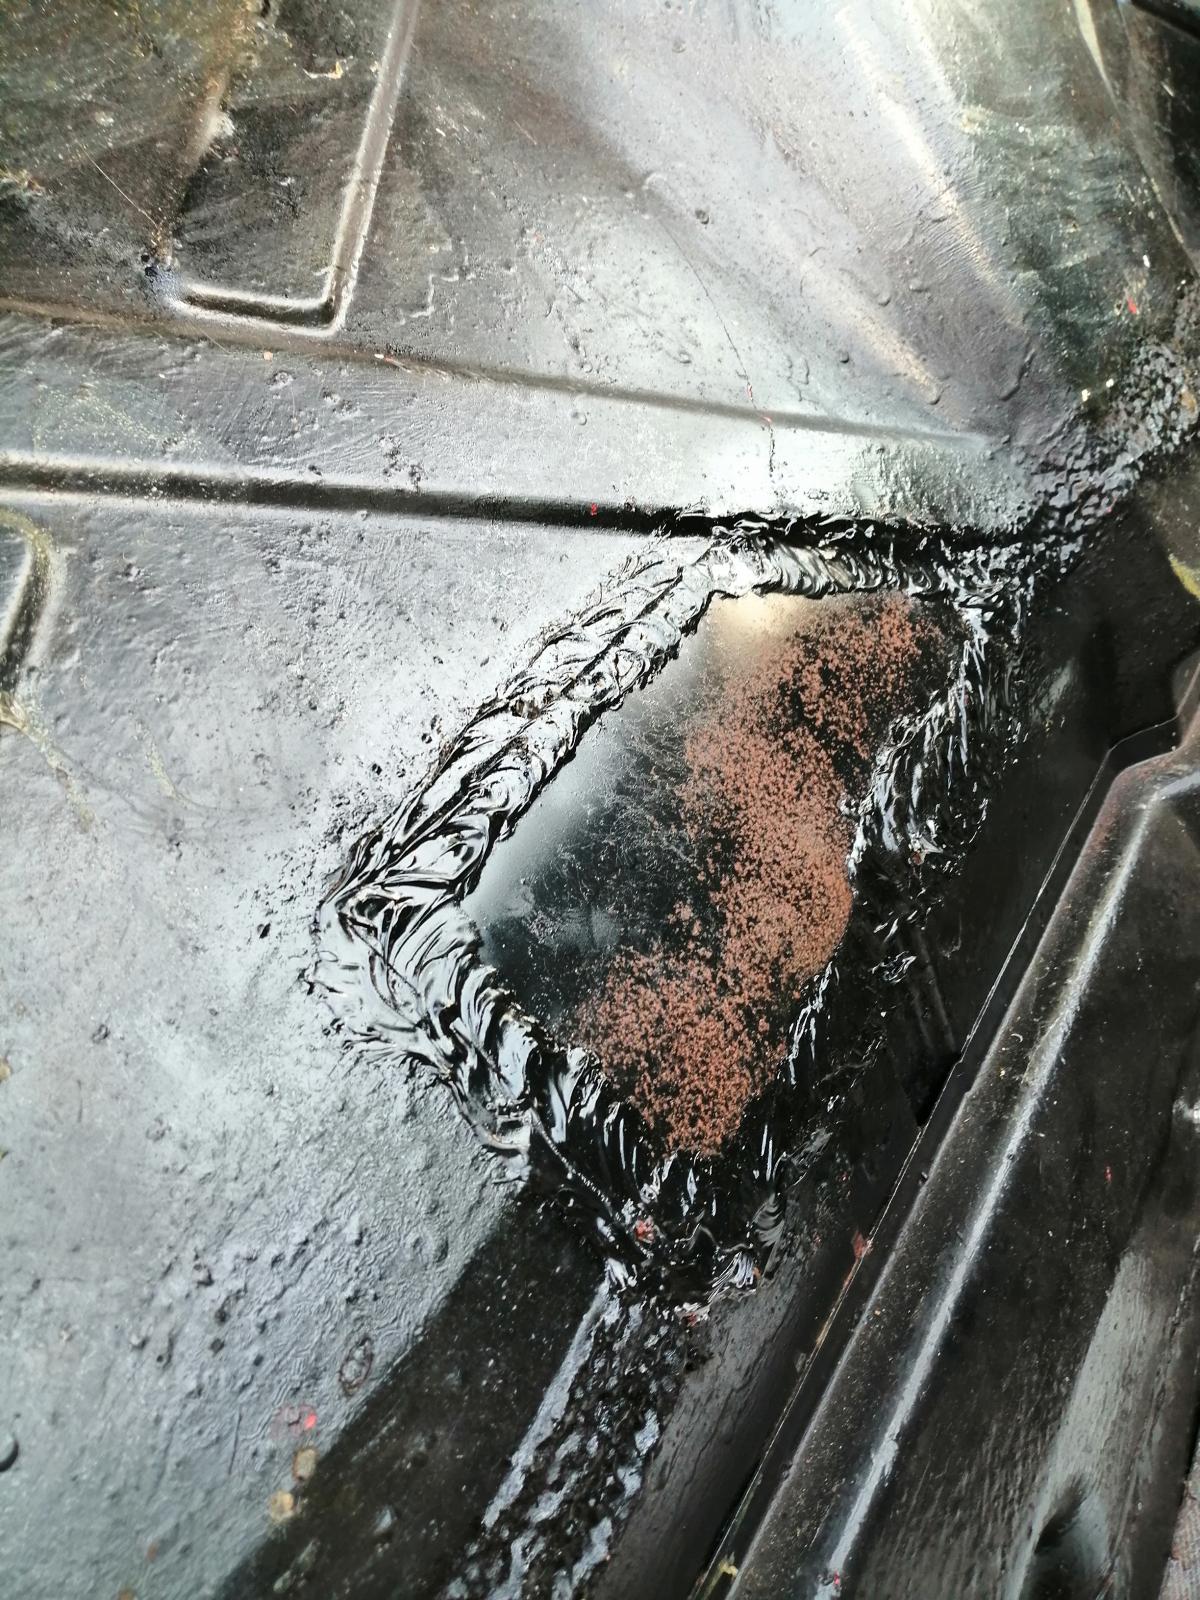
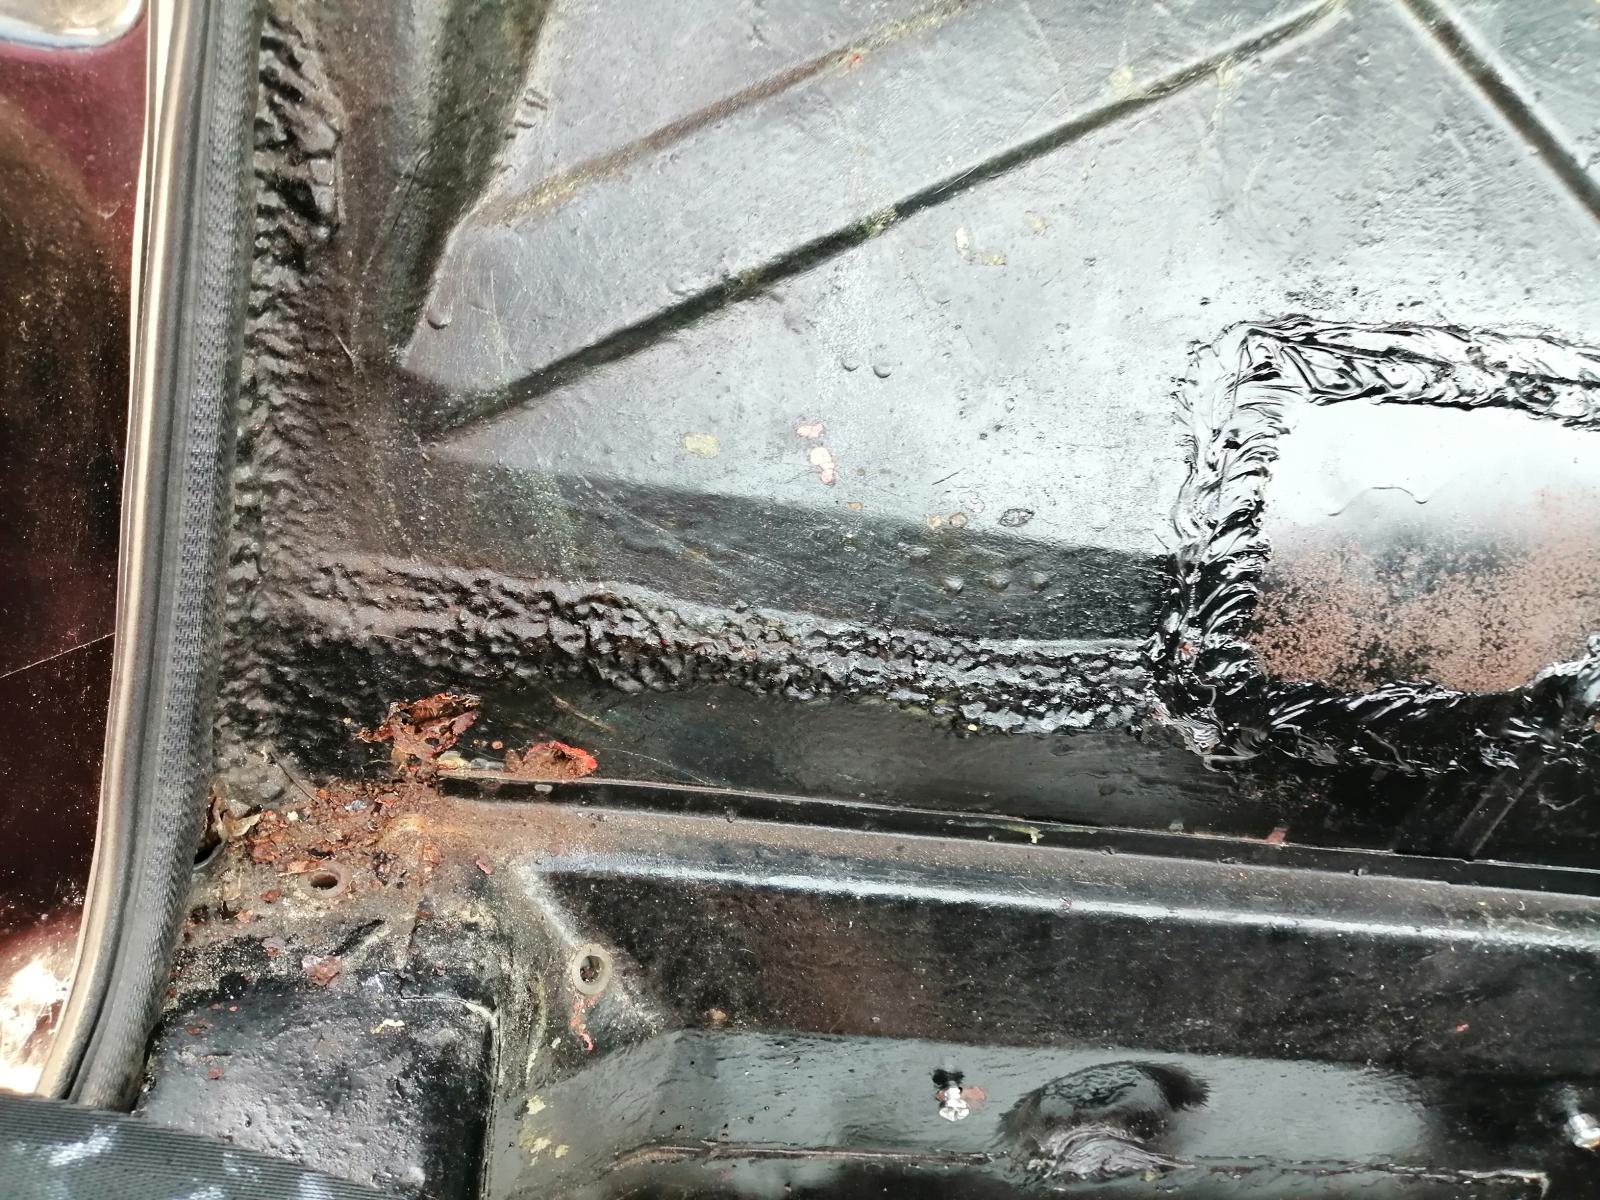
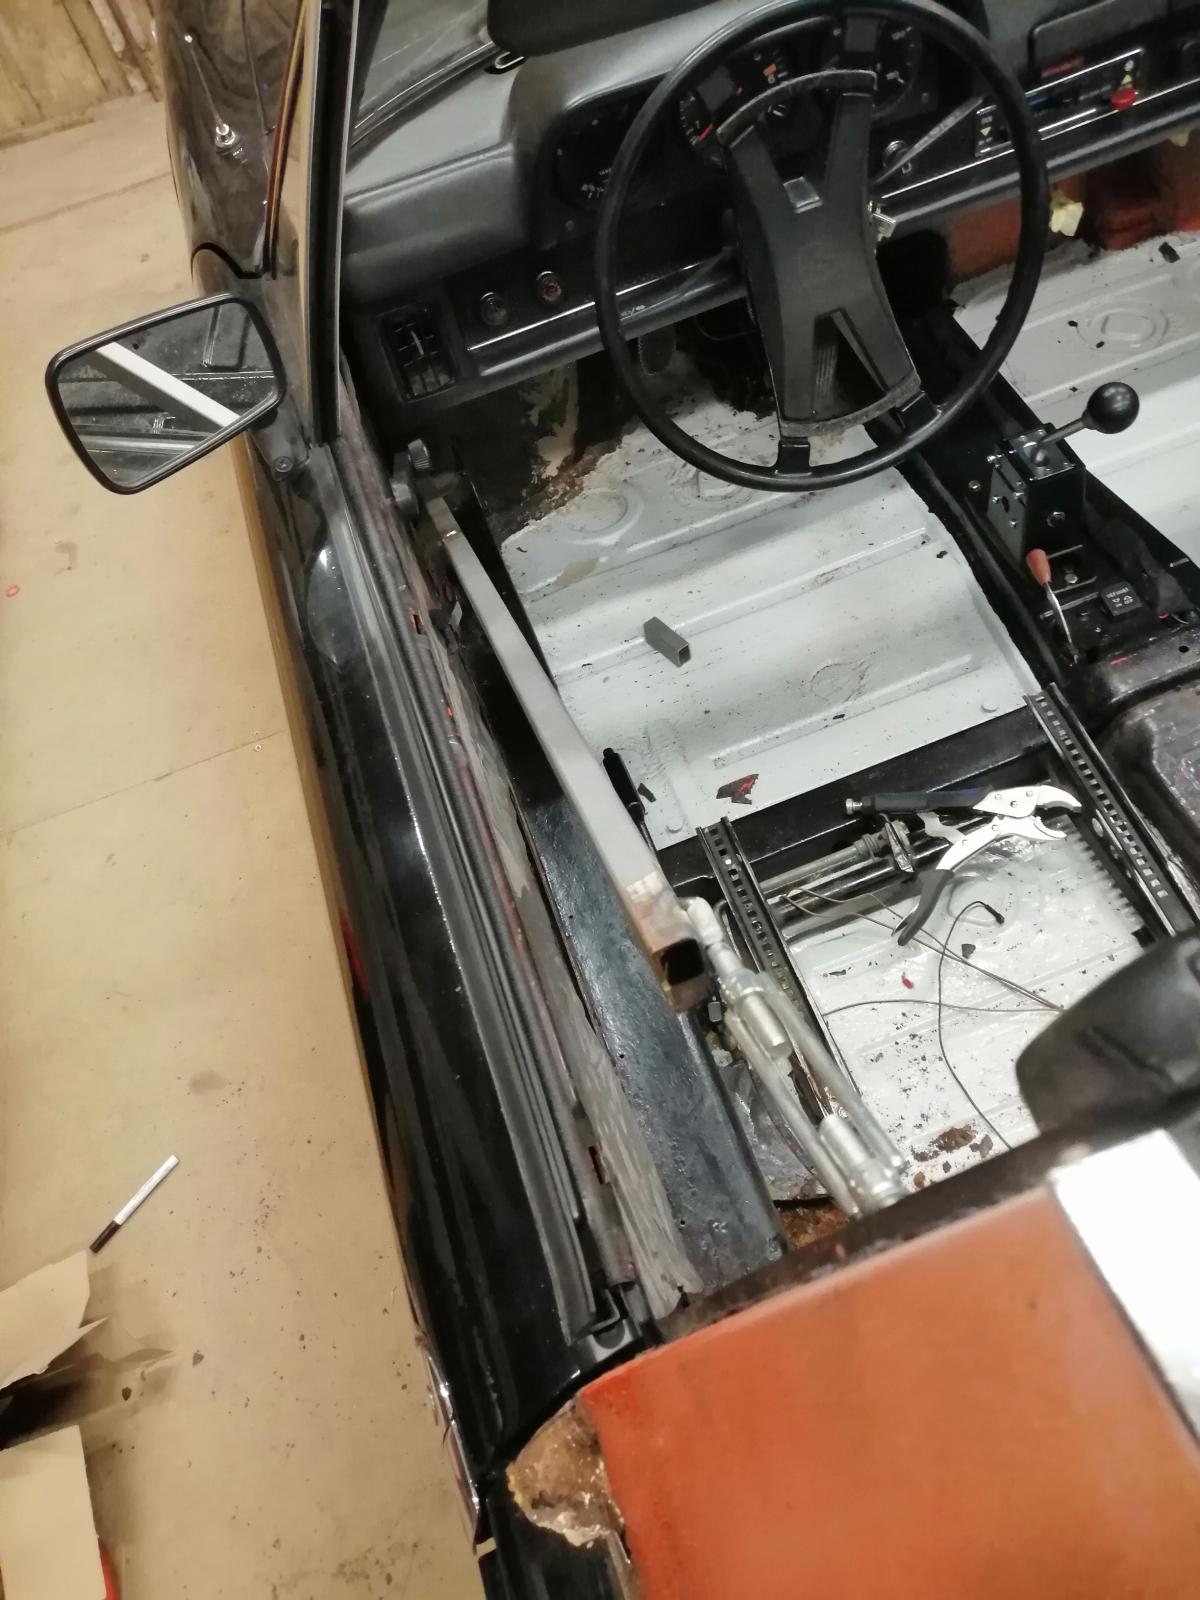
Driver's side, in the corner:

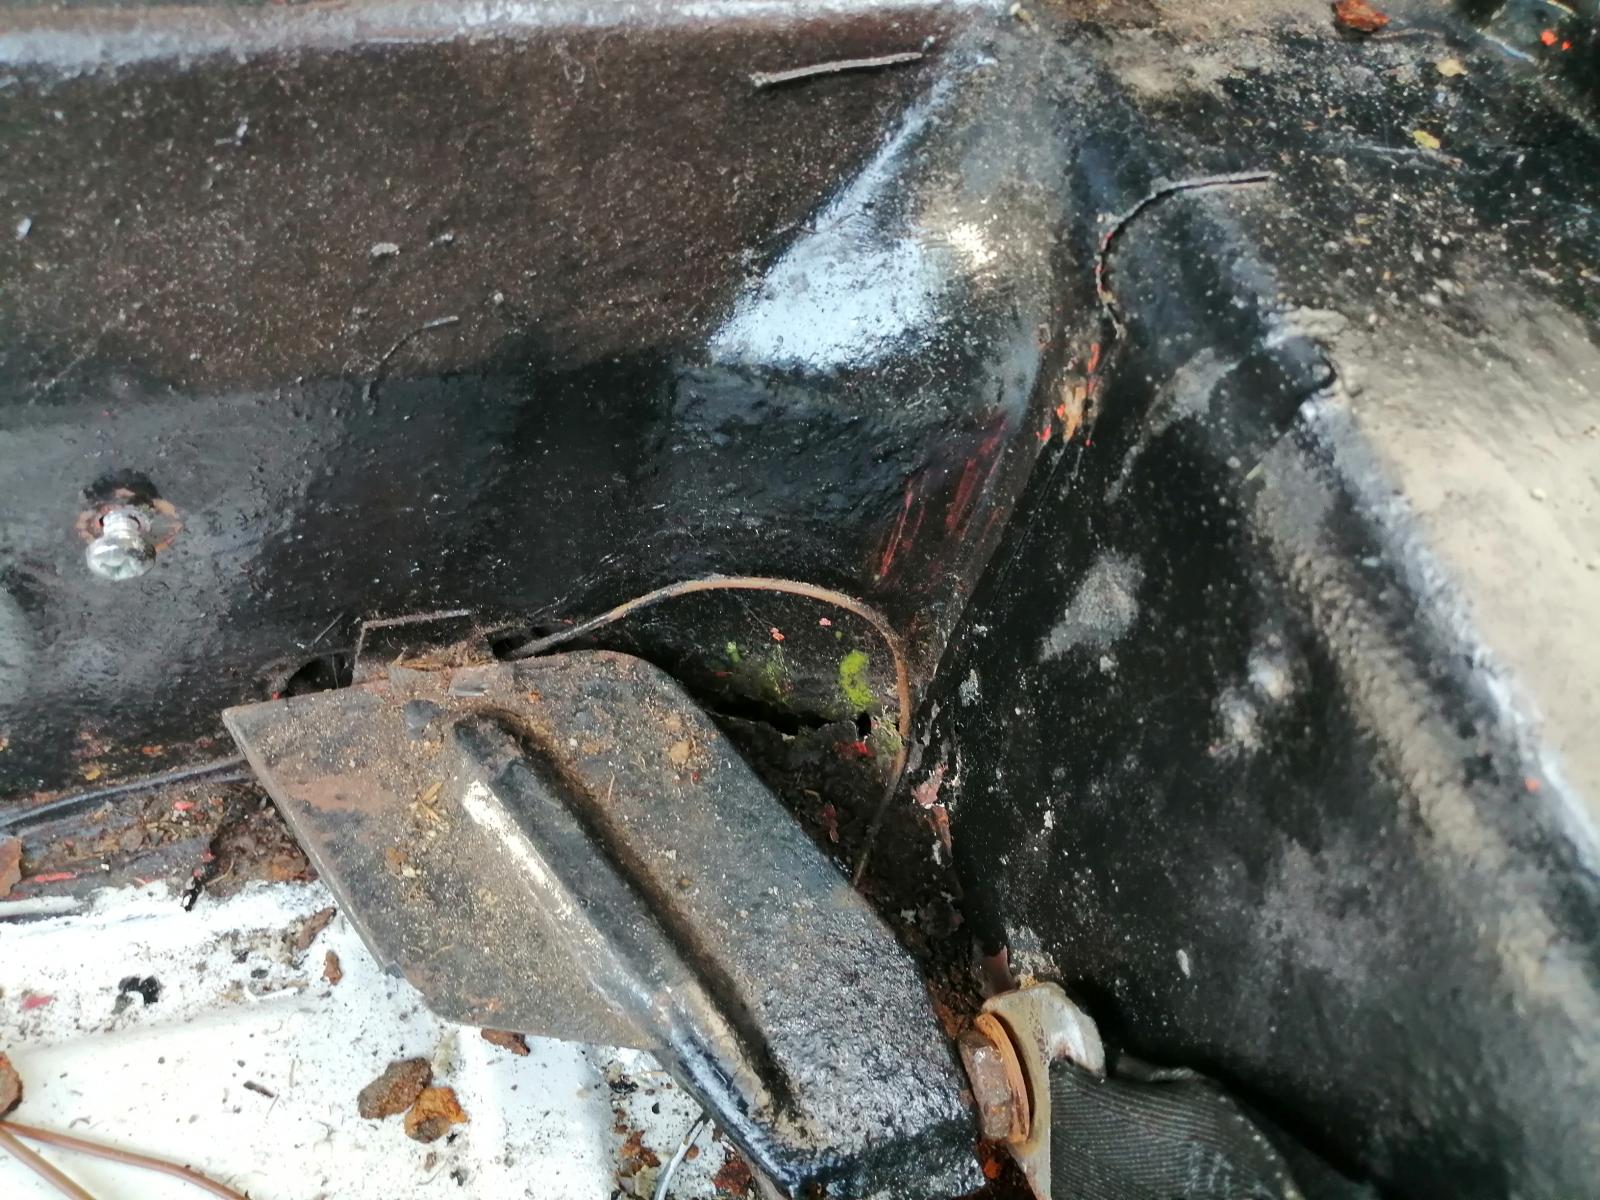

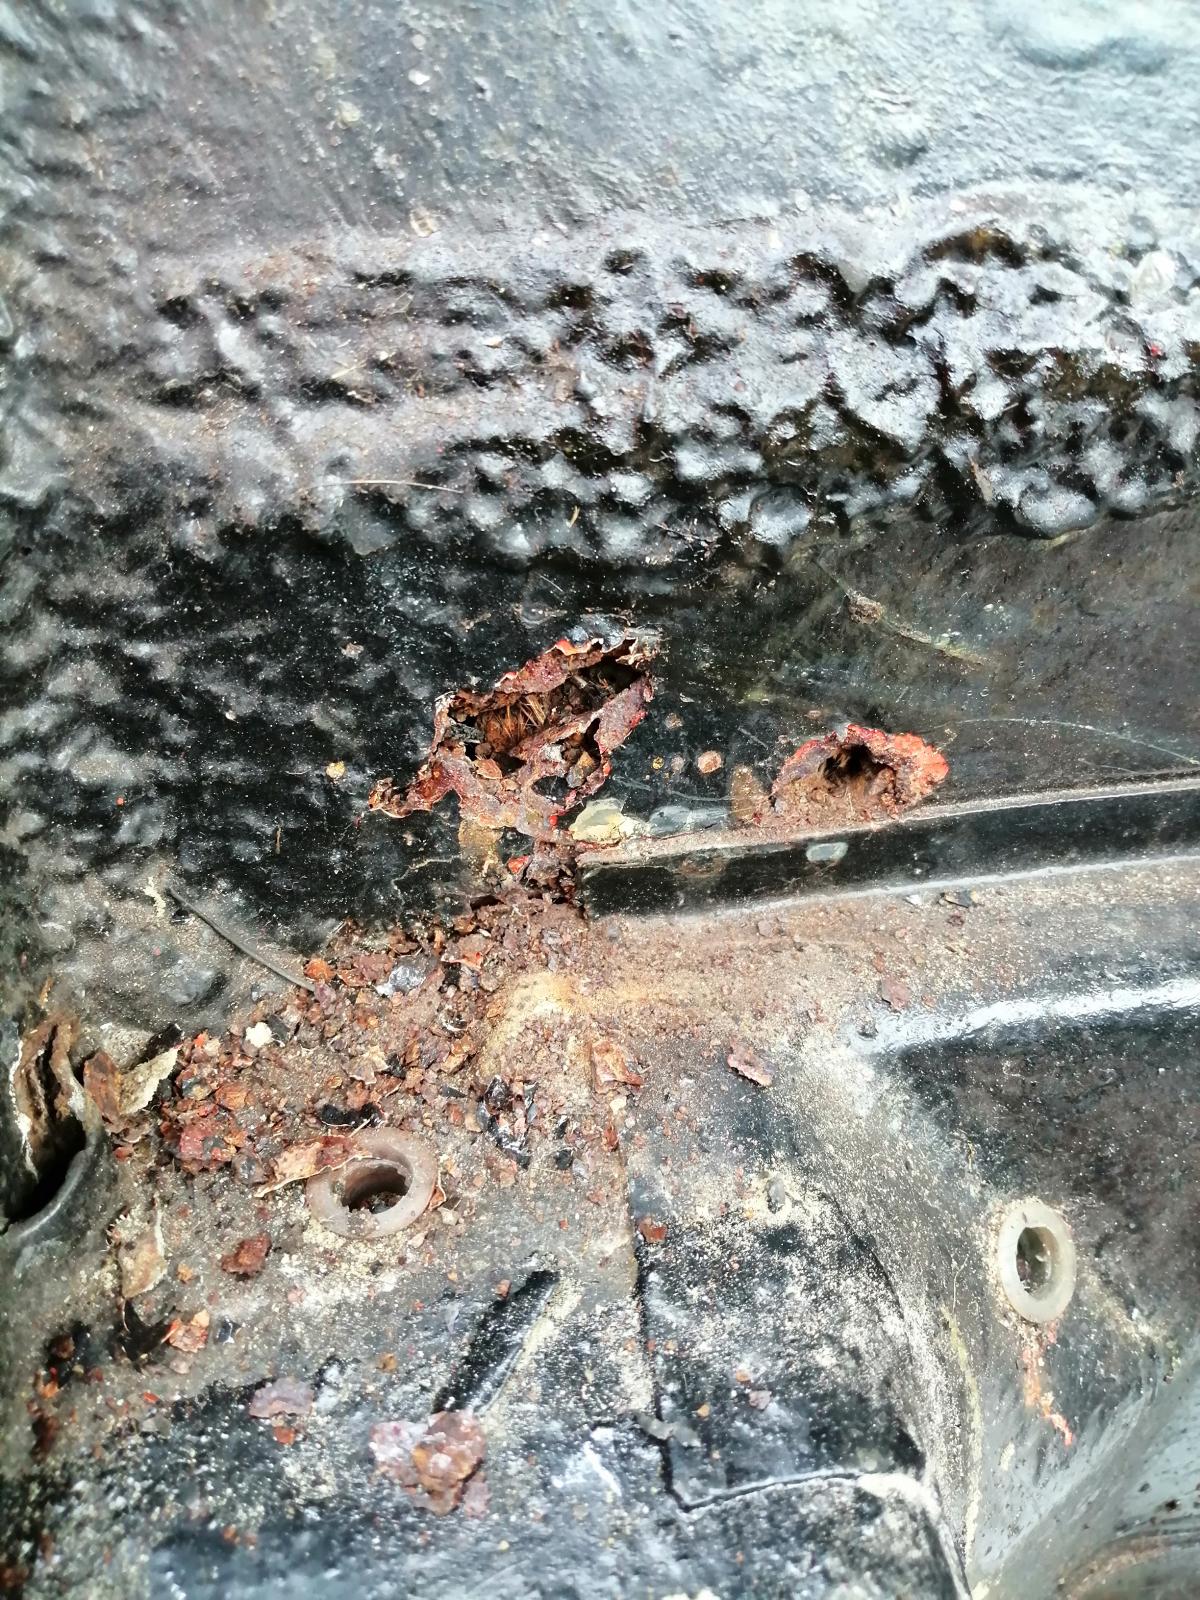
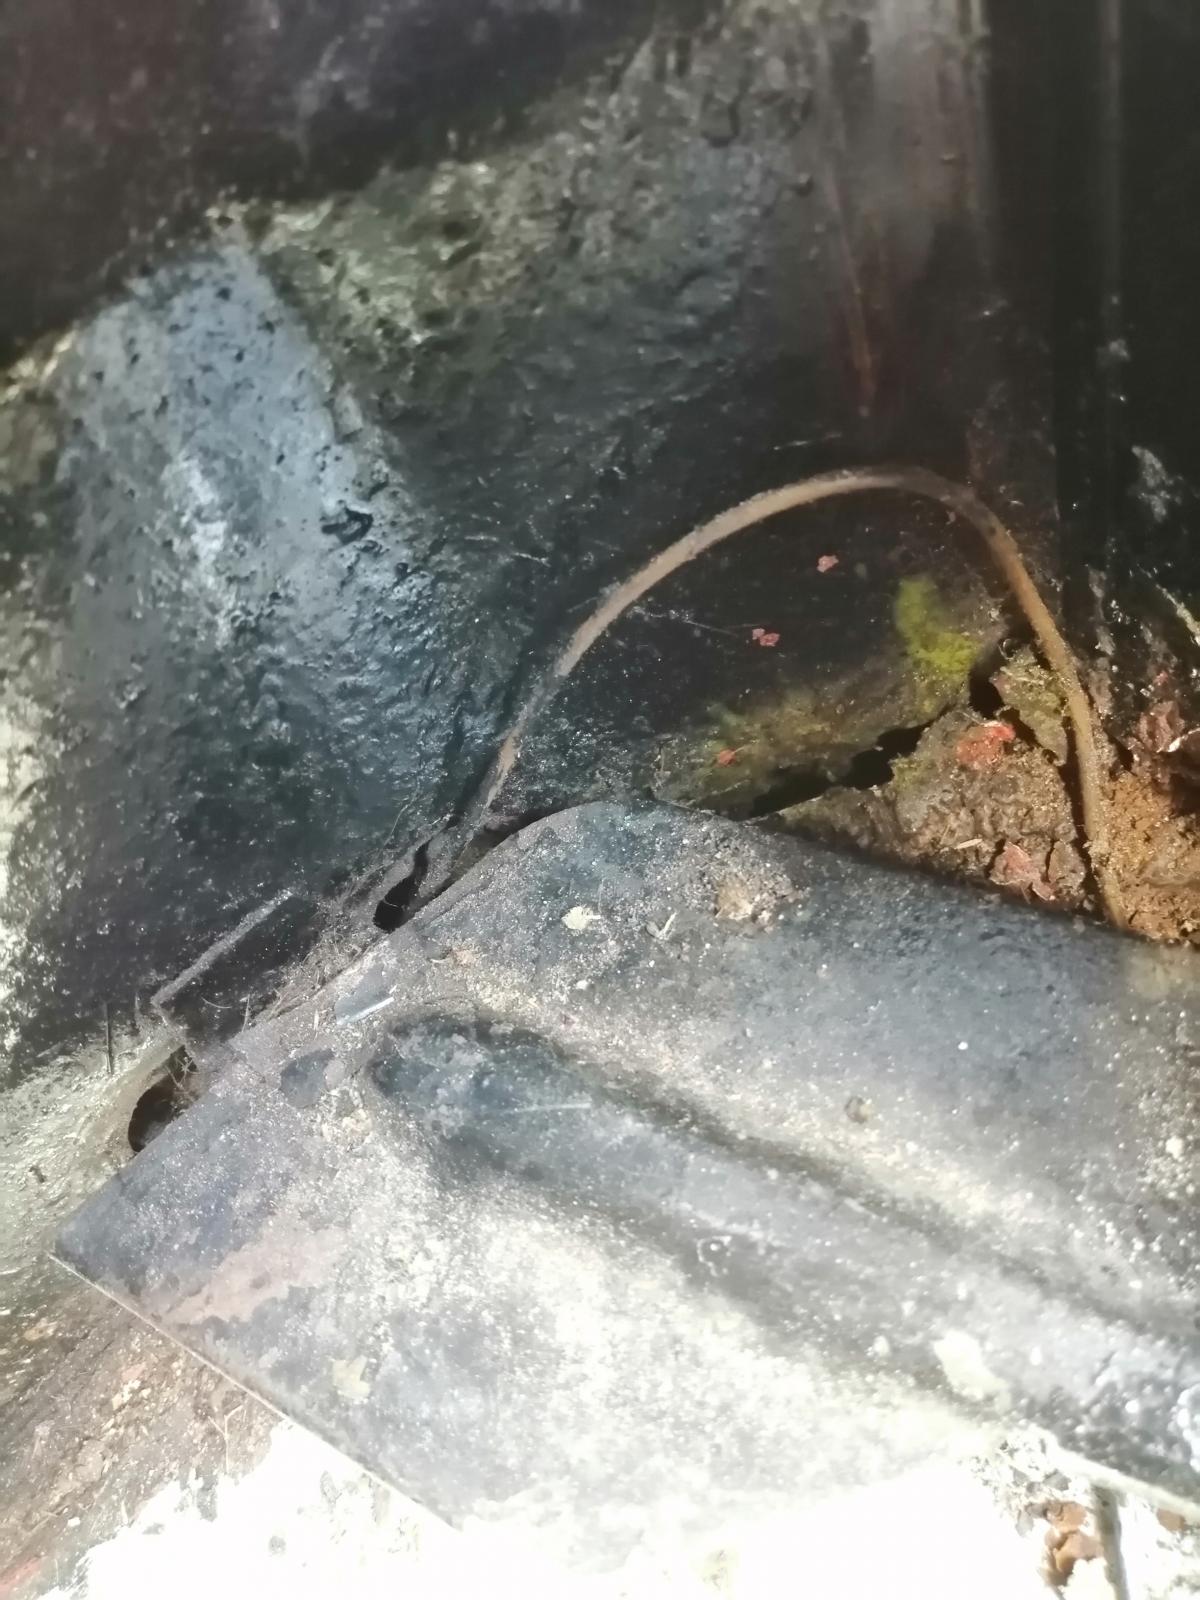
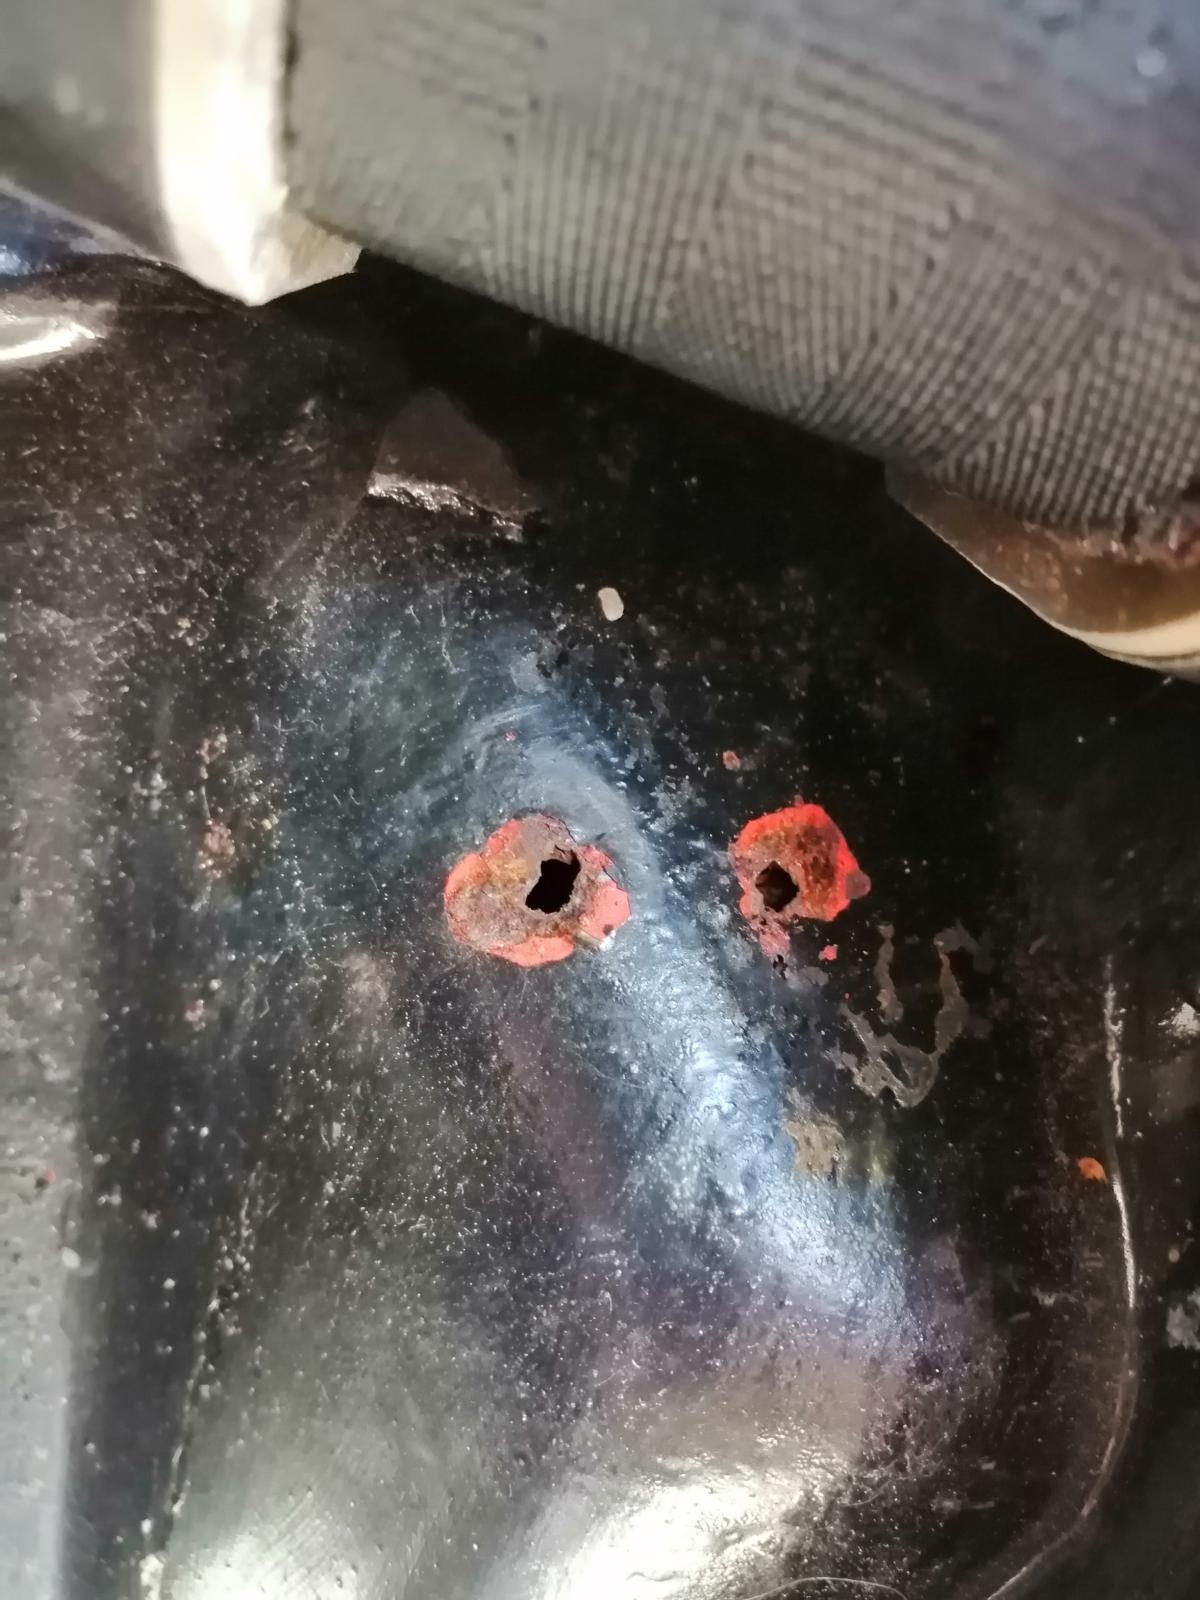
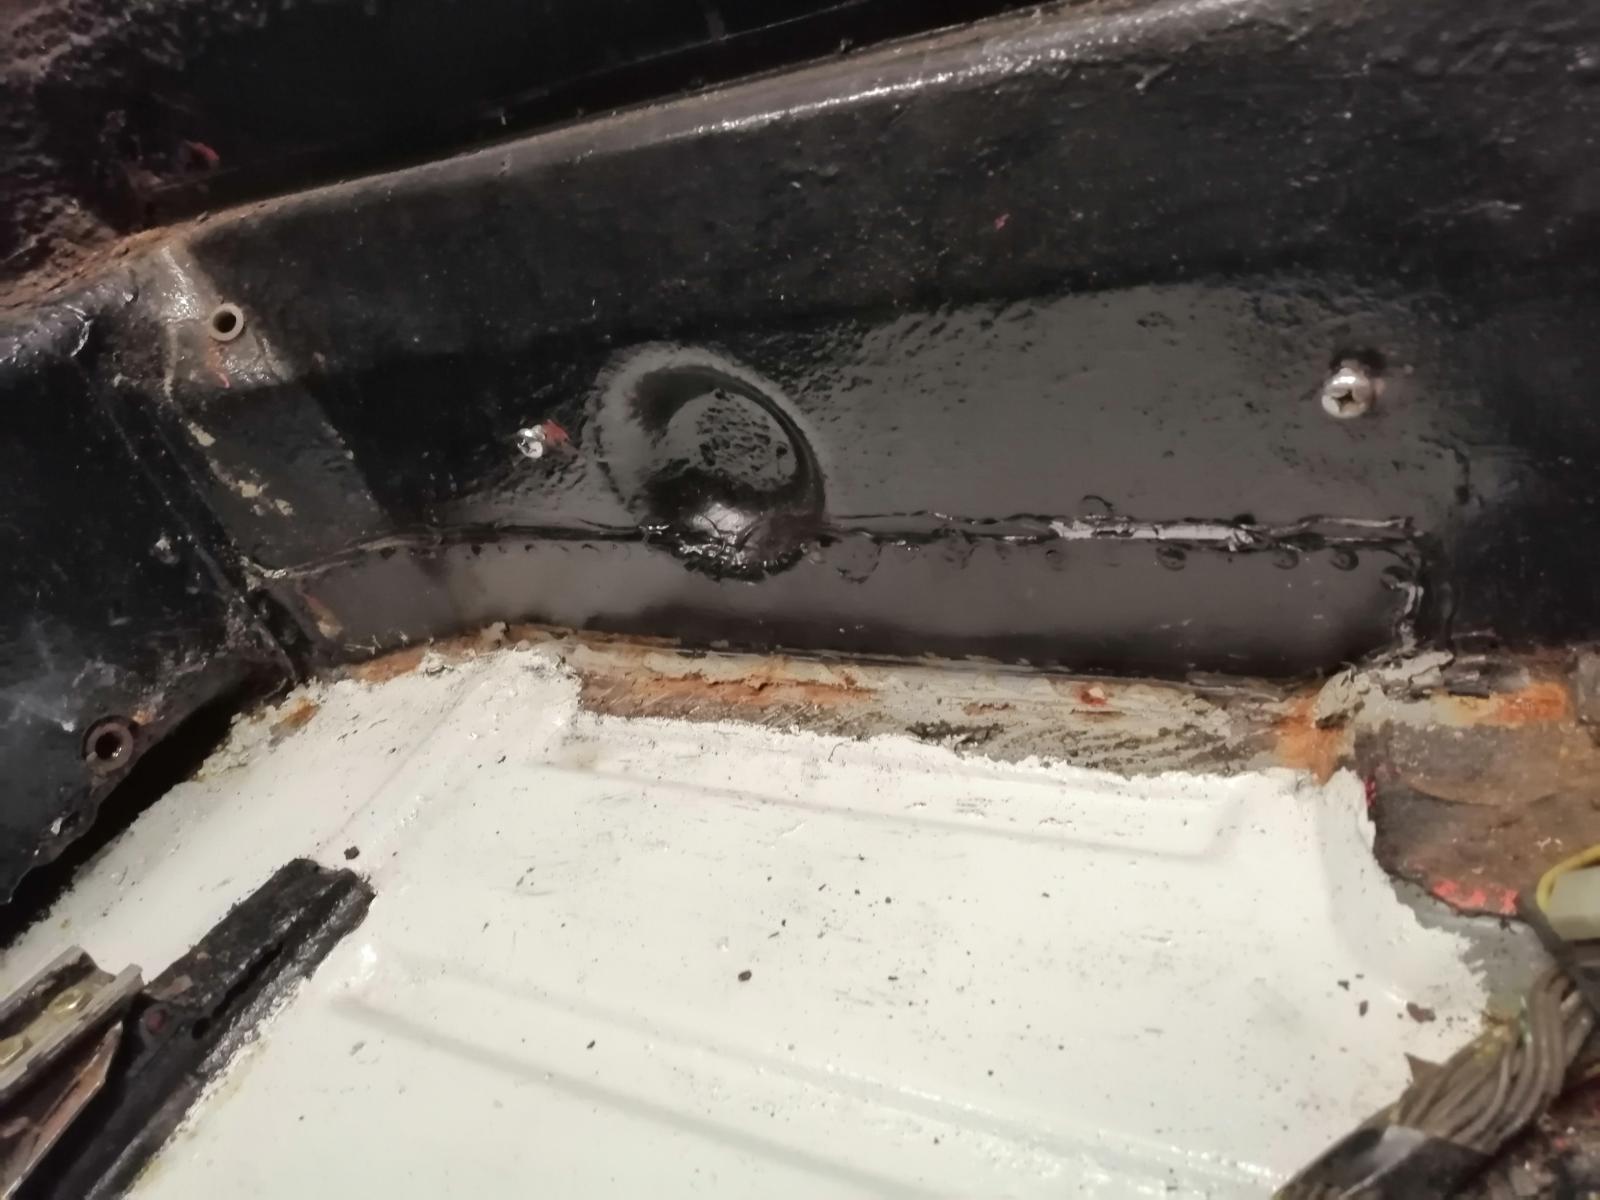
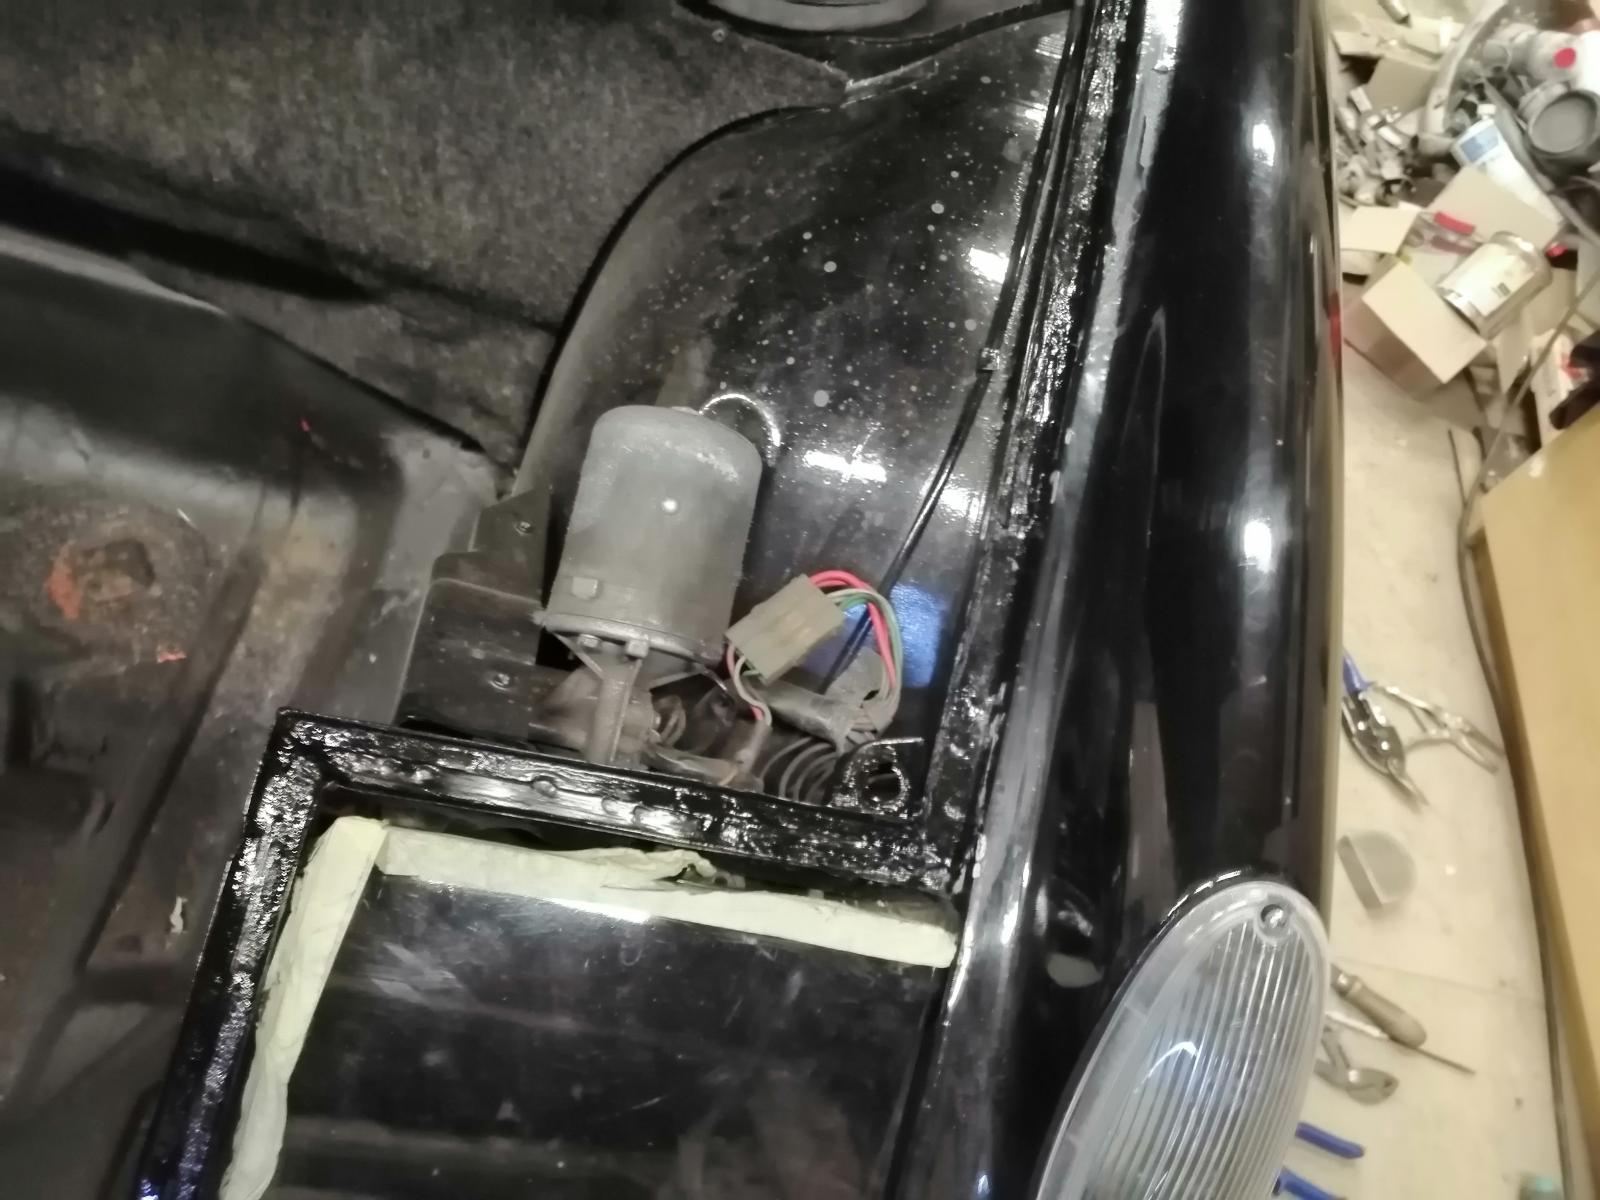
And under the seat belt up in the firewall, I don't know how it rusted here, was no hole, just rust where I got through with the screwdriver..


On the passenger side I only found some bad fixes from the past..

Well.. I'm in for real.. Not that I don't like it (metalshaping is my passion and I love welding, especially TIG) but this one is planned as a driver so will try to get it back on the road as fast as possible

Cheers
Antoine
QUOTE(Cairo94507 @ Aug 12 2021, 06:27 AM)
It can be a slippery slope once you start digging into the rust. I hope your rust is minor and you can patch it and get your 914 back on the road to enjoy it.
You're absolutely right.. We'll see when the engine is out how it looks like from the inside, suspension console,..
I want to drive it again as fast as possible but I want a safe car that is not going to suffer from any bump on the street.. Better be safe and take the time to do it properly now So, I asked my qualified employee (aka my 5 years old boy who is already wrenching with me as much as possible !) to remove the interior (except the driver's seat to drive it to my shop tomorrow) to better see what we got.. Well, rust
Driver's side, in the corner:

And under the seat belt up in the firewall, I don't know how it rusted here, was no hole, just rust where I got through with the screwdriver..
On the passenger side I only found some bad fixes from the past..


Well.. I'm in for real.. Not that I don't like it (metalshaping is my passion and I love welding, especially TIG) but this one is planned as a driver so will try to get it back on the road as fast as possible
Cheers
Antoine
You seem to be on the right path to take the 914 apart and fix it correctly. If someone has a bench to suspend the body, that would be good.
I own a lift and a rotisserie so no problem I will probably create a frame jig and fix it to the rotisserie
Cheers
Antoine
I will probably create a frame jig and fix it to the rotisserie Cheers
Antoine
I am sorry to see that. But it seems like you have got this well in hand. I look forward to seeing the repairs. The great news is once repaired you will not have to deal with that again.
There is a special place in hell for people who use fiberglass to cover up rust.
There is a special place in hell for people who use fiberglass to cover up rust.
QUOTE(Cairo94507 @ Aug 16 2021, 12:51 PM)
I am sorry to see that. But it seems like you have got this well in hand. I look forward to seeing the repairs. The great news is once repaired you will not have to deal with that again.
There is a special place in hell for people who use fiberglass to cover up rust.
Fiberglass AND undercoating.
I can only agree with you
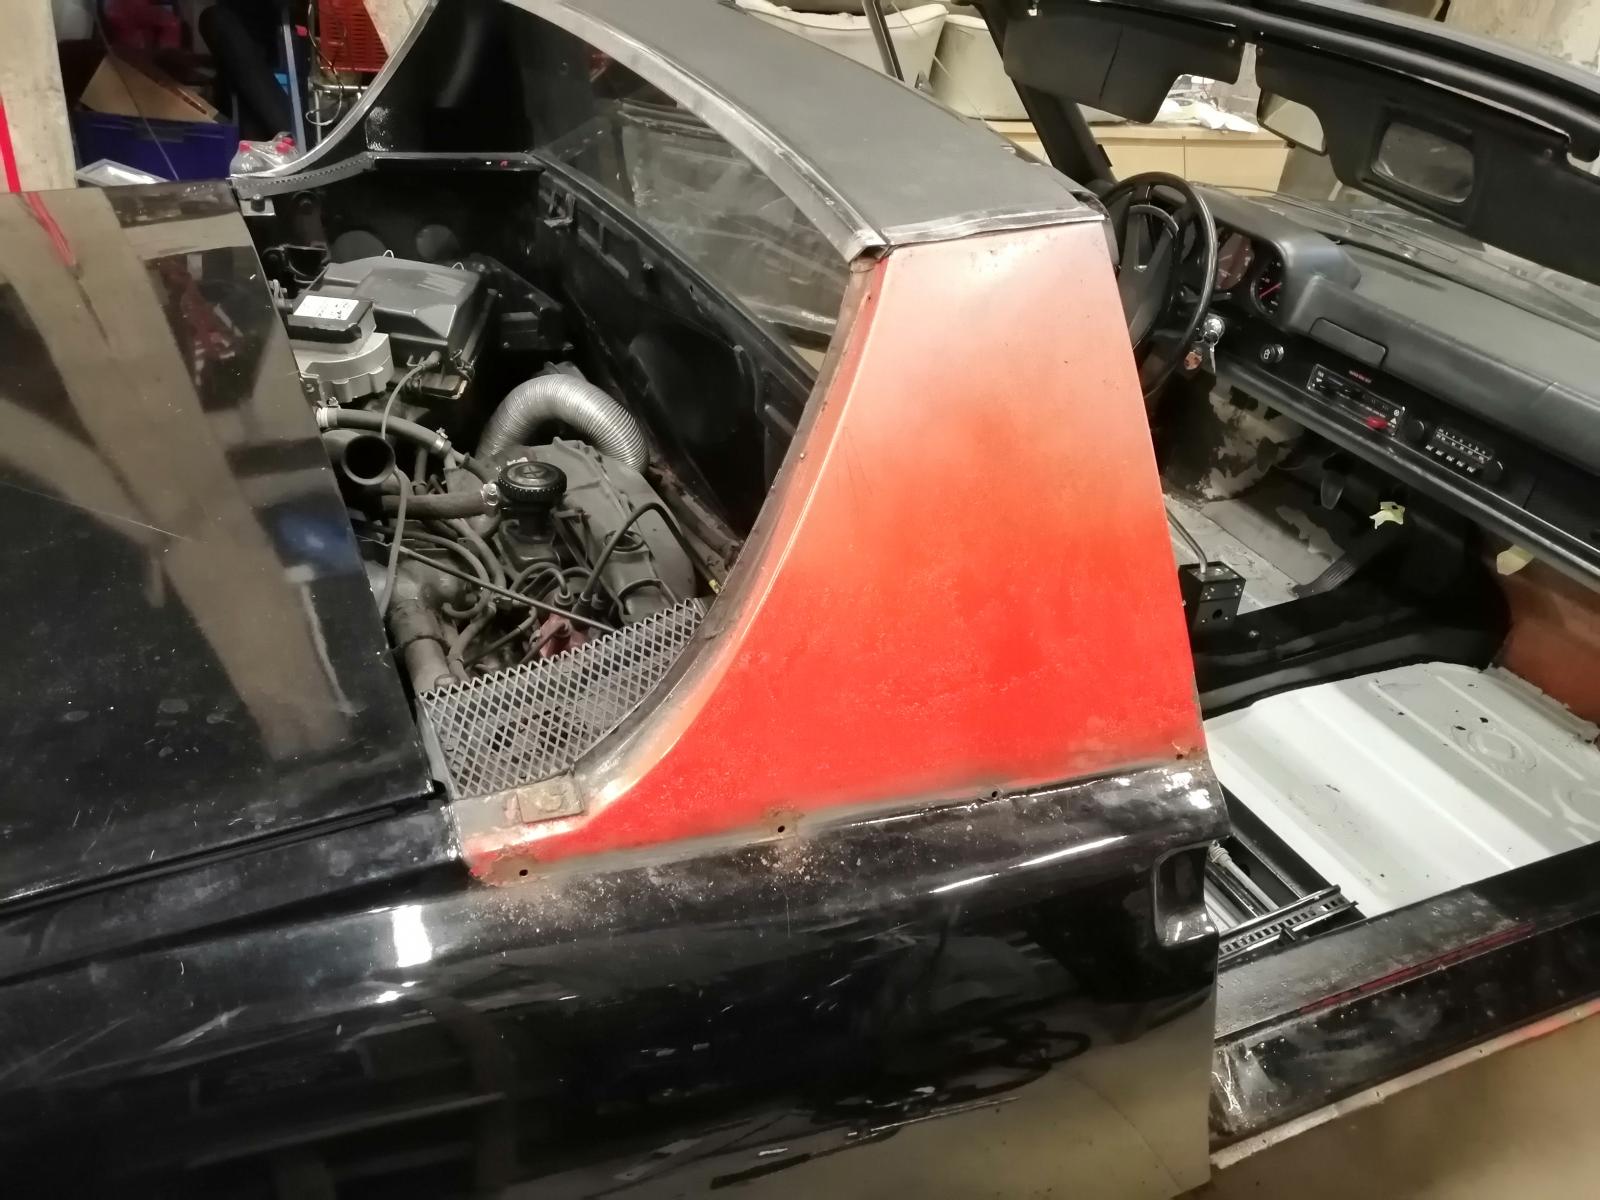
So.. The 914 is in my shop
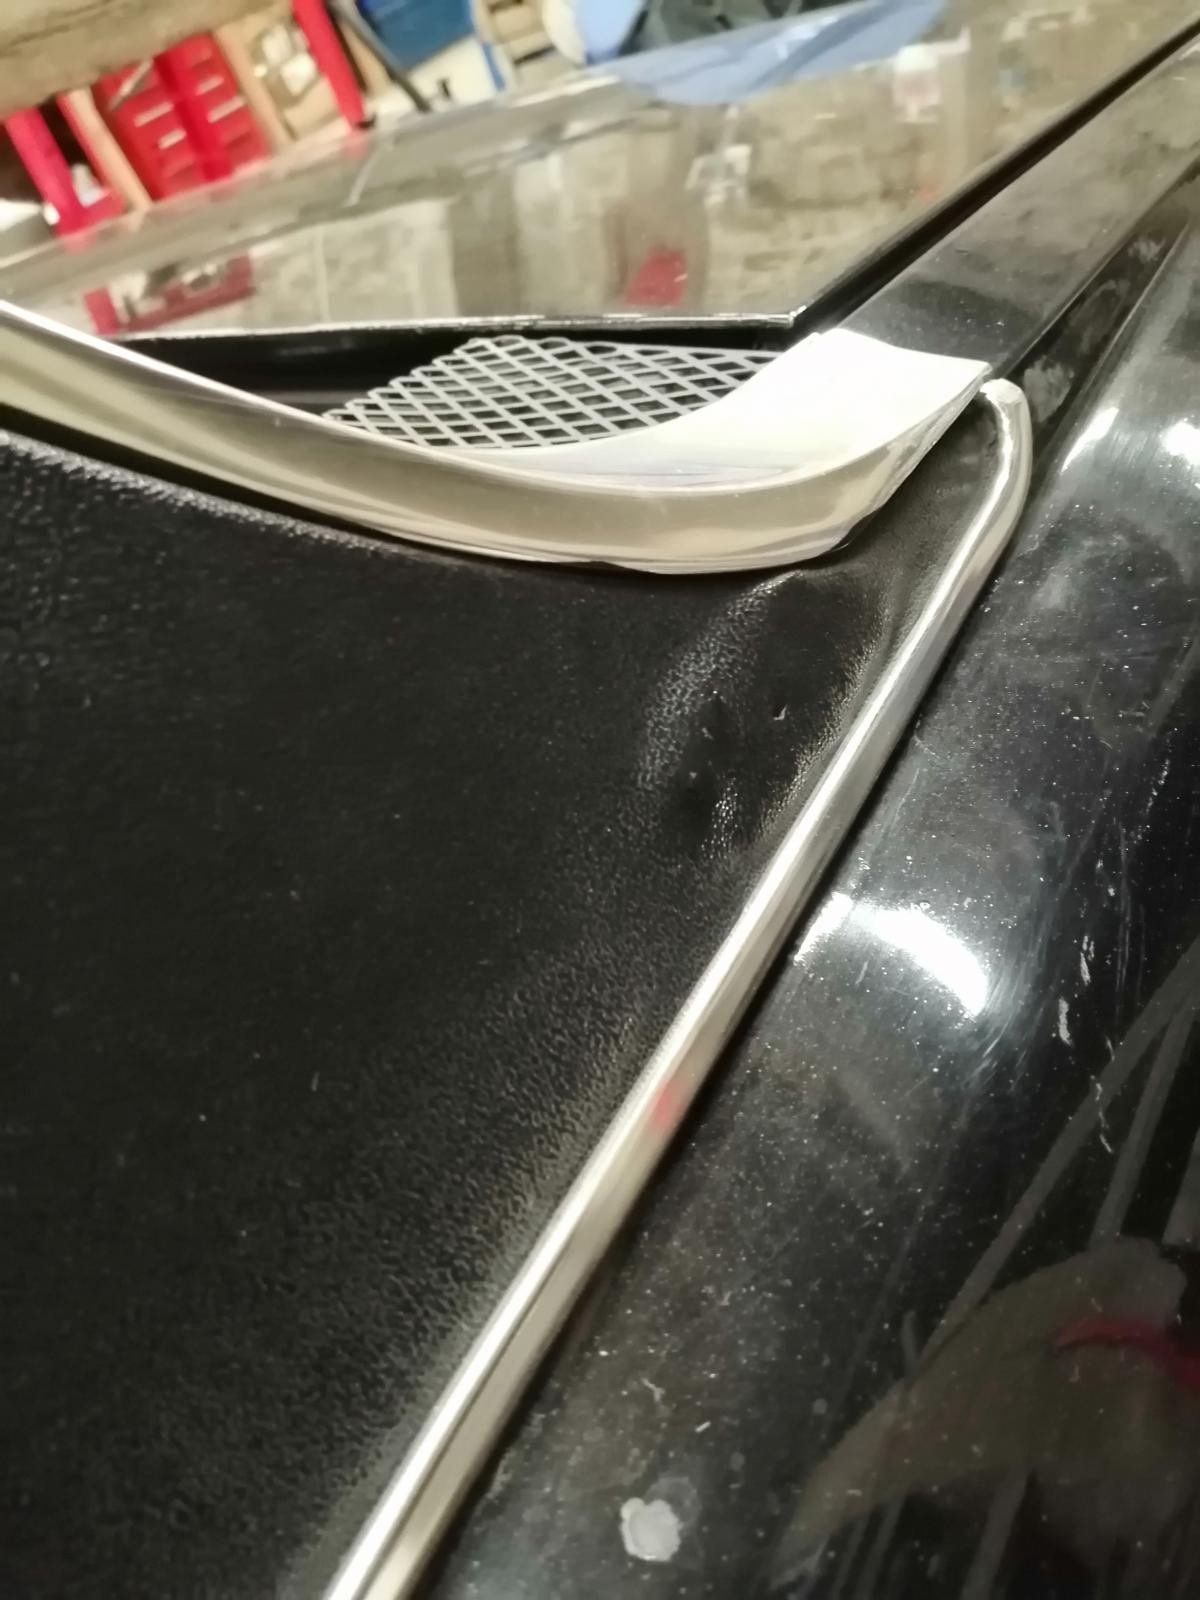
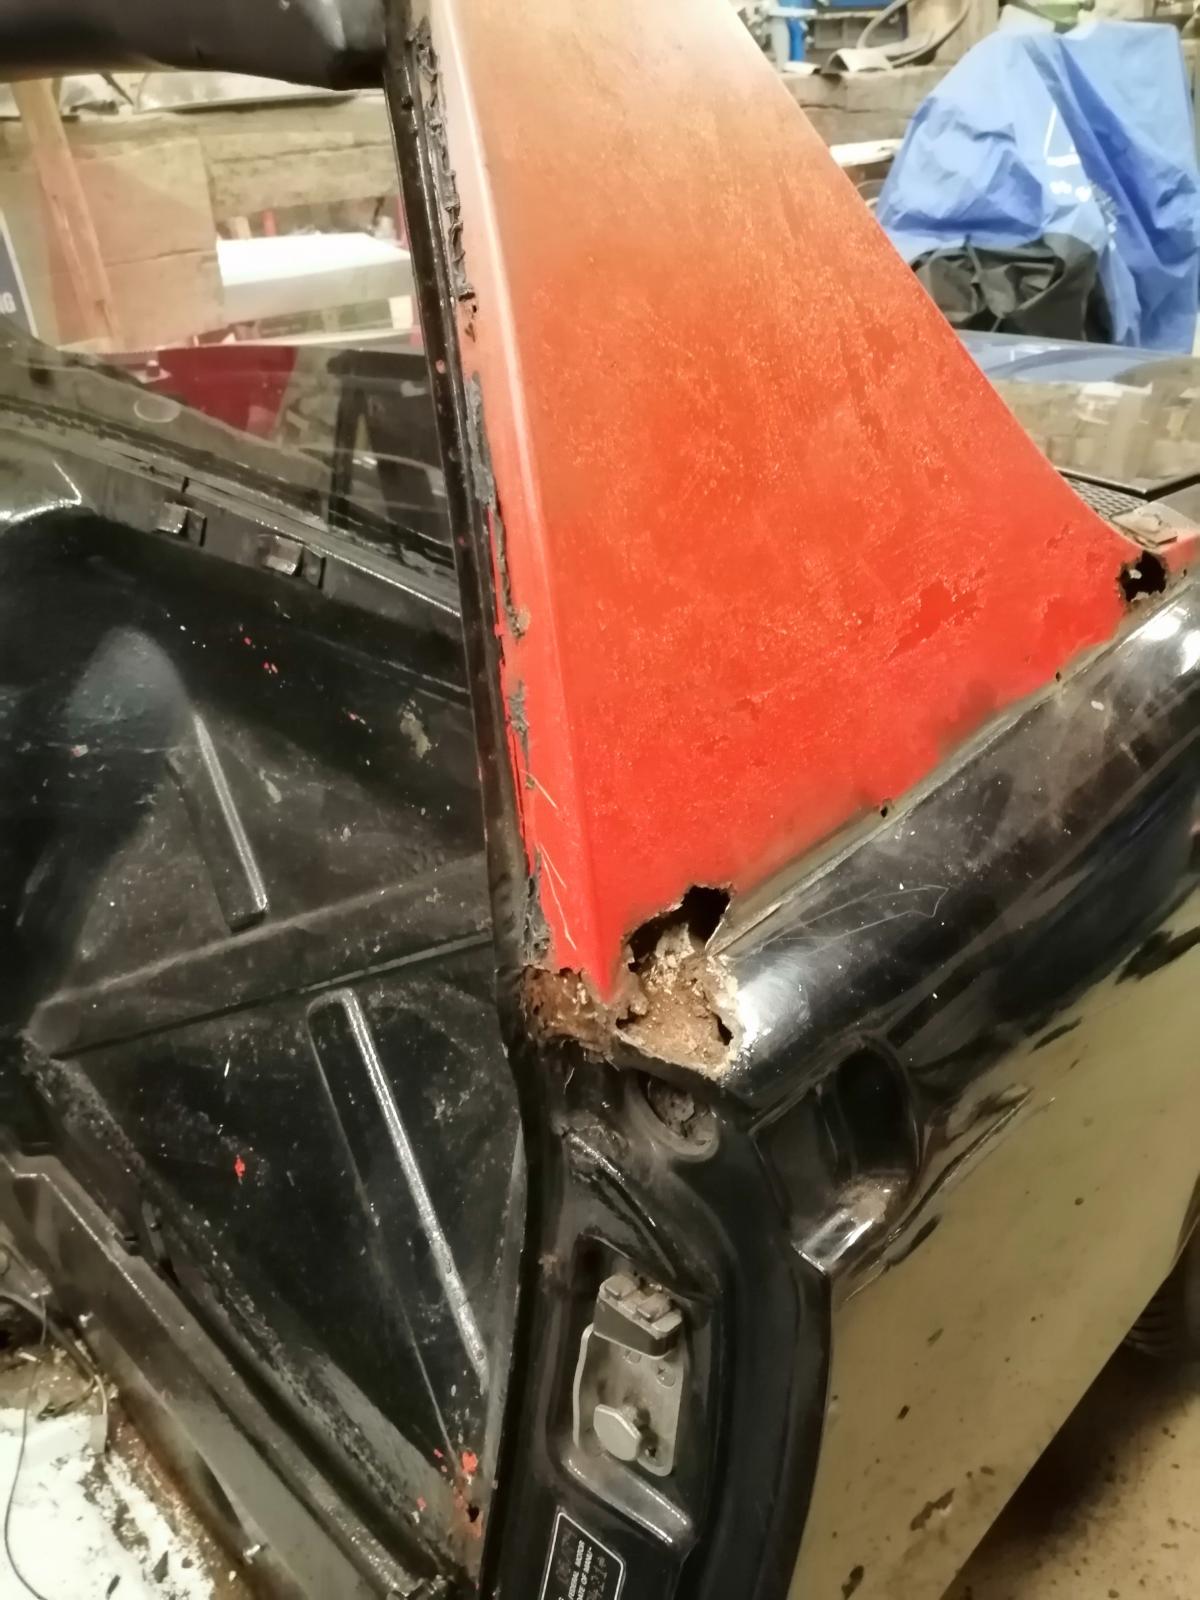
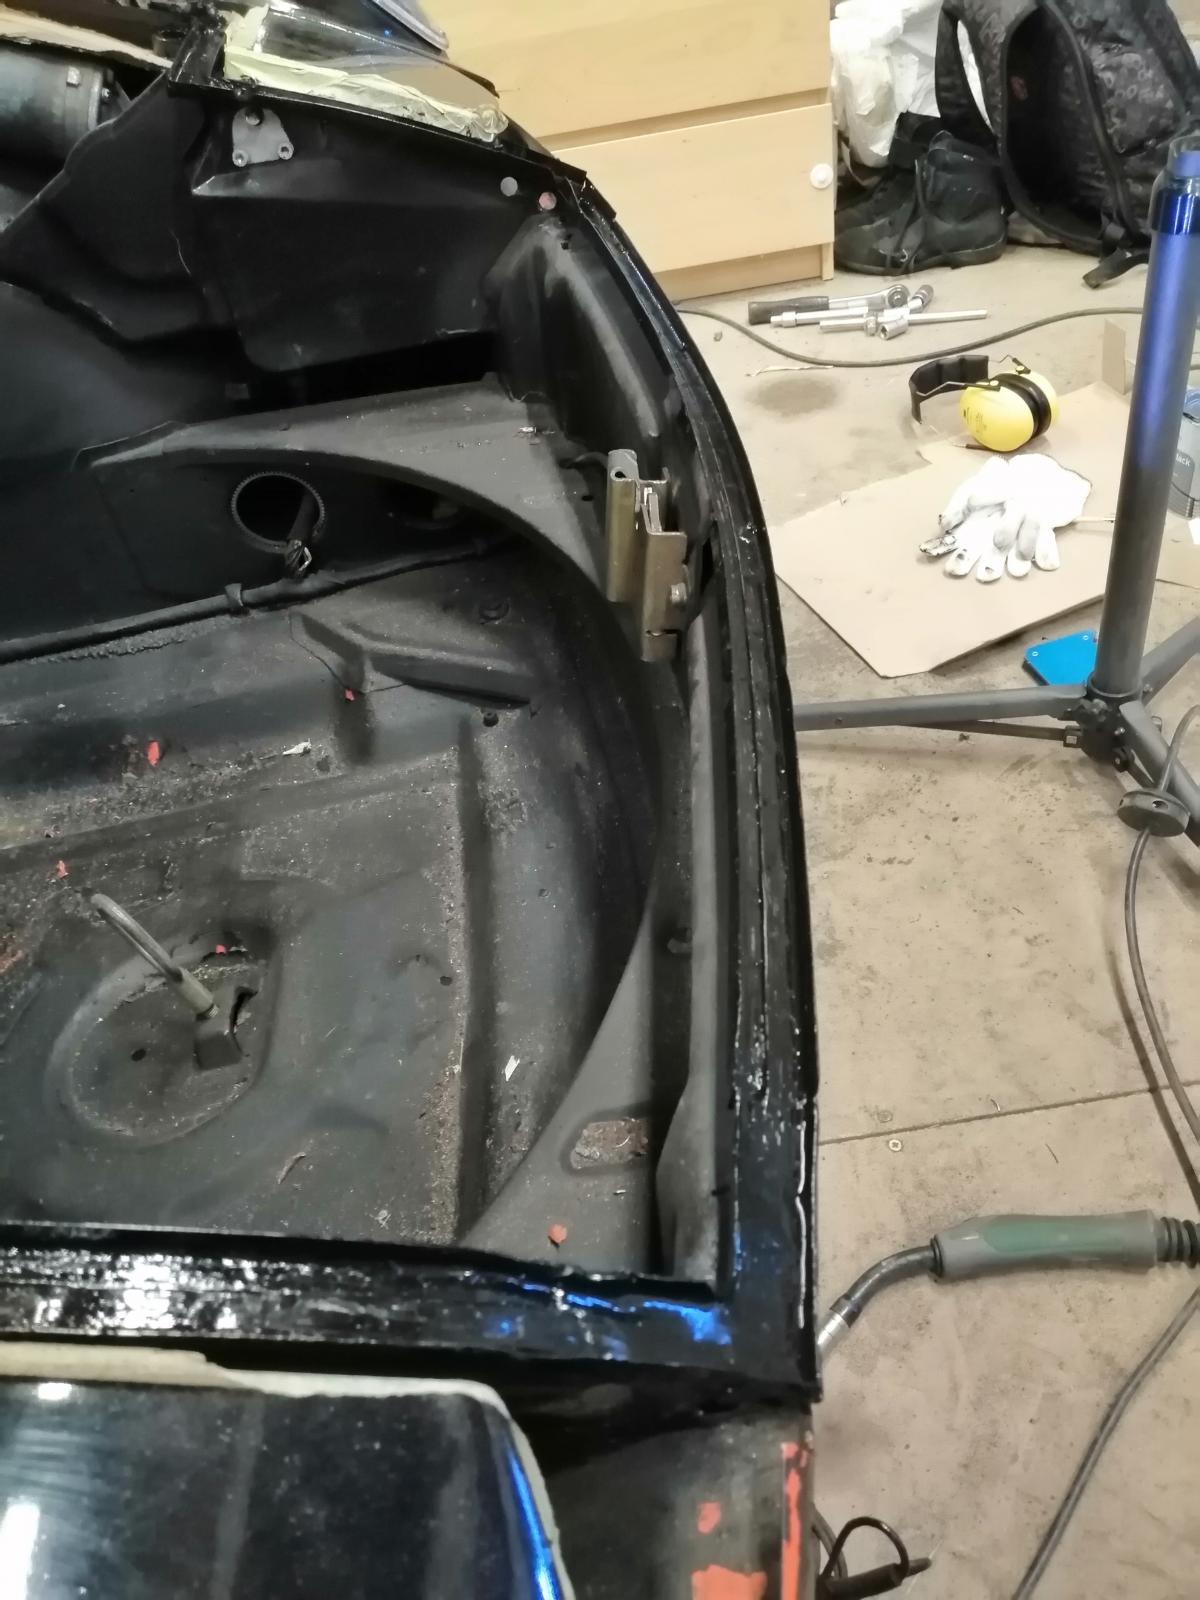
And I made some more disassembly, and checked the B-pillar behind the sail panel where I expected a lot of work..
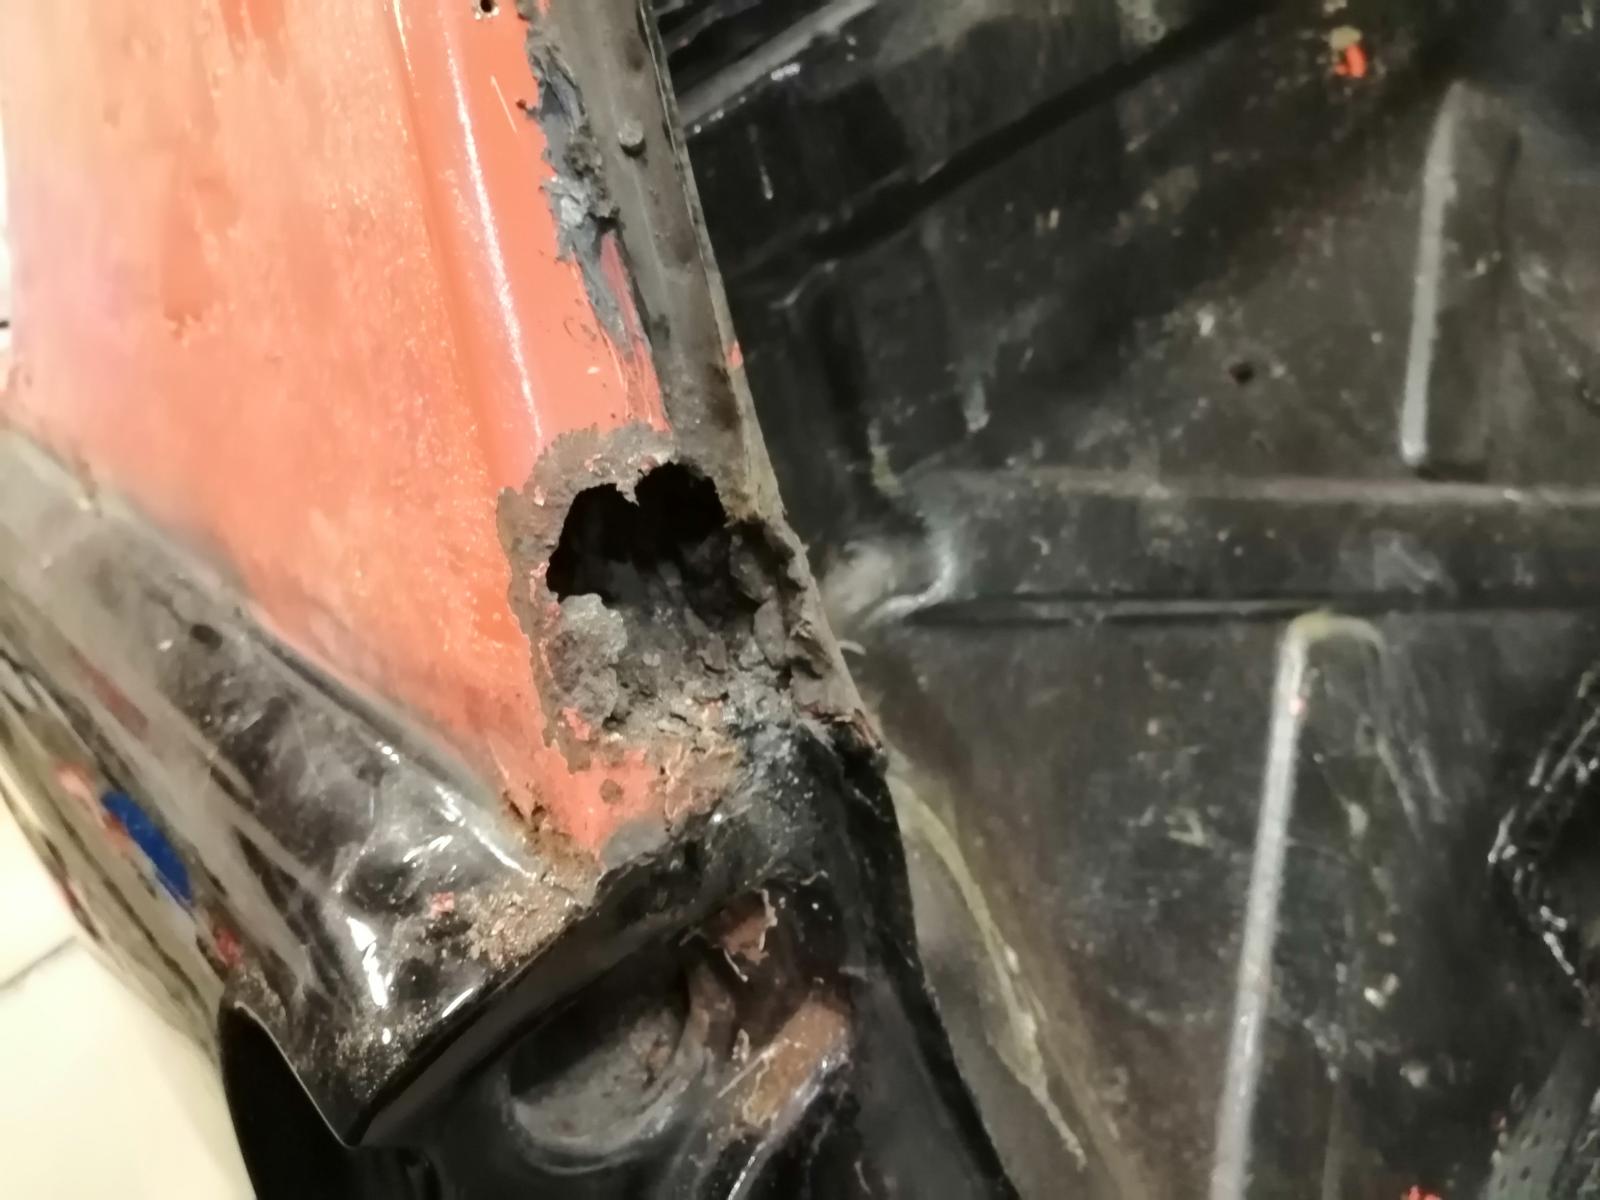
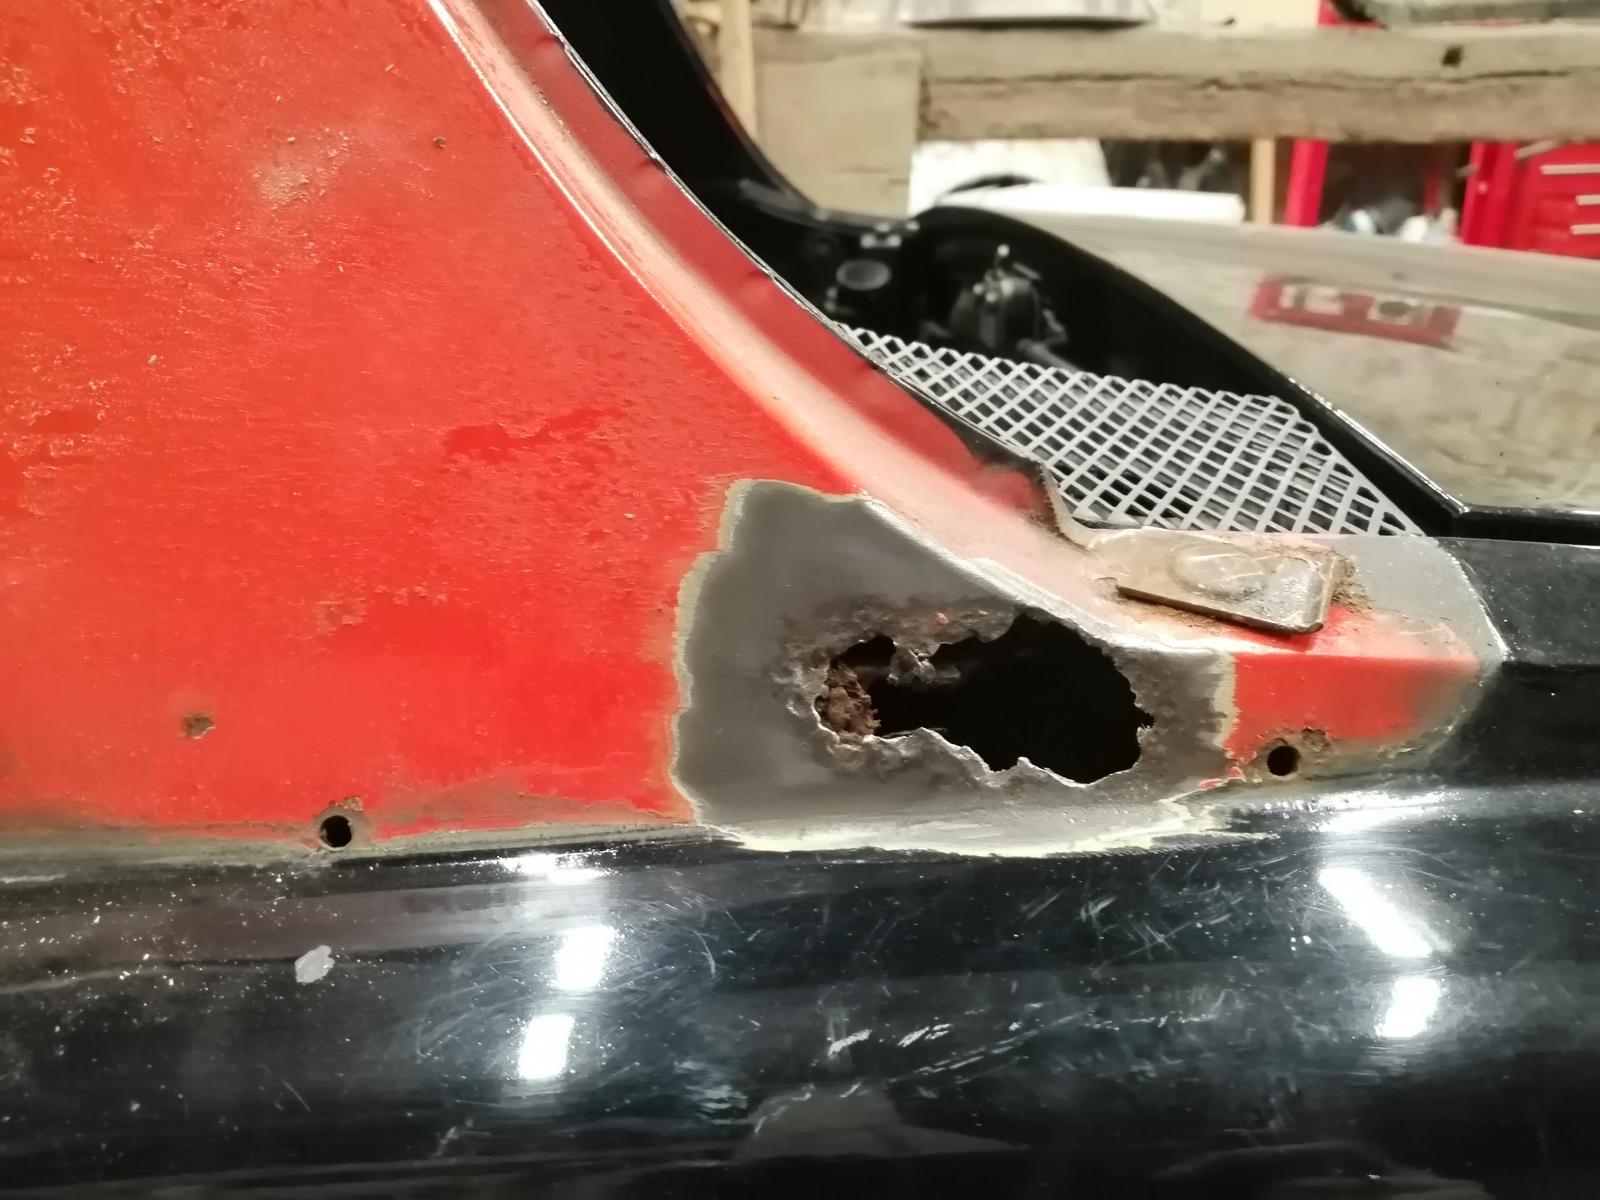
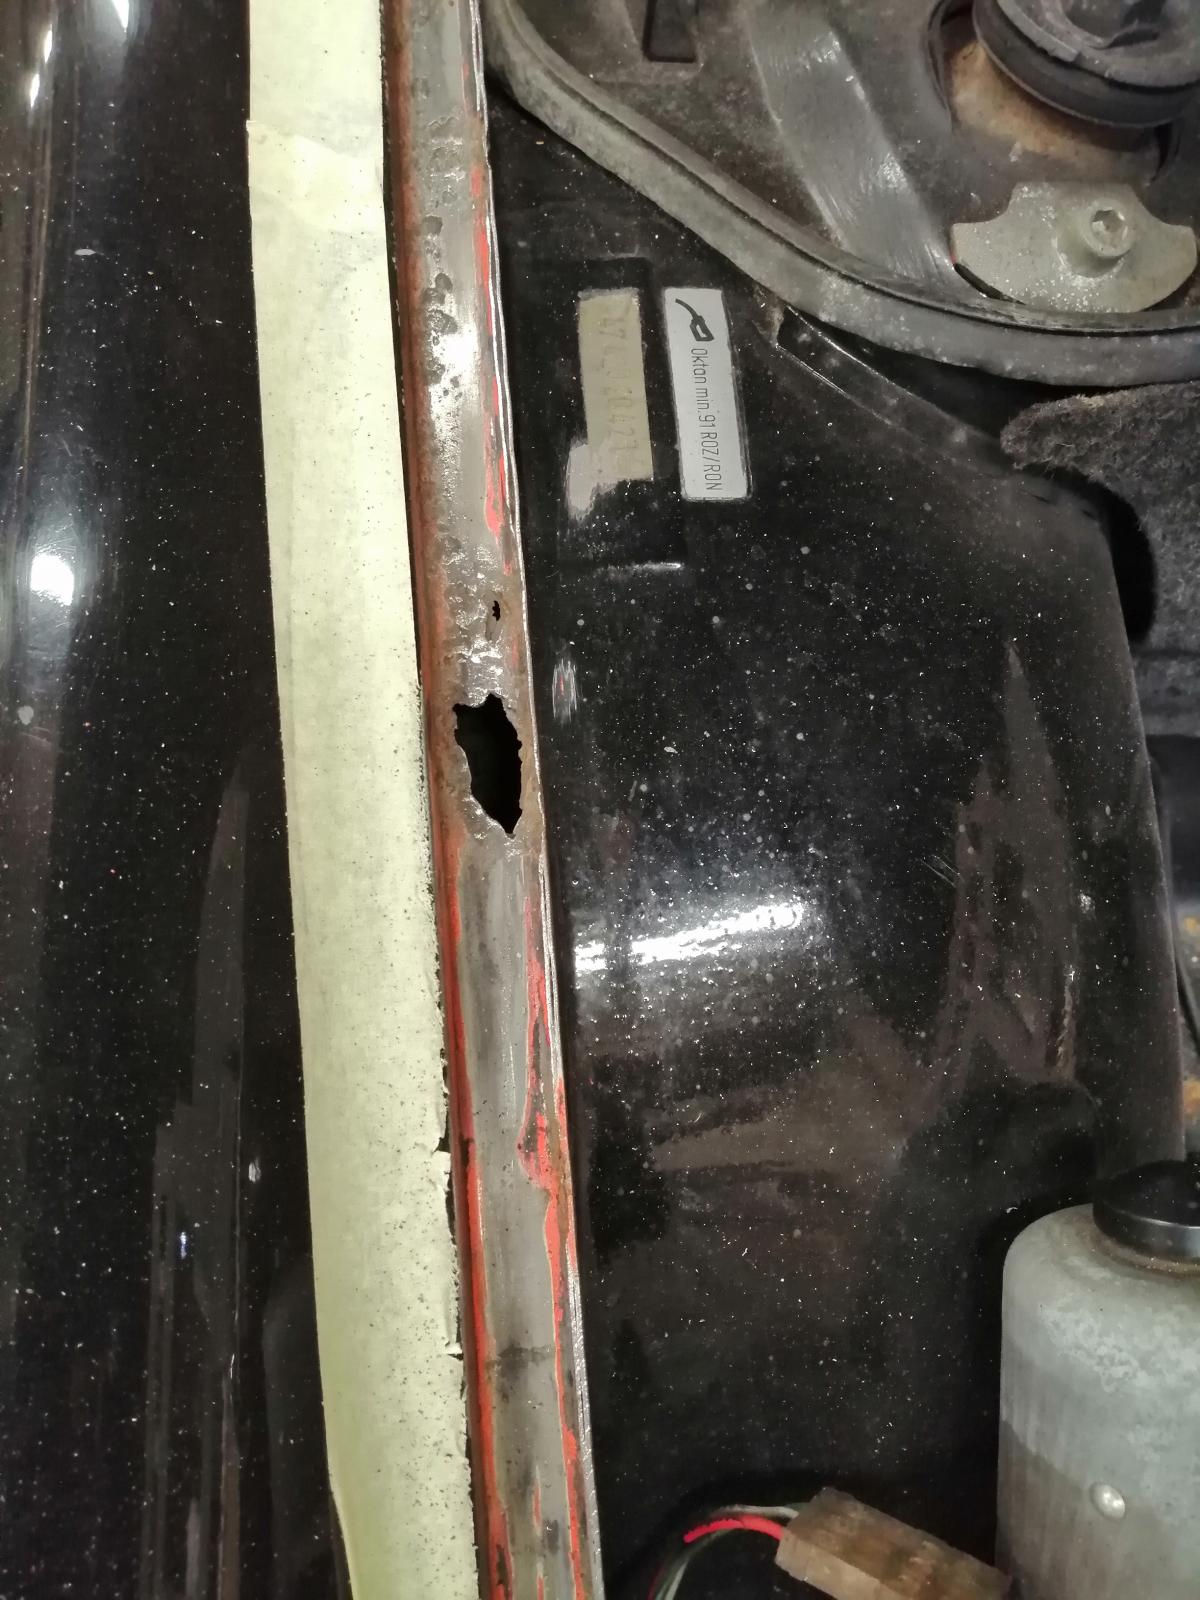
Passenger side is quite a good surprise, except this hole that could be foreseen:
And is real:
The rest is good
Driver side had developped some.. Let's say waves..
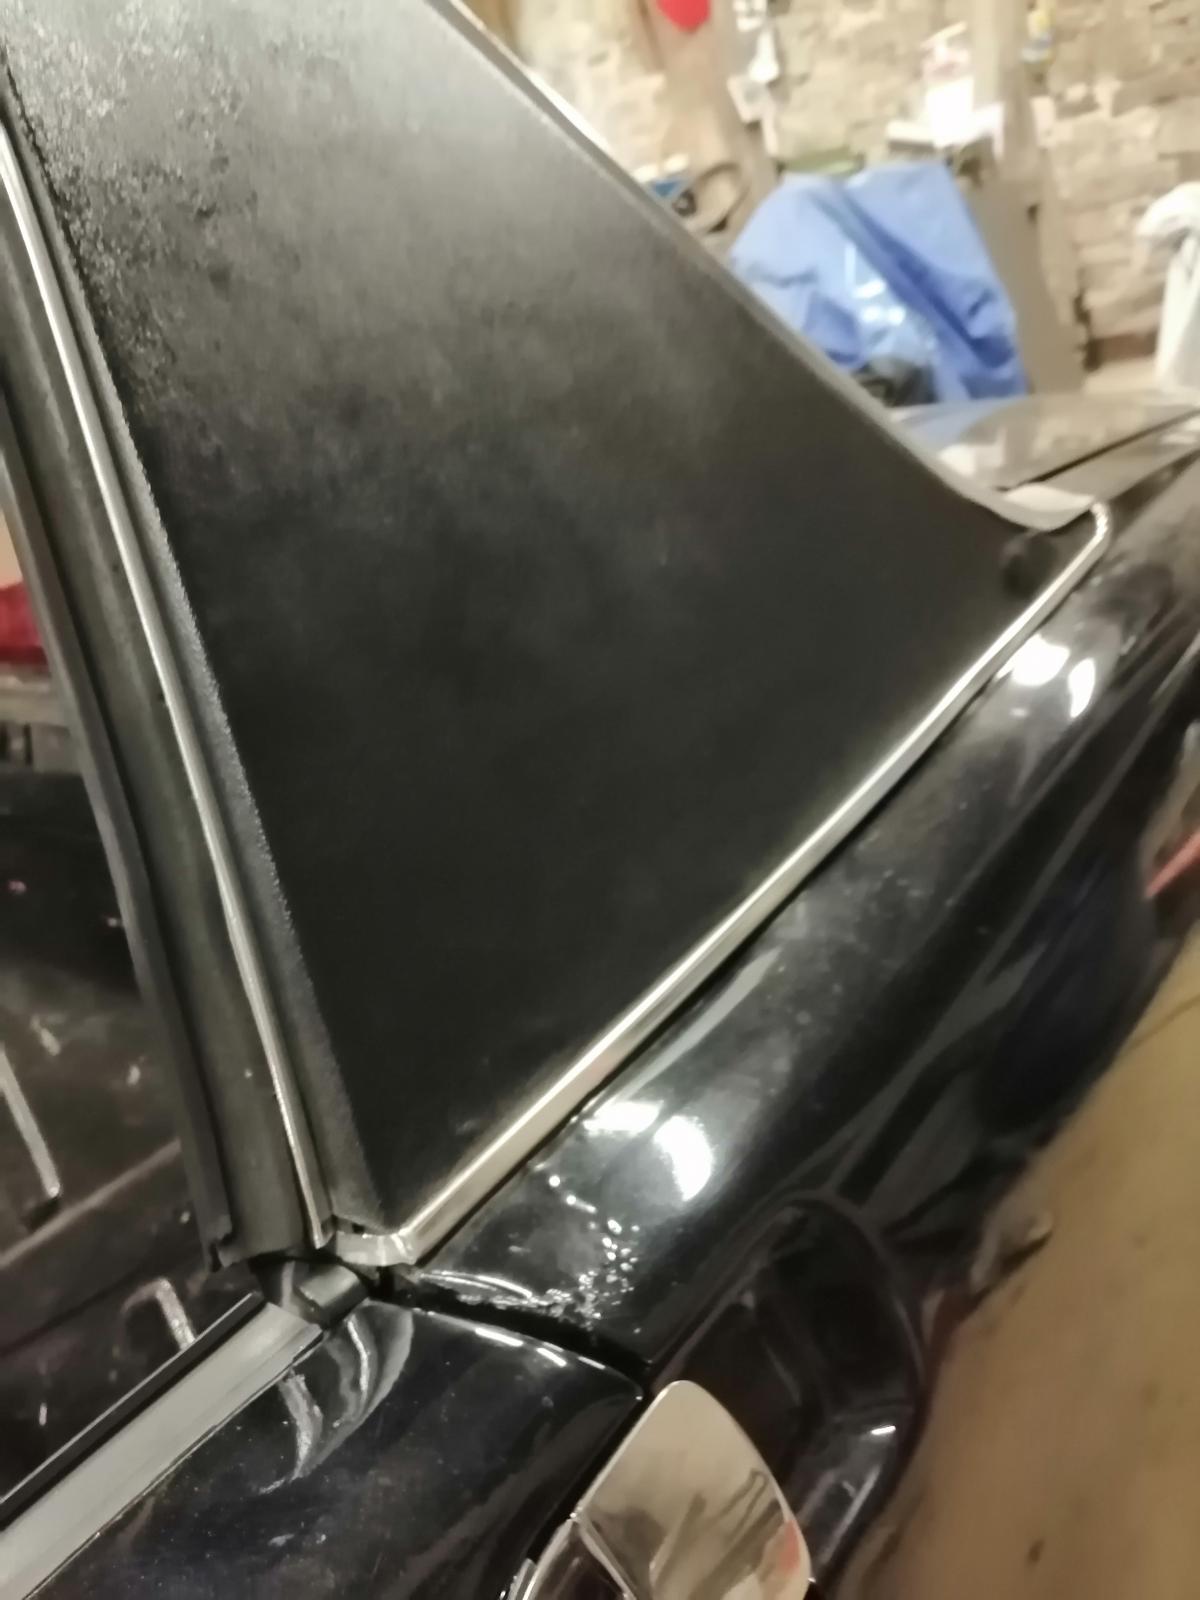
And here there are a bit more damages..
Well, I know the condition now, and nothing that really scares me
Then I built the necessary door braces, made to be able to keep the doors, in order to always be able to check the gaps
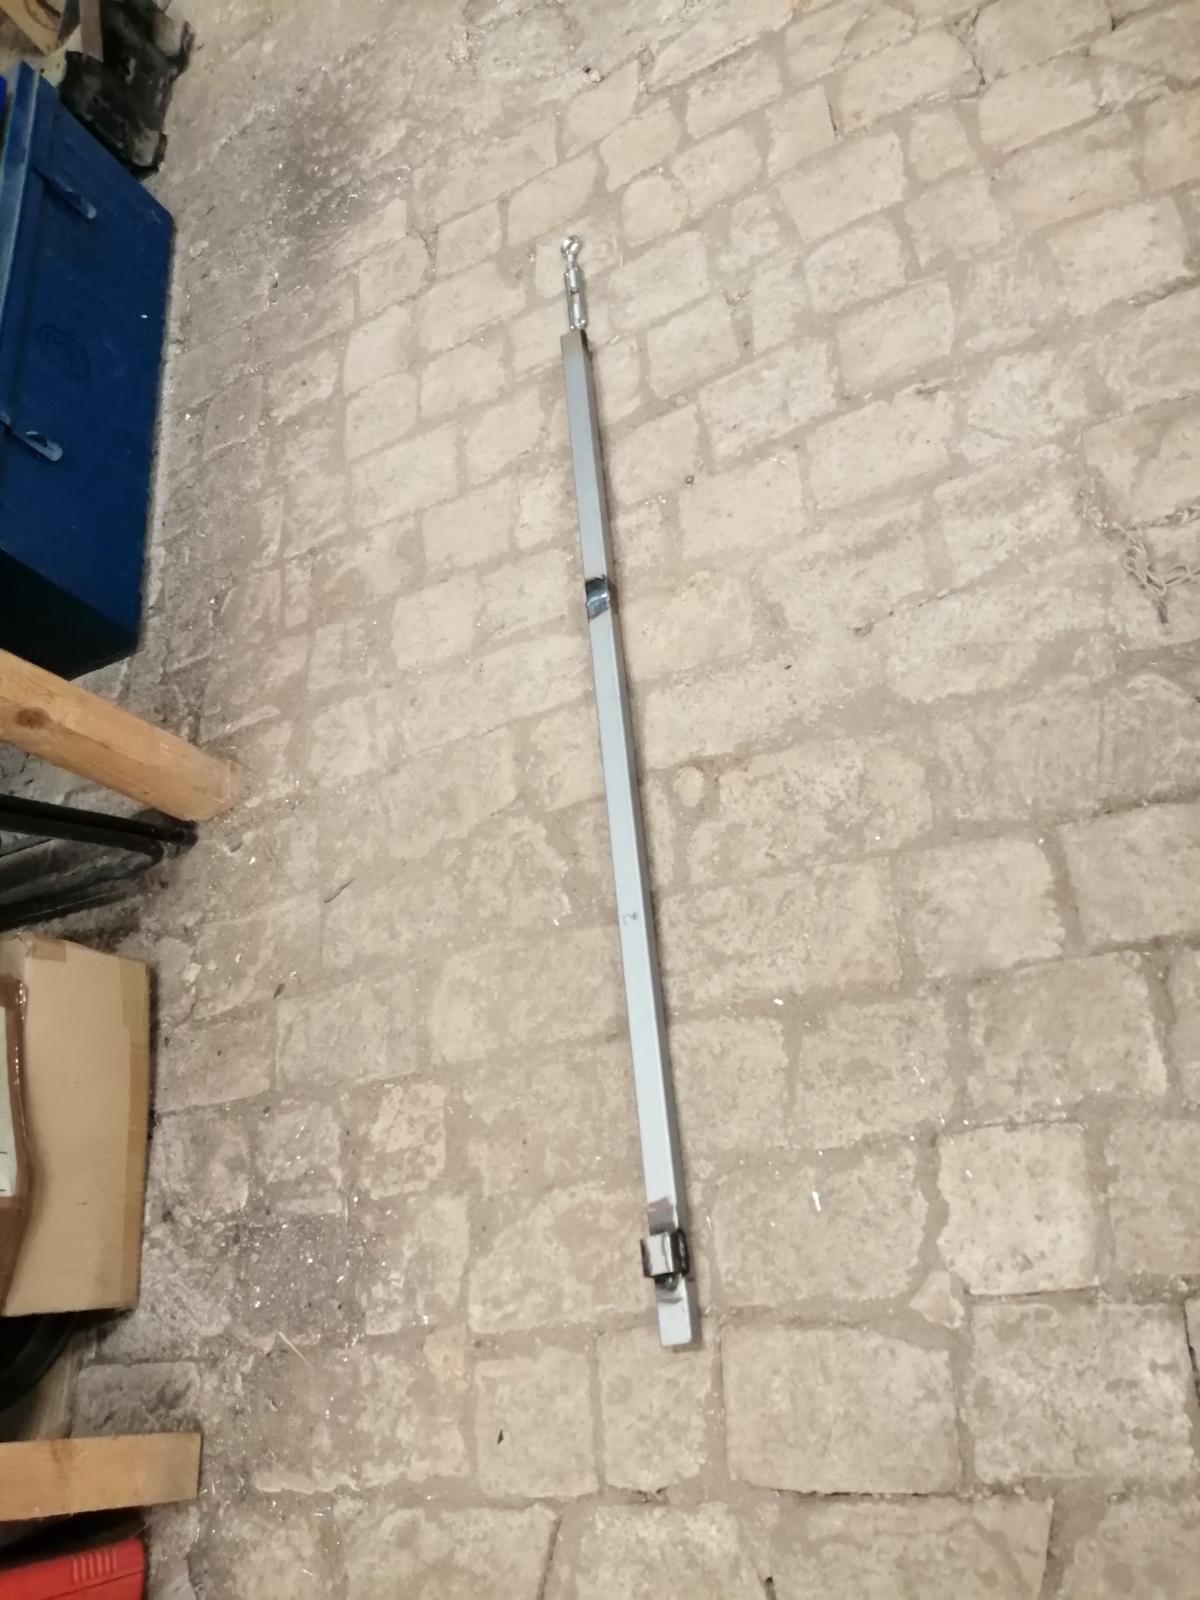
And mounted:
And I check further the inner firewall.. Holes on driver's side, bad repair on passenger's side..
Well, all in all I know more about the work to come, it has been a good first evening
Cheers
Antoine
So.. The 914 is in my shop
And I made some more disassembly, and checked the B-pillar behind the sail panel where I expected a lot of work..
Passenger side is quite a good surprise, except this hole that could be foreseen:
And is real:
The rest is good
Driver side had developped some.. Let's say waves..
And here there are a bit more damages..
Well, I know the condition now, and nothing that really scares me
Then I built the necessary door braces, made to be able to keep the doors, in order to always be able to check the gaps
And mounted:
And I check further the inner firewall.. Holes on driver's side, bad repair on passenger's side..
Well, all in all I know more about the work to come, it has been a good first evening
Cheers
Antoine
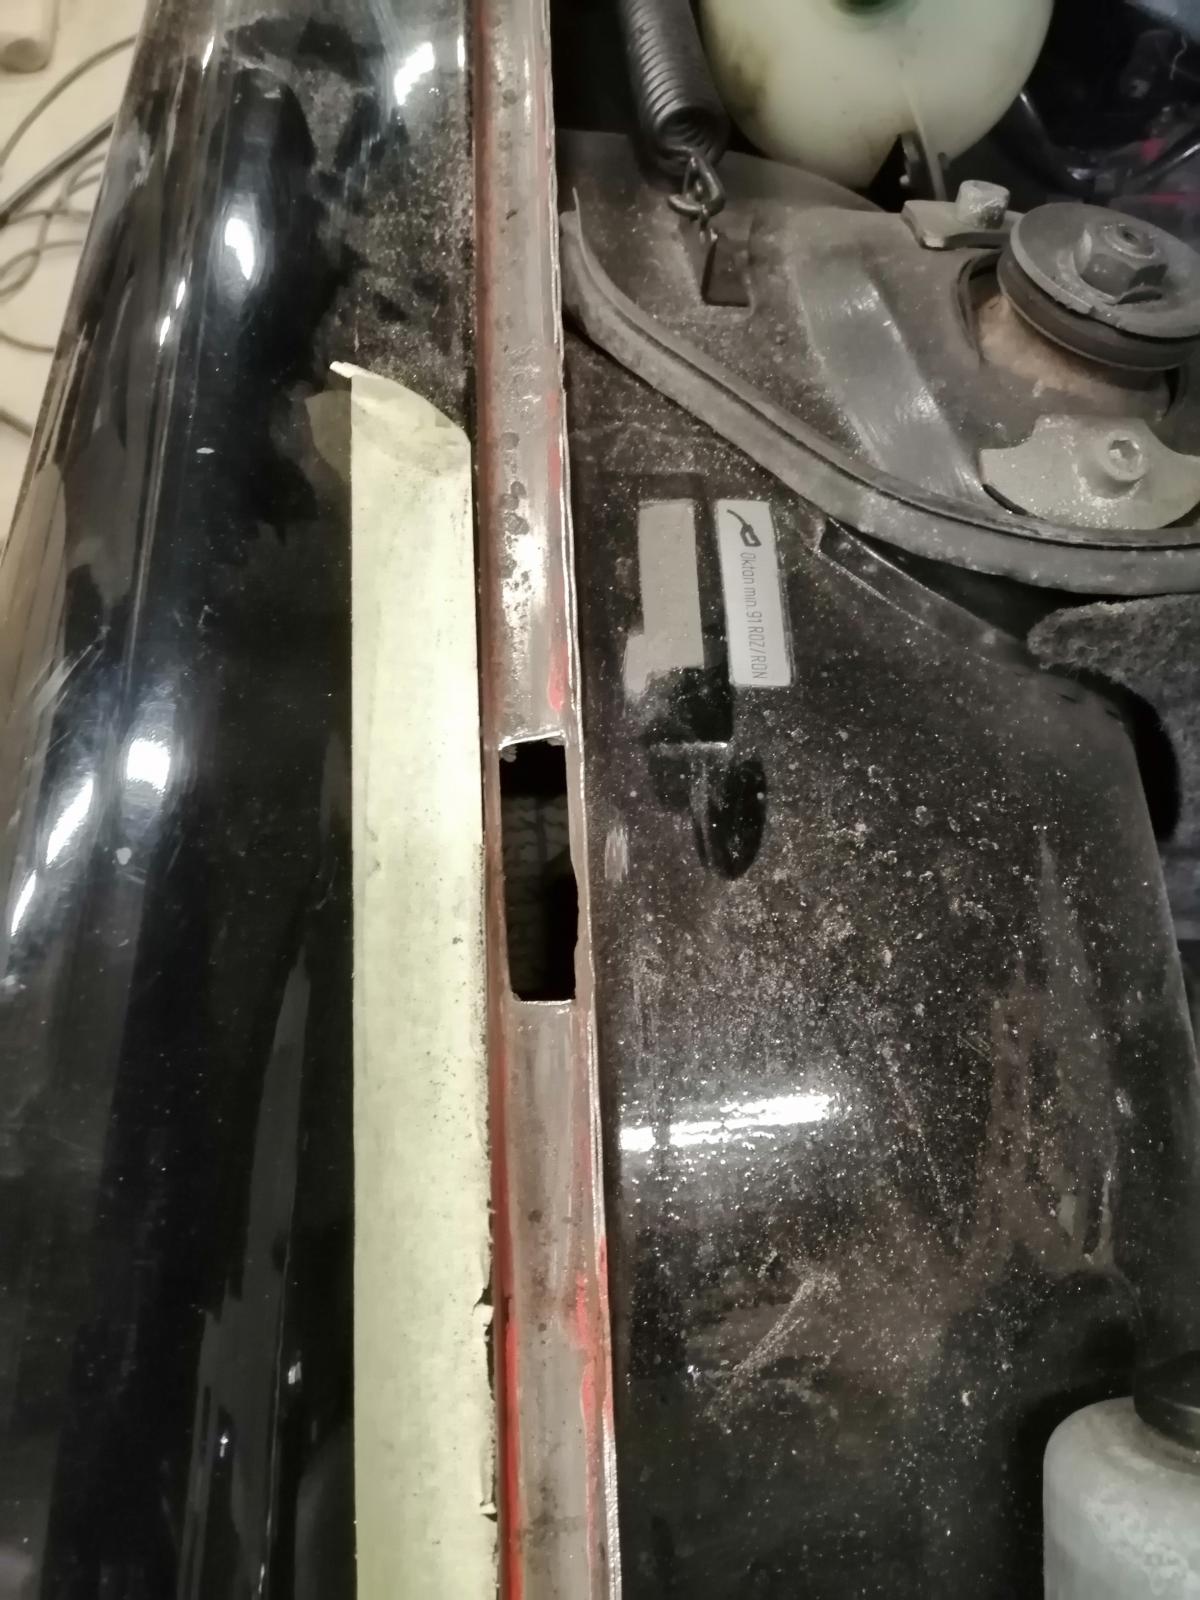
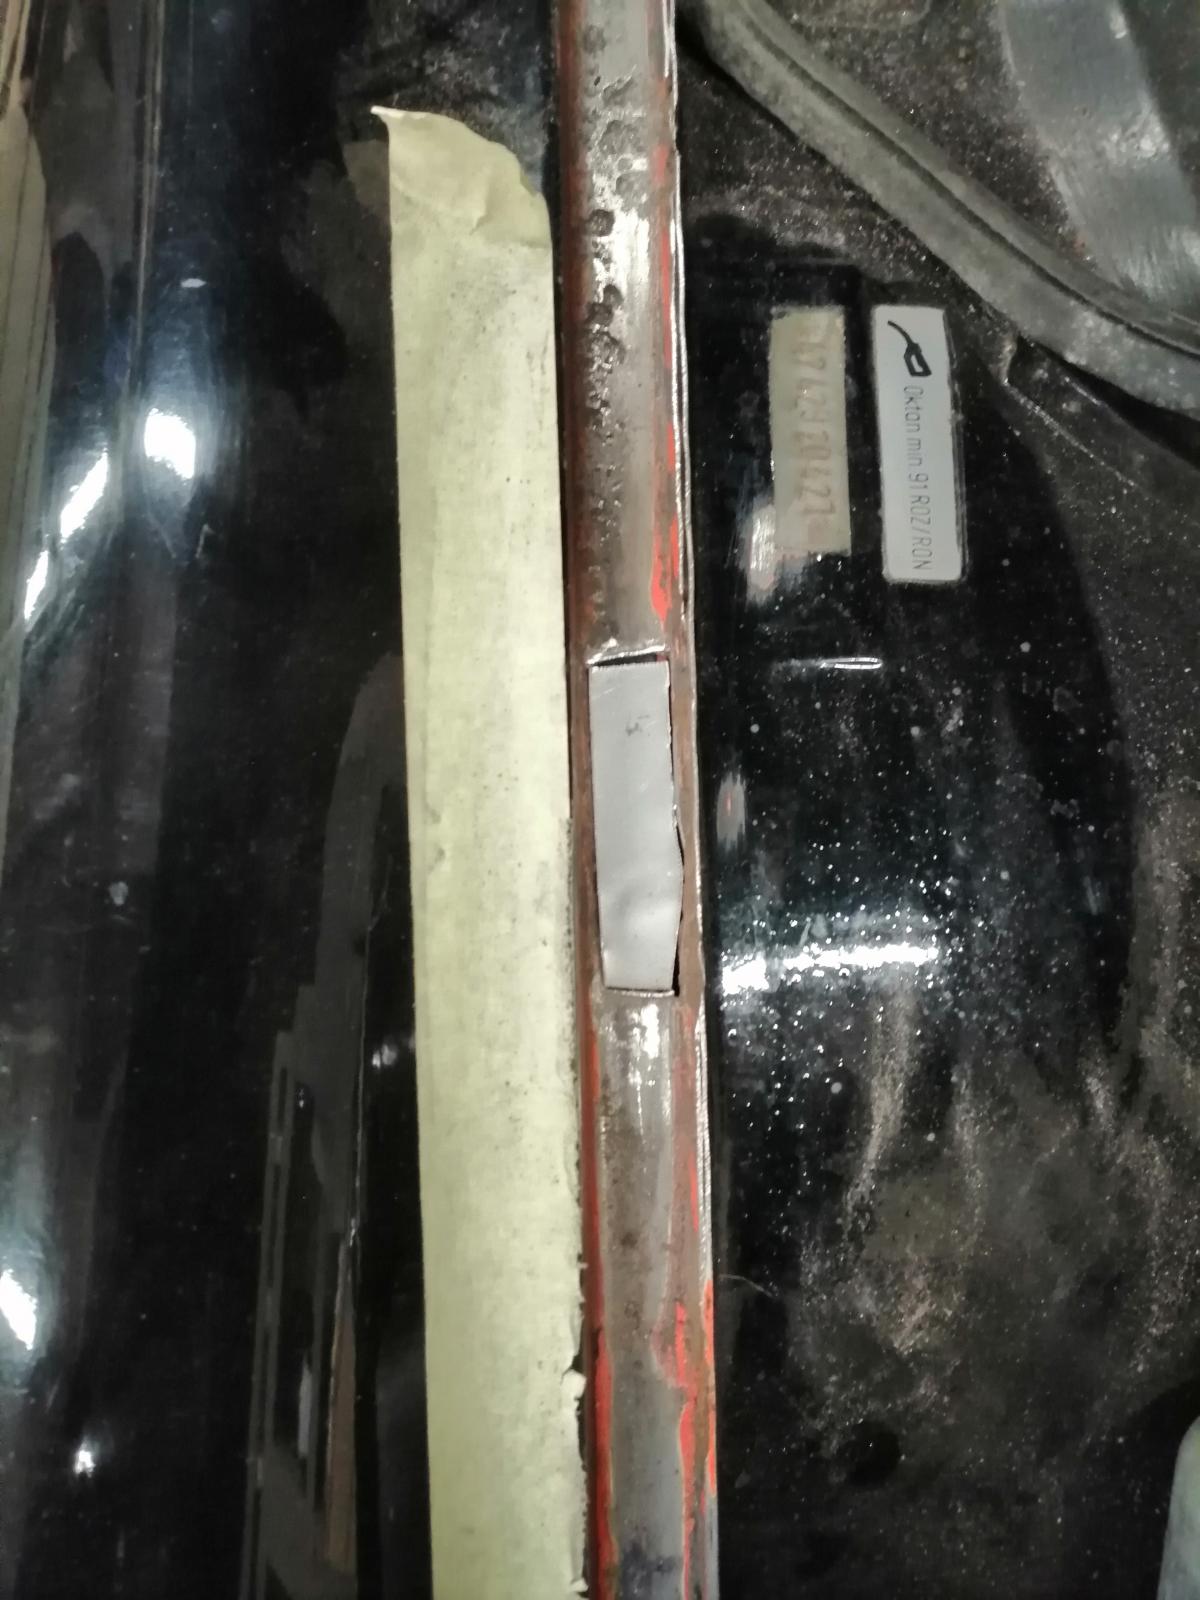
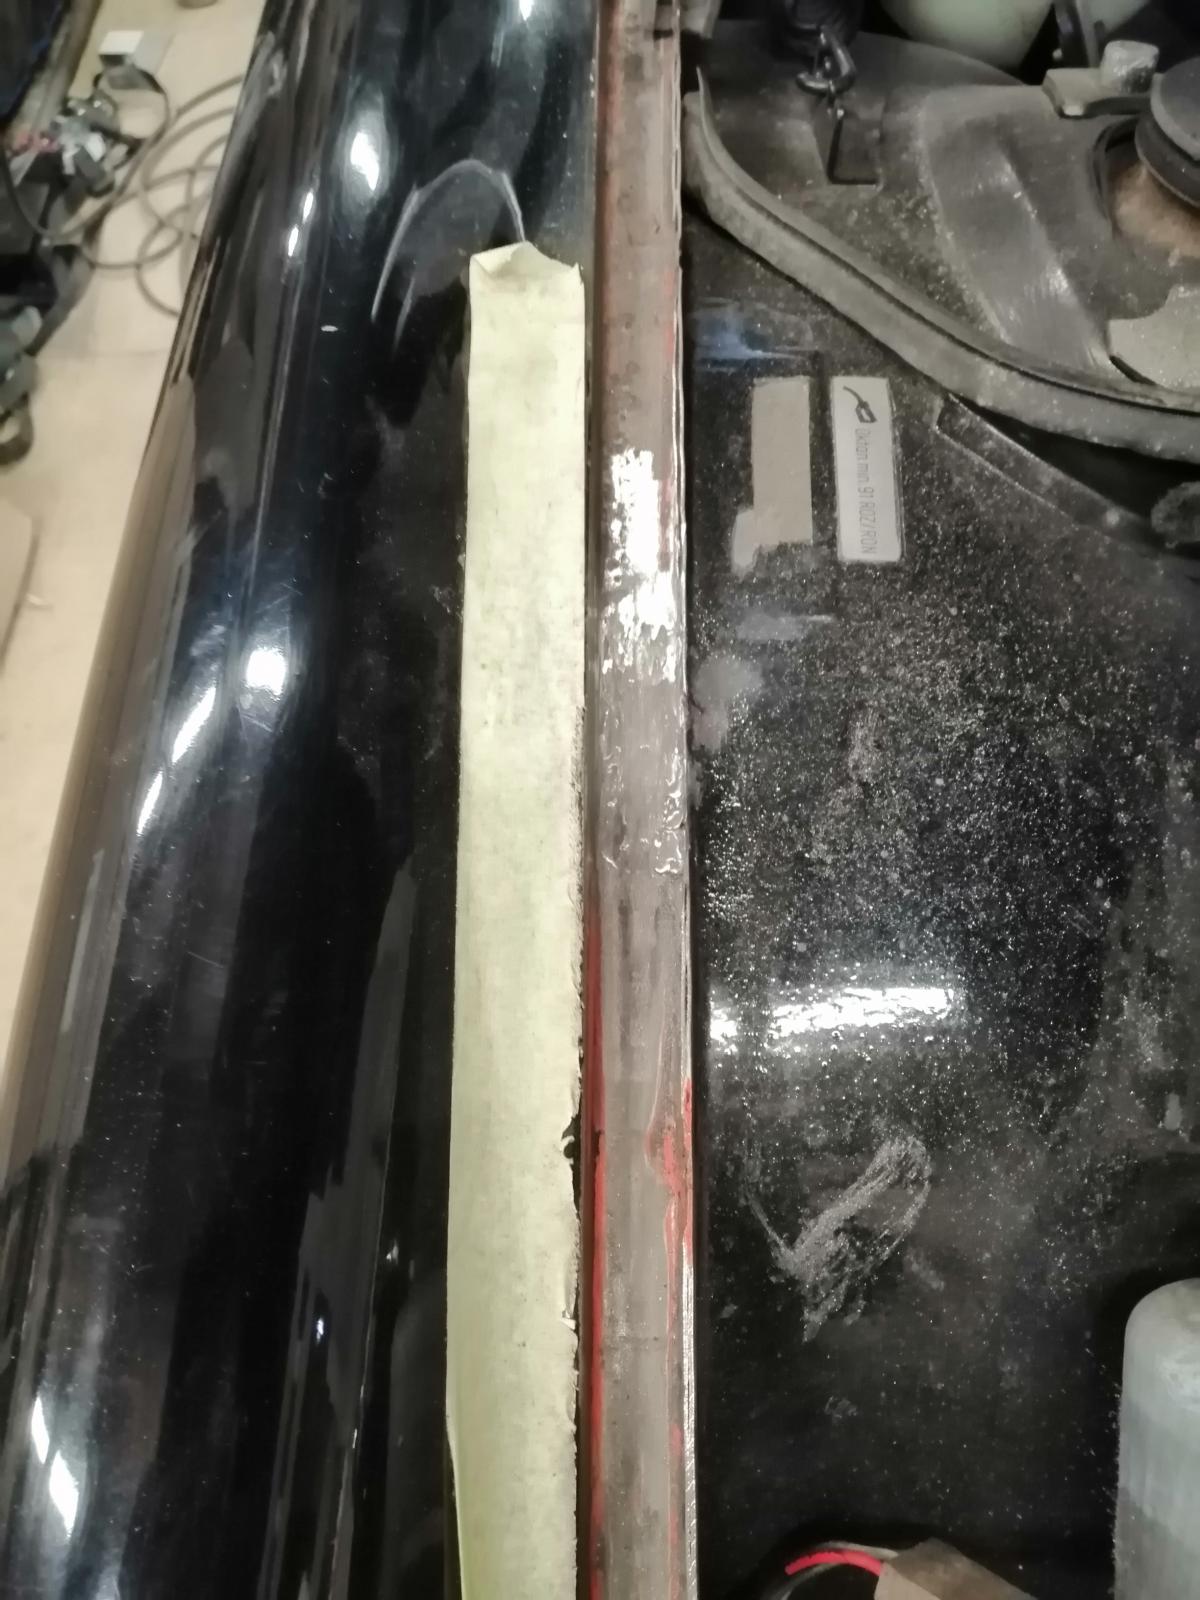
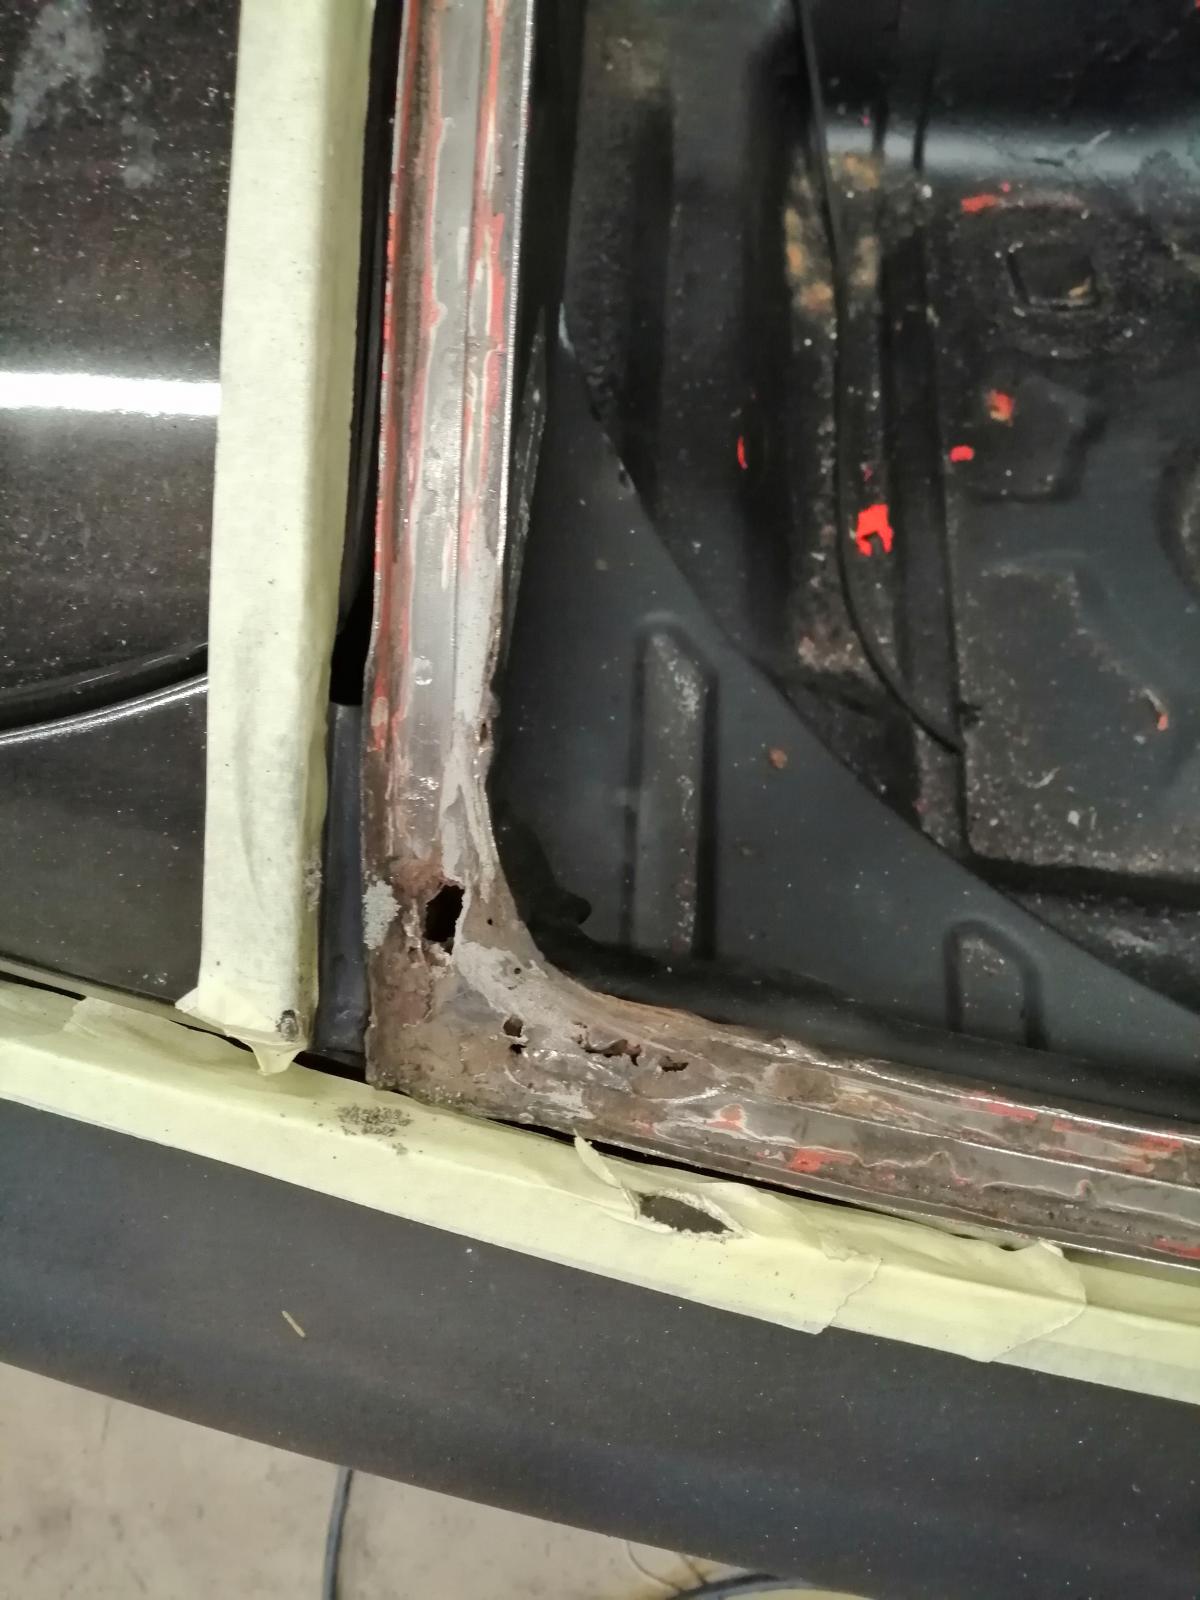
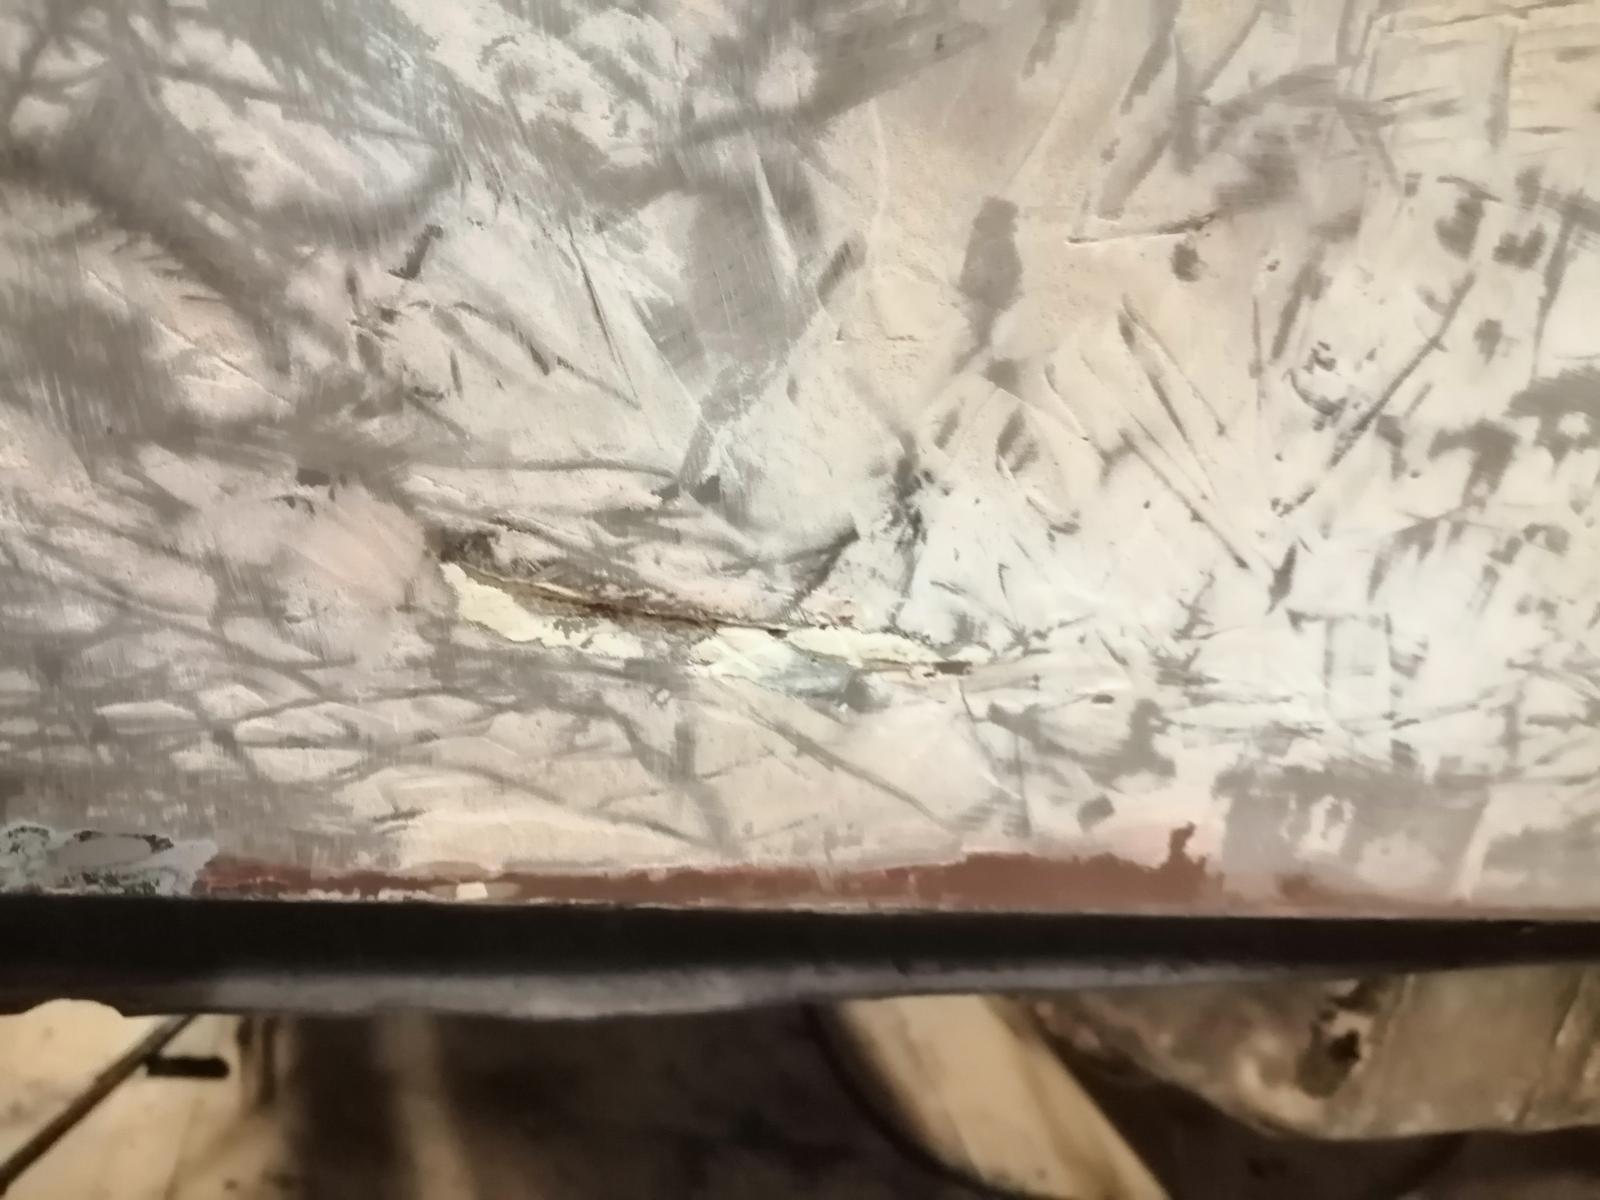
So, I removed more of the undercoating and it appeared to have some "fix" from the past on the long.. Well, let's see after cutting:
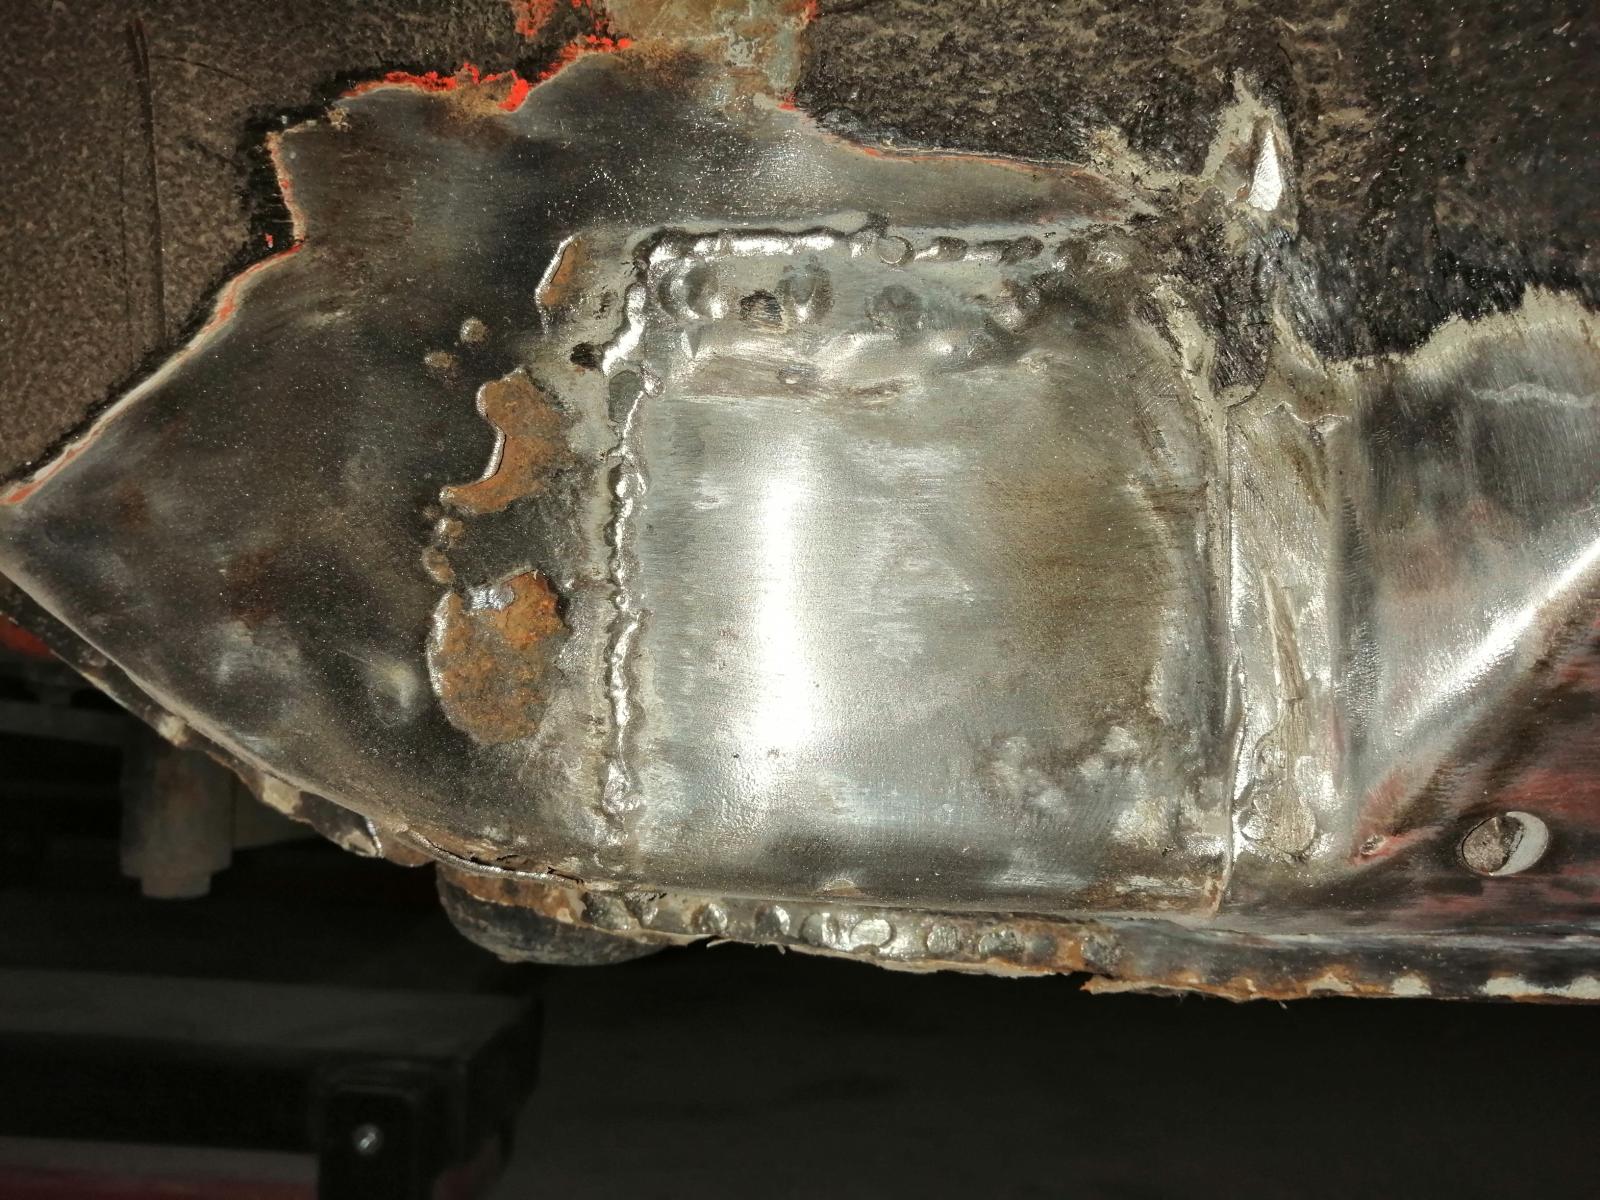
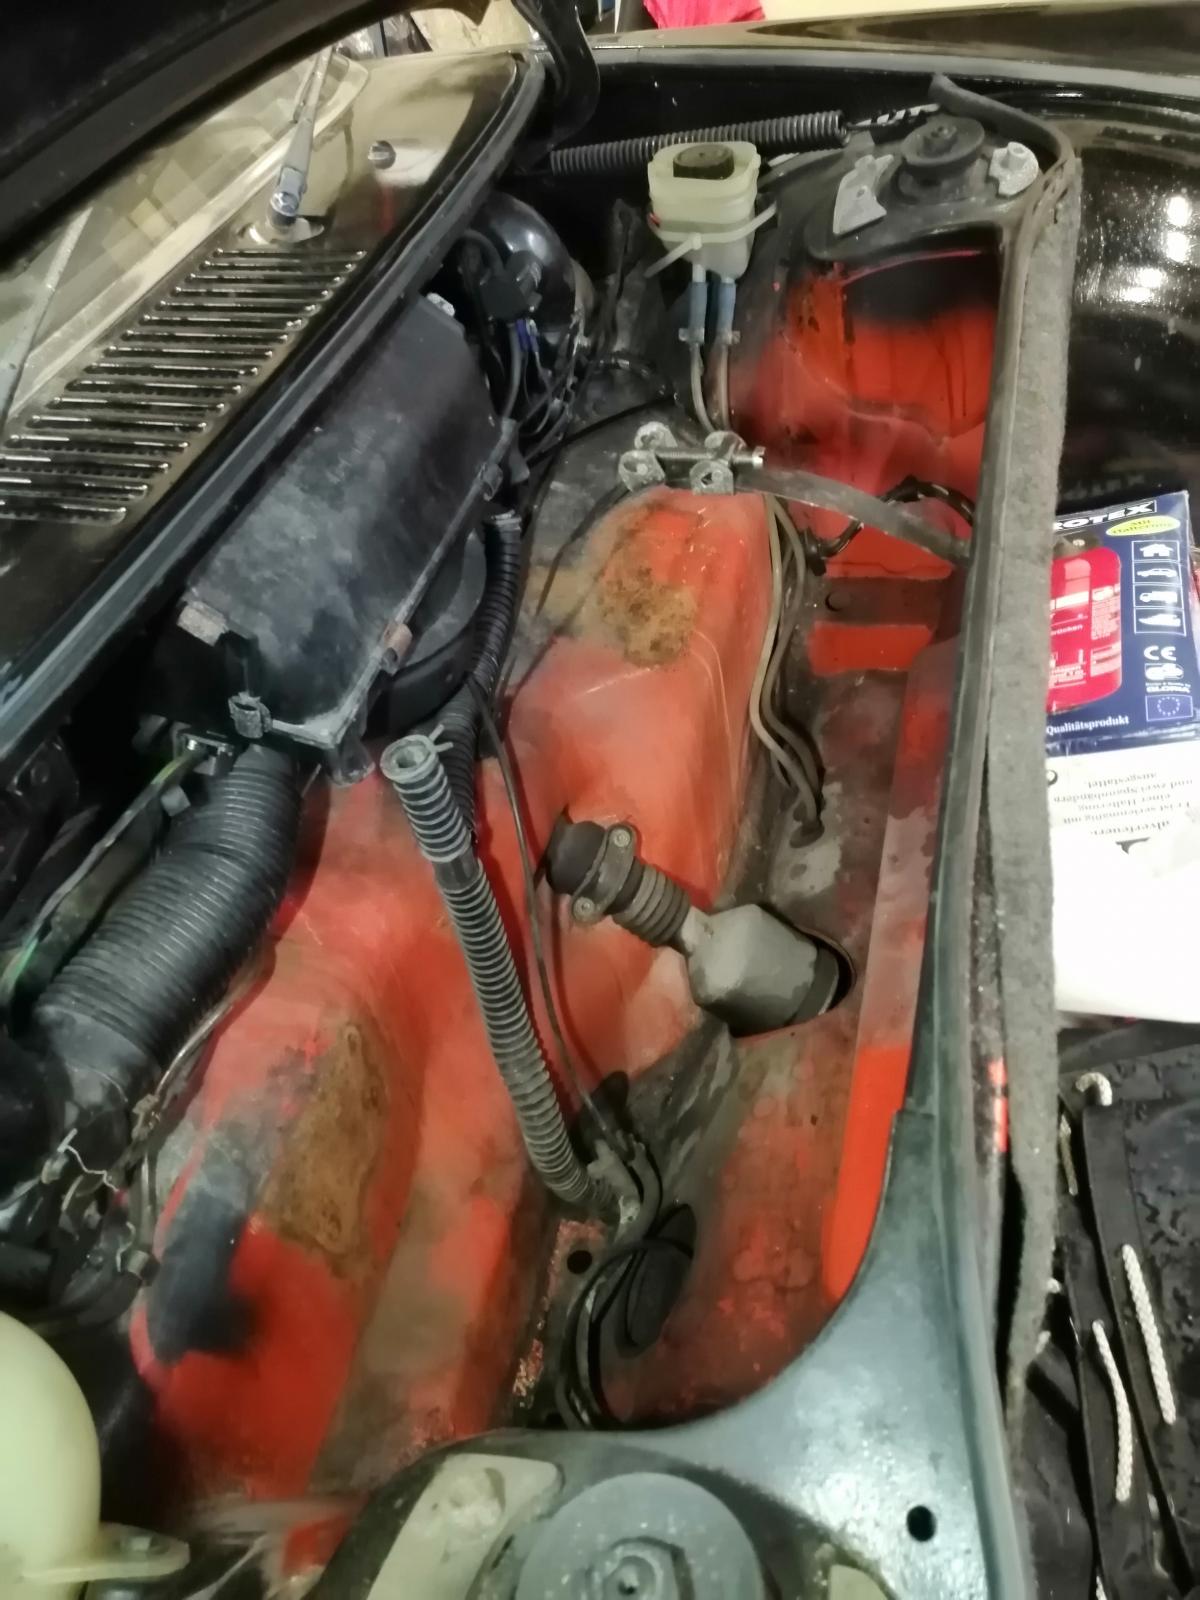
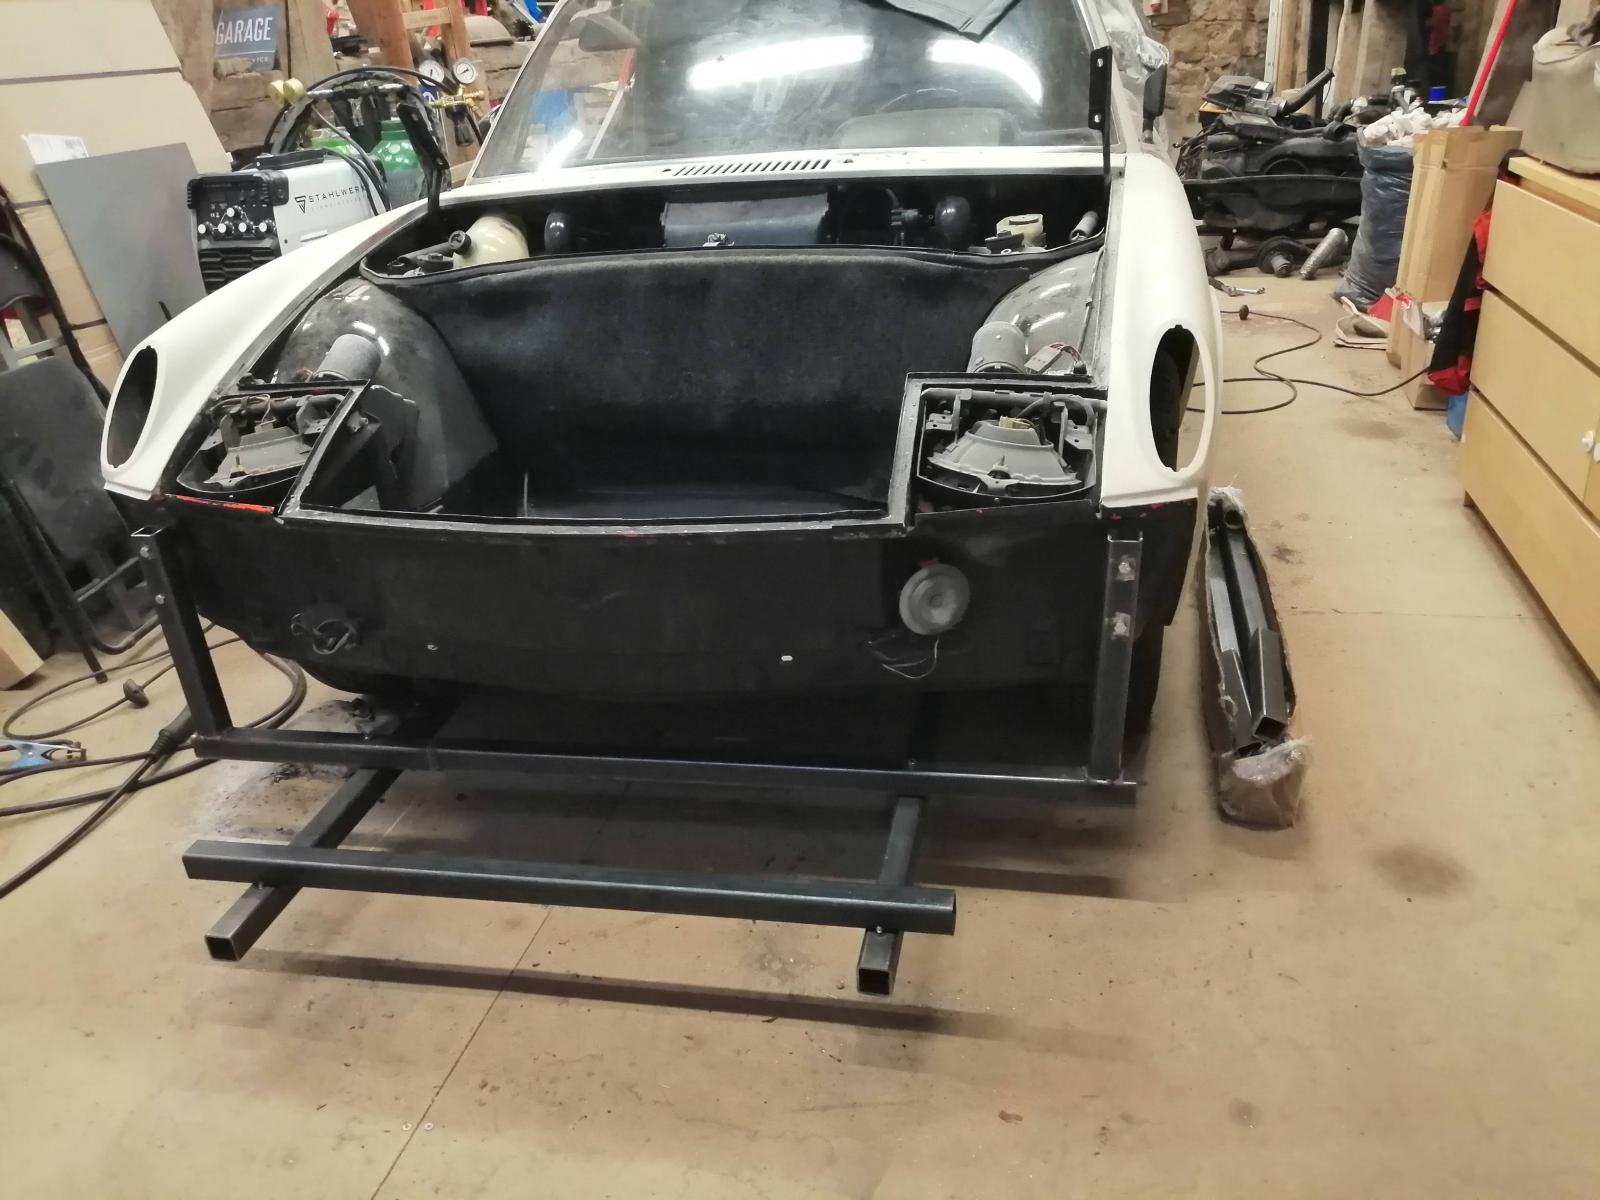
But before I go further there after engine removal, I started to remove the tank to be able to weld safely. I will also mount the sway bar in the same time, as well as change all fuel lines.
Here we are :
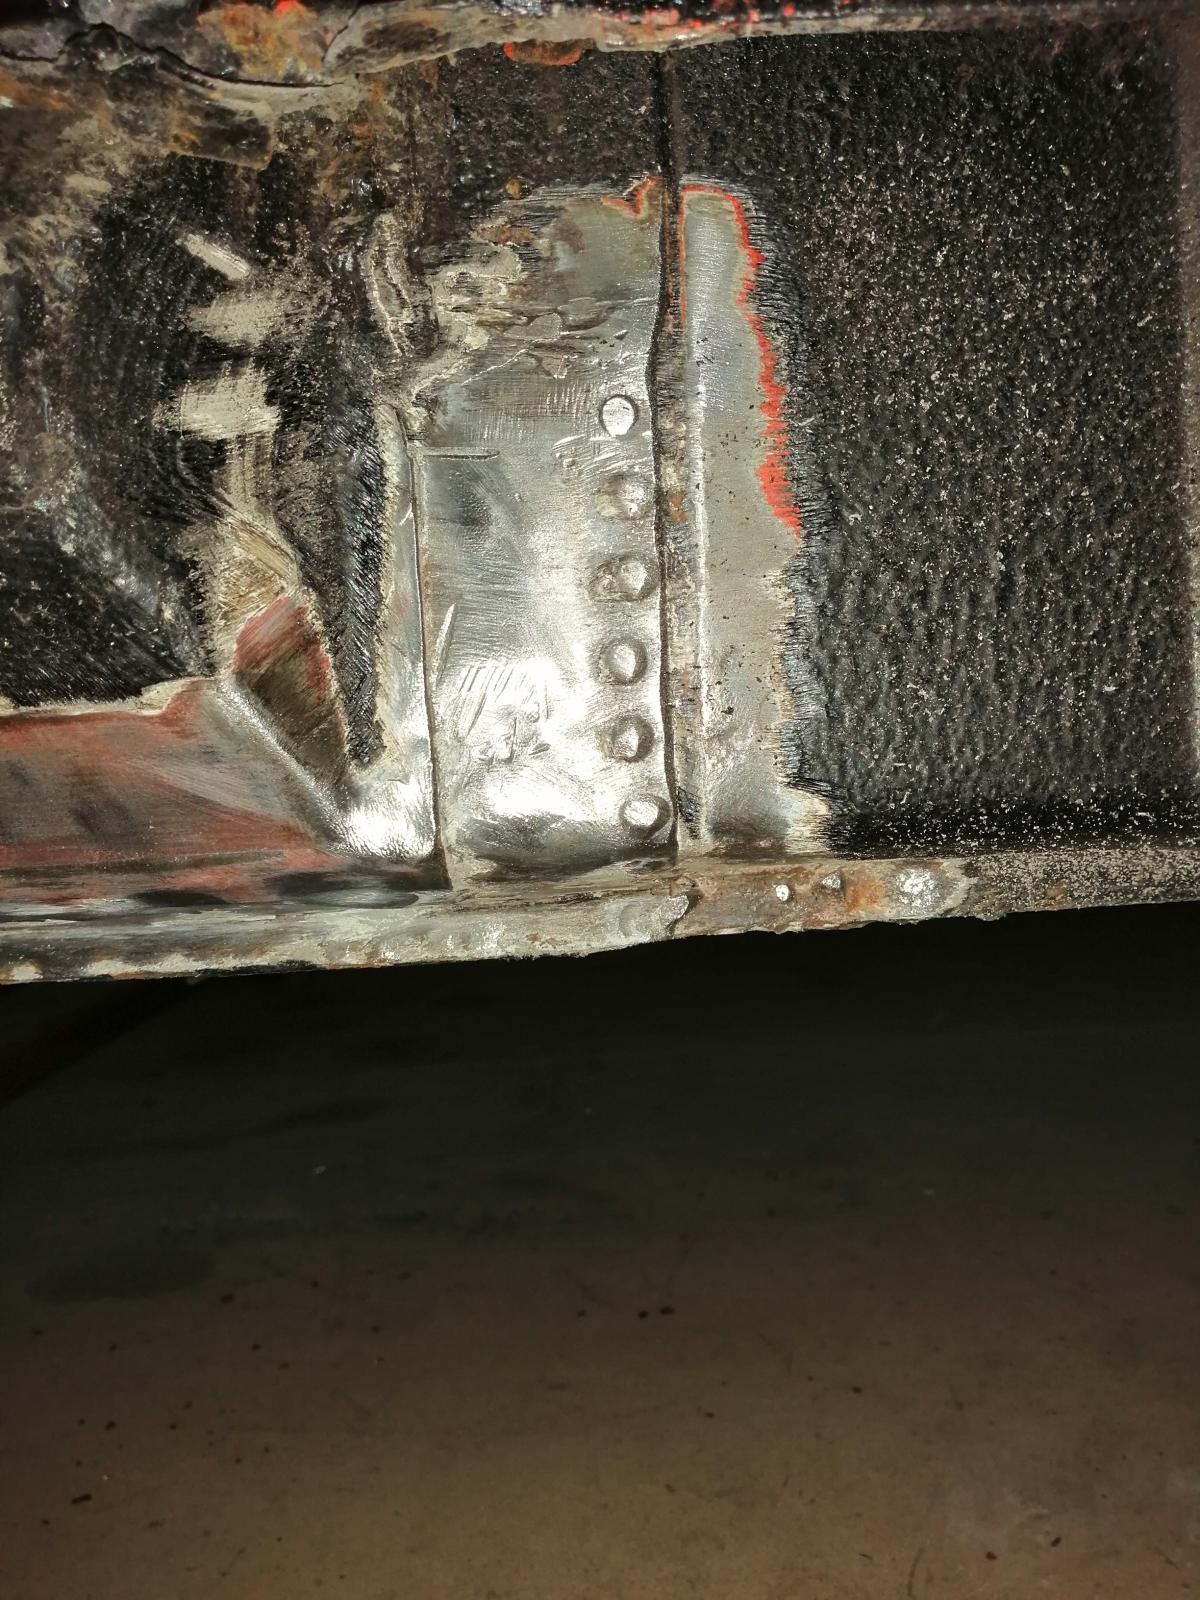
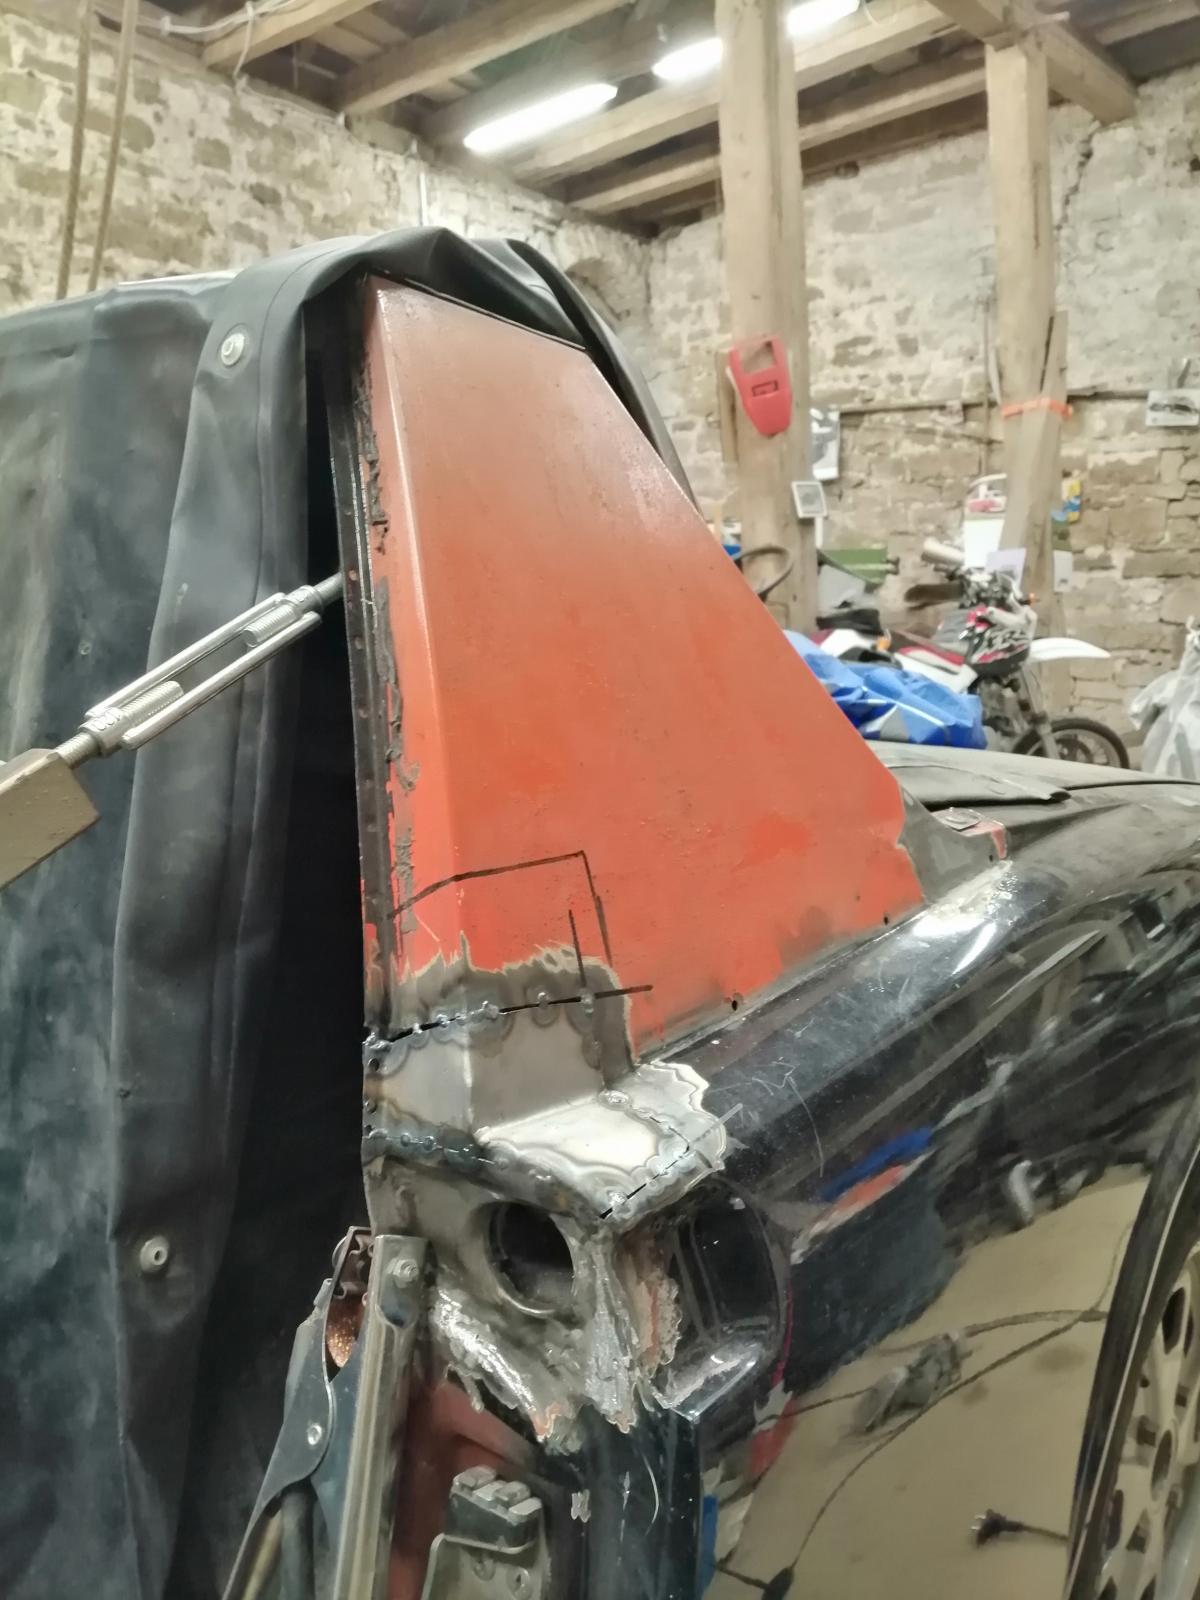
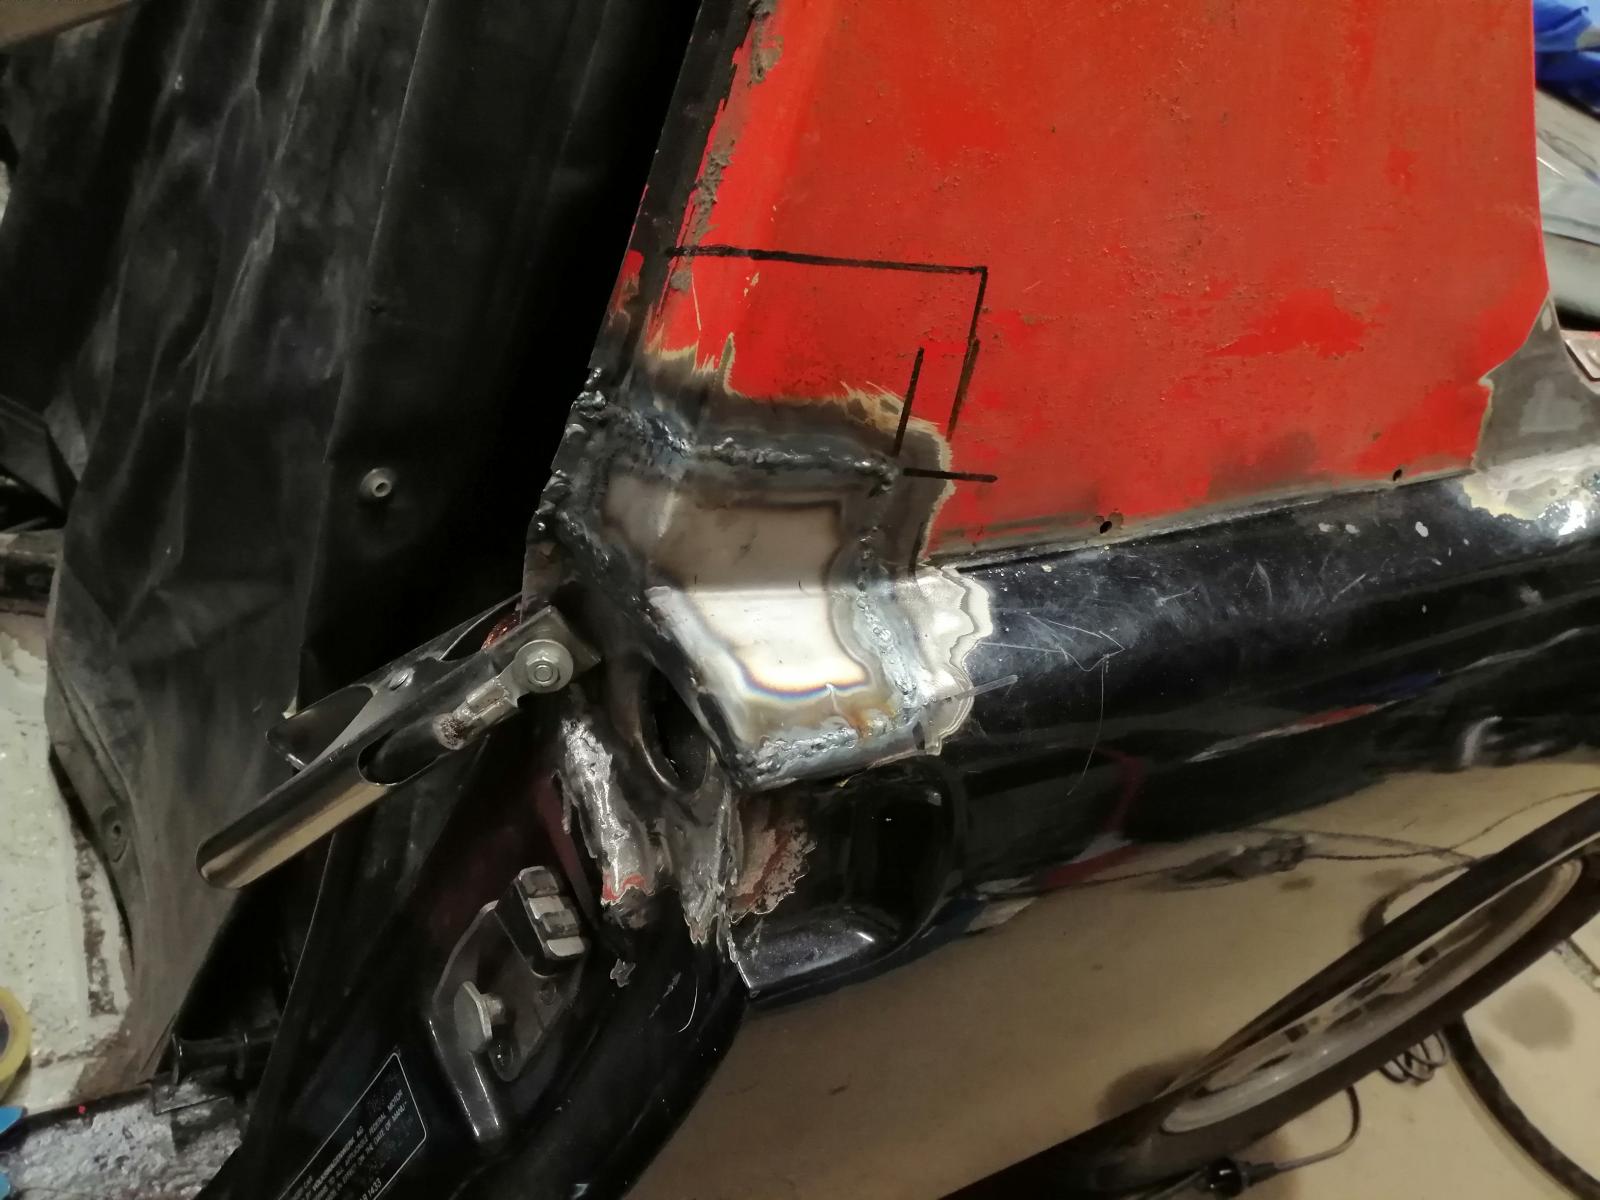
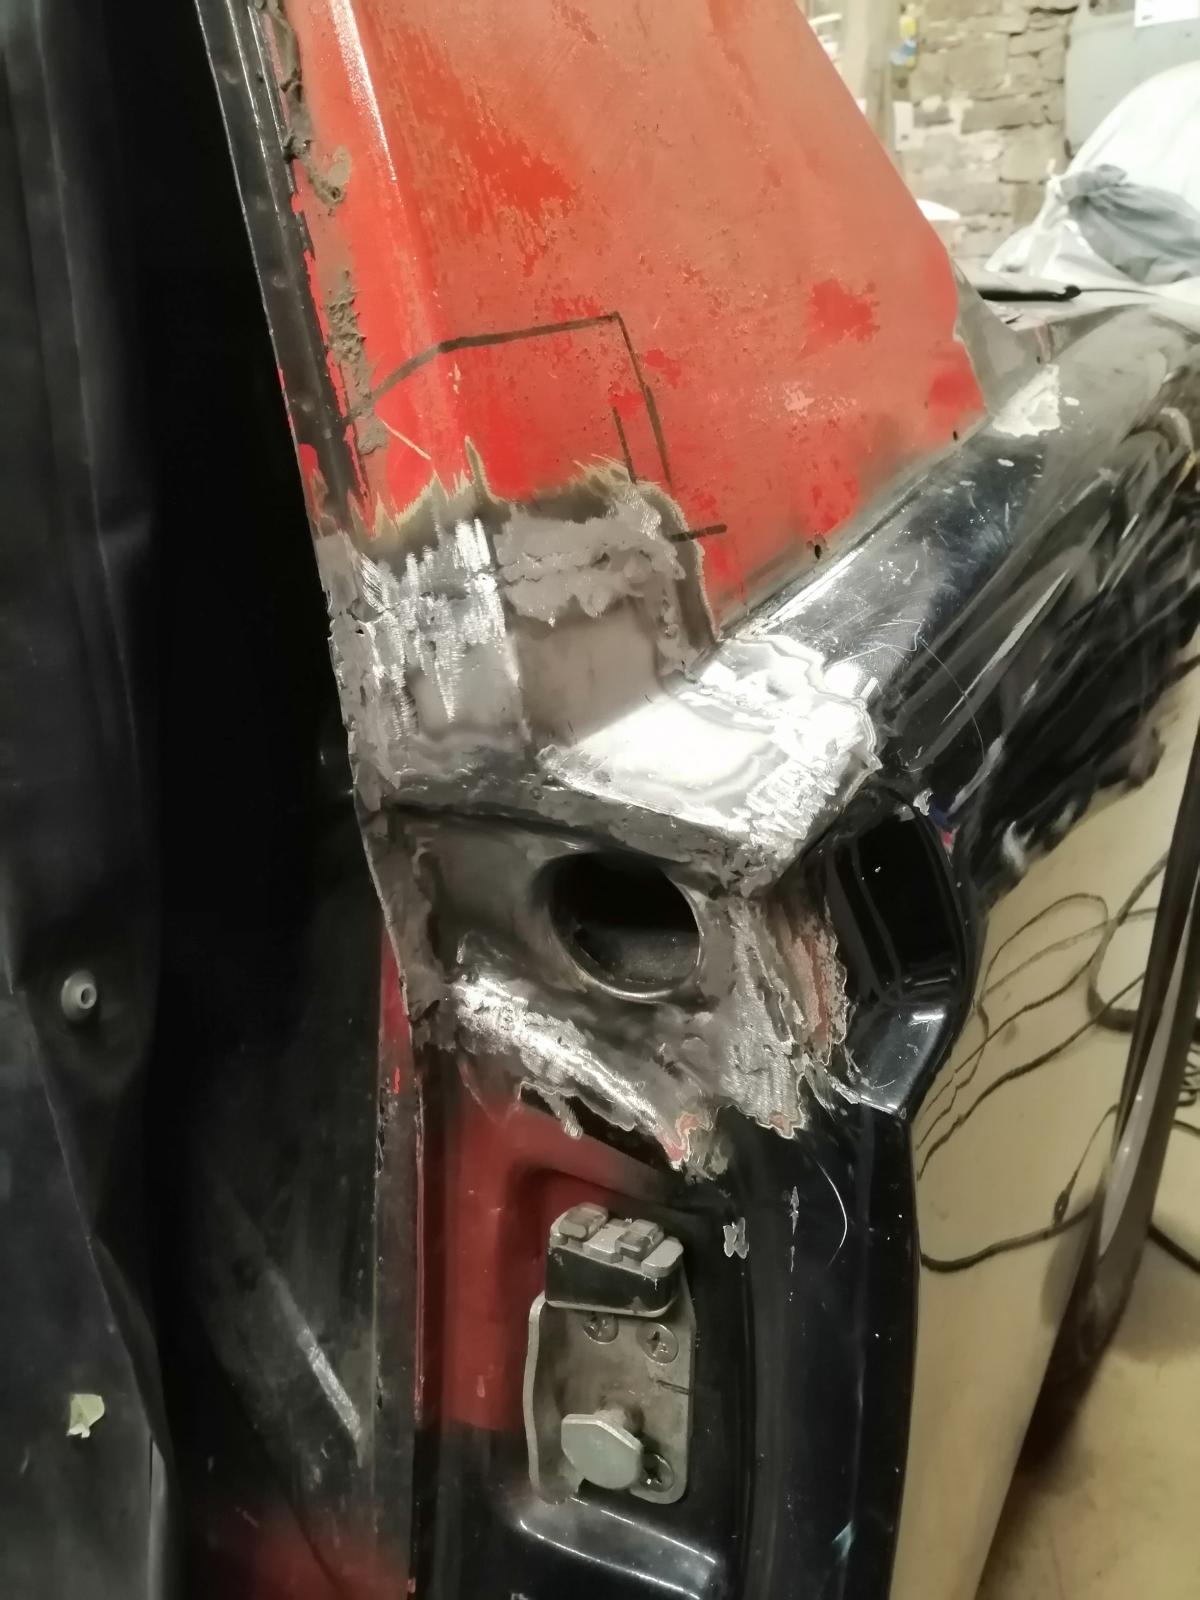
And because it's always good for the motivation, I made a first repair on my driver's sail panel, all TIG-welded
Cheers
Antoine
But before I go further there after engine removal, I started to remove the tank to be able to weld safely. I will also mount the sway bar in the same time, as well as change all fuel lines.
Here we are :
And because it's always good for the motivation, I made a first repair on my driver's sail panel, all TIG-welded
Cheers
Antoine
Yeah man- you are going to have that all taken care of quickly. Looks like that chassis is in pretty good shape overall.
Thanks man, this will take a couple months but I am up for the challenge!
So, already a lot happened to the 914 this week!
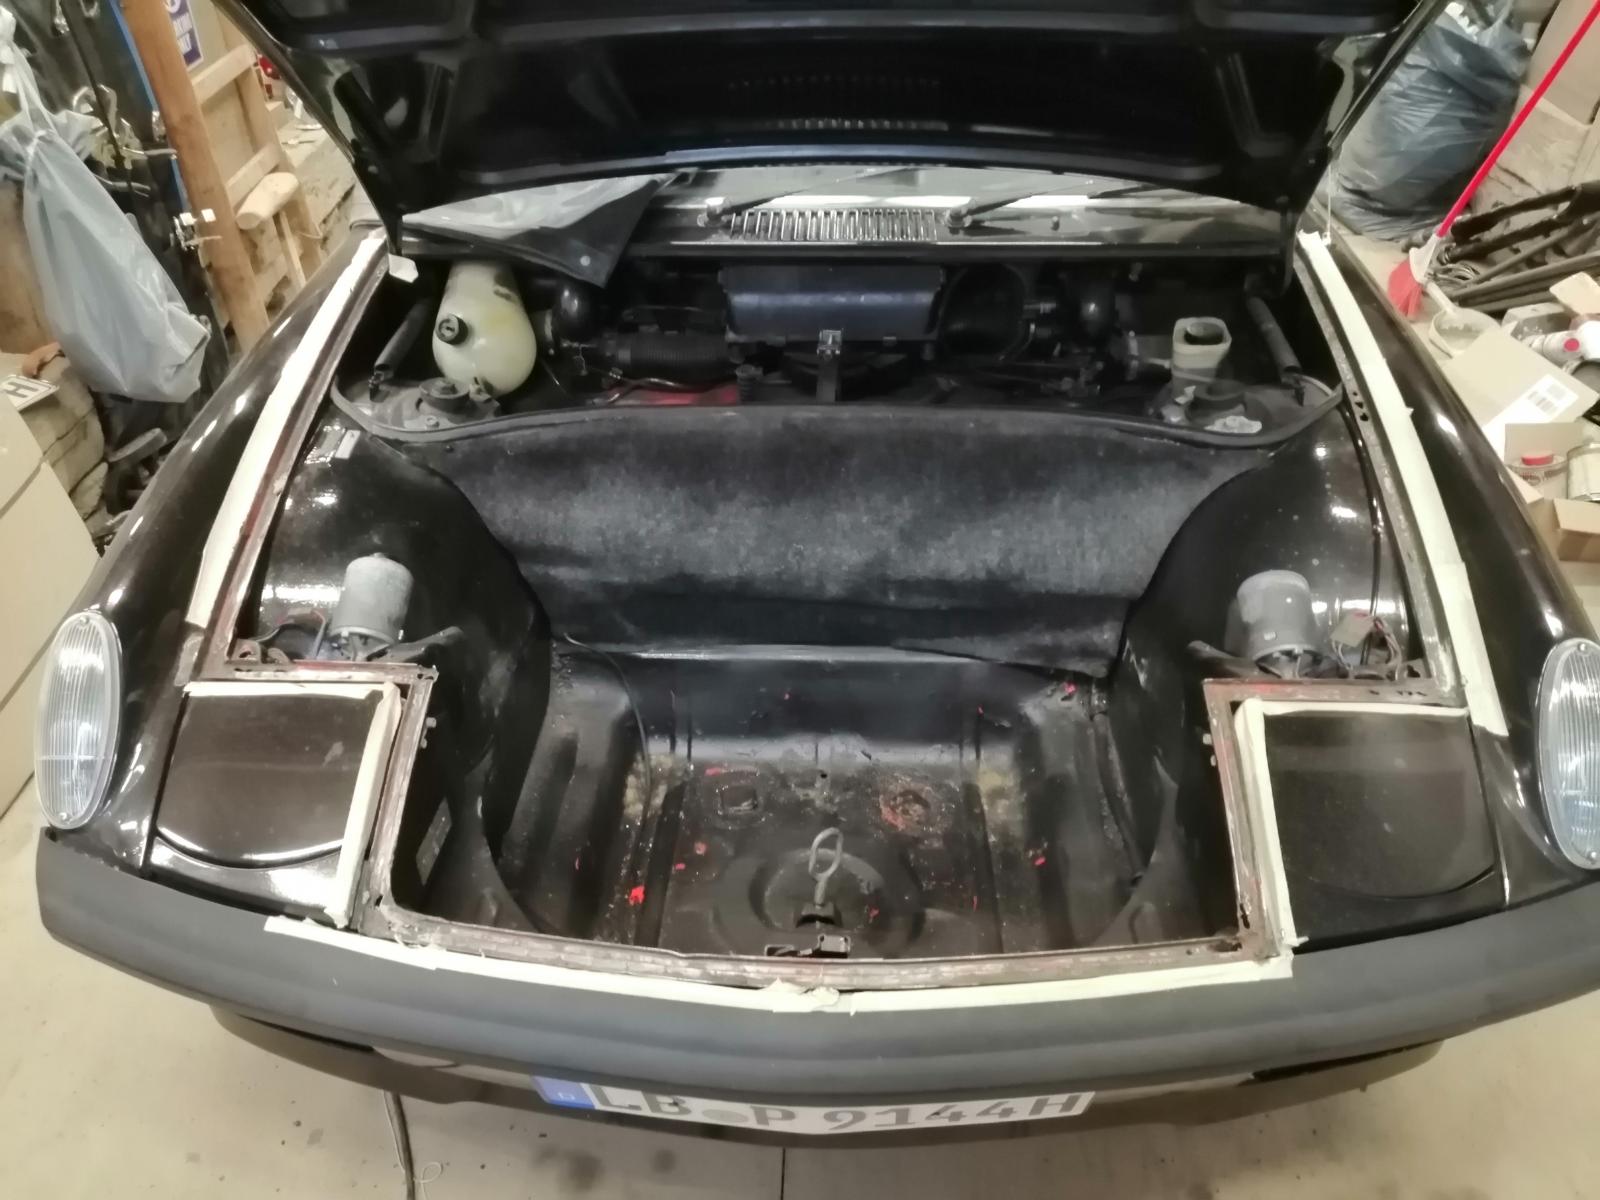
I started upfront by pulling out the frunk seal to check the condition under it..
And I found holes after holes. I cut each of them and replaced with metal, I won't bore you with every single picture but here are a couple of examples, like here :
Or here:

Or here :
One last example:
Afterward I put some primer and some paint for complete protection:
As I was already working on the front, I removed the side markers and the antenna (no radio on a lightweight project !) :
And started the first part for my B-Pillar:
The next update comes as soon as I have some time to post it!
Cheers
Antoine
So, already a lot happened to the 914 this week!
I started upfront by pulling out the frunk seal to check the condition under it..
And I found holes after holes. I cut each of them and replaced with metal, I won't bore you with every single picture but here are a couple of examples, like here :
Or here:
Or here :
One last example:
Afterward I put some primer and some paint for complete protection:
As I was already working on the front, I removed the side markers and the antenna (no radio on a lightweight project !) :
And started the first part for my B-Pillar:
The next update comes as soon as I have some time to post it!
Cheers
Antoine

Nice work!
Had to do some repair around the weather-strip channel myself. Not an easy area to fit and grind down.
QUOTE(Root_Werks @ Aug 30 2021, 09:29 AM)
Nice work!
Had to do some repair around the weather-strip channel myself. Not an easy area to fit and grind down.
Thanks! Yes it's some times quite hard to reach every corner!
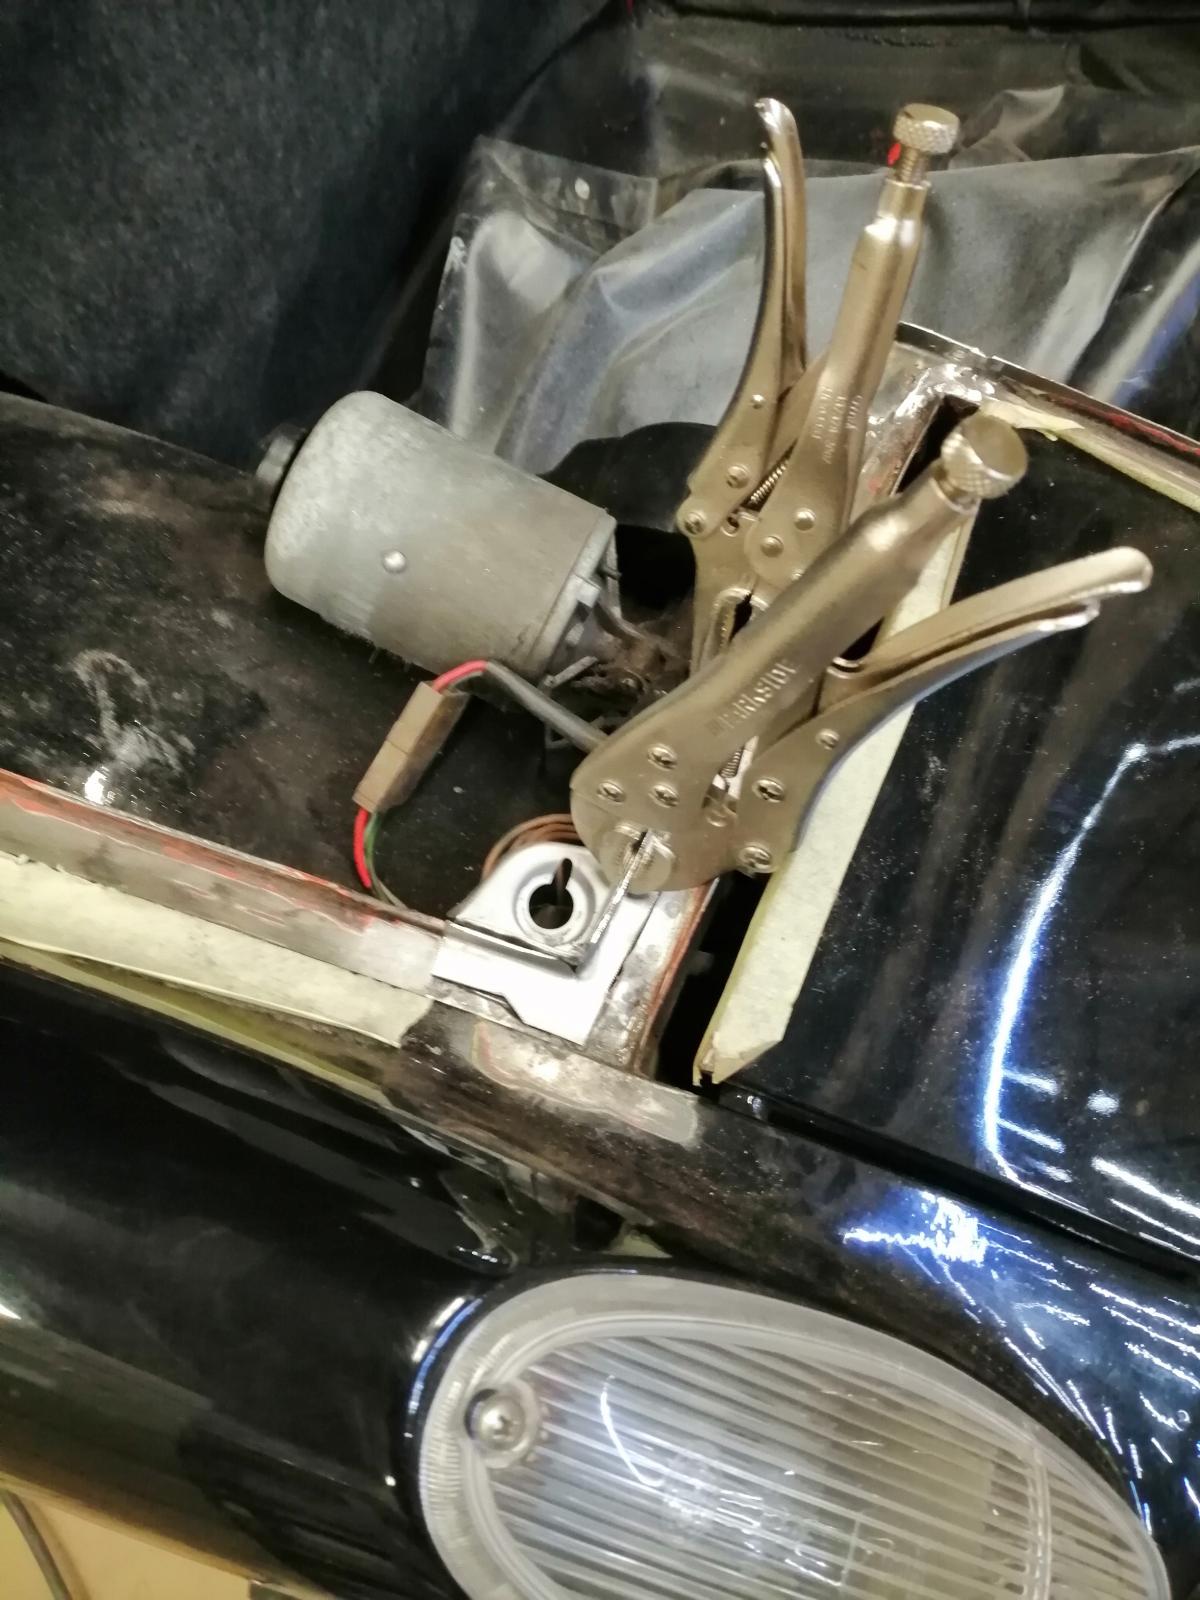
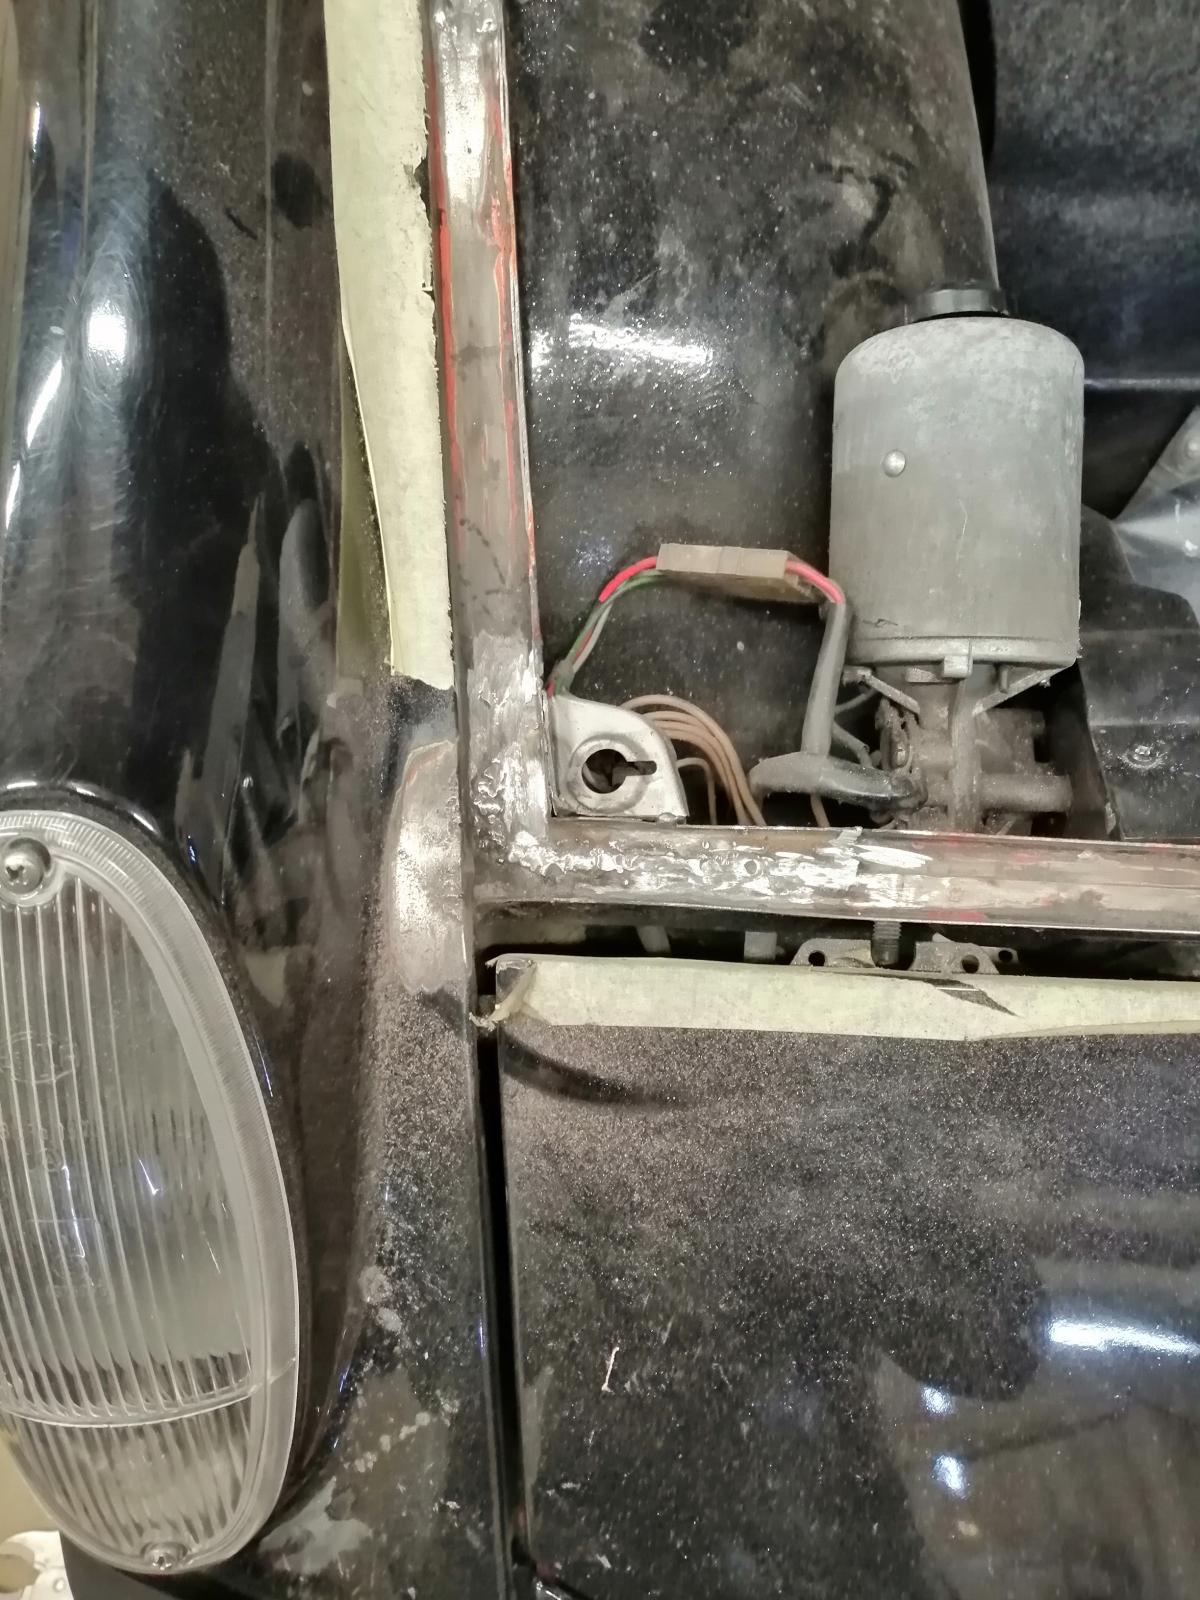
So, some more work happened!
I put the rear up in the air:
And removed the engine :
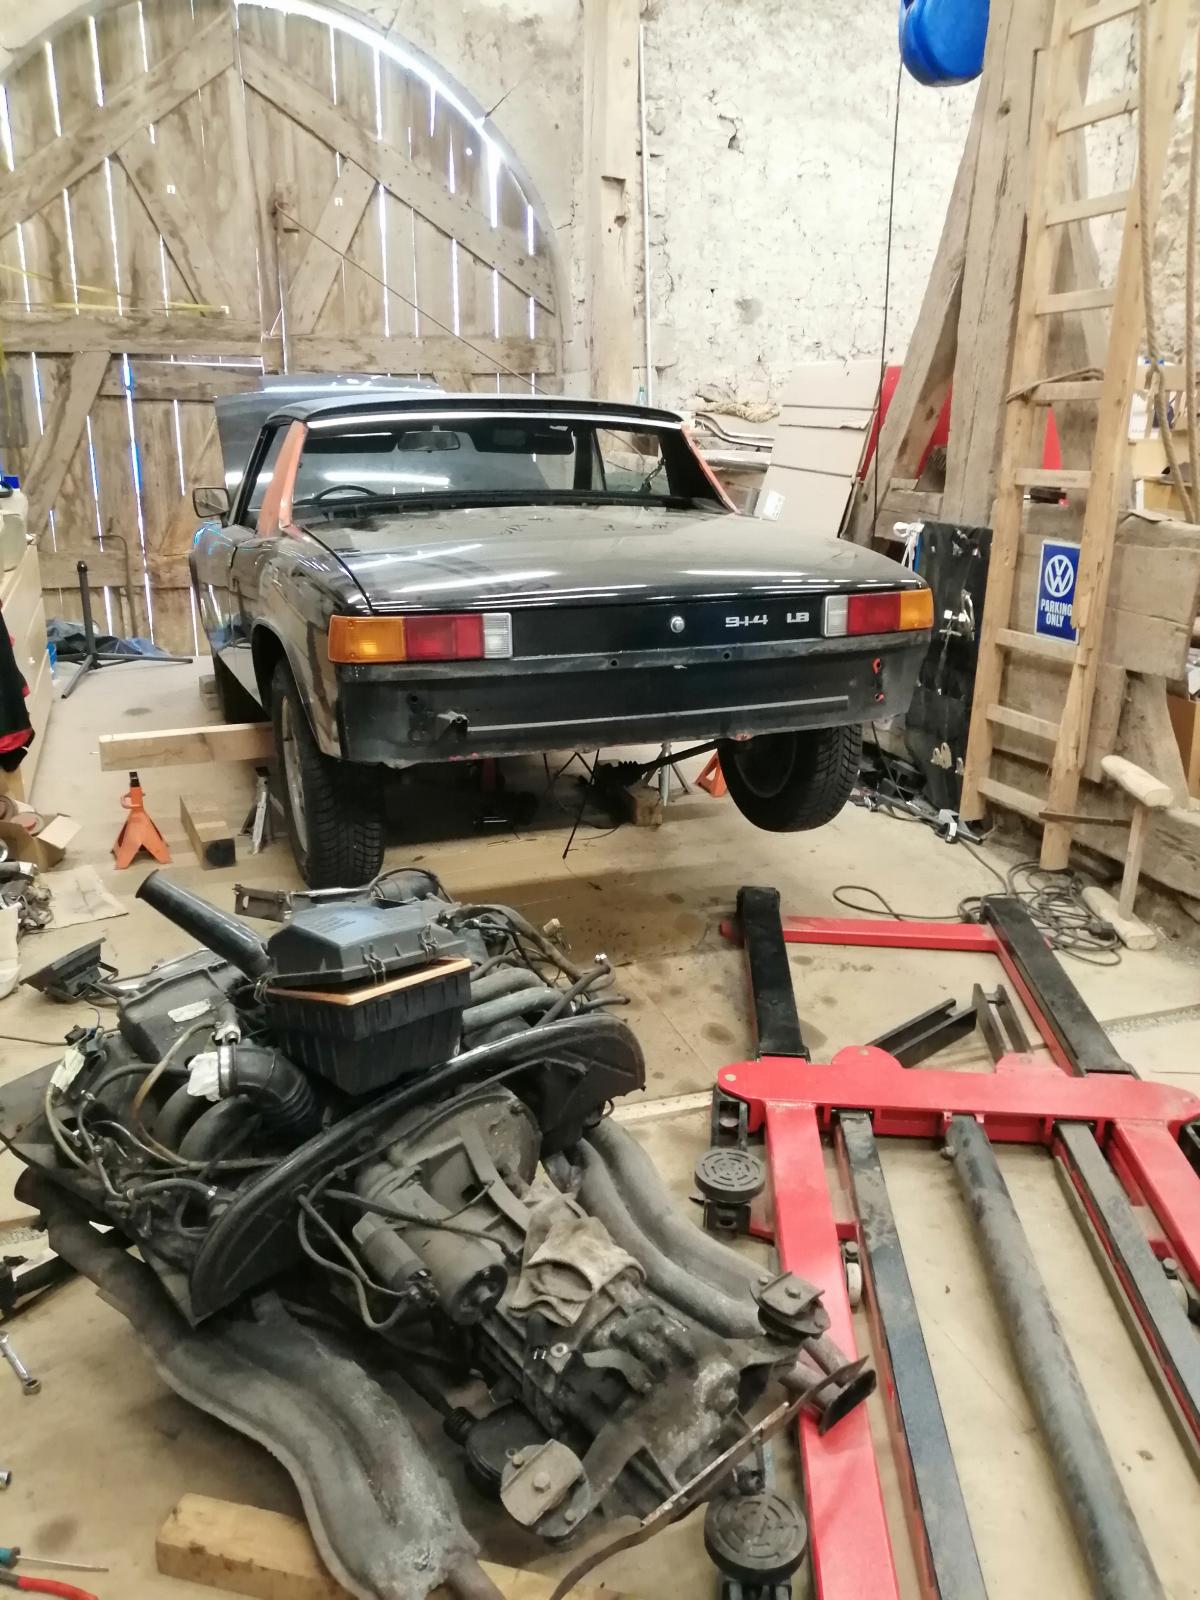
And the started to investigate..
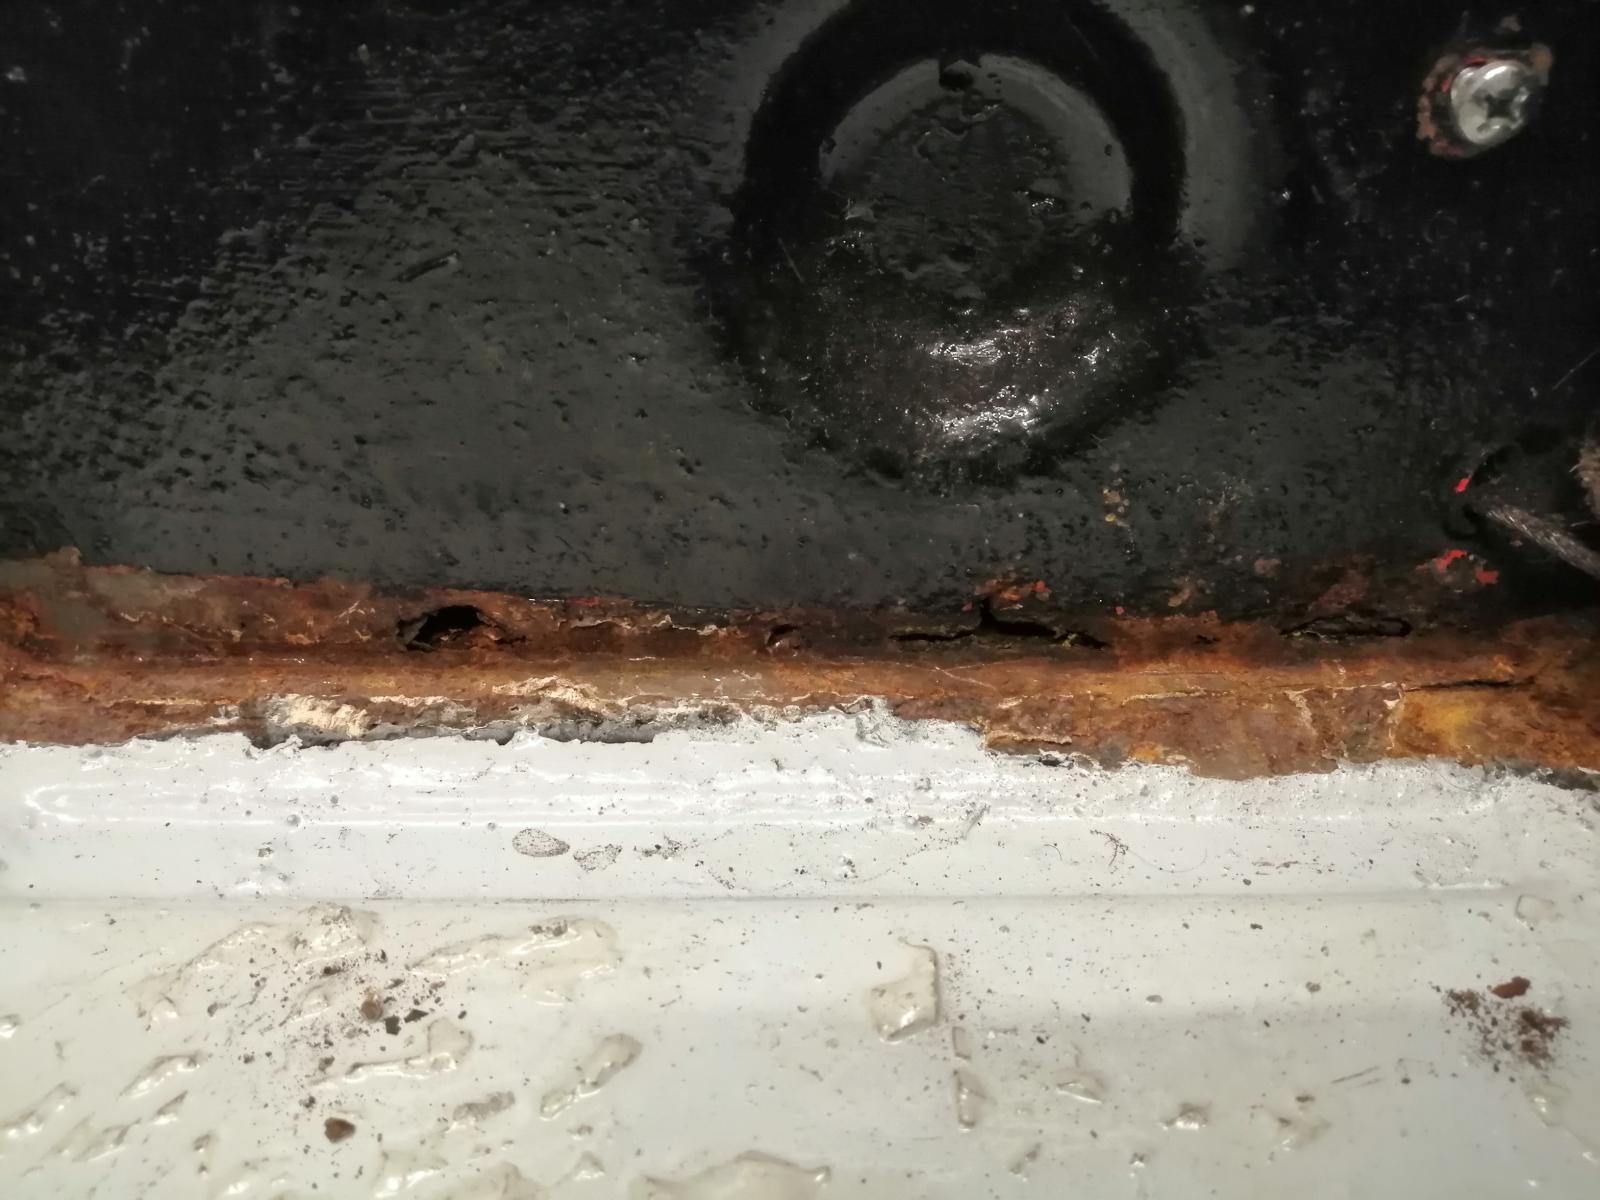
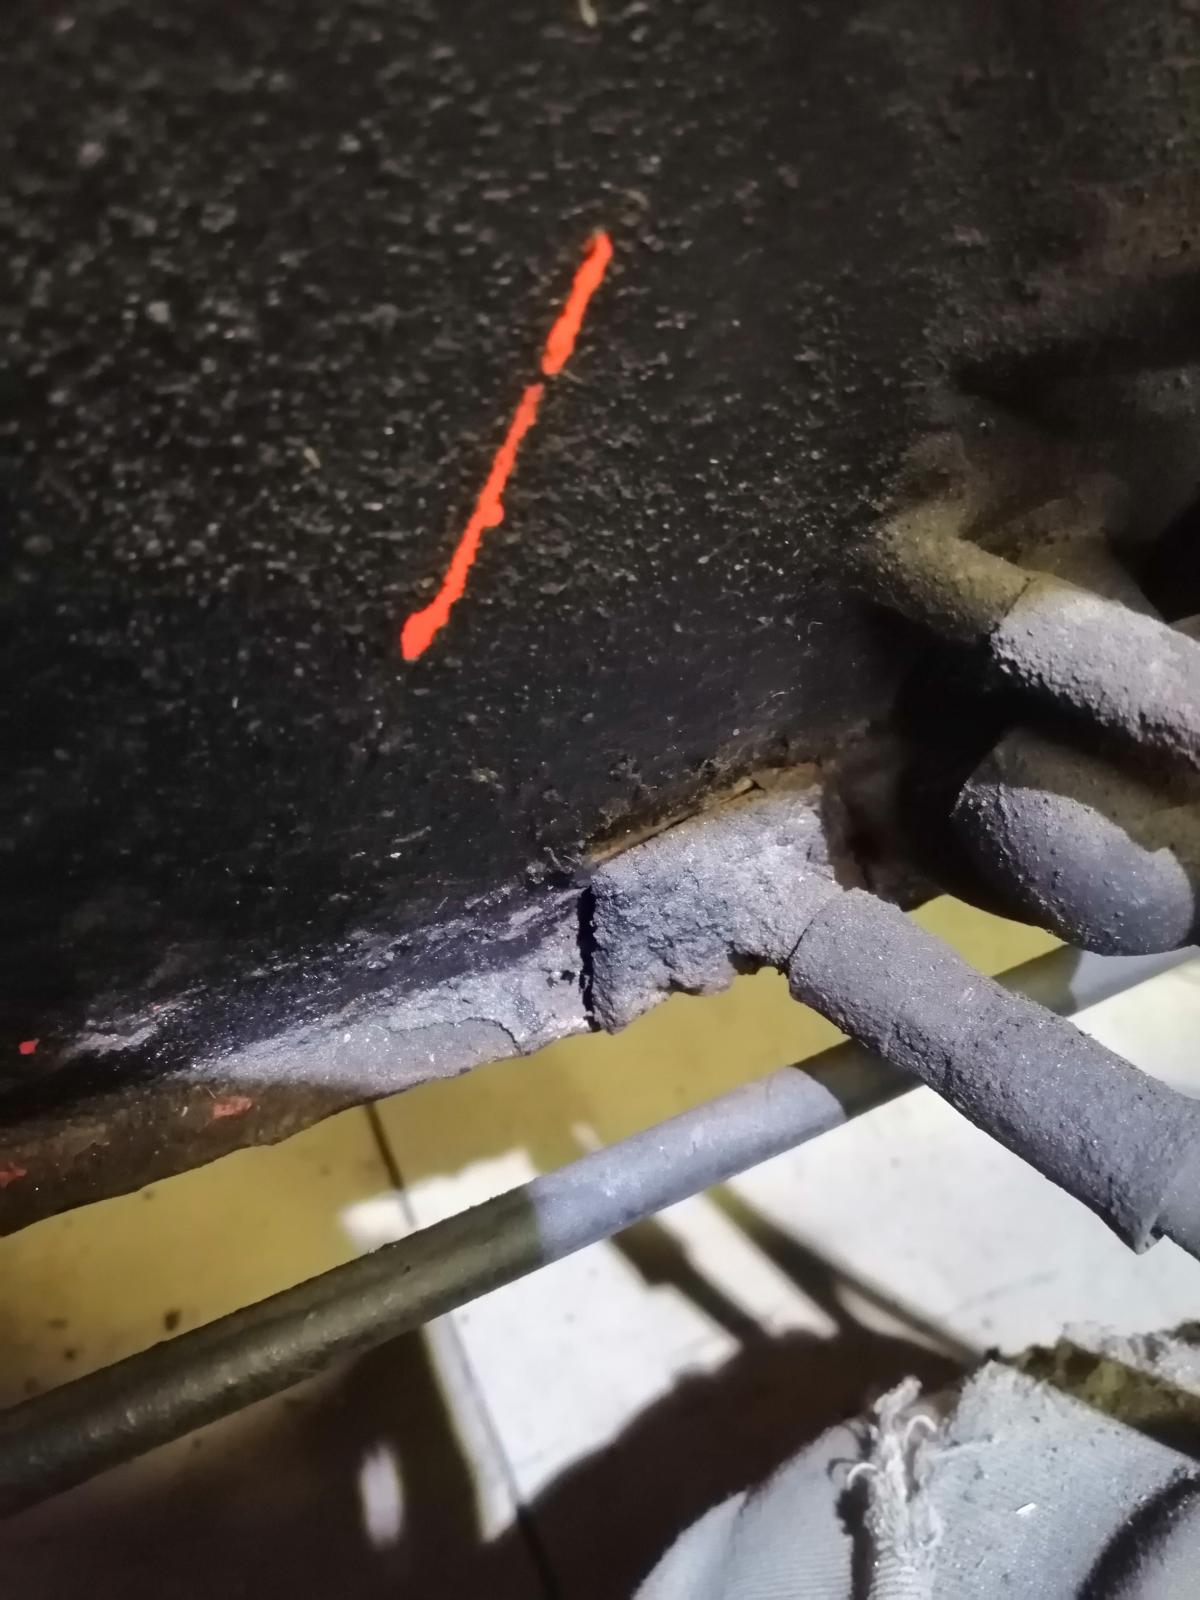
Found some rust here at the bottom of the firewall :
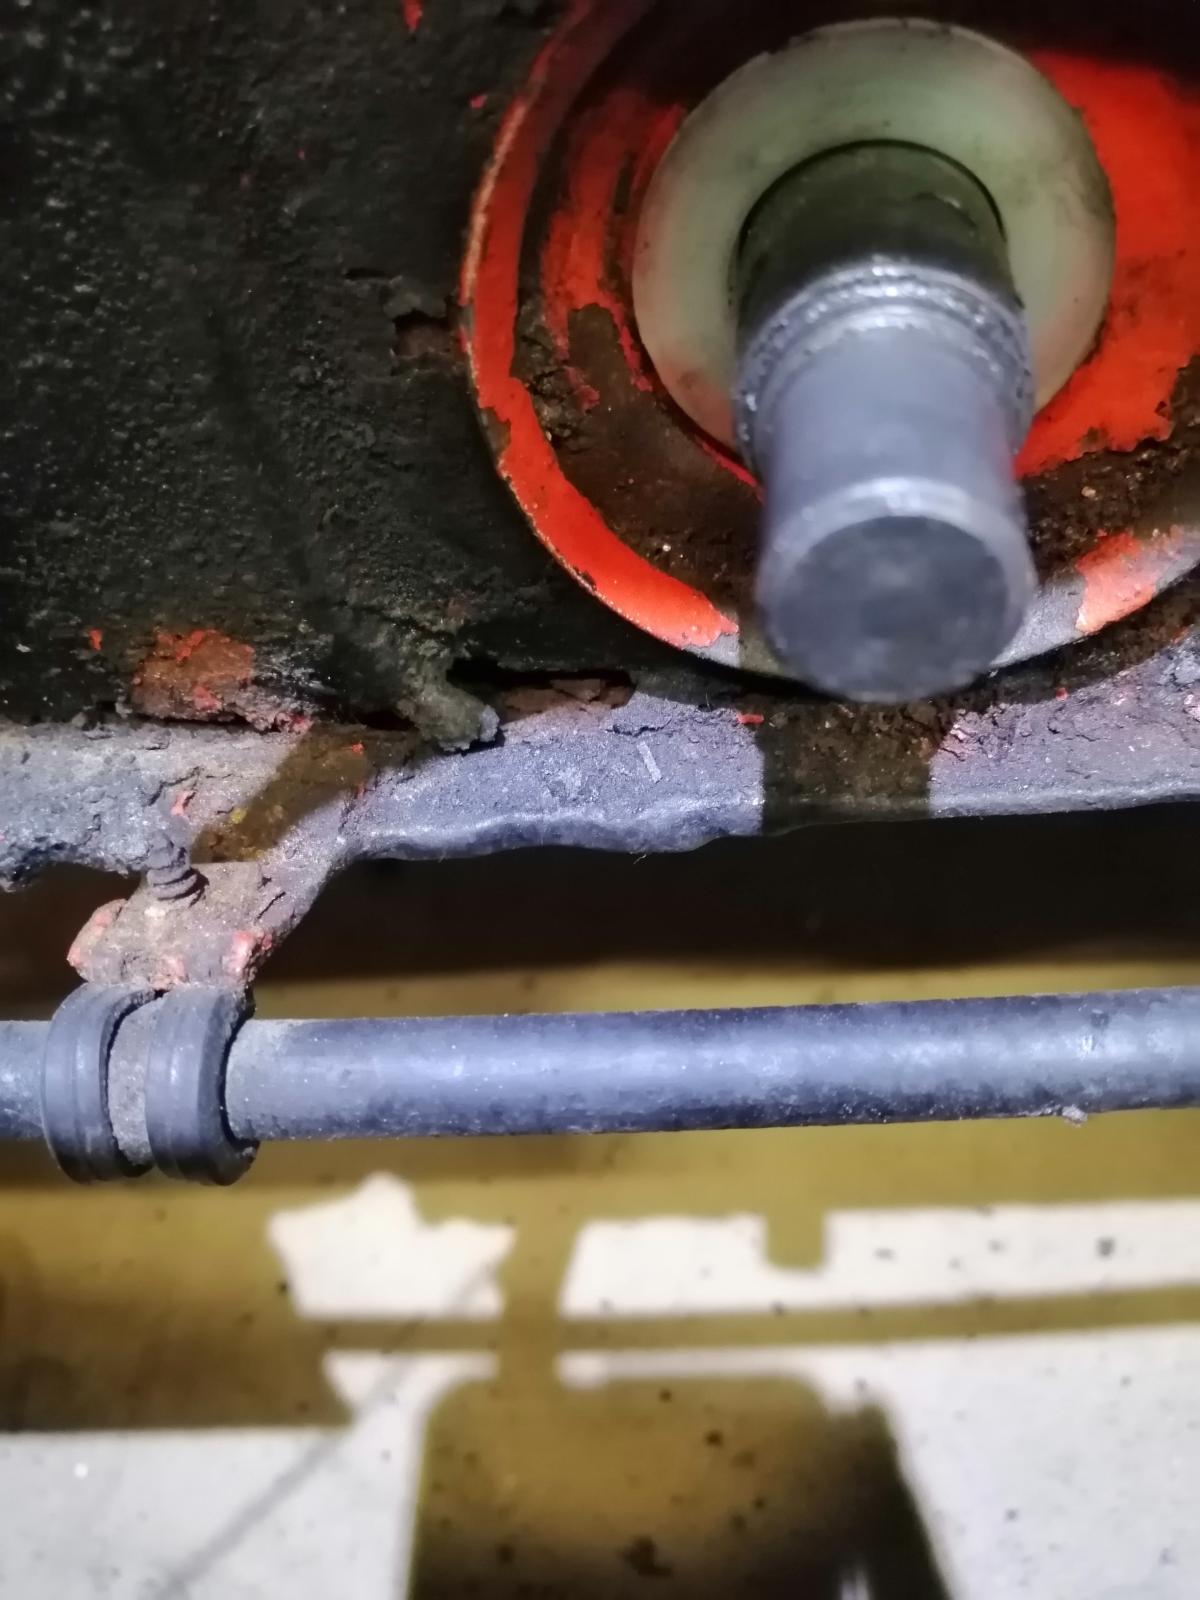
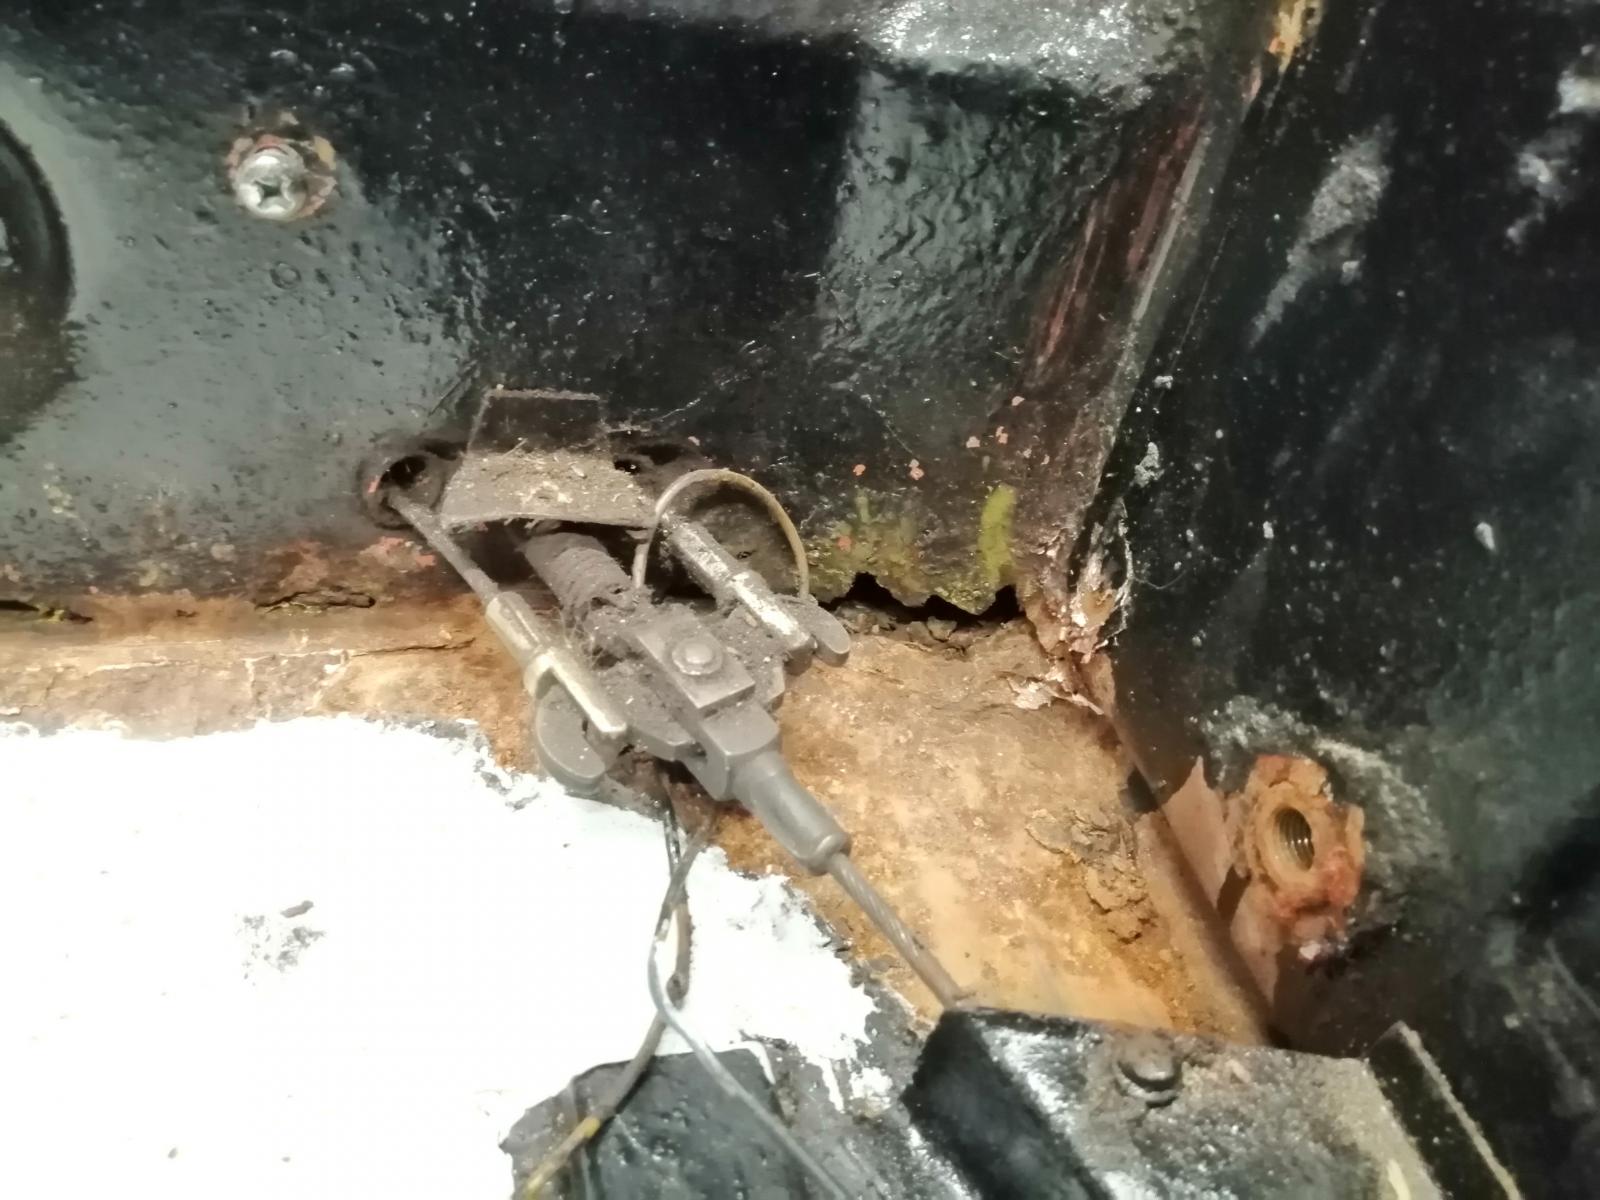
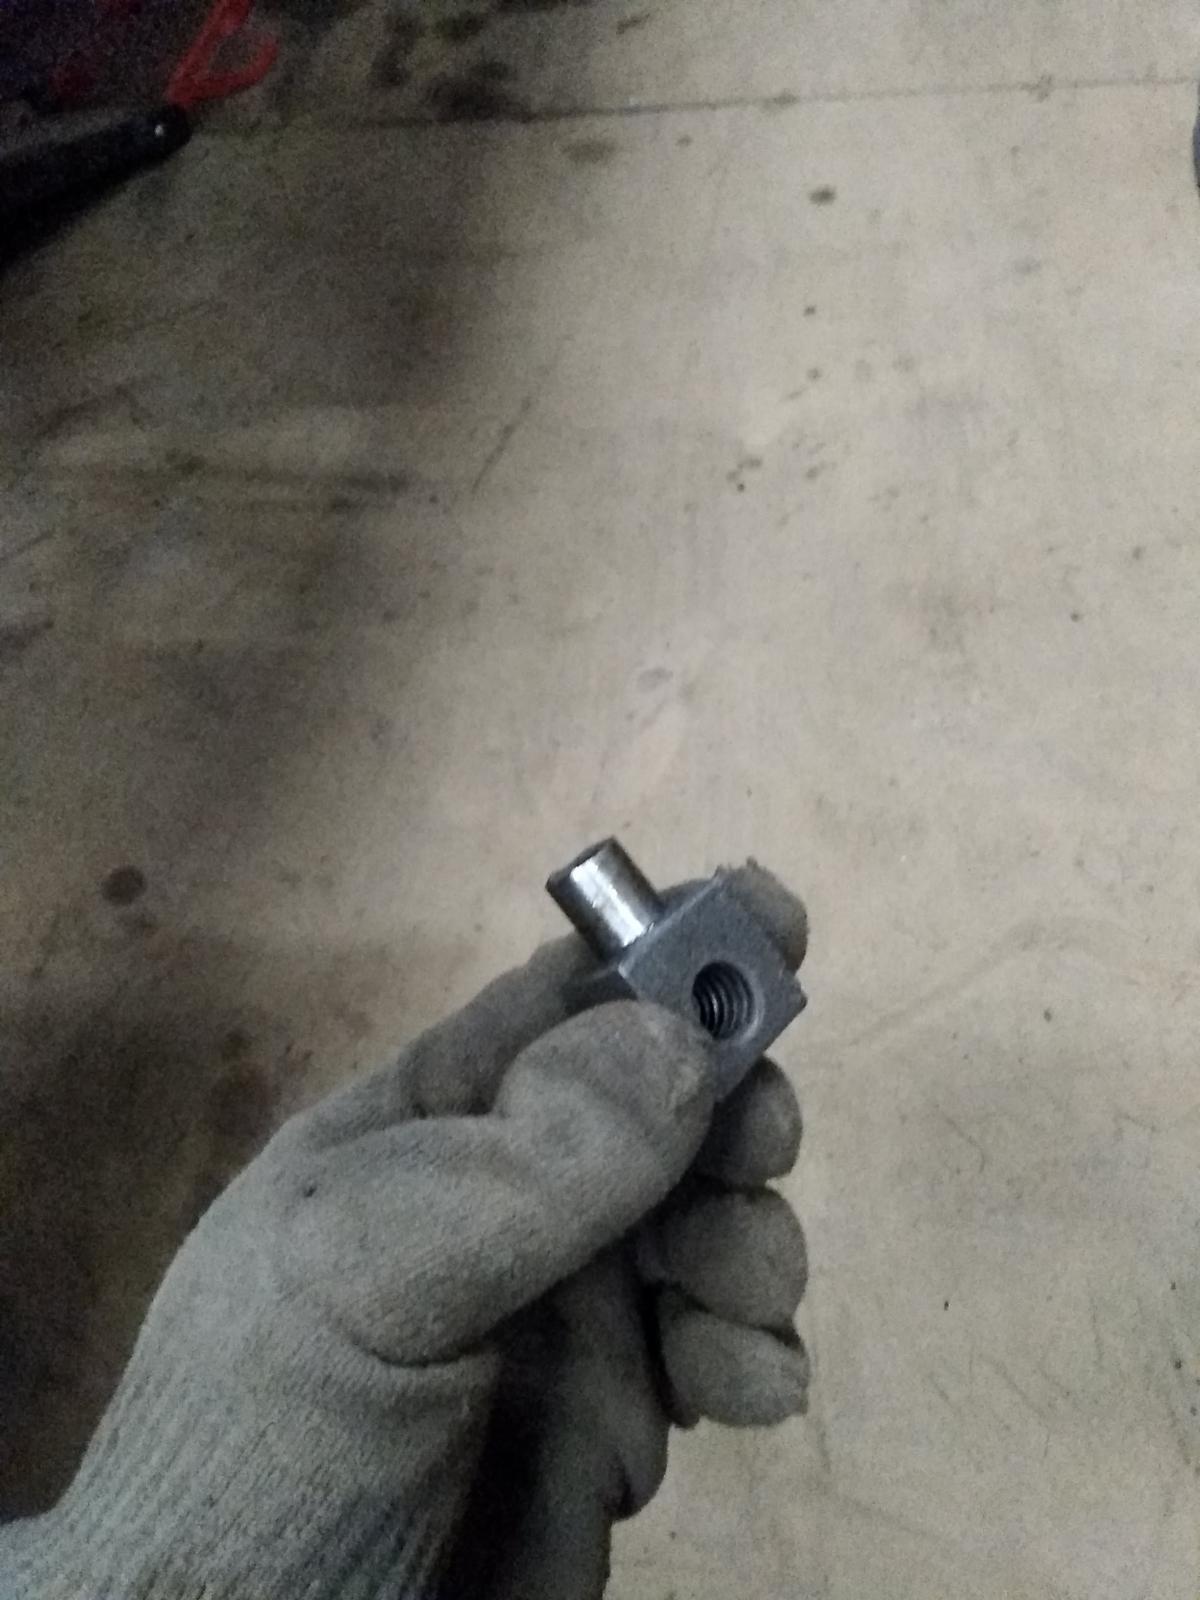
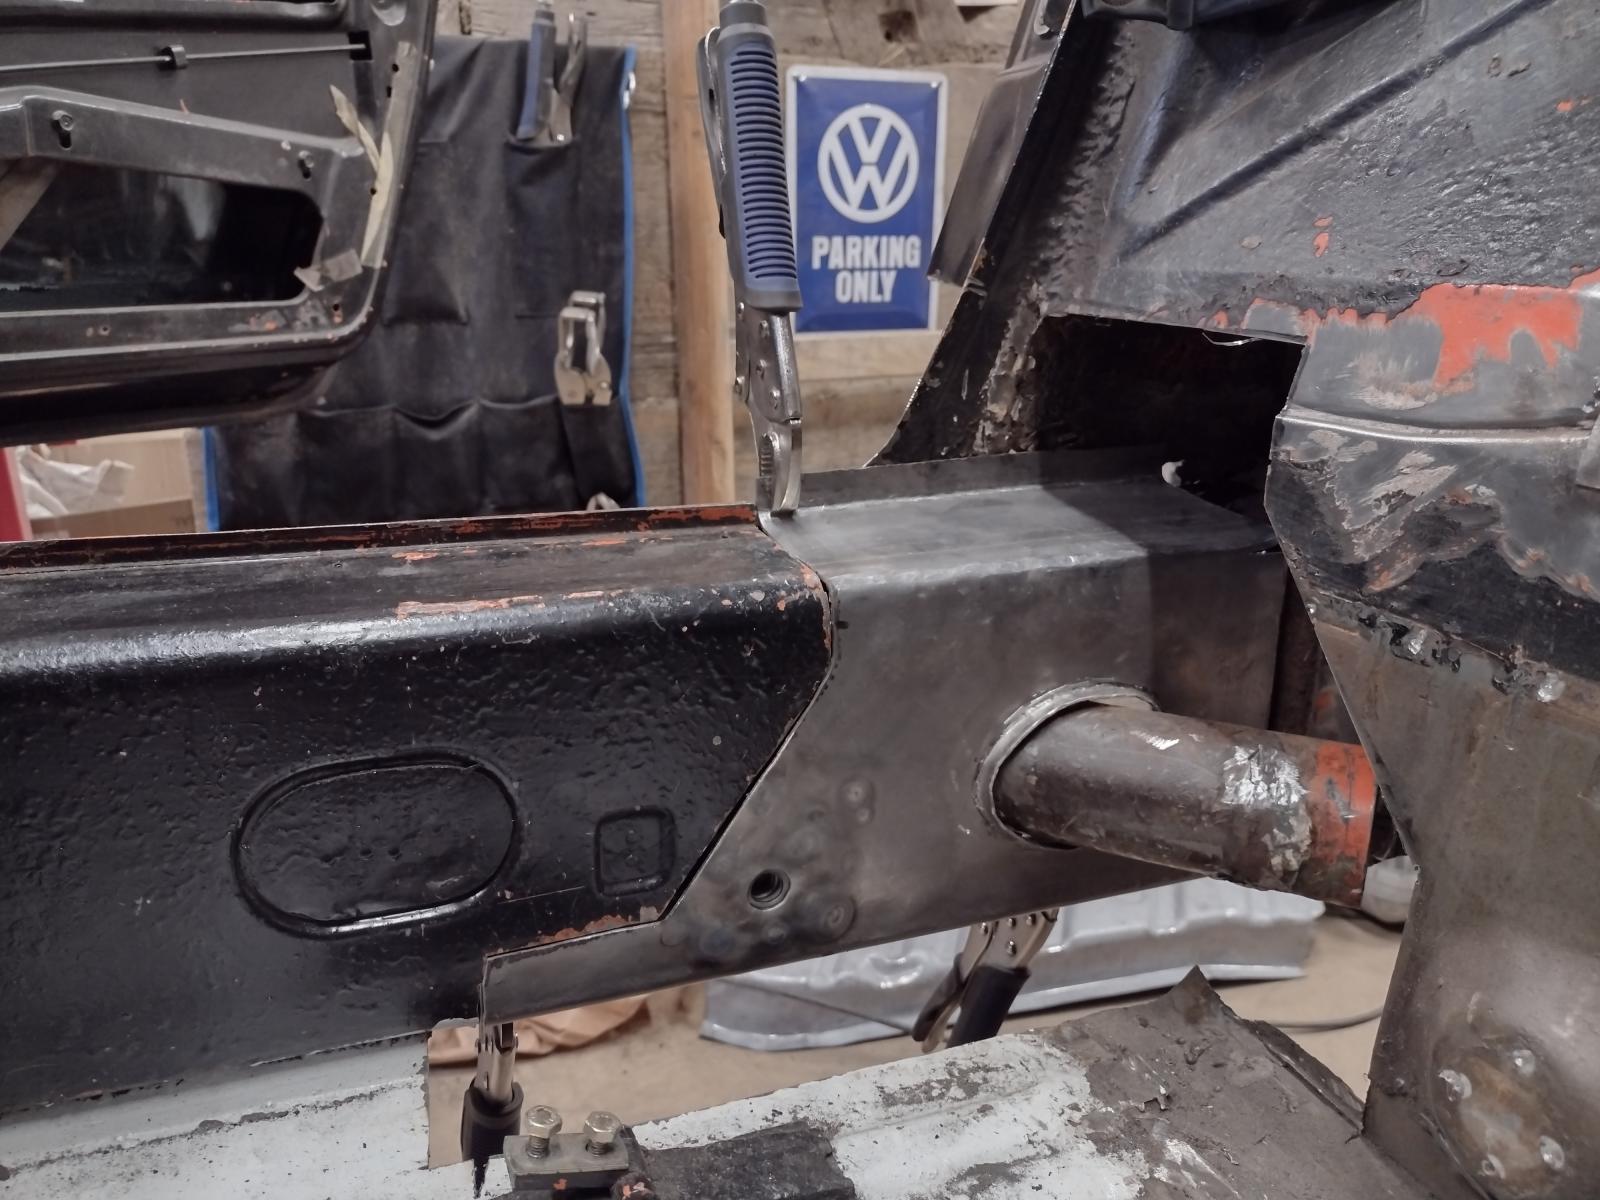
And what looked like a "sh**ty fix" for the clutch cable tube:
Is worse than that..the tube just moves freely like that!!
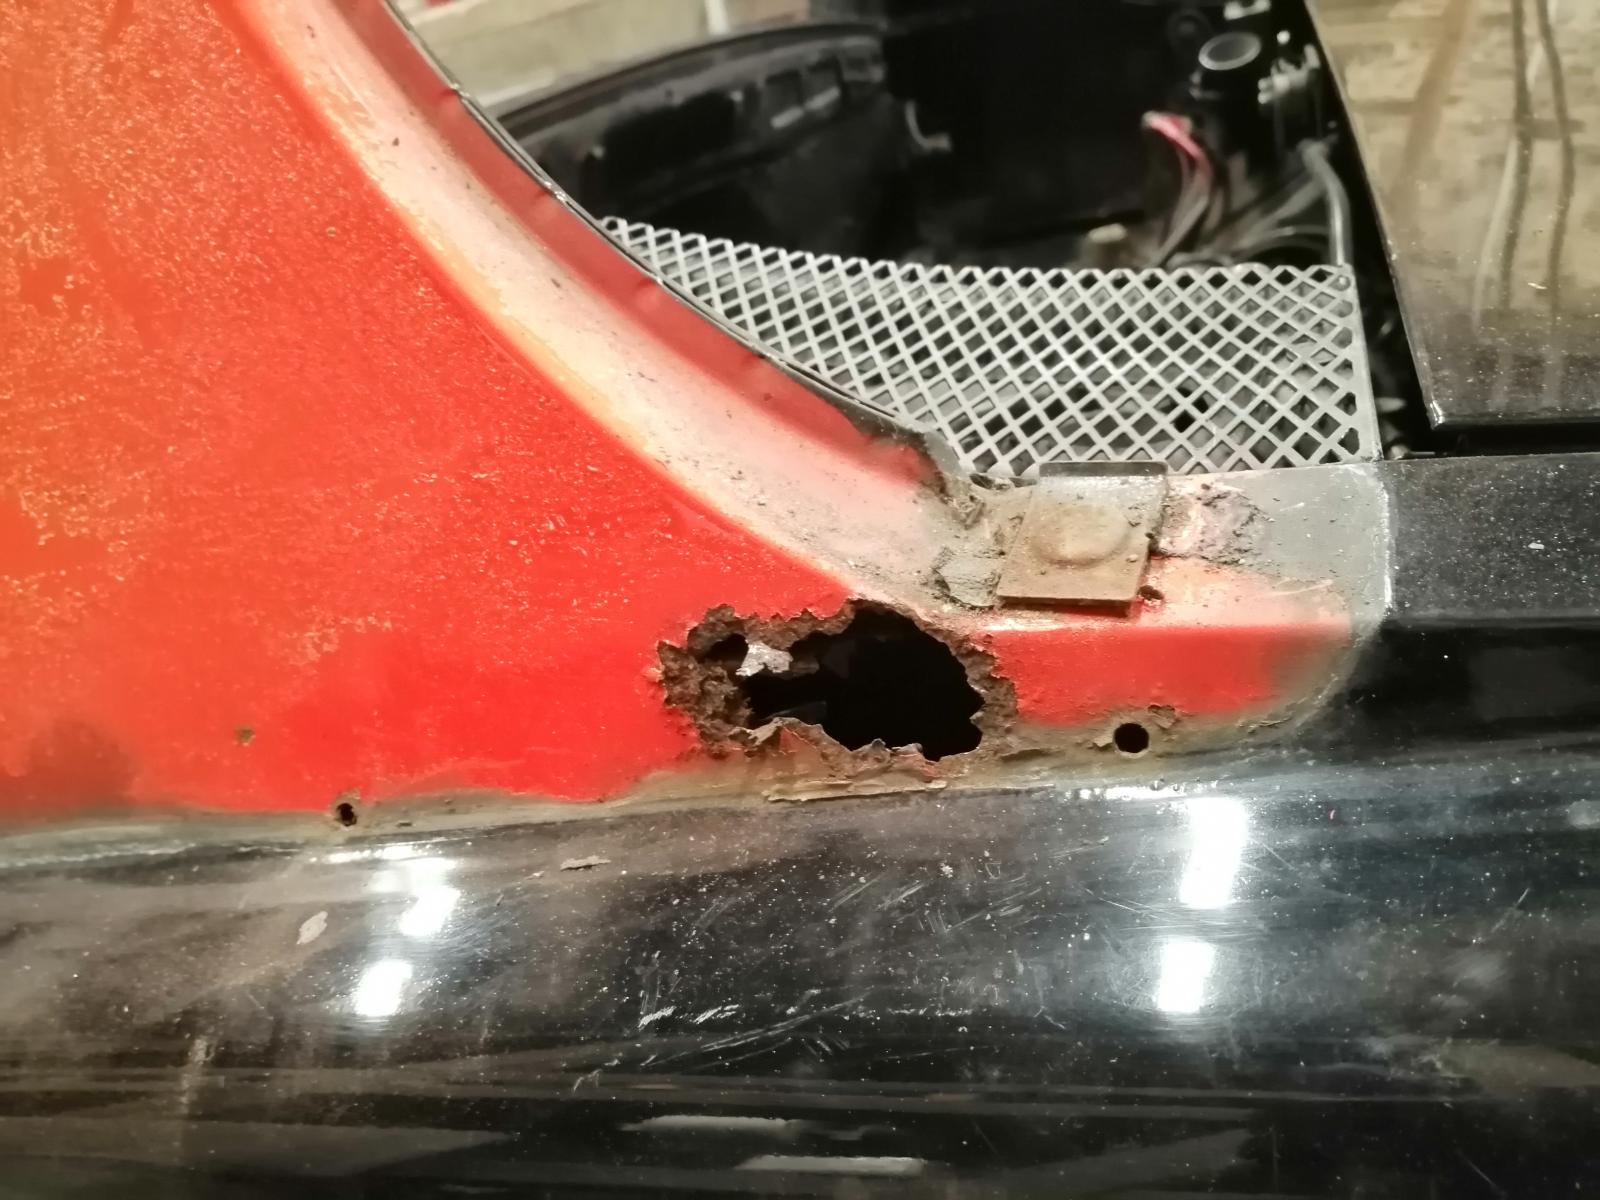
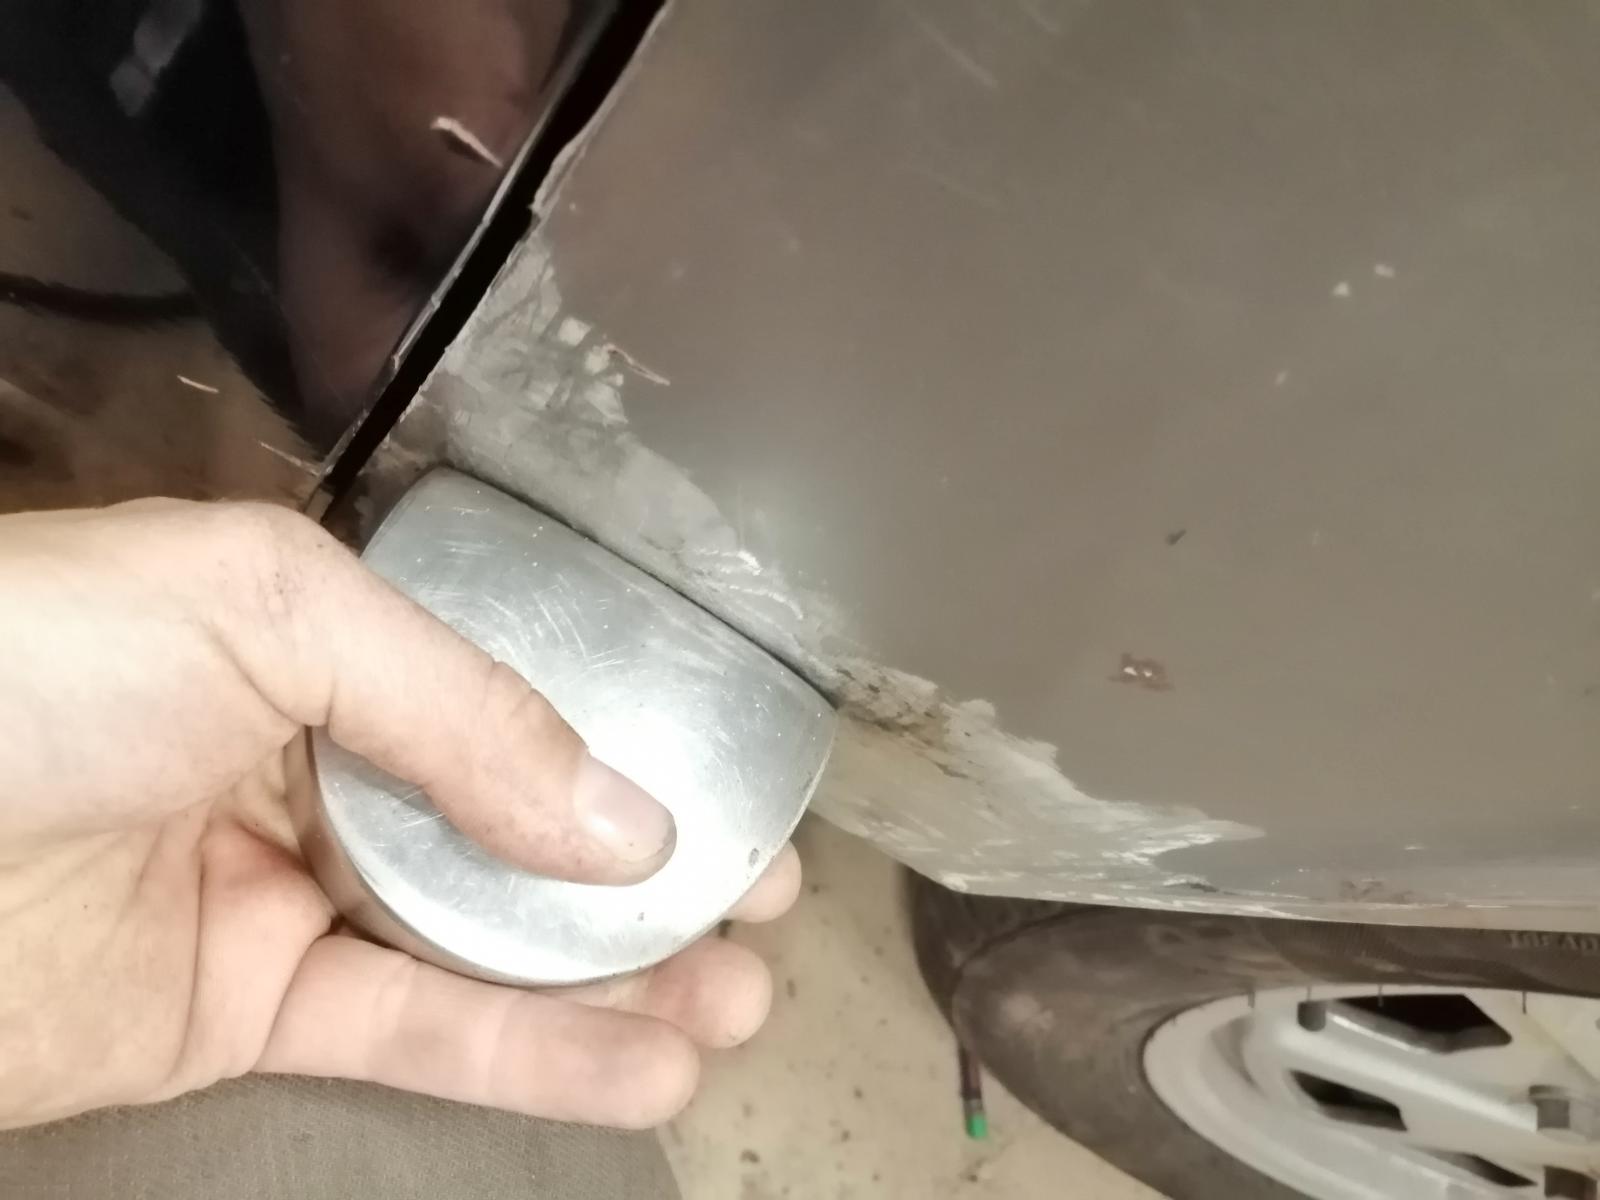
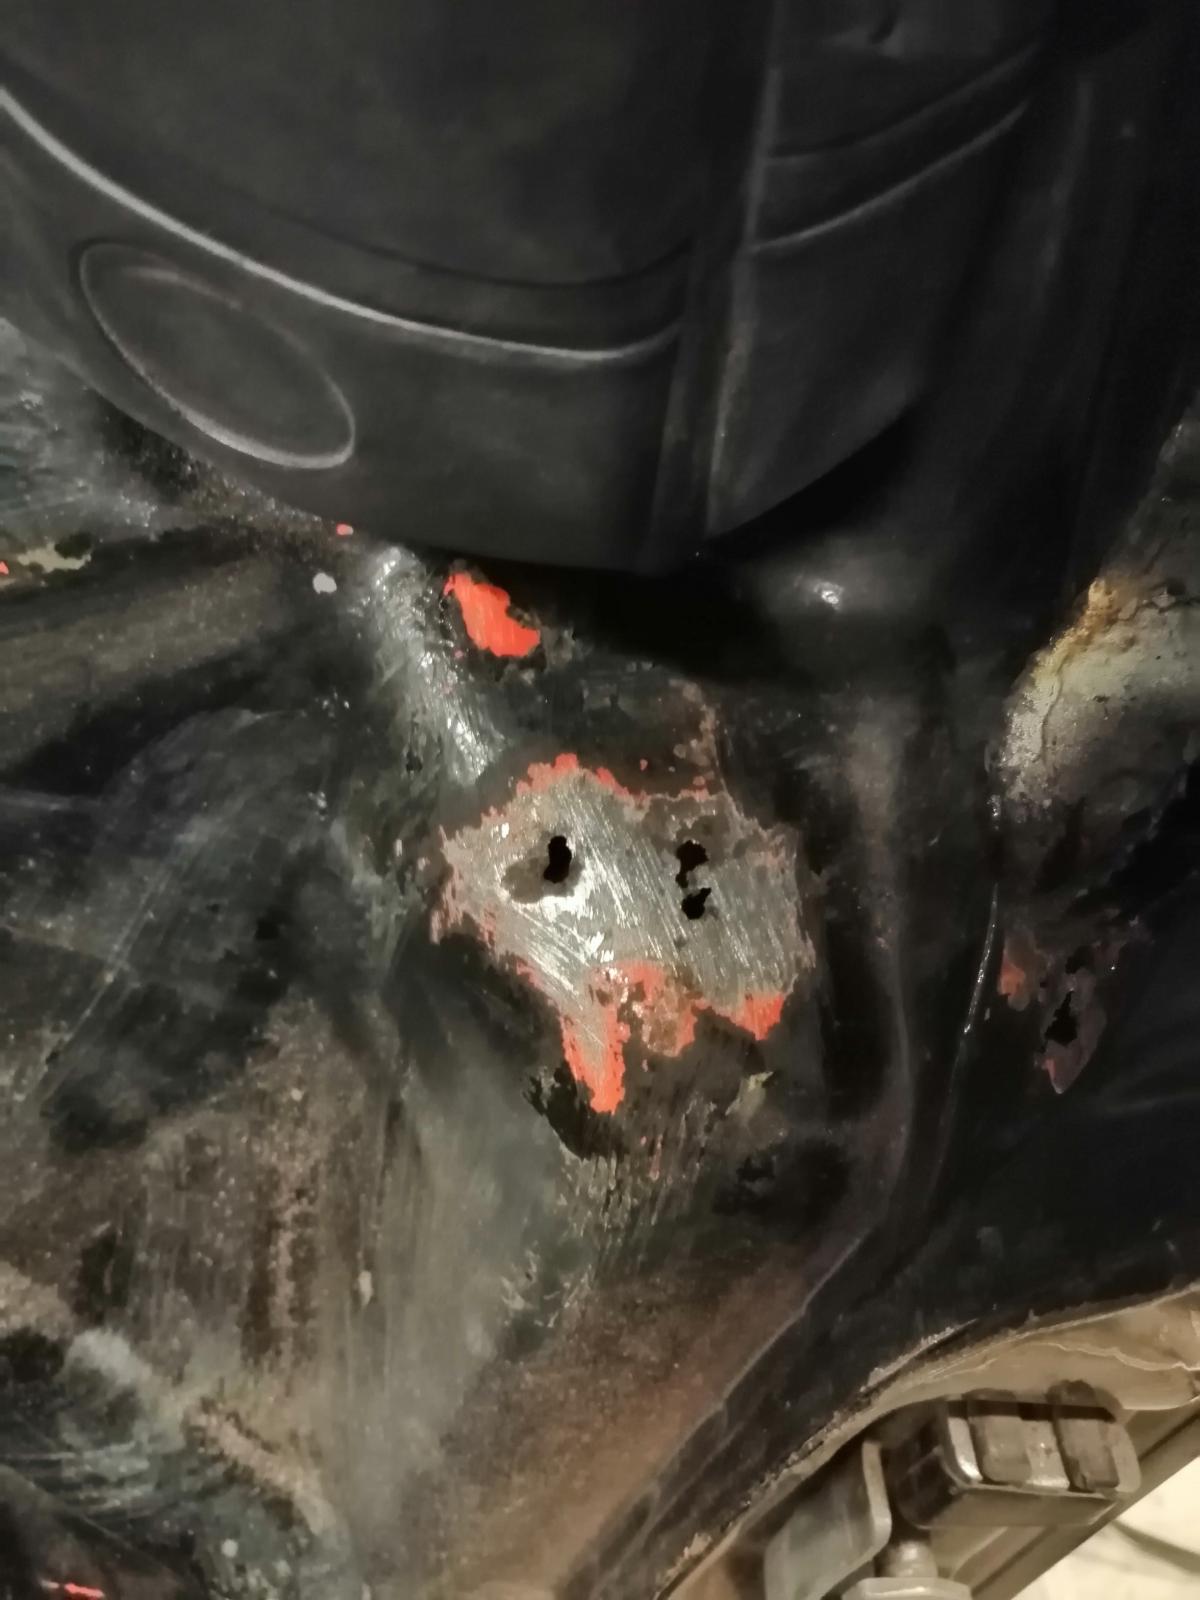
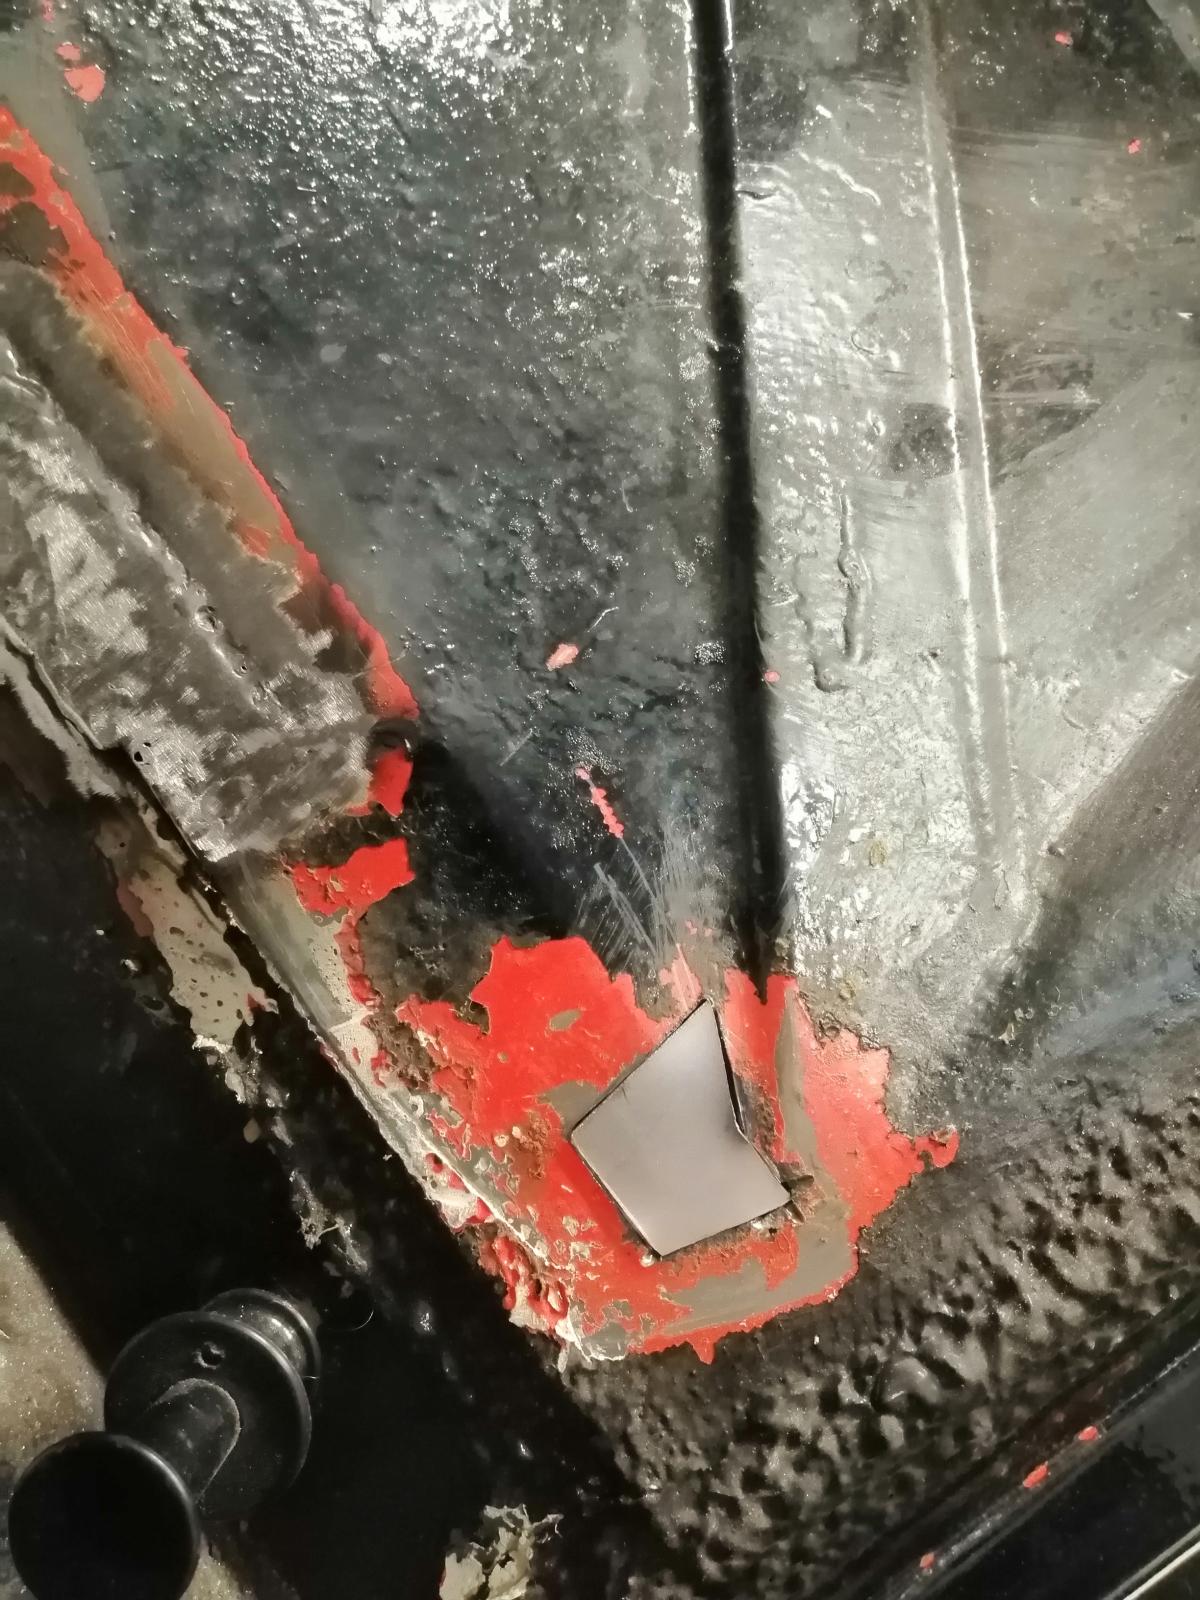
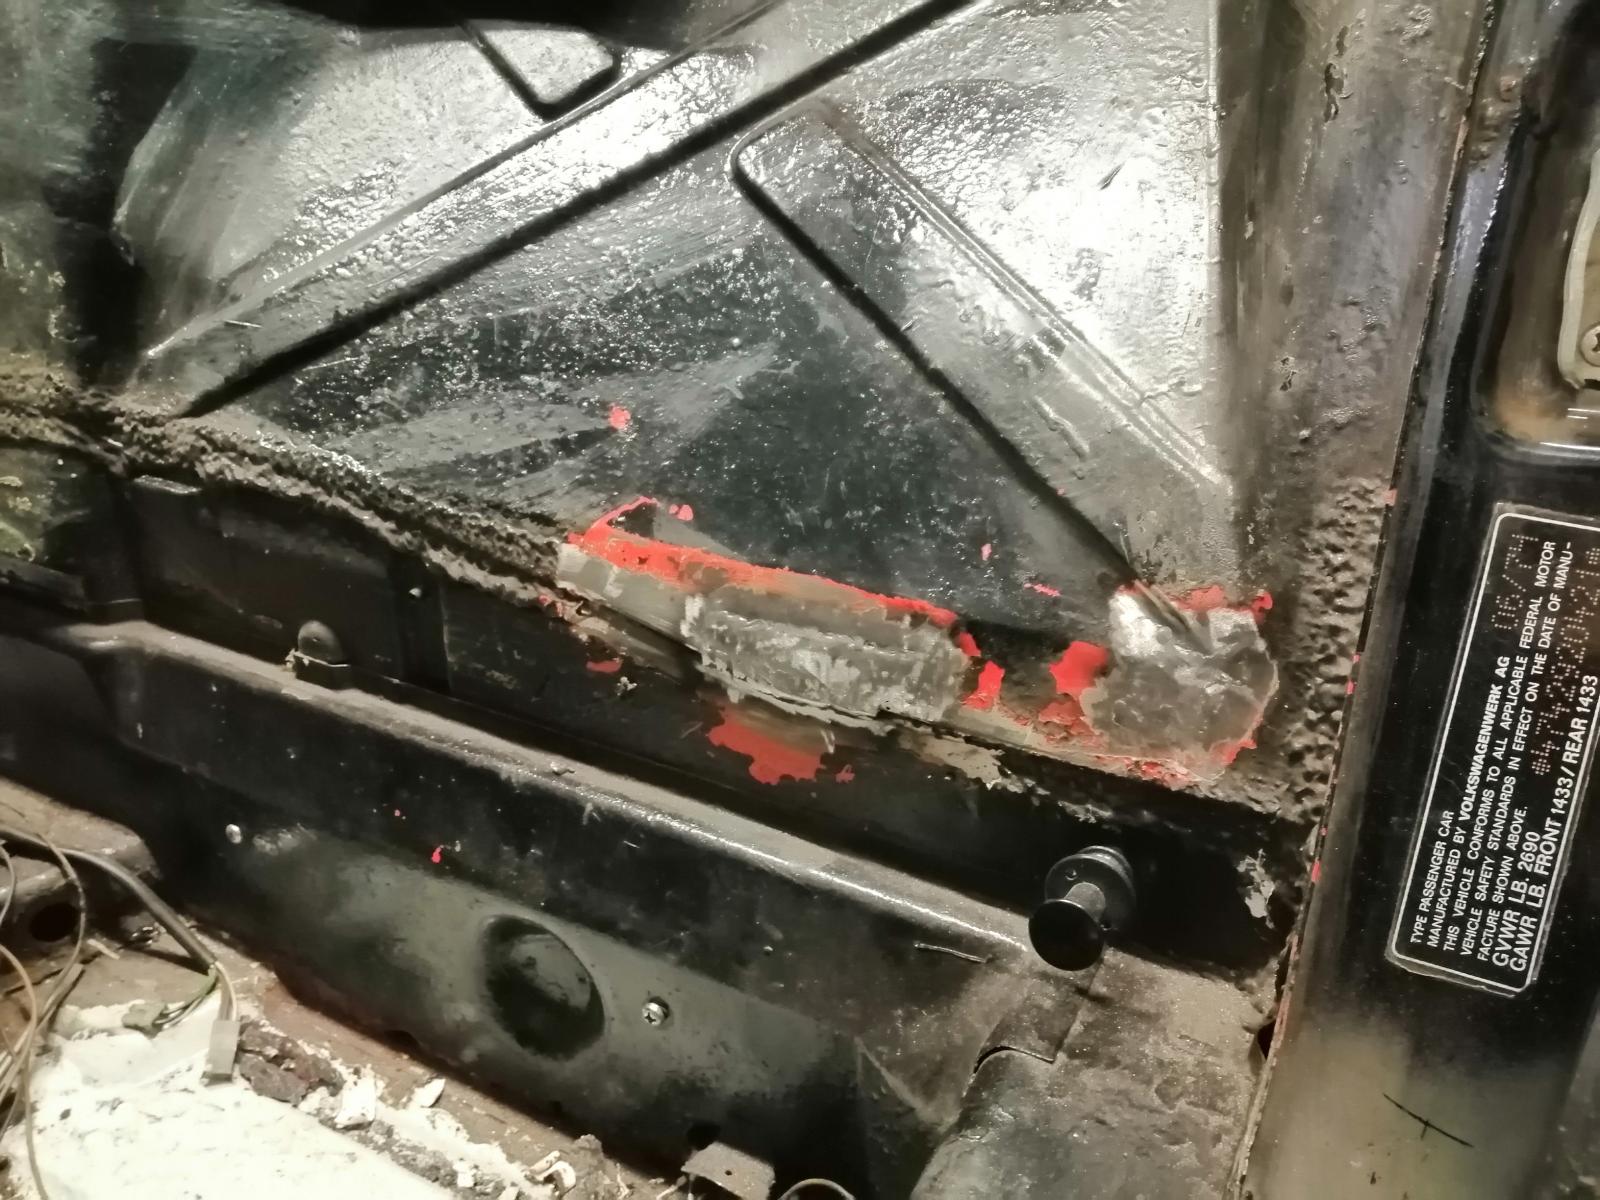
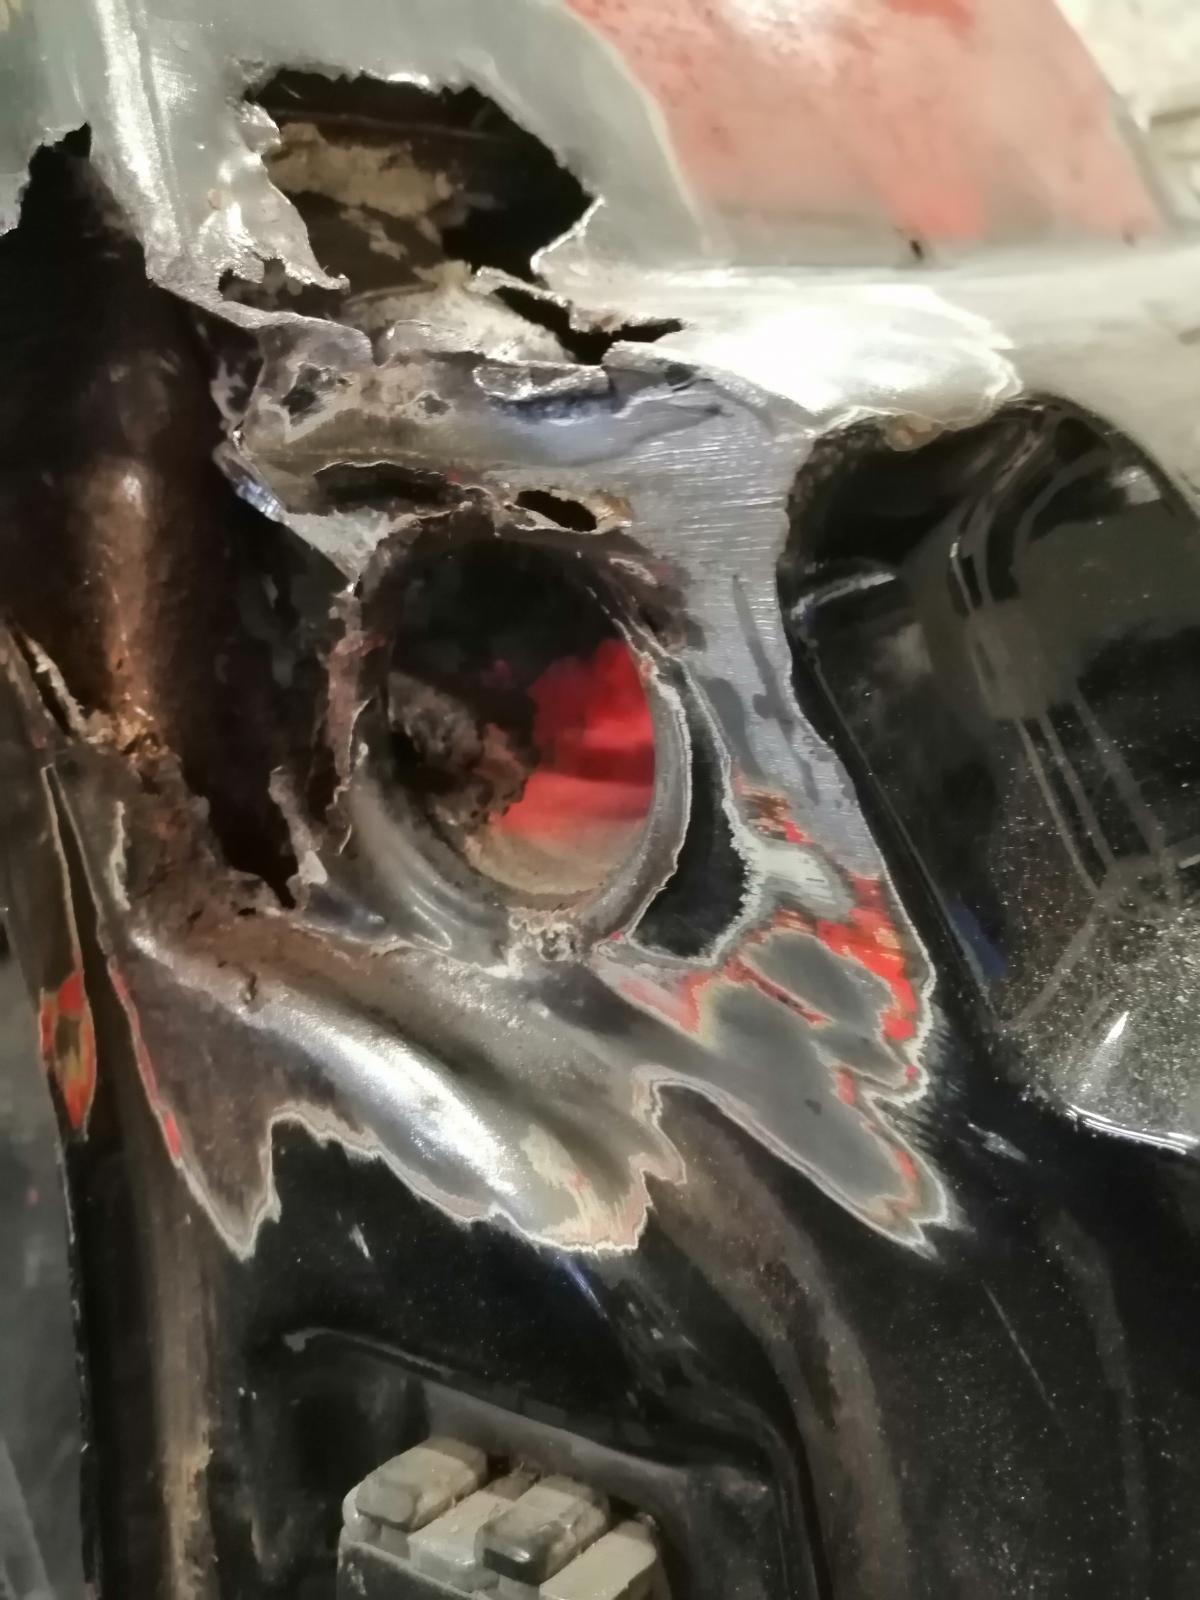
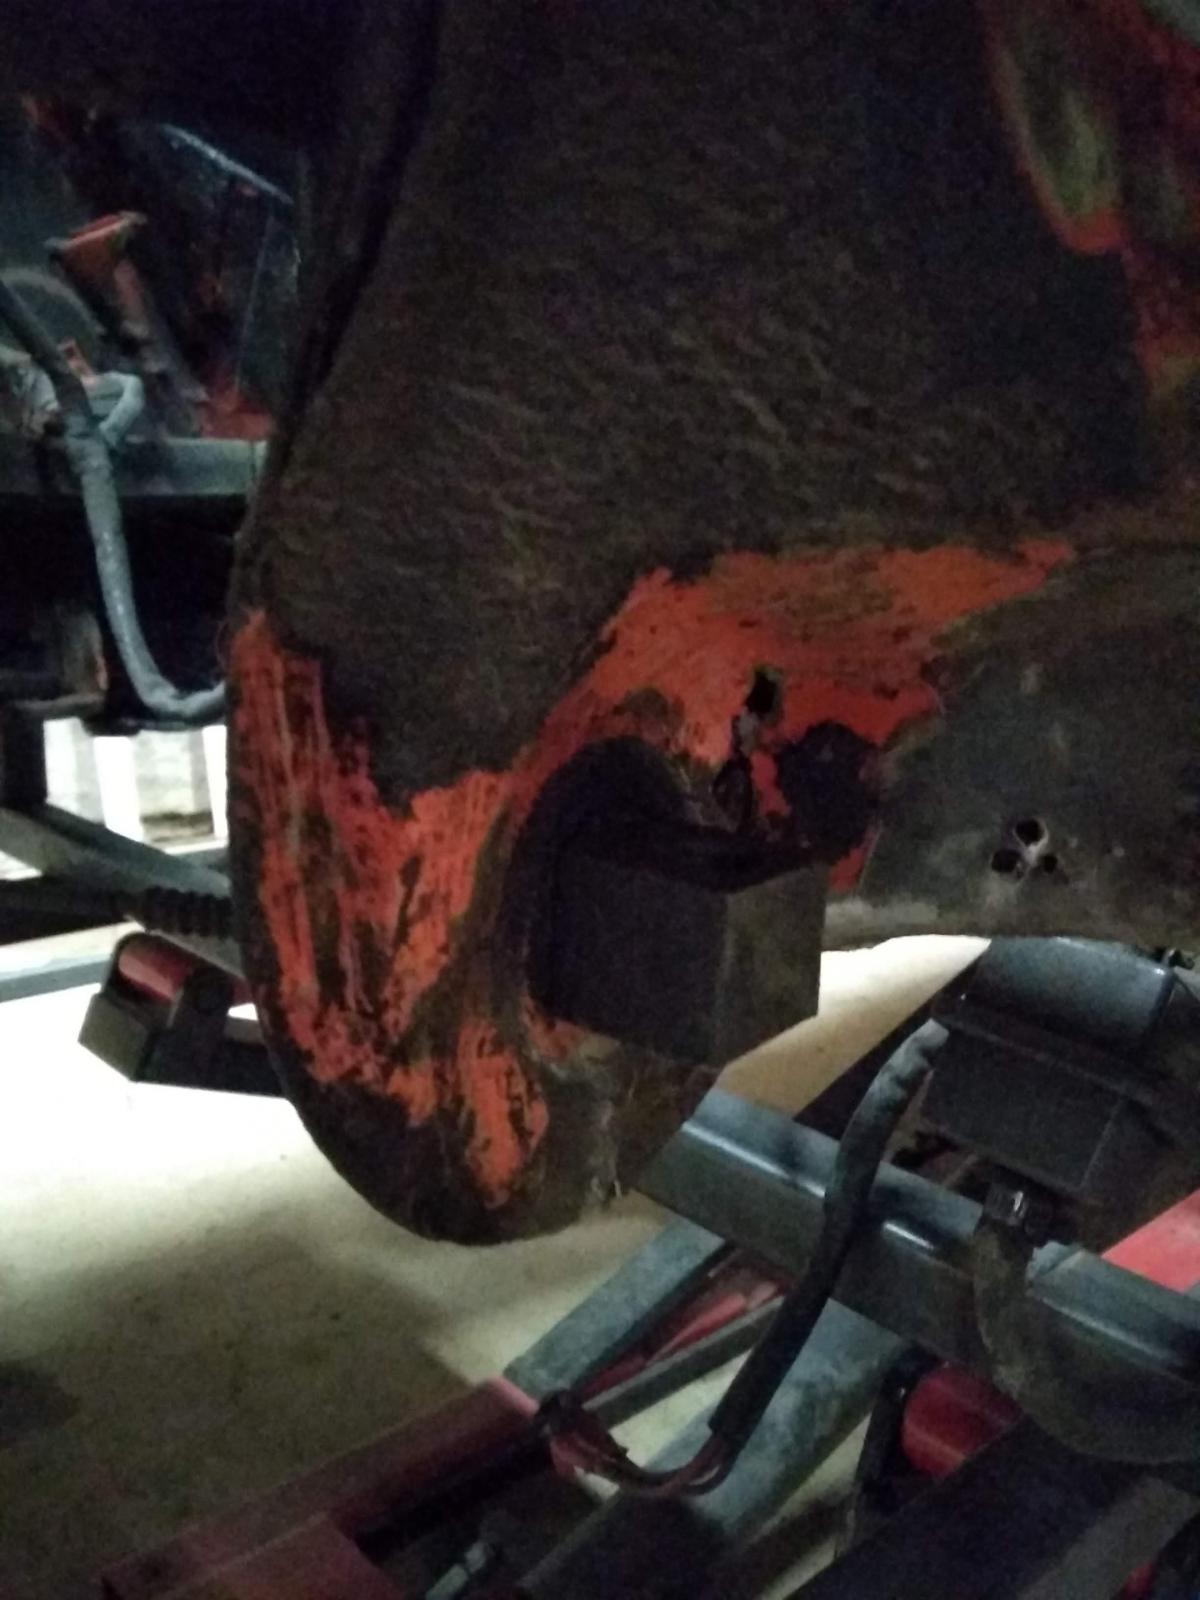
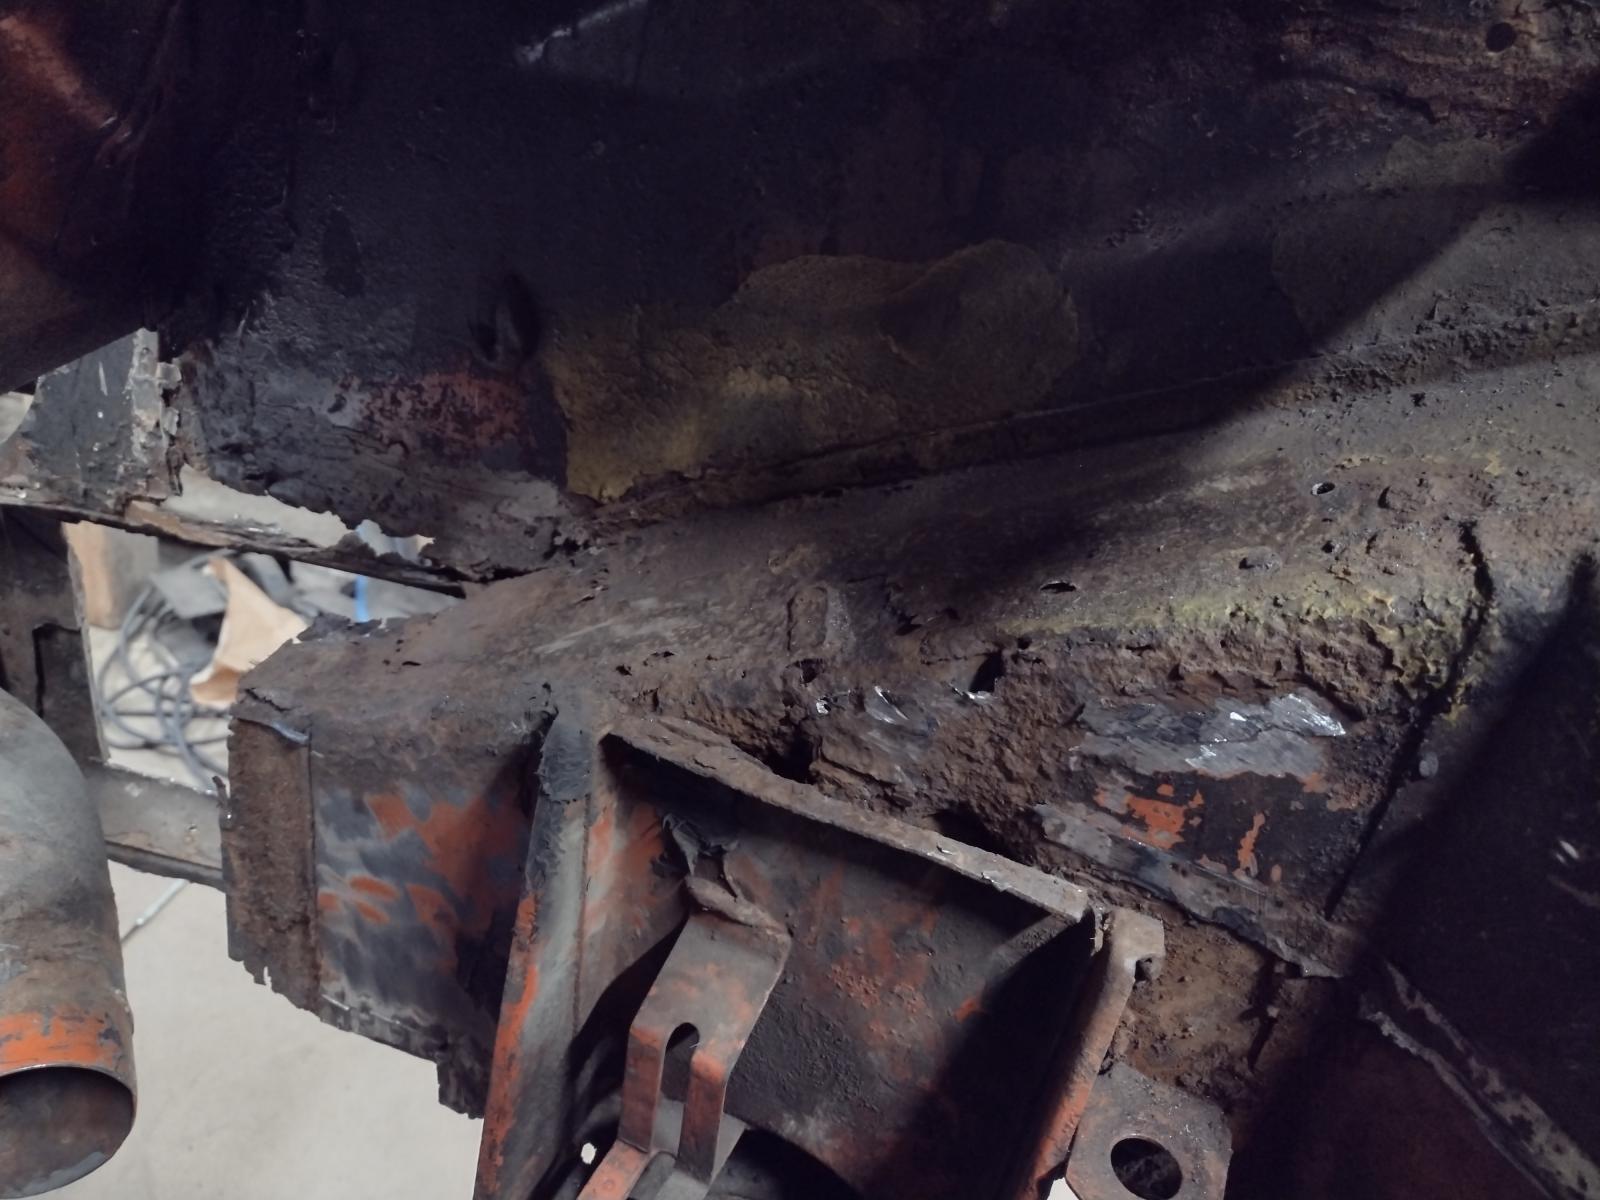
And the big question.. The hell hole.. Well, when I bought it, I couldn't disassemble much so I checked with my hand - no holes - and tried with a screwdriver-everything robust.. So I thought to be safe..
Then I checked after engine removal:
And after a better check with my screwdriver..
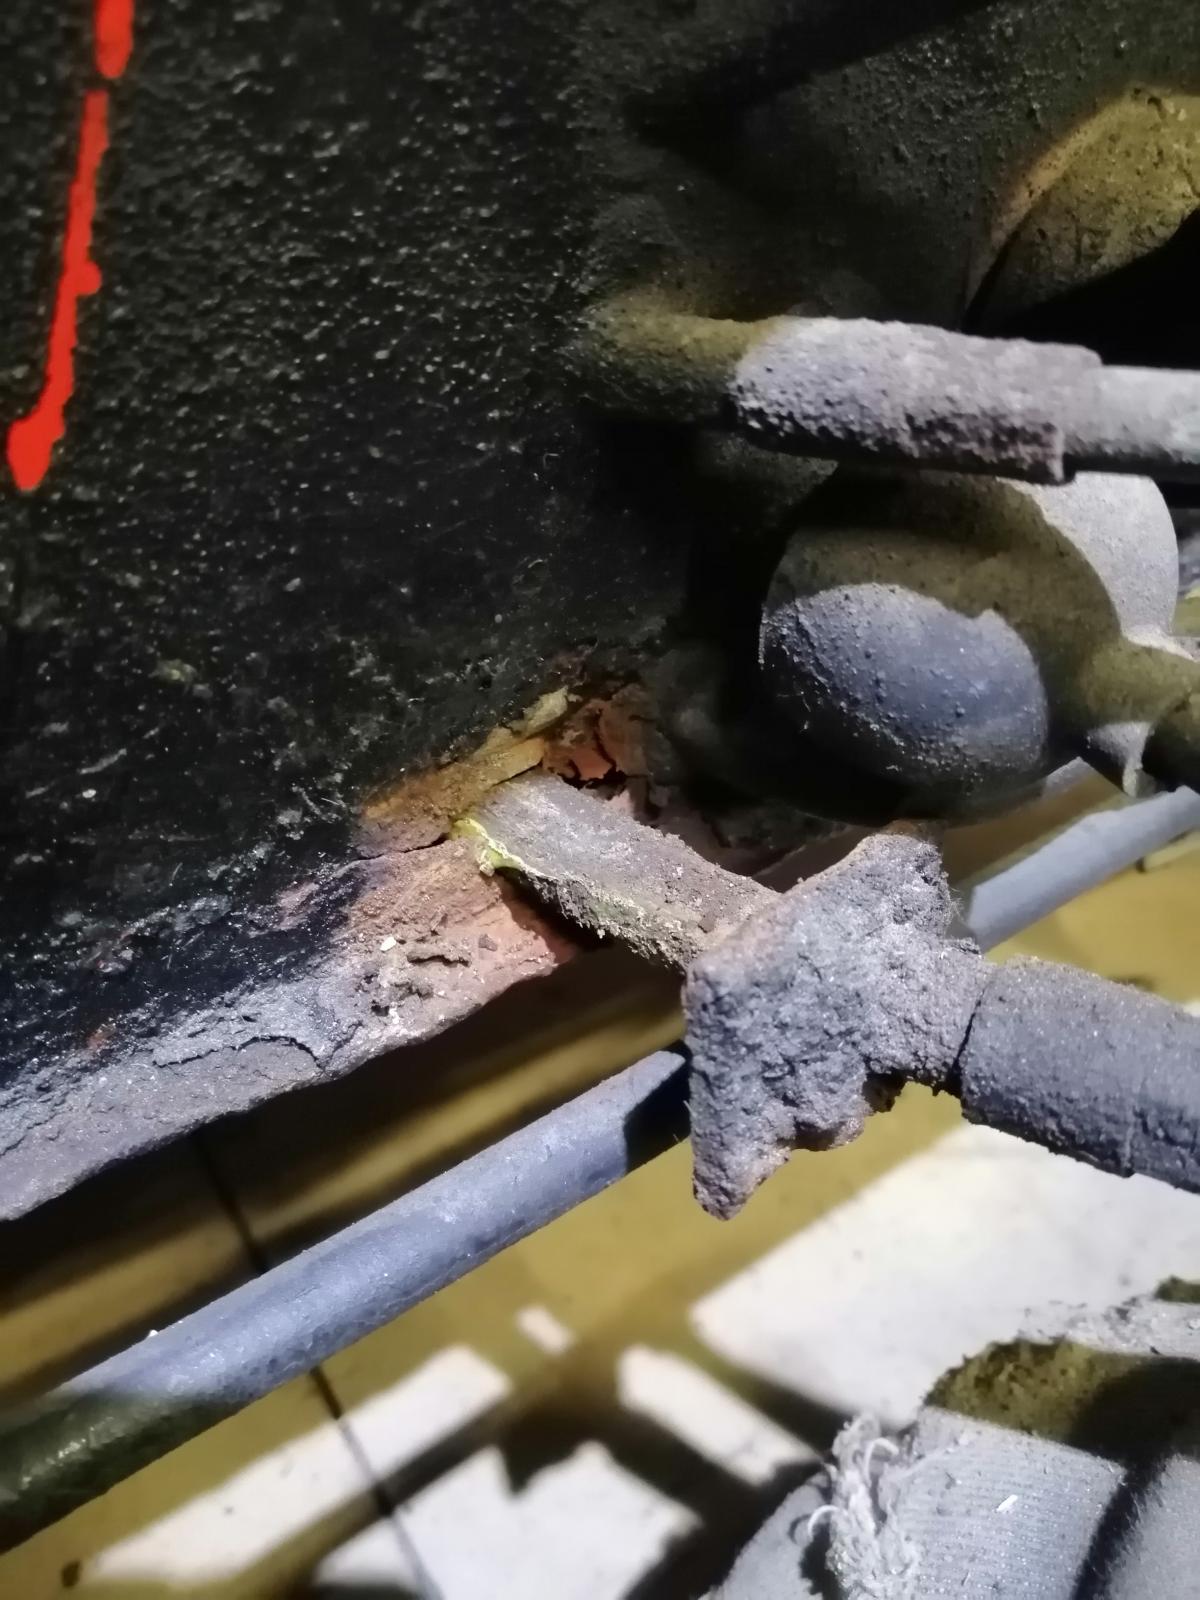
Here is what I found:

A real disaster:
But I am not a guy that let something like that discorage himself. So I need to remove my battery tray to check further and make my plan.. But before that, and before probably destroying the old one by disassembling.. I built the replacement one:

Check with the battery and the fixation sandblasted:
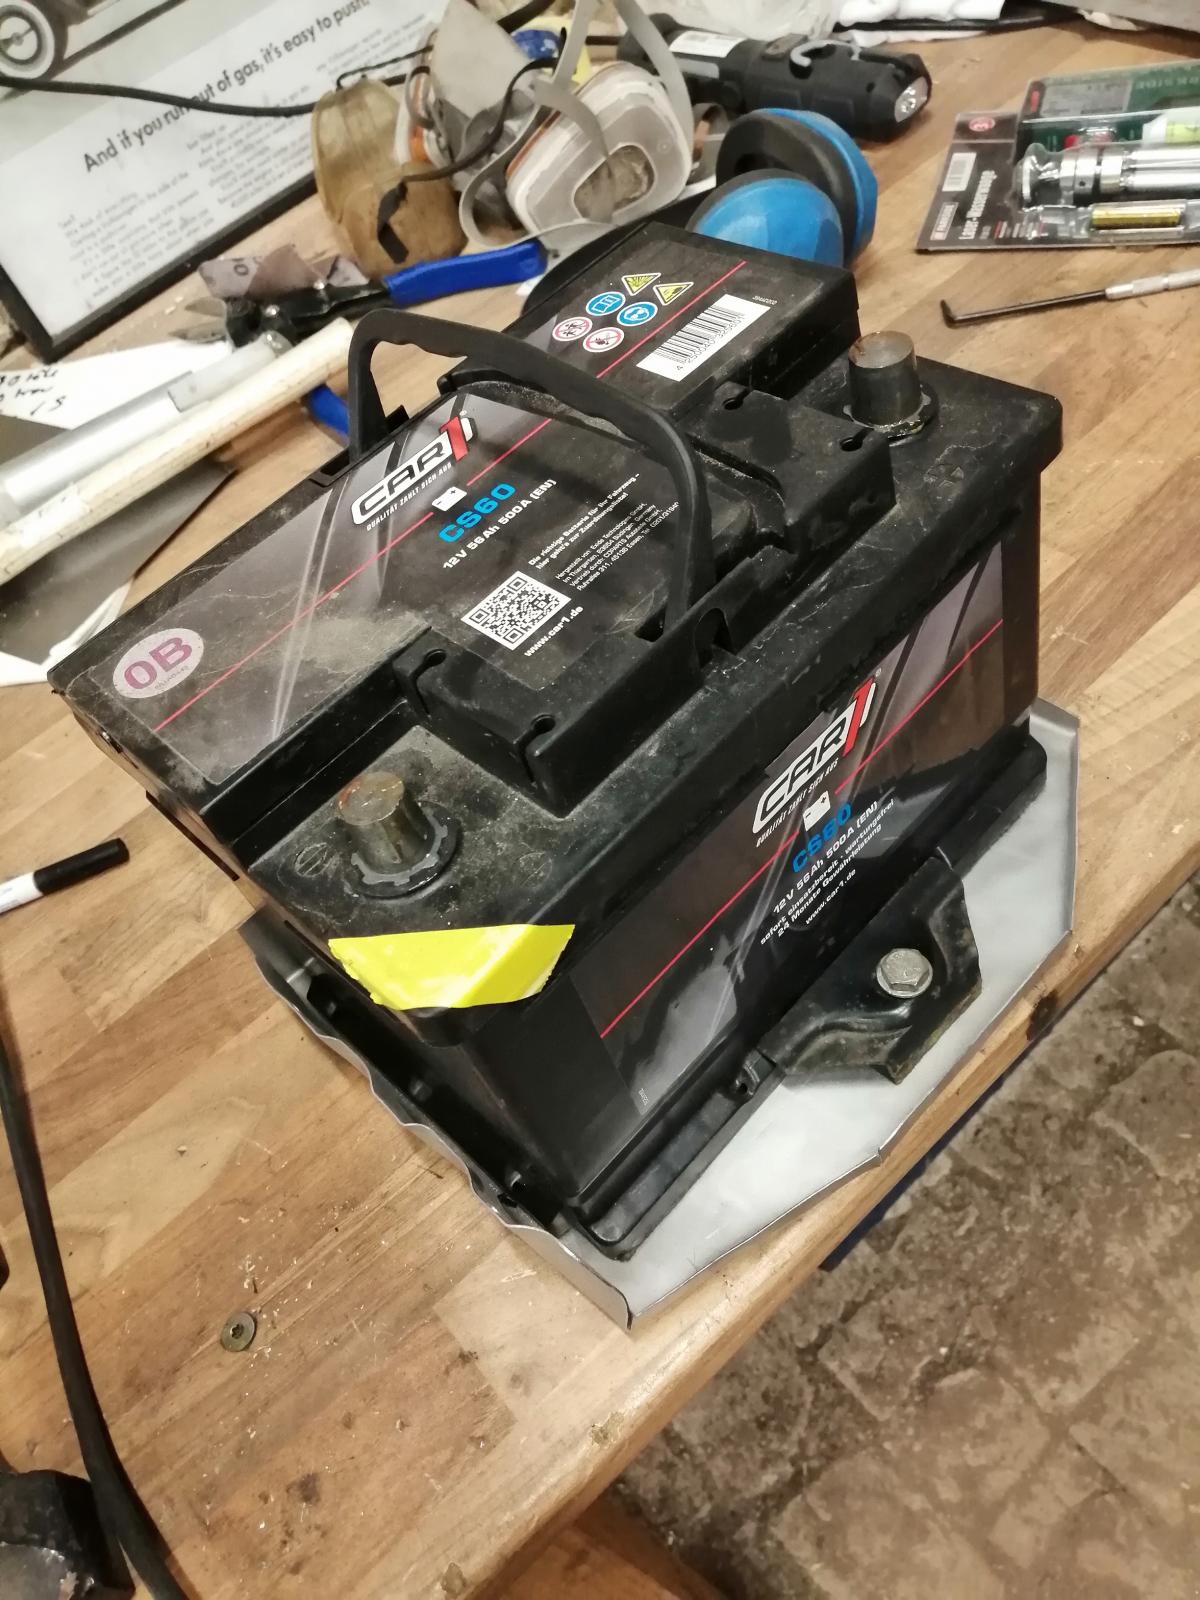
And the bottom part:
Ready to go after the hell hole repair:
Stay tuned!
Antoine
So, I did some more work on this toy and an update is long overdue!
As I already did start the work on the front, I decided to make sûre nothing is hidden there under the paint..
Well of course some (bondo-) surprises were there...
Here a big dent, that I took care of using dolly/hammer:

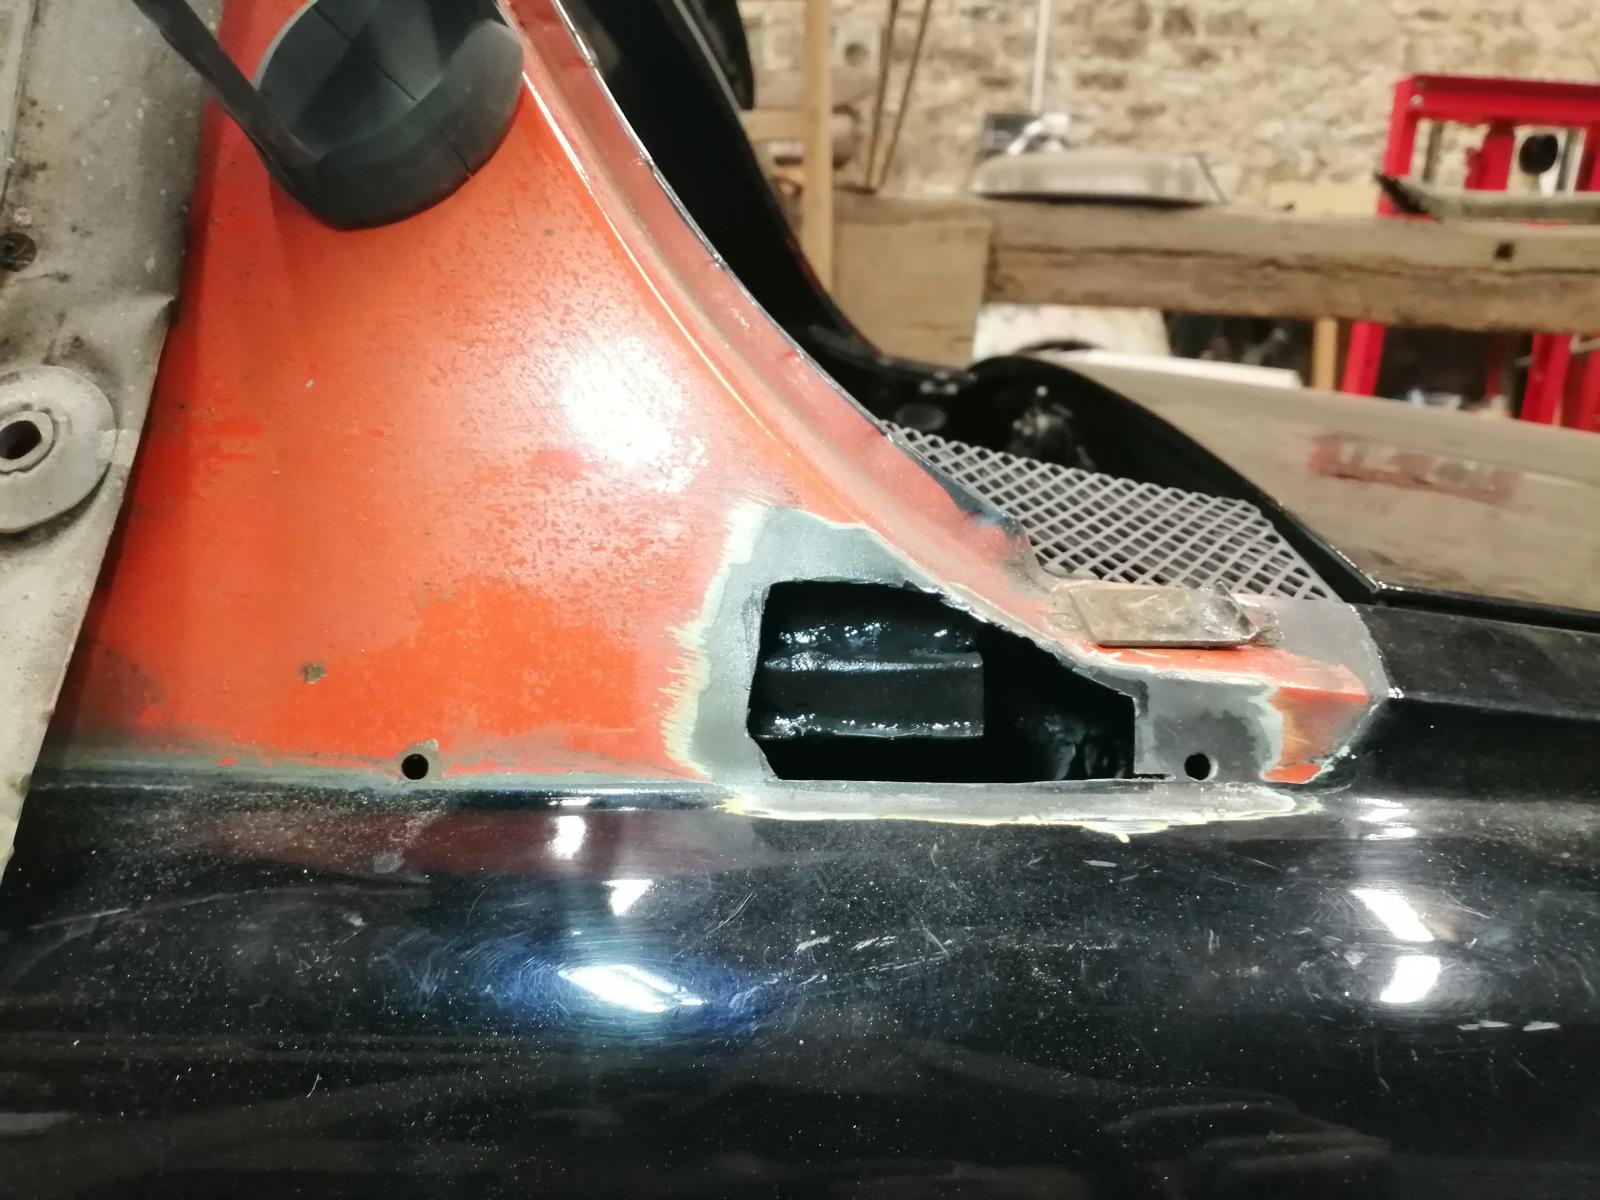
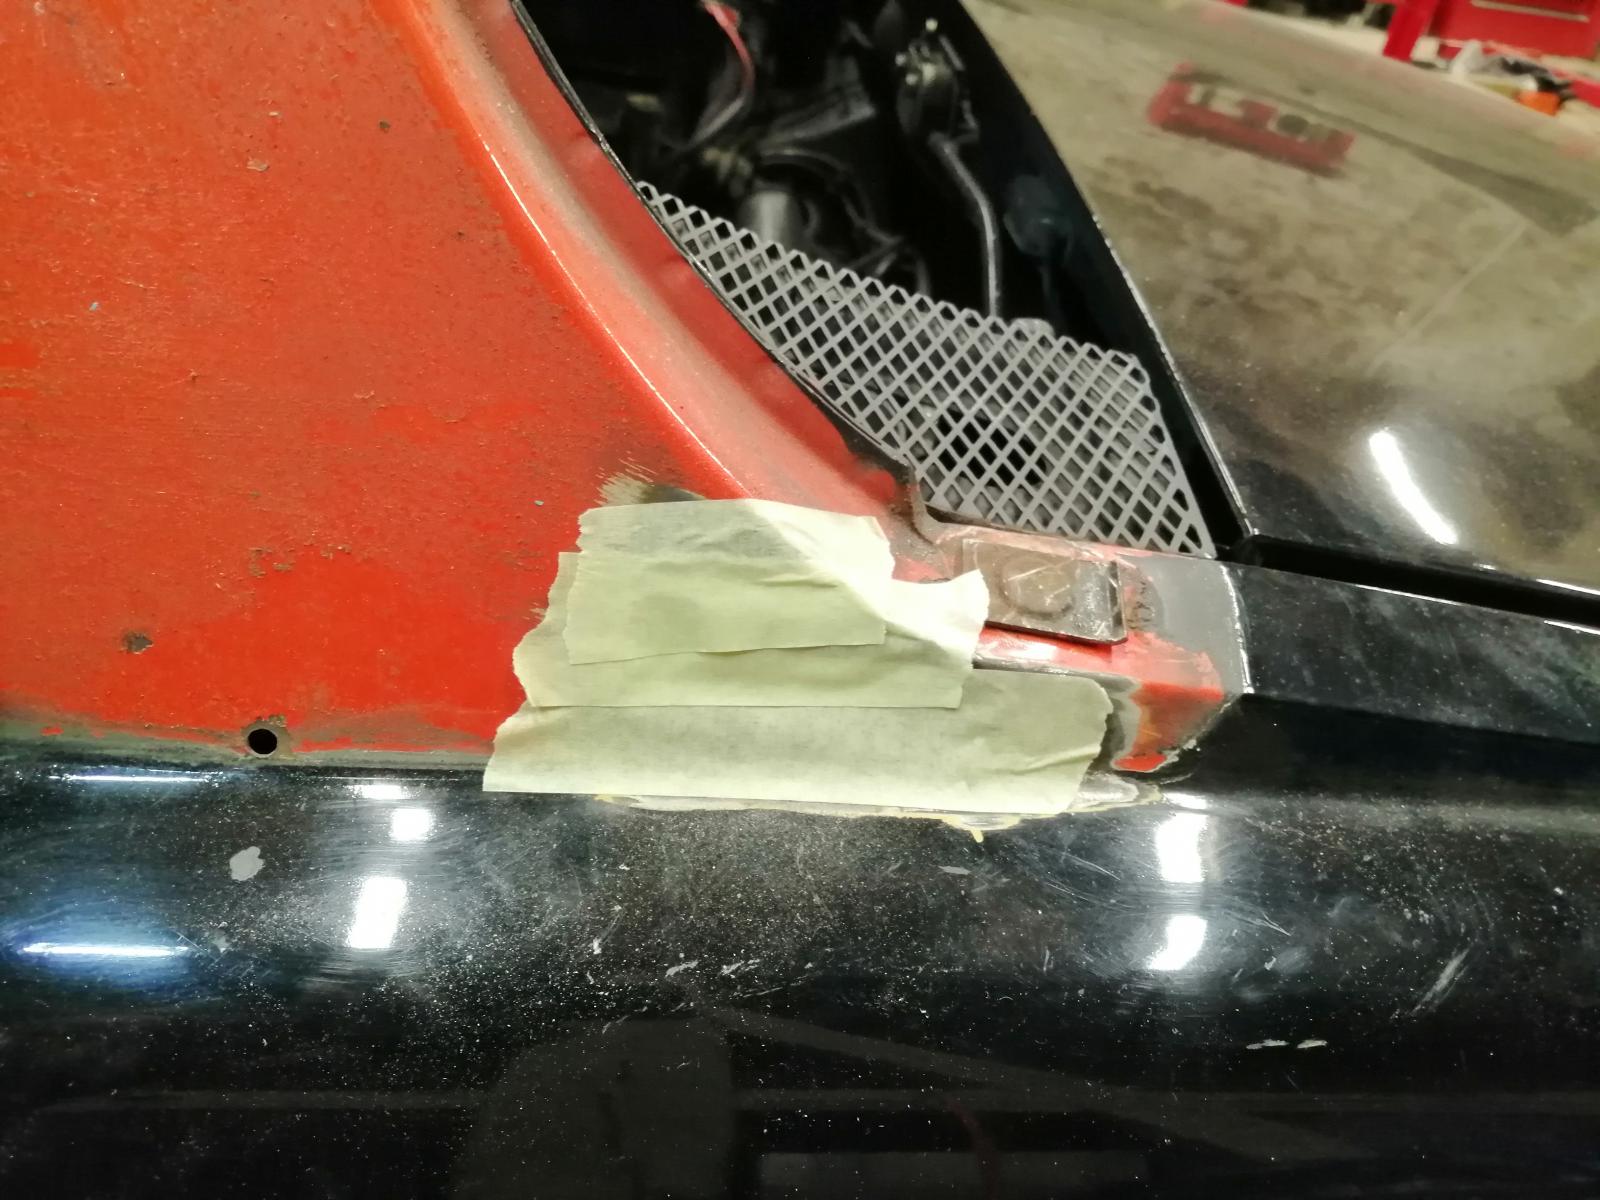
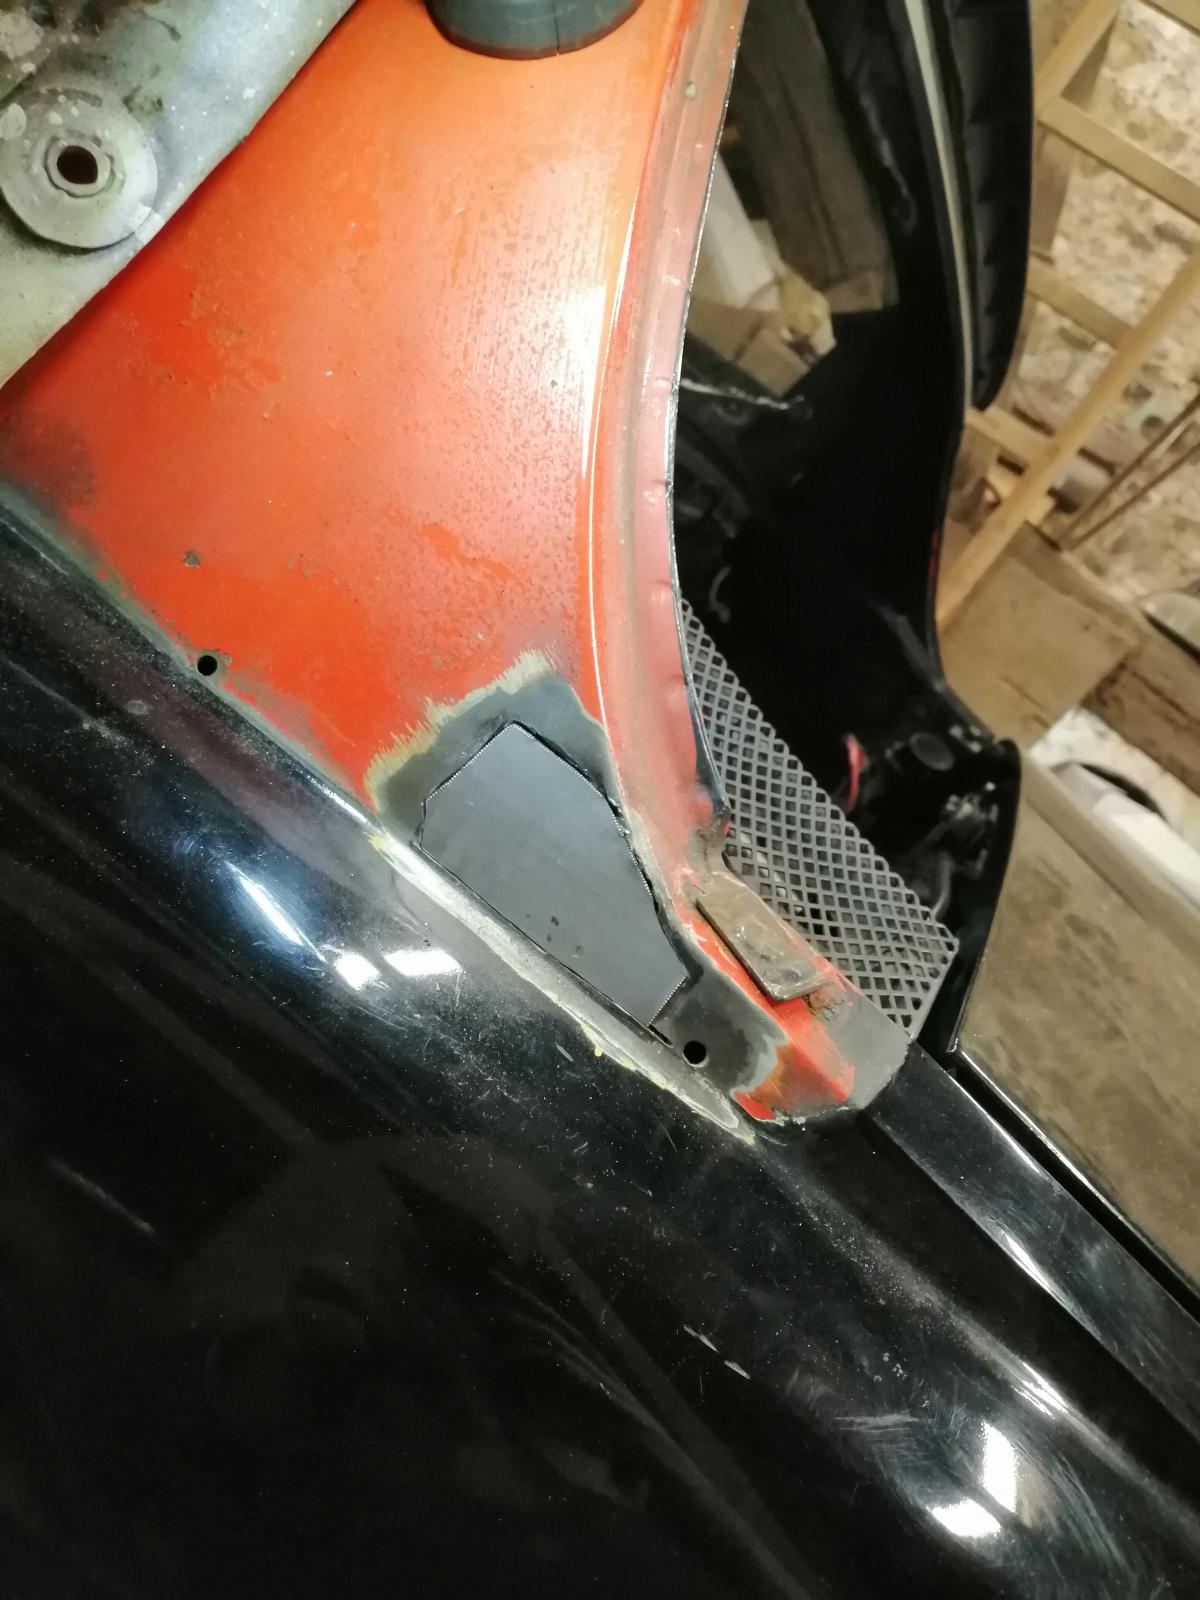
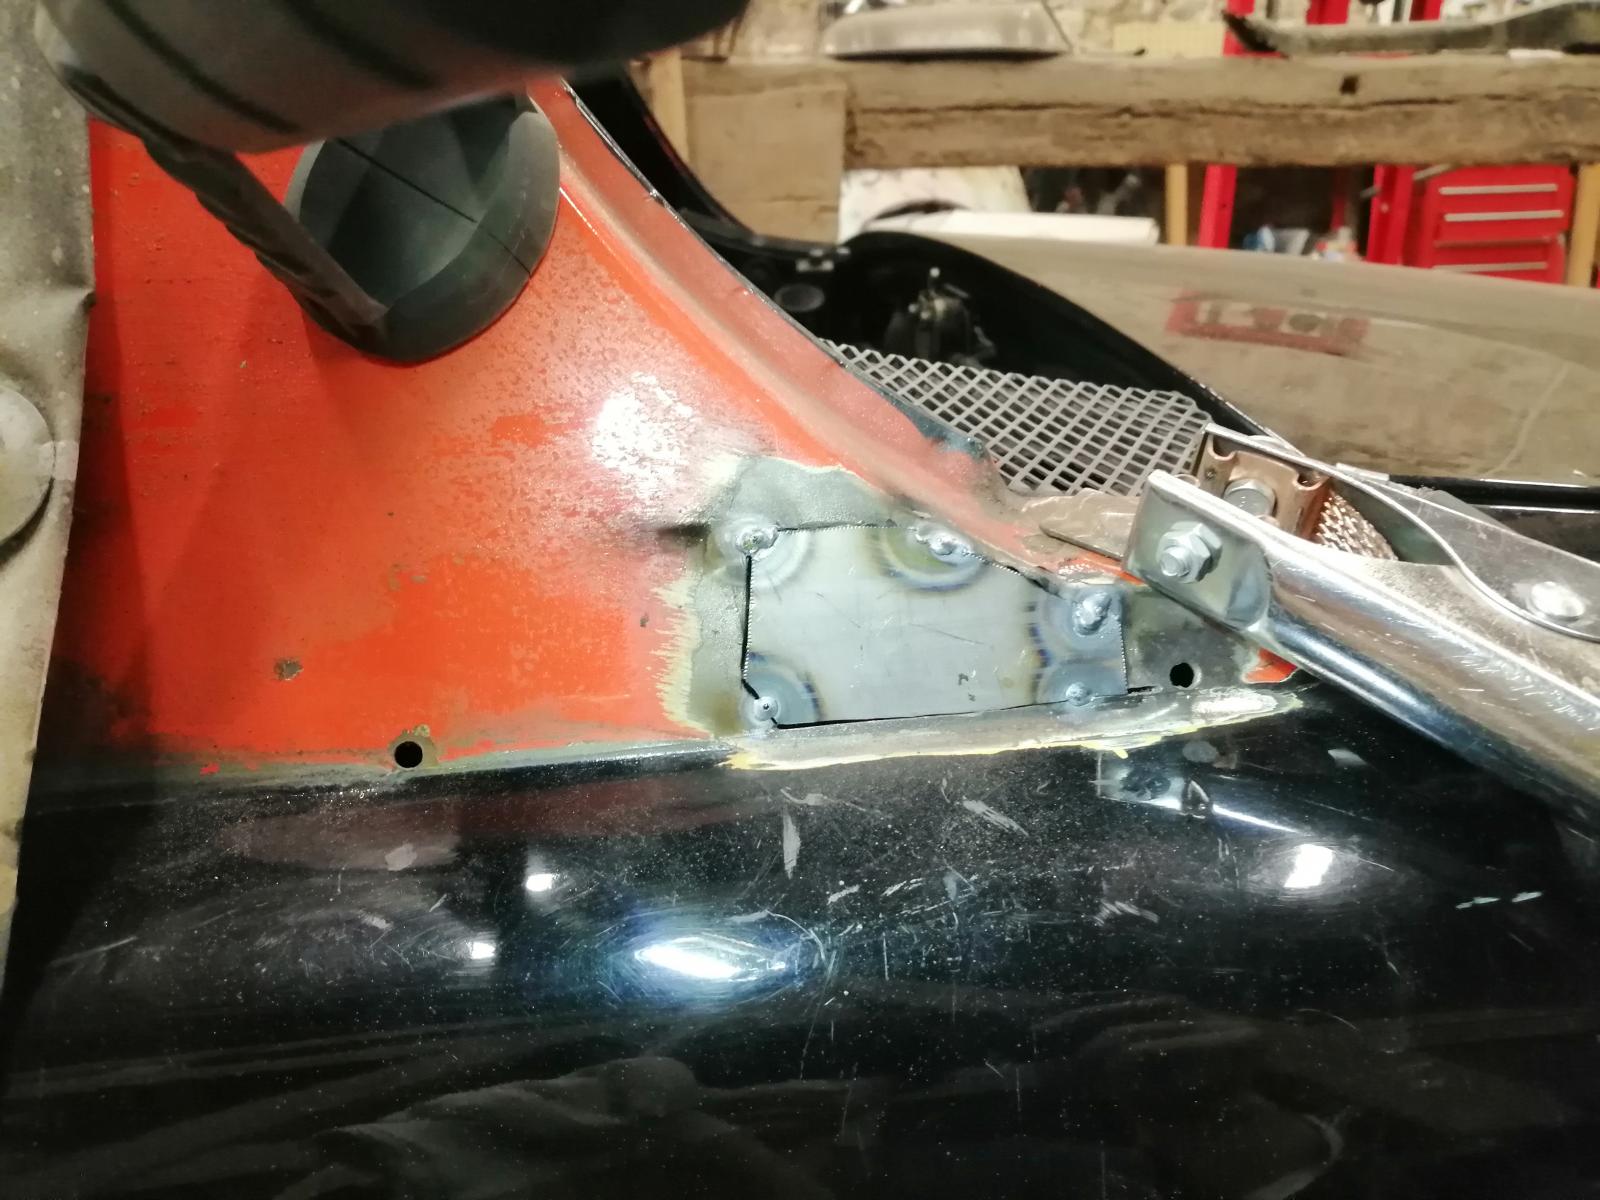
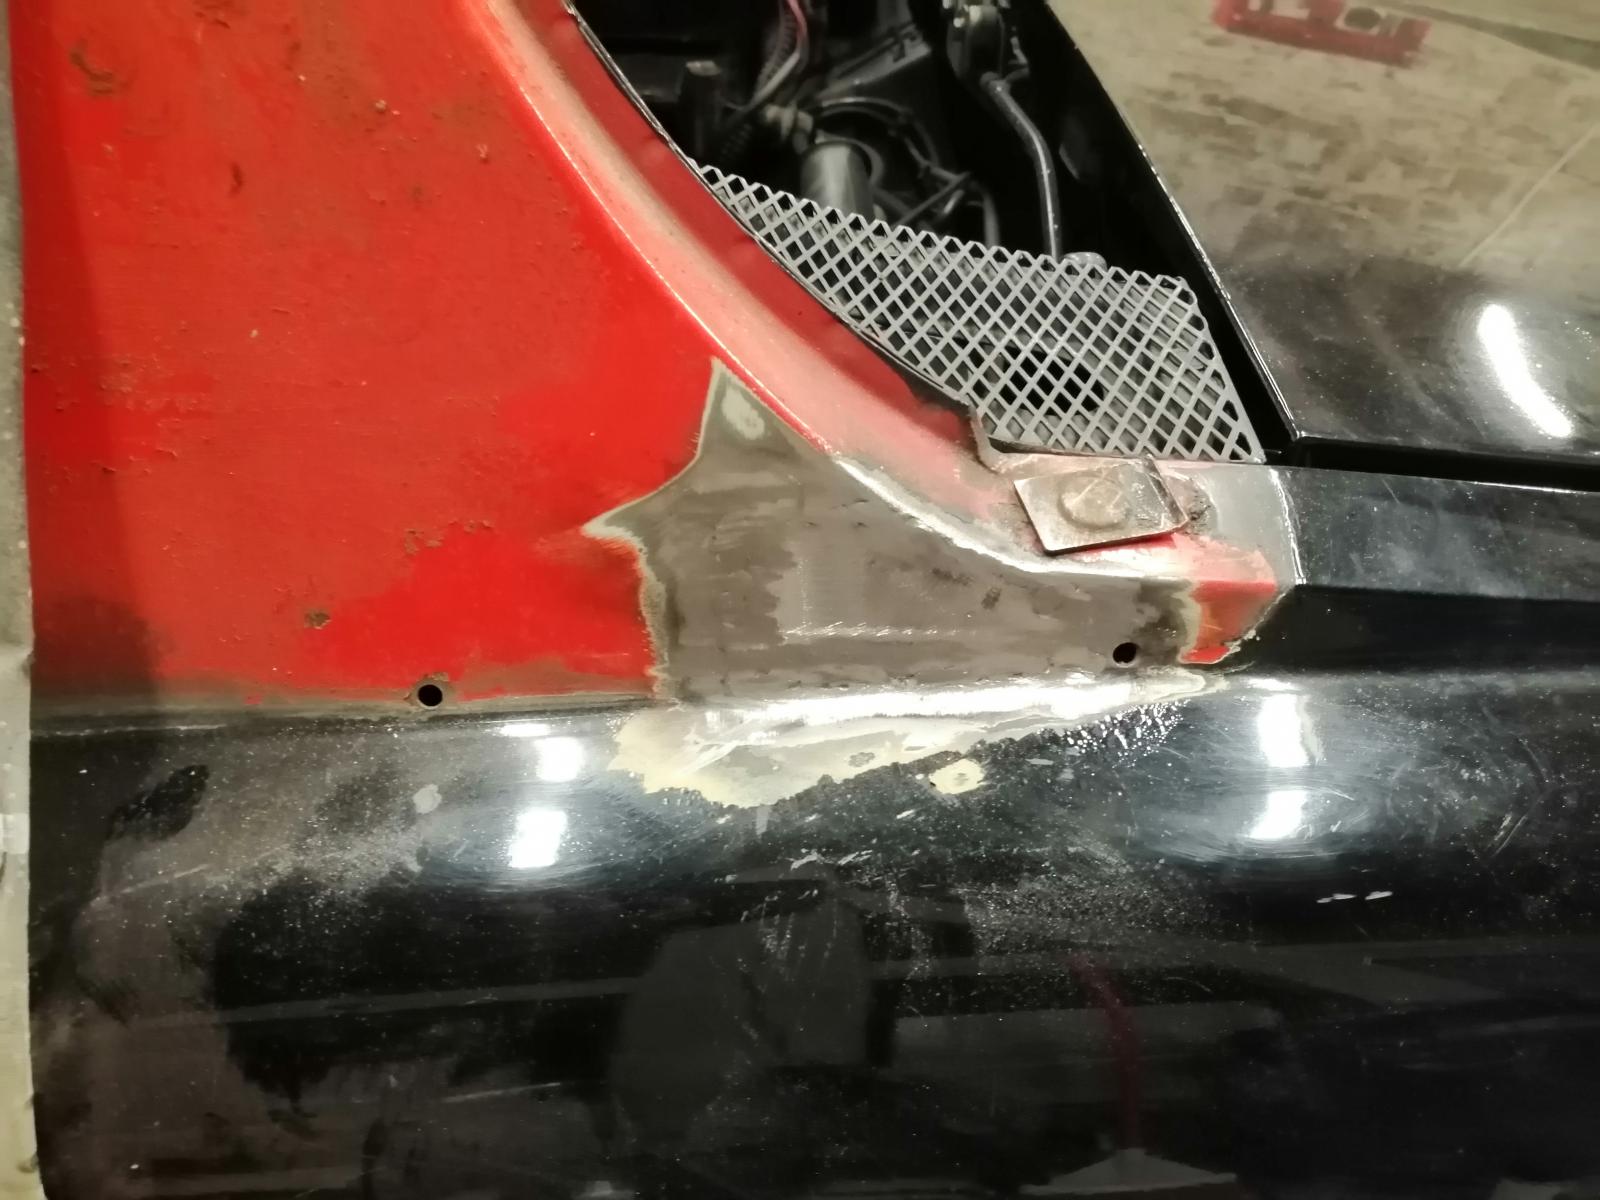
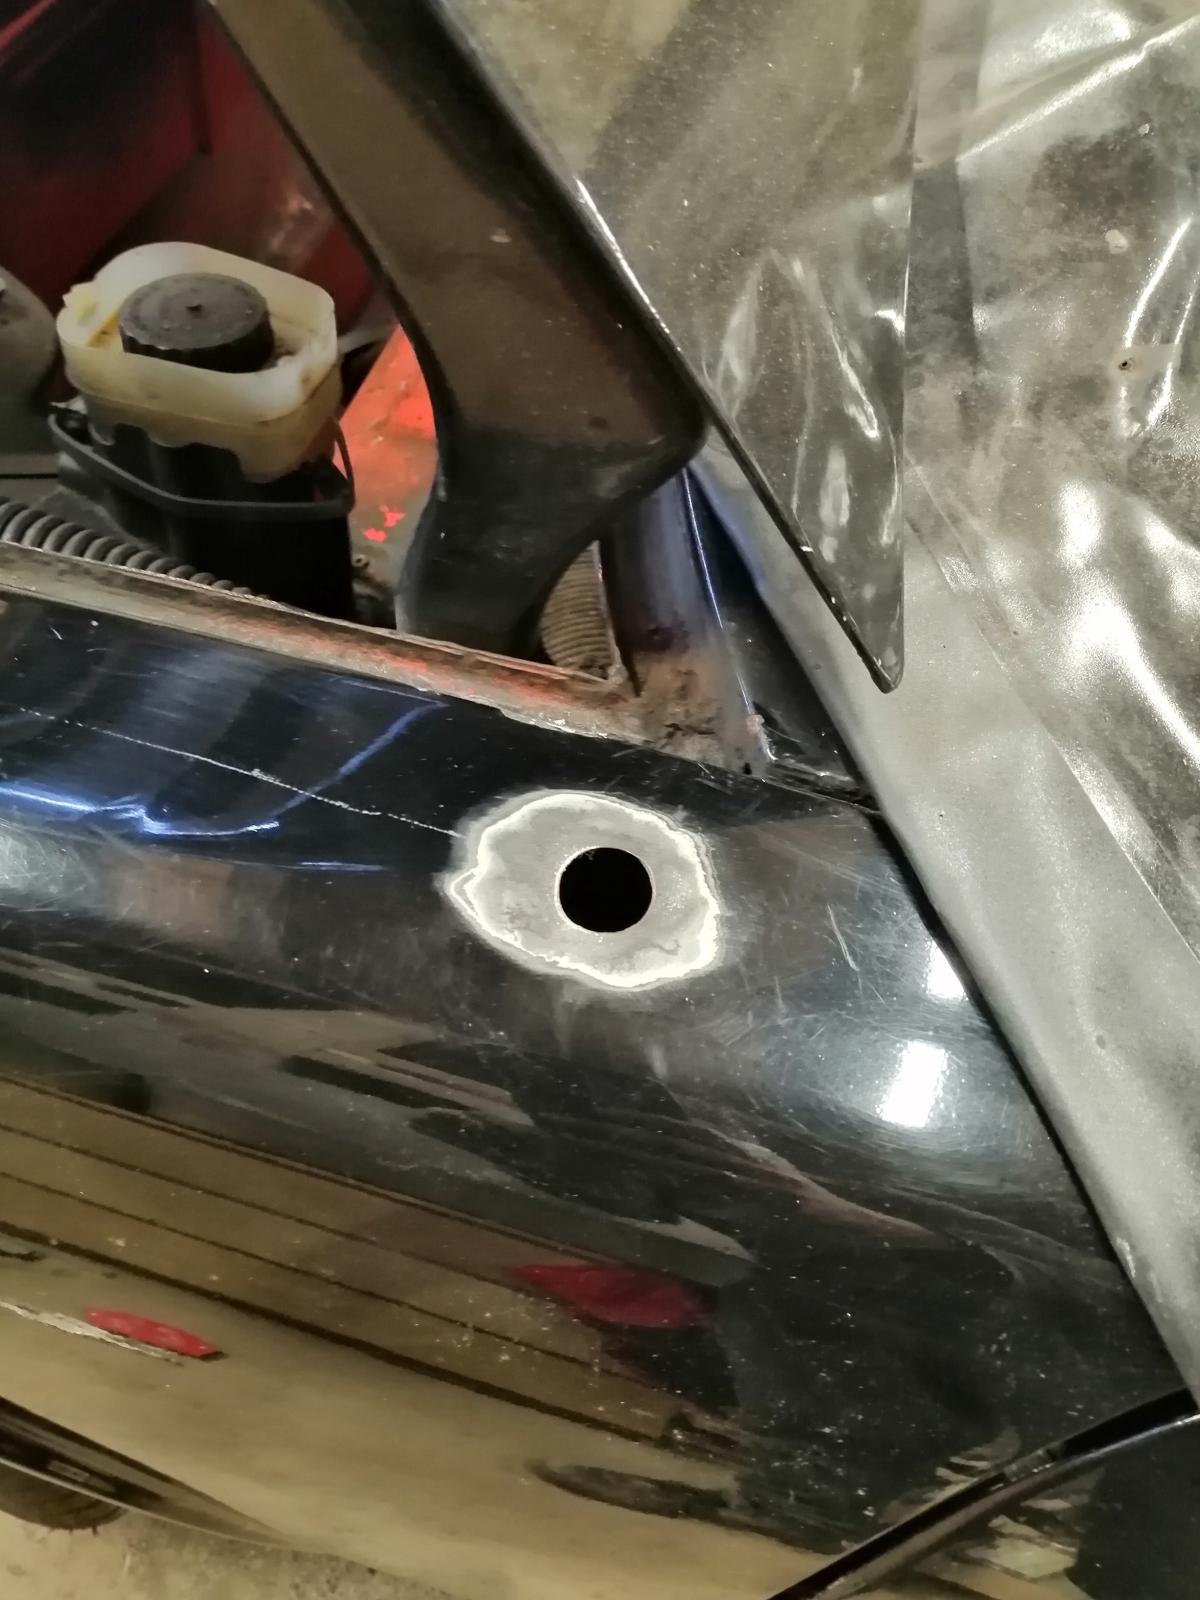
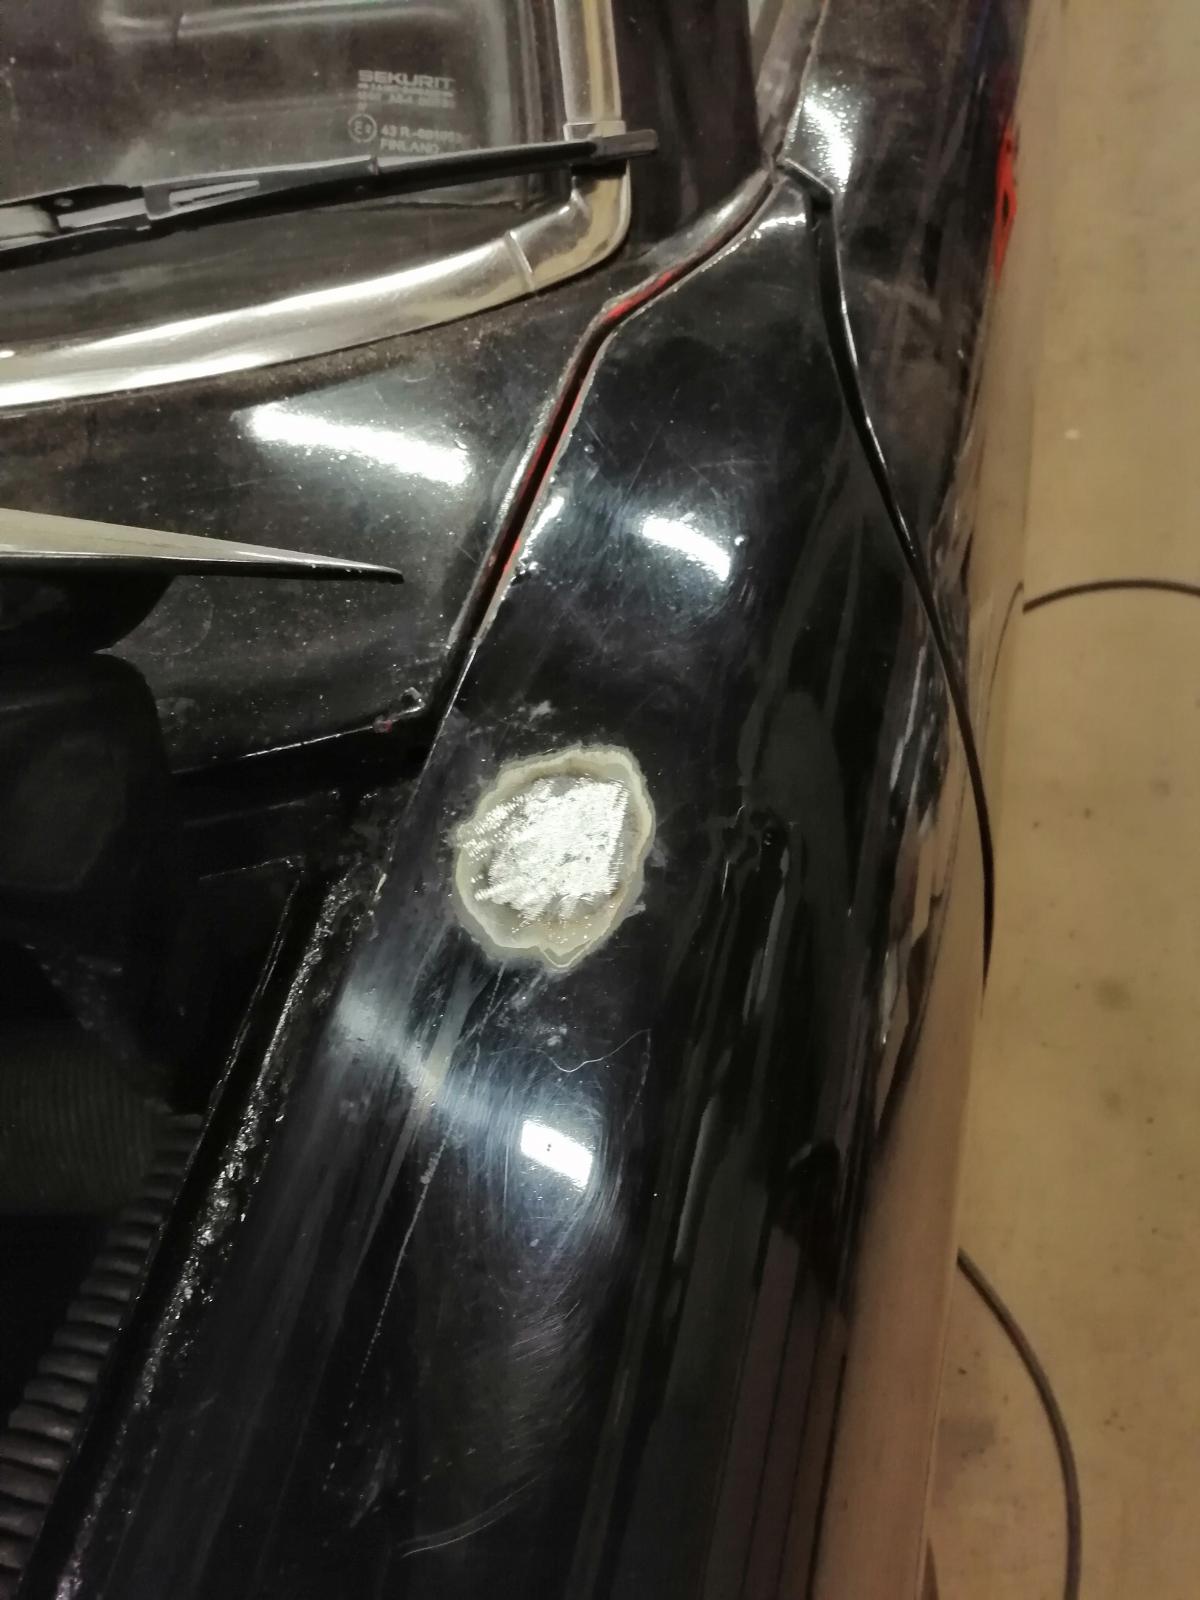
And here.. There was a lot of bondo and under it a "fix", by the way of a plate under the rust hole.. Here to see:

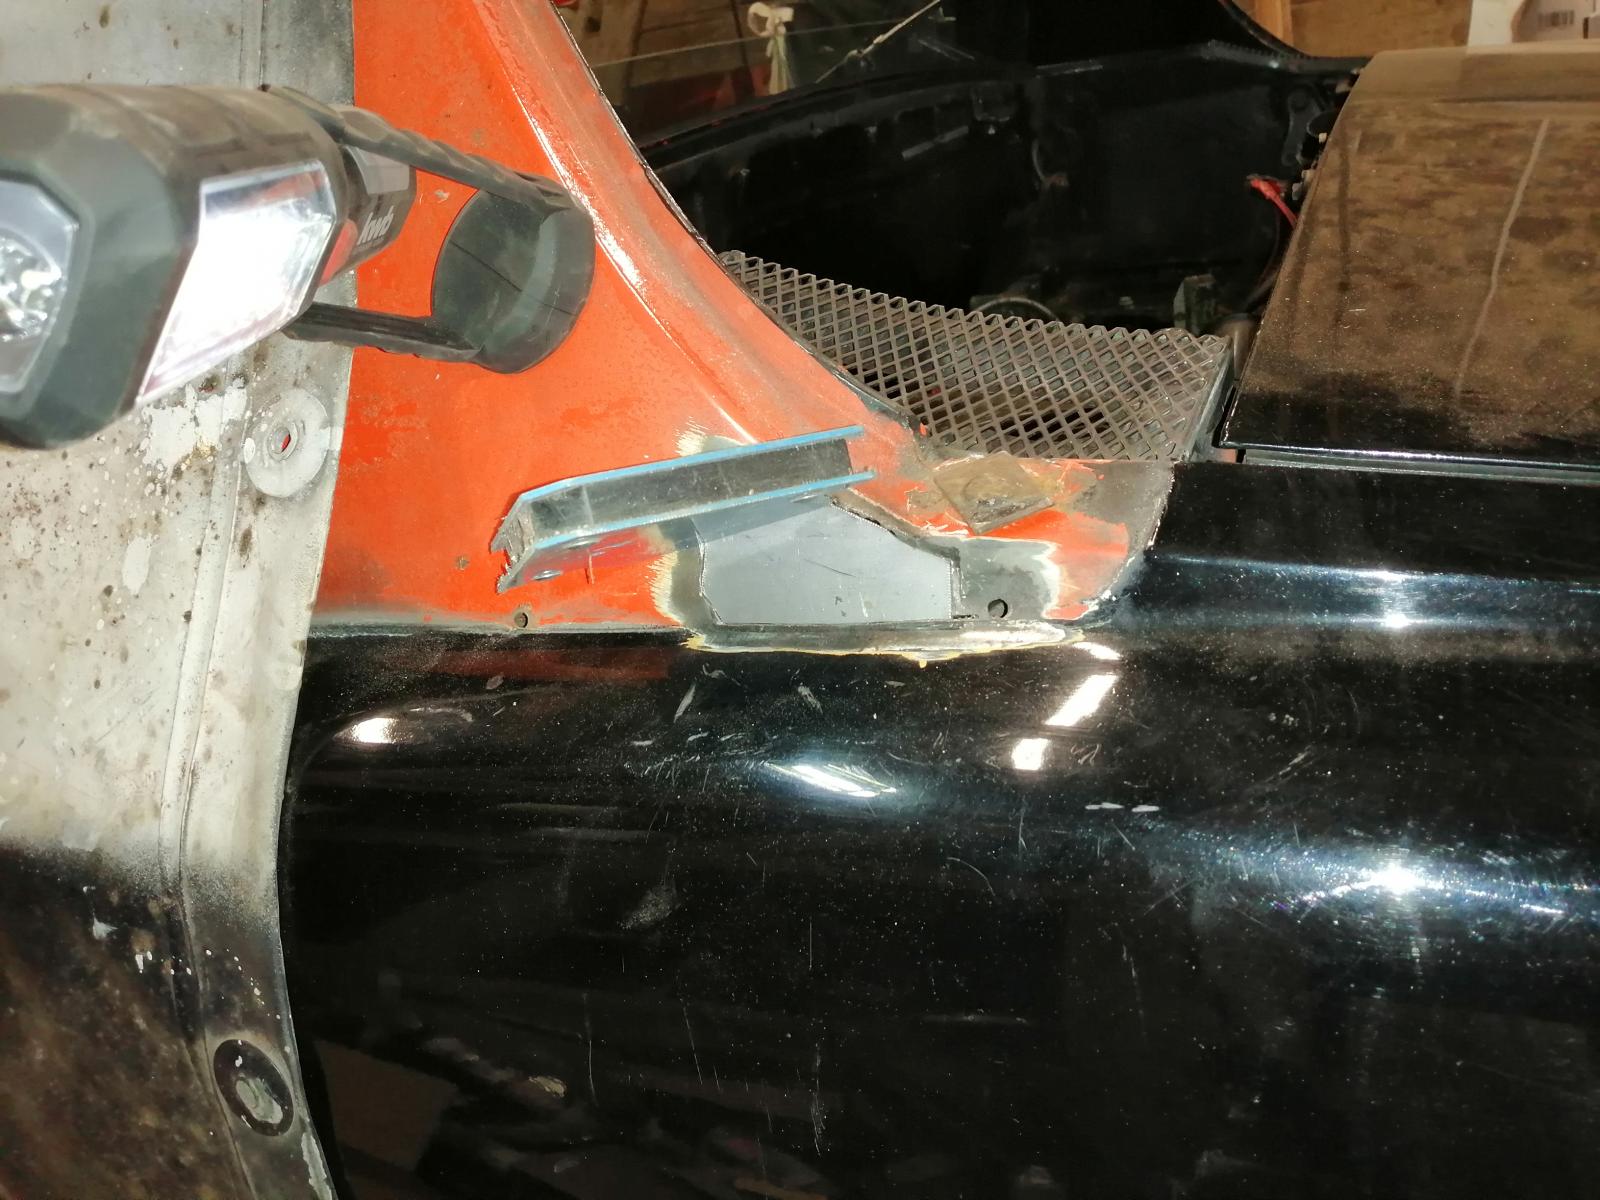
So I of course couldn't let it, so cut this bad work:
And TIG welded a real patch:
And put it in primer:

Same on the other side :
Big dent here was hidden under bondo:
So dolly/hammer:

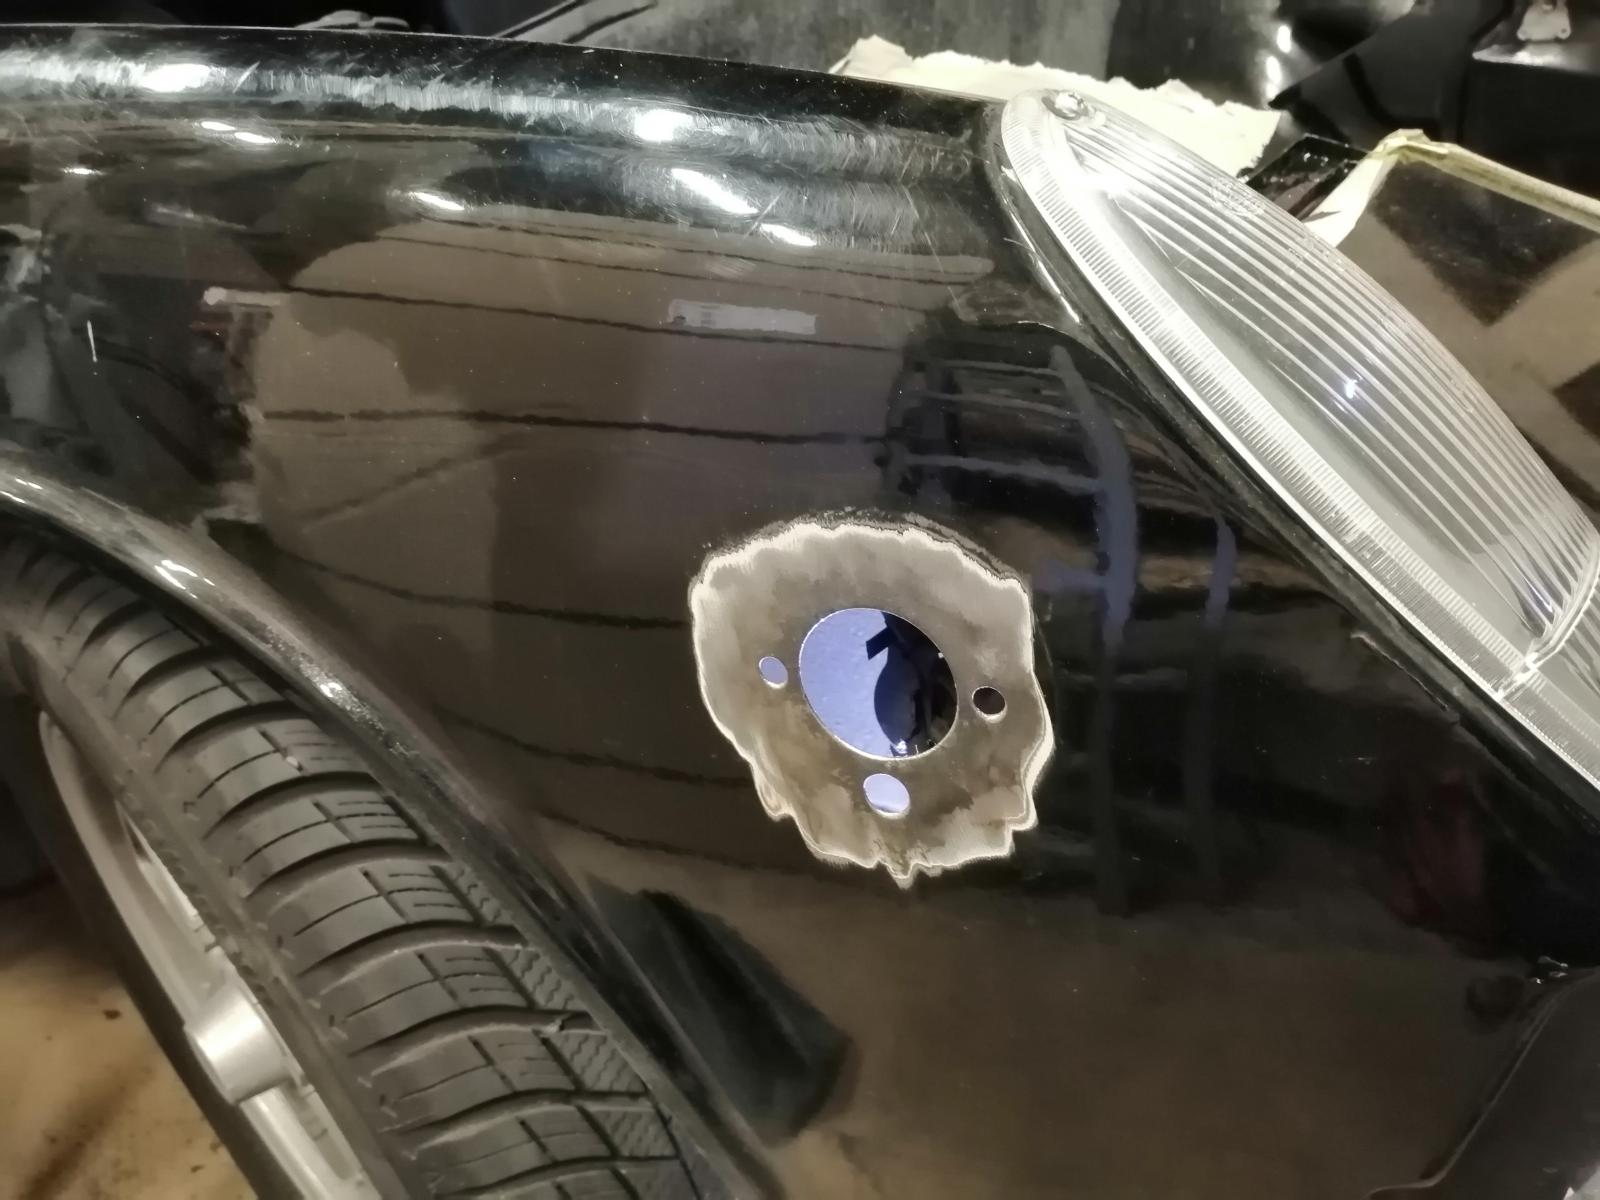
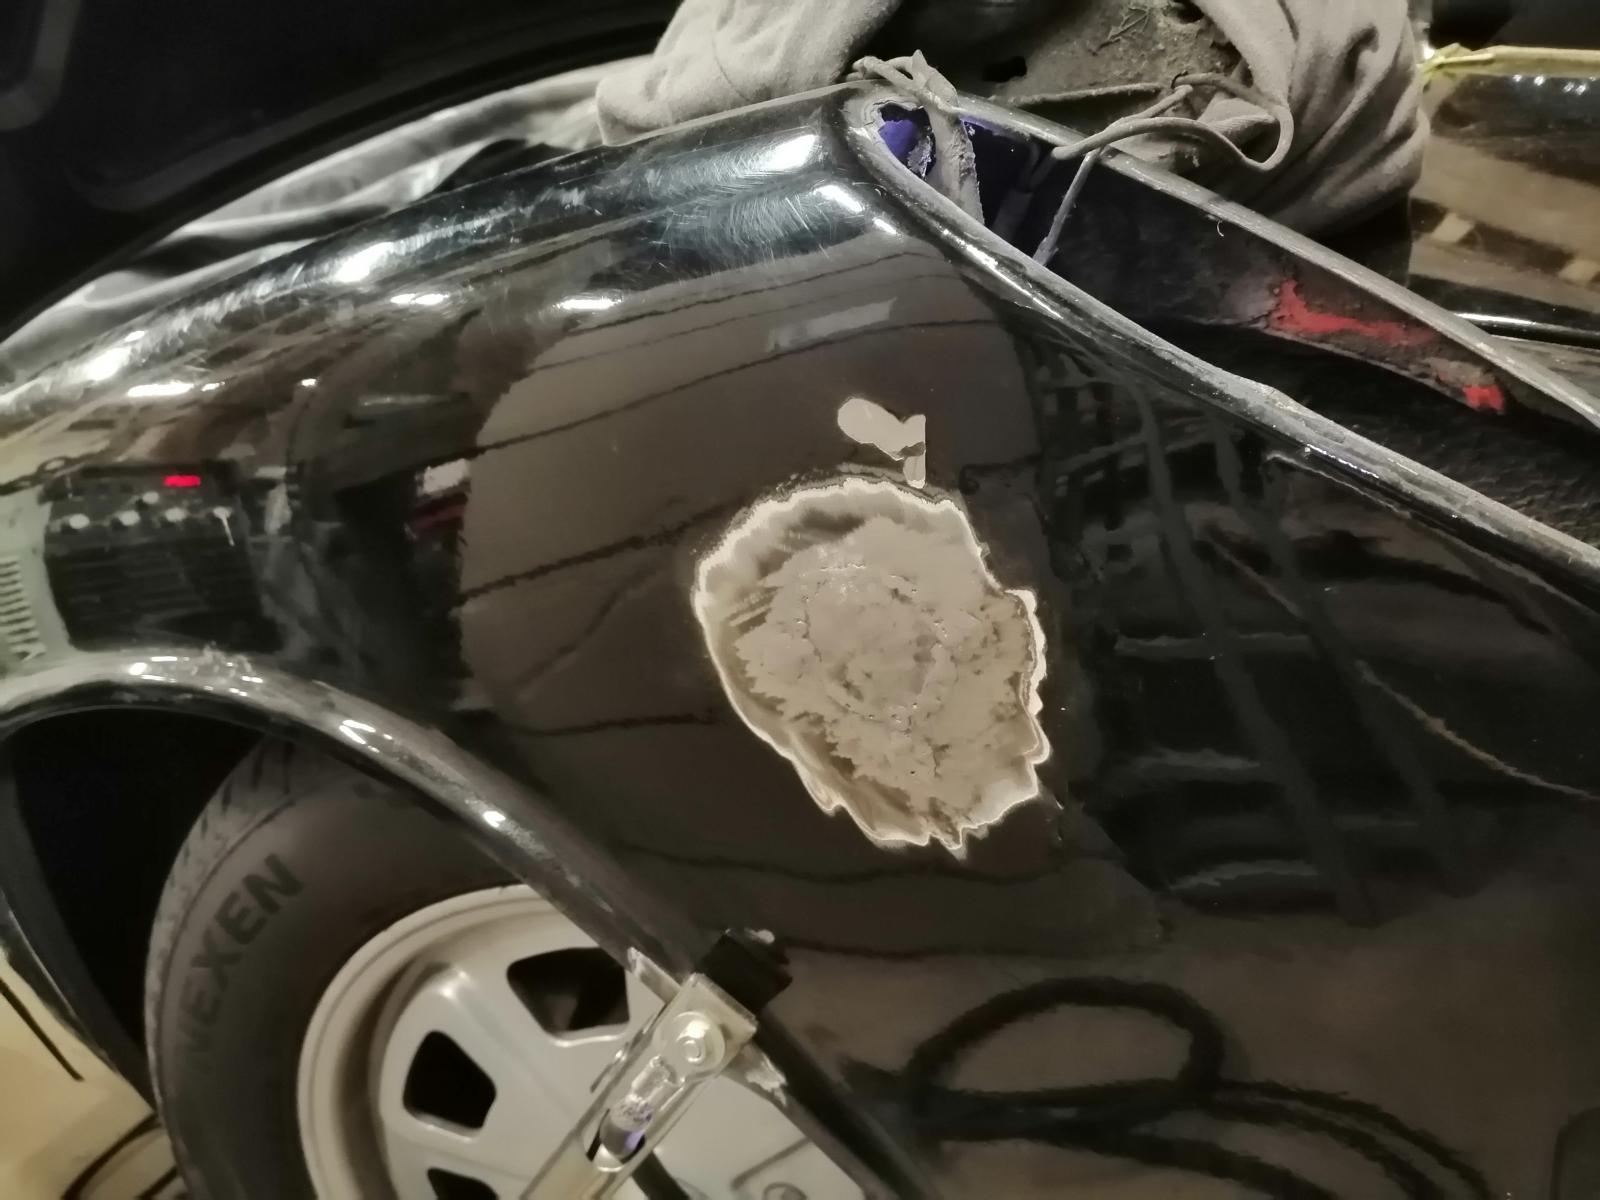
And in the back there was also a surprise:
Yes, again a plate welded quite behind the panel.. And on the bottom not welded :
So.. Patch prepared :
And welded:

Now we are flat:
Stay tuned, work is ongoing here!
Antoine
As I already did start the work on the front, I decided to make sûre nothing is hidden there under the paint..
Well of course some (bondo-) surprises were there...
Here a big dent, that I took care of using dolly/hammer:
And here.. There was a lot of bondo and under it a "fix", by the way of a plate under the rust hole.. Here to see:
So I of course couldn't let it, so cut this bad work:
And TIG welded a real patch:
And put it in primer:
Same on the other side :
Big dent here was hidden under bondo:
So dolly/hammer:
And in the back there was also a surprise:
Yes, again a plate welded quite behind the panel.. And on the bottom not welded :
So.. Patch prepared :
And welded:
Now we are flat:
Stay tuned, work is ongoing here!
Antoine
Amazing work, Antoine!!!
Seeing those pictures tells one why someone created the term "Hellhole".
Keep on the good work!
Arno
Seeing those pictures tells one why someone created the term "Hellhole".
Keep on the good work!
Arno
Fabulous metal forming! 

Thank you for all of the updates.
Coming along very nicely.
The fab work is great! Fantastic work and love the level of commitment. This was a beautiful car to start with, looks like it is becoming both beautiful and solid!
Thanks a lot to all of you! It clearly motivates and I am feel lucky being able to take on this project and share it with you!
So, that was the next logical step..primer on the passenger side fender (and all around the windshield after taking it also to bare metal ) :

And I took care of a few holes on the driver's side firewall:


For the bottom part, I will wait to have the body on the cart/body frame as not only the bottom of the firewall but also the floor is affected. More on that later
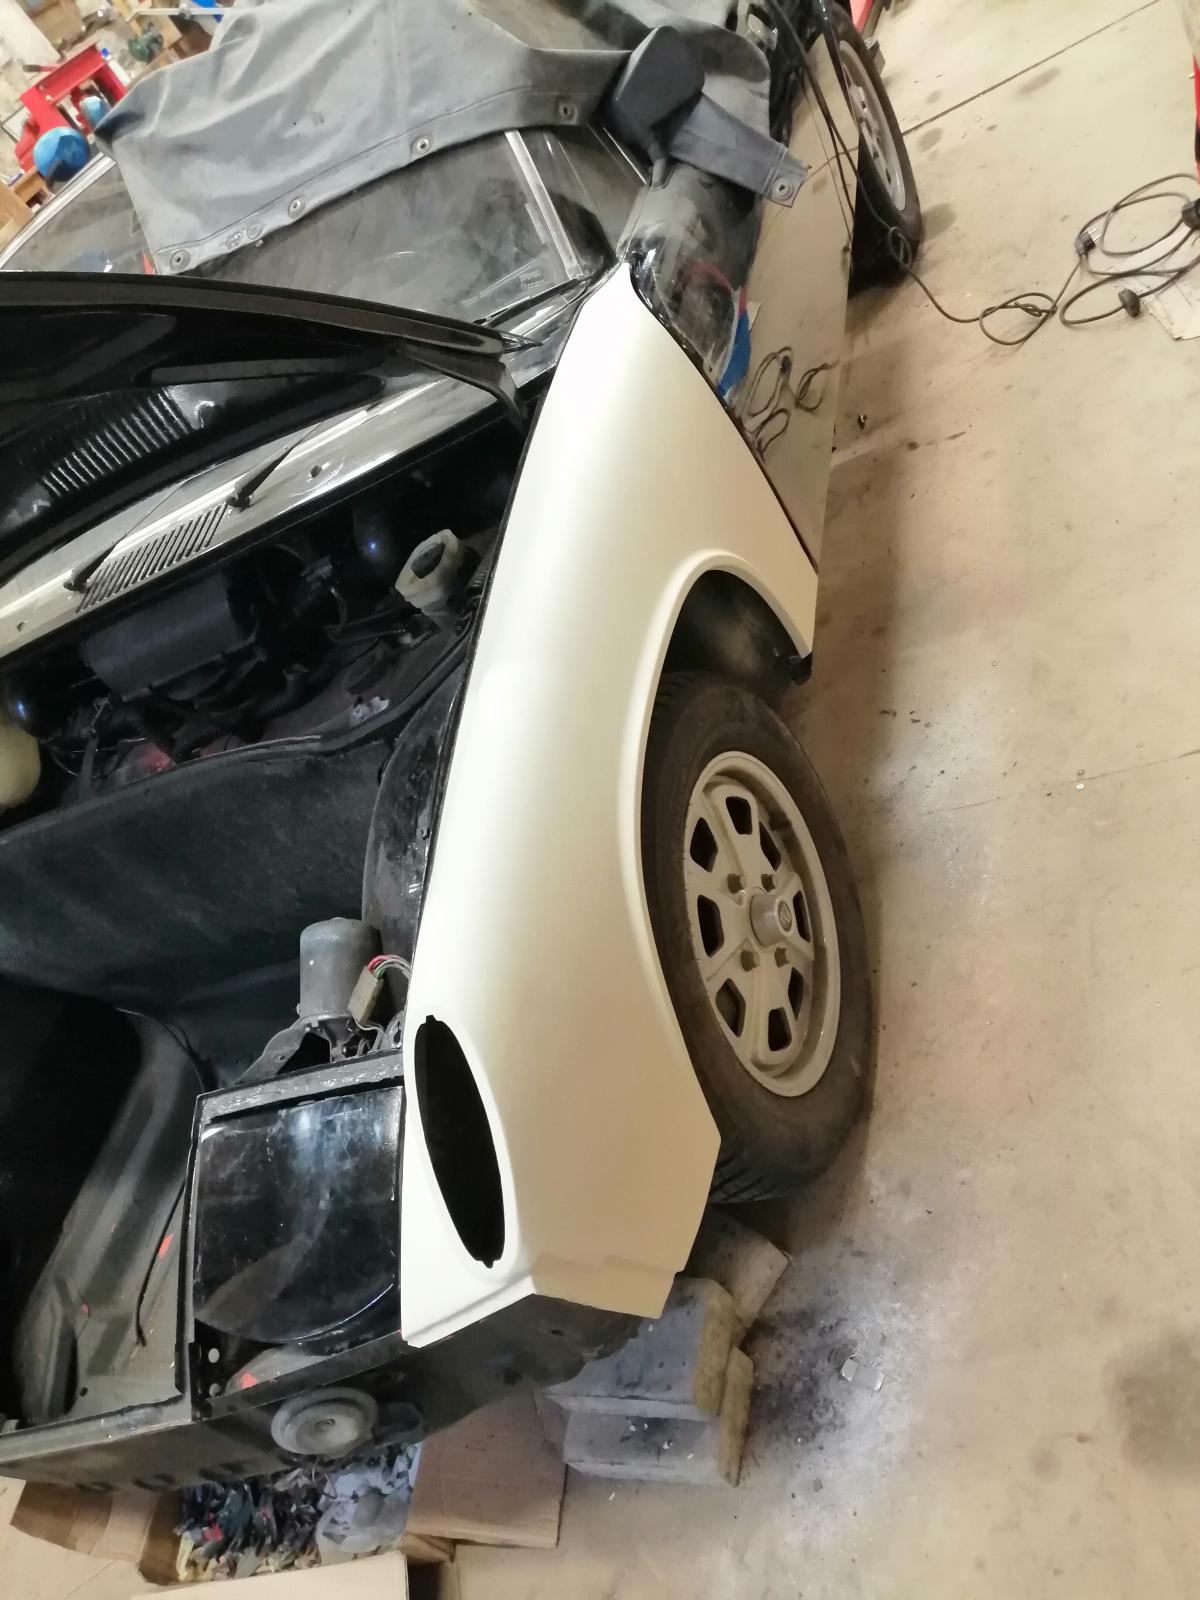
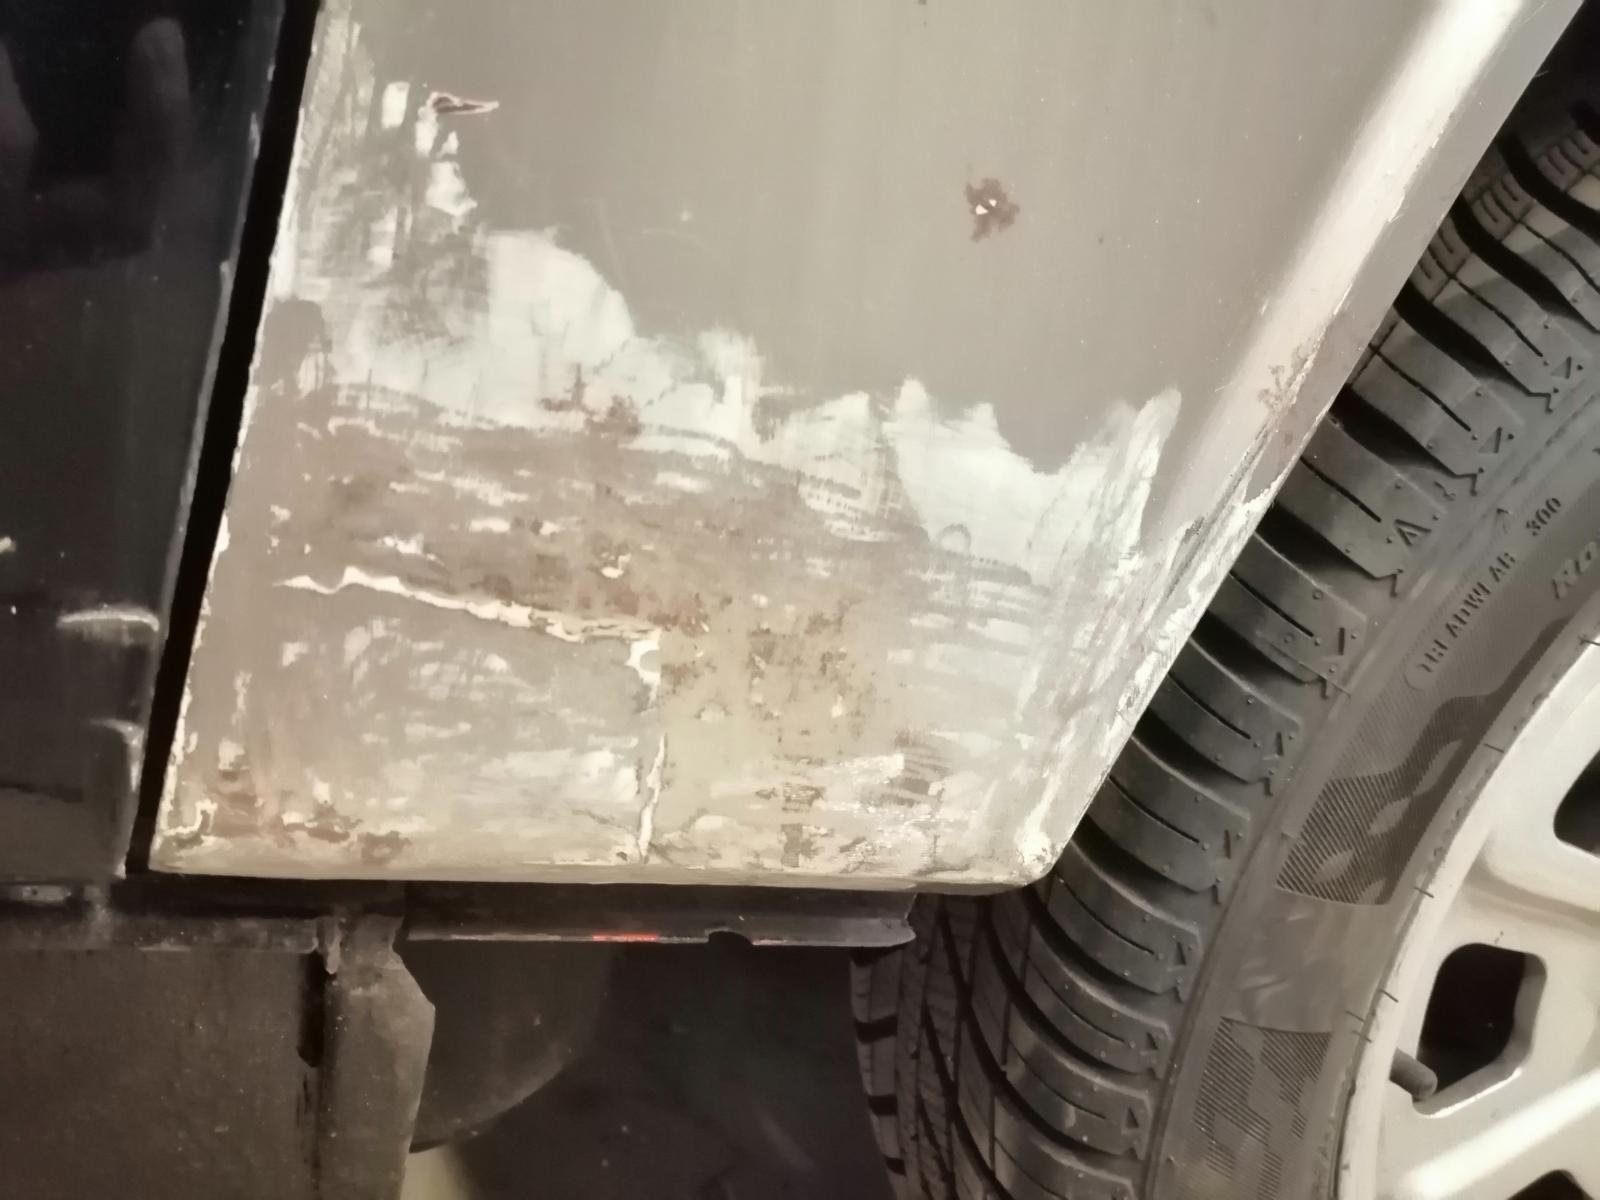
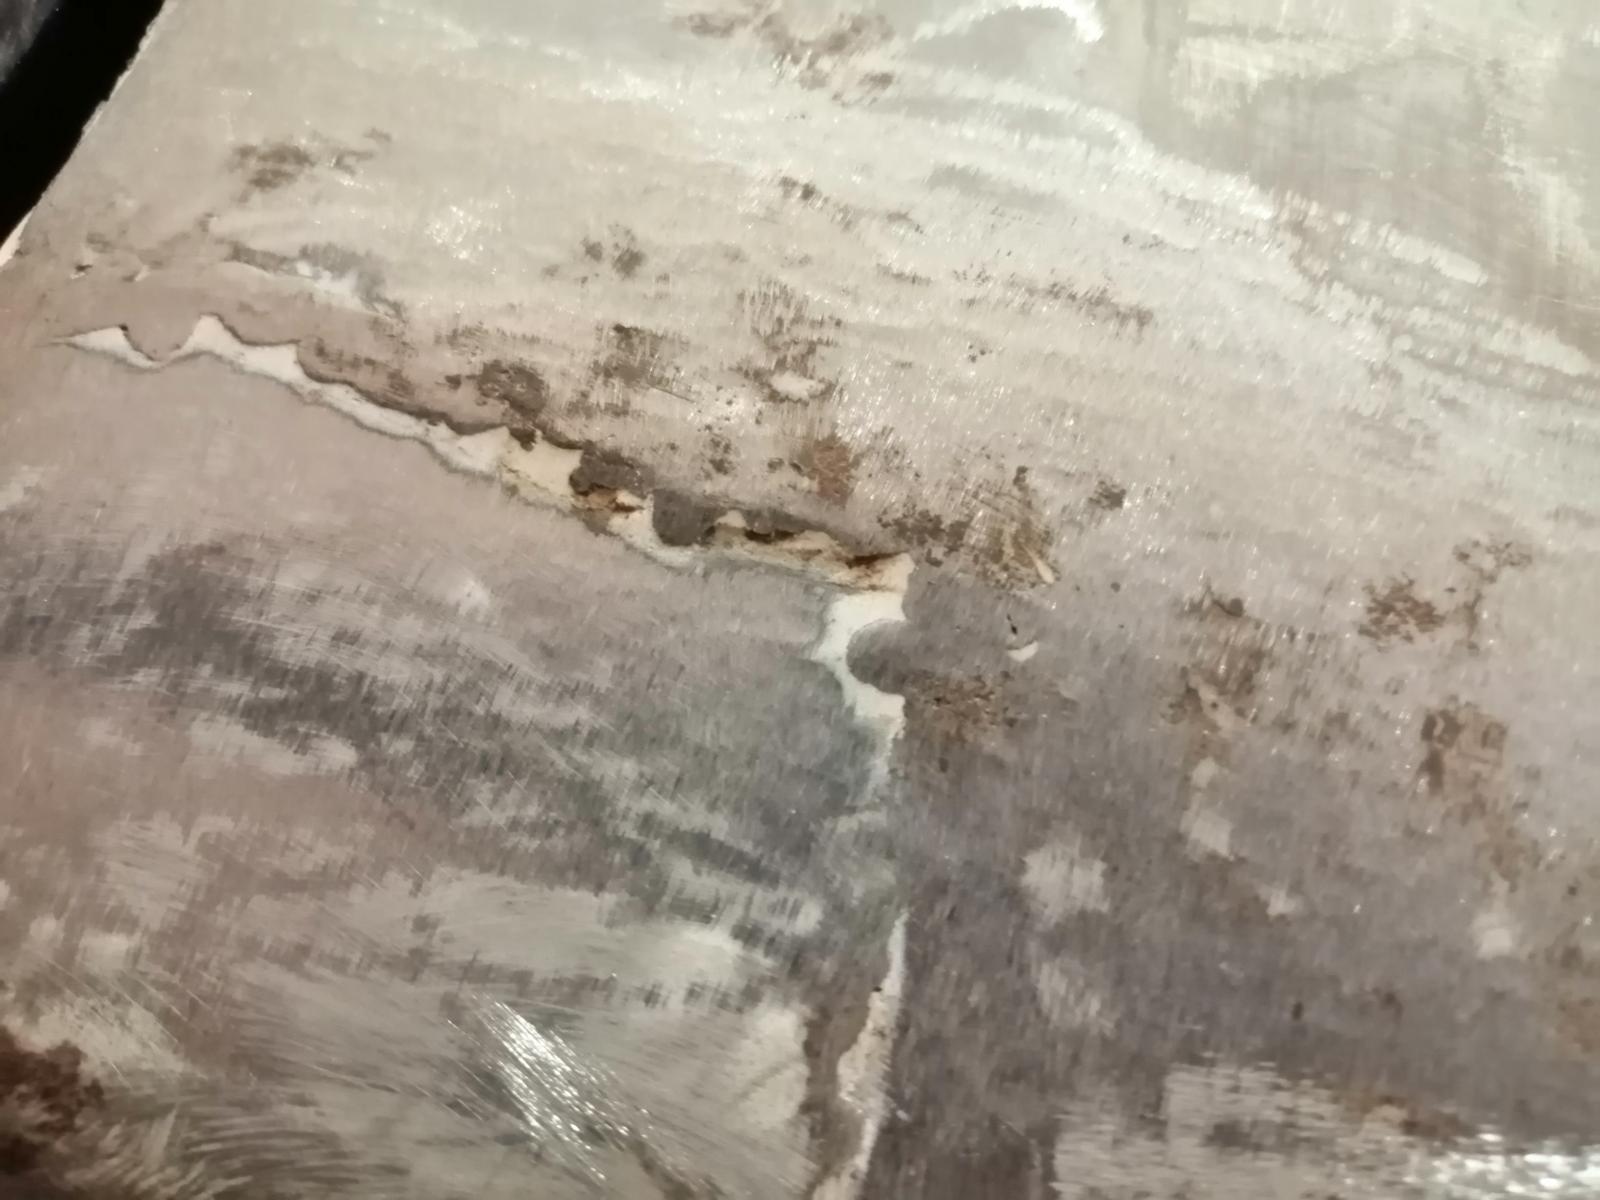
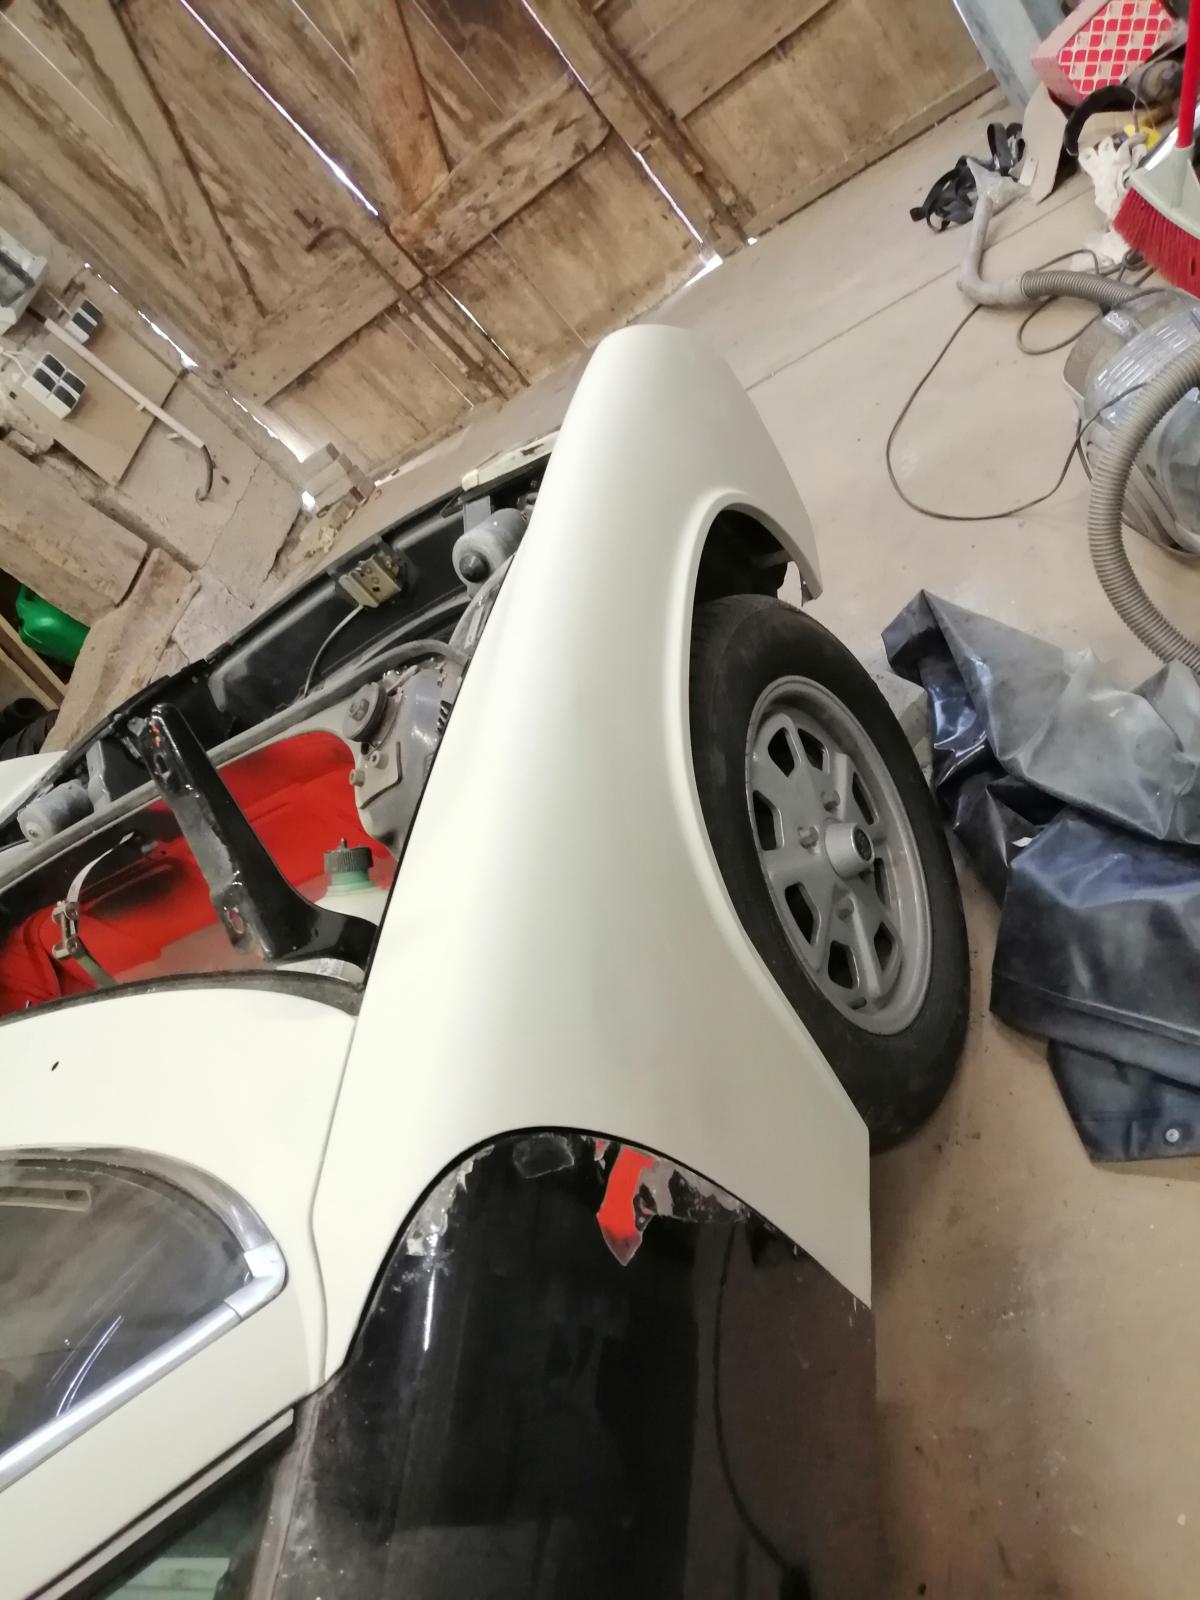
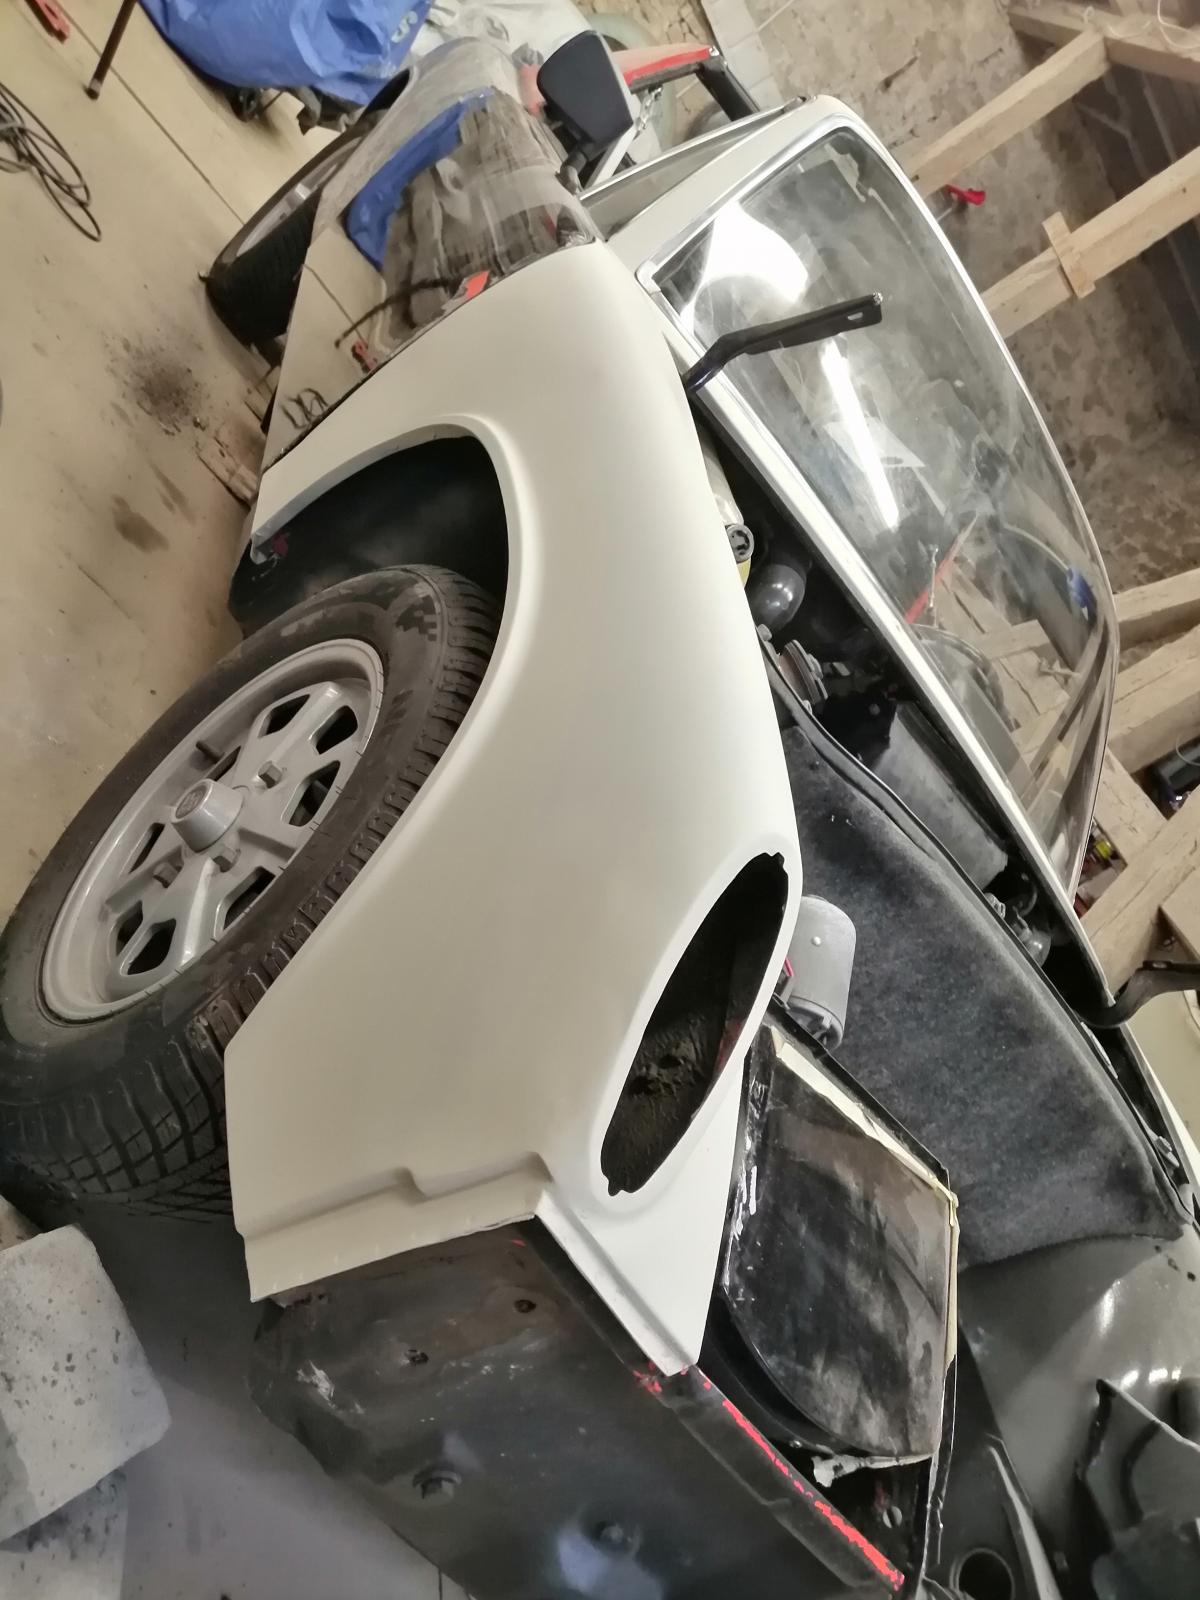
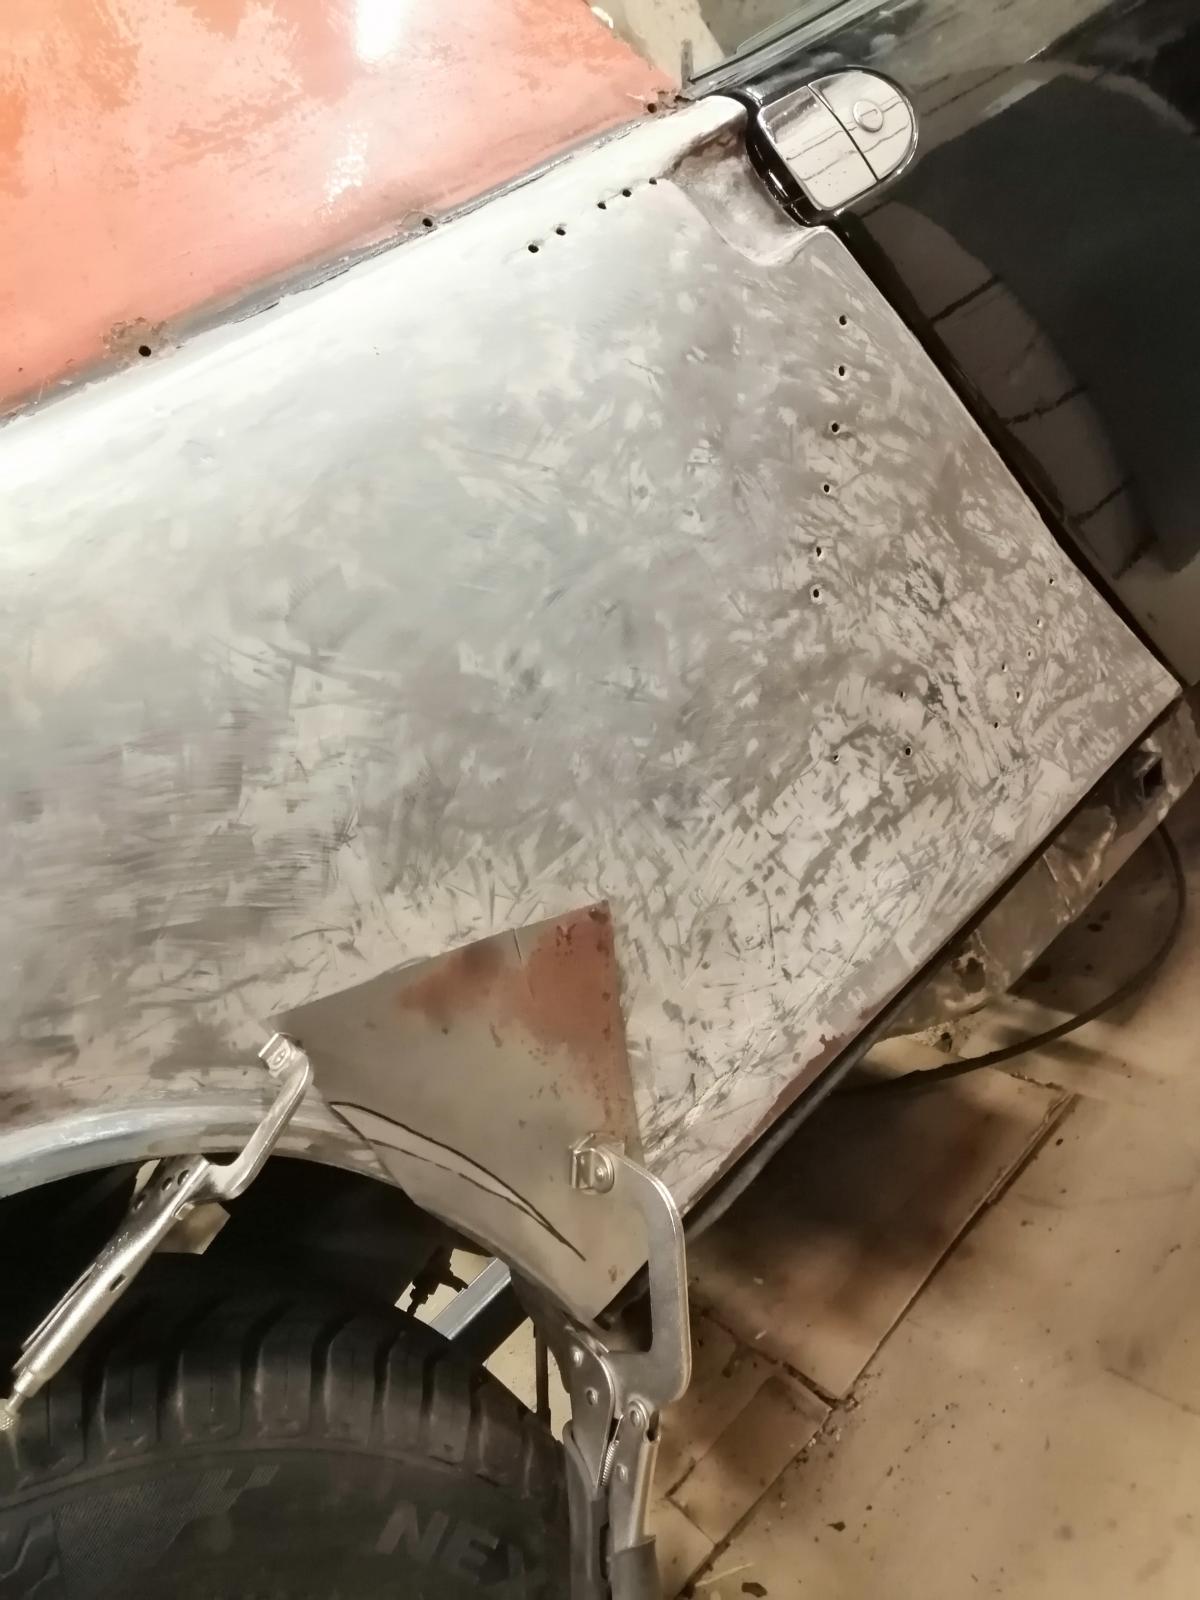
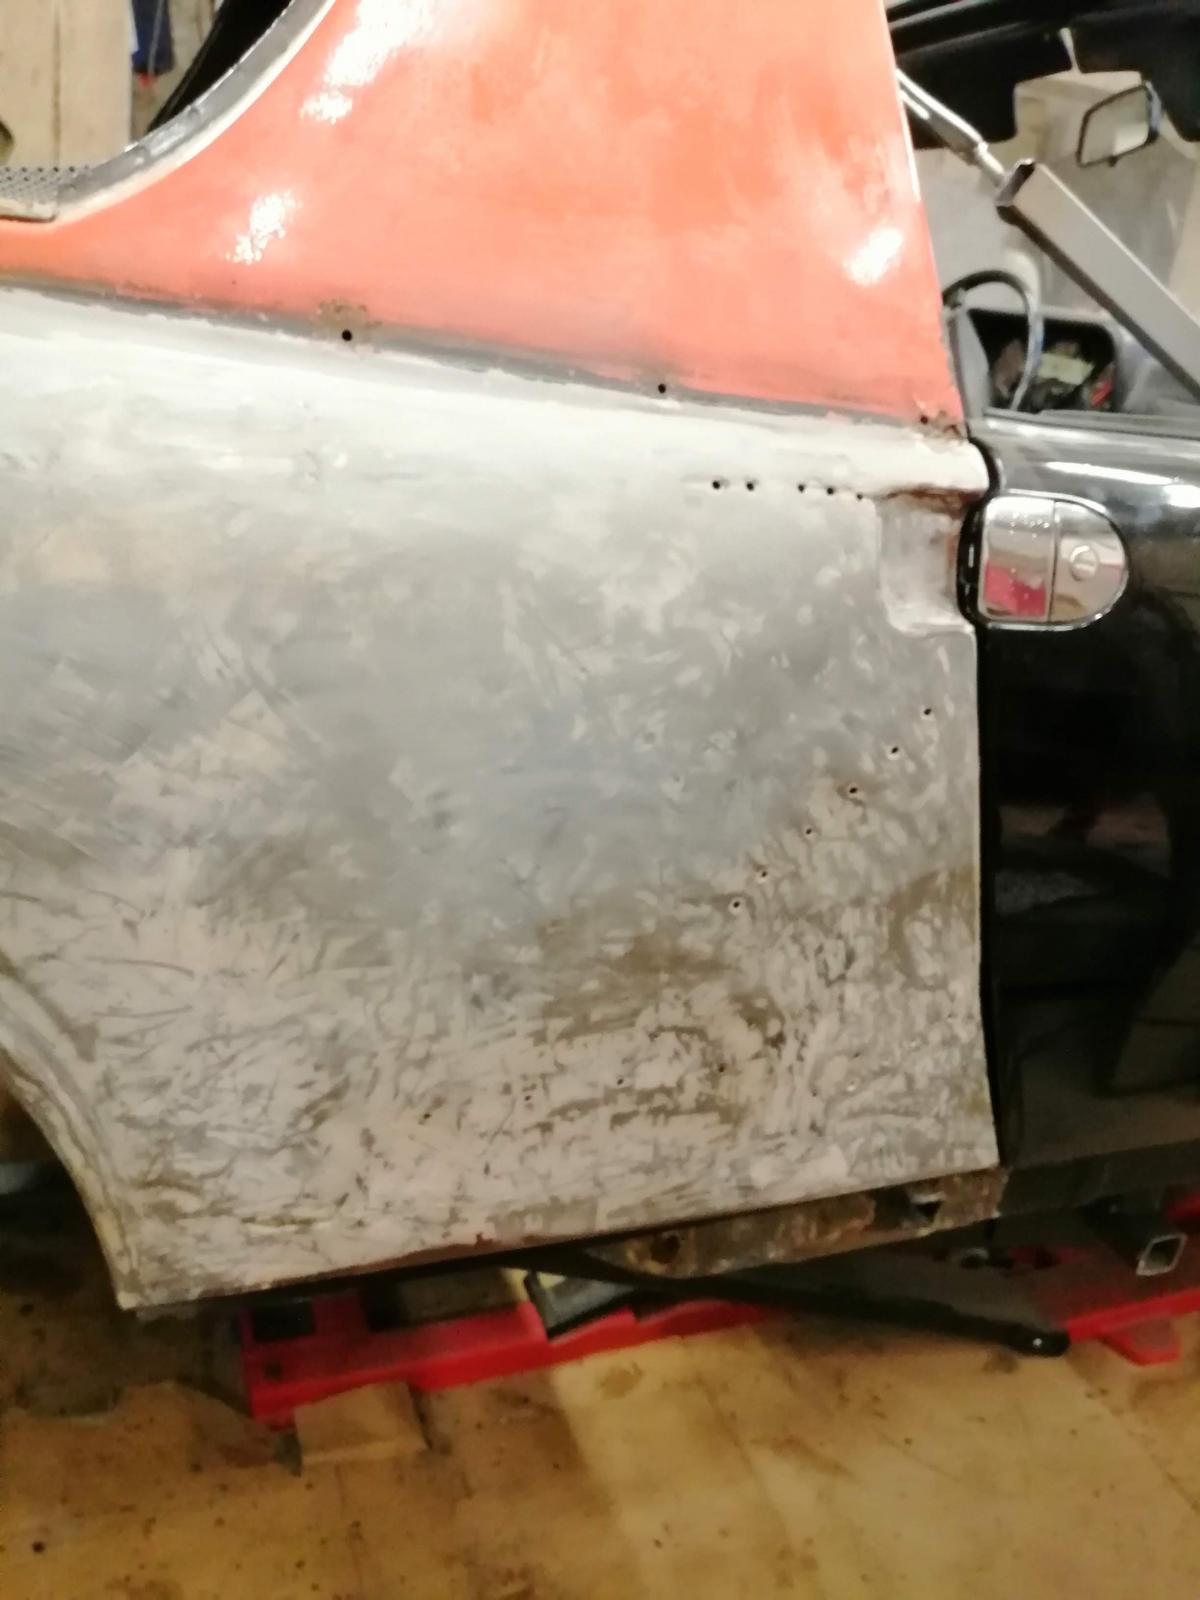
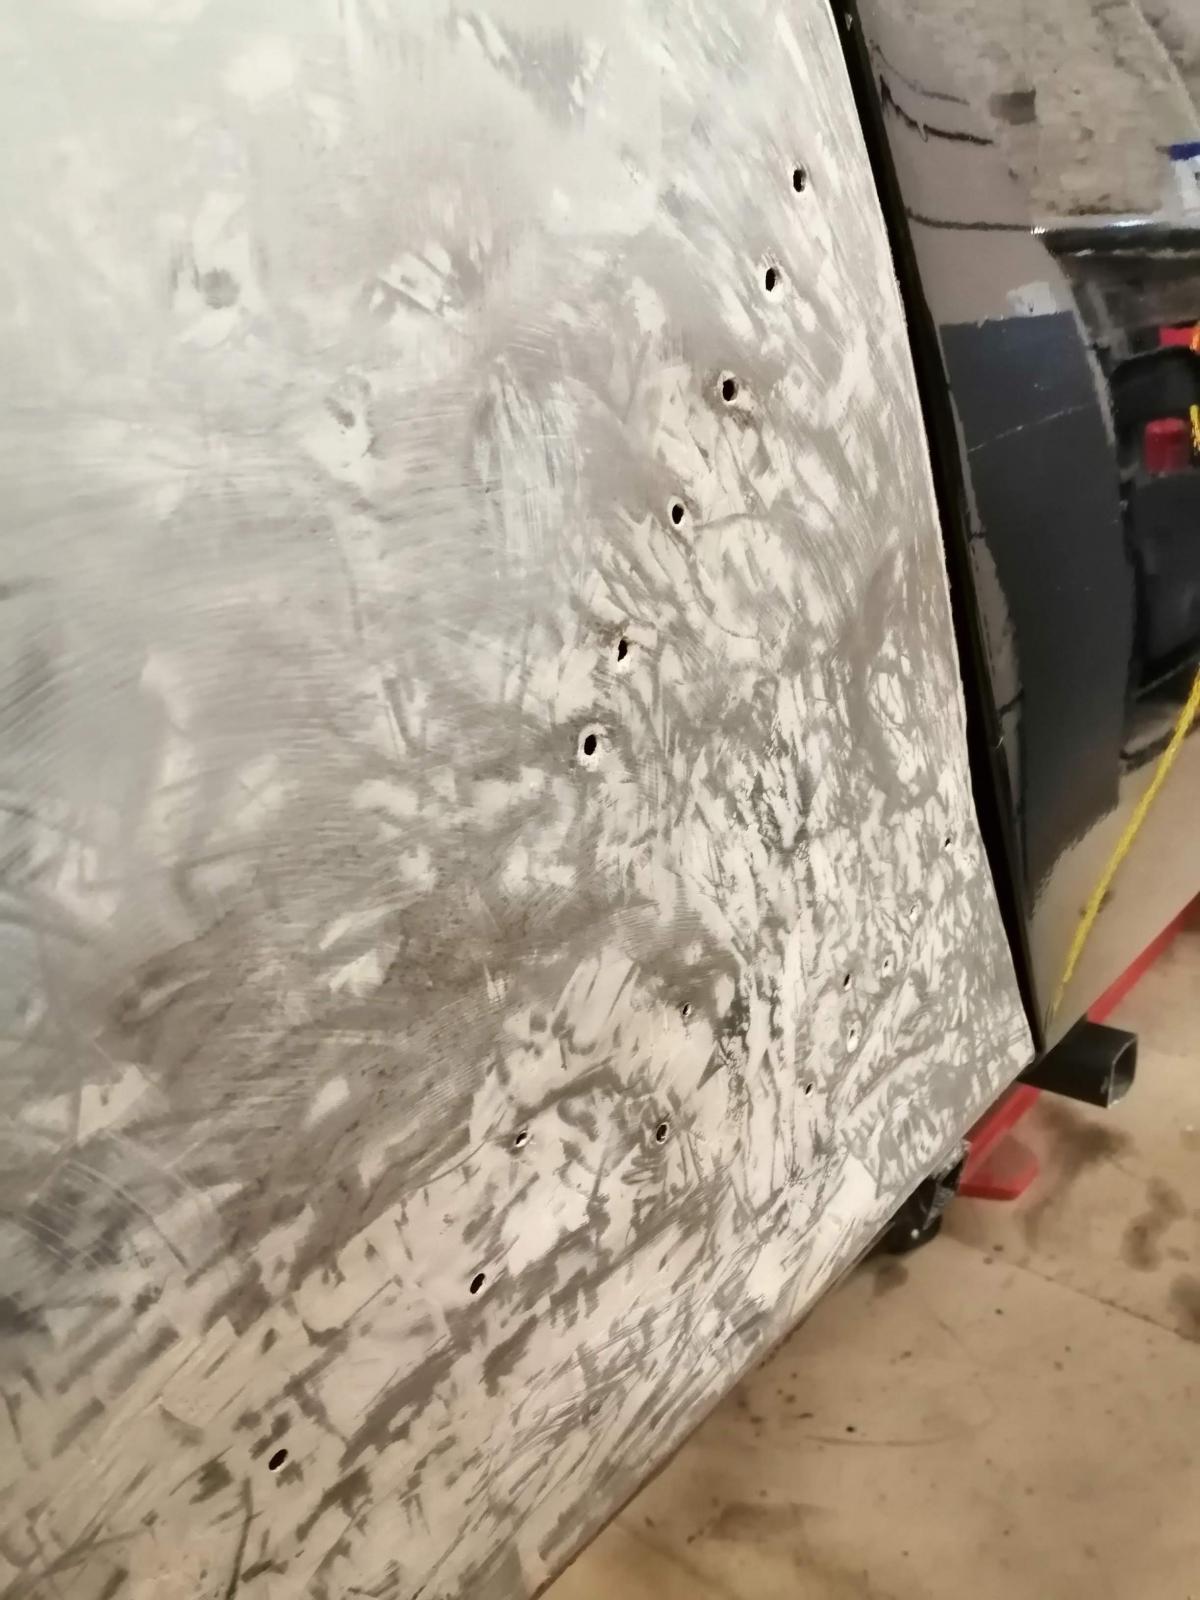
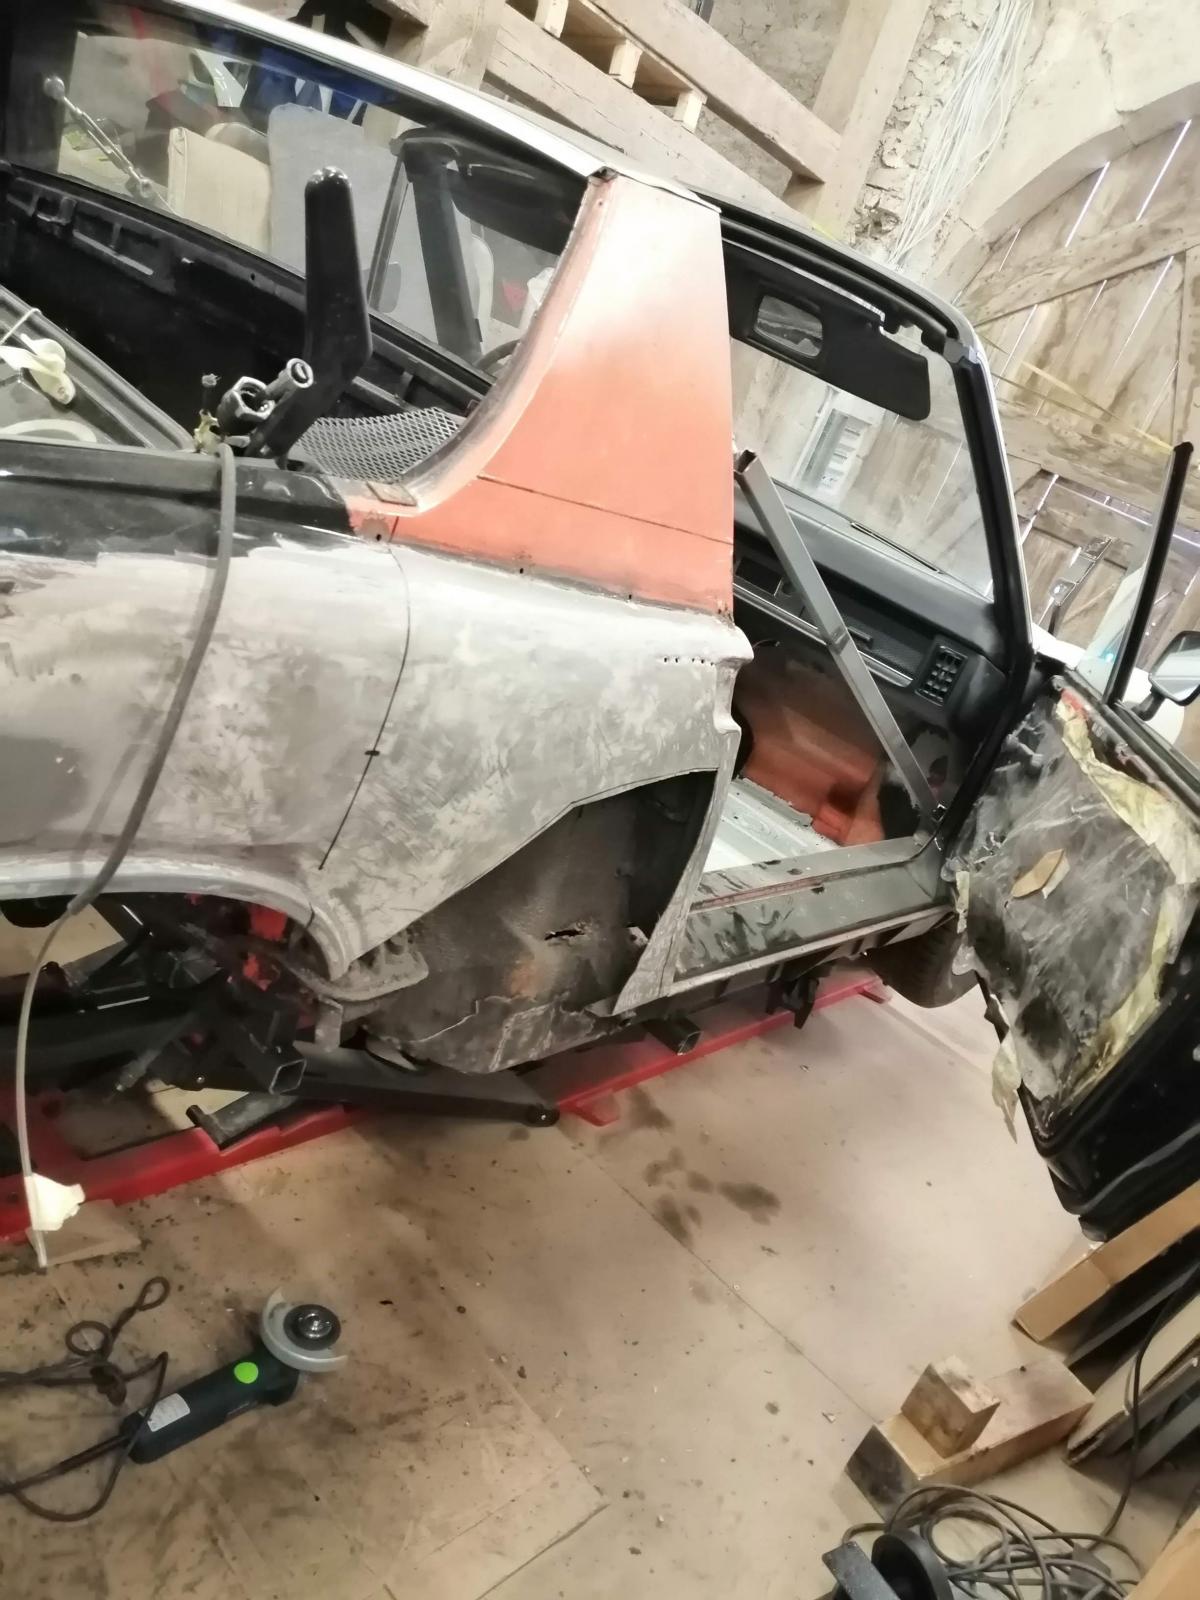
Before starting the body frame /hell hole fix, I wanted to check how the quarter is (part of me knowing I might have to cut it to repair right the right long).. Here the result, quite impressive..
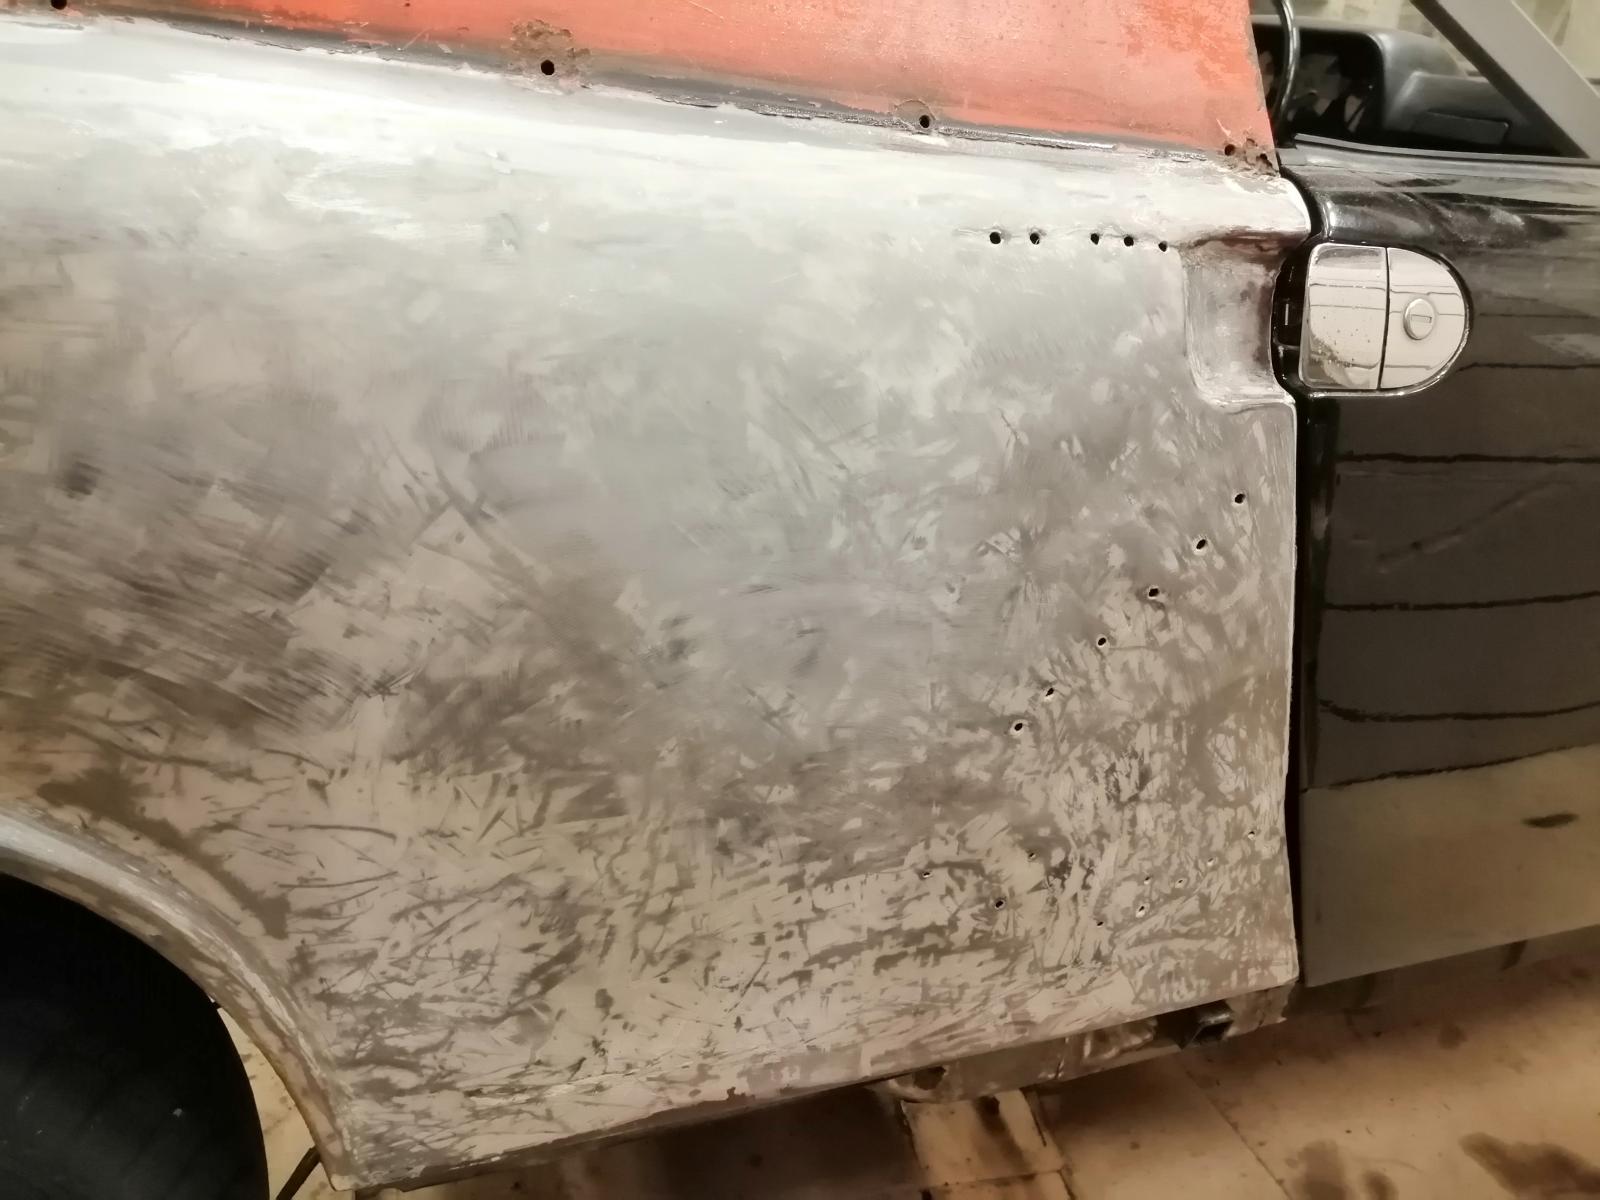
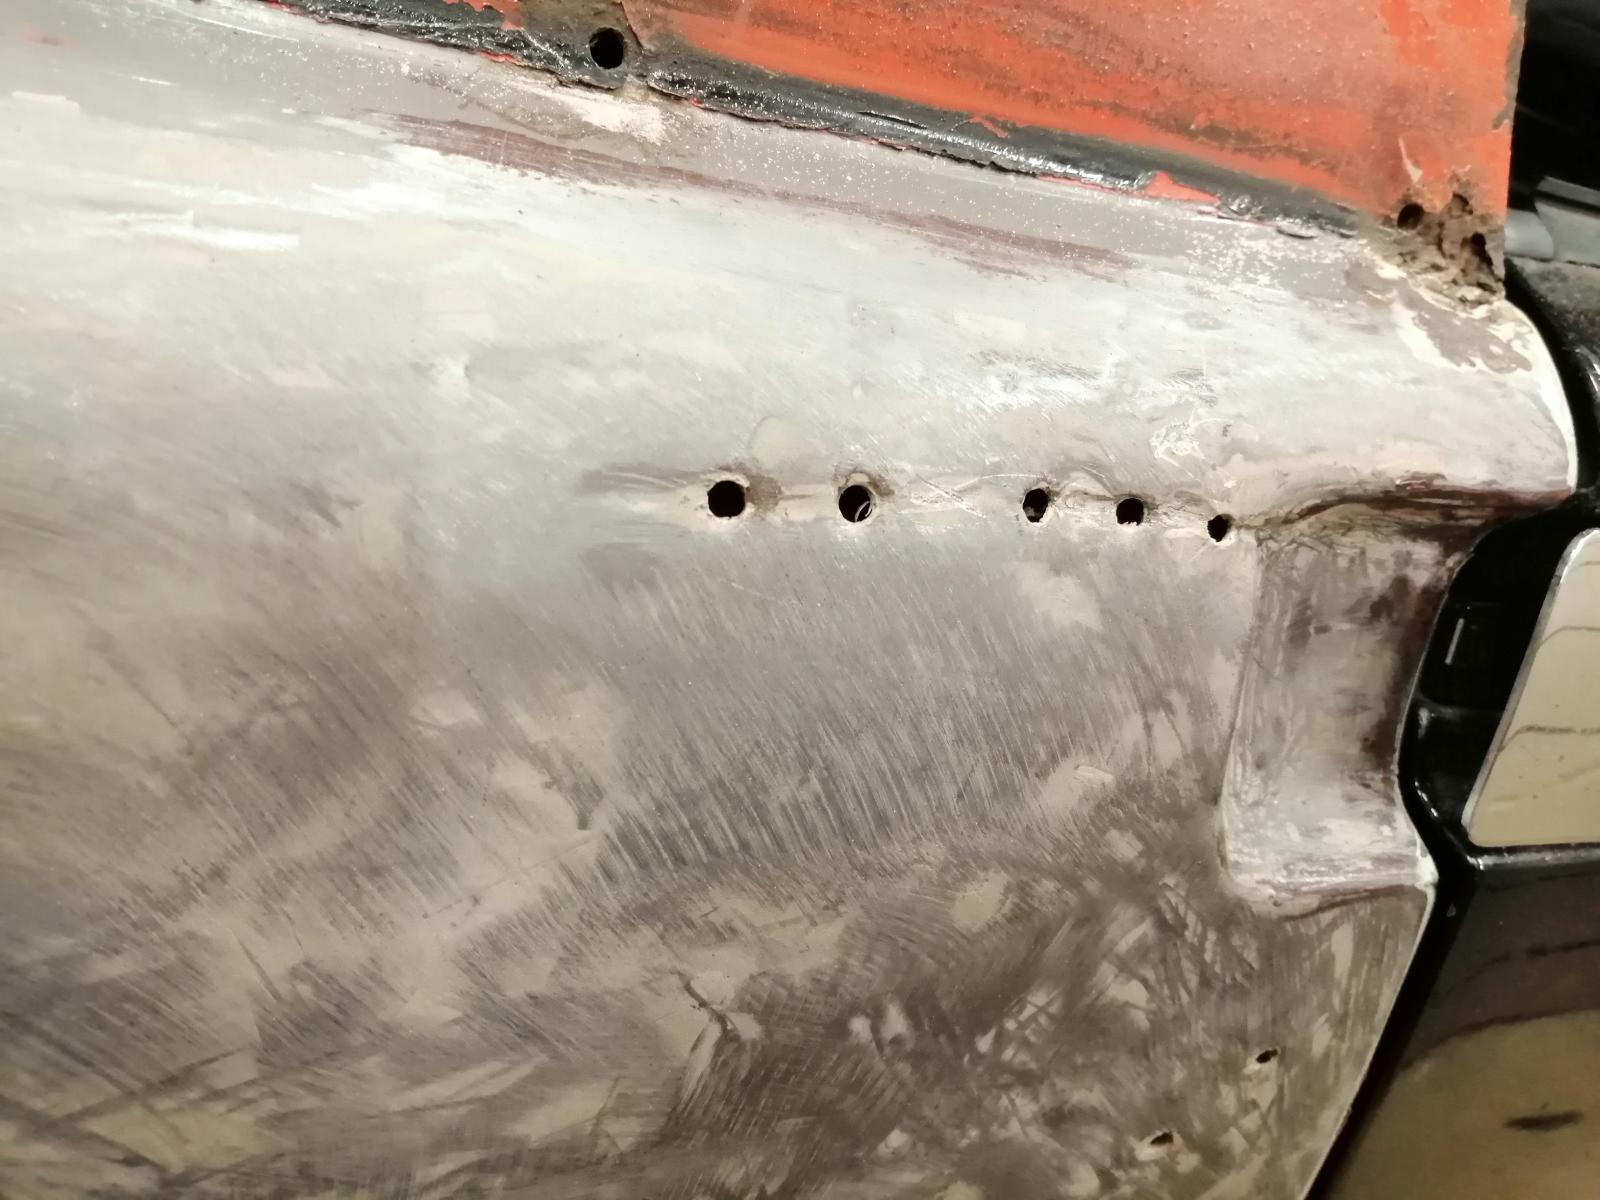

So now I know it.. I will build from scratch that quarter panel and cut it, repair the long, weld my new panel.
Just for fun I made a small test panel to try the shape of the wheel opening:
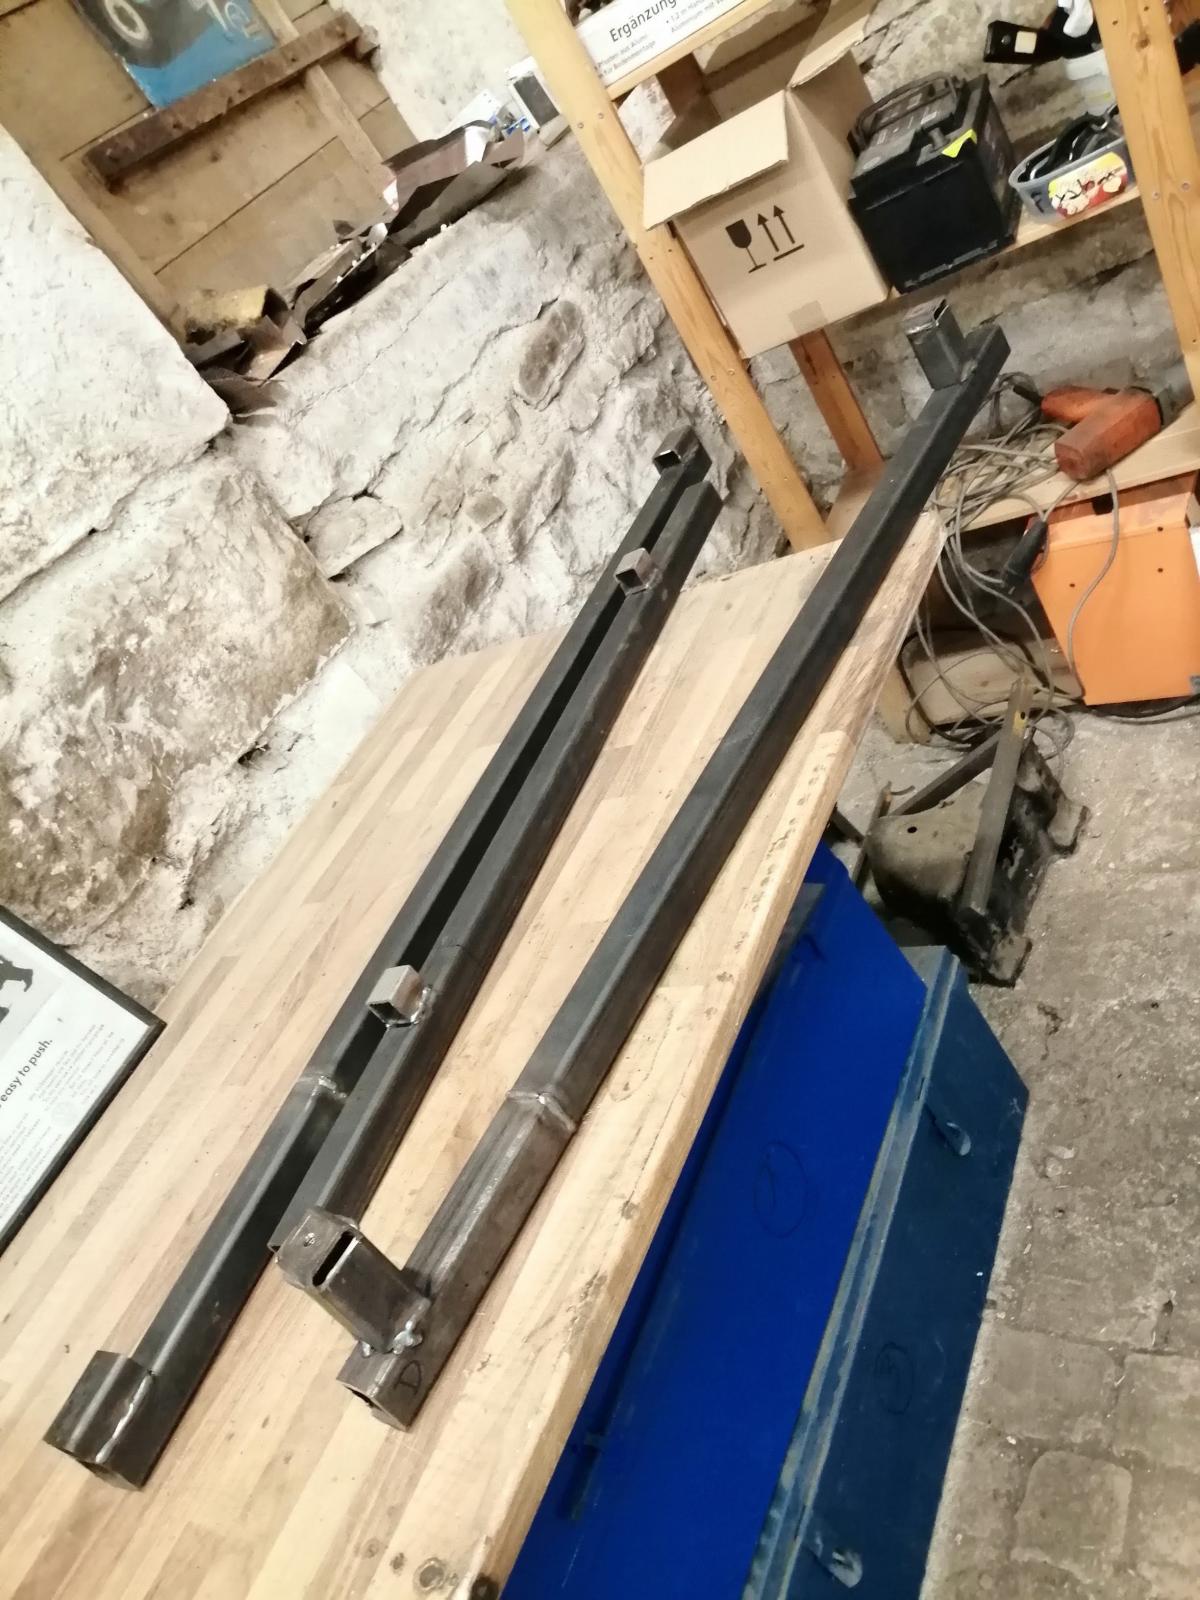
But I hadn't a large enough sheet metal piece to start on the quarter panel so I starte on my body frame..
Fresh metal came:
Welded the long part:
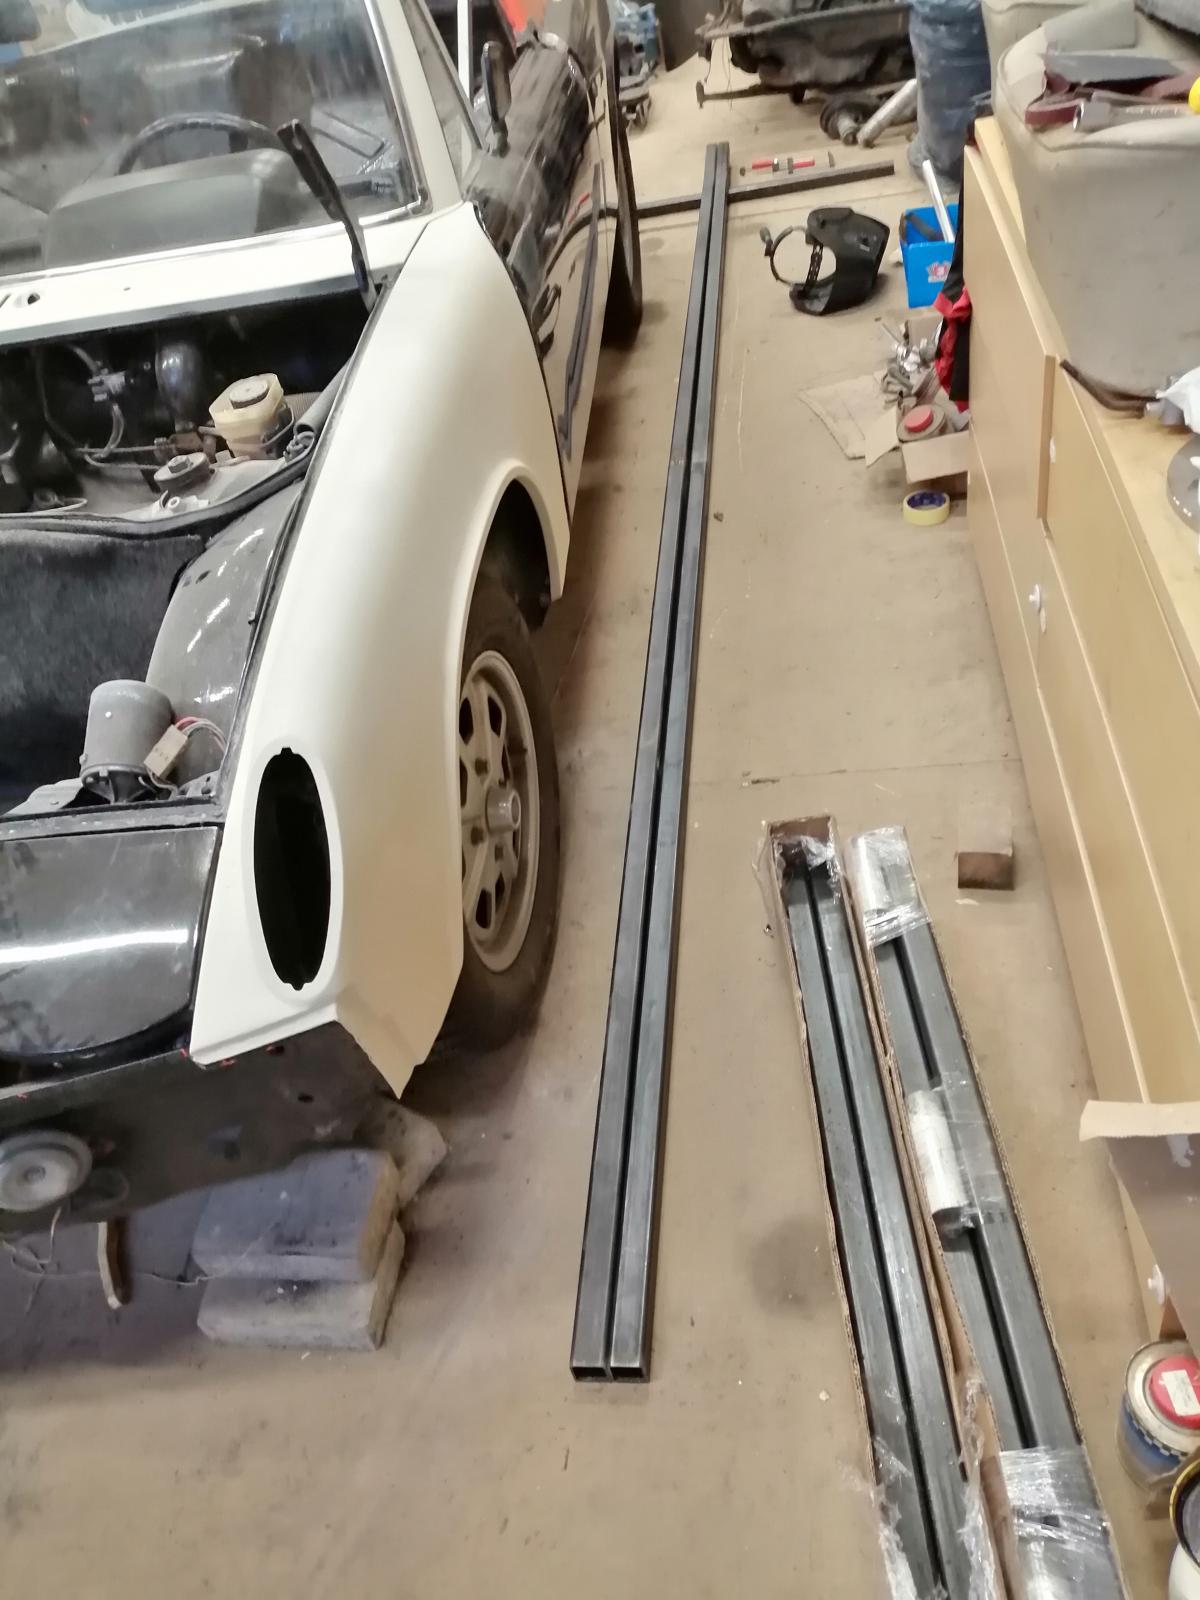
Rest will follow with all the fixations I planned (bumpers, engine, gearbox, front axle, back axle,..) to keep the body square du ring welding.
Stay tuned !![popcorn[1].gif](http://www.914world.com/bbs2/style_emoticons/default/popcorn[1].gif)
Antoine
So, that was the next logical step..primer on the passenger side fender
(and all around the windshield after taking it also to bare metal ) :And I took care of a few holes on the driver's side firewall:
For the bottom part, I will wait to have the body on the cart/body frame as not only the bottom of the firewall but also the floor is affected. More on that later
Before starting the body frame /hell hole fix, I wanted to check how the quarter is (part of me knowing I might have to cut it to repair right the right long).. Here the result, quite impressive..
So now I know it.. I will build from scratch that quarter panel and cut it, repair the long, weld my new panel.
Just for fun I made a small test panel to try the shape of the wheel opening:
But I hadn't a large enough sheet metal piece to start on the quarter panel so I starte on my body frame..
Fresh metal came:
Welded the long part:
Rest will follow with all the fixations I planned (bumpers, engine, gearbox, front axle, back axle,..) to keep the body square du ring welding.
Stay tuned !
Antoine
Do you have a portable spray booth or just masking it off and hitting it right there where it sits?
QUOTE(mbseto @ Sep 23 2021, 12:08 PM)
Do you have a portable spray booth or just masking it off and hitting it right there where it sits?
For the paint I will bring it in a paint booth but for primer, I just mask it and apply where it is
it's a 2k epoxy primer Antoine
Wow Antoine - that is some amazing work. That is going to be one beautiful 914 when you get if finished. Rust is a real bitch- but once you vanquish it, you should never have to deal with it again. There is a special place in Hell for people who use fiberglass to "repair" these cars. Good luck and keep up the terrific work and sharing the progress with us. We all enjoy it.
Wow, thanks a lot for the compliments !
Life got in the way the last couple weeks but I got a couple hours for it (and plan 2 days free of work next week to work on it!)
What I did in these couple hours:
I know I can buy the B-Pillar from RD but I love a challenge so.. Here we go:
The first steps:

And then it got worse:


And it's starting to take shape:


And it's ready to weld:

Stay tuned, welding it next time and then I will work further on my body frame !
Antoine
Life got in the way the last couple weeks but I got a couple hours for it (and plan 2 days free of work next week to work on it!)
What I did in these couple hours:
I know I can buy the B-Pillar from RD but I love a challenge so.. Here we go:
The first steps:
And then it got worse:
And it's starting to take shape:
And it's ready to weld:
Stay tuned, welding it next time and then I will work further on my body frame !
Antoine
Wow, thanks a lot for the compliments !
Life got in the way the last couple weeks but I got a couple hours for it (and plan 2 days free of work next week to work on it!)
What I did in these couple hours:
I know I can buy the B-Pillar from RD but I love a challenge so.. Here we go:

The first steps:


And then it got worse:

And it's starting to take shape:


And it's ready to weld:


Stay tuned, welding it next time and then I will work further on my body frame !
Antoine
Life got in the way the last couple weeks but I got a couple hours for it (and plan 2 days free of work next week to work on it!)
What I did in these couple hours:
I know I can buy the B-Pillar from RD but I love a challenge so.. Here we go:
The first steps:
And then it got worse:
And it's starting to take shape:
And it's ready to weld:
Stay tuned, welding it next time and then I will work further on my body frame !
Antoine
Car is coming along nice.
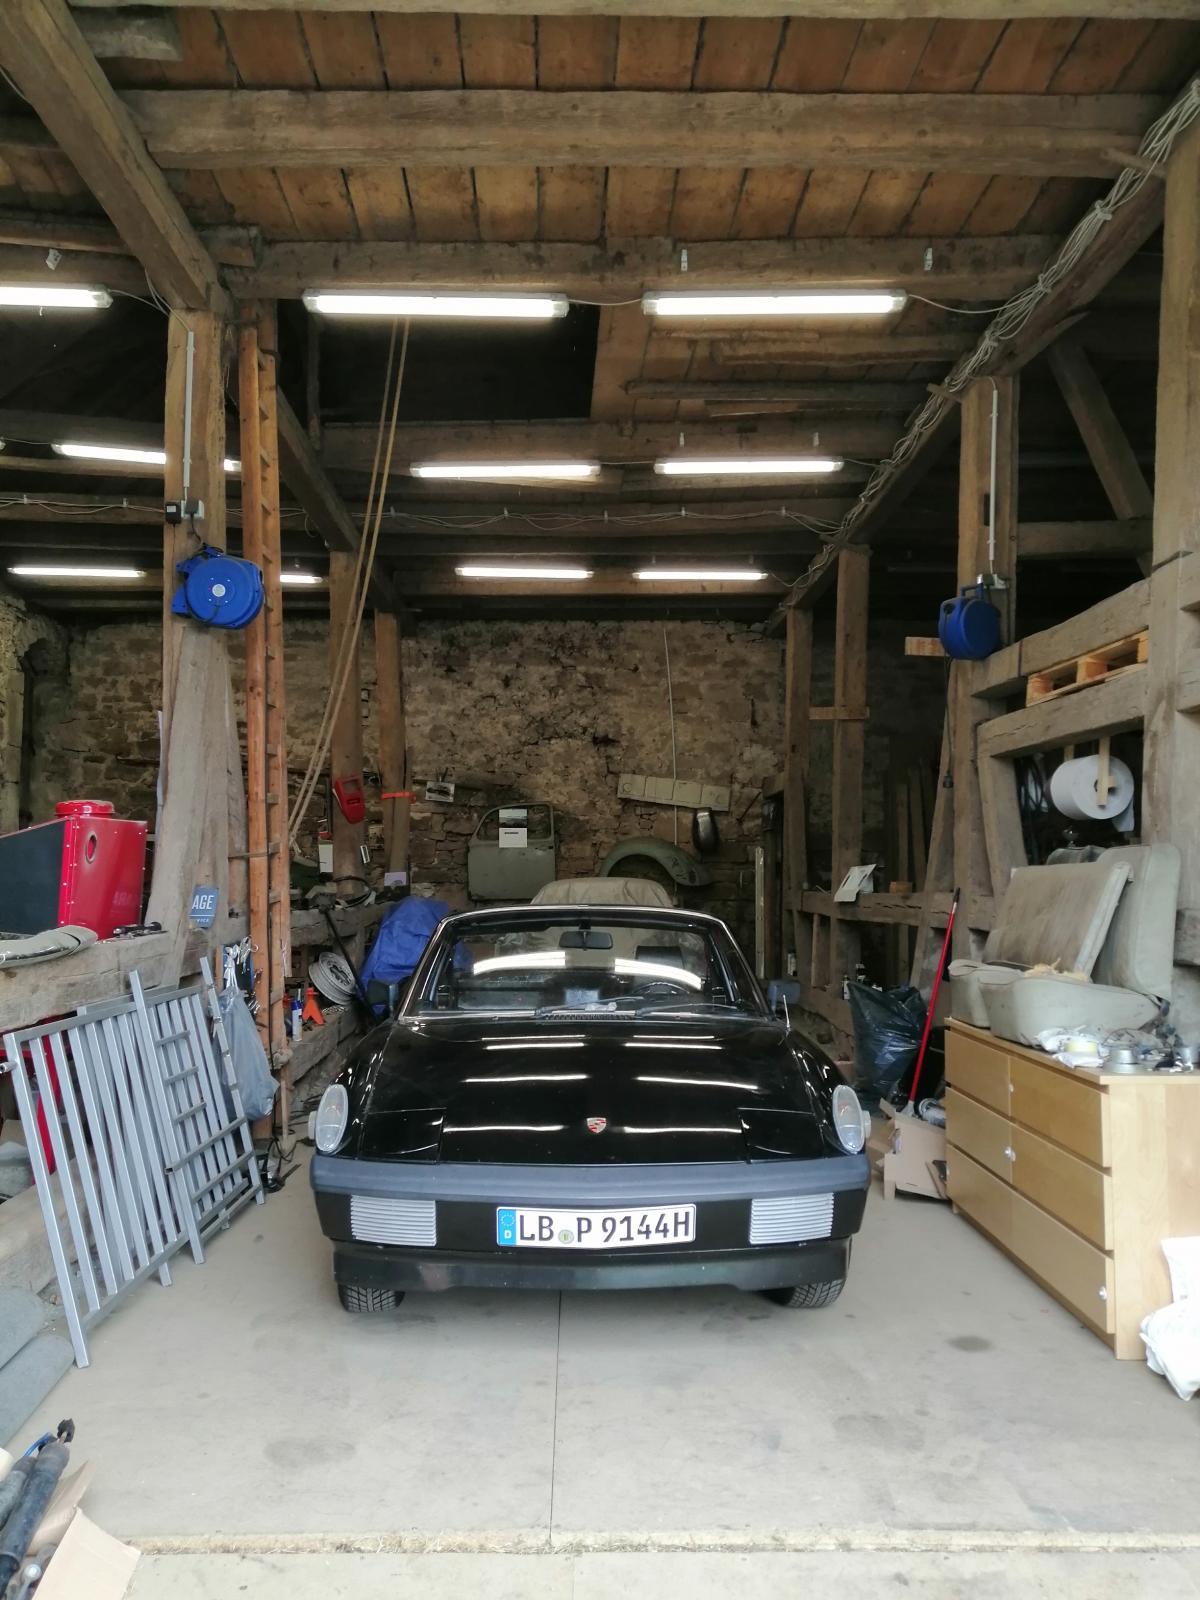
I love your garage!!!
Matt
I love your garage!!!
Matt
Thanks Matt! Yes the barn is really cool, crazy to think it hast been first built in 1560, partly demolished in 1714 and rebuilt in 1719..and mine since 3 small years 
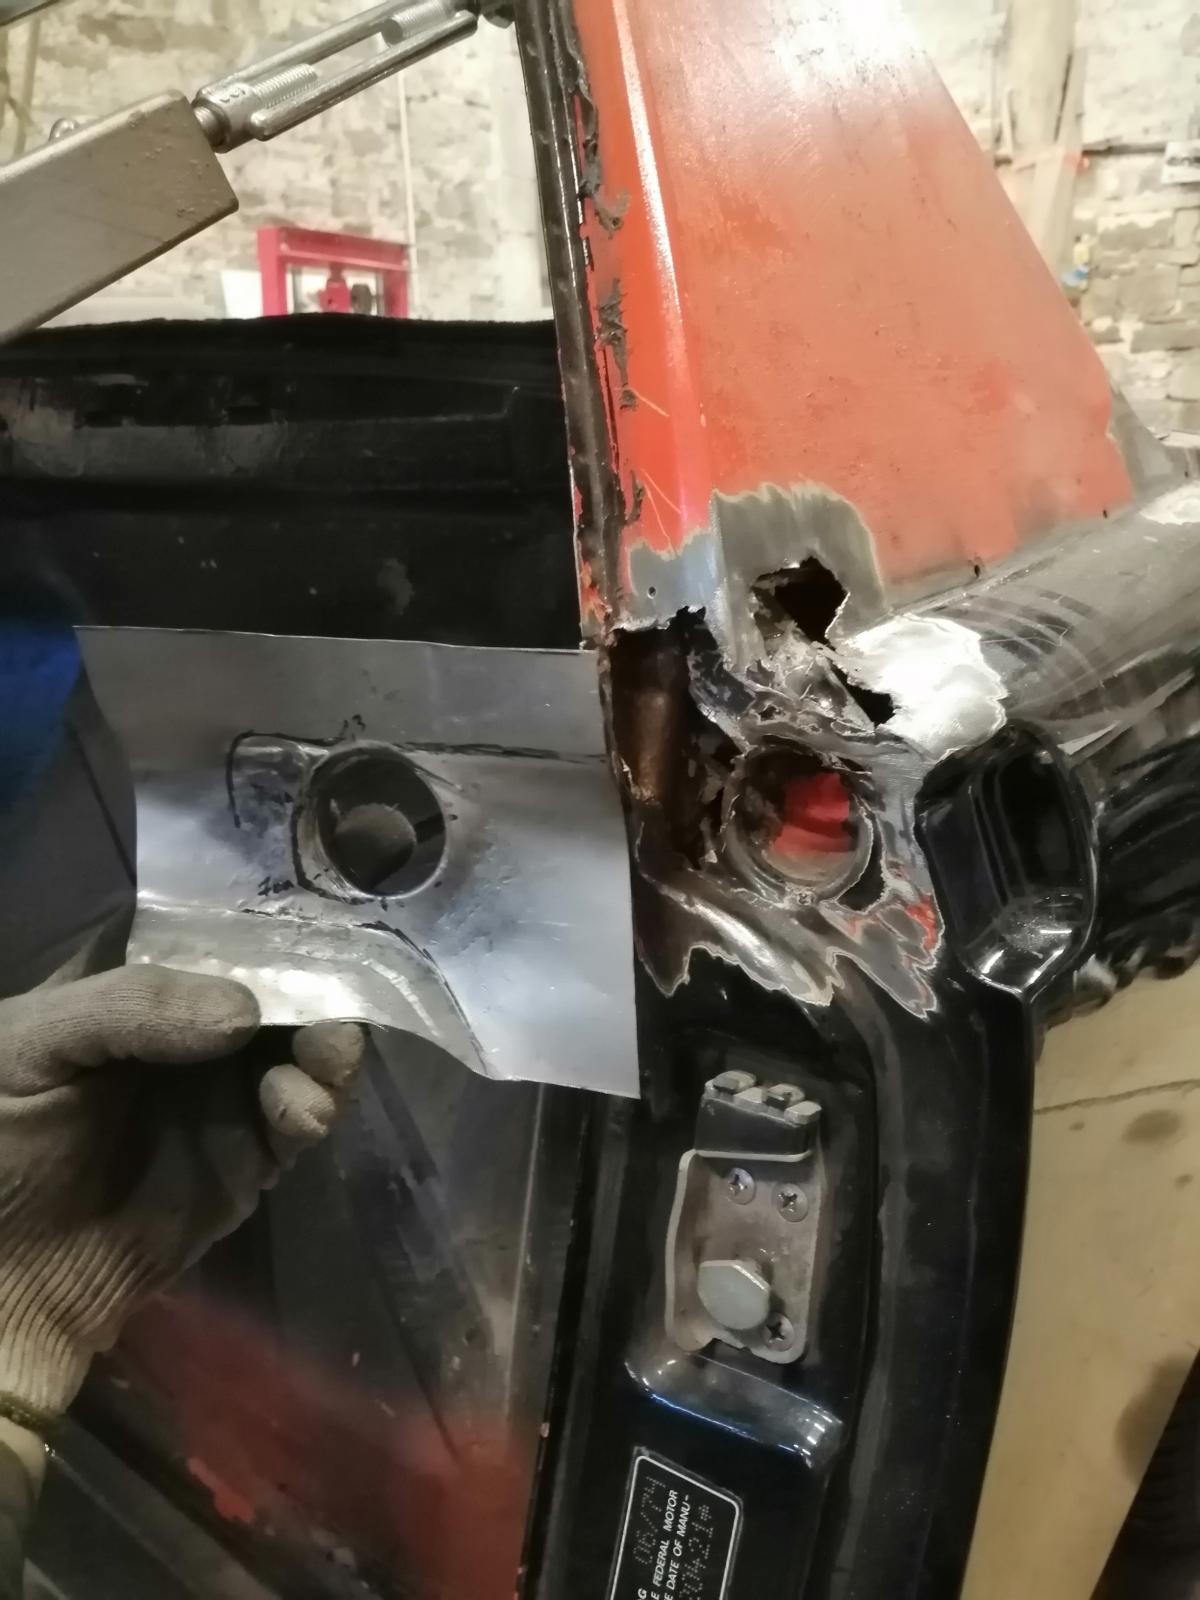
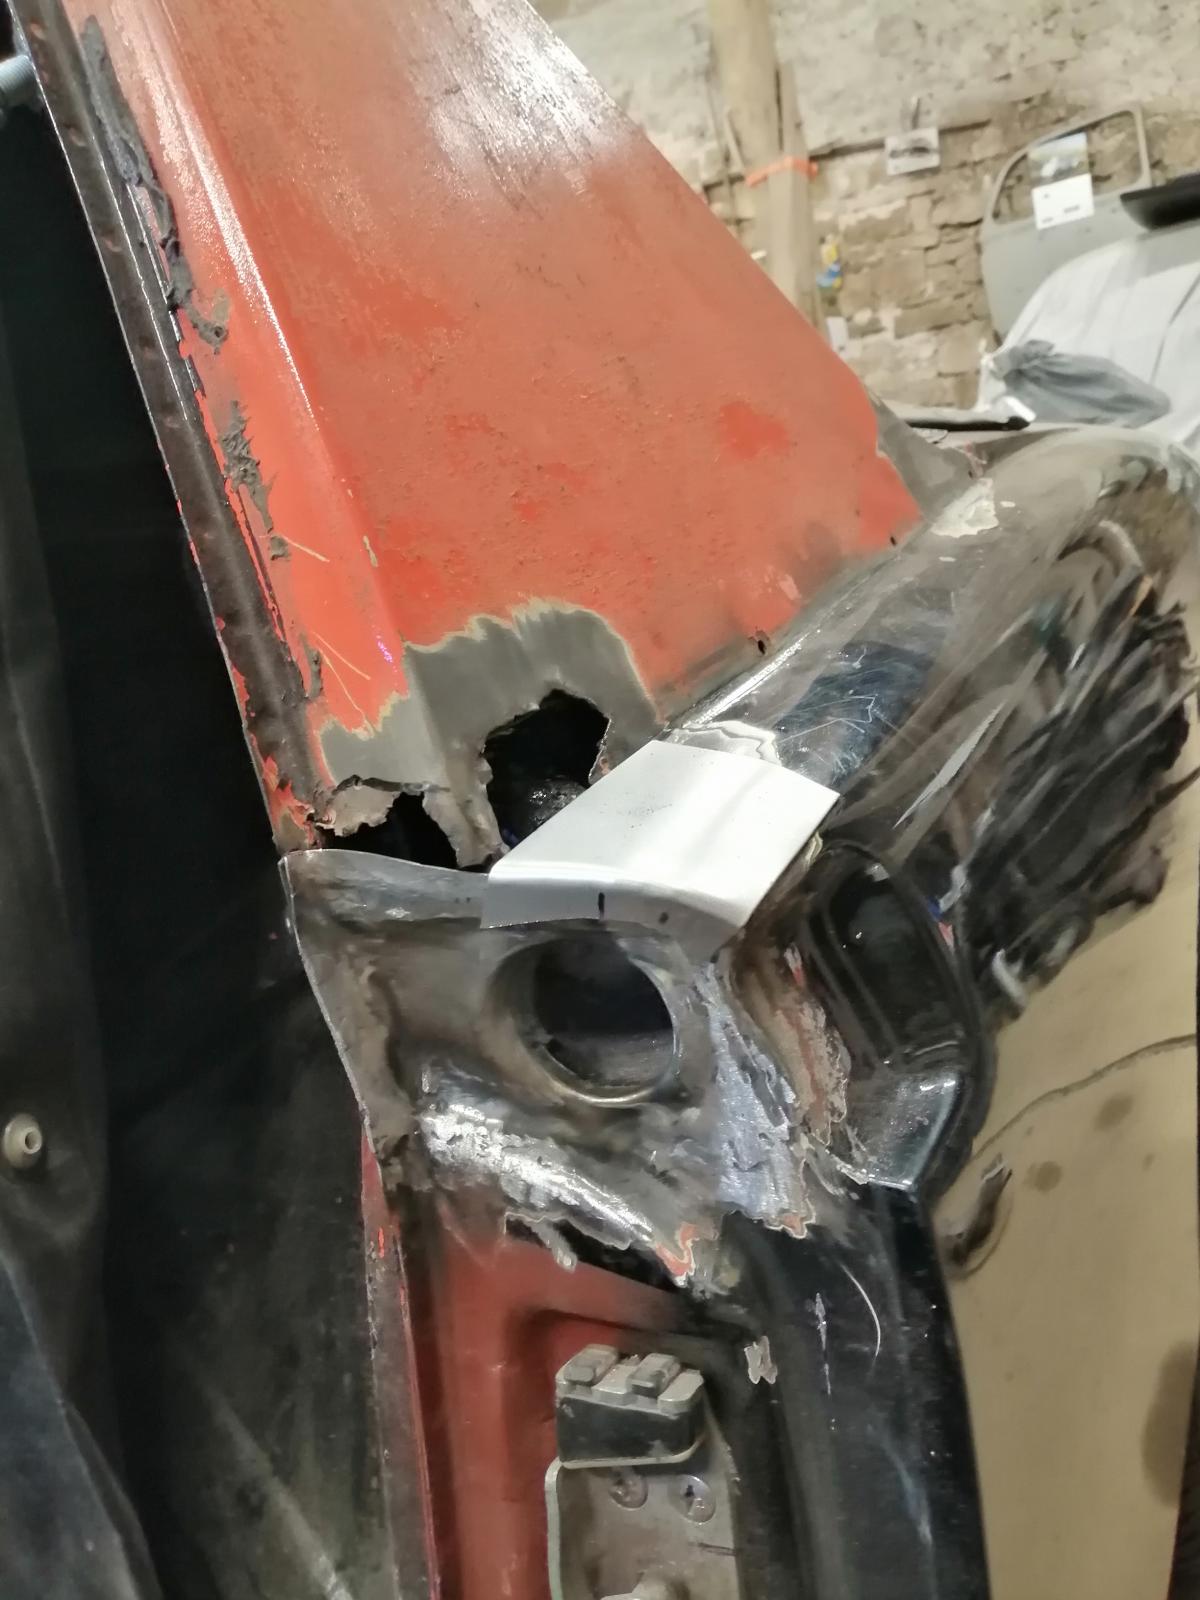
I finished the B-pillar, first with these small reparations:
Before:
During:
And finished:
And here:

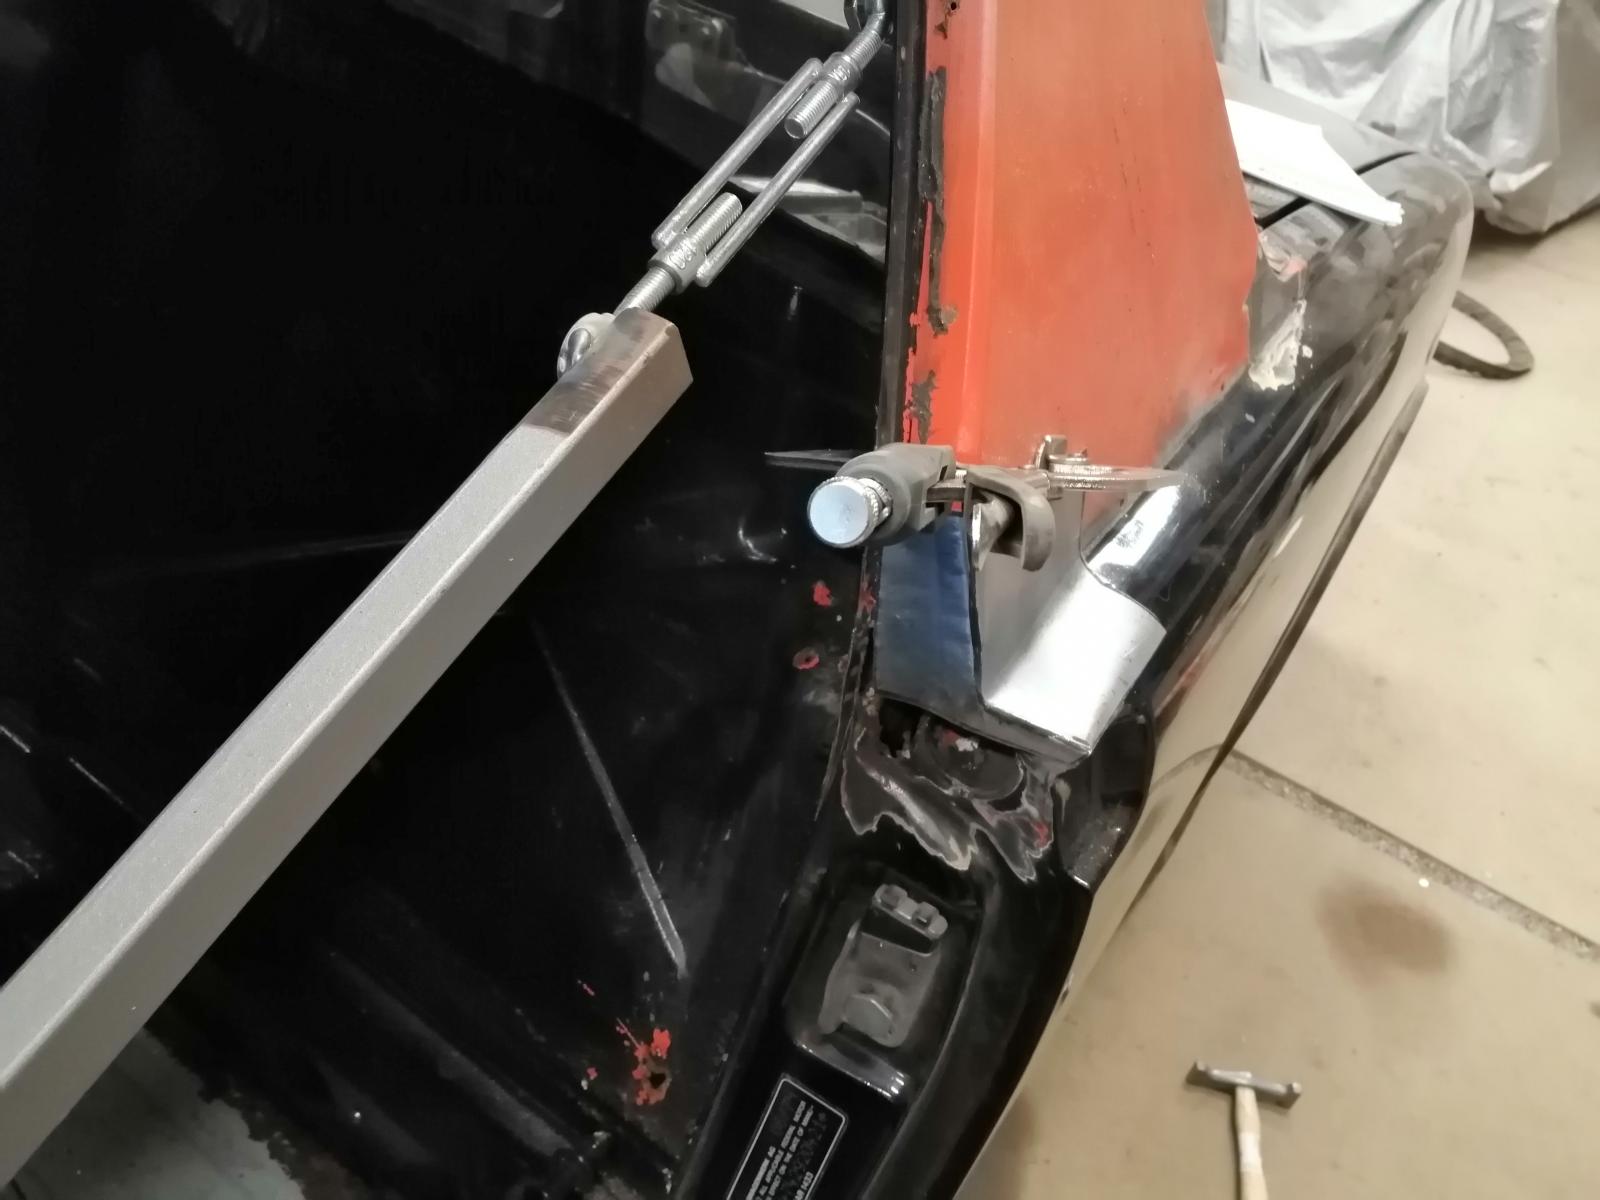
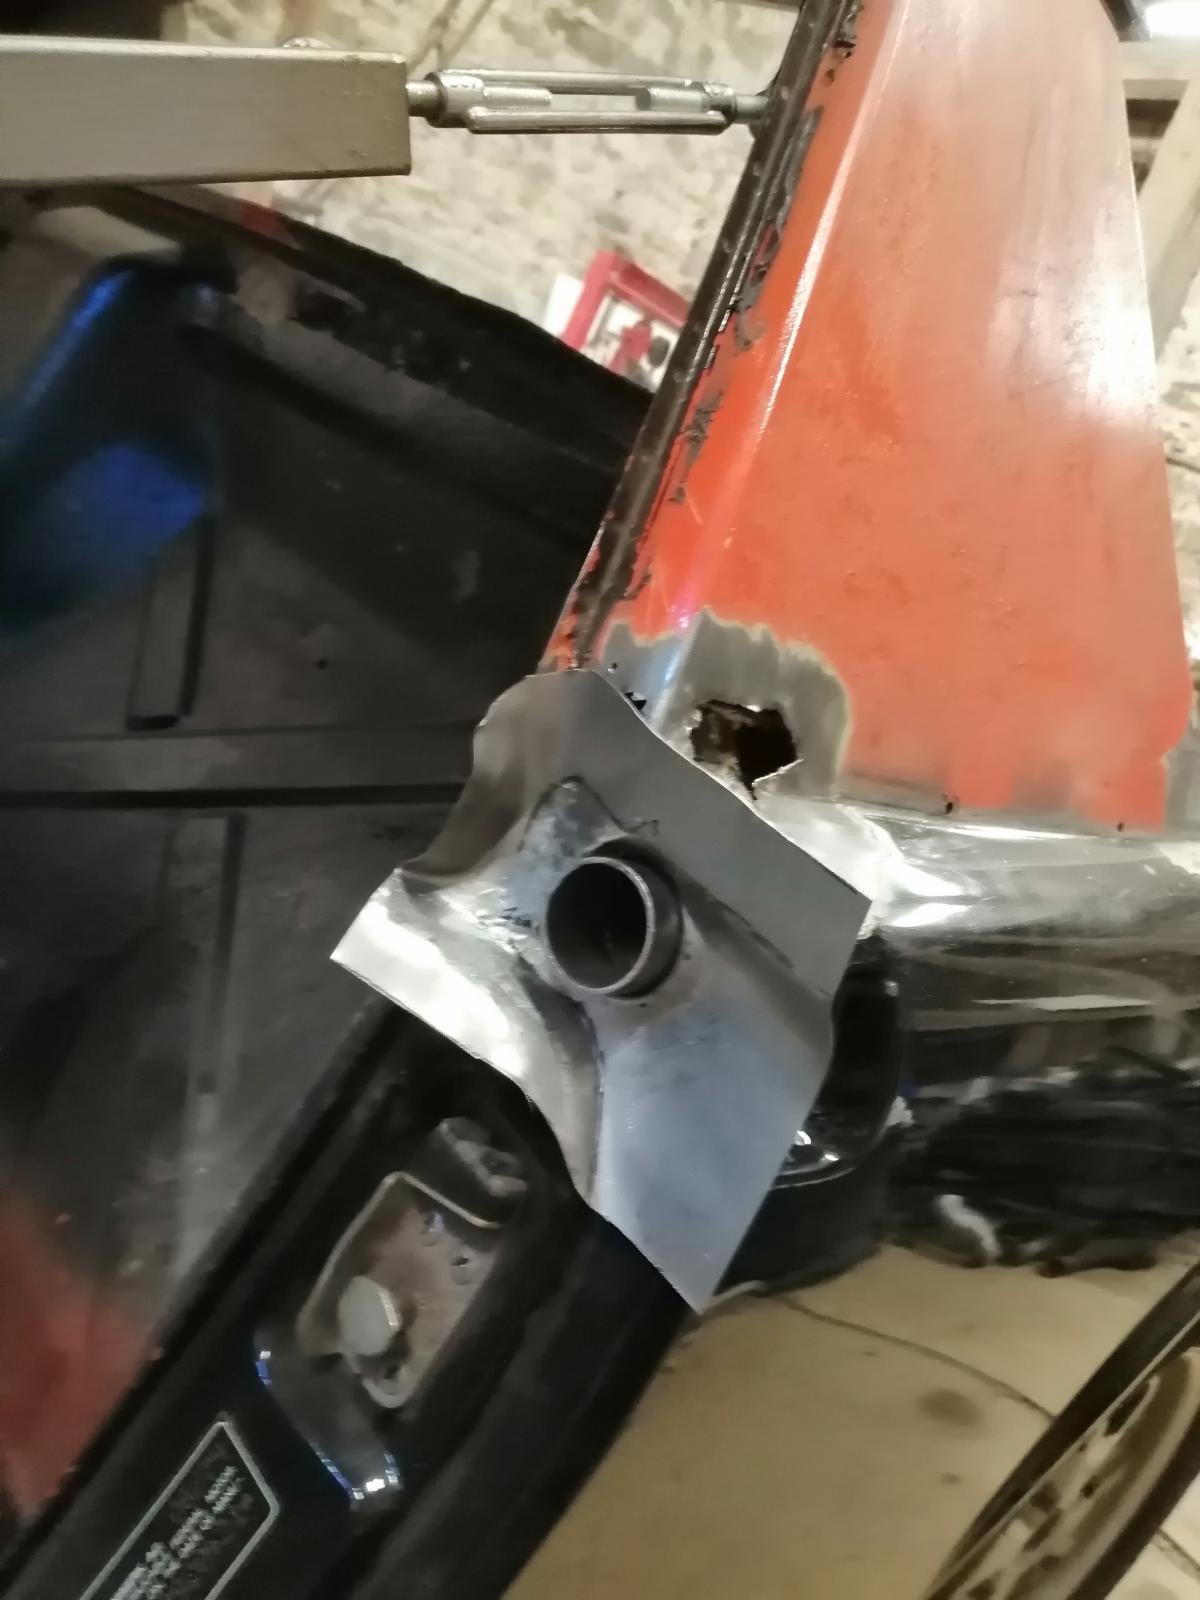
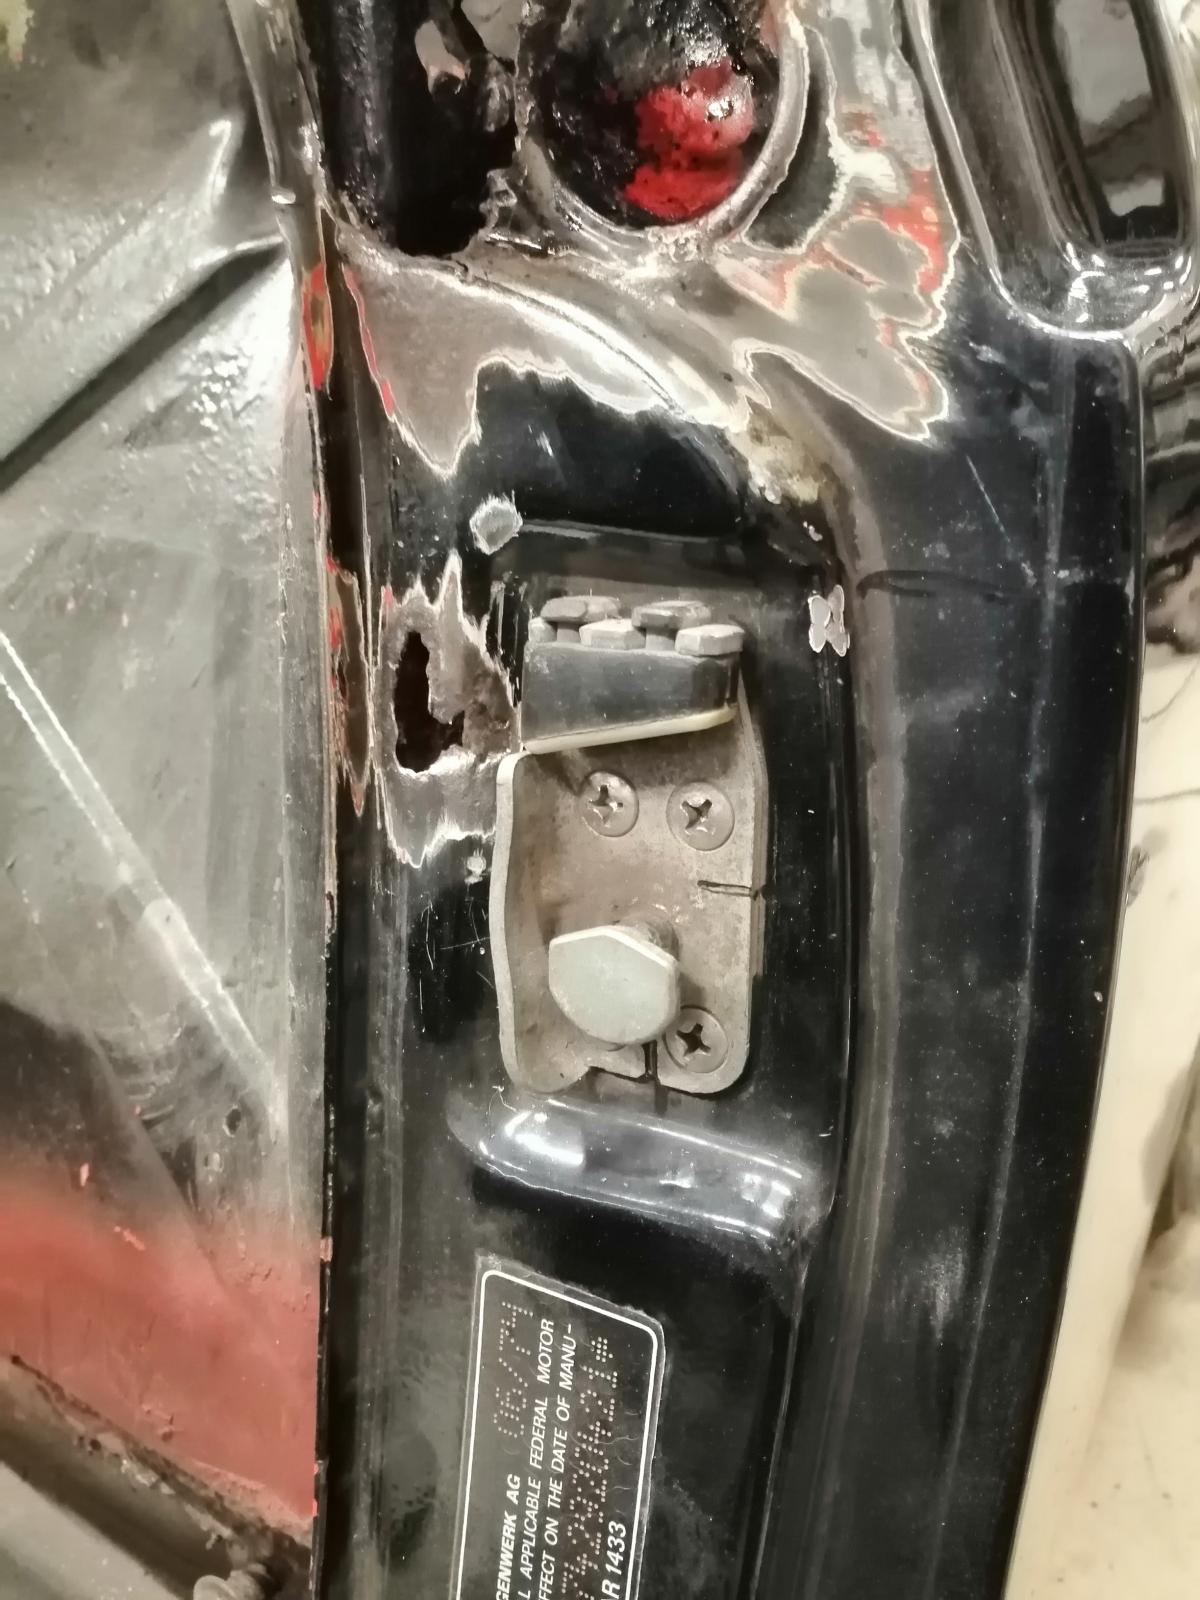
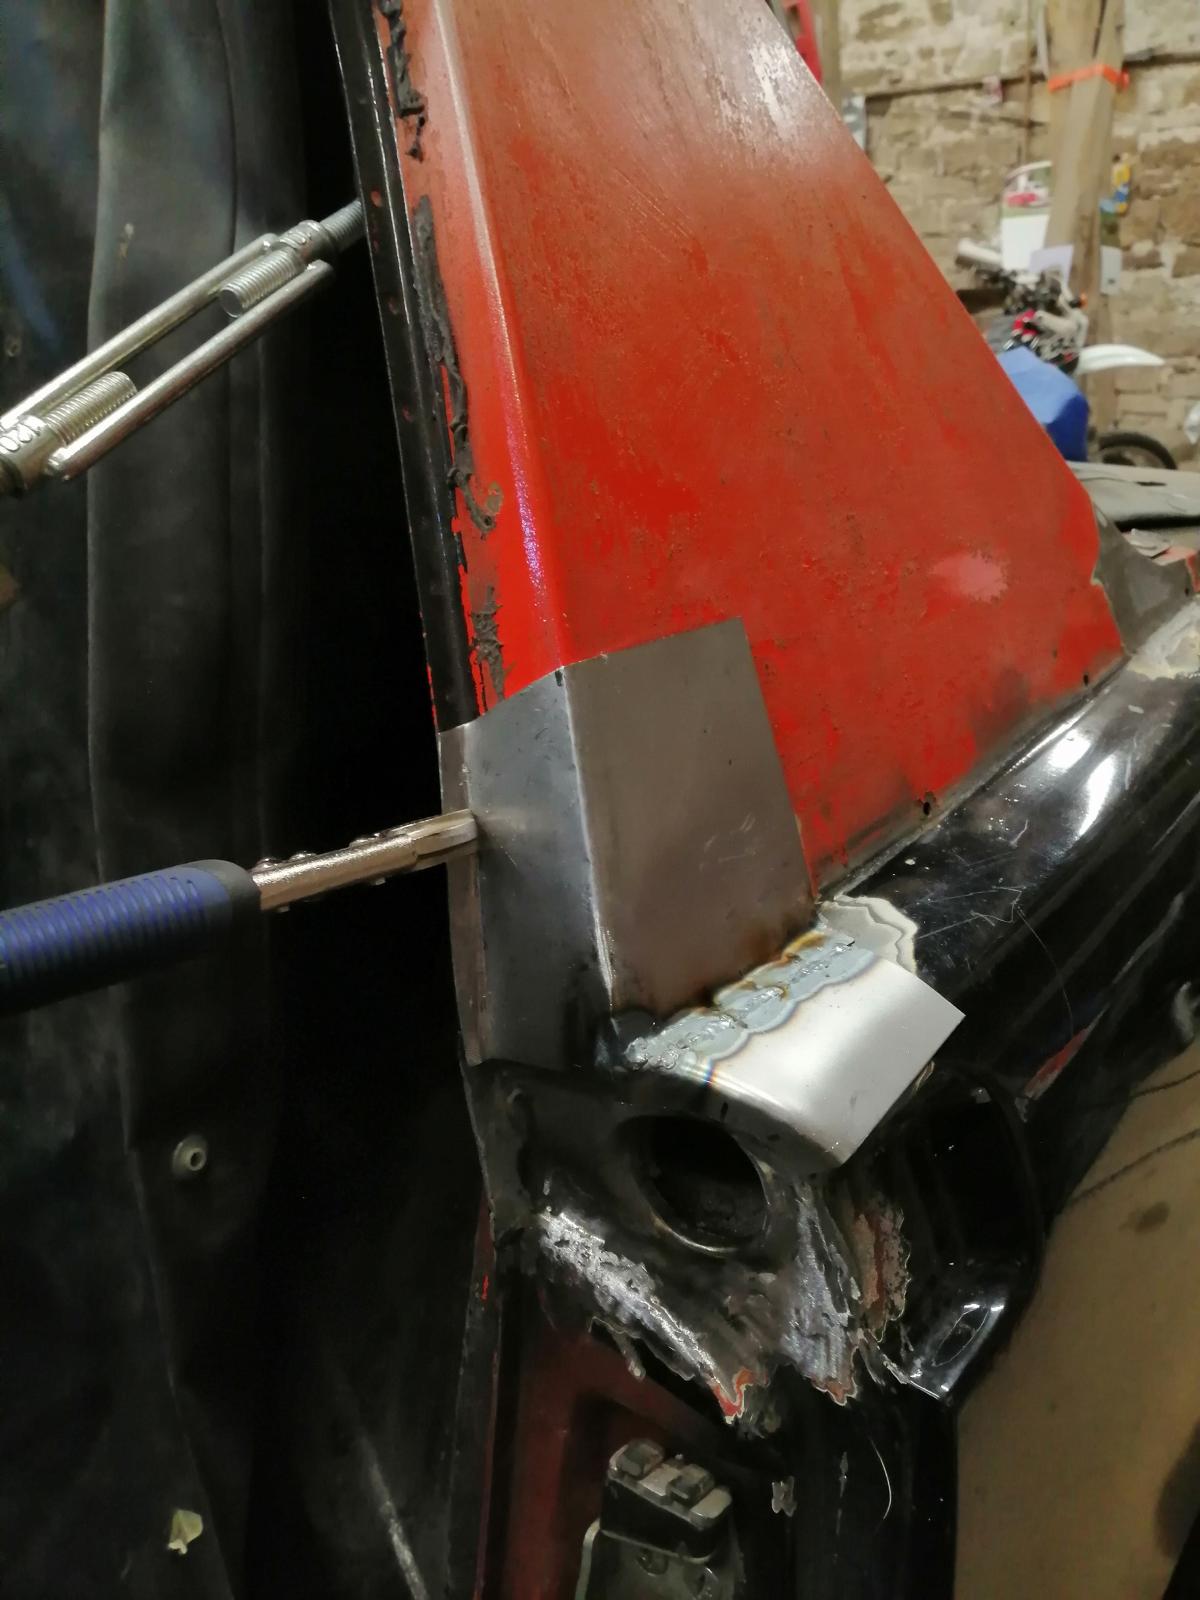
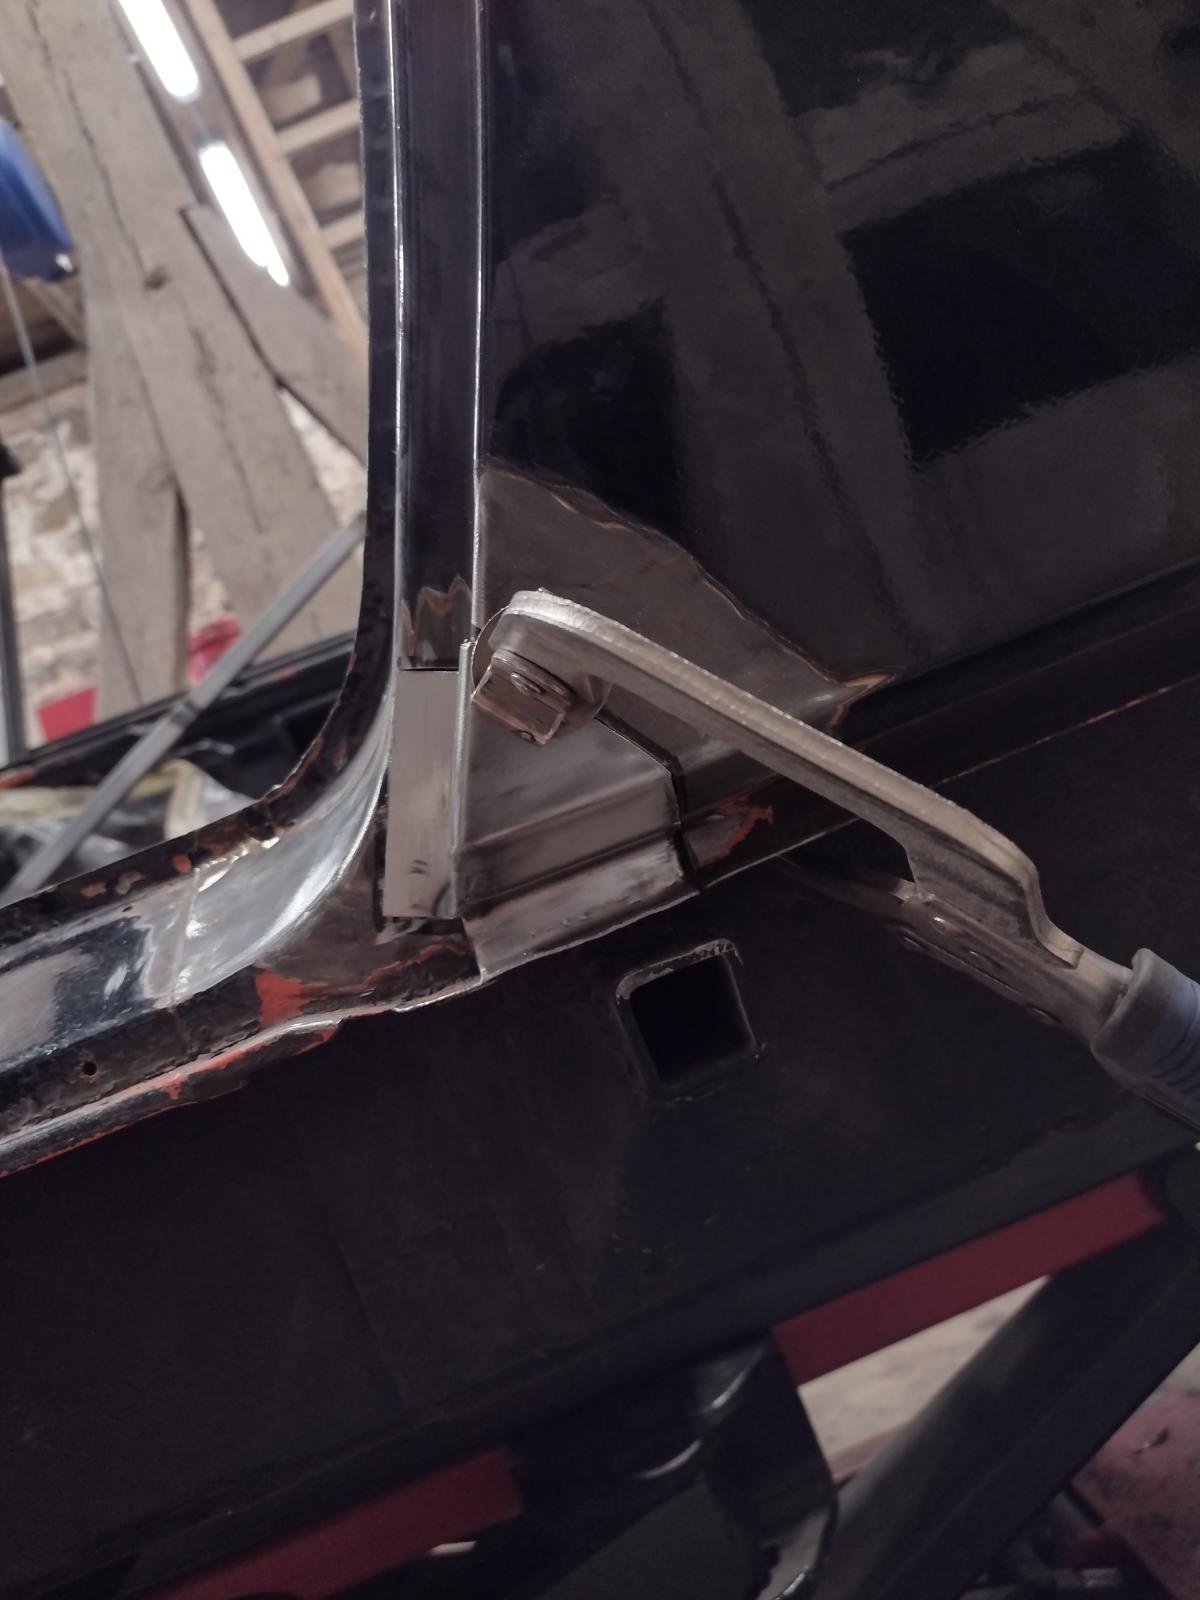
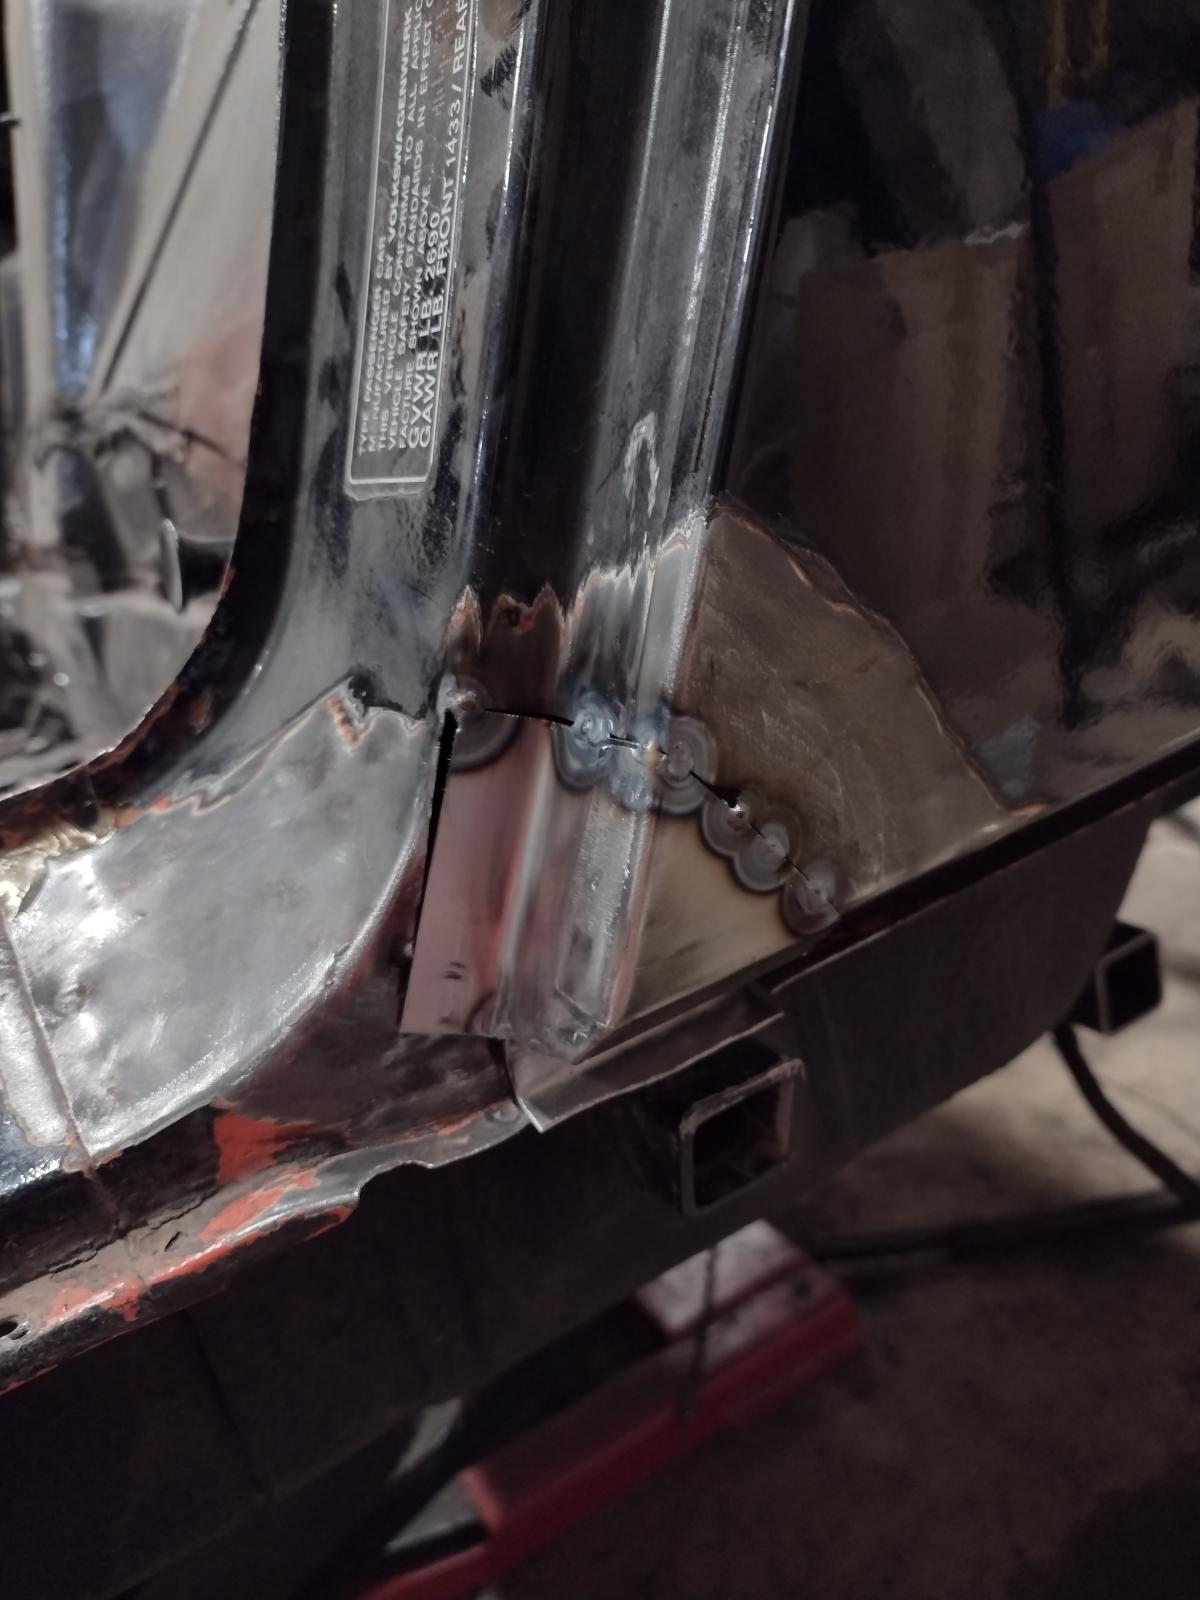
Then I welded my part on the top of the door latch but not before cleaning/fixing/painting behind it:
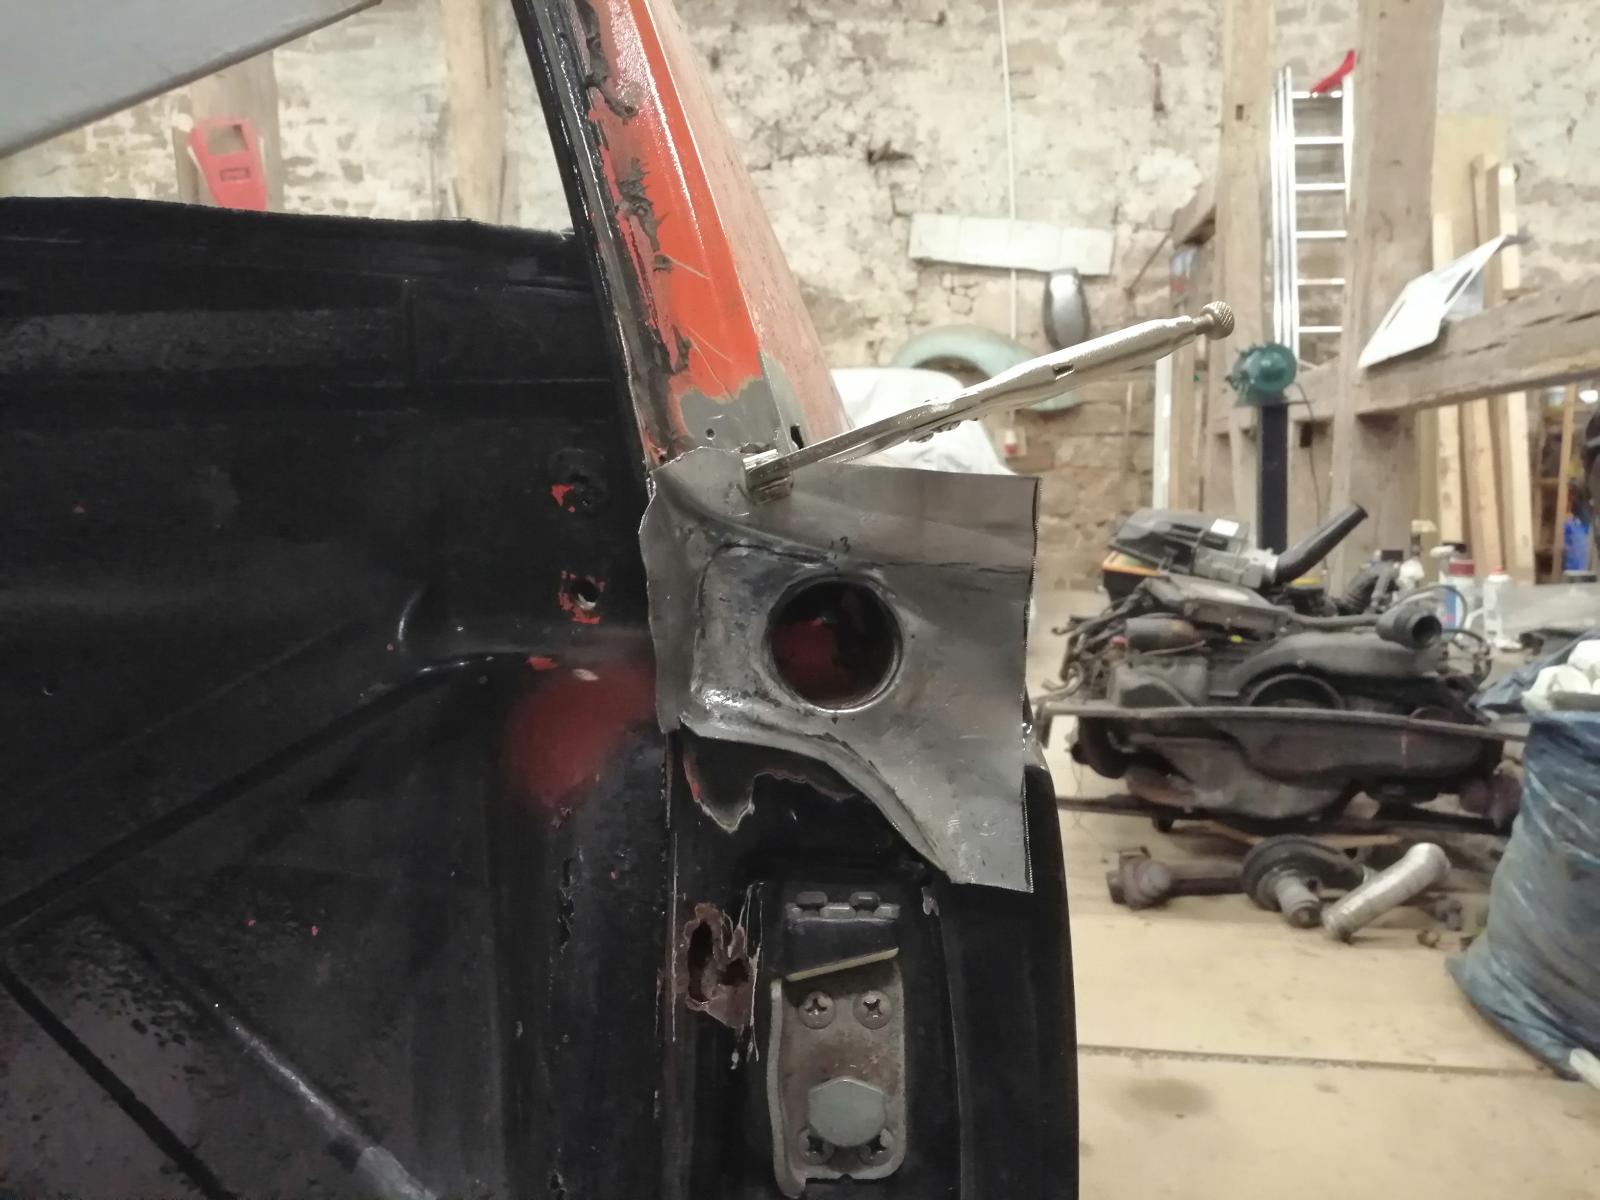
Adjusting:
And welded:
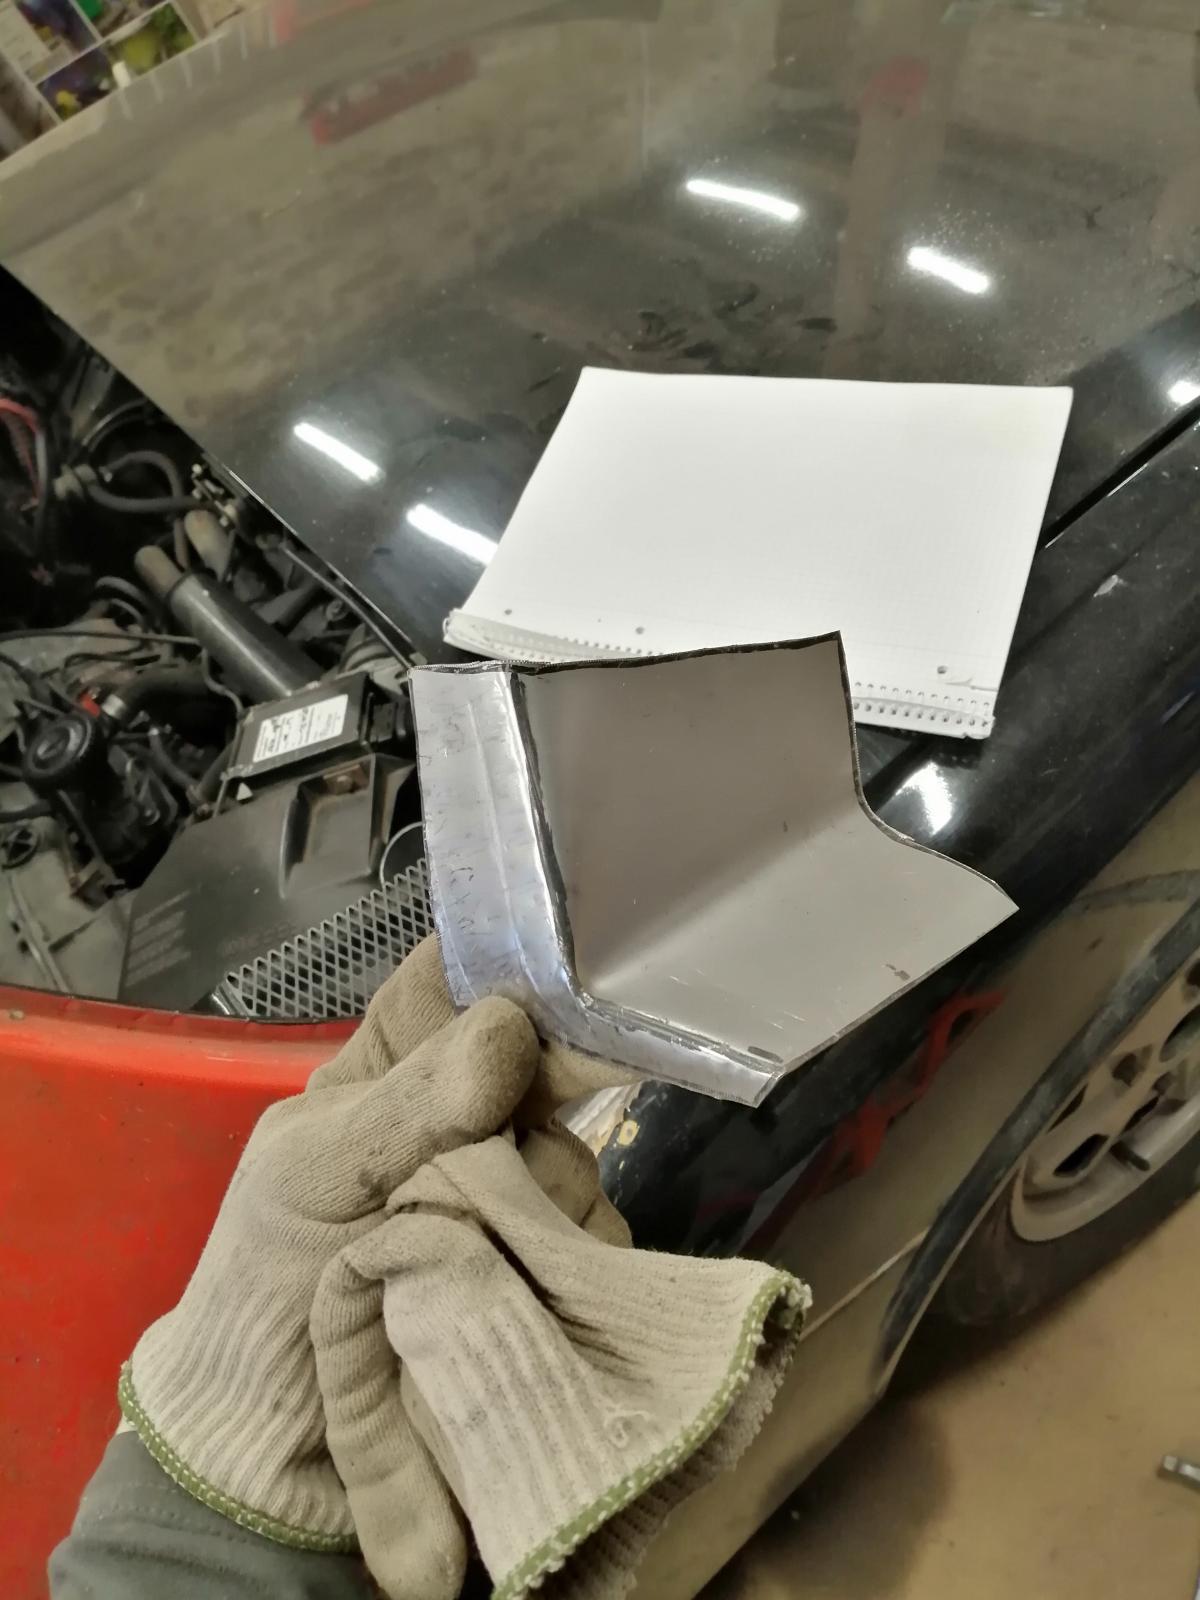
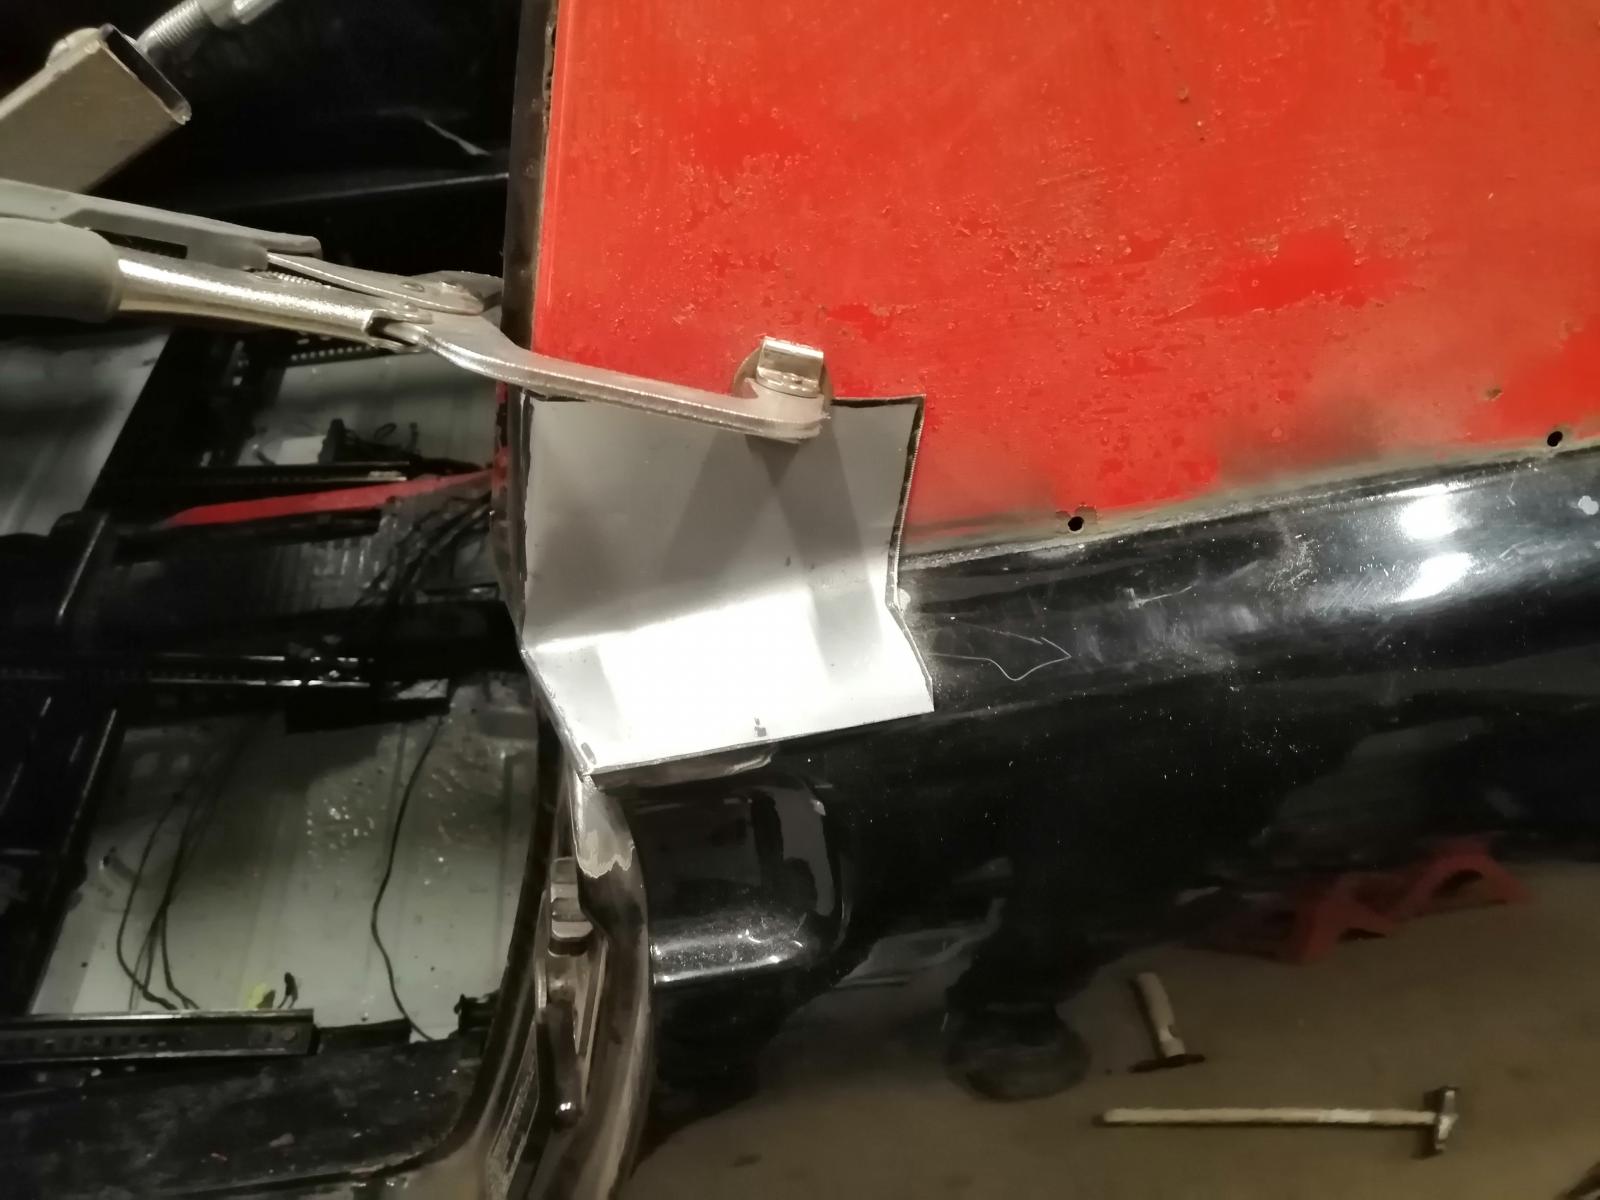
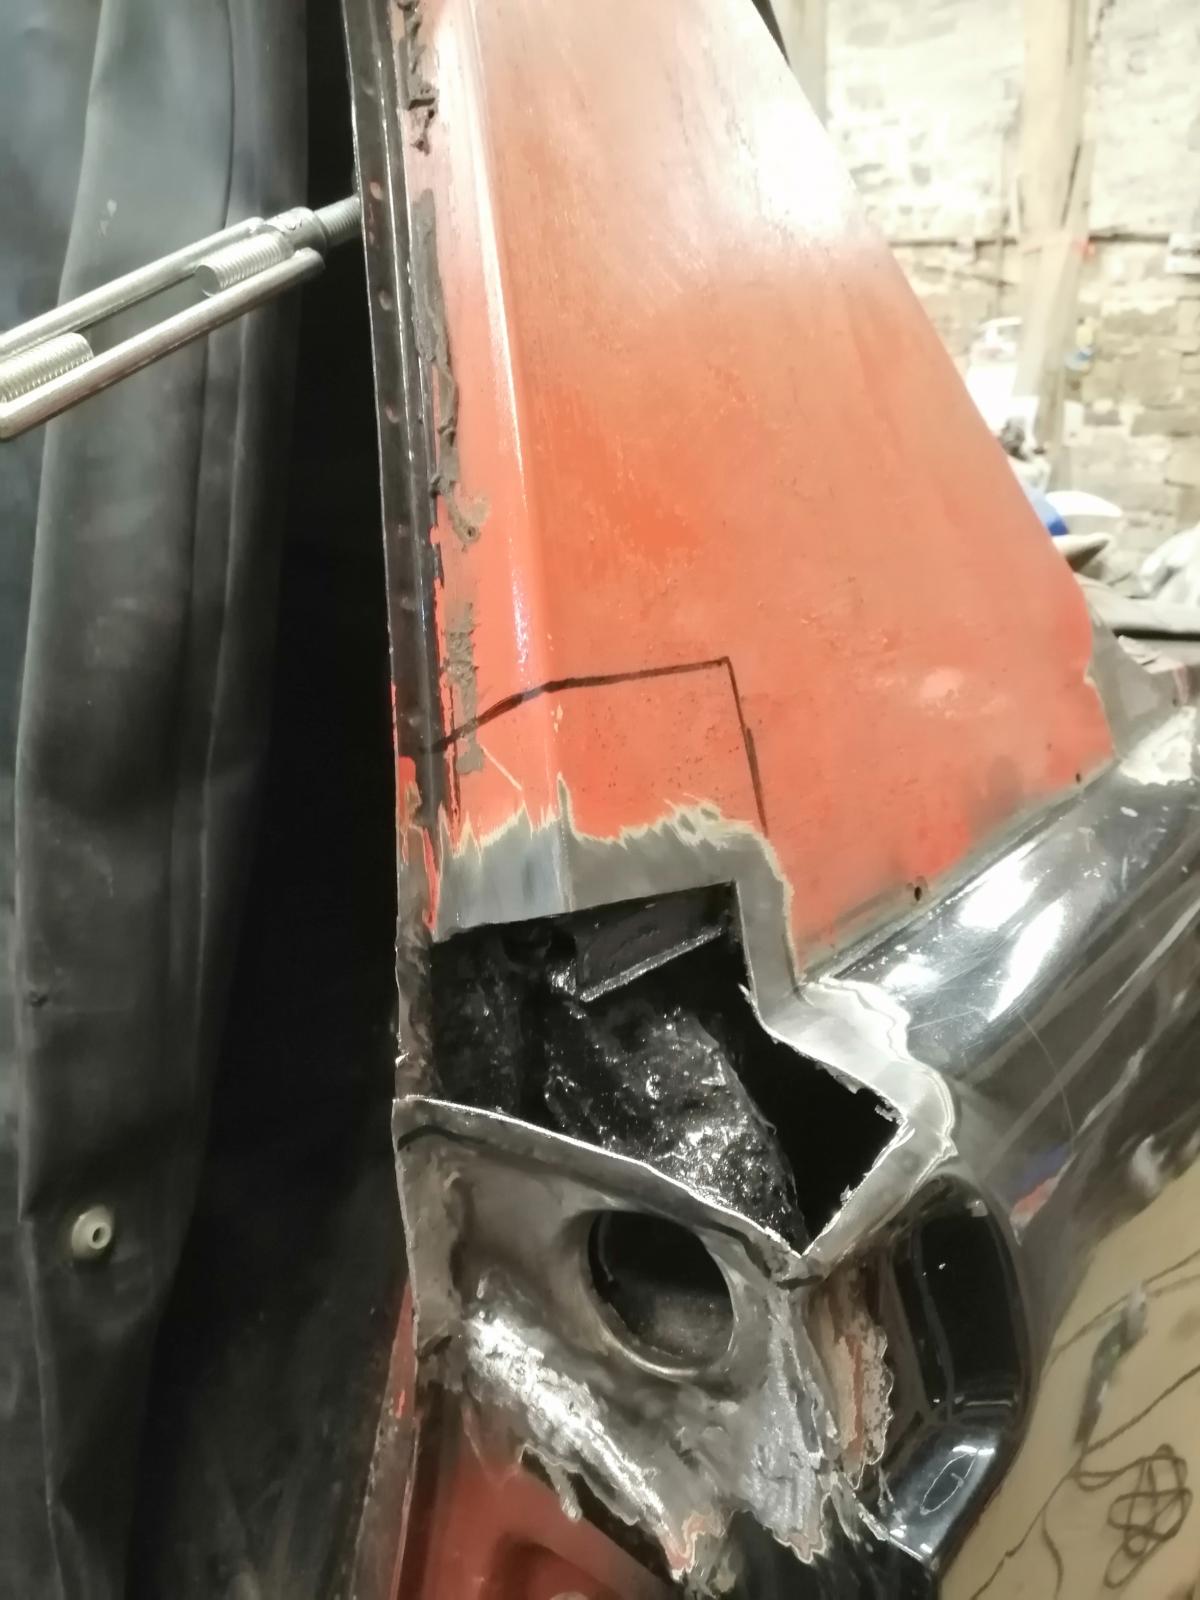
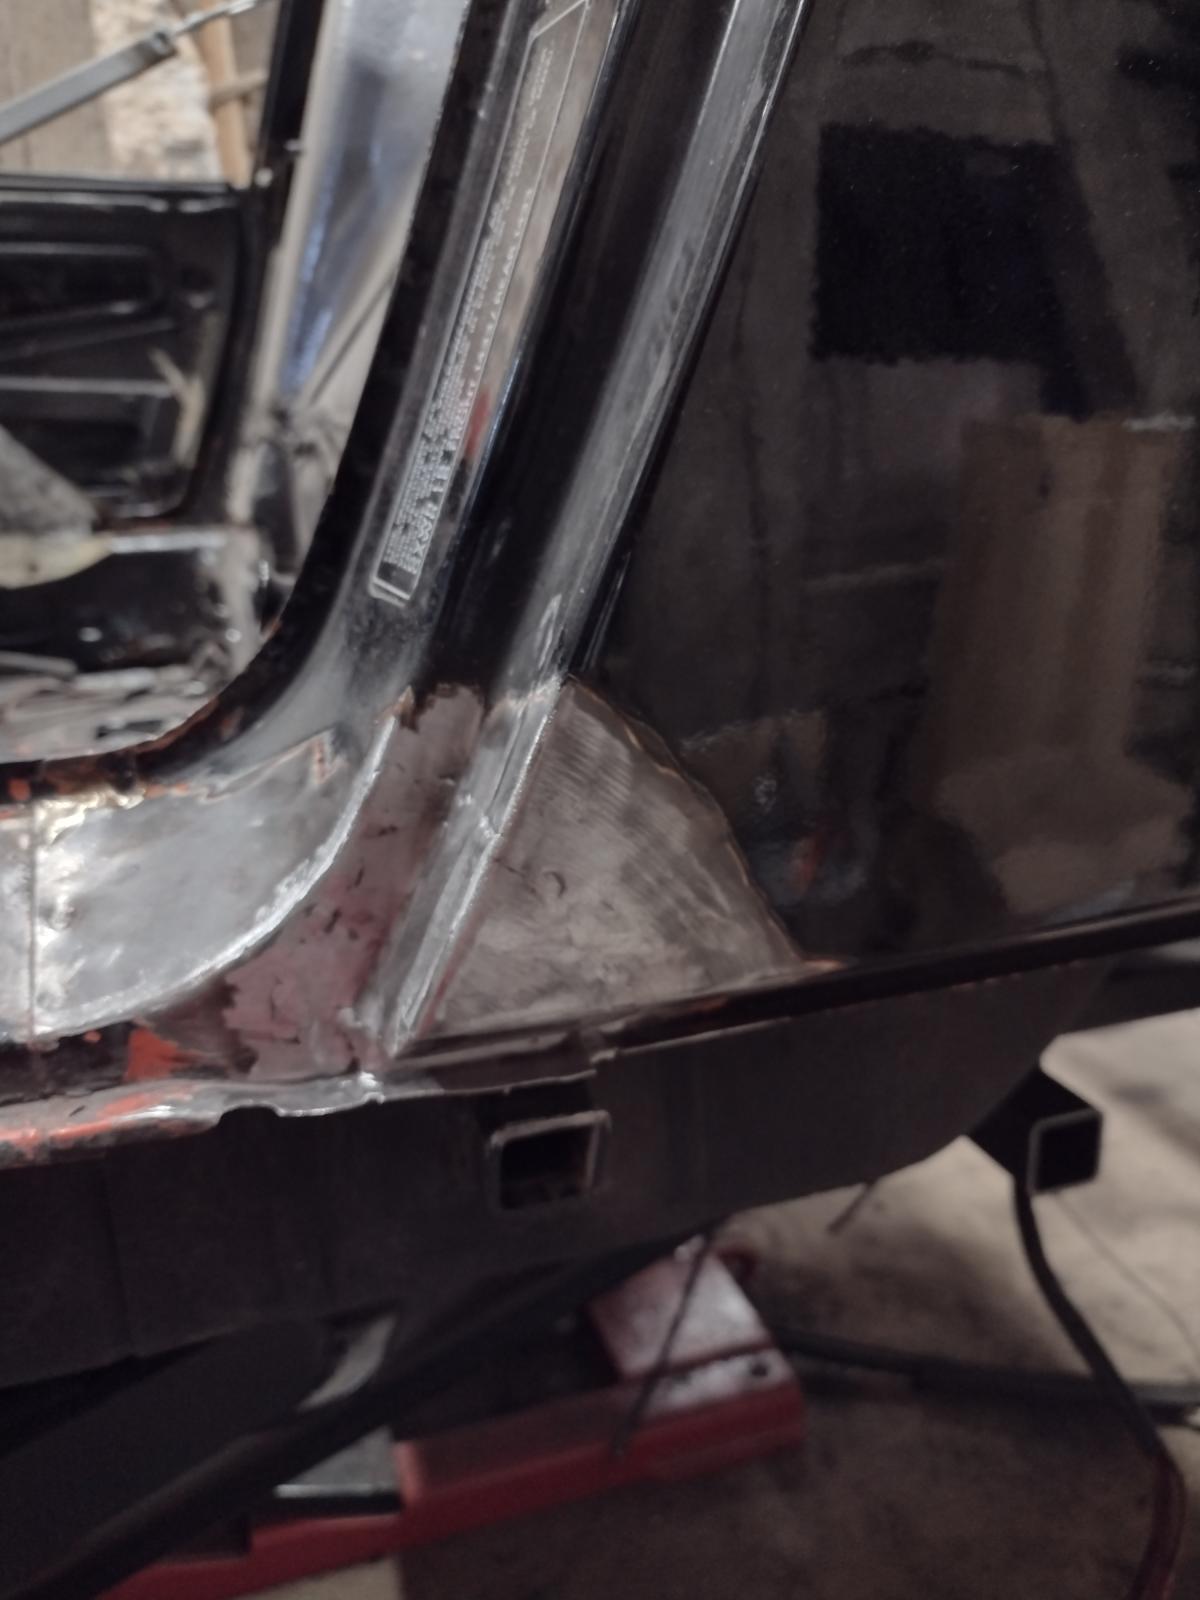
Then the top part, made in two parts:
Adjusting:
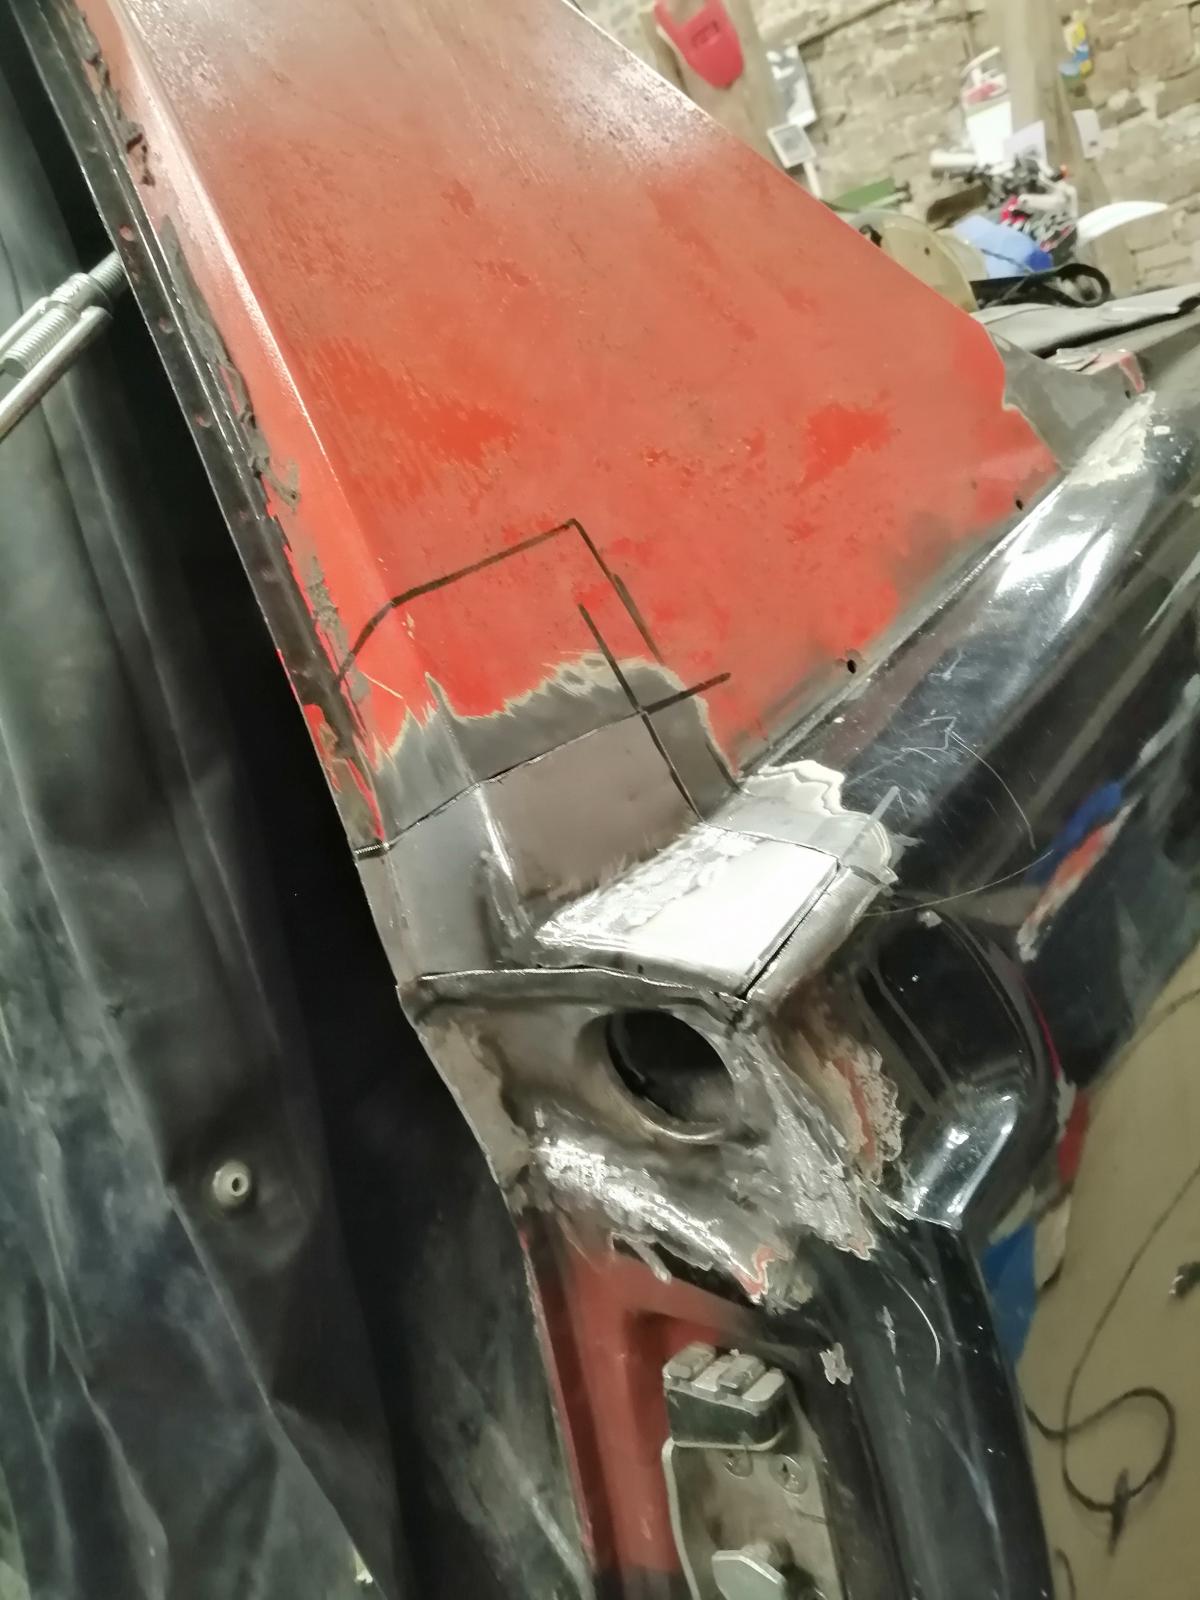
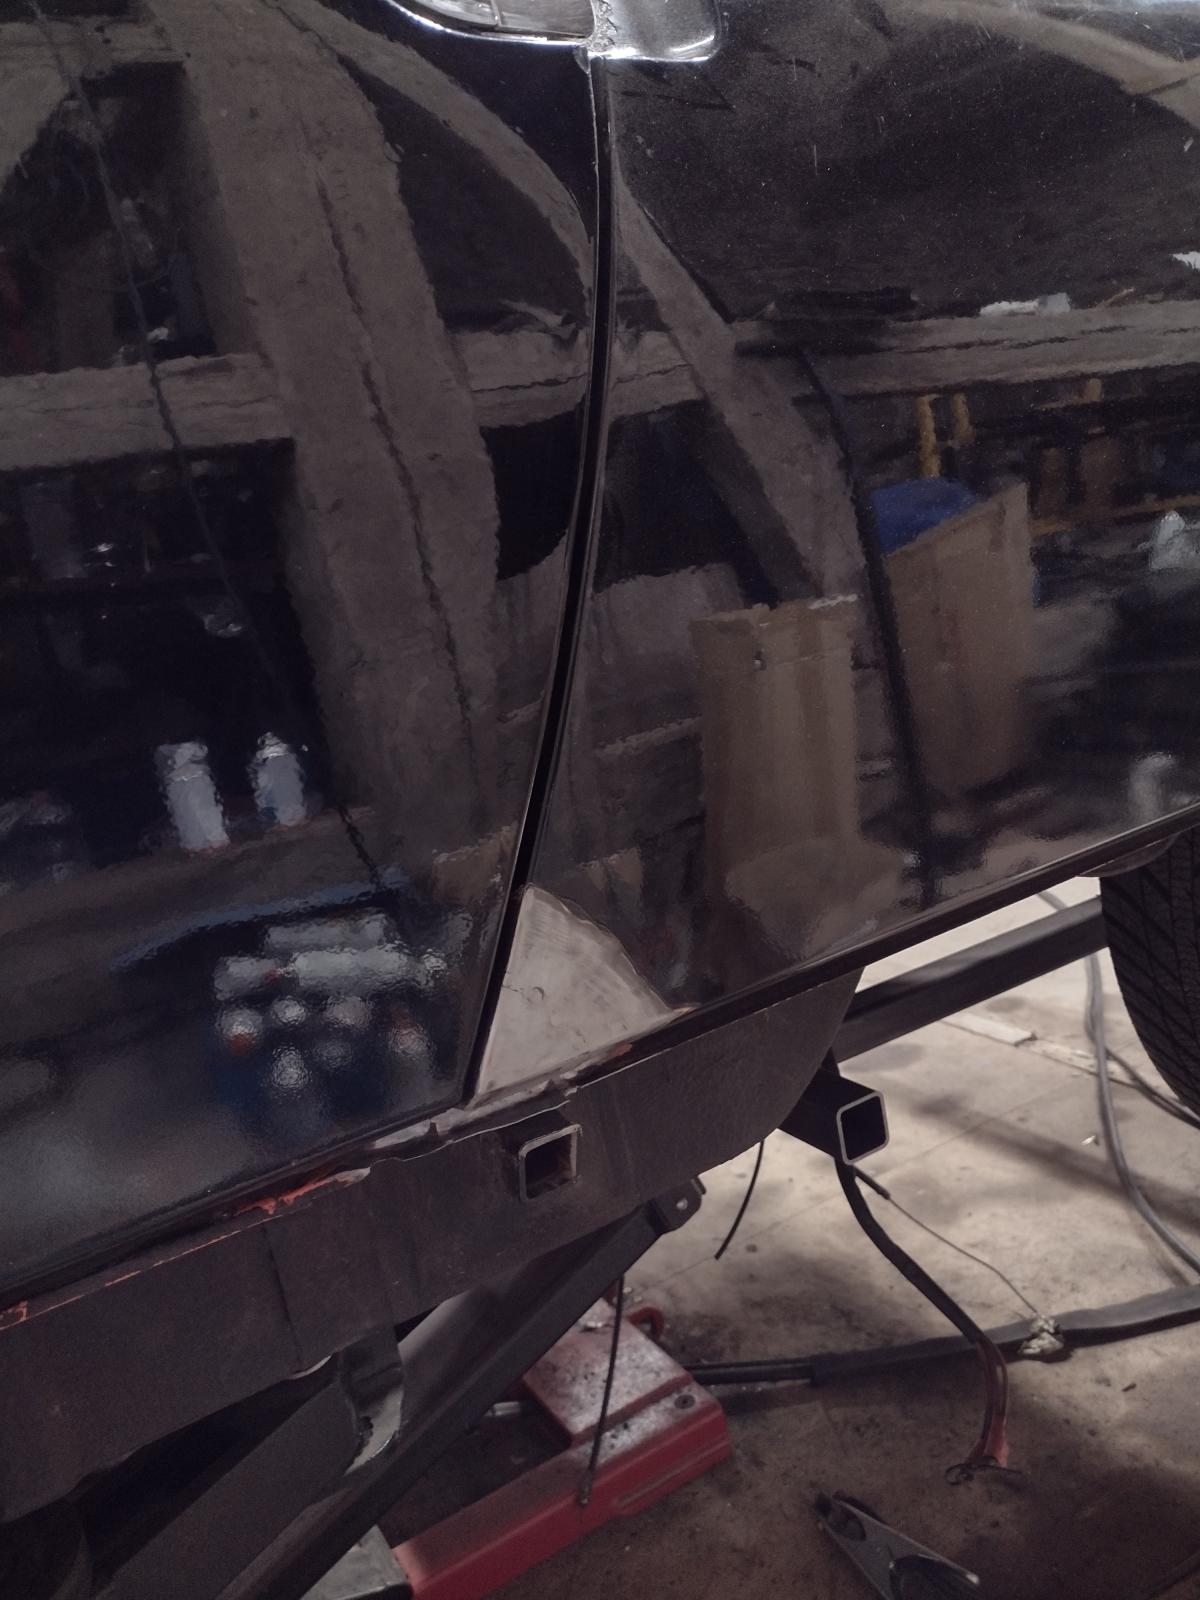
And then welded:
Metal finishing will take place when I prepare for paint.
Stay tuned, I have load more to post !
Antoine
I finished the B-pillar, first with these small reparations:
Before:
During:
And finished:
And here:
Then I welded my part on the top of the door latch but not before cleaning/fixing/painting behind it:
Adjusting:
And welded:
Then the top part, made in two parts:
Adjusting:
And then welded:
Metal finishing will take place when I prepare for paint.
Stay tuned, I have load more to post !
Antoine
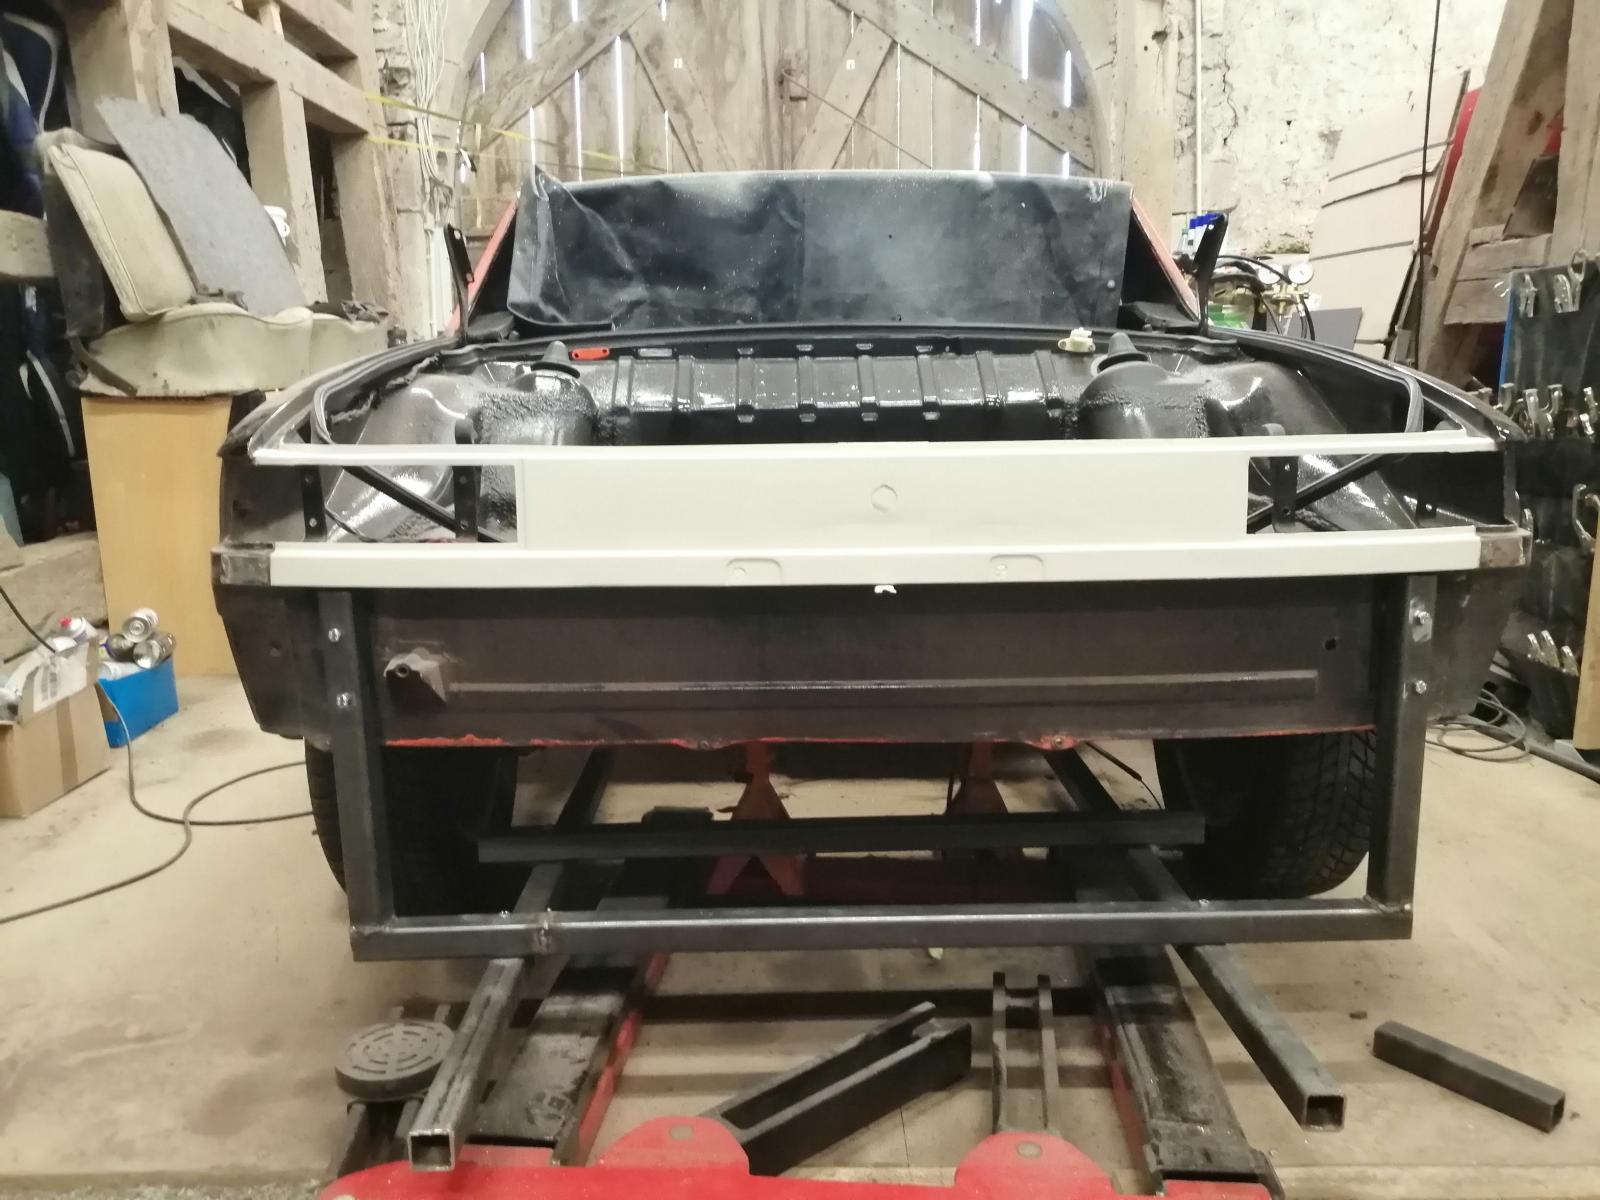
So, I made my body frame to ensure nothing moves during welding:
Every fixation is screwed to be able to remove/reuse all after.
Front:
Back:
Under the gearbox: (pic during tacking, fully welded after)

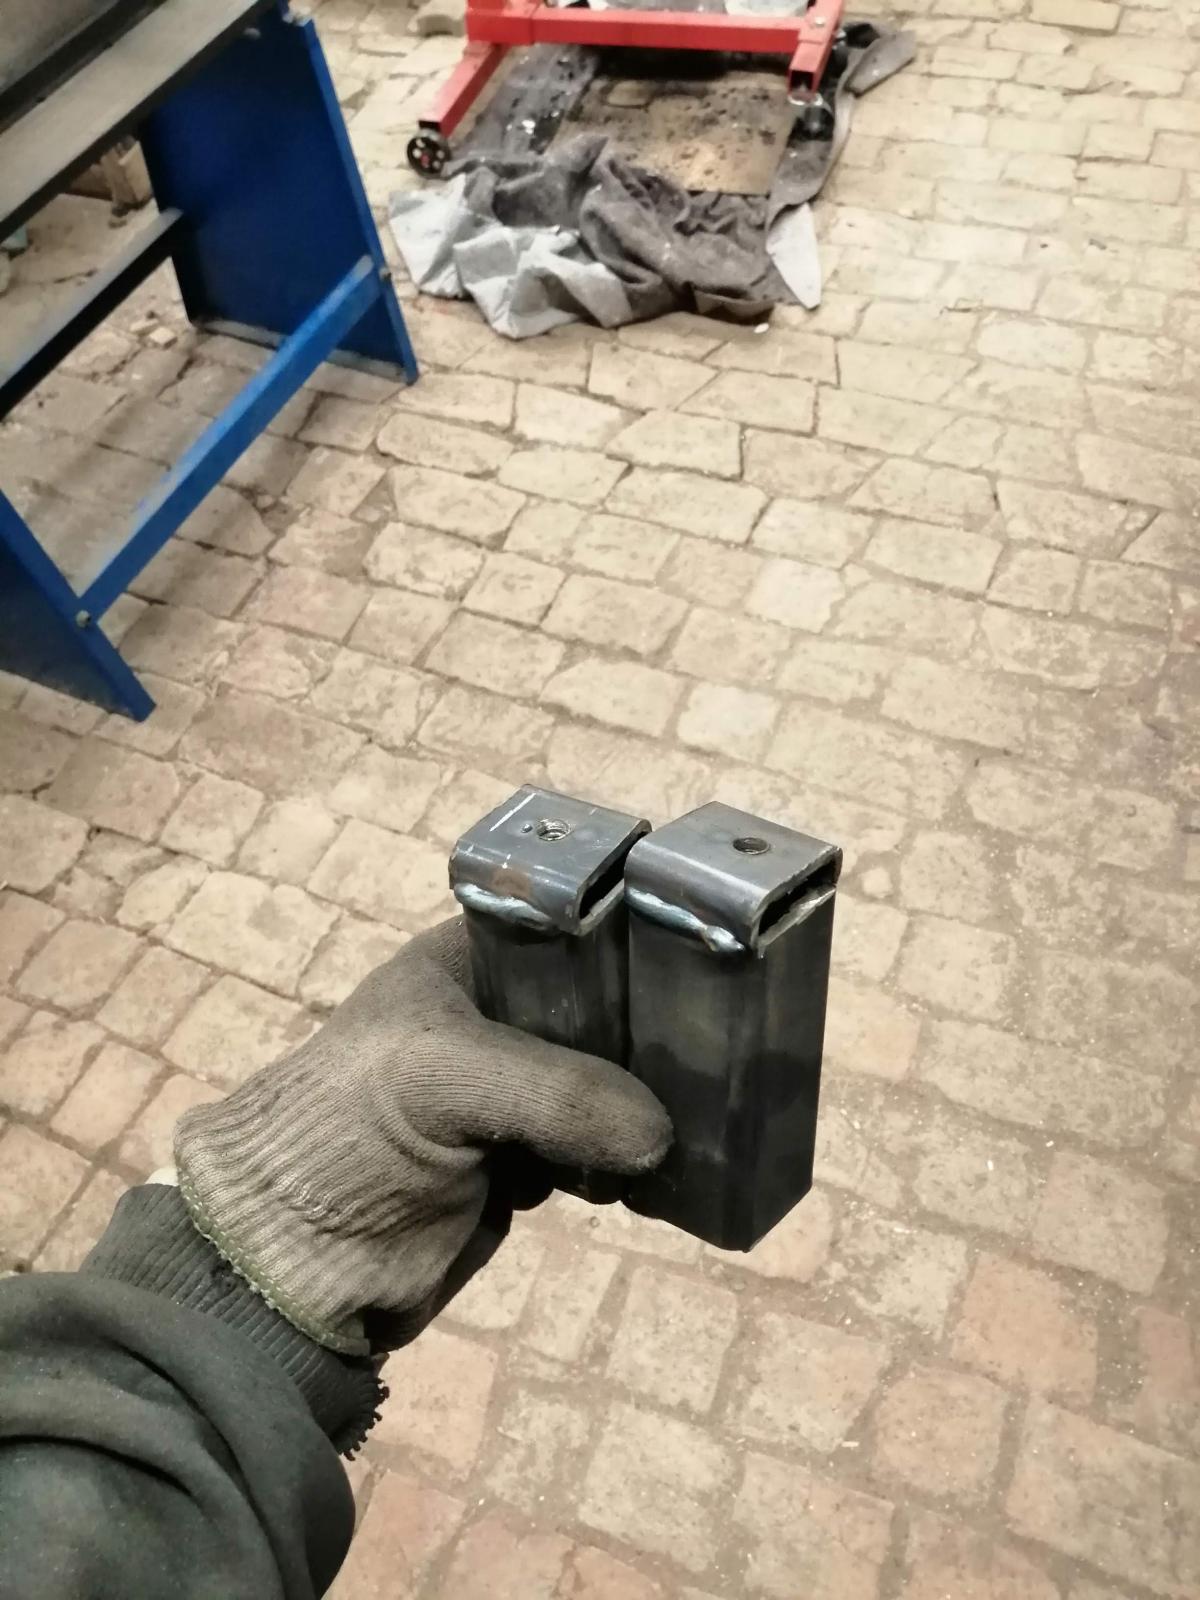
Engine mount:
And suspension console to have the exact position to put it back after hellhole repair:
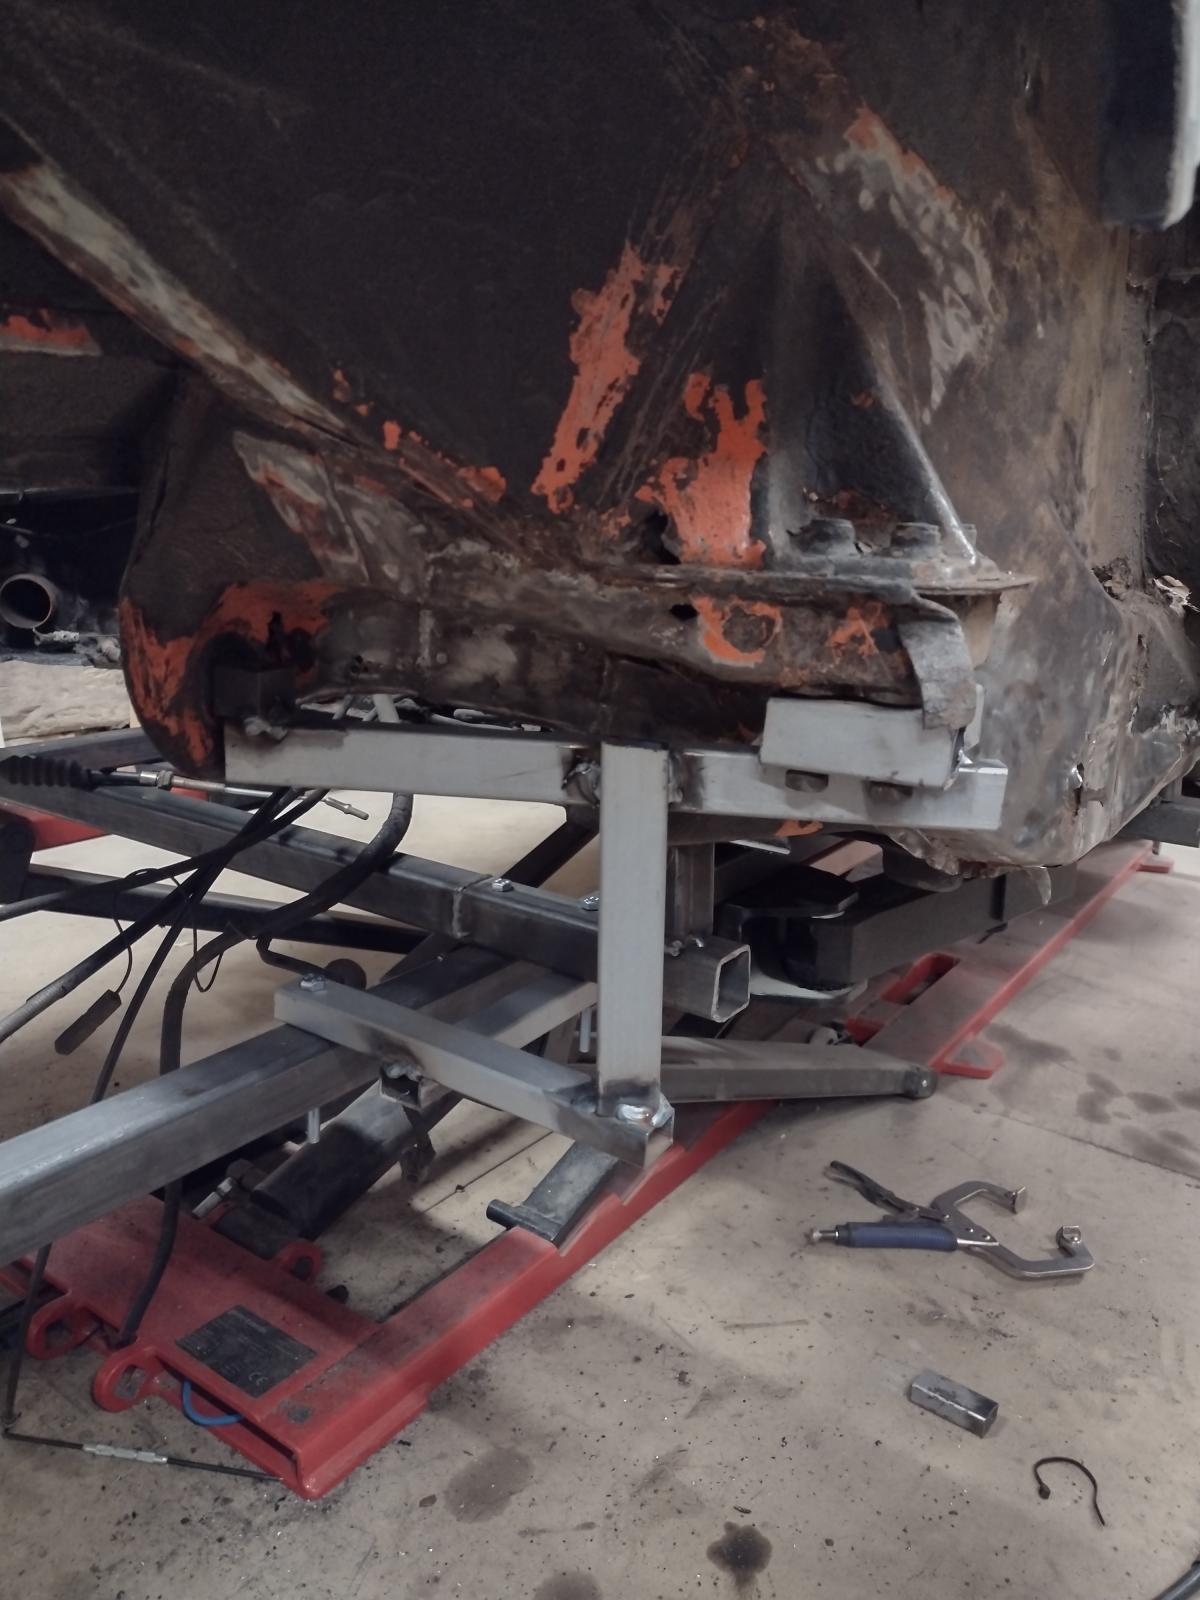
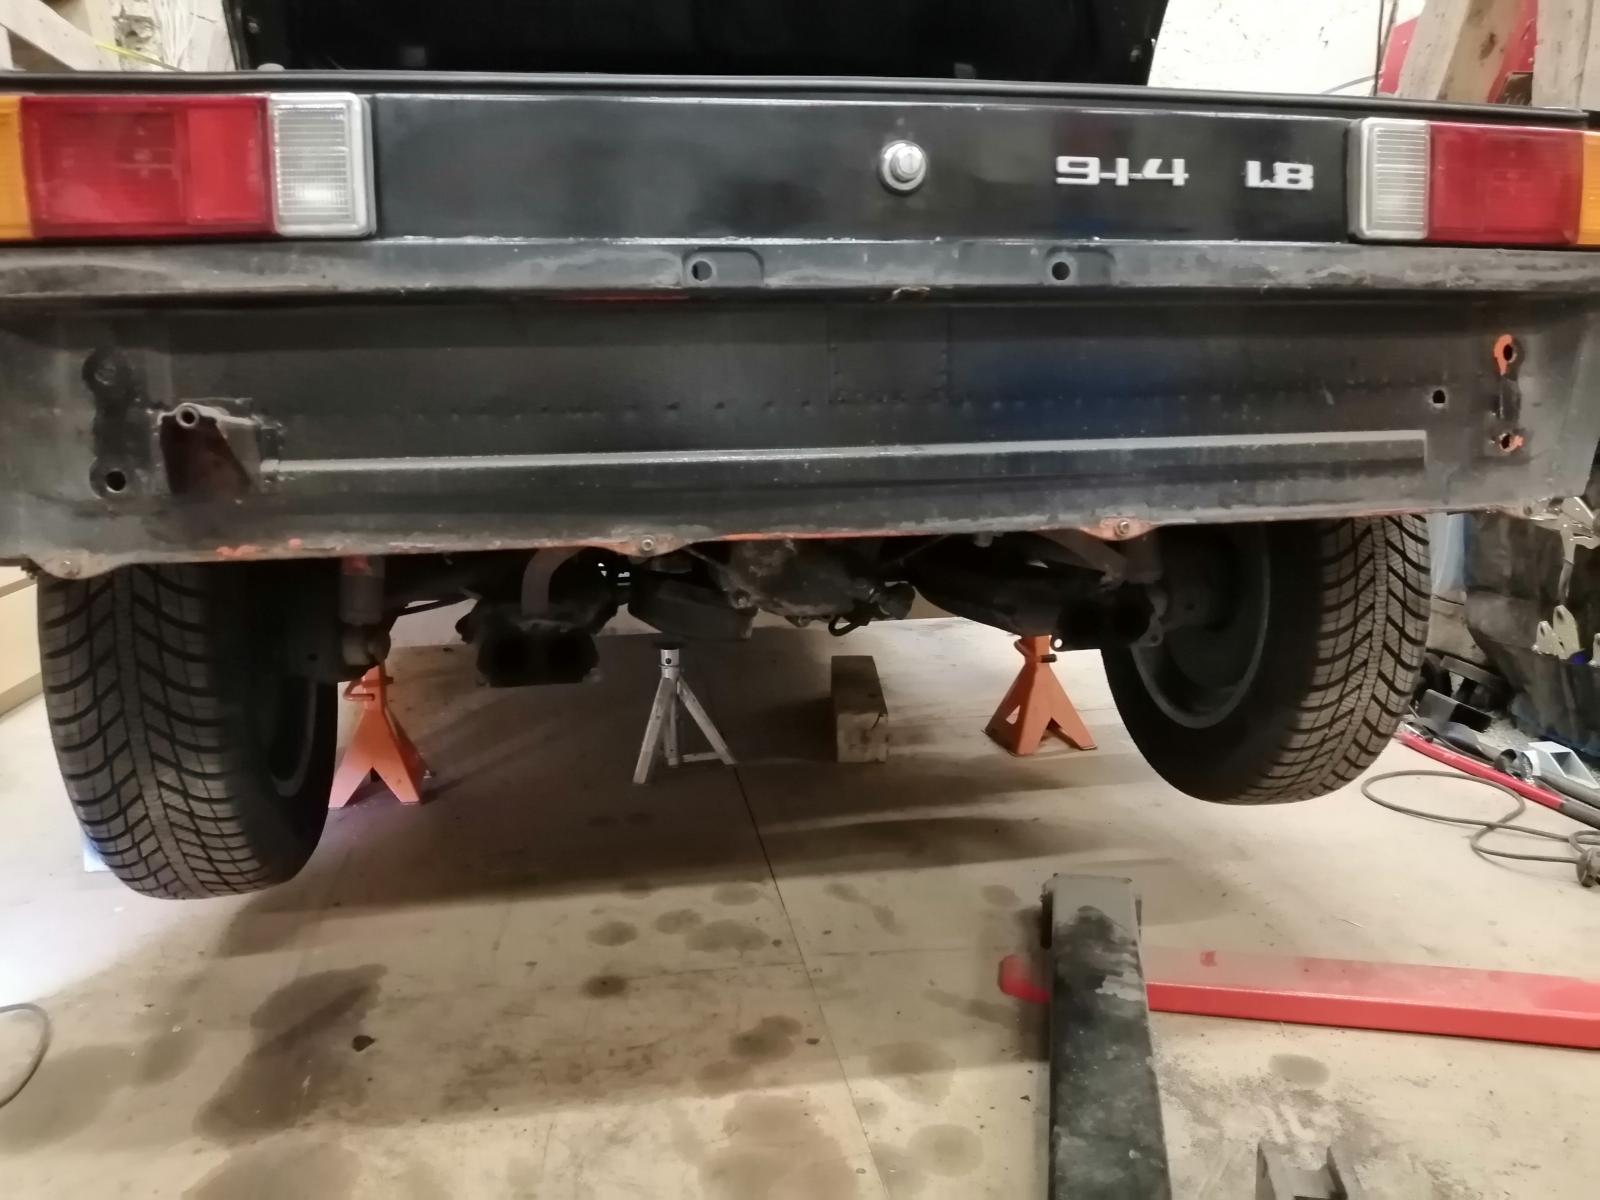
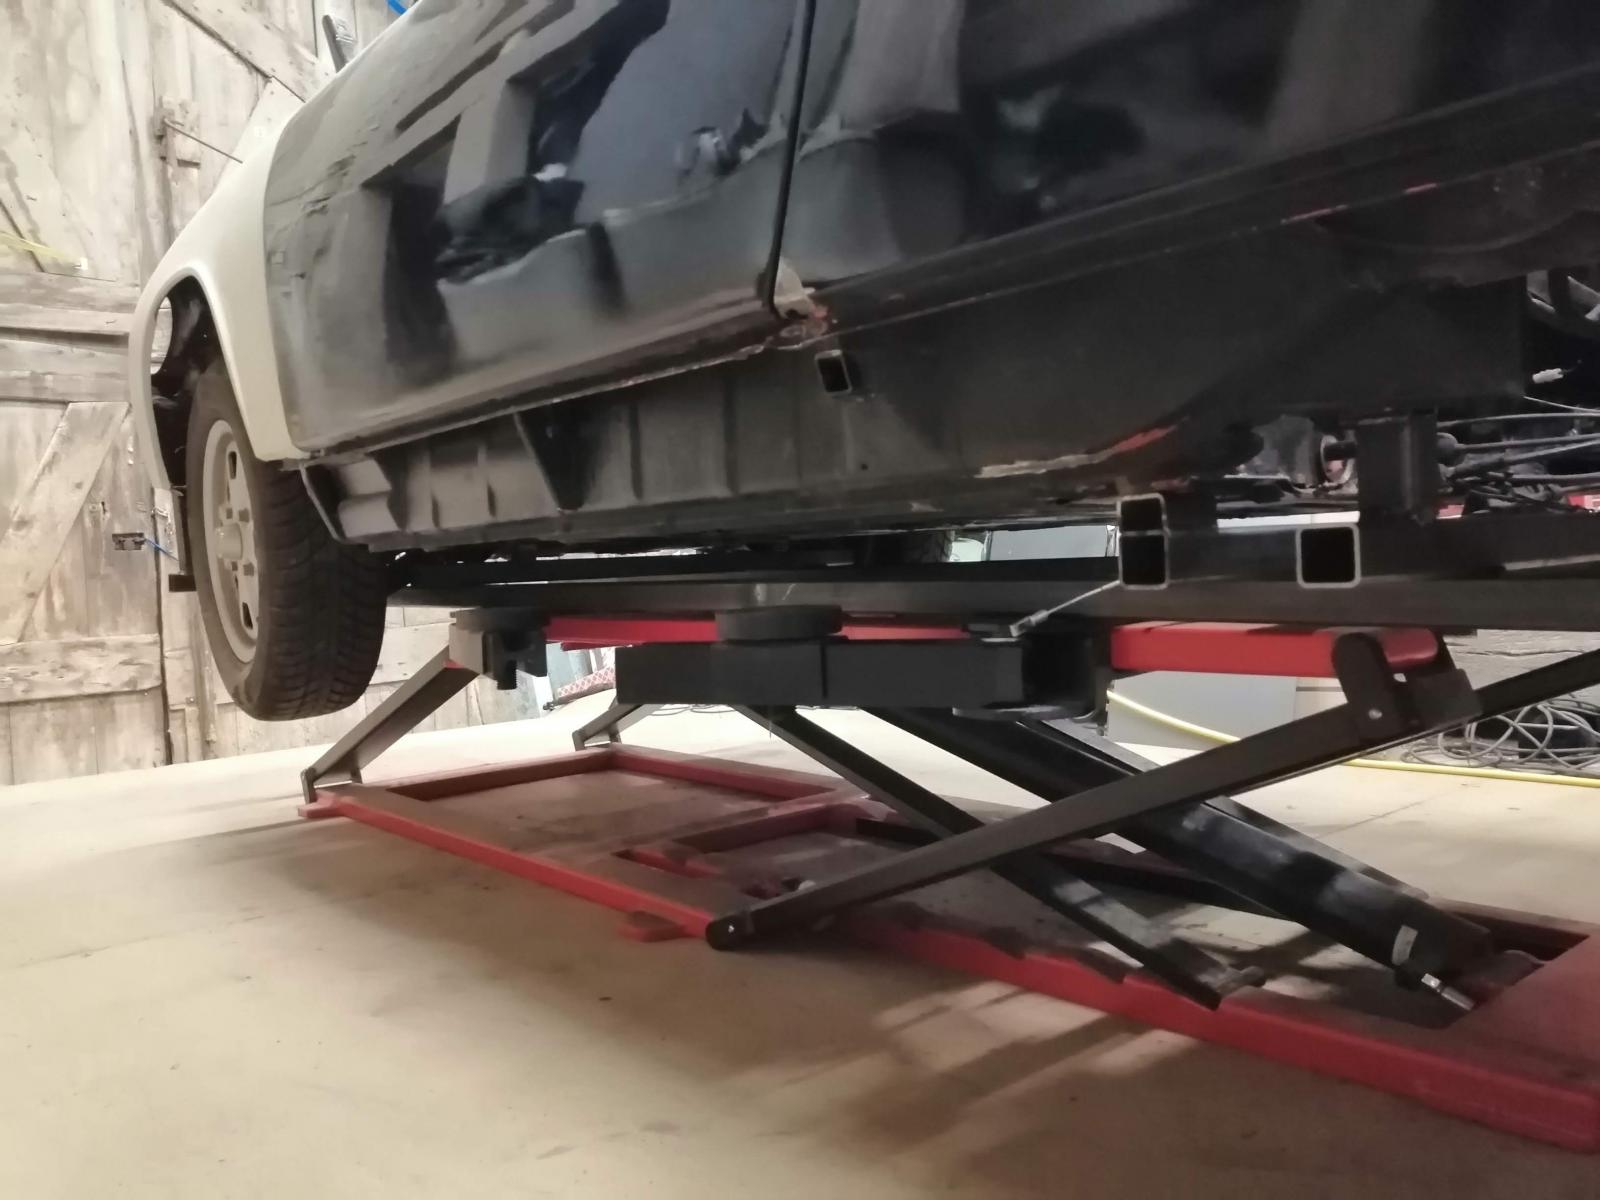
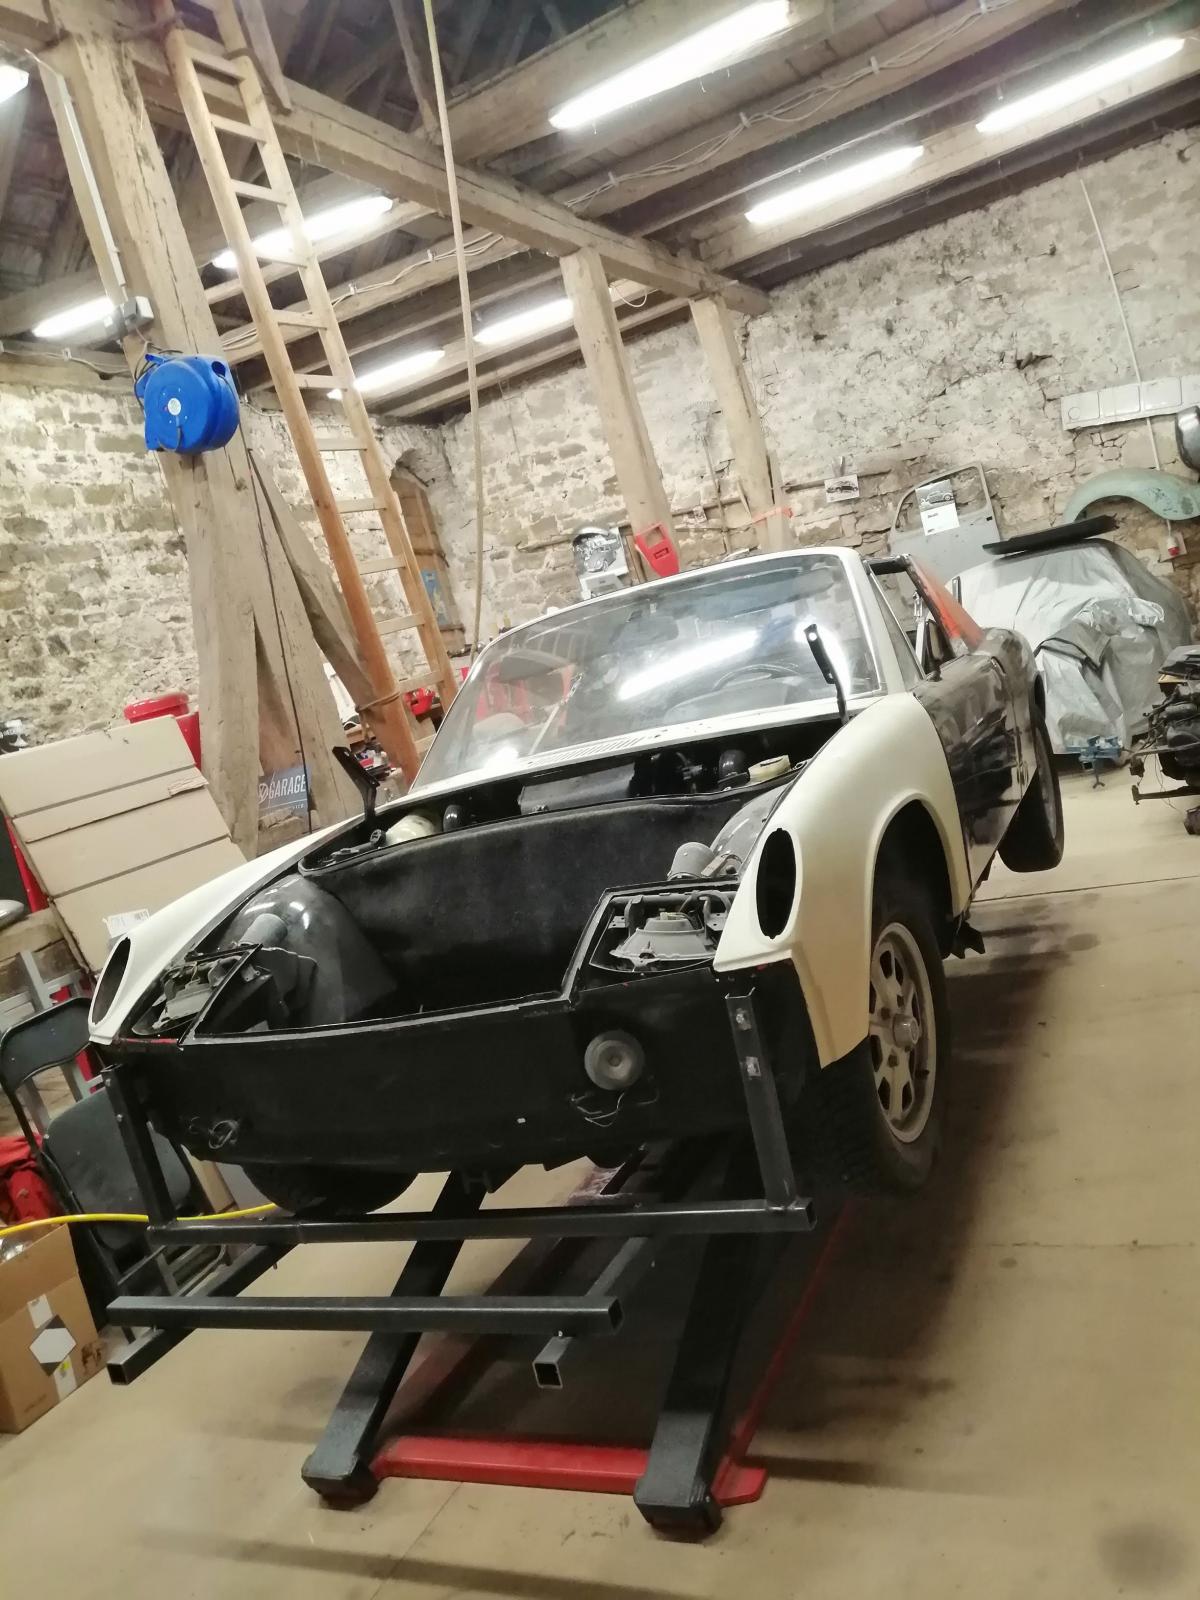
And the car is up:
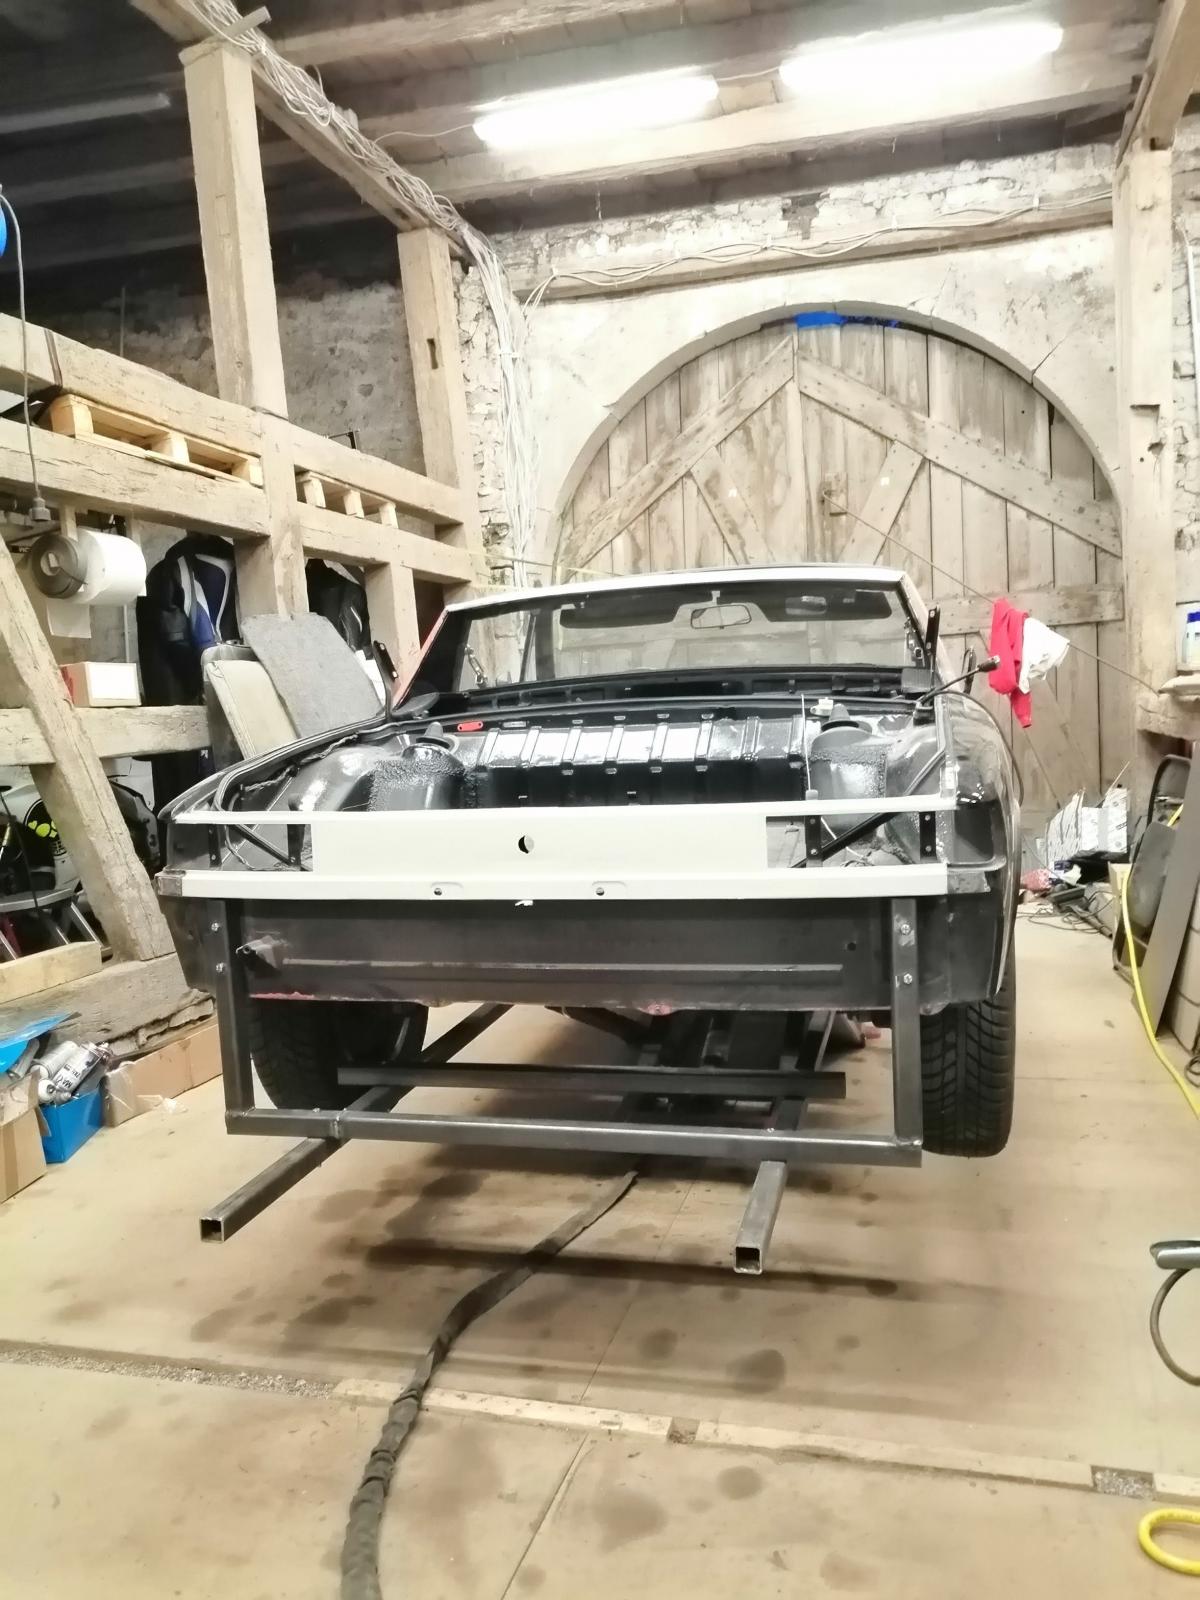
Stay tuned
Antoine
Every fixation is screwed to be able to remove/reuse all after.
Front:
Back:
Under the gearbox: (pic during tacking, fully welded after)
Engine mount:
And suspension console to have the exact position to put it back after hellhole repair:
And the car is up:
Stay tuned
Antoine
That door to the workshop, that's very cool.
914 is looking good as well. I assume a repaint is in the future?
914 is looking good as well. I assume a repaint is in the future?
Yes, will be back phoenix red
Antoine
Antoine
Wow. Just amazing skill set. Metal shaping is an understatement.
Loved how you formed the B pillar door jamb. So looking forward to more.
You covered a lot of ground fast.
Cheers, Dion
Loved how you formed the B pillar door jamb. So looking forward to more.
You covered a lot of ground fast.
Cheers, Dion
Thanks so much, this kind of comment really motivates ! I love the support here!
Metalshaping isn't my work or my background (I am a mechanical engineer) but I love it so much and really try my best here so really appreciated!
So, now that the car is solidly anchored in the frame and we can go forward.
Before starting on the hellhole, I made one last repair on the driver's B-pillar.
The bottom had some holes:

So I built the repair part in two parts as original:
Adjusted:
Tacked in position :
And welded:
Stay tuned, hellhole repair comes next!
Cheers
Antoine
Metalshaping isn't my work or my background (I am a mechanical engineer) but I love it so much and really try my best here so really appreciated!
So, now that the car is solidly anchored in the frame and we can go forward.
Before starting on the hellhole, I made one last repair on the driver's B-pillar.
The bottom had some holes:
So I built the repair part in two parts as original:
Adjusted:
Tacked in position :
And welded:
Stay tuned, hellhole repair comes next!
Cheers
Antoine
Great work I just sent you a PM because both of my parents are from south of your area.
Great work, great documentation. Thanks so much for the detailed "how to" steps! This is so helpful for others who have to do the same repairs. 
Certainly far more useful than the sorts of things I post!
Certainly far more useful than the sorts of things I post!
Thanks a lot for the support, really appreciated ! Stay tuned, a lot more to come as I had a day free for it this week!
Cheers
Antoine
Cheers
Antoine
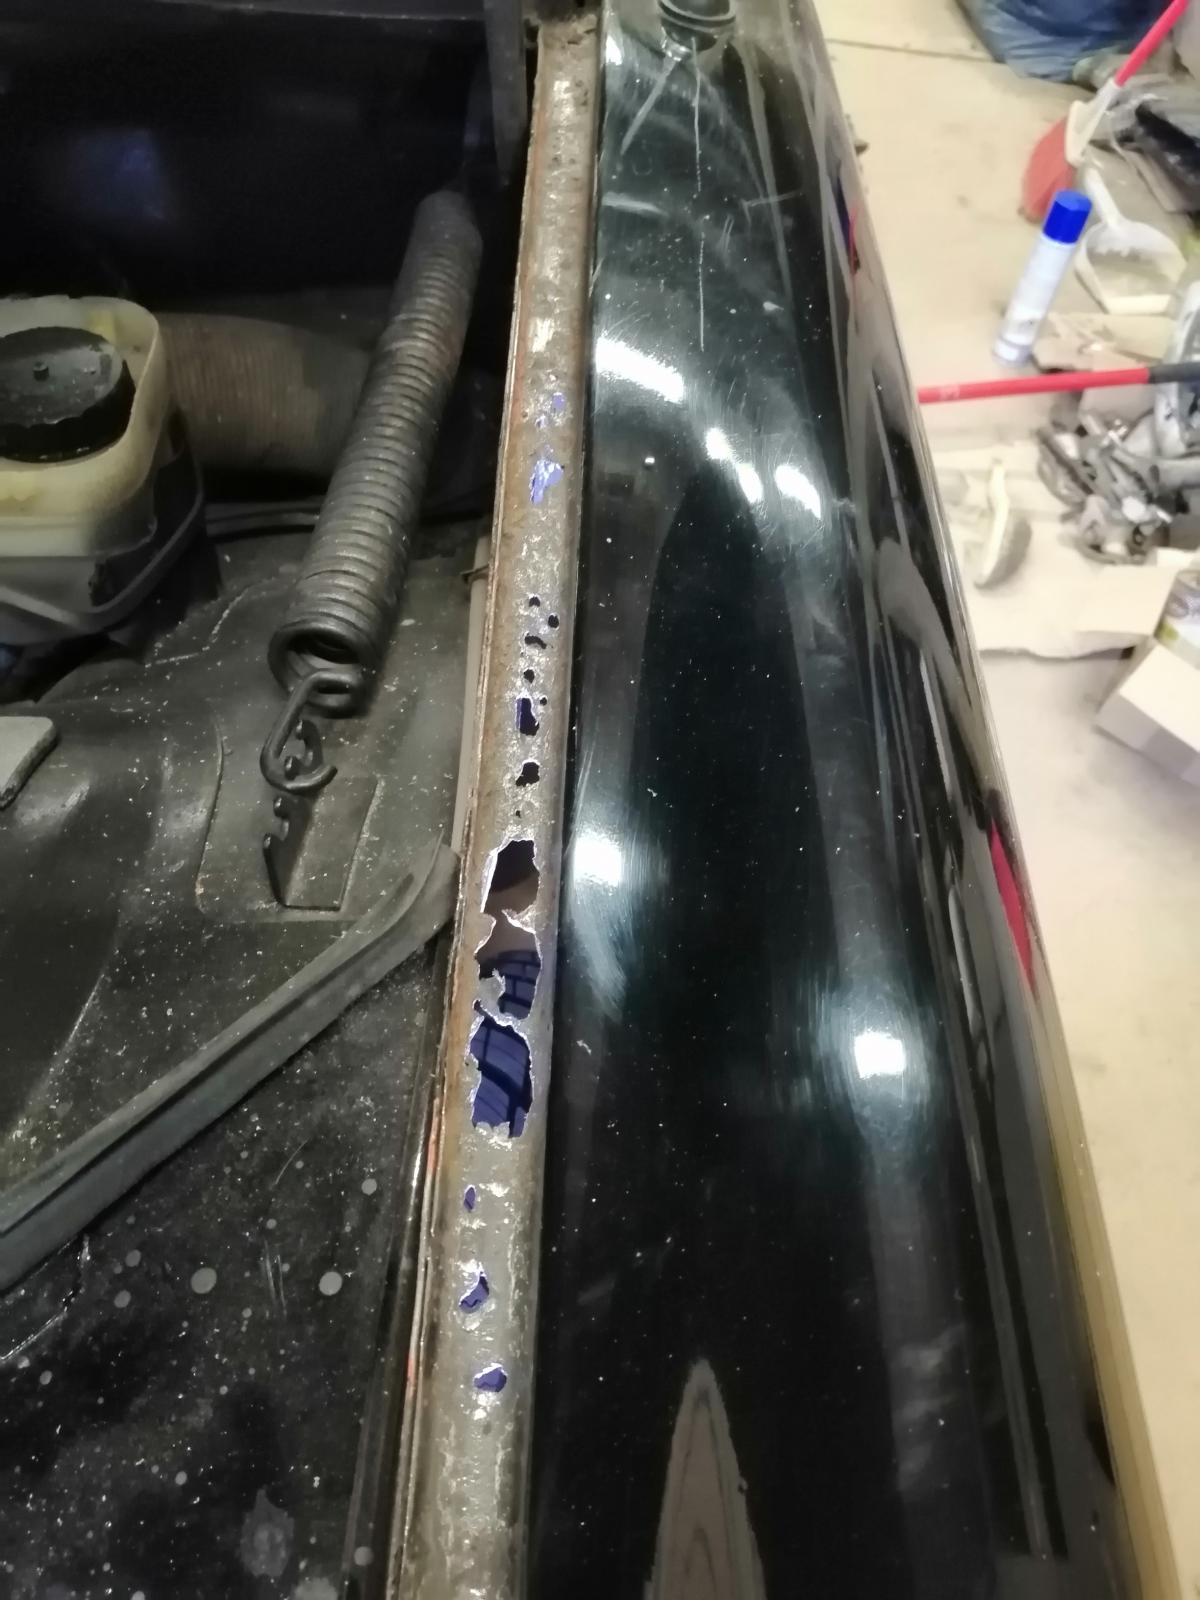
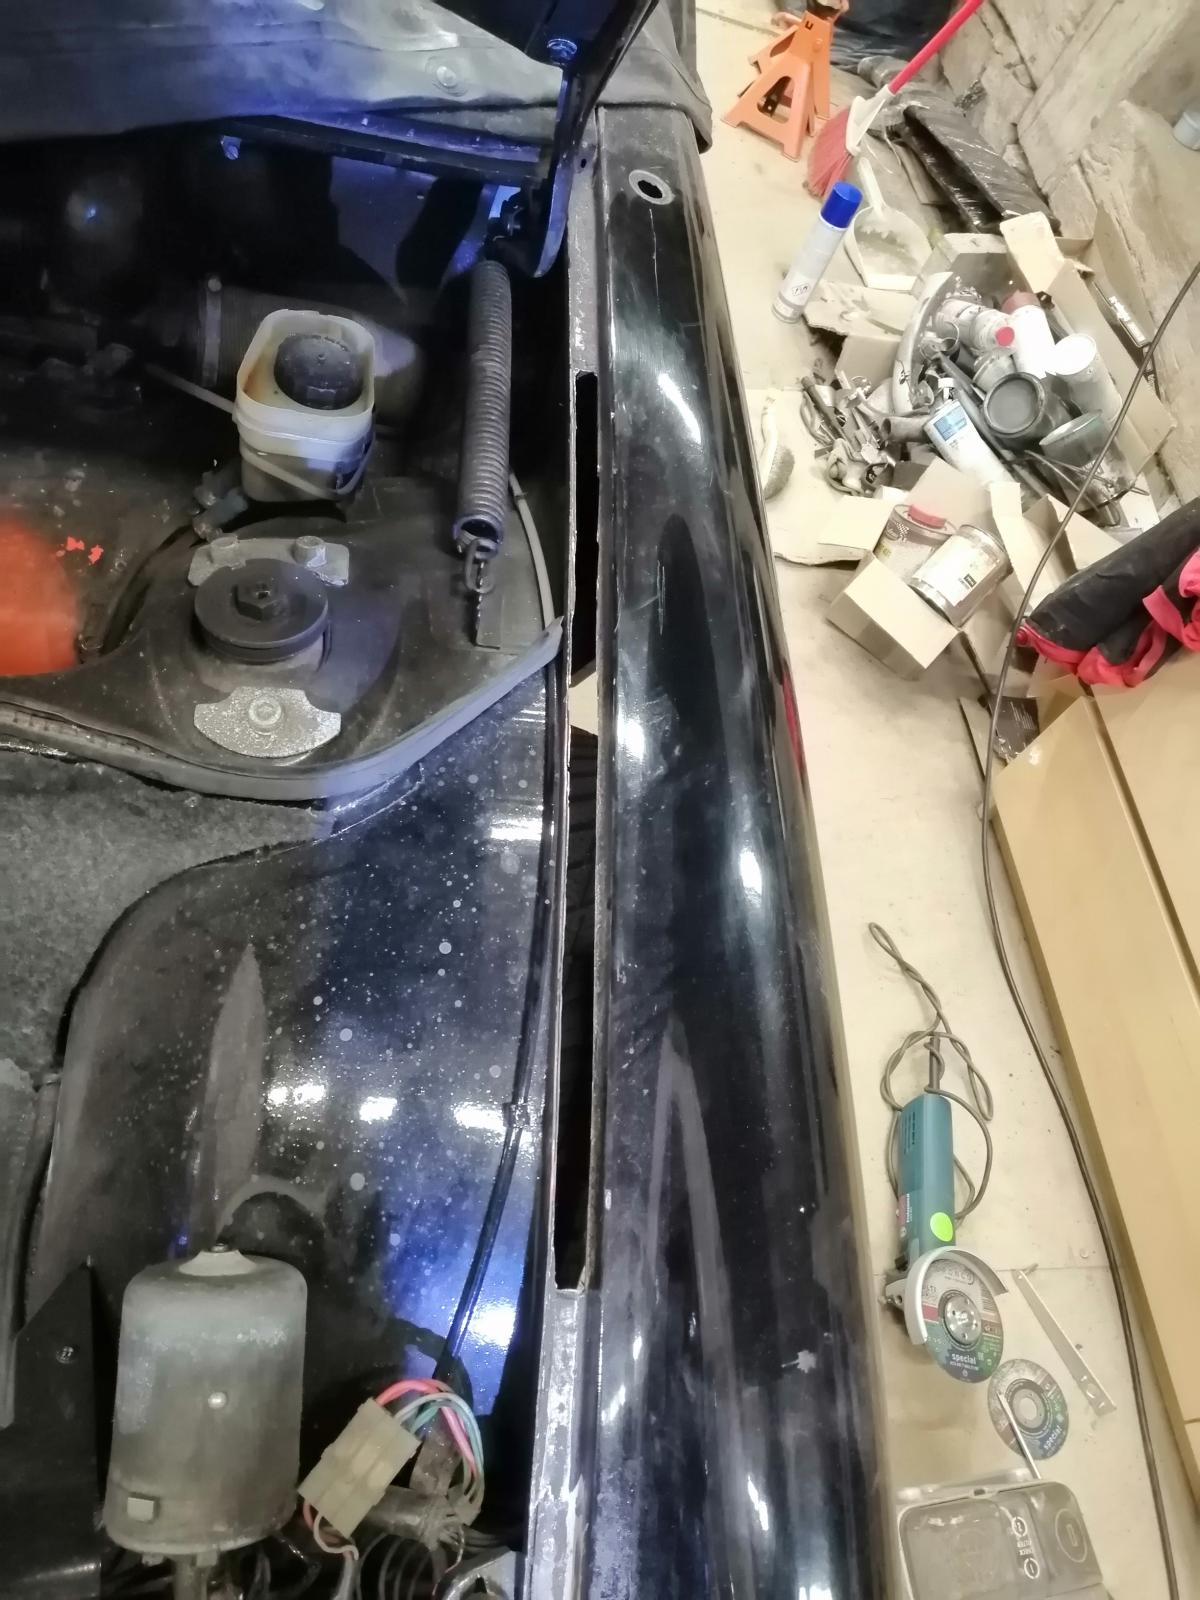
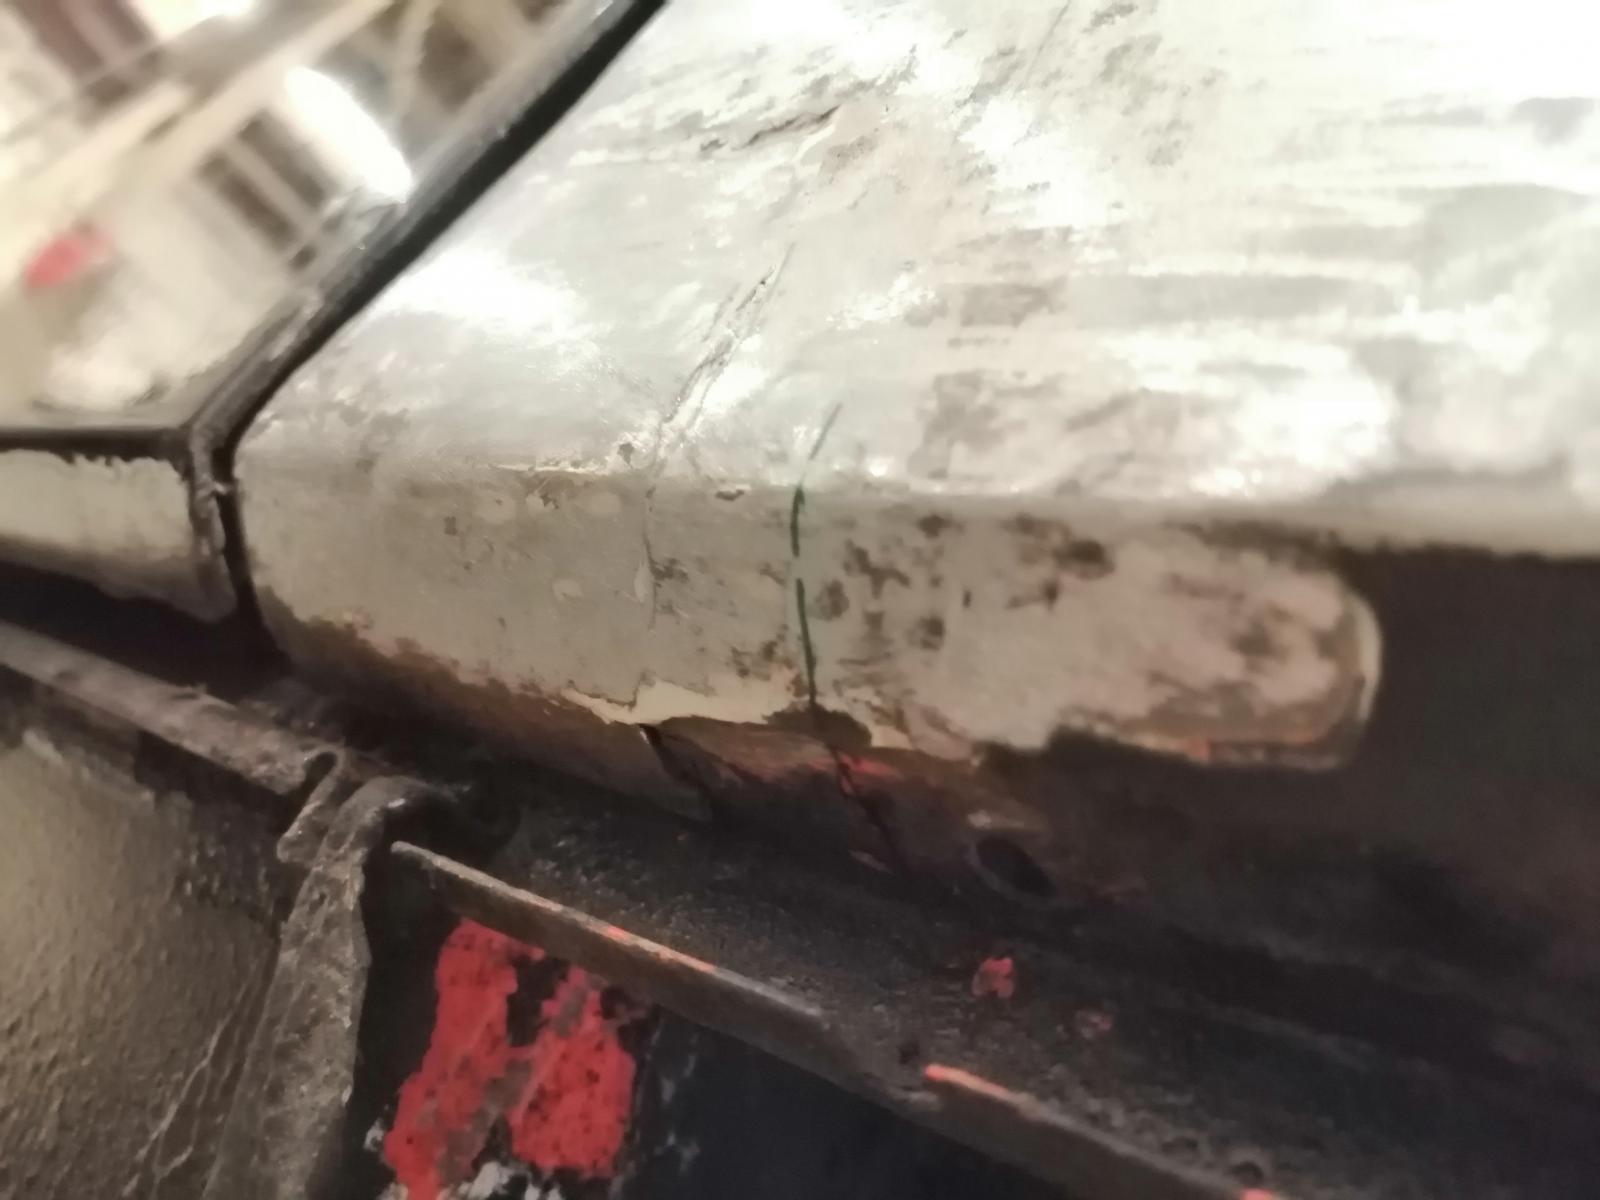
So, before removing the paint on the right rear quarter panel, I was'nt sure how to deal with it while repairing the hellhole. I knew cutting it would allow me a better access but cutting good metal is always a hard decision..
Well, from that point of view I got "lucky" because there is no good metal
Here without paint:
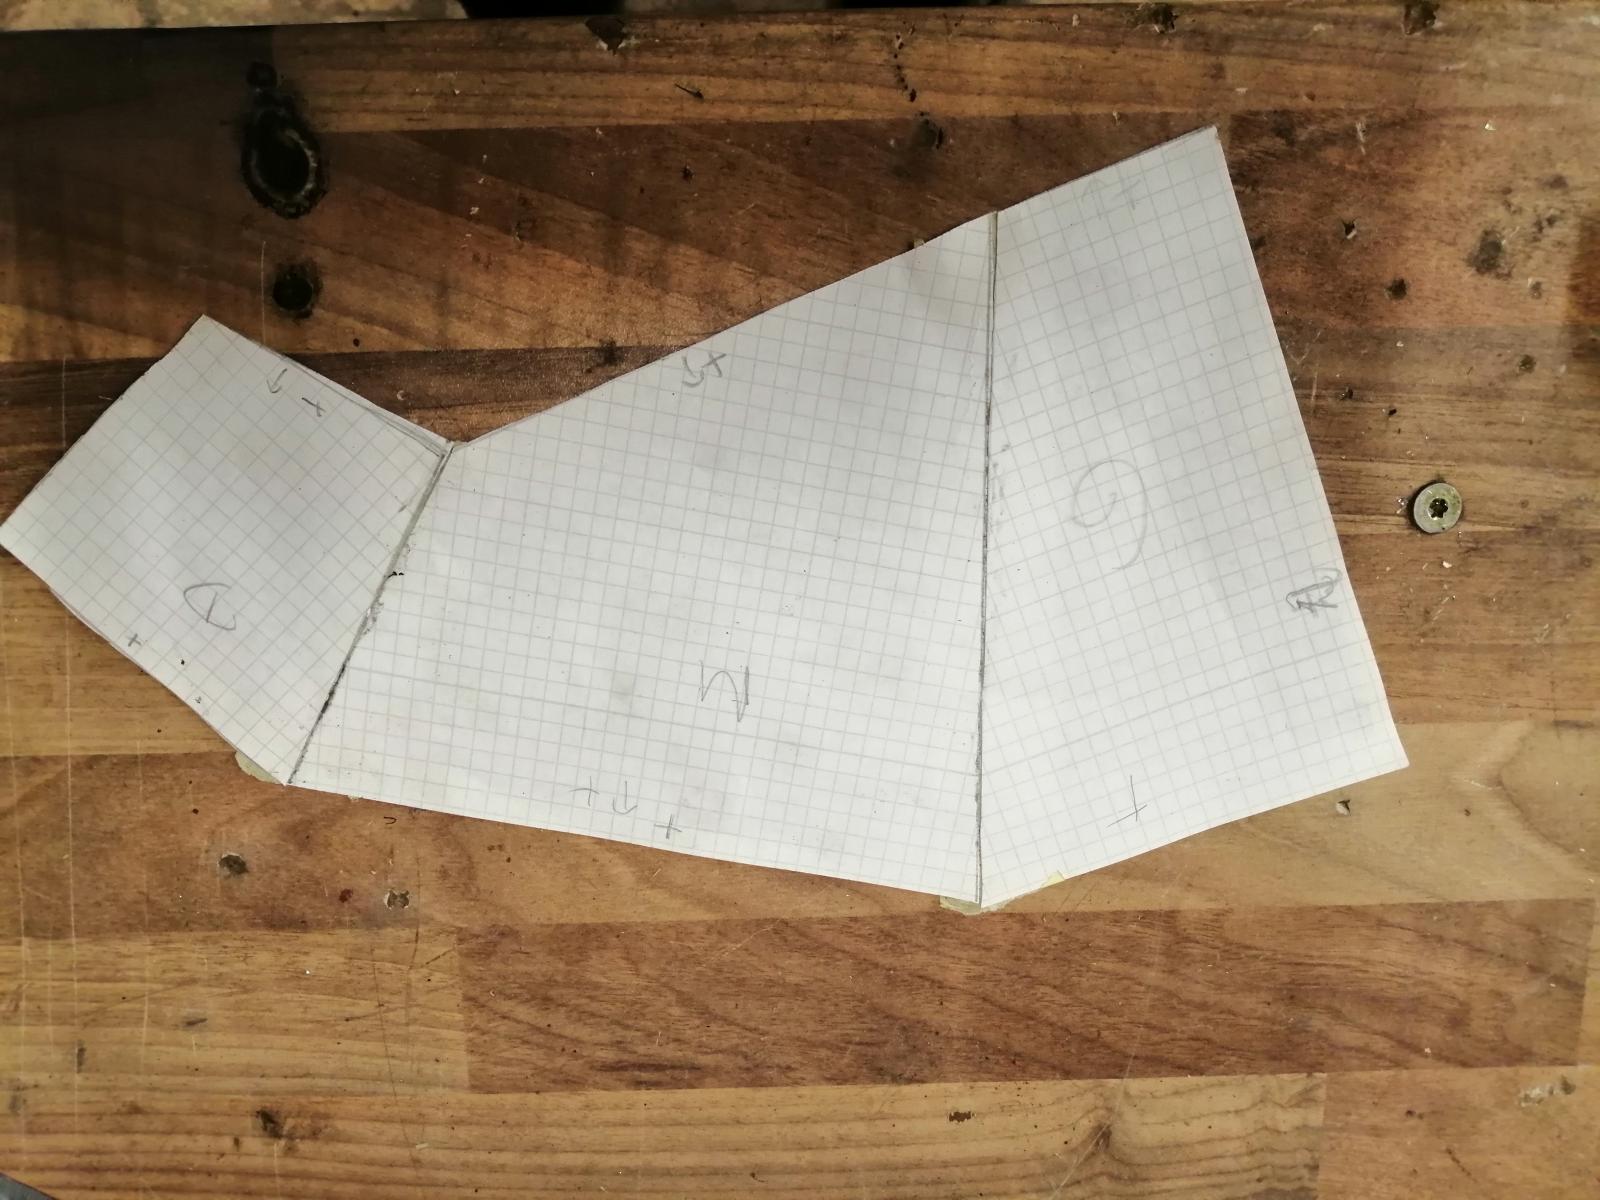
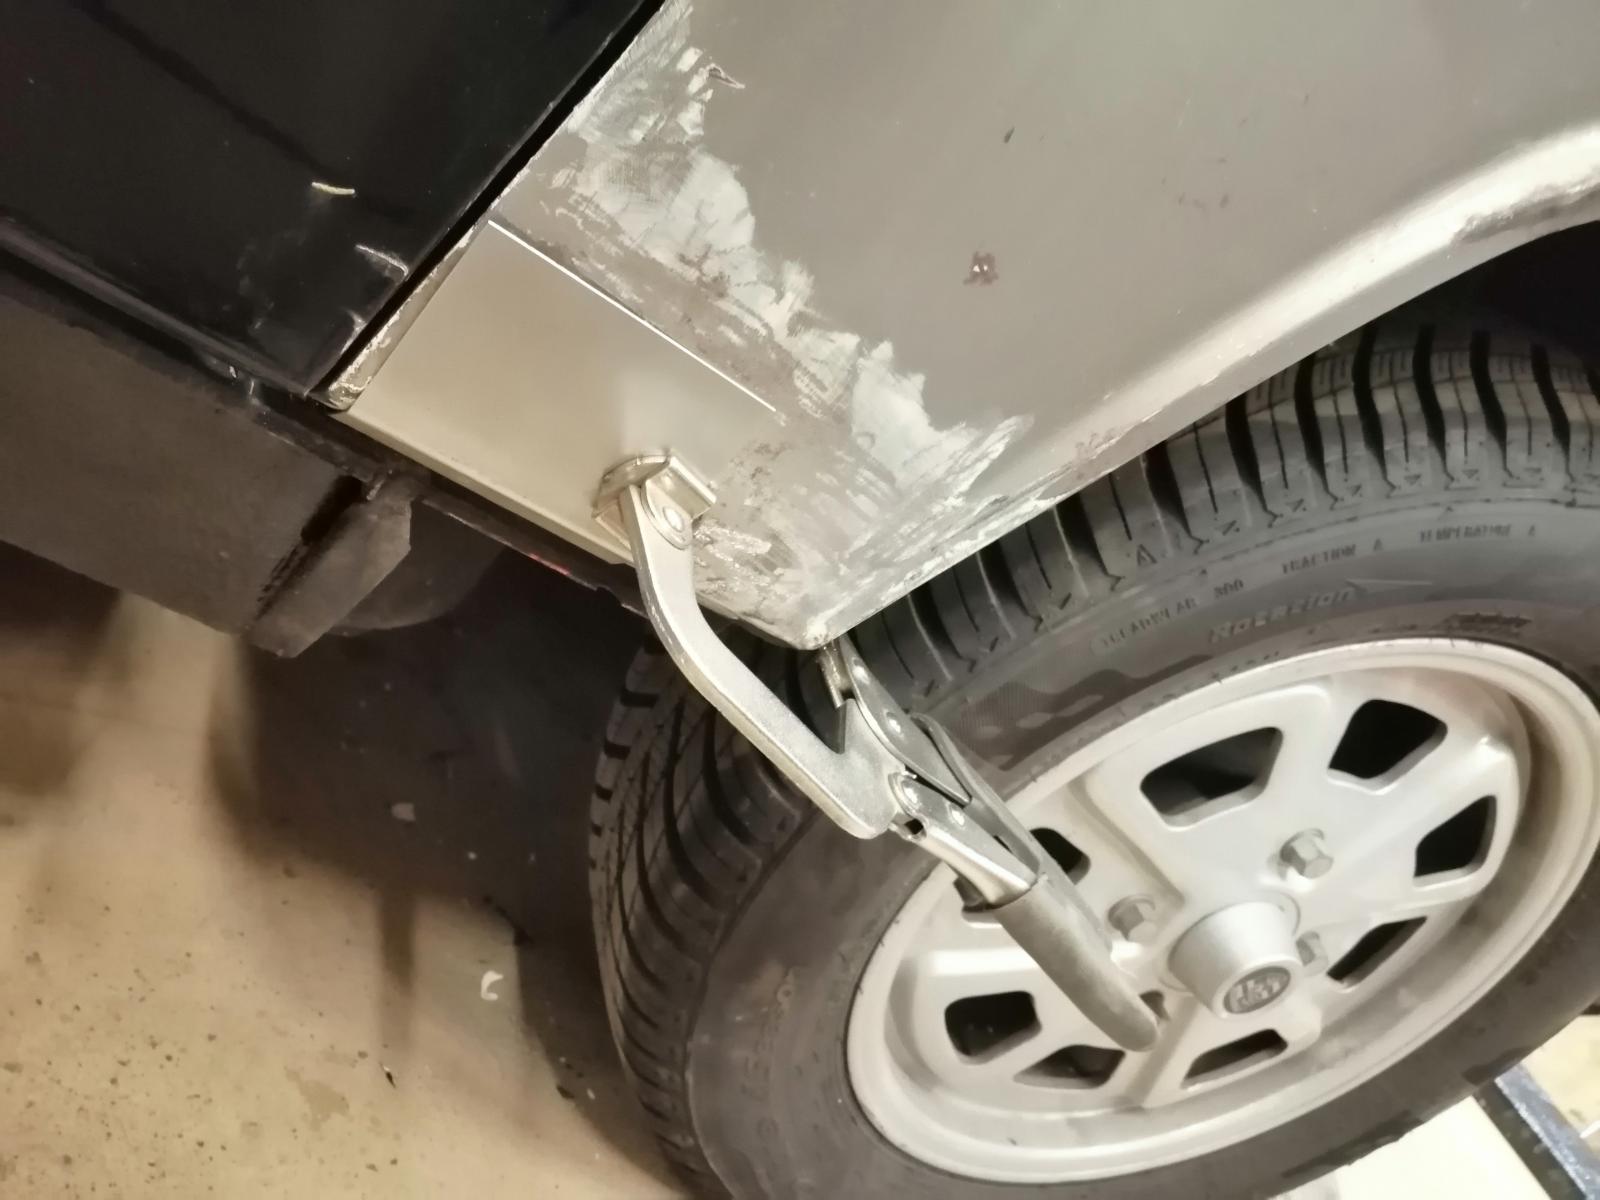
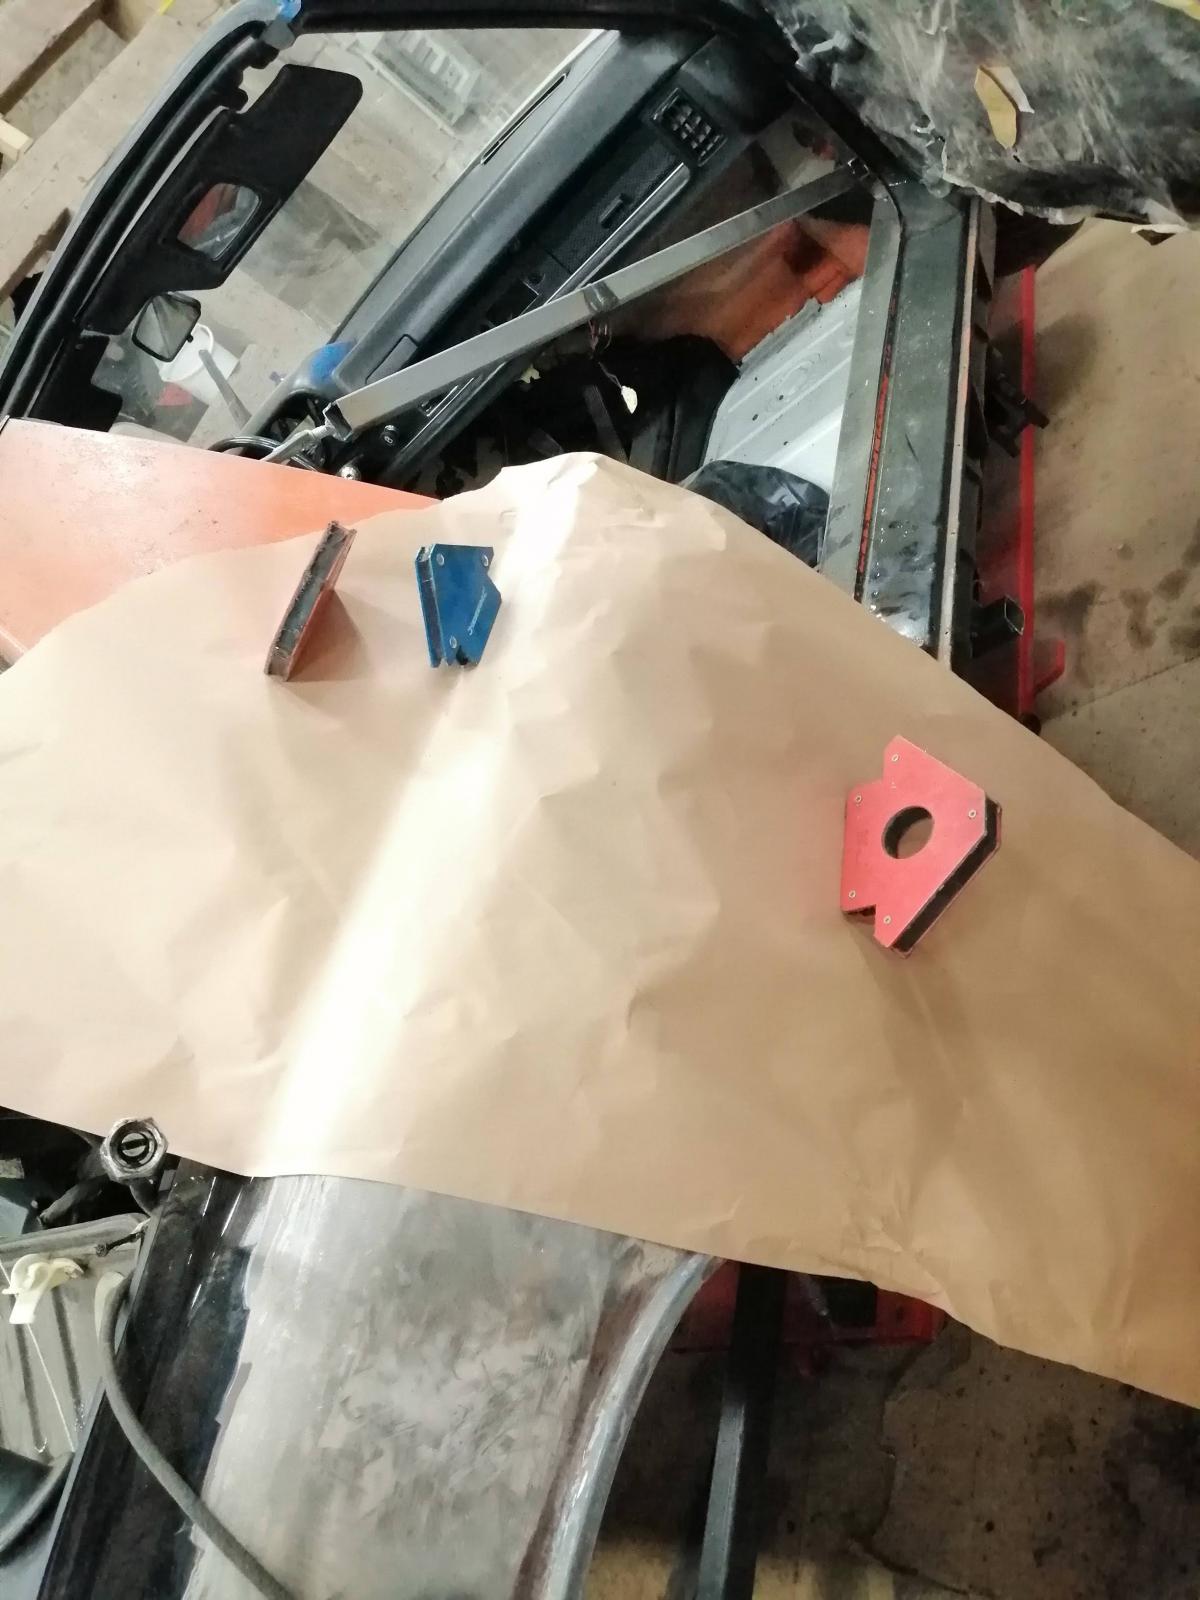
And I have a habit that I built(or make sure I have it) the part before cutting, to ensure I won't miss any measurement/positioning. So here we go !
Making my template :

And starting :
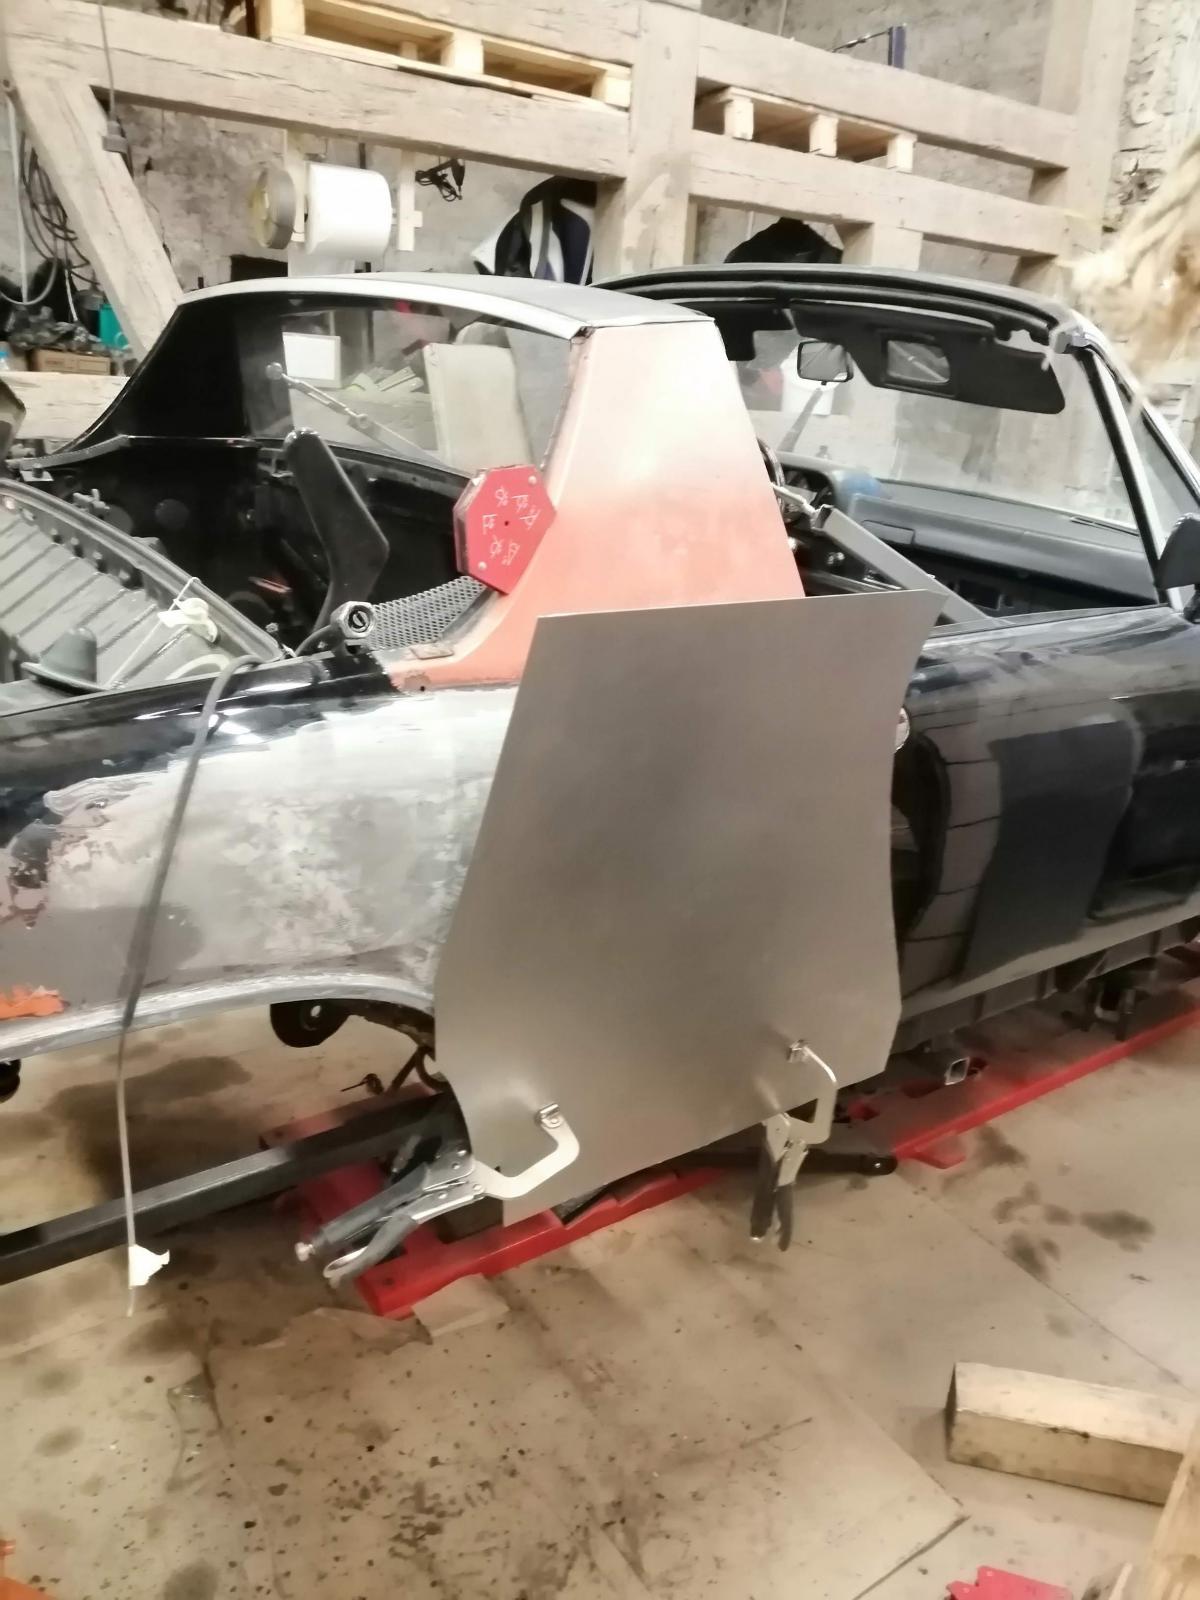
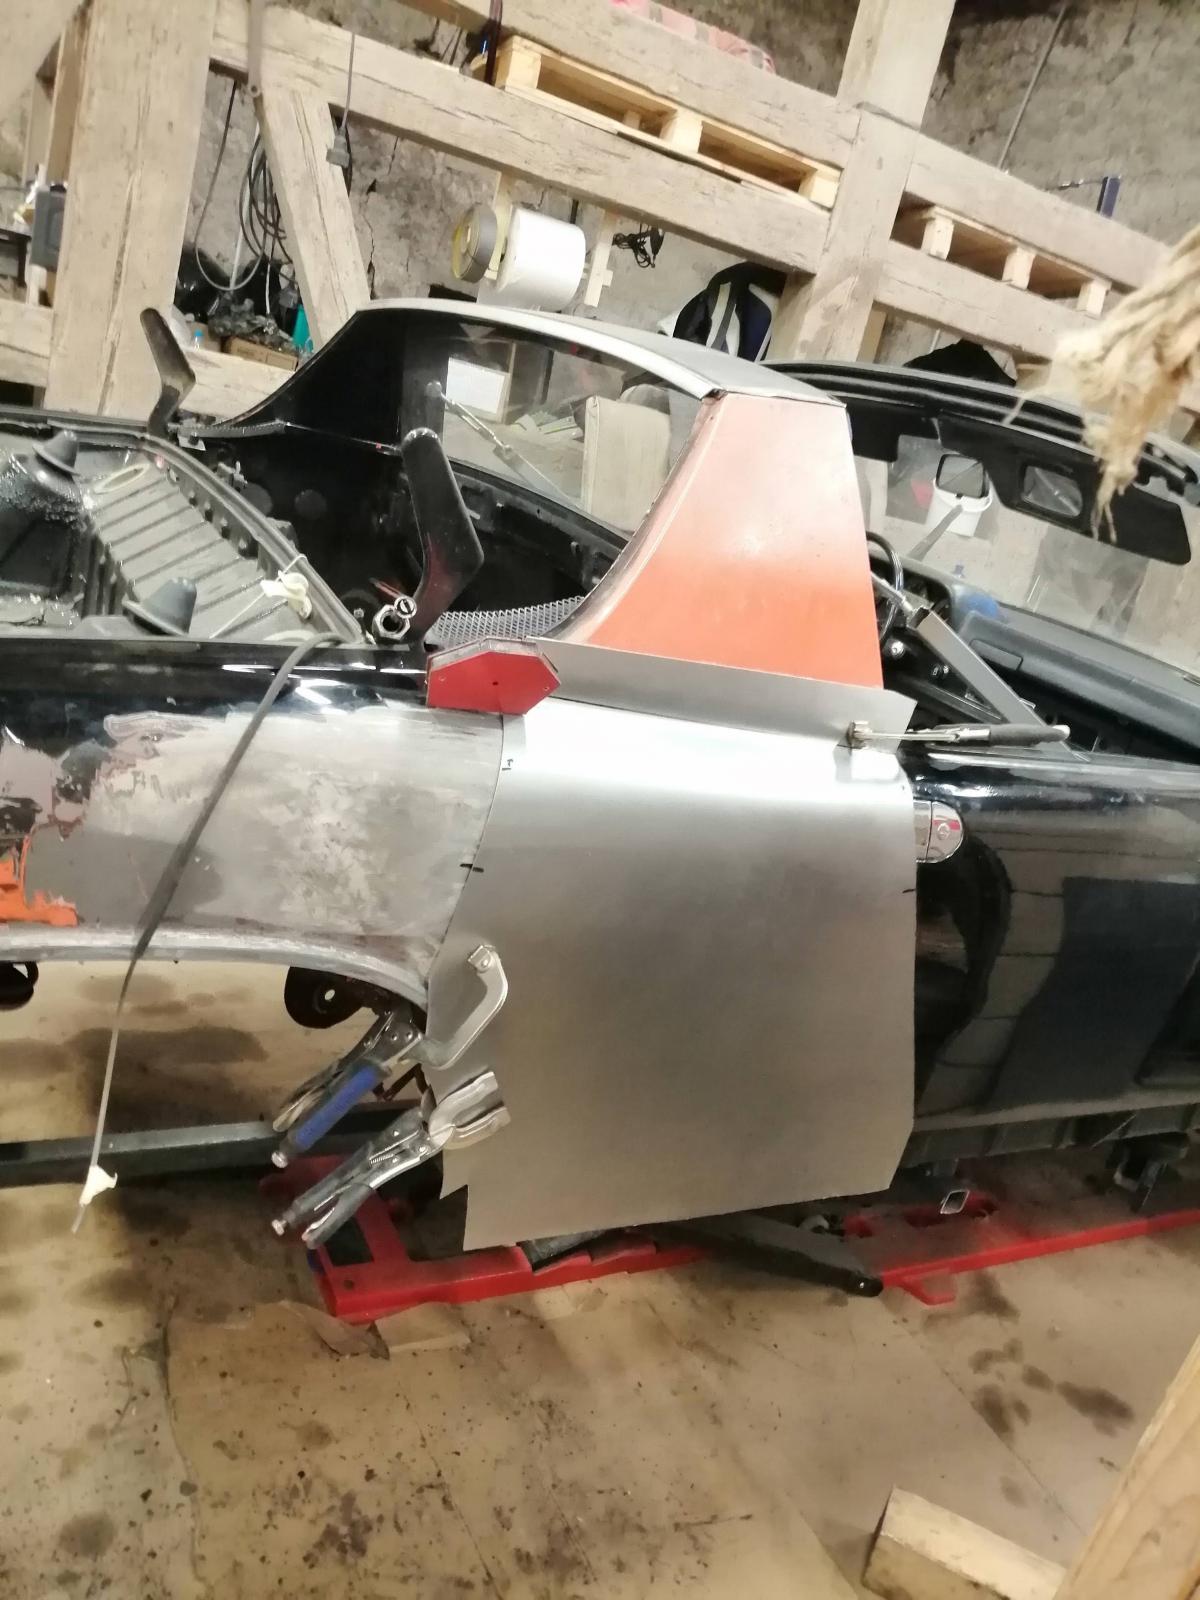
And after a couple hours:
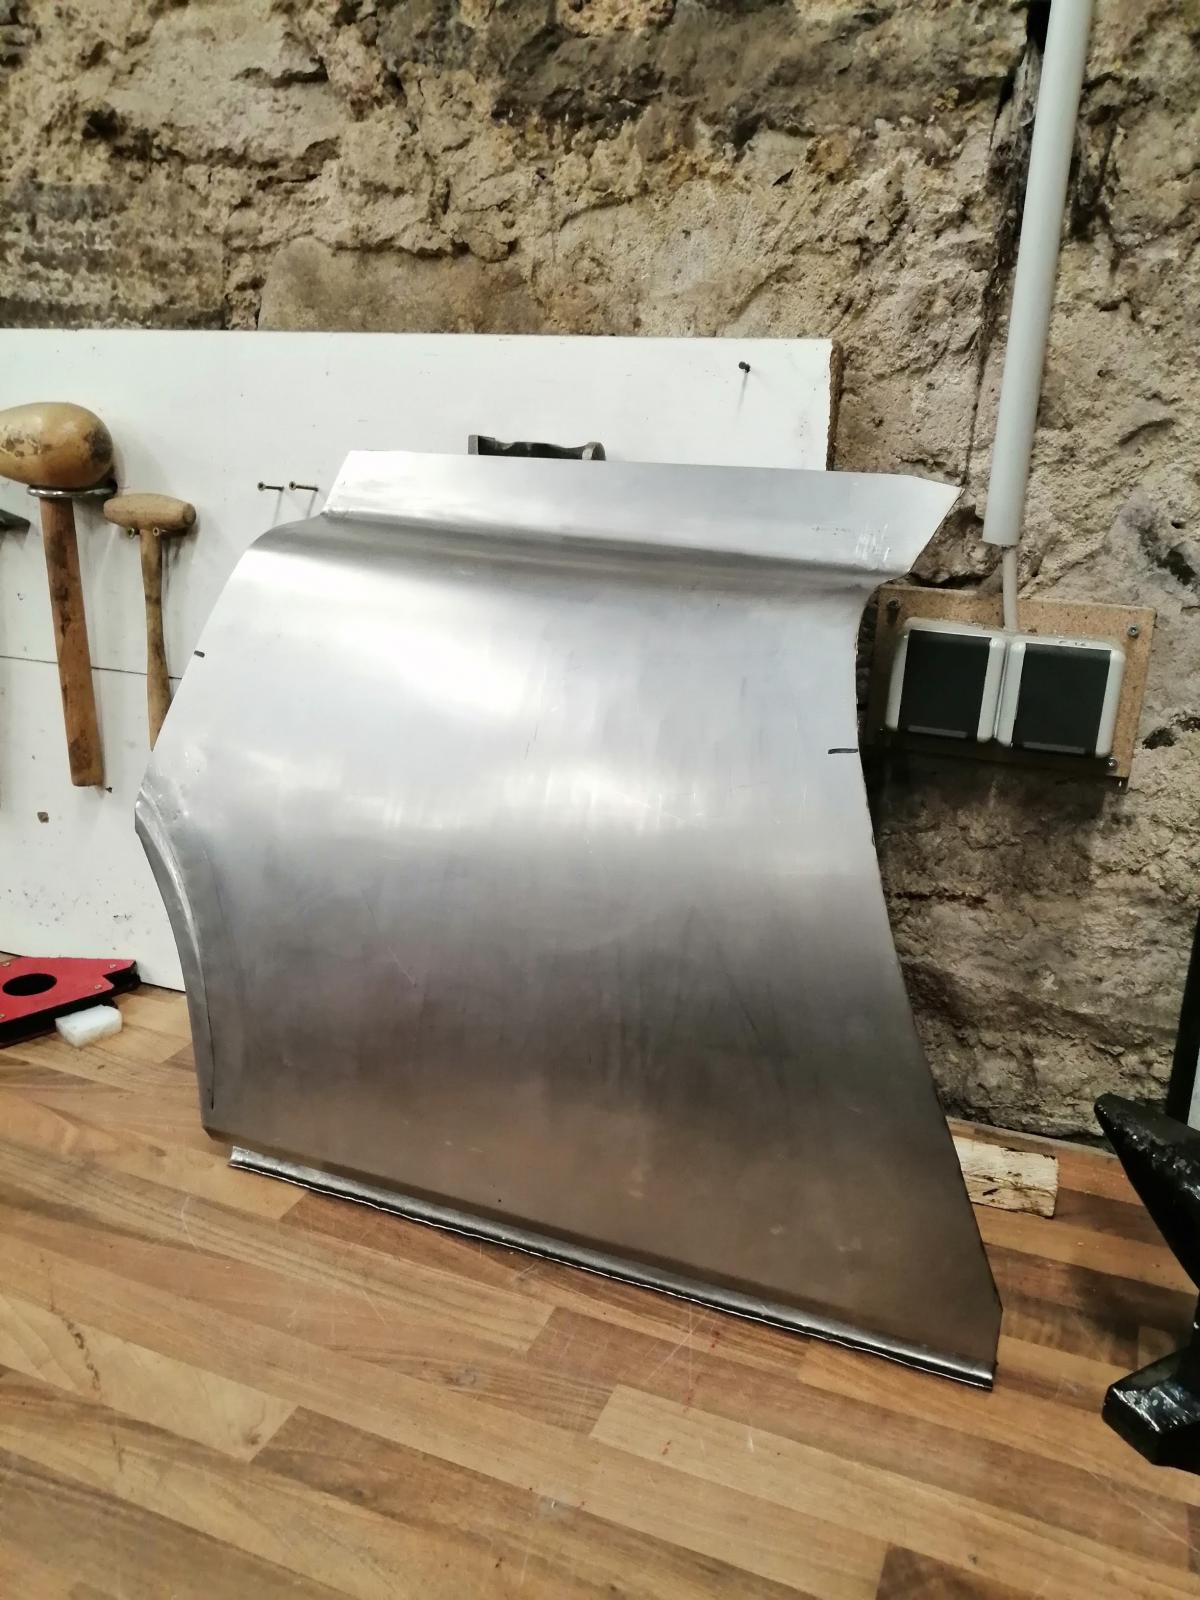
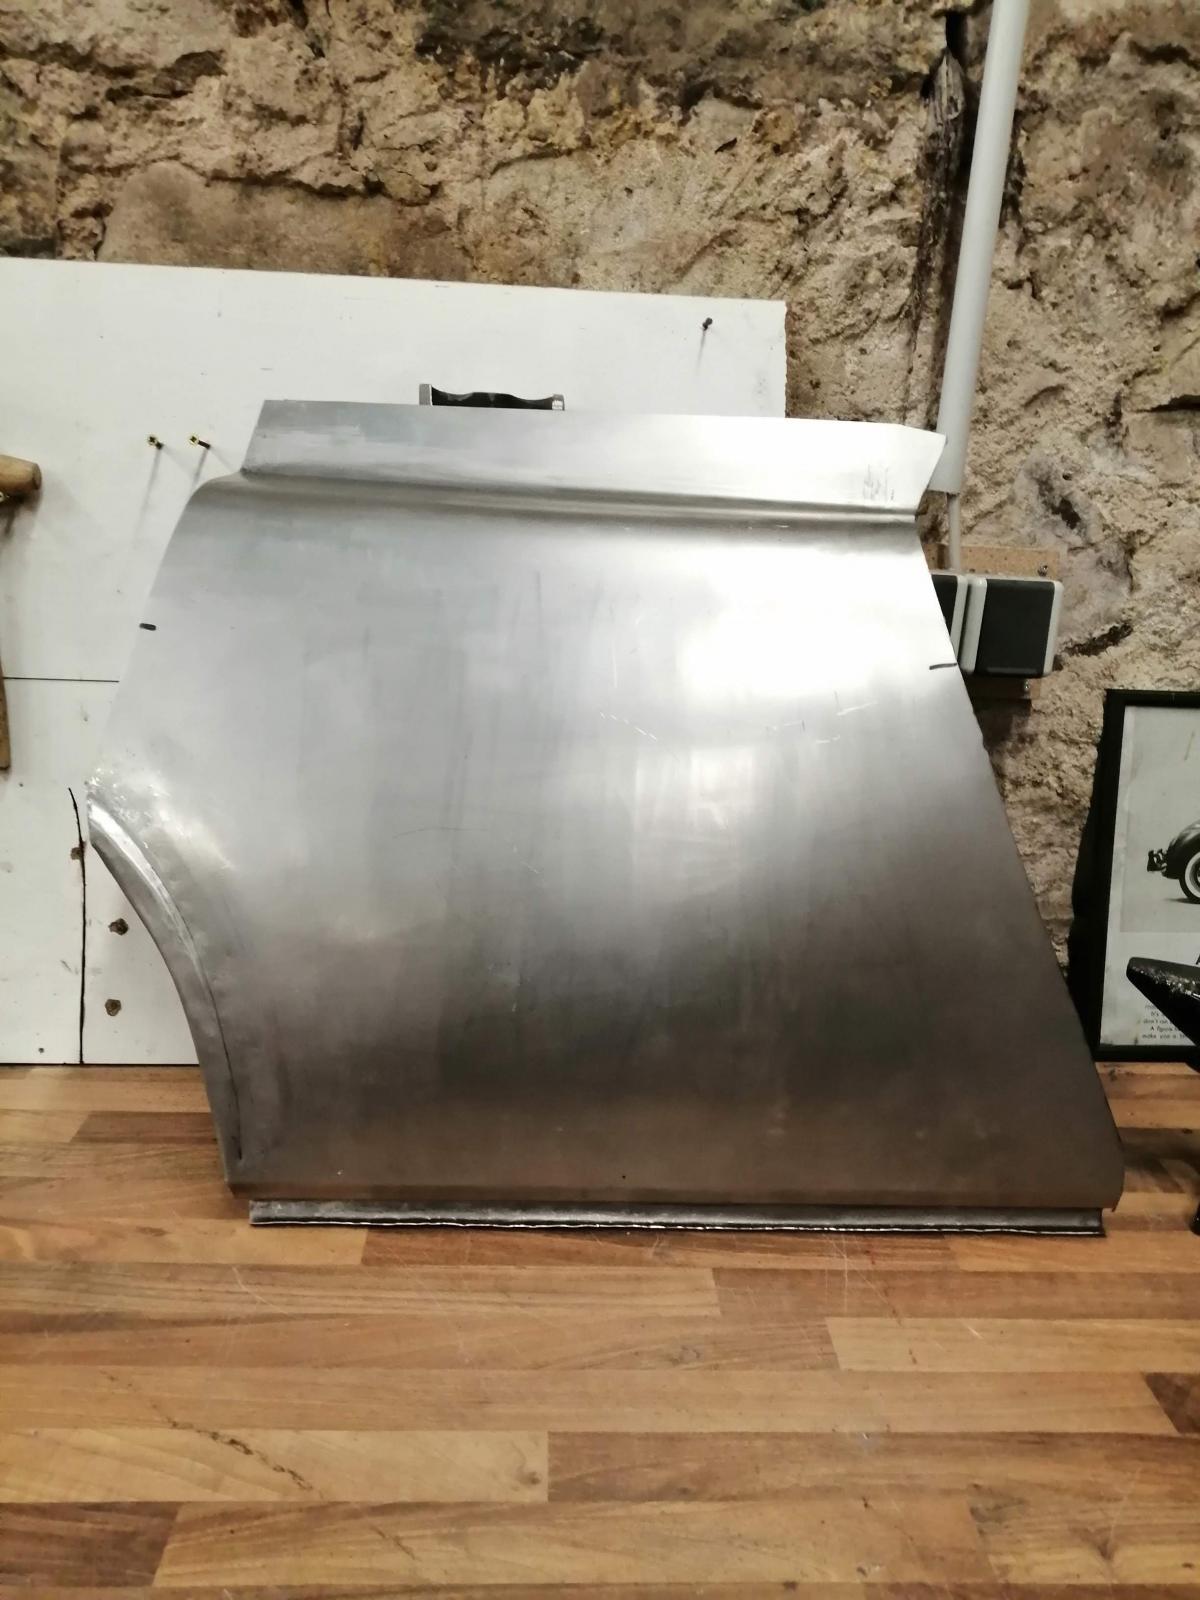
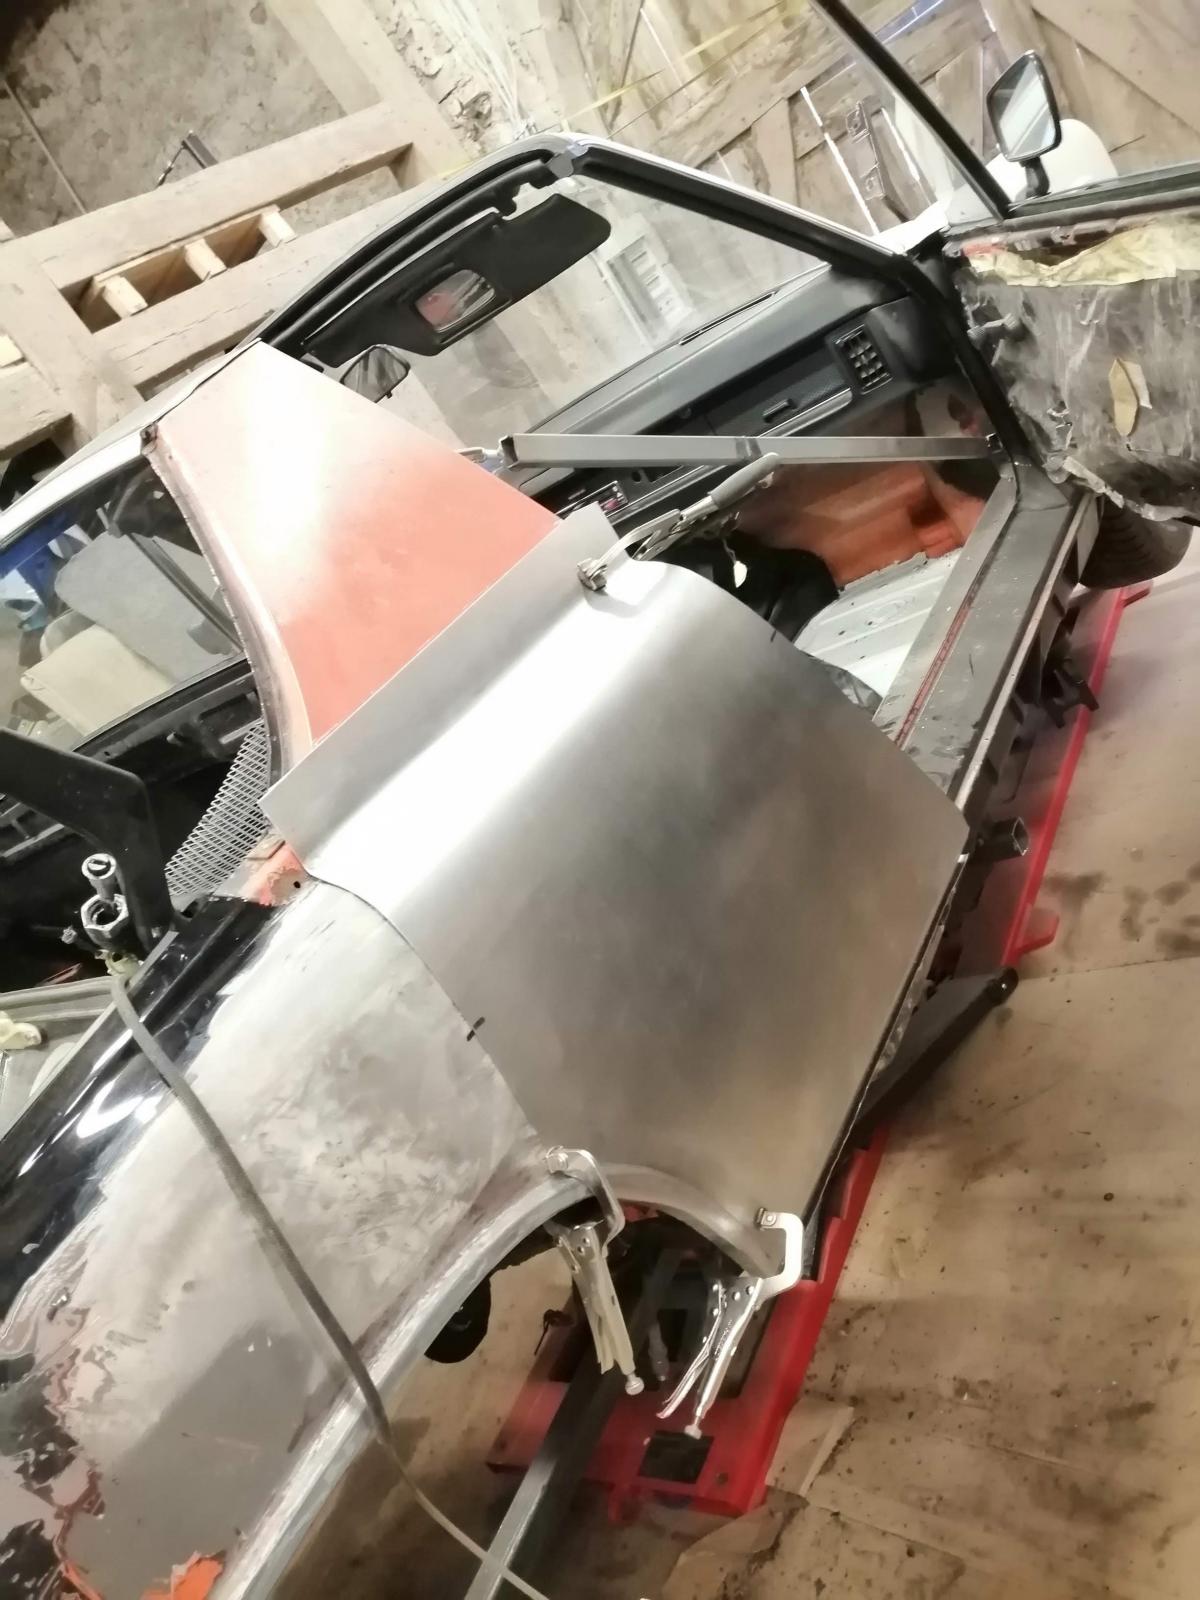
I left the front part undone to be able to make a good door gap when it comes to that time.
So, now that this is done..cutting!
Stay tuned, the work on the hellhole is going to start!
Cheers
Antoine
Well, from that point of view I got "lucky"
because there is no good metal Here without paint:
And I have a habit that I built(or make sure I have it) the part before cutting, to ensure I won't miss any measurement/positioning. So here we go !
Making my template :
And starting :
And after a couple hours:
I left the front part undone to be able to make a good door gap when it comes to that time.
So, now that this is done..cutting!
Stay tuned, the work on the hellhole is going to start!
Cheers
Antoine
fantastic.
can see the phoenix red peeking through.
can see the phoenix red peeking through.
You car is really sweet- I'm guessing that their are more 914's in the states, but most are full of rust, The really nice ones that are in Europe. Welcome to 914 world. chris
Wow, cool to see you take sheet metal and form those complex parts. Looks like you are using basic hand tools also?
DAMN, that is a lot of skill with metal.
Nice work!
Nice work!
Awesome Antoine!
Thanks a lot guys!
@wonkipop : yes, the color is showing through and will be back
@FL000 : yes, no fancy pullmax or power hammer..a lot by hands and a bit of shrinker/stretcher/wheeling machine
I made some more progress !
I removed the 47 years old fuel lines:
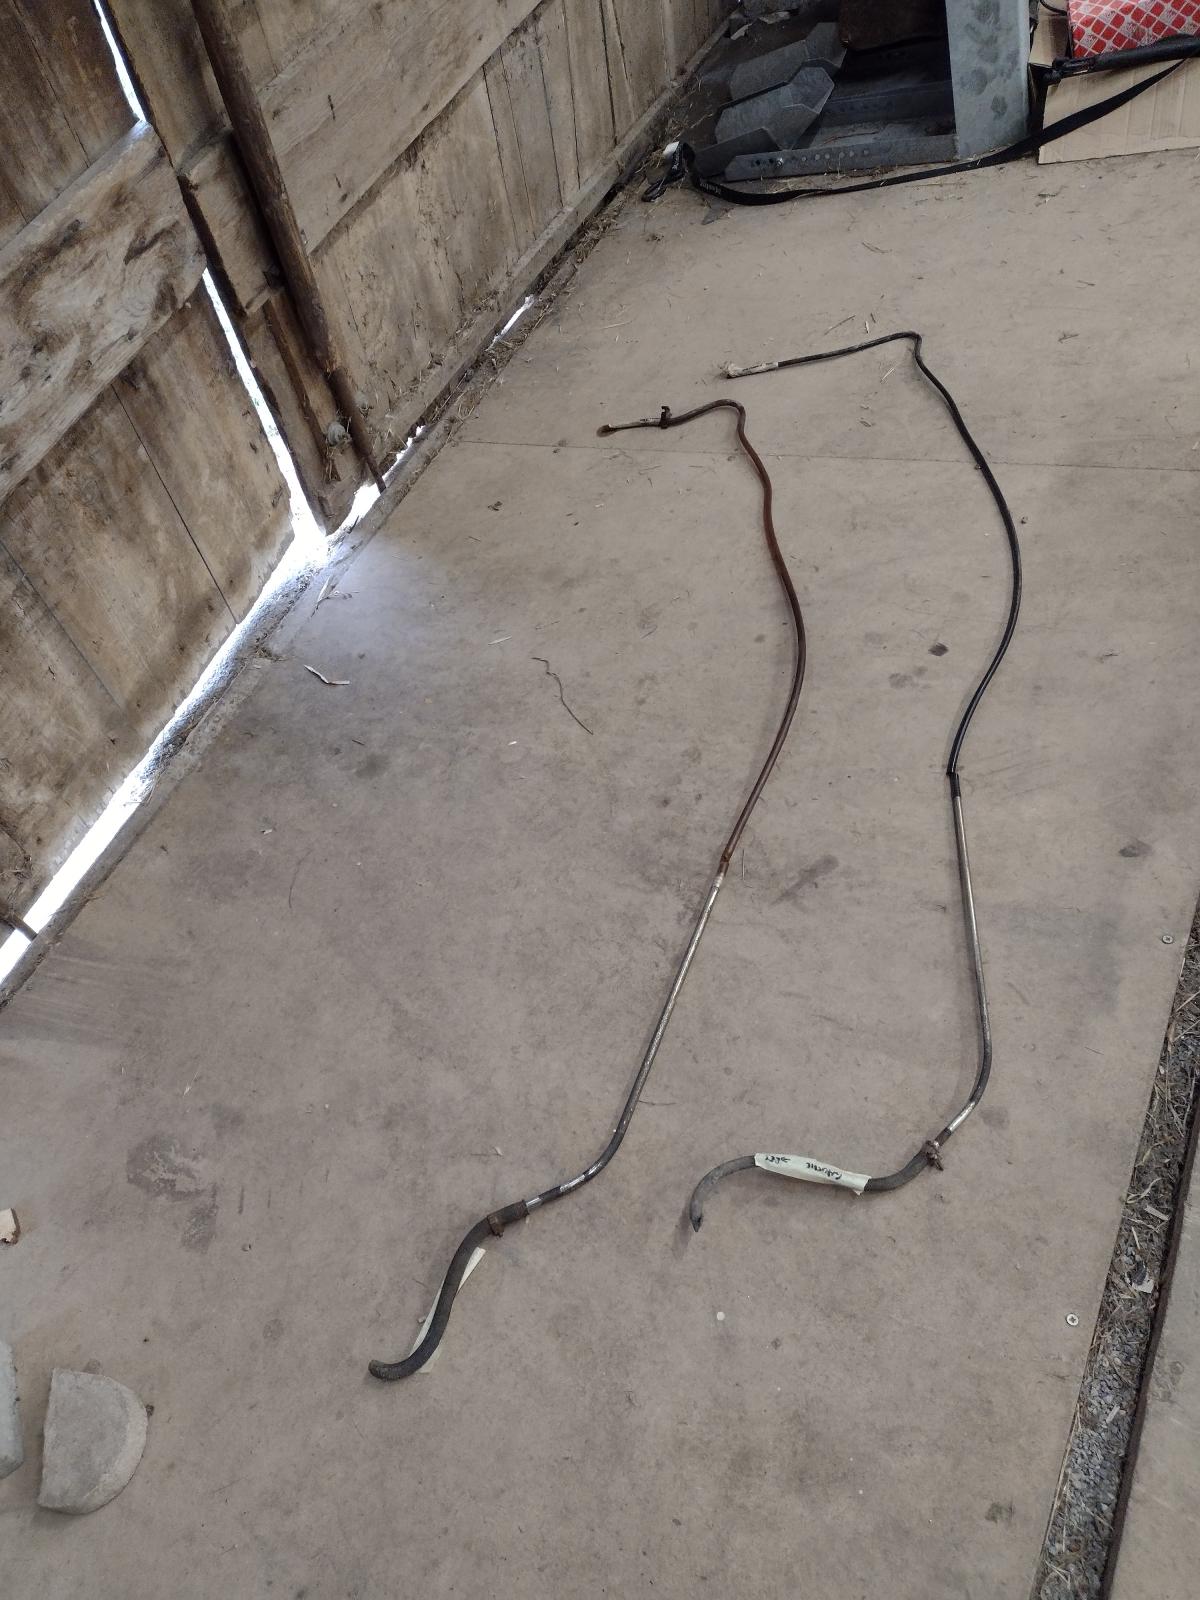
Stainless steel replacement is on its way!
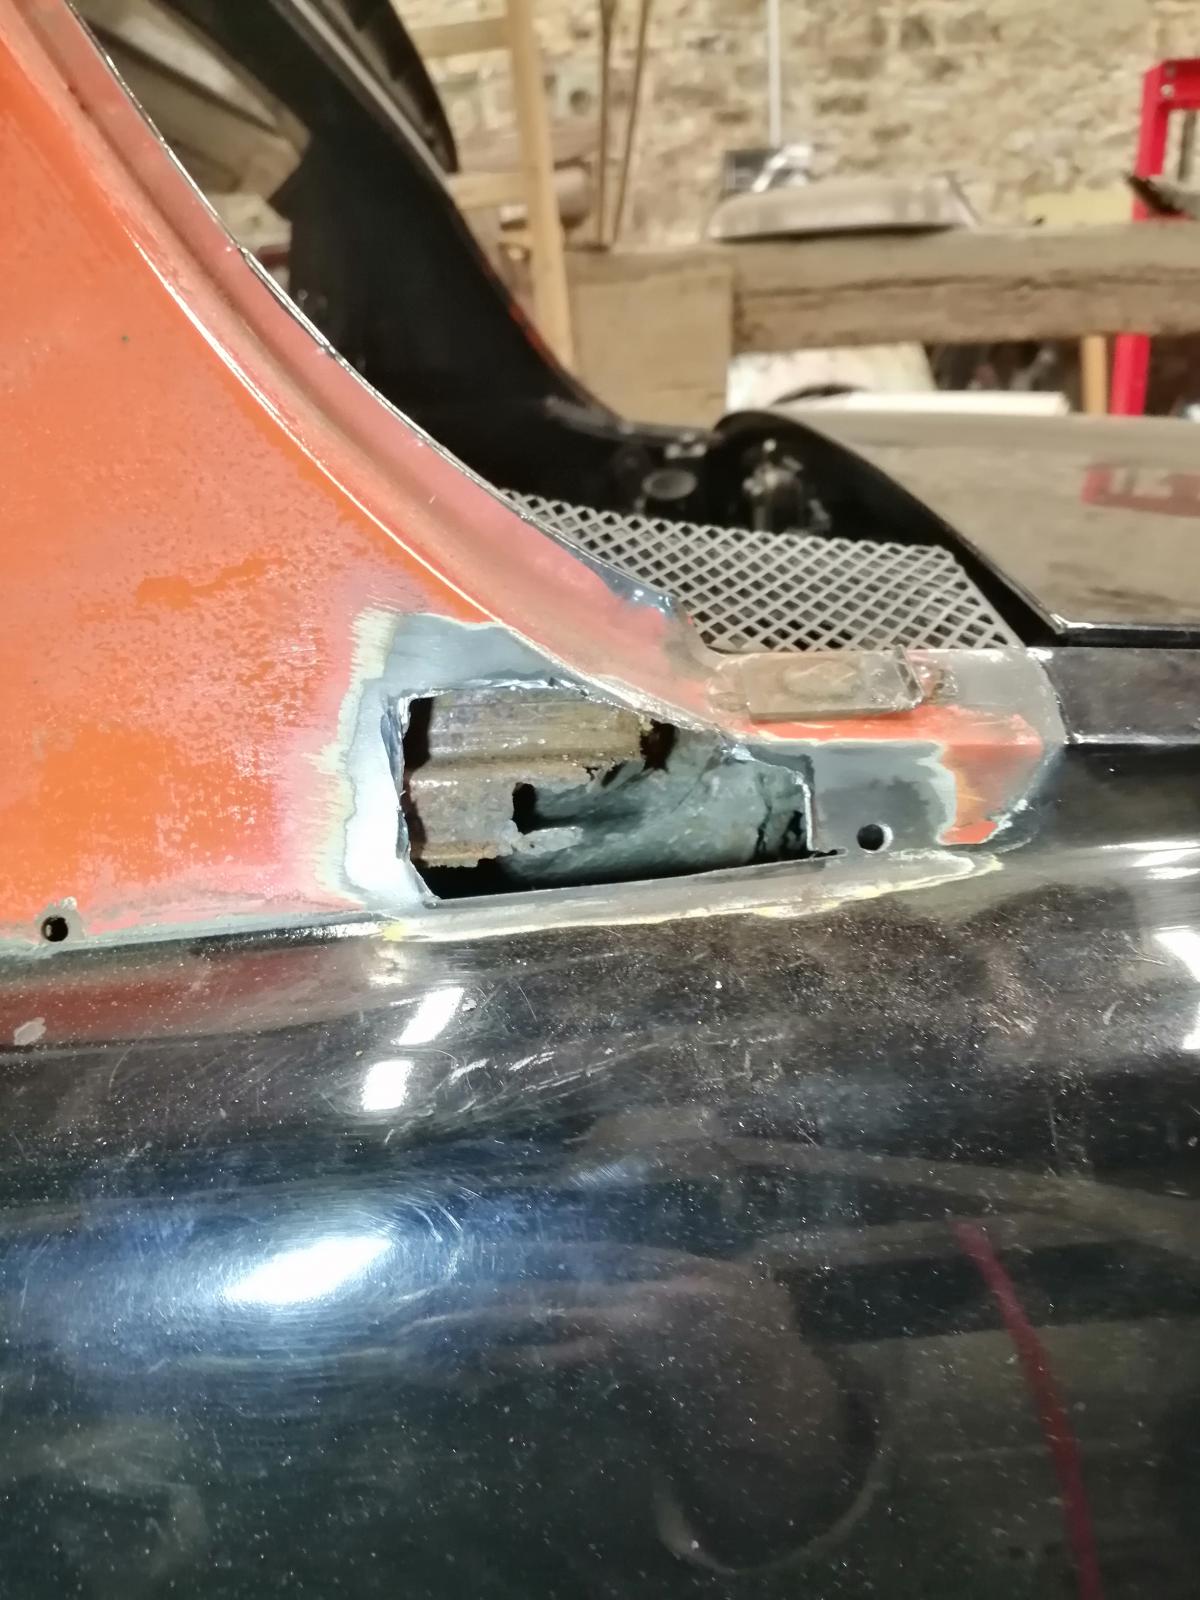
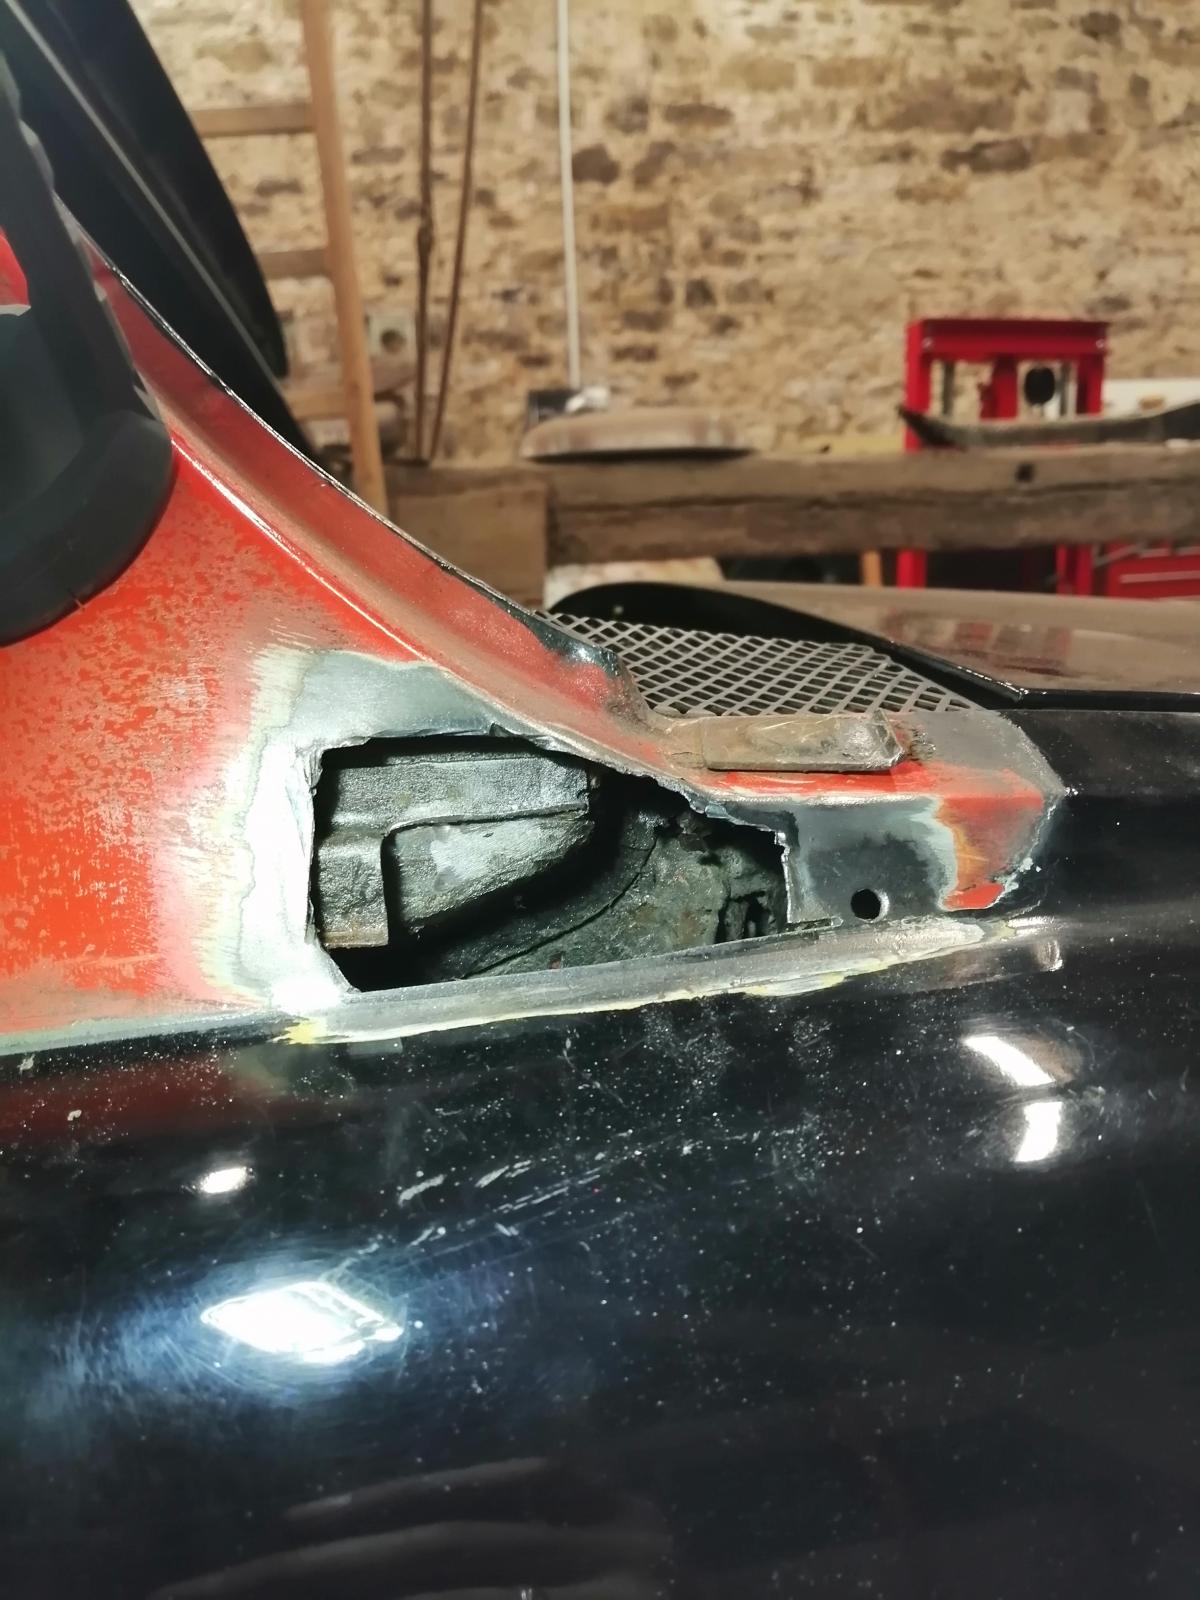
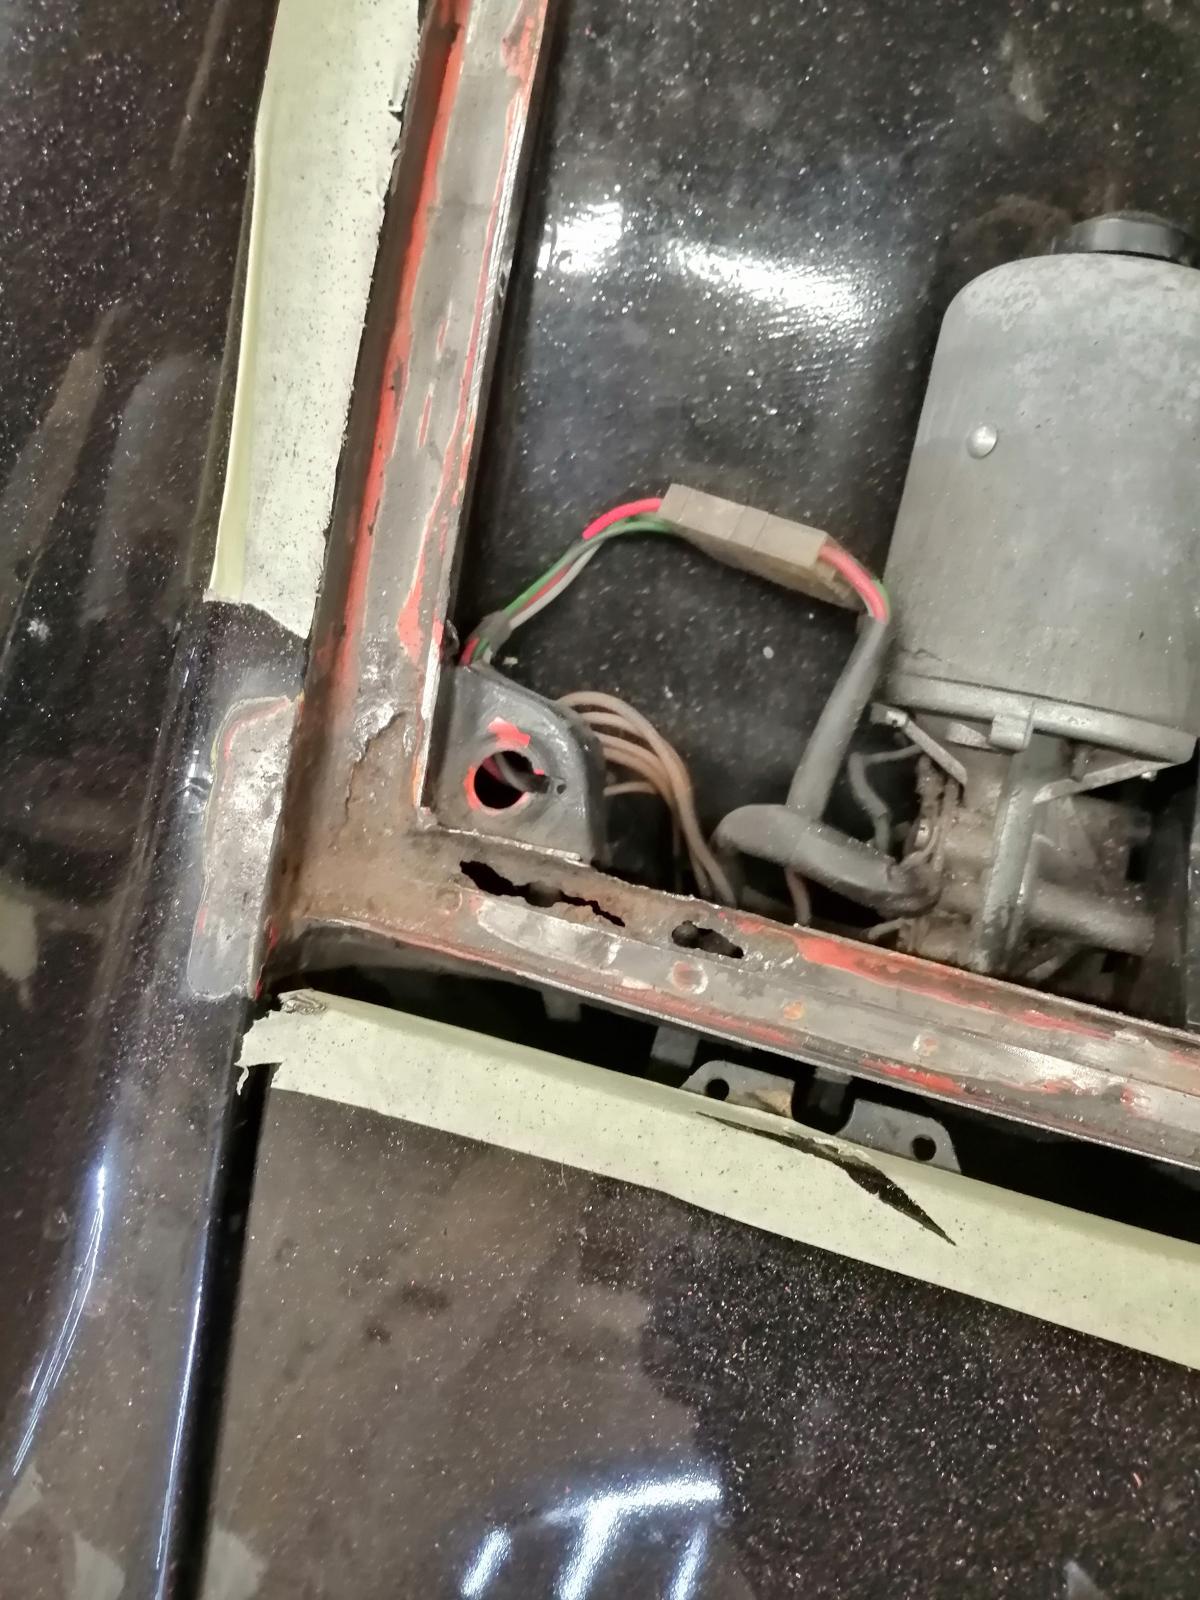
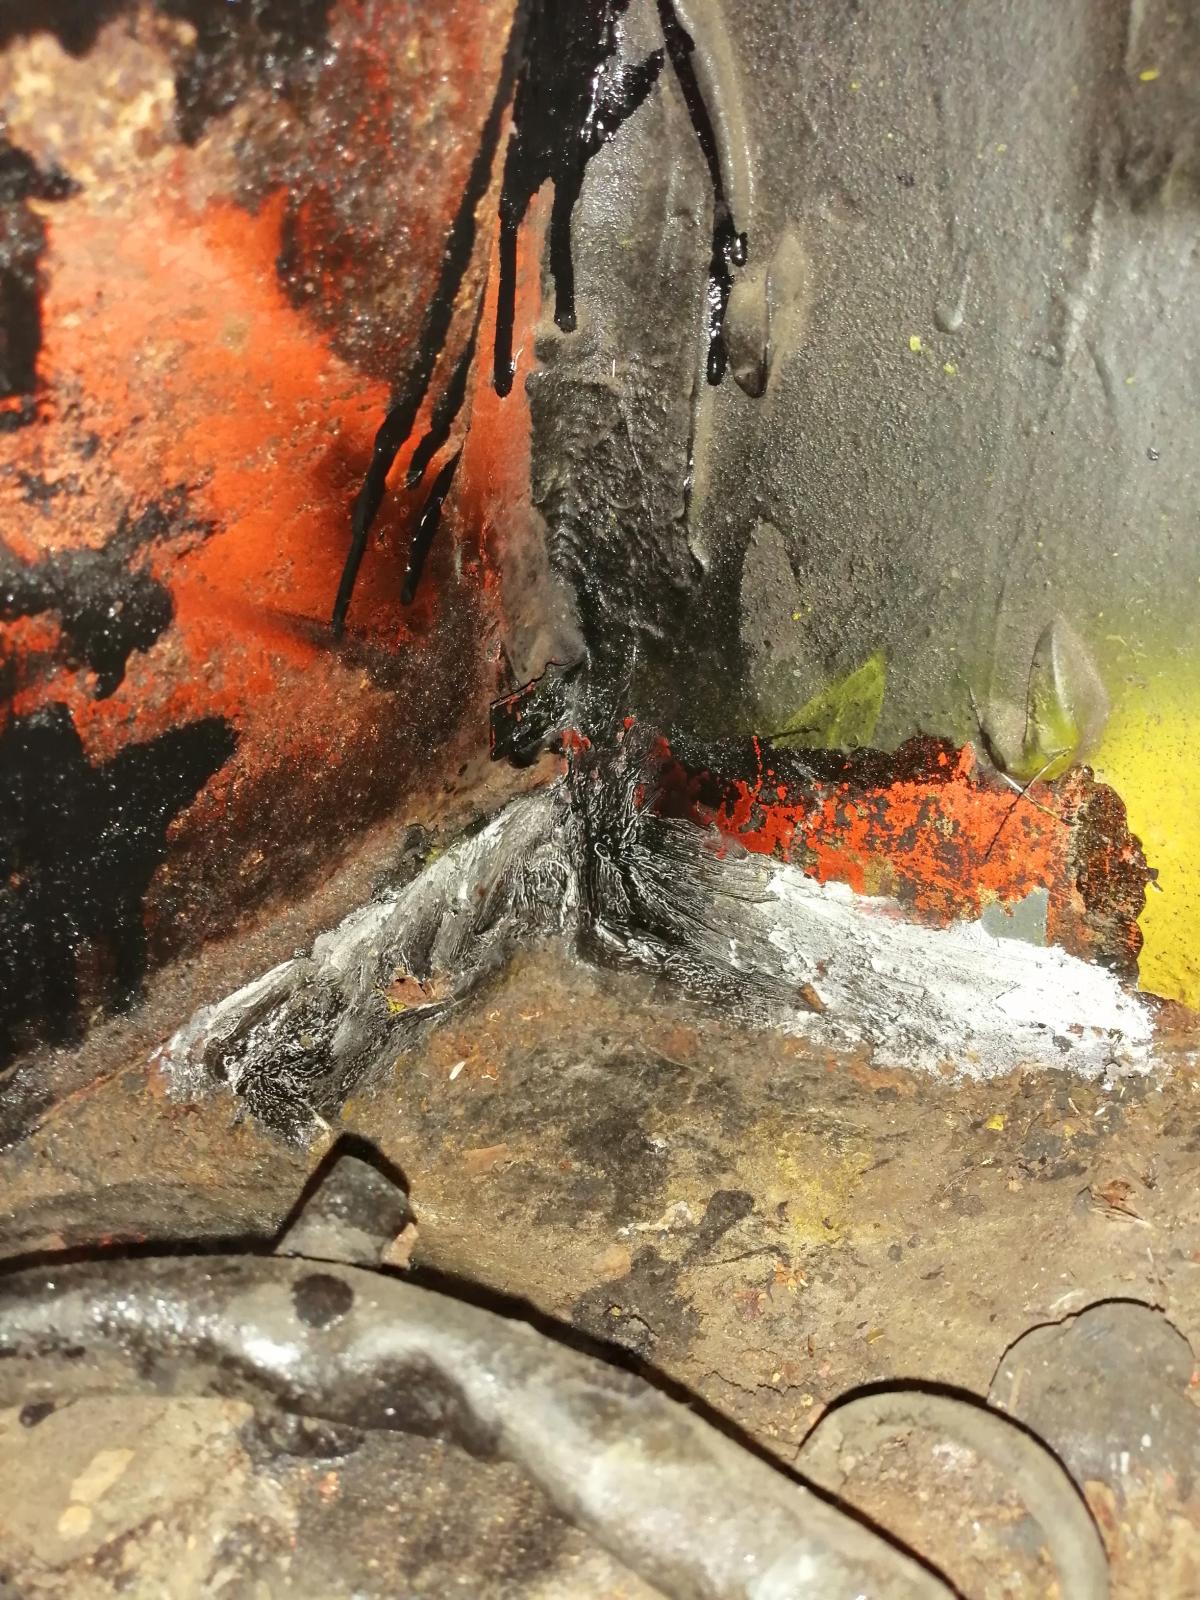
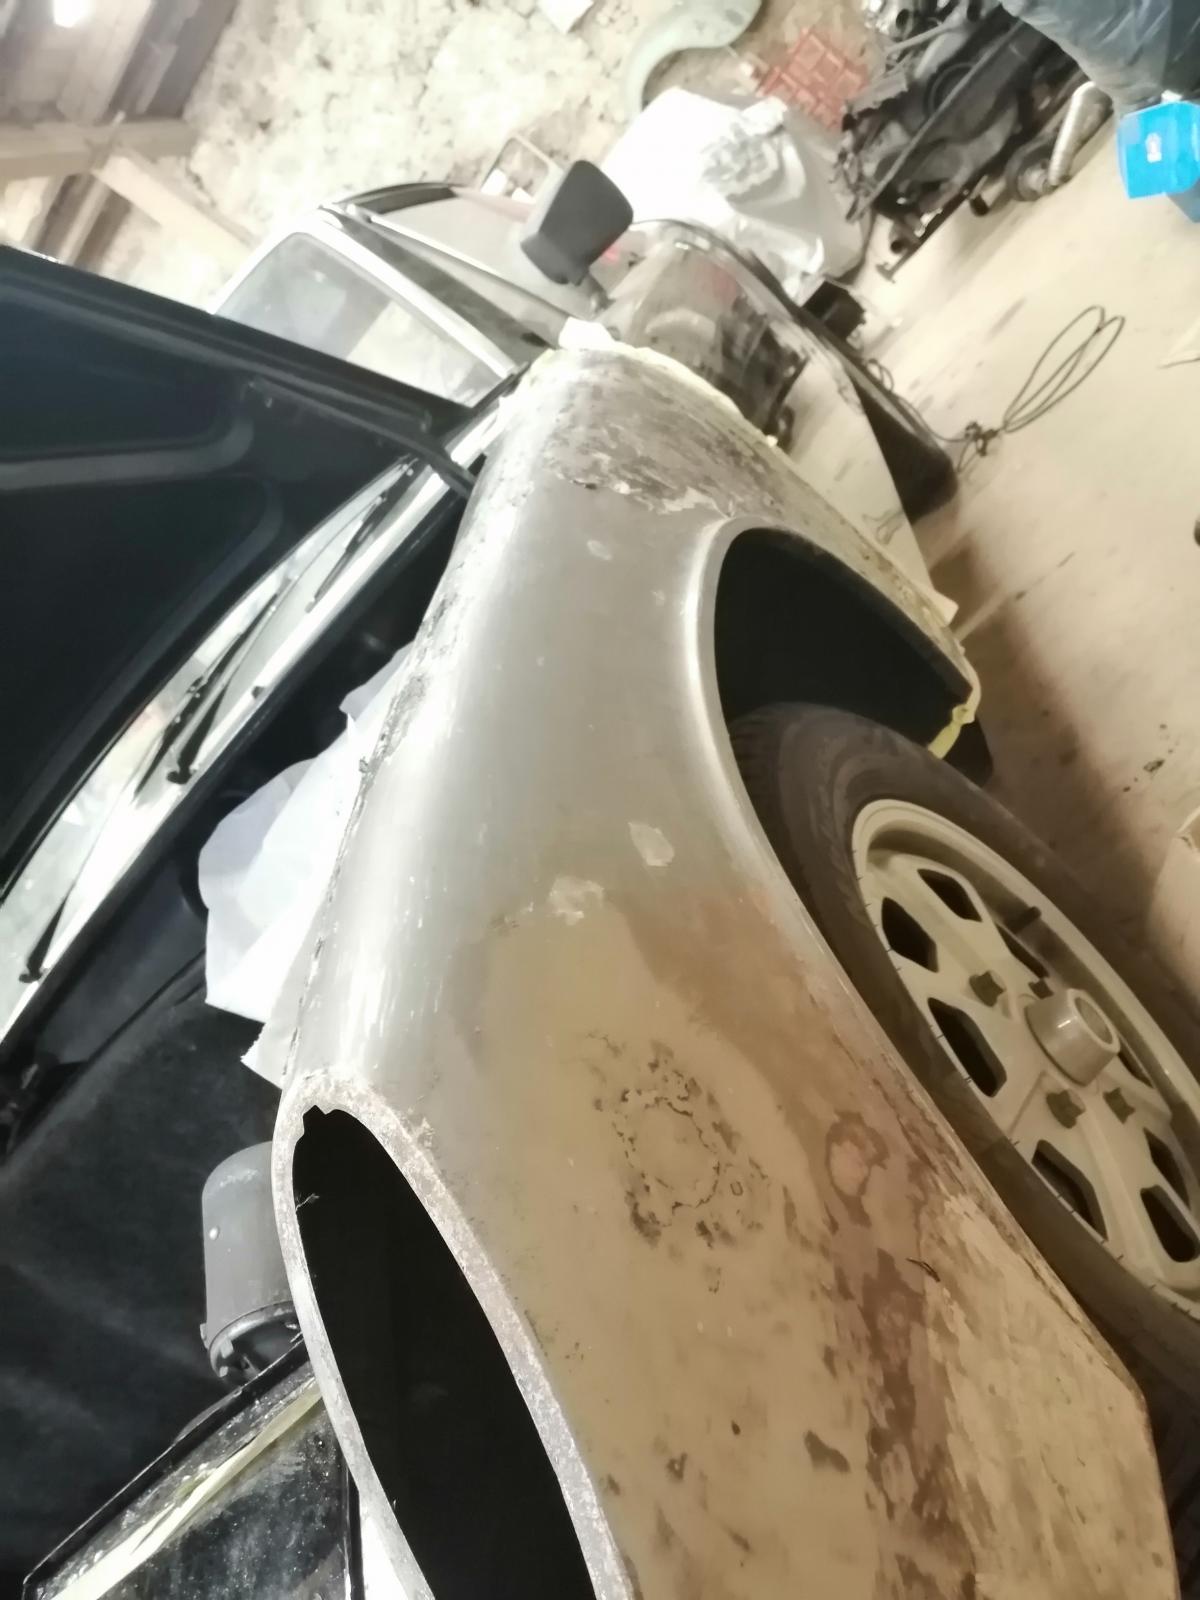
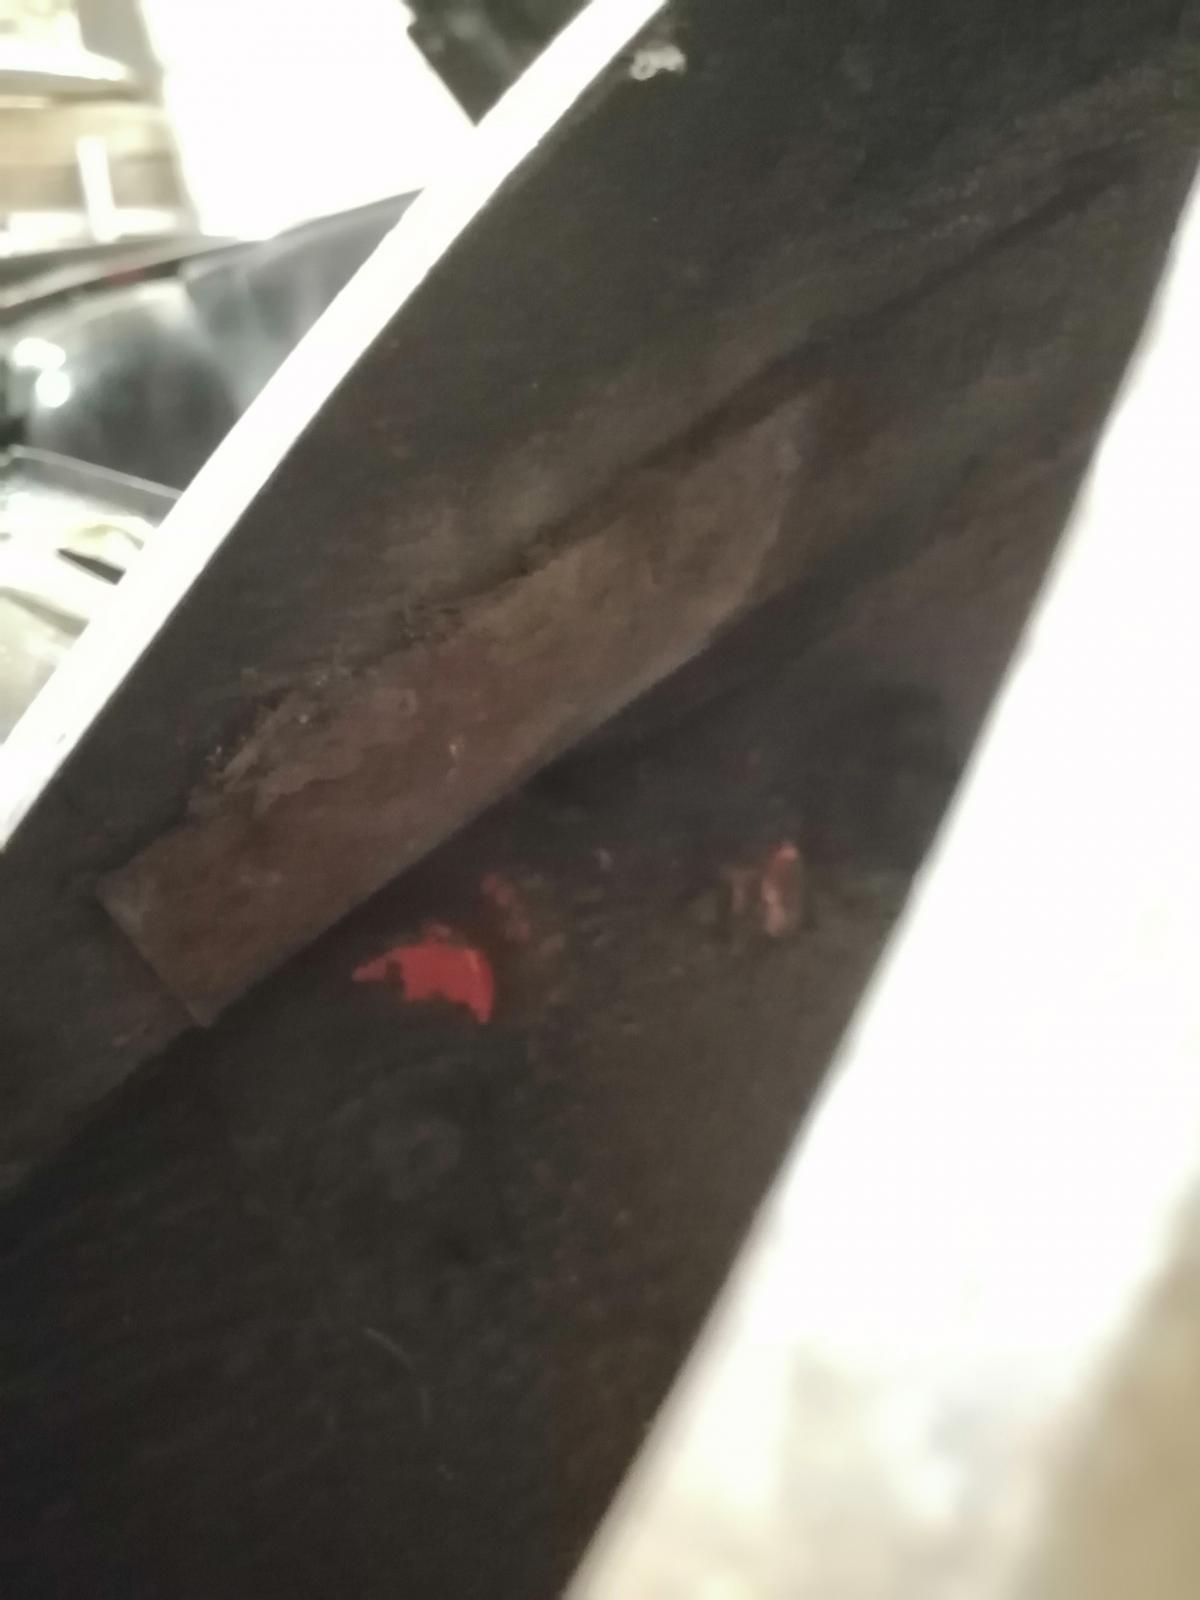
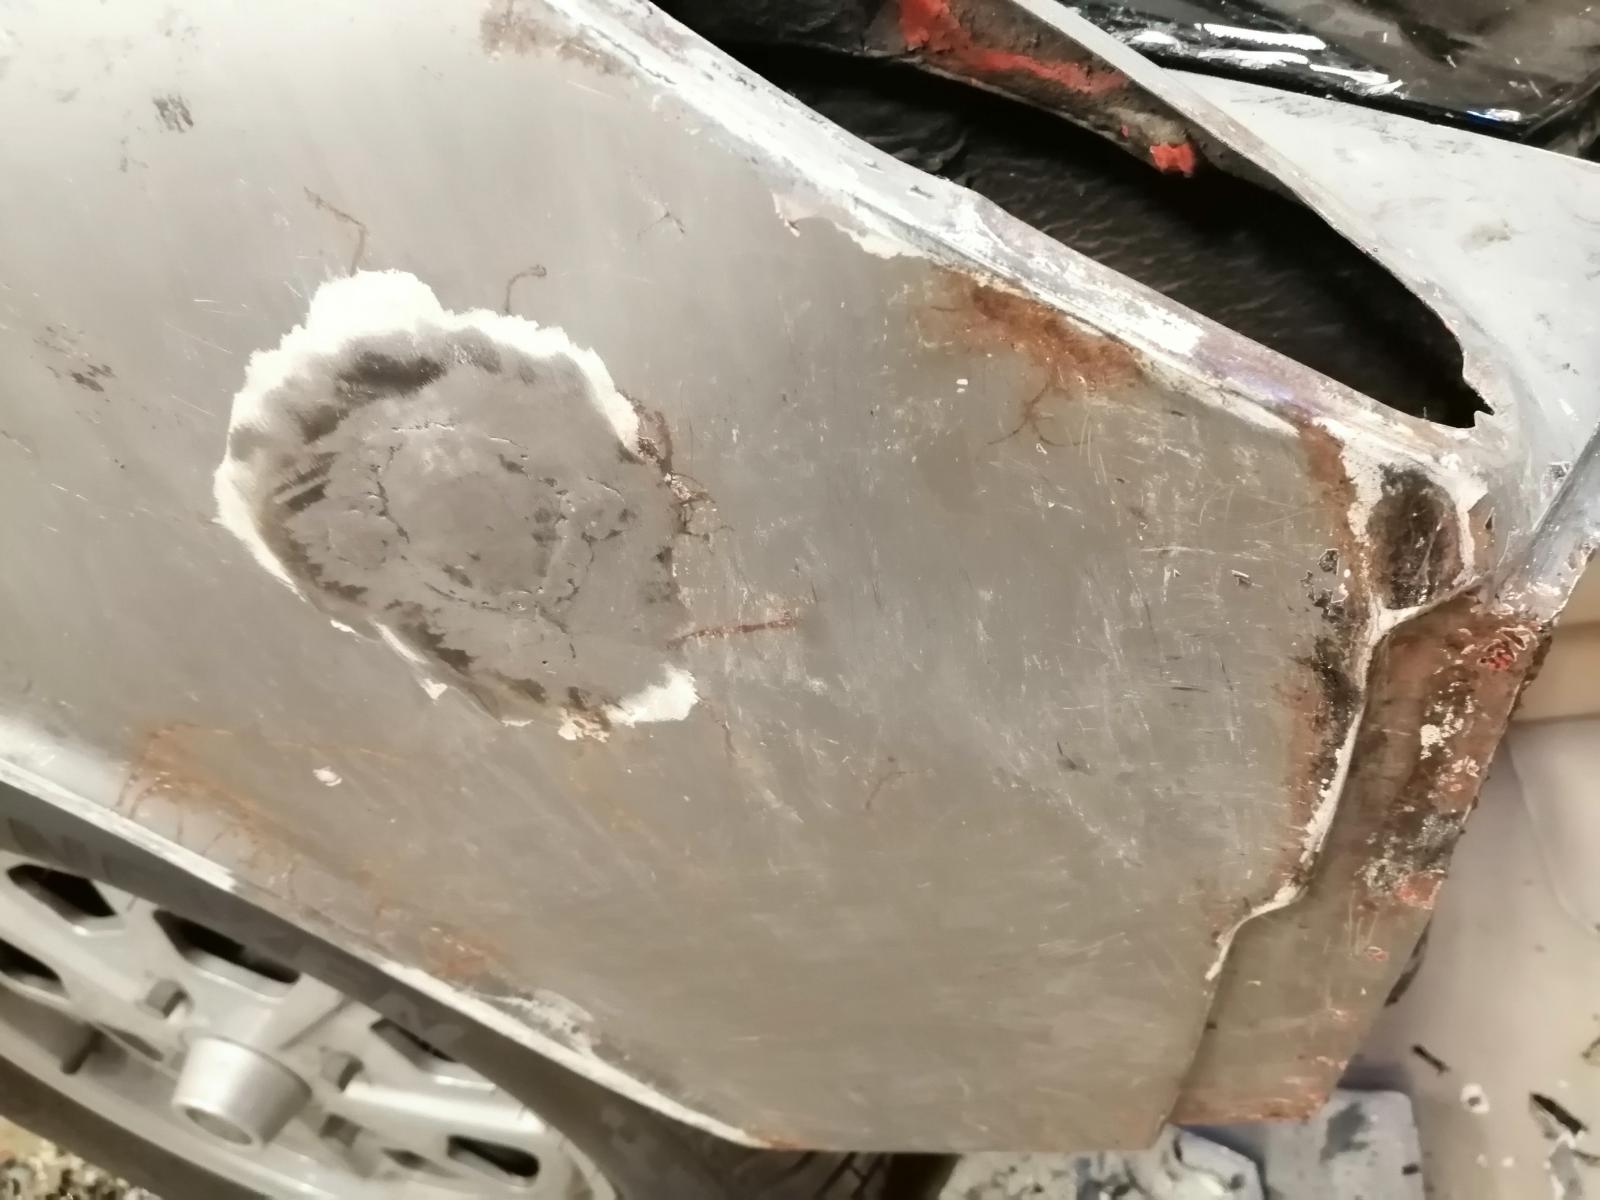
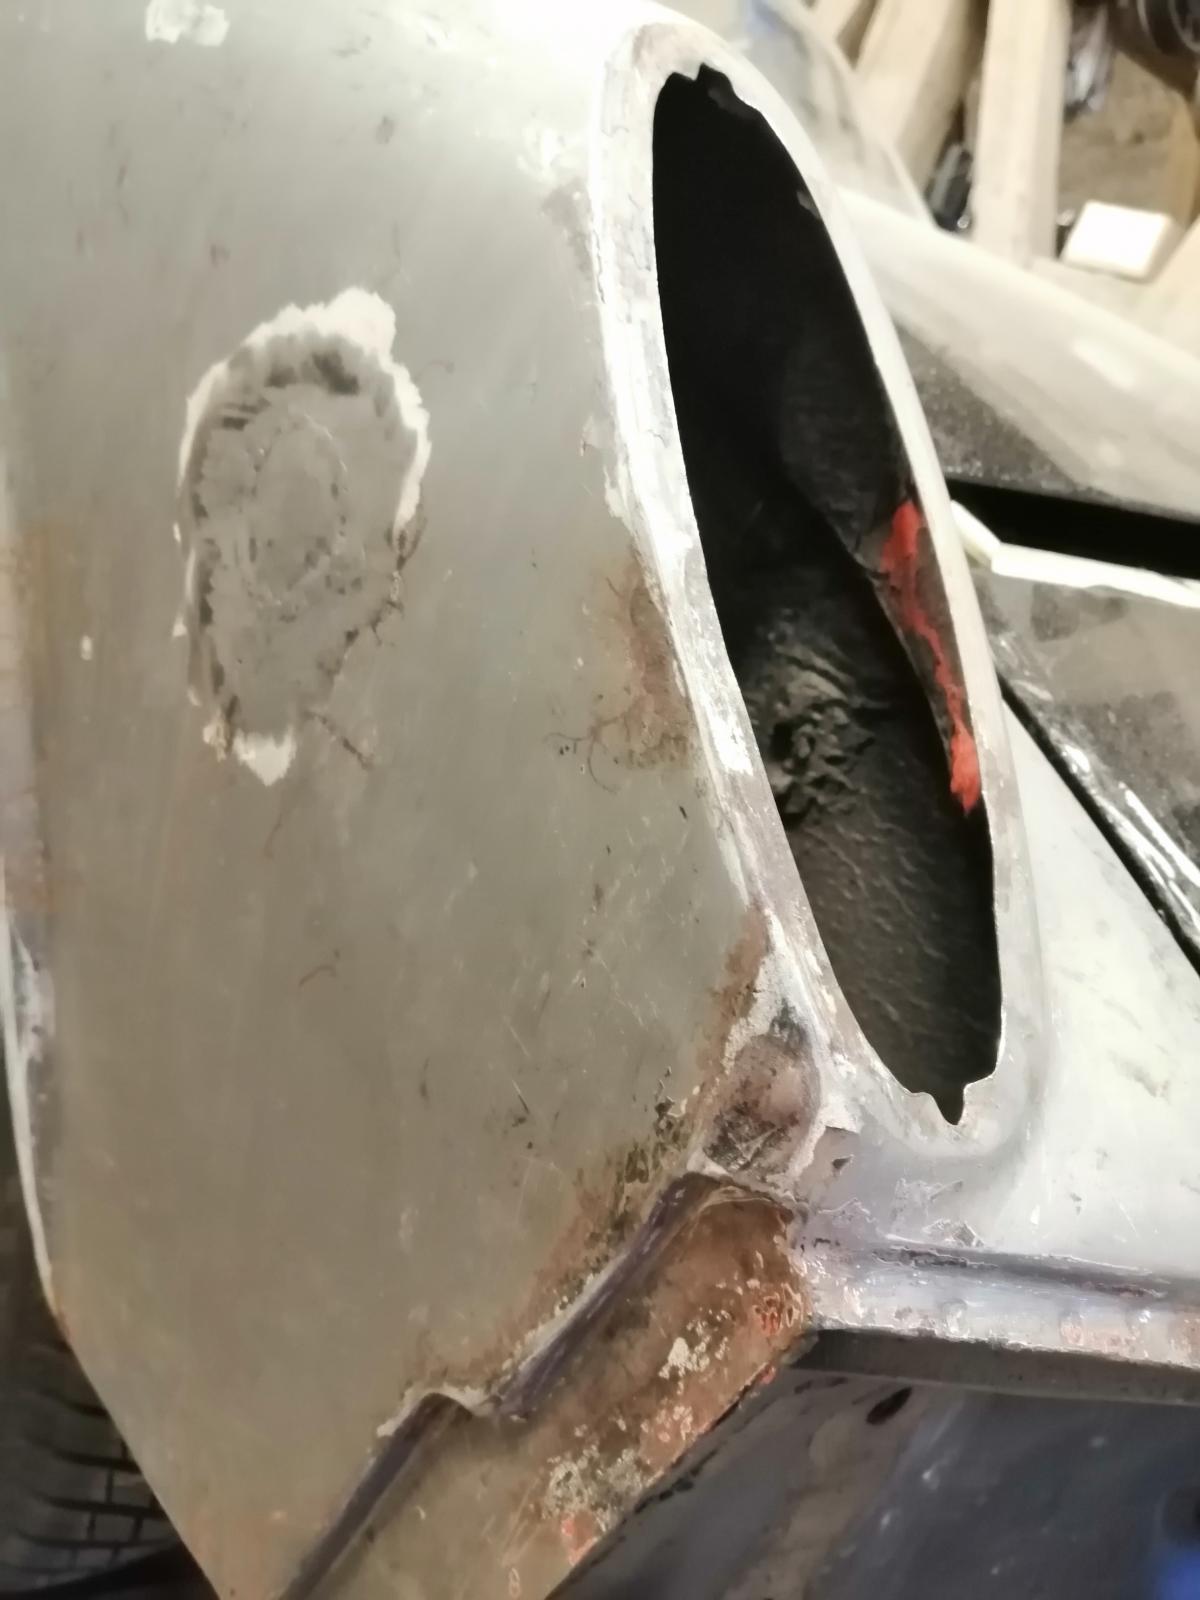
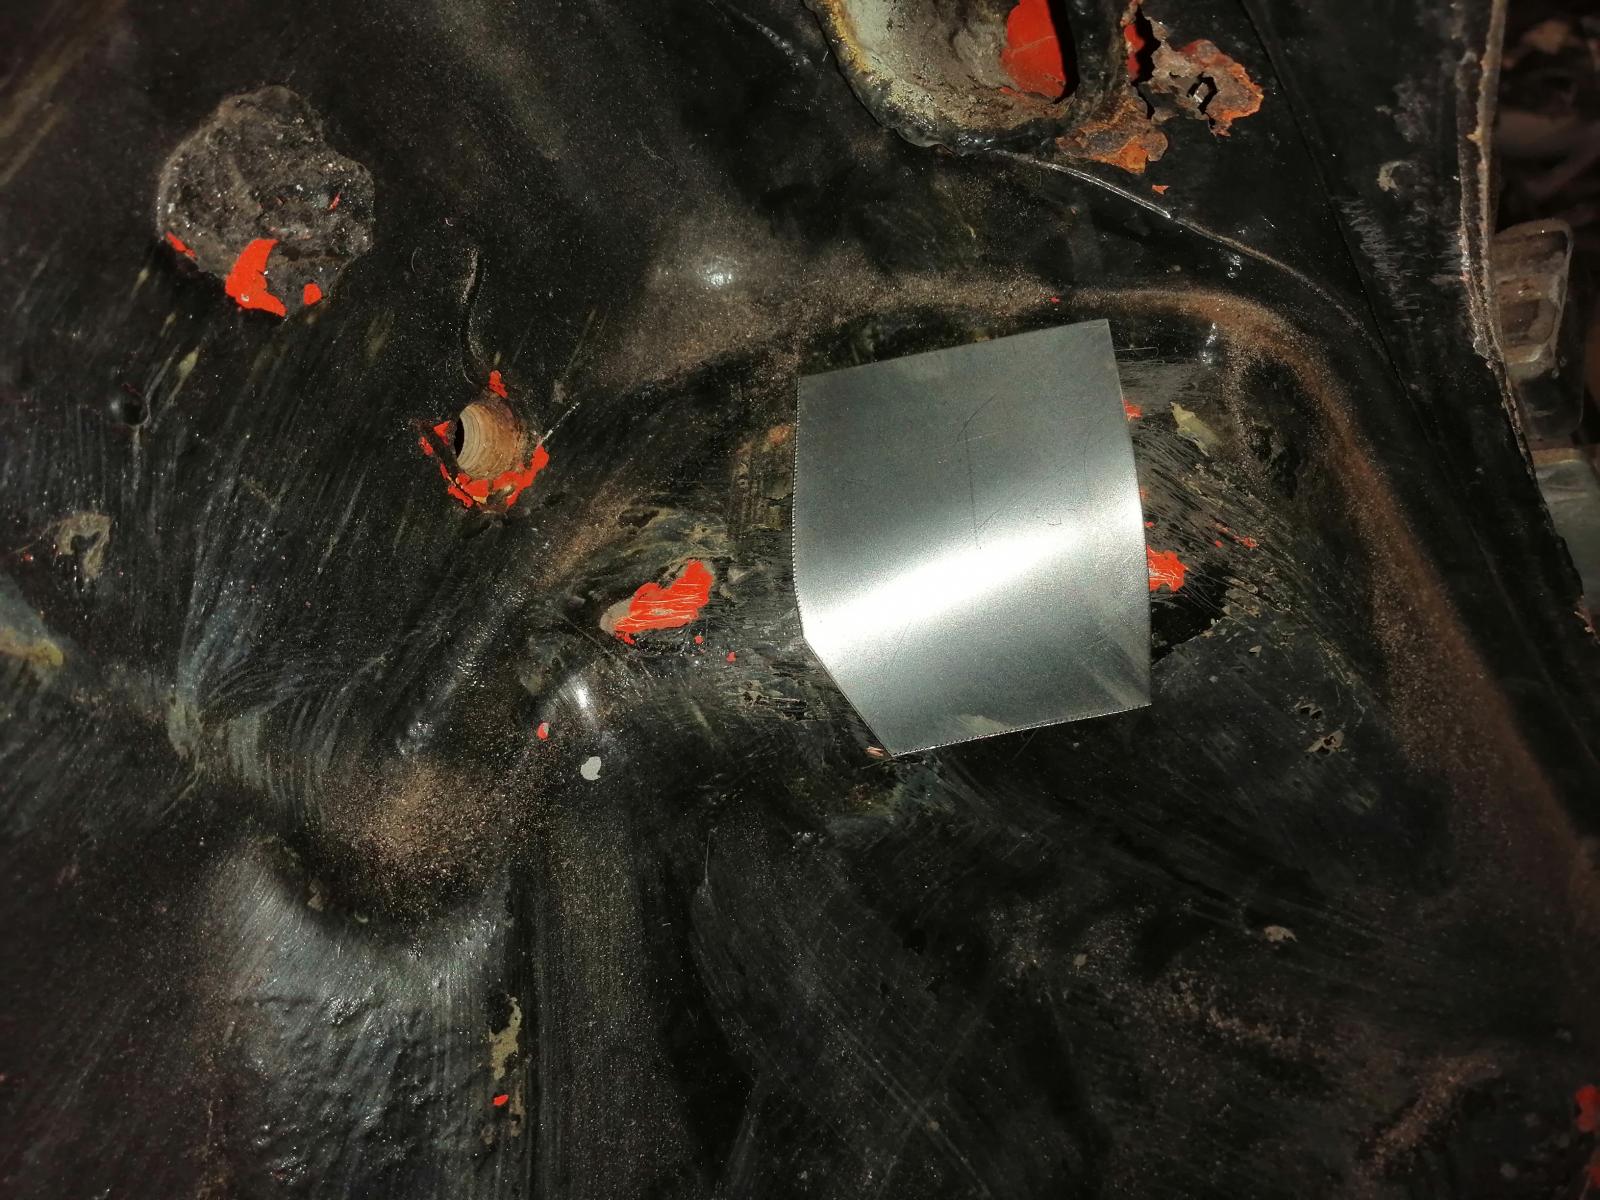
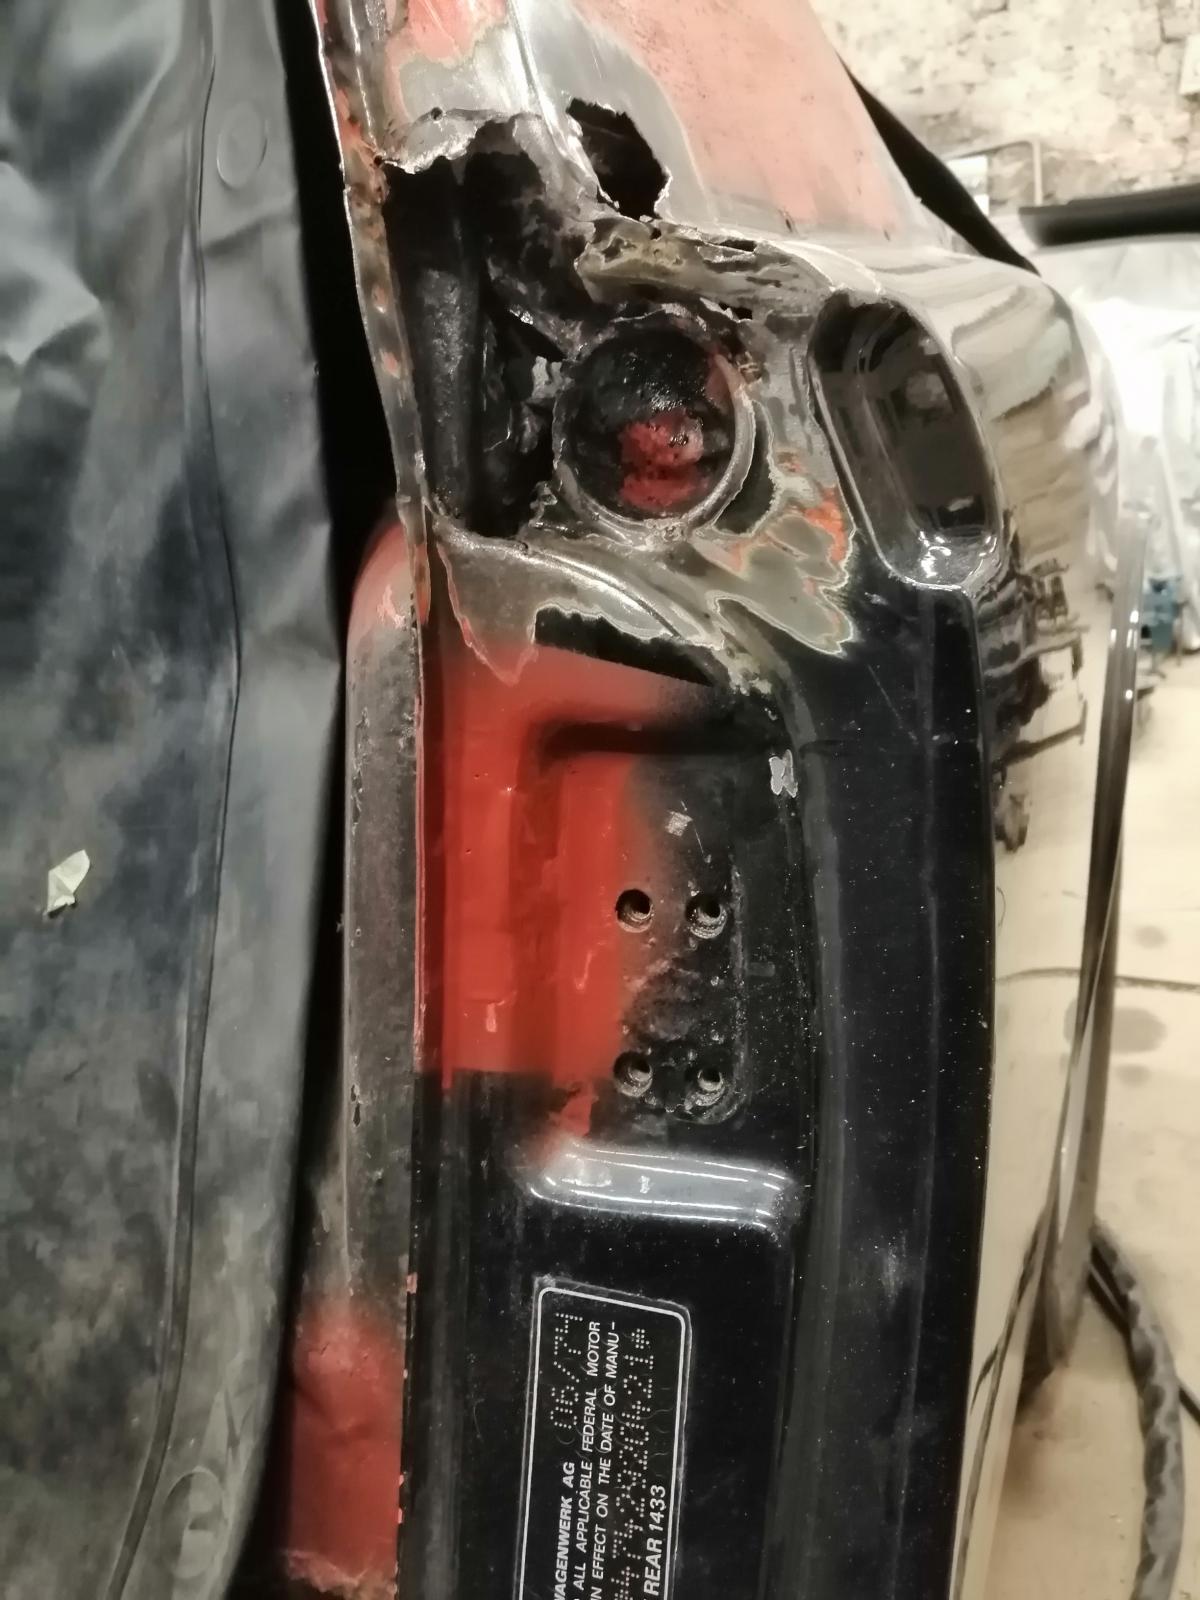
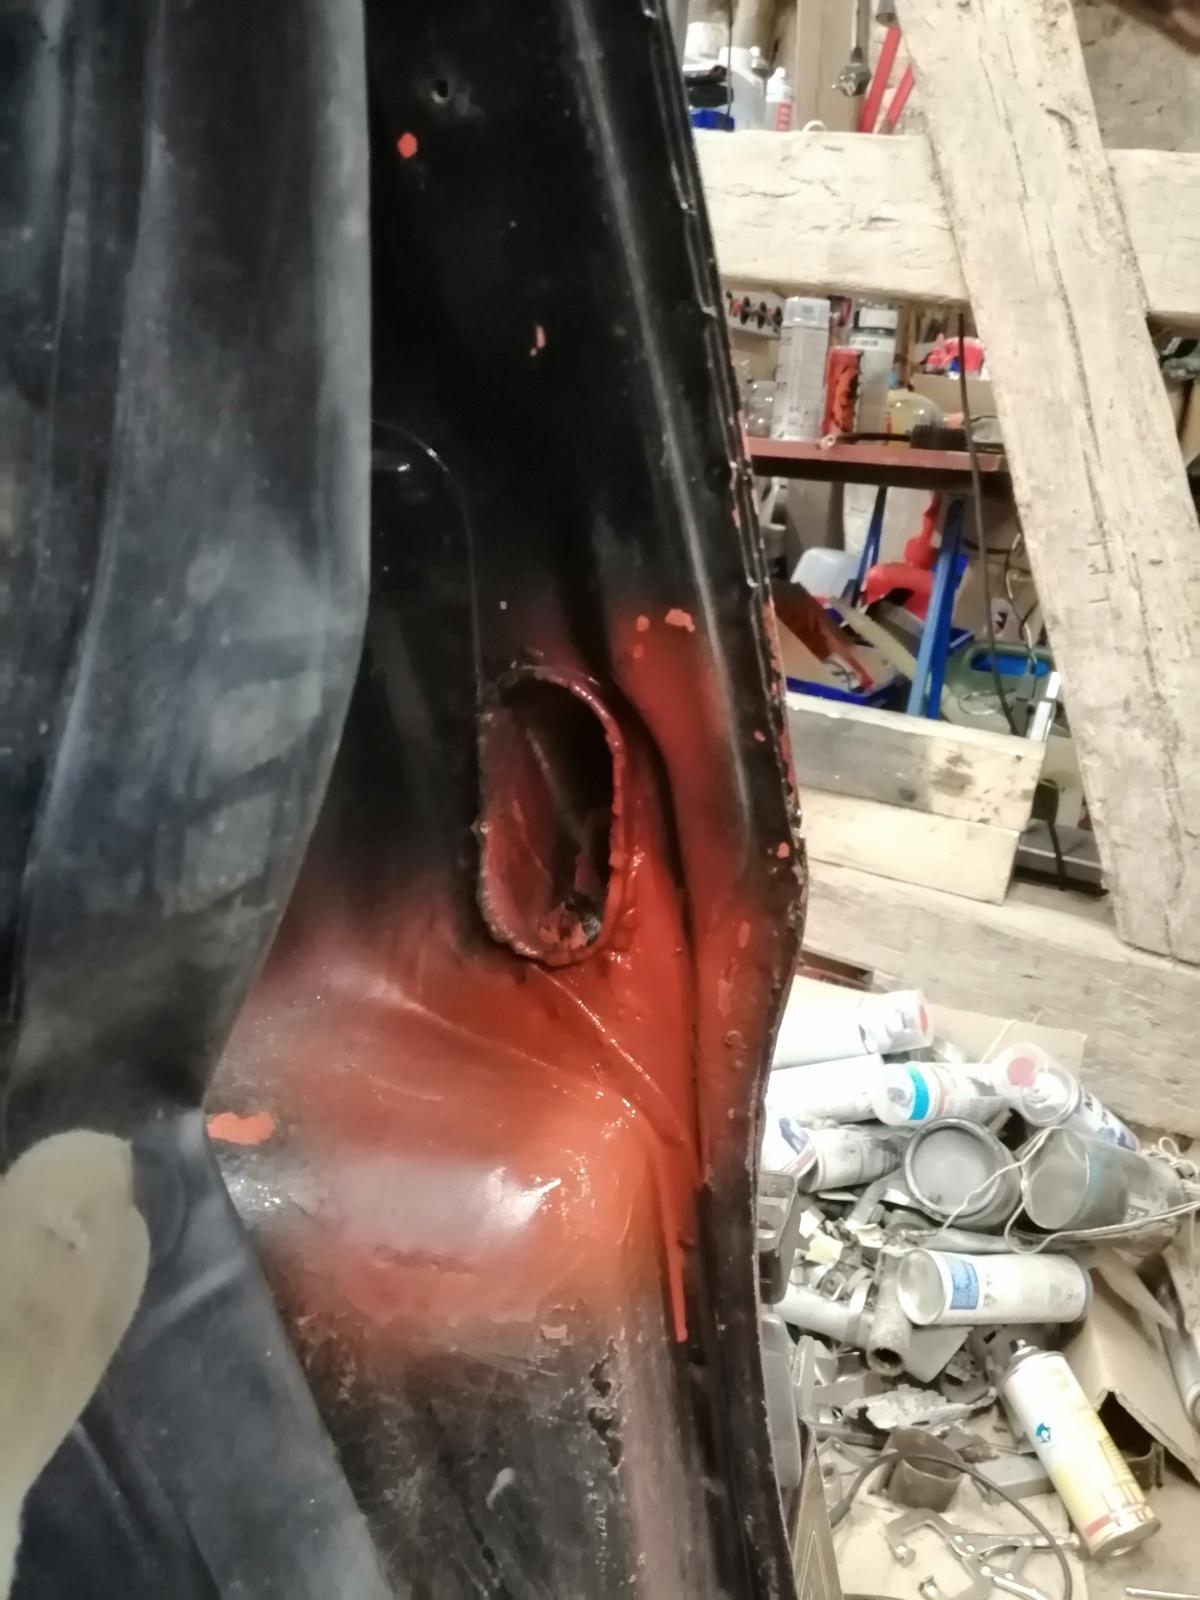
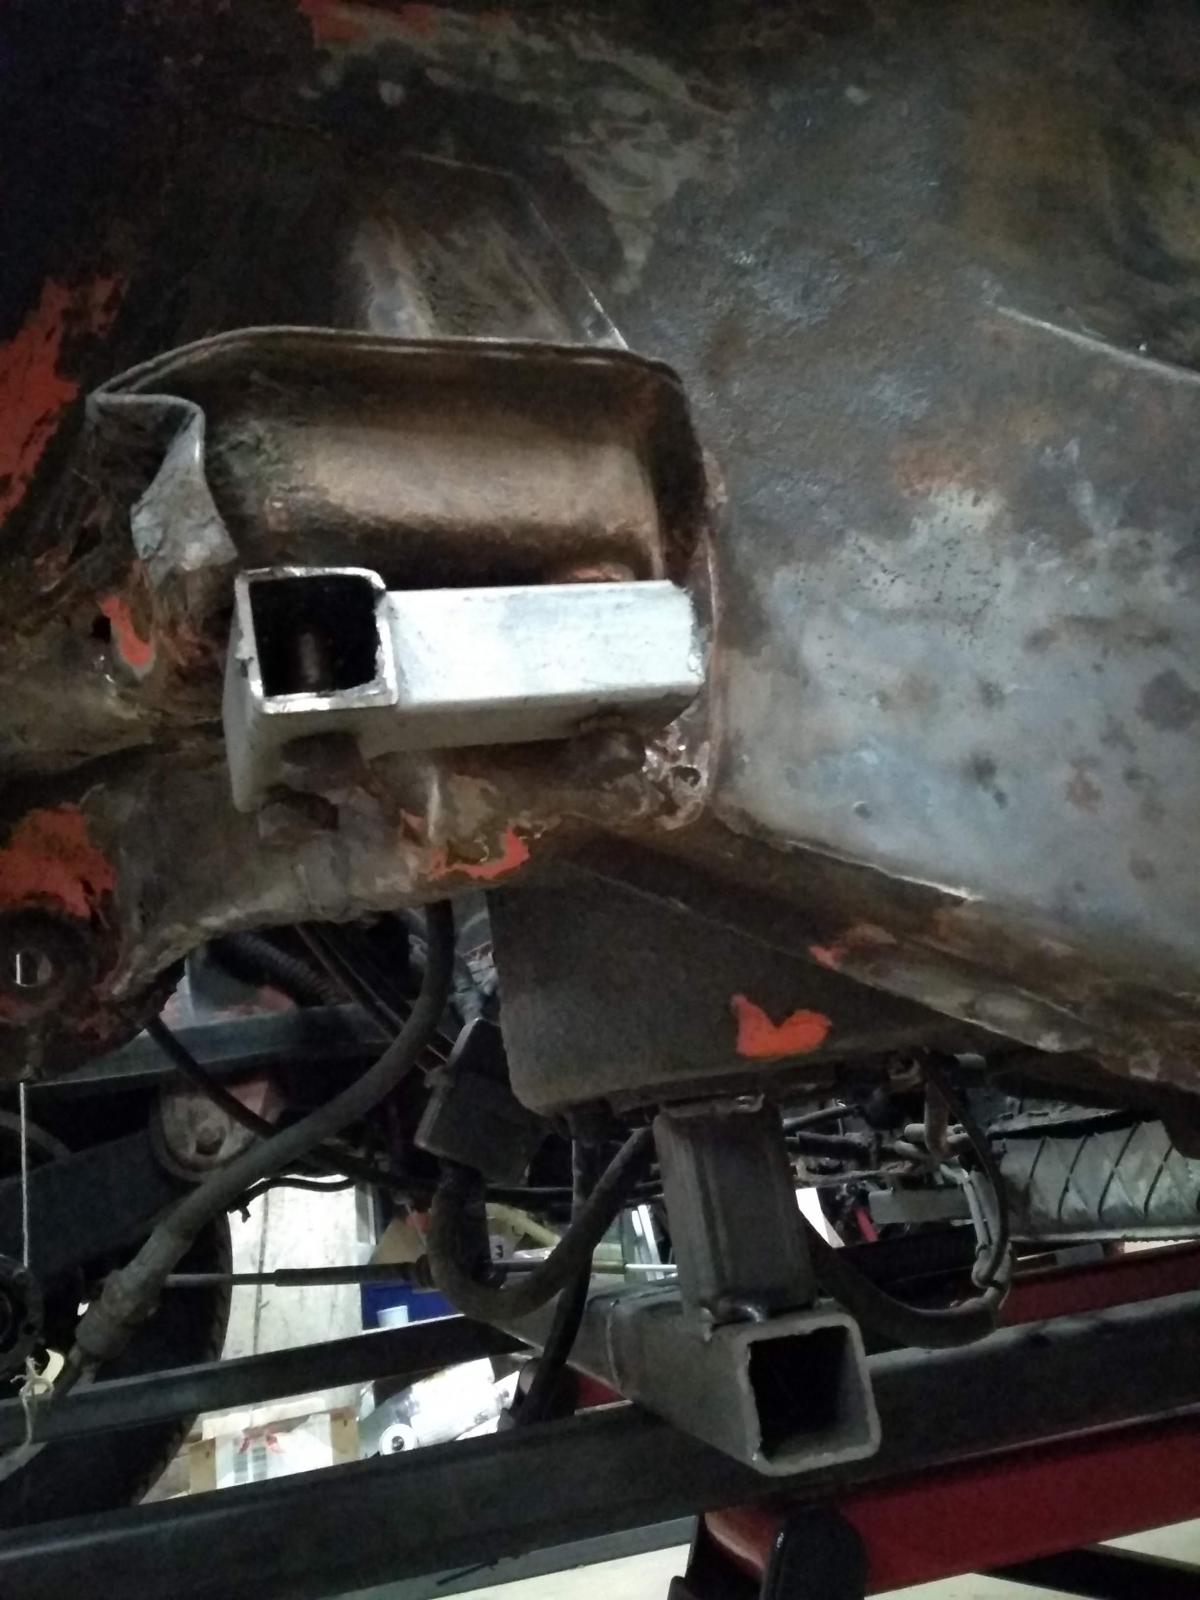
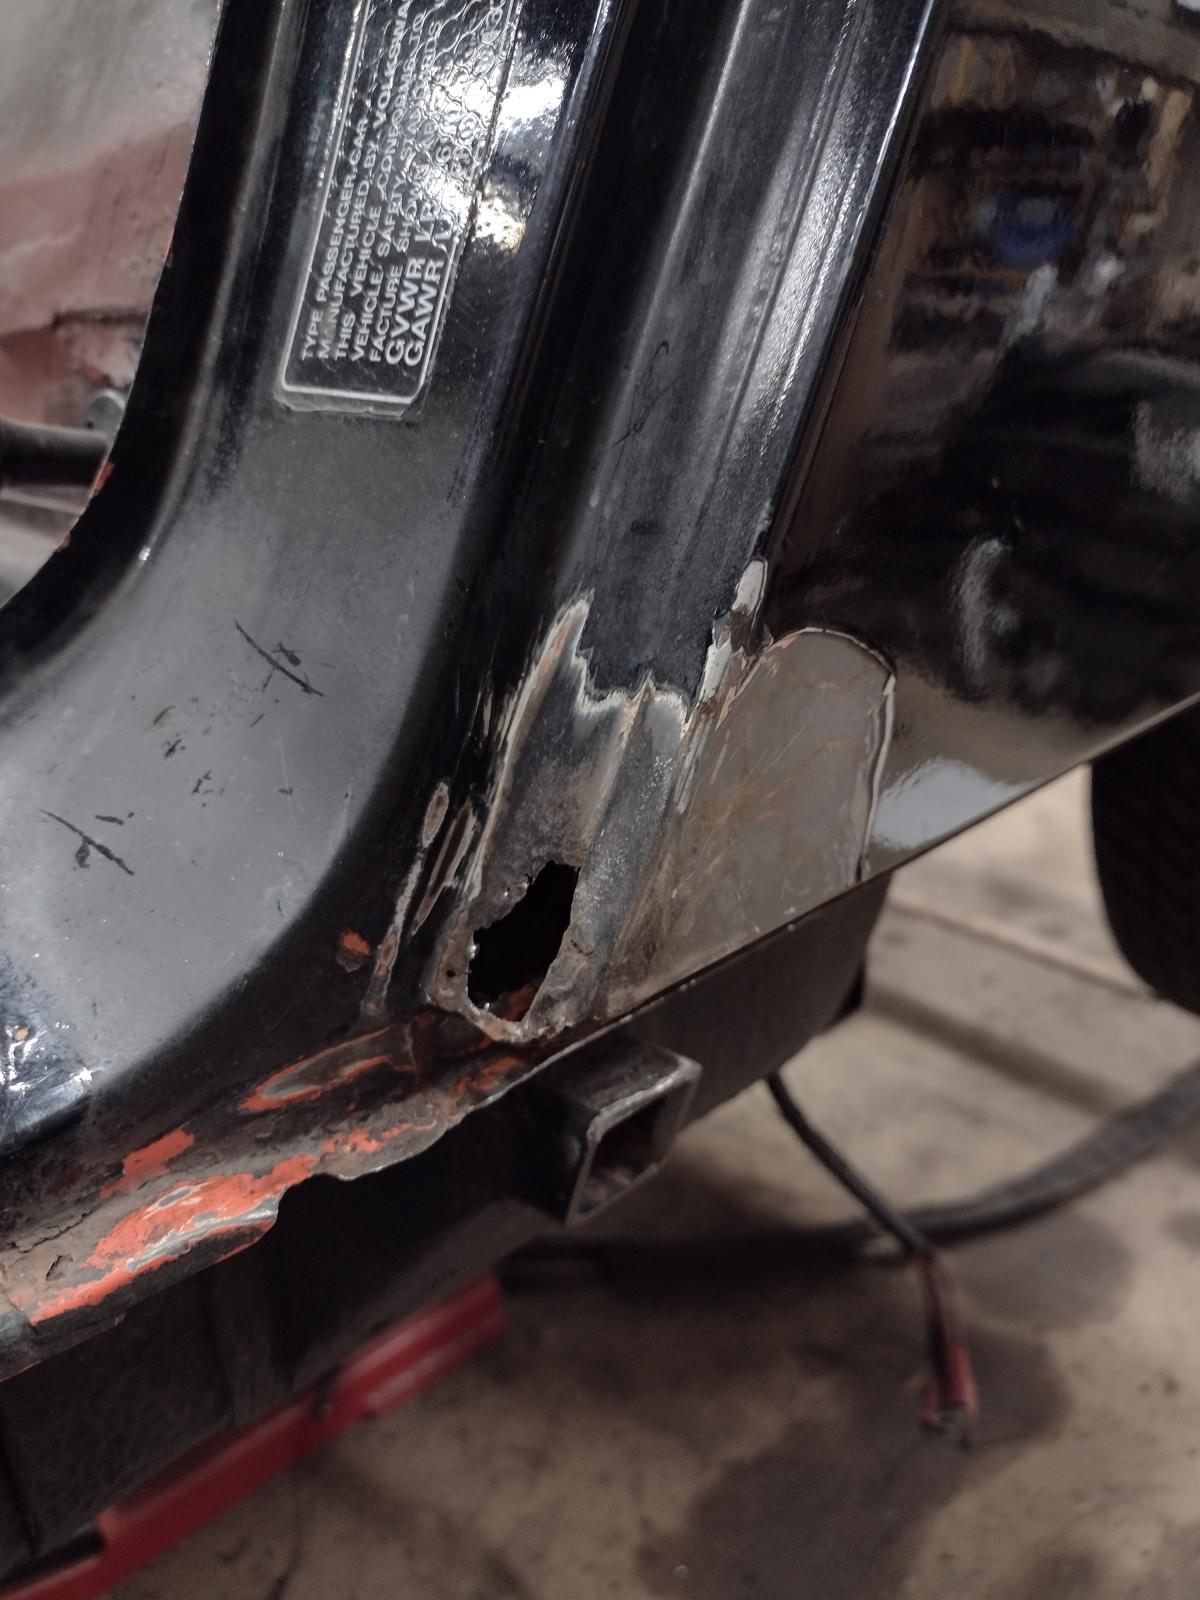
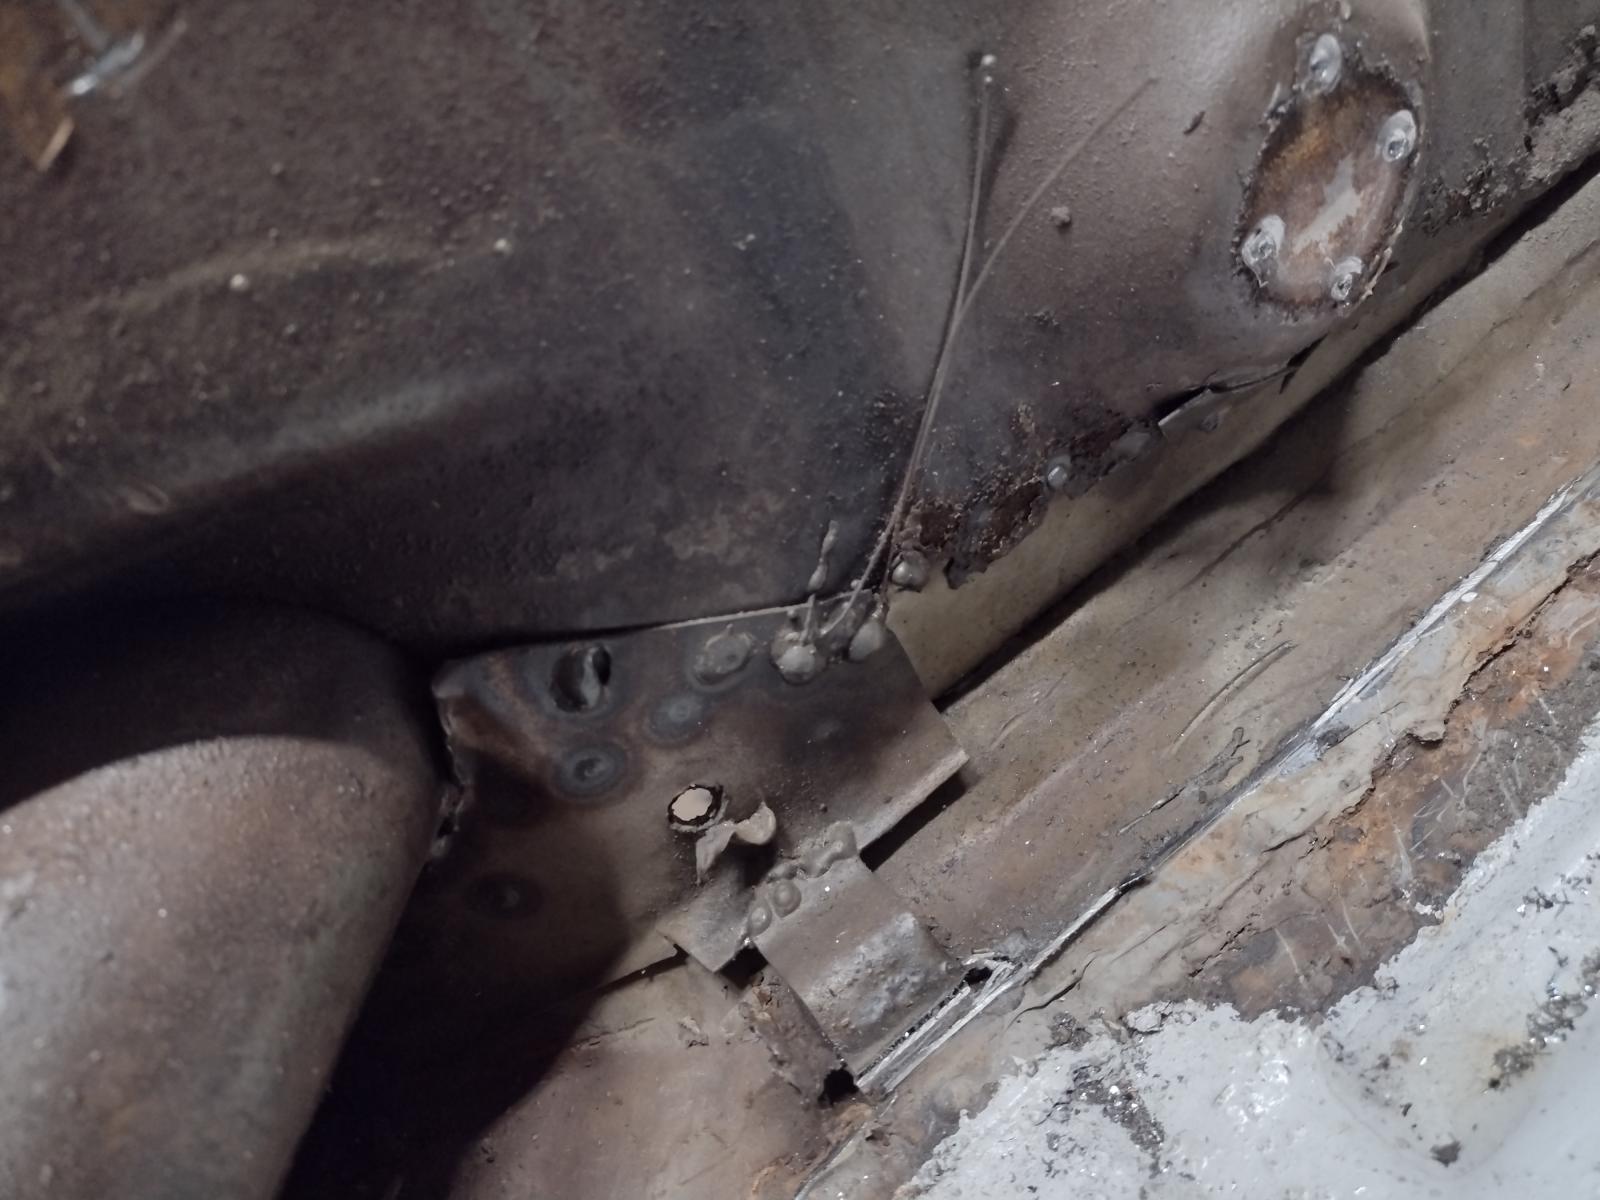
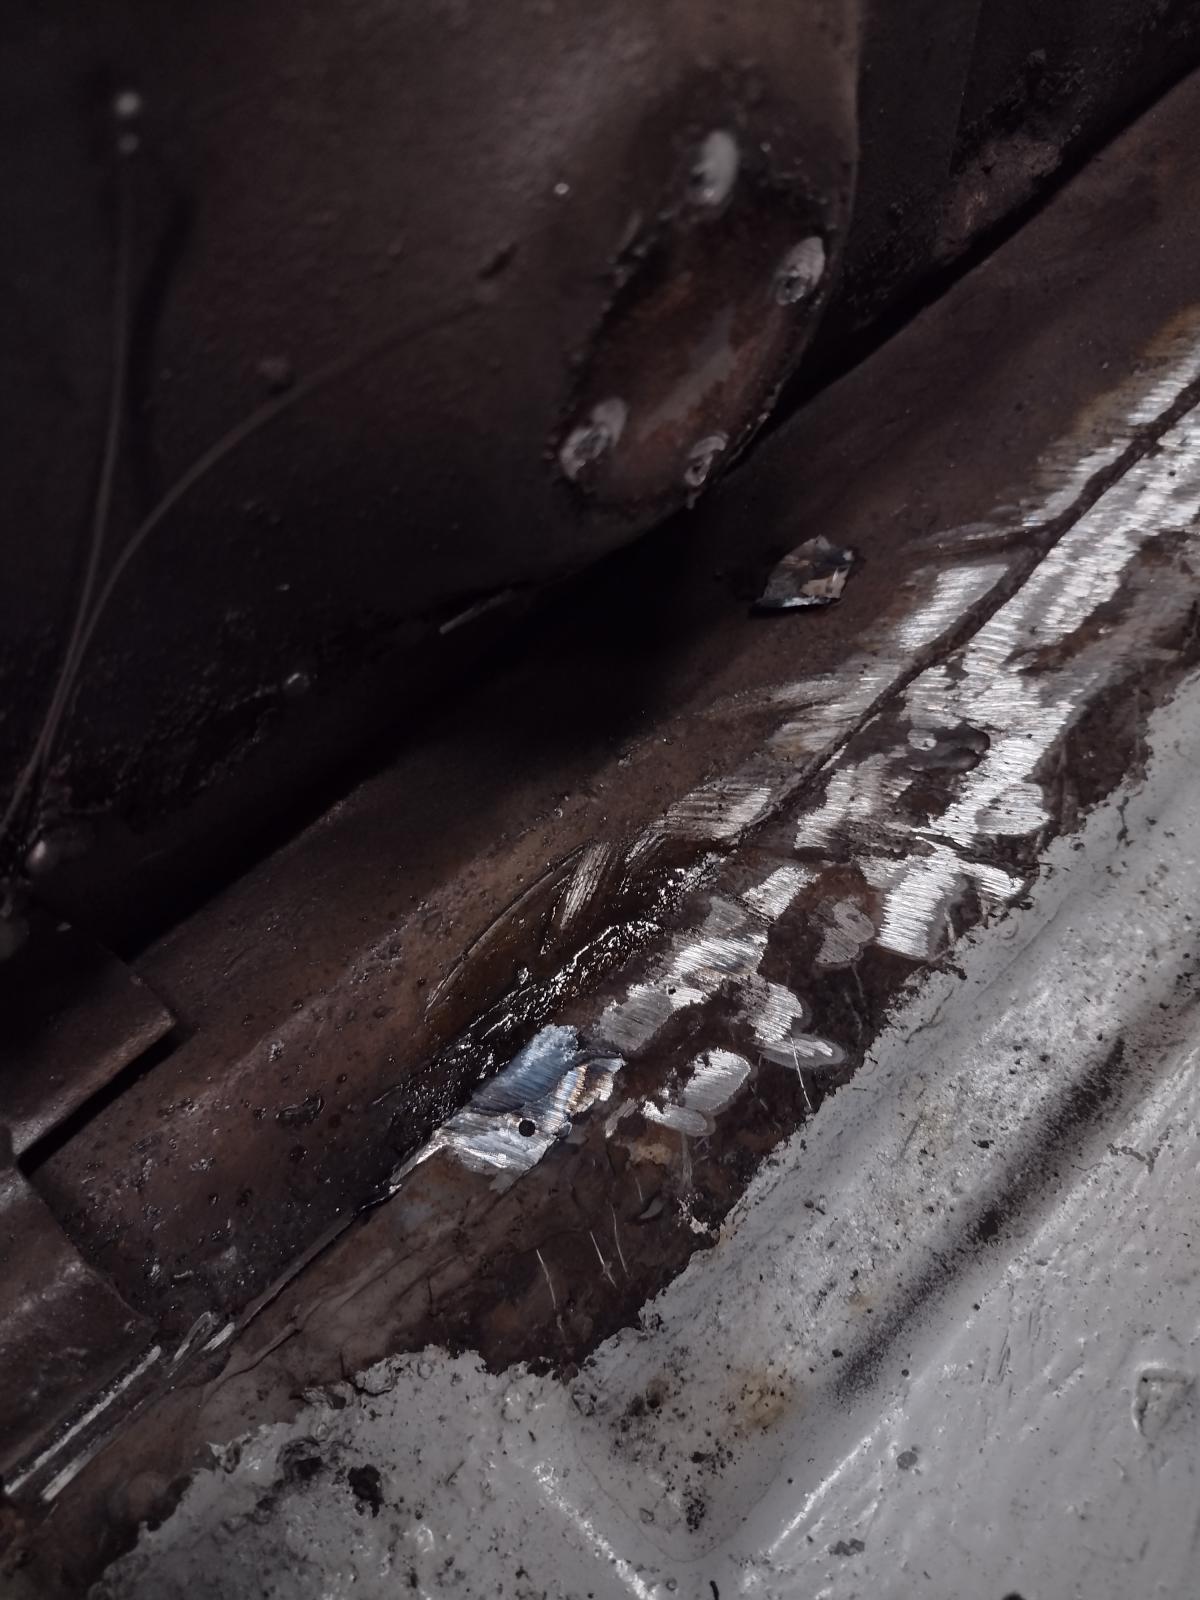
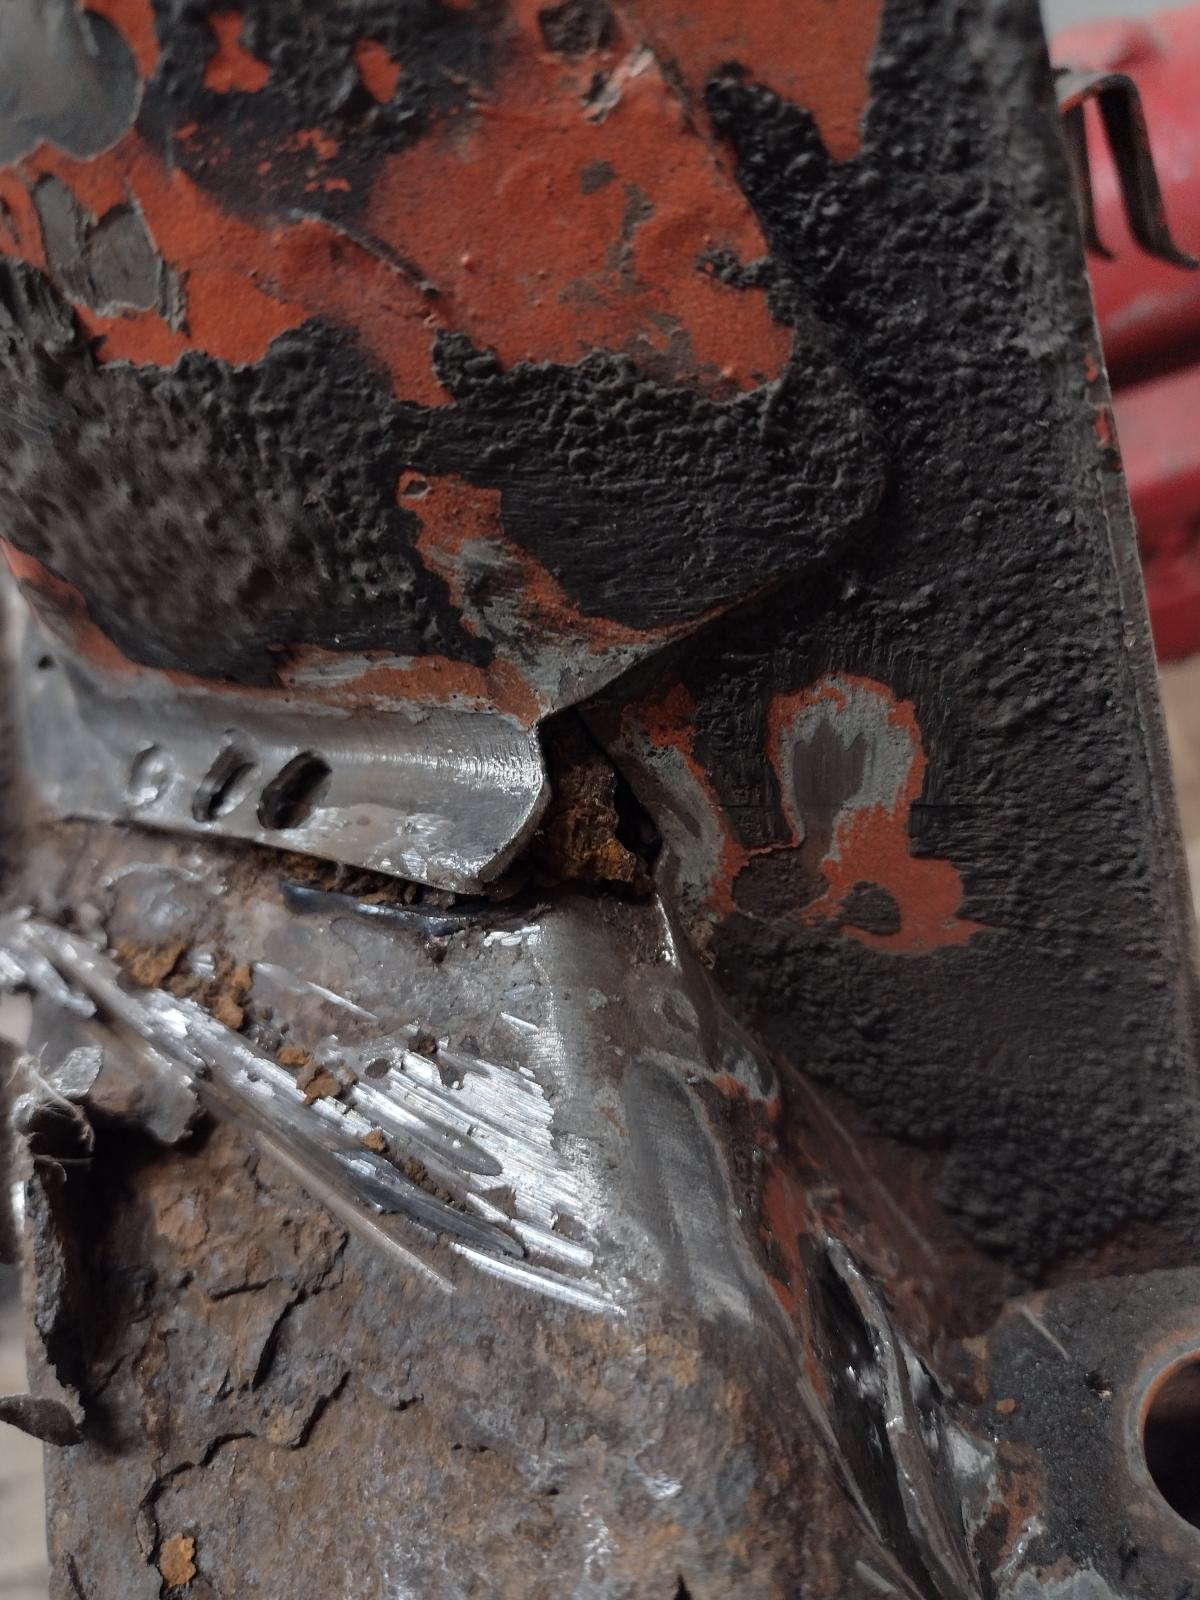
Then I looked further on the outside part of the hellhole..which doesn't look promising:
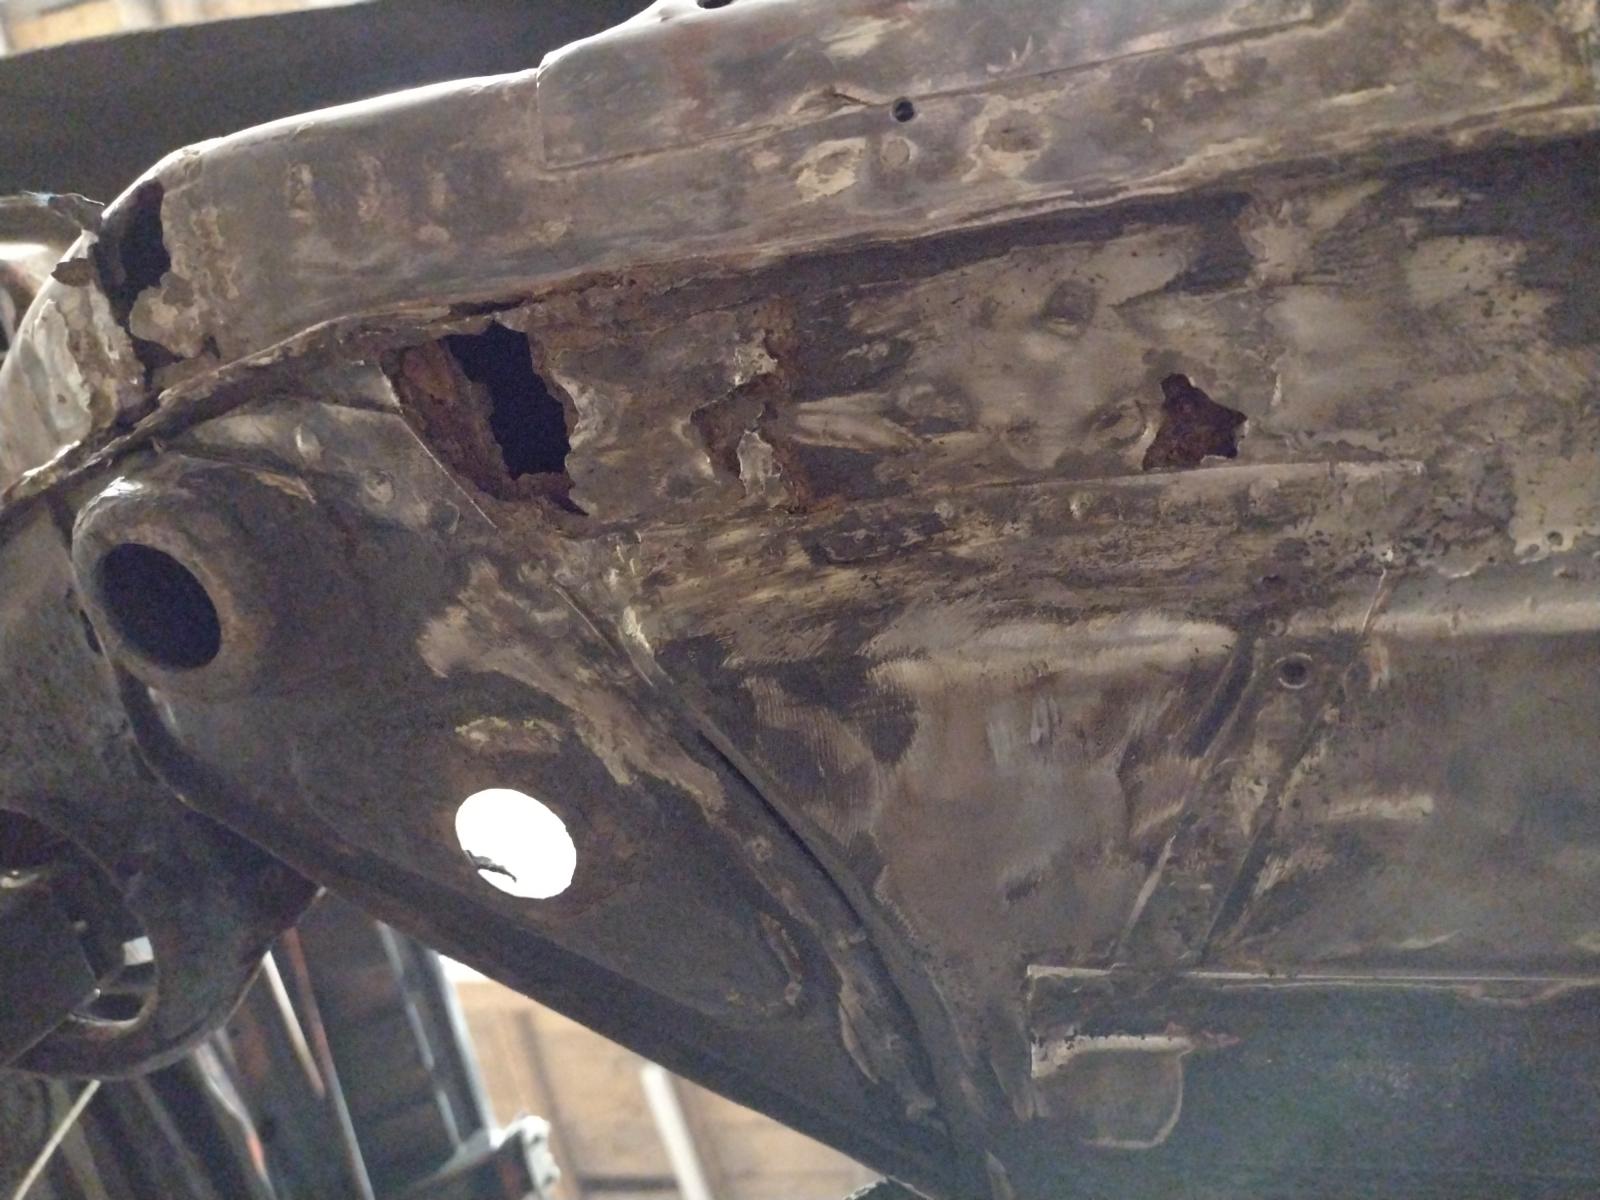
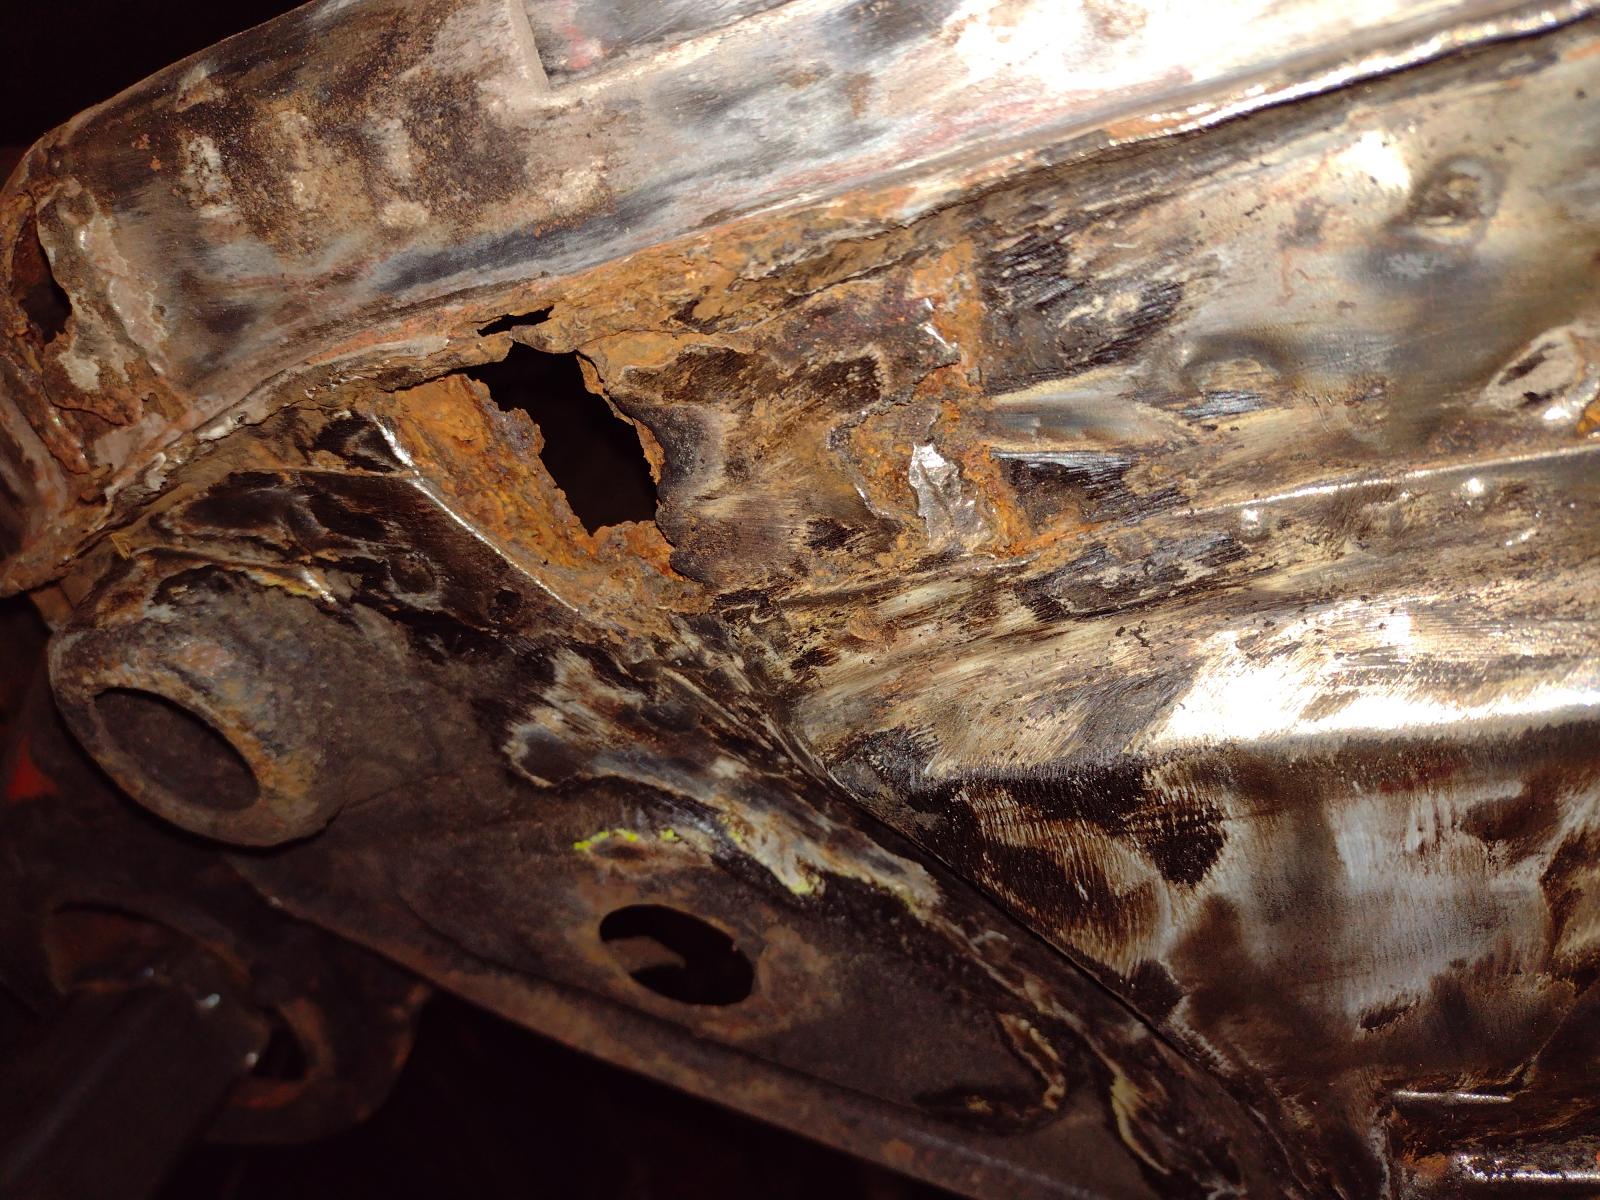
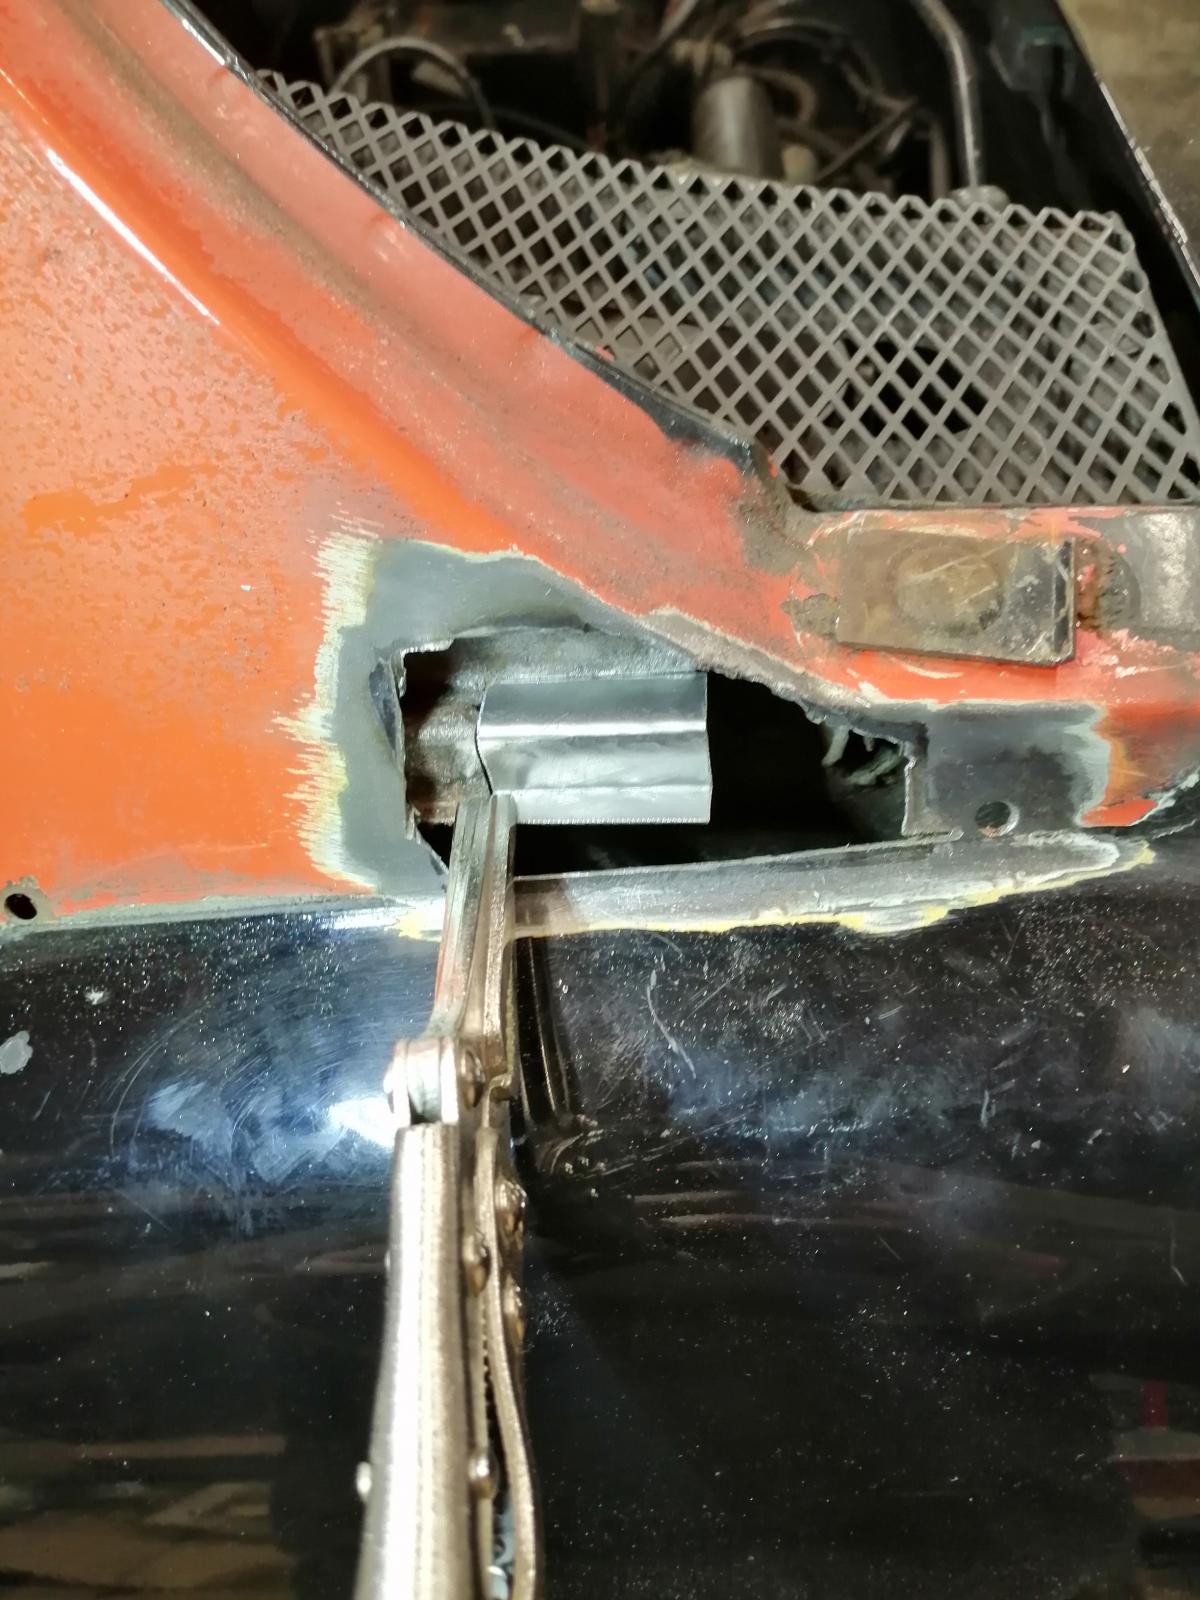
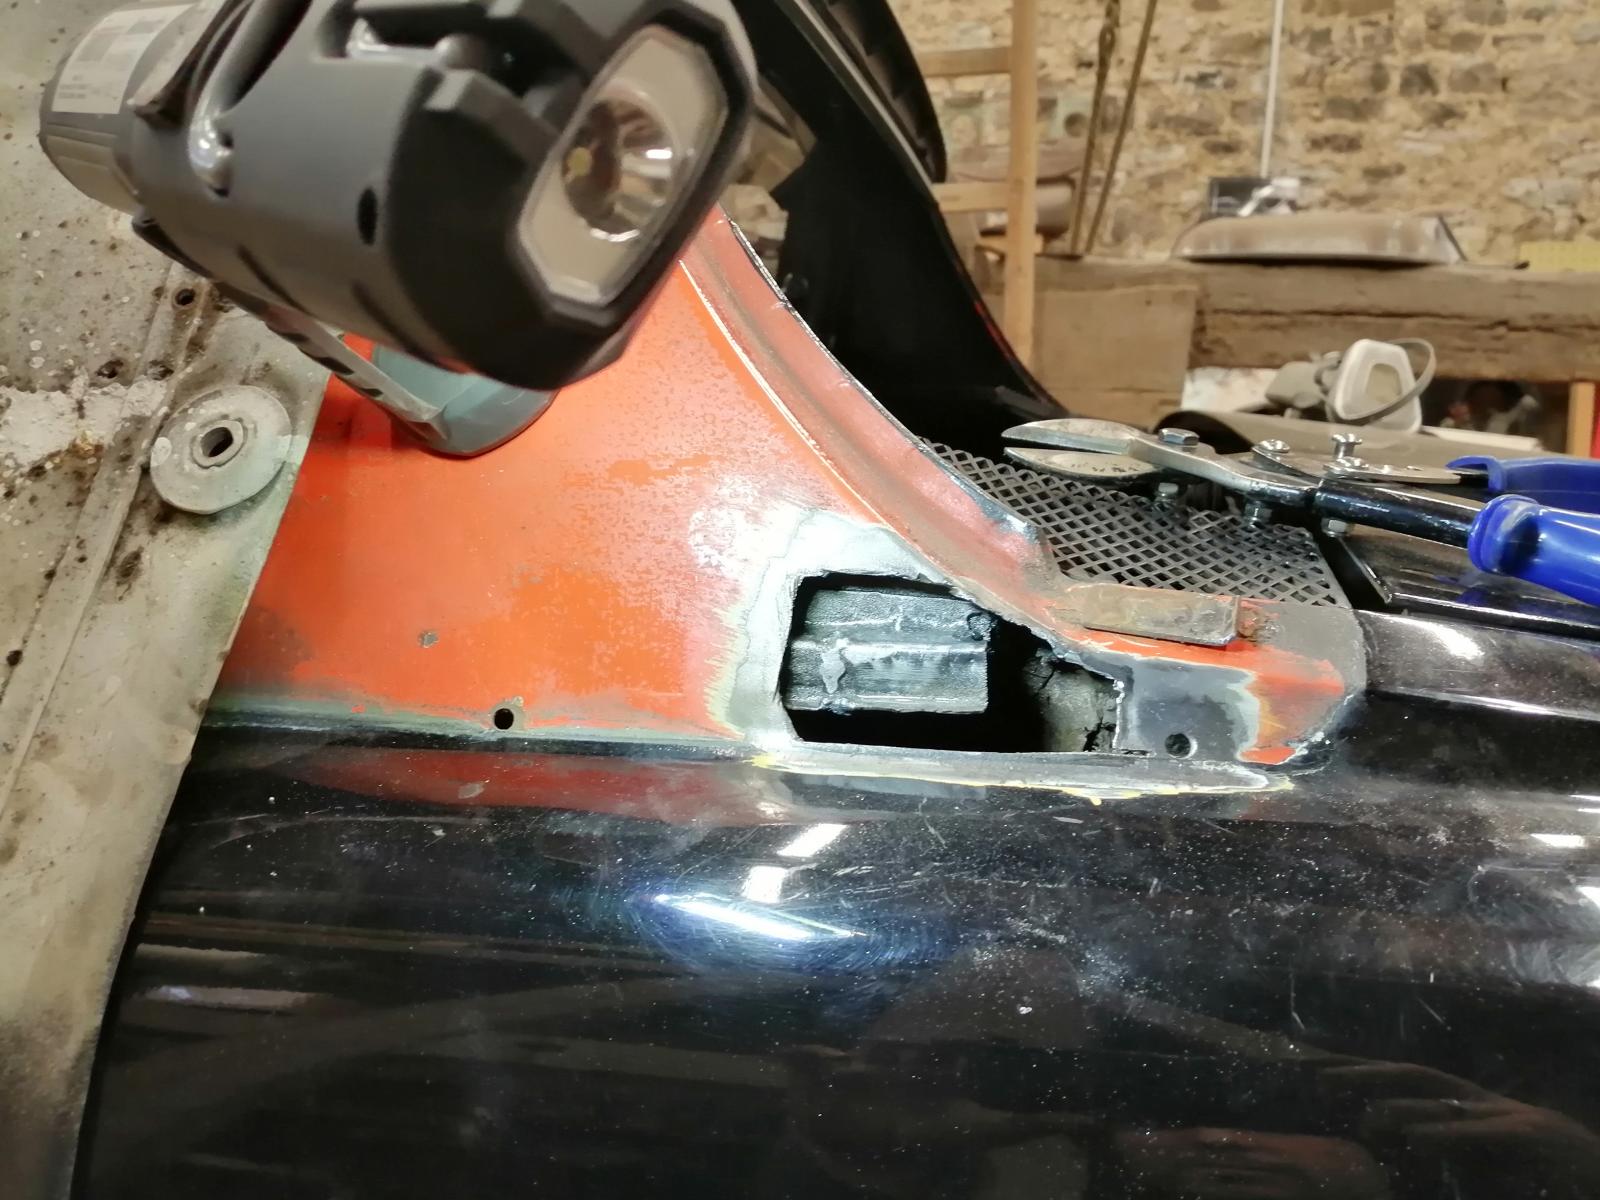
And after checking a bit inside (quite a lot of layers in this badly repaired jack point..):
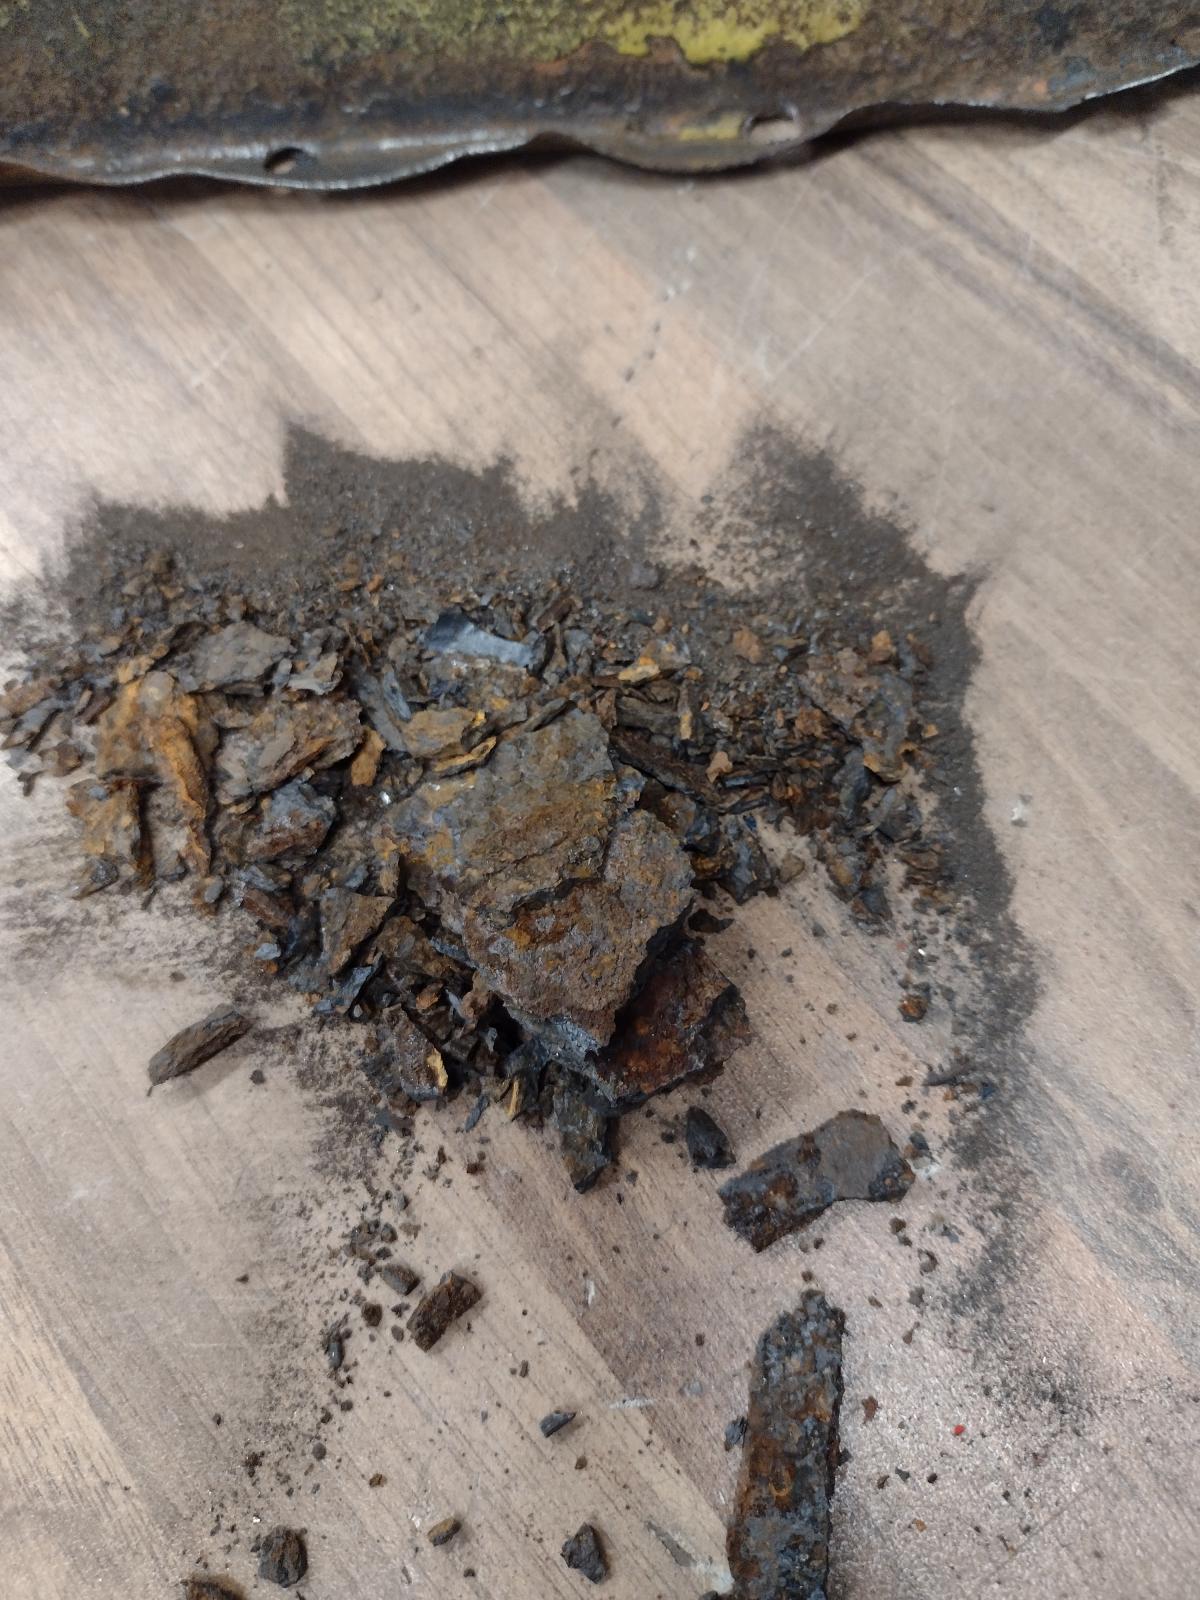
There were some findings:
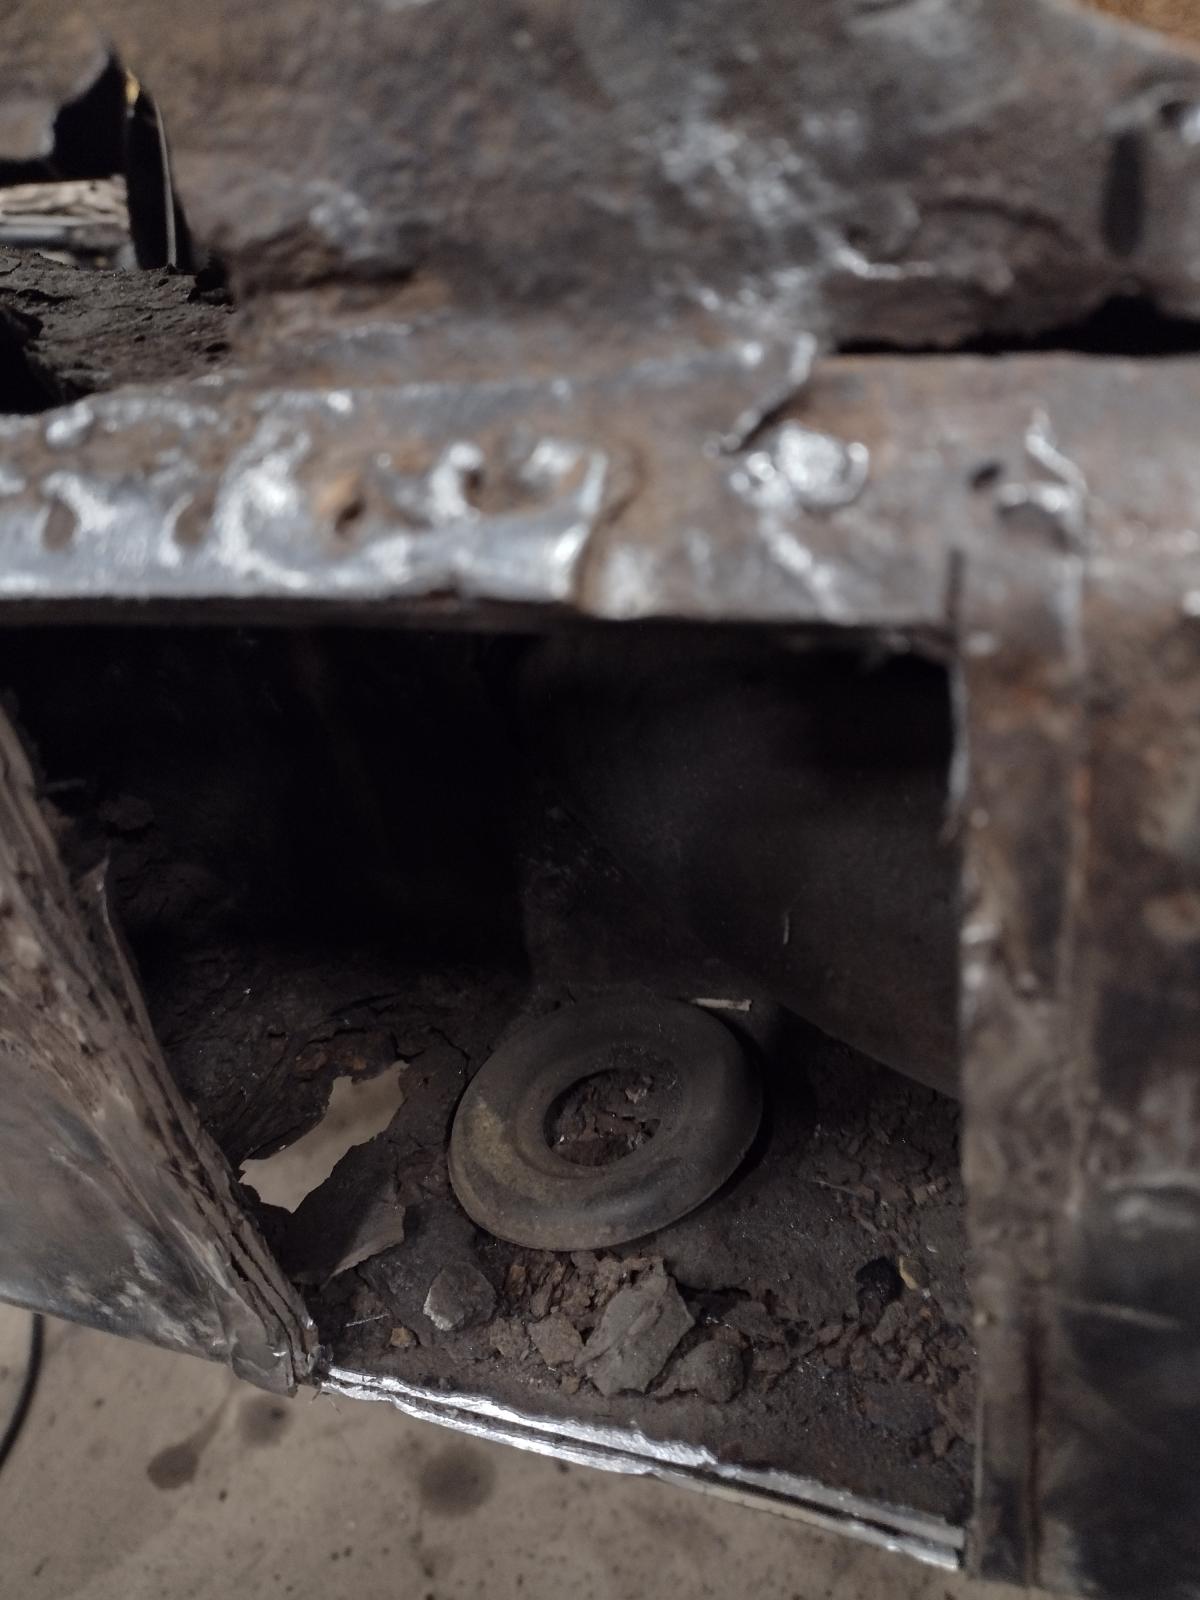
And a lot of rust falling through:
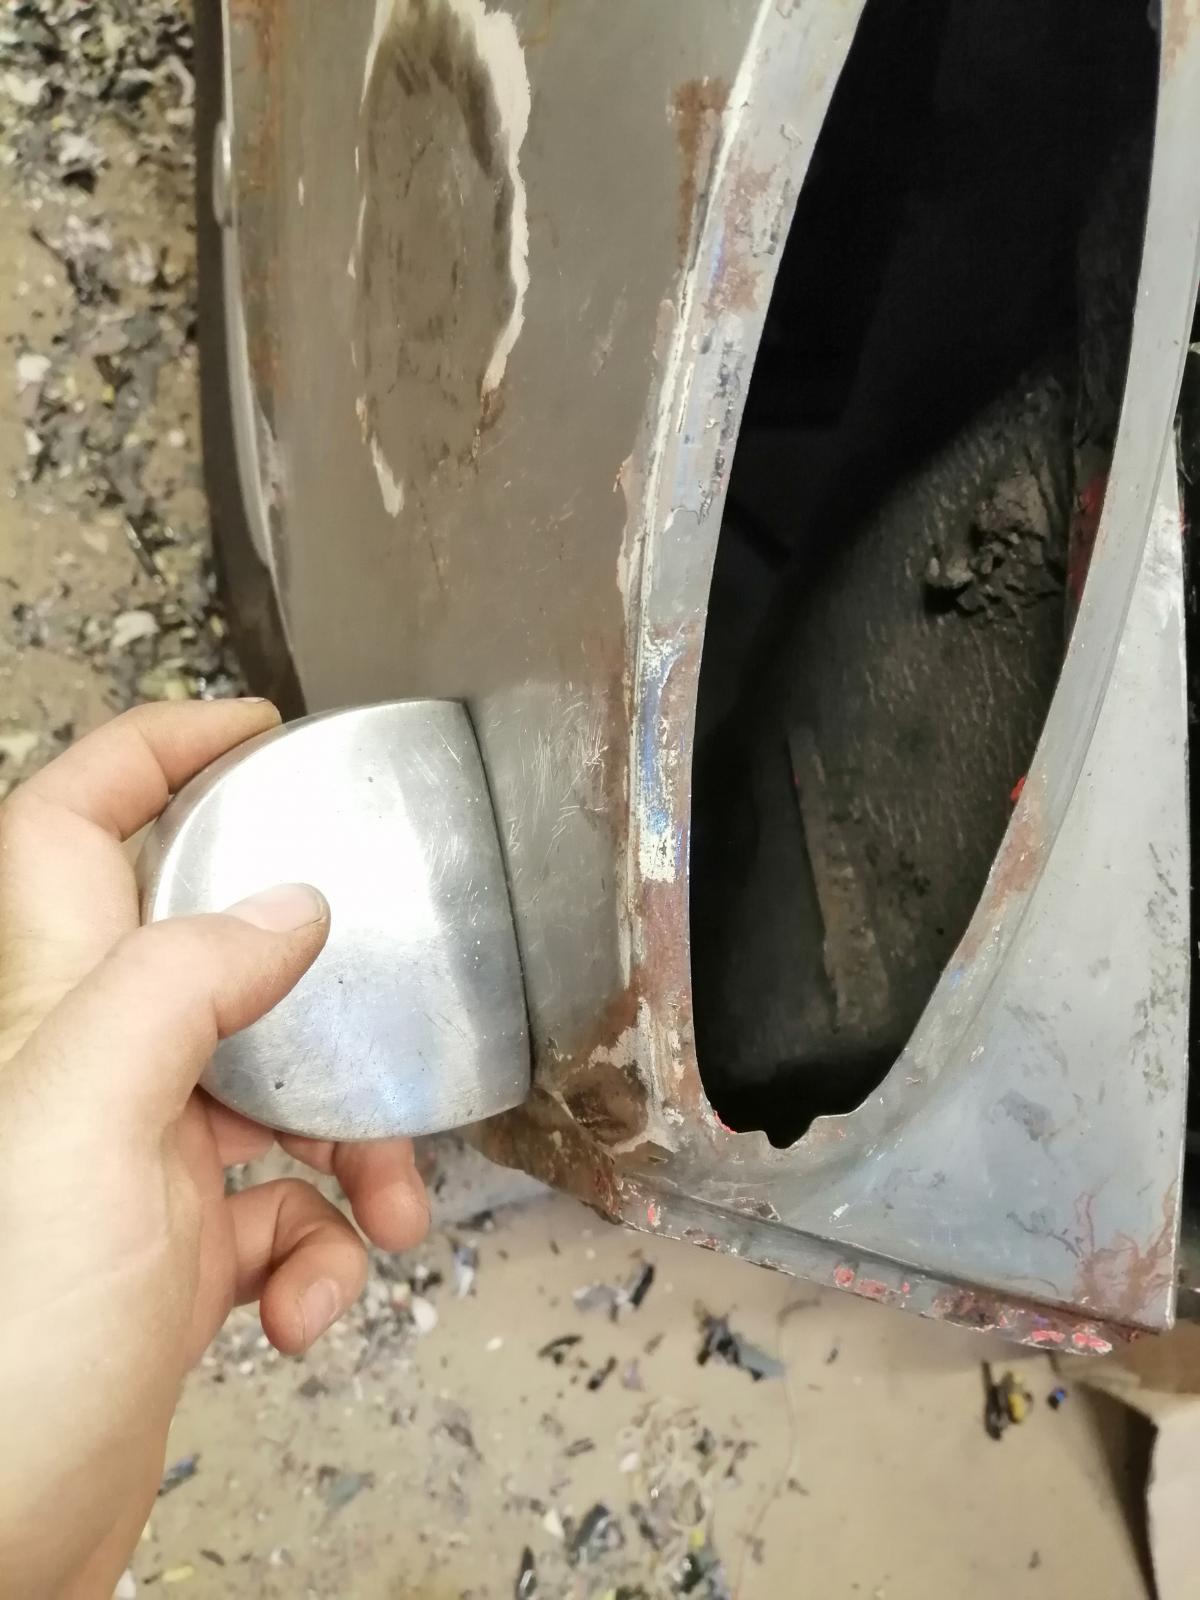
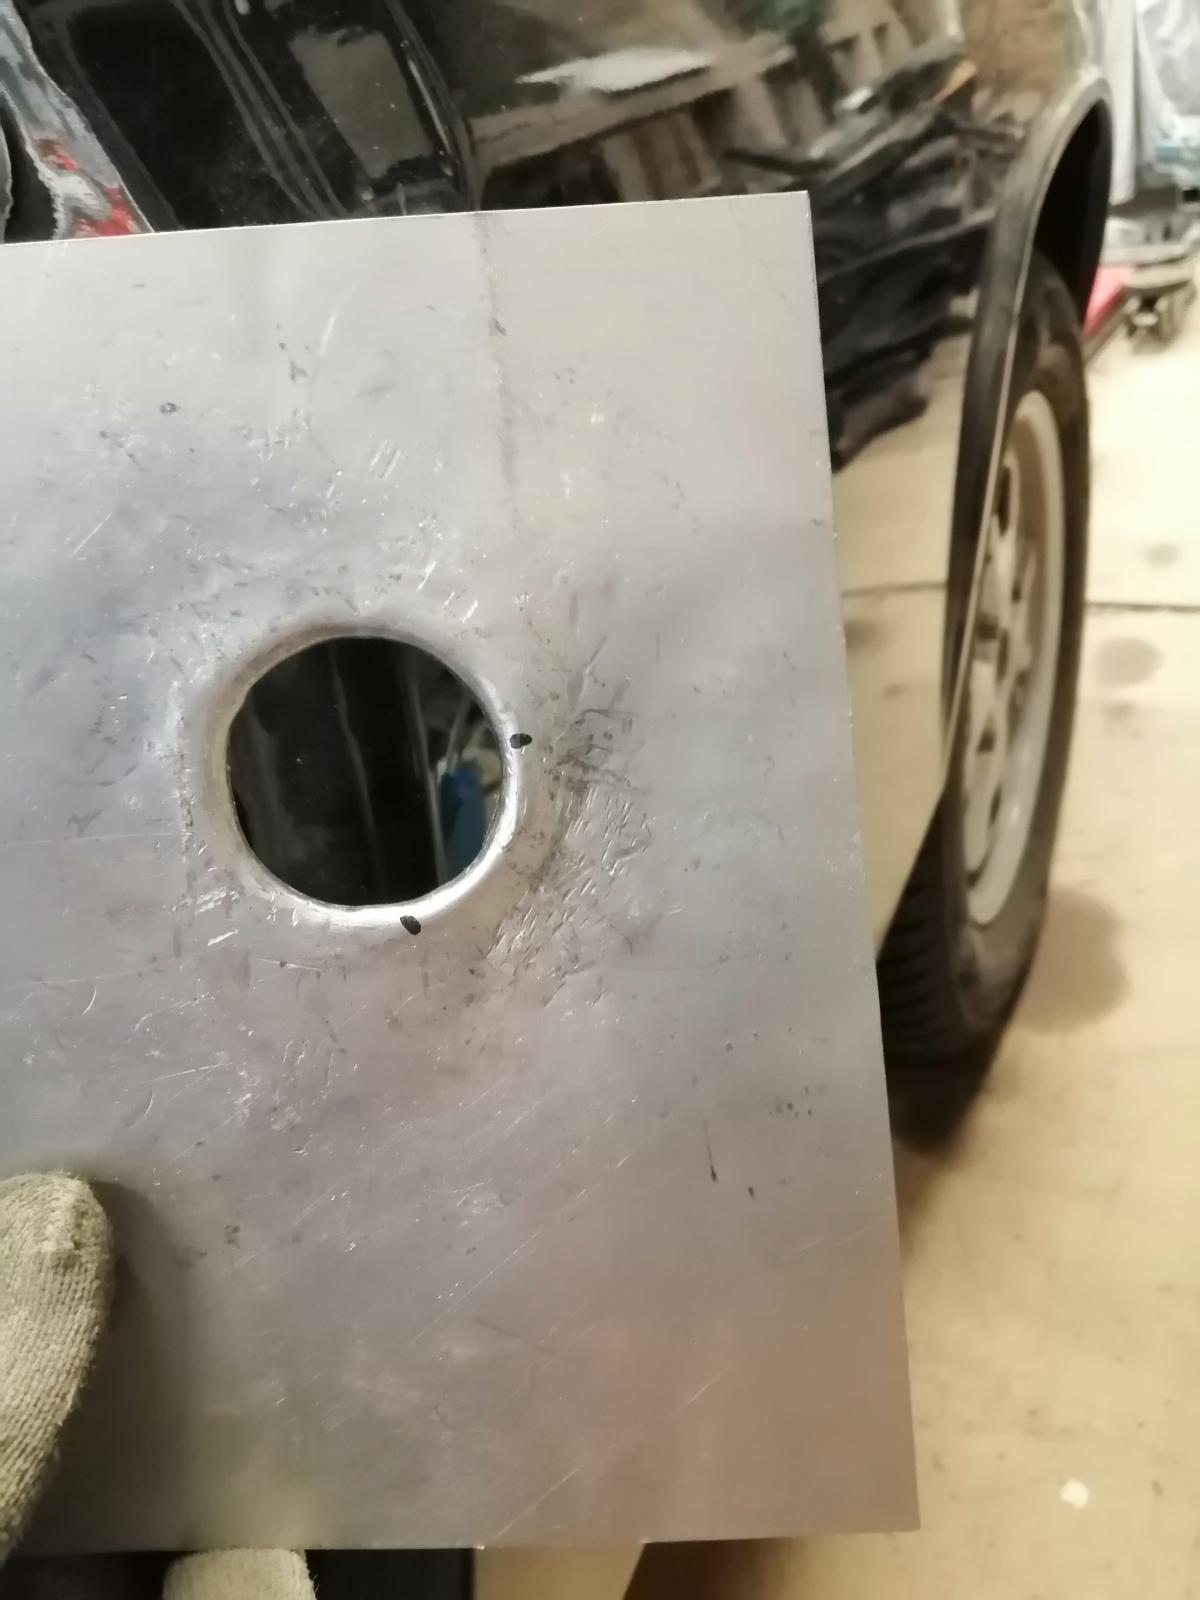
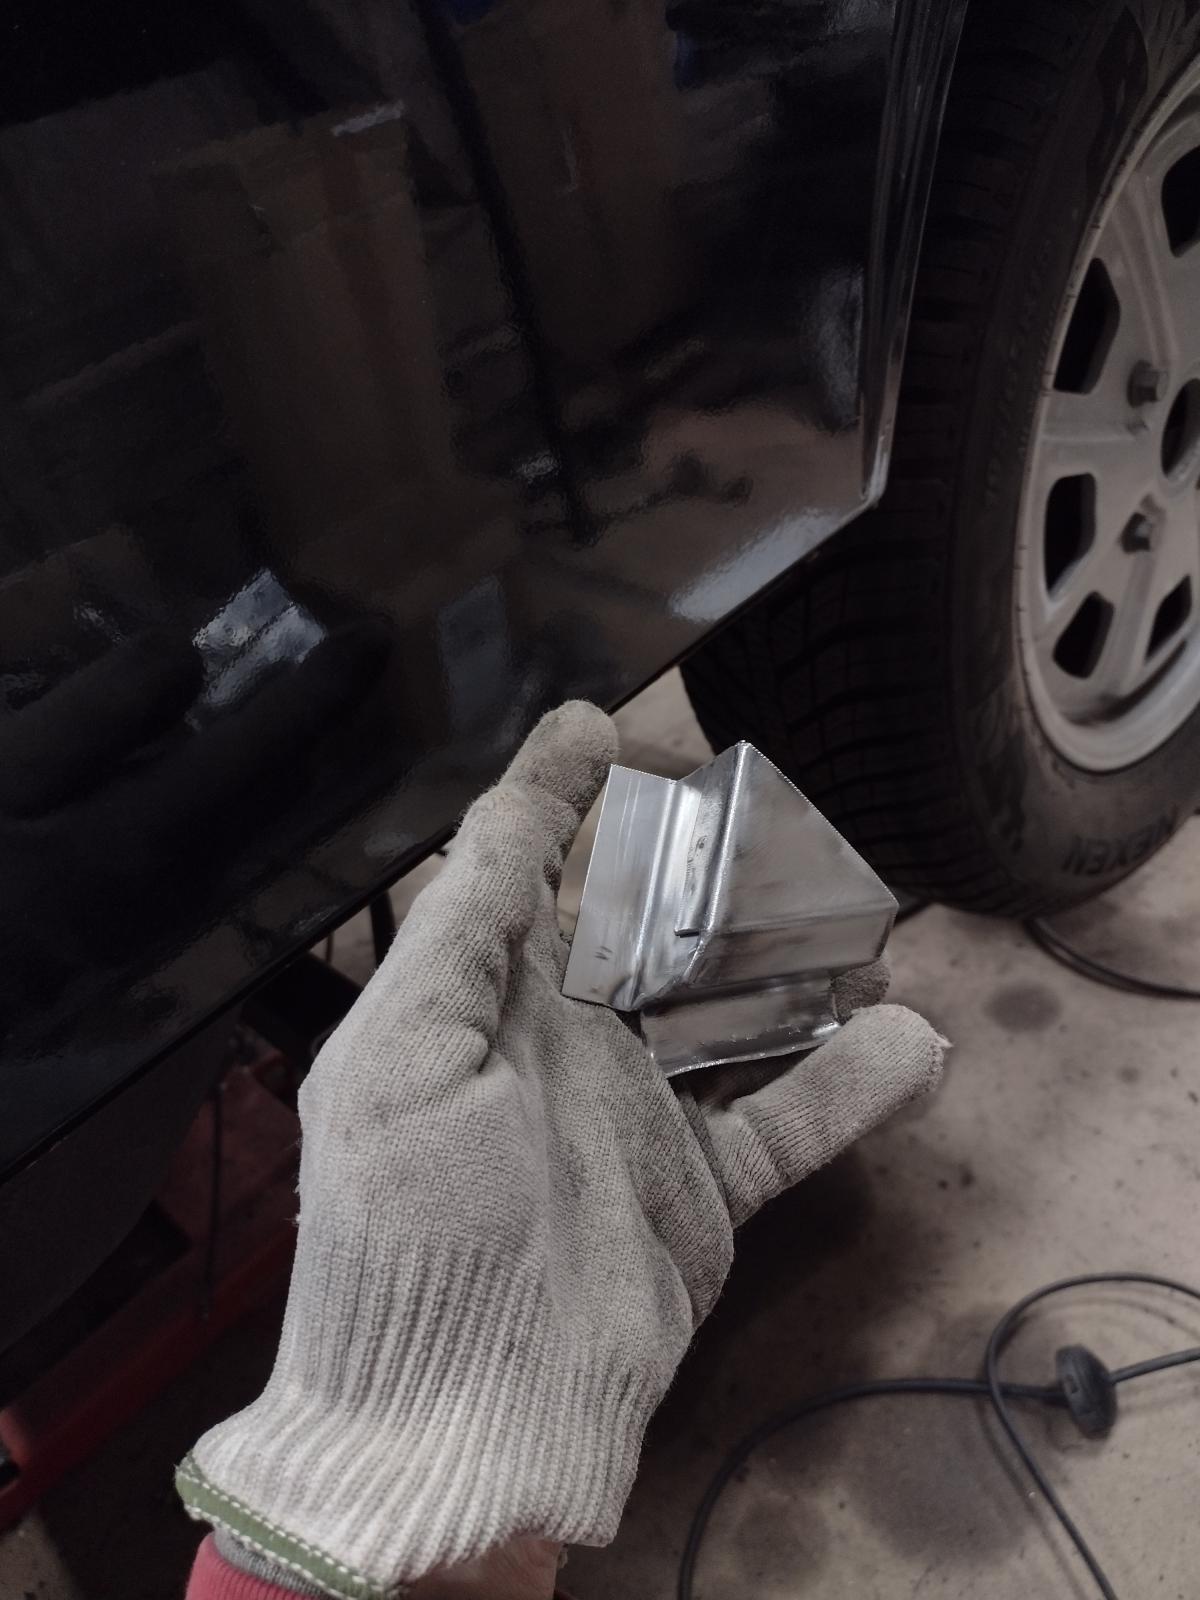
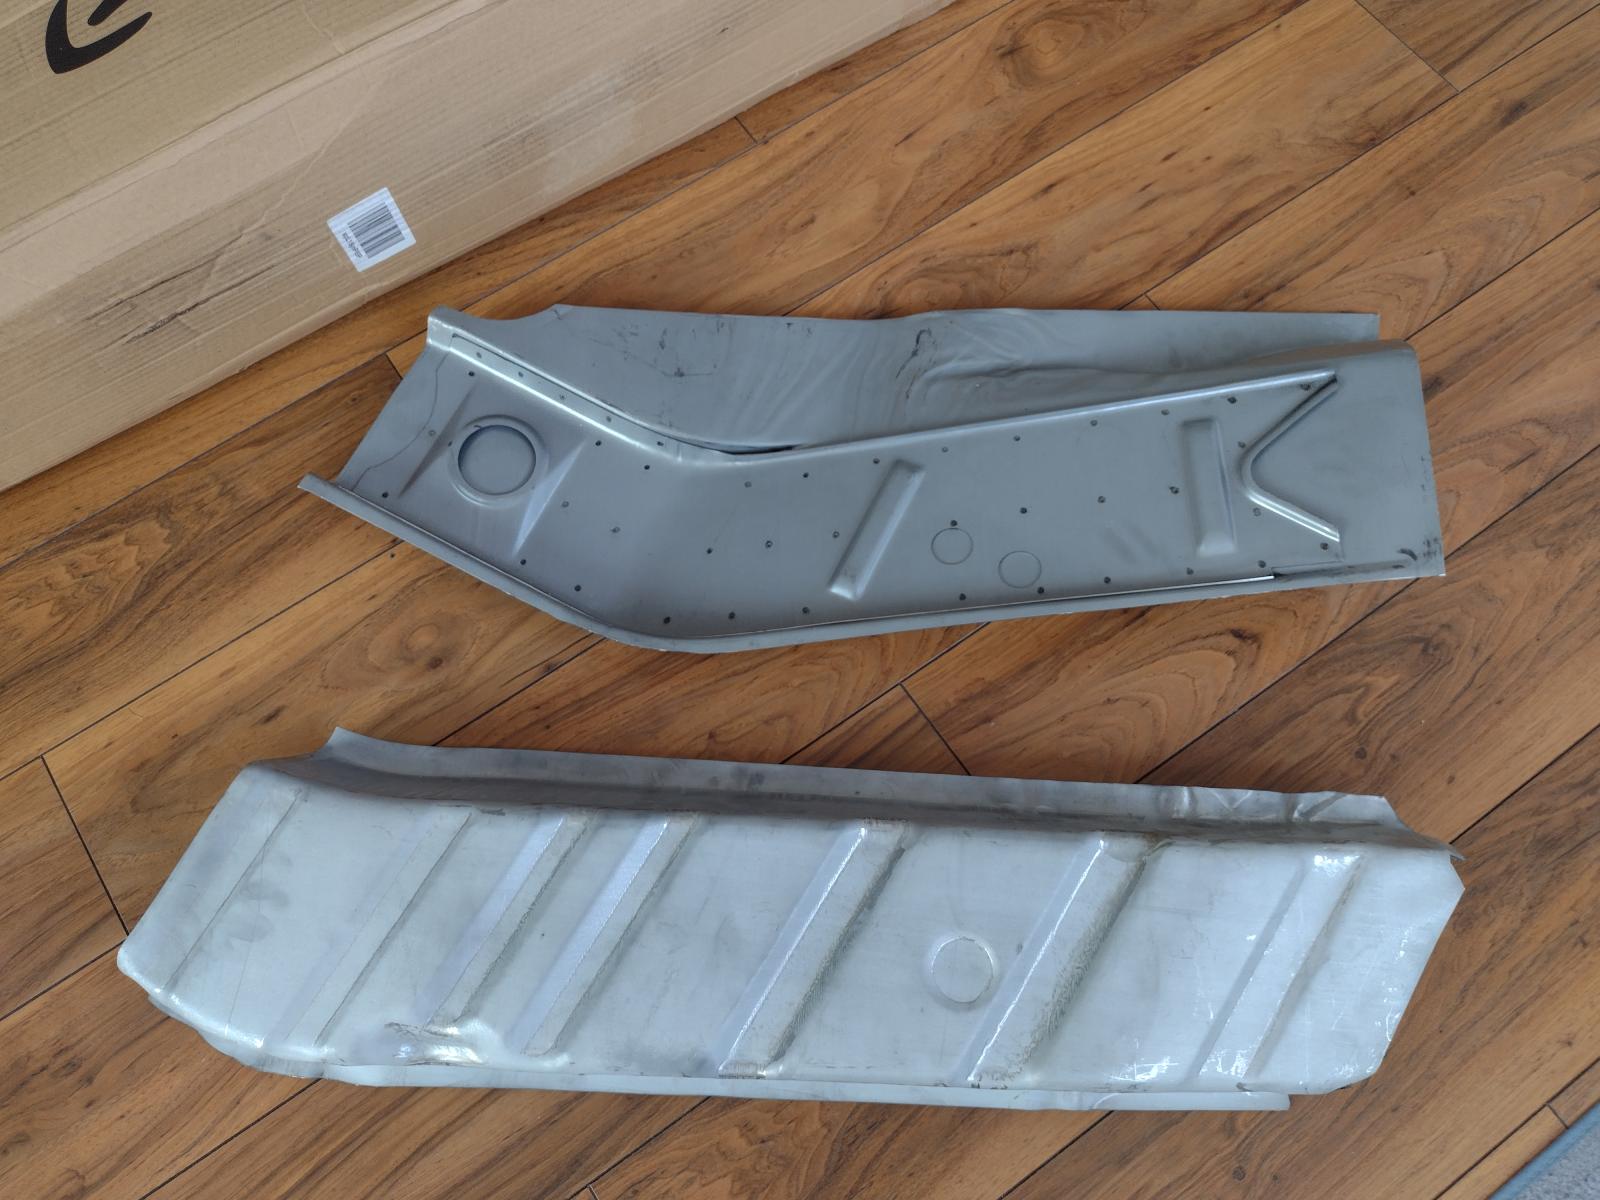
I did not want to fight forming too much thick metals so I made a small order to save me some time:
So..time to cut really into this repair..
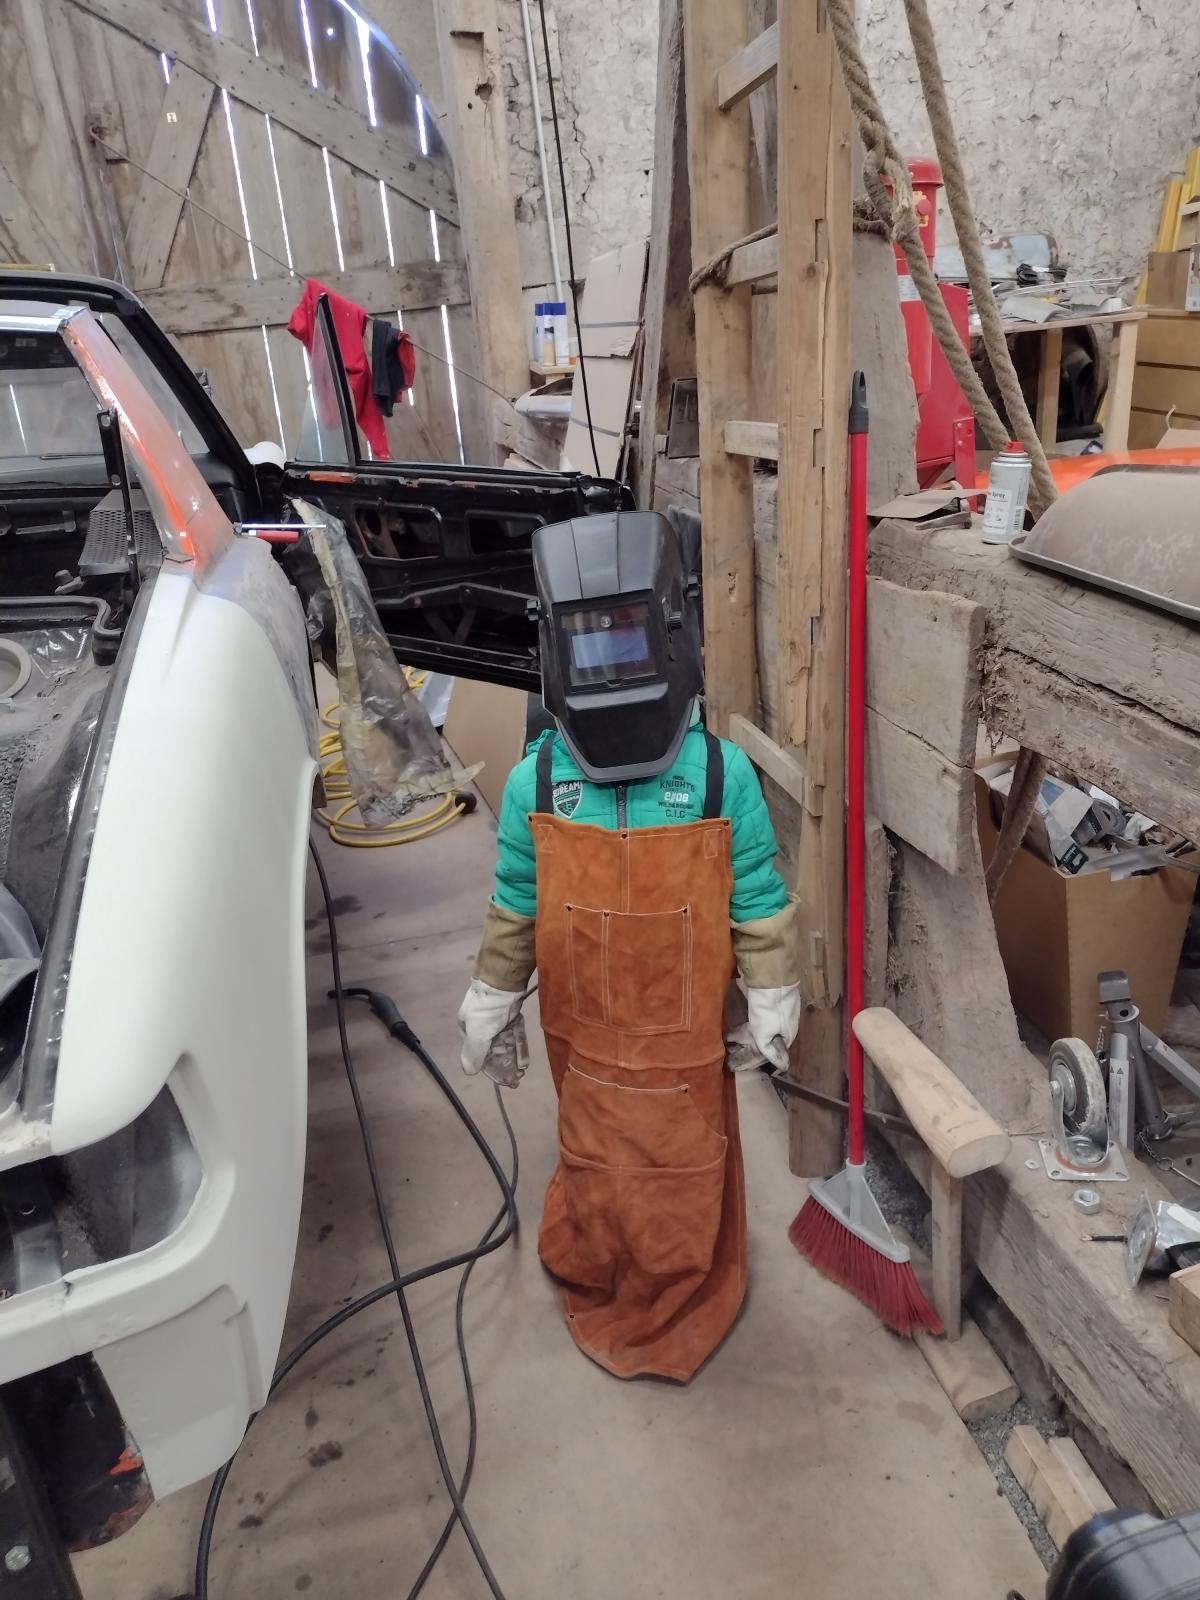
But before that, I took a bit of time investing in my future partner in crime..my 5 years old boy already wants to learn how to weld!
Stay tuned
Antoine
@wonkipop : yes, the color is showing through and will be back
@FL000 : yes, no fancy pullmax or power hammer..a lot by hands and a bit of shrinker/stretcher/wheeling machine
I made some more progress !
I removed the 47 years old fuel lines:
Stainless steel replacement is on its way!
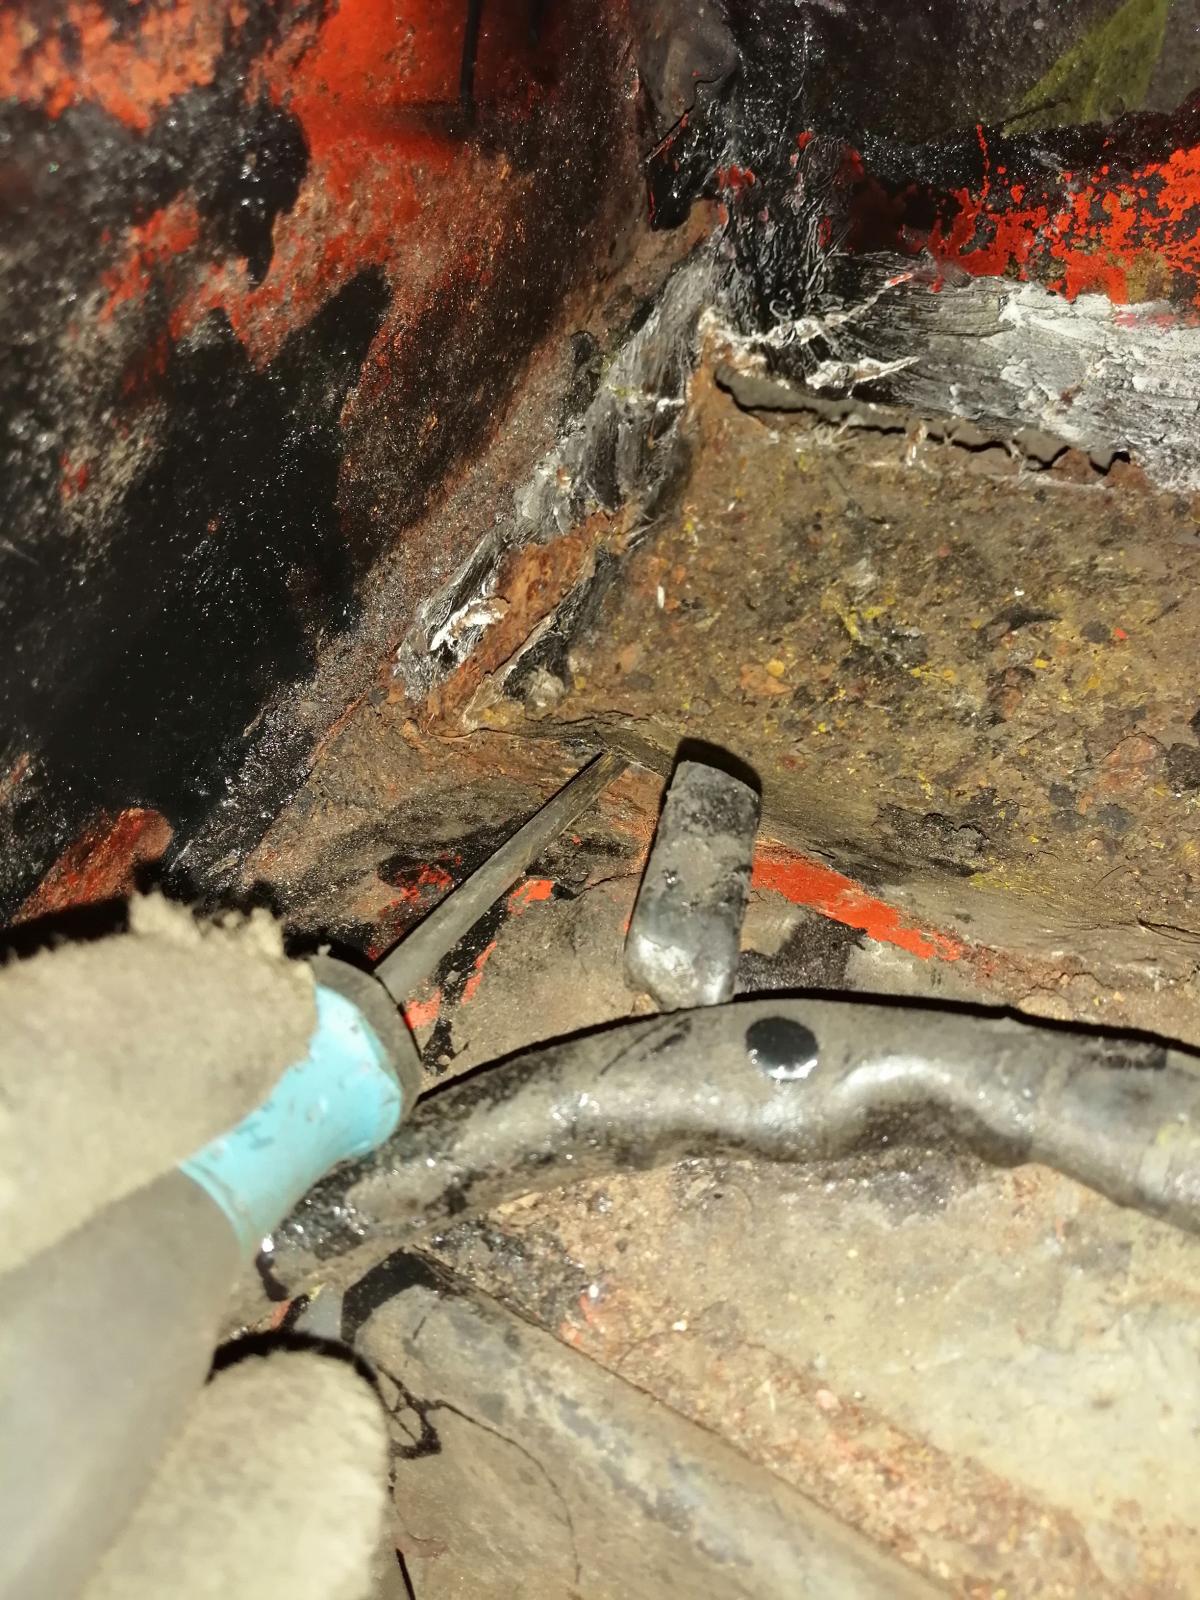
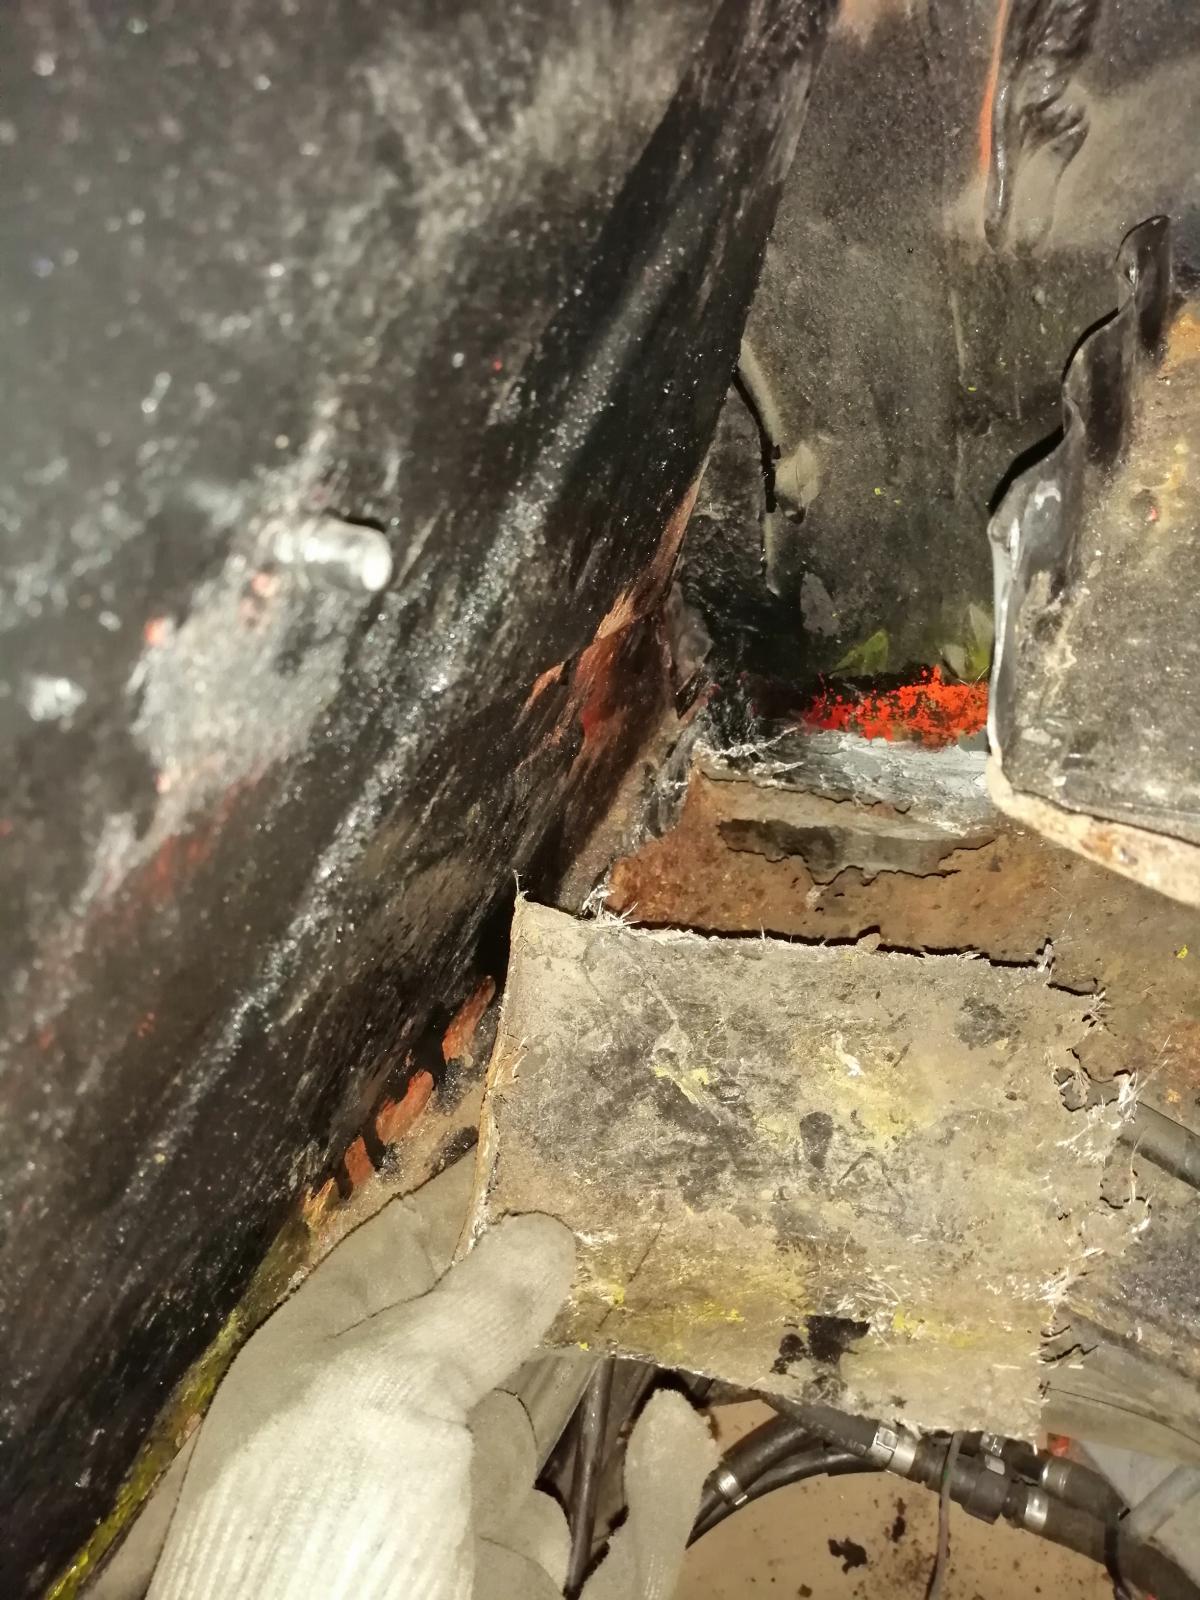
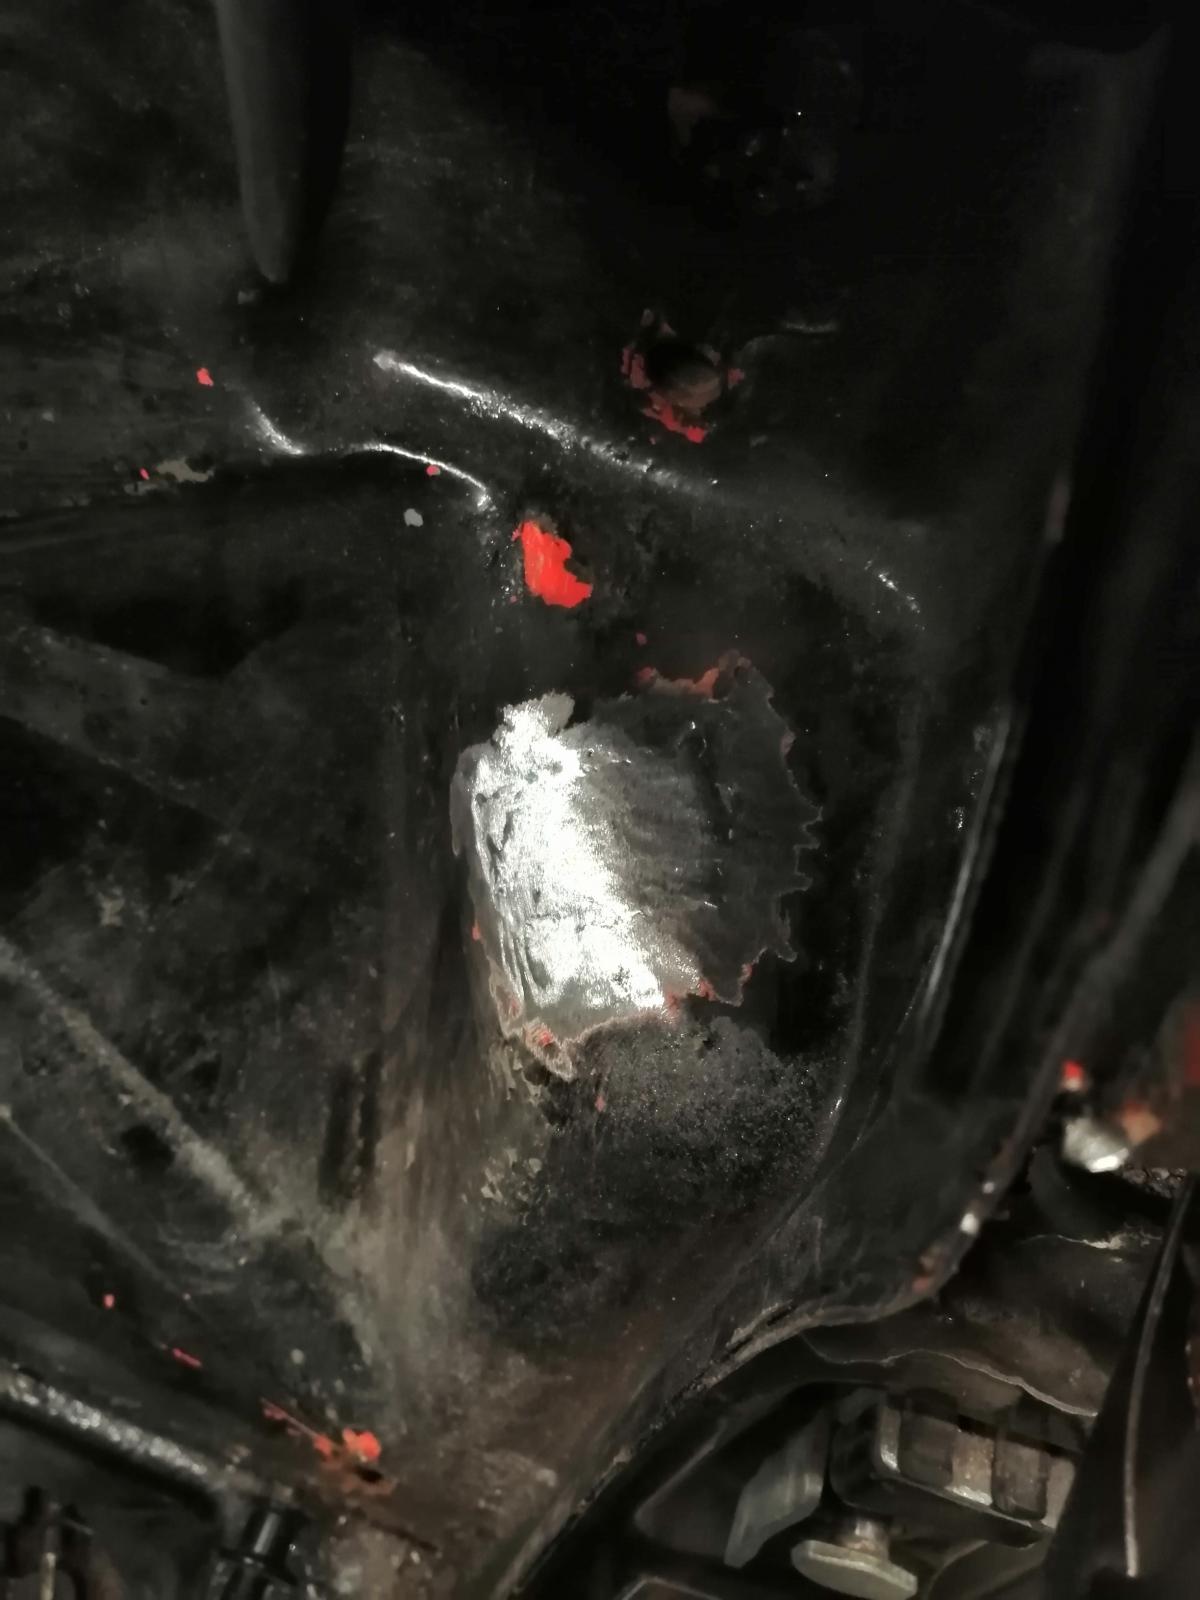
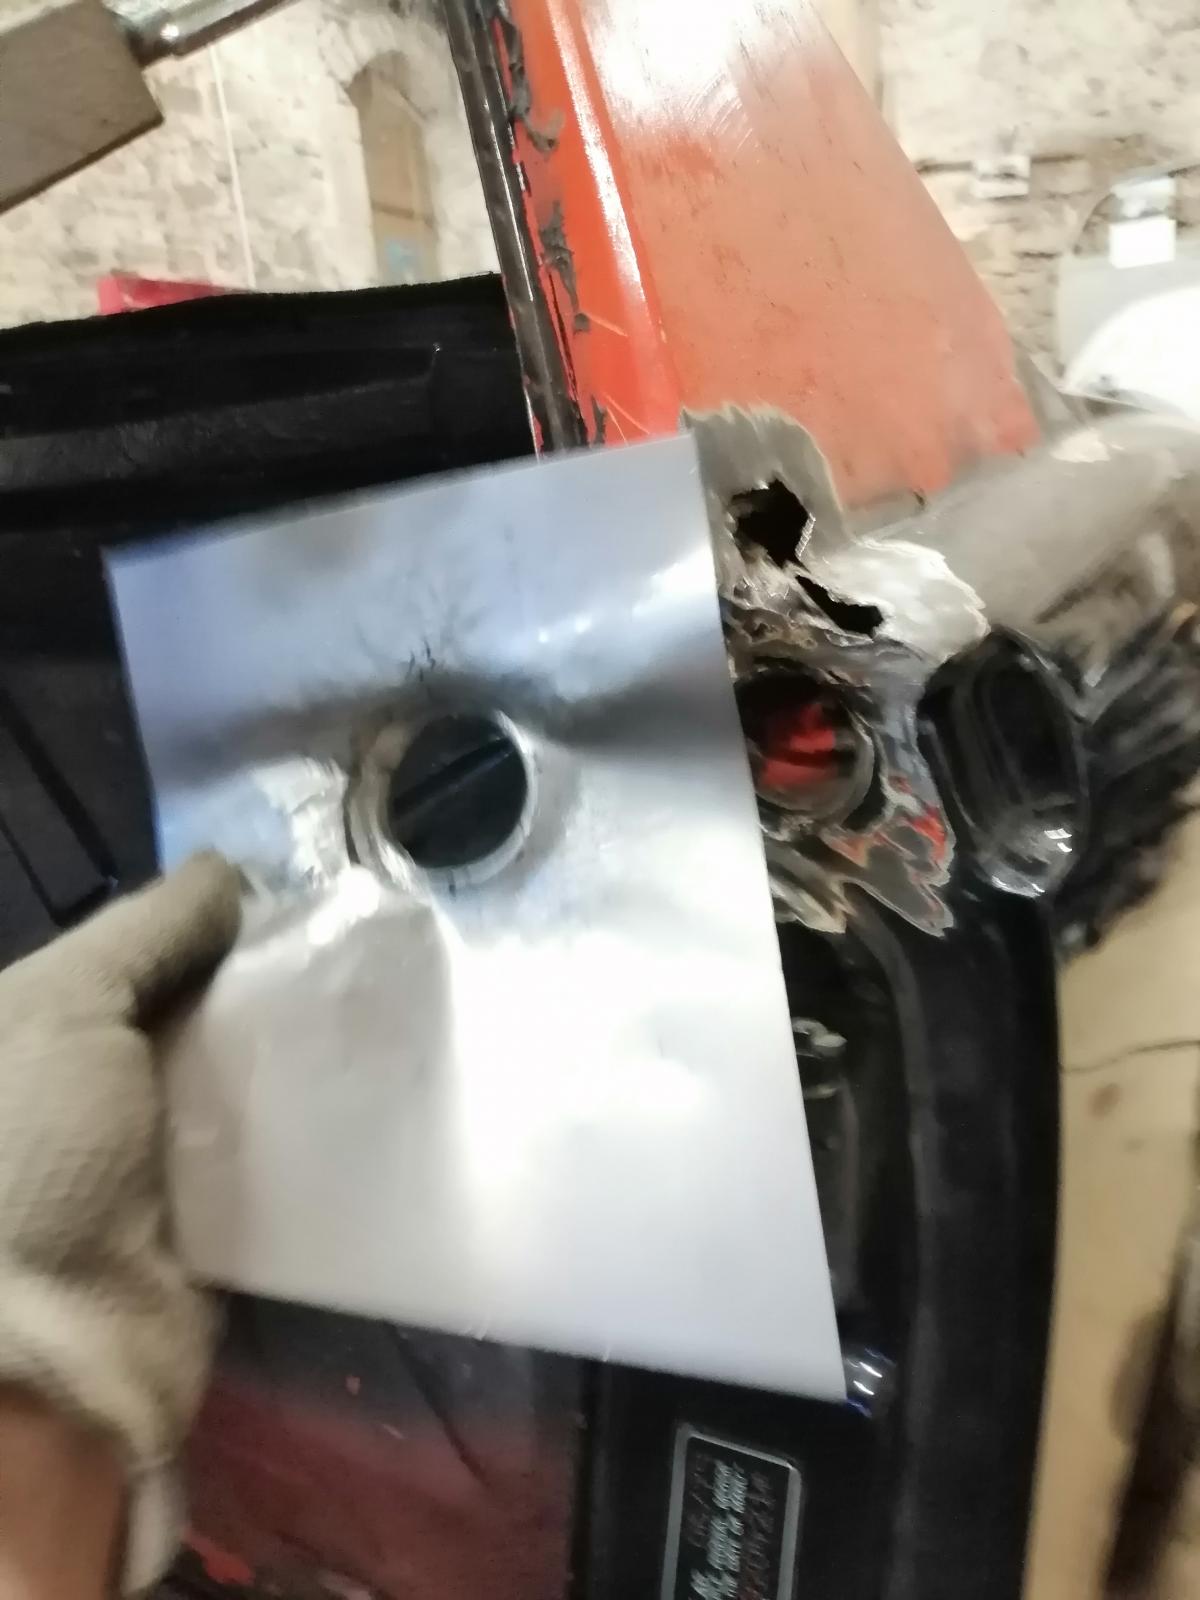
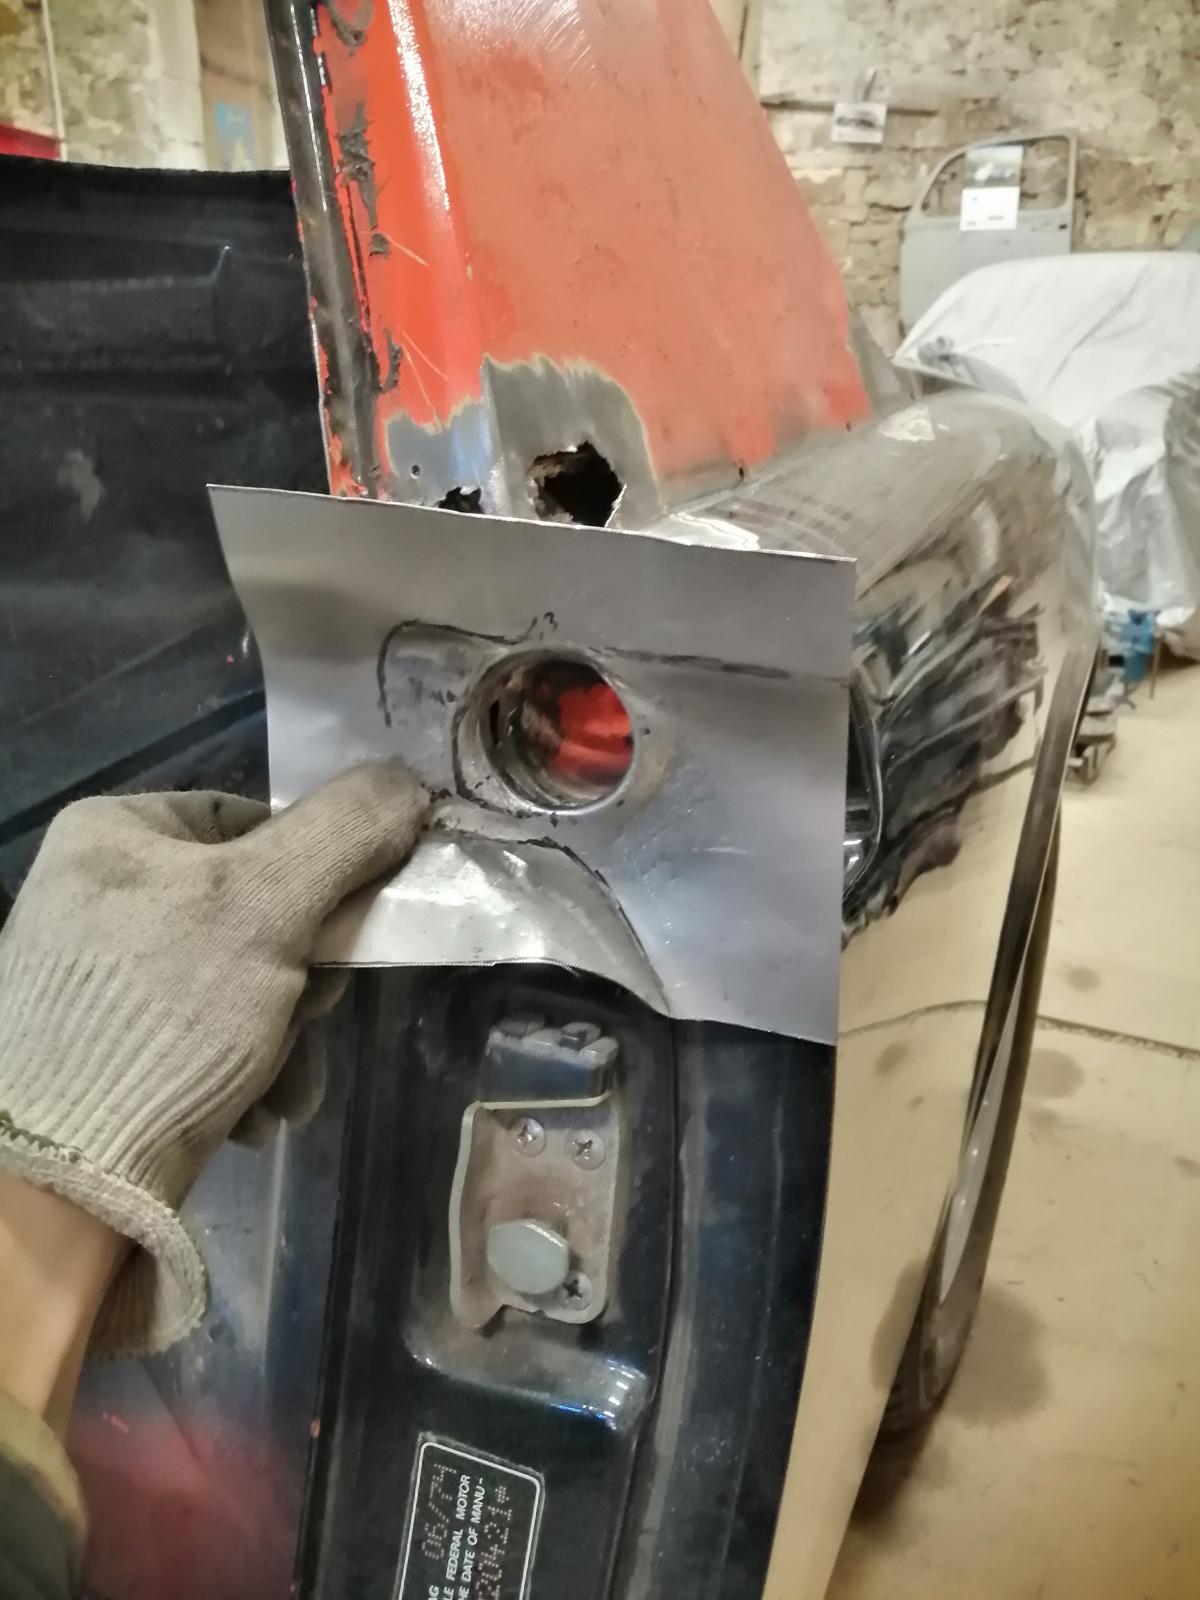
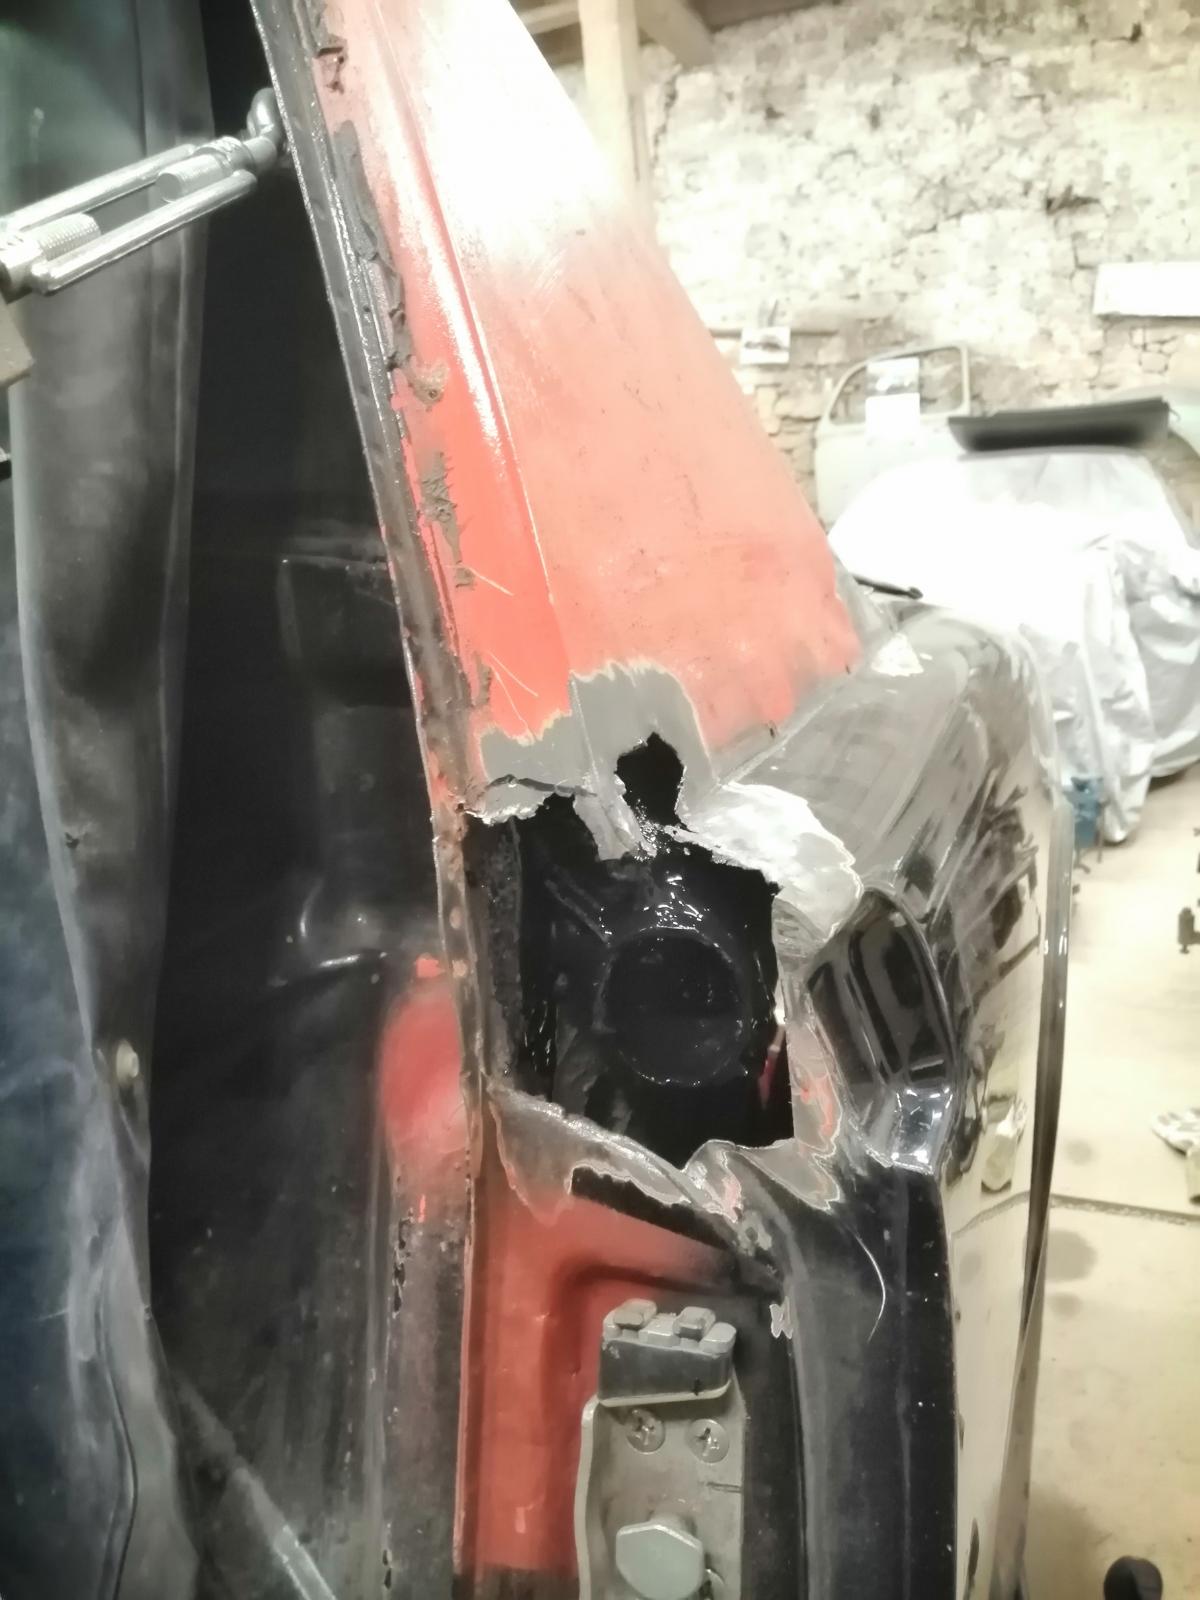
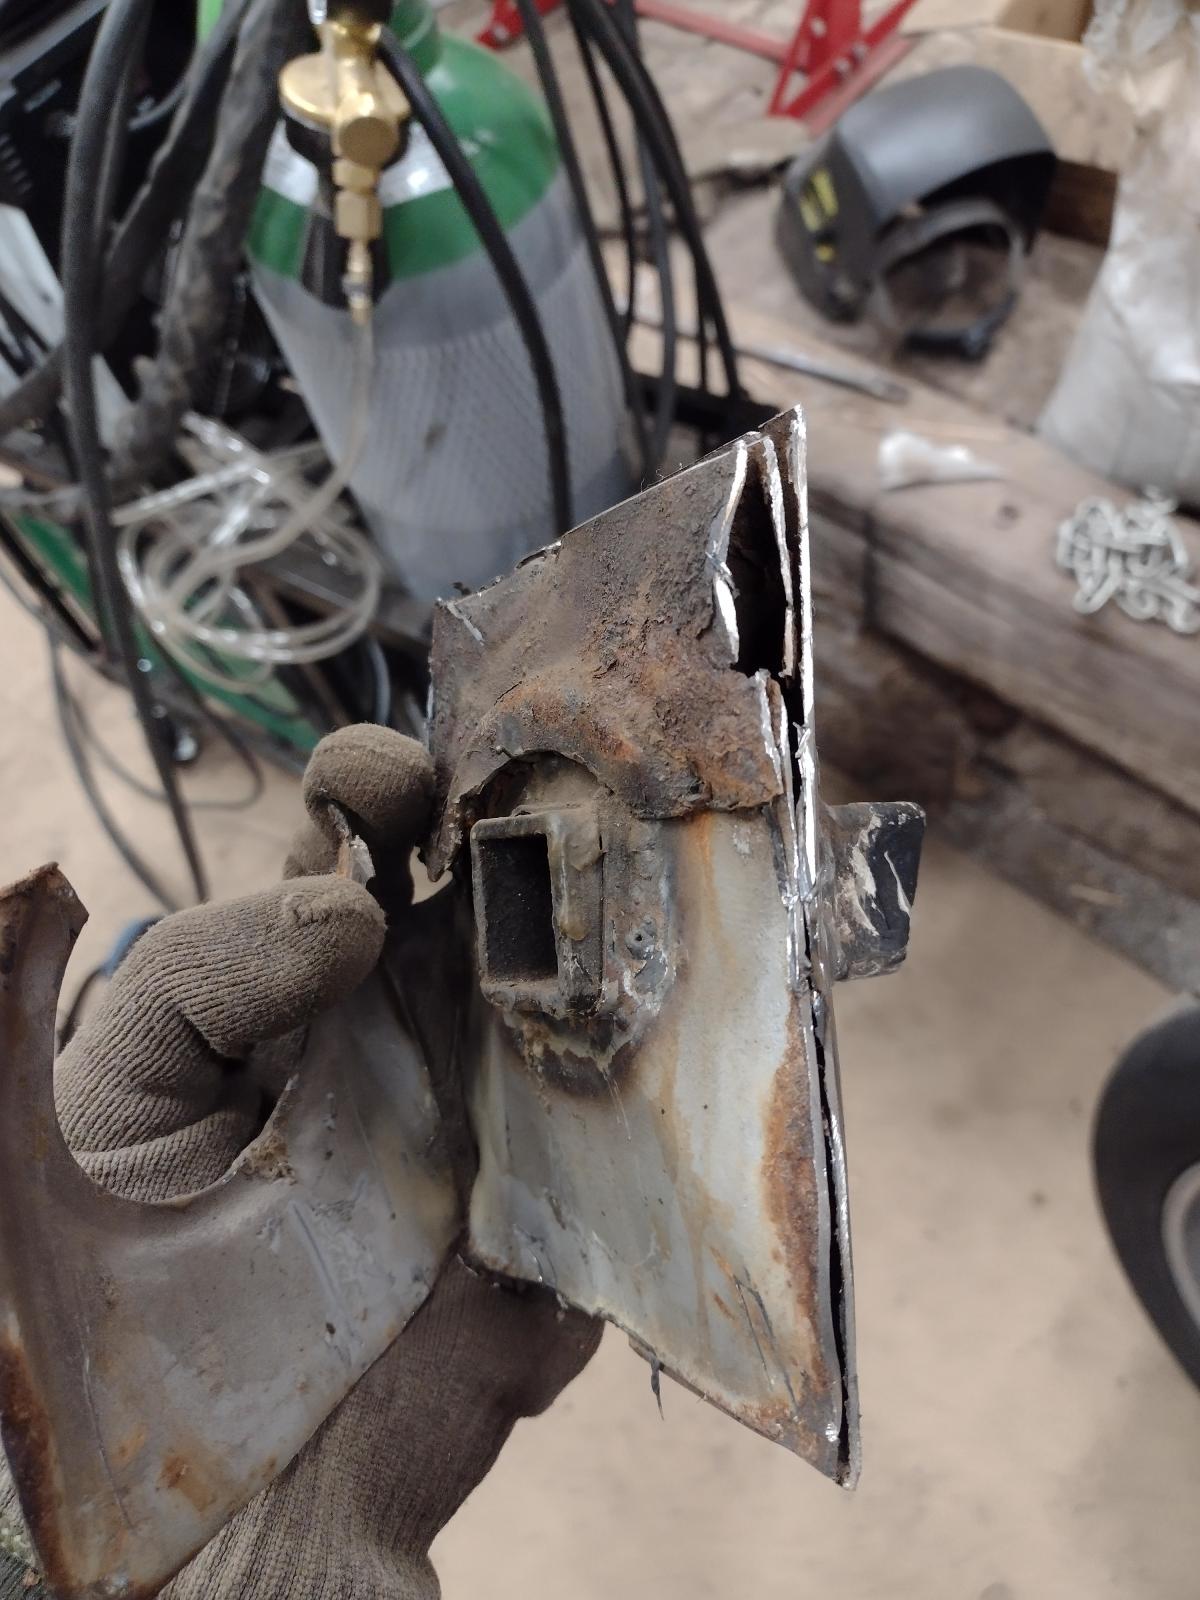
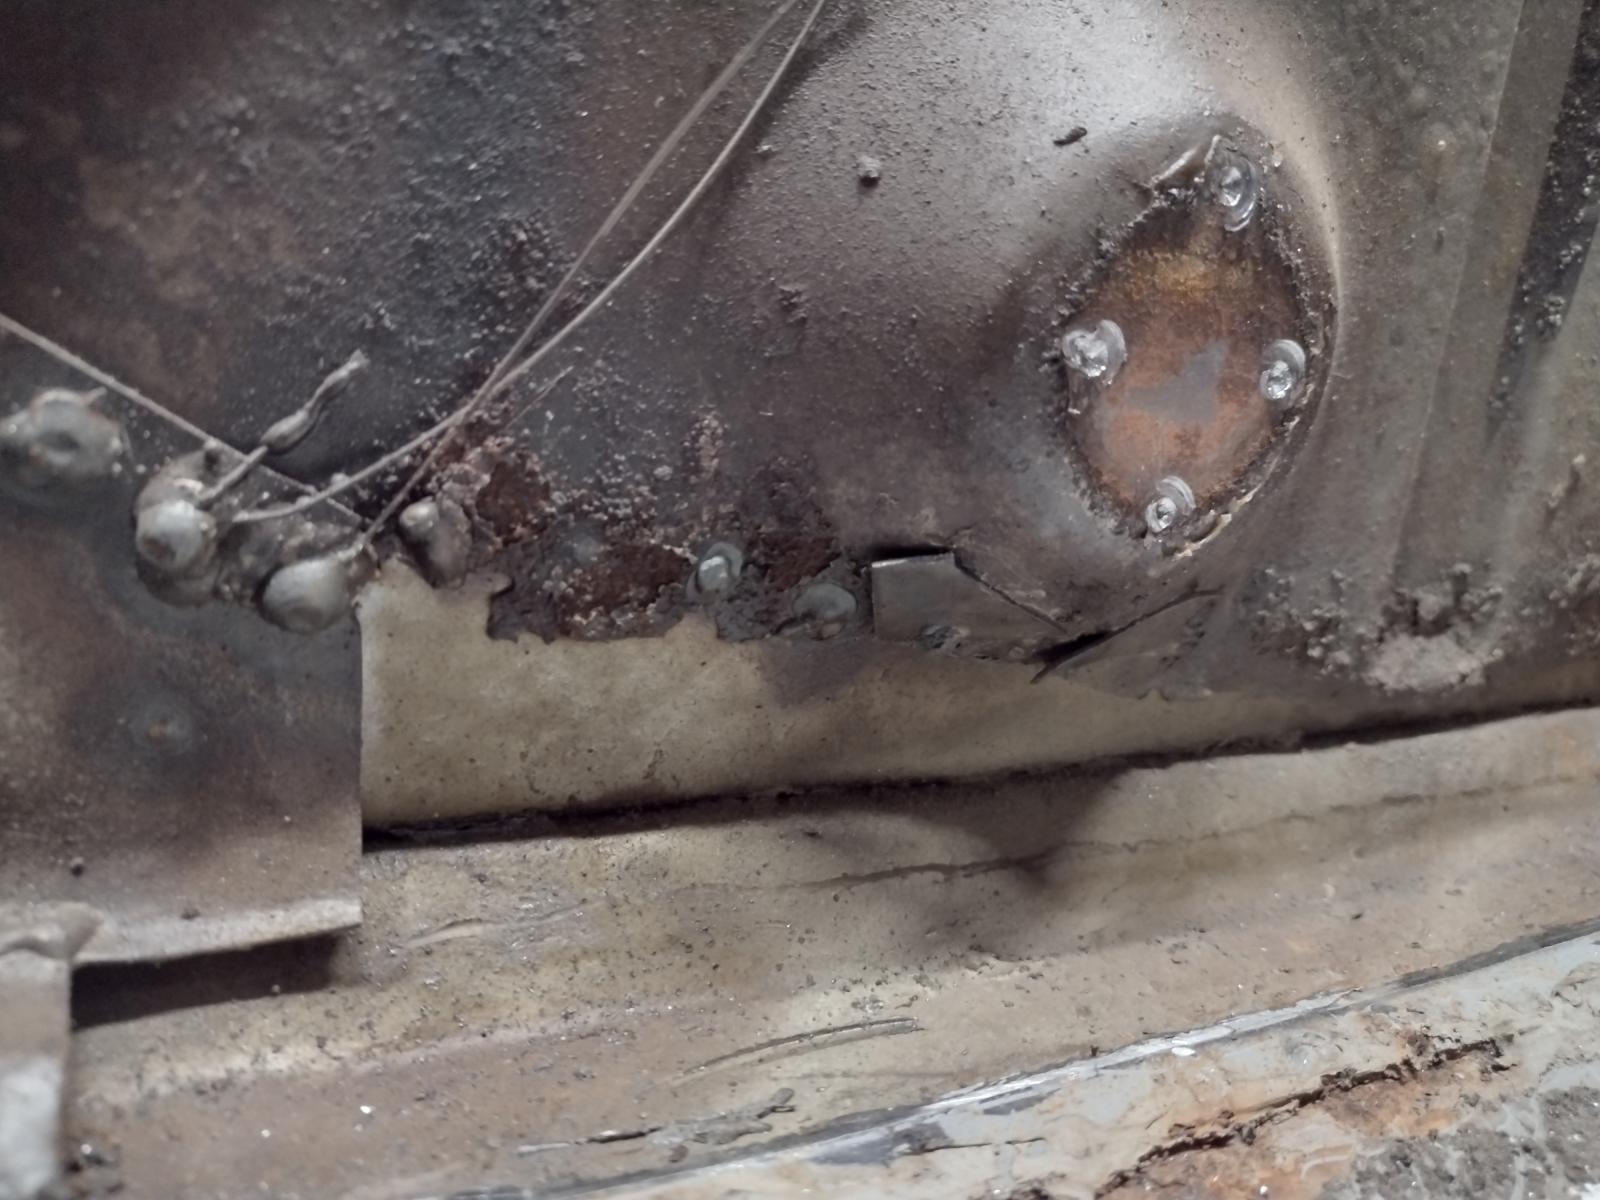
Then I looked further on the outside part of the hellhole..which doesn't look promising:
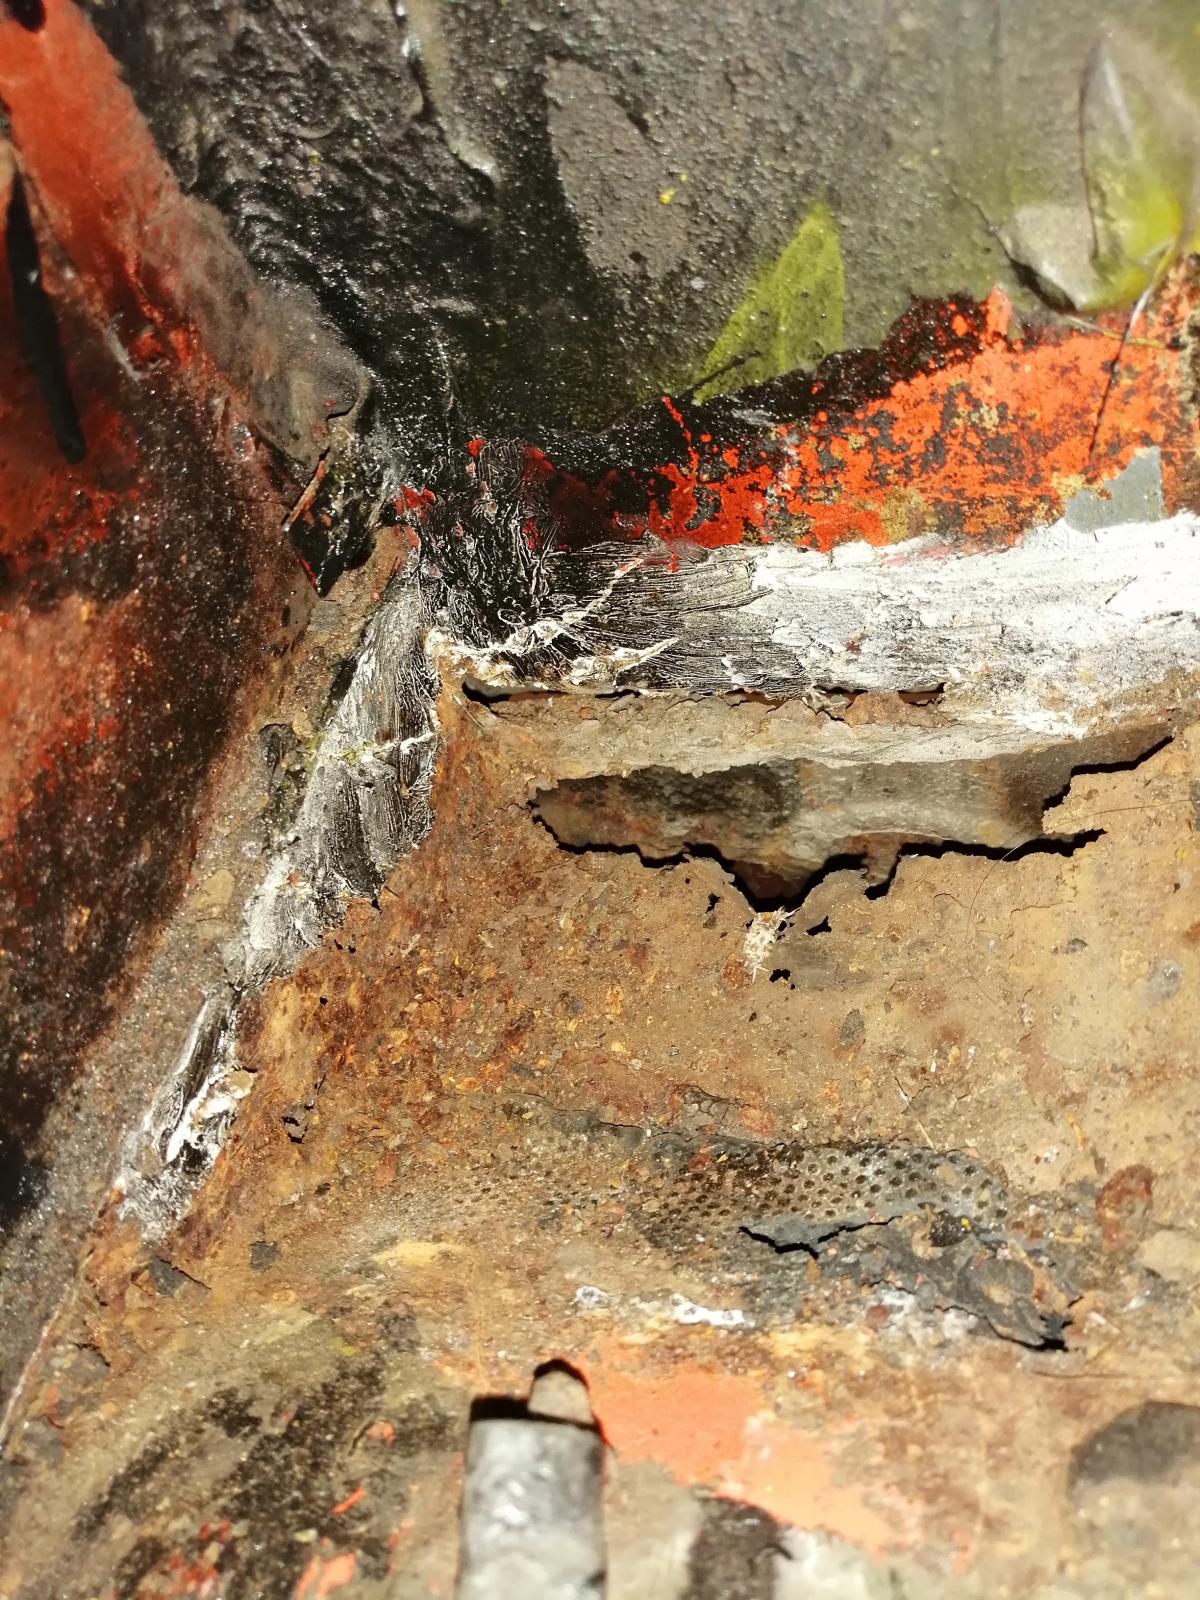
And after checking a bit inside (quite a lot of layers in this badly repaired jack point..):
There were some findings:
And a lot of rust falling through:
I did not want to fight forming too much thick metals so I made a small order to save me some time:
So..time to cut really into this repair..
But before that, I took a bit of time investing in my future partner in crime..my 5 years old boy already wants to learn how to weld!
Stay tuned
Antoine
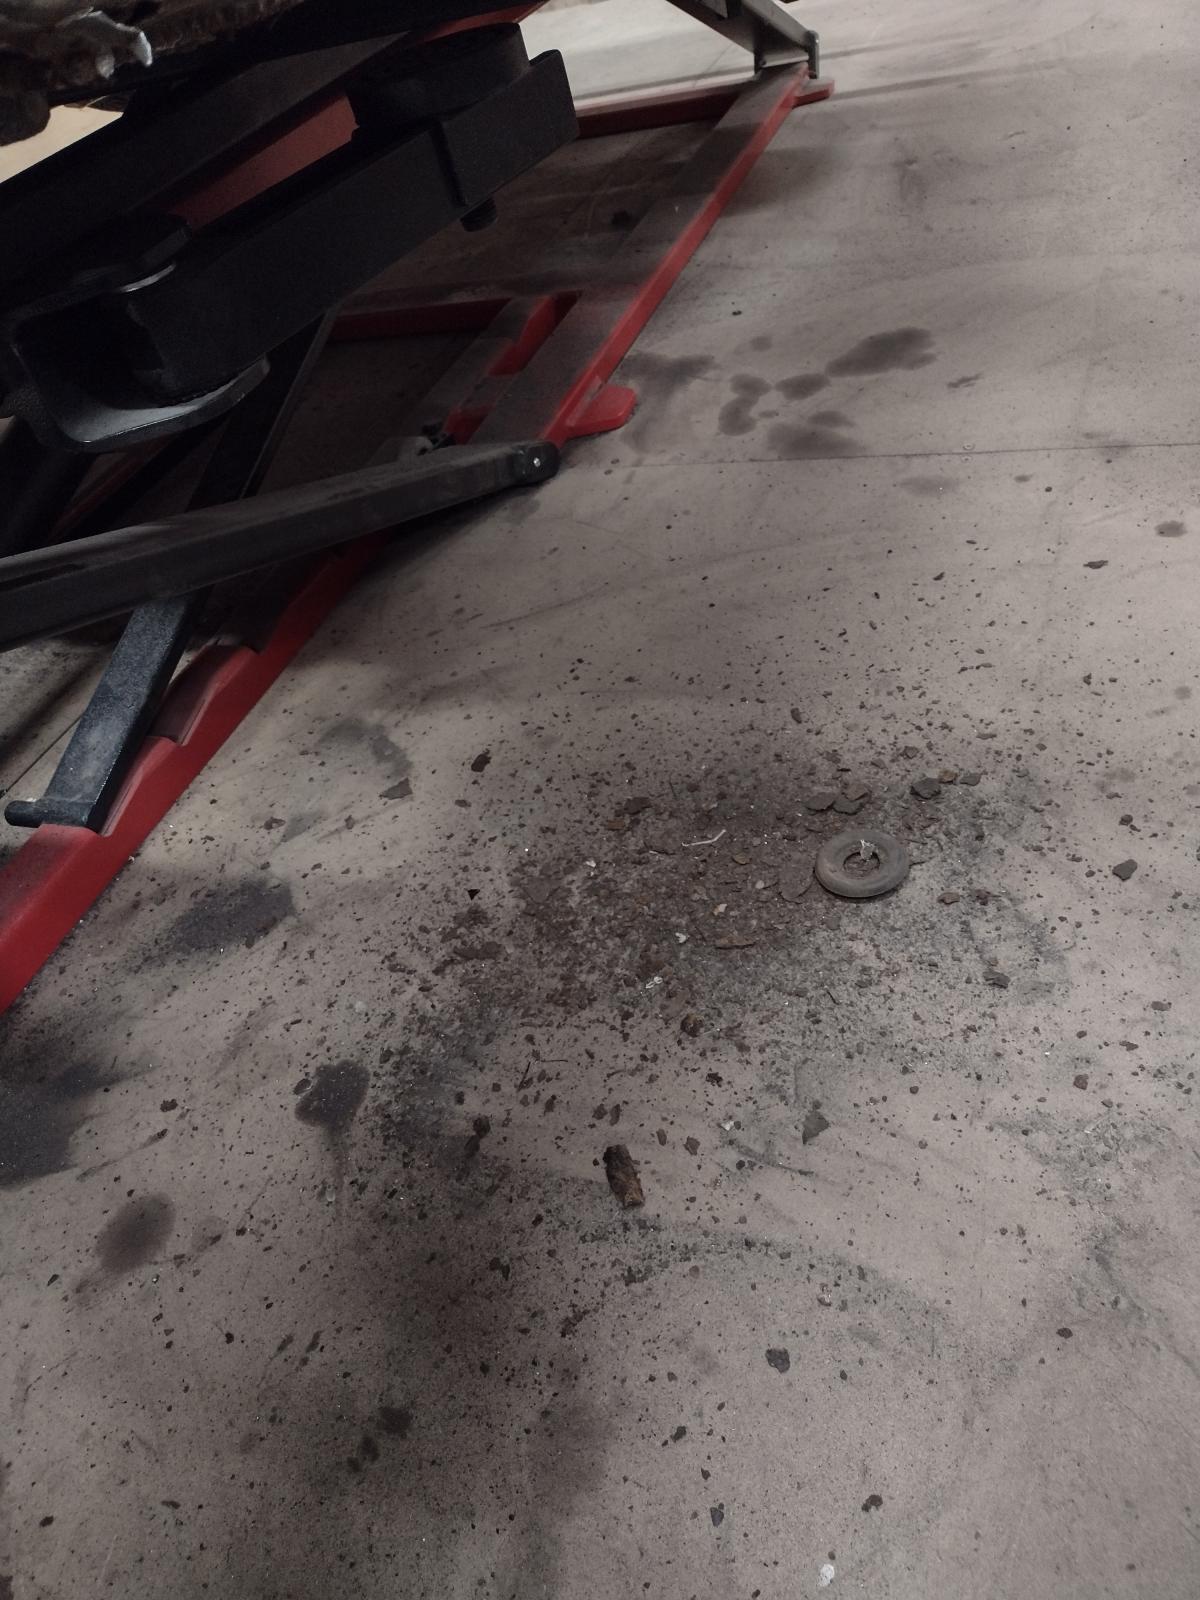
He looks well prepared! Hope he has fun. Sorry that hell hole is not looking kind. Good call on getting the new pre-formed metal. Some time saved. Amazing how the grommet made its way down to the jack area! Carry on.
Yes, it is great to get him a feeling how it works and sharing it with him!
For the hellhole : there is sure a lot to do but if will end up strong
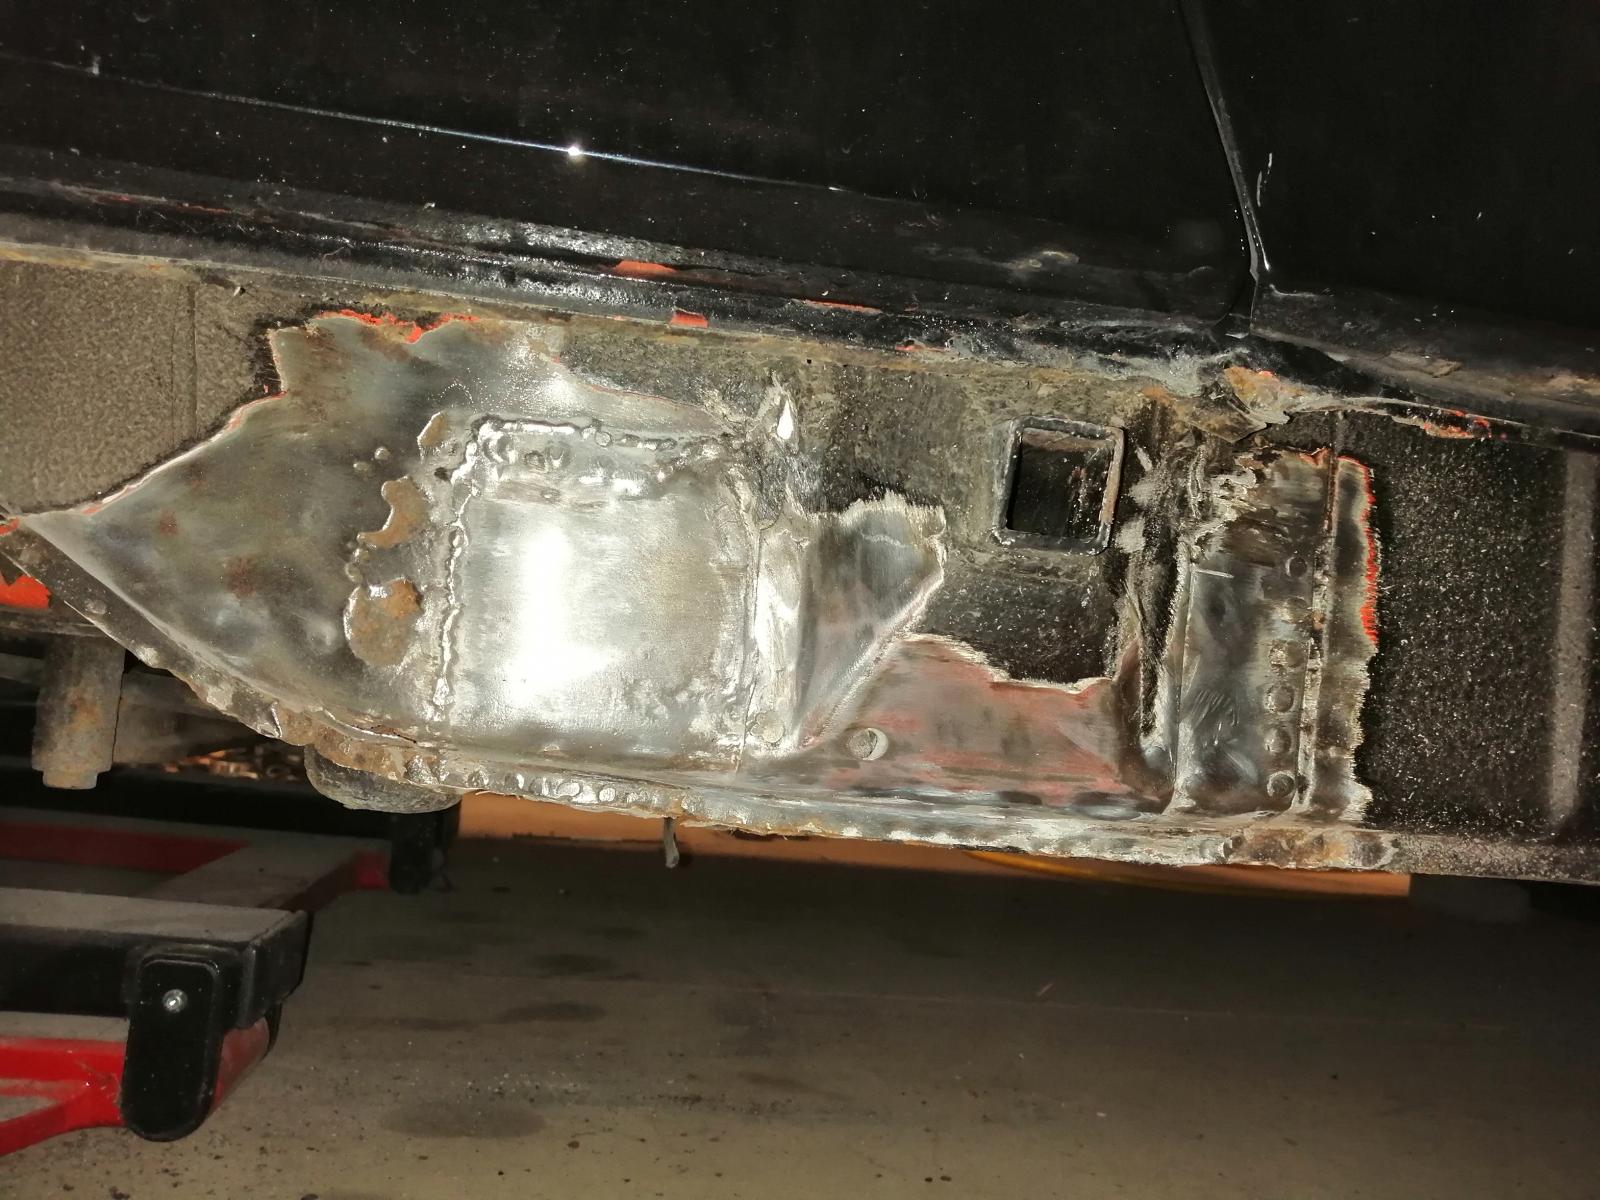
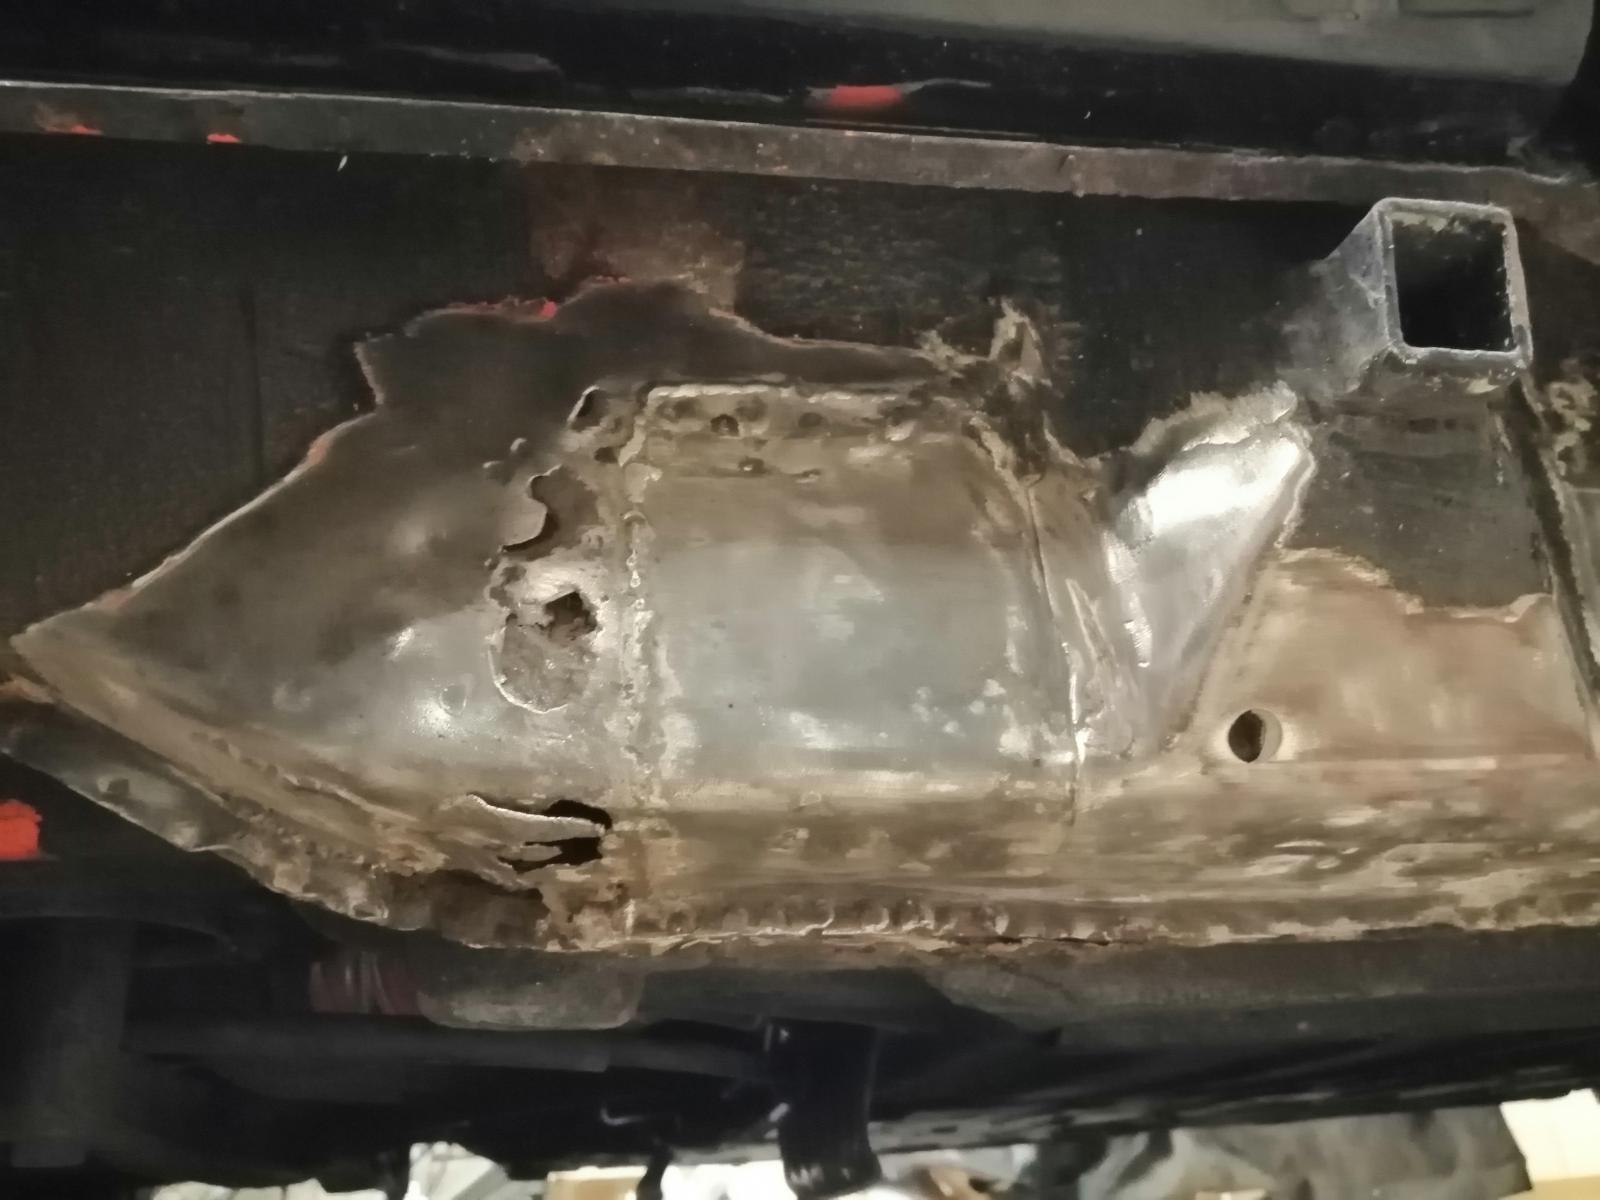
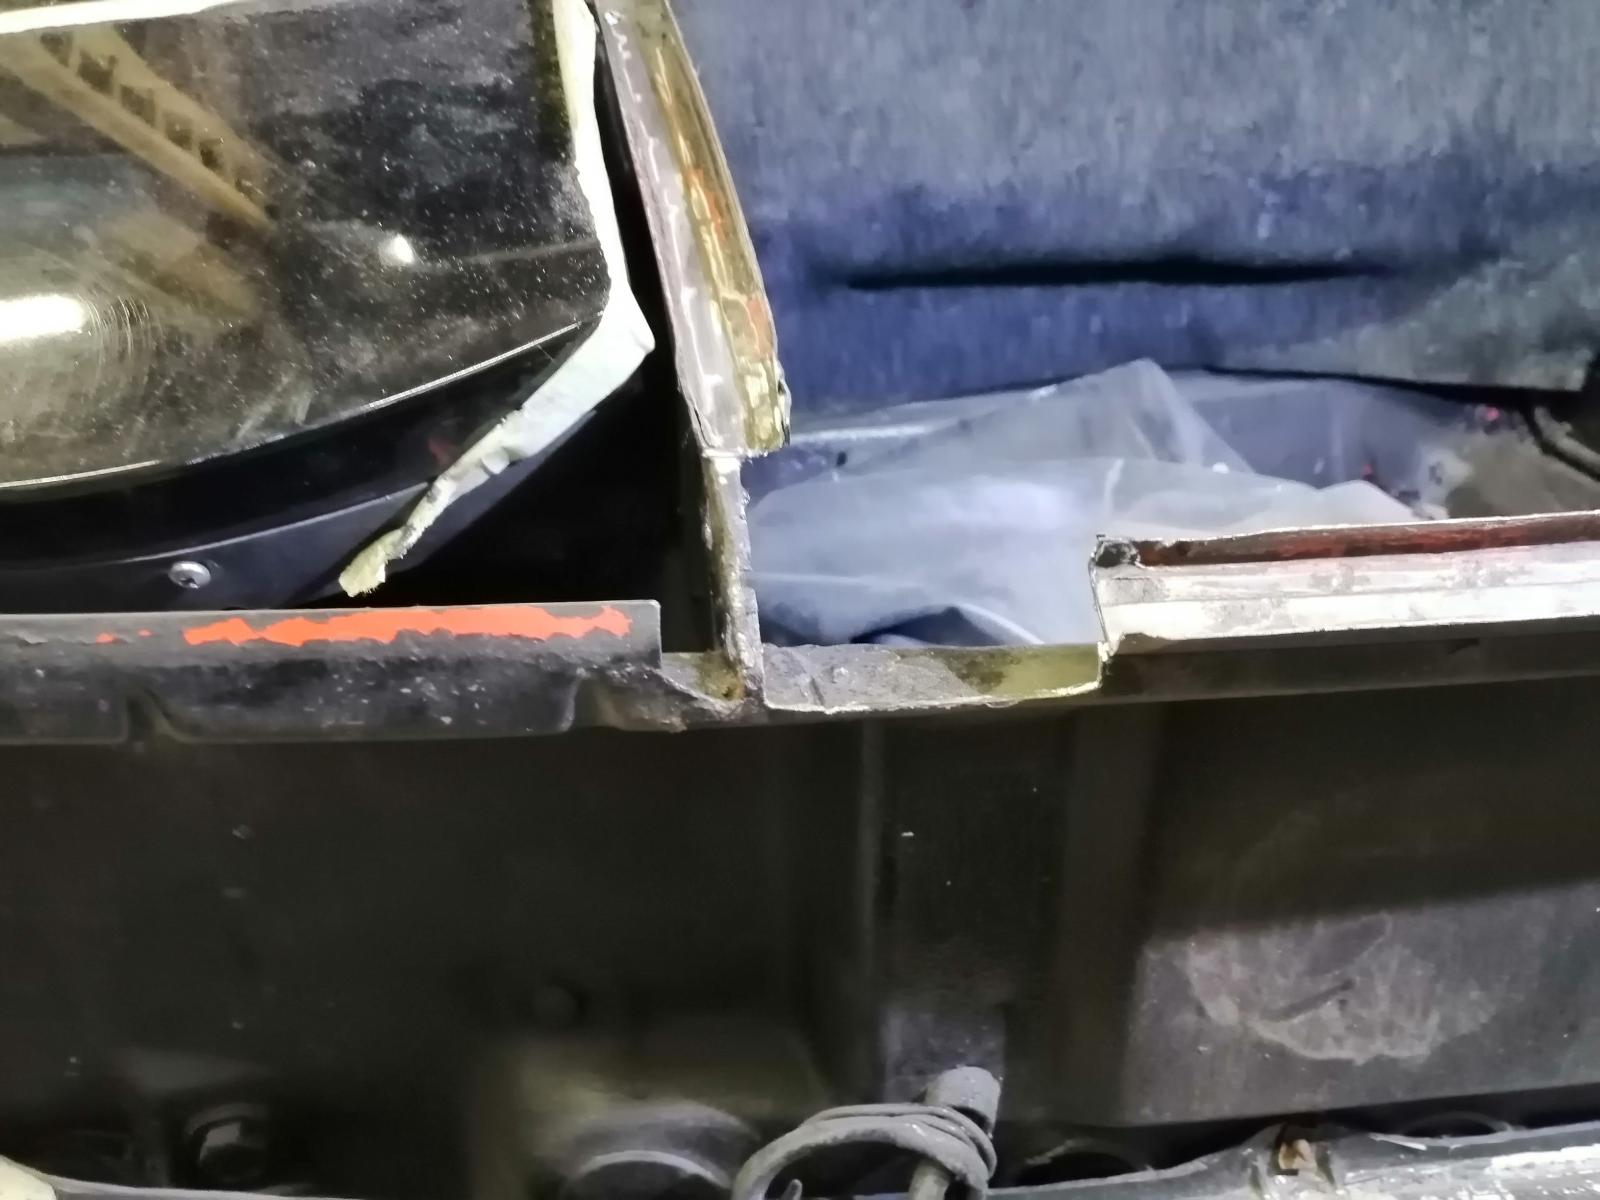
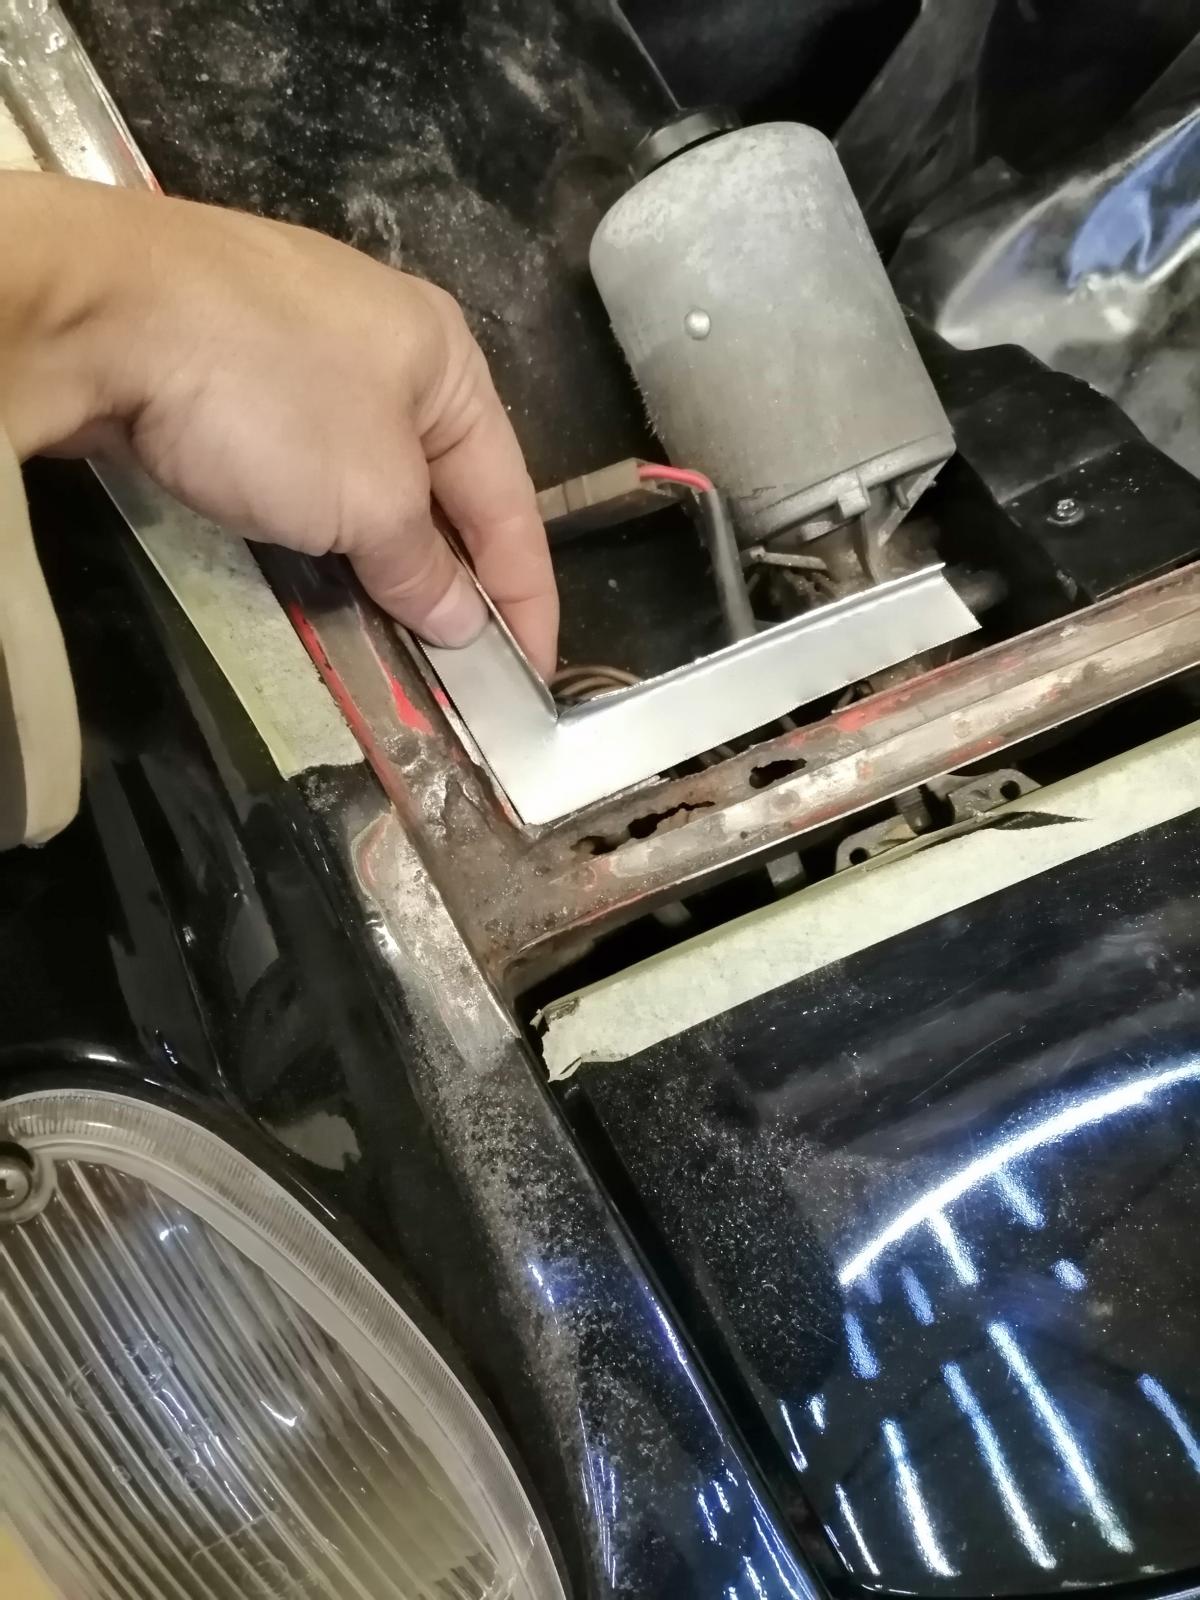
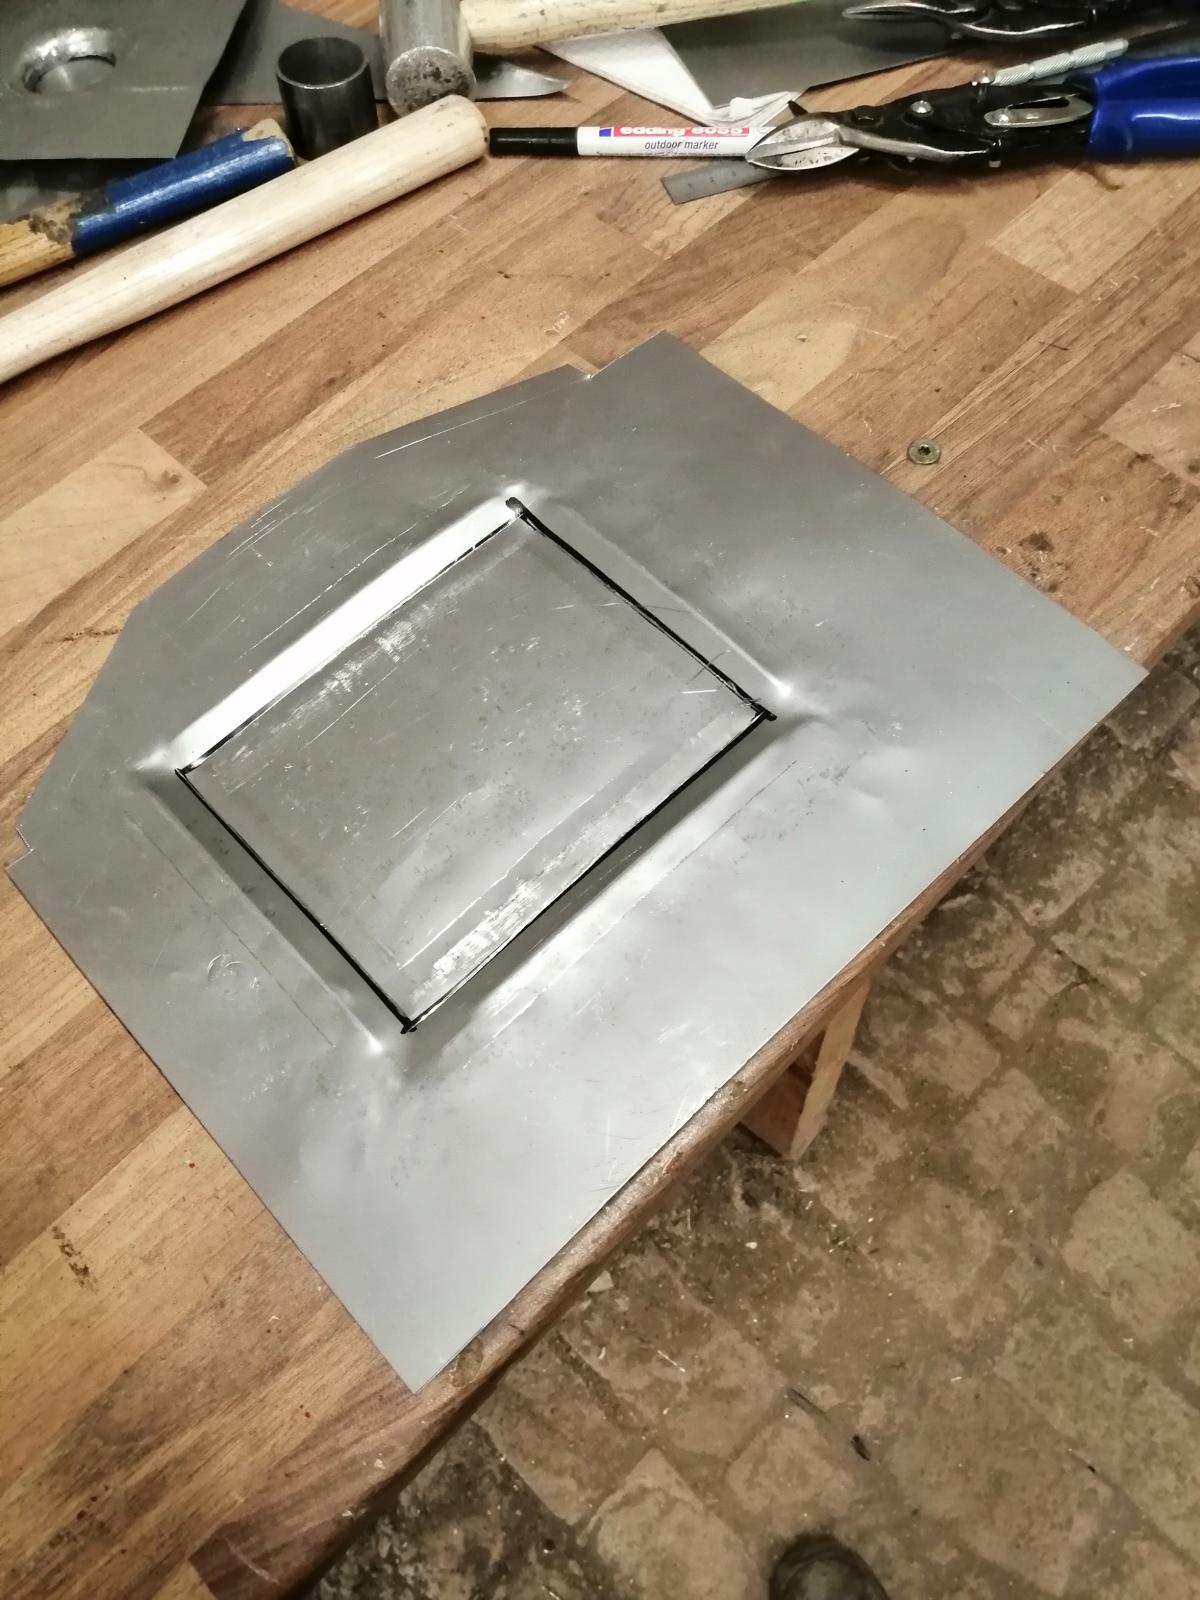
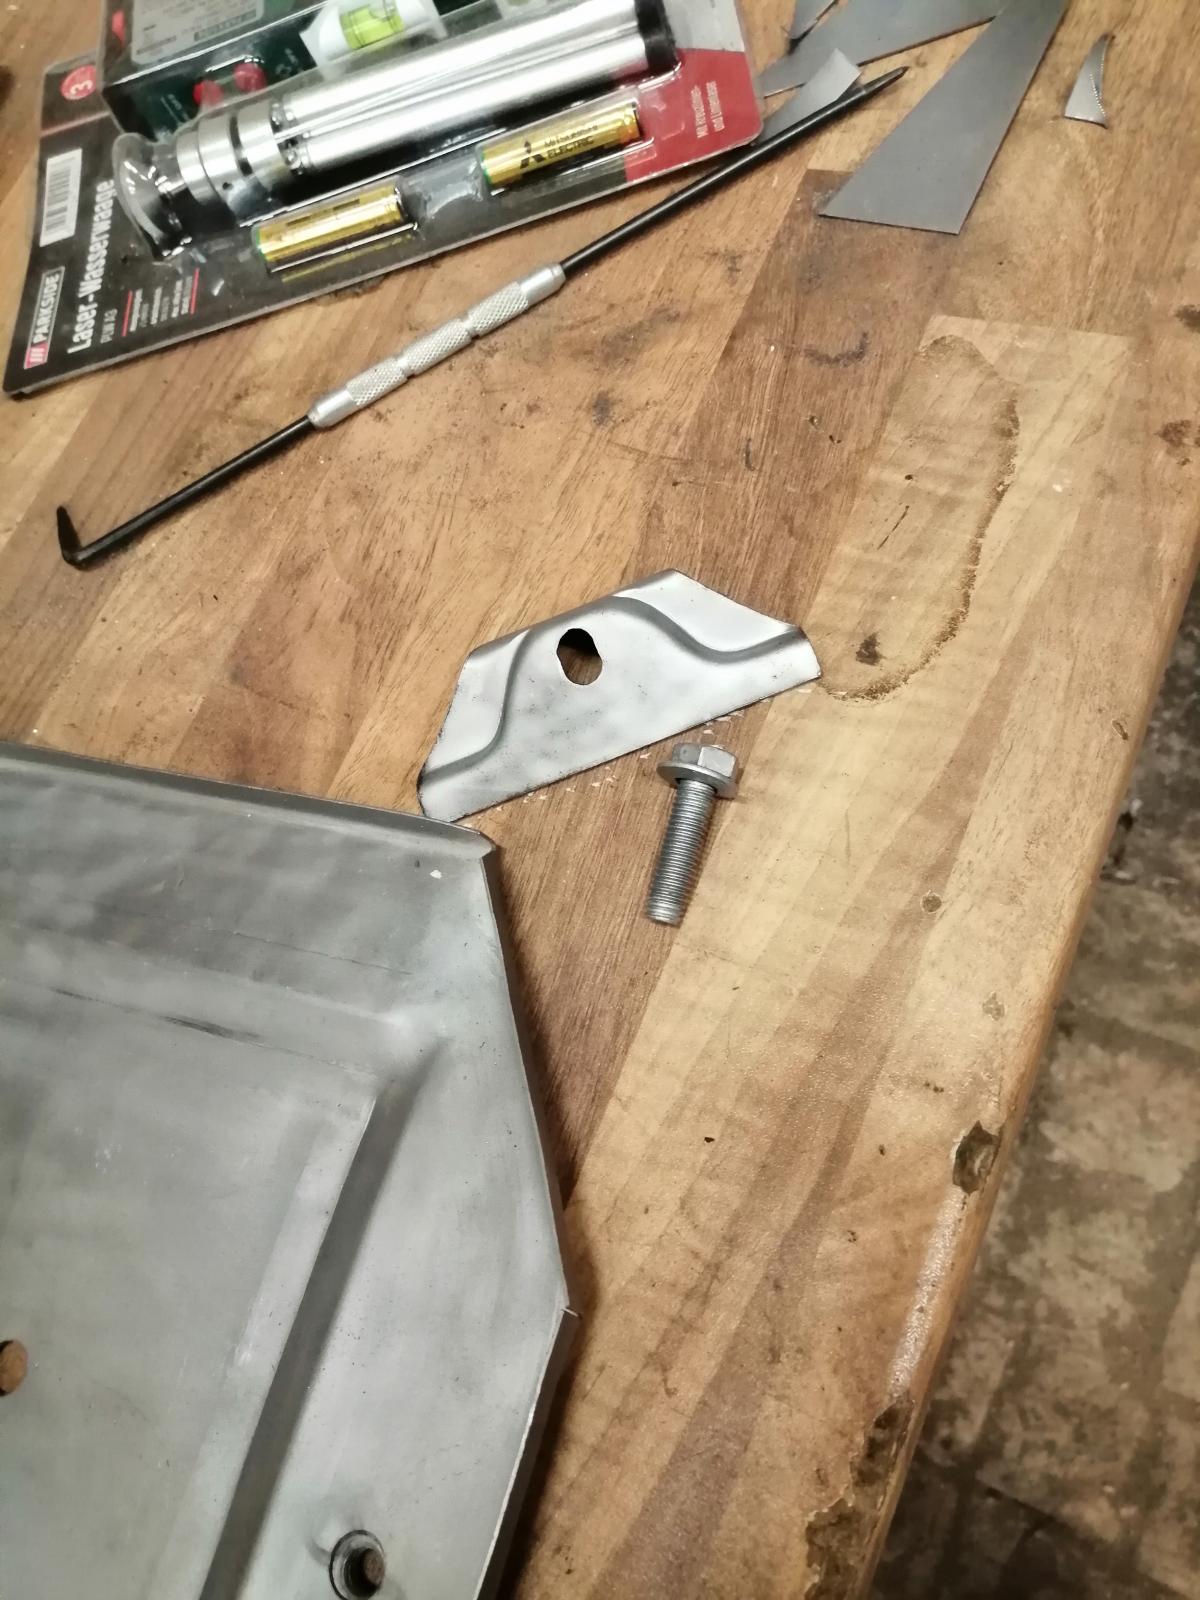
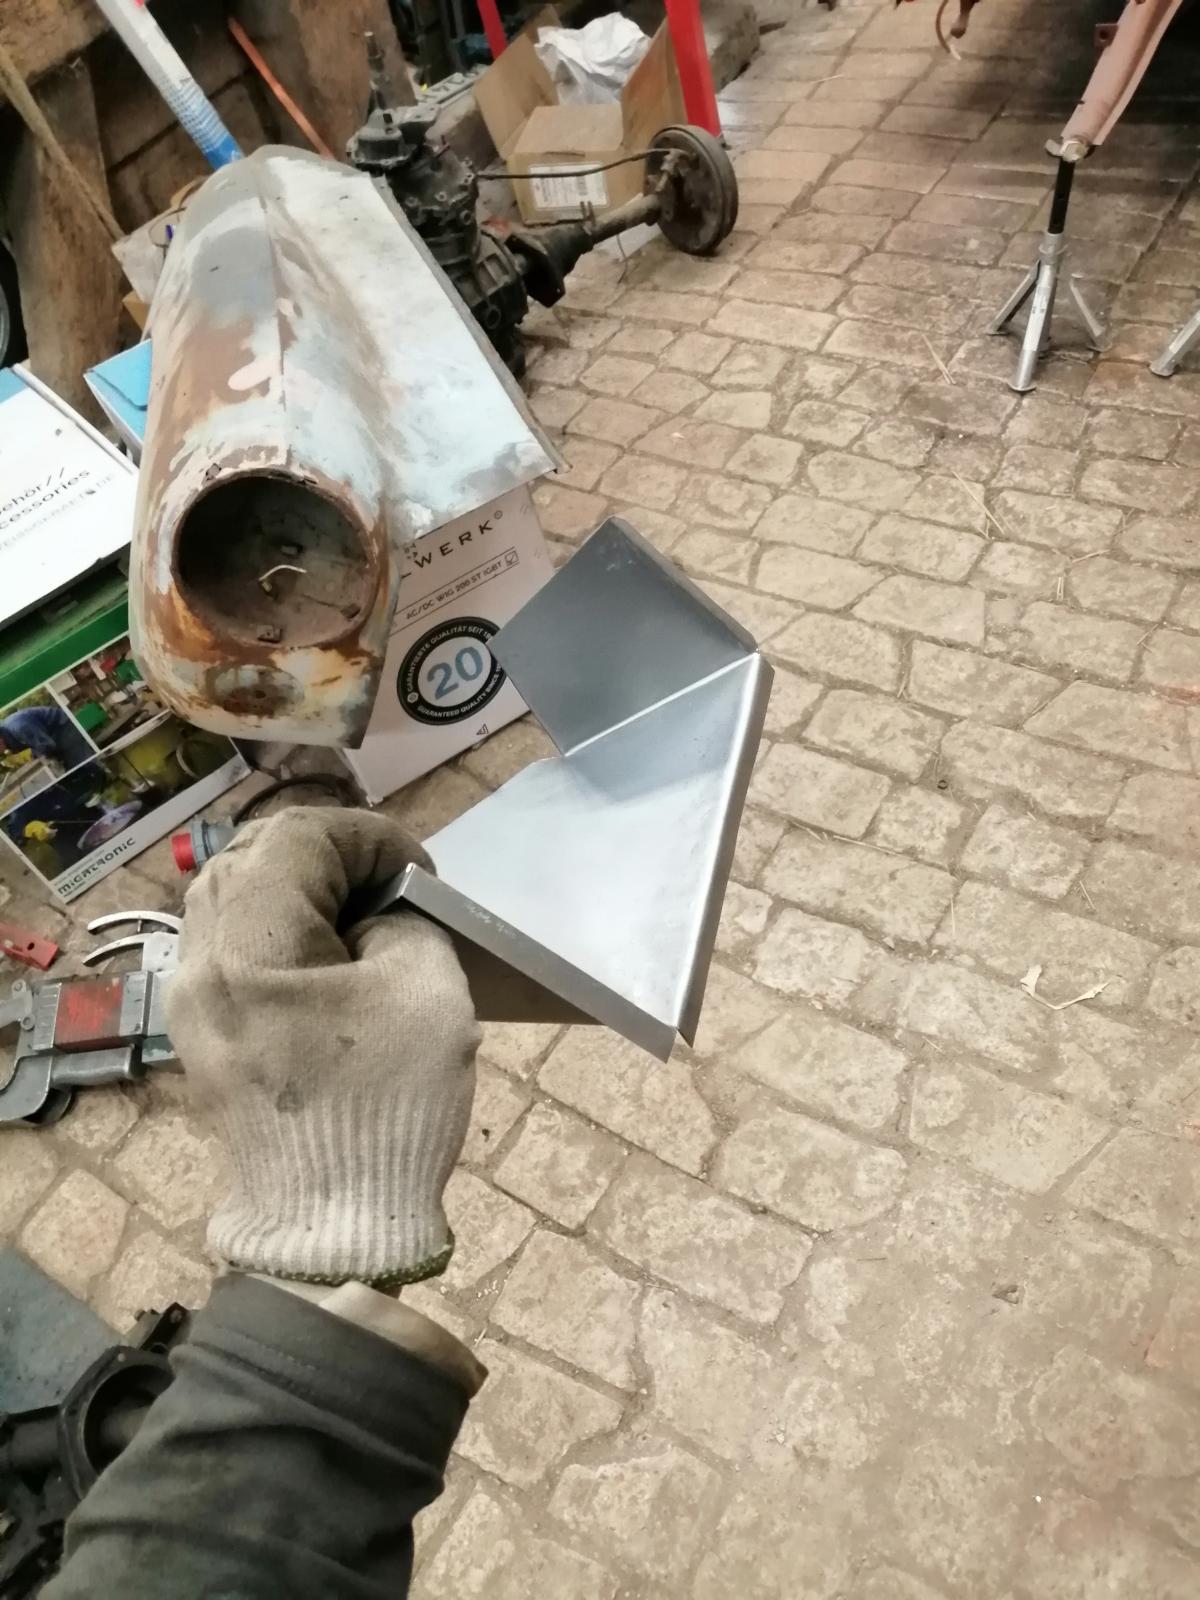
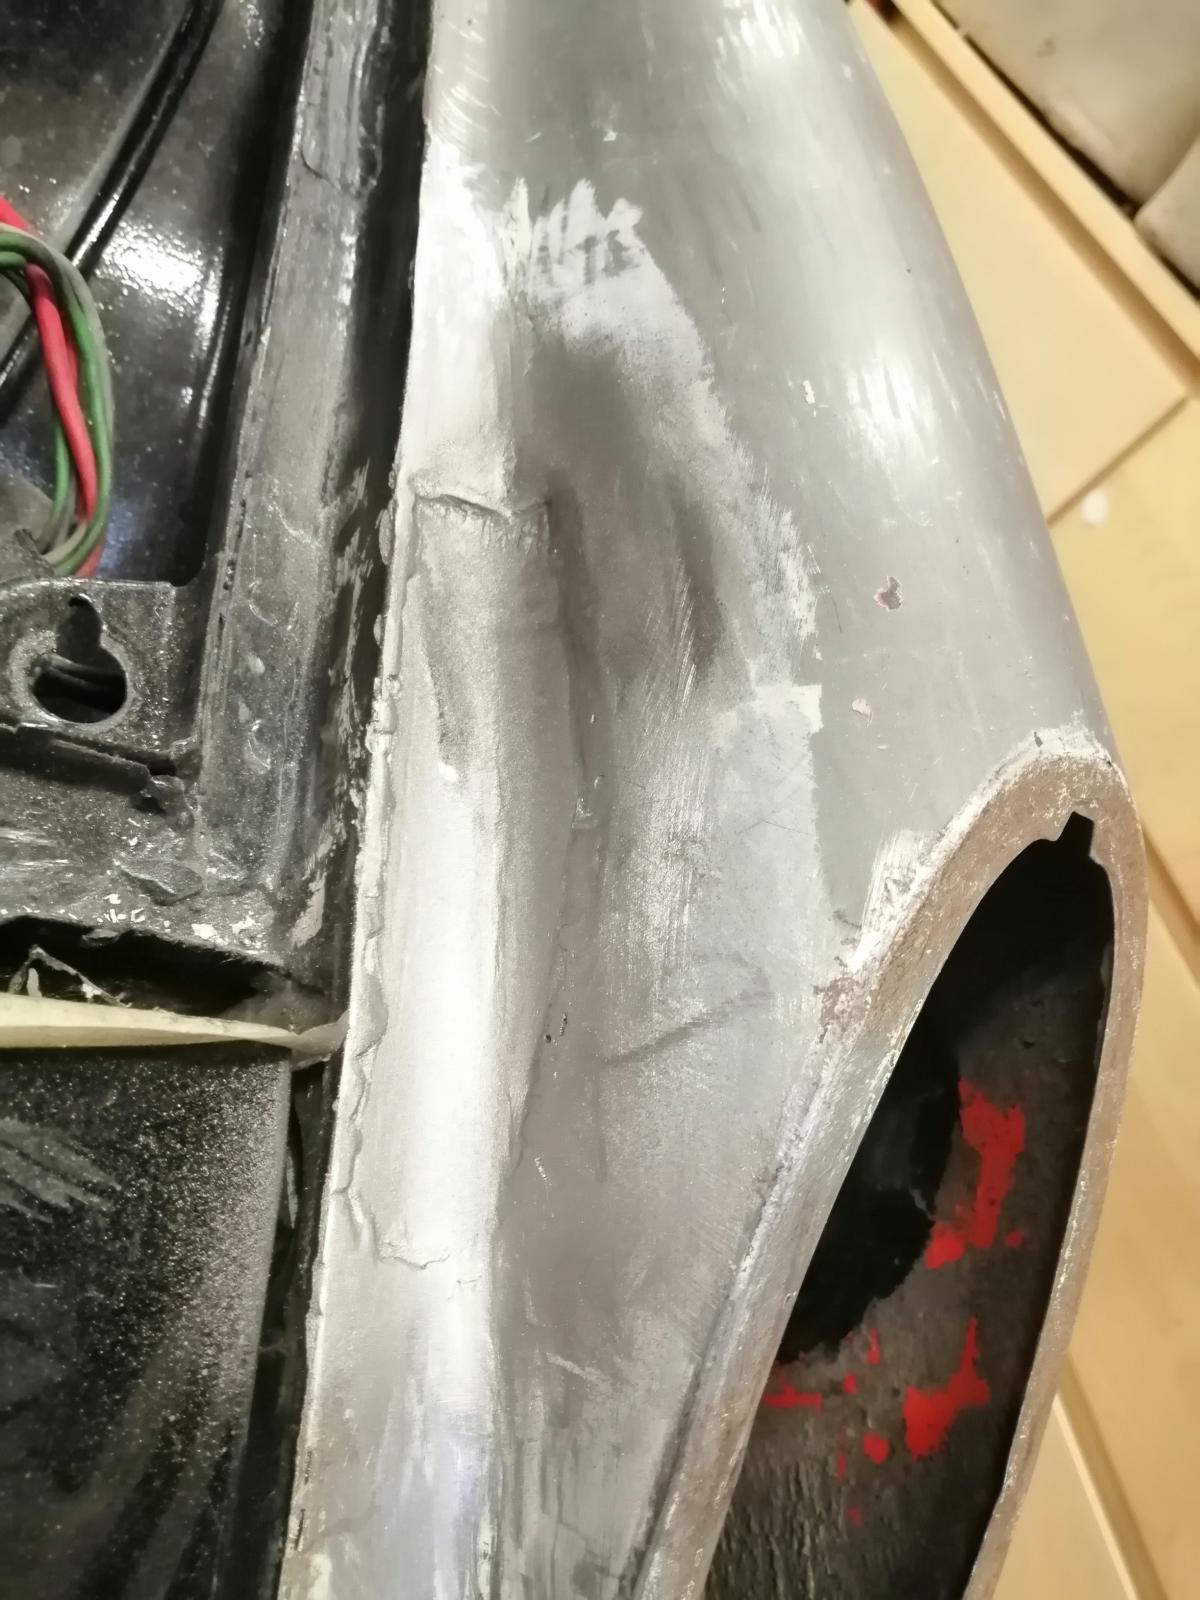
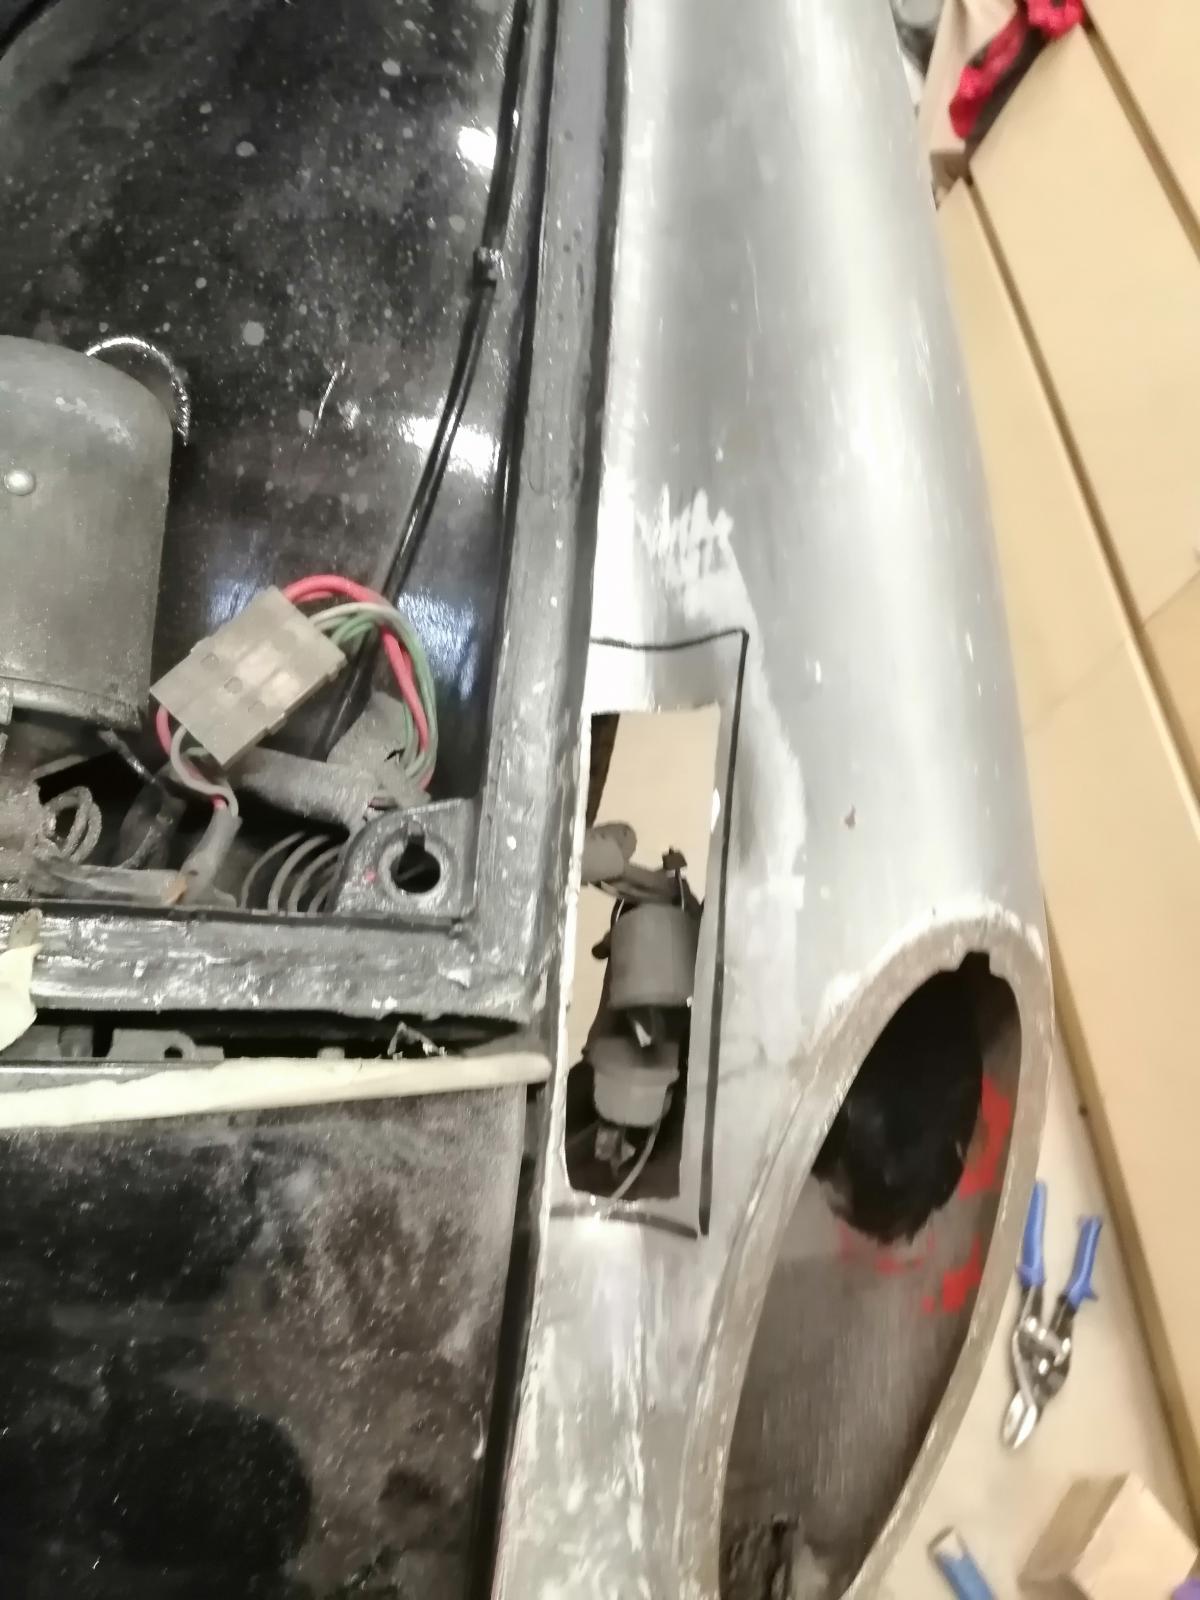
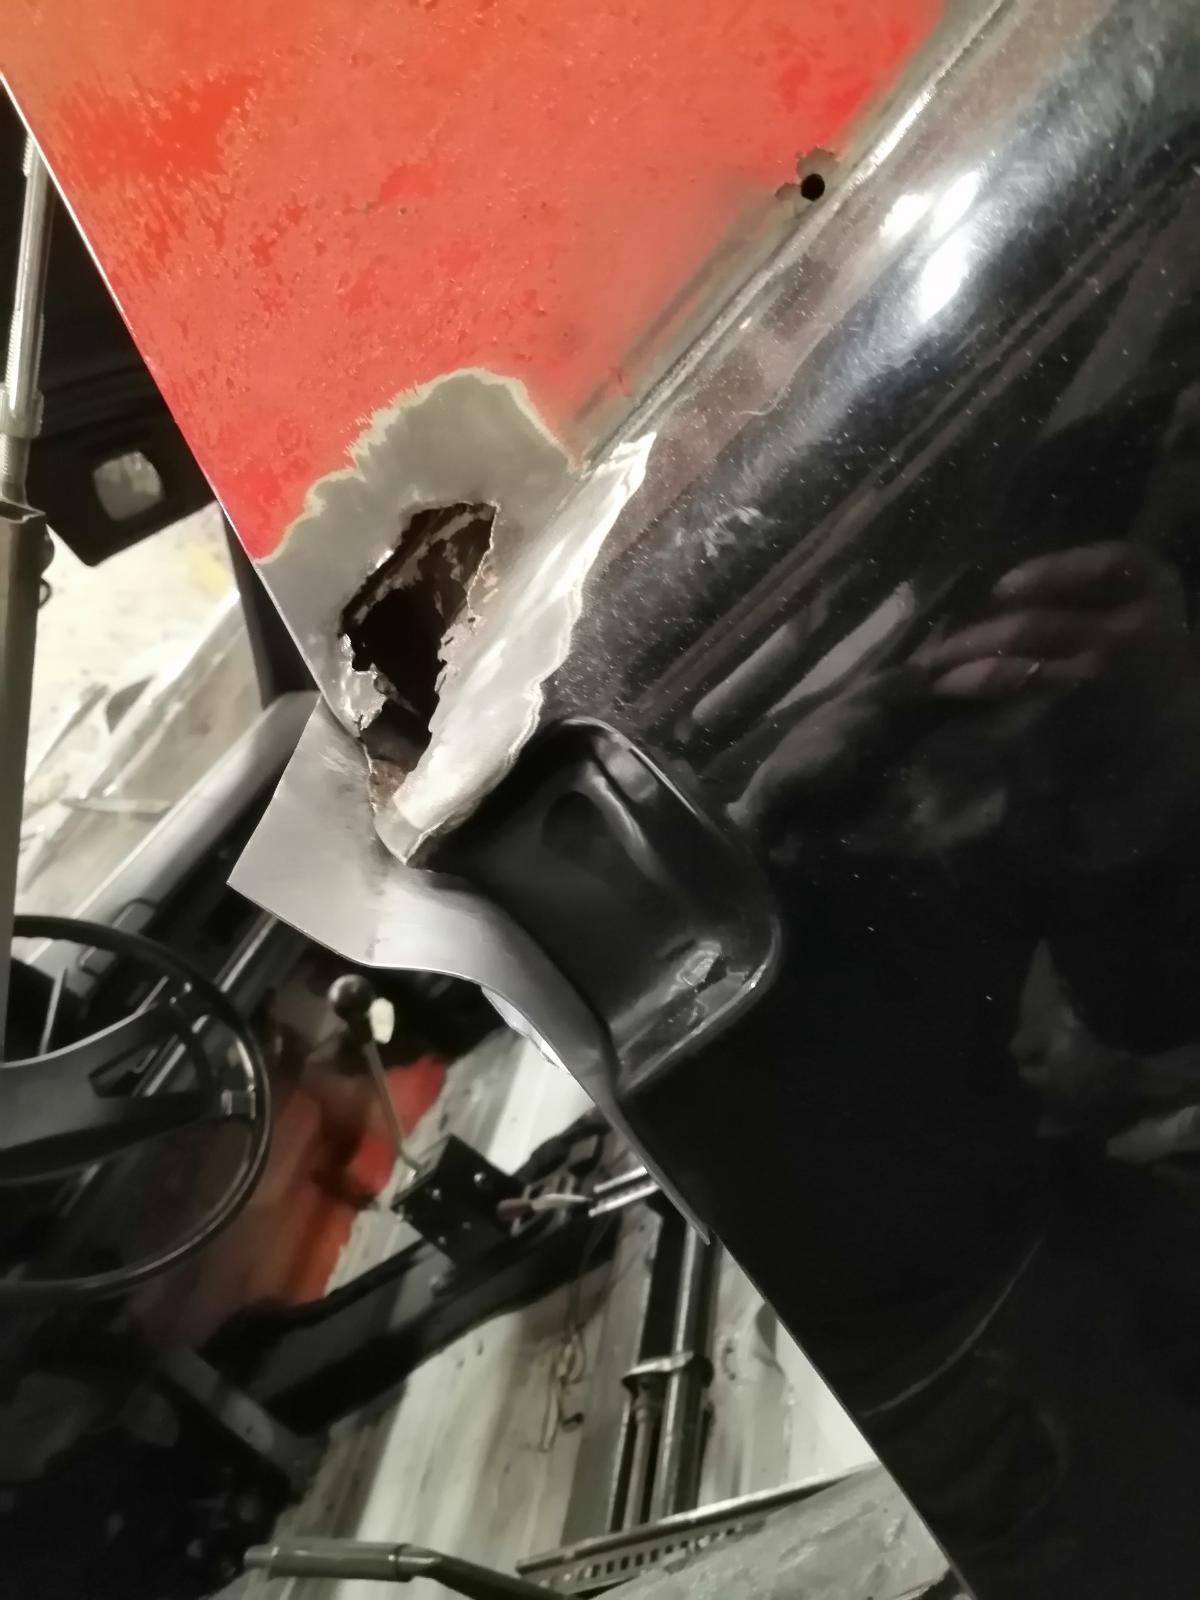
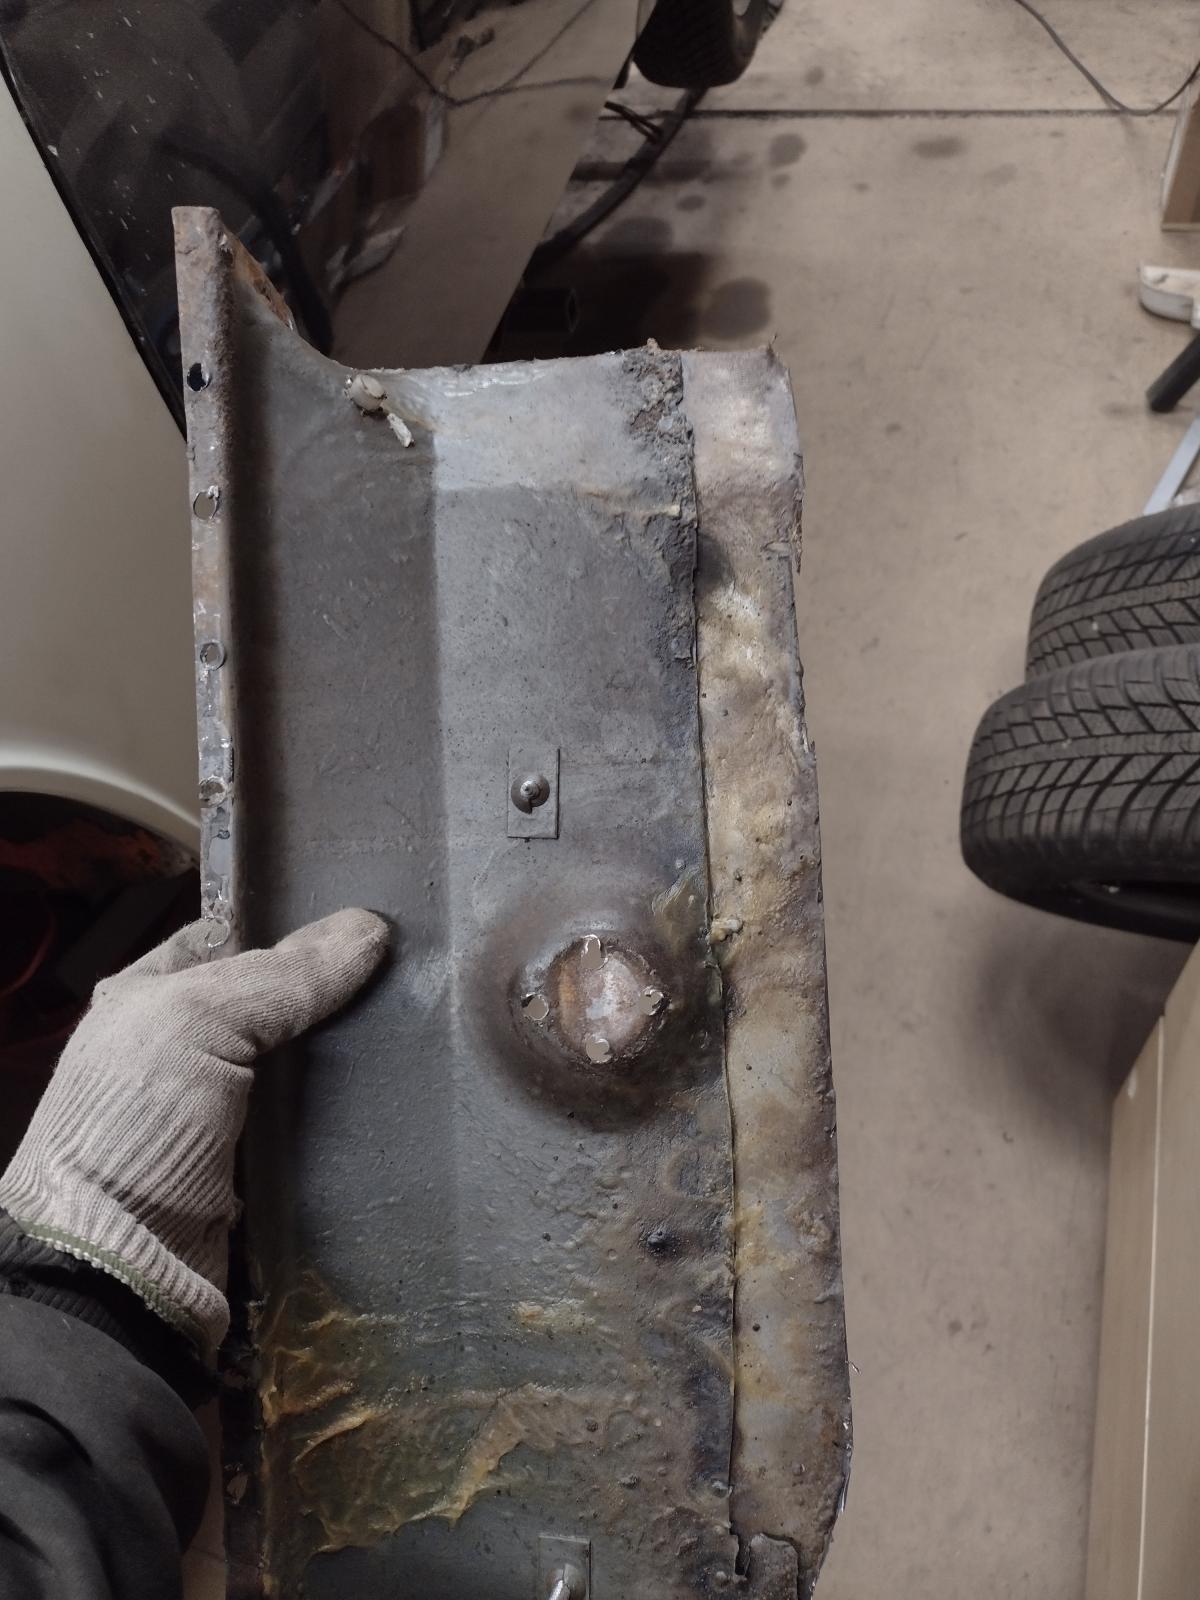
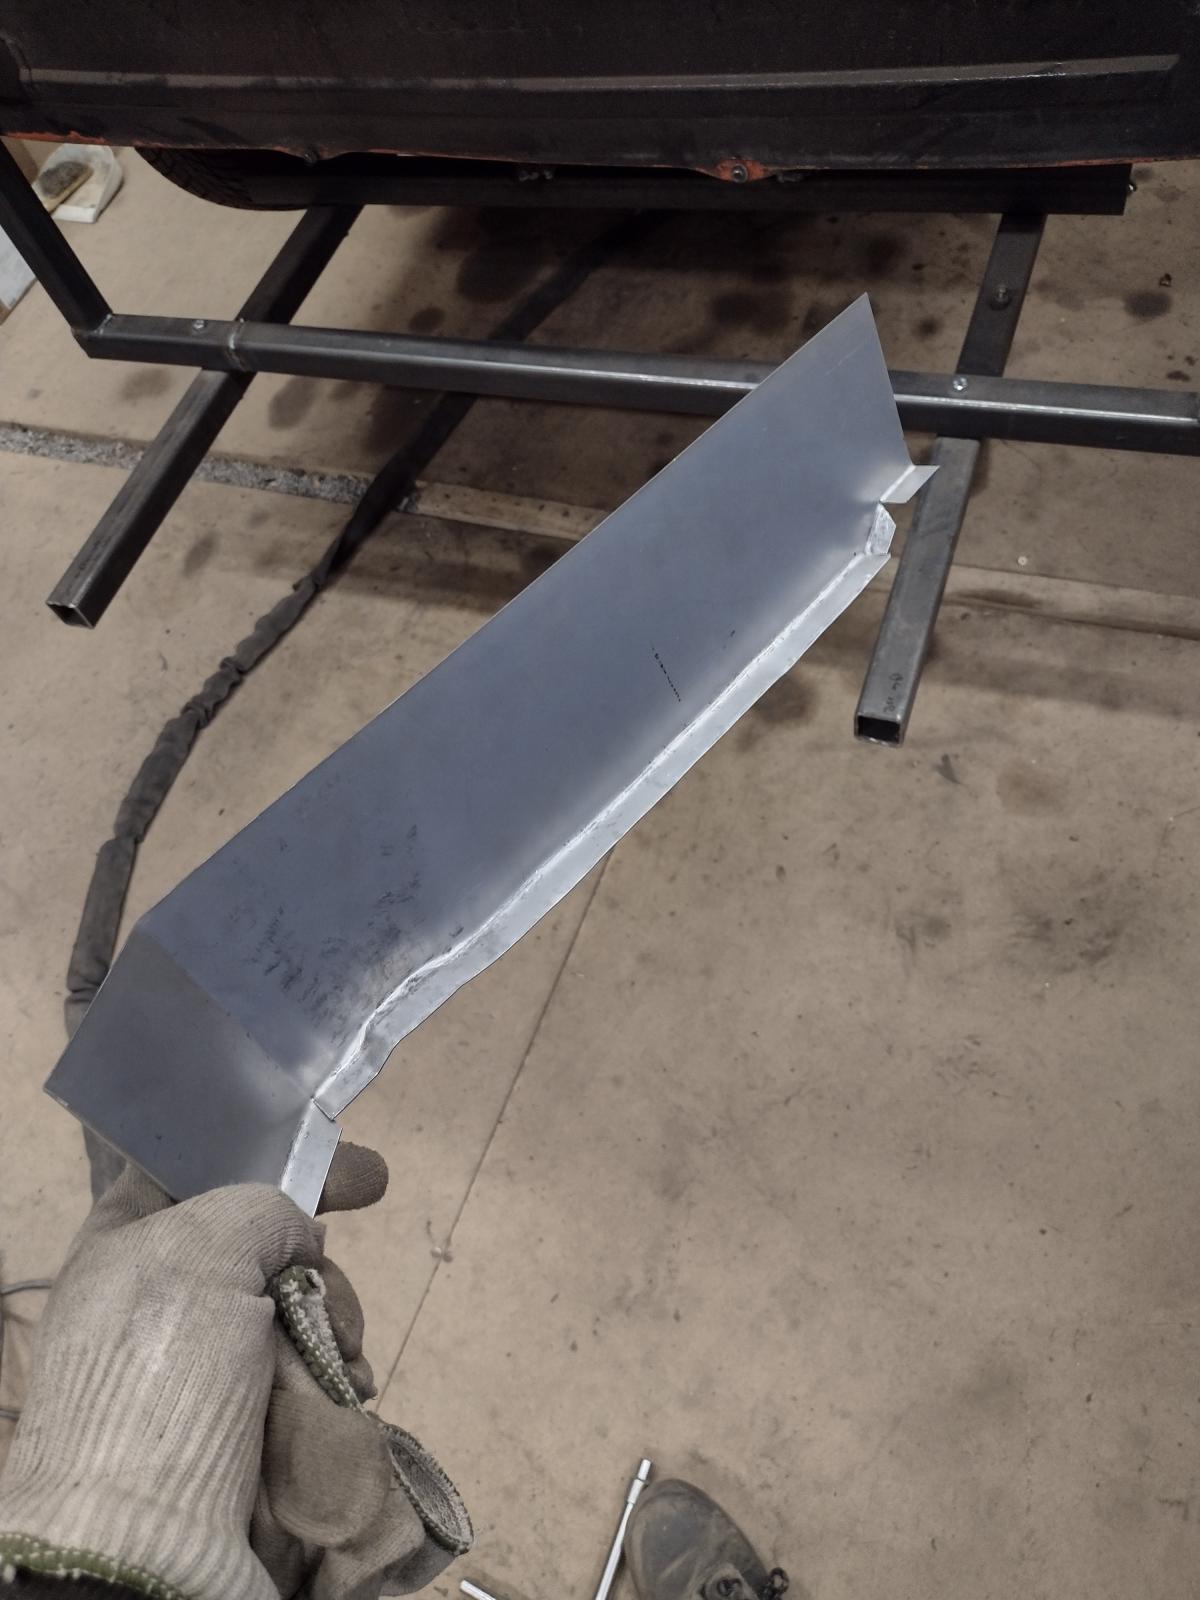
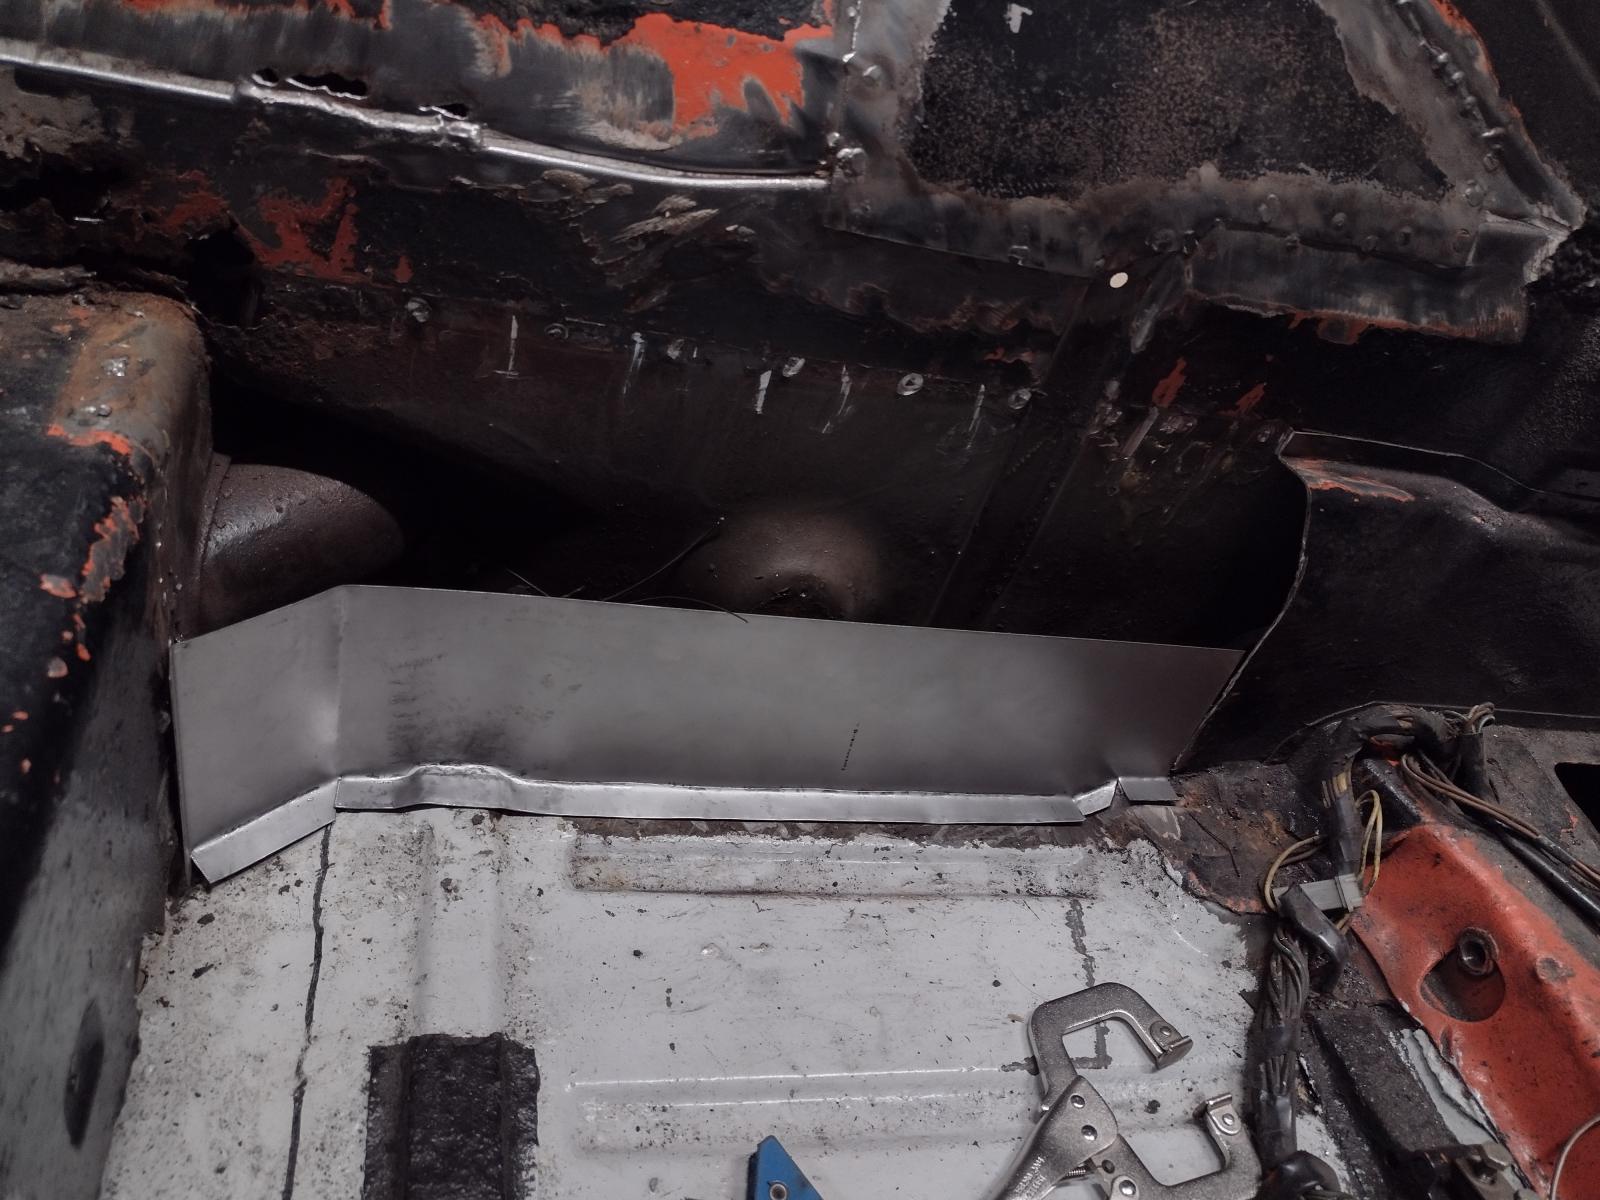
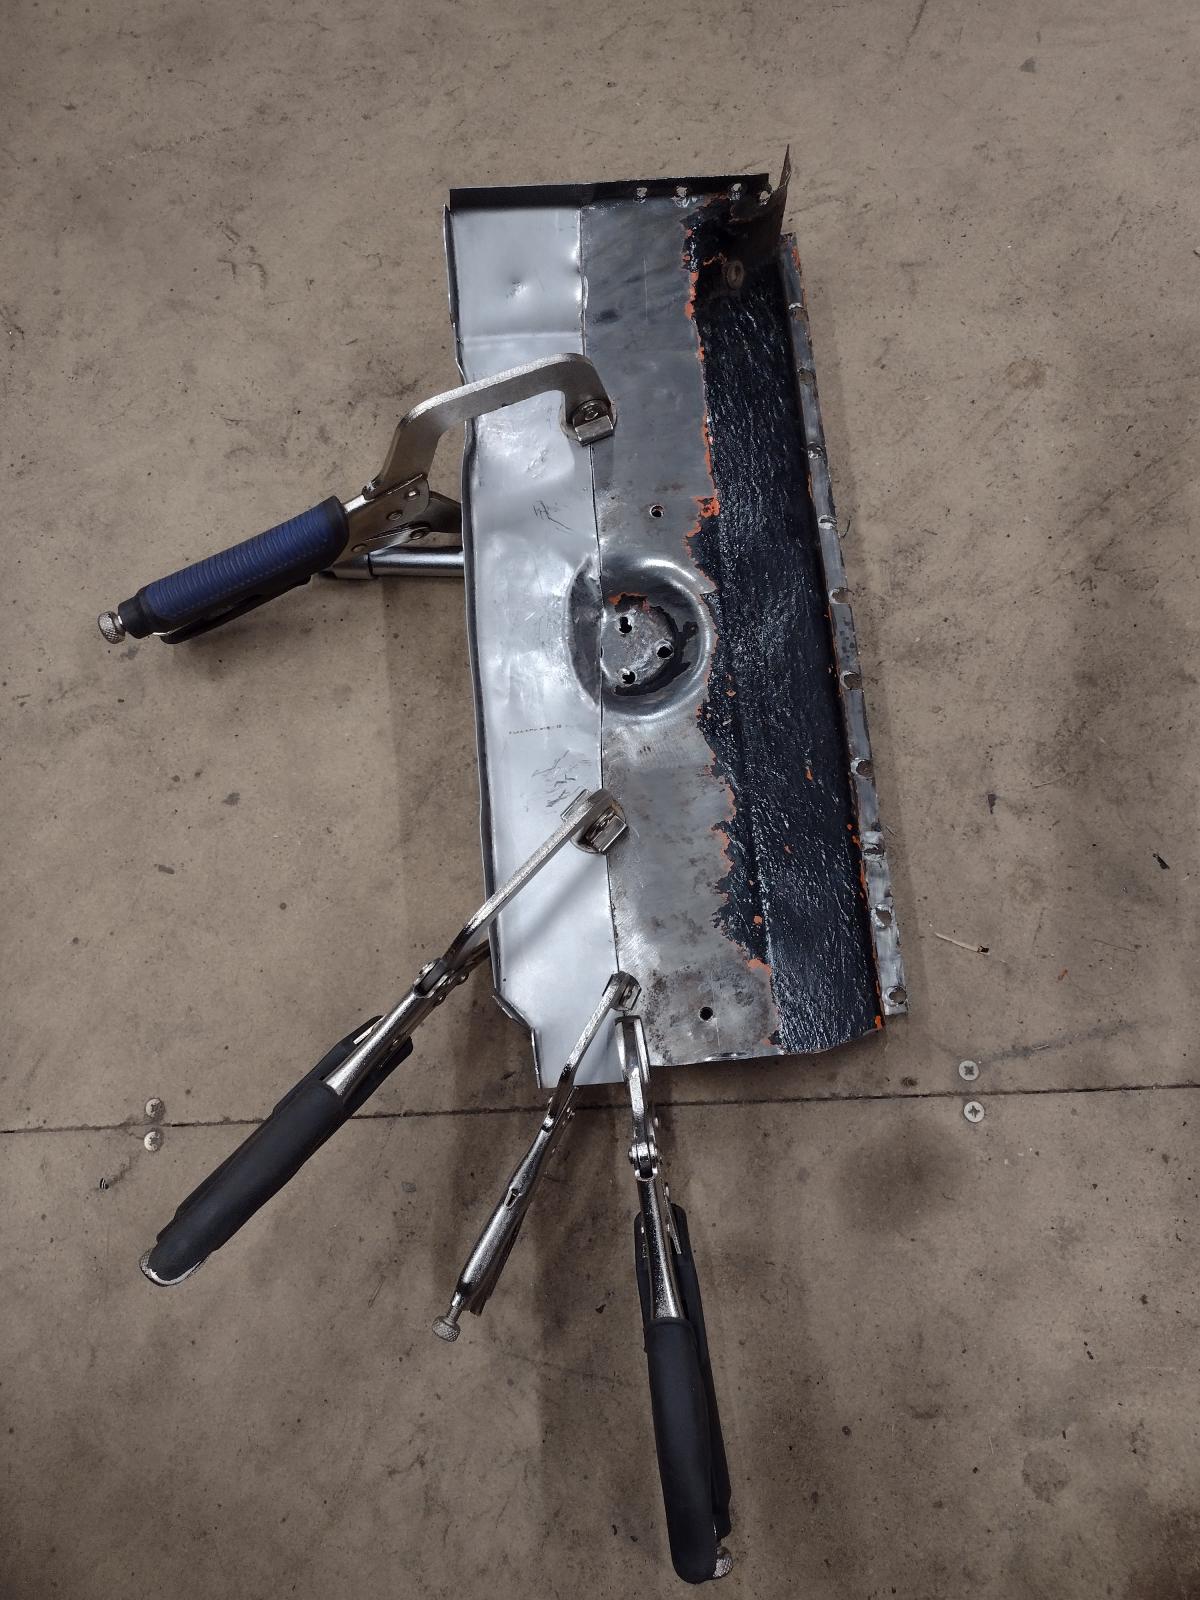
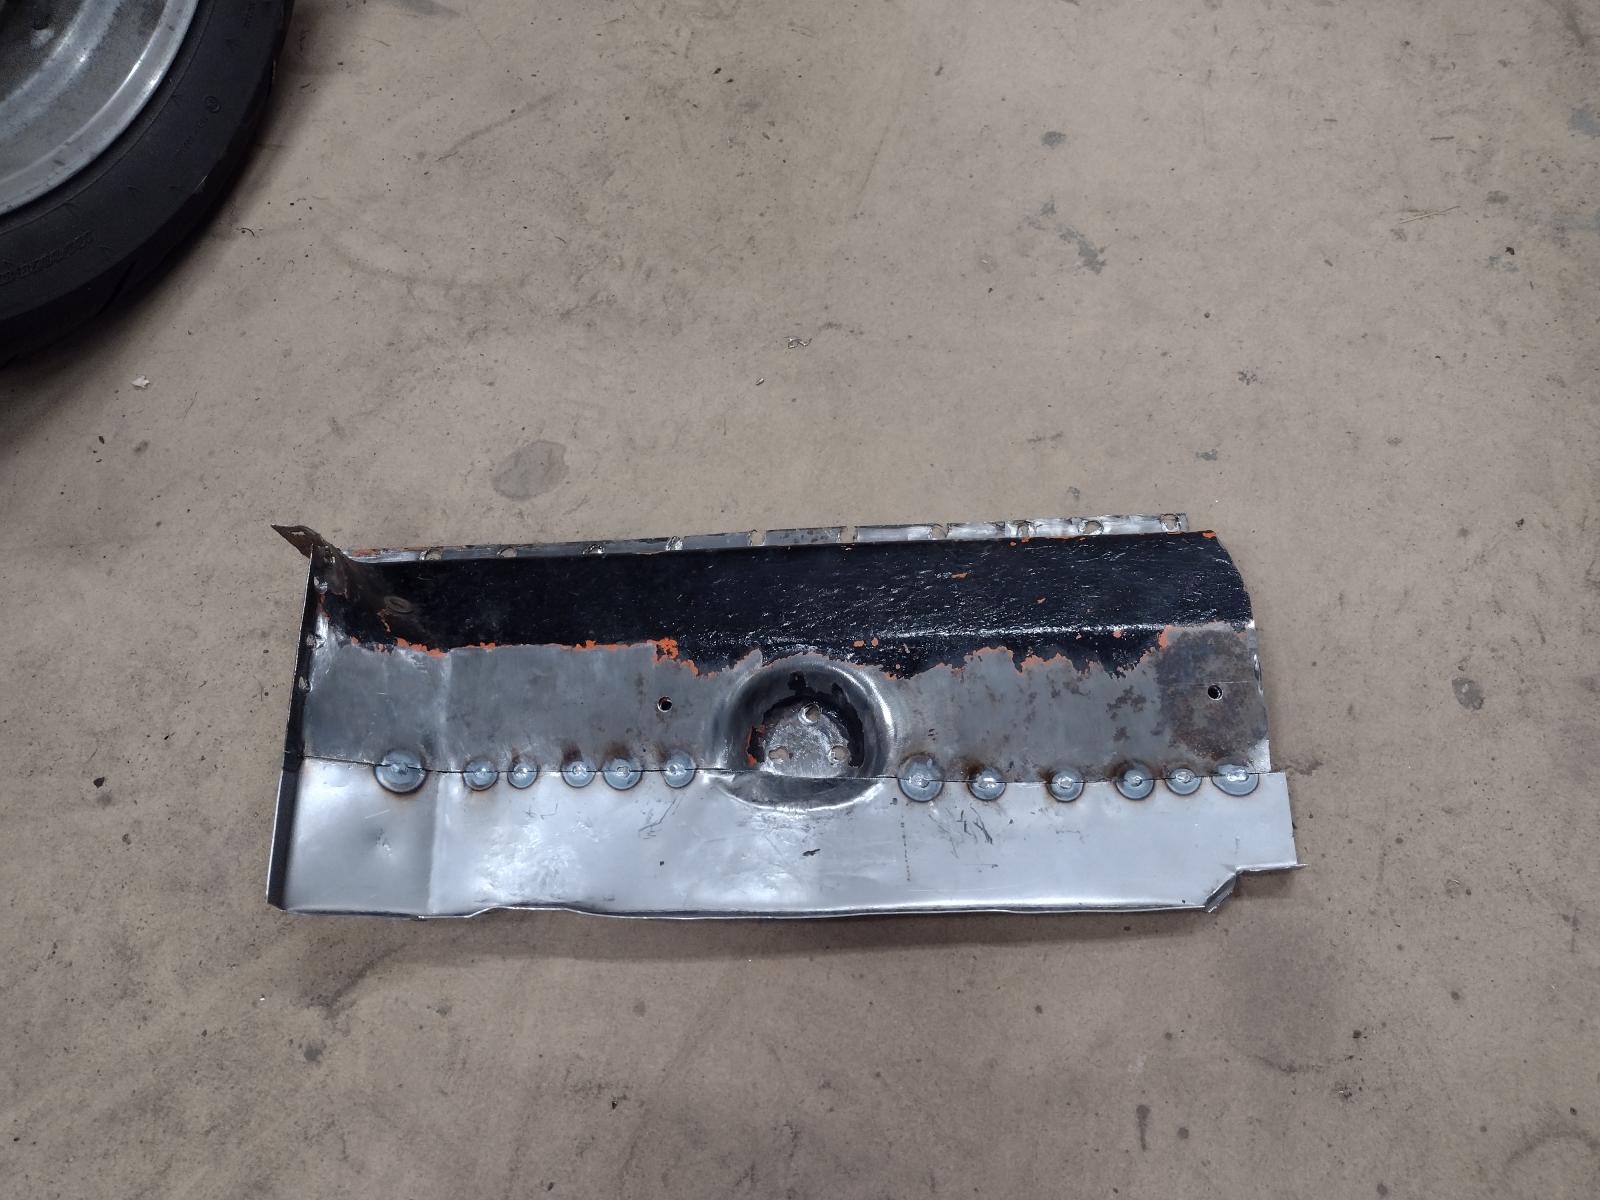
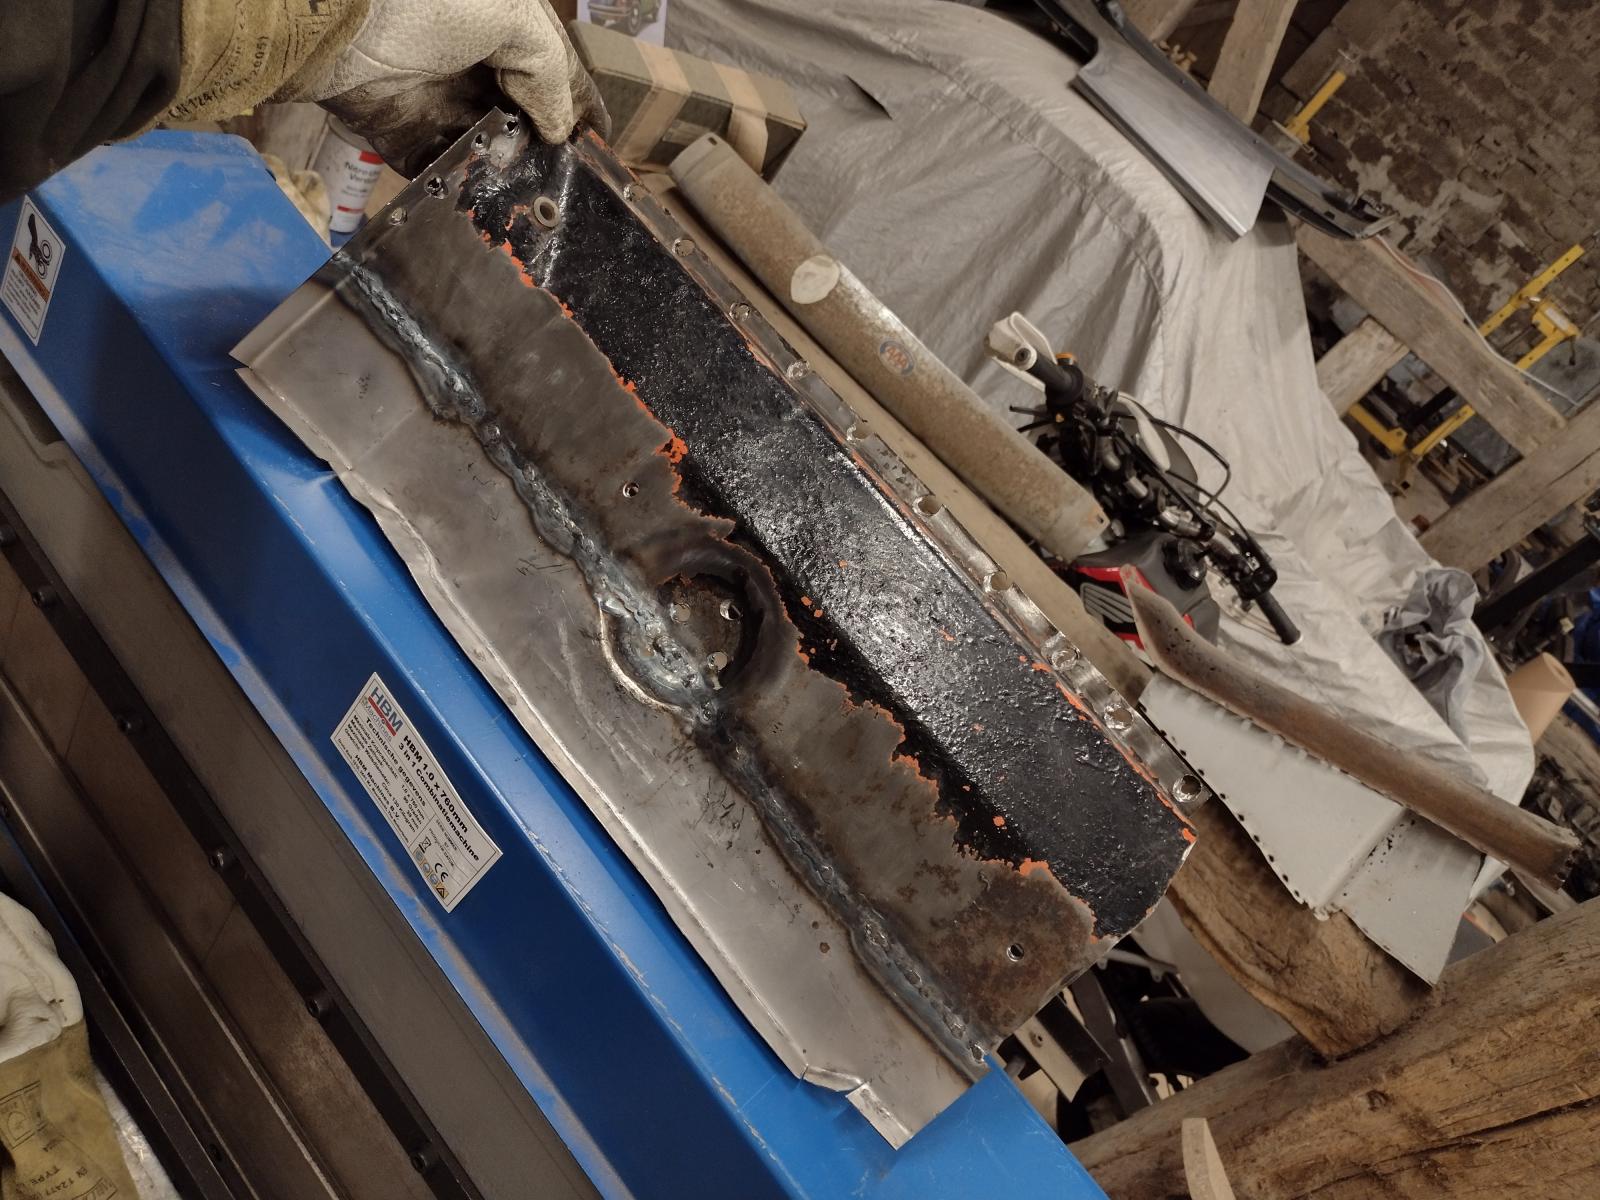
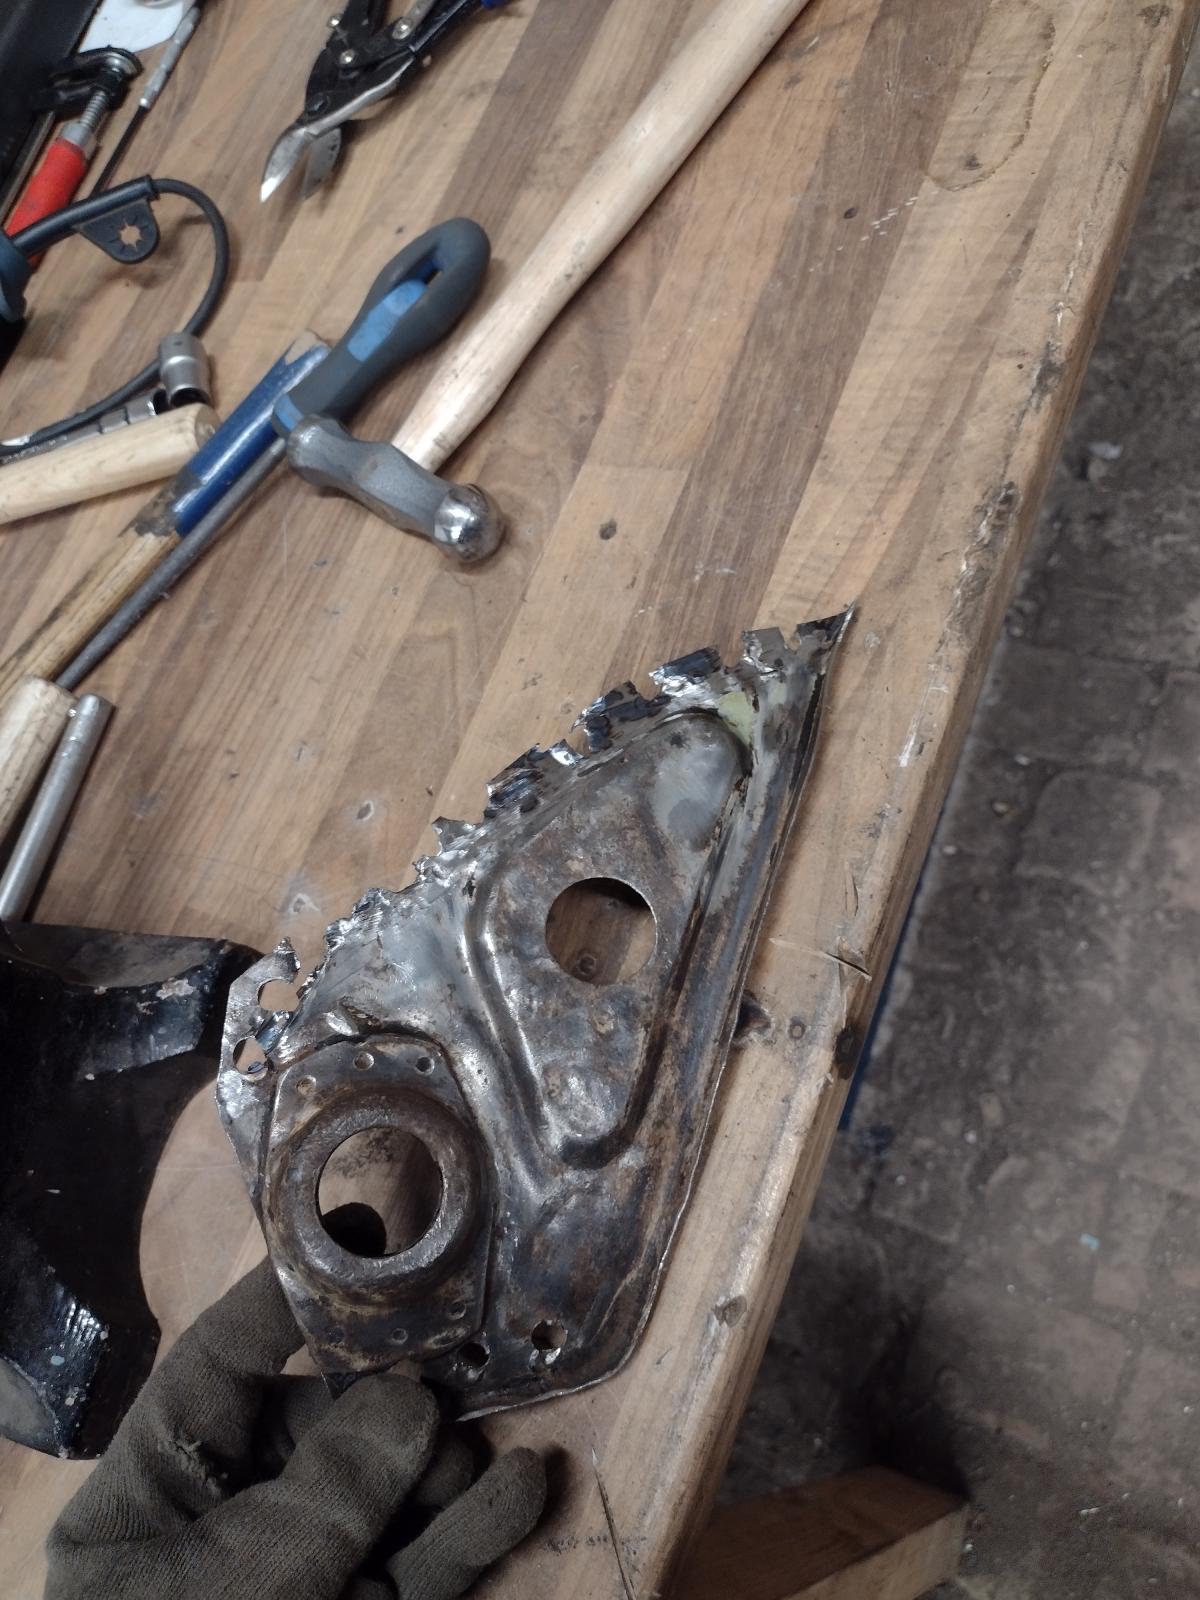
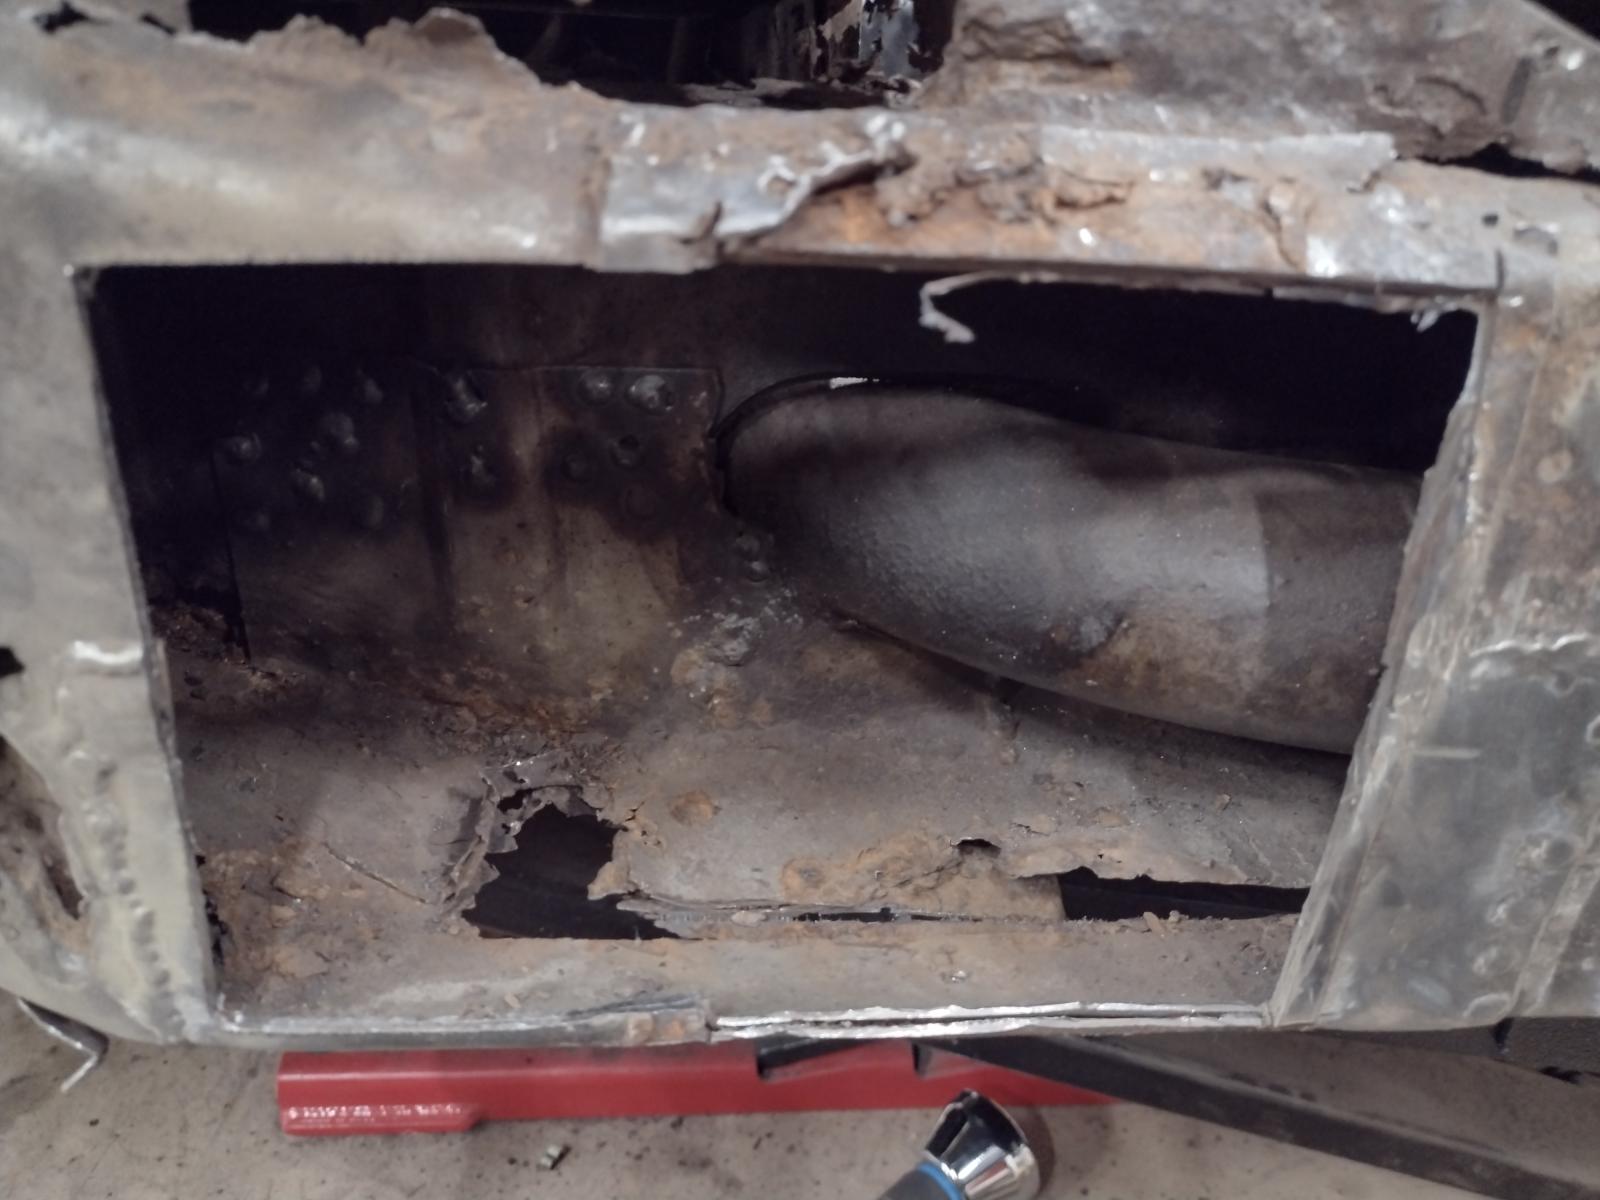
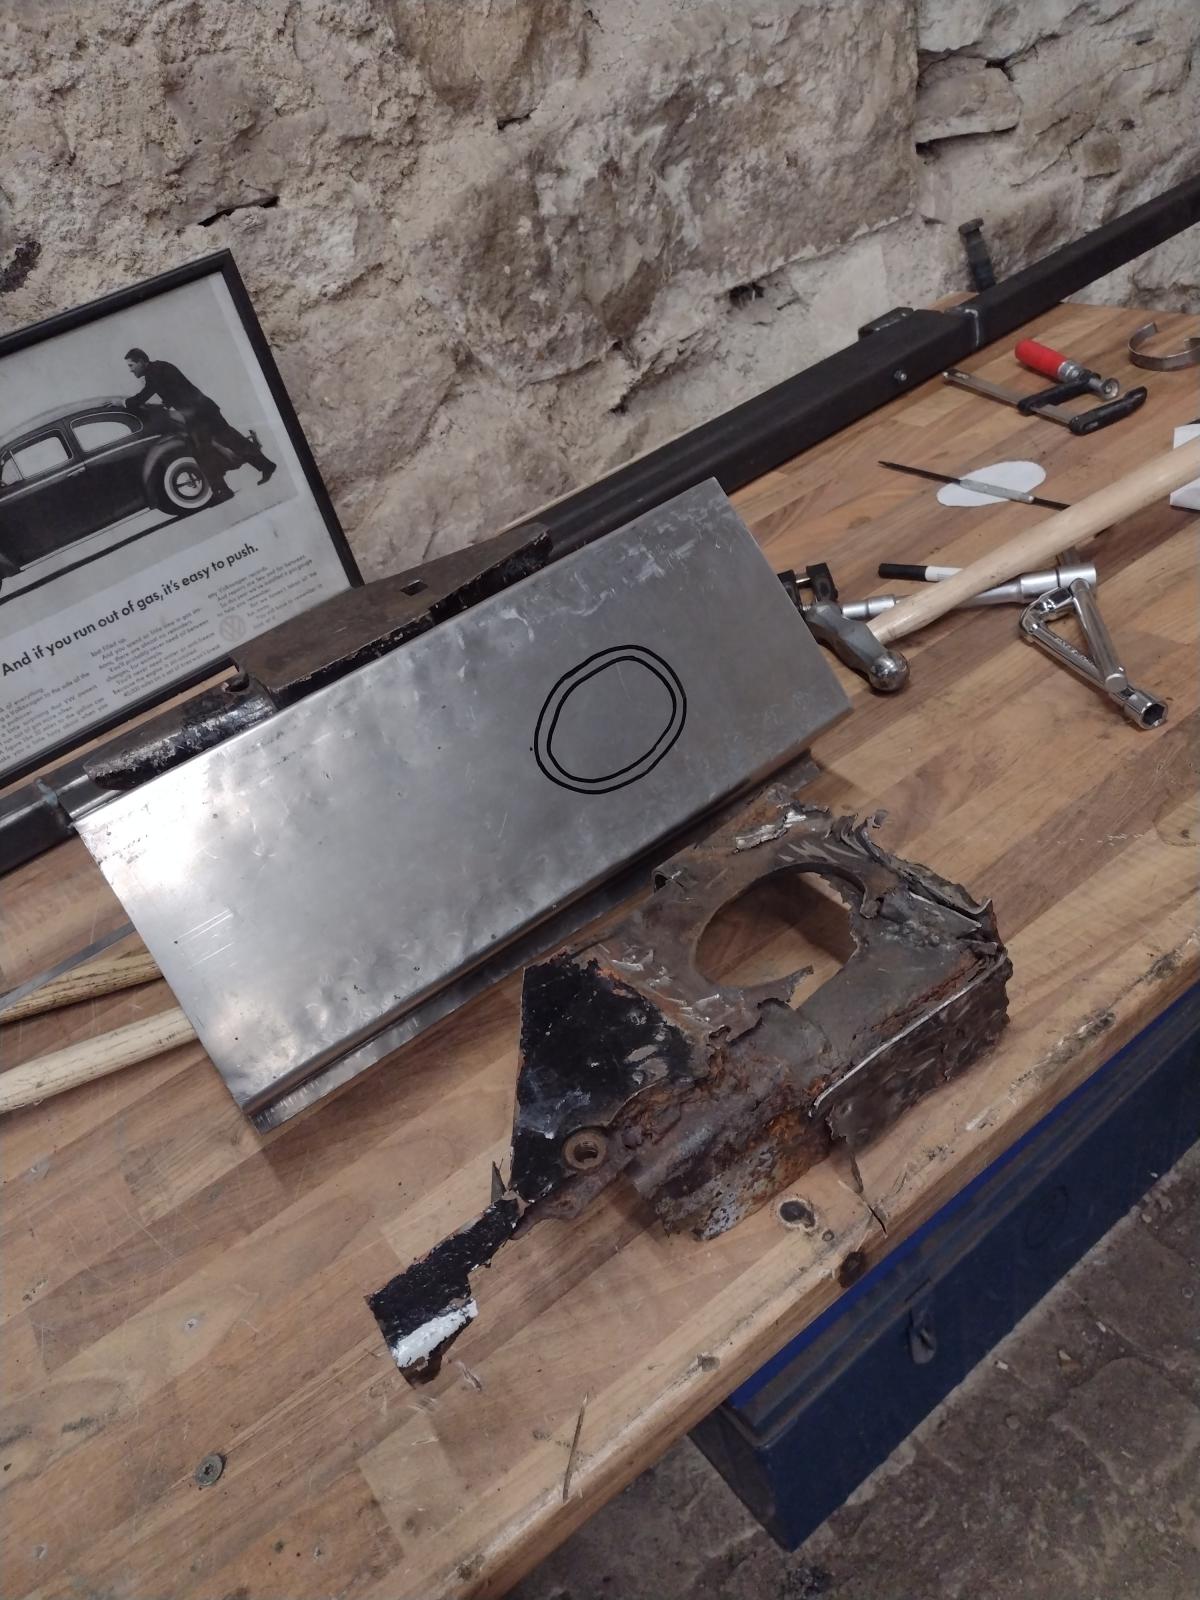
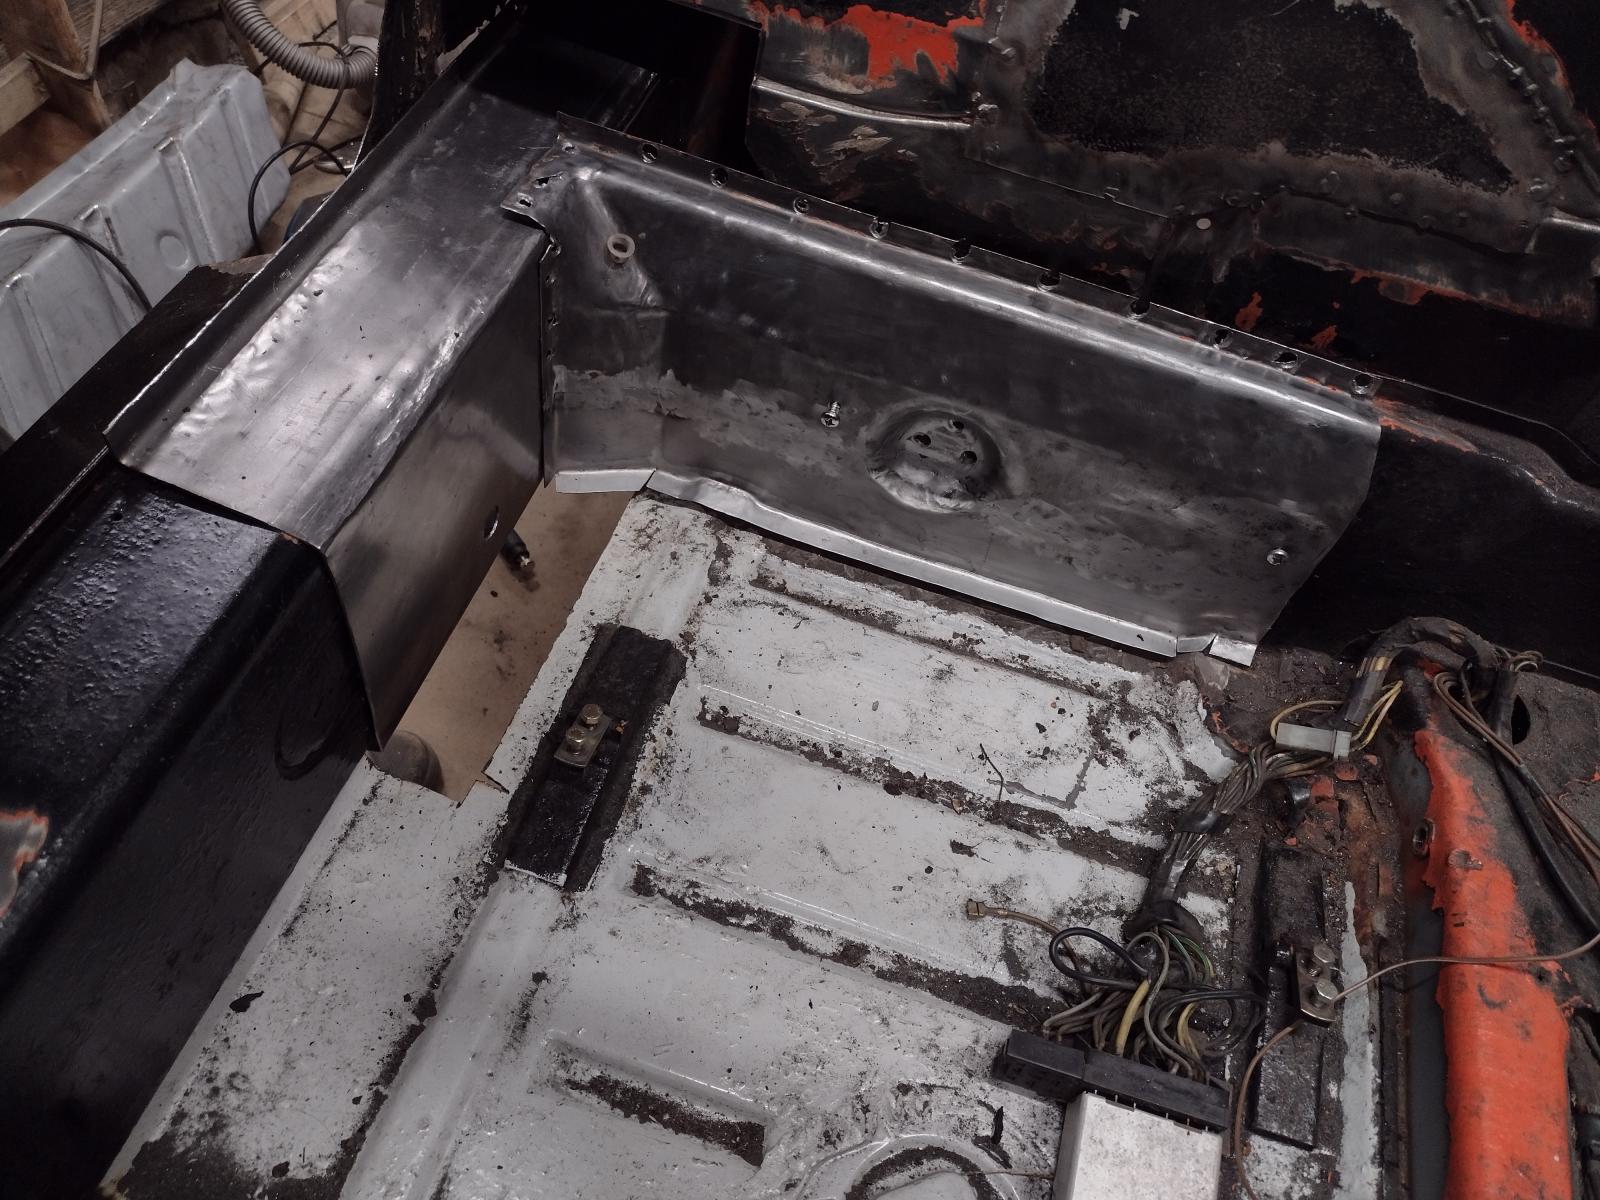
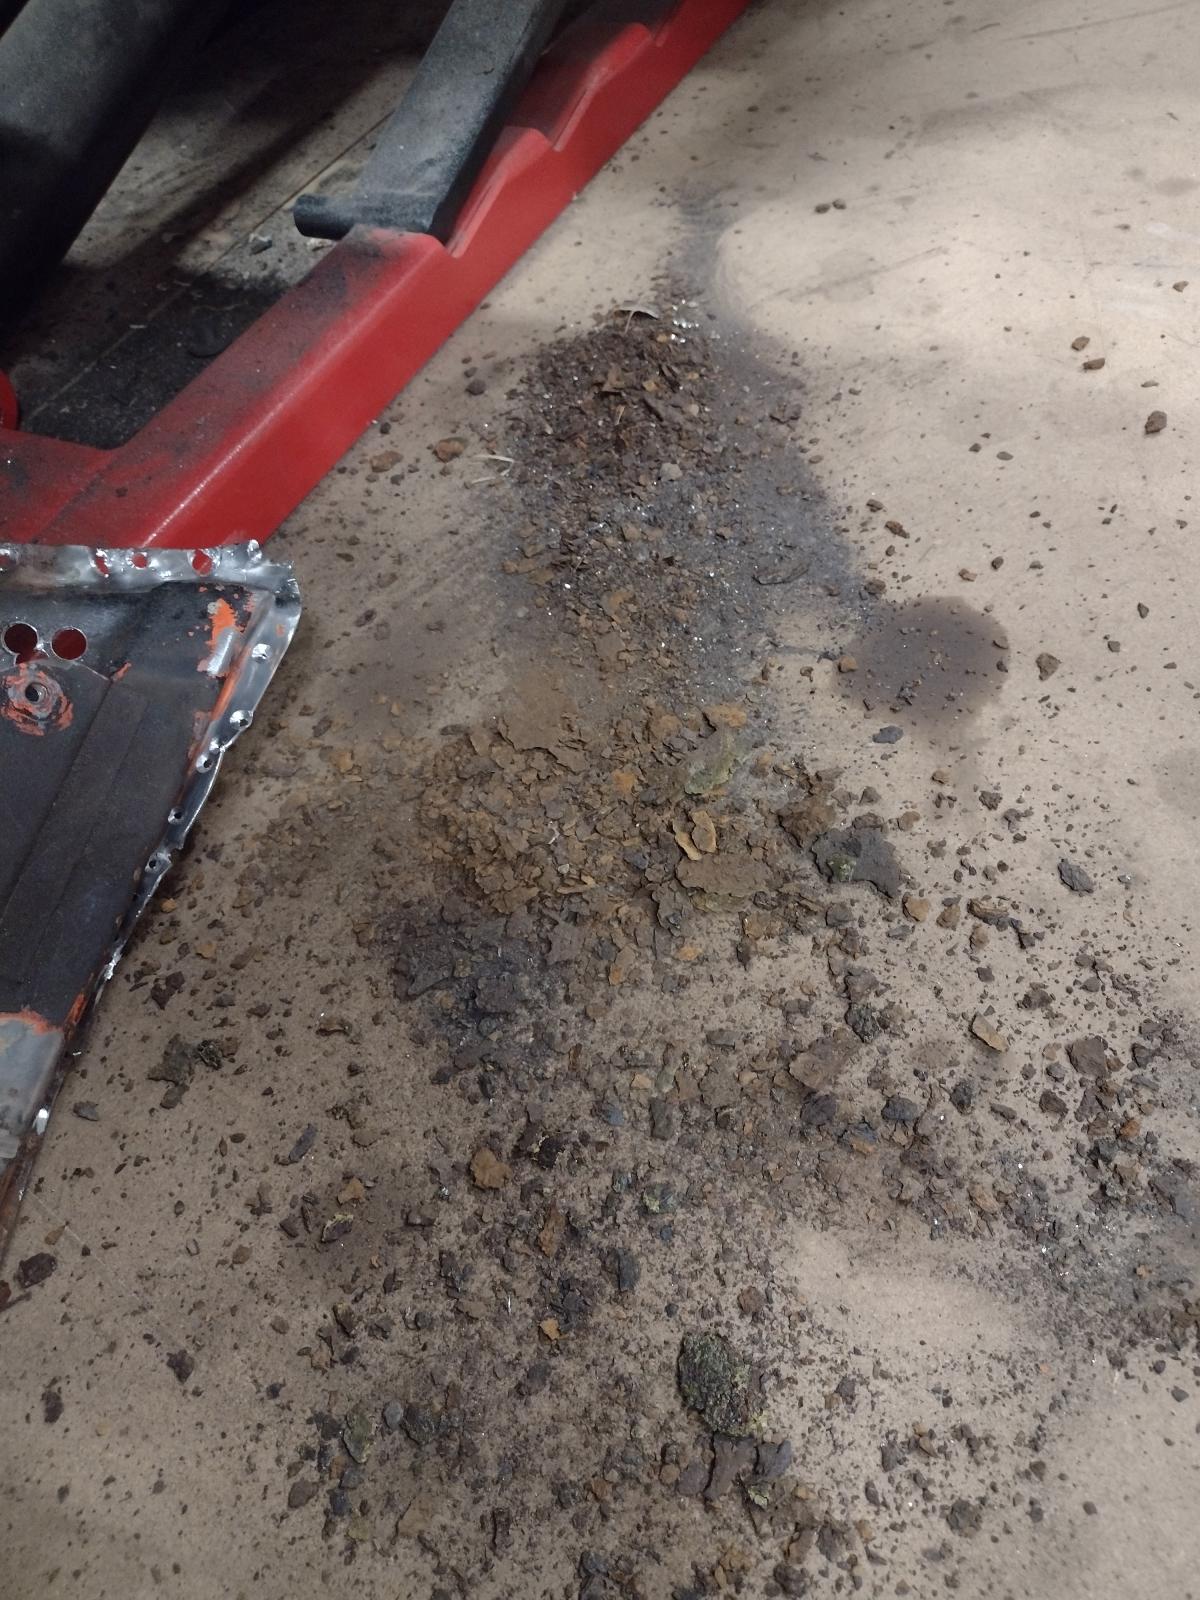
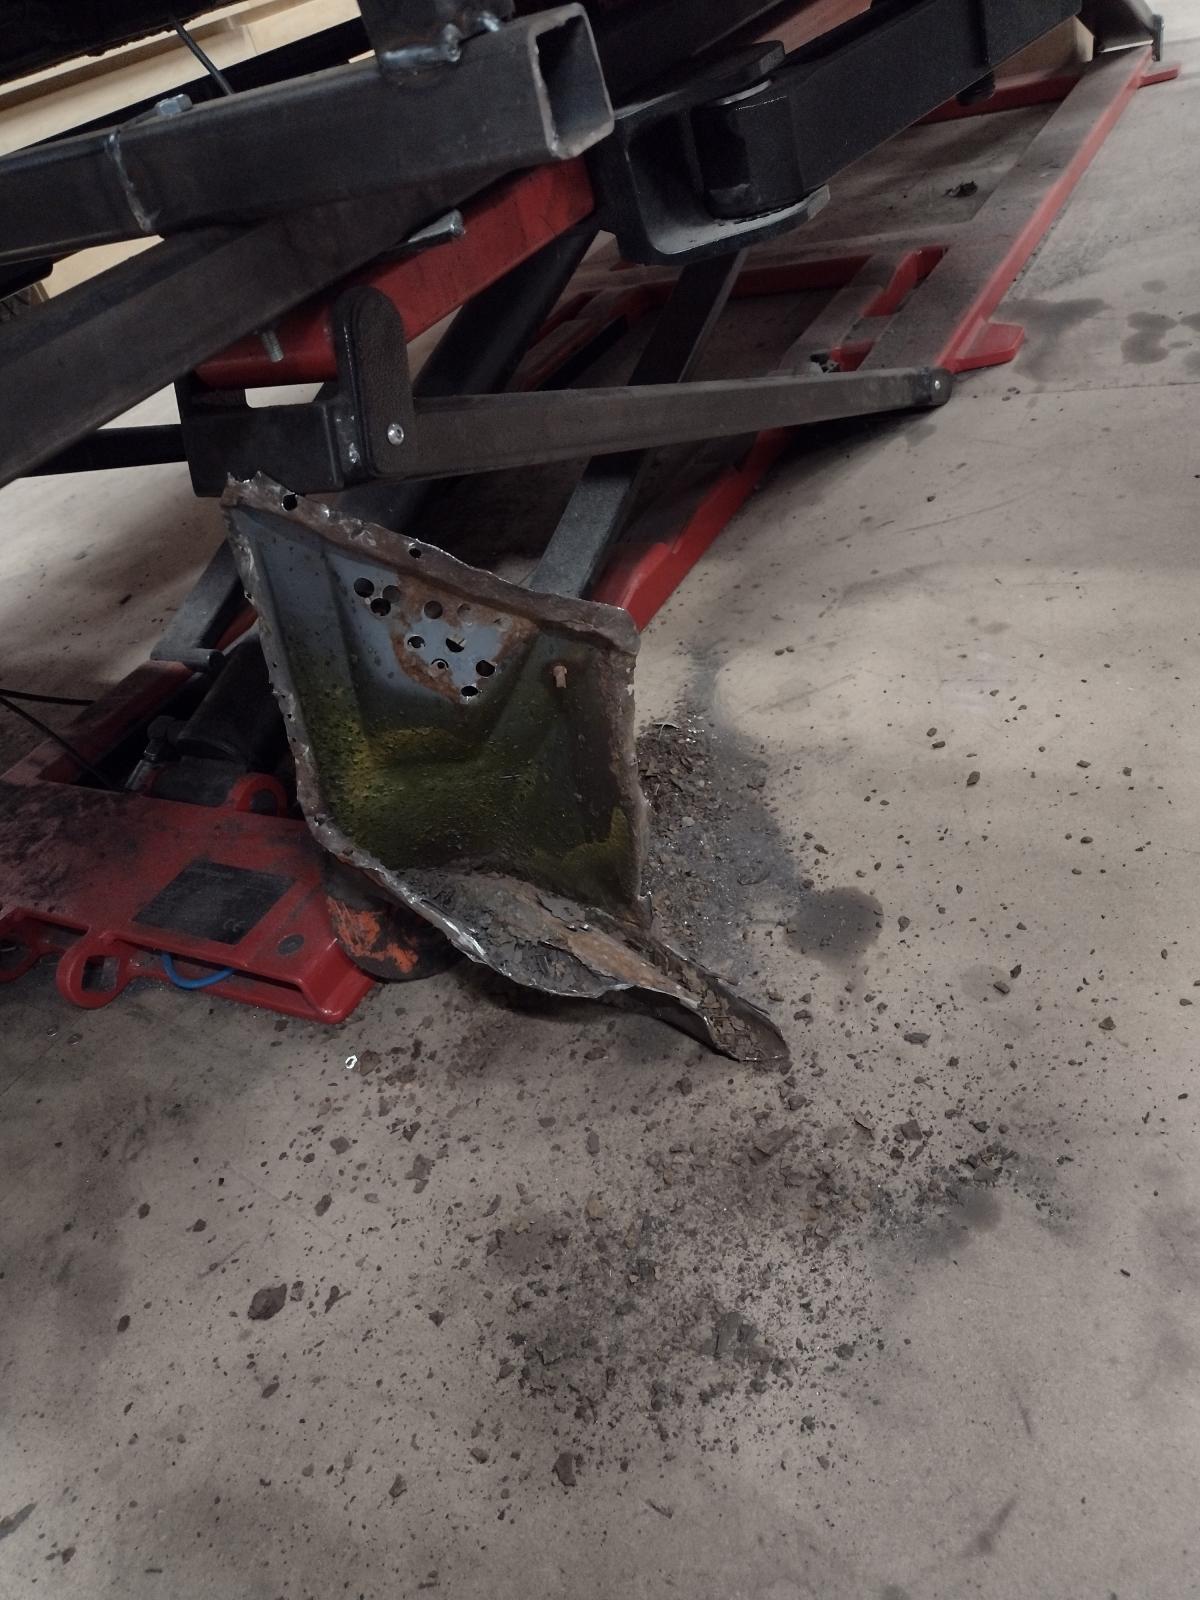
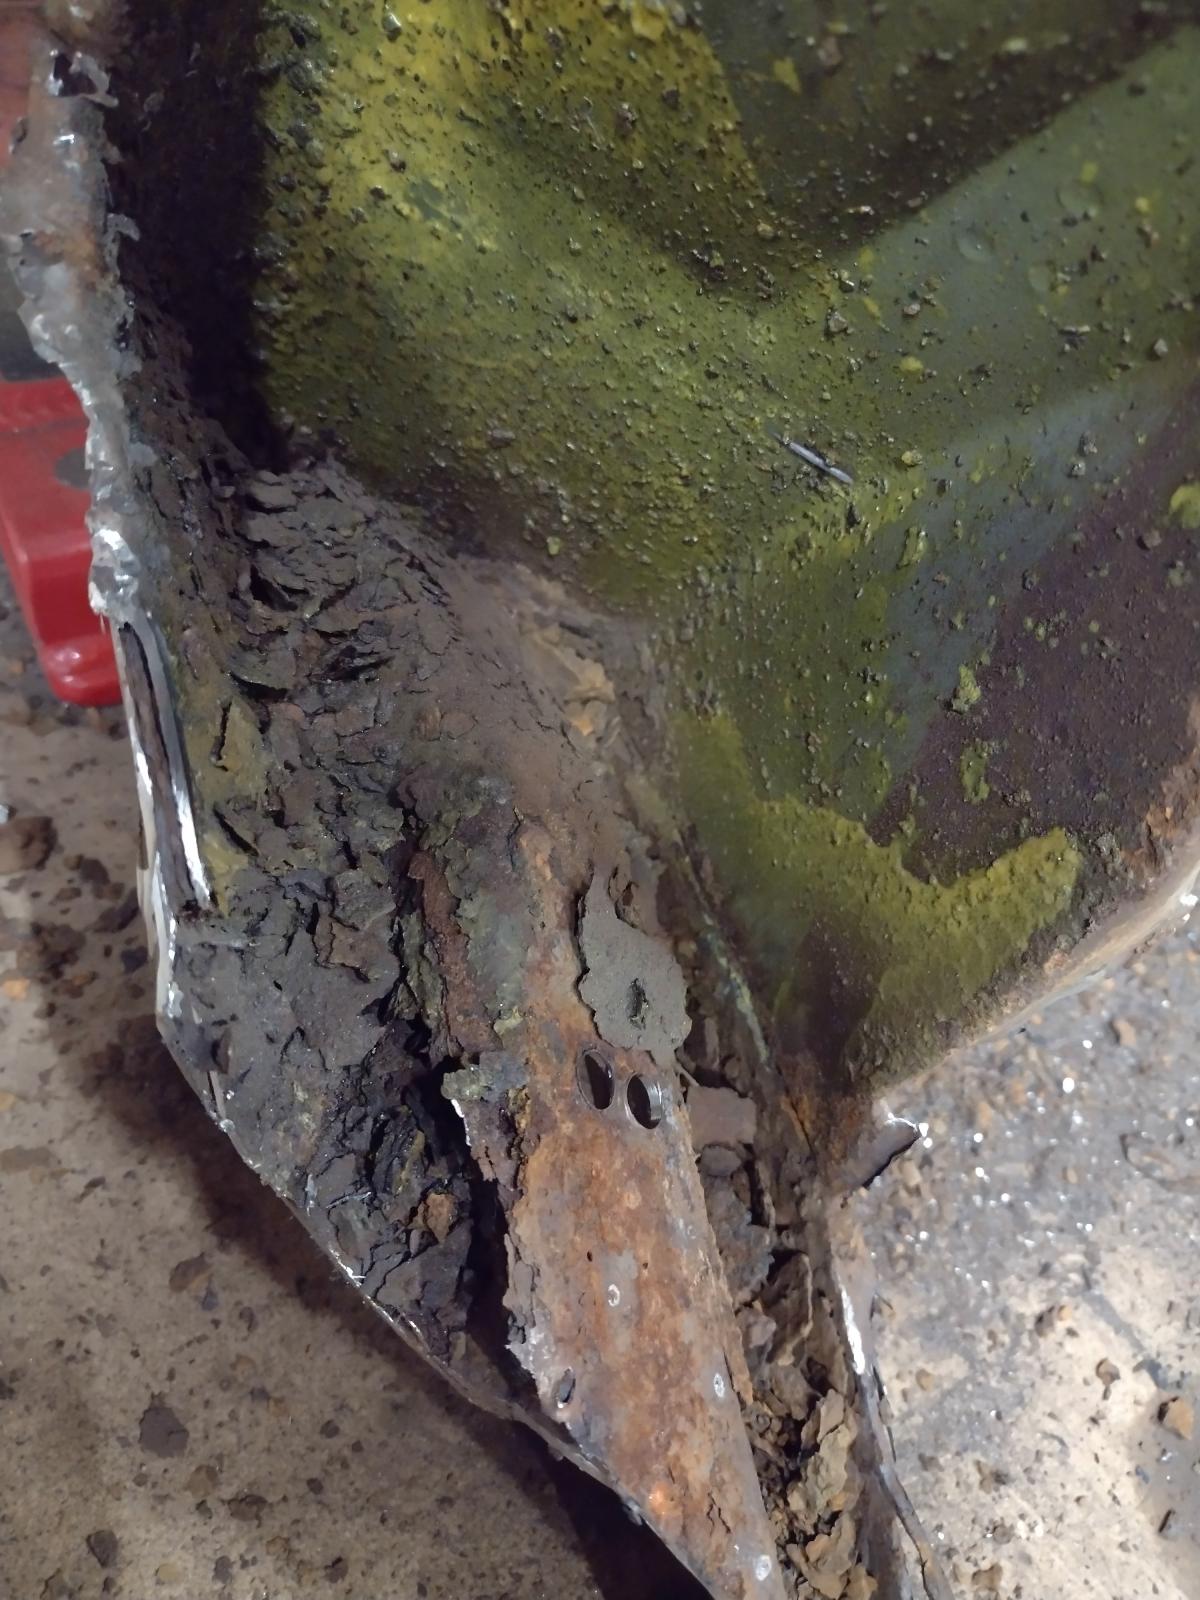
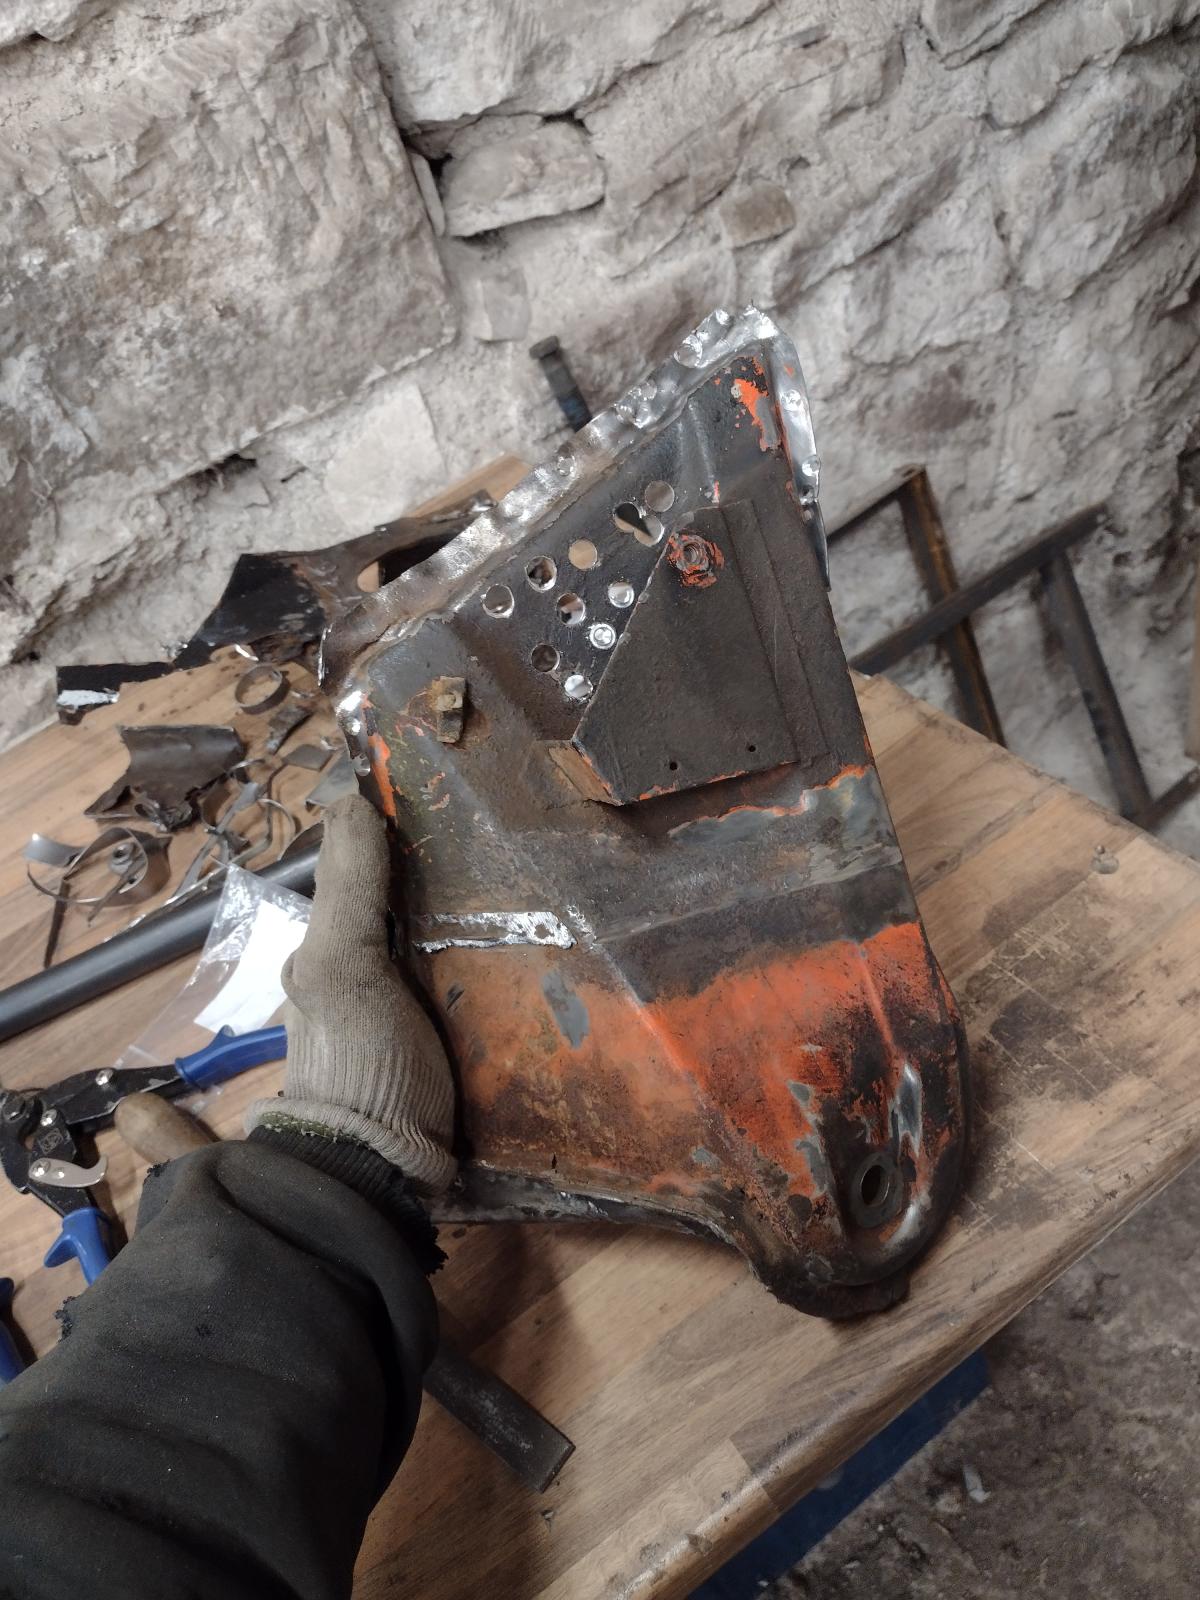
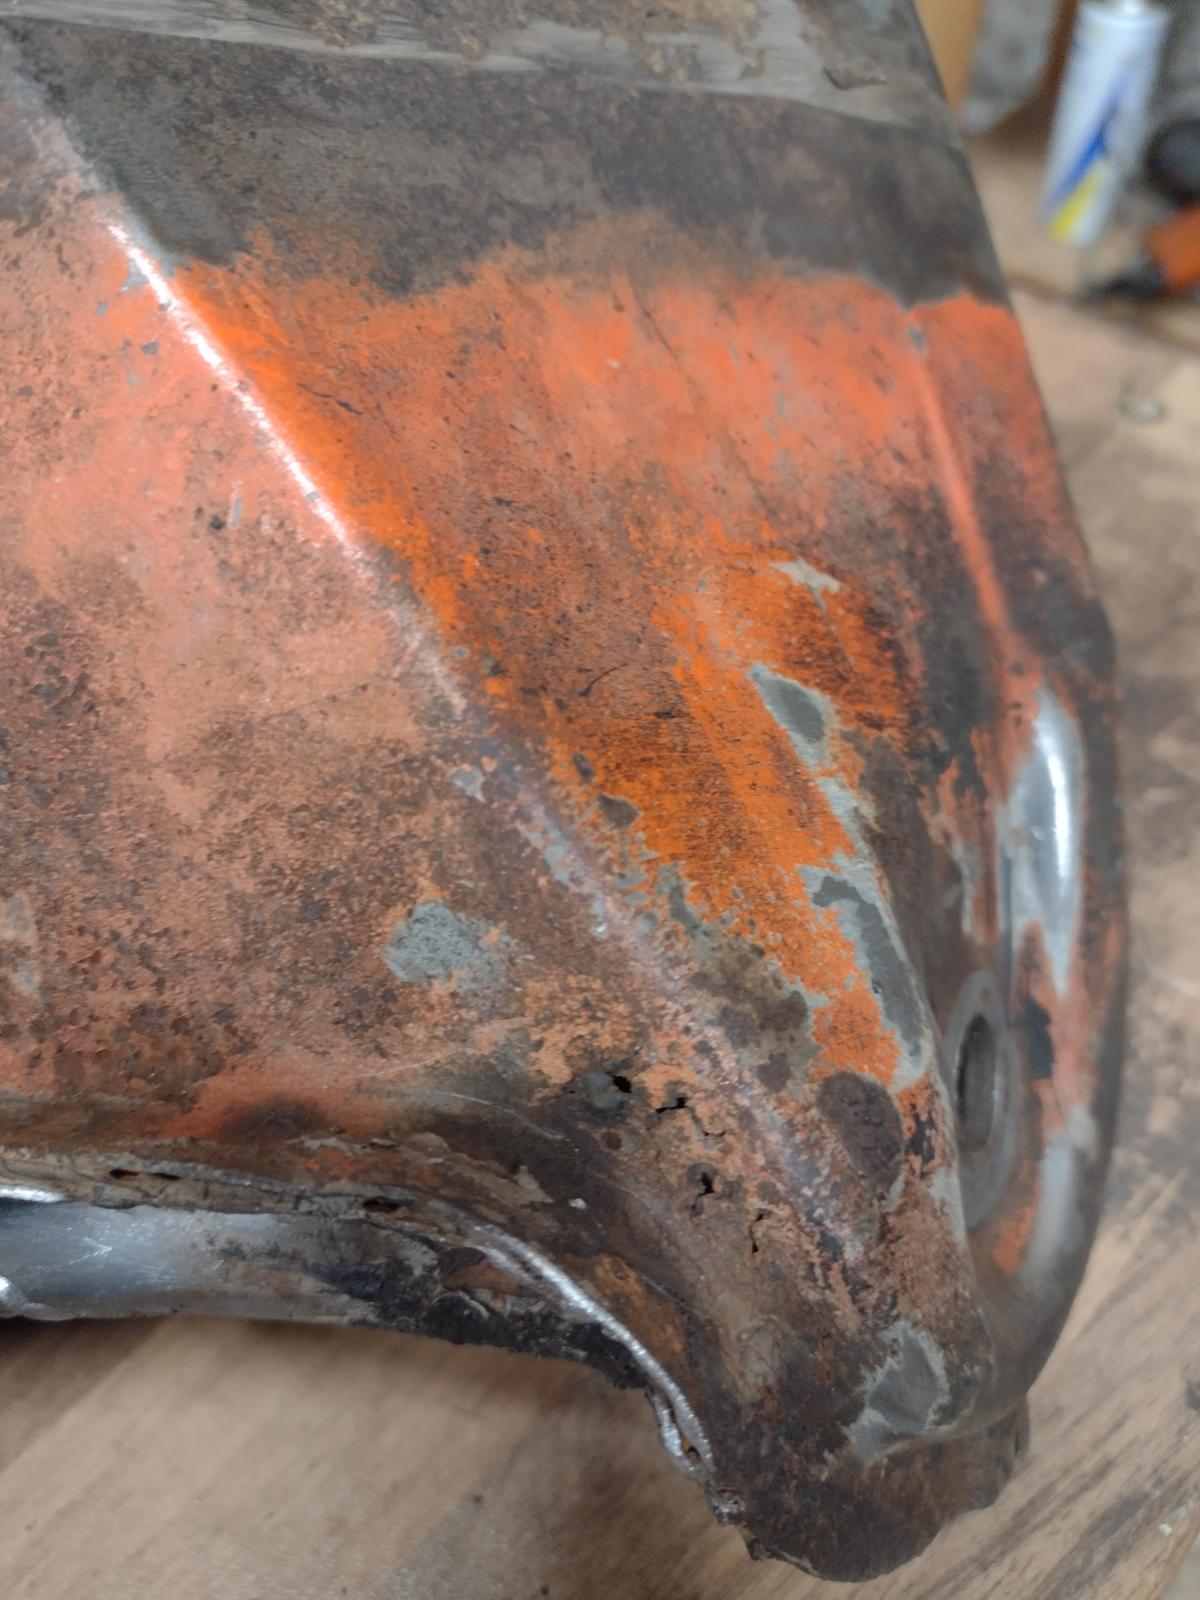
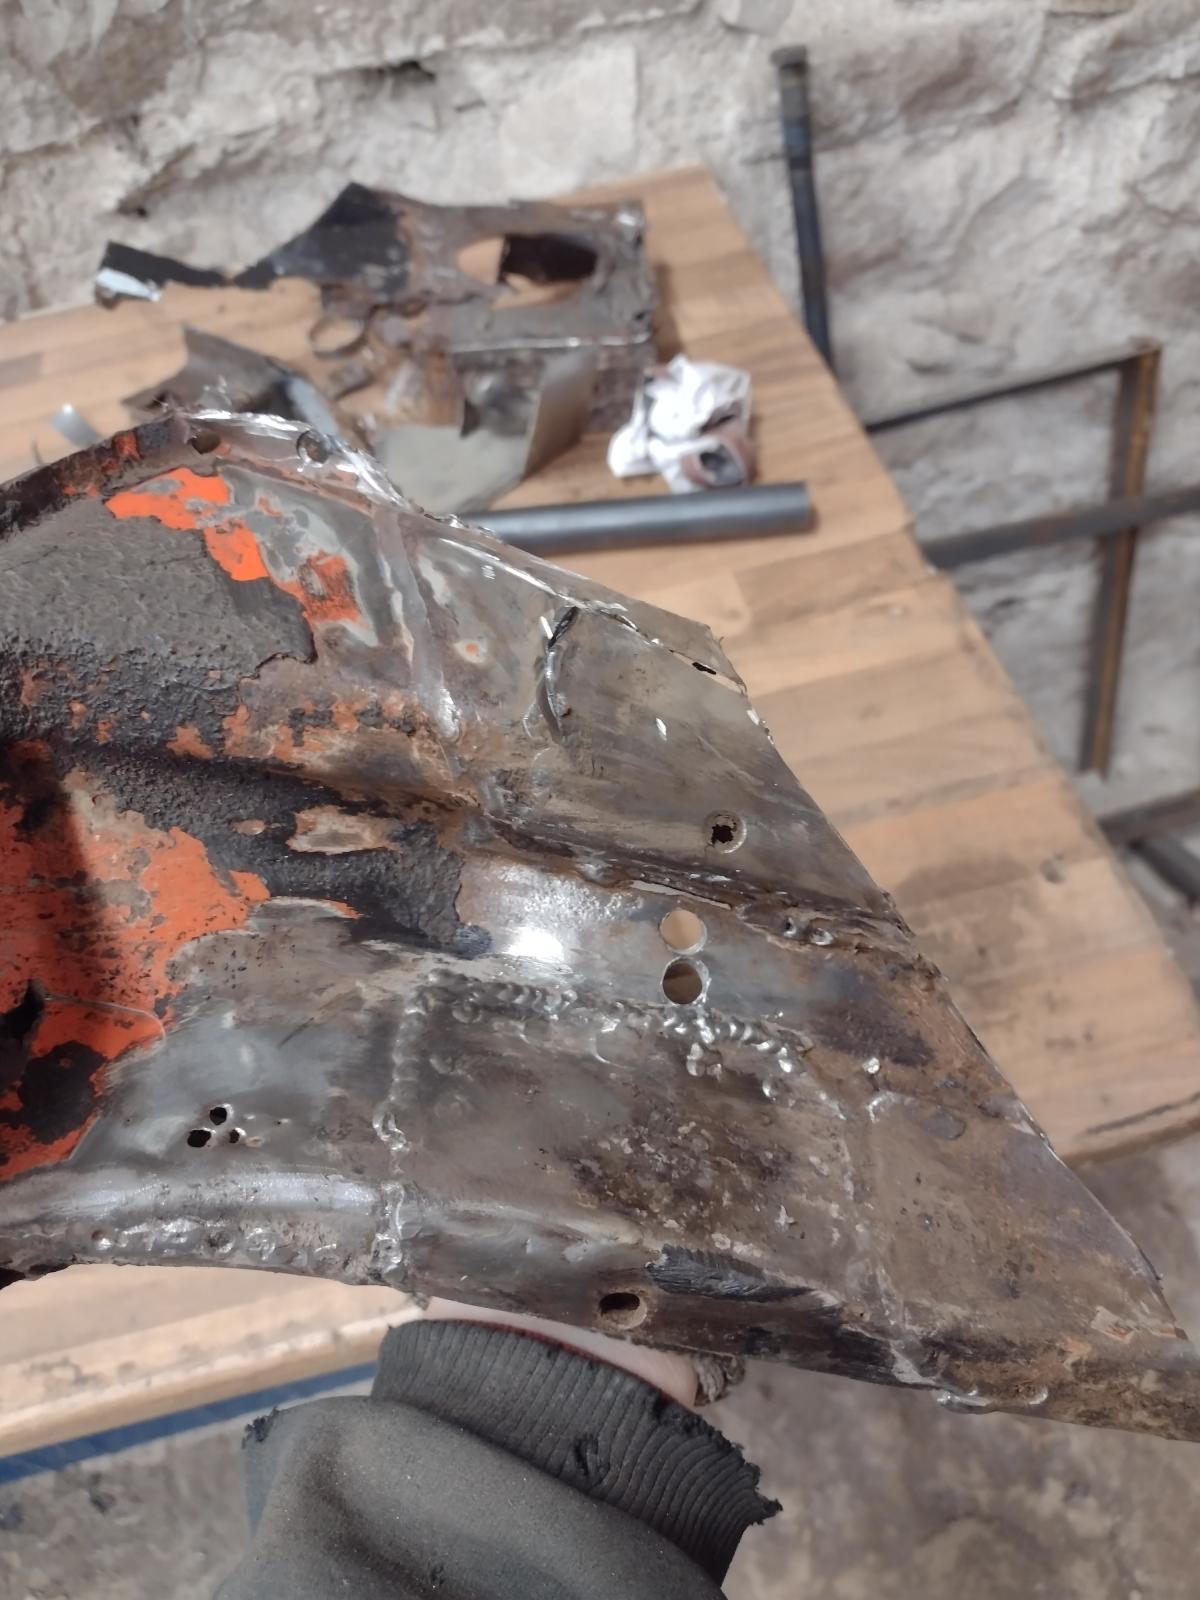
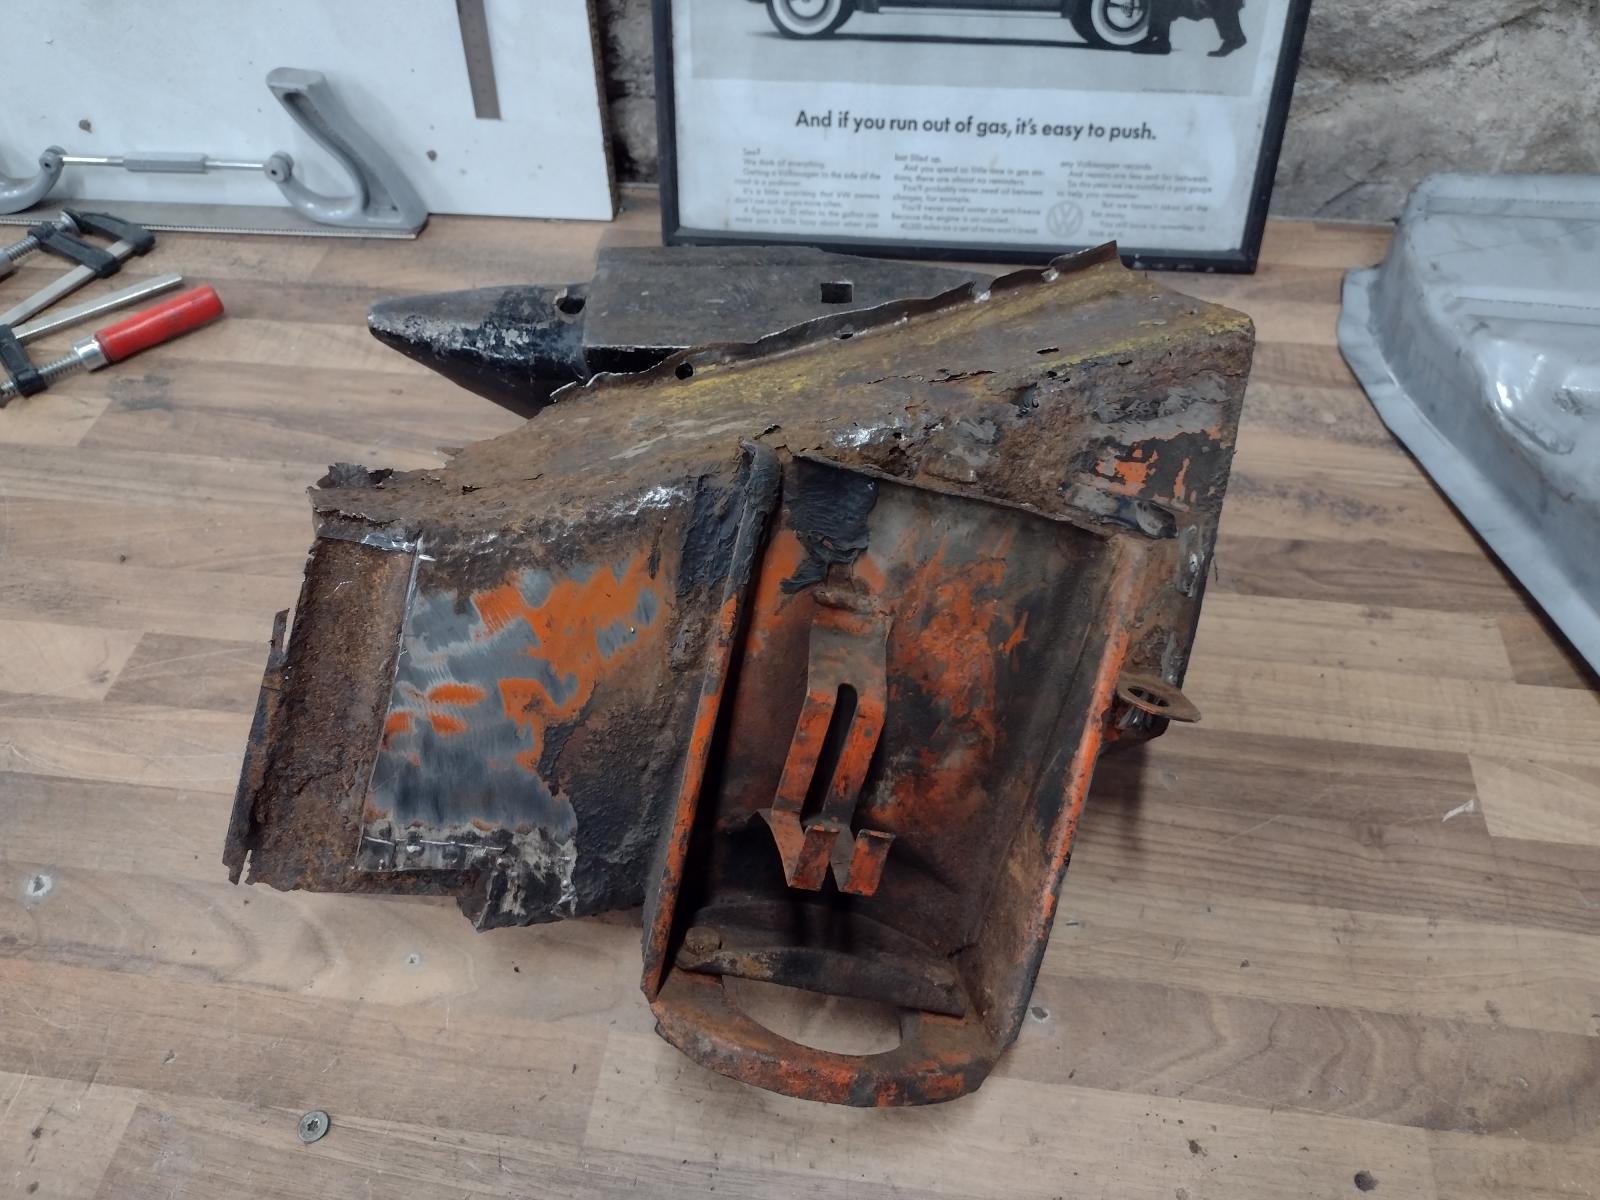
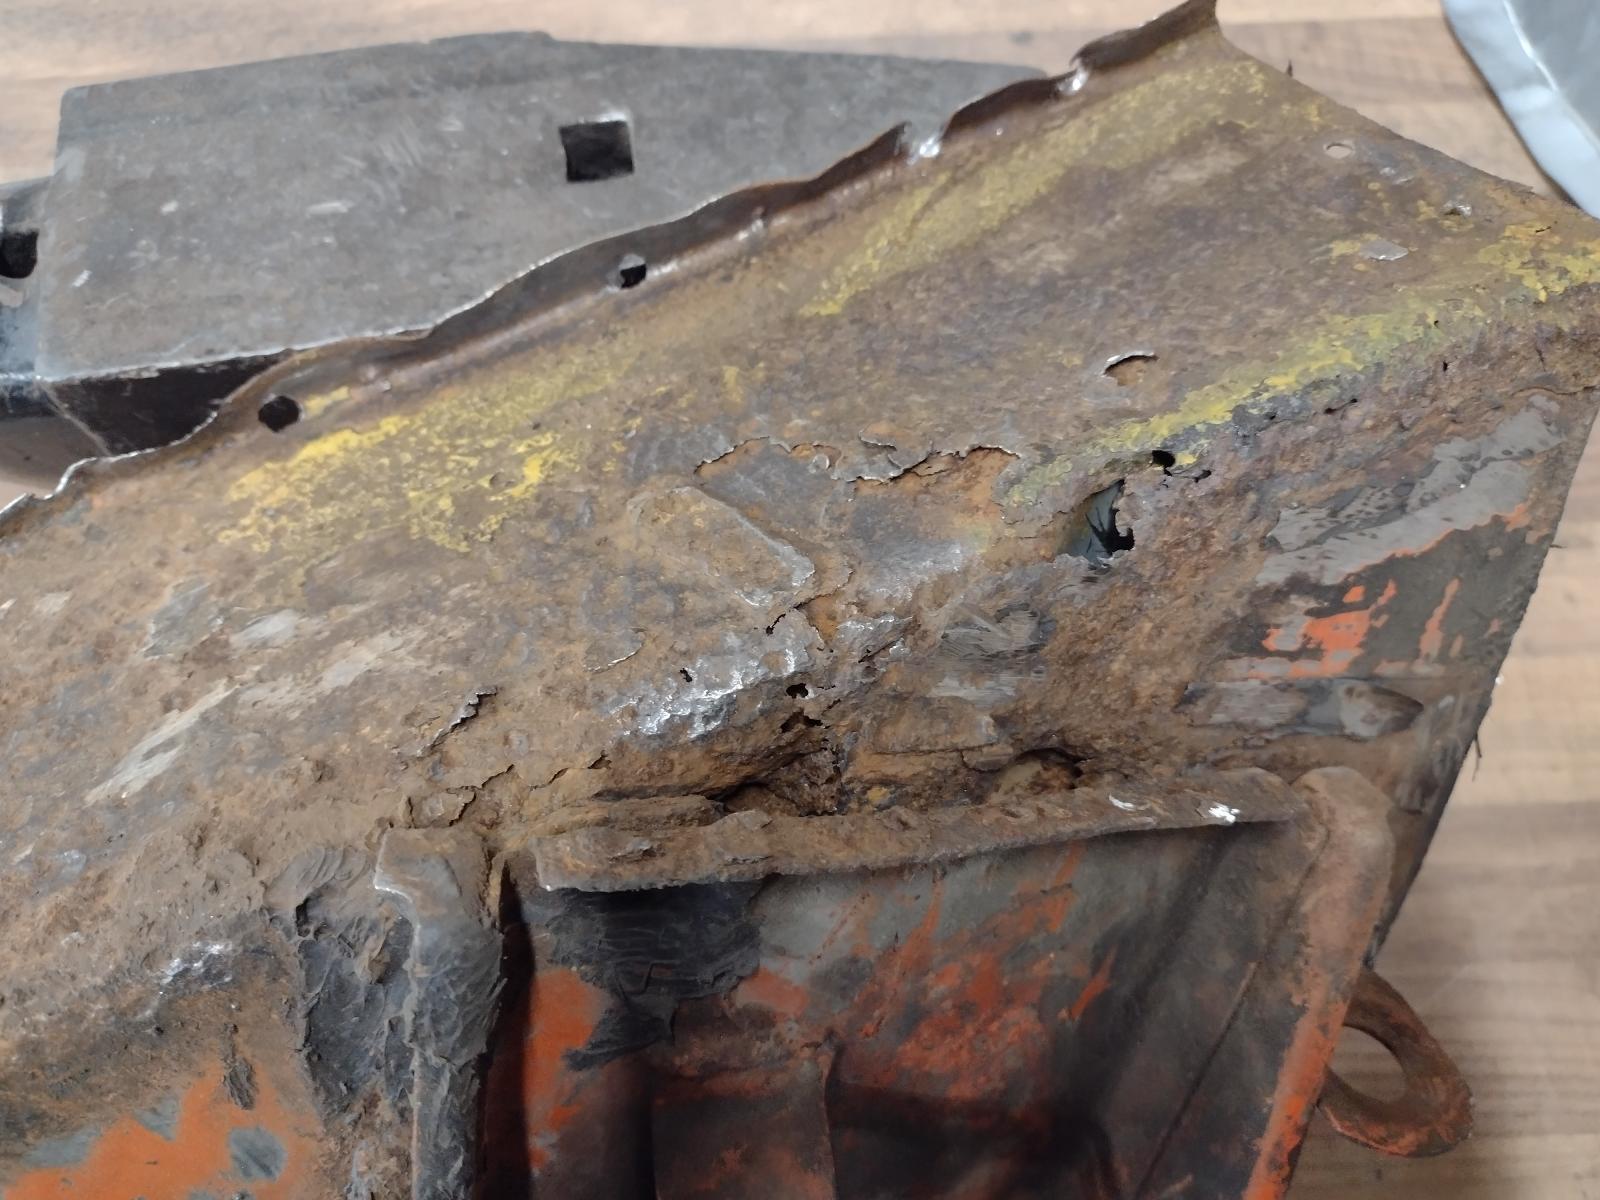
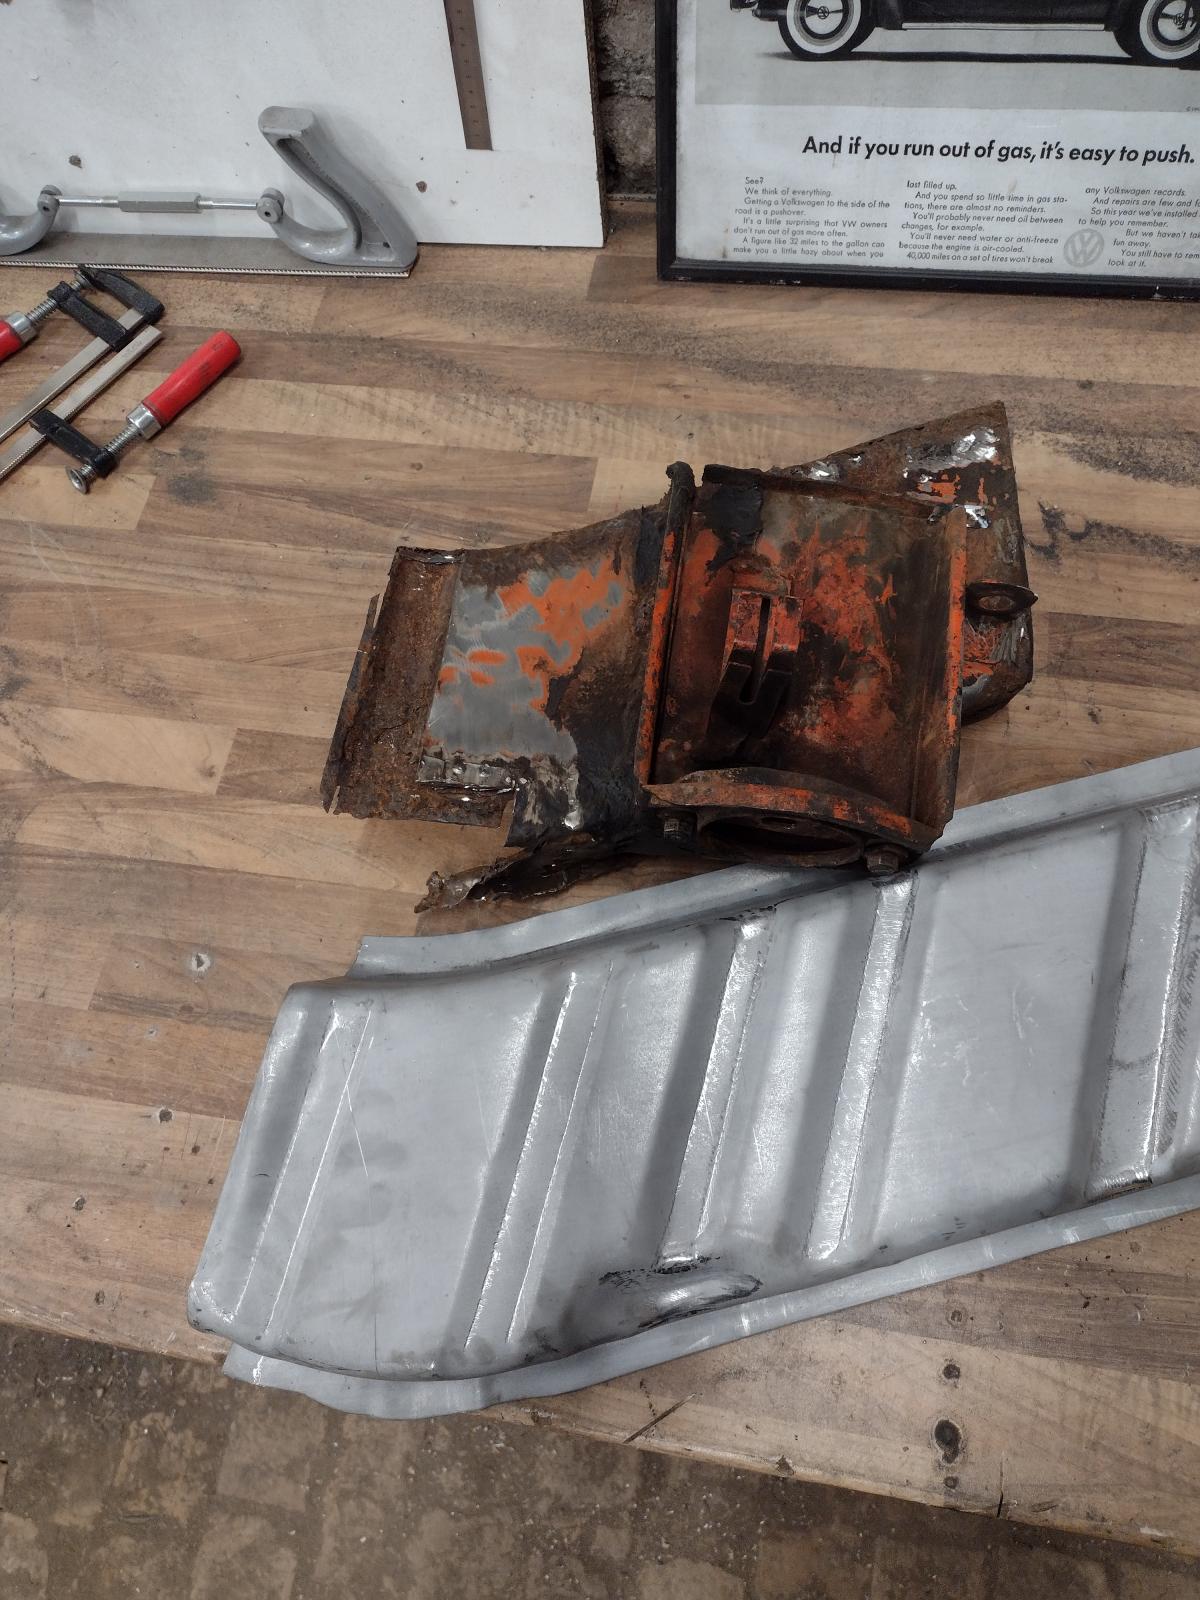
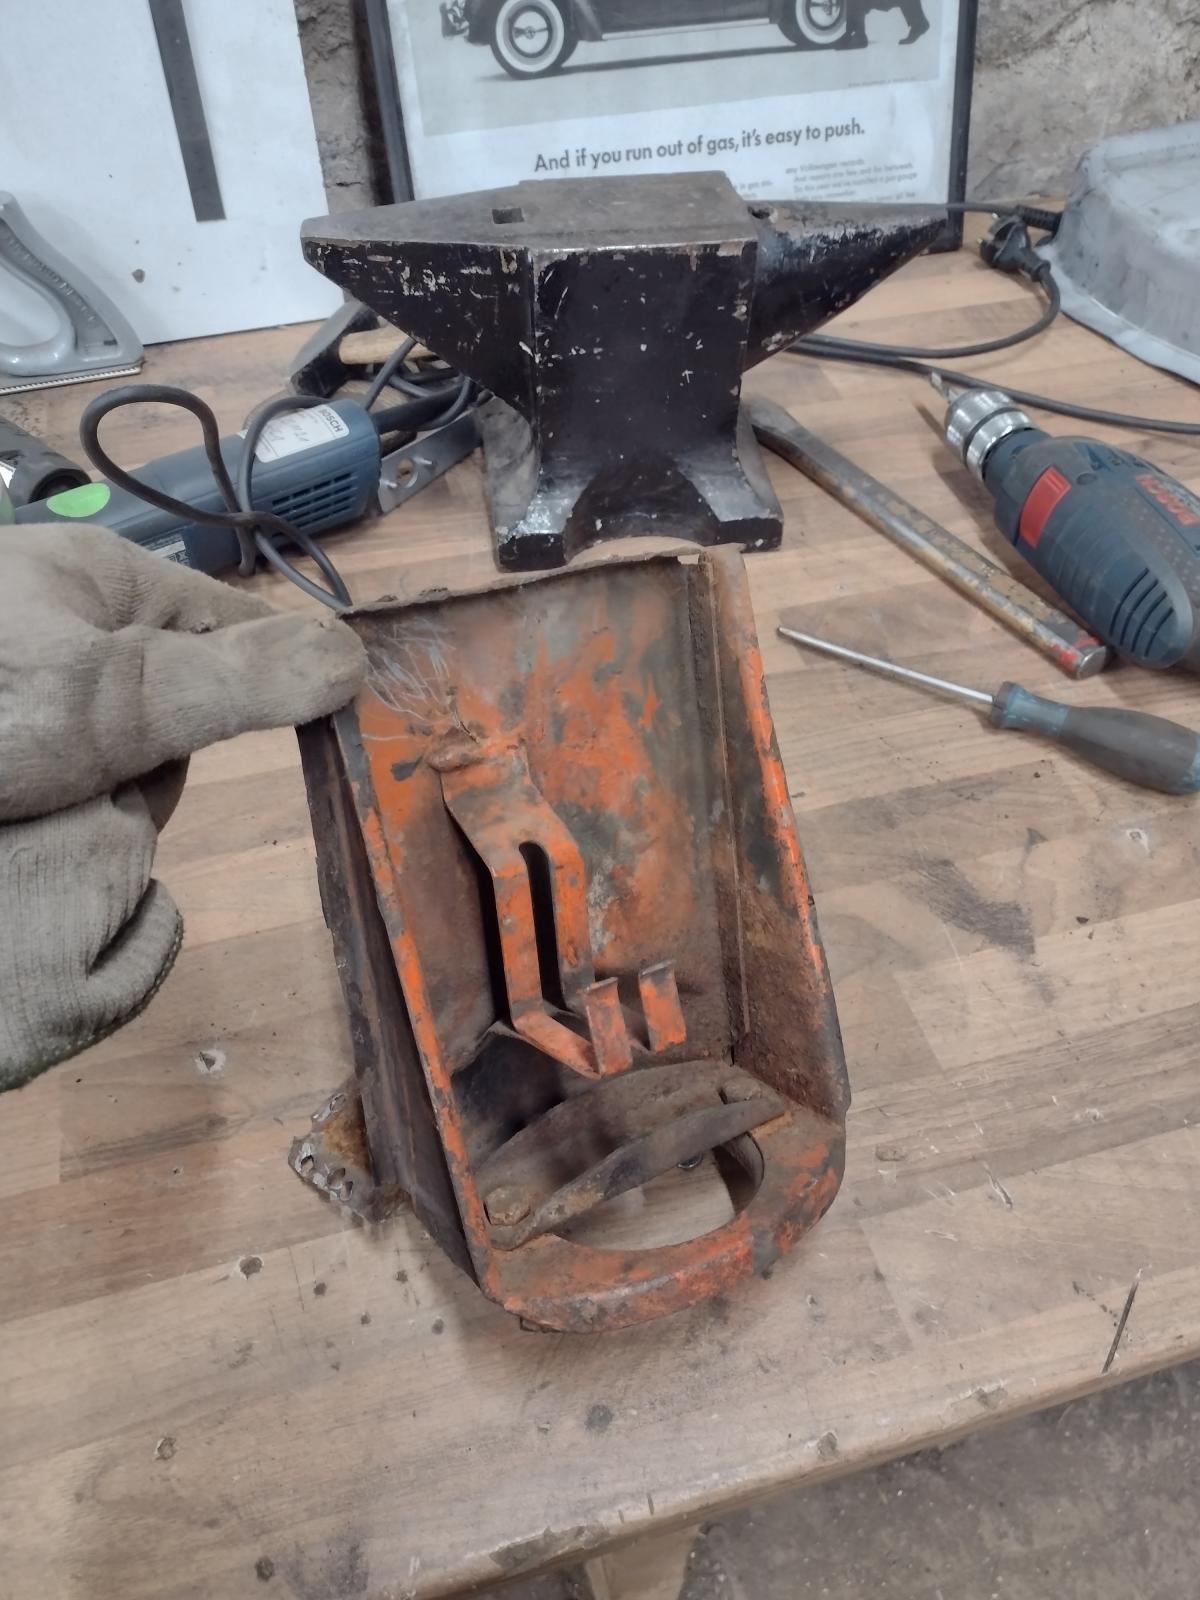
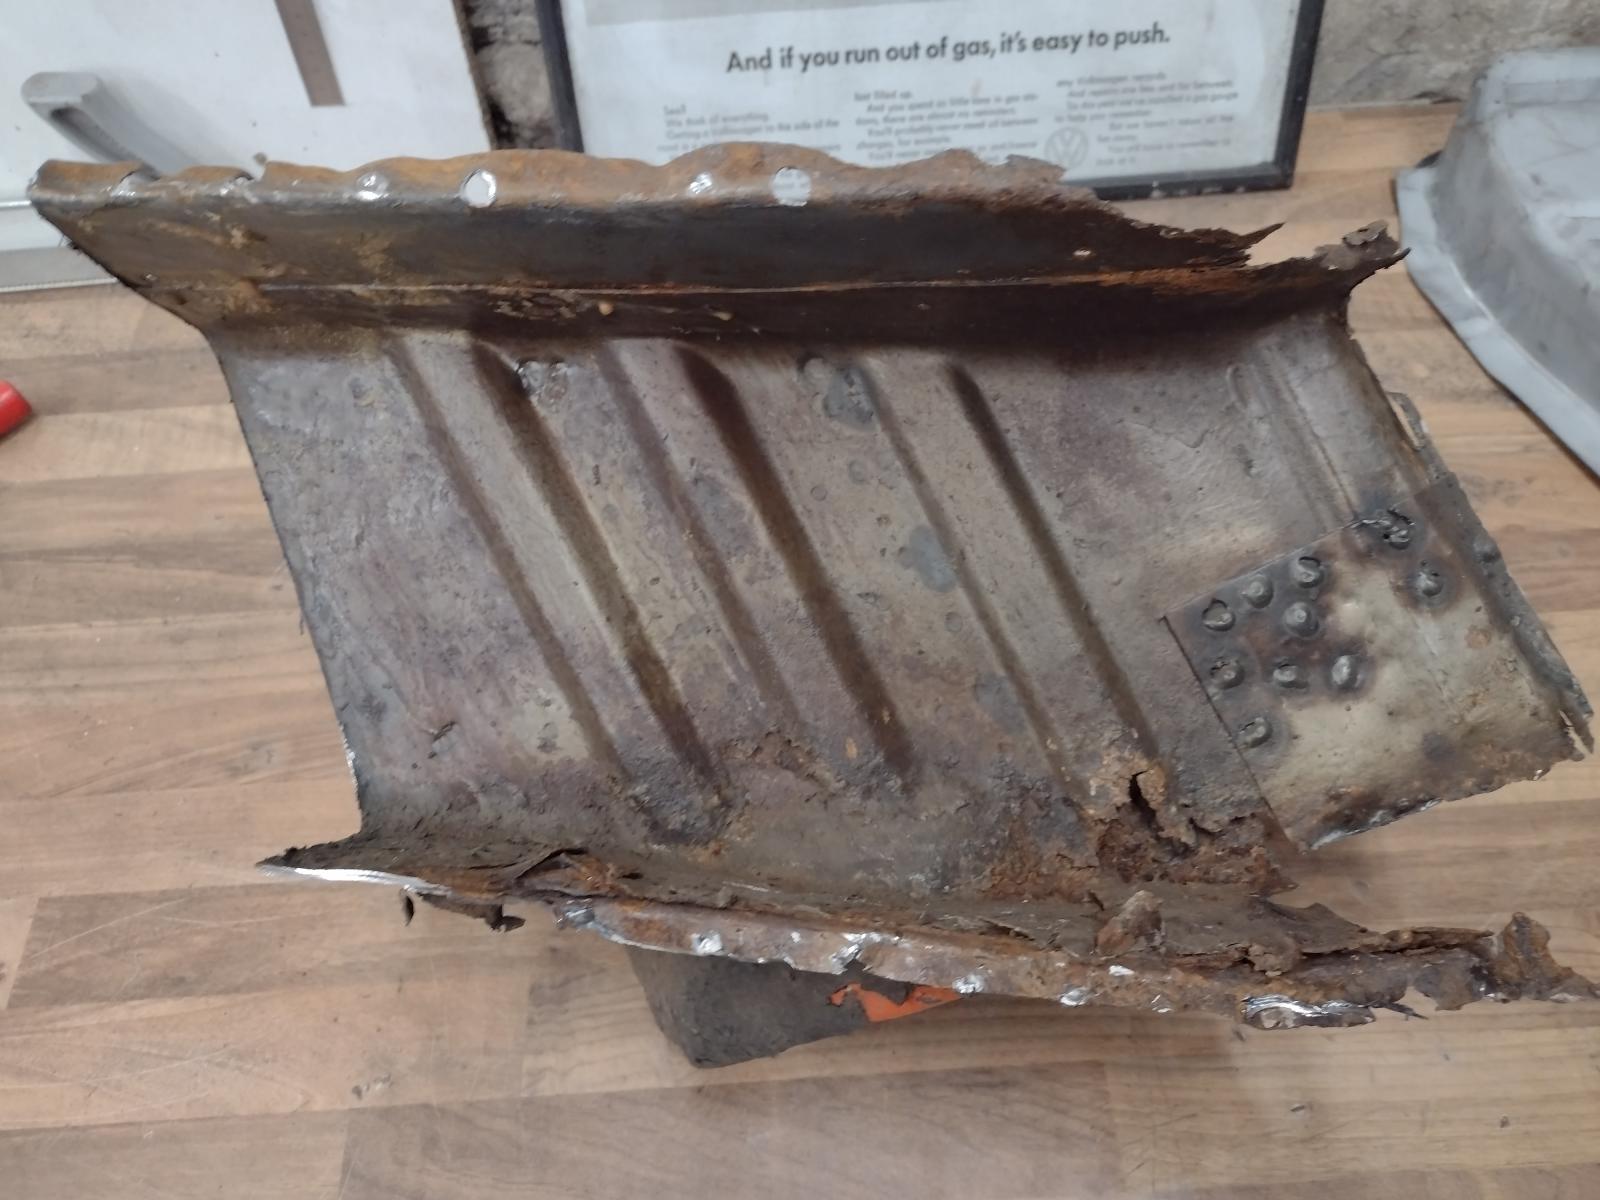
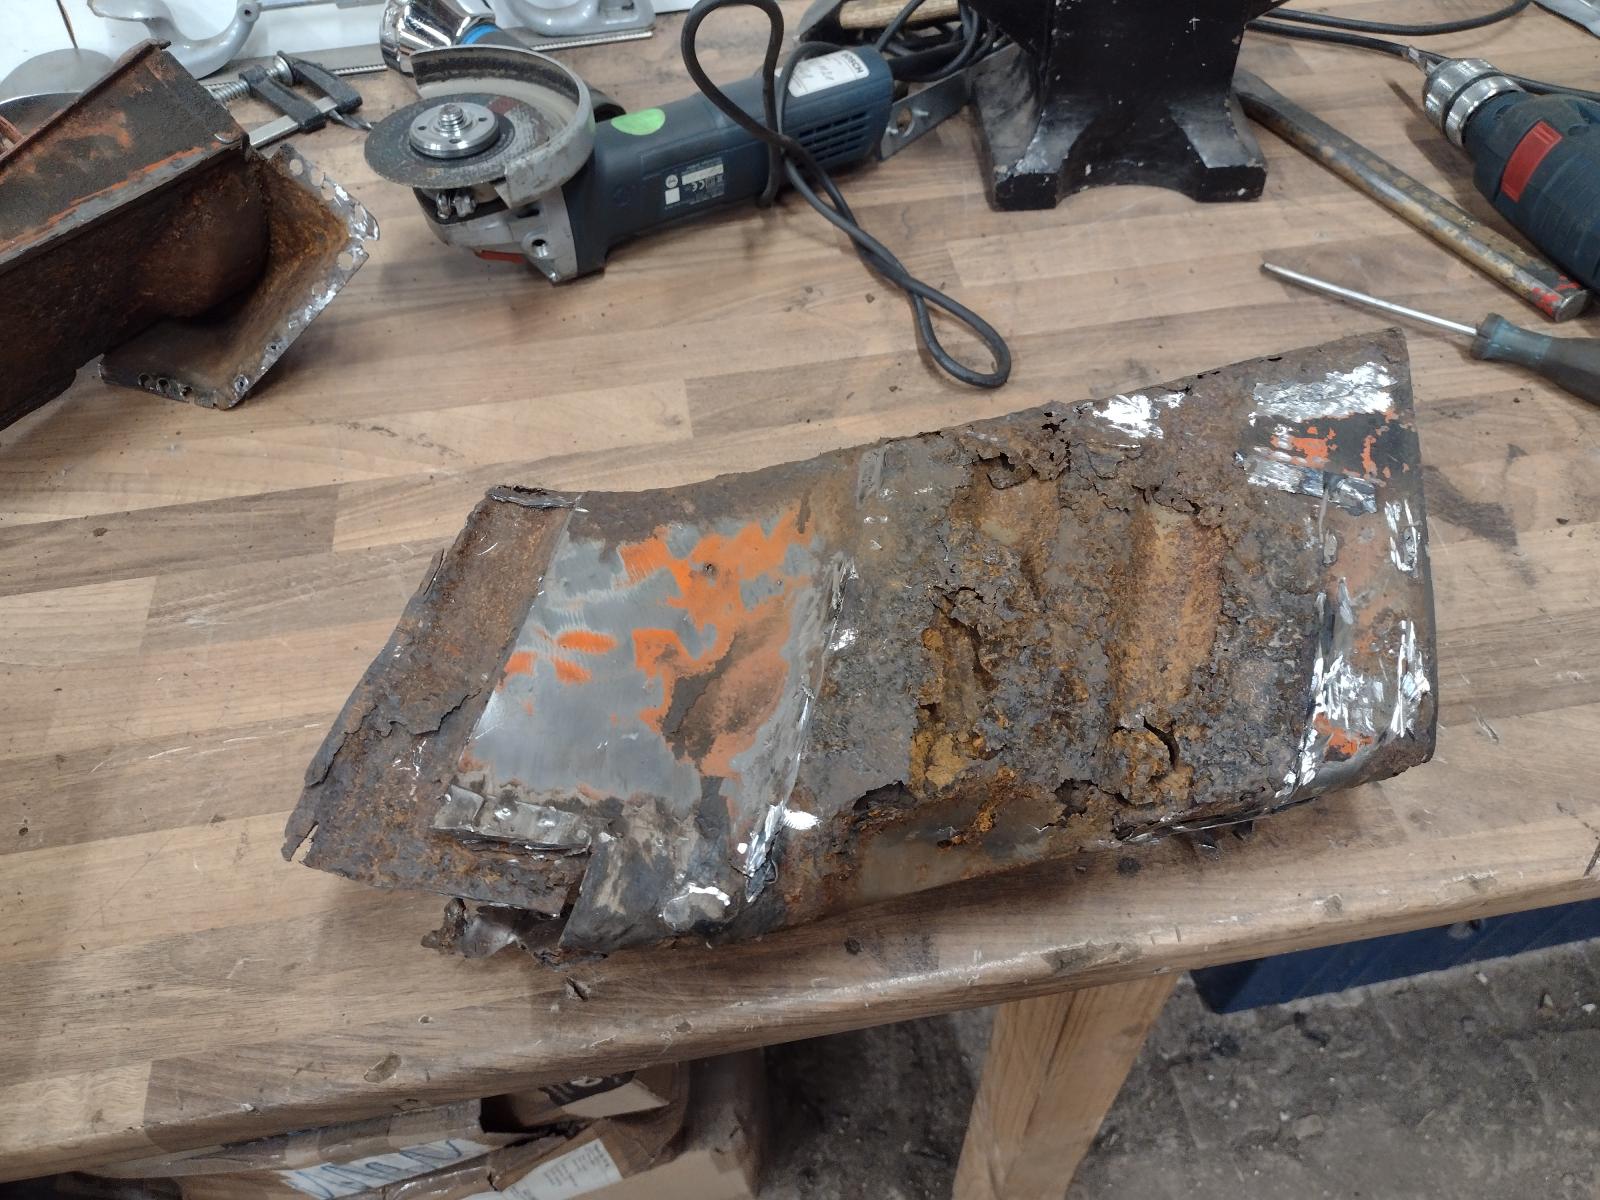
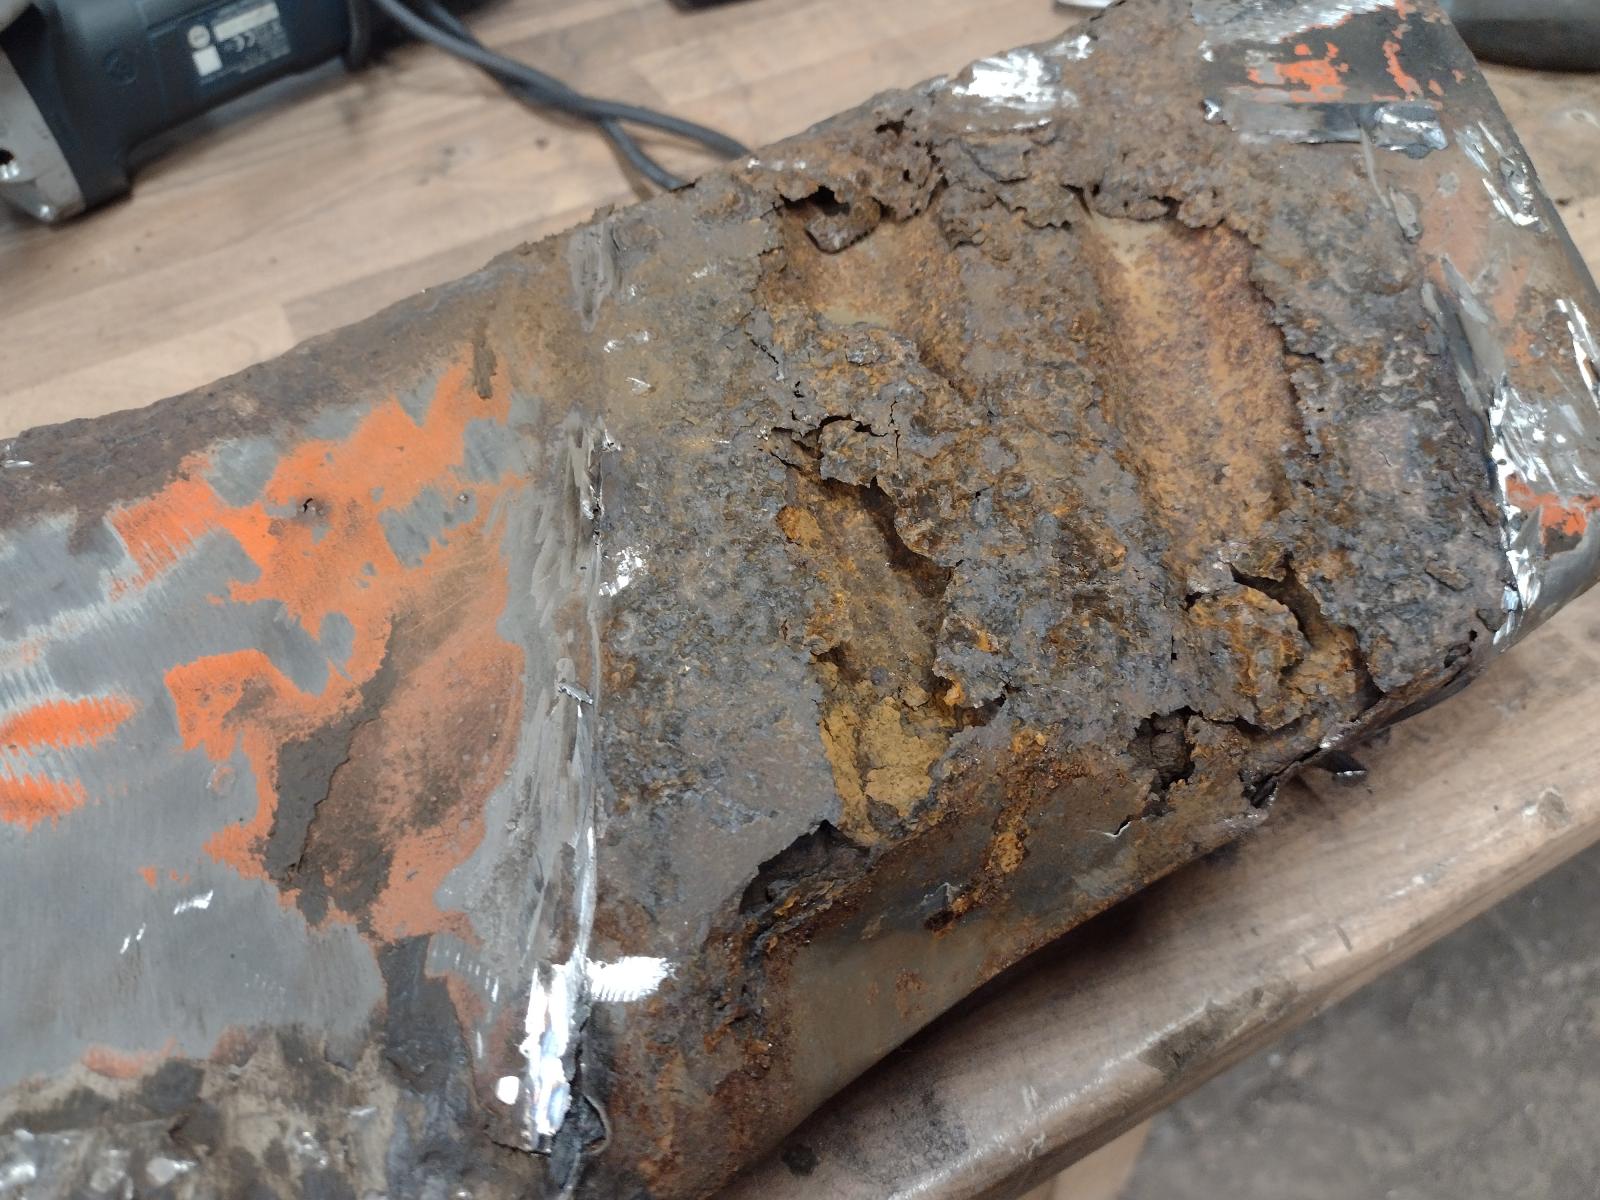
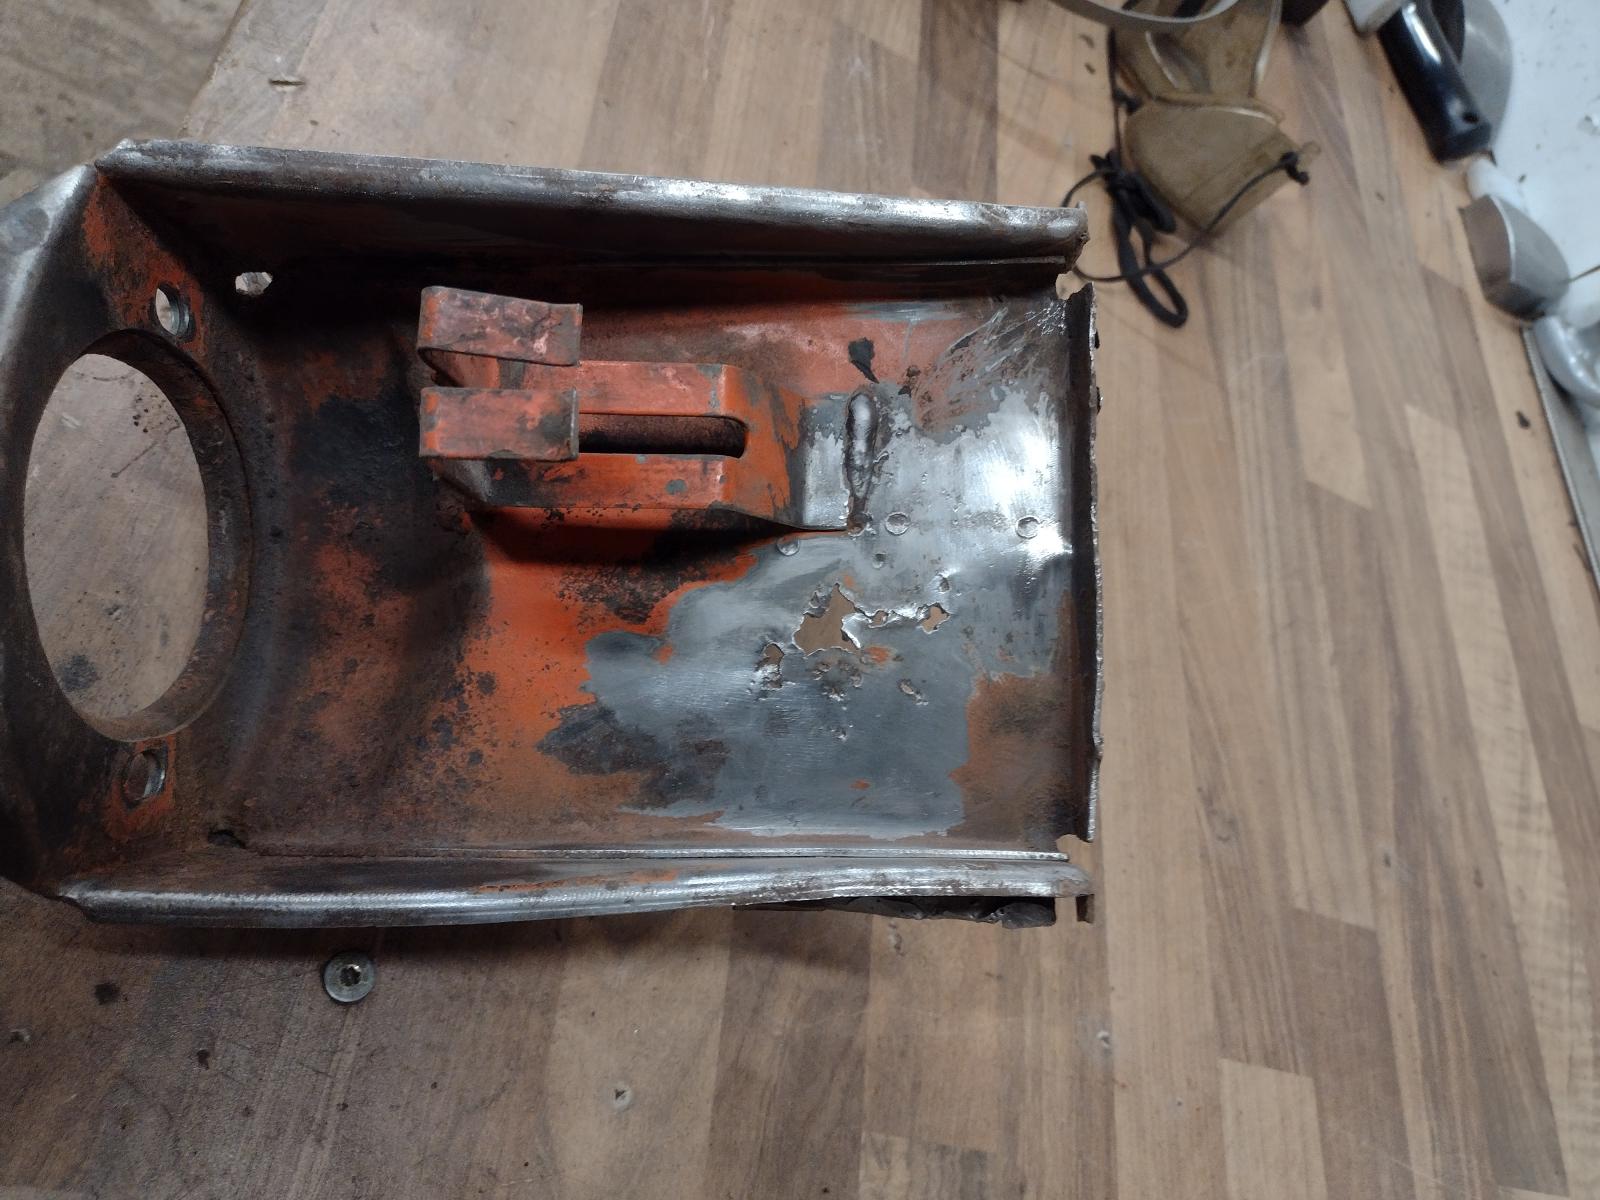
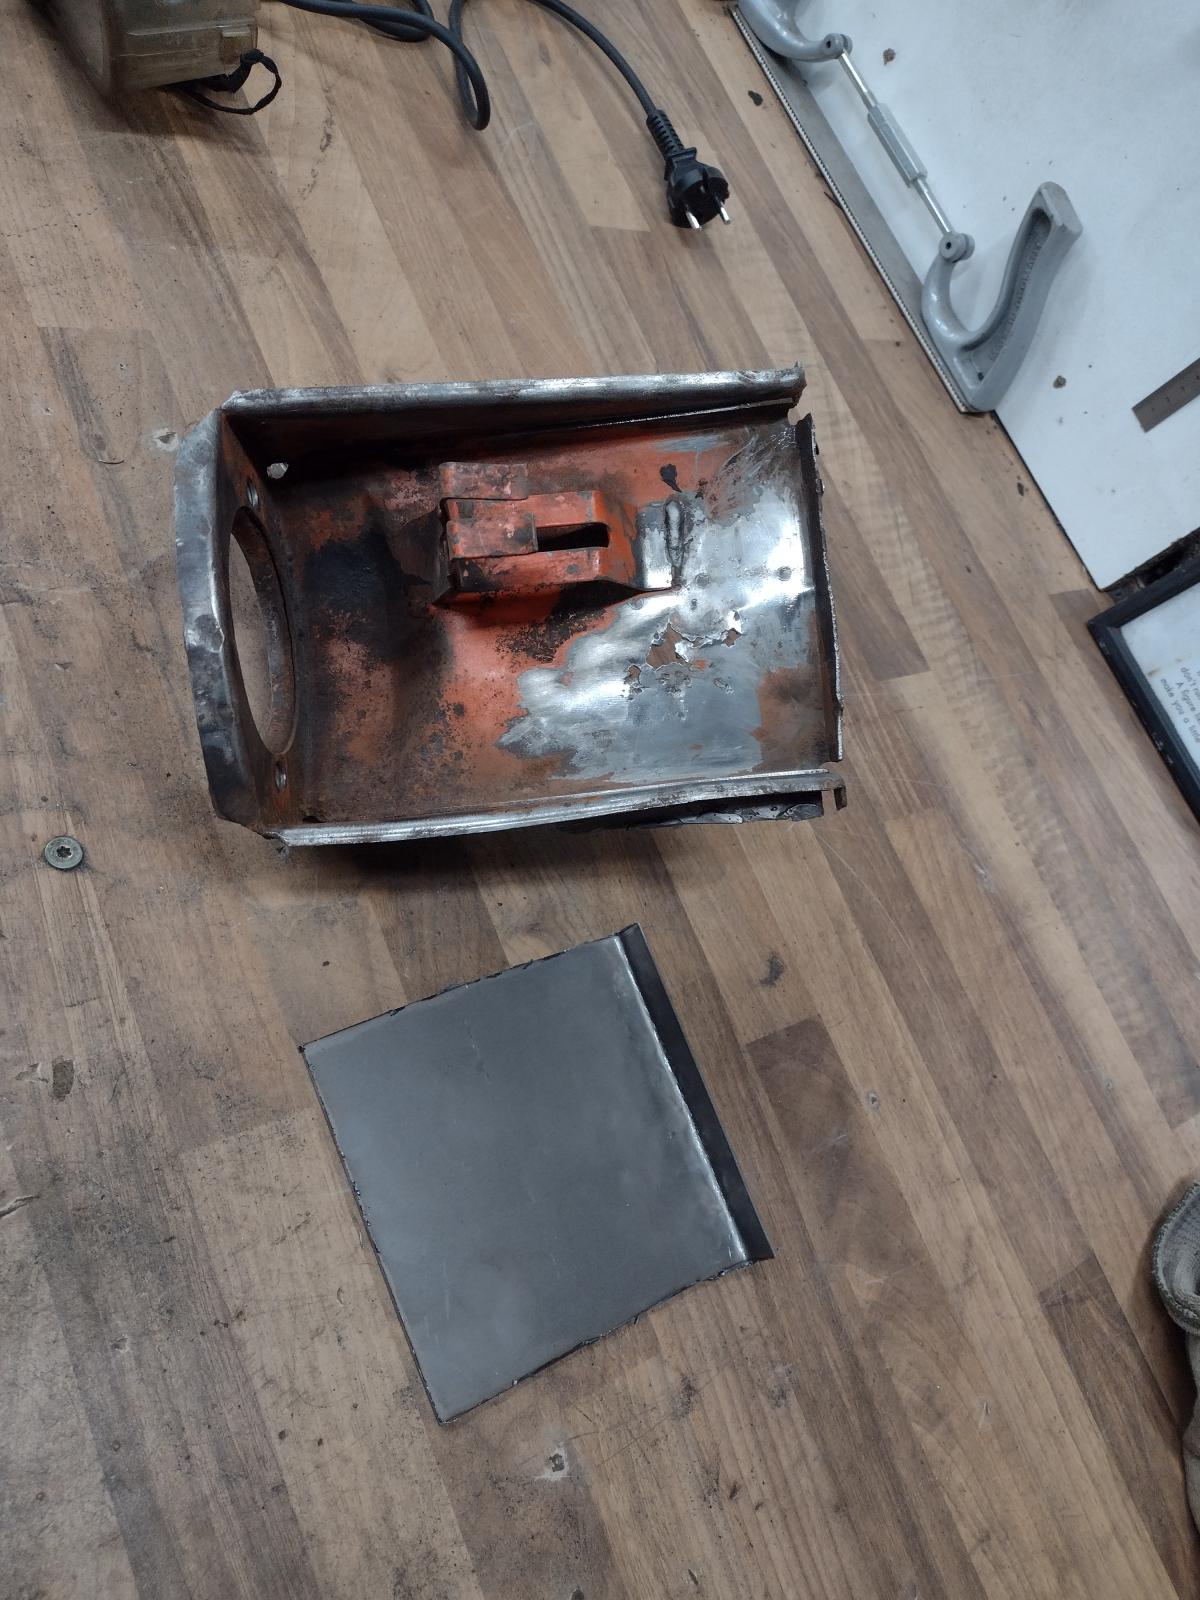
So, next on my list was the engine tray on the right..as your might remember it was not nice, so I removed it:

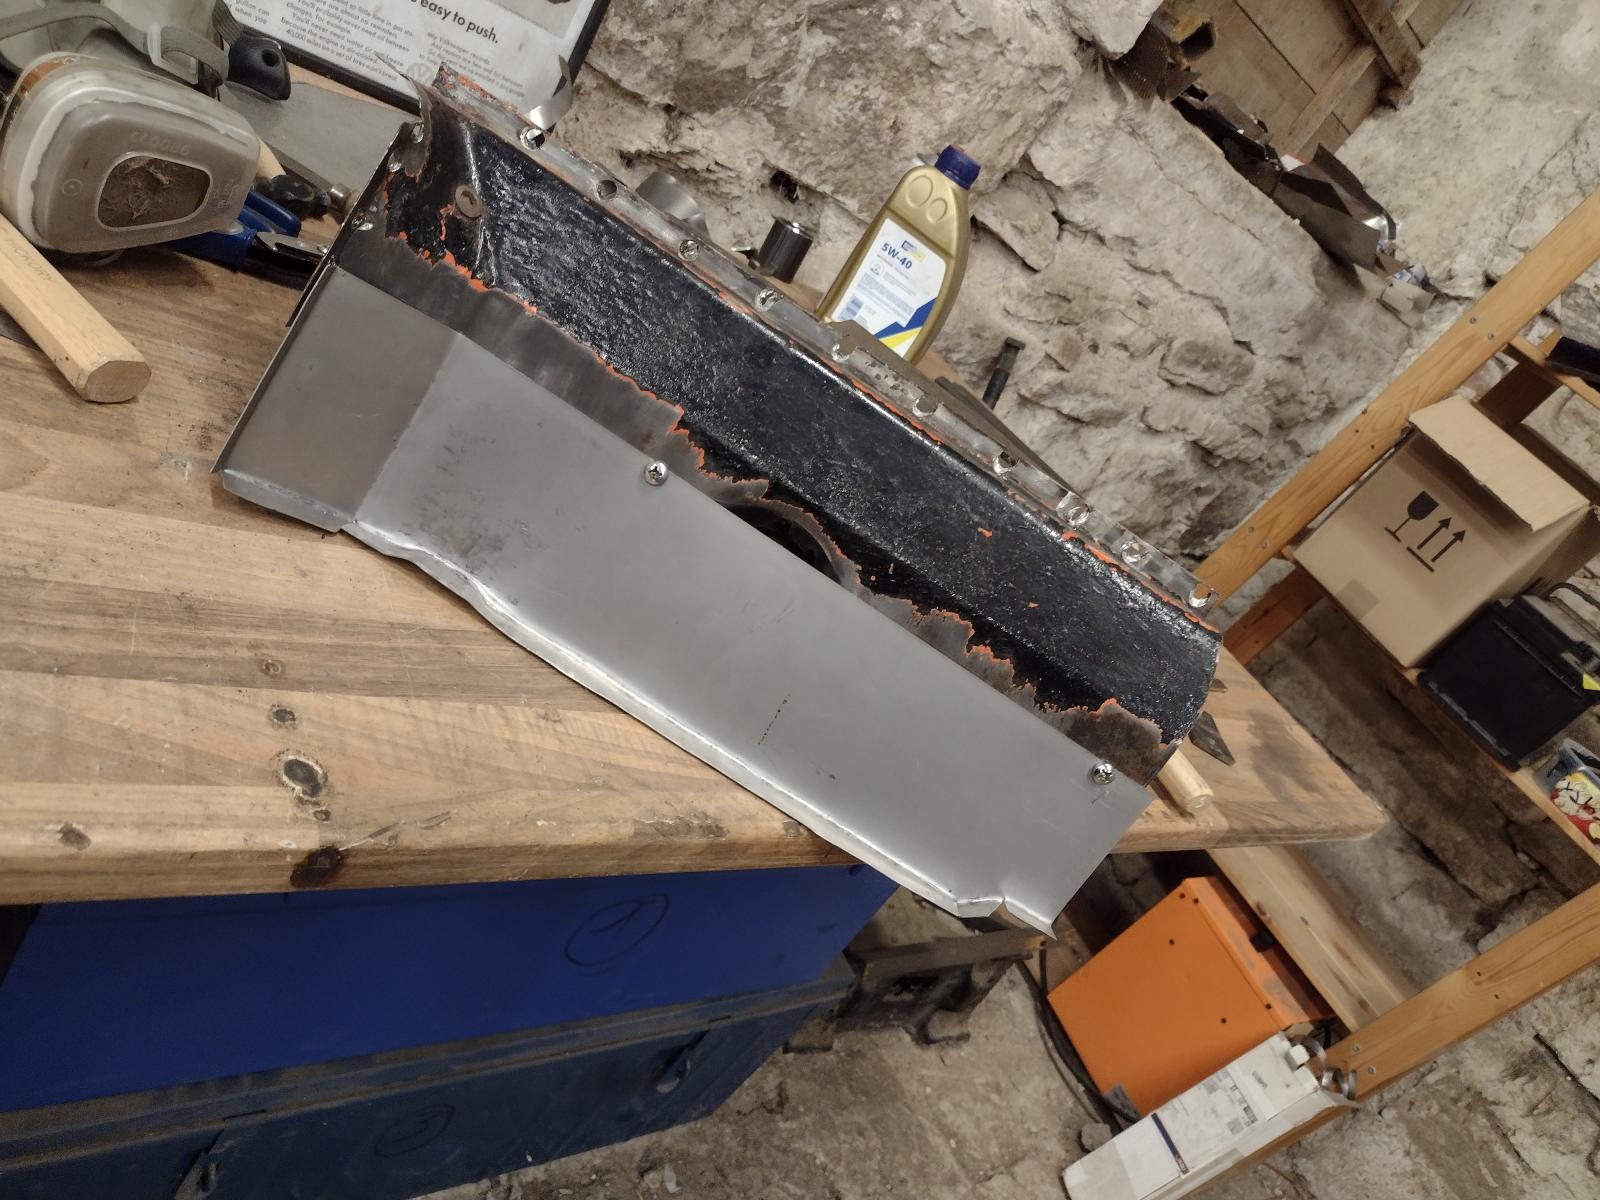
But it was even worse than I thought:
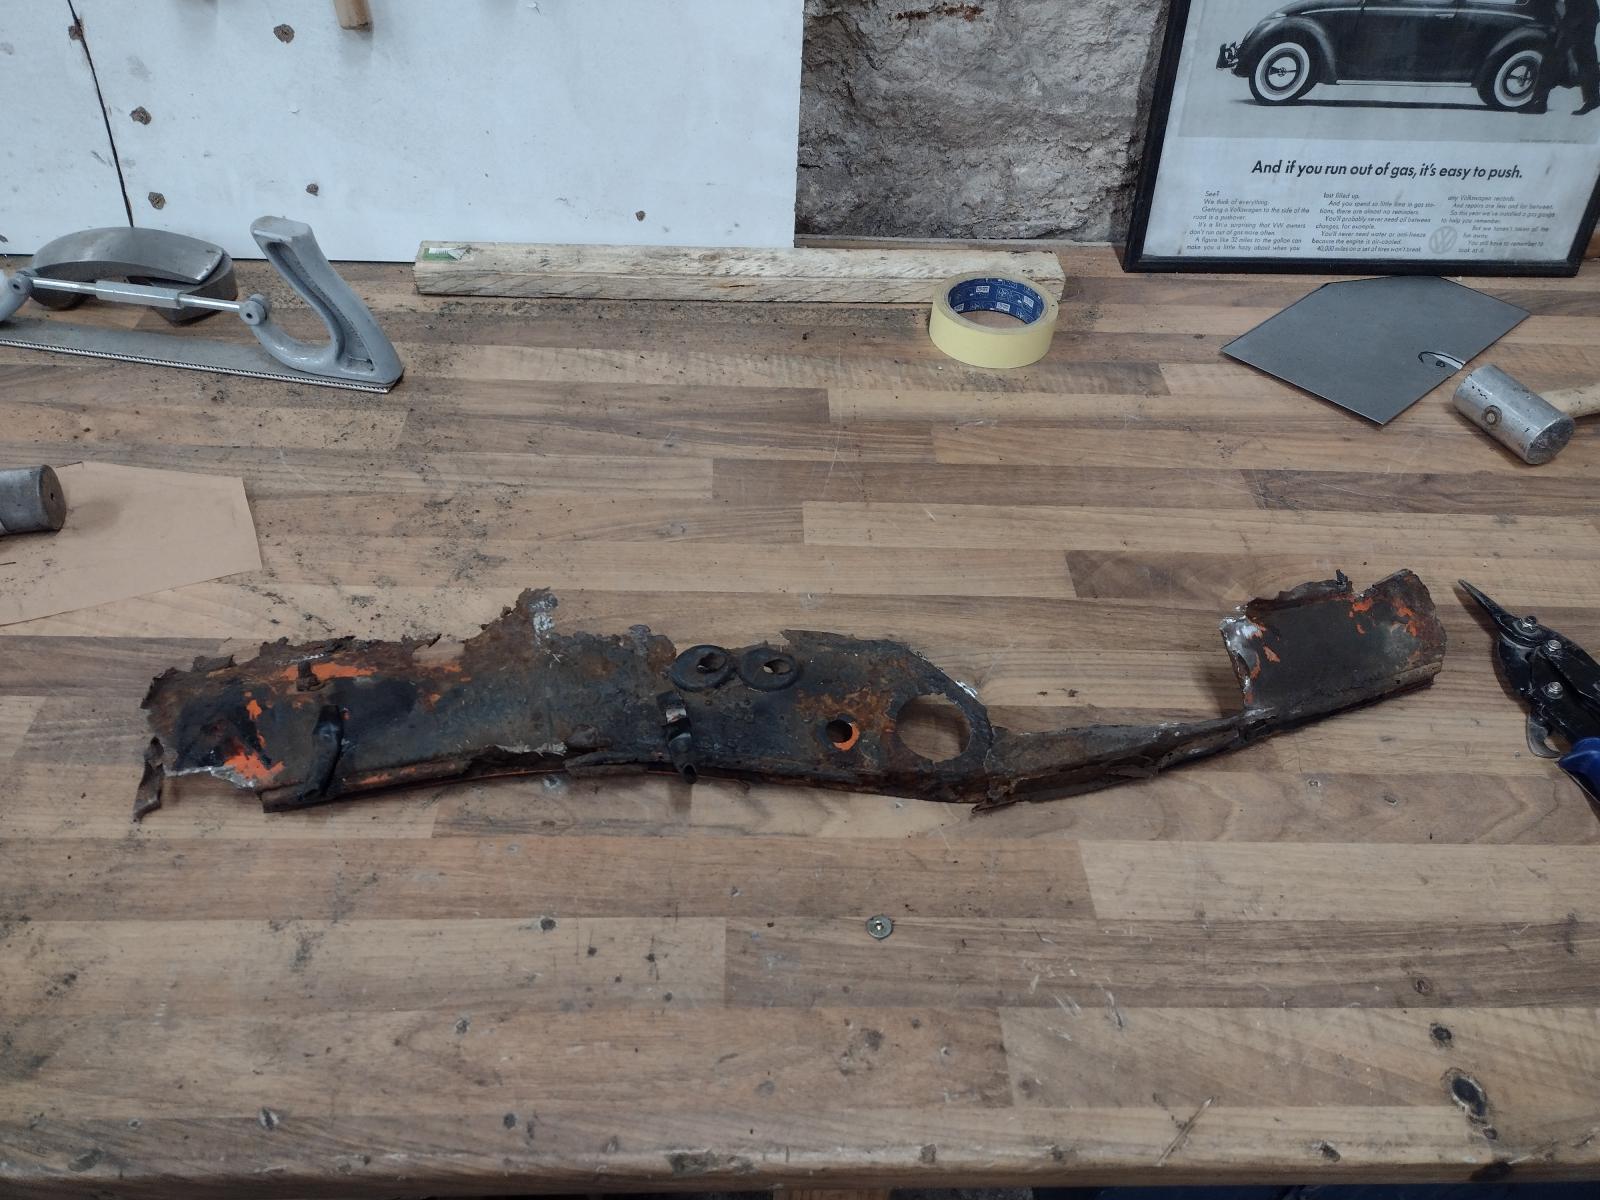
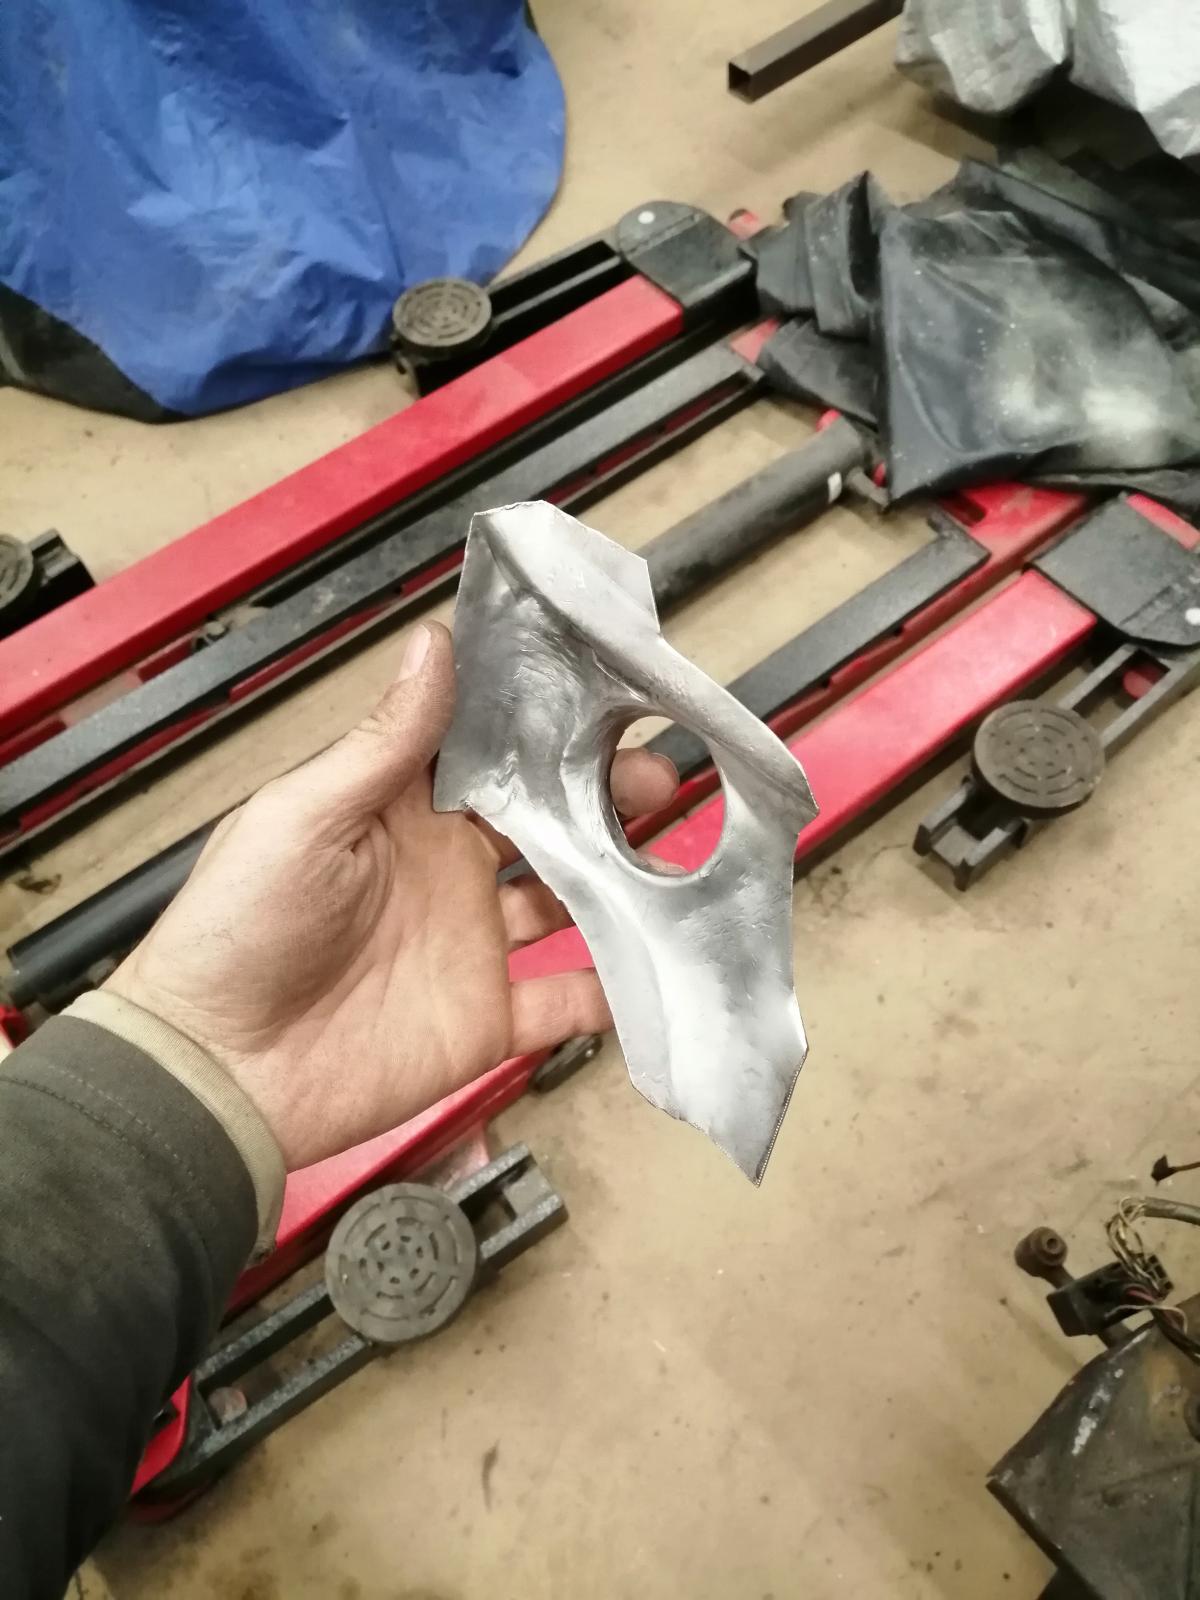
Almost not enough to use as a template!
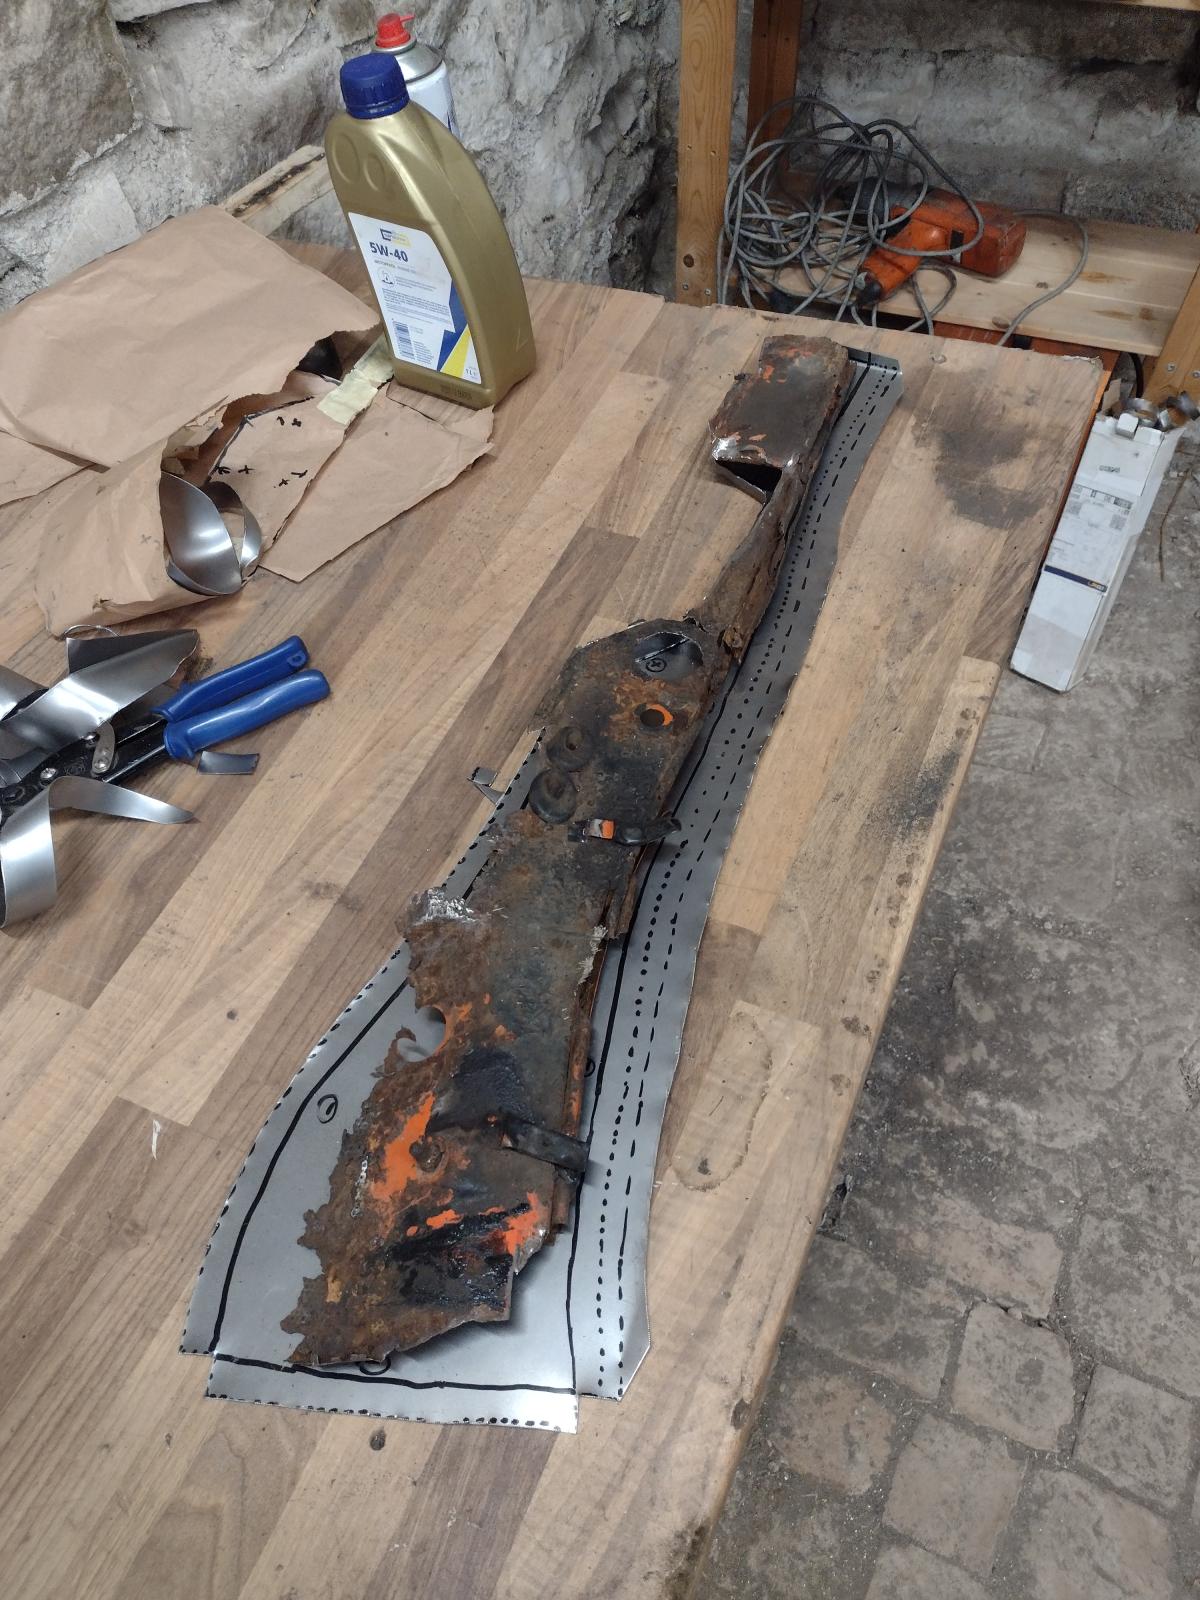
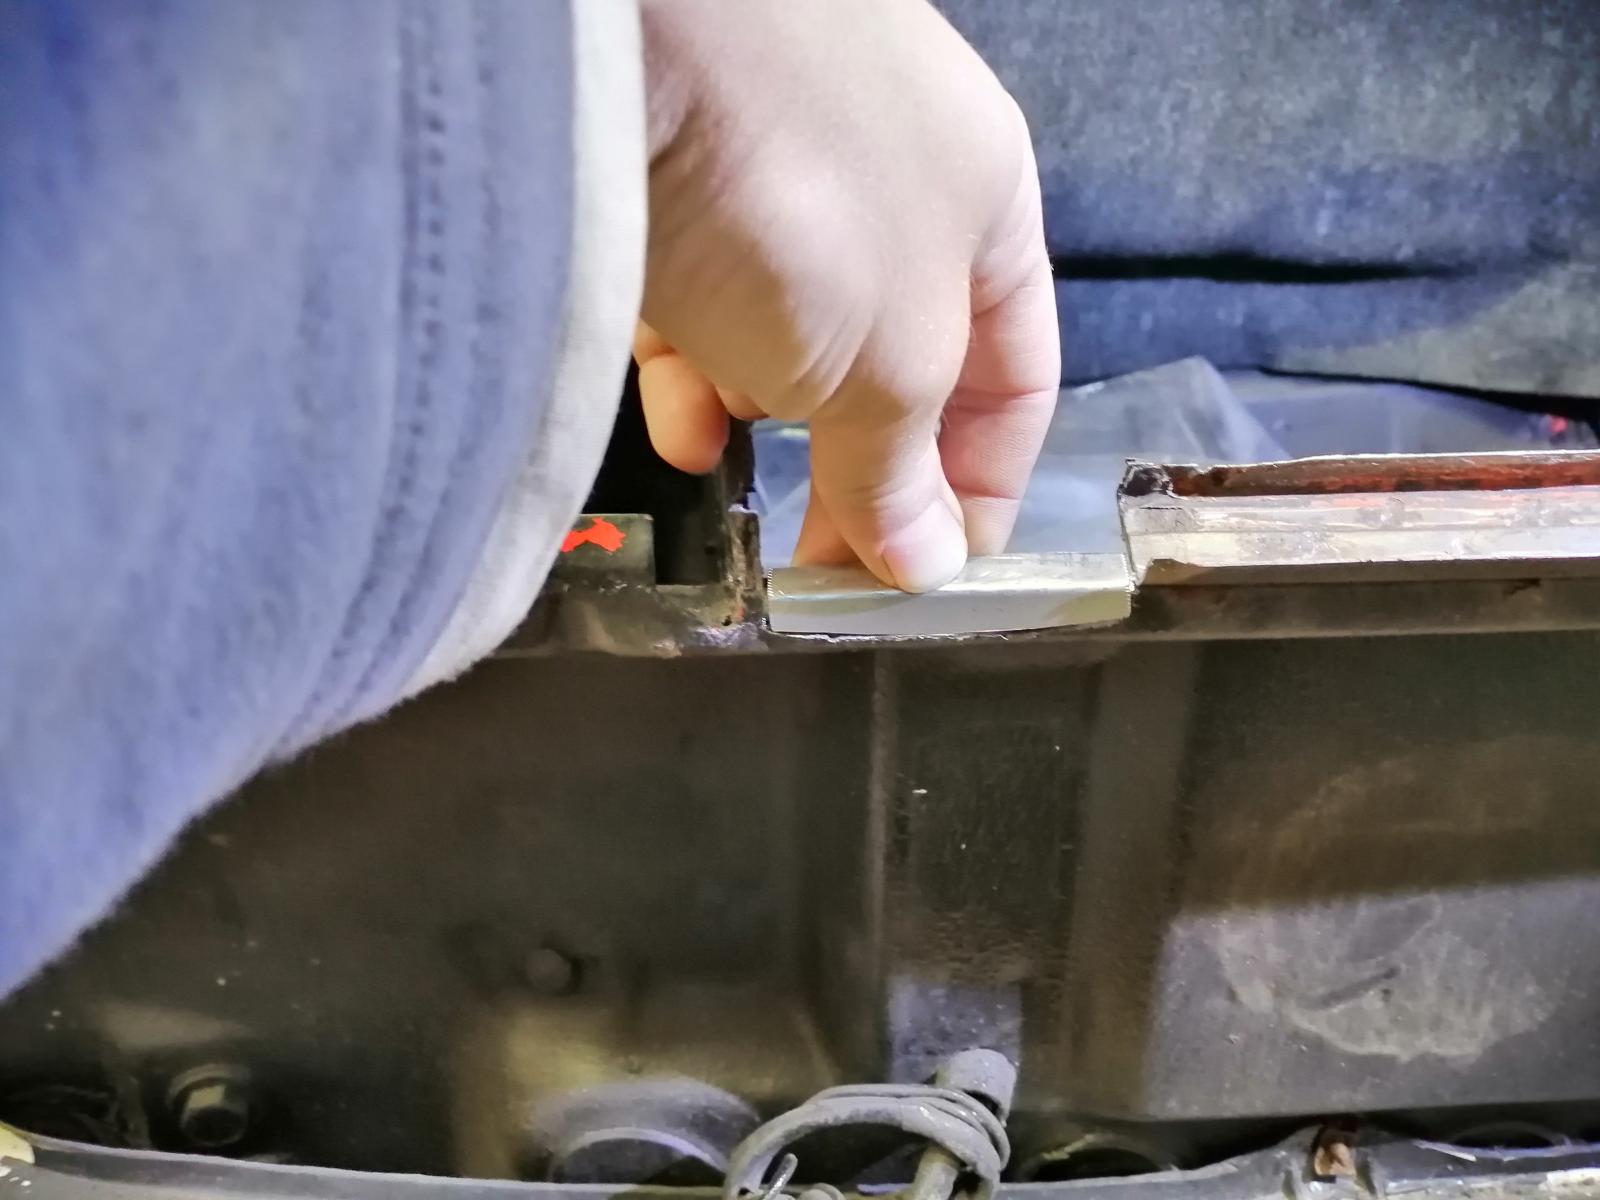
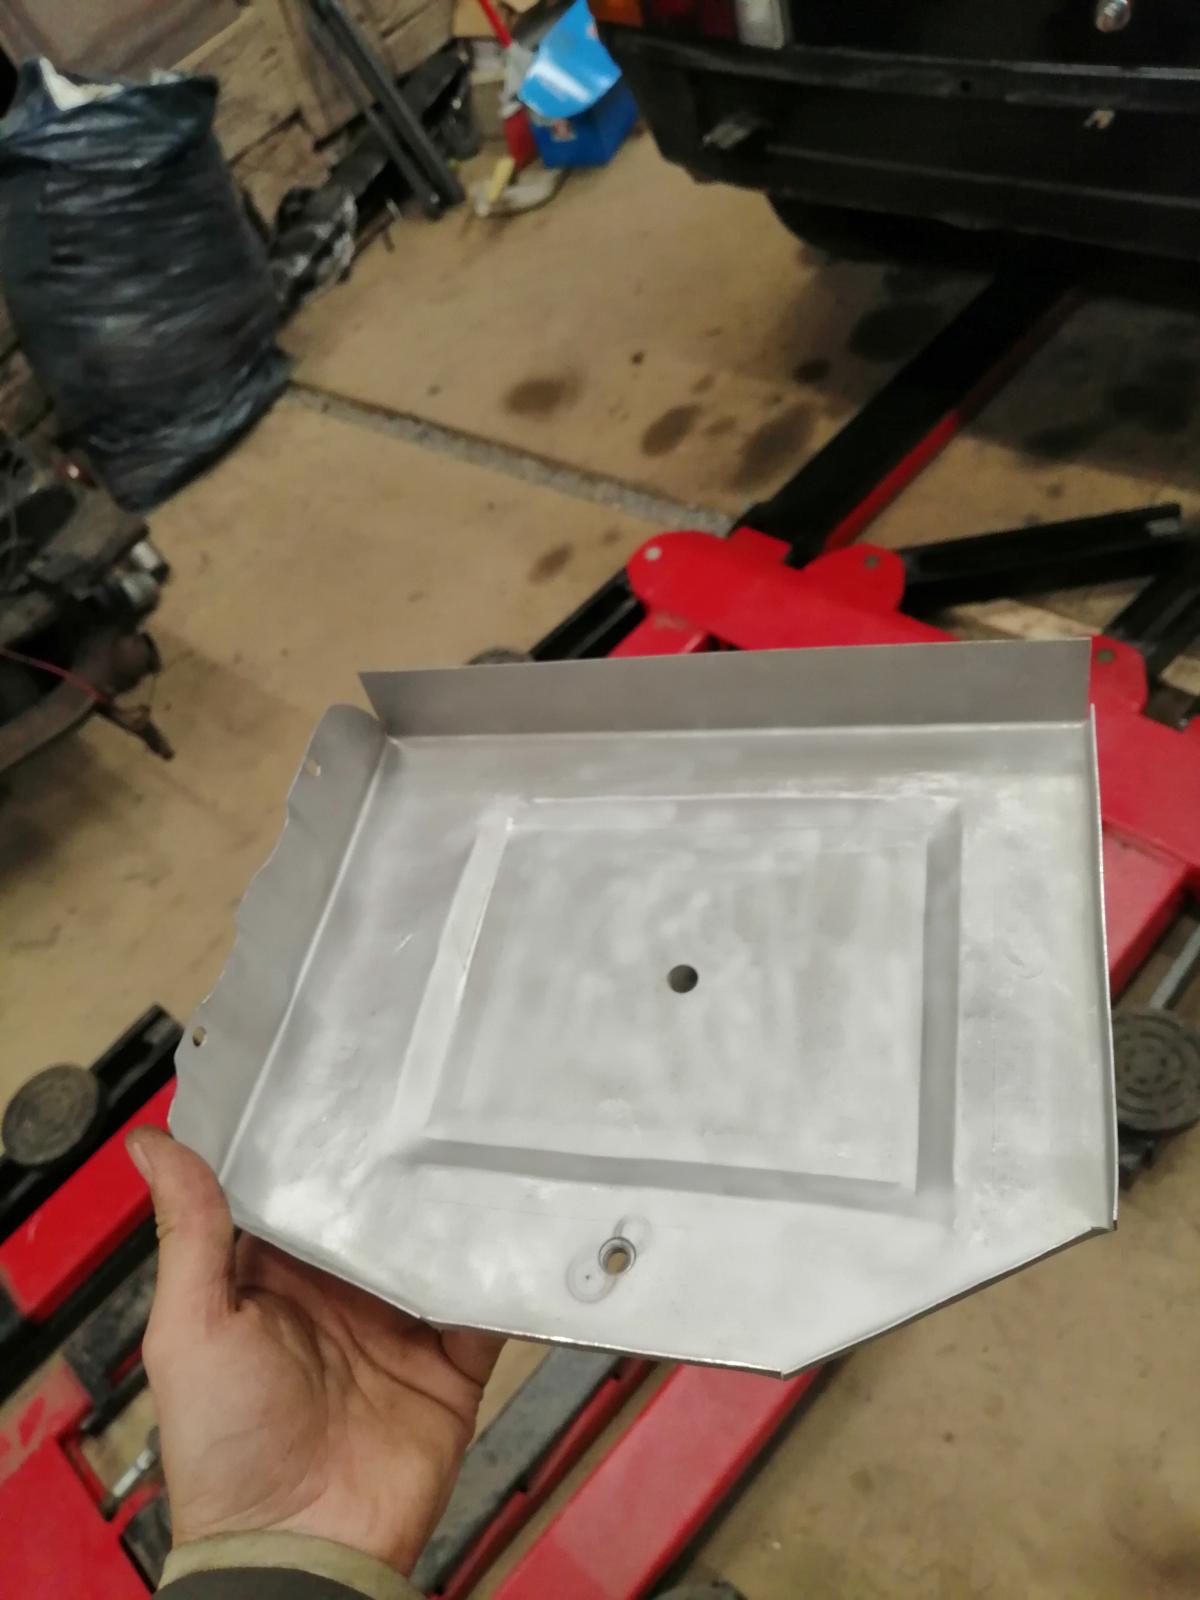
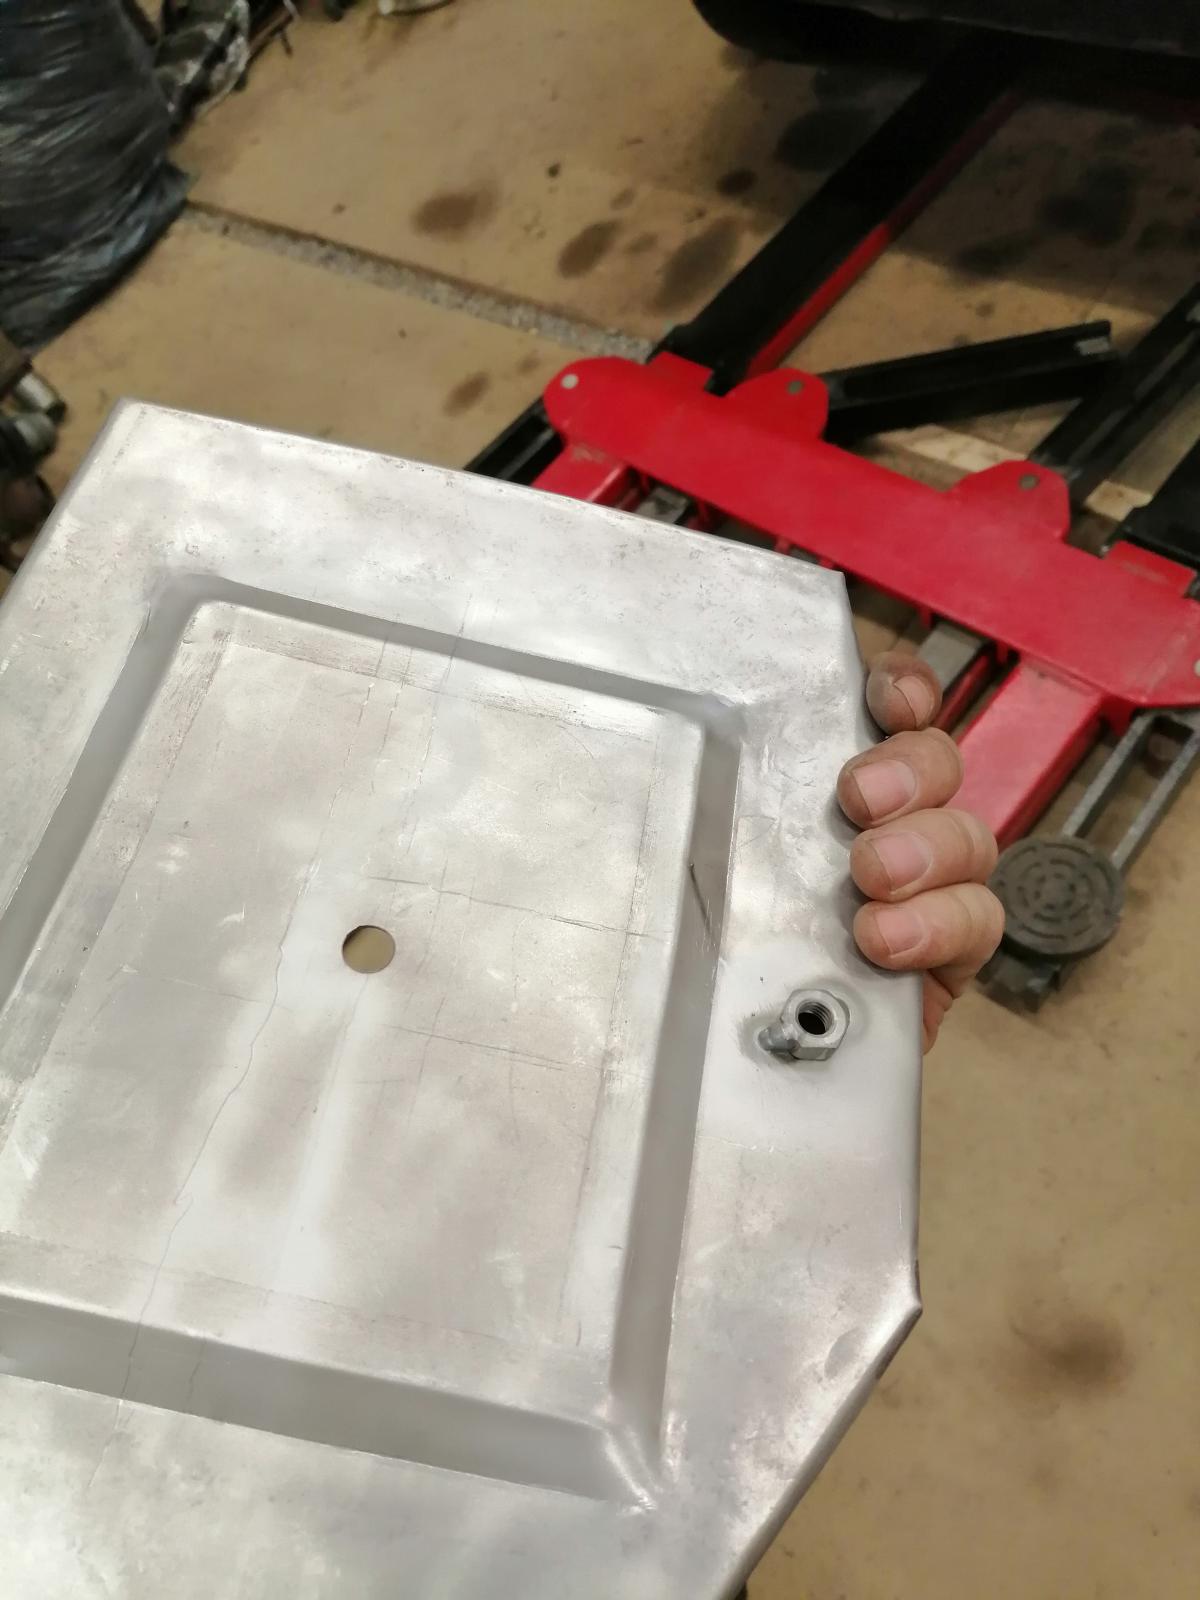
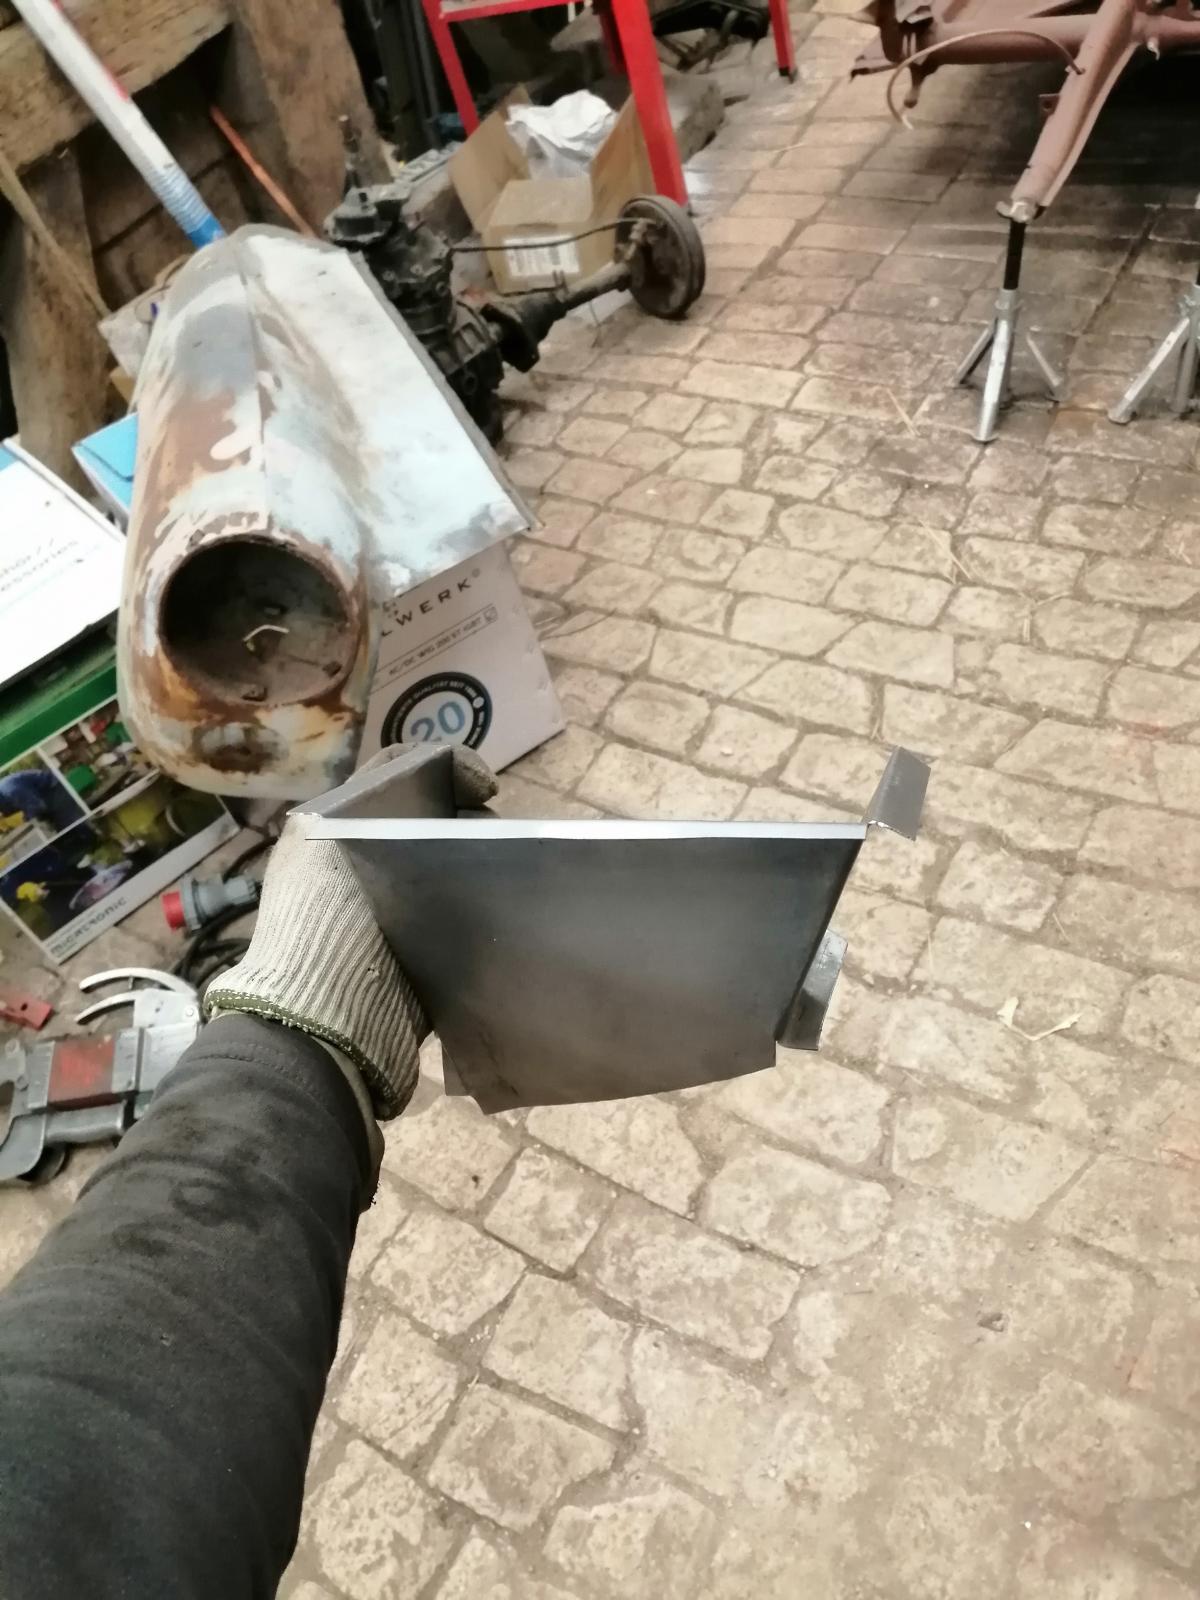
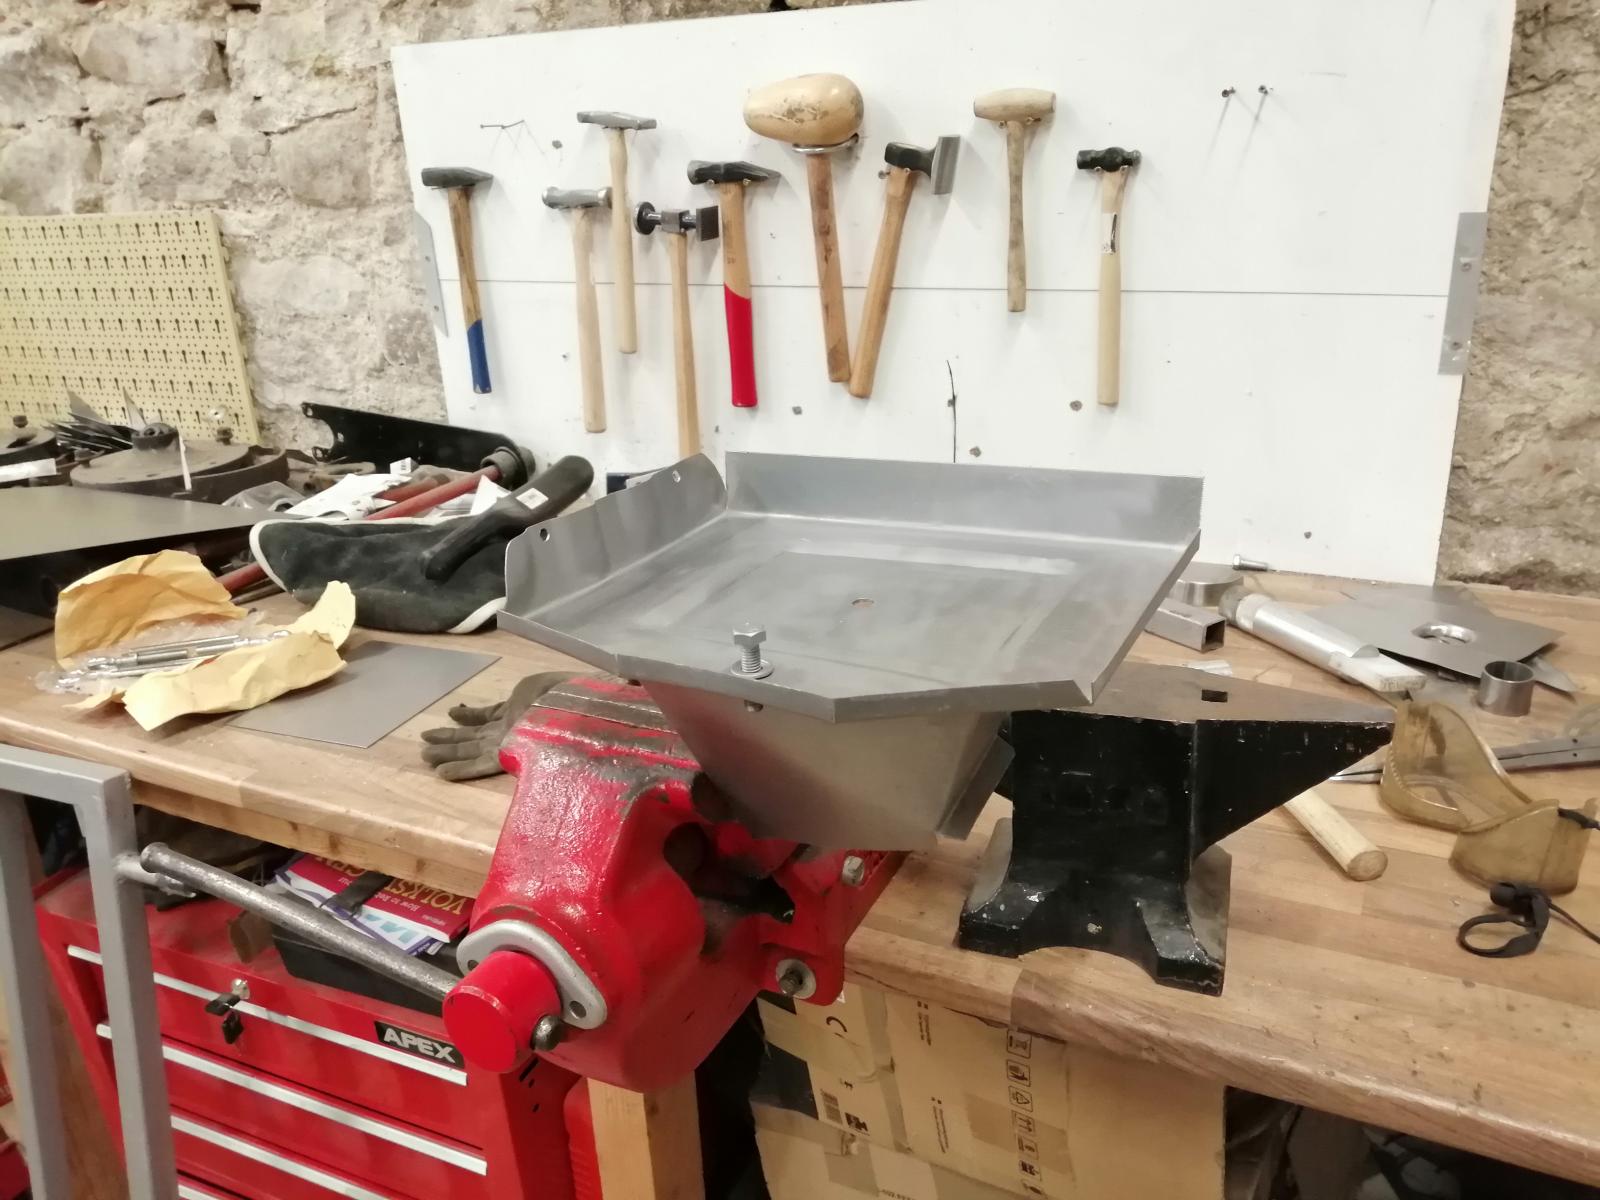
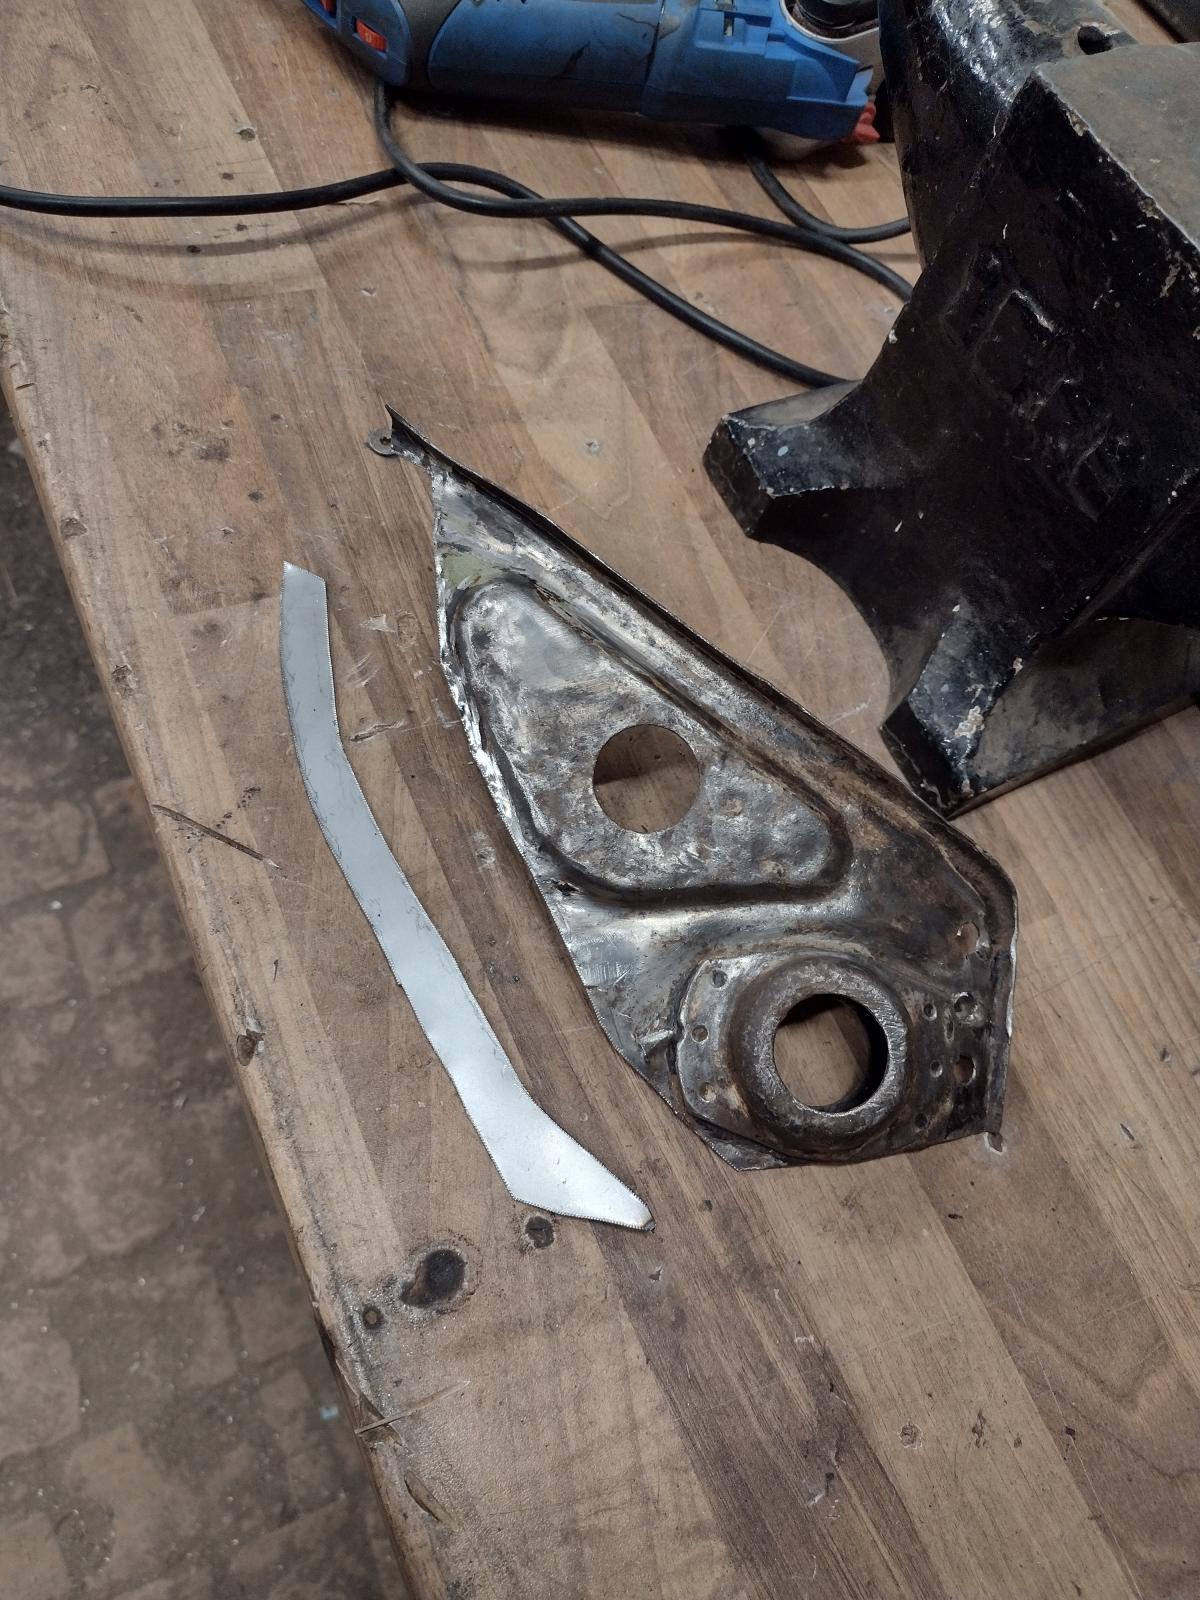
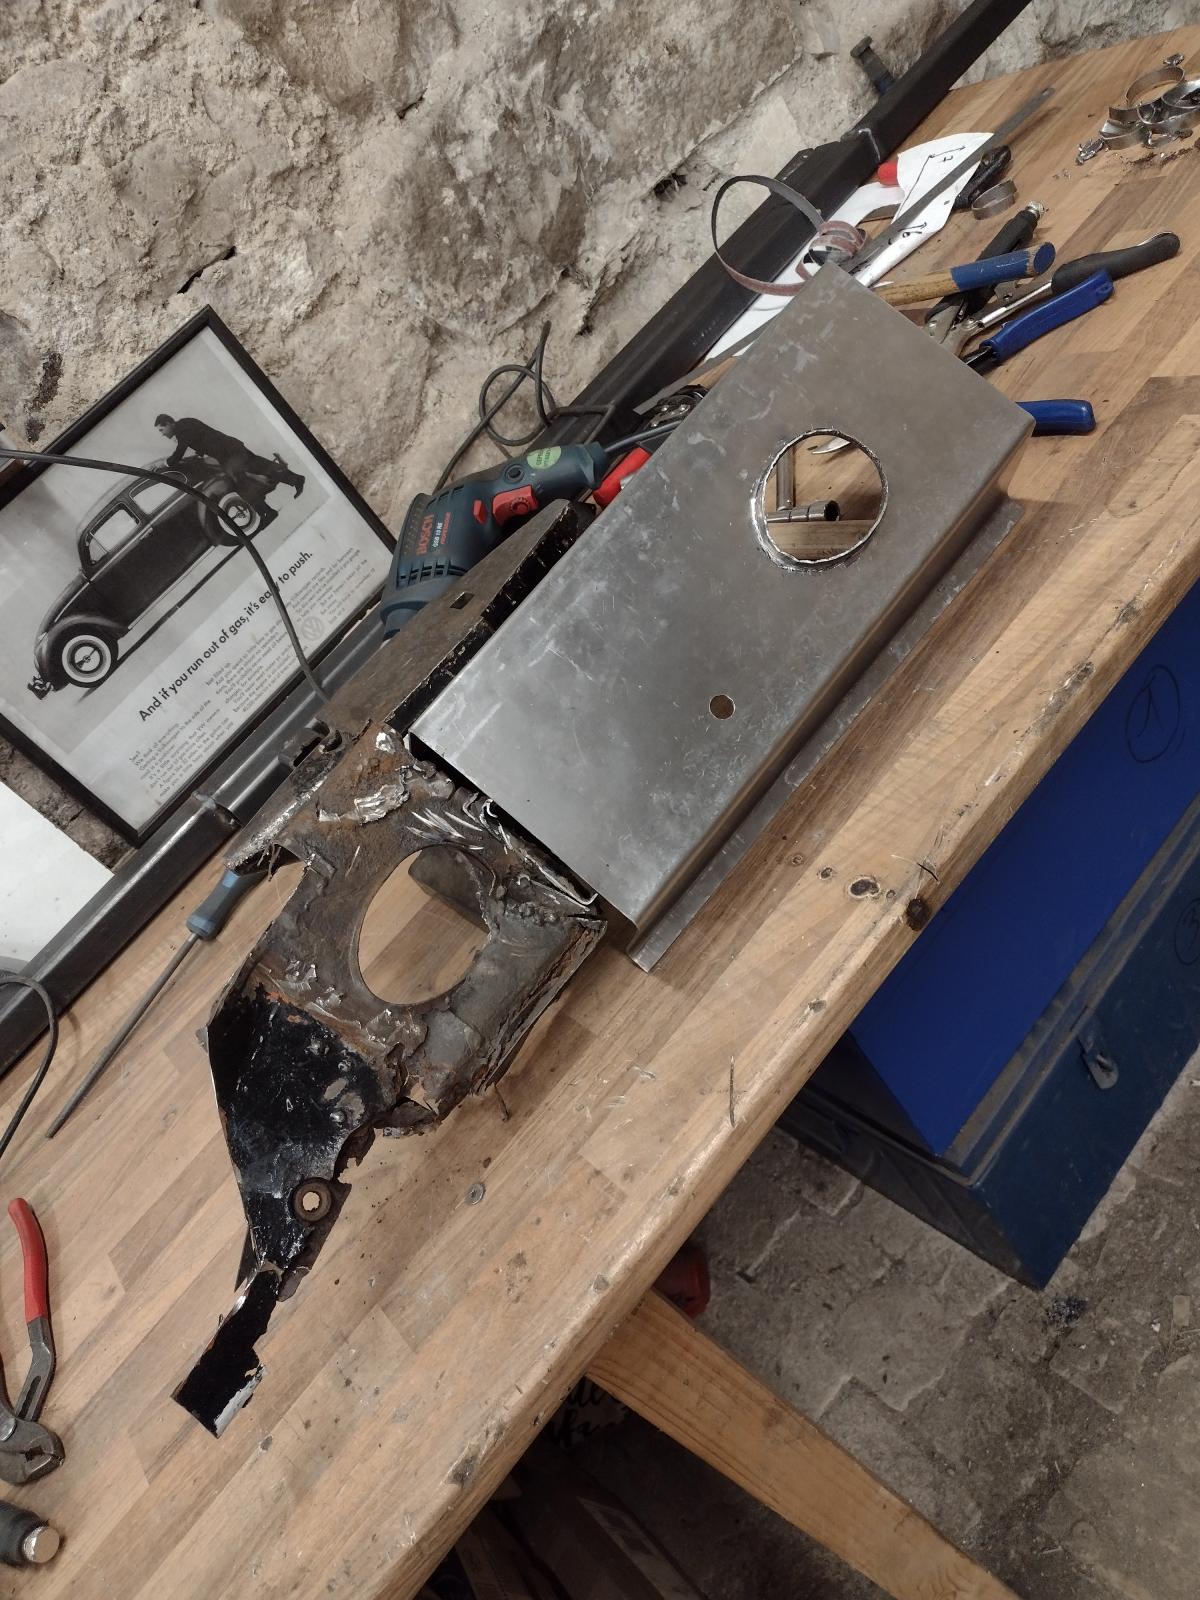
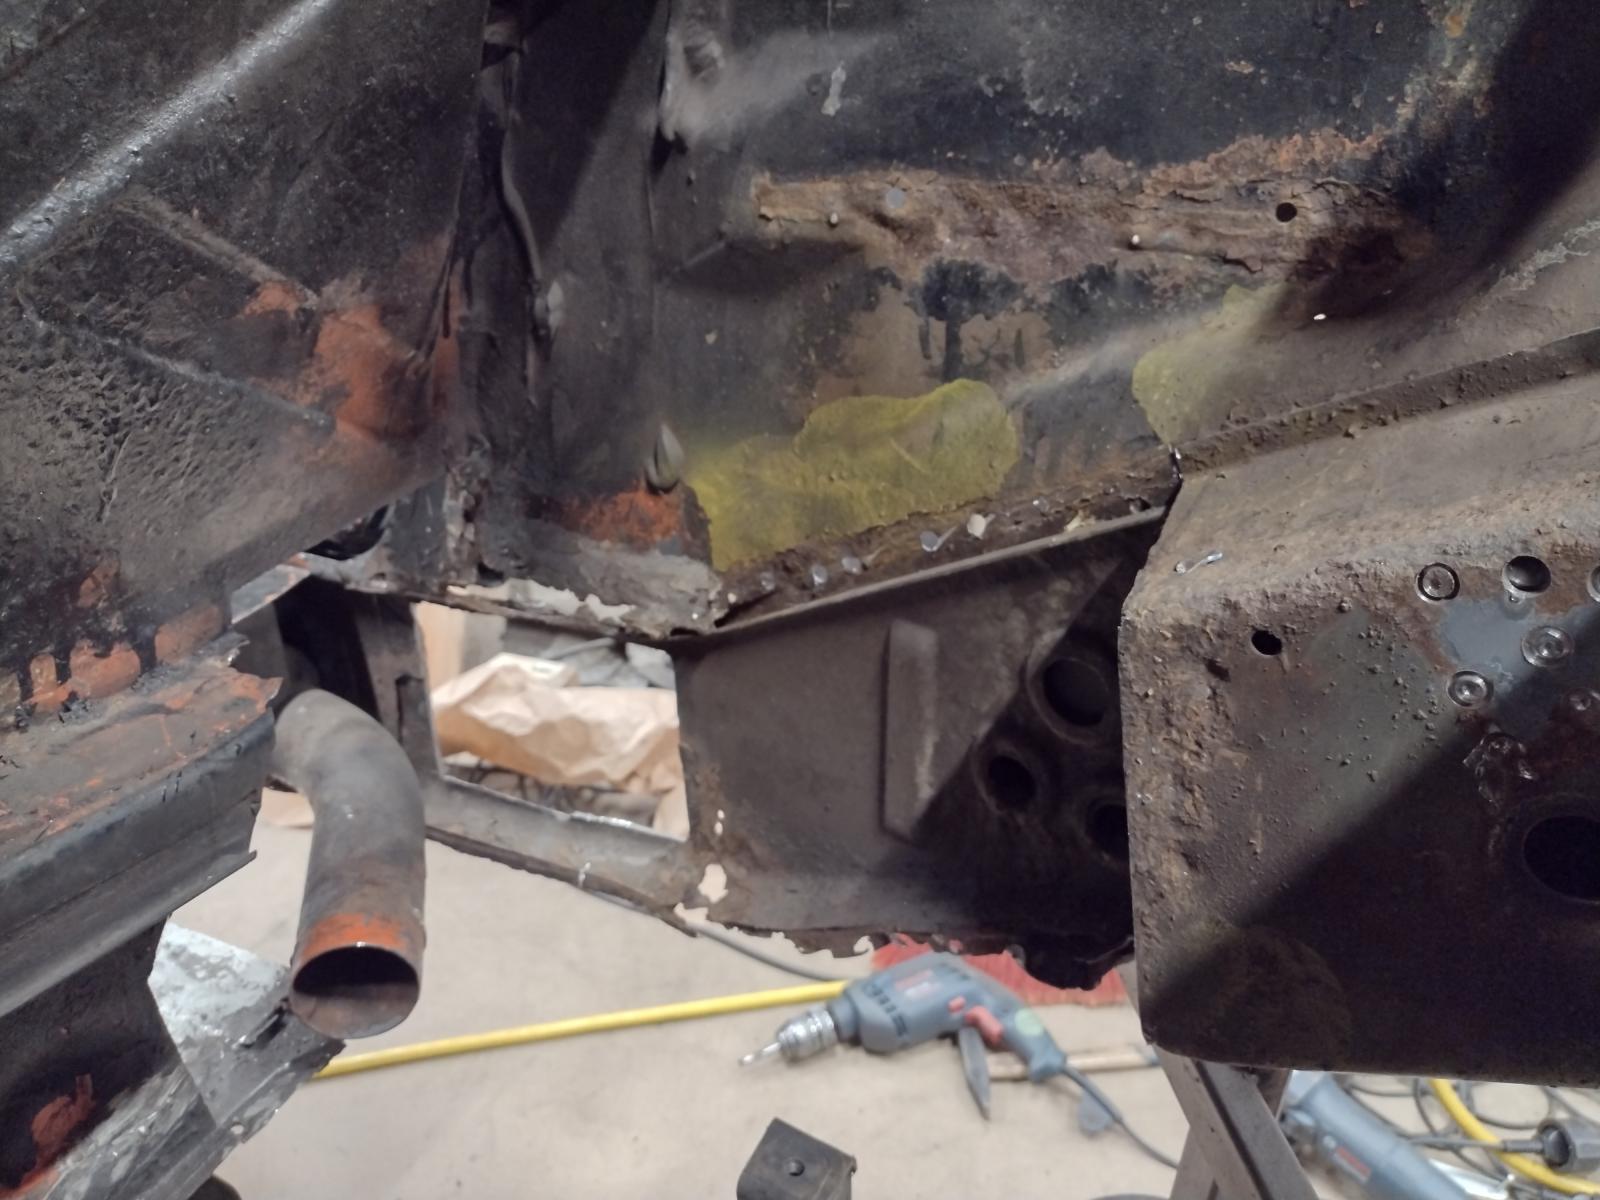
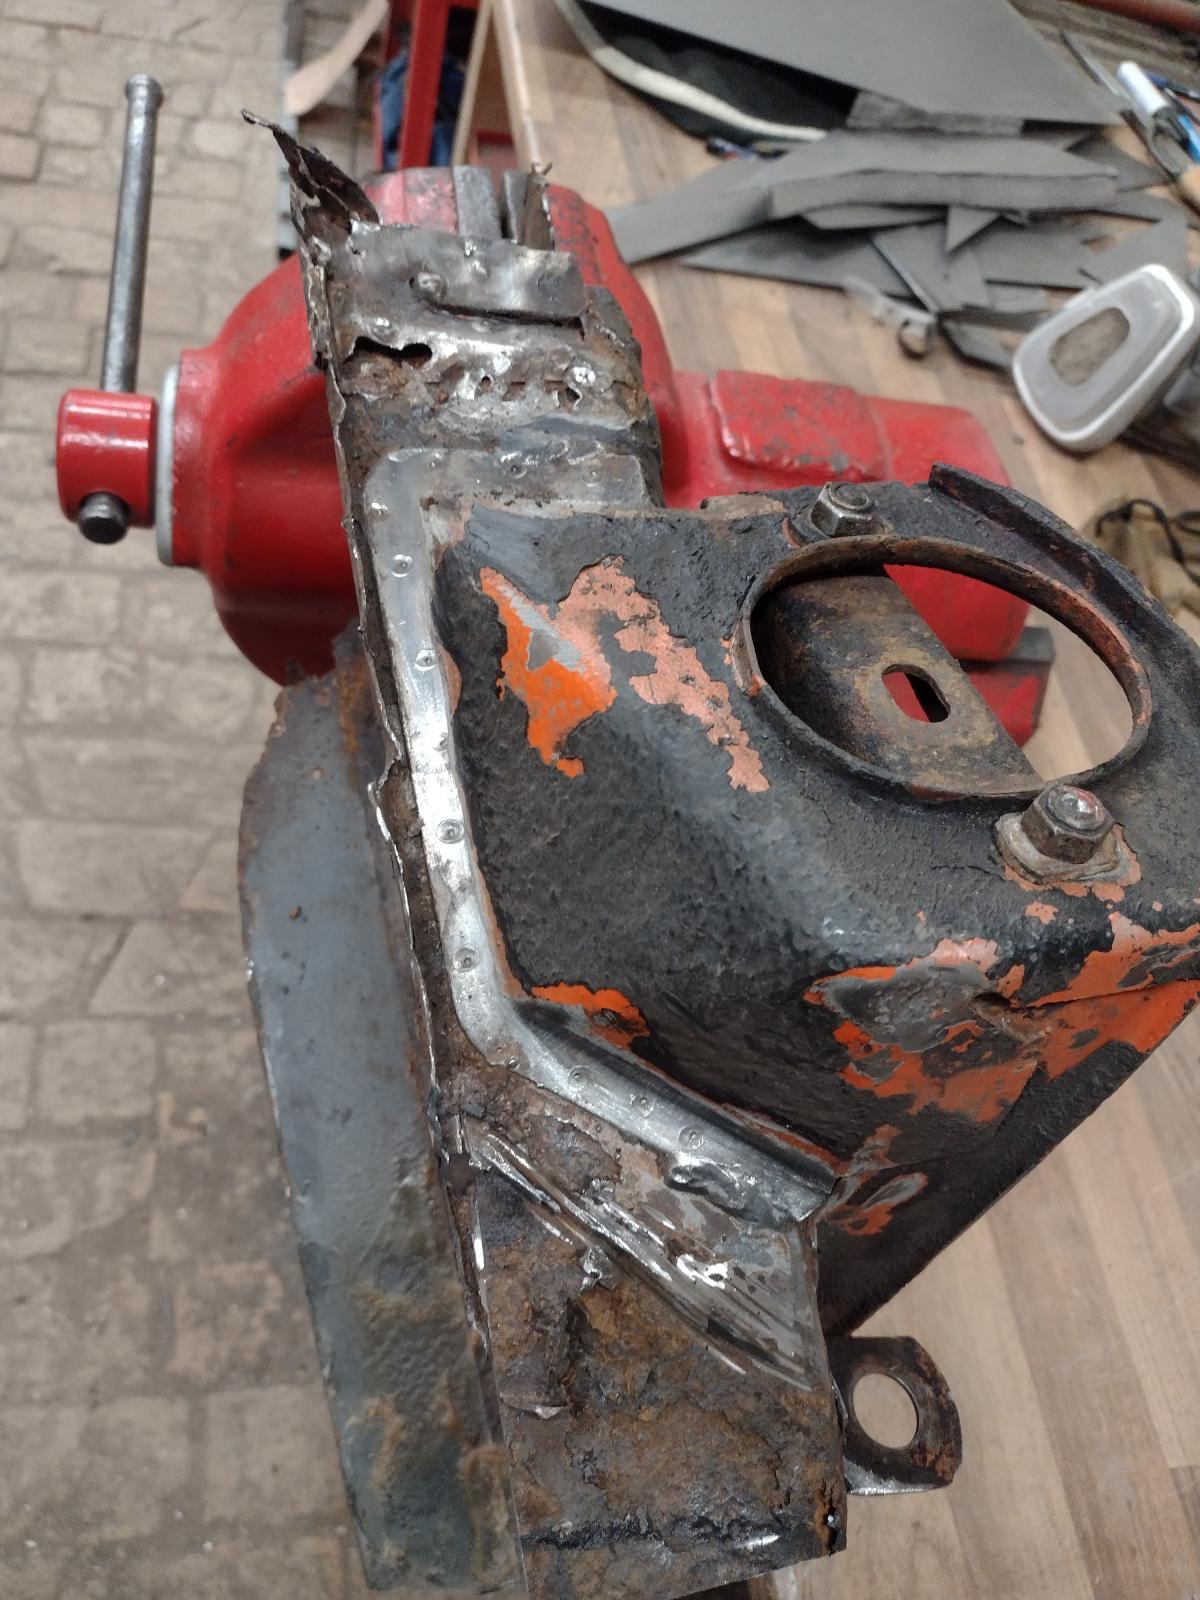
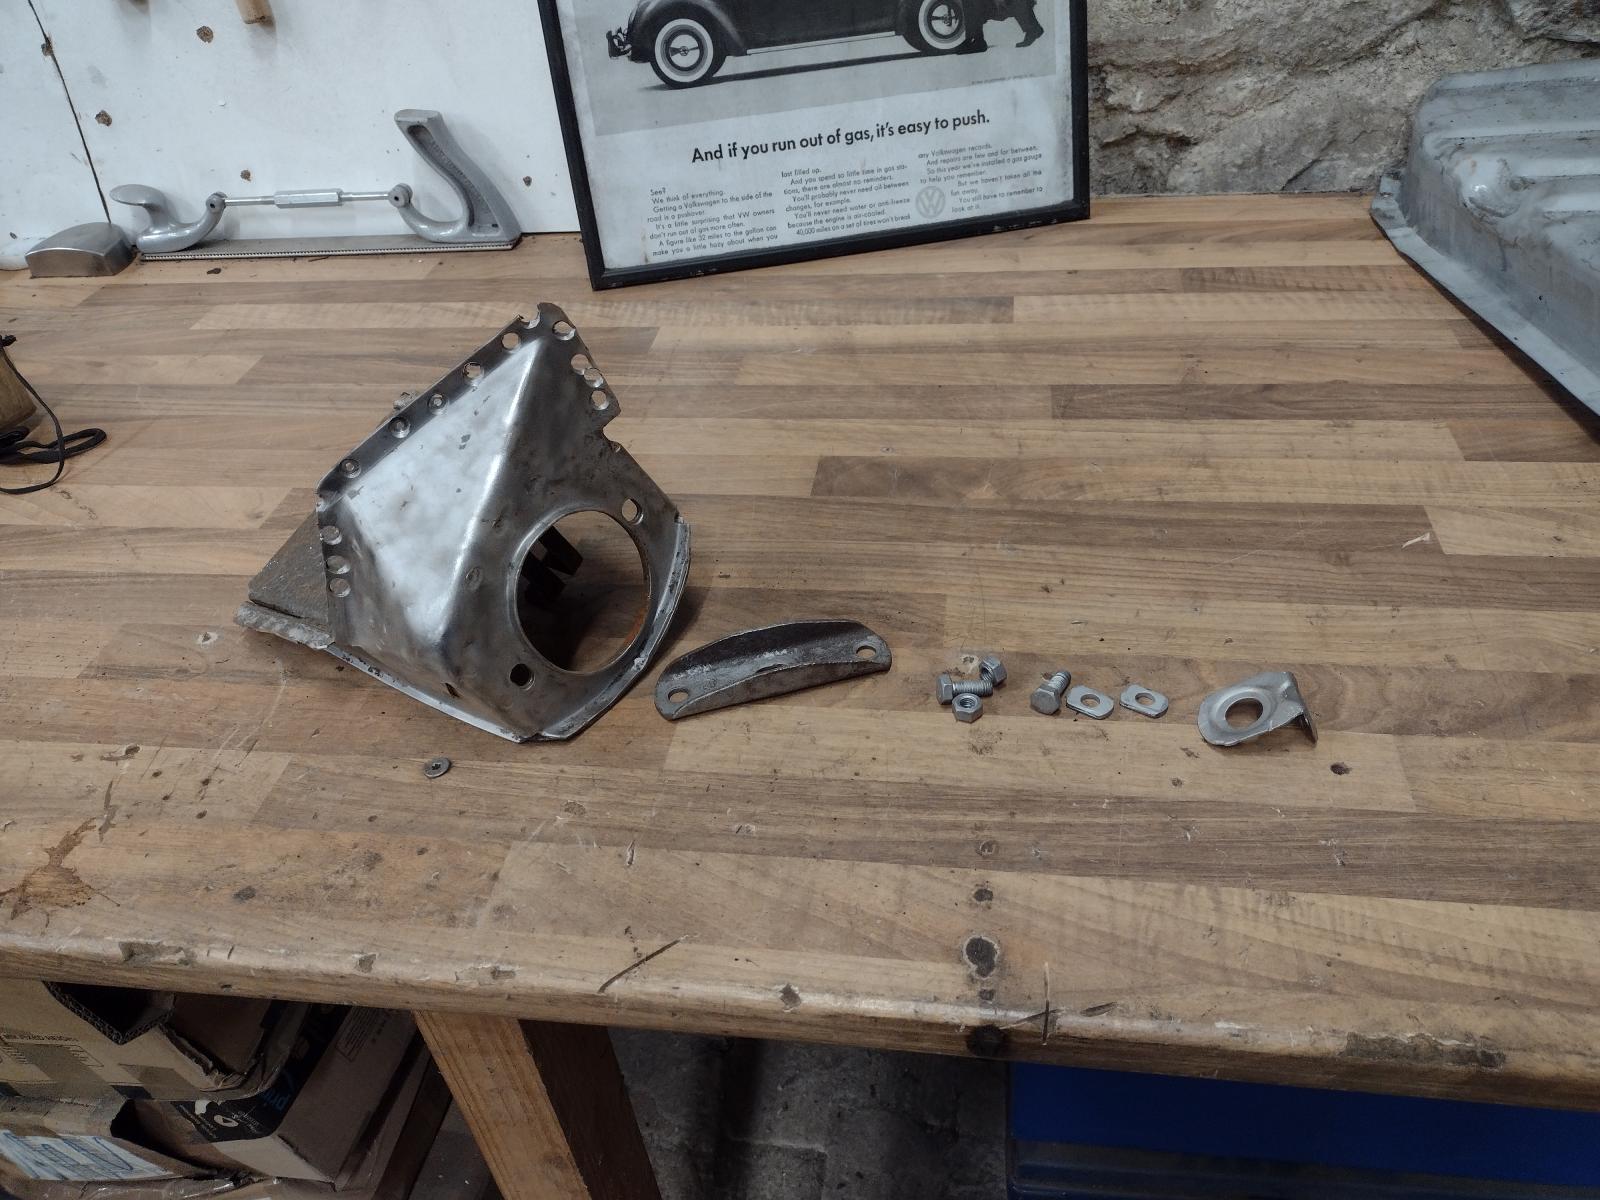
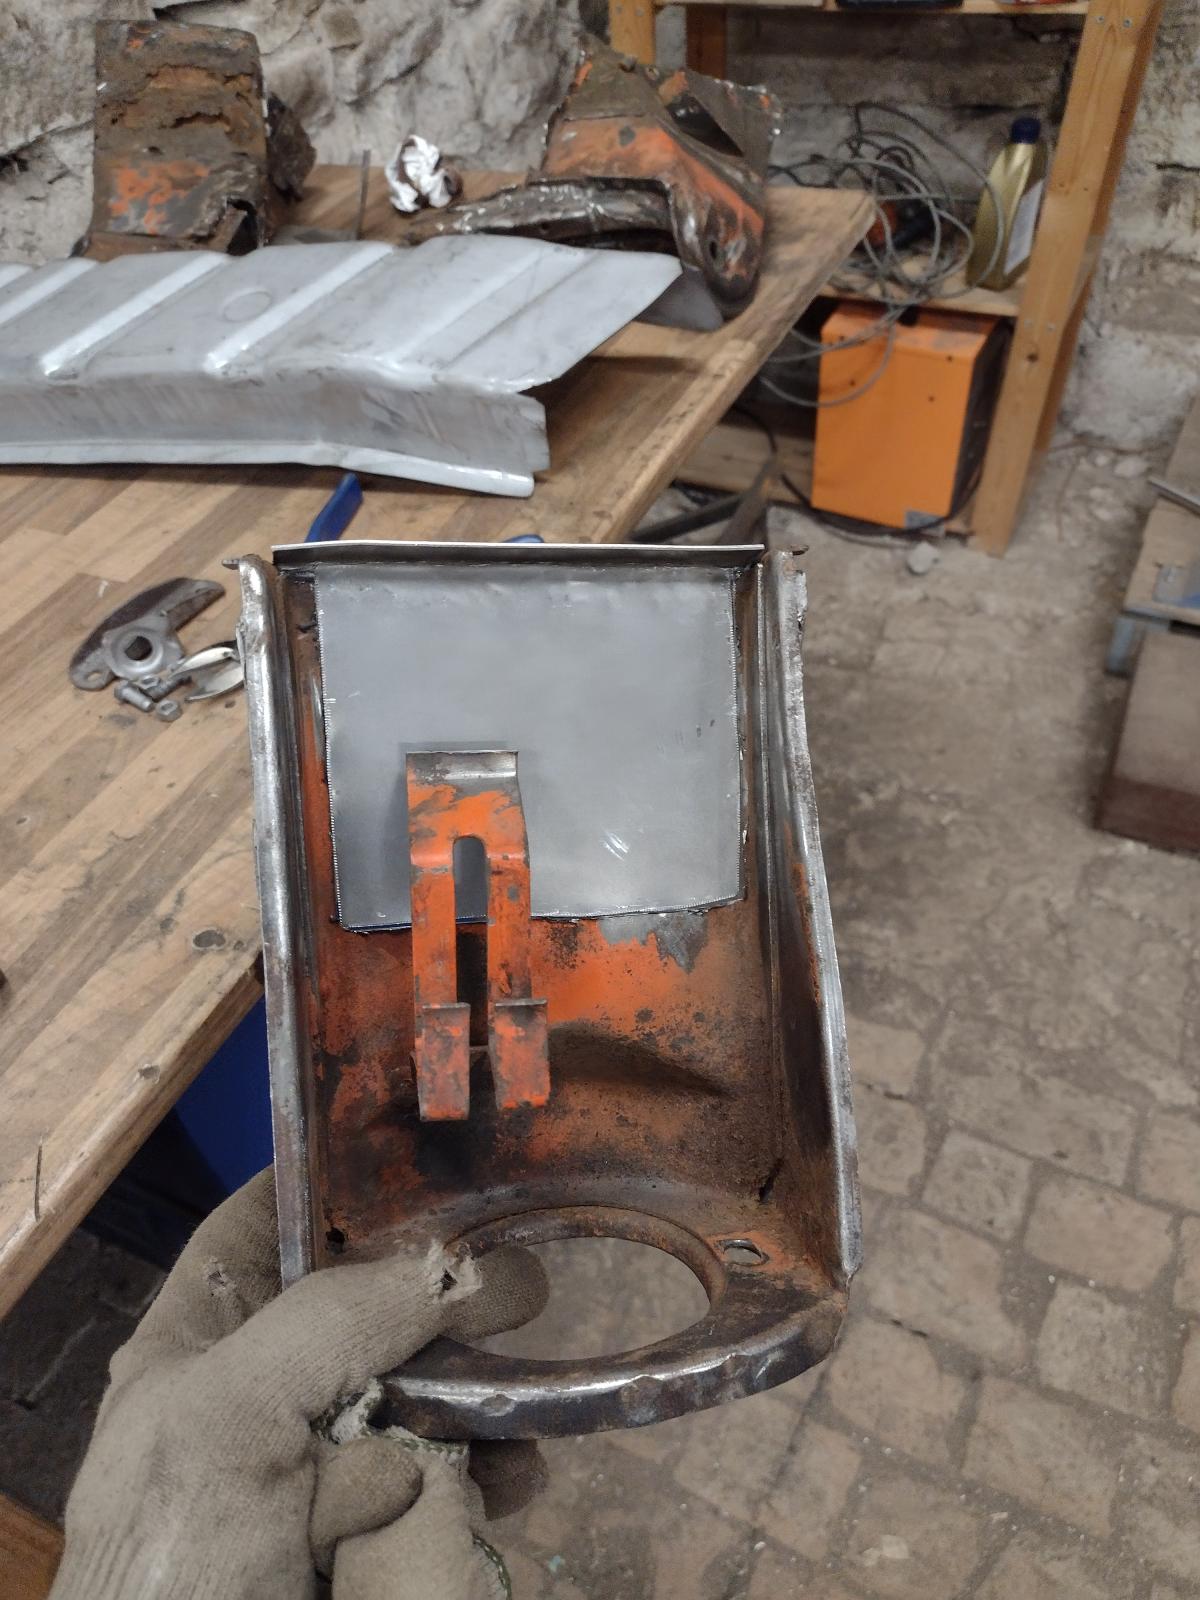
So I started to make a new one..and I had some difficulties getting the shape with so few left..I made a couple trial and in the end made it in two parts, easier to adjust and tig welded together in the end.
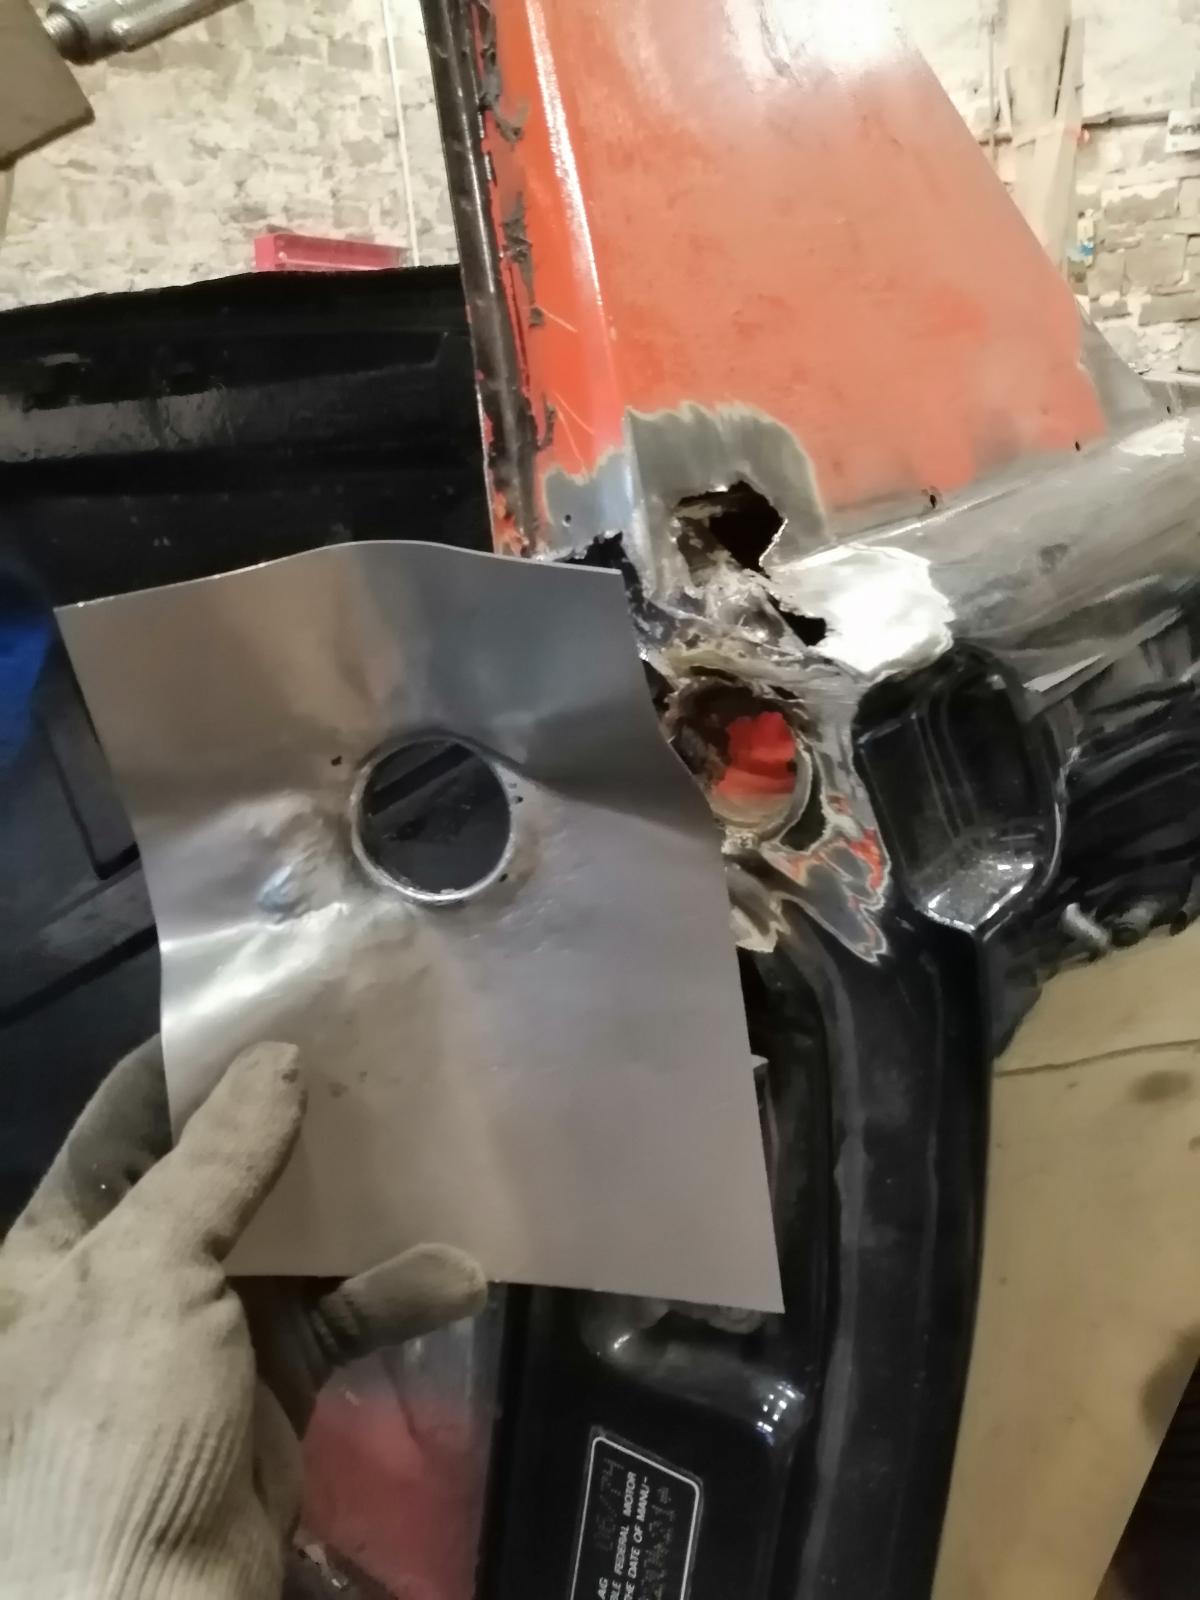
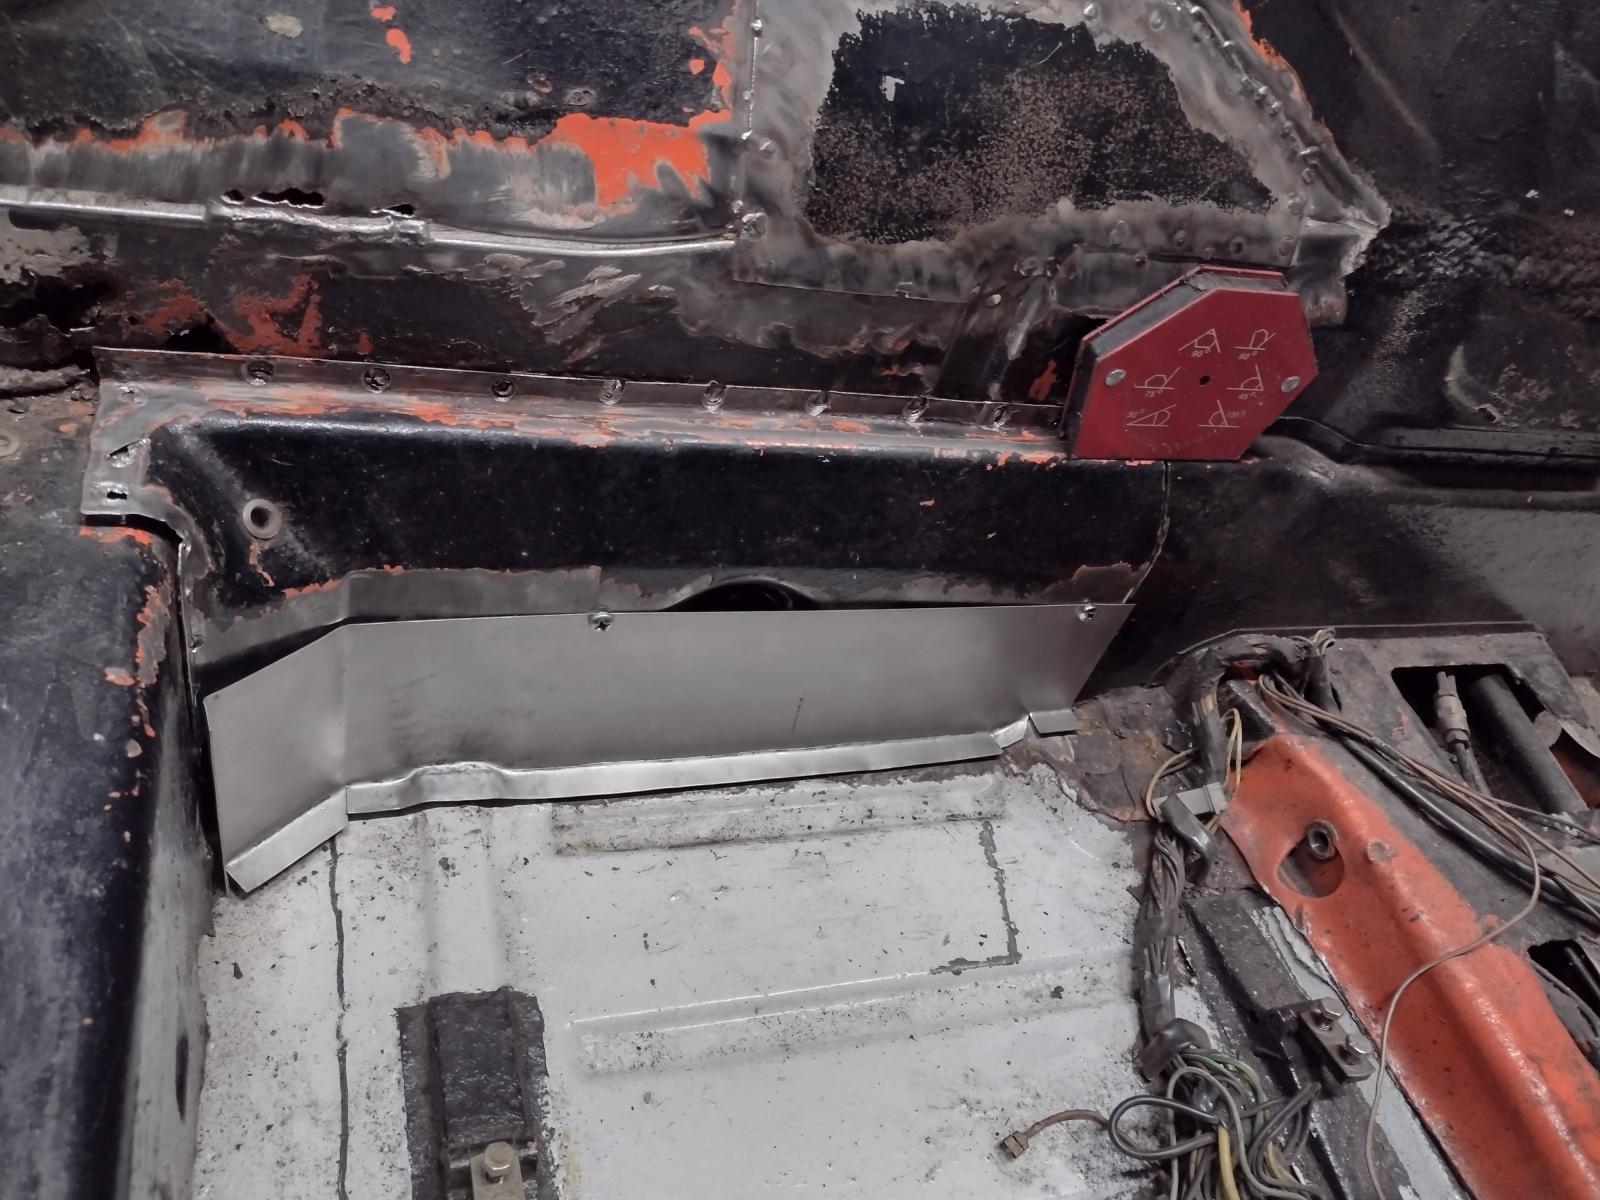
Here both parts getting adjusted:
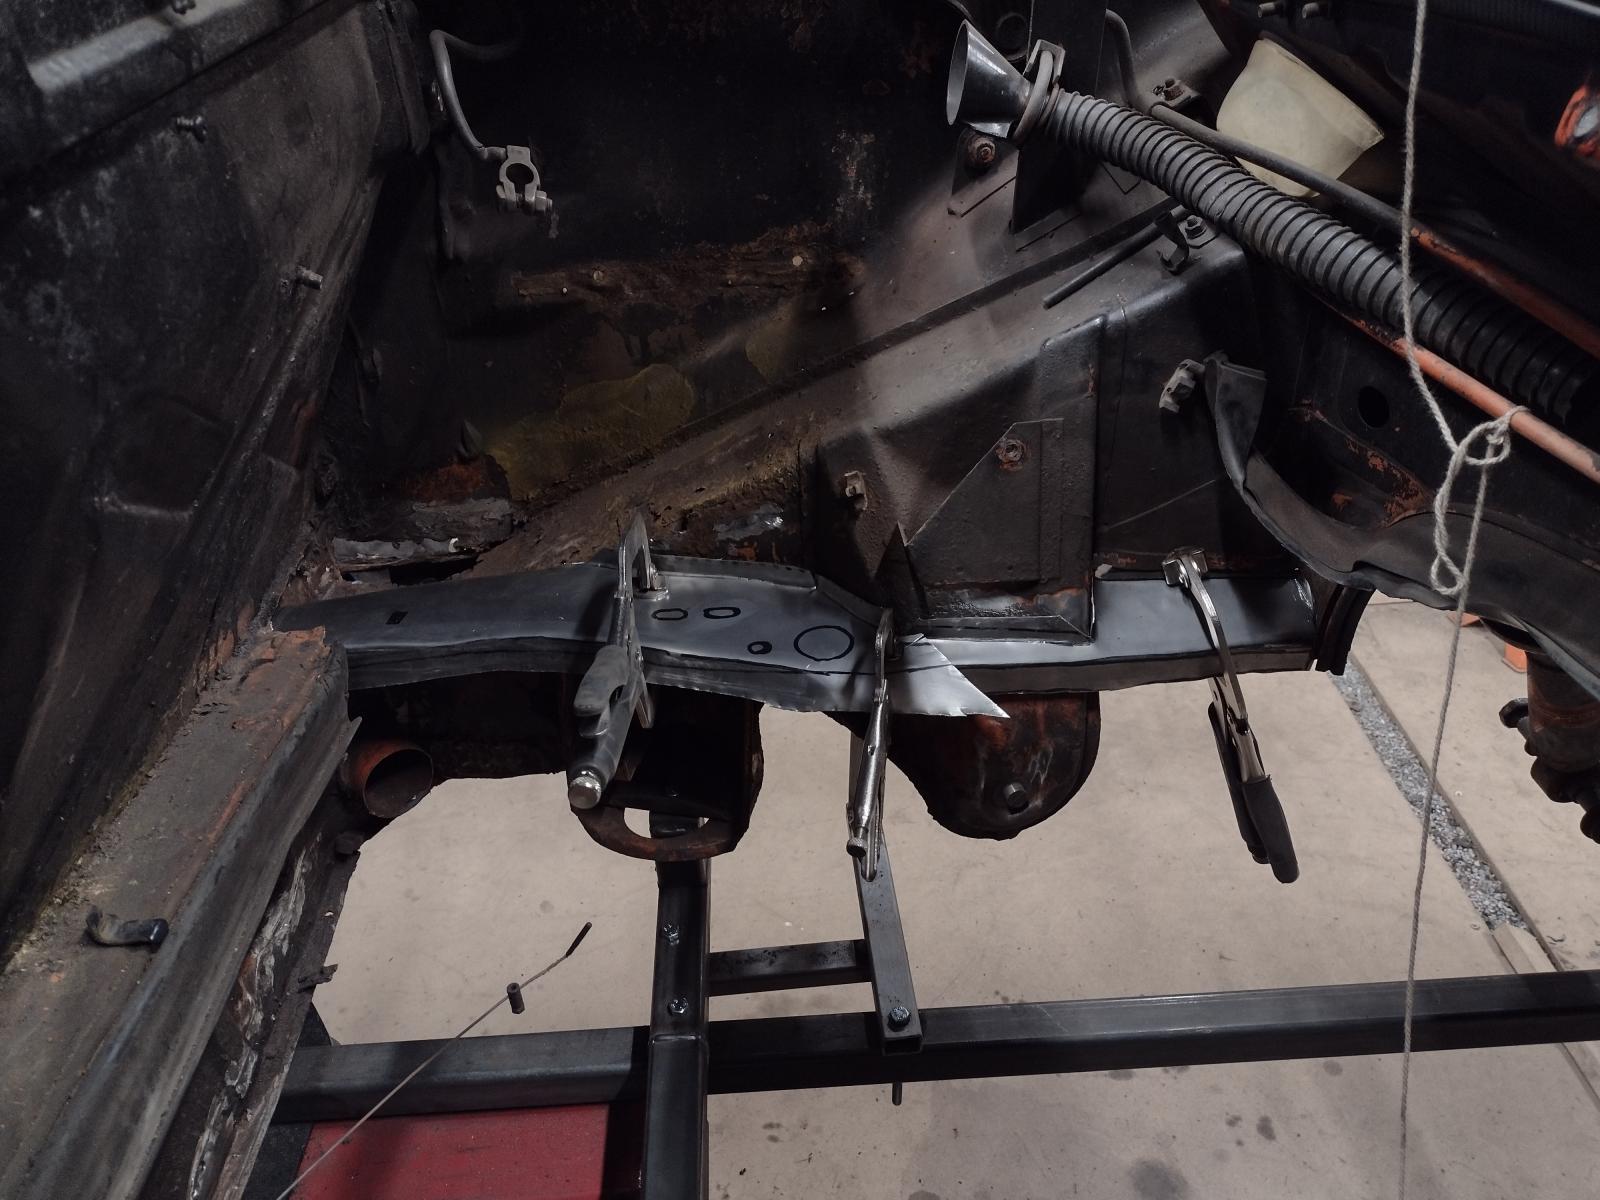
And welded:
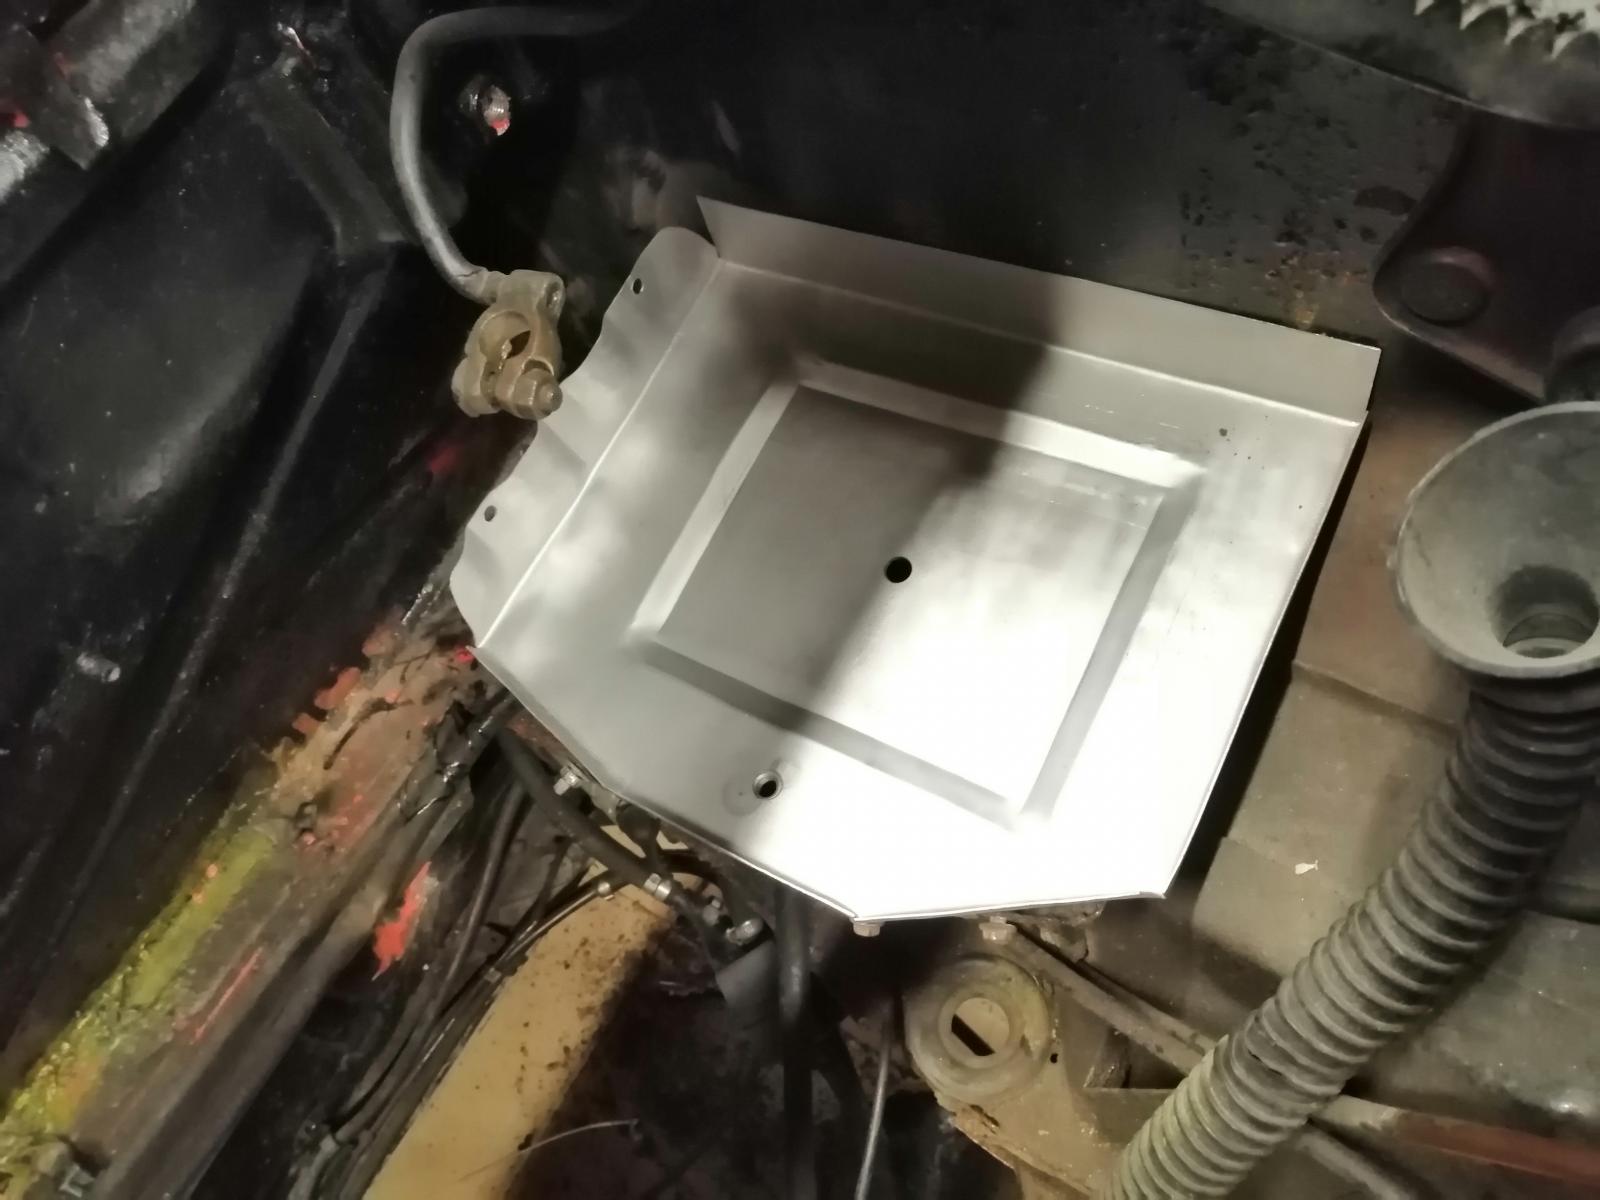
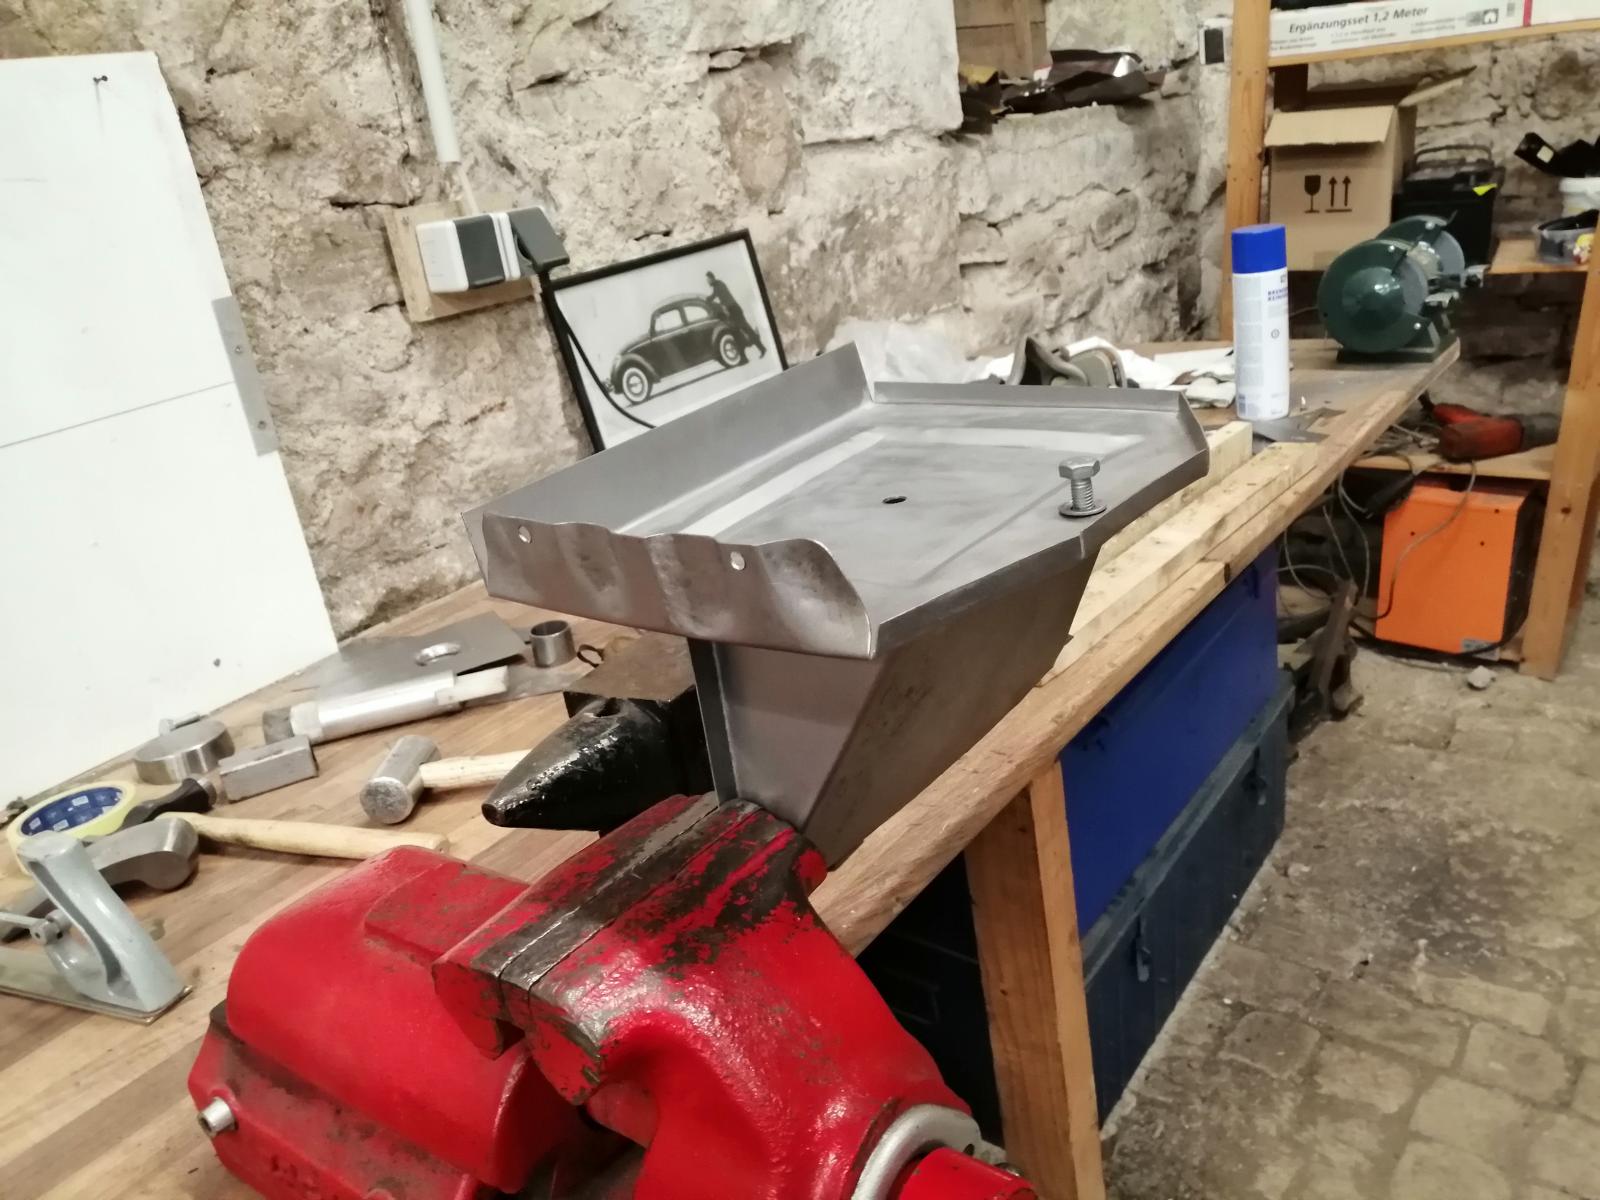
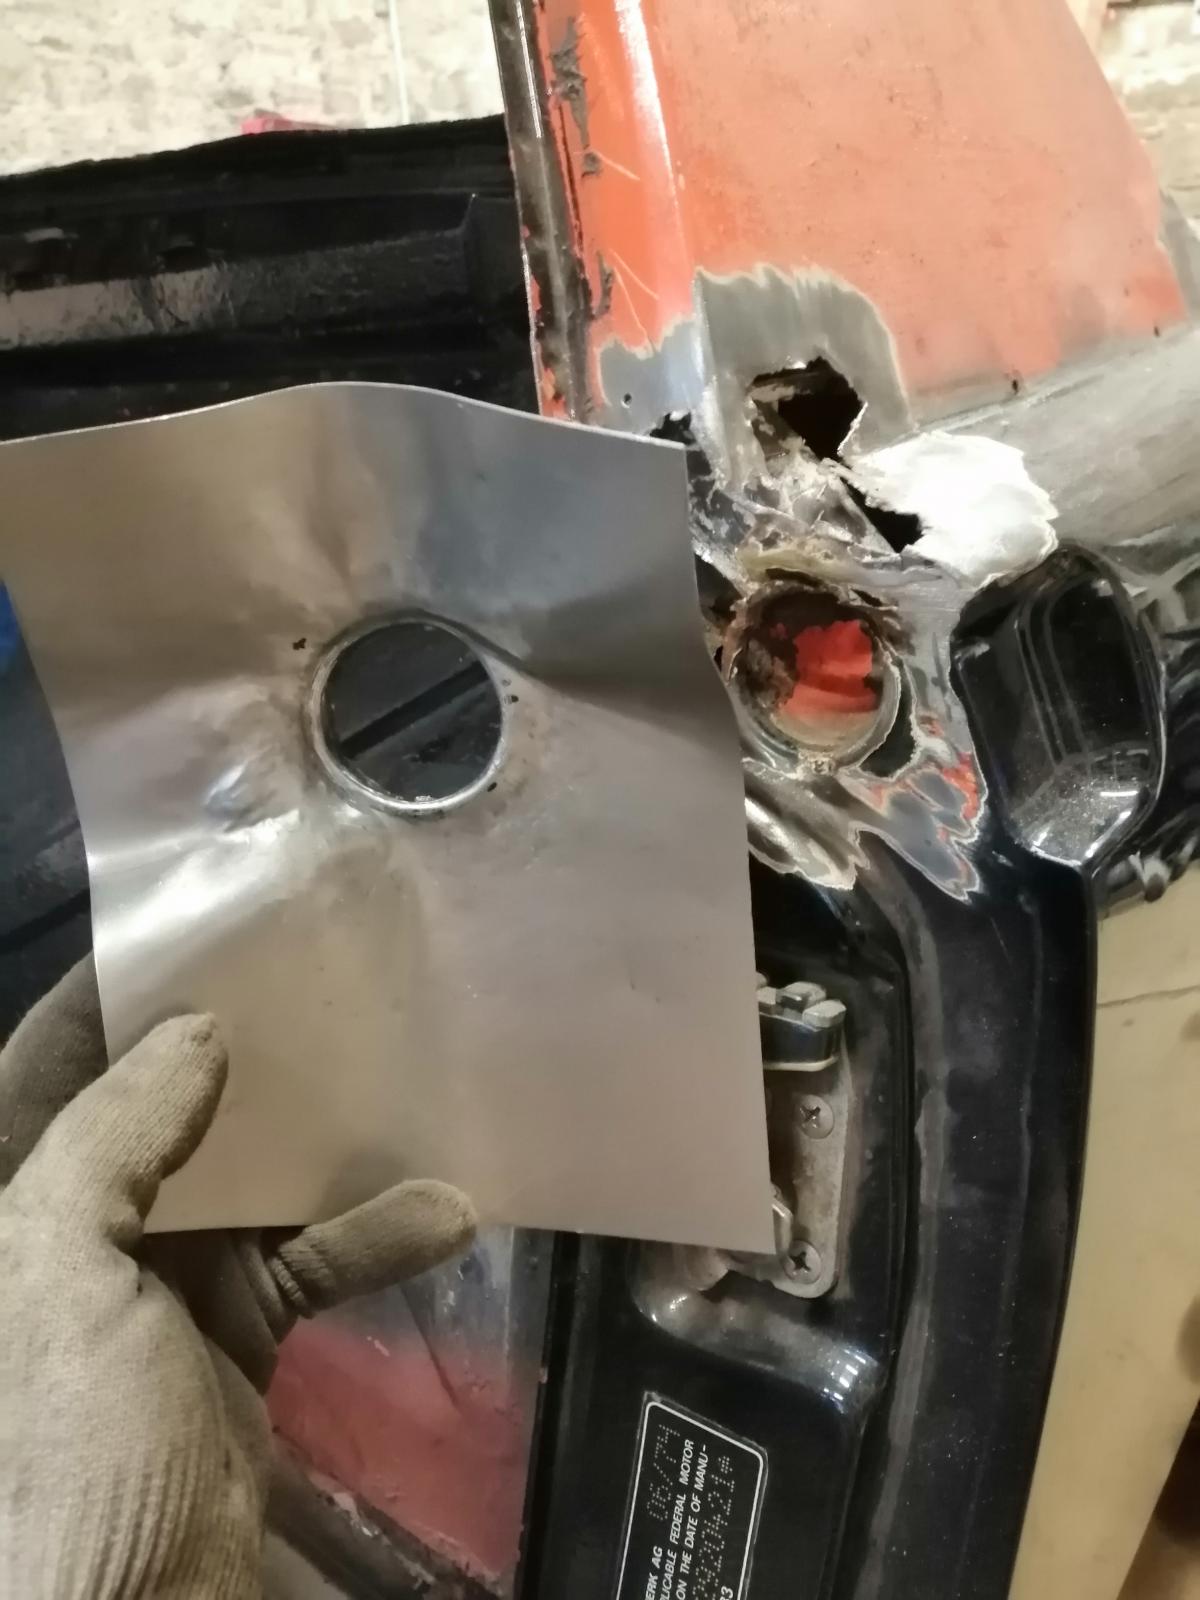
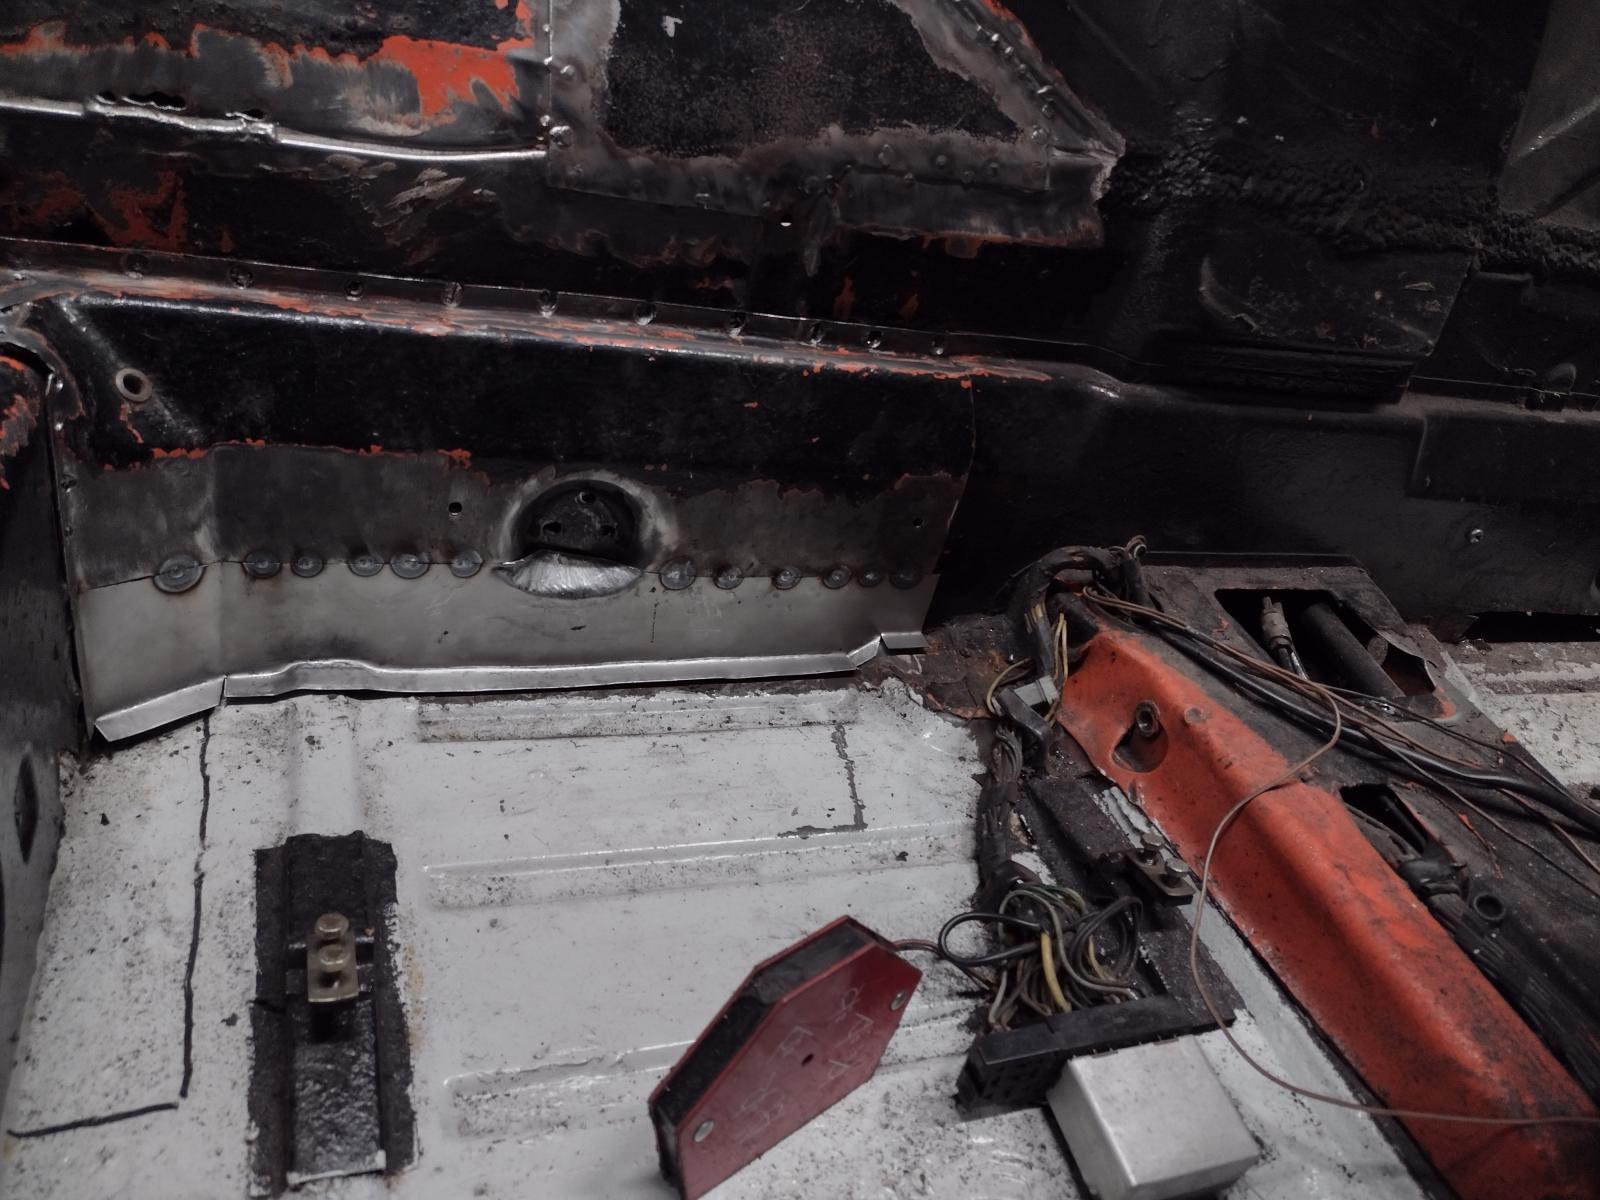
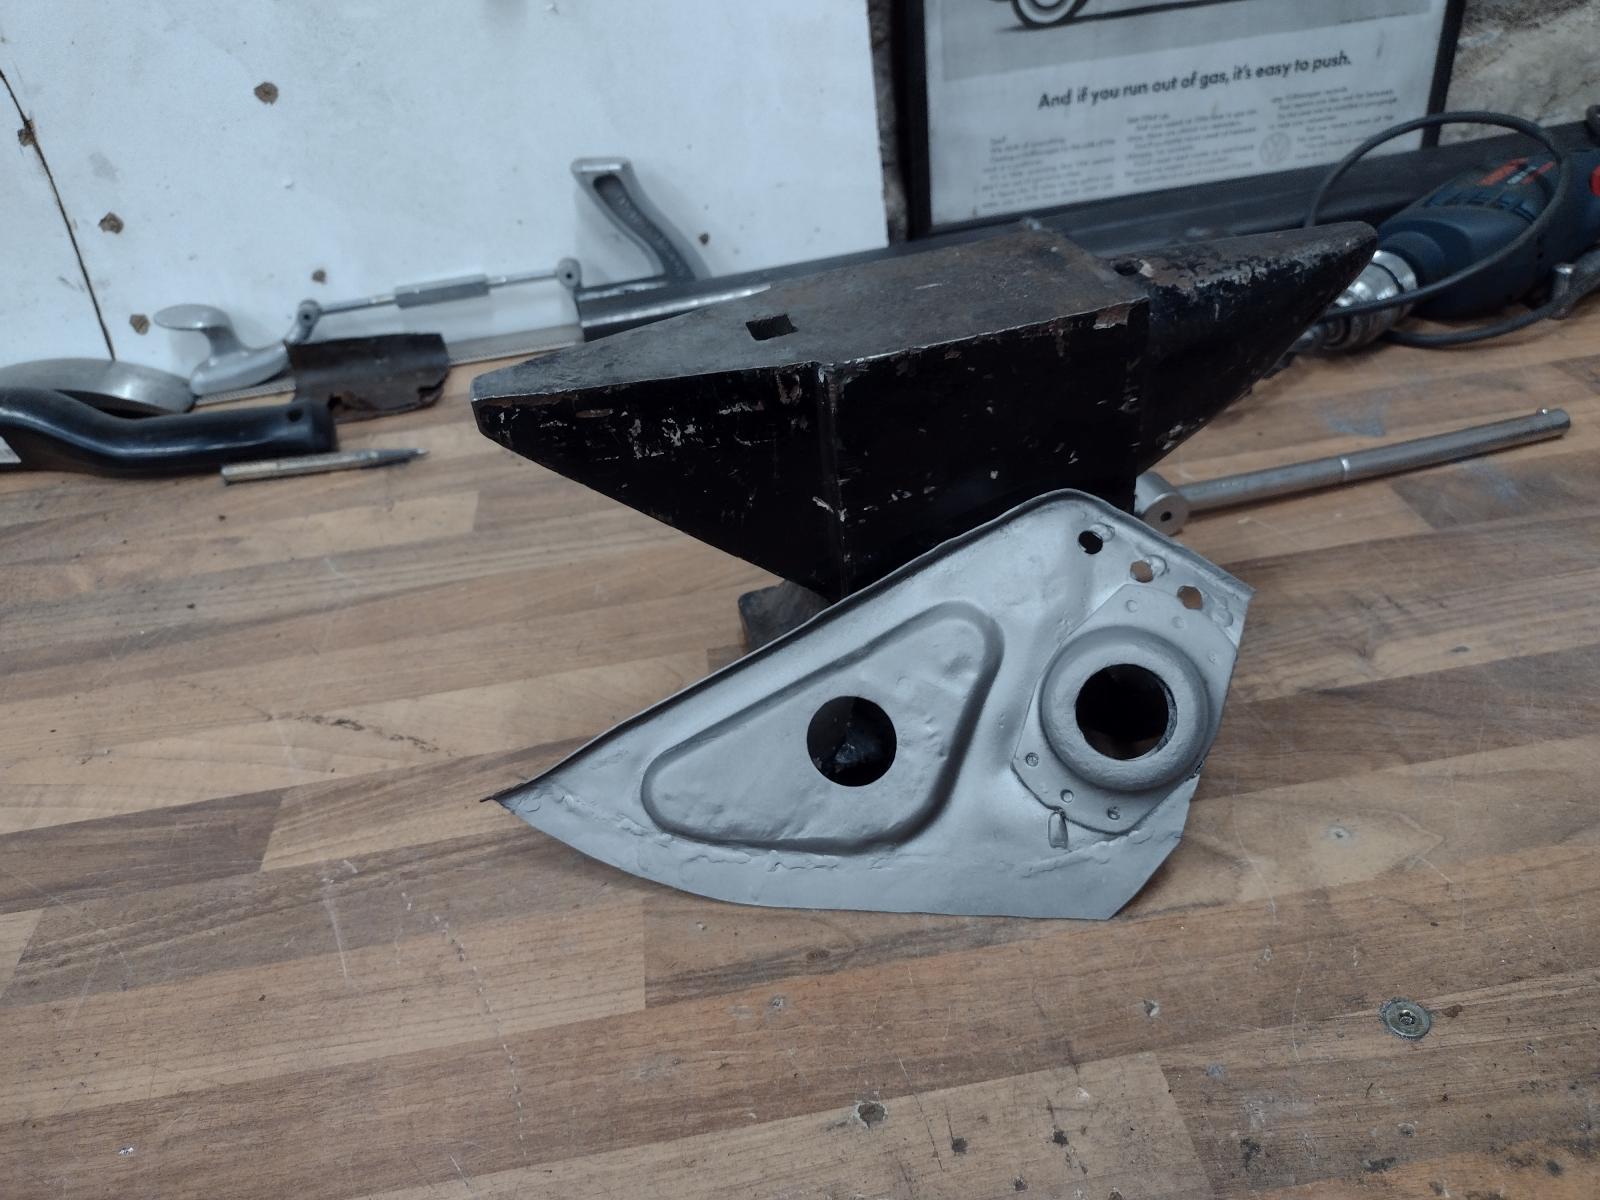
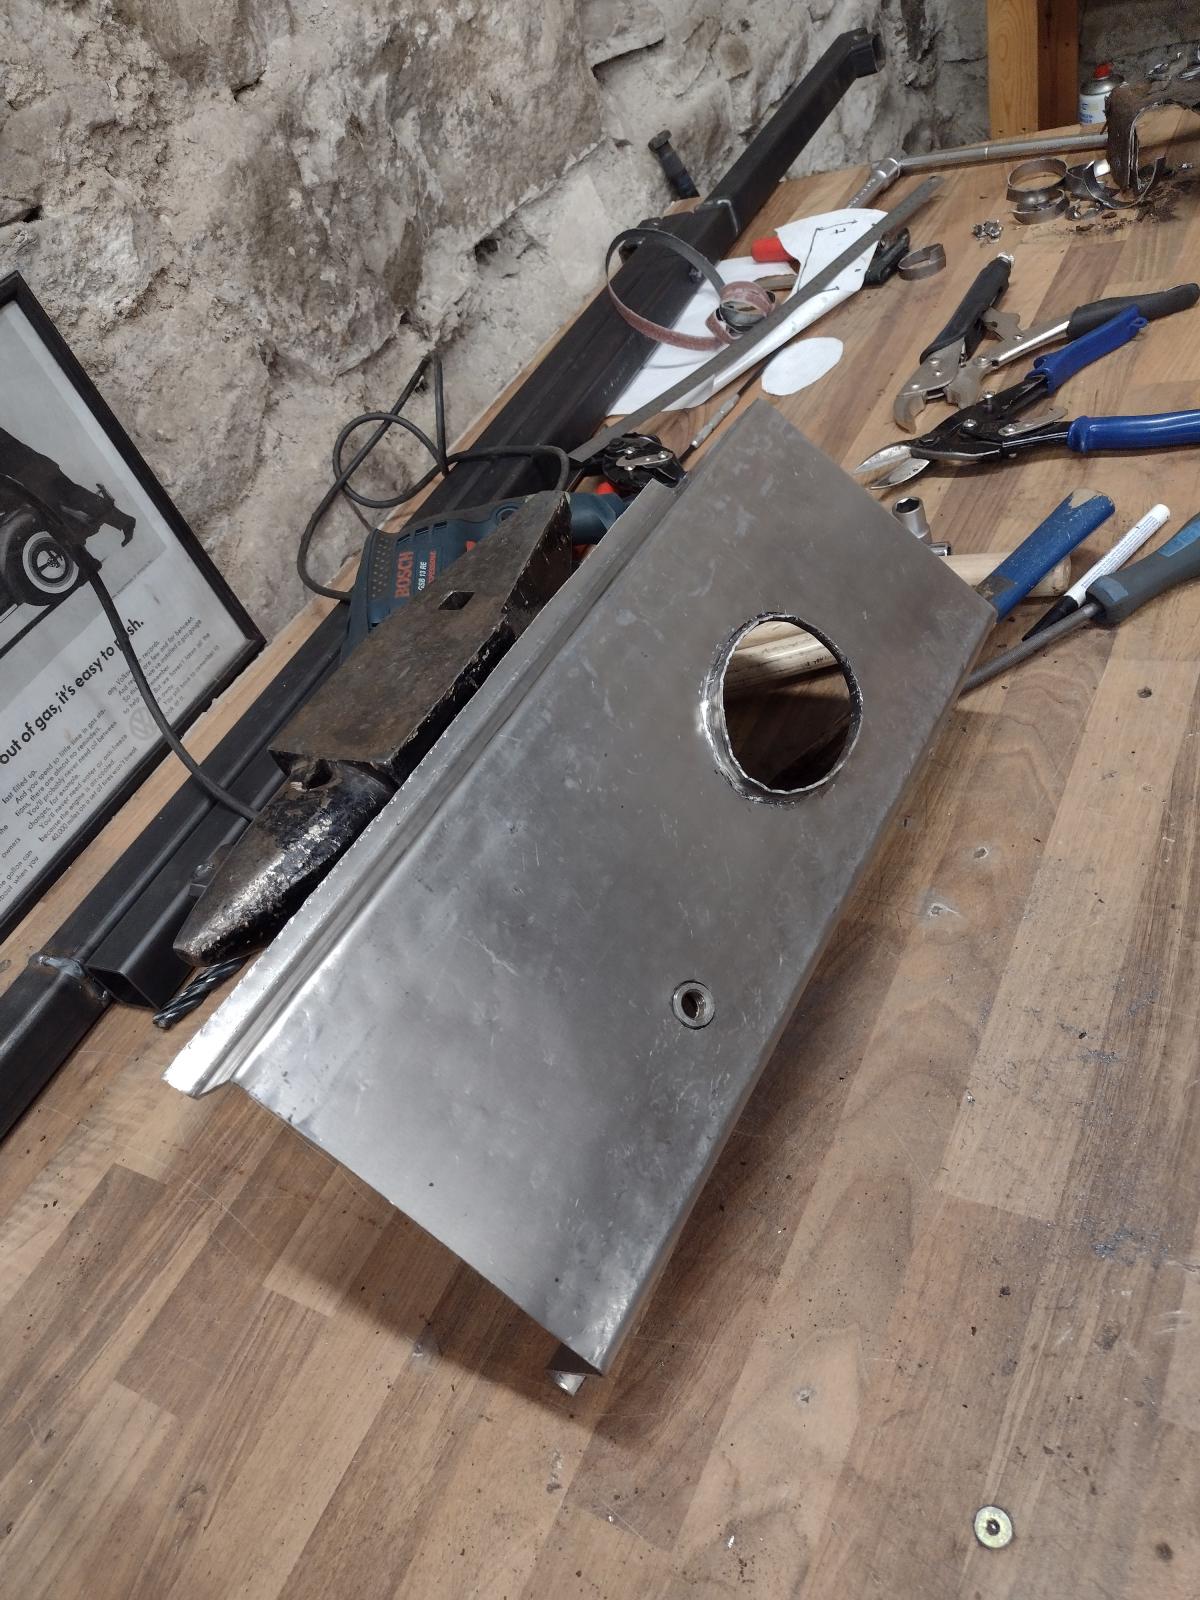
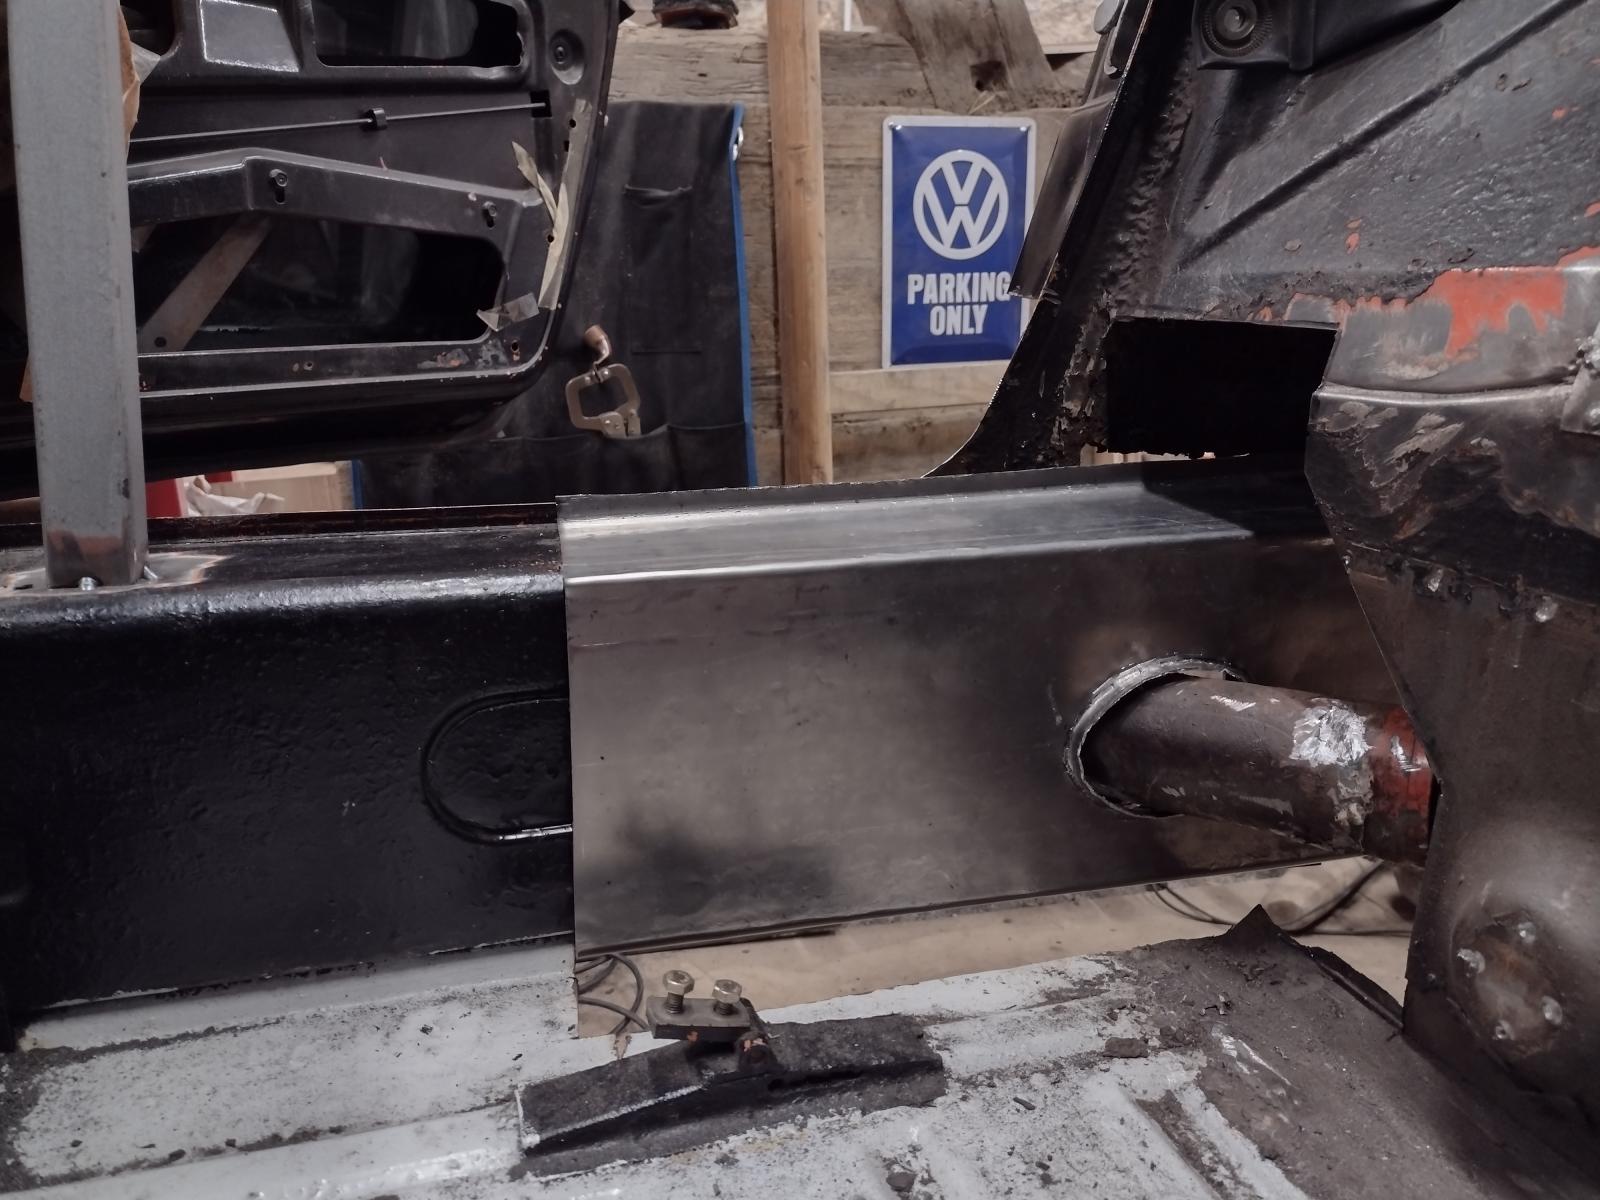
I still need to make the holes for the grommets and build the retaining part for the engine seal but if fits as it should:
Stay tuned,
Antoine
For the hellhole : there is sure a lot to do but if will end up strong
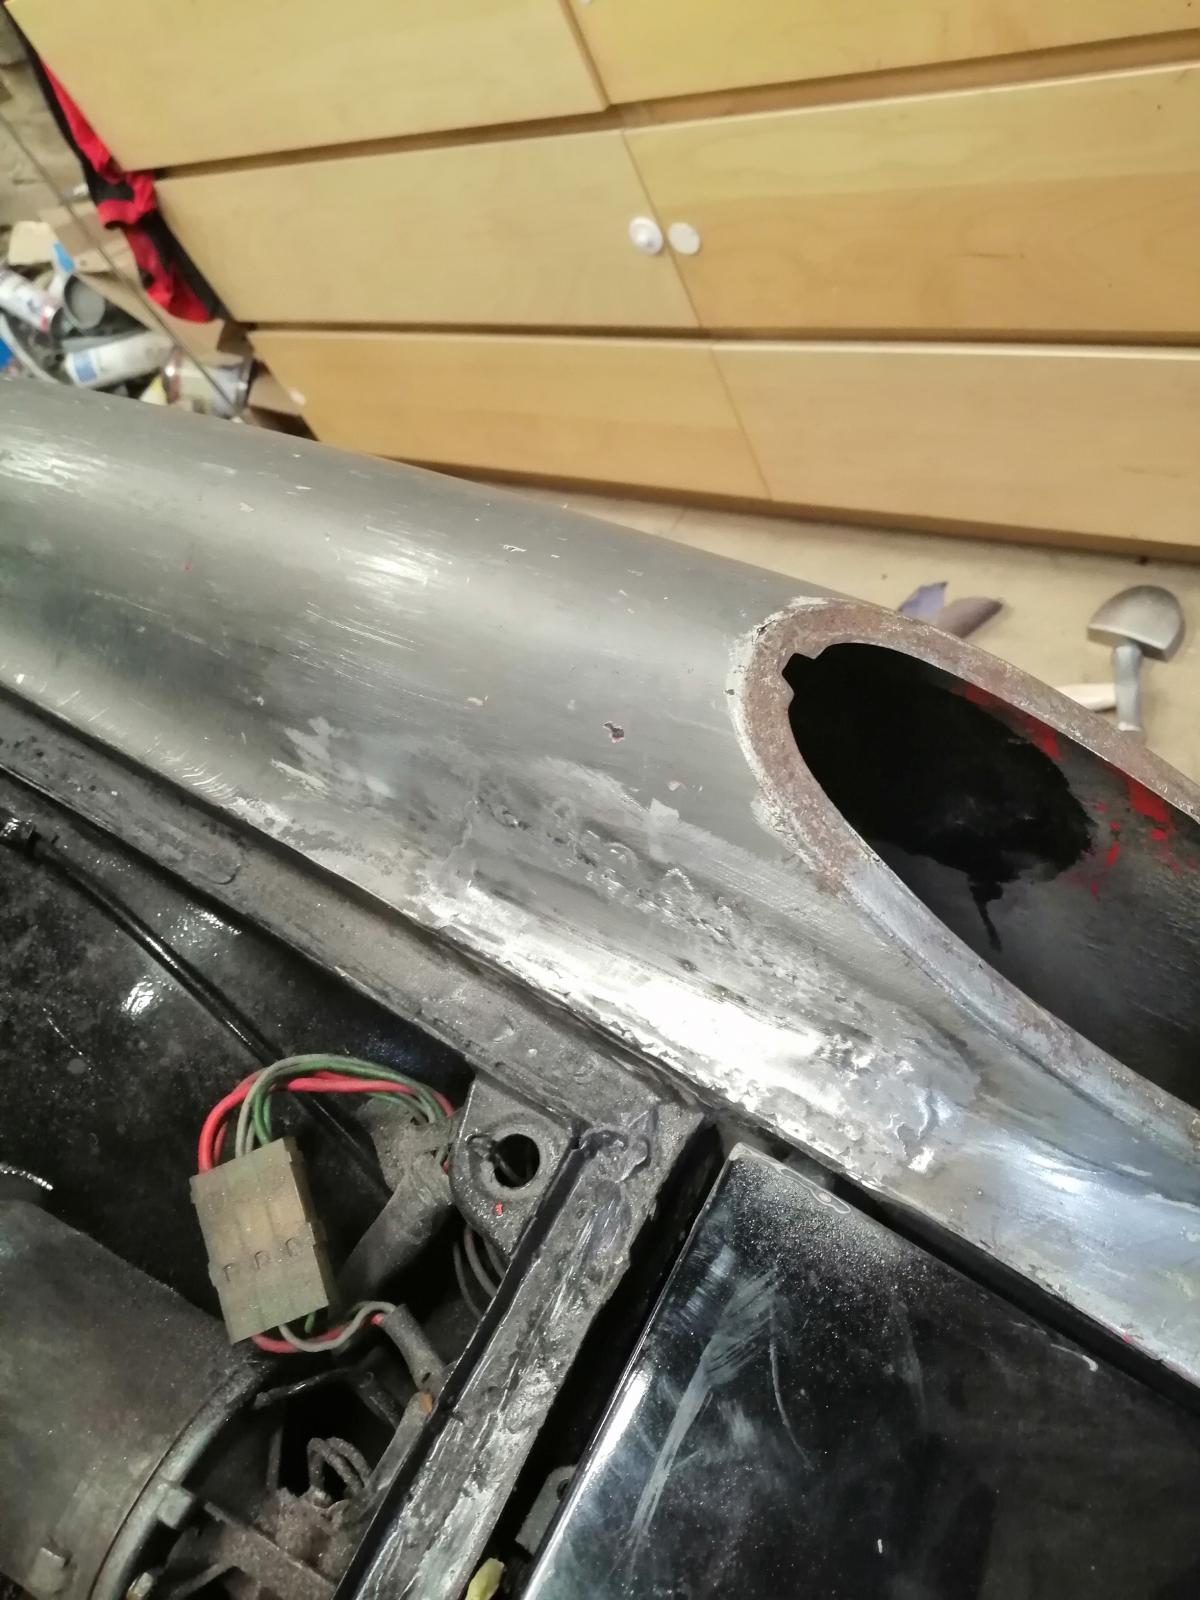
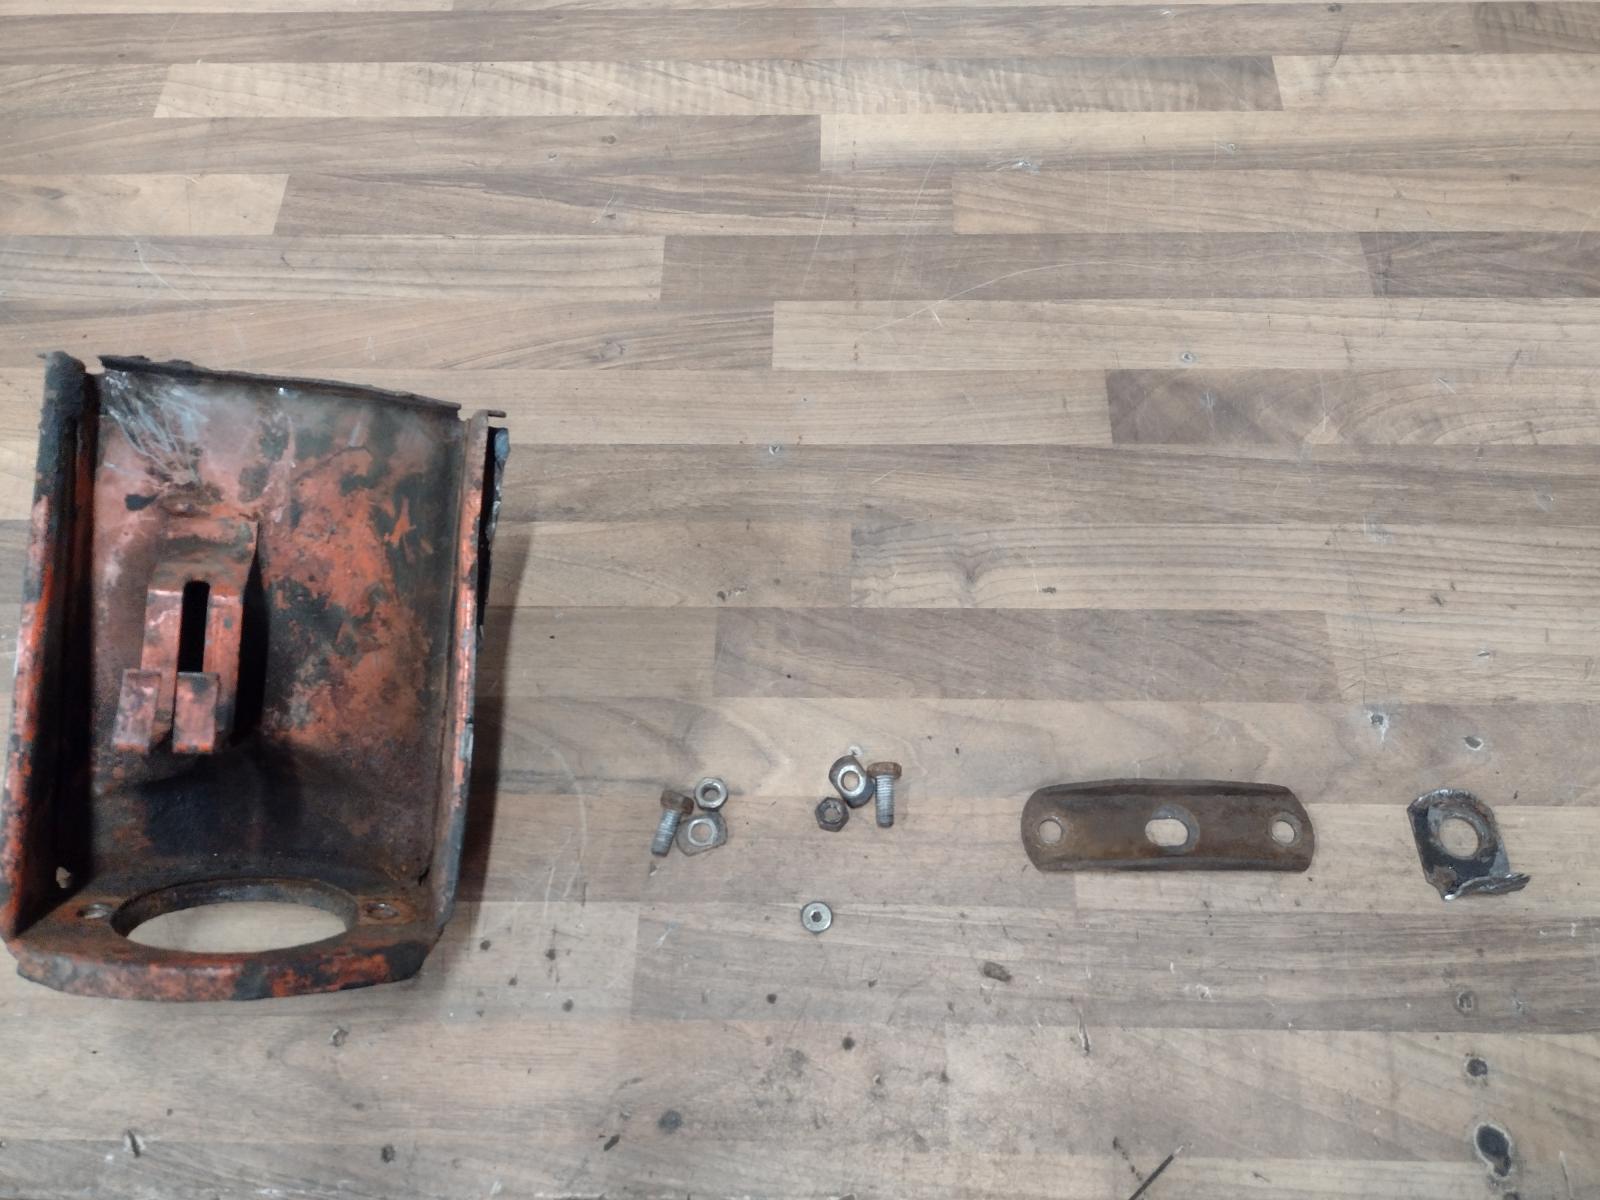
So, next on my list was the engine tray on the right..as your might remember it was not nice, so I removed it:
But it was even worse than I thought:
Almost not enough to use as a template!
So I started to make a new one..and I had some difficulties getting the shape with so few left..I made a couple trial and in the end made it in two parts, easier to adjust and tig welded together in the end.
Here both parts getting adjusted:
And welded:
I still need to make the holes for the grommets and build the retaining part for the engine seal but if fits as it should:
Stay tuned,
Antoine
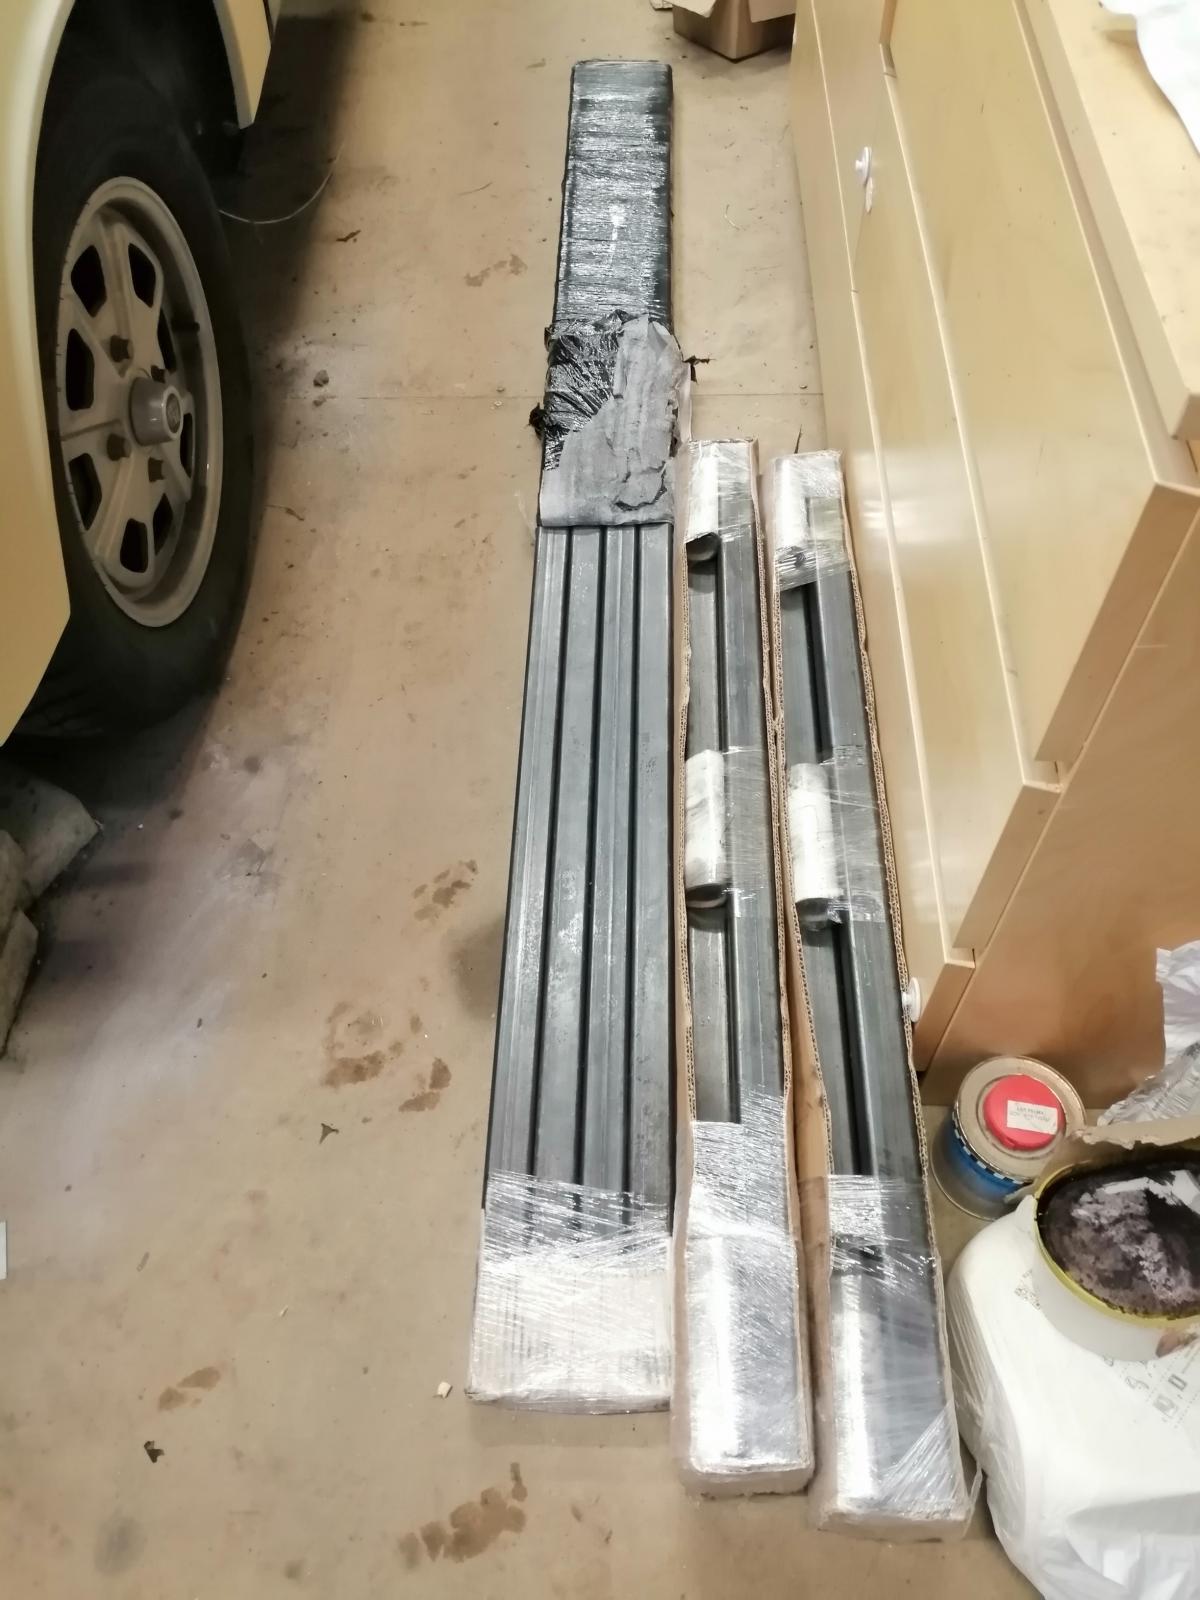
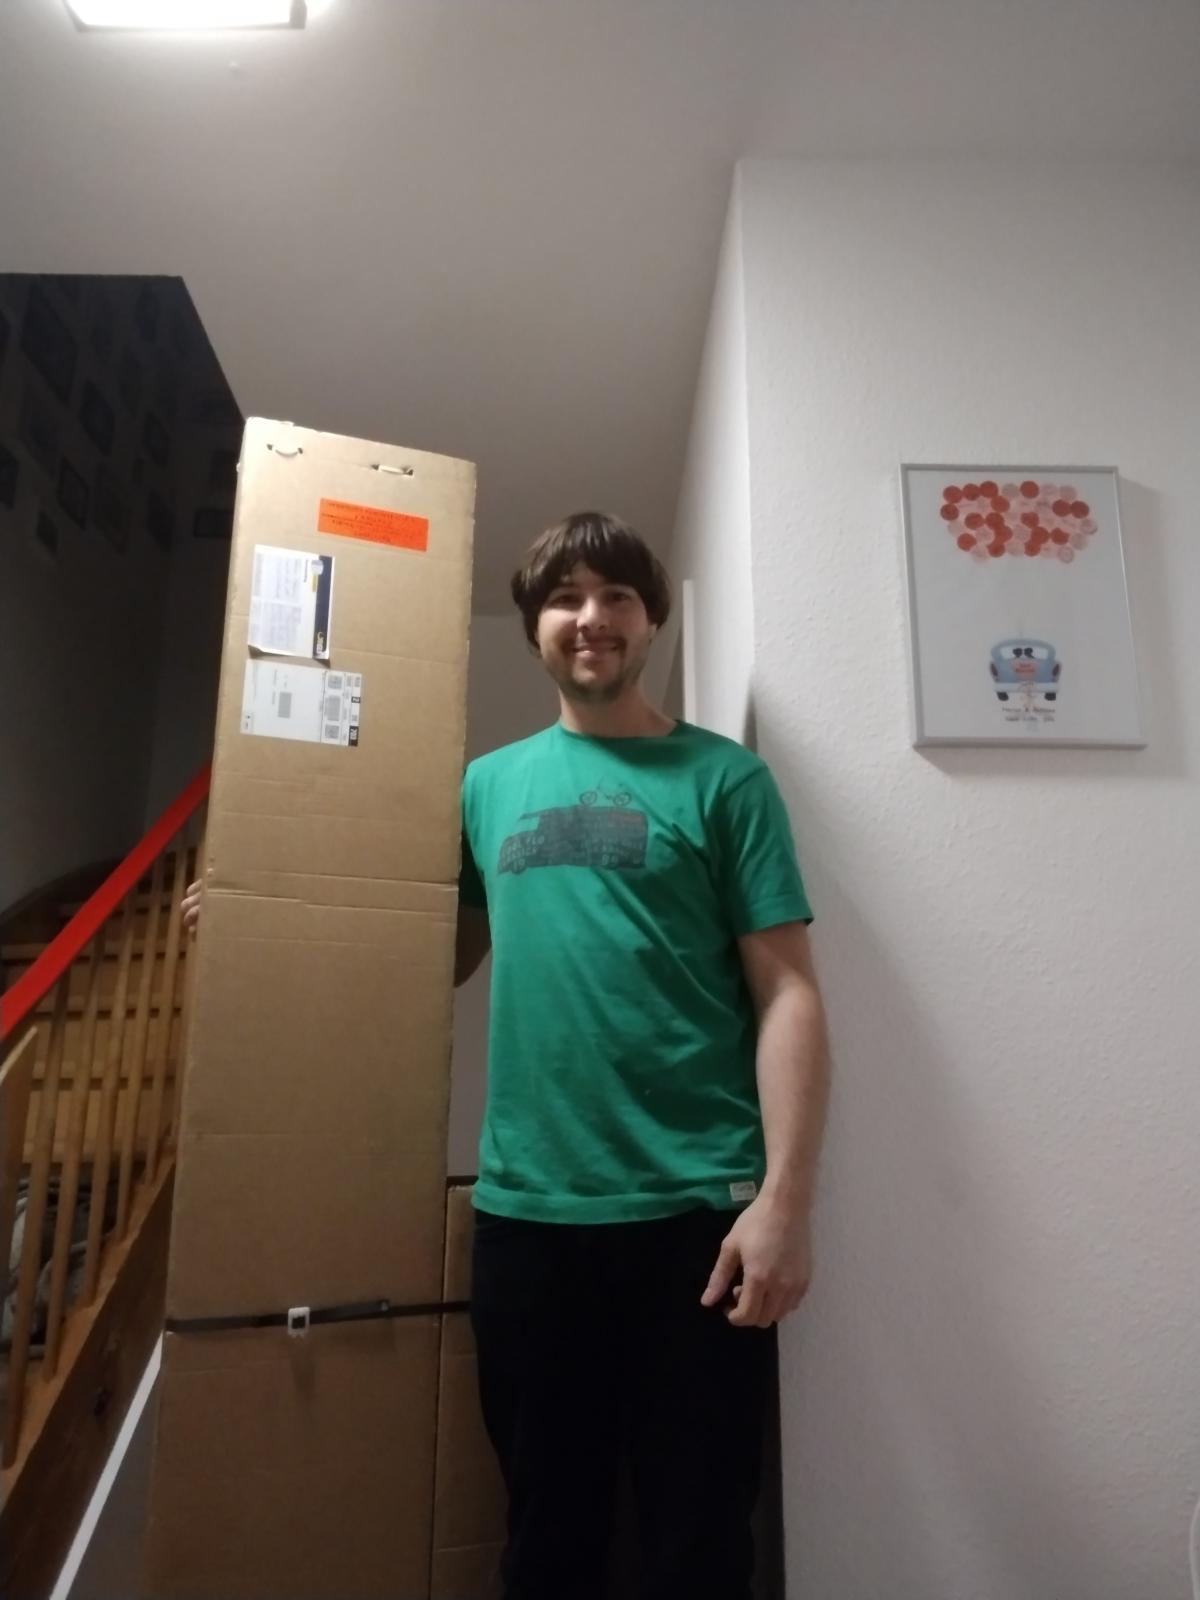
So, I got a big box:
With my stainless steel fuel lines:

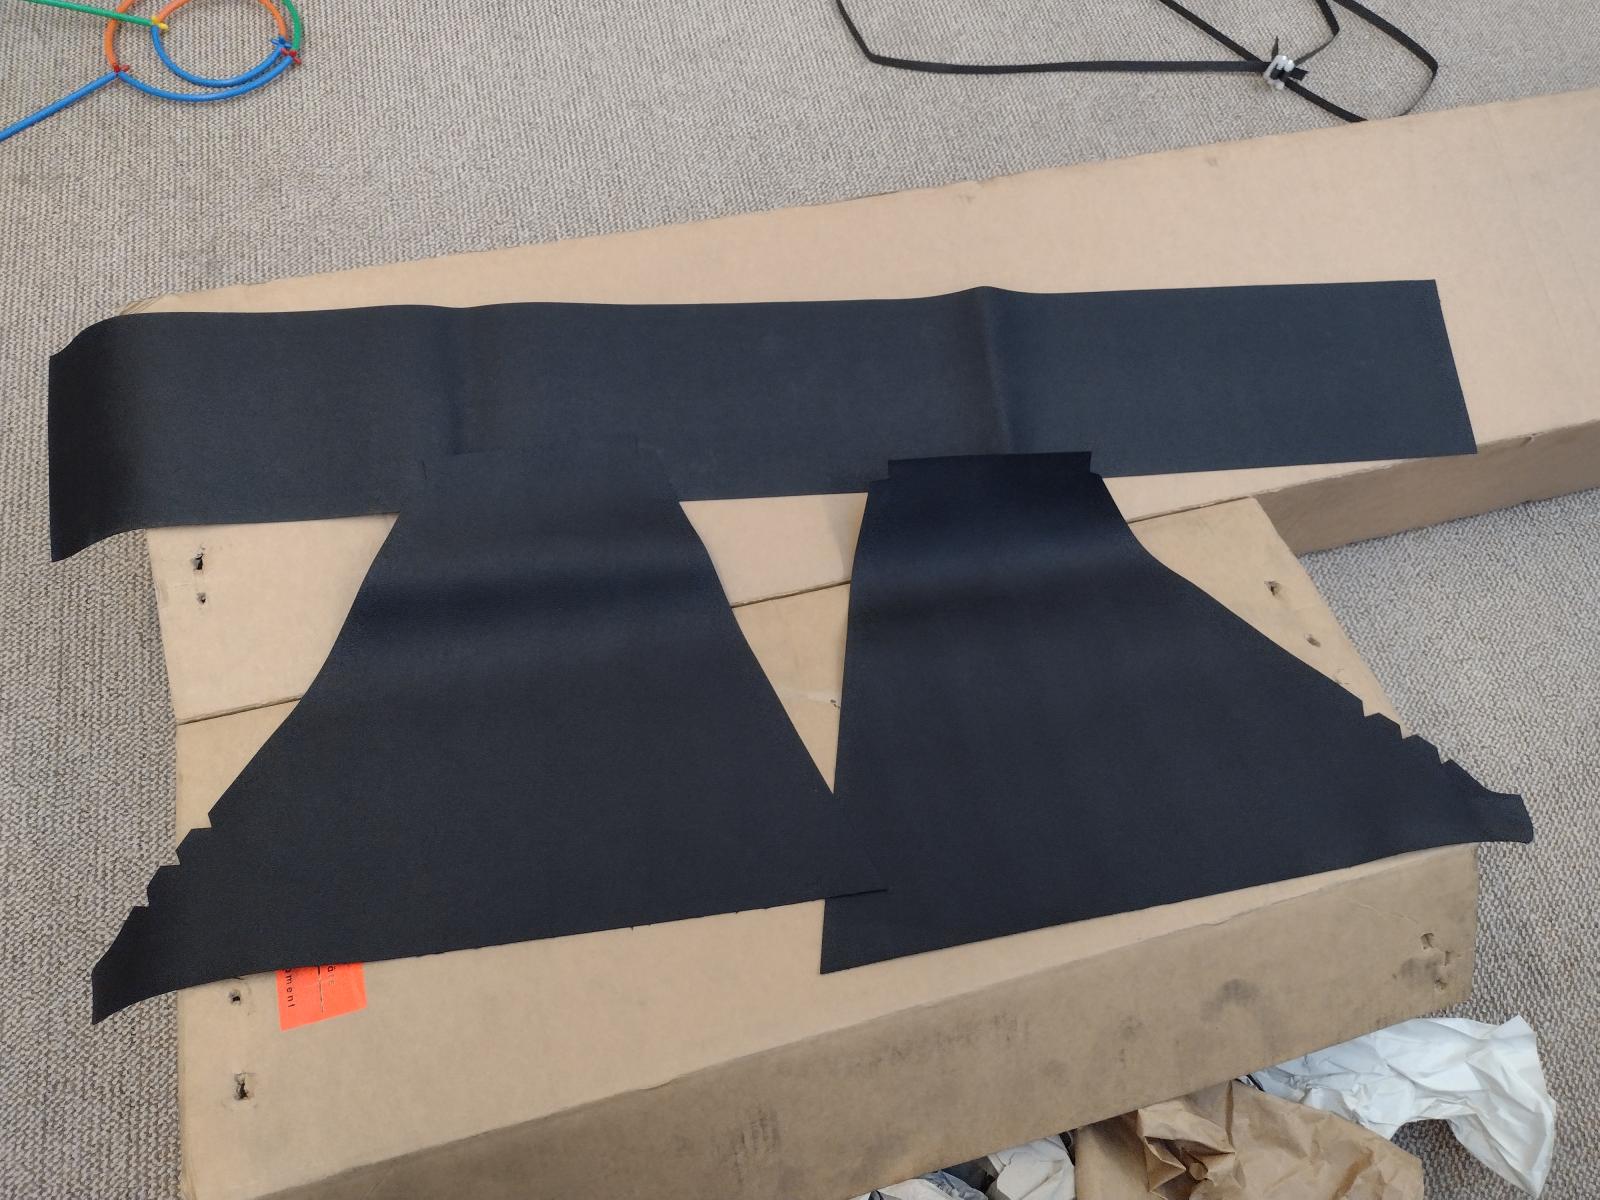
And the vinyl for the sail panel:
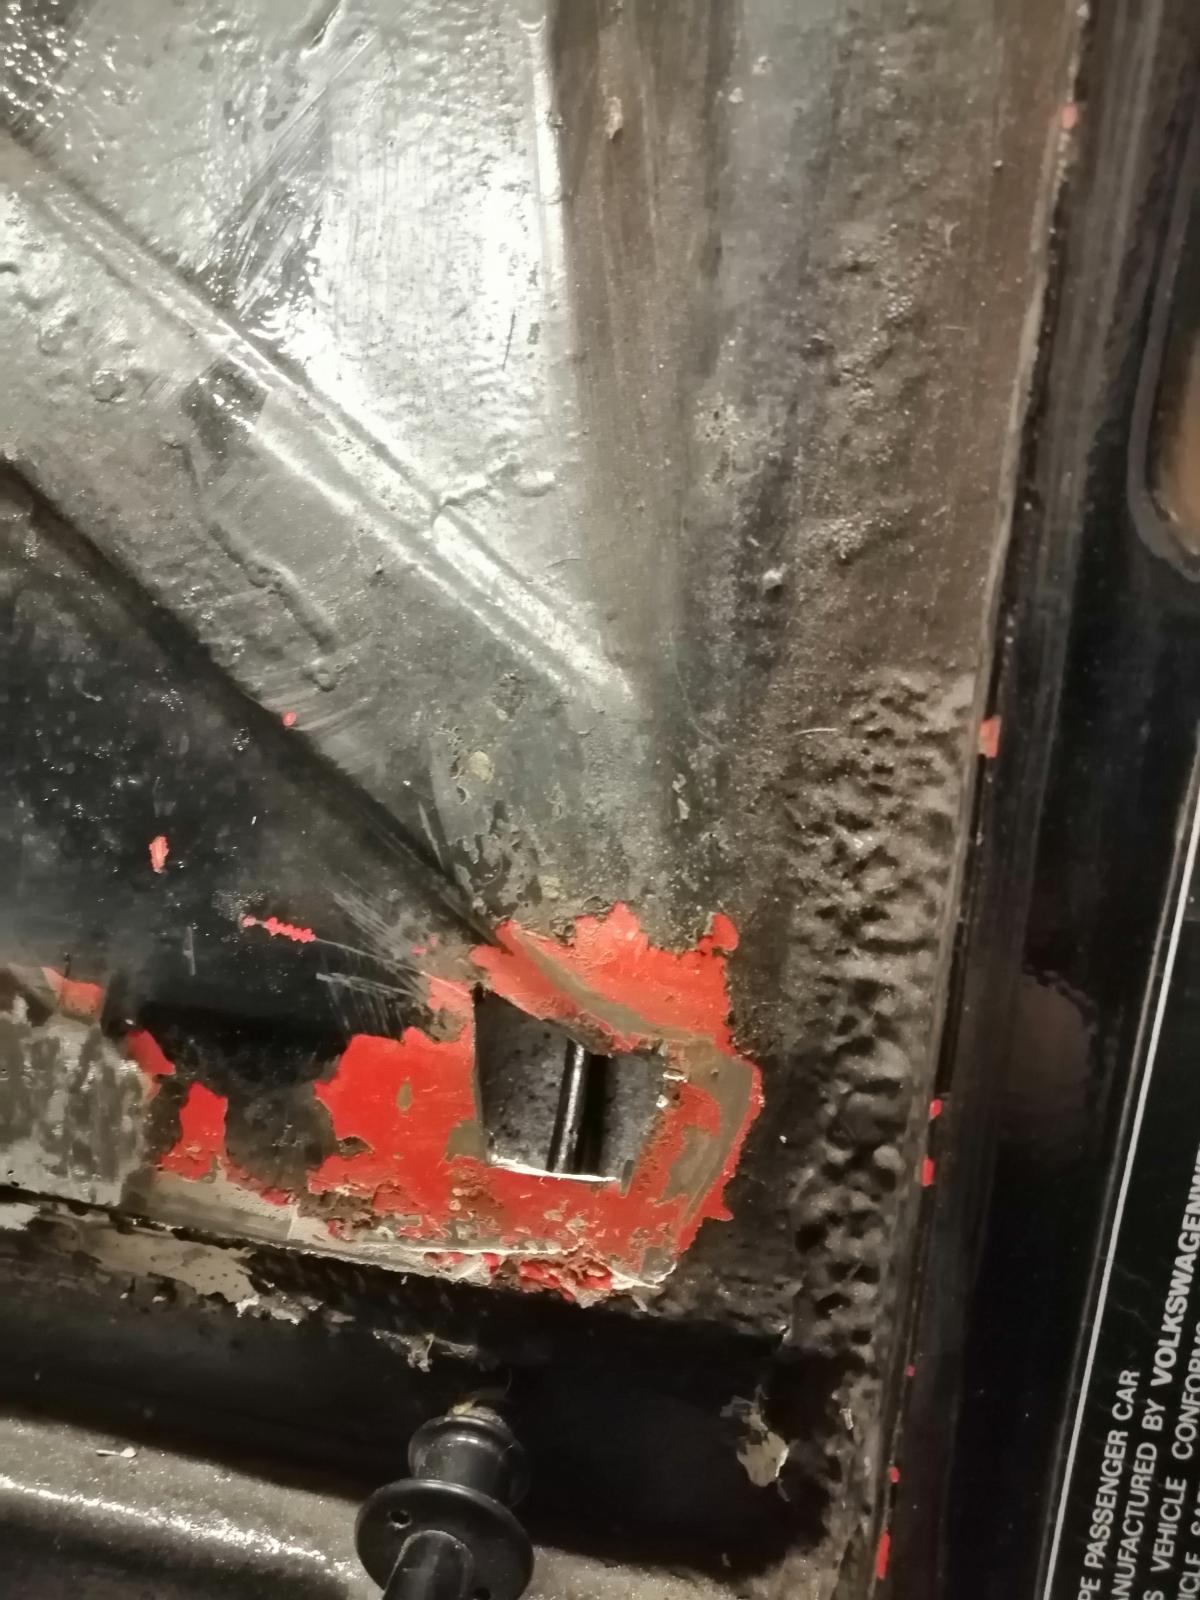
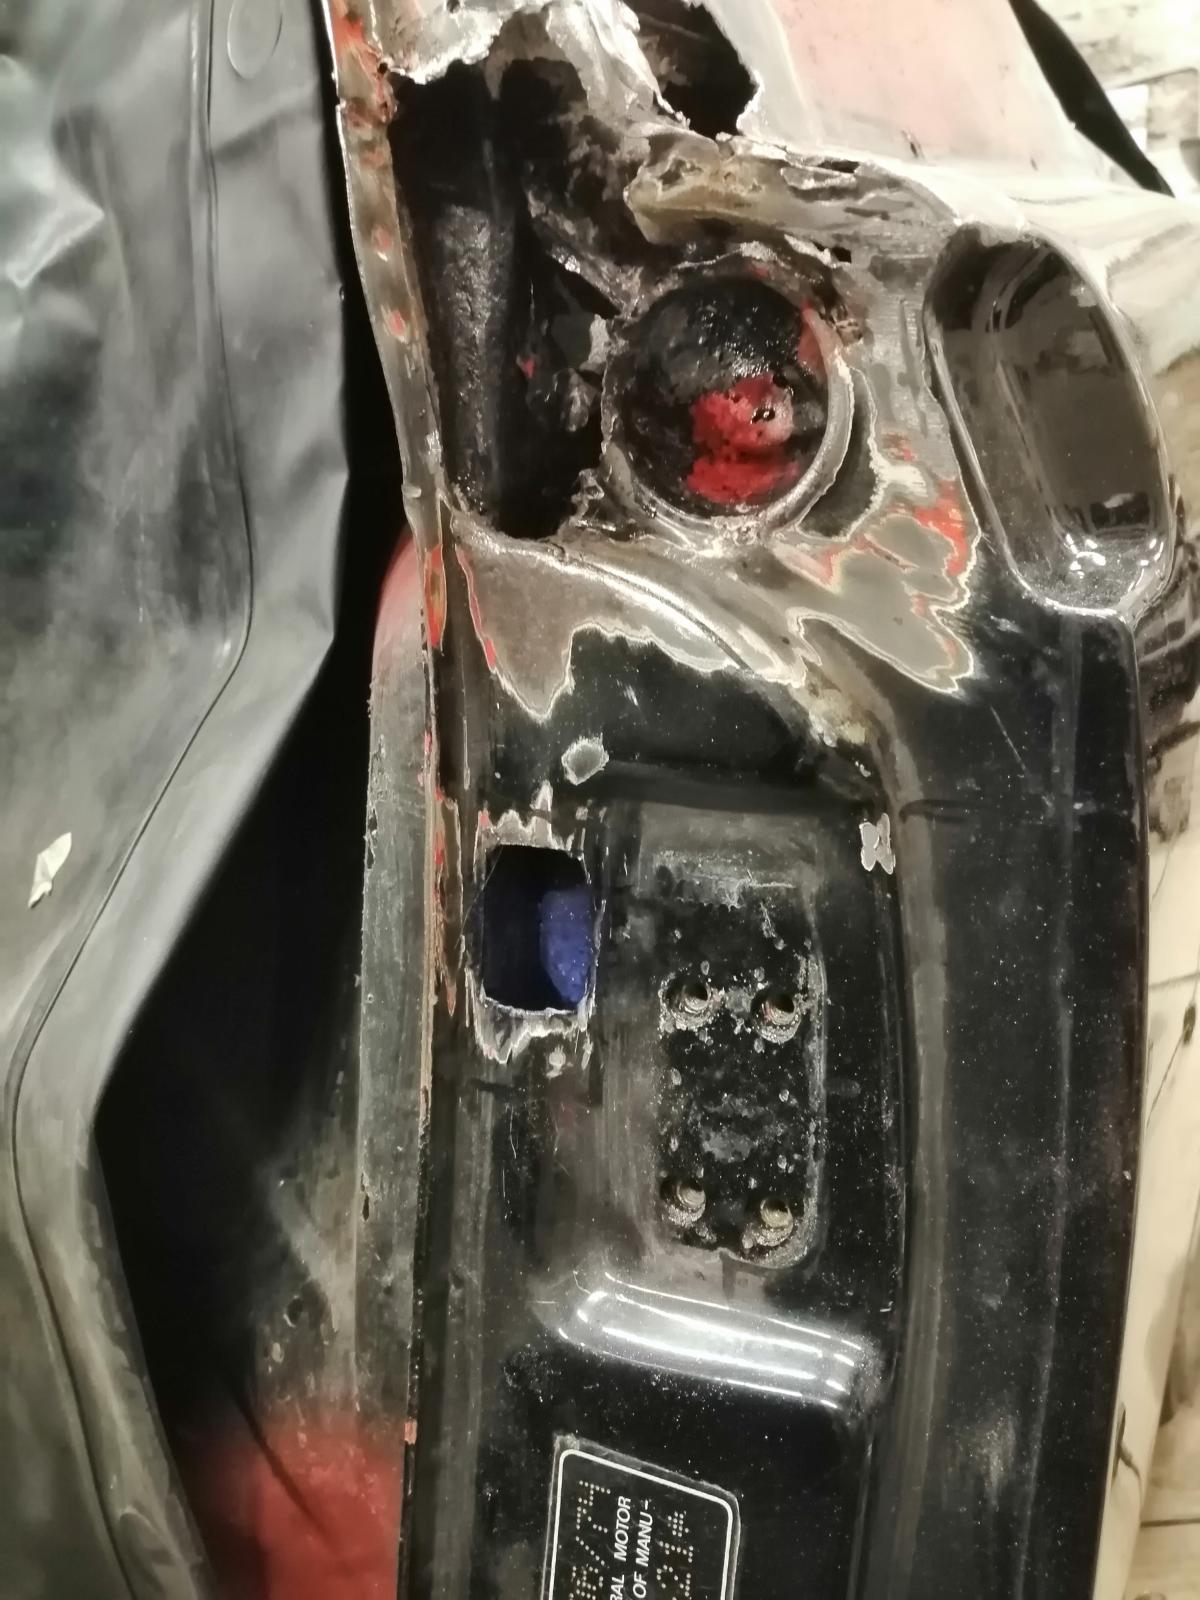
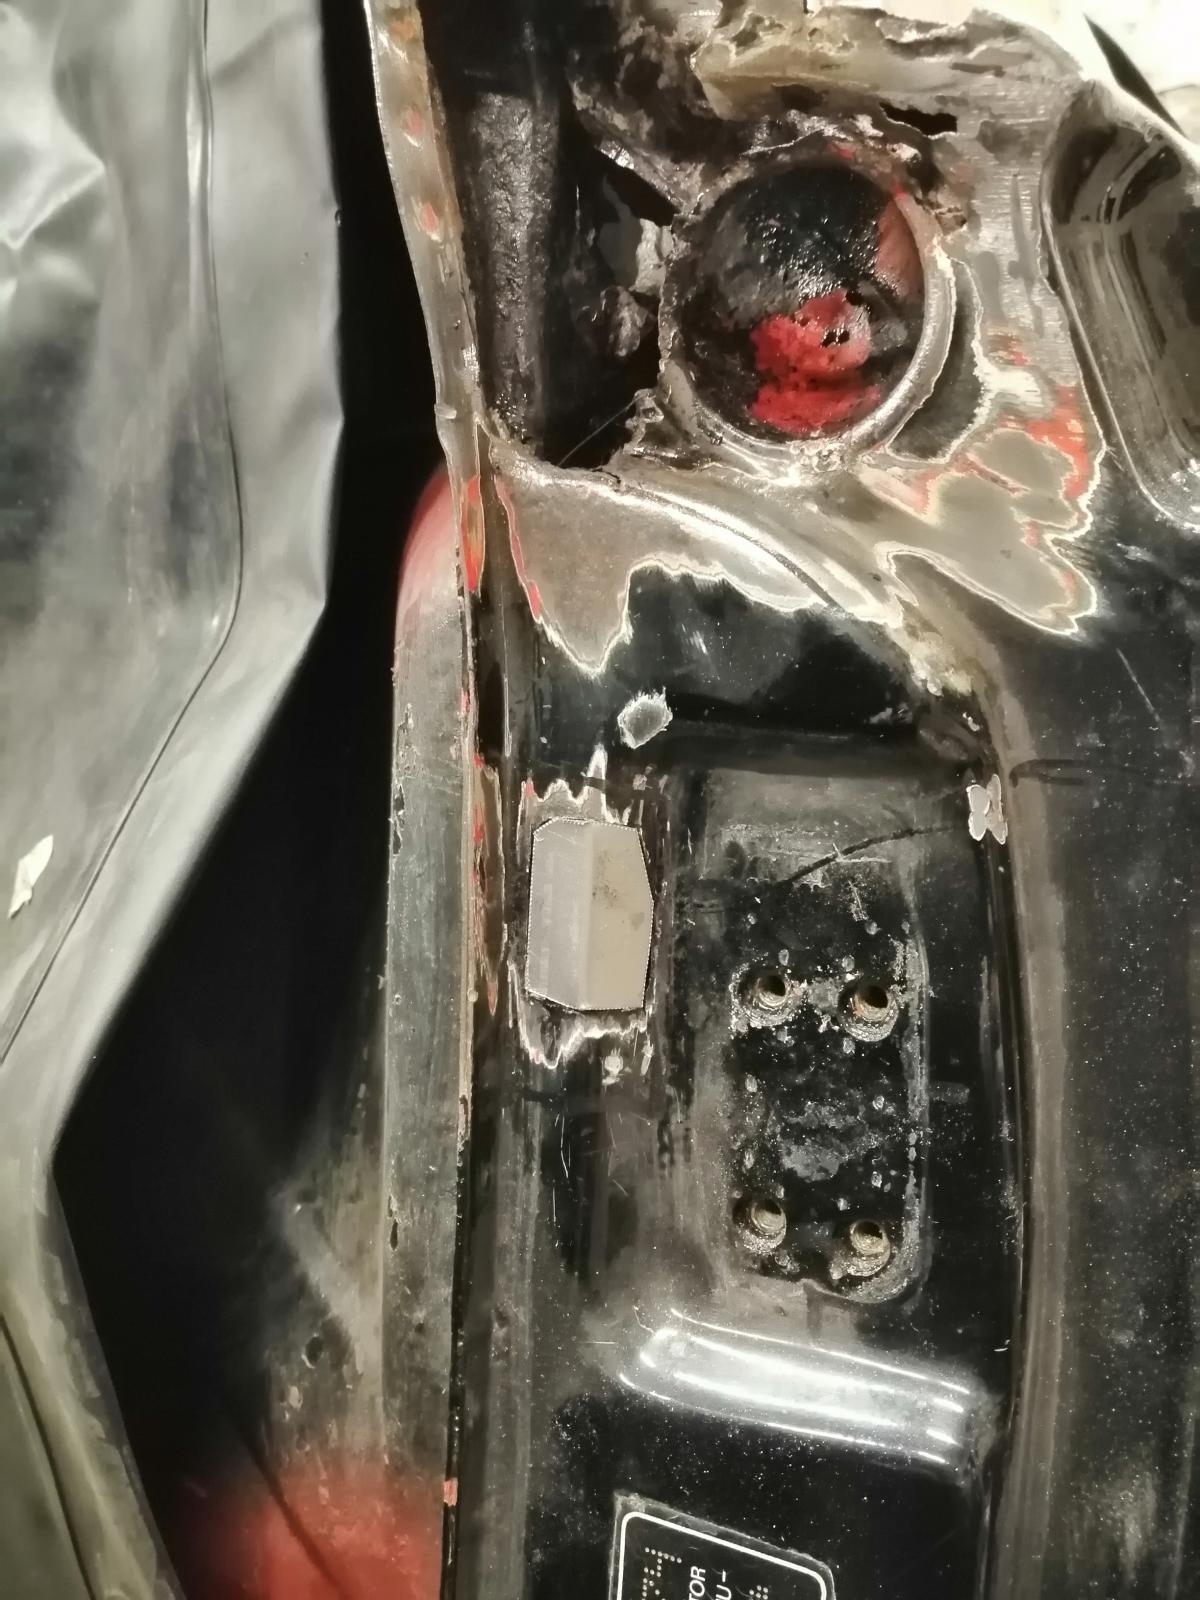
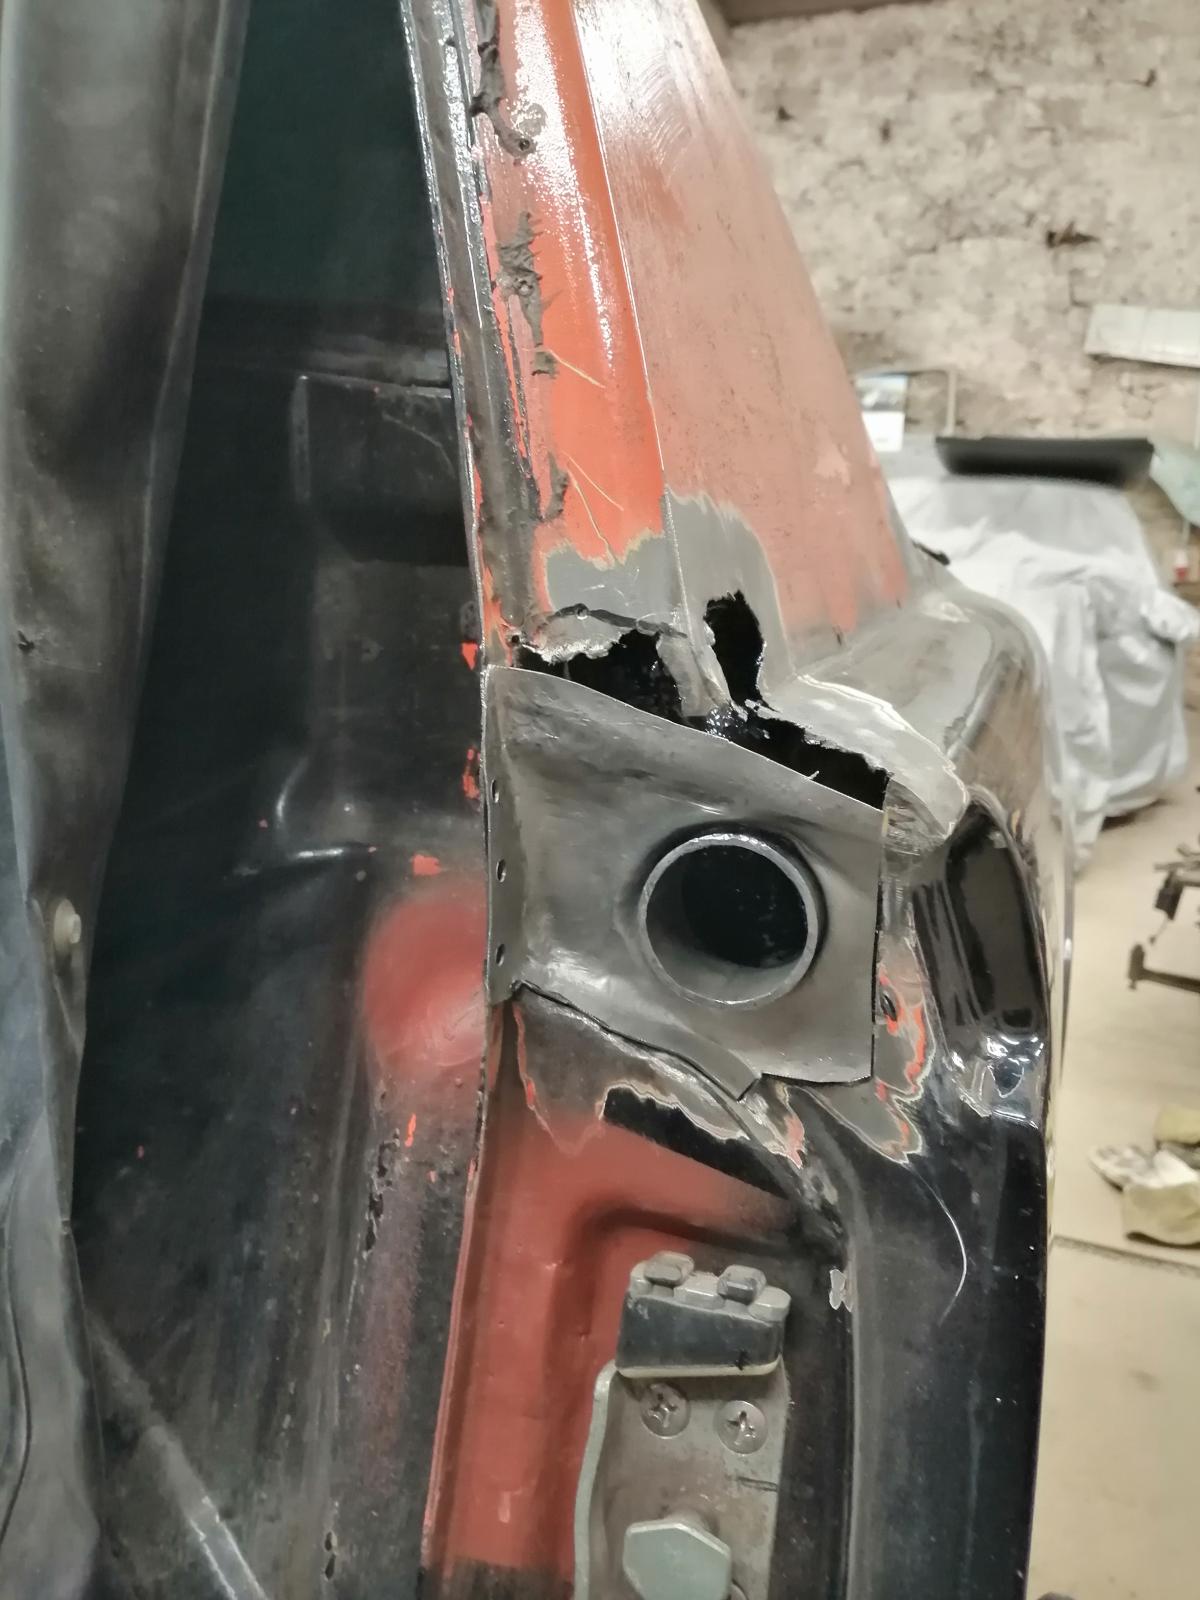
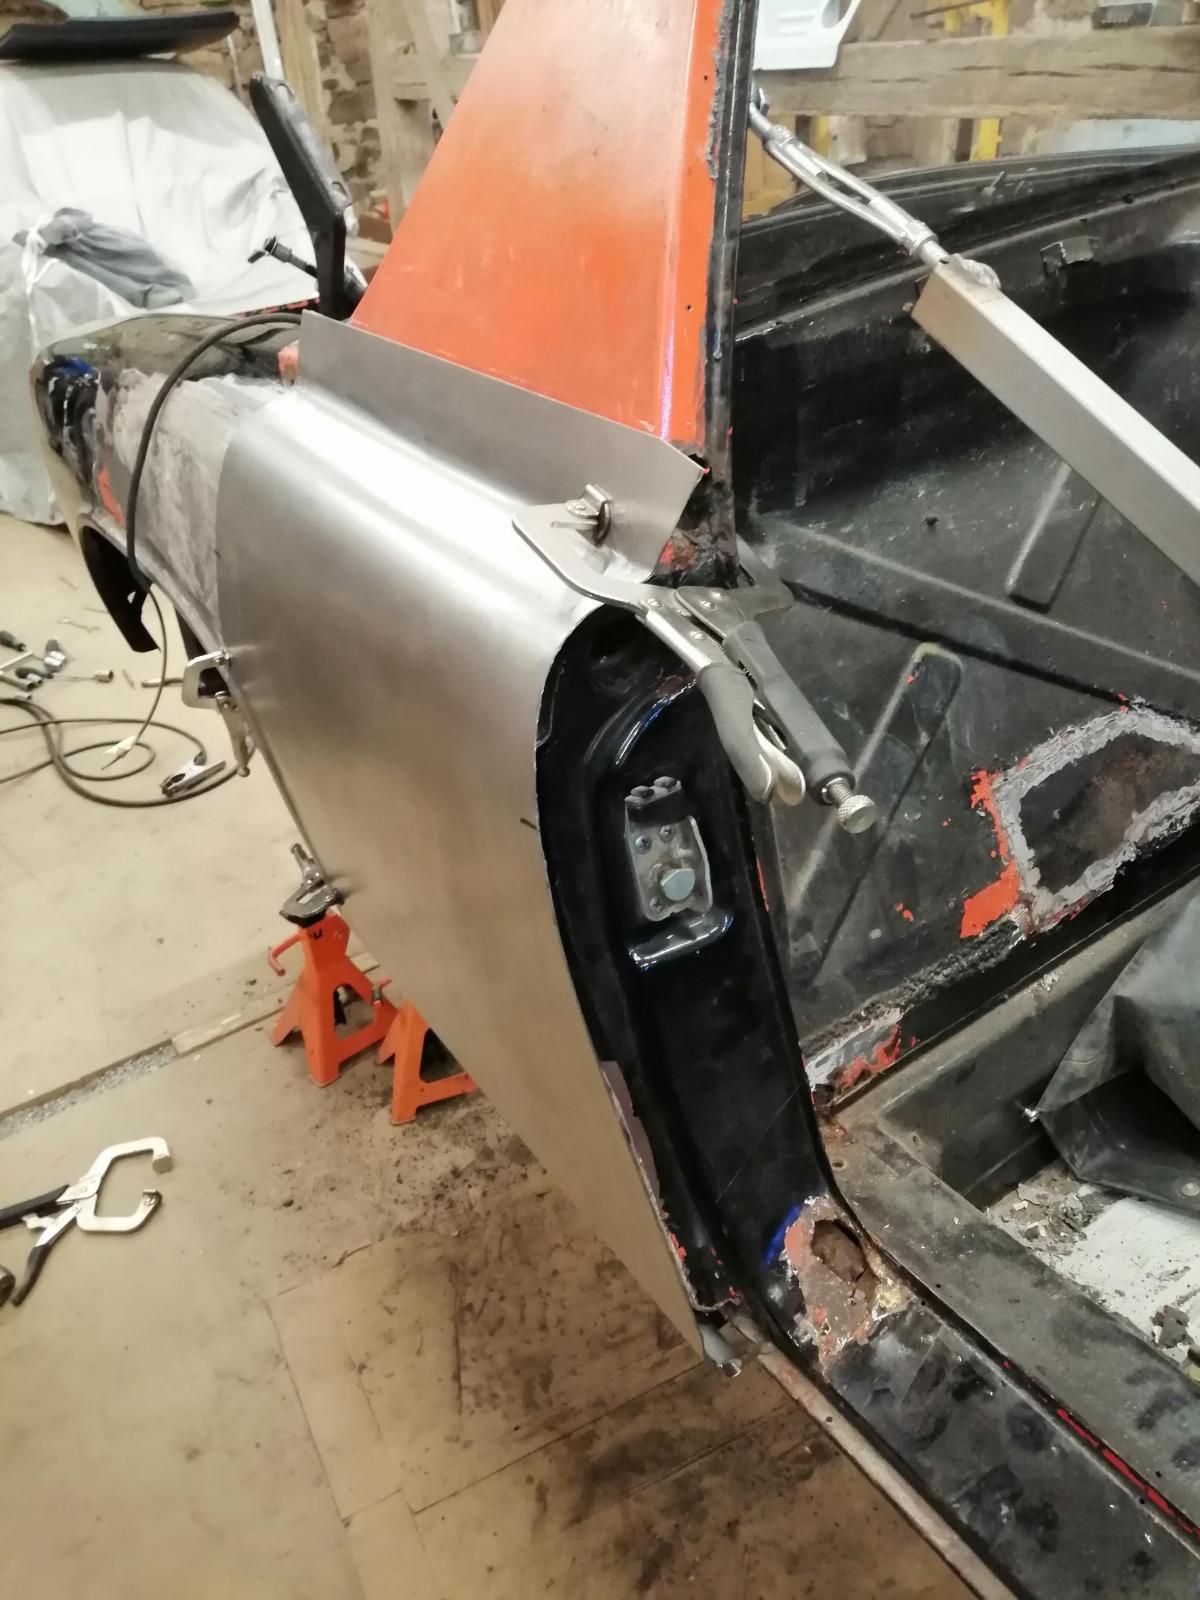
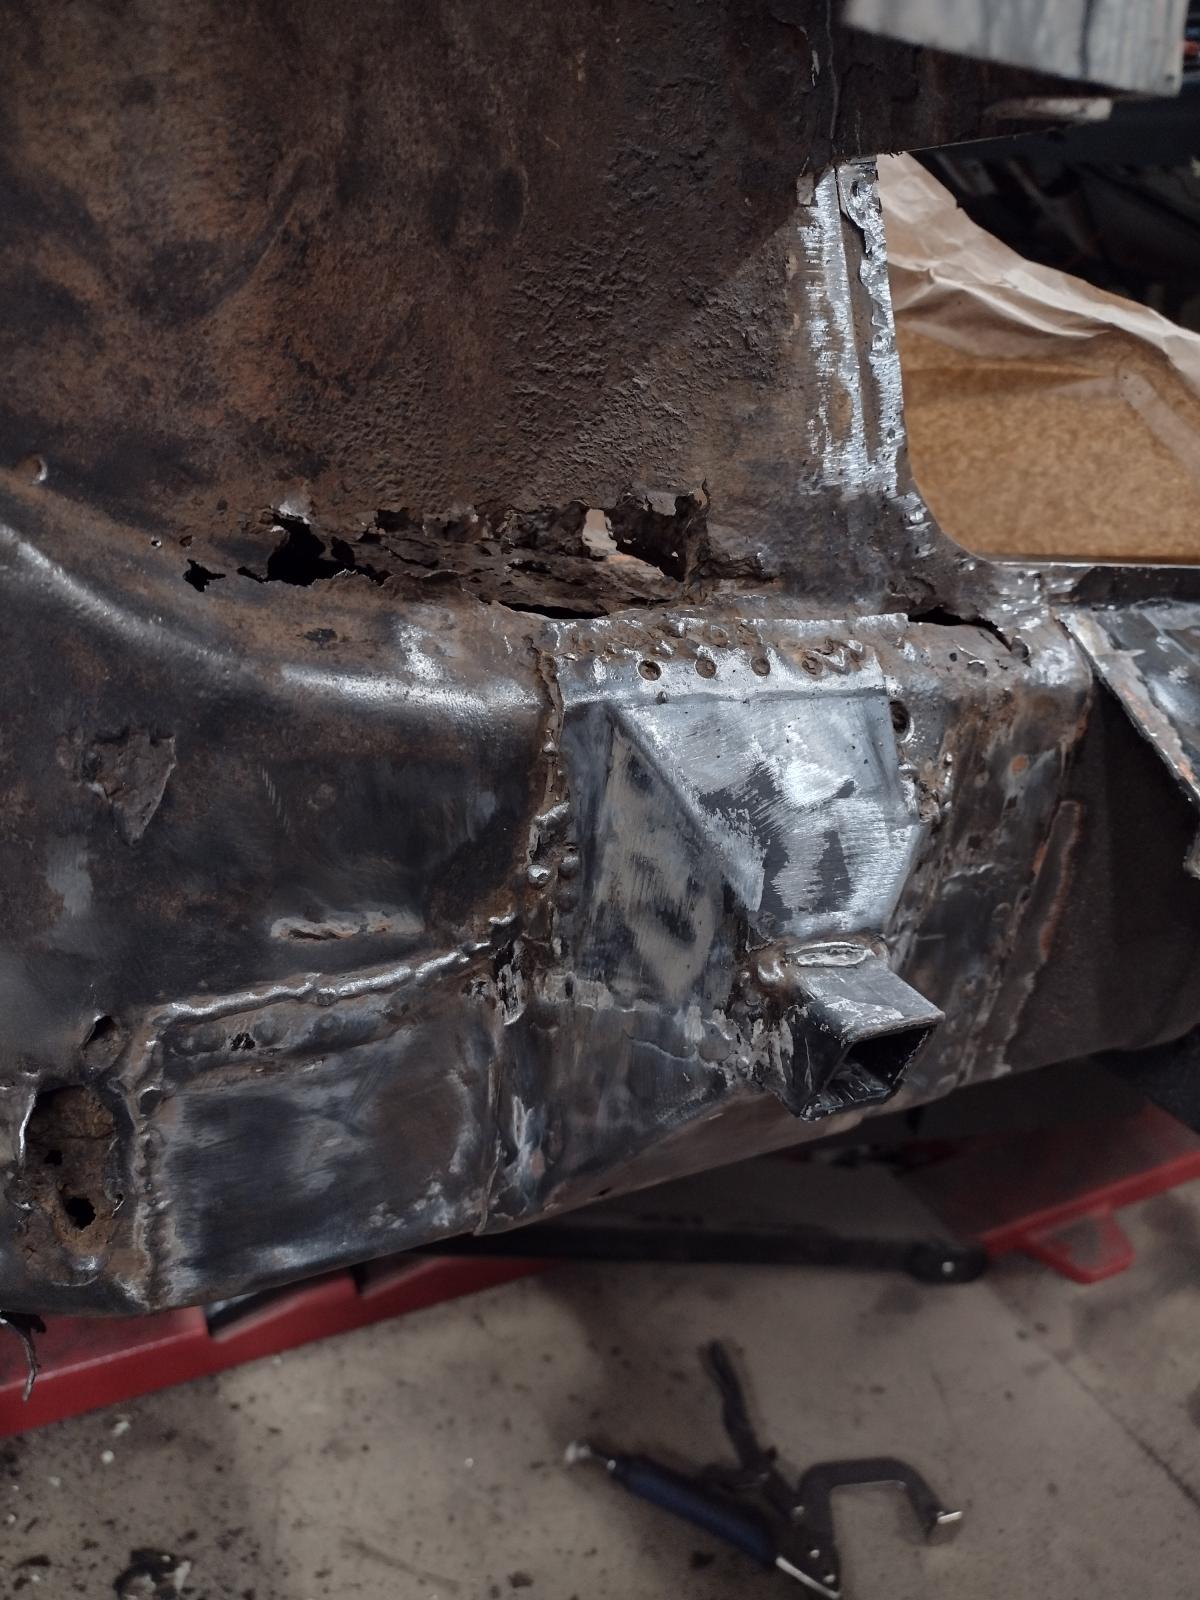
And then it was time to start on the hellhole. First making some space in the corner of the cabin..so a part ofthe firewall has to go:
It had its issue and bad repair:
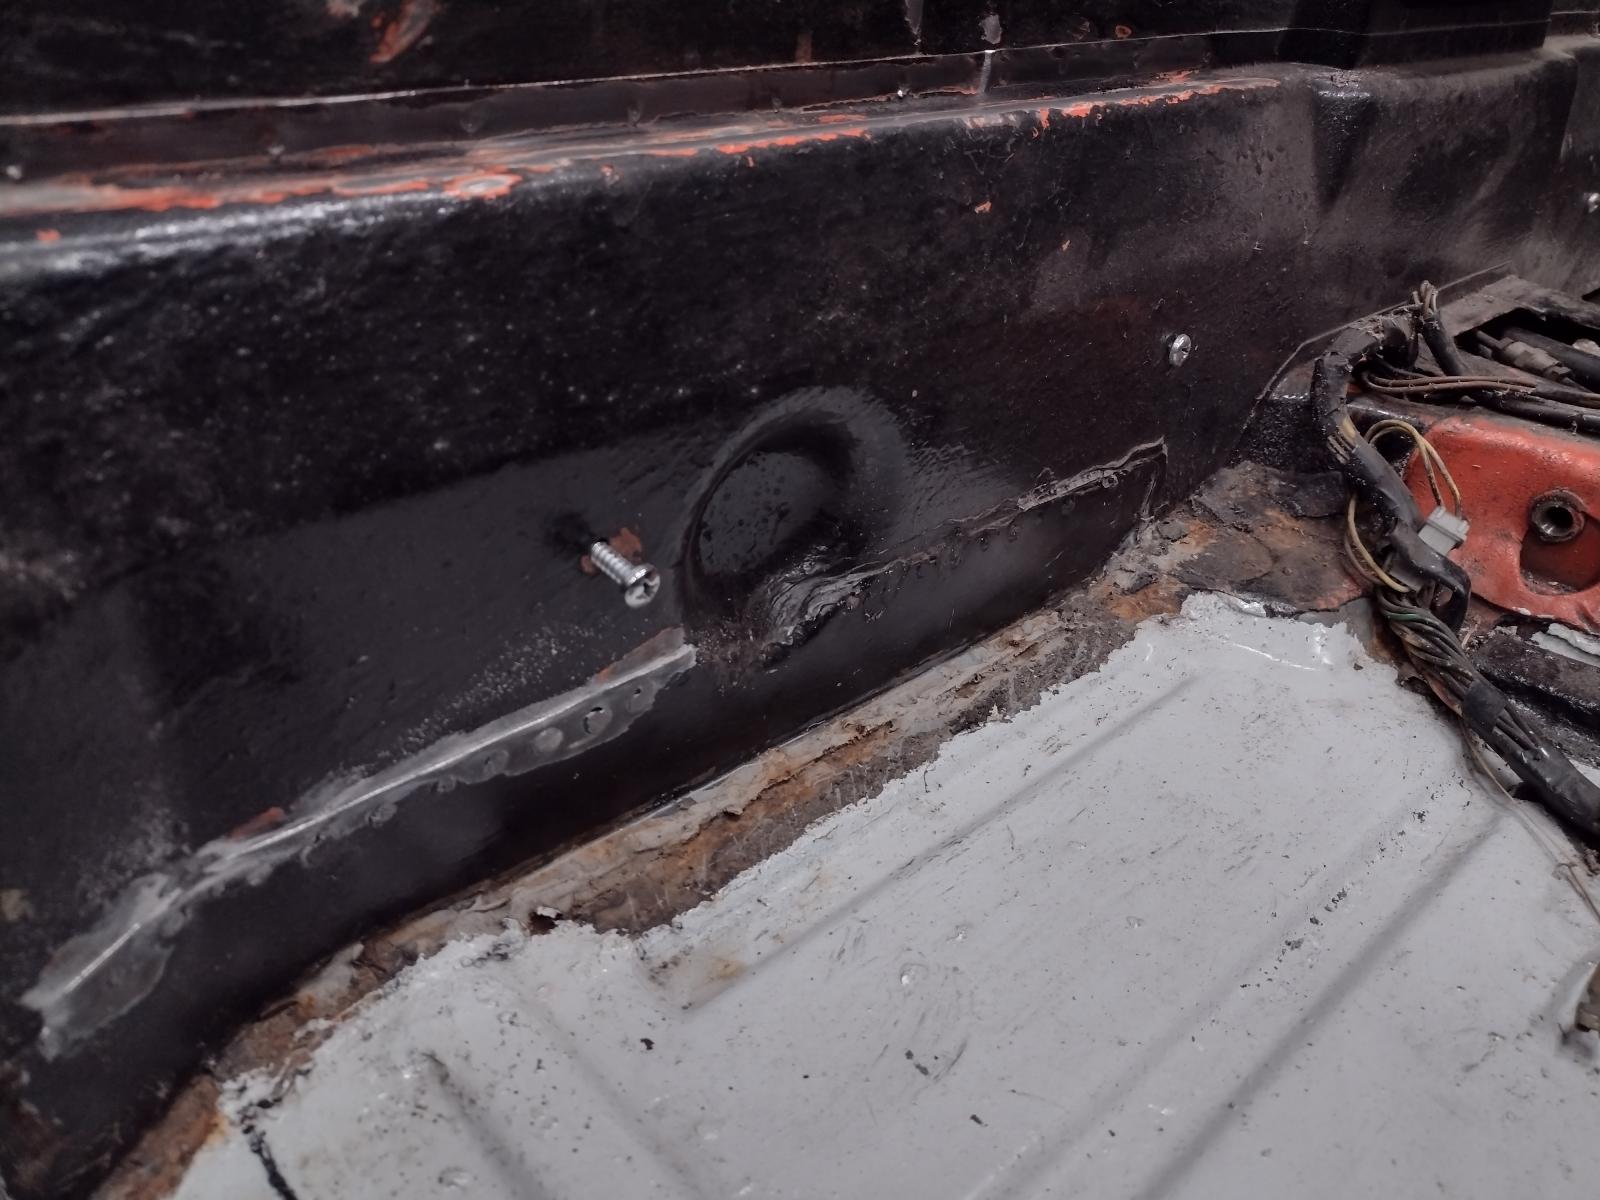
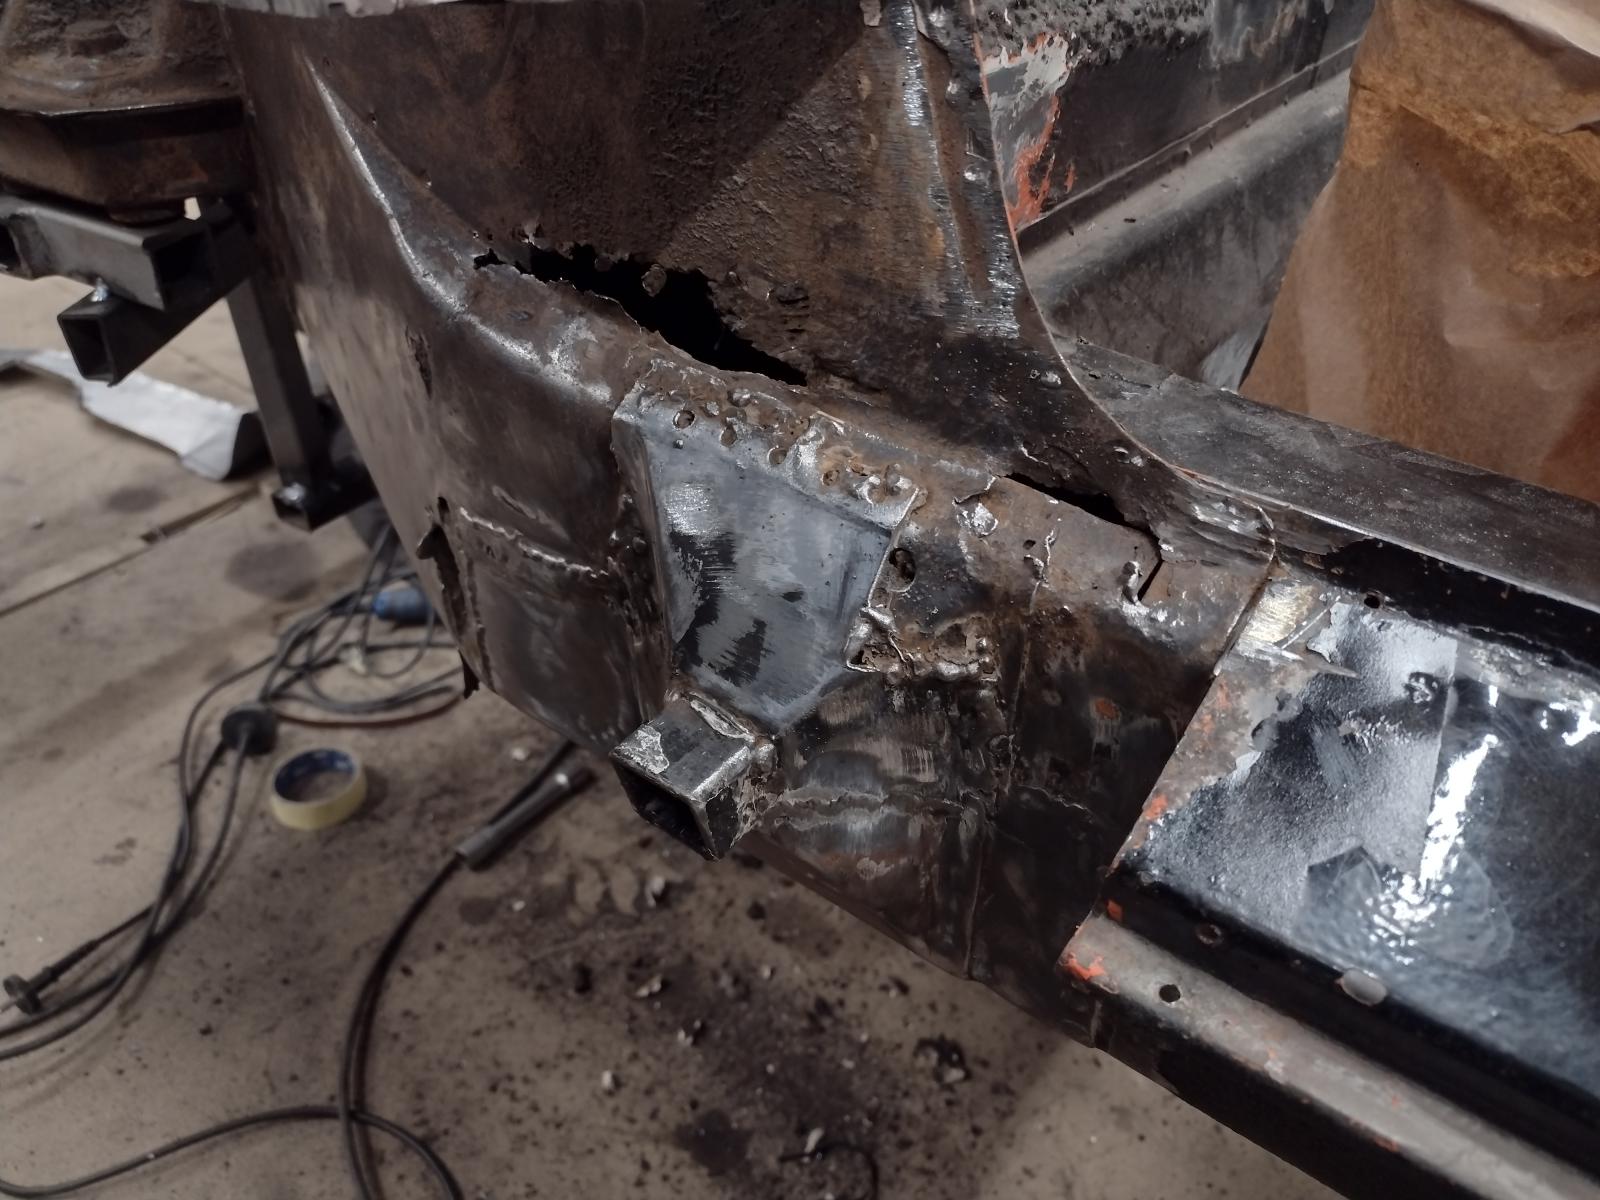
So it was time to remove as far as needed to repair it properly:
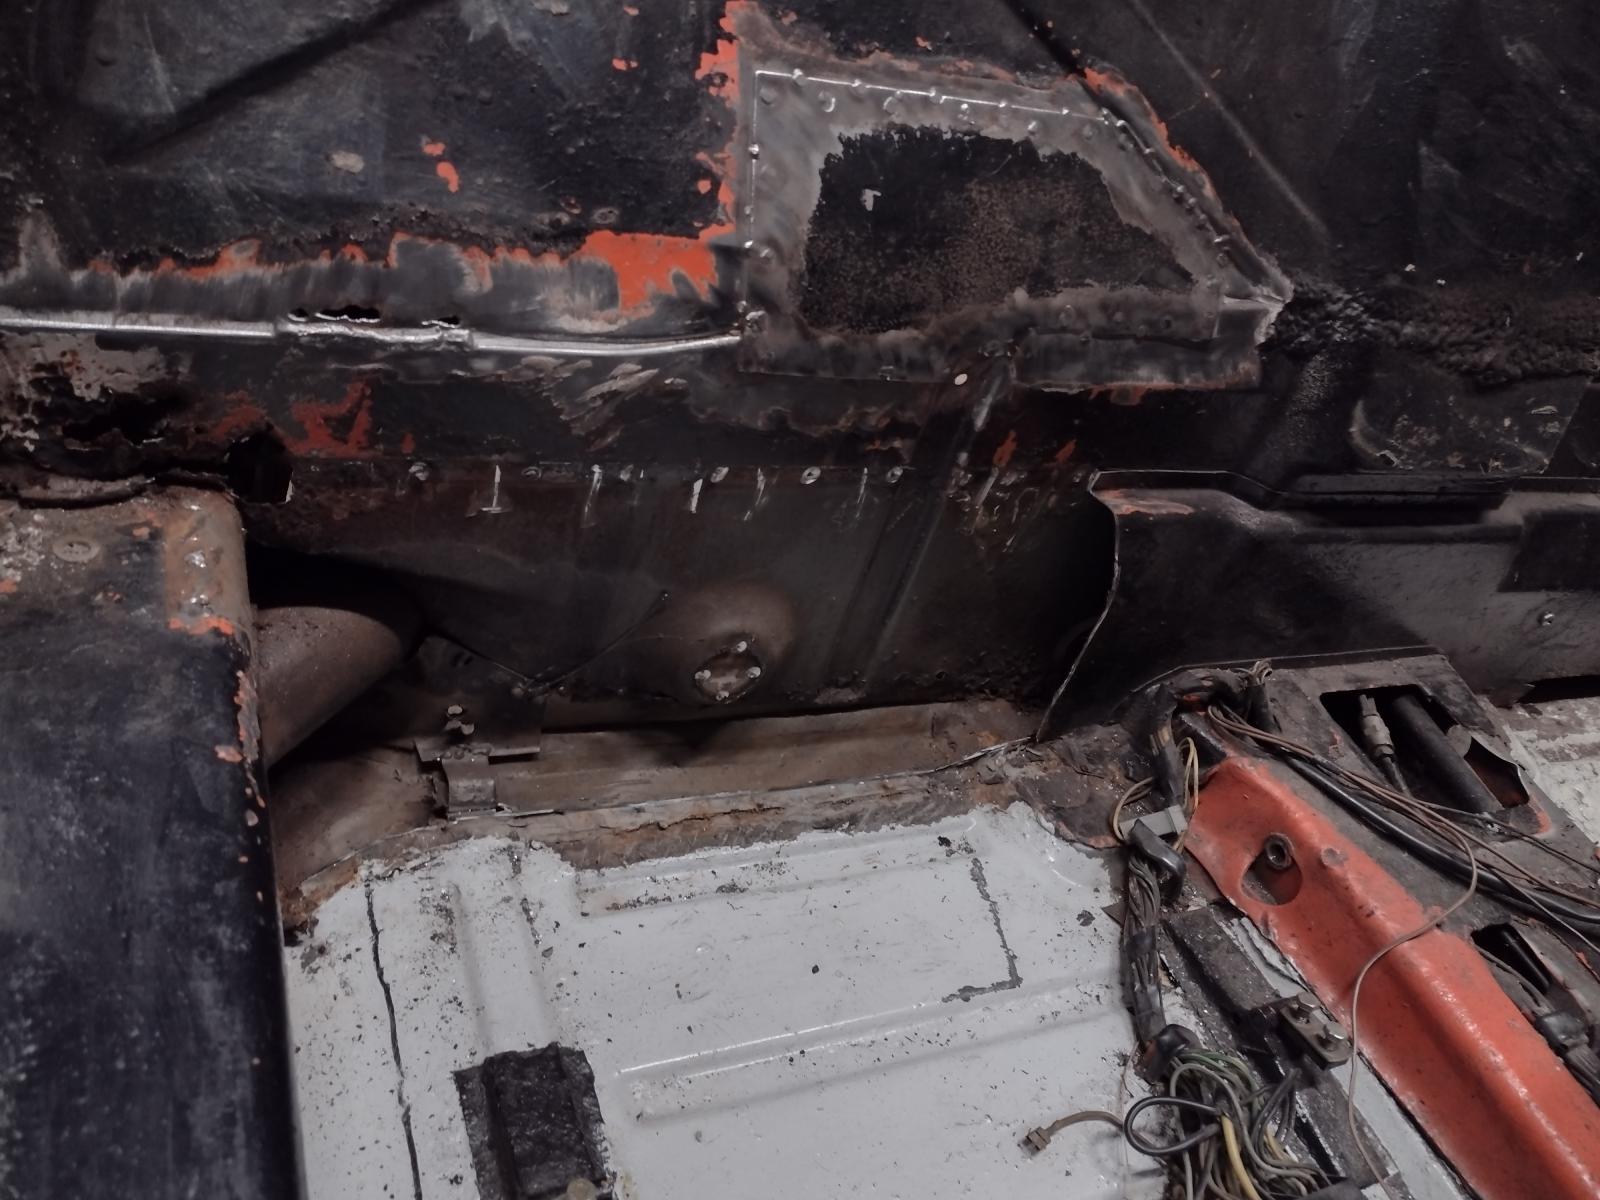
What I discovered behind it wasn't nice either:
And the floor "repair" was not butt welded, which showed when I cut here the remain of the firewall and water came through capillarity even if the car did not see any water/rain since end of july
So more work on this area..
The next update with some firewall repair is coming, stay tuned !
Antoine
With my stainless steel fuel lines:
And the vinyl for the sail panel:
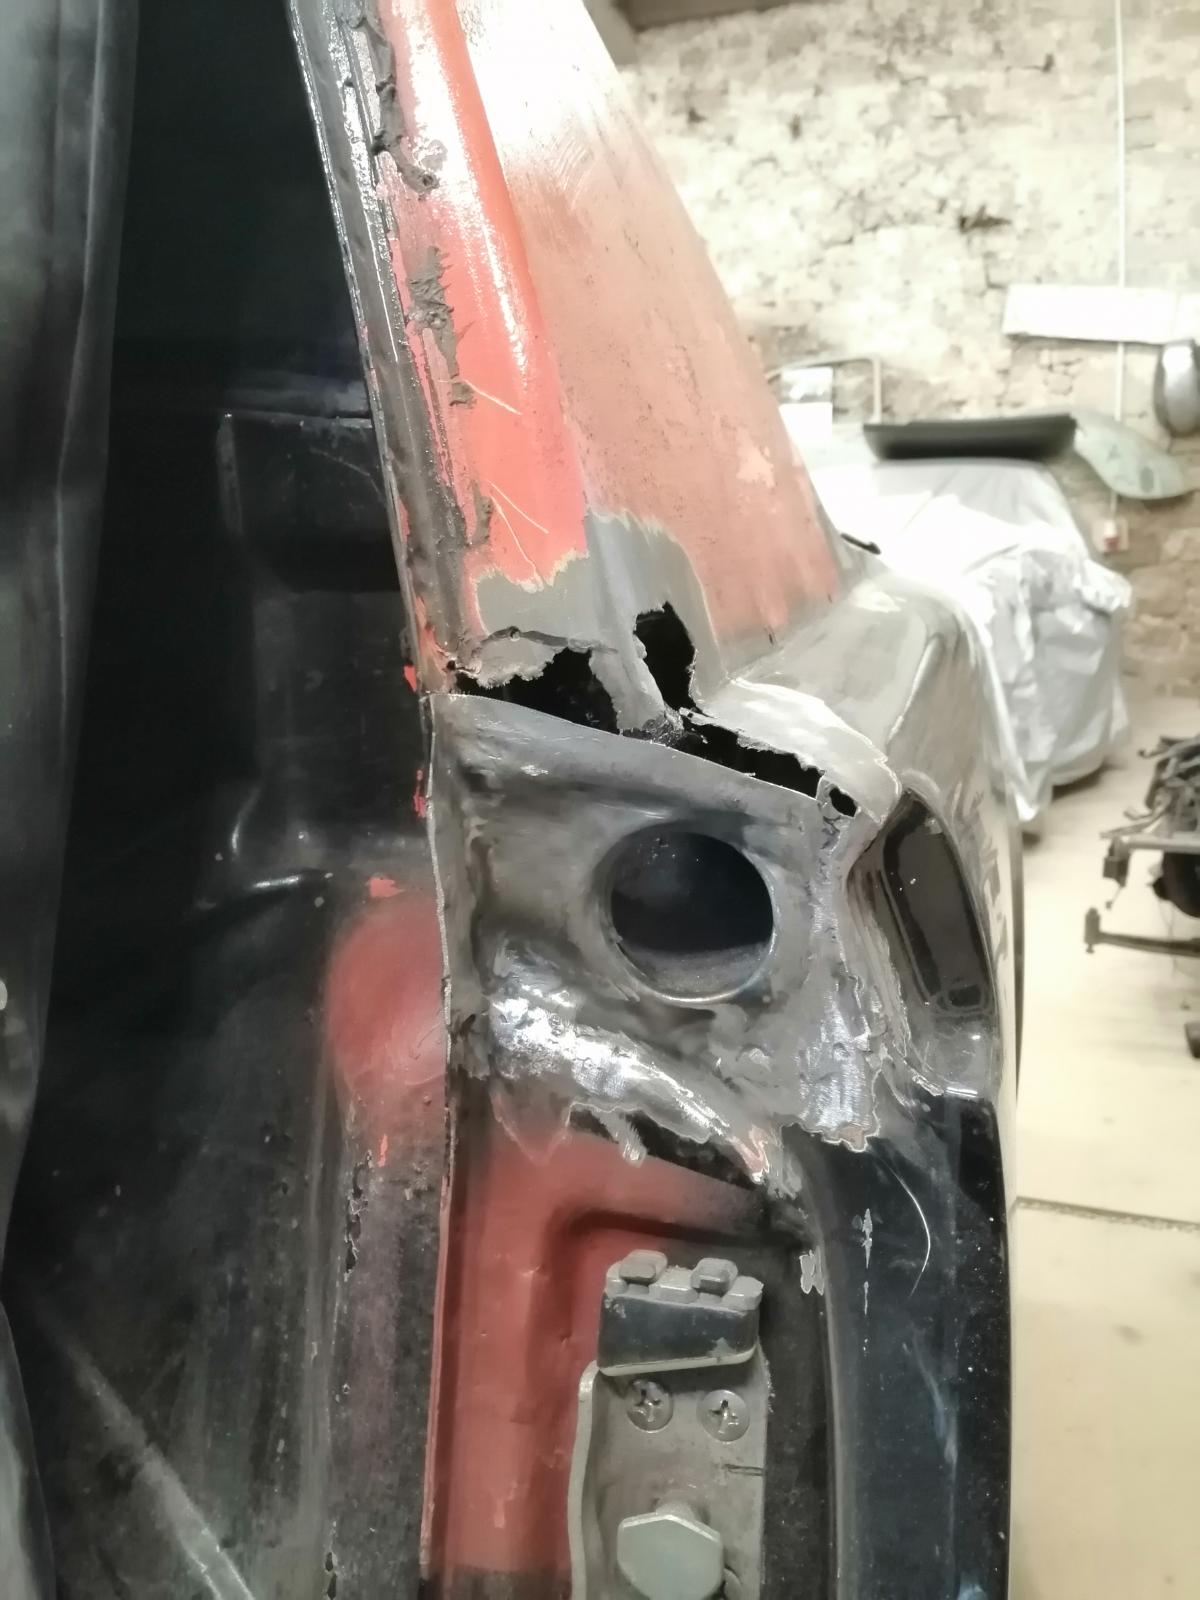
And then it was time to start on the hellhole. First making some space in the corner of the cabin..so a part ofthe firewall has to go:
It had its issue and bad repair:
So it was time to remove as far as needed to repair it properly:
What I discovered behind it wasn't nice either:
And the floor "repair" was not butt welded, which showed when I cut here the remain of the firewall and water came through capillarity even if the car did not see any water/rain since end of july
So more work on this area..
The next update with some firewall repair is coming, stay tuned !
Antoine
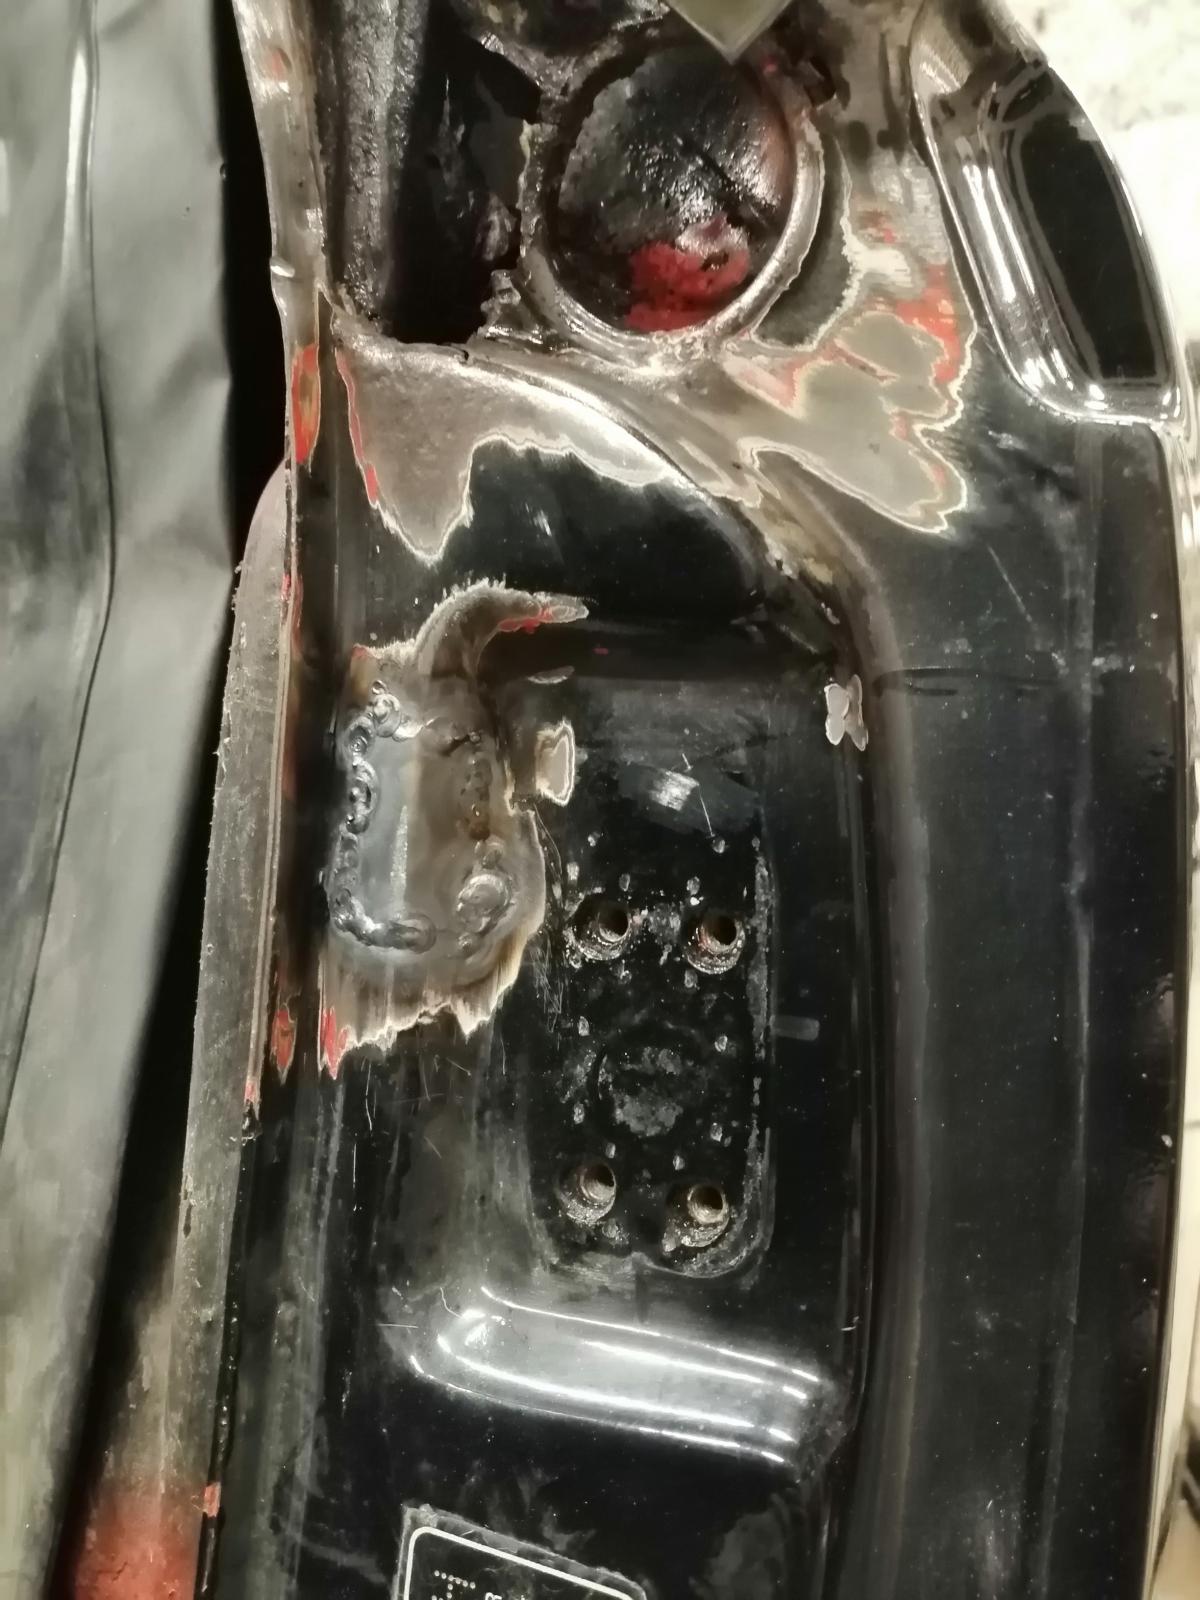
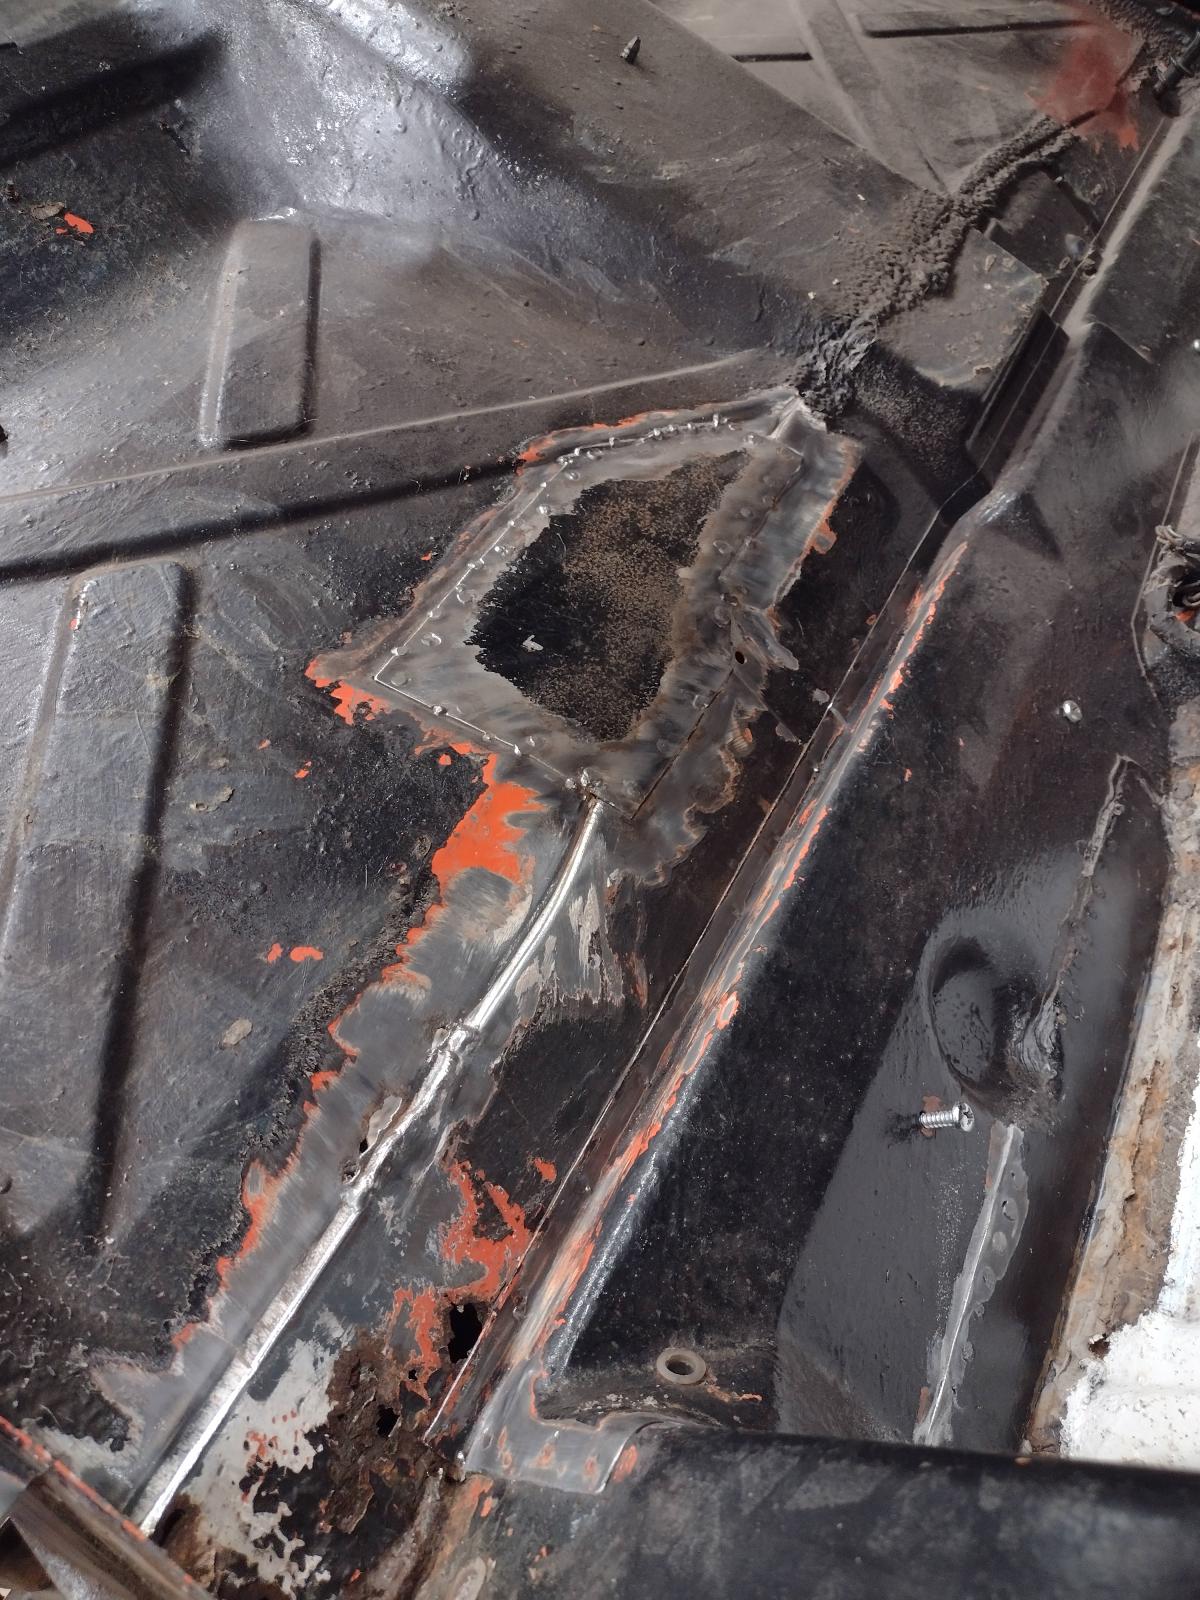
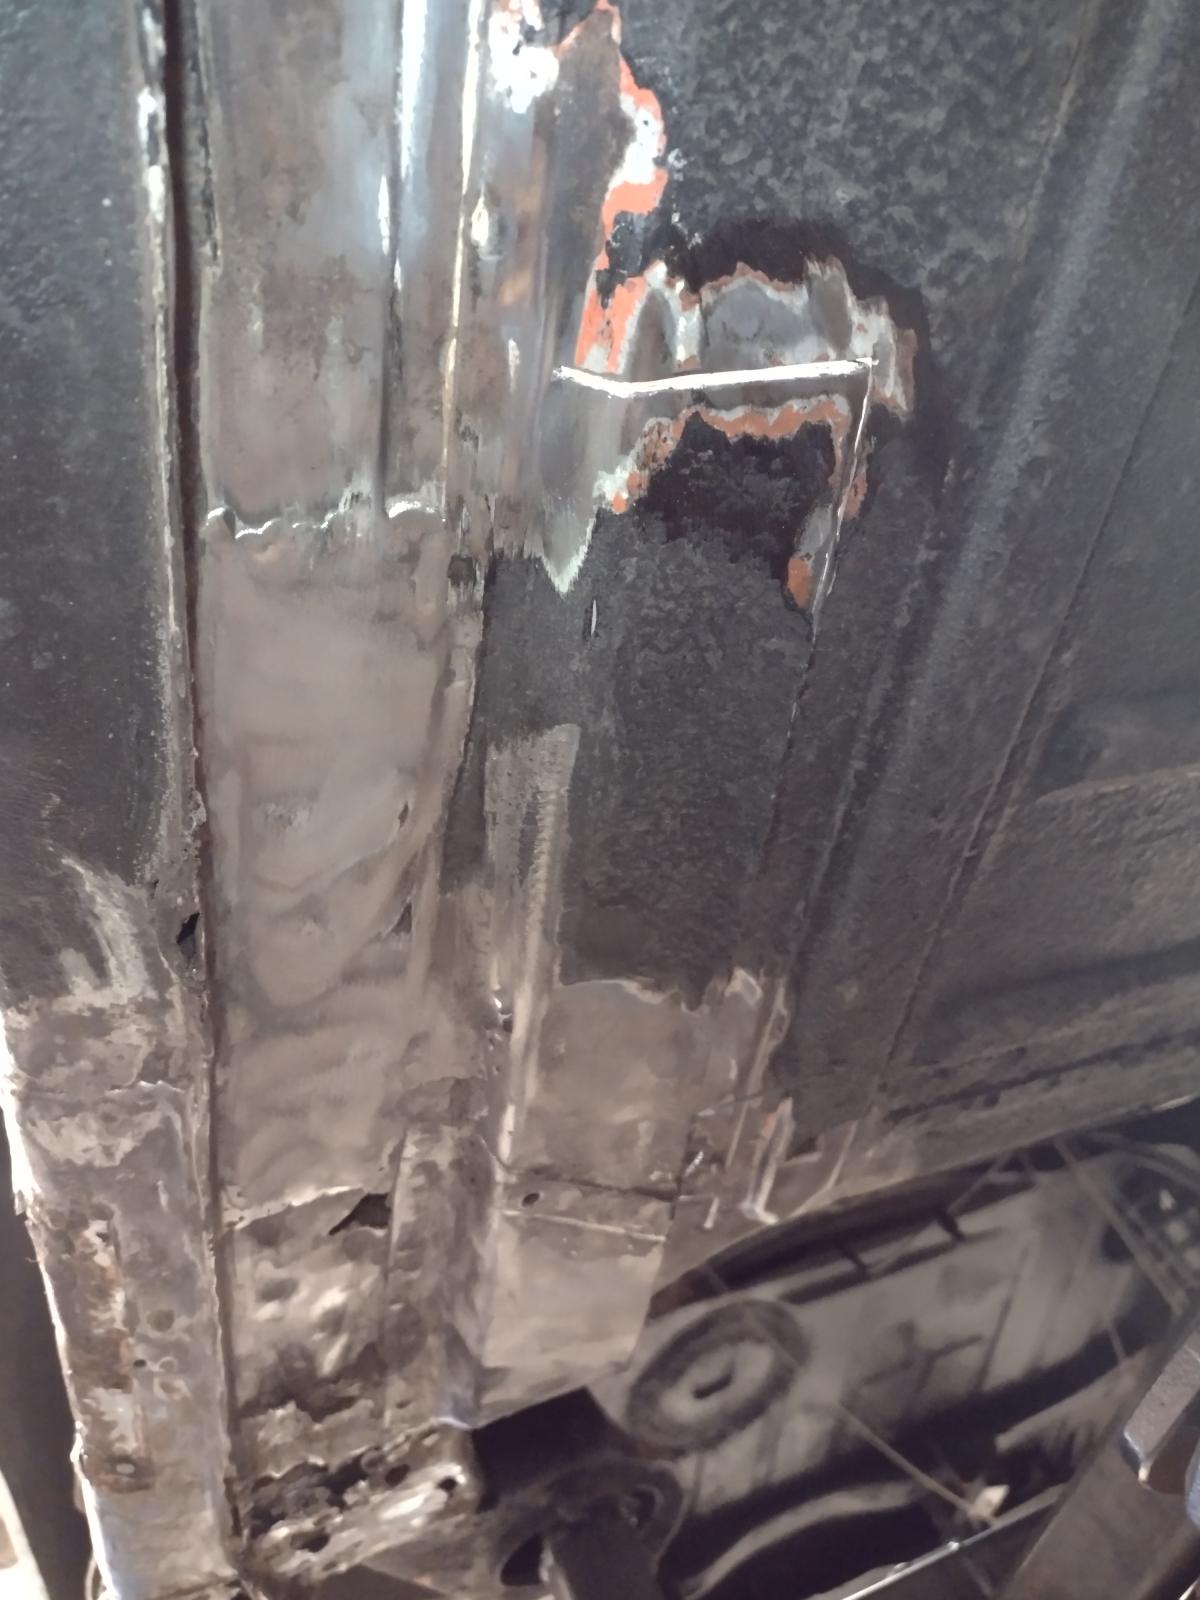
So, as I said, before going further, I repaired properly the firewall part I did cut.
It had a "repair" with metal over rust...

So I made a patch :
And adjusting:
Ready to weld:
Tack welded and check:
Welded and check:
And grinded/planished:

Cheers
Antoine
It had a "repair" with metal over rust...
So I made a patch :
And adjusting:
Ready to weld:
Tack welded and check:
Welded and check:
And grinded/planished:
Cheers
Antoine
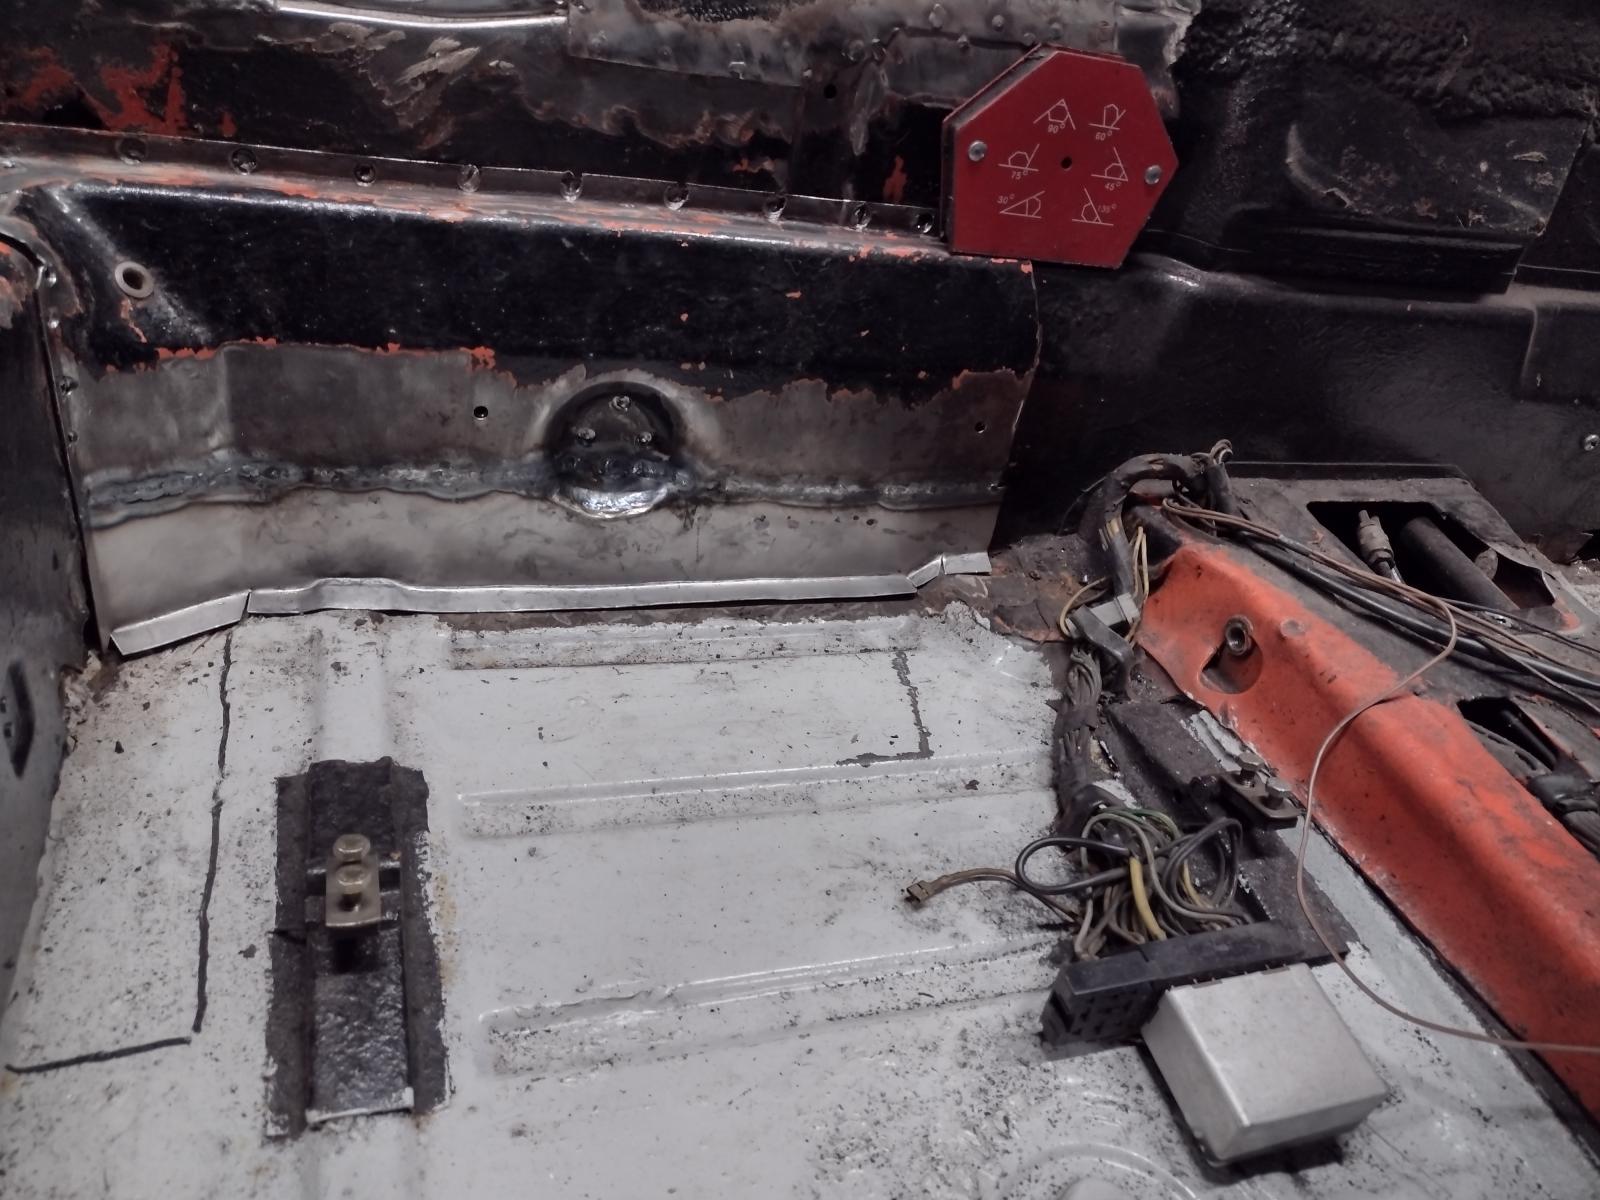
So, next update ! I removed the triangle at the back of the floor and it was damaged/poorly welded but still not really rusted so I decided to save it.
Before:
During:
After welding and beadblasting:
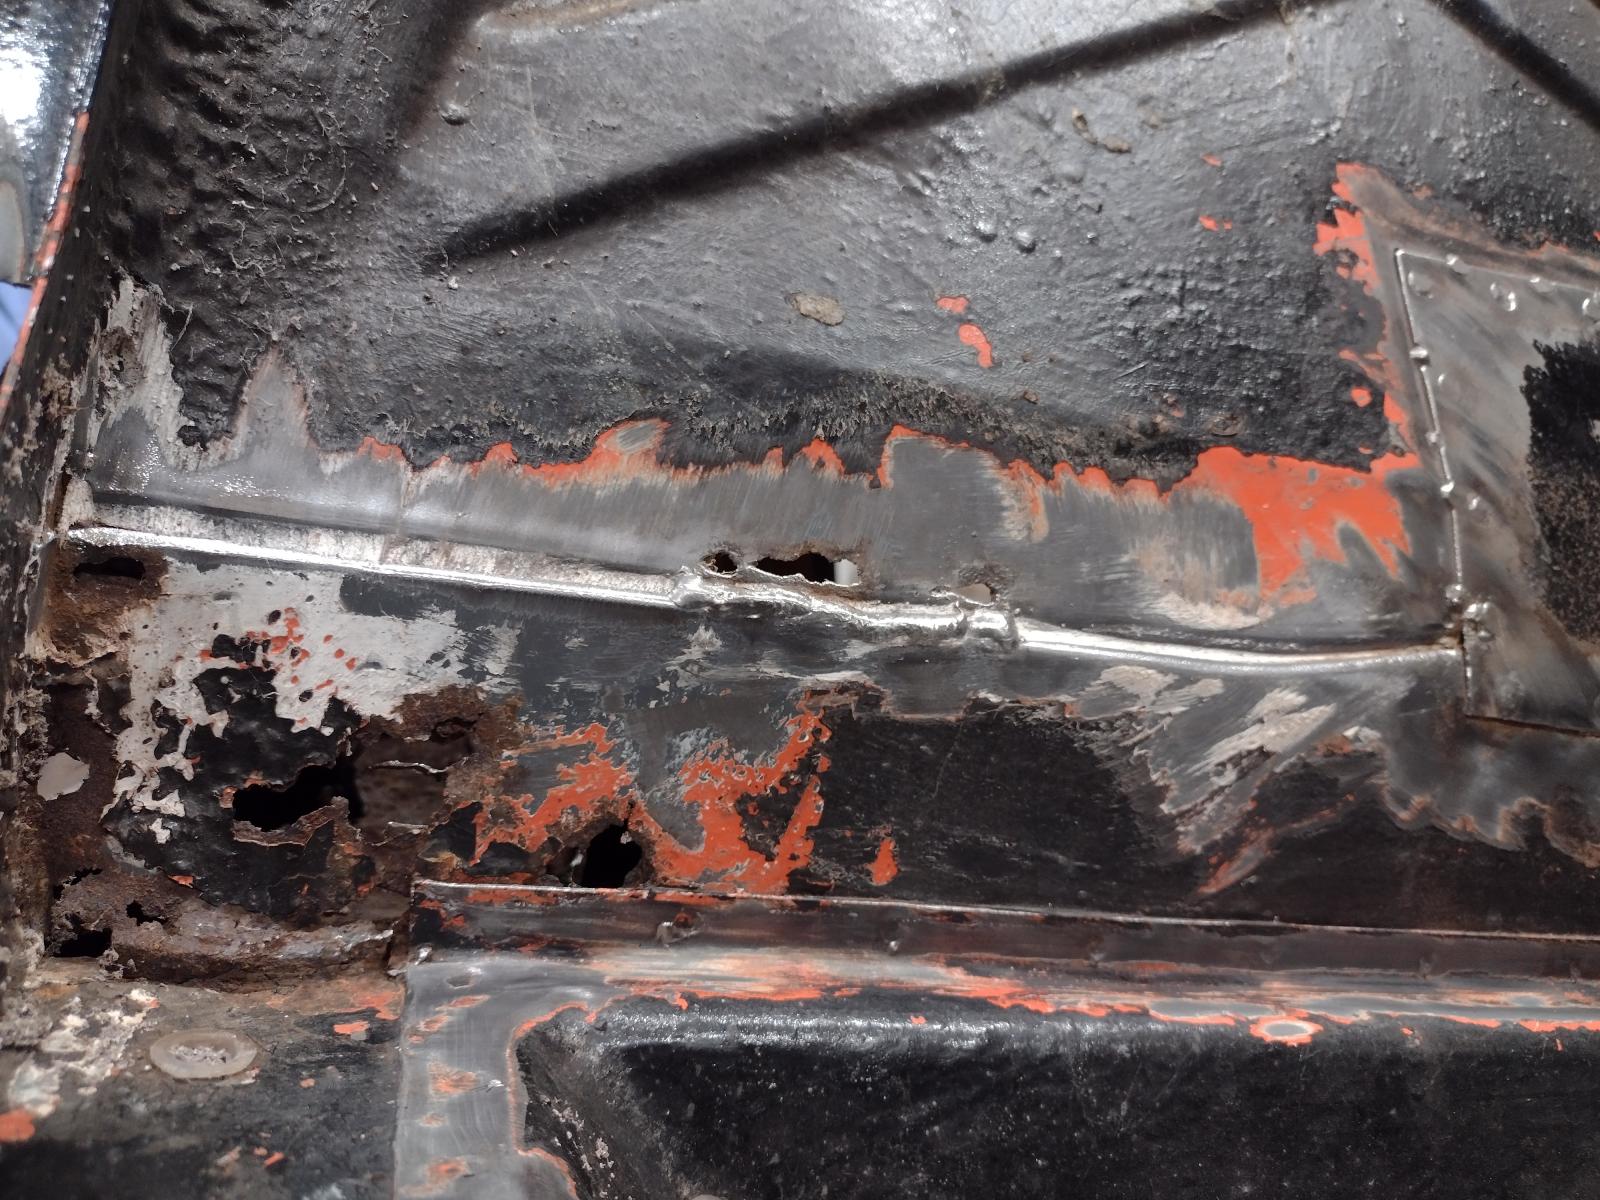
Then it was time to make some space to work on the long. Rust damages were there:
And when removing you see the old "repair" with metal over rust:

So let's make some space:
And start to make the repair pieces:
Test checking in position :
And soon all of this will be welded together:
Stay tuned, I planned some solid hours on it next week !
Antoine
Before:
During:
After welding and beadblasting:
Then it was time to make some space to work on the long. Rust damages were there:
And when removing you see the old "repair" with metal over rust:
So let's make some space:
And start to make the repair pieces:
Test checking in position :
And soon all of this will be welded together:
Stay tuned, I planned some solid hours on it next week !
Antoine
great stuff @TRS63 .
since you are a dedicated L jet owner chopping out all the rust and fixing the dodgy repairs from half a century too far away from german precision - cough up your info on the L jet info request thread i posted. i spied a photo at start of your thread and could see something resembling an intact L jet set up. you might have some interesting info if you look closely at what is left on the car.
keep up the good work.
Thanks for the kind words !
I did not manage to go to the shop this week but saw your post and will contribute there with my informations !
Bests
Antoine
I did not manage to go to the shop this week but saw your post and will contribute there with my informations !
Bests
Antoine
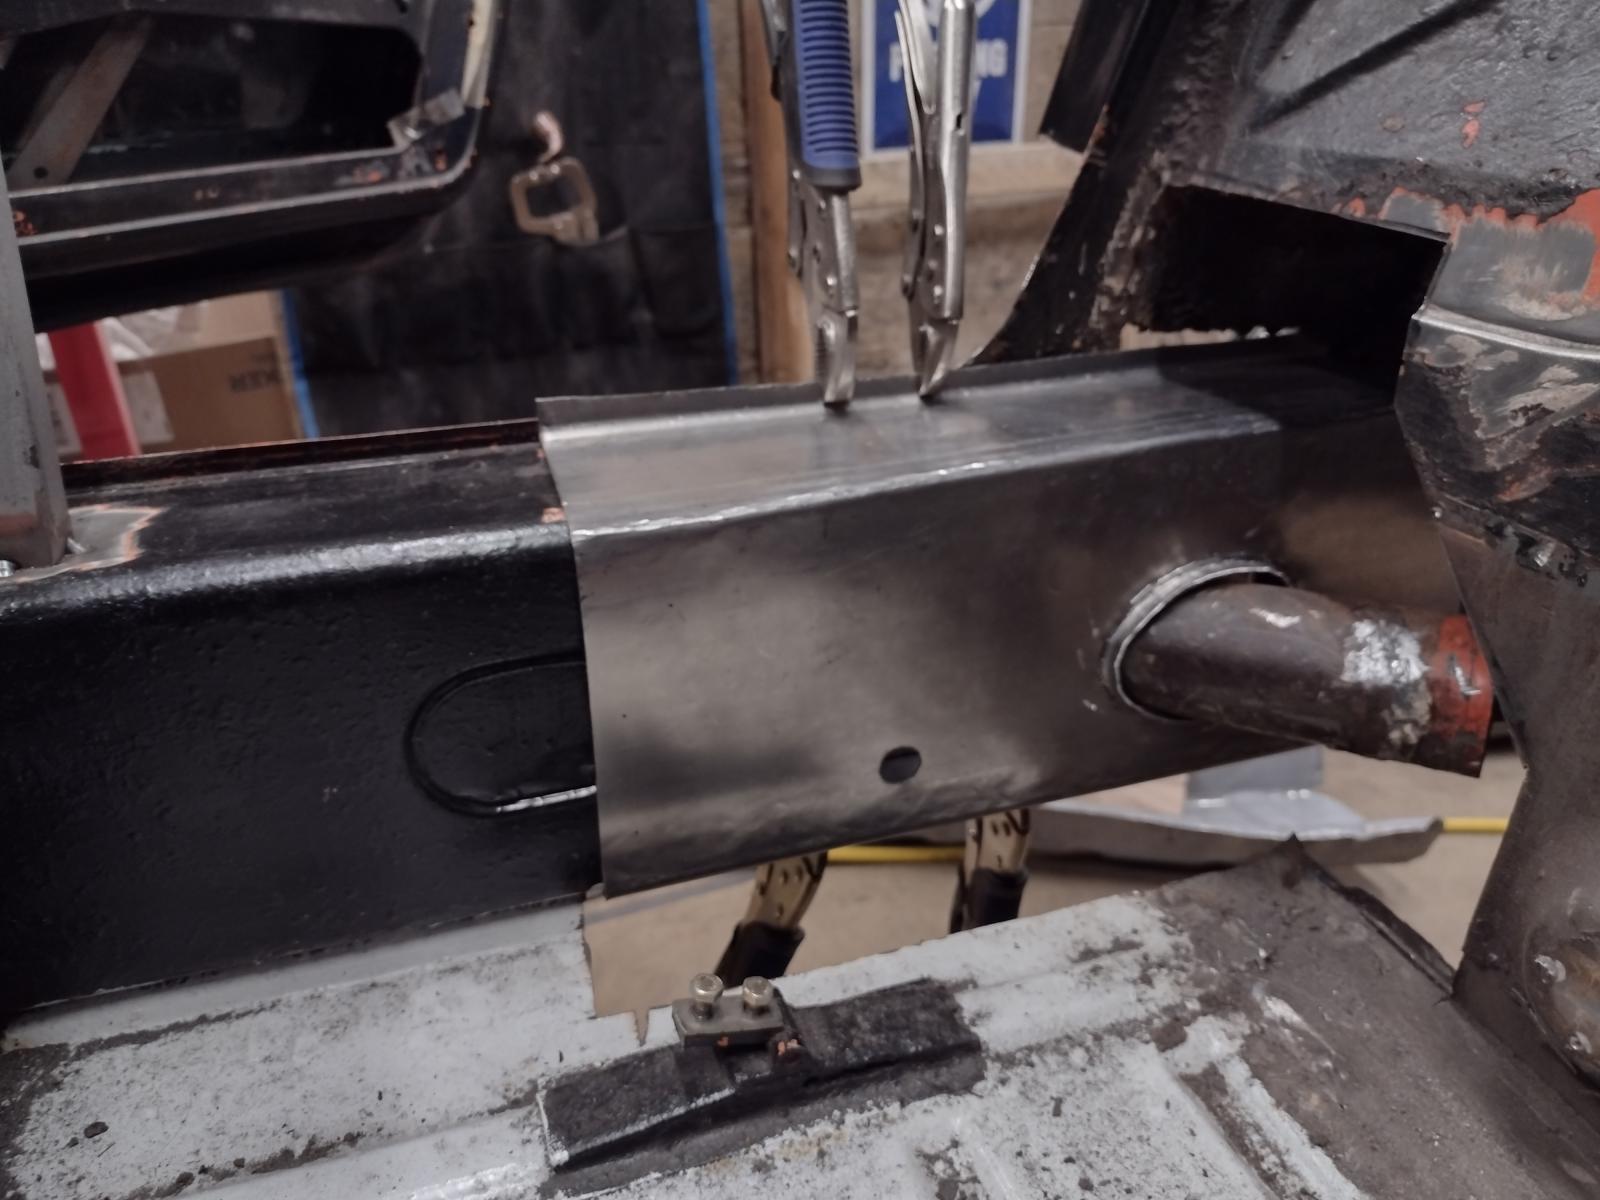
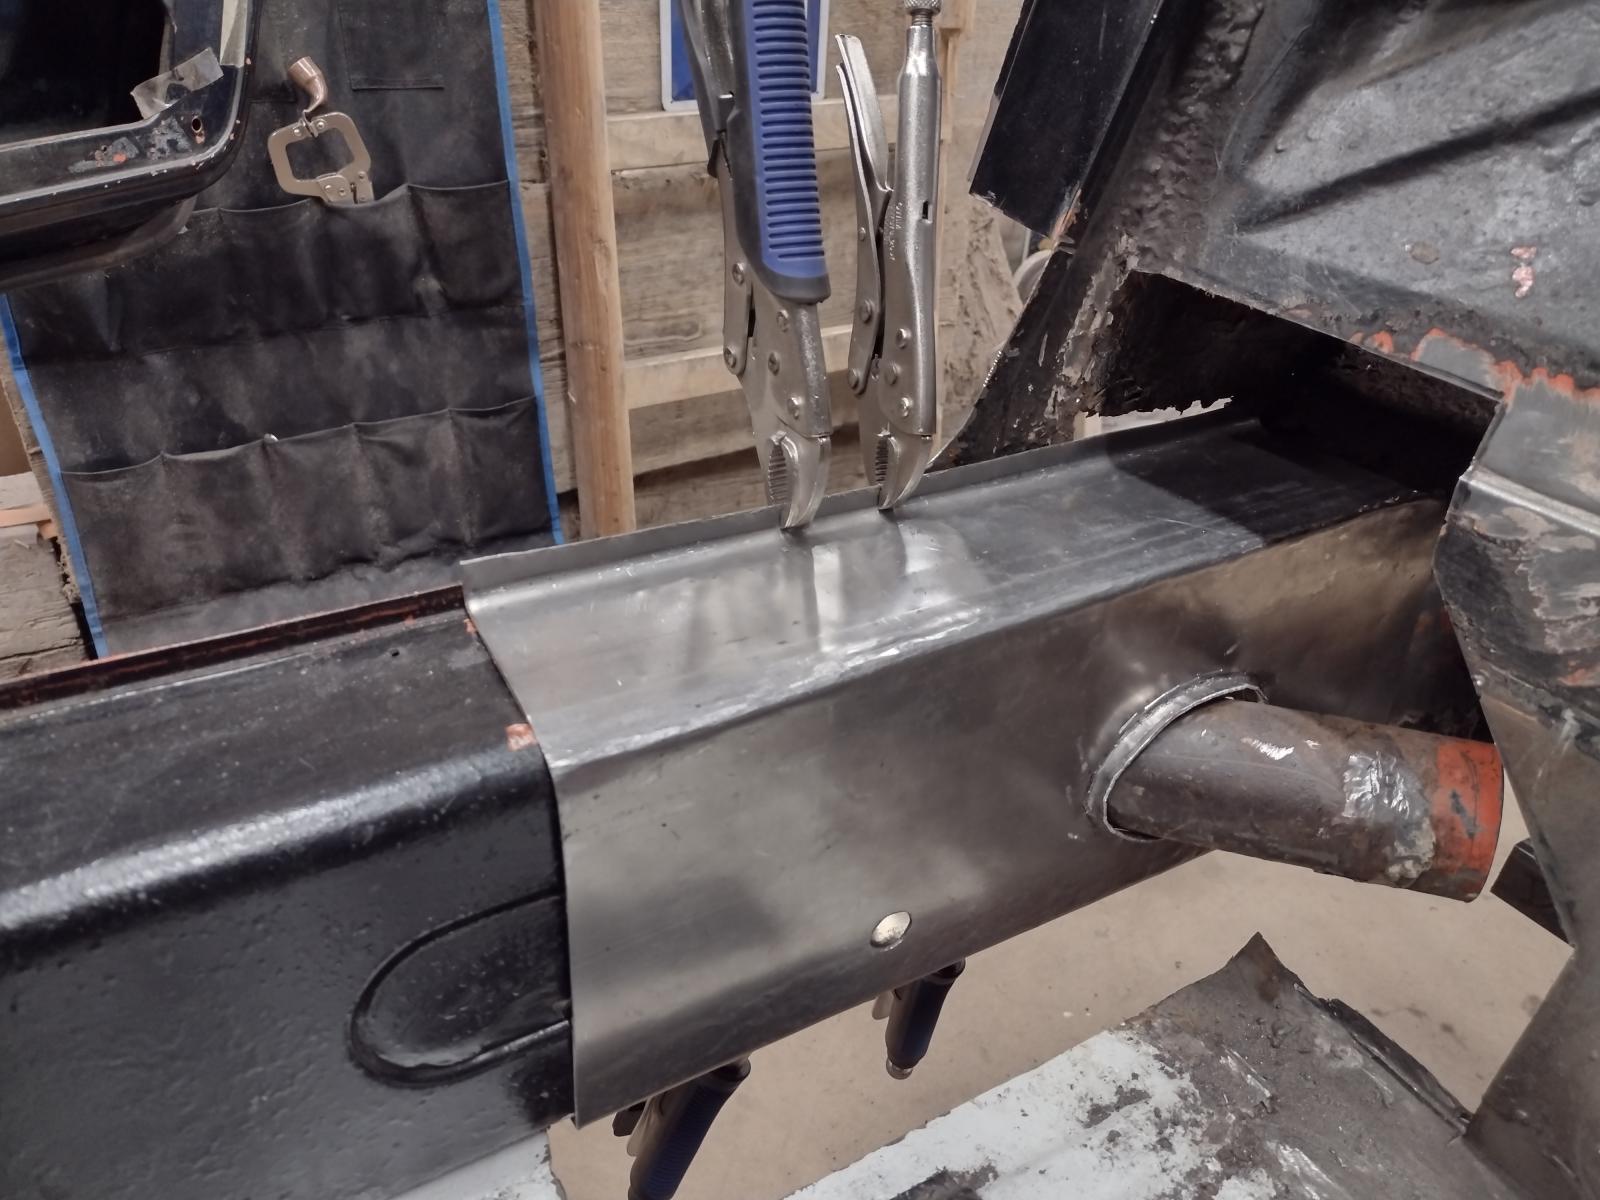
So, I finished welding the seat belt mounting point and adjusting my home made part of the long:
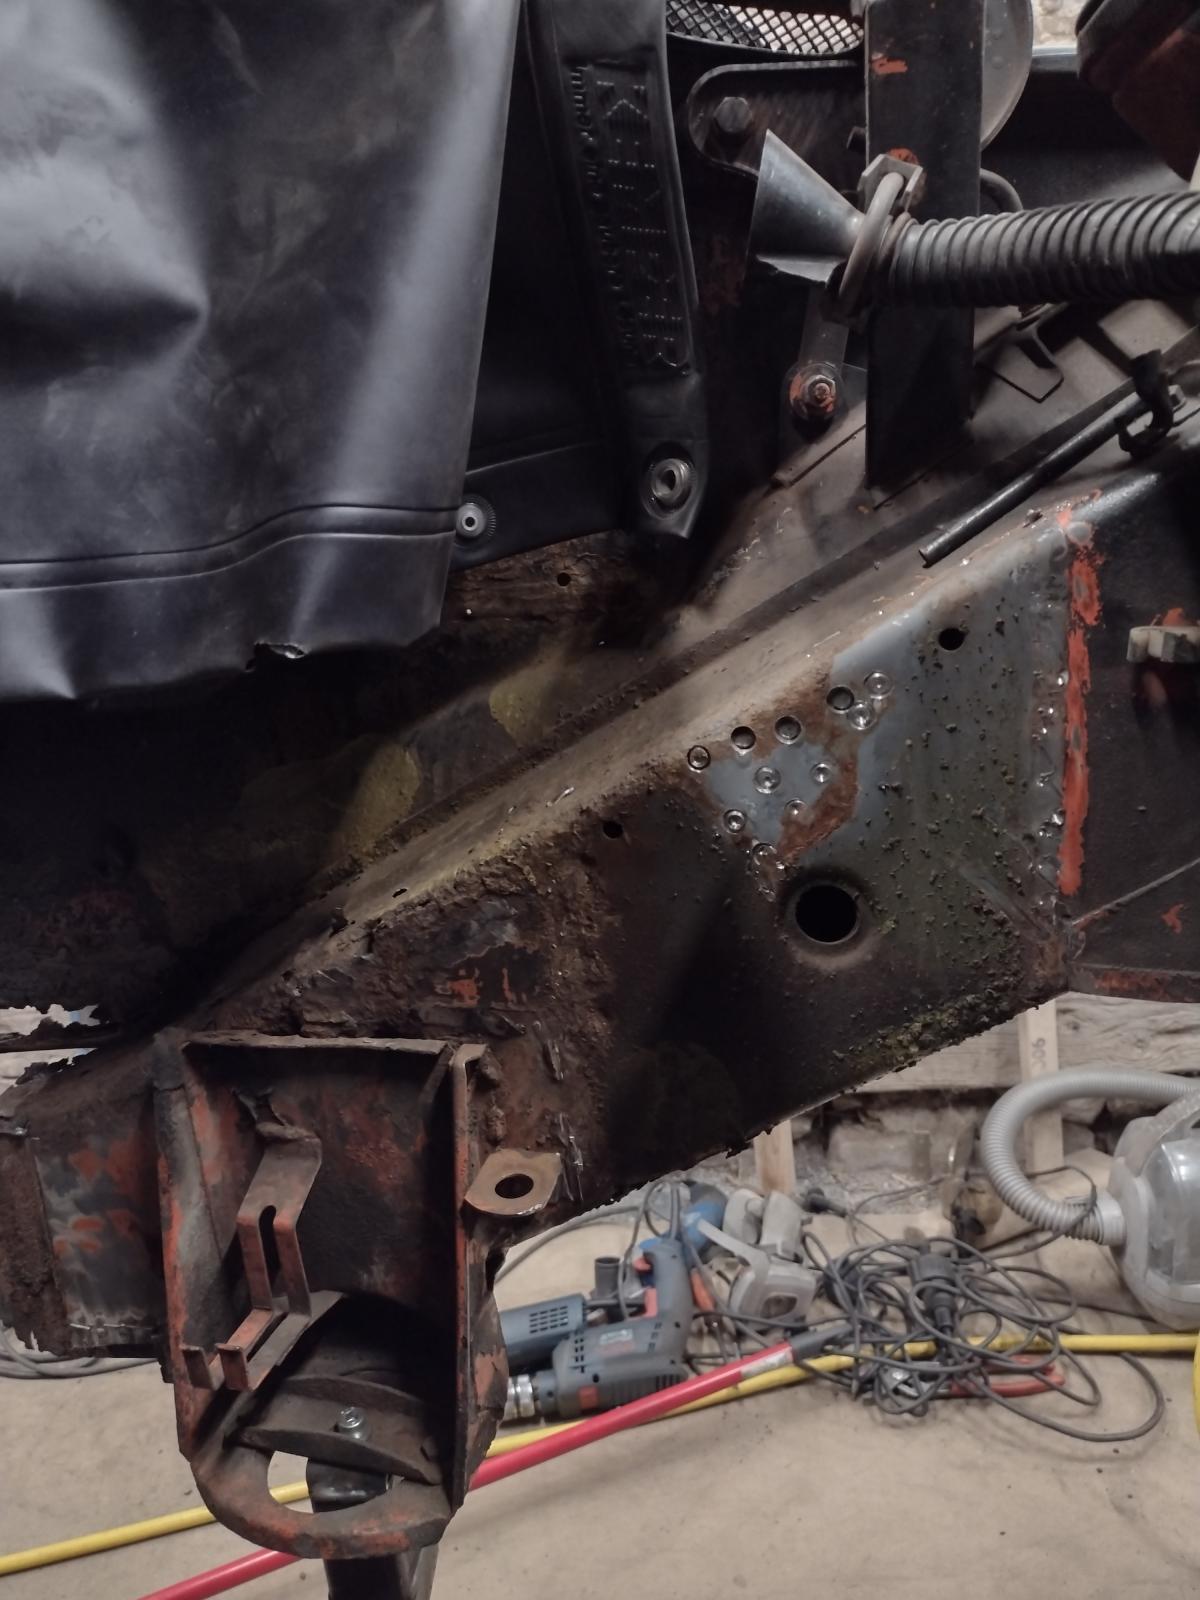
Then time to start on the back part. Plenty of rust:
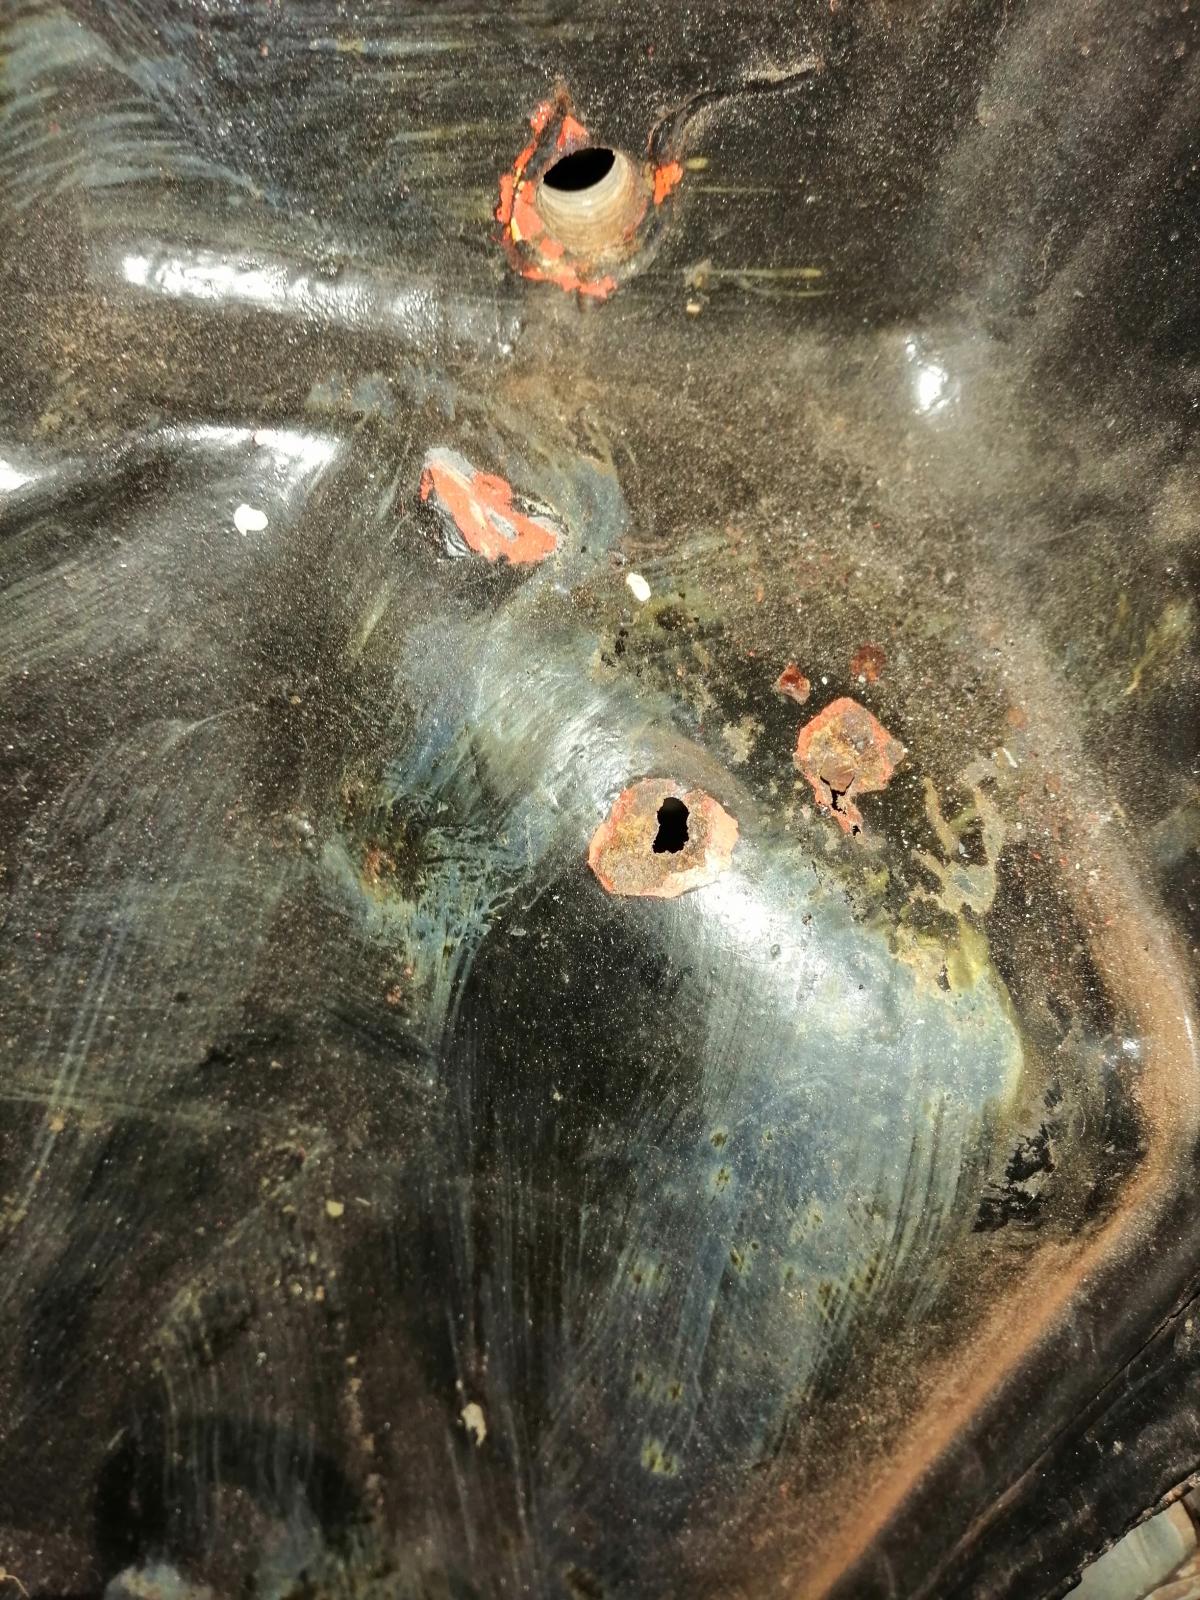
Inner suspension console has some rust, see here the holes:
Some bad repairs with metal over rust, and looks like the long's rust gets up to it :

So decision was made to remove it to repair correctly..and I opened again a can of rust..
So it's now removed:
But it is really rusted through on several places and poorly repaired on others..
I think I will order a new one instead of fixing it..will be cleaner, efficienter and easier!
Just for fun made some assembly :

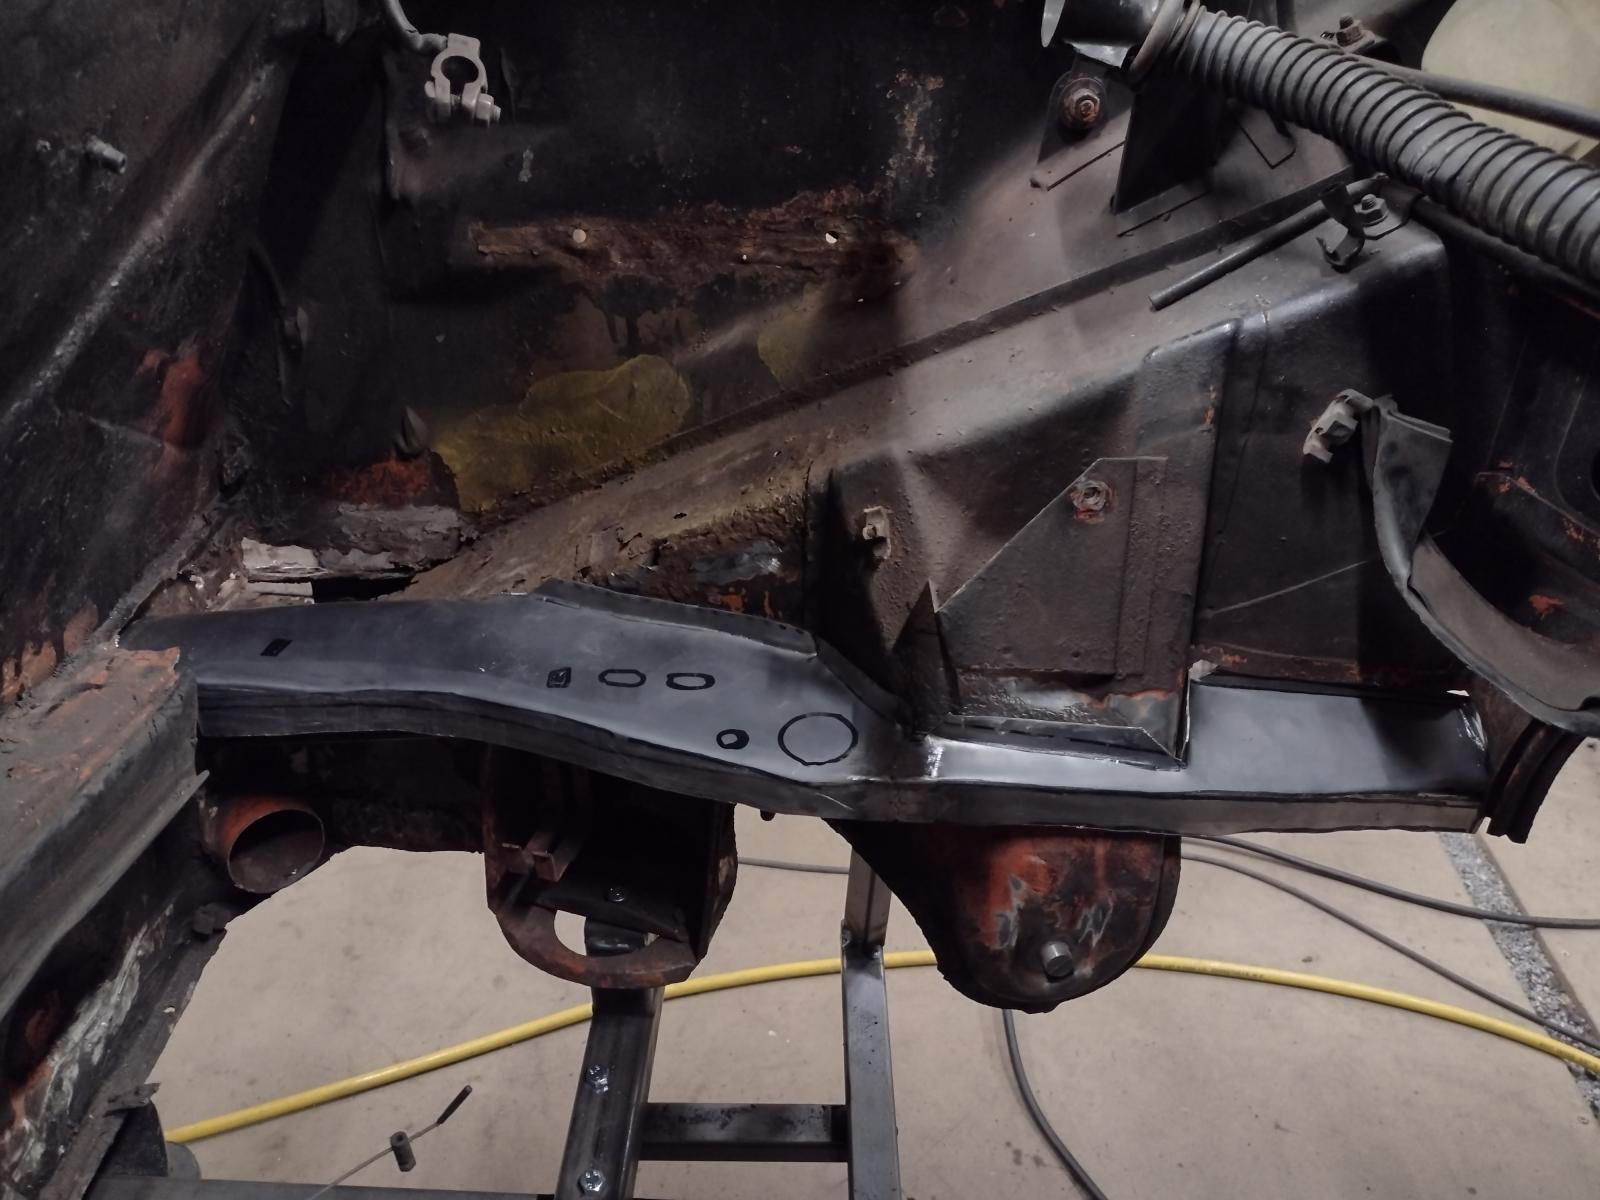
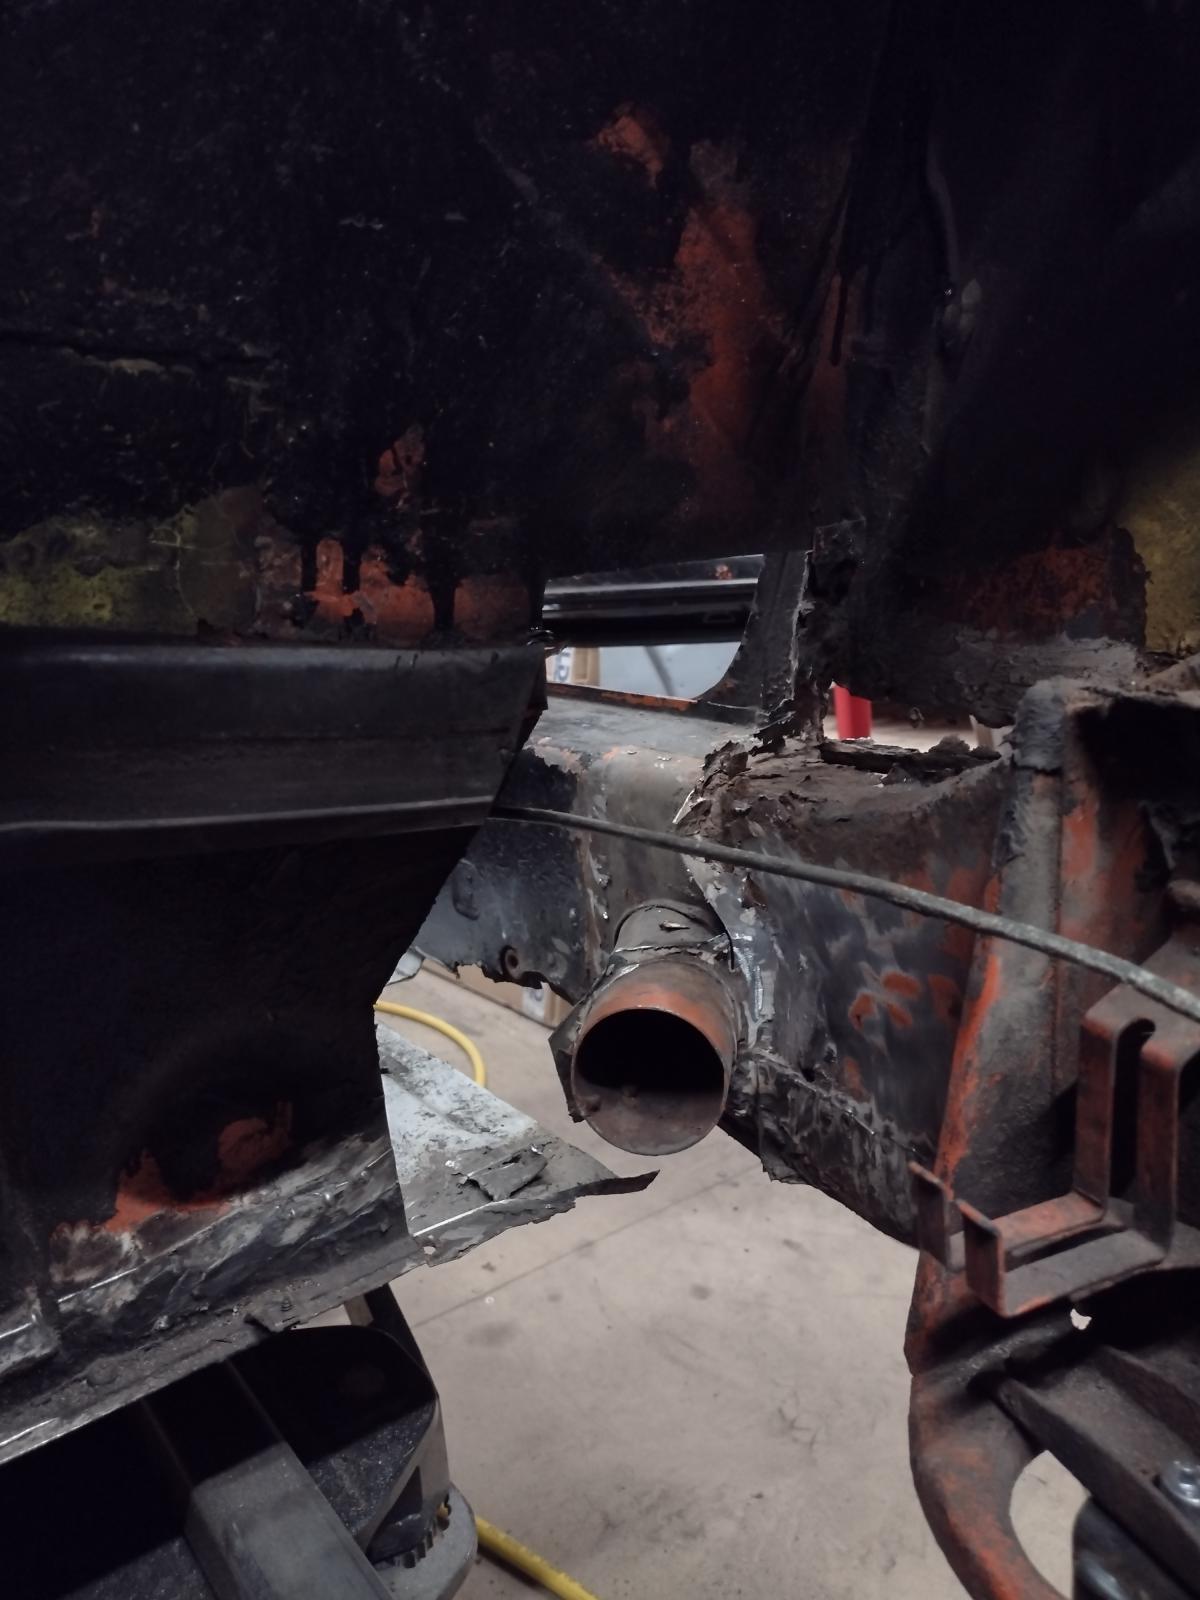
Then it was time to remove the rusted long. My plan is to remove the rusted part of the inner long, weld the new one in (including engine mount and inner suspension console), and then remove the outer long with part of the wheel tray, and replace it. Even if everything is braced, I feel safer to make it one after the other to keep some sort of stability and measure points. Please tell me if anything speaks against it, I am still new in the 914world!
So here we are:
Time to remove the engine mount:
Rust behind it:

And out:
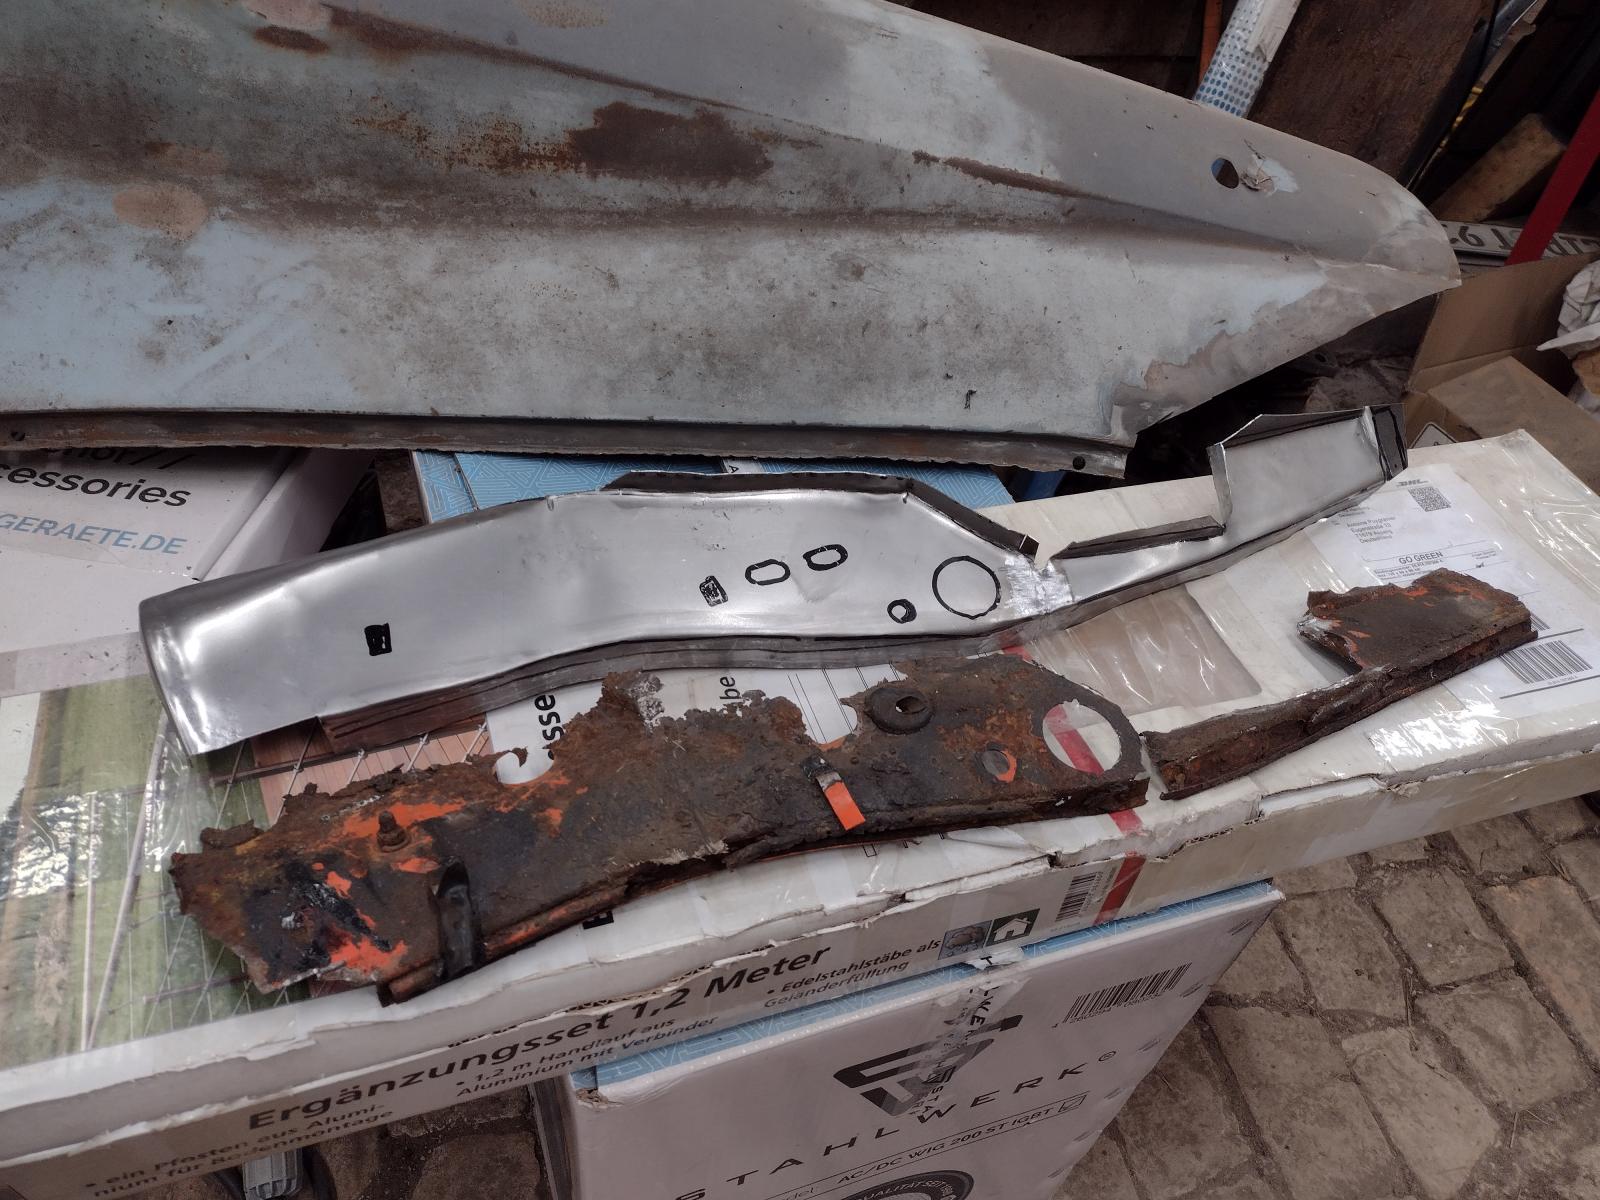
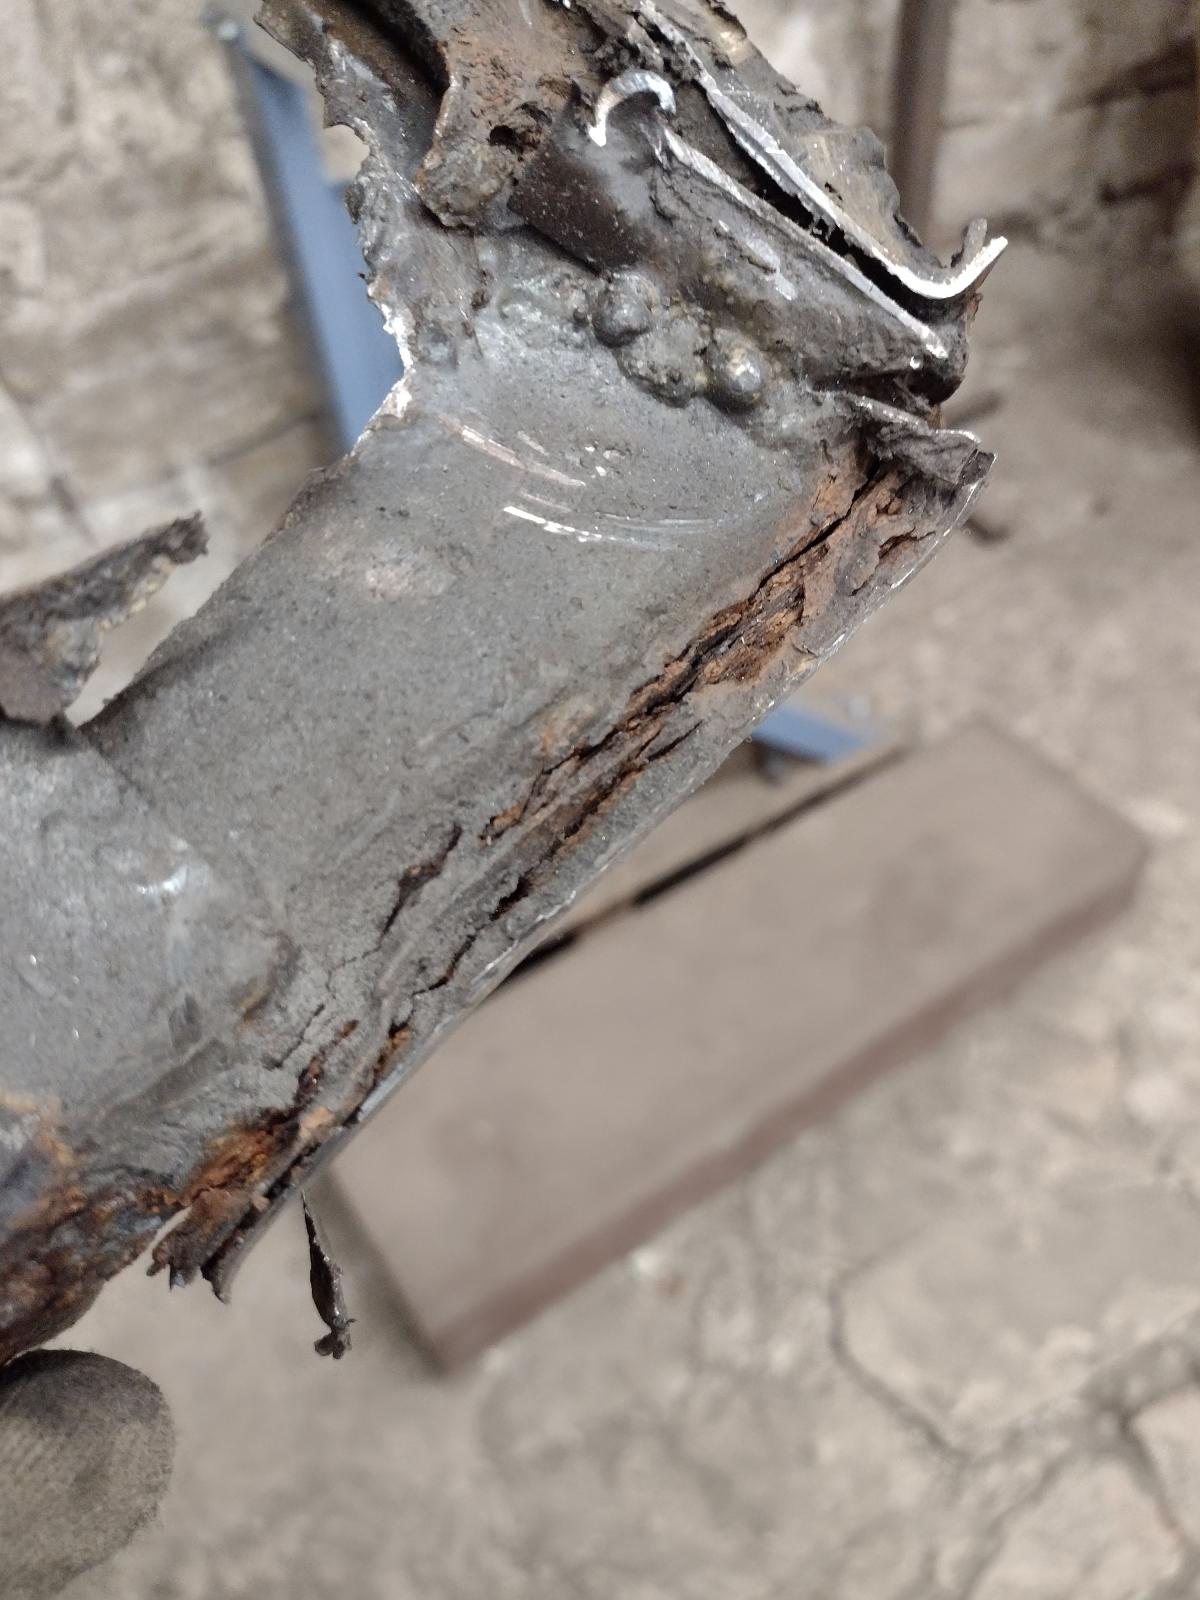
The long was really at the end of its life:
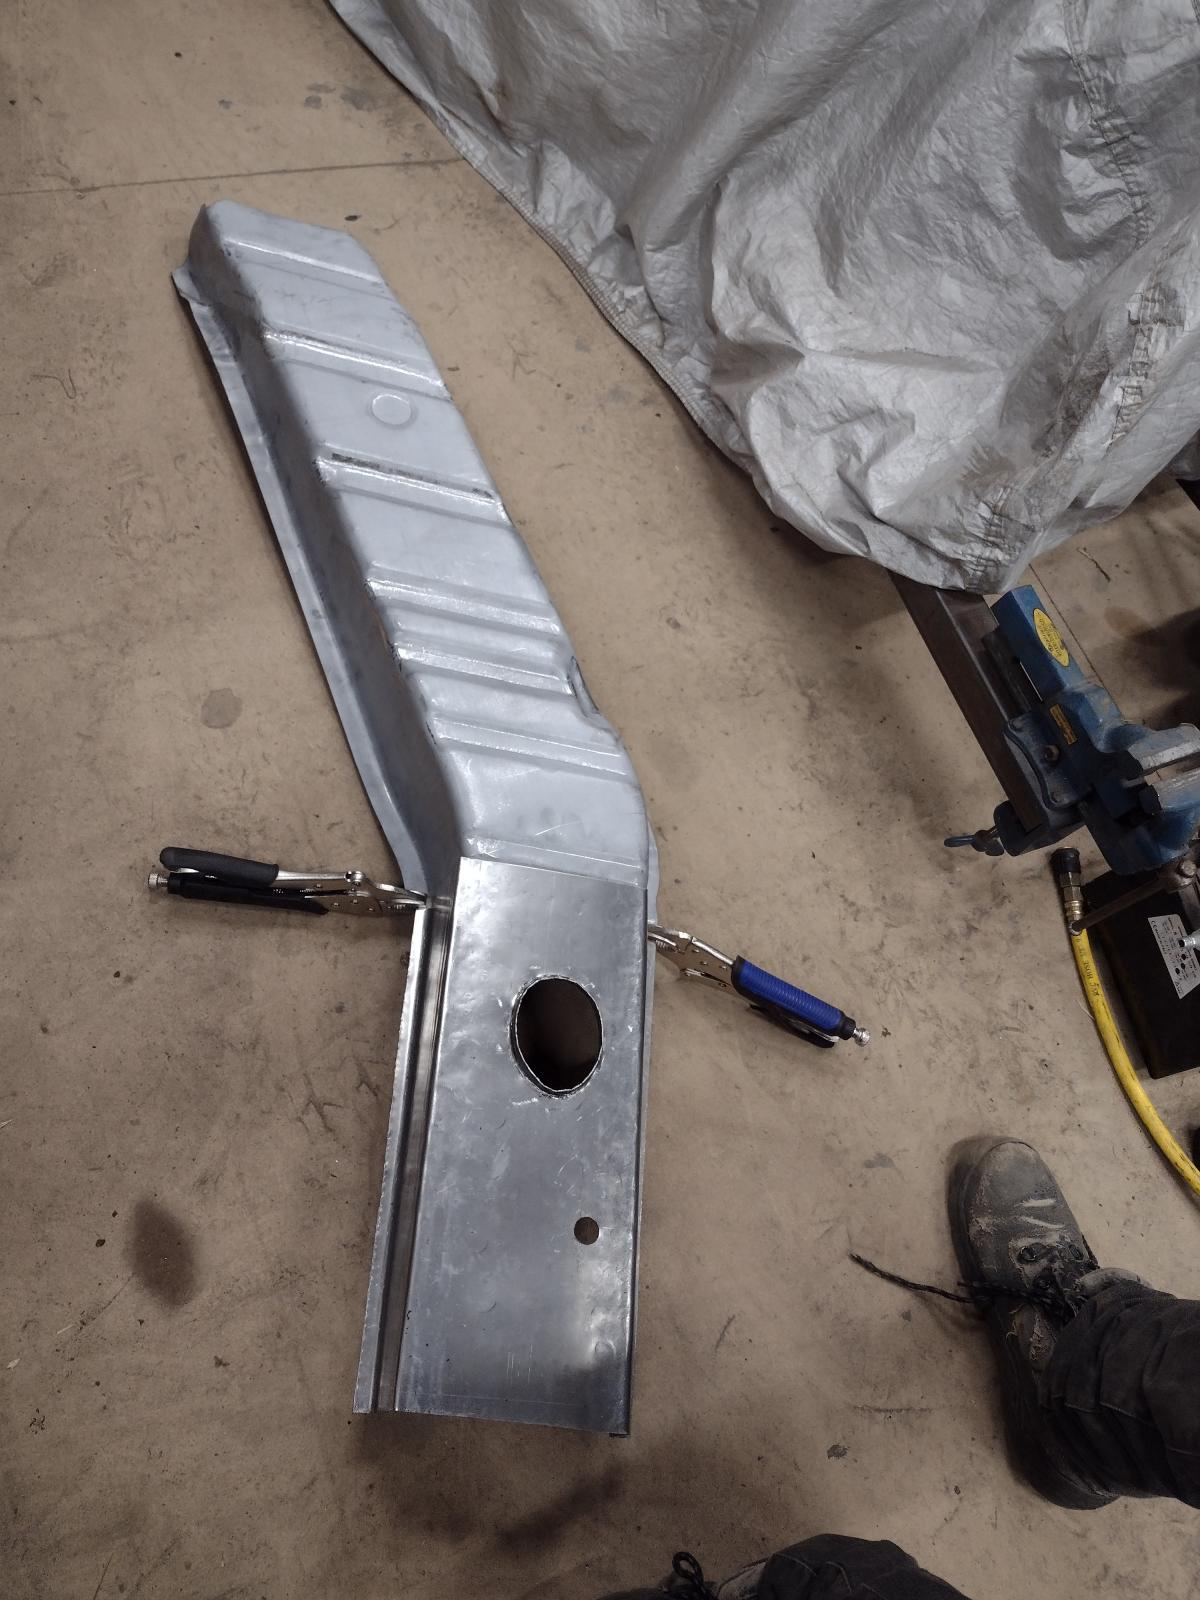
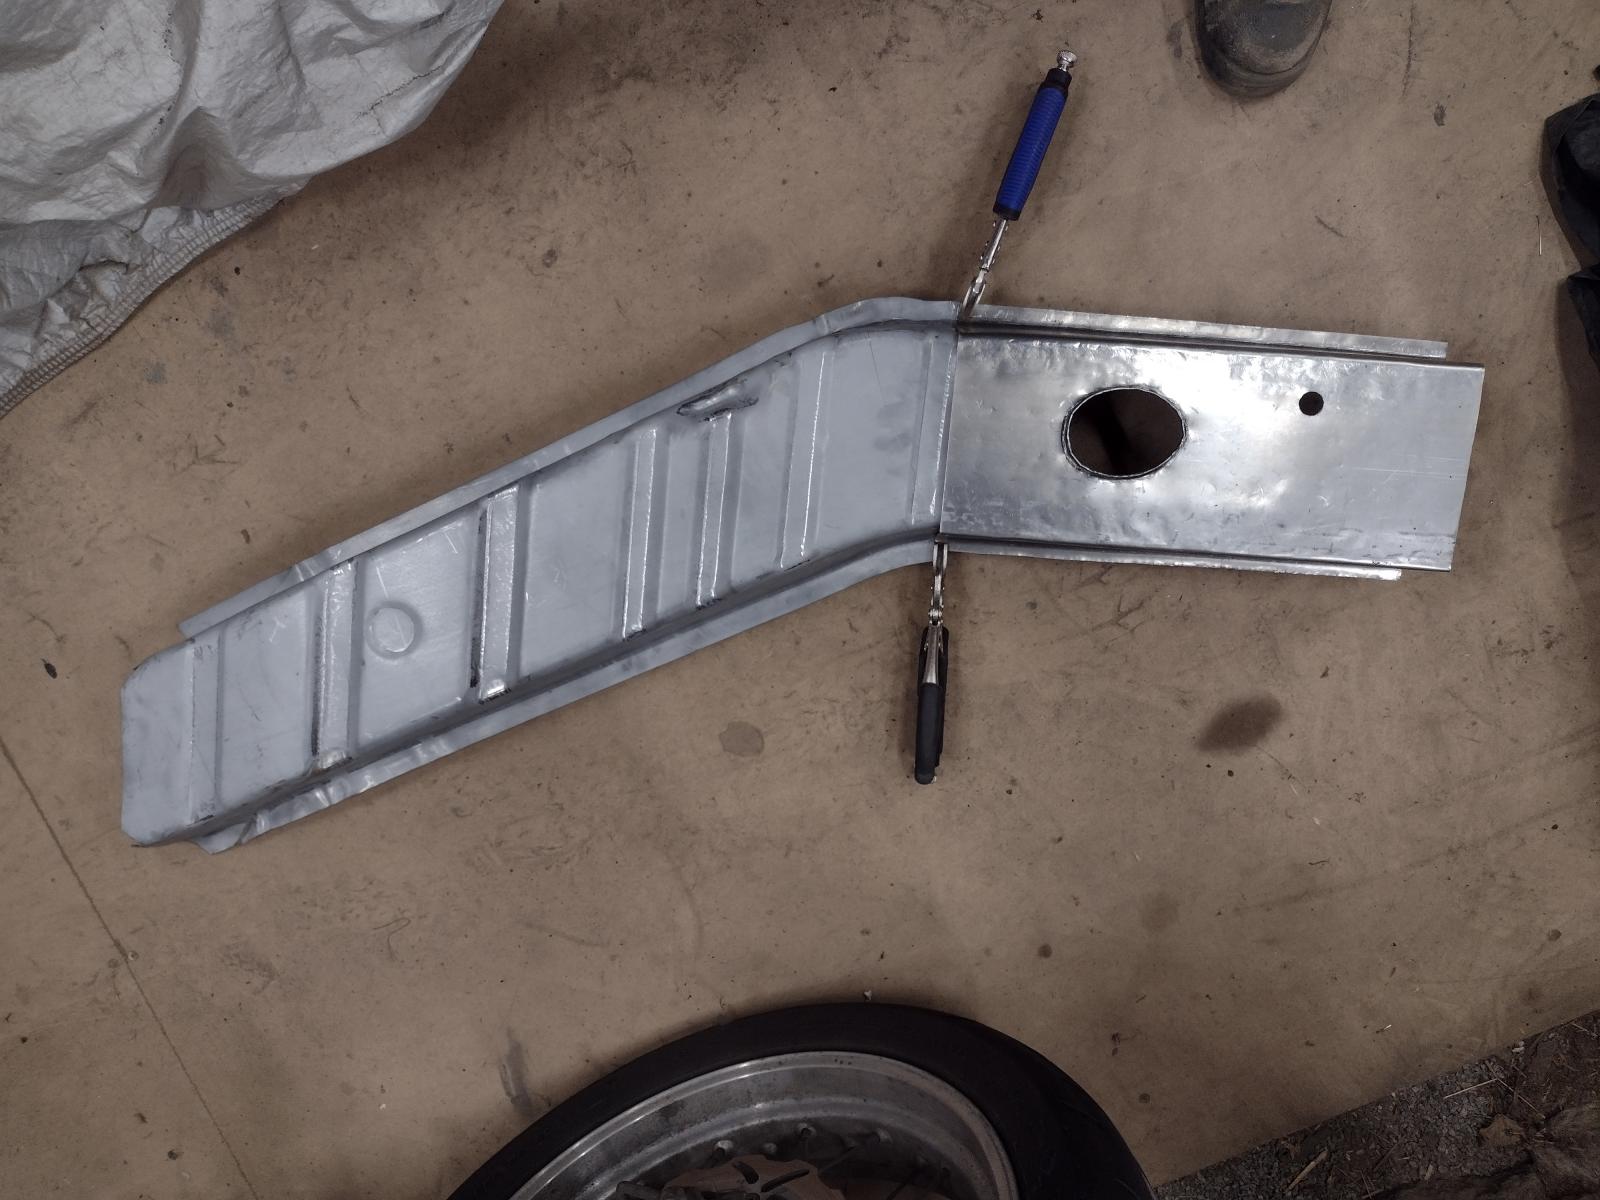
And now the parts ready for blasting:
And blasted:

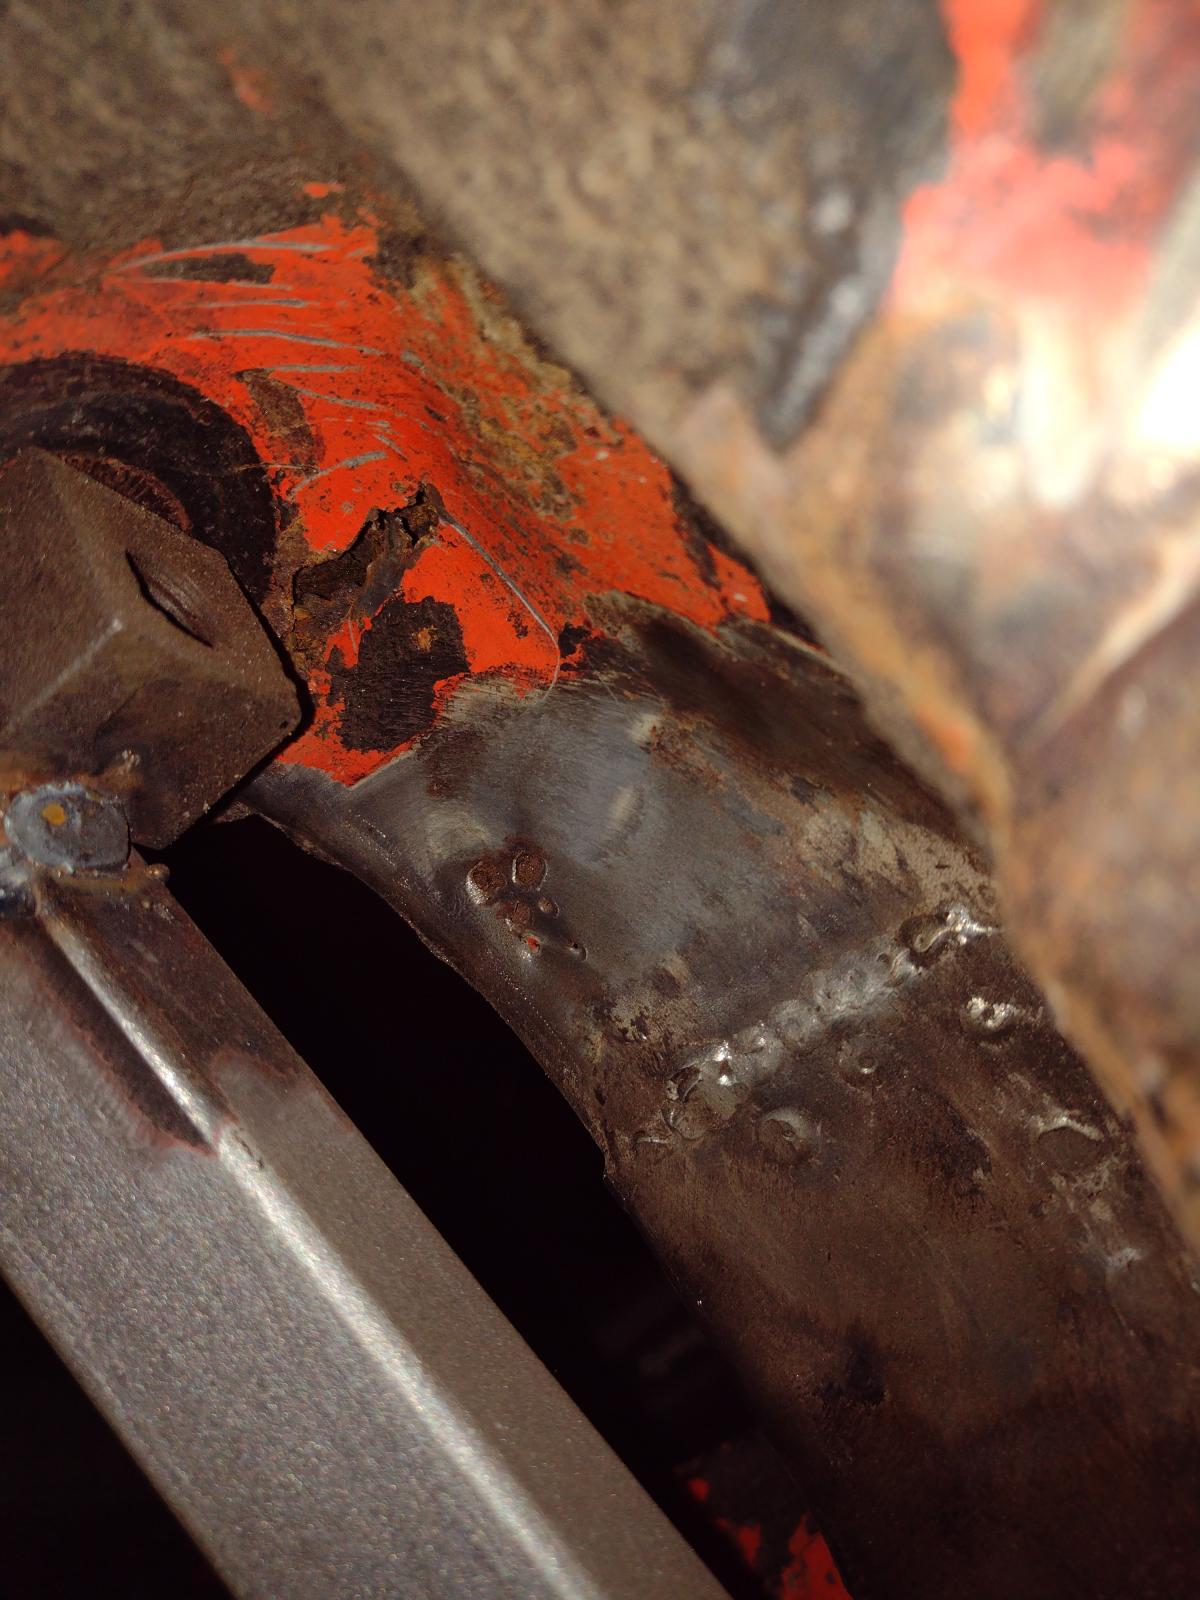
The engine mount showed some issues :
So let's fix it:
Ready to weld:
One picture with a hint of the color, good for the motivation !
Now this topic is up to date!
Stay tuned,
Antoine
Then time to start on the back part. Plenty of rust:
Inner suspension console has some rust, see here the holes:
Some bad repairs with metal over rust, and looks like the long's rust gets up to it :
So decision was made to remove it to repair correctly..and I opened again a can of rust..
So it's now removed:
But it is really rusted through on several places and poorly repaired on others..
I think I will order a new one instead of fixing it..will be cleaner, efficienter and easier!
Just for fun made some assembly :
Then it was time to remove the rusted long. My plan is to remove the rusted part of the inner long, weld the new one in (including engine mount and inner suspension console), and then remove the outer long with part of the wheel tray, and replace it. Even if everything is braced, I feel safer to make it one after the other to keep some sort of stability and measure points. Please tell me if anything speaks against it, I am still new in the 914world!
So here we are:
Time to remove the engine mount:
Rust behind it:
And out:
The long was really at the end of its life:
And now the parts ready for blasting:
And blasted:
The engine mount showed some issues :
So let's fix it:
Ready to weld:
One picture with a hint of the color, good for the motivation !
Now this topic is up to date!
Stay tuned,
Antoine
This is a "lo-fi" version of our main content. To view the full version with more information, formatting and images, please click here.