krk
Nov 10 2004, 01:30 AM
QUOTE(Gint @ Nov 9 2004, 10:49 PM)
Thanks Kim. If Shar finds a job before the end of February it won't even have to sit in the garage doing nothing waiting on $$$.
Heh -- I'm sure I"m not alone on this -- I look forward to the coming out party (or at least really great pics of it) whenever it is!
But in the mean time, you've clearly made some solid progress!
kim.
Gint
Nov 10 2004, 06:49 AM
QUOTE(ChrisReale Posted on Nov 9 2004 @ 11:03 PM)
Is this the one that you dropped off at Brads? The one with fiberglass longs?
One and the same.
QUOTE(Eric Taylor Posted on Nov 10 2004 @ 12:17 AM)
By the way, what color? Are you gona go stock with the orange, or something totally different?
Thanks Eric. Same color, tangerine.
Rusty
Nov 10 2004, 07:28 AM
Fantastic, Mike.
I'm glad someone was able to fix the hack-job.
-Rusty

restore2seater
Nov 10 2004, 08:47 AM
Hi everyone. New to the board. I have been following the progress and am really impressed.
"I wish I could find the cowl corner replacement pics."
I am going to need to replace mine also. Did you ever find those pics? I would really like to see them if you can find them.
william harris
Nov 10 2004, 09:06 AM
Mike: what a fantastic job.

Keep em coming. We are preserving the legacy. Will the next generation appreciate that?

brant
Nov 10 2004, 09:14 AM
Definitely worth the wait Mike...
wow, those are great pics...
keep it up.
brant
Ferg
Nov 10 2004, 09:50 AM
Sweet Gint, can't wait to see you behind the wheel.
Ferg.

seanery
Nov 10 2004, 09:50 AM
looking great Mike! I can't wait to see the paint on it. I may need to drop a white car off in Utah for a couple months!

Quebecer
Nov 10 2004, 01:32 PM
It's amazing how two cars can have similar "challenges".
Mine is almost a copy, but unfortunately I haven't worked on it for one complete year.
Built my own house (larger garage), got married, and expecting a kid.
I must congratulate you on the great work you've done!
You're an inspiration for those days when I almost want to sell the project.

Thanks !!!
Eric_Shea
Nov 10 2004, 02:32 PM
restore2seater
Troy (the body man) has them custom made. He replaced both on my car. I can check to see if he has any extra stock
gint
Fender is on... looks great. I tried to take pics with a "real" camera but mine kept giving me a system error. I think it's just a low battery issue. Floor is out and the new one is going in today. Everything looks really clean.
I helped Troy upload that zip file so, the pics are from the same bad camera (just not great in low light) but they're 800 by 640 or something like that.
I'll try to get some shots nmaybe later today once the floor is in.
Gint
Nov 10 2004, 06:05 PM
QUOTE(restore2seater Posted on Nov 10 2004 @ 07:47 AM)
QUOTE
"I wish I could find the cowl corner replacement pics."
I am going to need to replace mine also. Did you ever find those pics? I would really like to see them if you can find them.
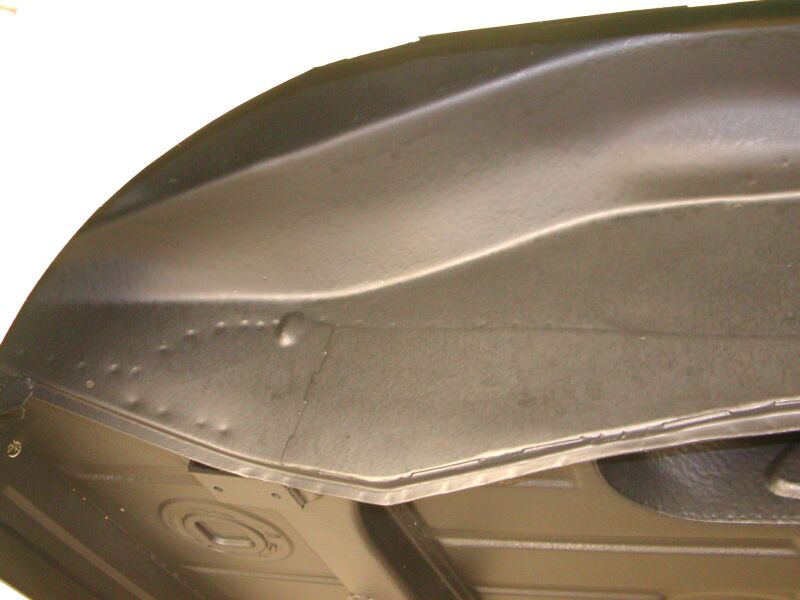
They can be made by a competent body guy. They're not that intricate. In my case, I had a donor tub. Look at the fenderless pic above. There is a close up of the driver's side cowl corner . That on was repaired instead of replaced.
QUOTE(Quebecer Posted on Nov 10 2004 @ 12:32 PM)
Mine is almost a copy, but unfortunately I haven't worked on it for one complete year.
Built my own house (larger garage), got married, and expecting a kid.
I must congratulate you on the great work you've done!
You're an inspiration for those days when I almost want to sell the project.
The body work and paint are being handled by folks that have the ability. I just tore it apart and will put it back together. And of course fork over $$$$$
Need two pieces of sheet metal - yesterday - Seat mount reinforcement thread914/6 rusto \"while I'm in there\" question thread
Gint
Nov 10 2004, 06:12 PM
QUOTE(Eric_Shea Posted on Nov 10 2004 @ 01:32 PM)
Fender is on... looks great. I tried to take pics with a "real" camera but mine kept giving me a system error. I think it's just a low battery issue. Floor is out and the new one is going in today. Everything looks really clean.
Got 'em. Thanks! I'll post them next.
QUOTE(Eric_Shea Posted on Nov 10 2004 @ 01:32 PM)
I'll try to get some shots nmaybe later today once the floor is in.
Keep 'em comin. Thanks Eric.
Gint
Nov 10 2004, 06:13 PM
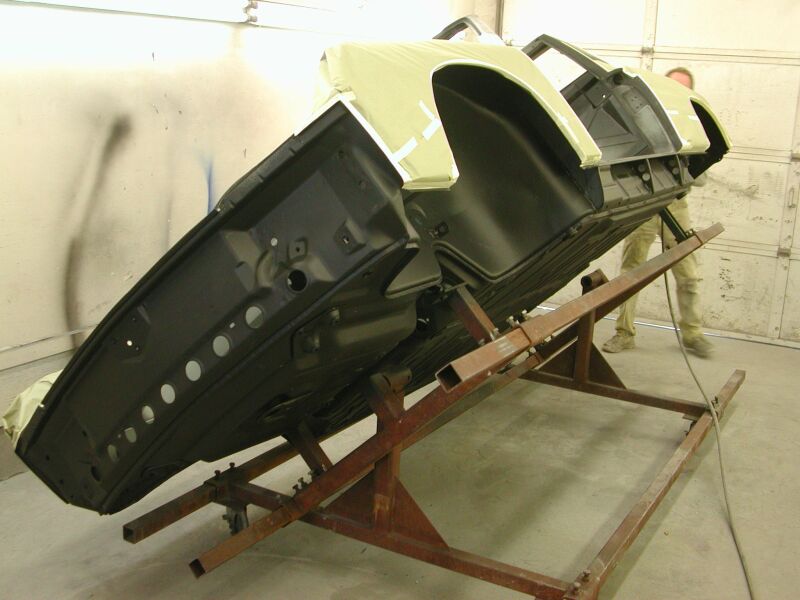
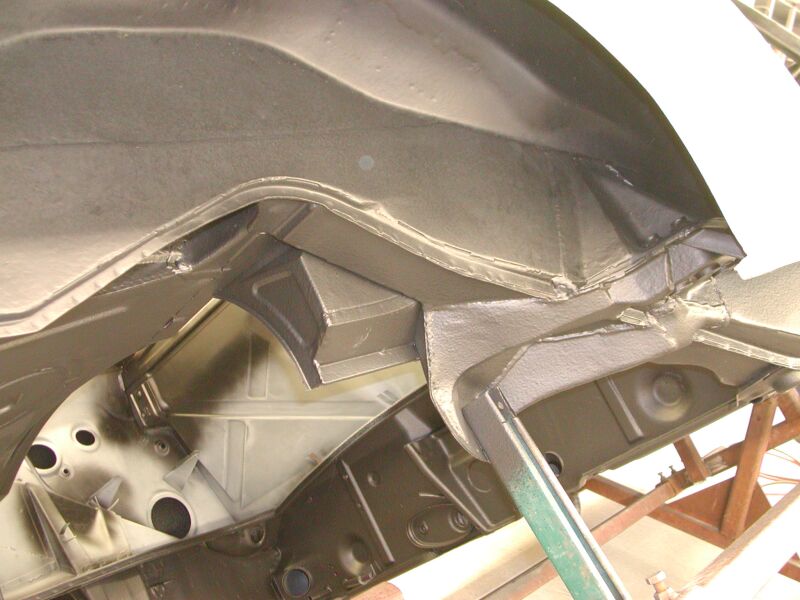
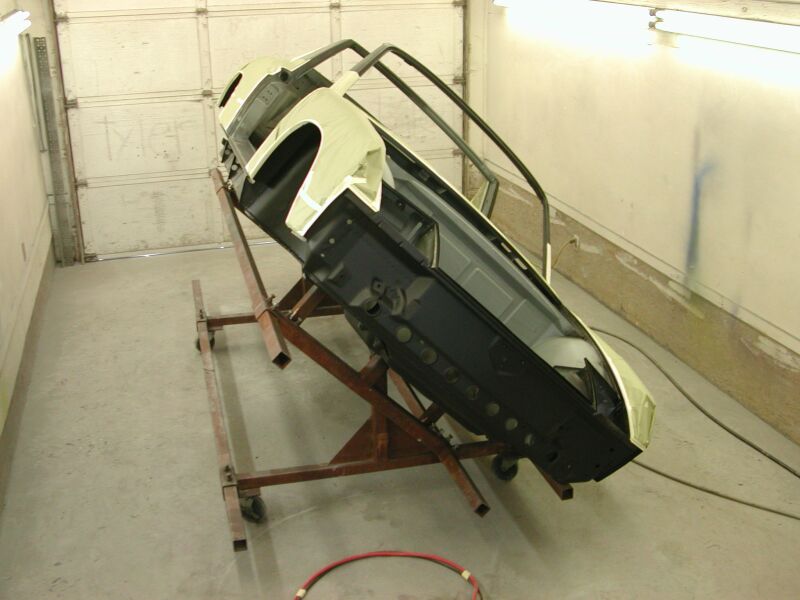
Today's pics. The replacement fender is installed.
Gint
Nov 10 2004, 06:14 PM
reta
Gint
Nov 10 2004, 06:15 PM
reta
Eric_Shea
Nov 10 2004, 08:38 PM
Who's that handsome mother fucher in that first pic... the one trying to get his camera to work?

restore2seater
Nov 11 2004, 07:56 AM
Mike, Eric
Actually the cowl area is the least of my problem areas right now. I was just curious what the replacement part looked like. The rust on the cowl area on my car is actually around the lower right windshield chrome area.
What are you using to remove your fenders? The areas look pretty clean and smooth where the spott welds were. Do you use some kind of bit in a drill? I bought a couple from Eastwood and would like to know if there is any trick to using them.
I do have a question off this topic though. How do you remove the hooks on the inside above the upper seat belt mount? For the clothes hangers to hang on. I'm stripping everything off the body and I don't want to destroy the padding around that area since it's in pretty good shape.
Gint
Nov 11 2004, 09:54 AM
QUOTE(restore2seater Posted on Nov 11 2004 @ 06:56 AM)
The rust on the cowl area on my car is actually around the lower right windshield chrome area.
In a couple of months I can cut out the piece you need from my donor tub.
QUOTE
What are you using to remove your fenders? The areas look pretty clean and smooth where the spott welds were. Do you use some kind of bit in a drill? I bought a couple from Eastwood and would like to know if there is any trick to using them.
I don't really know what troy used for certain. I have a spot weld cutter, but you can use an ordinary drill bit. Do a google search for a spot weld cutter. In fact, you can do a search on this site as it's been discussed before.
QUOTE
I do have a question off this topic though. How do you remove the hooks on the inside above the upper seat belt mount? For the clothes hangers to hang on. I'm stripping everything off the body and I don't want to destroy the padding around that area since it's in pretty good shape.
Those plastic covers lift straight up and the metal bracket underneath has a phillips head screw holding it on. Really simple once you know that bit of info.
restore2seater
Nov 11 2004, 10:04 AM
This is the set of cutters I bought from Eastwood.
Gint
Nov 11 2004, 10:05 AM
Those will work. along with the standard arsenal of tools. It's not much fun, that's why I let Troy do all of that work.

restore2seater
Nov 11 2004, 11:20 AM
I've noticed that most of the repo places don't sell fenders. Most of the other body panels and frame pieces I need (longs, rockers, floor pans...) are available. Whats the best way to get front and rear fenders?
And no, I can't buy another car as a donor. Aggravated the wife too much already with my Challenger and now the 914.
Gint
Nov 11 2004, 03:51 PM
Donor tub. I have a left rear quater in really nice shape. Again, it's a couple of months from being available.
restore2seater
Nov 11 2004, 04:05 PM
Well I definitely need a right side rear fender but until I do some more diggin into the rest of the car I don't know about the left side. The front fenders have some DA marks showing through the paint and what looks like some bondo that wasn't featherd out to well. Probably PO work done at home rather than at a body shop. I would be interested in the left side rear though. And any other parts thats in good condition.
At this point if I had half a brain I should just part it out and find a better choice to restore but in central Illinois everything around here is going to have rust from the 70's.
I tried to remove that hooks above the seat belt the way you said and it won't move. Maybe I'm not being clear as to what I am trying to remove. These are attached on the inside about 2 inches up from the seat belt retractor. Their plastic and I assume they are used to hang clothes on. Although the location of the hooks makes me wonder how this could be done and still be able to see out the side windows.
Eric_Shea
Nov 11 2004, 07:12 PM
QUOTE
I tried to remove that hooks above the seat belt the way you said and it won't move. Maybe I'm not being clear as to what I am trying to remove. These are attached on the inside about 2 inches up from the seat belt retractor. Their plastic and I assume they are used to hang clothes on. Although the location of the hooks makes me wonder how this could be done and still be able to see out the side windows
Gint nailed it in his previous post. Take a flat-head and lightly pry up around the base and they should begin to lift like he said. Slide them up and you're good to go at the "actual" bracket that's under those covers.
restore2seater
Nov 11 2004, 08:07 PM
When you wrote "pry up" I took that literally. I took a screwdriver like you said and pryed out away from the side and that made it possible to pry up. I guess it was just a case of terminology. Thanks for the help.
Gint
Nov 15 2004, 10:45 PM
Forgot to post today's pics.
Gint
Nov 15 2004, 10:45 PM
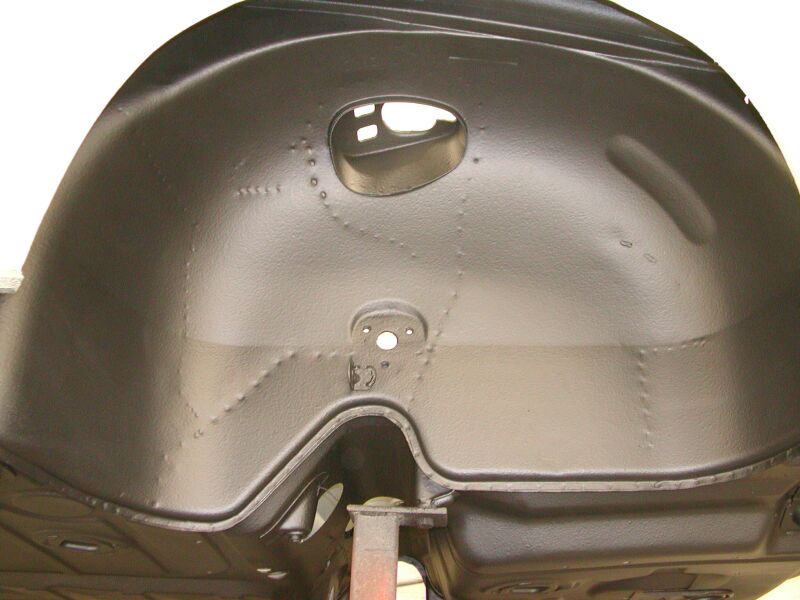
Pans are in.
Gint
Nov 15 2004, 10:47 PM
New donuts and triangles too.
Gint
Nov 15 2004, 10:48 PM
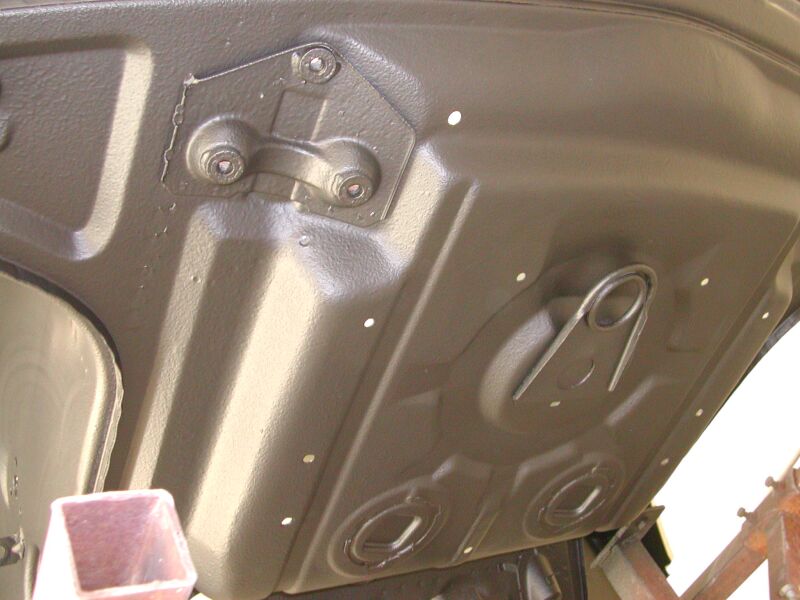
Metal work is almost complete now.
Gint
Nov 15 2004, 10:48 PM
Rusty seal channel has all been repaired.
redshift
Nov 15 2004, 10:53 PM
Ginty, it's not so horrible anymore... the light I see now is hopeful, whereas the light I used to see was a light... on the other side.
I have been deeded space to do mine, by a friend who is as dumb, as he is nice.
I shall overcome!
M
Gint
Nov 15 2004, 10:57 PM
Yeah... it's startin to look like a real car again.
redshift
Nov 15 2004, 11:03 PM
Serious, you must either look at that, and go "Oh MY GOD NO!" or look at it and say... well, you can't say that here, but let's just give it the old...
DARN TOOTIN'!
So, when do you start on mine?
© m
Gint
Nov 15 2004, 11:07 PM
I won't go through this again for a long time to come. Let alone on someone else's car.
Be sure to post pics when you get started.
redshift
Nov 15 2004, 11:13 PM
Oh I will... before I touch the paint... with a little comentary about the slight rust repairs to come..

I need a camera... one with a doggone cloudy lens.

M
krk
Nov 16 2004, 01:09 AM
Mike,
Great pics -- it's gotta be pleasing to see it coming together like it obviously is!
kim.
Gint
Nov 16 2004, 06:21 PM
QUOTE(krk Posted on Nov 16 2004 @ 12:09 AM)
Mike,
Great pics -- it's gotta be pleasing to see it coming together like it obviously is!
kim.
You're so right. I'm extremely happy with the progress of late. Even if the tub sits for a while waiting for an influx of cash, I'll be happy to have it sitting in my own garage looking all orange and purty.
I finally found the
long or frame rail to shock tower thread of Jeroen's that I've been looking for. Looking for opinions of anyone who has BTDT. Feel free to add your $.02 to that thread.
Gint
Dec 22 2004, 11:37 PM
sixnotfour
Dec 22 2004, 11:41 PM
That is Beautiful !

JeffBowlsby
Dec 22 2004, 11:46 PM
Thats pure ART Mike...I am sure you are excited...

SP9146
Dec 23 2004, 12:42 AM
Wow Mike it's almost done ;-) Seriously worst part is behind you and your car looks great.
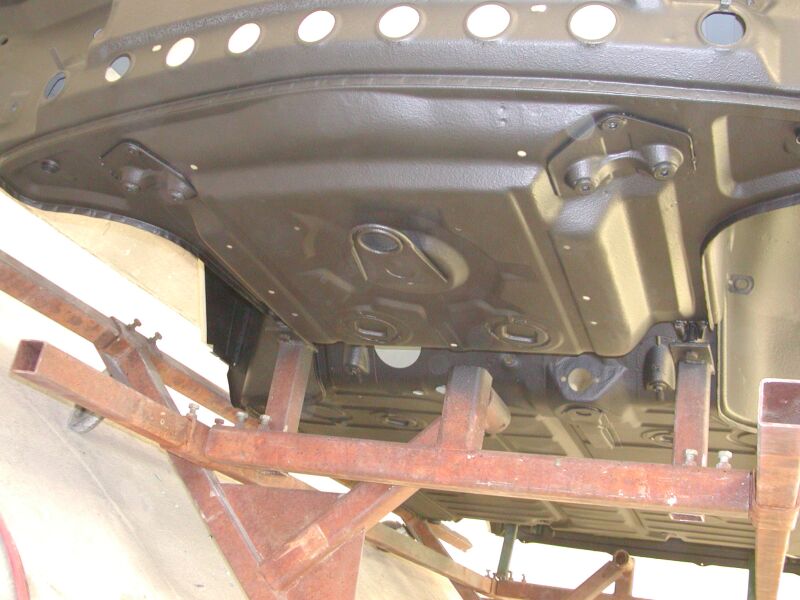
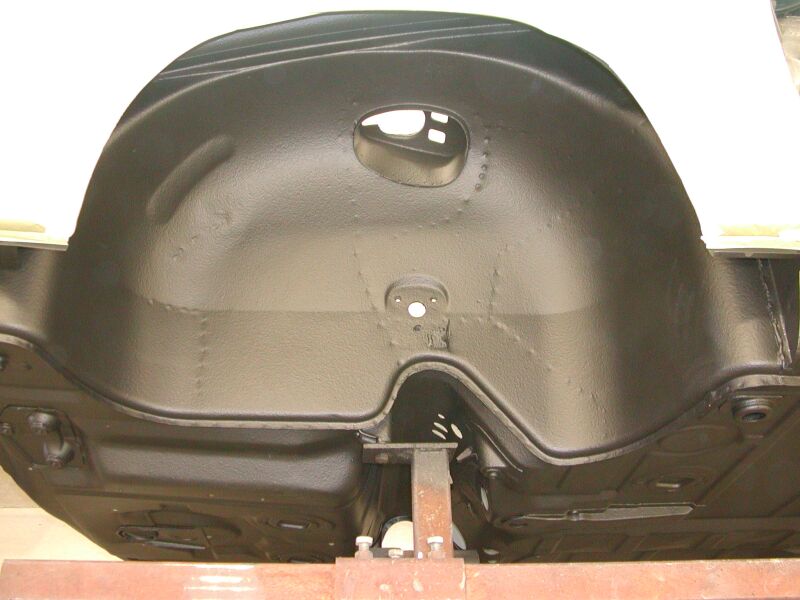
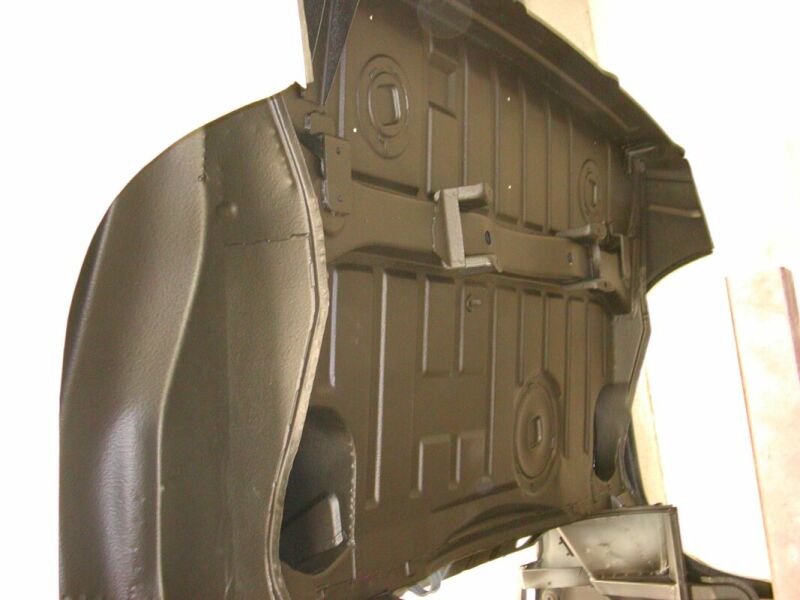
I'm curious about the final finish for the wheel wells and underside. Did that come from the factory body color or was it painted body color and then undercoated? How are you going to do yours?
Gint
Dec 23 2004, 08:38 AM
Yup, I'm getting excited... until I get the bills. LOL The tub is 4-6 weeks from completion now.
| QUOTE (SP9146 Posted on Dec 22 2004 @ 11:42 PM) |
| I'm curious about the final finish for the wheel wells and underside. Did that come from the factory body color or was it painted body color and then undercoated? How are you going to do yours? |
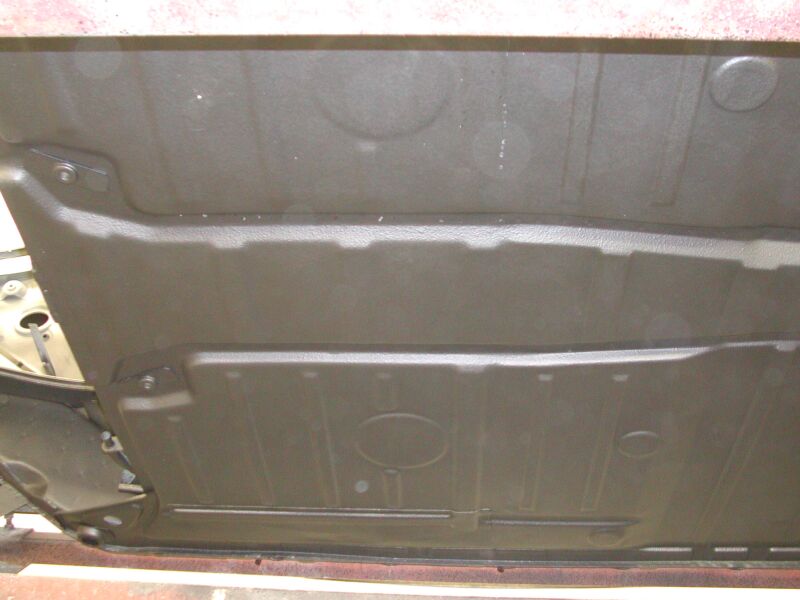
The factory used undercoat much like this Wurth product that you see applied here. Then it's painted body color over the top of that. I could be wrong (I'm sure someone will correct me if necessary), but I don't believe the factory ever applied black undercoat on top of the paint in the the wheel well or pan areas. All of the cars you see like that have been "improved" by some owner somewhere.
Root_Werks
Dec 23 2004, 08:50 AM
Truly inspiring!

I can't wait to see things start going back together!

Bleyseng
Dec 23 2004, 09:02 AM
| QUOTE (Gint @ Dec 23 2004, 06:38 AM) |
| QUOTE (SP9146 Posted on Dec 22 2004 @ 11:42 PM) | | I'm curious about the final finish for the wheel wells and underside. Did that come from the factory body color or was it painted body color and then undercoated? How are you going to do yours? |
|
The undercoating process was a Dealer option.
brant
Dec 23 2004, 12:36 PM
wow,
thats seriously great Mike!!!
brant
balthazar
Dec 23 2004, 02:10 PM
WOW...I had no idea you were THAT far along! I posted the stuff below before I realized...hahahaha Looks f&^$#%* awesome!!!!!!
Need any long reinforcement pieces? I have and early Brad Meyer set if you want to have a look, go here:
http://pelicanparts.com/motorcity/balthaza...zar/73_914.html pix on front page, just scroll down.
They have been stripped and covered with a coupla coats of primer. I will get some current pix up if you are interested...
Eric_Shea
Dec 23 2004, 02:44 PM
Should I tease Gint by posting Tangerine pictures here before I send them to him?
Naaaaaaaaaa... that would be cruel

brant
Dec 23 2004, 02:51 PM
Eric,
maybe just a little one?
b
Eric_Shea
Dec 23 2004, 02:55 PM
brant
Dec 23 2004, 02:58 PM
nice... nice one... ha...
hey, I'm starting to think that this is the correct color that Dr. Porsche intended all along.
b
This is a "lo-fi" version of our main content. To view the full version with more information, formatting and images, please
click here.