
Full Version: BUILD-OFF CHALLENGE: Barn find with 50k original miles
New grommet, tape and our new wiring harness tab covers.
Wiring in tank area done
Wiring haness in front trunk done
Learned that the "Engine Deck Lid Bumper" is actualy used in 2 places. The other is in the front trunk to keep water out in these 2 holes
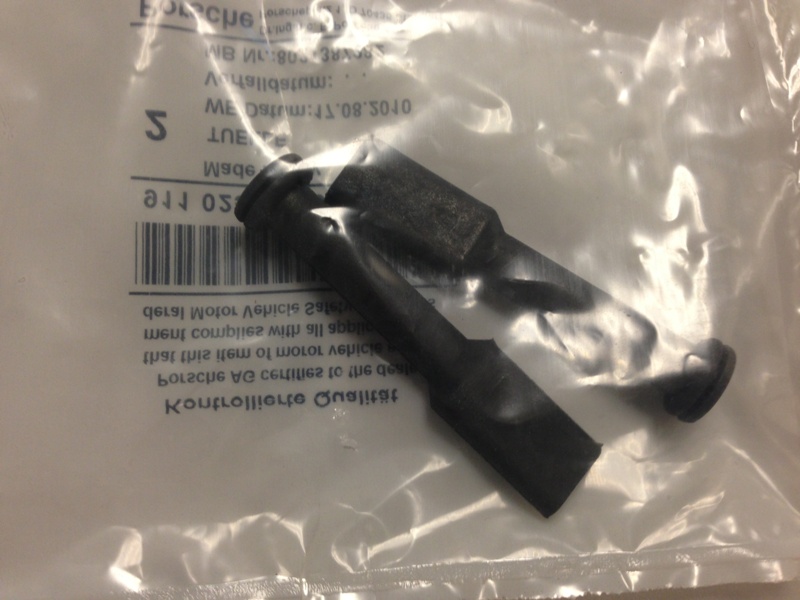
New part preview
QUOTE(Matty900 @ Jun 11 2017, 01:24 PM) 
Learned that the "Engine Deck Lid Bumper" is actualy used in 2 places. The other is in the front trunk to keep water out in these 2 holes
Actually, that is incorrect!
The holes in the front trunk are supposed to have longer rubber tubes in them that allow water to flow out of the trunk.

Got the fan schroud painted
QUOTE(SirAndy @ Jun 11 2017, 01:44 PM)
The holes in the front trunk are supposed to have longer rubber tubes in them that allow water to flow out of the trunk.
Part # 911.025.612.00
QUOTE(SirAndy @ Jun 11 2017, 01:44 PM)
QUOTE(Matty900 @ Jun 11 2017, 01:24 PM)
Learned that the "Engine Deck Lid Bumper" is actualy used in 2 places. The other is in the front trunk to keep water out in these 2 holes
Actually, that is incorrect!
The holes in the front trunk are supposed to have longer rubber tubes in them that allow water to flow out of the trunk.
I removed the same part from the holes to take these photos. It came up while I was working on the parts list for the new website with Bruce Stone. The PET shows the same part number in 2 applications. One to stop the upward travel on the engine deck lid and the other in this location. I have yet to find where the drain tubes are in the PET. Is there possibly a variation in years?
QUOTE(Matty900 @ Jun 11 2017, 02:22 PM)
QUOTE(SirAndy @ Jun 11 2017, 01:44 PM)
QUOTE(Matty900 @ Jun 11 2017, 01:24 PM)
Learned that the "Engine Deck Lid Bumper" is actualy used in 2 places. The other is in the front trunk to keep water out in these 2 holes
Actually, that is incorrect!
The holes in the front trunk are supposed to have longer rubber tubes in them that allow water to flow out of the trunk.
I removed the same part from the holes to take these photos. It came up while I was working on the parts list for the new website with Bruce Stone. The PET shows the same part number in 2 applications. One to stop the upward travel on the engine deck lid and the other in this location. I have yet to find where the drain tubes are in the PET. Is there possibly a variation in years?
We make that part too but this is what I was finding in the PET. Any help in getting this figured out is greatly appreciated.
Got the wiper assembly mounted. Figured out the order to do thing's in. 1st step Attached the windshield wiper Isolator to the assembly.
Step 2 put on everything up to the lower "femail" wiper grommets and then get them seated as low as possible so the posts can come through the holes far enough for the nut to thread.
Put the other end of the isolator through the firewall. (Photo is upside down for some reason.)
Stick the wiper posts through the holes. Marke suret that they are centered and pull the posts through as far as you can.
Add "male" wiper grommets and push the down as far as you can go. Ad metal cap washer and then the nut to tighten it all down.
Tighten nut on the isolator
QUOTE(SirAndy @ Jun 11 2017, 01:44 PM)
QUOTE(Matty900 @ Jun 11 2017, 01:24 PM)
Learned that the "Engine Deck Lid Bumper" is actualy used in 2 places. The other is in the front trunk to keep water out in these 2 holes
Actually, that is incorrect!
The holes in the front trunk are supposed to have longer rubber tubes in them that allow water to flow out of the trunk.
Really curious. I think the drain tubes are under the spare tire. At least that's where I put mine.
Got more parts back from plating this week.
Fresh door striker plates
The blower fan is all cleaned up and ready to go back in
Got the pressure regulator rebuilt by Eric Shae at PMB and ordered all new hard lines. So I had to clean up the engine bay to be able to start putting parts on. Metal was in great shape underneath the paint and all the seam sealer.
The boy is busy ...........
He got pretty dirty yesterday. But it look great.
He got pretty dirty yesterday. But it look great.
 1st attempt at seam sealer. FAIL
Reassembled the fresh air mixing box and put on new drain hoses.
Took the controls apart to clean up before reinstalling them.
Blower for the heater is ready to go back in.
Stripped and re plated and painted headlights. Then put in all new bushings and lights.
Engine back from machine shop so we start with new heads, valves, springs, keepers, guides all rebuilt and ready to go. The block is cleaned and deburred. Crank shaft is balanced and polished. Brand new pistons, rings, barrels. Connecting rods preend, balanced, checked and resleaved. Cam work done. 1911 striker assembly starting next week.
Cary fixed a loose tube for the accelerator cable. That should make the car go faster right?
A lot of good work happening in this thread, keep it up!

QUOTE(turk22 @ Jul 2 2017, 02:19 PM)
A lot of good work happening in this thread, keep it up!
Thank you.
Took the engine bay back down to metal and got it primed today. Etching primer followed by sandable primer and sanded with 320 between coats. Drying until Tuesday then we will get seam sealer back on from a calling gun and then sprayer before laying down color and clear.
Another angle.
Much happier with this attempt.
This will cure until Thursday and then we'll hit the corners at least with Wurth.
Took apart the airbox controls, cleaned and reassembled.
Cleaned up the defrost vents and control boxes. Hope to install all of this Thursday.
QUOTE(SirAndy @ Jun 11 2017, 01:44 PM)
QUOTE(Matty900 @ Jun 11 2017, 01:24 PM)
Learned that the "Engine Deck Lid Bumper" is actualy used in 2 places. The other is in the front trunk to keep water out in these 2 holes
Actually, that is incorrect!
The holes in the front trunk are supposed to have longer rubber tubes in them that allow water to flow out of the trunk.
My 1971 914-4 has the same engine deck lid bumpers in the those 2 holes....not the any kind of longer drain tubes. So Porsche must have been doing this on many of the cars.
Reapplied seam sealer from gun. Much better result
Haven't uploaded any progress for a while so here's a few more photos. We got the spray in seam sealer, wurth undercoat and paint in the engine bay.
Took seats to an awesome 3rd generation upholstery wizard. Brought Justice along with me from the shop so he can get trained by him to recover seats. Thanks to people like Jamie rust we have about 15 - 20 sets of seats that can be used as a core Exchange program so that will be able to do completed seats in the future. He's also working on improving our patterns for installation by the Layman so it should make it easier on everyone that wants to do it themselves.
Cleaned up the mixing boxes and put on re plated clips
Cleaned up the defroster vents and replaced the seals. The old ones had degraded in to a sticky mess.
Installed new washers, check valves and lines.
Cary figured out the best way to install the fresh air mixing box in the car.
This makes the installation easier.
I upgraded to the late style grill and seal for the air box. The key to this is superglue and patience. The factory seals were glued to the grills. I superglued the grill into the seal and let it set up for the night. Then I glued the sill to the Box halfway around and let it set. Then I came back and glued it to the other side so that it was completely glued to the Box. When I went to install I used the Sil Glide liberally all the way around so that the new rubber didn't stick to the new paint and make it come off the Box.
This is Carys magic wand for installing the fresh air mixing box 
Stripped and repainted the fog light housings
This is a "lo-fi" version of our main content. To view the full version with more information, formatting and images, please click here.