Help - Search - Members - Calendar
Full Version: 914 2.0 > 3.0 GT Conversion
914World.com > The 914 Forums > 914World Garage
Pages: 1, 2, 3, 4, 5, 6, 7, 8, 9, 10, 11, 12
defianty
Back in the engine bay it was on to the ramp area under the battery tray.

With my shrinker it was fairly easy to fabricate this part. Although fitting it wasn't!
IPB Image

I made a mistake here as I didn't realise this area was double skinned. Luckily I didn't cut too much away and it was easy to fit. Should have done more homework. *Slaps own wrist.

IPB Image

Rotten part of the ramp removed.
IPB Image

With the ramp area out of the way it was time to turn to the inner wheel well. Originally I didn't know how I was going to repair this area as I don't have the fabrication skills necessary. Fortunately Restoration Design made a replacement panel. However it was out of stock and needed to be retooled. Luckily after a call out a 914World member had one in his stash and a deal was struck. Another hefty shipping bill from the US laugh.gif

Here's the new panel on arrival.
IPB Image

Here's what I decided to use of it.
IPB Image

Almost in...
IPB Image

Done.
IPB Image
defianty
Now I could get back to the ramp and fit that.
IPB Image

Last little piece of firewall going in.
IPB Image

The last main piece to fit was the engine shelf, supplied by Restoration Design.

IPB Image


Just need to fit the battery tray which is currently being blasted to clean it up a bit, then I'll call this part done. Quite a few days work there in quite a tight space, I'm glad it's done.

Next step is to fit a new trunk hinge bracket so I can put the trunk lid back on. This will assist with lining up everything as the rear end accident damage gets finished.

More soon.
Lucky9146
QUOTE(defianty @ Jan 11 2018, 08:29 AM) *

Now I could get back to the ramp and fit that.

Last little piece of firewall going in.

The last main piece to fit was the engine shelf, supplied by Restoration Design.

Just need to fit the battery tray which is currently being blasted to clean it up a bit, then I'll call this part done. Quite a few days work there in quite a tight space, I'm glad it's done.

Next step is to fit a new trunk hinge bracket so I can put the trunk lid back on. This will assist with lining up everything as the rear end accident damage gets finished.

More soon.


And here I thought you had just been sitting on your thumbs waiting for the Tach to arrive. av-943.gif

Great work and detail! Pictures are fantastic! You have developed some skills. welder.gif smilie_pokal.gif Looking forward to the next chapter. Thanks for sharing your progress!
white914.jpg
jd74914
Very nice! That hell hole reconstruction looks awesome!!
tygaboy
QUOTE(jd74914 @ Jan 11 2018, 08:57 AM) *

Very nice! That hell hole reconstruction looks awesome!!


agree.gif REALLY nice work. Skill, serious commitment and LOTS of time for this level of quality. Good stuff! aktion035.gif
defianty
QUOTE(Lucky9146 @ Jan 11 2018, 04:50 PM) *


And here I thought you had just been sitting on your thumbs waiting for the Tach to arrive. av-943.gif


av-943.gif

Not only did I do all that Jim, I celebrated Christmas and New Year, I also did this!

IPB Image

Yeah I got married just before Christmas. I'm the hairy one on the right, in case you wondered av-943.gif
Lucky9146
QUOTE(defianty @ Jan 11 2018, 09:27 AM) *

QUOTE(Lucky9146 @ Jan 11 2018, 04:50 PM) *


And here I thought you had just been sitting on your thumbs waiting for the Tach to arrive. av-943.gif


av-943.gif

Not only did I do all that Jim, I celebrated Christmas and New Year, I also did this!

Yeah I got married just before Christmas. I'm the hairy one on the right, in case you wondered av-943.gif


Awesome! Congrats! But does she weld? lol-2.gif
And that's a way better pic than your welding pics. Lucky guy and beautiful girl! You have been busy biggrin.gif
white914.jpg
Mueller
Congrats!

Great work on the car, I too will be tackling the hell hole area, mine won't be half as nice as yours so I doubt any pictures will be taken of my shoddy workmanship, hahaha
defianty
QUOTE(Lucky9146 @ Jan 11 2018, 06:32 PM) *

Awesome! Congrats! But does she weld? lol-2.gif


Nope laugh.gif Makes a good sandwich and great coffee though, which is all I need to keep going! biggrin.gif
LowBridge
fantastic project and congrats on the wedding beerchug.gif
mb911
Looks good.. Nice progress.. I did my hell hole the same way.. The shrinker/stretcher was the key for mine..
BENBRO02
QUOTE(raynekat @ Oct 1 2017, 04:43 PM) *

Car Bone is great but a lot of people here in the States either don't know about them...or are scared because they are located in Poland. I've had nothing but good experiences with them. Plus they can custom reproduce anything if you furnish an example.

I got a door jamb vin sticker from them and they did a great job.
defianty
I came across the photo whilst putting together the next instalment below and I thought I'd post it as a reminder of what the hell hole really looked like on first inspection. It truly looks awful but all those layers of paint had at least given the area some extra protection from the elements and acid. You can also see the reason I replaced the engine shelf - the huge hole is quite visible here.

IPB Image
defianty
Finishing the hell hole meant I could then weld in a new trunk hinge support as I removed mine due to an exceptionally poor repair years ago. With that complete I could then refit the trunk lid I needed this on to enable me to line up the accident damaged rear quarter.

Most of this work I'd done months previous so it was great to finally see the end of this part of the project.

So here's the story...

Here's what I started with after chipping and sanding away at the bondo. As I mentioned before I knew there was damage there but it had been sculpted so well I didn't envisage it being as bad. It didn't take long to realise nothing in that area was going to be salvagable so I set about finding replacement panels. NOS and reproduction rear quarters aren't available so an offcut from another car was going to be my only option.

IPB Image

IPB Image

I always had a small rust bubble in this area so this was no surprise.
IPB Image

Investigating
IPB Image

Absorbant foam, what a great idea!
IPB Image

Over the years the seam sealer holding this in had split - no doubt encouraged by the accident. This had then let the water in. As a precation I'll be cutting out the other side and removing the foam. You can see in the background of this shot the replacement rear wing I found.
IPB Image

After removing all the foam this part of the inner wing would need to be repaired.
IPB Image

Repair underway.
IPB Image
defianty
Here's the replacement rear wing being cleaned up before installation. As is always the case with replacement panels, you never know if the replacement is actually any good. I actually wanted to use more of the wing but sadly the rest wasn't usable. I'll cover that at a later date when I get on to the B post repair.

IPB Image

Fingers crossed there's no rot in this one.
IPB Image

Completely rust free, almost ready to use.
IPB Image
defianty
The damage wasn't just on the corner but also along the rear panel, again cleverly disguised with filler. This would need to be replaced too. Sourcing a rear panel took quite some time, when I first looked original panels were still available but priced at around £1K and I didn't fancy paying out that much. As my search continued the last NOS one I knew about was sold. Since this Restoration Design now reproduce this rear panel.

I'd need to replace everything marked here.
IPB Image

So I cut it out!
IPB Image

IPB Image

I found a couple of used rear panels in Germany but they were asking too much for my liking. Eventually Garold Shaffer helped me out and shipped this to me from the US for a decent price.

IPB Image

It was going to need a fair bit of work but it was a good solid start. My mistake here, I think, was not using the entire panel and cutting it in half. Lining everything up was extremely difficult when I came to fit it and maybe it would have been easier if I'd left the panel in one piece. Another learning expreience.

Cleaning up the rear panel.
IPB Image

IPB Image

I'd need to weld up the badge hole as I've something different to go there I've been working on.
IPB Image

Holes welded up.
IPB Image

Lots to more to do but at this stage I realised it would be best to get the panel blasted.
IPB Image
defianty
After having the panel blasted I offered it up for its first fit along with the replacent corner panel. Lots of measuring ahead before it would finally be welded in.

IPB Image

Talking of measuring this is a prime example of what happens when you only measure one! This is me welding on an extra piece as I'd cut it 4mm too short. You can just about see the gap in the picture above.

IPB Image

IPB Image

So it was at that stage I knew I'd need the trunk lid fitted to continue so I set about finishing the trunk floor and got to work on the hell hole.
defianty
With everything now in place I could continue.

Rear panel being tacked and screwed into place.
IPB Image

Corner gusset fitted and corner section

Rear wing fitted.
IPB Image

Nice and straight finally.
IPB Image

Getting the above straight and the corner section to line up took an incredible amount of time, measuring, measuring, measuring and head scratching over several days. The problem all stemmed from the replacement rear wing being a slightly different shape from the other side. It was only a few millimetres different but more than enough to throw everything out of line. Originally when I had everything in, what I thought was, the correct place - the corner light cluster fitted poorly and wouldn't make a seal. I even wondered if my cluster was bent and sourced a replacement to try. When that didn't fit I really was lost for a while.

Anyway, with that and other issues beaten I was on to the finishing stretch.

Bonnet on, panel gaps perfect, lights in and bumper on.

One straight rear end with no bondo!
IPB Image


That brings me all up to date again. There's a few welds to clean up on the rear end so that's the next small task. After that I'll be venturing under the sail panels to see what rusty delights are awaiting me.
ndfrigi
Wow Stephen! that is a very fast restoration and a beautiful build!
Lucky9146
QUOTE(defianty @ Jan 14 2018, 07:12 AM) *

Nice and straight finally.

Getting the above straight and the corner section to line up took an incredible amount of time, measuring, measuring, measuring and head scratching over several days. The problem all stemmed from the replacement rear wing being a slightly different shape from the other side. It was only a few millimetres different but more than enough to throw everything out of line. Originally when I had everything in, what I thought was, the correct place - the corner light cluster fitted poorly and wouldn't make a seal. I even wondered if my cluster was bent and sourced a replacement to try. When that didn't fit I really was lost for a while.

Anyway, with that and other issues beaten I was on to the finishing stretch.

Bonnet on, panel gaps perfect, lights in and bumper on.

One straight rear end with no bondo!
IPB Image


That brings me all up to date again. There's a few welds to clean up on the rear end so that's the next small task. After that I'll be venturing under the sail panels to see what rusty delights are awaiting me.


Impressive! Dang! Seeing this level of work and result I had to go back to see if I had actually read something correctly earlier in your thread and I found it from your June 16th 2017 post where someone had said:

Nice fab work! From the looks of your skills, that body work will be no problem to sort out.

Your response was:
Thanks very much. However before starting this project I'd never done anything like this and I've only been welding a few months. I love a challenge.

Have to say that I have done a bit of welding in my day but never to this level. Great work Stephen smilie_pokal.gif Thanks for the great documentation and your experience.
Oh and I used to work with a guy who used the word bonnet and I hadn't heard it many years so thanks for that too!
white914.jpg
defianty
Thanks again Jim. I'm getting excited, it's really progressing now and getting closer to being painted.
Cairo94507
Stephen - That rear end looks really nice smilie_pokal.gif That is the way to correct a damaged rear for sure. beerchug.gif
defianty
In this weeks episode of the Rust Explorer we take a look at the sail panels. laugh.gif

There's no easy way of doing this without removing a lot of metal. This part of the rear quarter had been beaten to hell in a previous life and was covered in filler. It didn't take long to decide to cut that off and bin it.

IPB Image

Originally I'd hoped I'd be able to repair the rust that was bubbling through above the door handle but on closer inspection the copious amount seam sealer that was stuffed there had failed. This resulted in a fair bit of corrosion and metal thinned beyond repair.

This is where I had a couple of bubbles peeping through.
IPB Image

It didn't get any better.
IPB Image

So... off with the sail panel. I've not mentioned my hatred for drilling spot welds have I. I've tried multiple tools and have just decided it's a bugger of a job. Every tool seems to blunt so quickly.

IPB Image

I've discovered opening up panels on a 914 is not like opening up presents on Christmas morning. Much too much disappointment in my opinion. Unless it was a present from an elderly distant great Aunt laugh.gif

IPB Image

IPB Image

That stuff hanging down is sponge - the water absorbing, rust inducing kind laugh.gif

Here's the underside of the removed sail panel, I think you can see just how thin the metal is here. Not savable.
IPB Image

Fortunately after removing all the seam sealer and underseal the damage was only on the surface, again I got there in the knick of time.

IPB Image
defianty
Before the car gets painted the remaining painted areas are going to be media blasted. This area under the sail panel will be almost inaccessible so I'll be treating it now before putting it all back together.

A good coating if epoxy primer later and things are starting to look a lot tidier. The areas where the seams will be welded are coated in weld thru primer.

IPB Image

Roger Bray did me a good deal on a pair of sail panels, now was the time to try them out. Getting everything lined up wasn't easy, well for me it wasn't. laugh.gif

IPB Image

I refitting the door latch mechanism so I could get everything lined up, at this stage I wanted to make sure I was heading in the right direction so the door gaps were perfect.

Looking good, and measuring within 0.5mm all down the door.
IPB Image
defianty
You can't just do one side can you...

So the otherside received the same treatment. Tougher this side though as I need to replace the door jam too as that suffered in the accident.

IPB Image

IPB Image

IPB Image

IPB Image

The sail panel obviously came from a different supplier originally and abielt a slightly thinner gauge steel it did fit slightly better.
defianty
Whilst I was in the area I need to attend to this jacking point too. Luckily the inner skin was unaffected so it was a simple case of cutting off and replacing. Nice simple job.

IPB Image

Ready to weld.
IPB Image

Done.
IPB Image
defianty
I finally found a decent early passenger door. These are starting to get rare now in good condition and not easy to find in the UK. I was very close to buying one and shipping it from the US. Thanks to Retro Restorer in Oxfordshire for this.

IPB Image


And this is where we are now, all ready for lots of welding but close to finishing the body.
IPB Image


Hopefully the next installment will see the body back in one piece laugh.gif Well almost.

And if I ever decide what colour to paint the thing it'll go off to paint.

maf914
Good photos and nice work.

Where does the vent tube from the door jam vent terminate? Does it actually move air? I have always wondered what the purpose was of the black plastic vent in the door jam. idea.gif

defianty
QUOTE(maf914 @ Feb 3 2018, 01:16 PM) *

Good photos and nice work.

Where does the vent tube from the door jam vent terminate? Does it actually move air? I have always wondered what the purpose was of the black plastic vent in the door jam. idea.gif


I don't have a photo but I it goes behind the back pad. I guess it's just to equalise cabin pressure but could be wrong. Interestingly European 914's didn't have the black plastic grill.
mepstein
QUOTE(defianty @ Feb 3 2018, 08:18 AM) *

QUOTE(maf914 @ Feb 3 2018, 01:16 PM) *

Good photos and nice work.

Where does the vent tube from the door jam vent terminate? Does it actually move air? I have always wondered what the purpose was of the black plastic vent in the door jam. idea.gif


I don't have a photo but I it goes behind the back pad. I guess it's just to equalise cabin pressure but could be wrong. Interestingly European 914's didn't have the black plastic grill.

You are right. Let’s some air out of the cabin. Helps the heat system as well. I don’t know about the euro cars but early didn’t have the round plastic vent grill. Mid and late cars do.
Lucky9146
QUOTE(defianty @ Feb 3 2018, 02:25 AM) *


And this is where we are now, all ready for lots of welding but close to finishing the body.
IPB Image

Hopefully the next installment will see the body back in one piece laugh.gif Well almost.

And if I ever decide what colour to paint the thing it'll go off to paint.


I am always more impressed with each post I see. I mean this as the highest complement, better you than me, smilie_pokal.gif because your results are way better than I know I could achieve. Great progress!
white914.jpg
2mAn
Just went through the entire thread. Its really inspiring to see a decent looking car and knowing theres issues and just going for it. I have a 68 Datsun Roadster that I know will need this at some point, so for now Im just an observer as Im not ready to tackle this type of resto. Good on you for diving in

Cheers!
defianty
QUOTE(2mAn @ Feb 3 2018, 05:55 PM) *

Just went through the entire thread. Its really inspiring to see a decent looking car and knowing theres issues and just going for it. I have a 68 Datsun Roadster that I know will need this at some point, so for now Im just an observer as Im not ready to tackle this type of resto. Good on you for diving in

Cheers!


Thanks for reading Simon. I sure wasn't ready for this type of resto at the beginning laugh.gif it just happened. av-943.gif
bbrock
Looking good! Seems to be an exciting stage of the resto. I'm looking forward to being ready to put the sails and quarters back on mine. Can't wait to see your progress. Thanks for sharing.
defianty
Ok, let's get on to the next instalment!

Before I start buttoning everything back together I need to add the drivers side GT strengthening as I never got around to doing this side previously.

IPB Image

With that in place I could start putting it all back together.

I didn't want to cut this off originally but installing the new jacking point but removing it made the installation of the jacking point much easier.

IPB Image

I'm not sure why I chose to cut this piece like I did. Drilling the spot welds would have been the better option.

All back in place now though.
IPB Image

I could now get on to welding in the sail panels.
IPB Image

Getting some seam sealer in place as this area will be difficult to access once it's all back together.
IPB Image

Drivers side sail panel in place. I thought it turned out well.
IPB Image

That was going to be it for that side now as I wanted to fit the sail on at the same time. This way I could measure them both as they were being fitted so I knew they were in the perfect location.
defianty
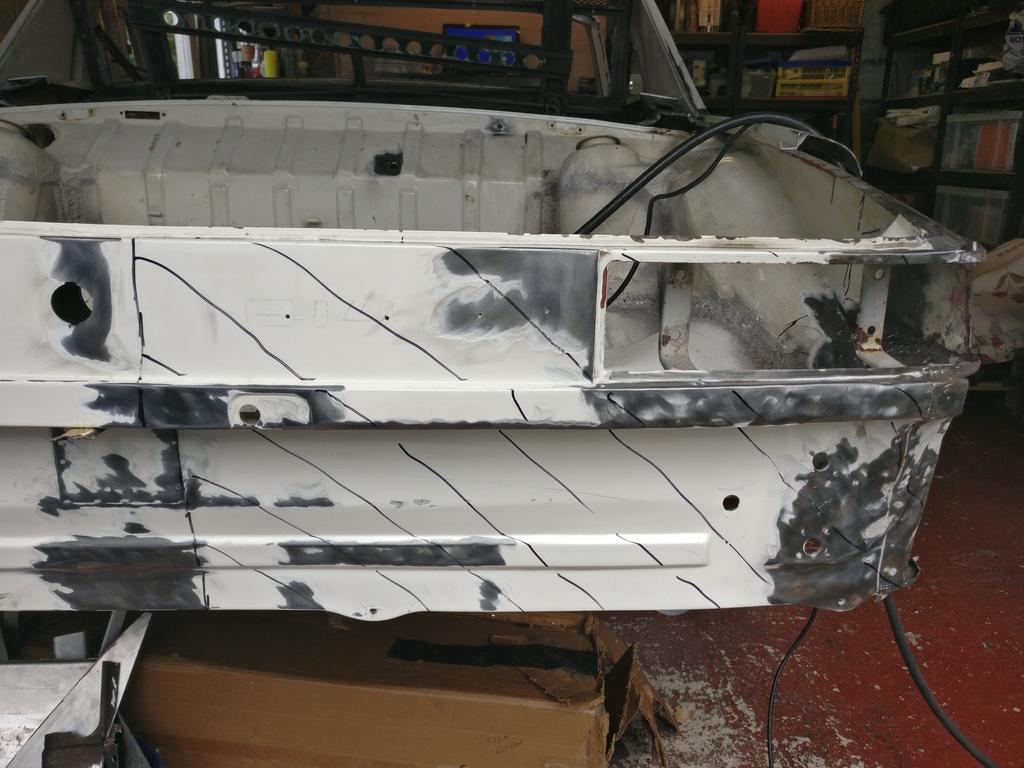
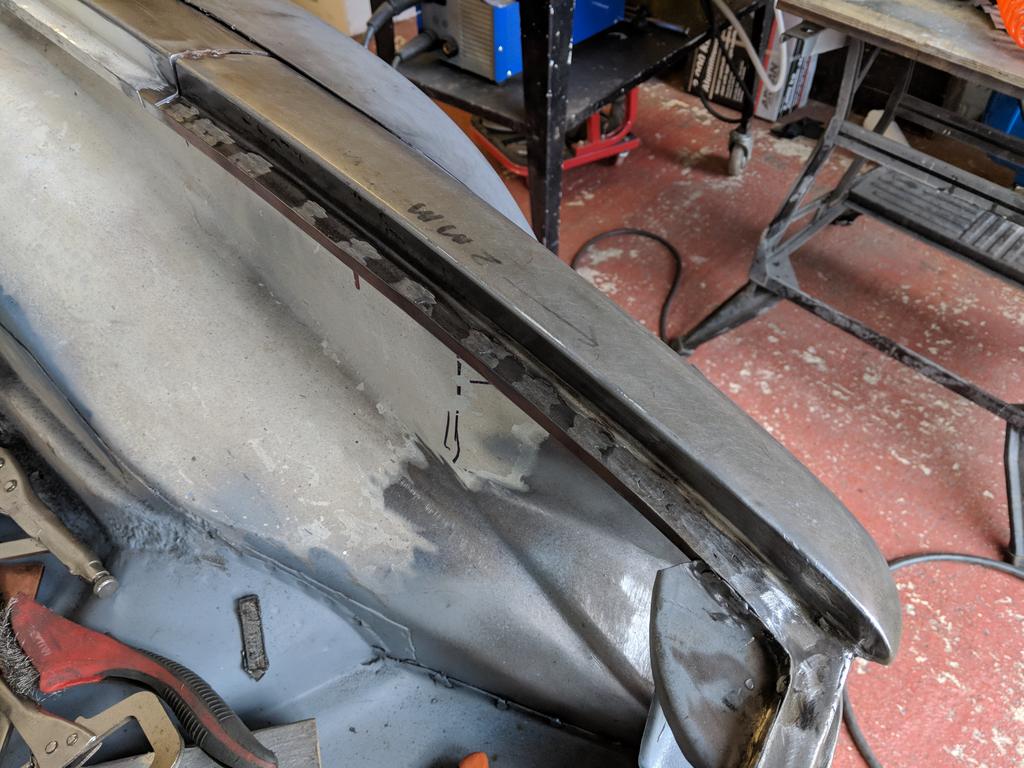
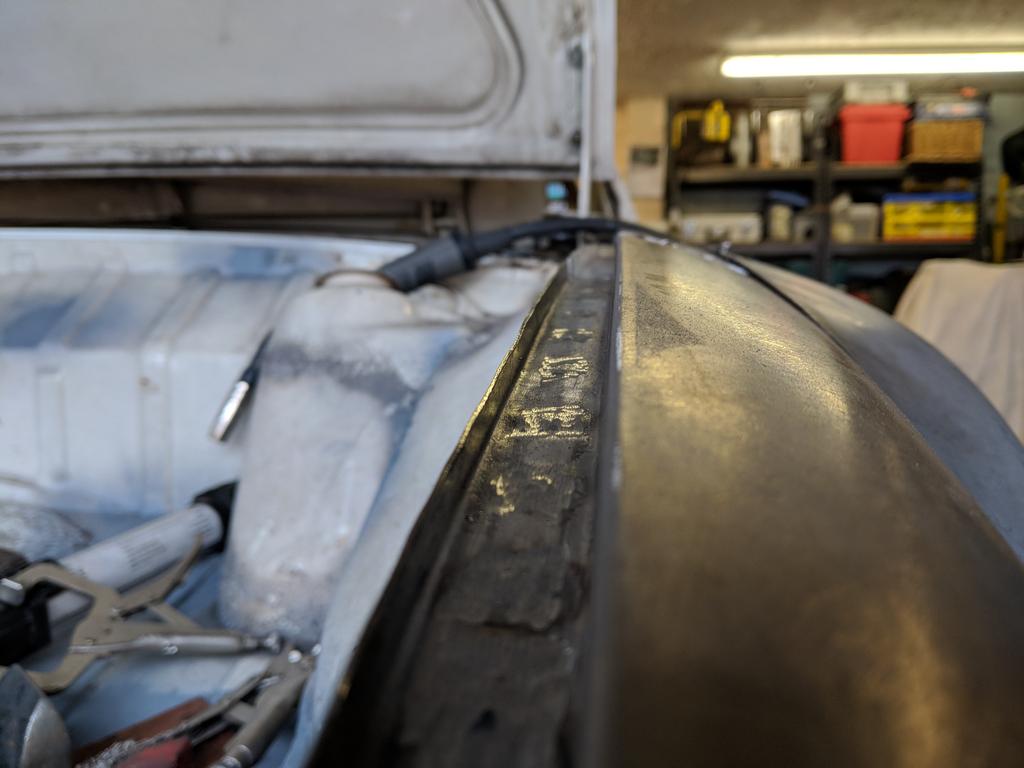
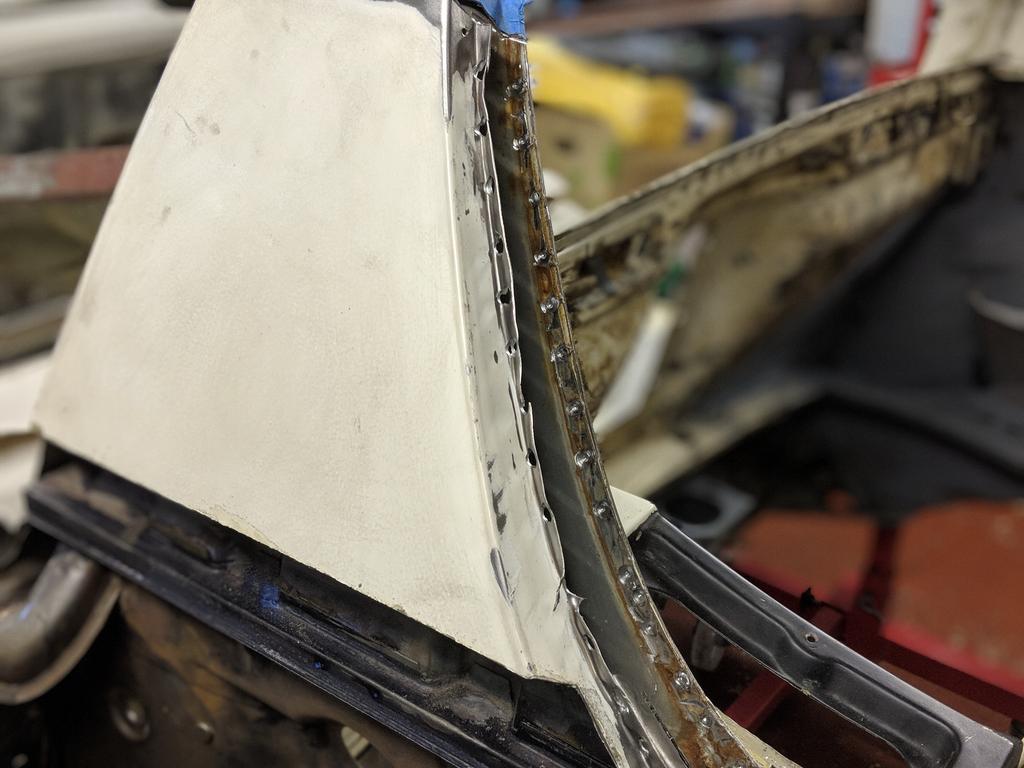
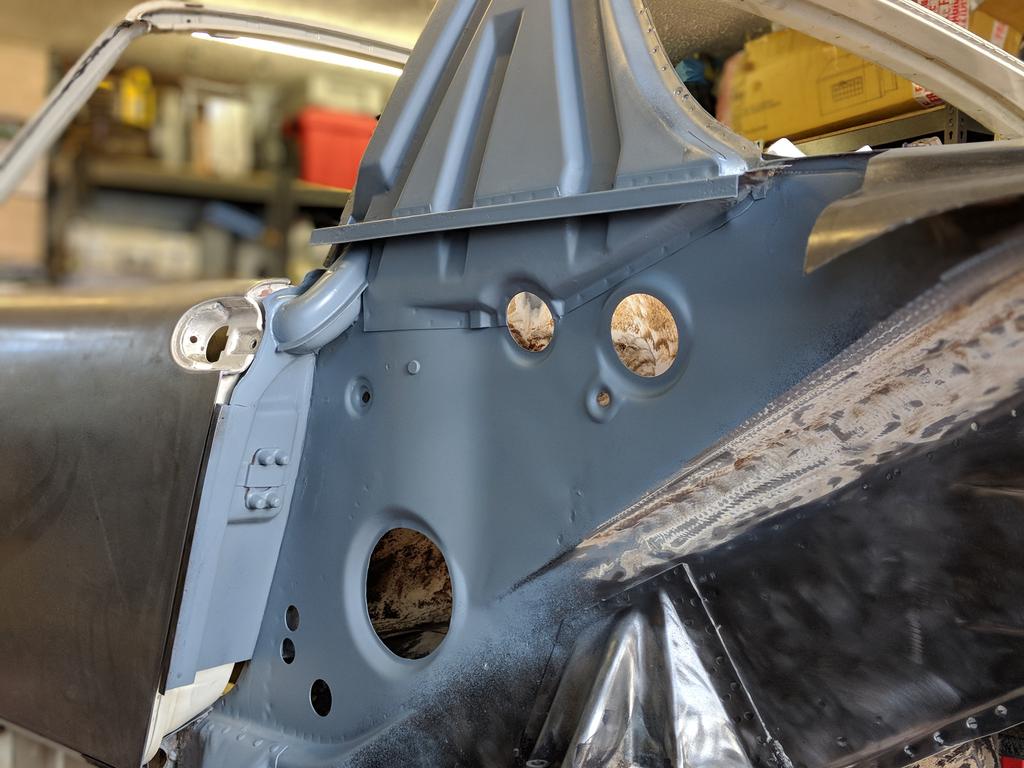
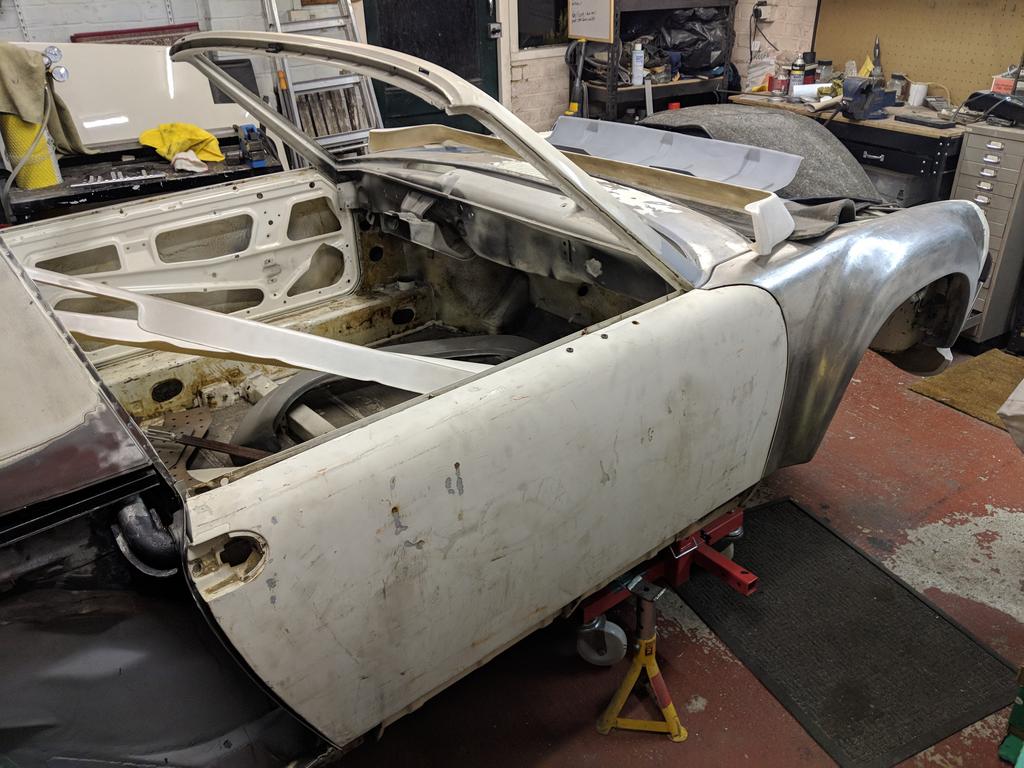
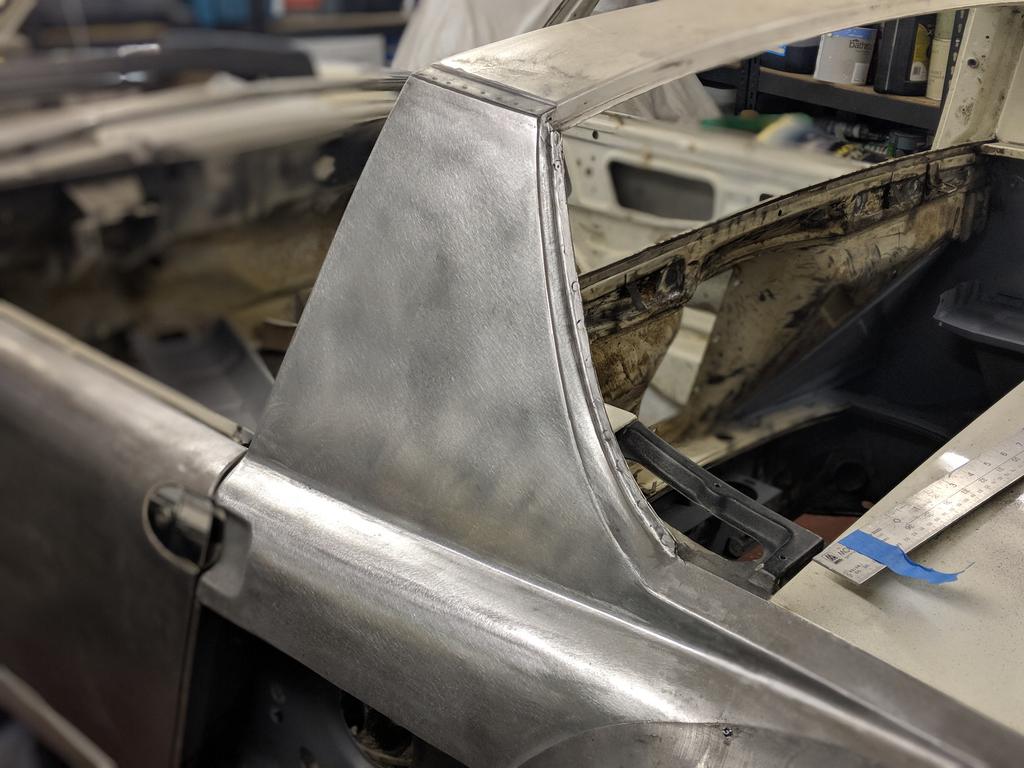
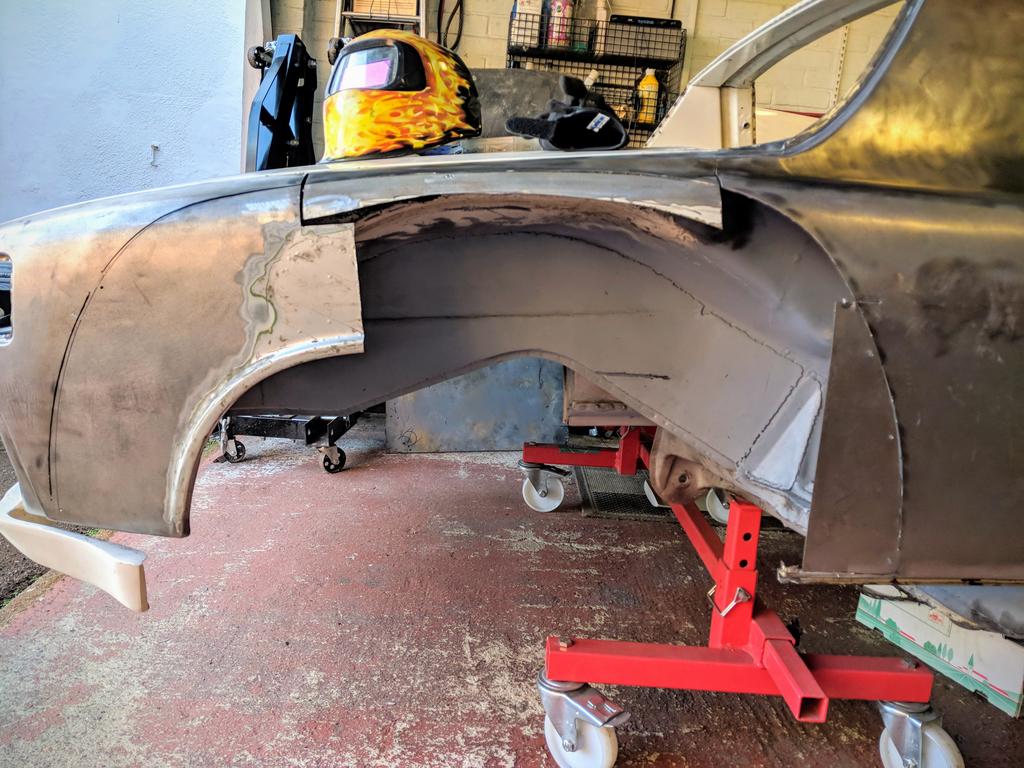
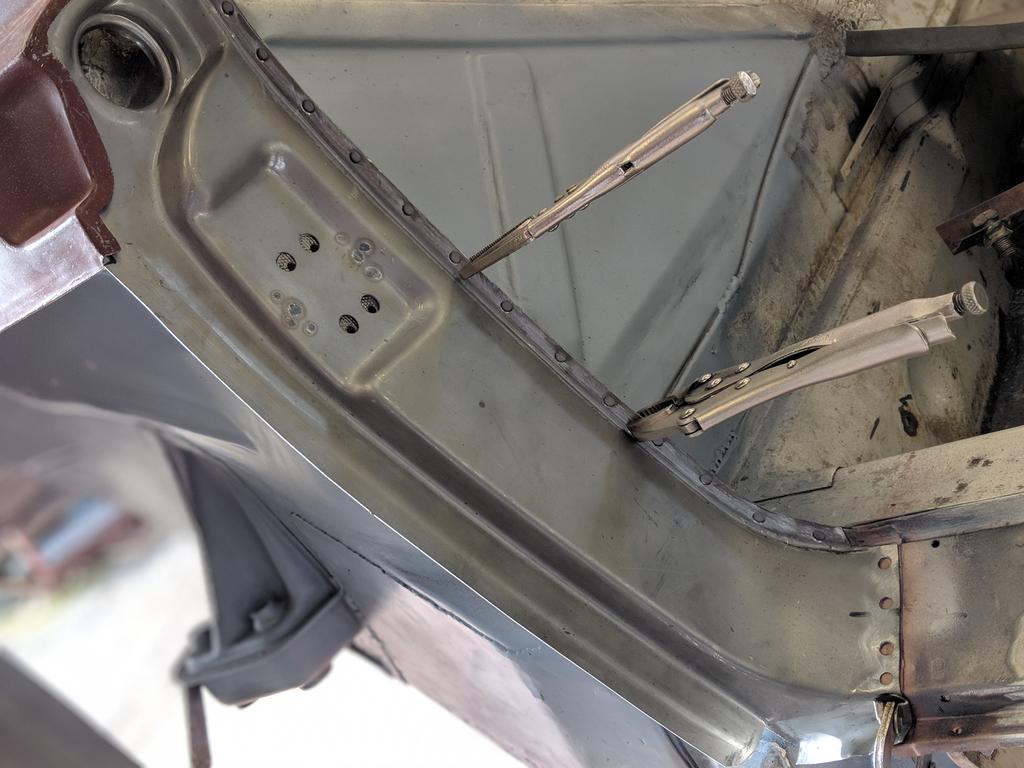
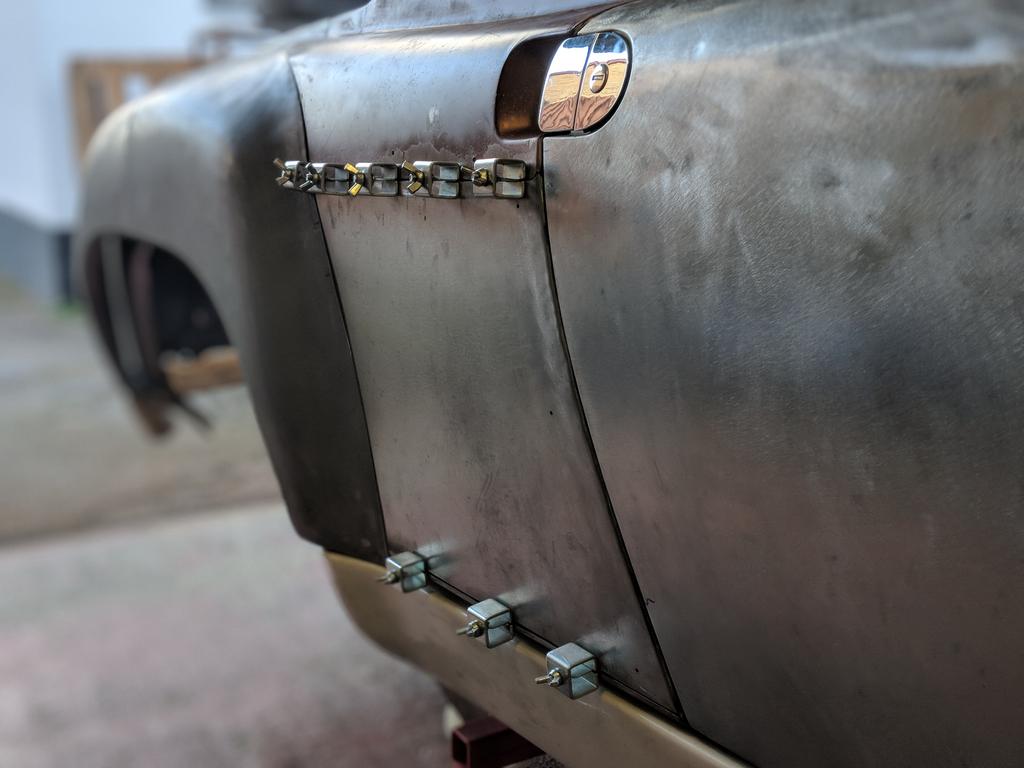
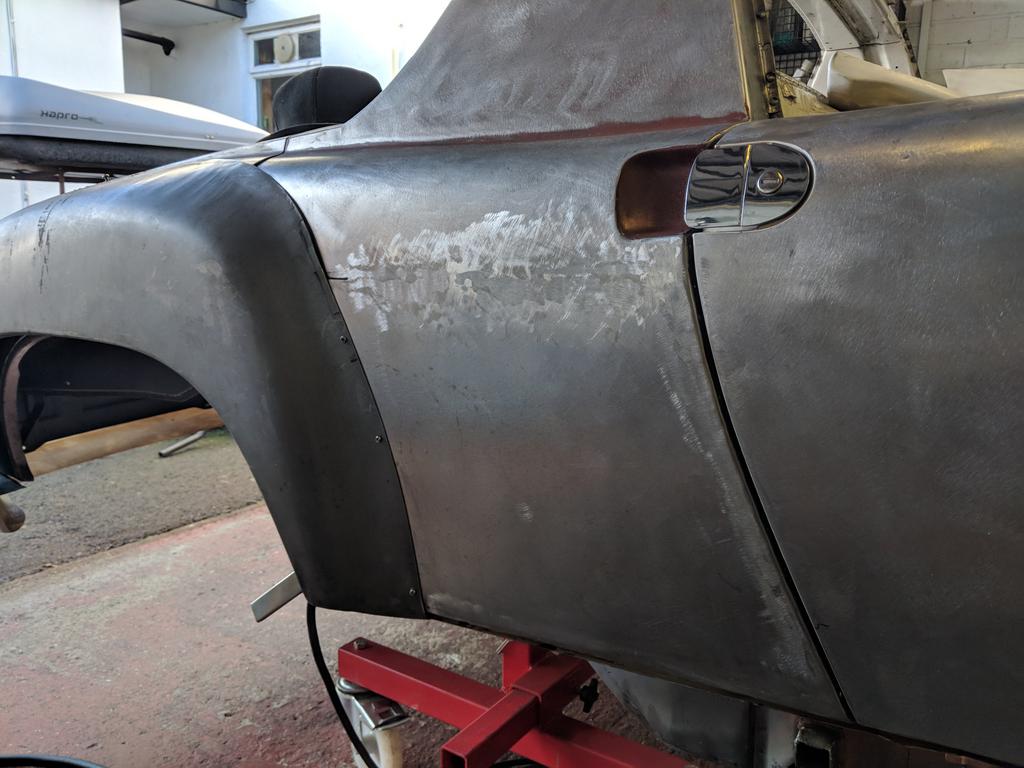
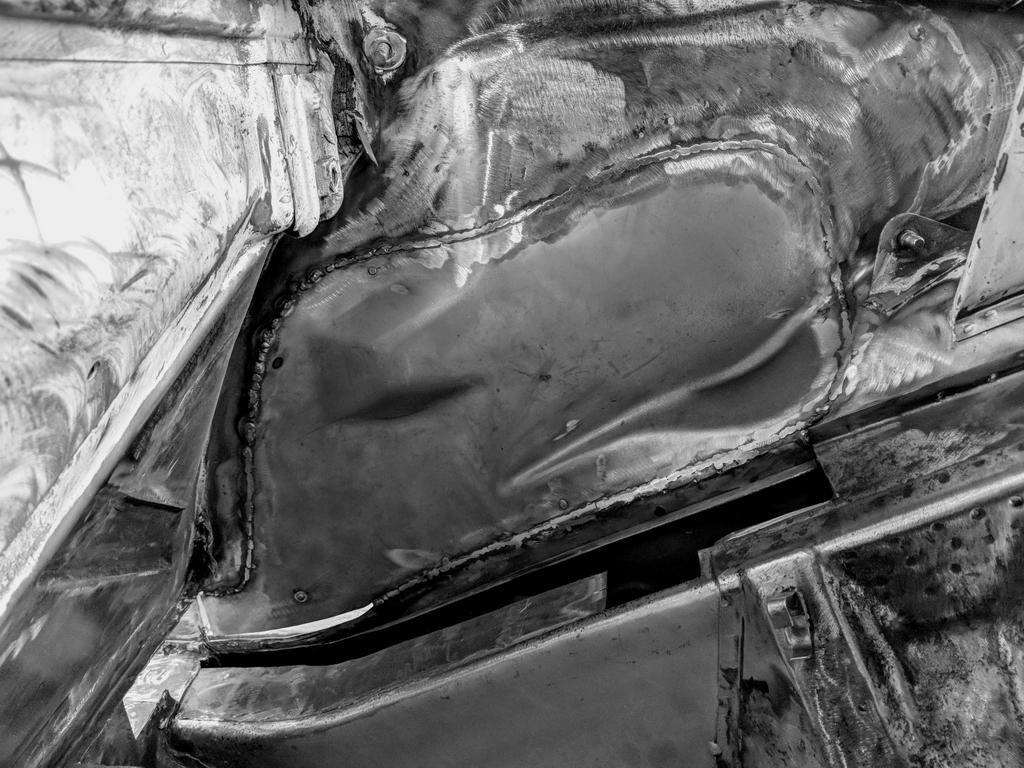
The passenger side was a lot trickier due to having to fit a new door jamb panel too. Getting this to fit perfectly took an age and I spent far more time measuring and checking things that it actually took to install.

IPB Image

IPB Image

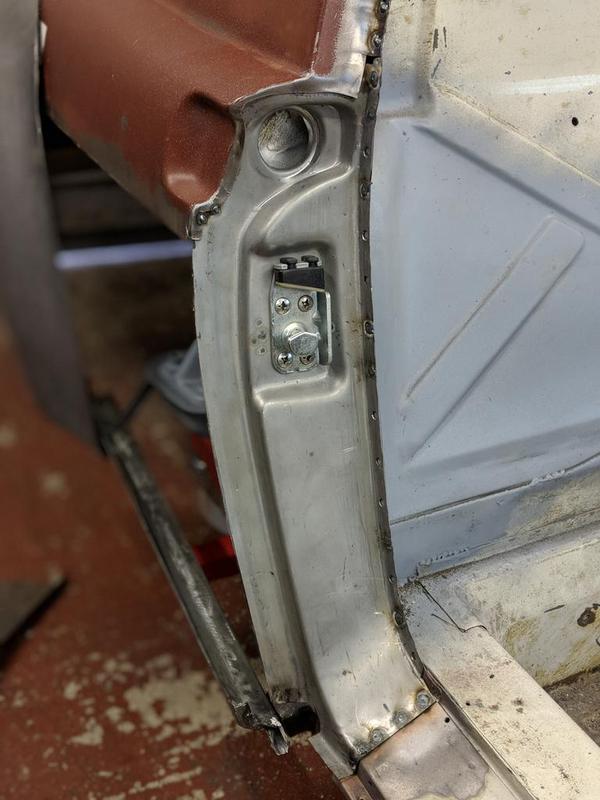
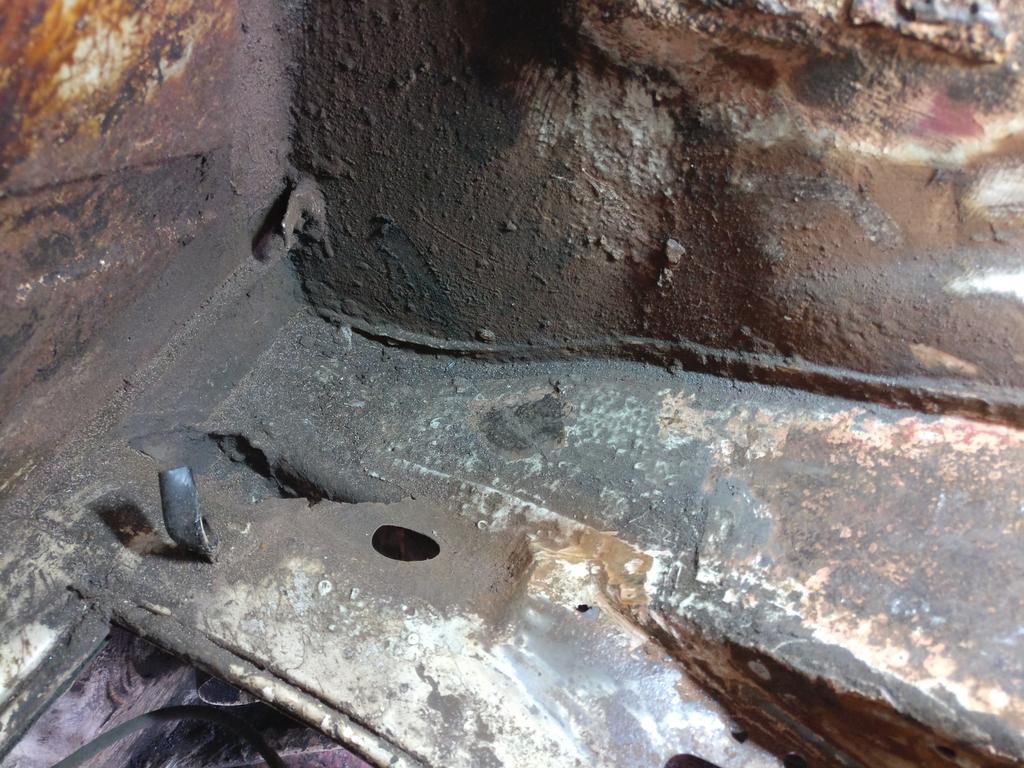
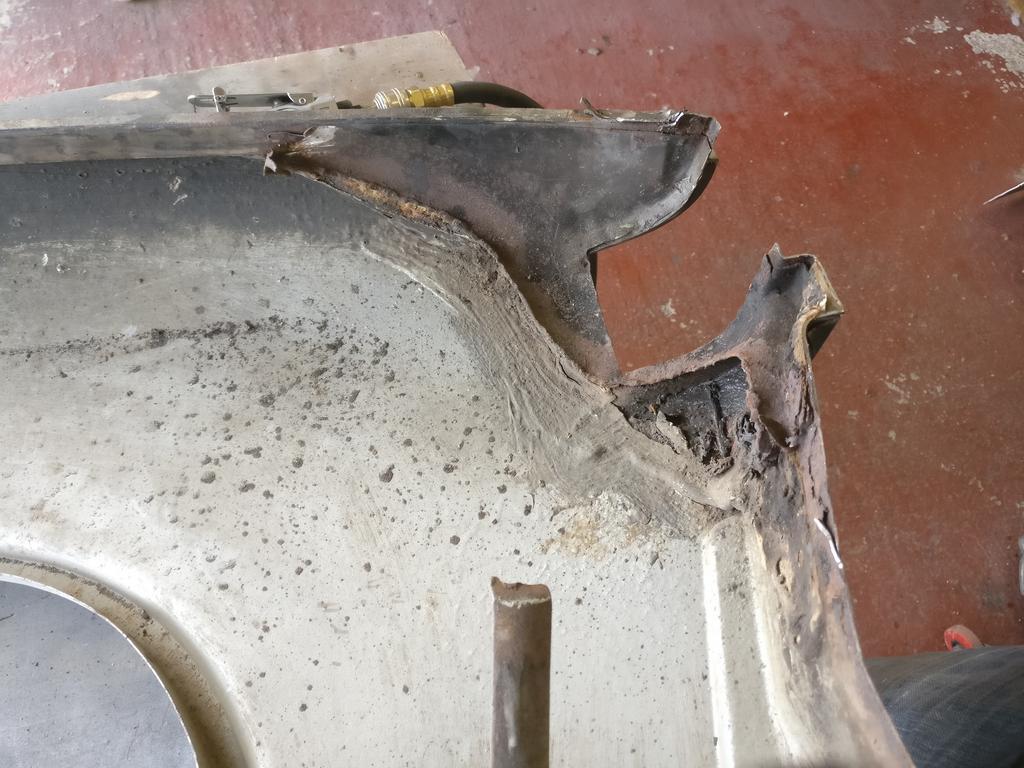
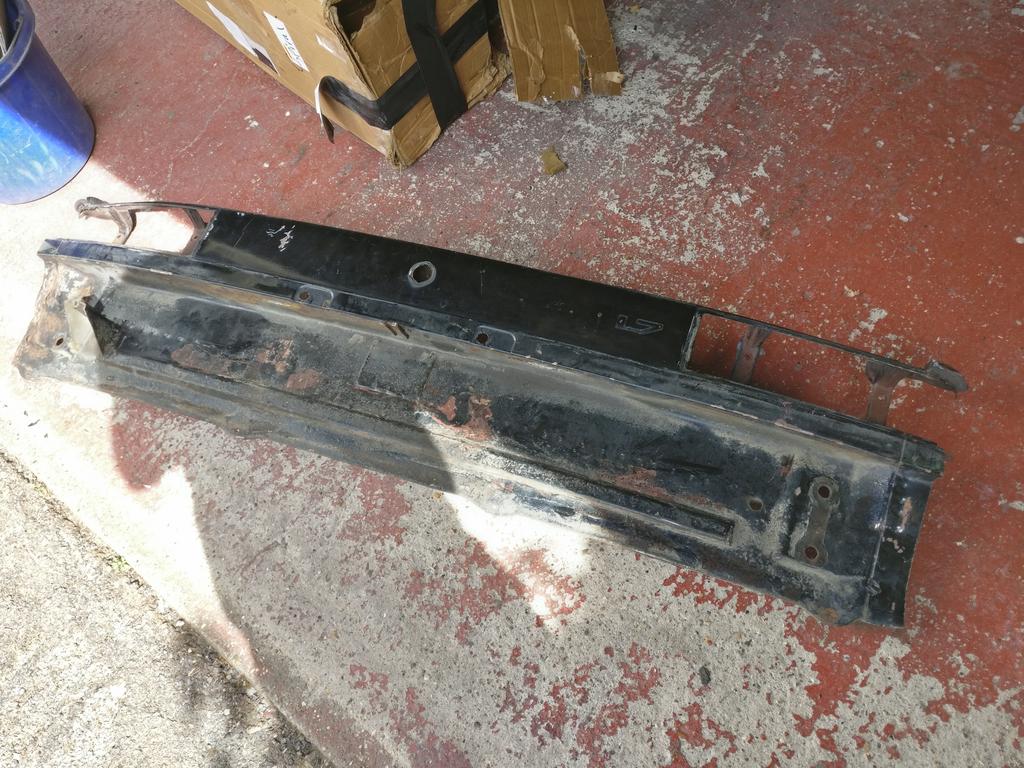
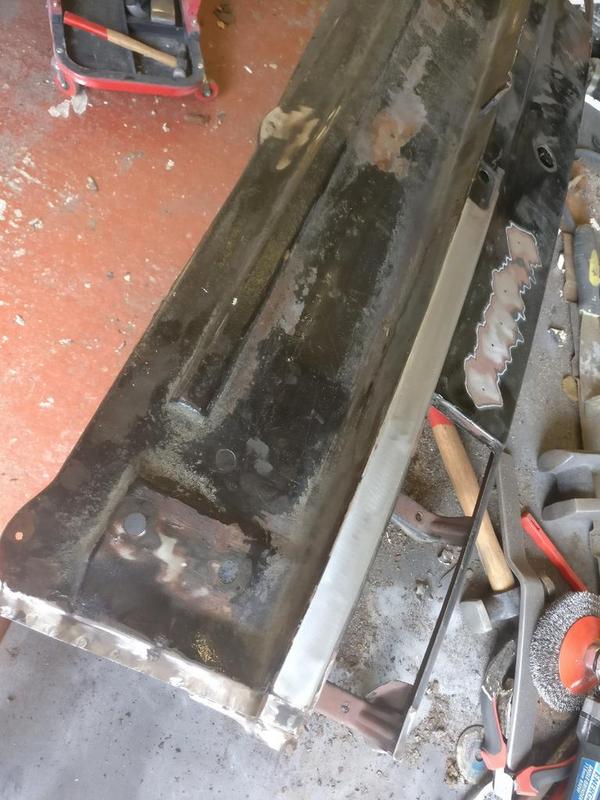
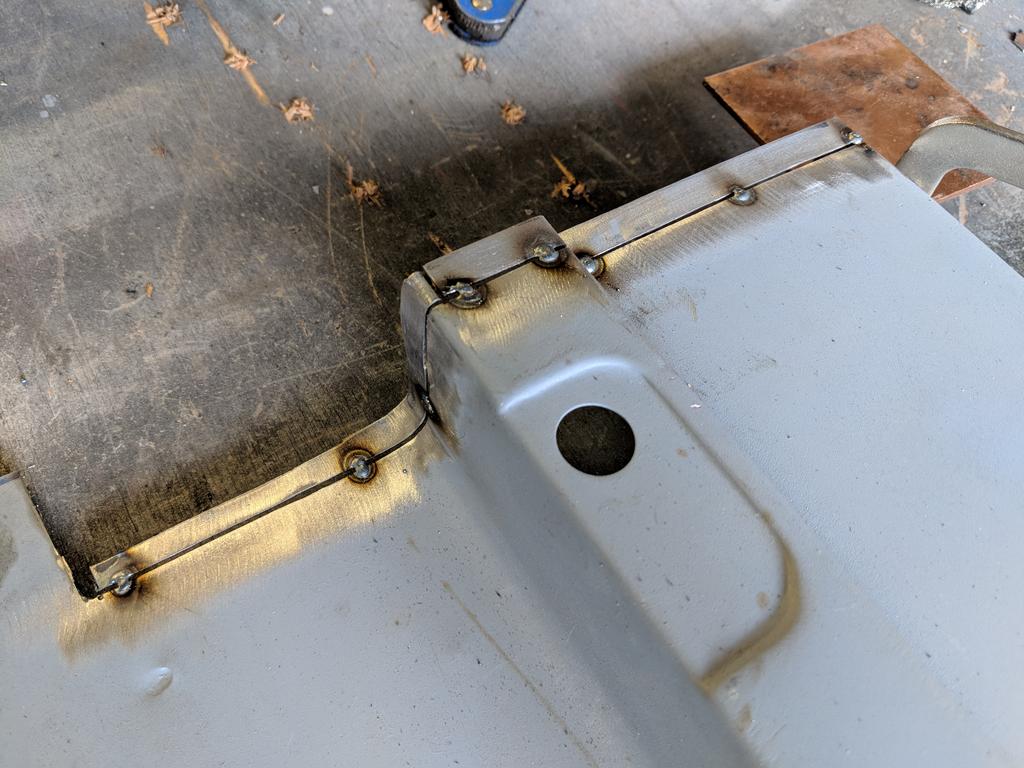
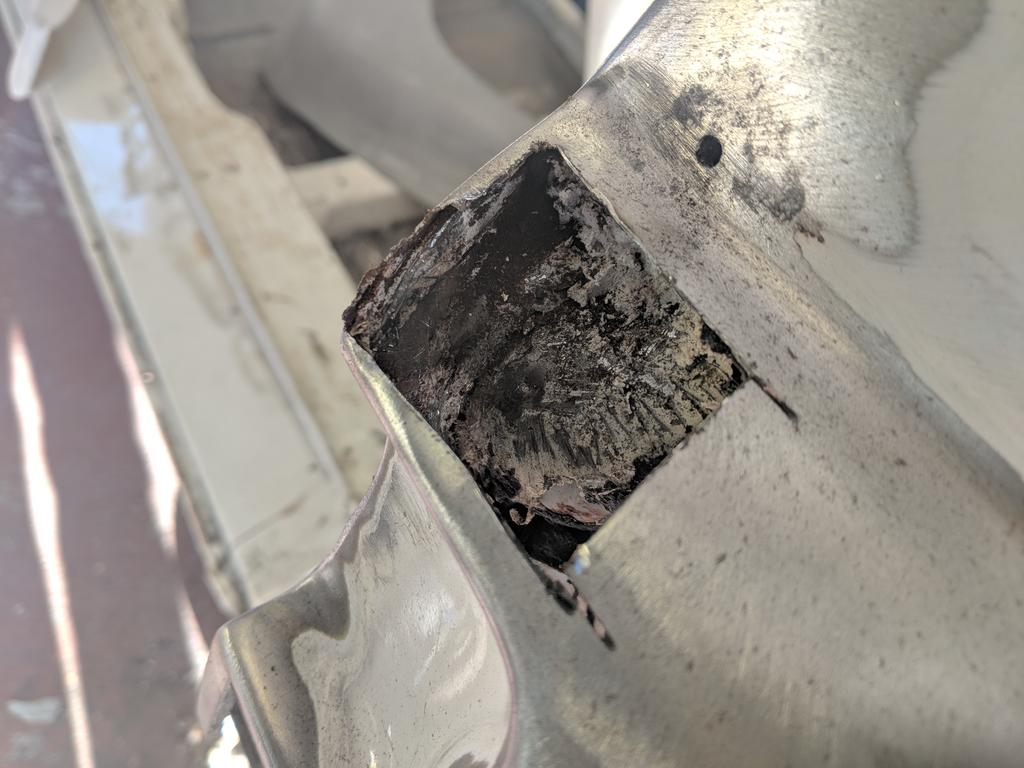
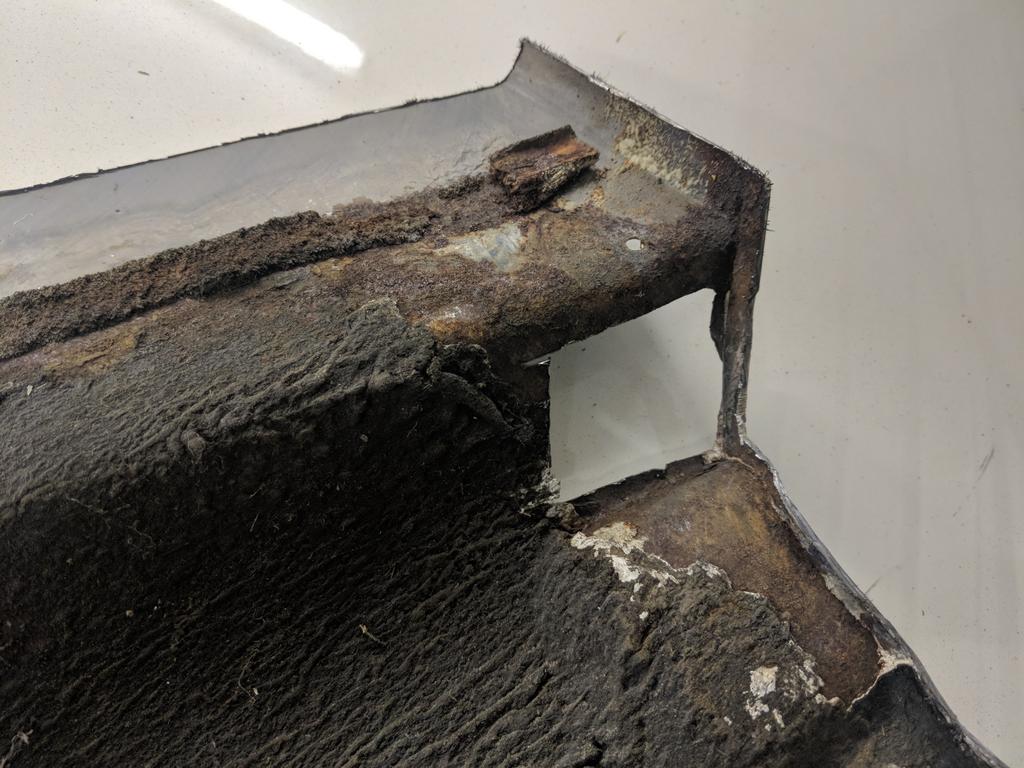
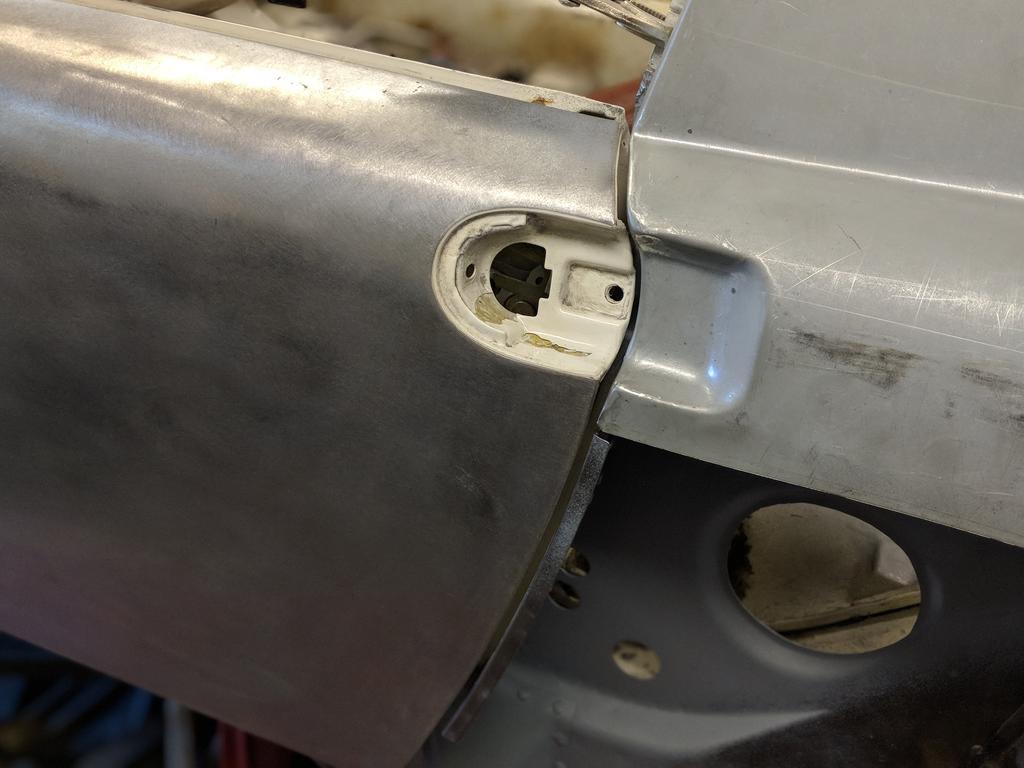
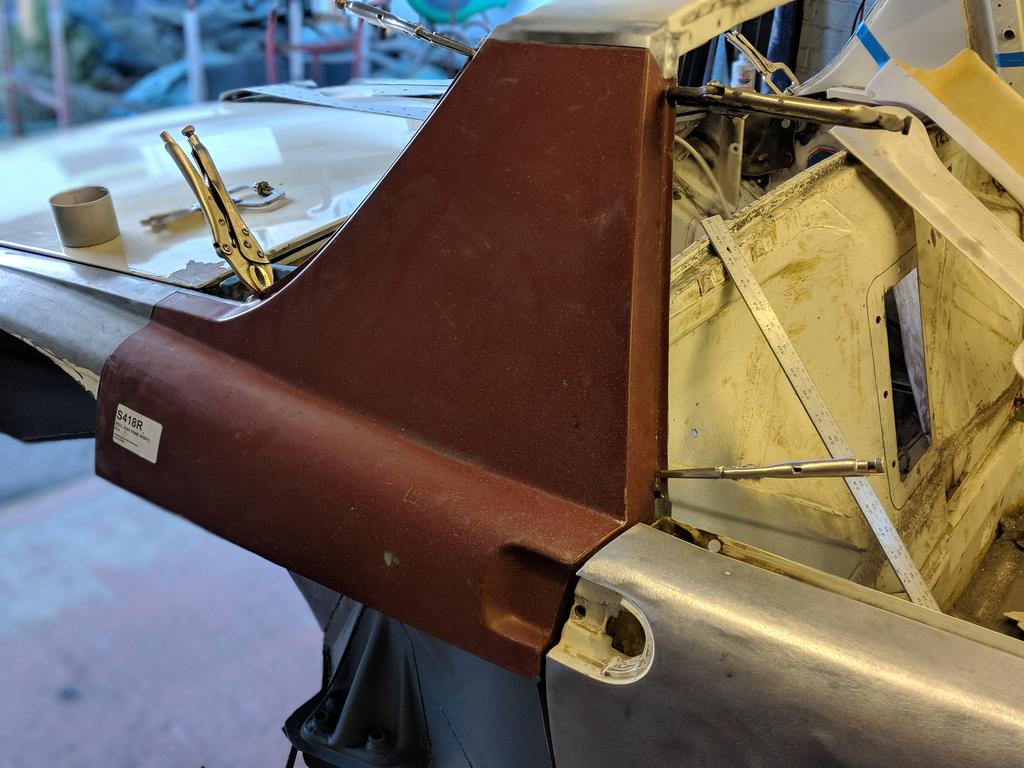
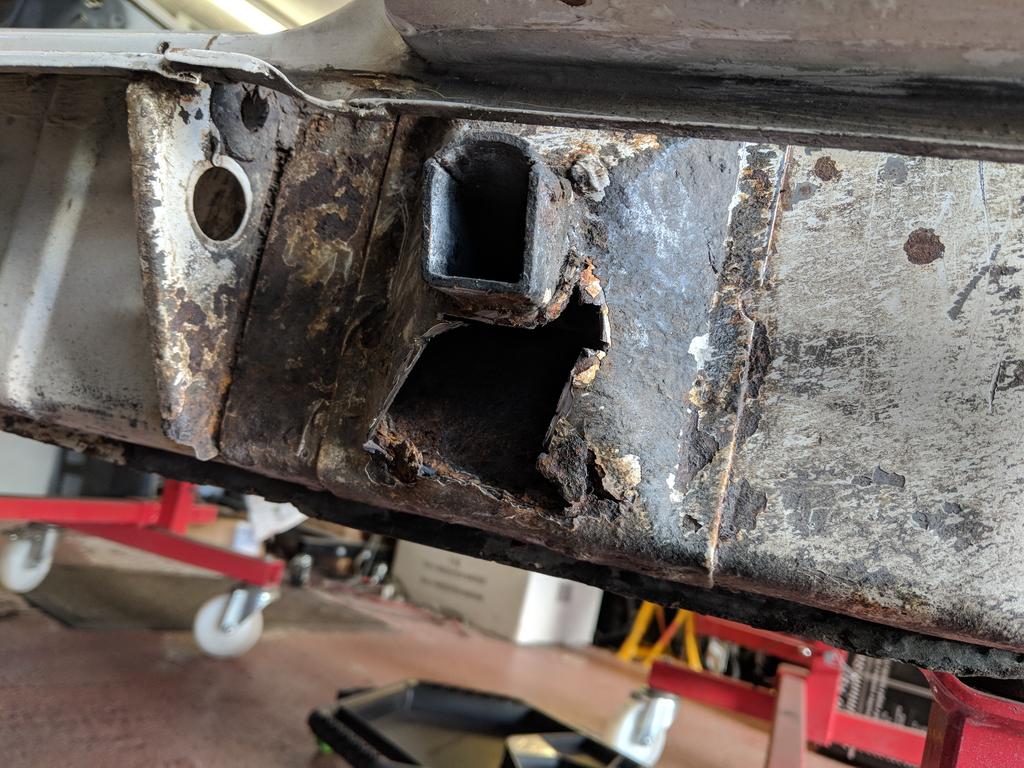
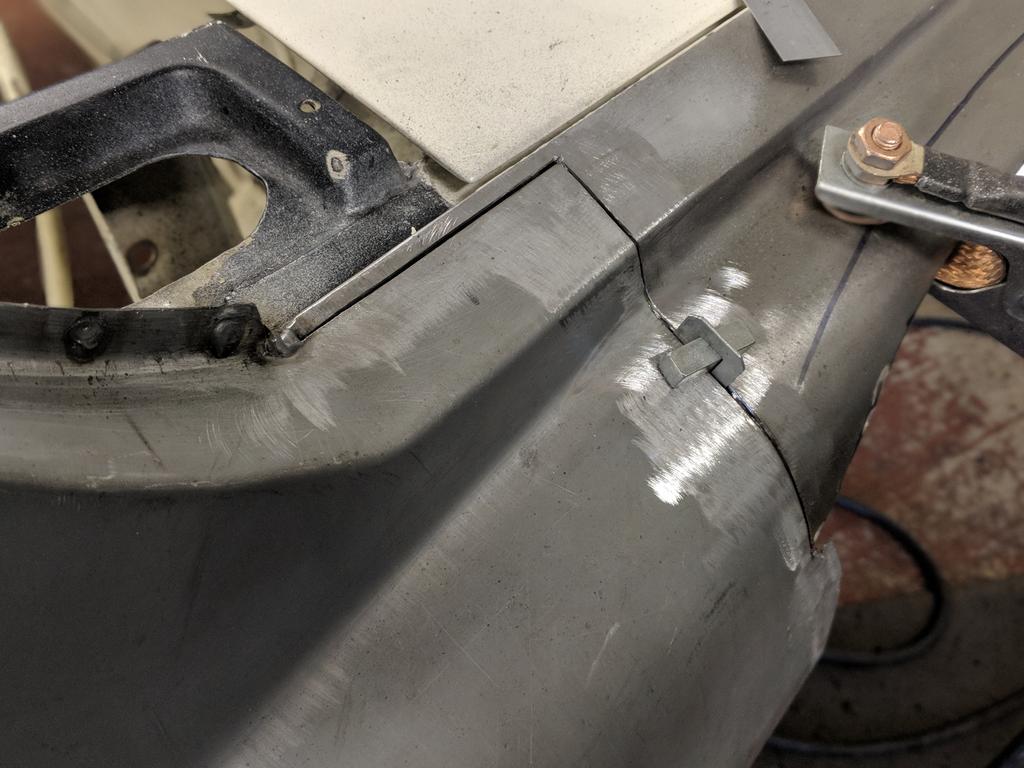
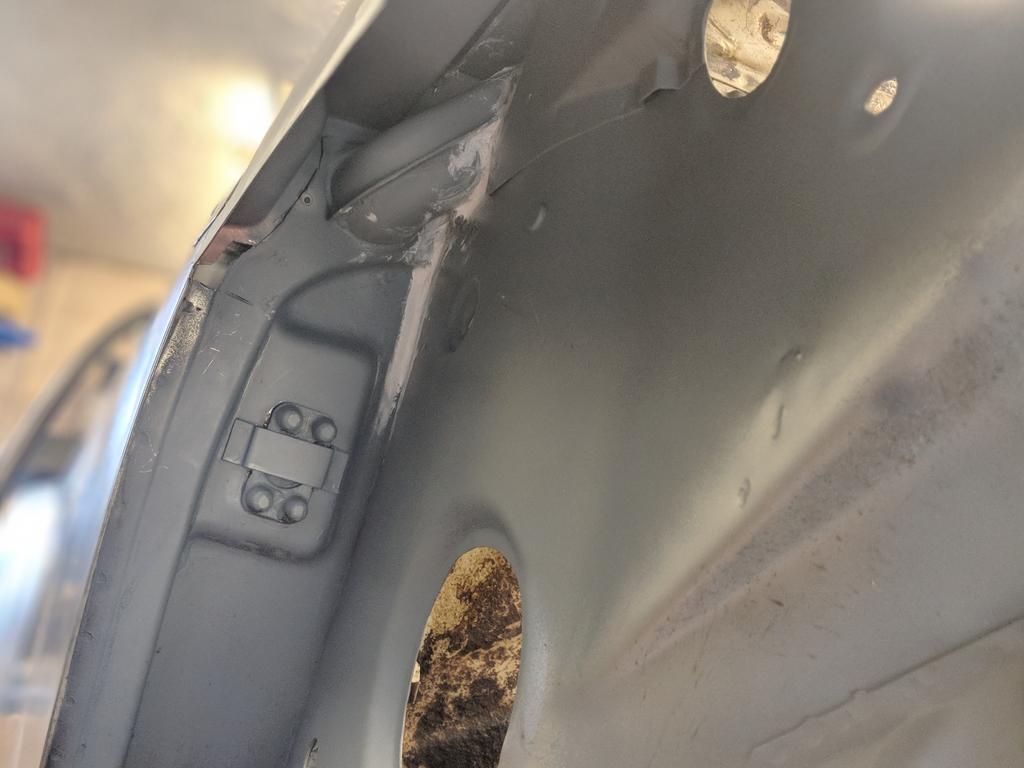
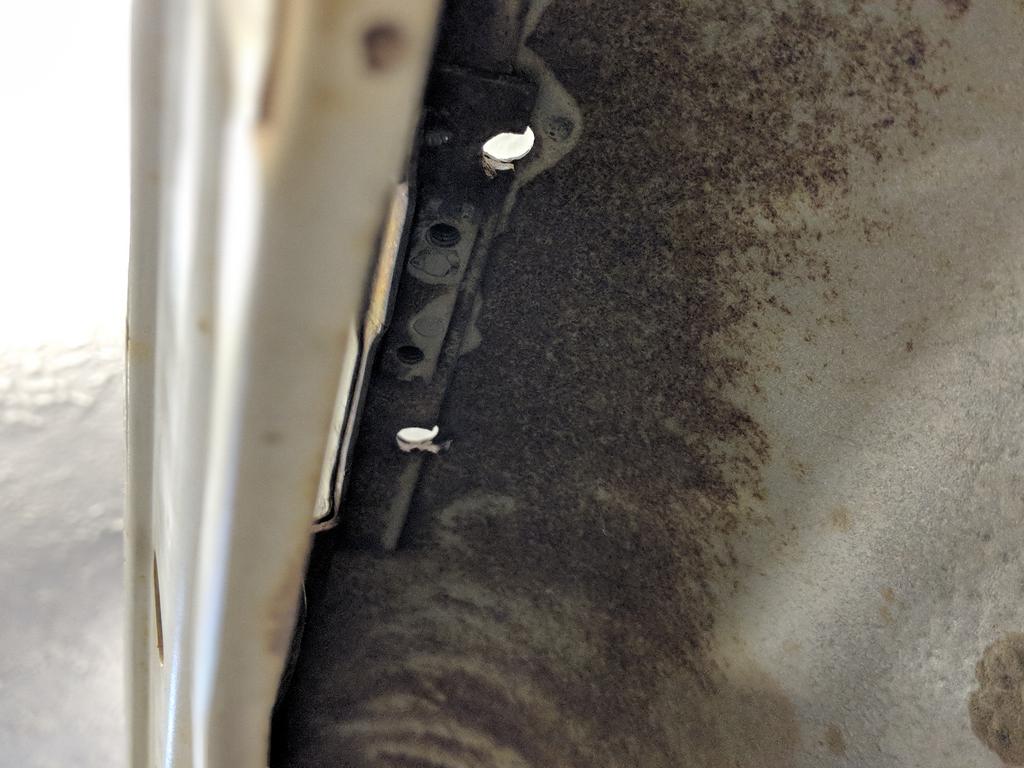
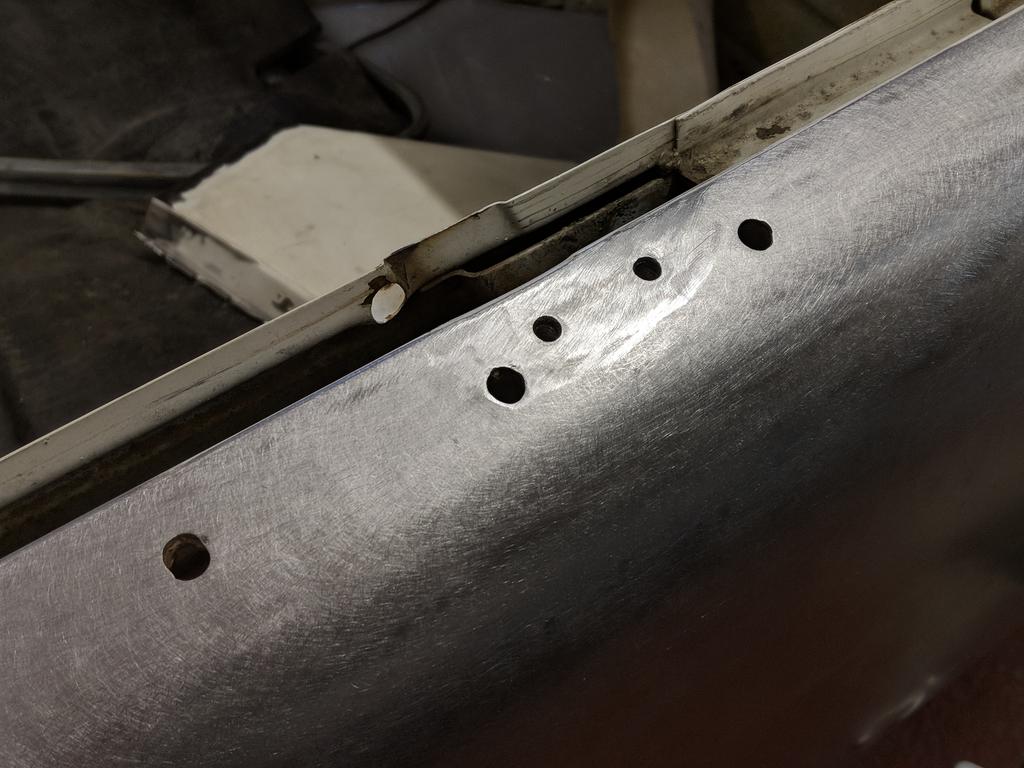
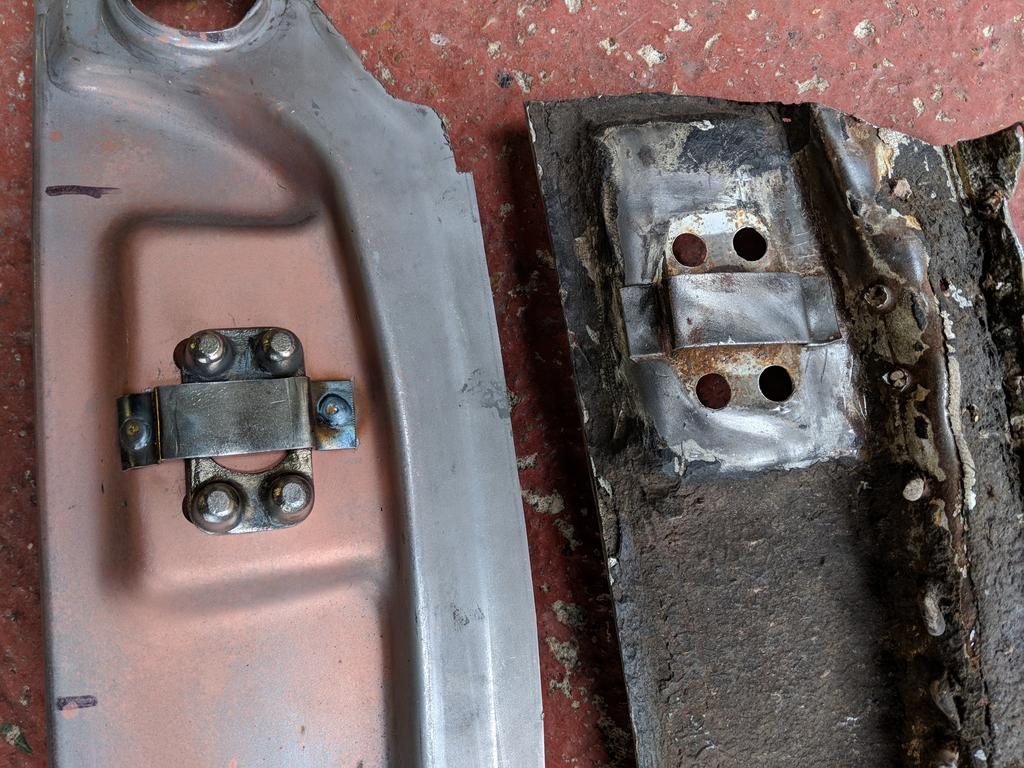
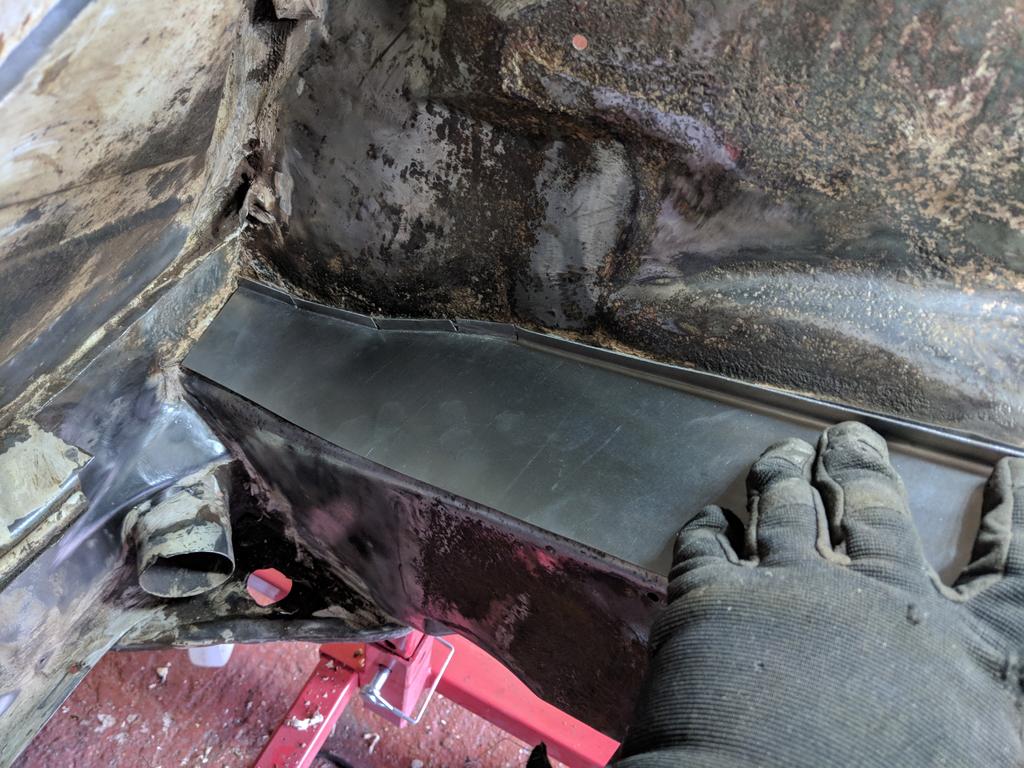
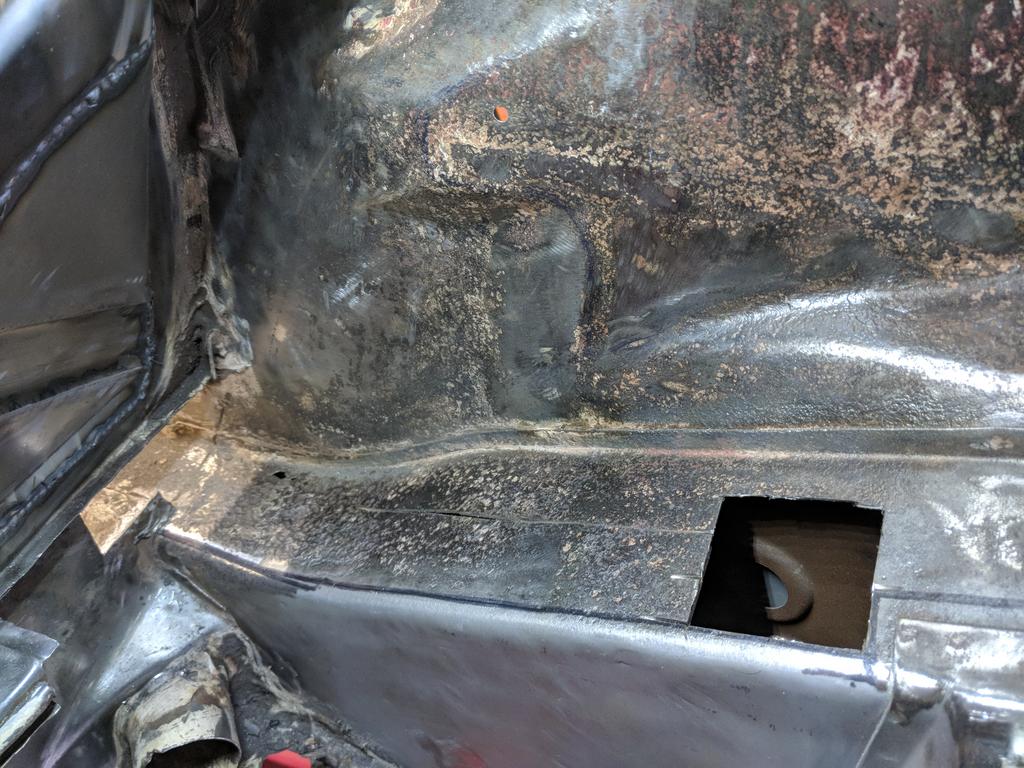
The reproduction panel doesn't come with the bolt receiver holder so that had to be fabricated. Here you can see the state of the original panel that suffered badly in the accident. Drilled full of holes and stuffed with filler.

IPB Image

IPB Image

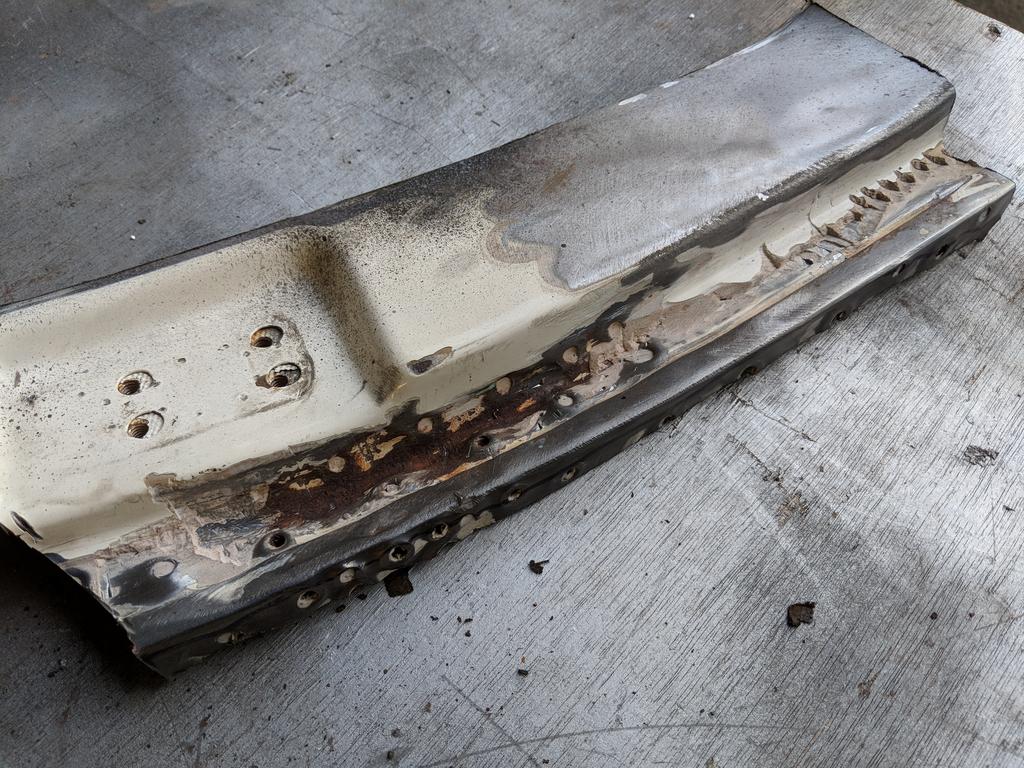
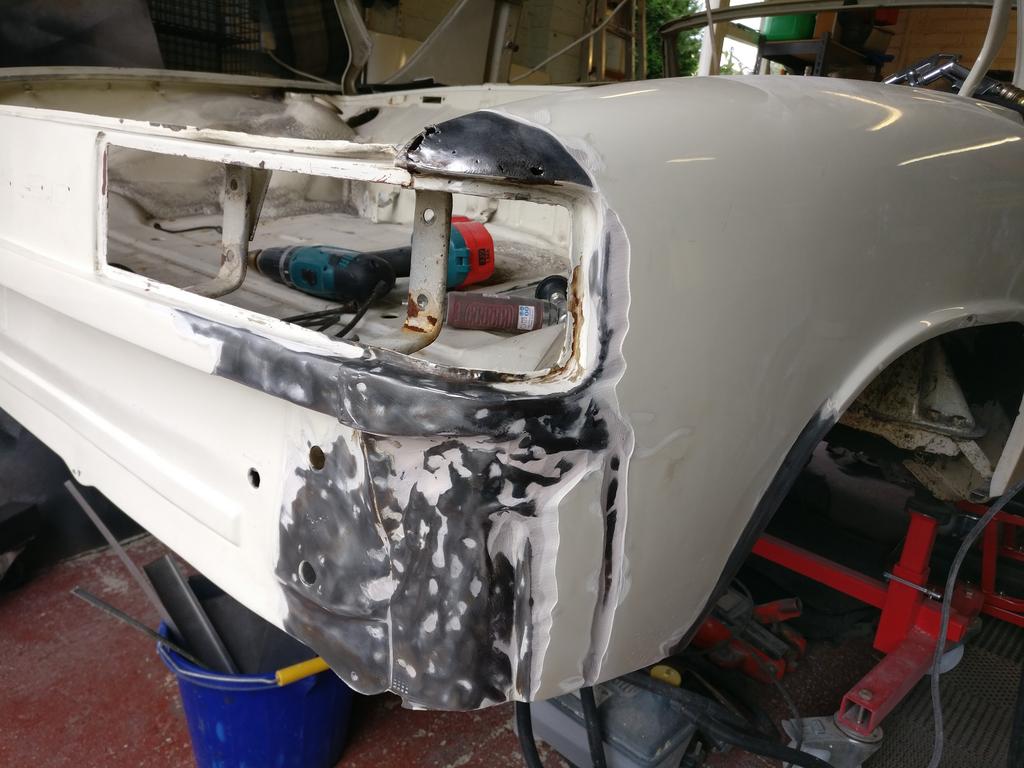
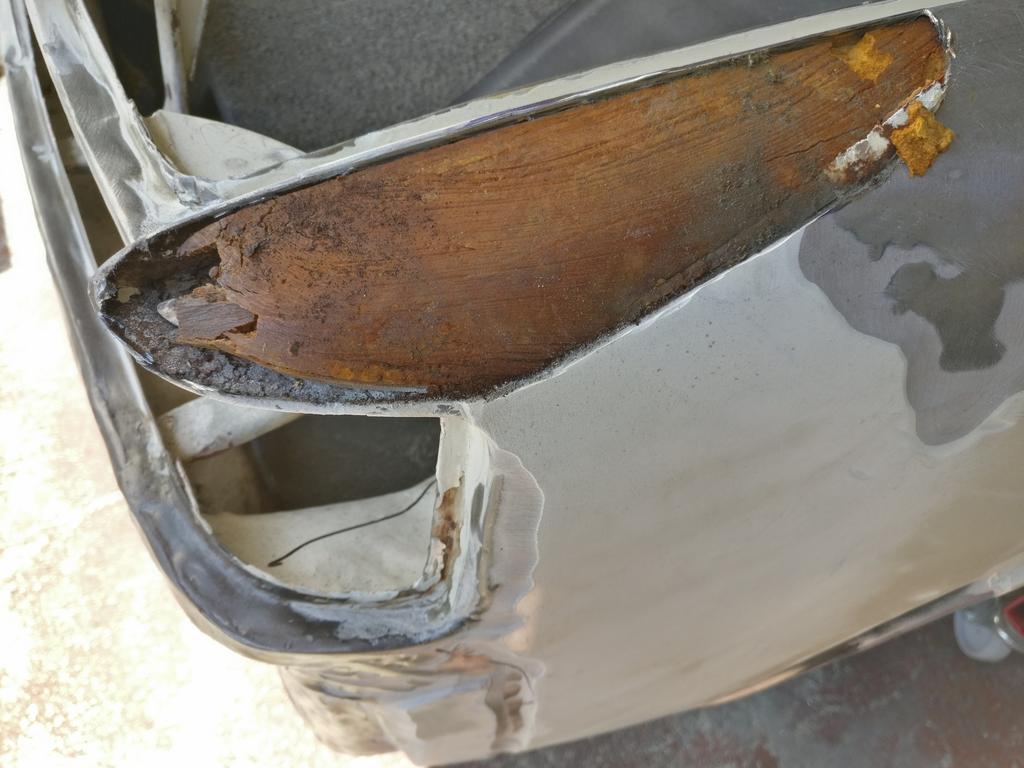
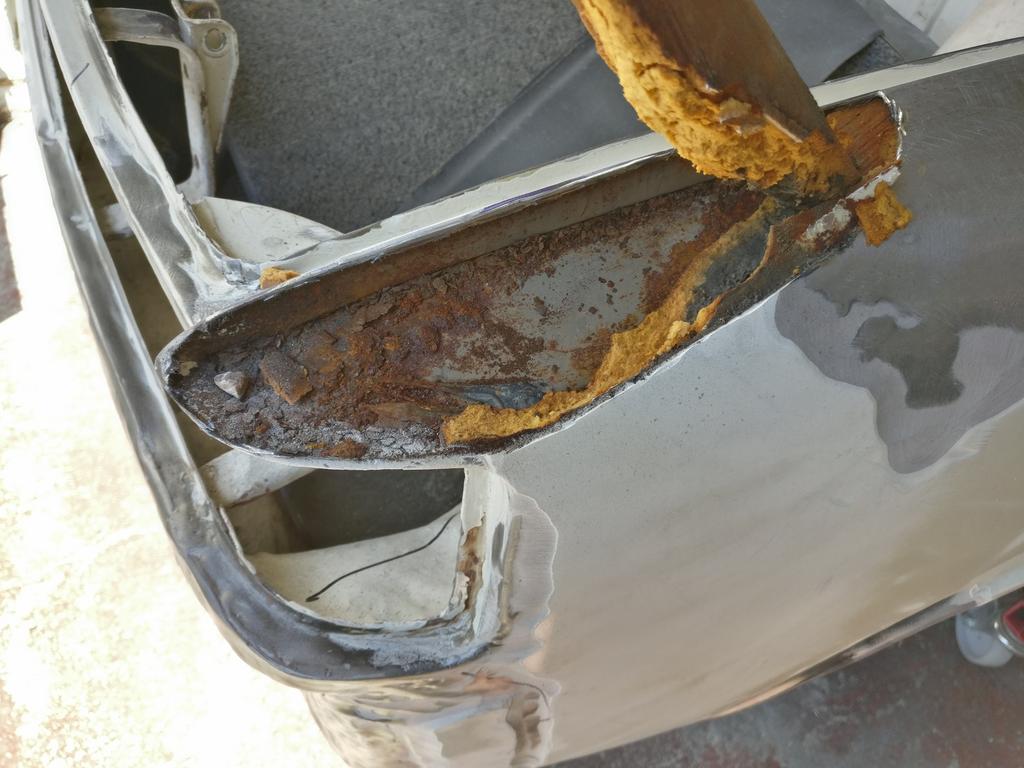
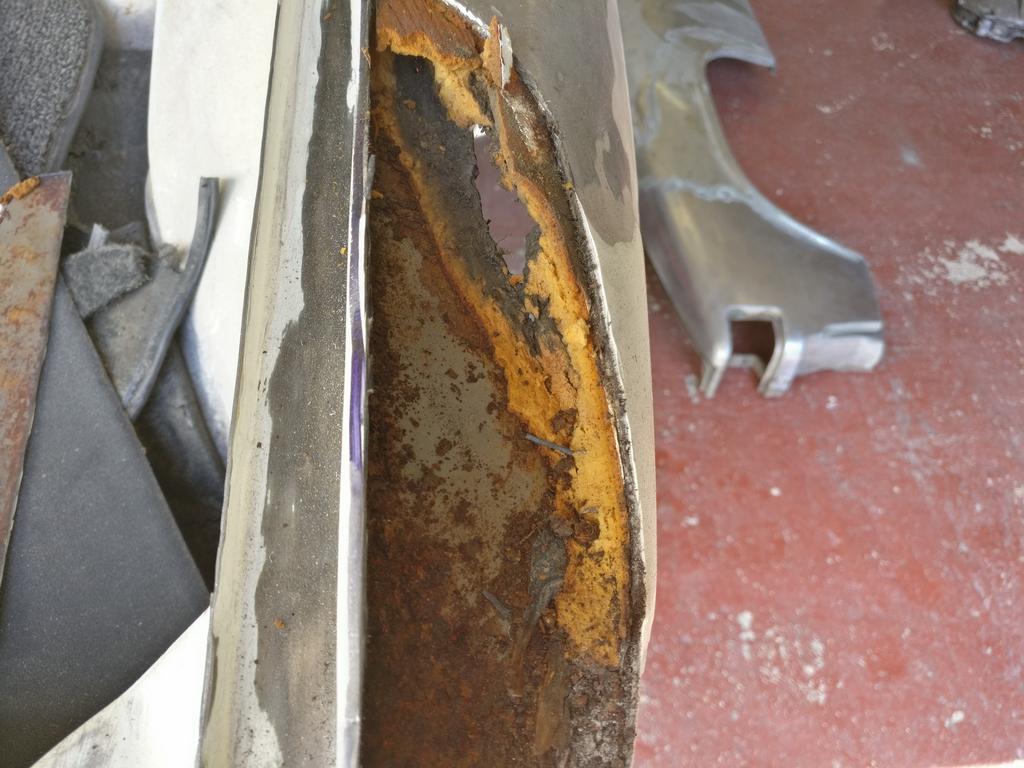
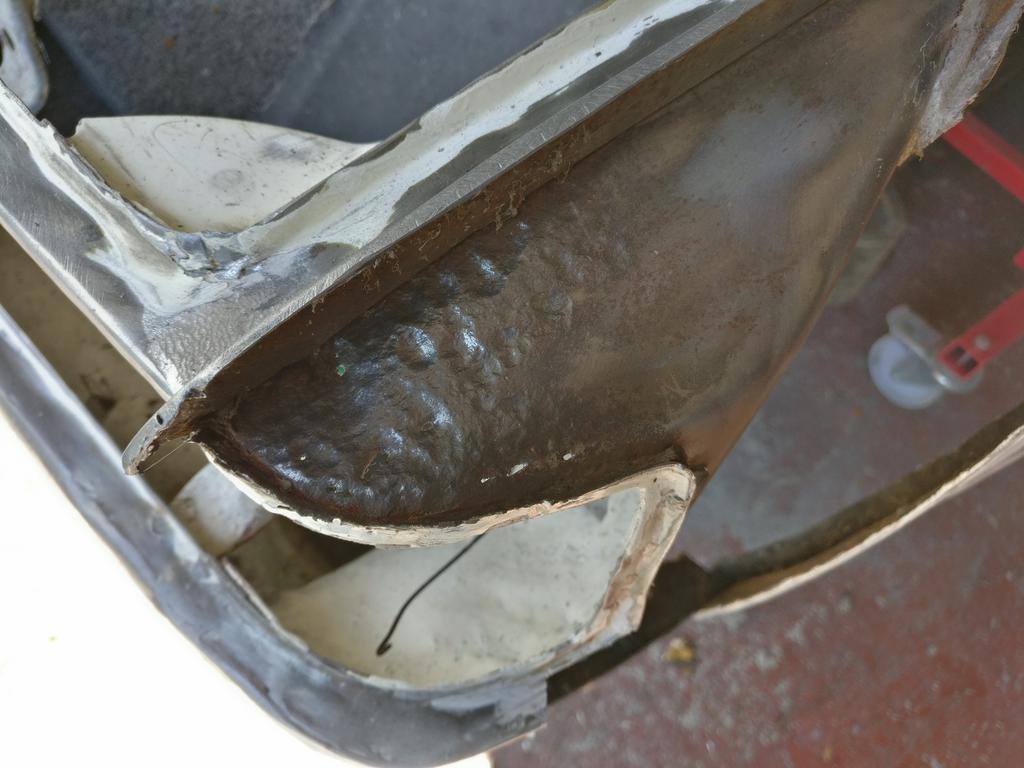
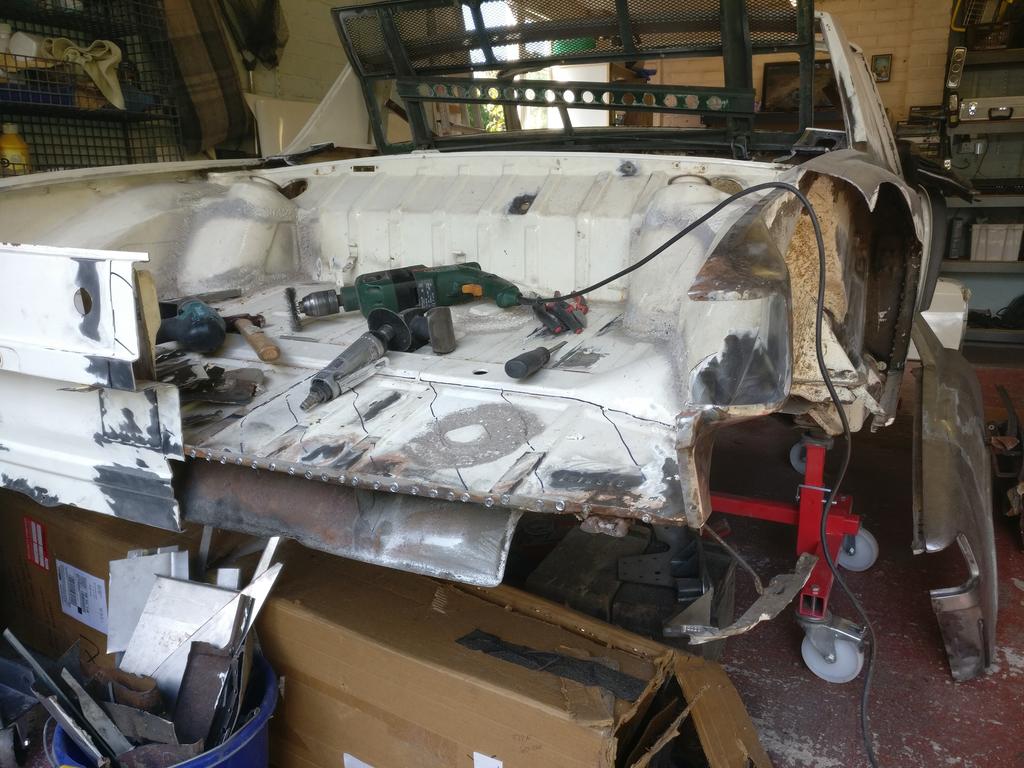
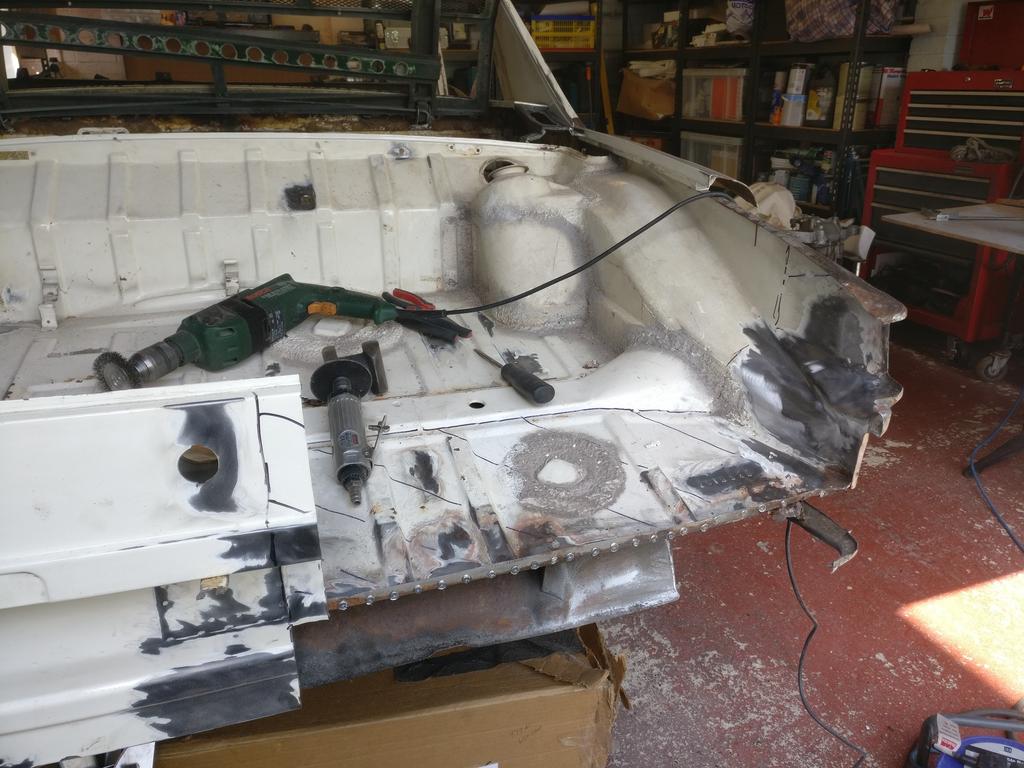
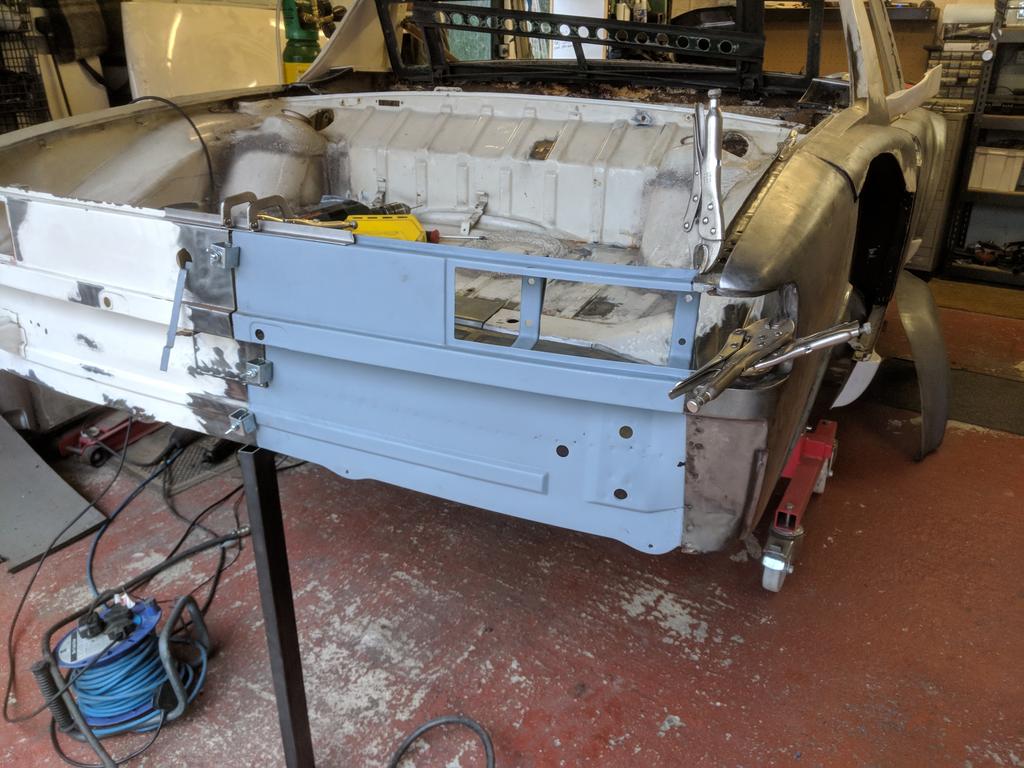
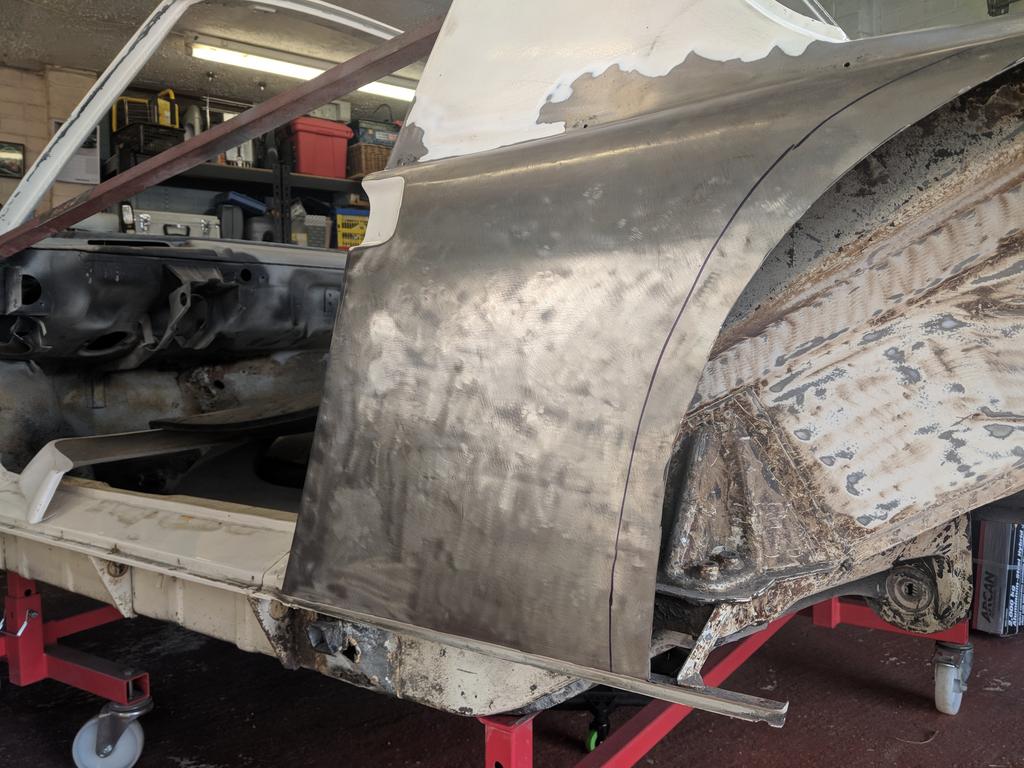
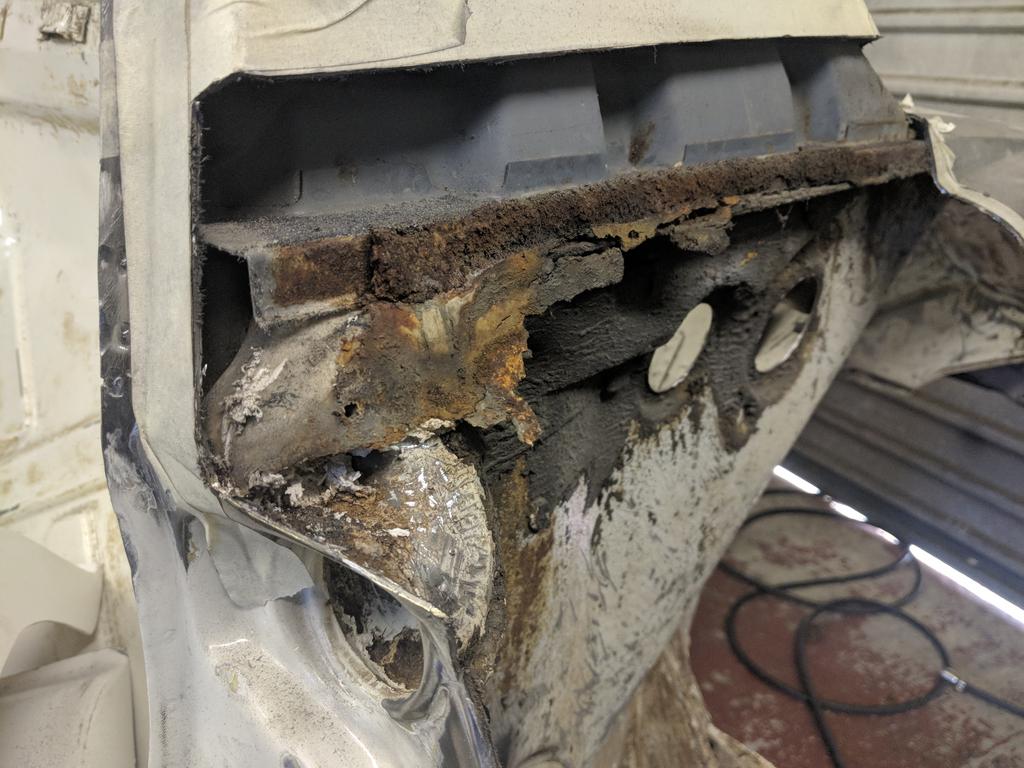
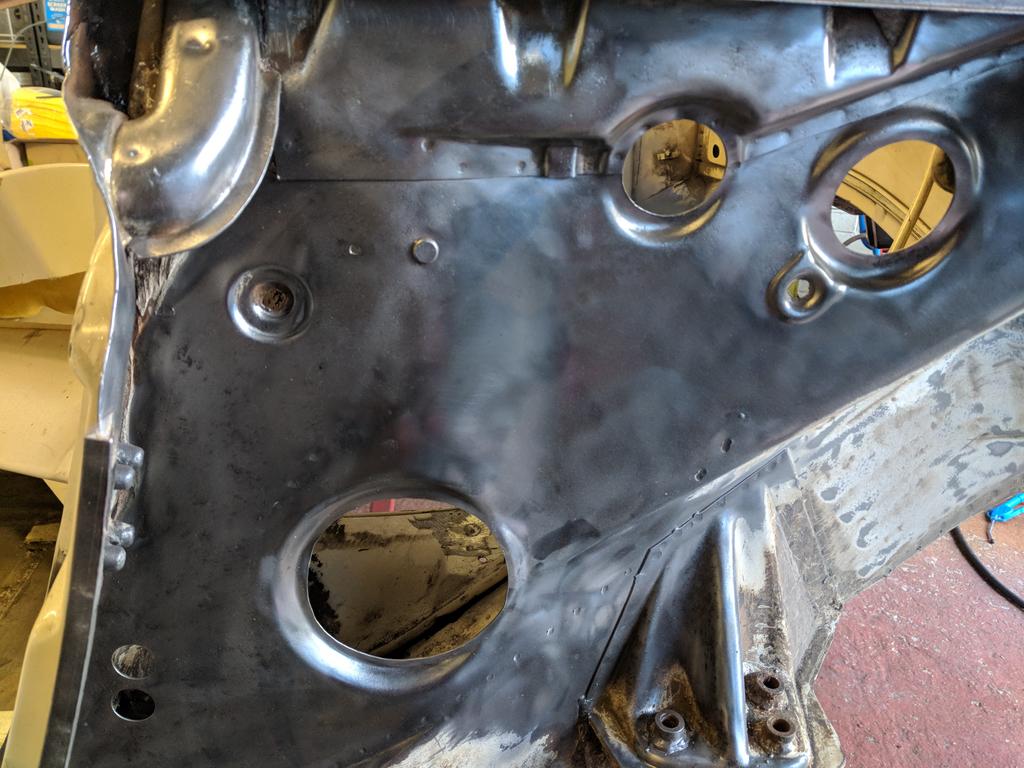
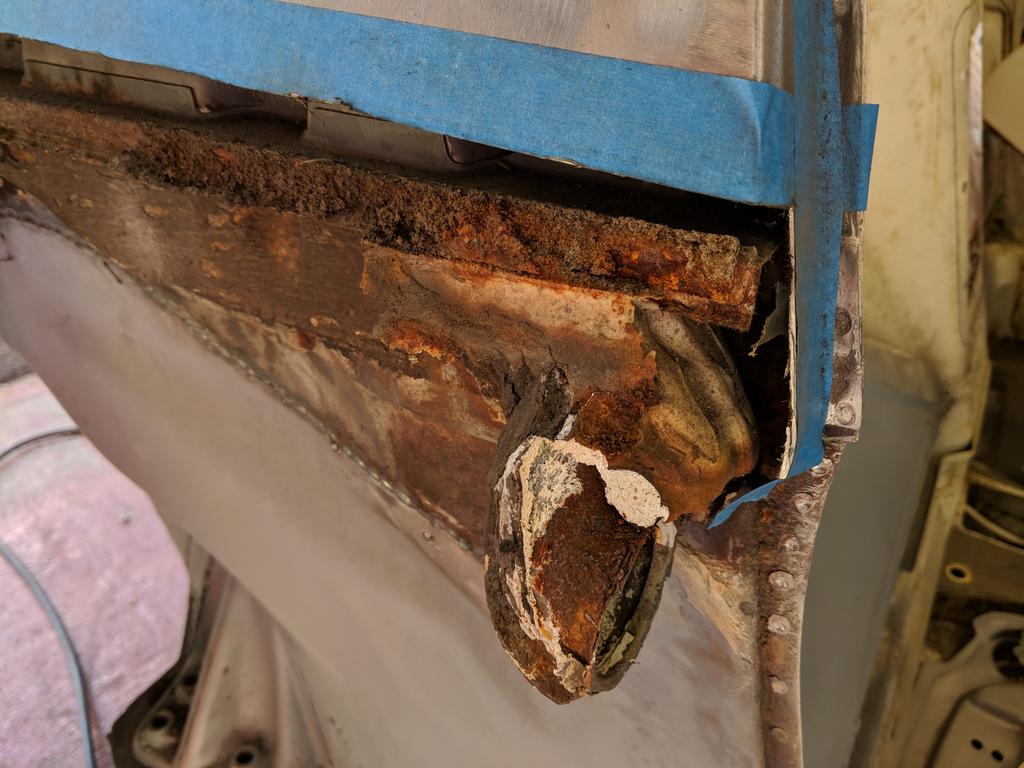
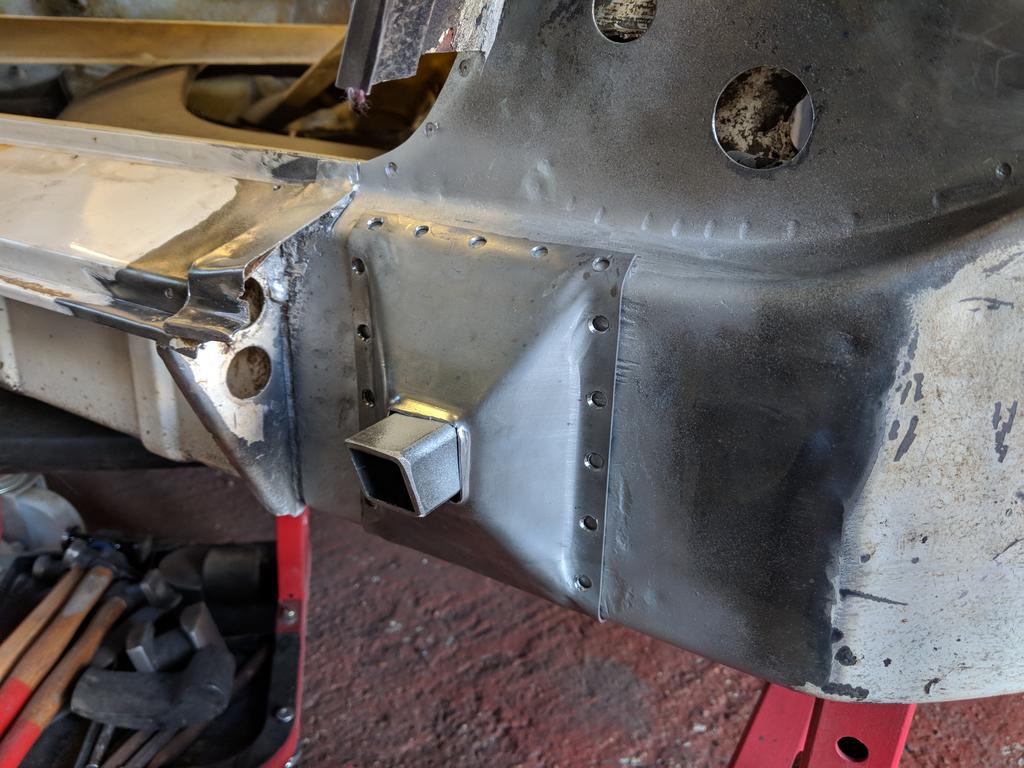
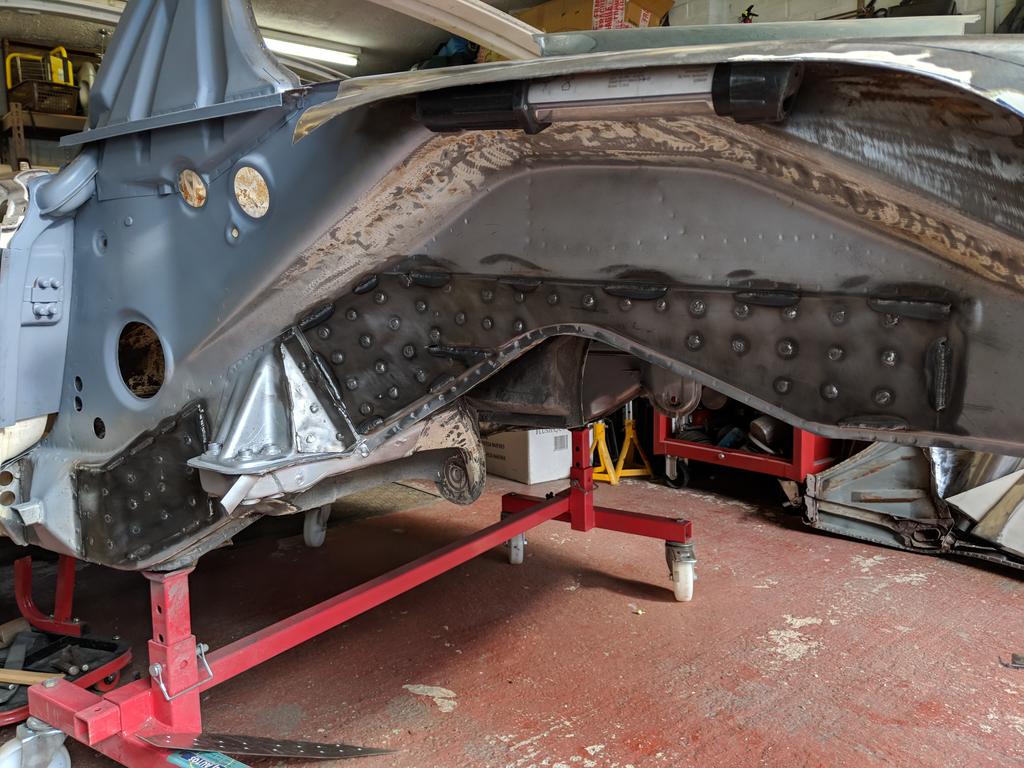
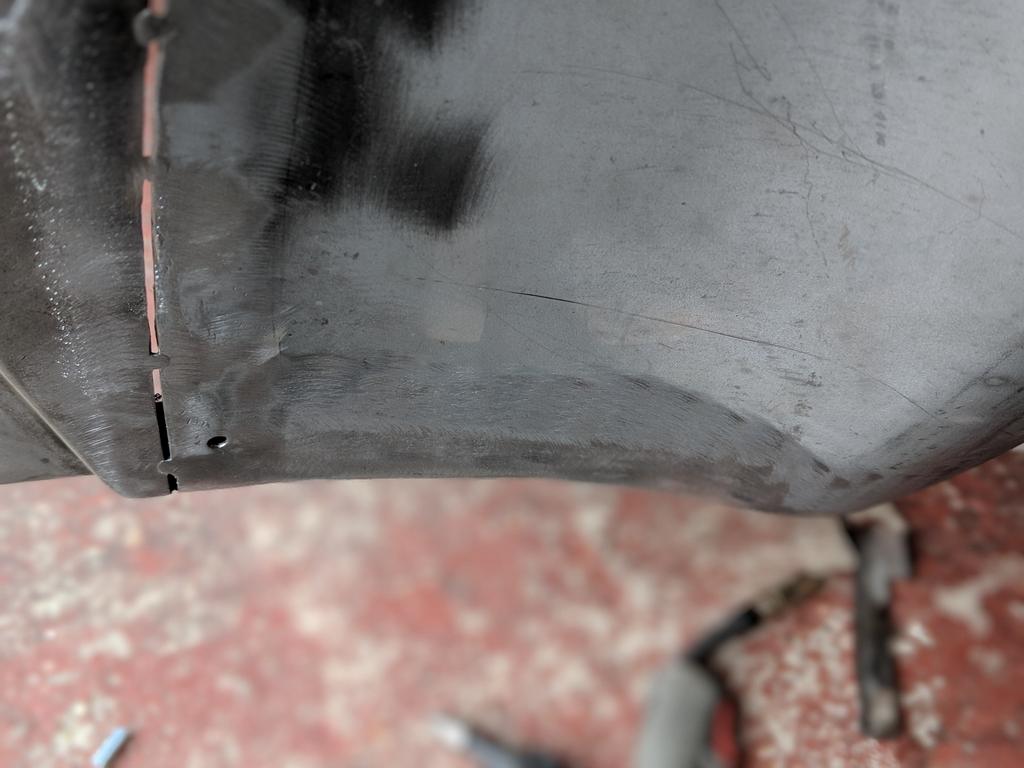
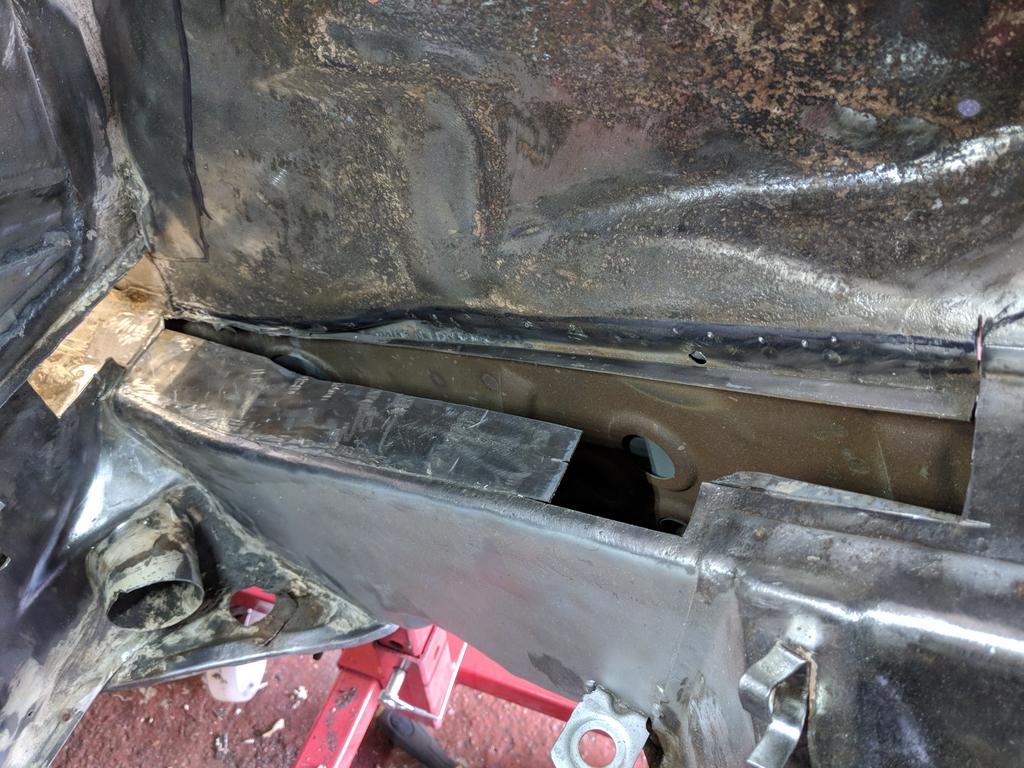
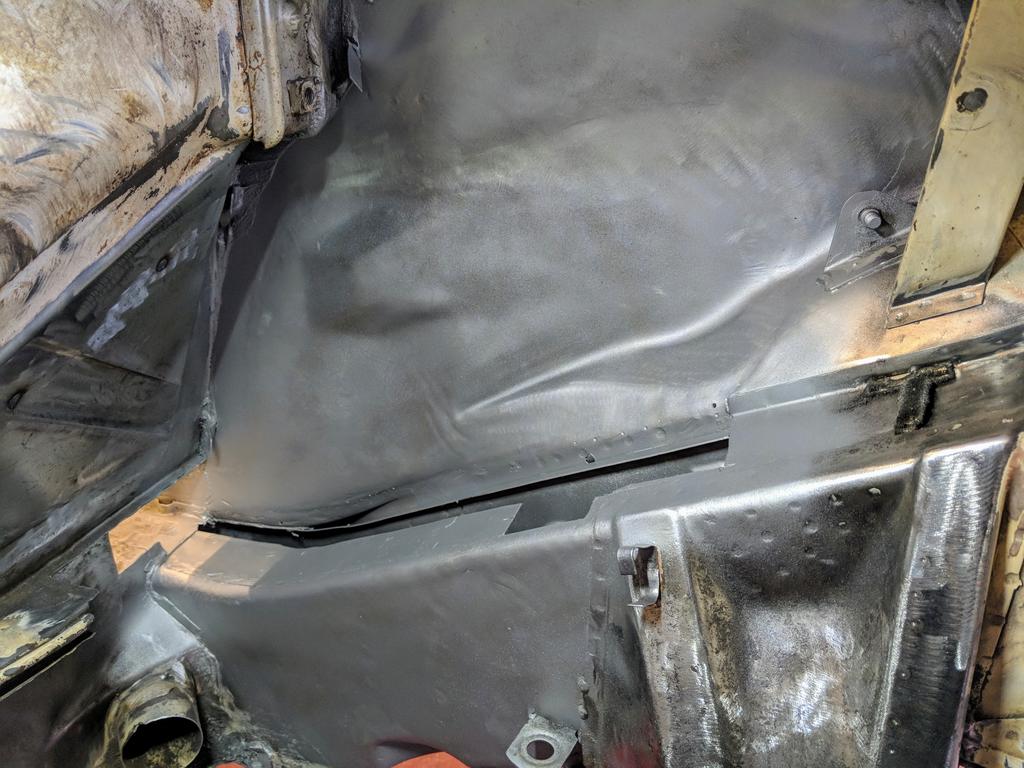
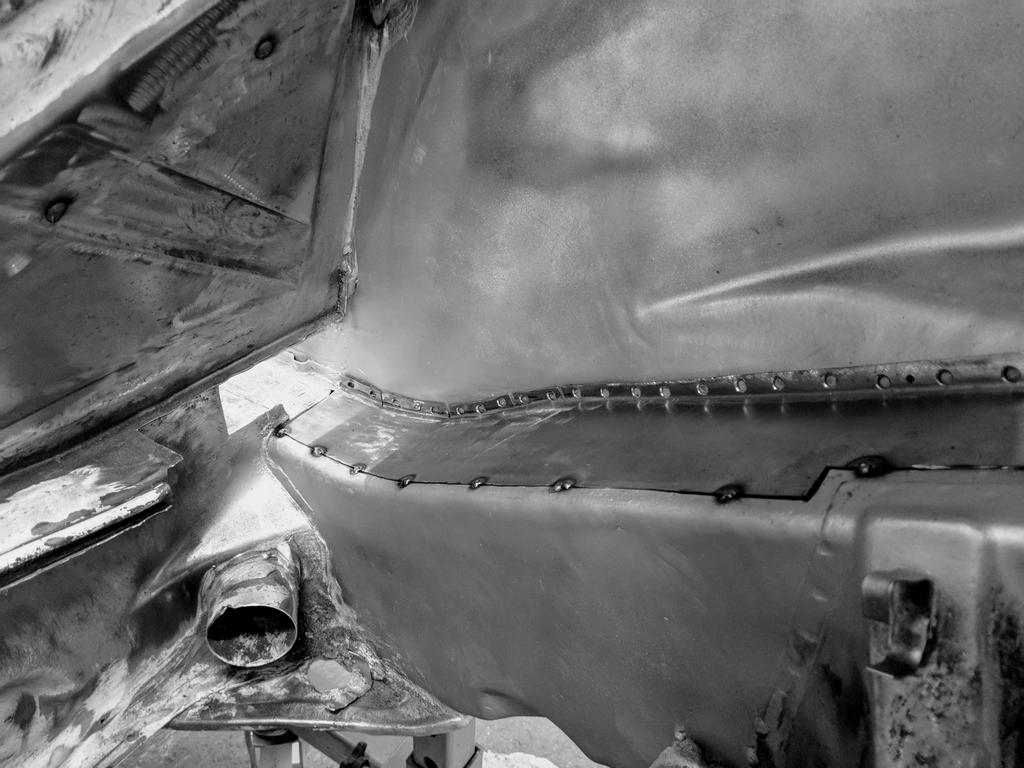
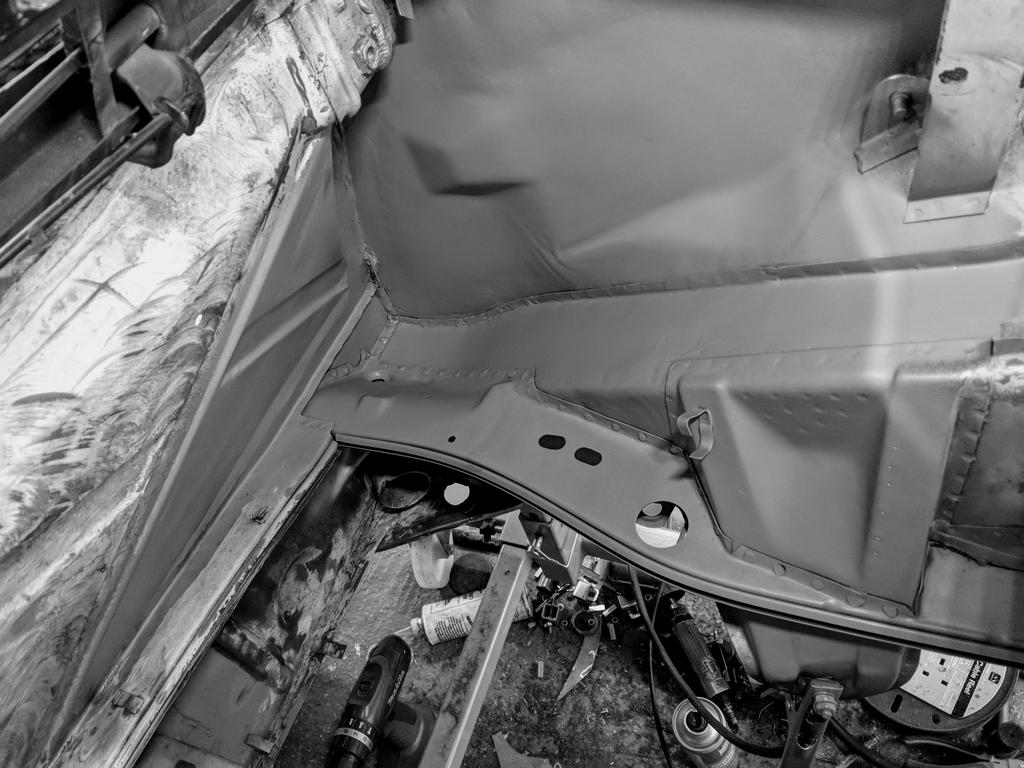
The passenger side the lower rear quarter I had to fabricate as the replacement panel I sourced was too rusty to use. Buying new isn't an option.

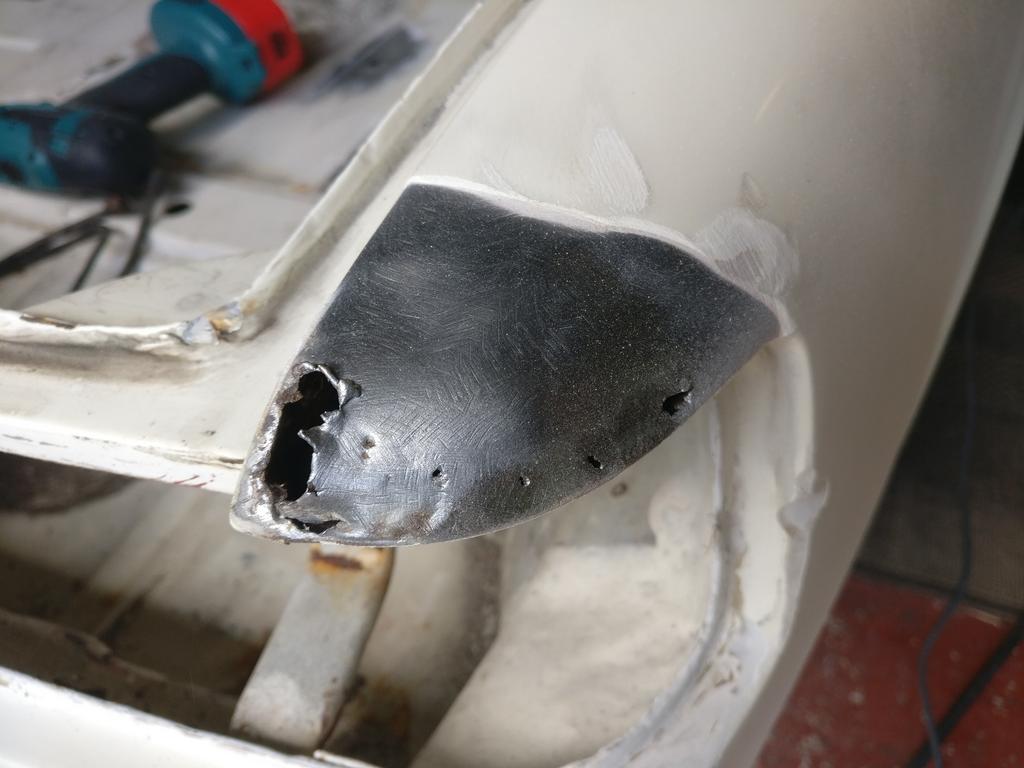
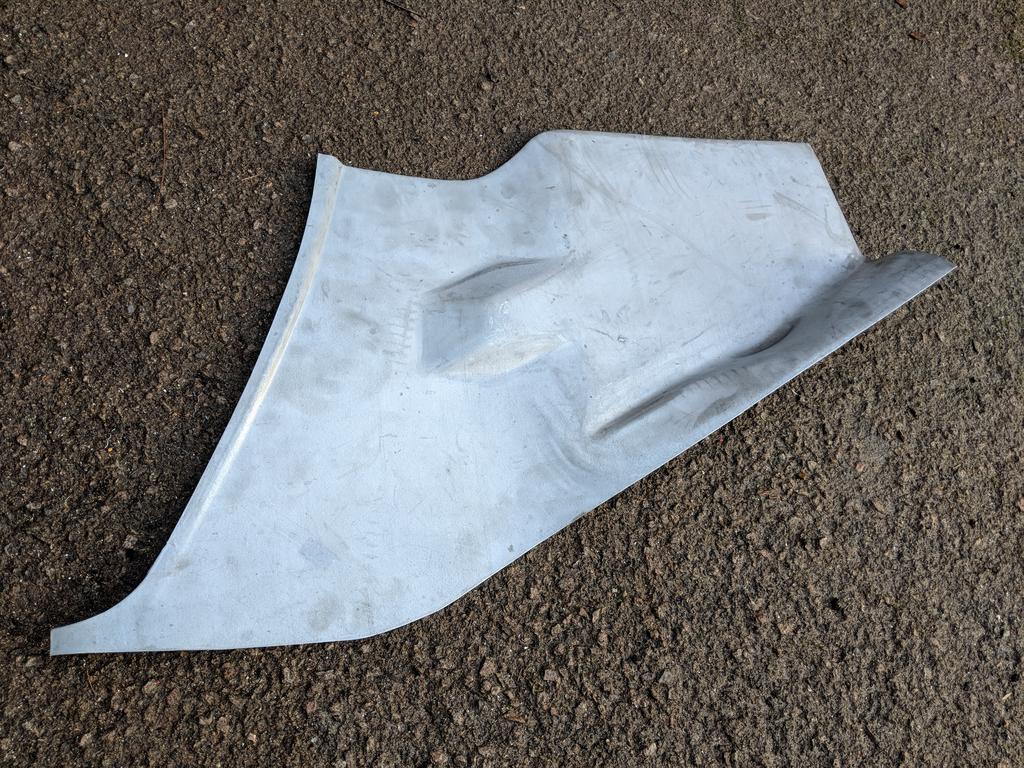
I've got to be honest here I never for a second thought this was going to work and it always worried me just how I was going to repair this rear quarter and actually be happy with it.

Anyway, don't laugh this is what I did.

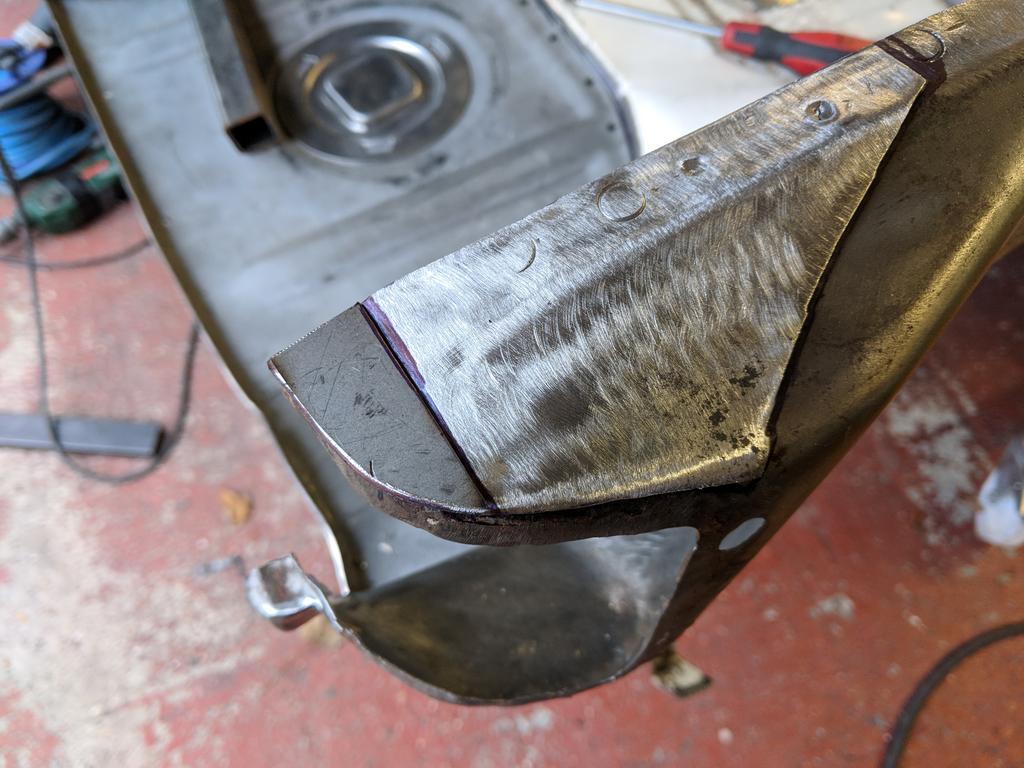
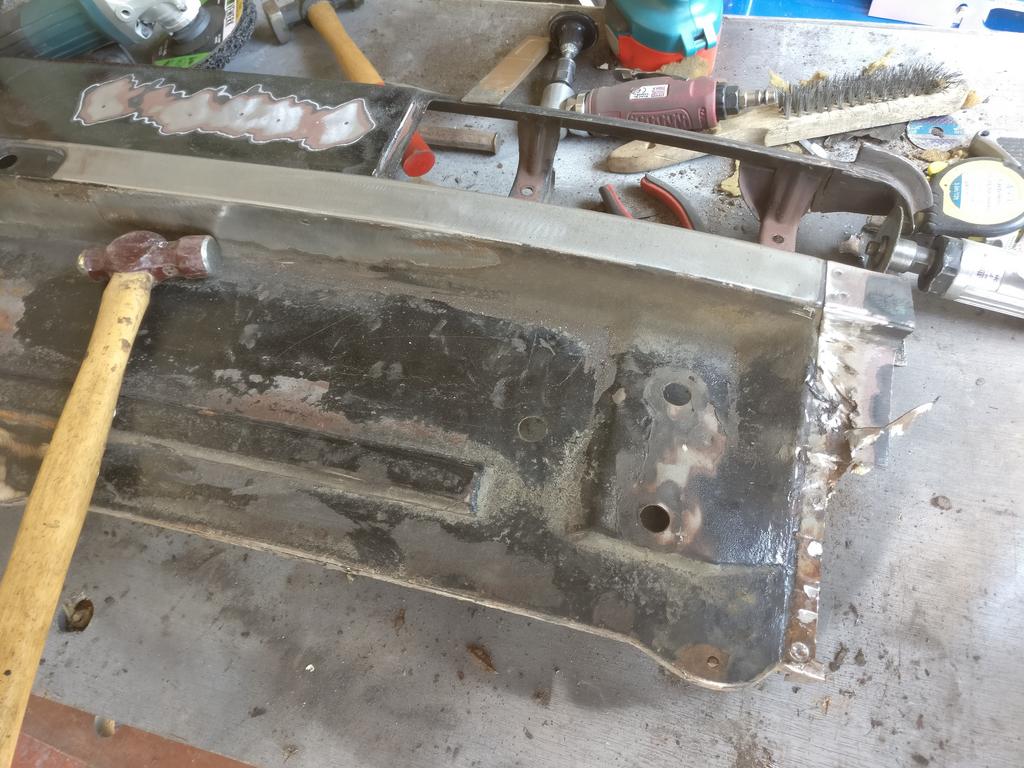
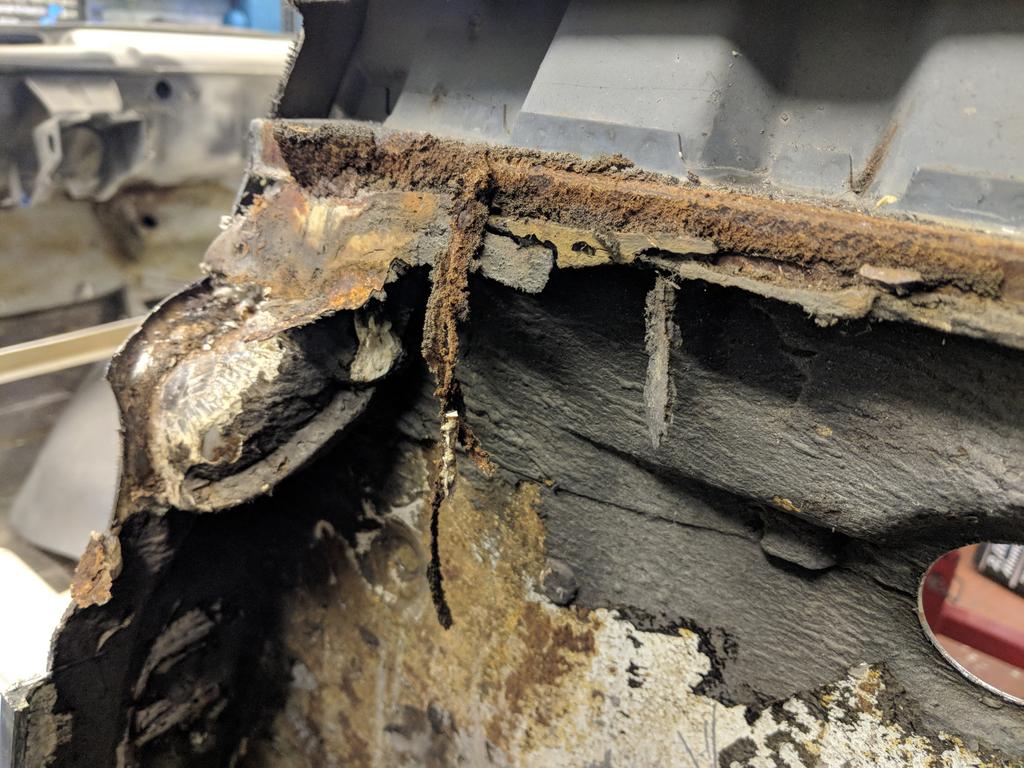
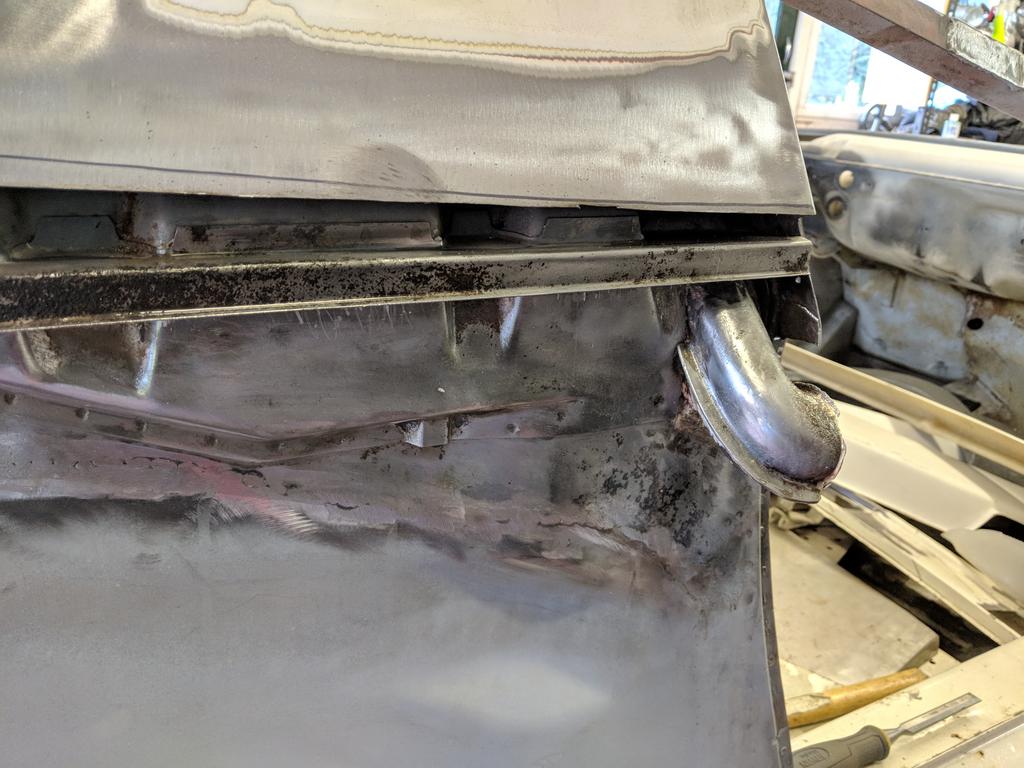
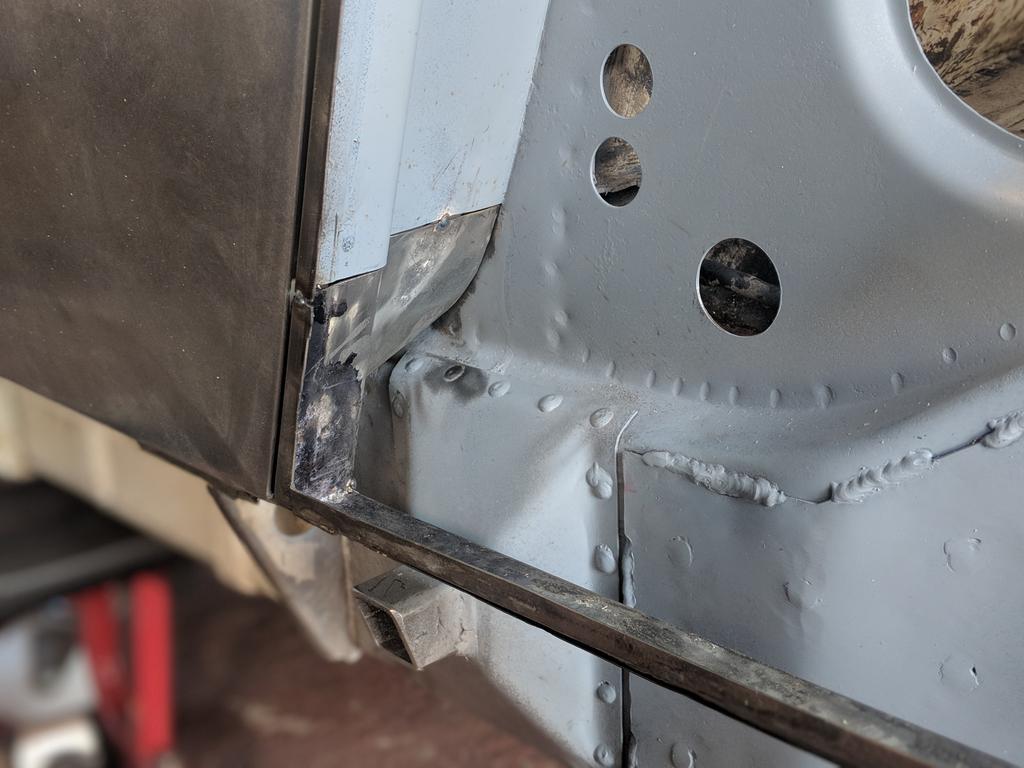
After cutting out a piece of steel the right size screwed it onto the rusty replacement panel and used it as a template. I then carefully hammered over the edge to give me the return I needed. By using a shrinker on the return I was able to add the curve in the panel to match the side of the door. I did all this months ago and it was only last week, after never finding a better solution, that I pulled this panel out and decided to go with it.

IPB Image

IPB Image

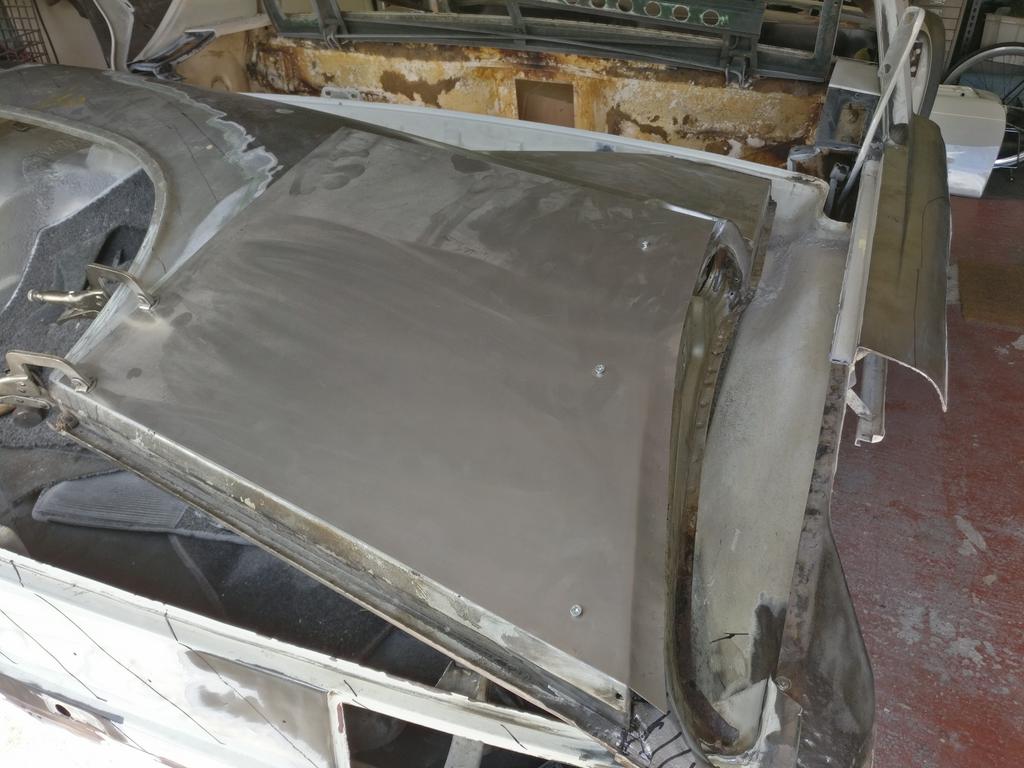
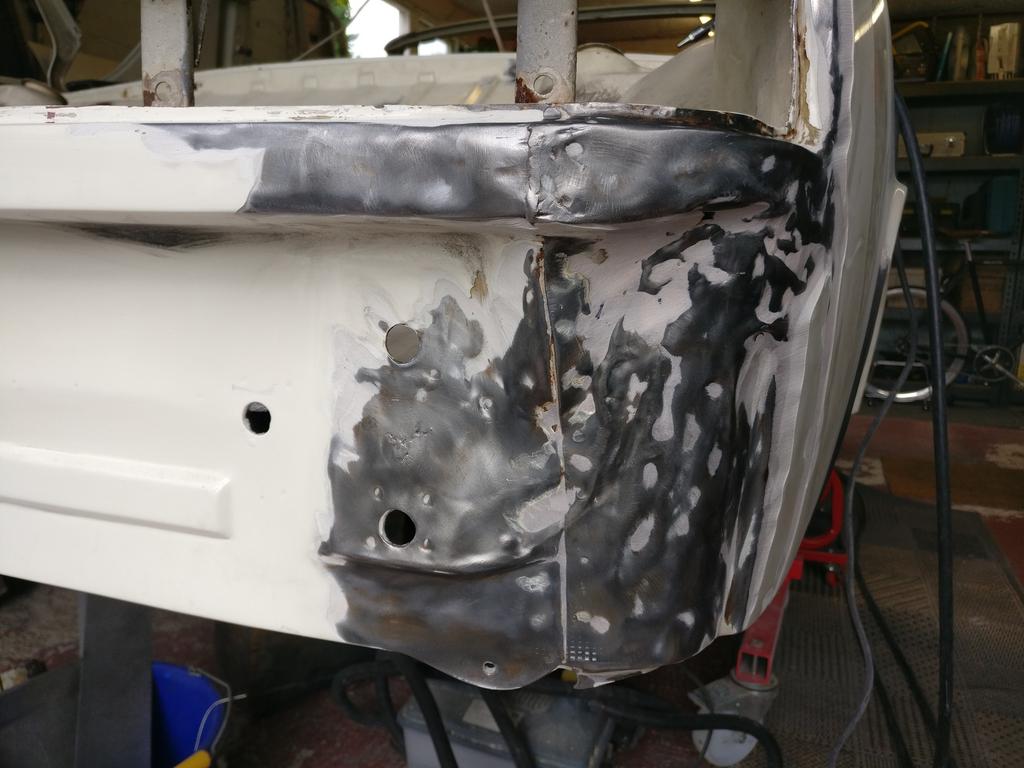
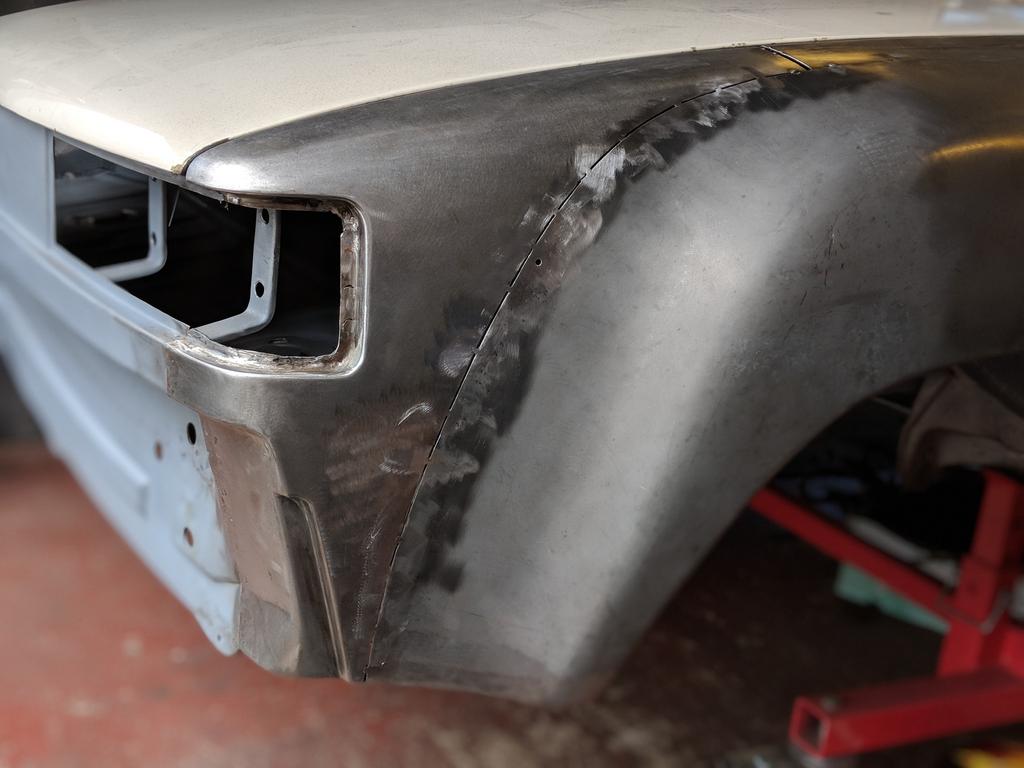
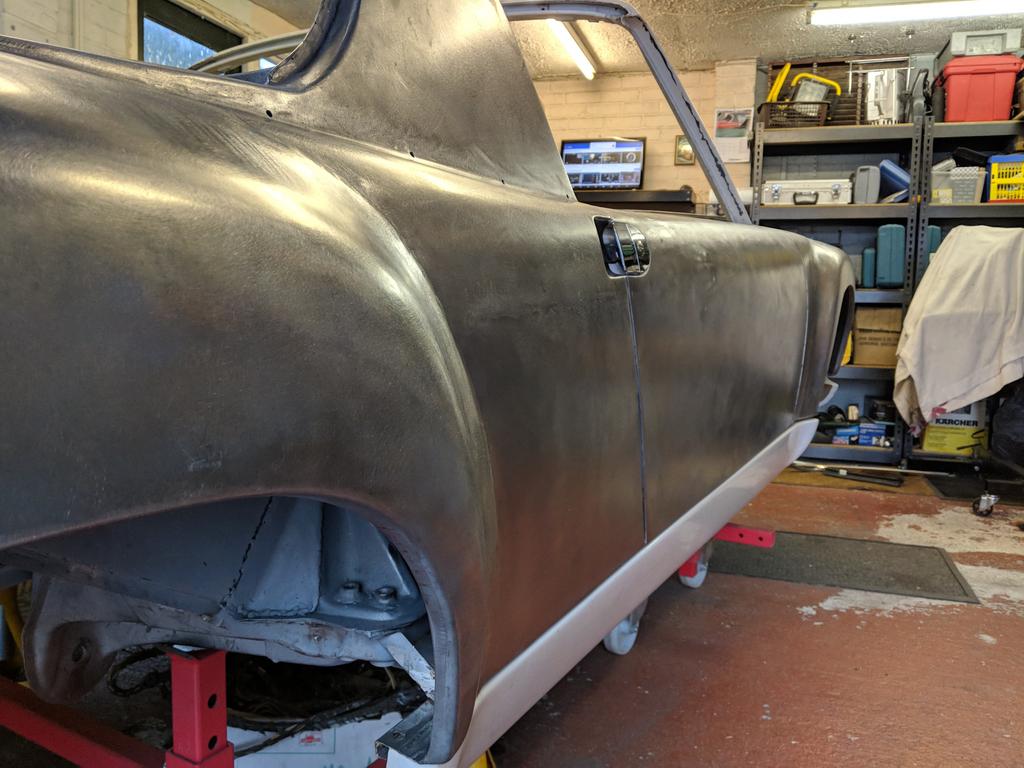
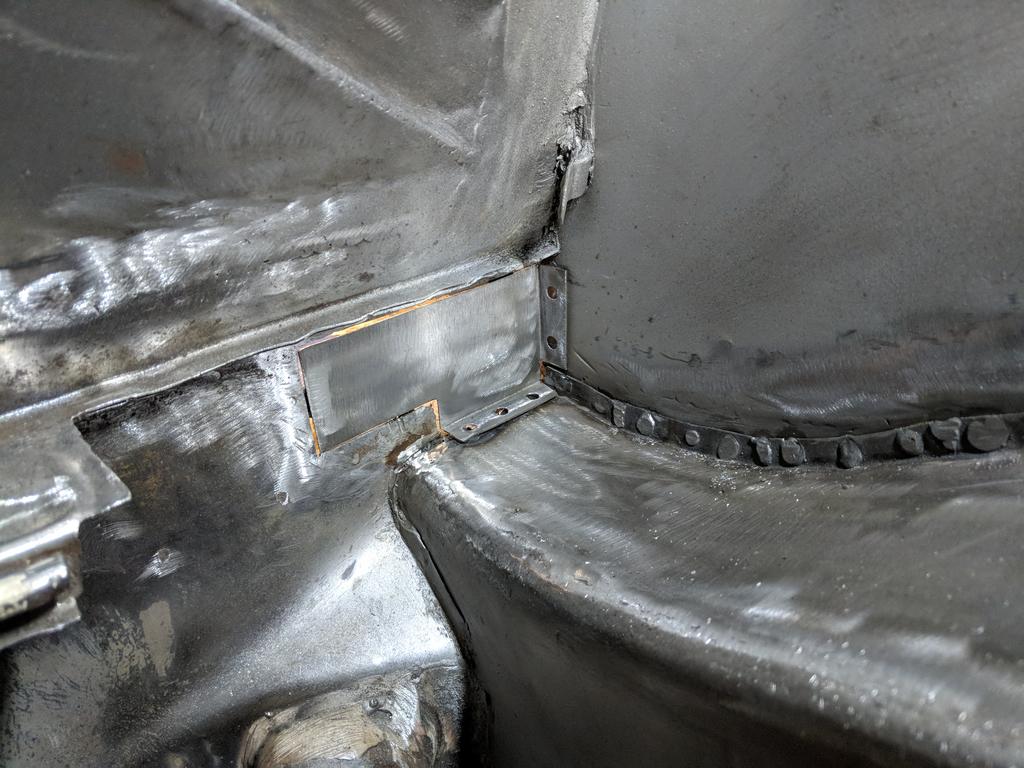
Now having a replacement door with the correct shape finally I could hold up my fabricated panel and see if it was going to work.

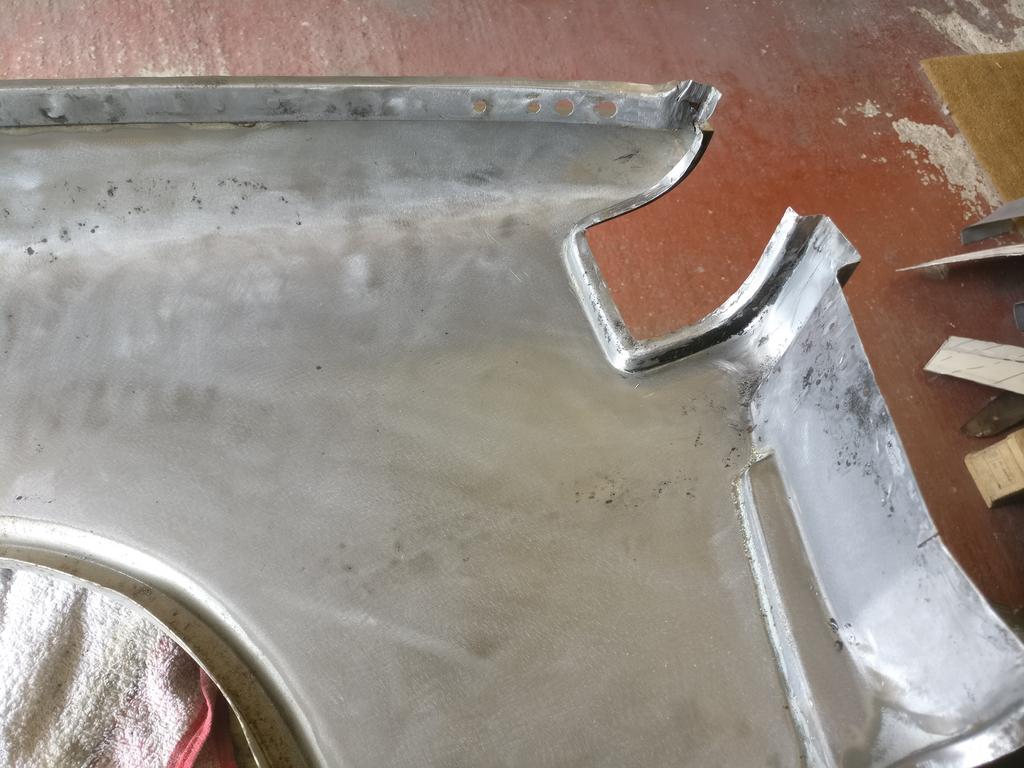
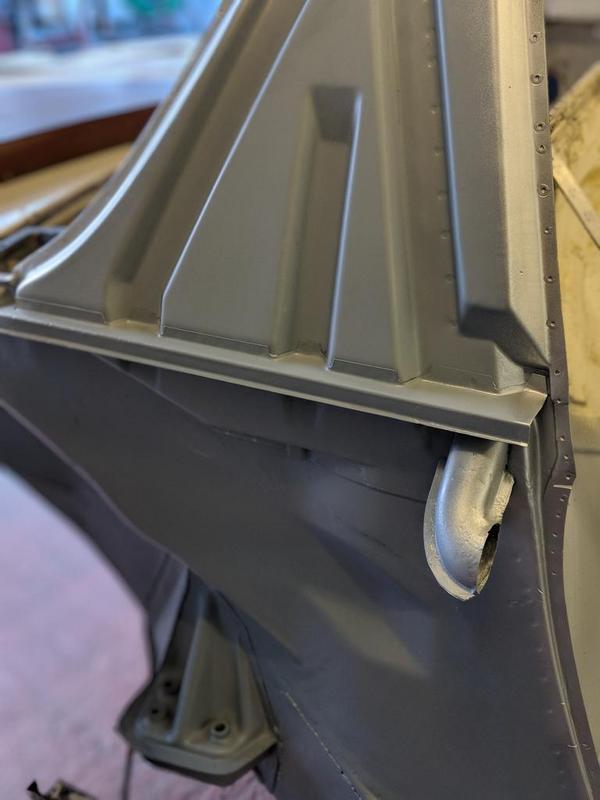
Well, would you look at that! Not bad.
IPB Image

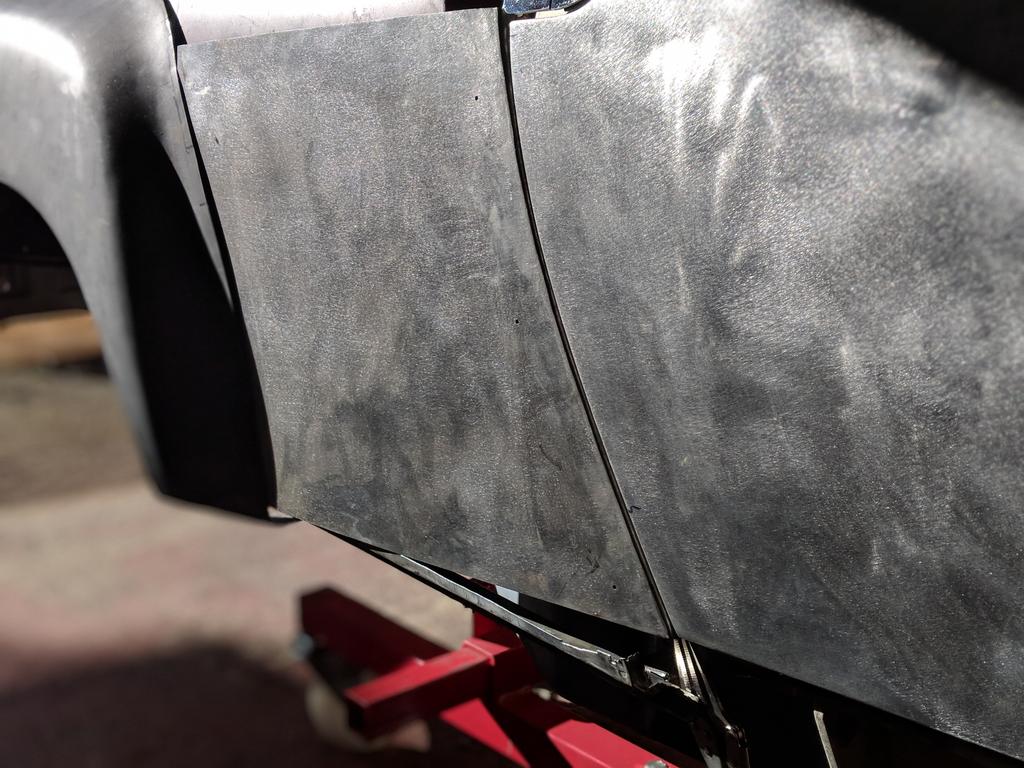
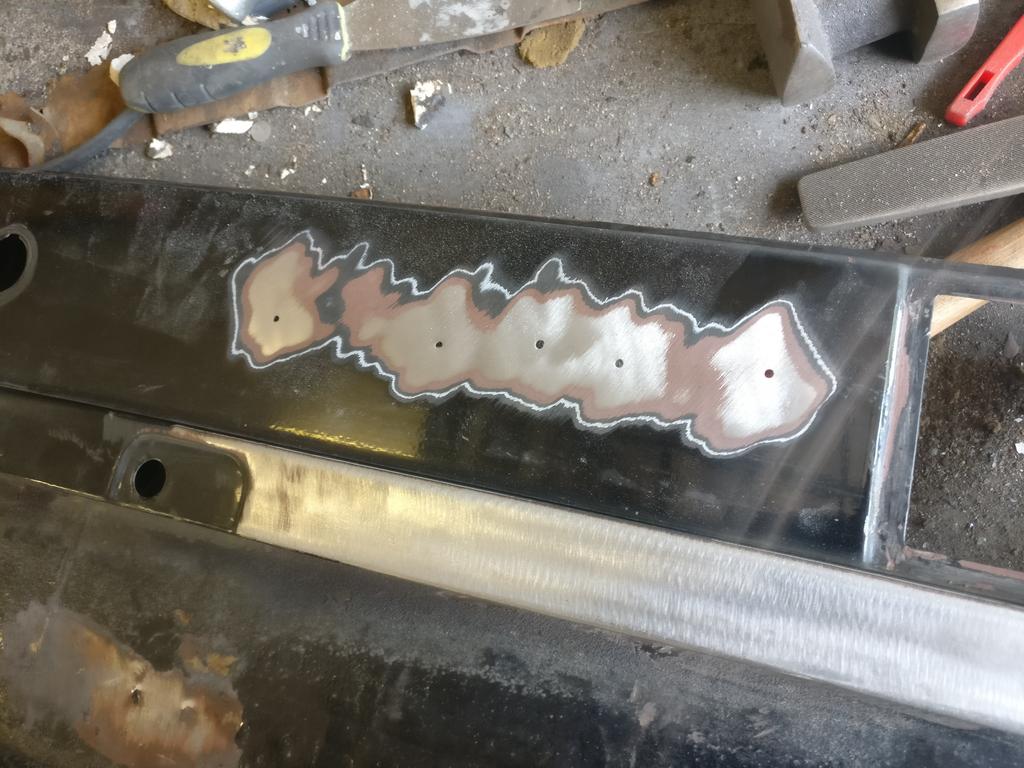
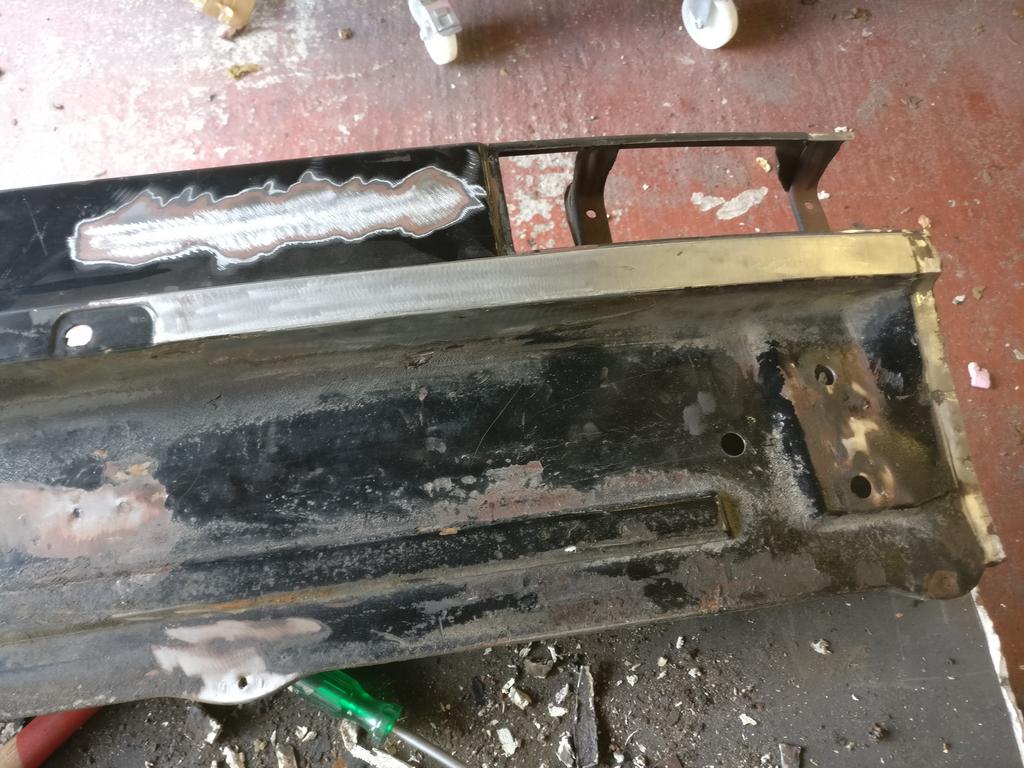
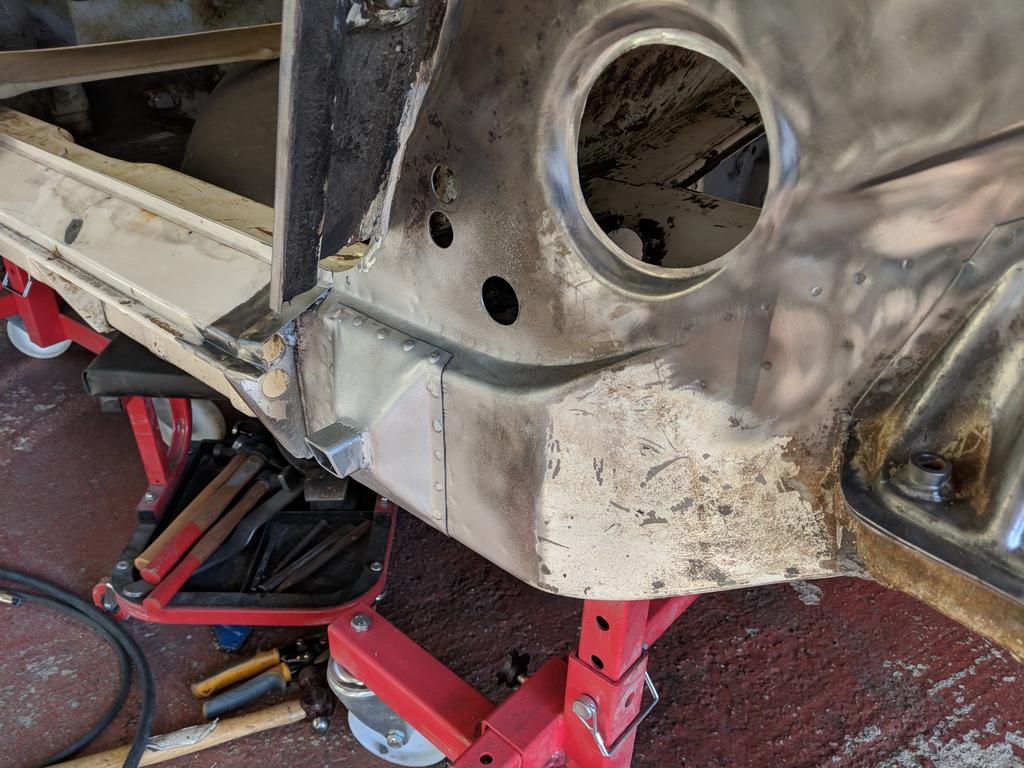
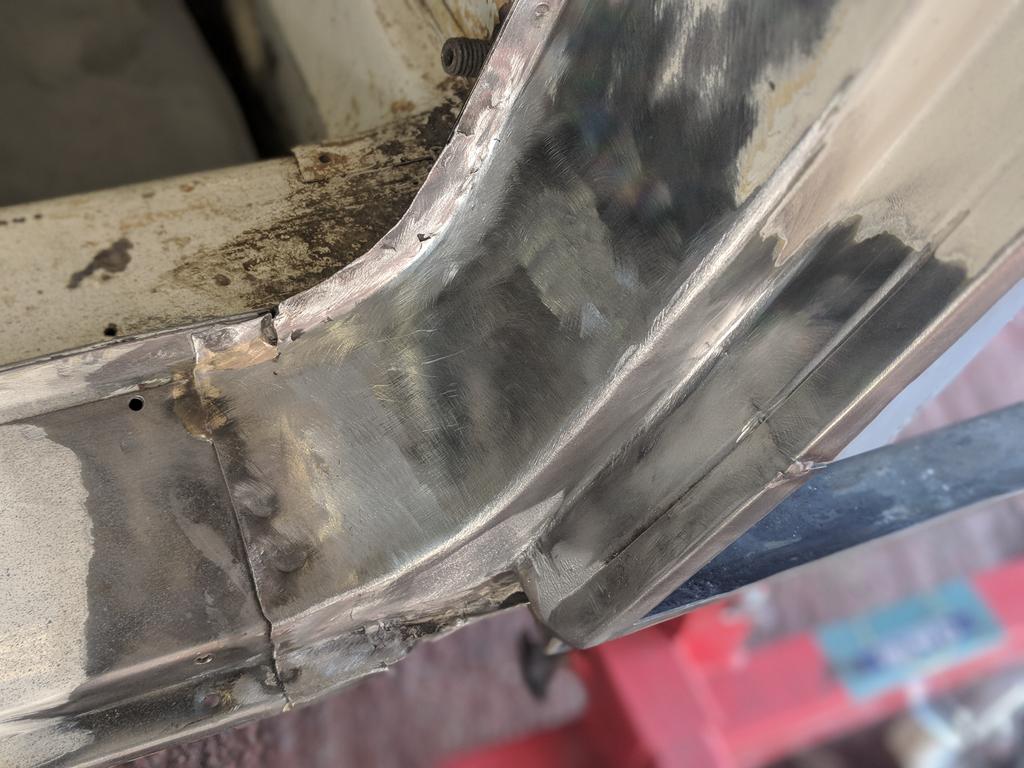
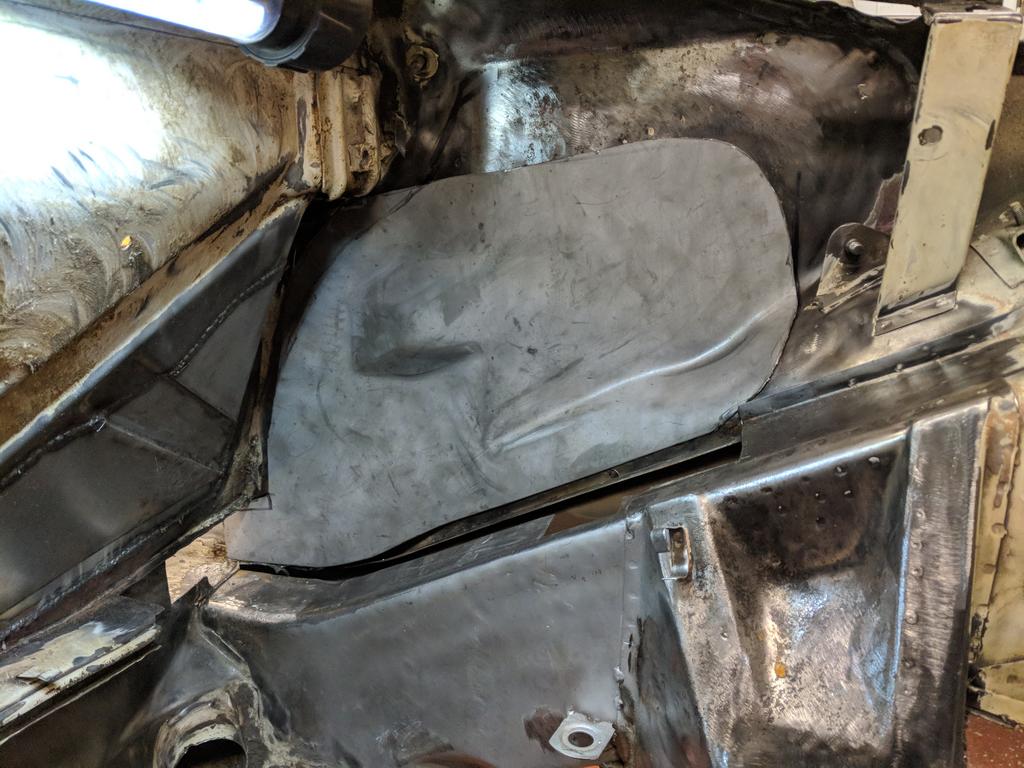
All cut down and ready to weld in.

IPB Image

I seem to have forgotten to photograph the passenger sail panel install, I could have probably used the shots of the other side and flipped them. I doubt anyone would have noticed
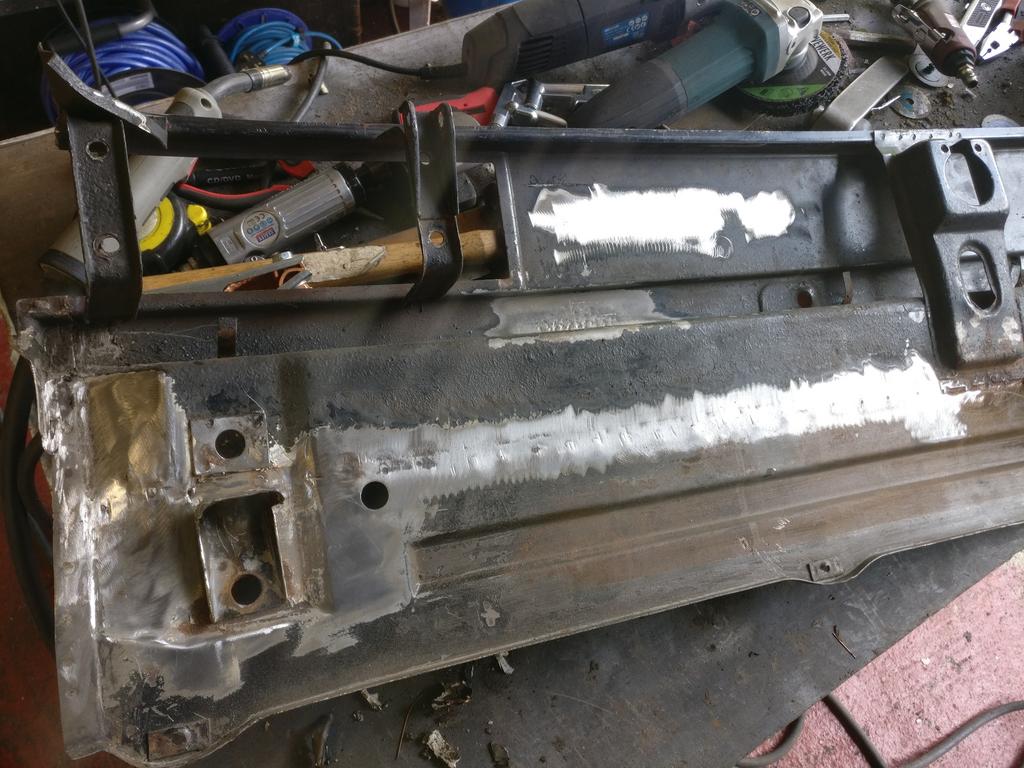
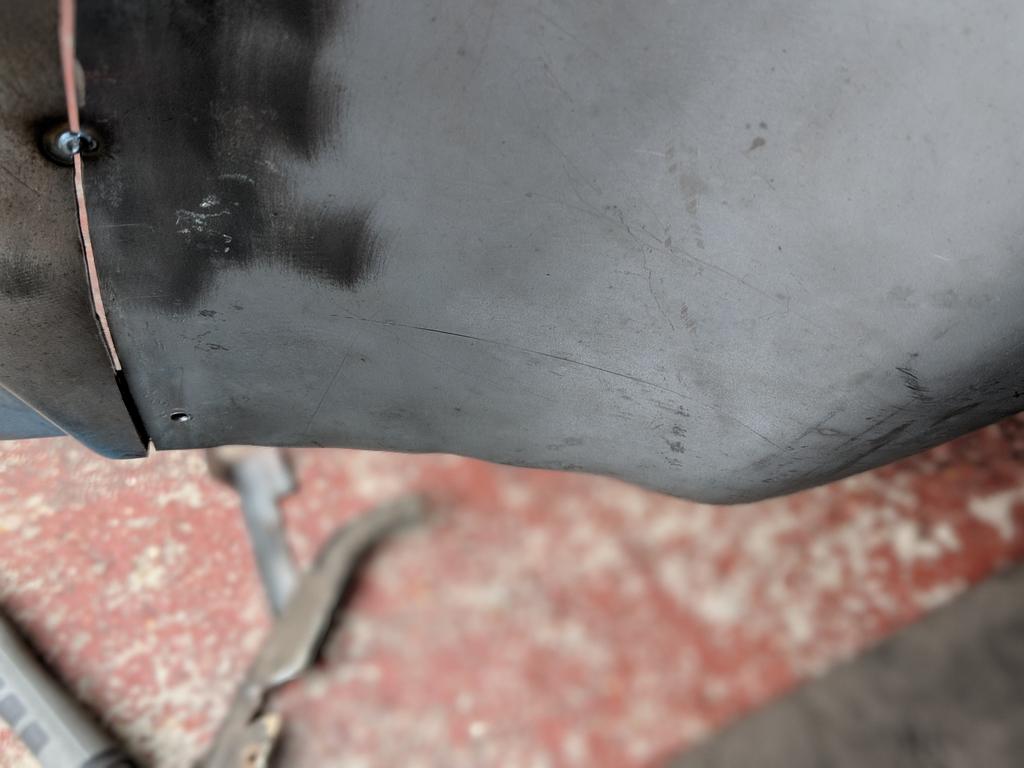
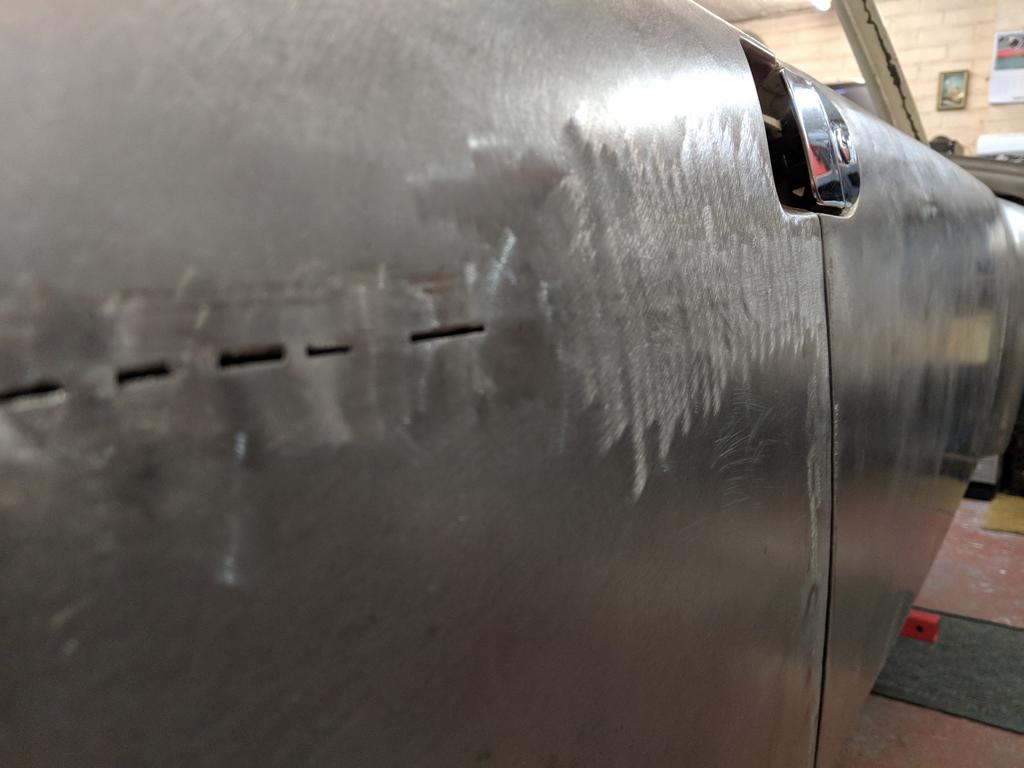
 laugh.gif

Slow and steady.
IPB Image

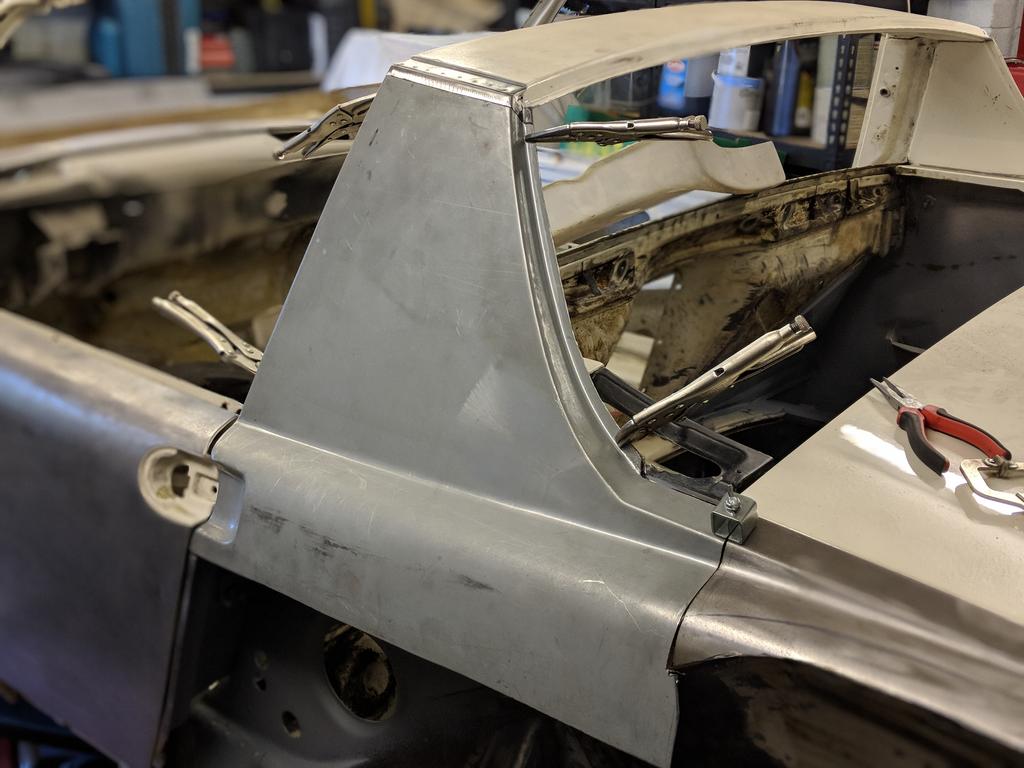
Done! Just a slight adjustment of the door gap needed but at this stage it was less than 0.5mm out.
IPB Image
defianty
Before I finished of the rear quarter I need to address these holes in my new door. It looks like a previous owner had installed an aftermarket mirror or two. As many of you know the mounting point for oem mirror is already in the door all that's need is to drill the holes in the correct place.

Looking up from inside the door. You can make out the threaded holes ready for the mirror fittings.
IPB Image

Driving up a center punch from inside the door gives you the spots where to drill. I drilled in with a 2mm bit and when filed out the holes to the correct size.

With the new holes drilled it was time to fill the others.
IPB Image

Job completed.
IPB Image
defianty
With the sail panel, lower rear quarter and the other end complete I could finally piece together this patchwork rear quarter and wrap up the passenger side! To say I was excited to finally get this done was an understatement!

Patchwork!
IPB Image

Flare going on.
IPB Image

Again is surprising just how long this takes to do. The butt weld join on the rear arches is over five foot long!

The other end.
IPB Image

This part at the end of the arch needed some attention, this is how I received it and I couldn't leave it like that.

IPB Image

Better.
IPB Image

Drum roll!

Passenger side complete!

IPB Image

IPB Image
bbrock
clap56.gif clap56.gif pray.gif pray.gif pray.gif smiley_notworthy.gif smiley_notworthy.gif smiley_notworthy.gif

I'm blown away. That quarter panel fab is amazing. I didn't have the balls to attempt it. And the welding... amazing stuff here. I don't think I can compete.
tygaboy
So much talent being applied! You can be proud of your craftsmanship. Really impressive. pray.gif smilie_pokal.gif
Lucky9146
QUOTE(defianty @ Feb 20 2018, 10:07 AM) *


Again is surprising just how long this takes to do. The butt weld join on the rear arches is over five foot long!


IPB Image


Truly fantastic work you are doing there! beerchug.gif
Lots of progress for sure!
white914.jpg
defianty
Thanks again all. Really happy with how it's all coming together now. Having learnt what I've learnt on this project I know think I want to progress the skill somehow. I simply enjoy doing it so much I'm seriously going to miss it once the car is complete.
Dion
Stellar!
pete000
Beautiful metal work !

Who's rocker panels are those?
defianty
QUOTE(pete000 @ Feb 21 2018, 04:39 PM) *

Beautiful metal work !

Who's rocker panels are those?


Thanks very much.

All my fibreglass parts came from https://www.f-s-h.com/ in Germany.
defianty
A few things have got in the way over the last few weeks and little progress has actually been made on the body. Other little projects have ticked along in the background and I'll post an update again fairly soon covering those.

However, the big news is that I now have a deadline to finish off the body! At the beginning of May the car is going to be collected by the paint shop :shock: So I have just weeks left to finish the body, hopefully plenty of time. Wish me luck! laugh.gif
Cairo94507
Keep up the great work. Looks good and I look forward to seeing color on it. beerchug.gif
EdwardBlume
Excellent work! Any plans to move to CA?
defianty
QUOTE(Edward Blume @ Mar 15 2018, 12:38 PM) *

Excellent work! Any plans to move to CA?


If only I was twenty years younger laugh.gif
Lucky9146
QUOTE(defianty @ Mar 15 2018, 03:04 AM) *

A few things have got in the way over the last few weeks and little progress has actually been made on the body. Other little projects have ticked along in the background and I'll post an update again fairly soon covering those.

However, the big news is that I now have a deadline to finish off the body! At the beginning of May the car is going to be collected by the paint shop :shock: So I have just weeks left to finish the body, hopefully plenty of time. Wish me luck! laugh.gif


Looking at your work and progress I know you can make it and be ready! first.gif

That will be a huge step to have painting completed.

Best of luck!
white914.jpg
This is a "lo-fi" version of our main content. To view the full version with more information, formatting and images, please click here.
Invision Power Board © 2001-2024 Invision Power Services, Inc.