Full Version: 914 2.0 > 3.0 GT Conversion
Stephen, that is a great build and photos. And the day it go's to the painter is heaven. Thanks, MarkClick to view attachment
Another visit to the see the car this morning to catch up and see the progress. The previous project, a plane believe it or not, that was holding up progress on mine has now been completed and shipped out so mine will now move along a lot quicker. Not a problem though as I knew this was the case.
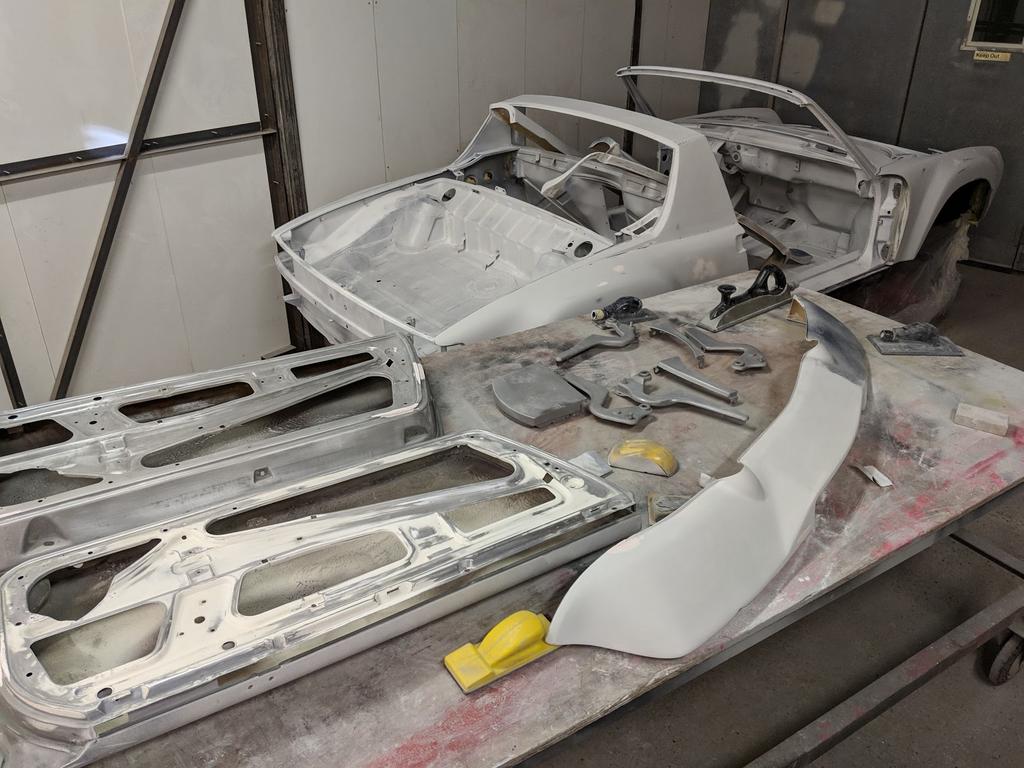
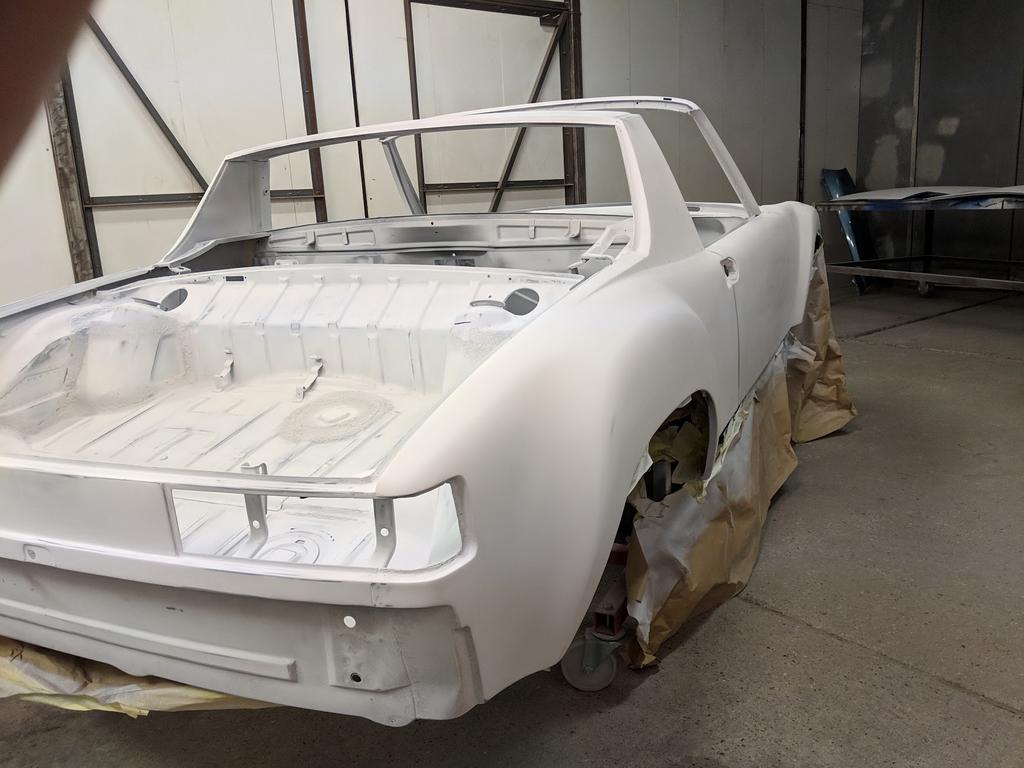
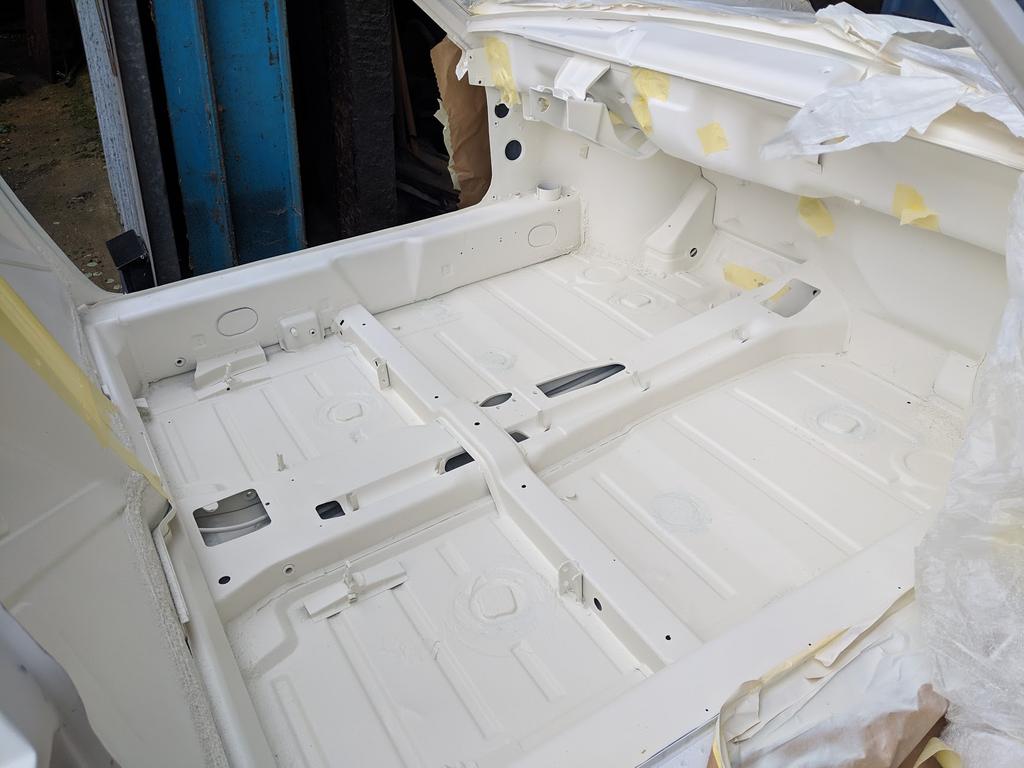
Not an awful lot to see but a few pictures nonetheless.
A frew bits on the floor have been tidied up that I was previously unable to get to.
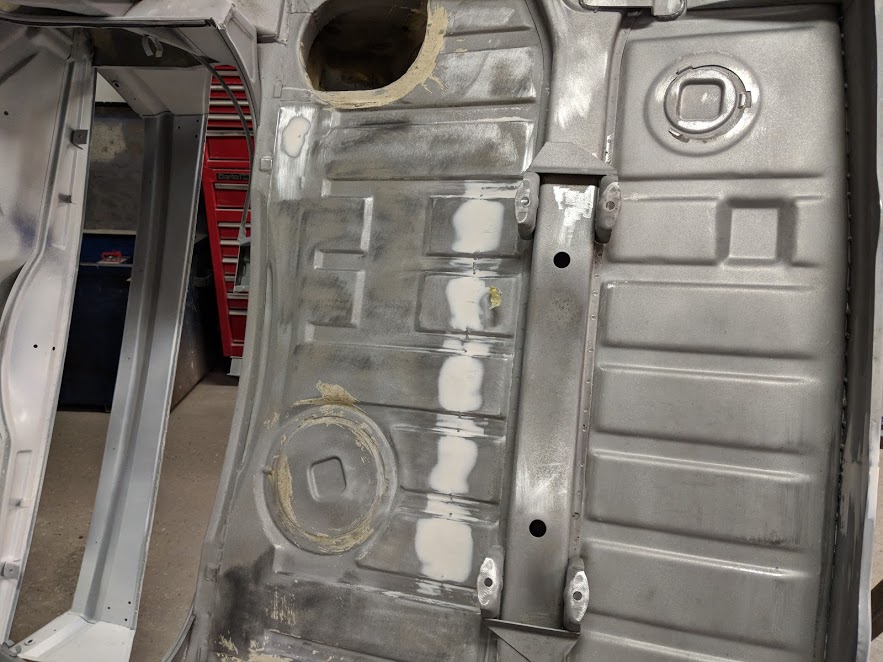
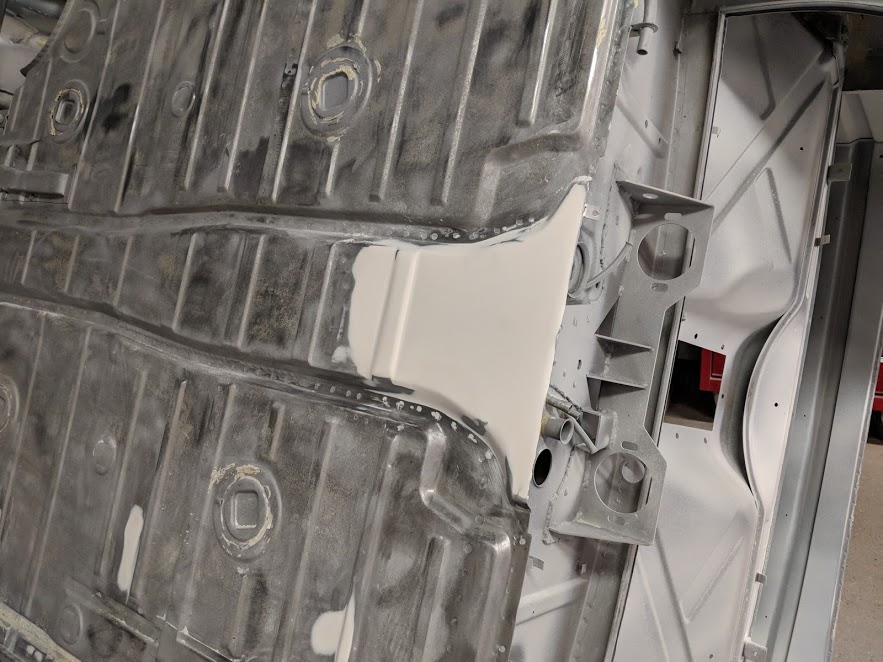
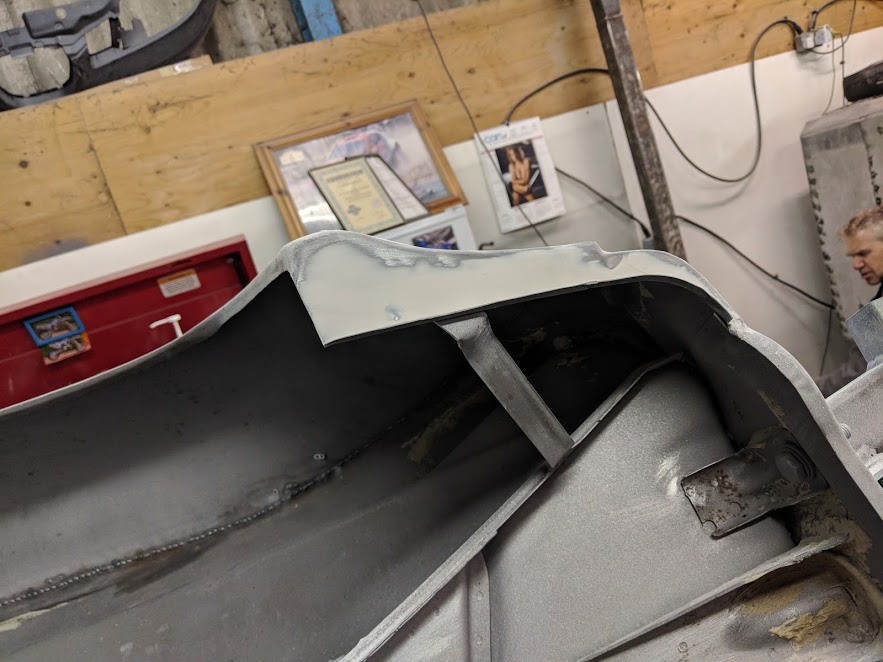
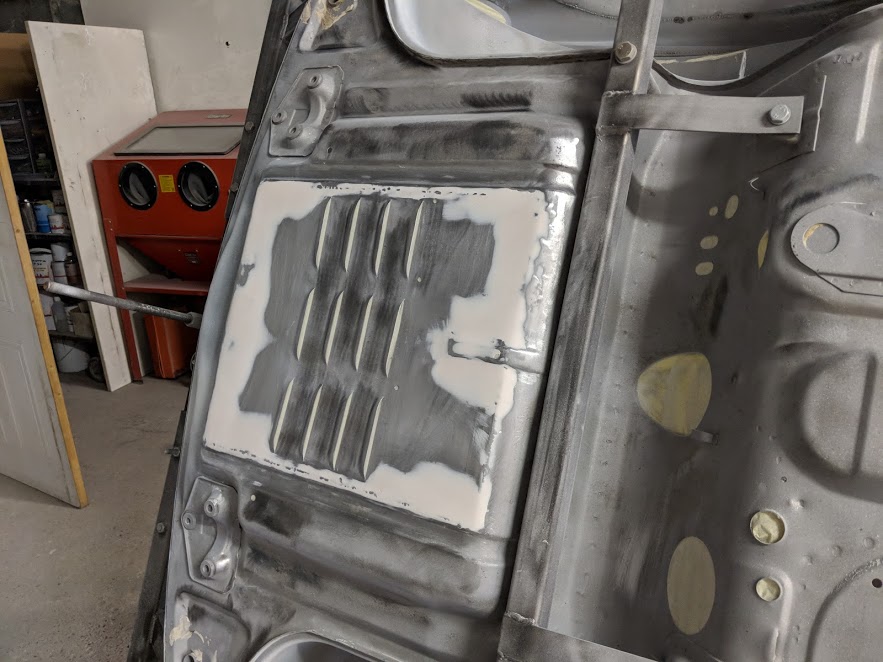
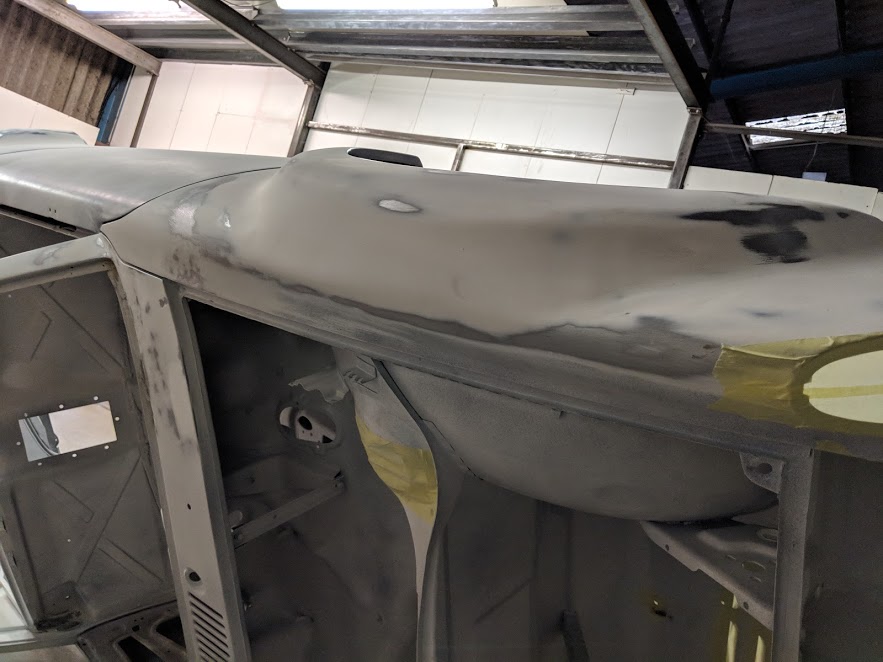
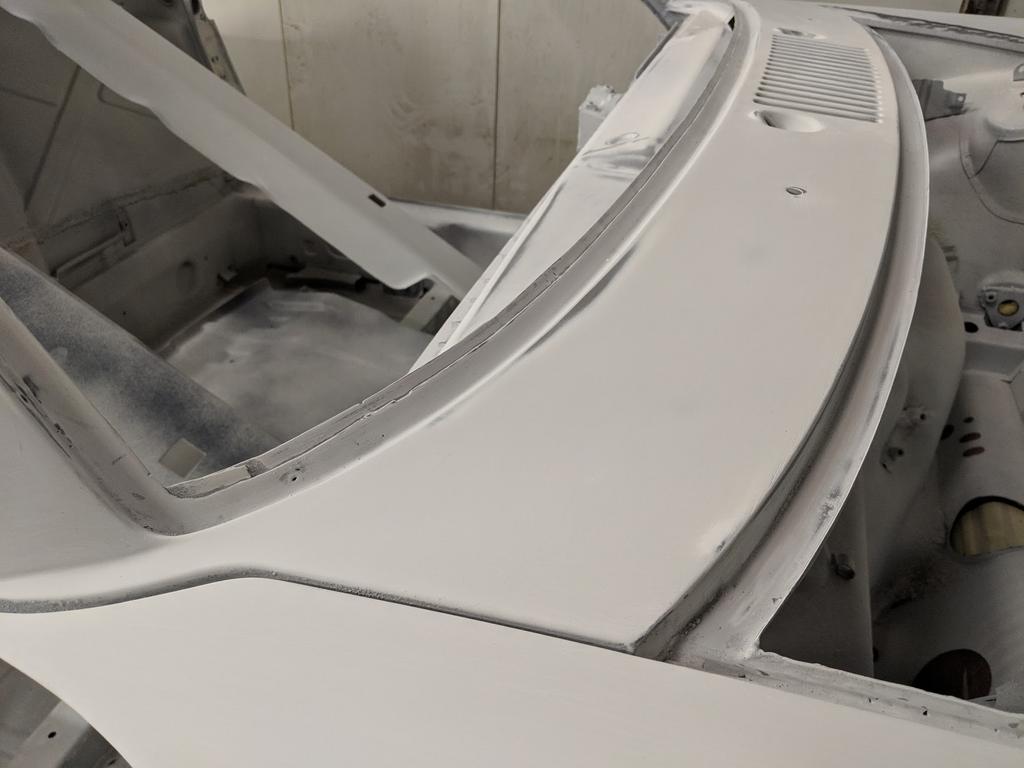
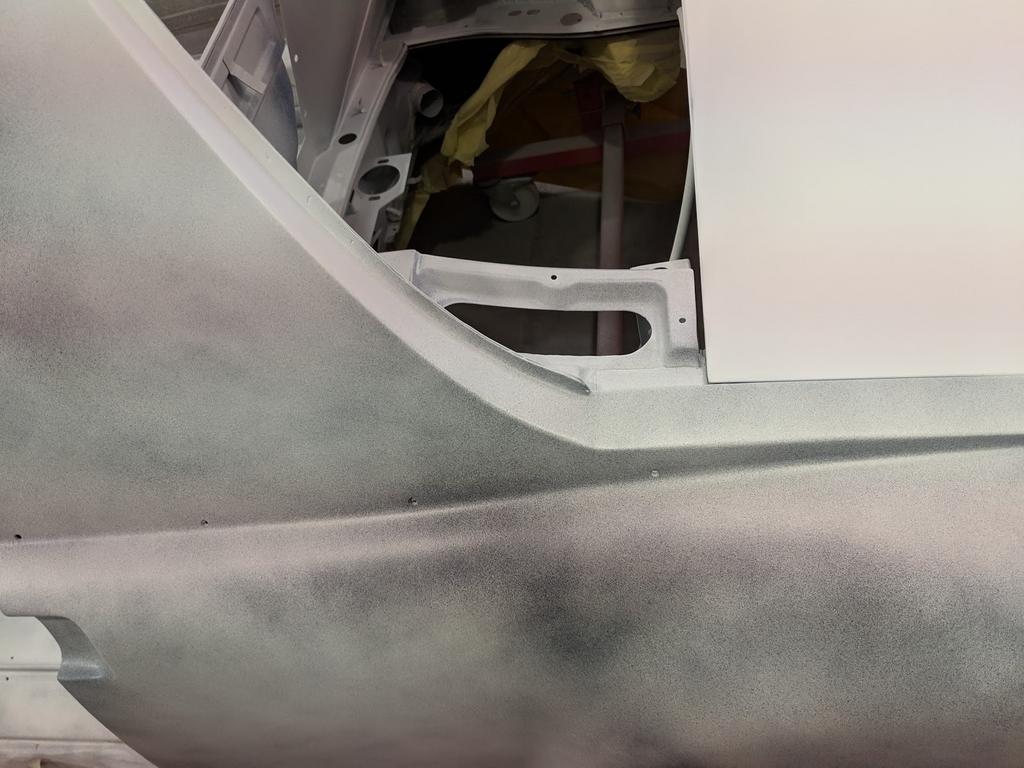
Topside a first light skim of filler over the arch welds.
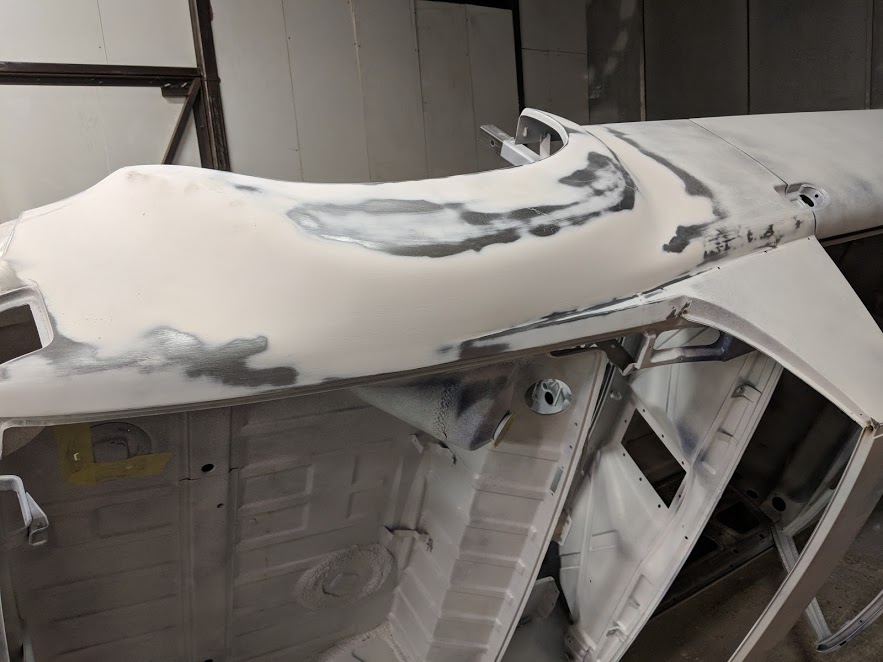
Over the next week the underneath will be completed and the car will come off the rotisserie. More updates in a week or two.
Not an awful lot to see but a few pictures nonetheless.
A frew bits on the floor have been tidied up that I was previously unable to get to.
Topside a first light skim of filler over the arch welds.
Over the next week the underneath will be completed and the car will come off the rotisserie. More updates in a week or two.
QUOTE(mlindner @ Sep 18 2018, 12:54 AM) 
Stephen, that is a great build and photos. And the day it go's to the painter is heaven. Thanks, Mark
Thanks Mark, it's sure great now the the car is at paint. I'm really please the the painter is going the extra mile too with his attention to detail.
Nice to see the progress shots. It is a very exciting time for these projects when they go to paint. 
QUOTE(Cairo94507 @ Oct 6 2018, 05:54 AM)
Nice to see the progress shots. It is a very exciting time for these projects when they go to paint.
 It's even more exciting when one actually gets painted

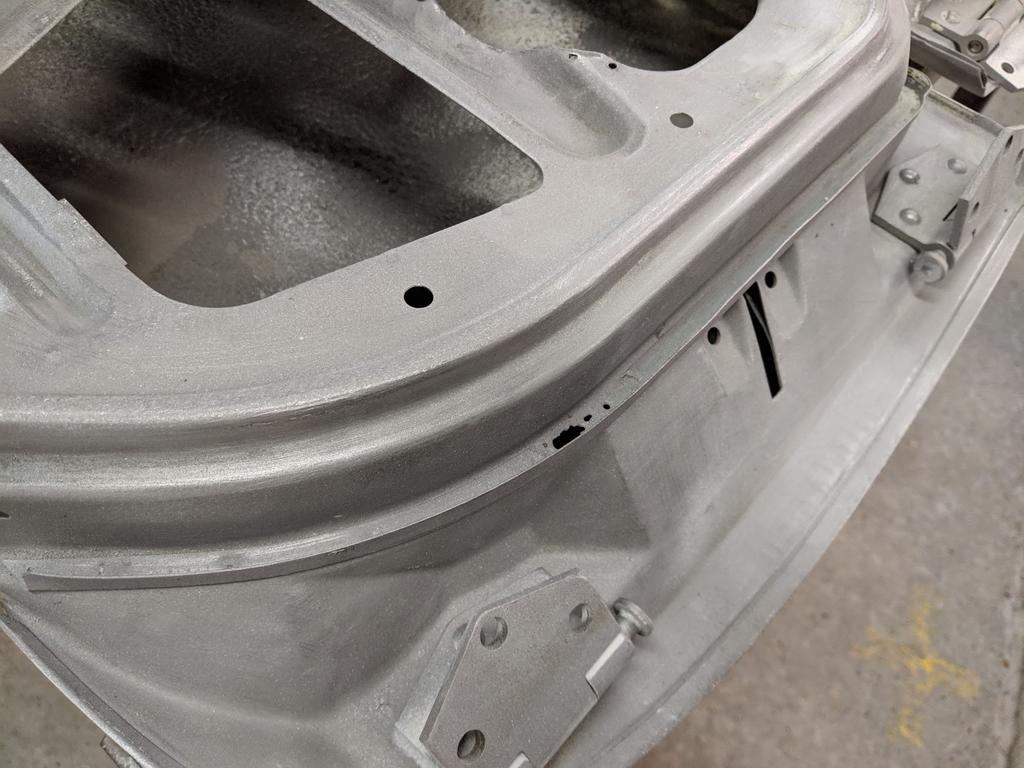
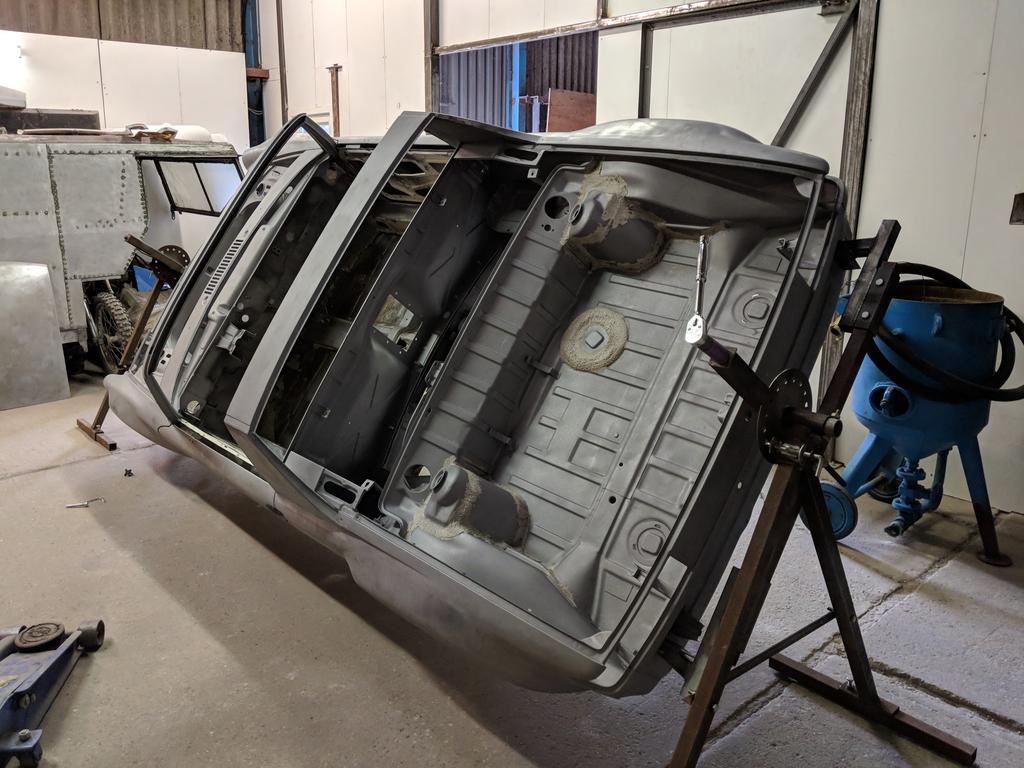
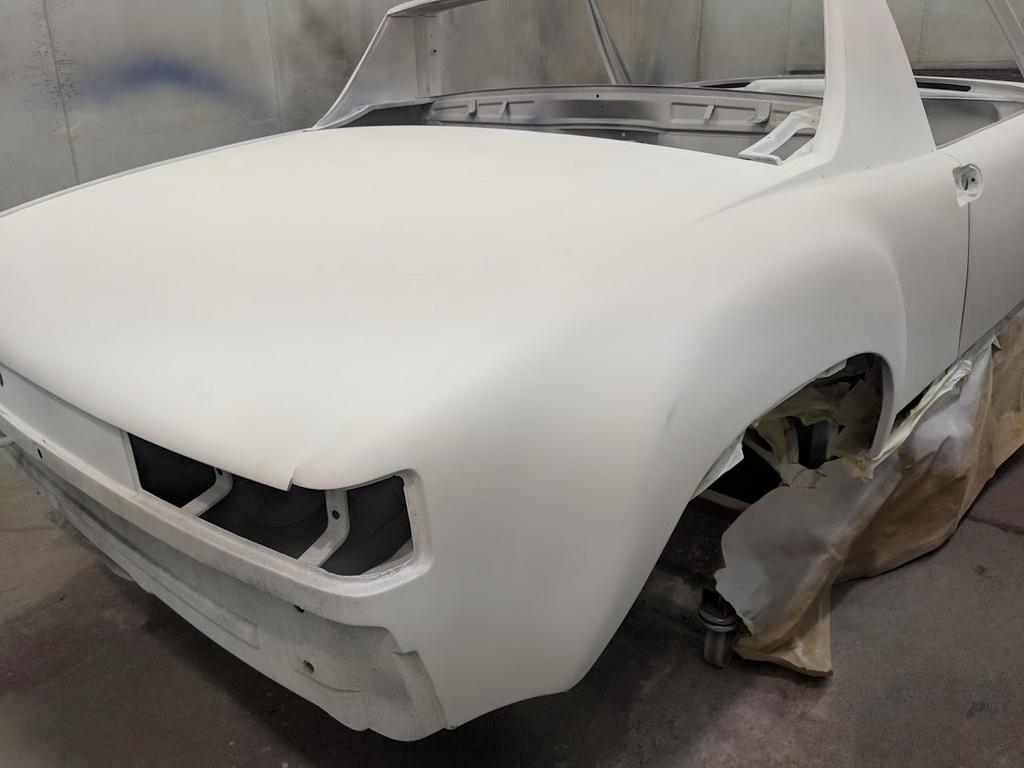
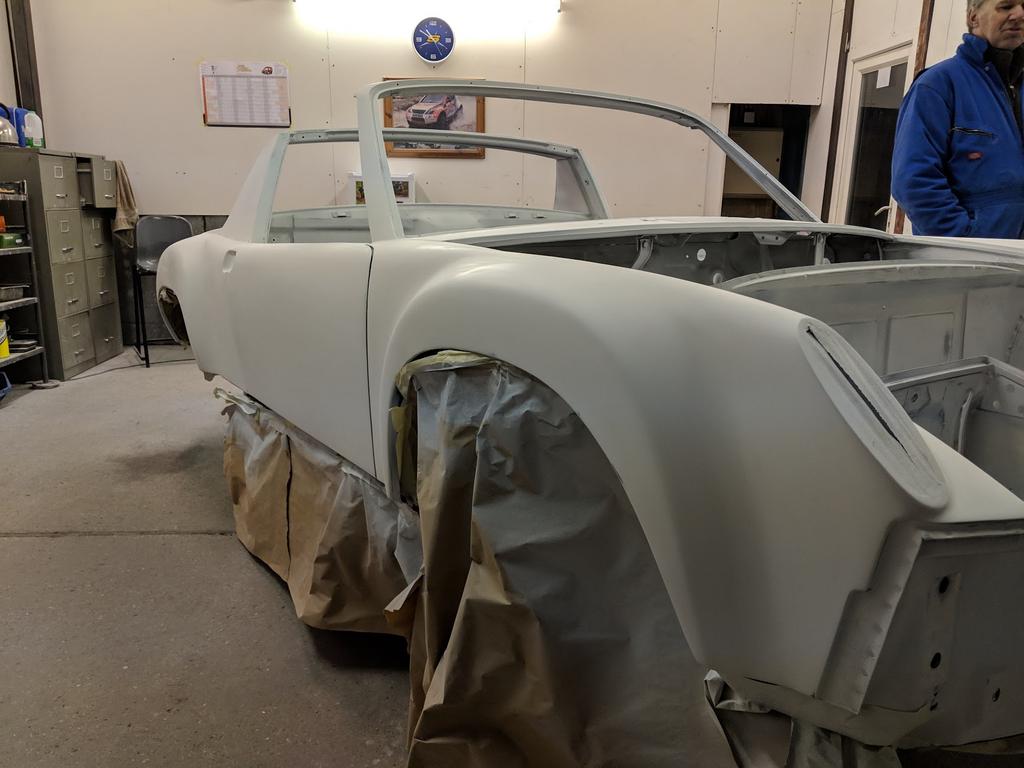
Another Saturday morning visit to the bodyshop and delighted to see some good progress made on the car.
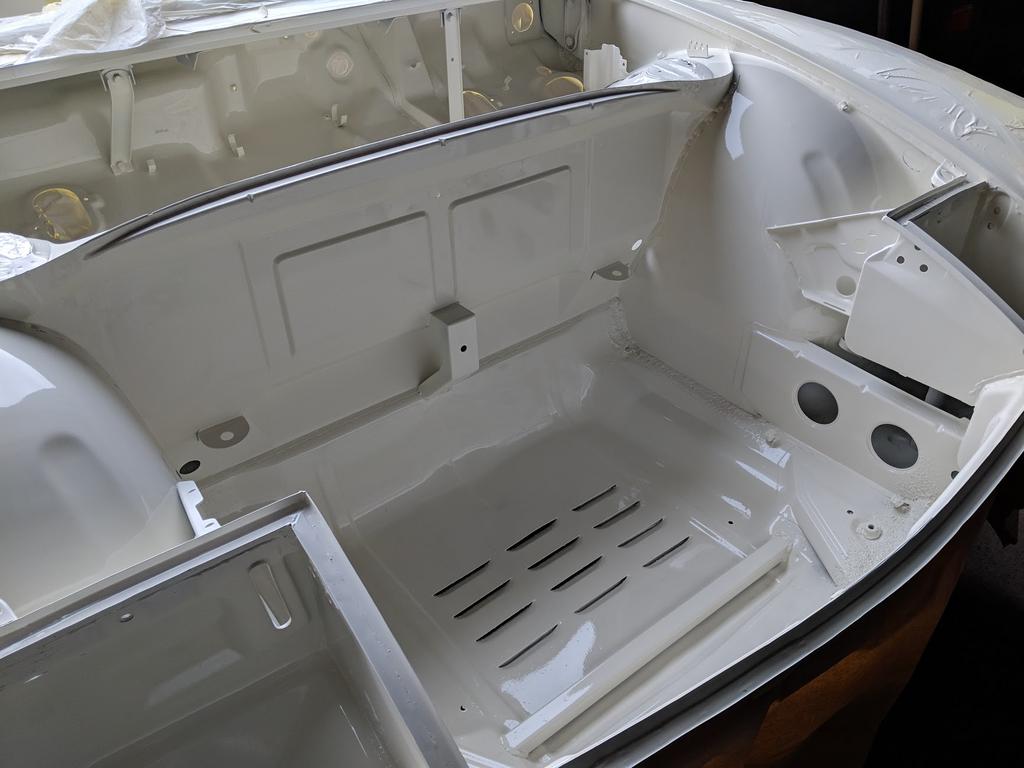
Of course there's always a few not so nice bits too. Just a few small holes found in the door seal channel a a few pin holes on the boot lid structure. They'll all be welded up.
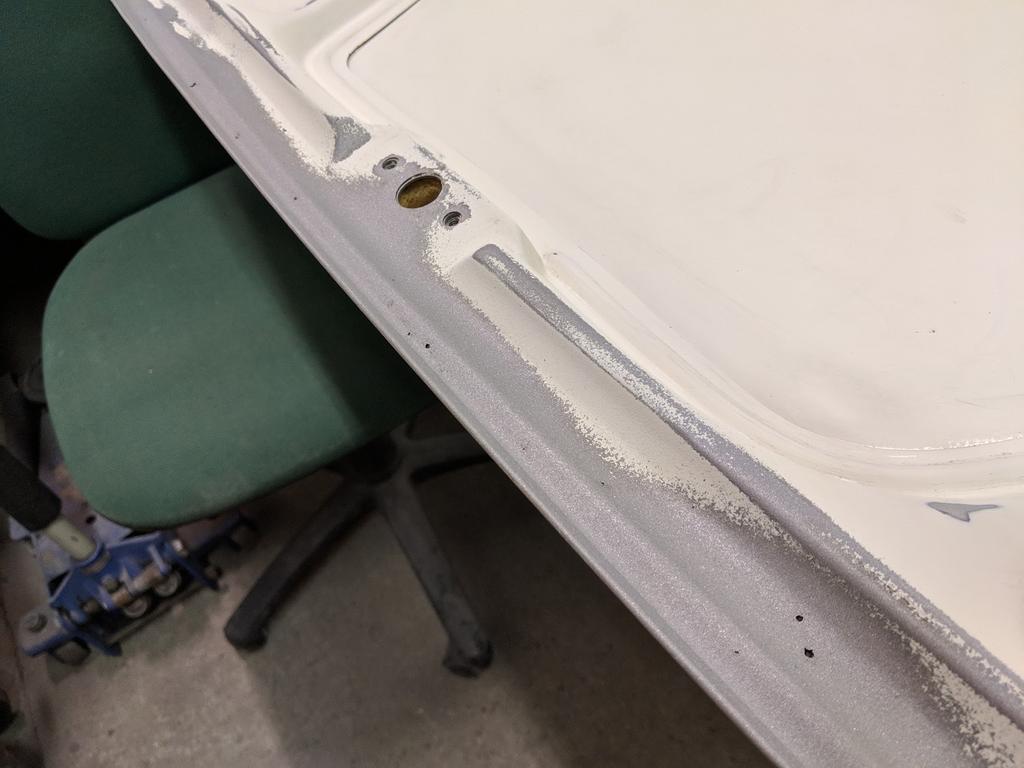
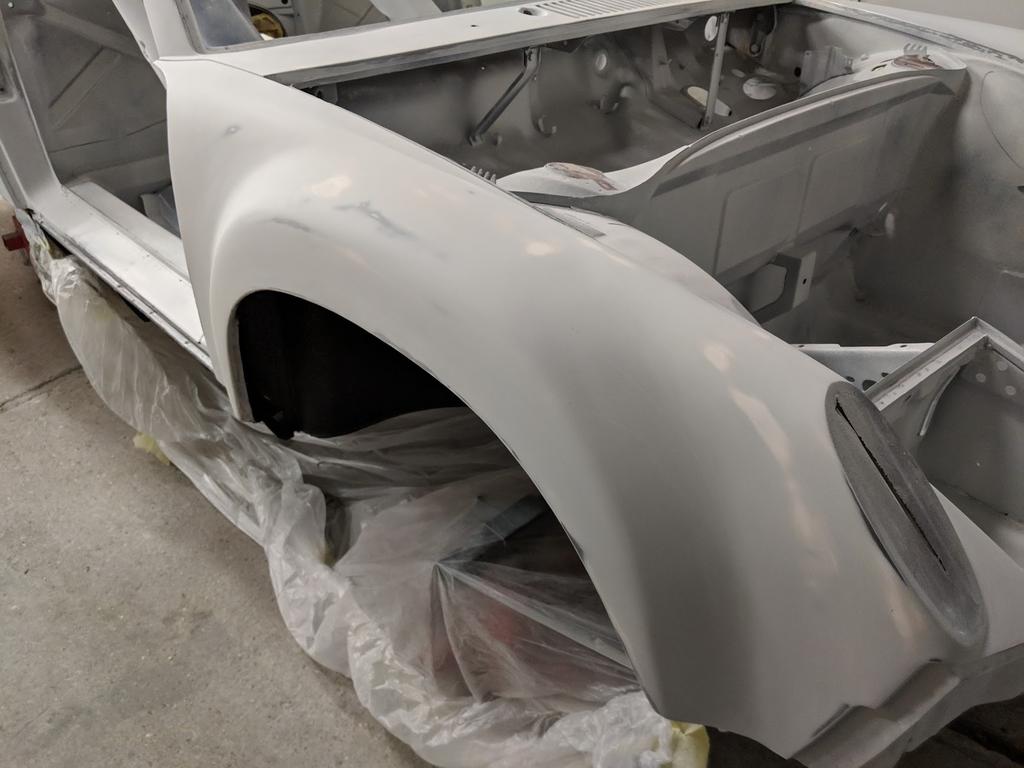
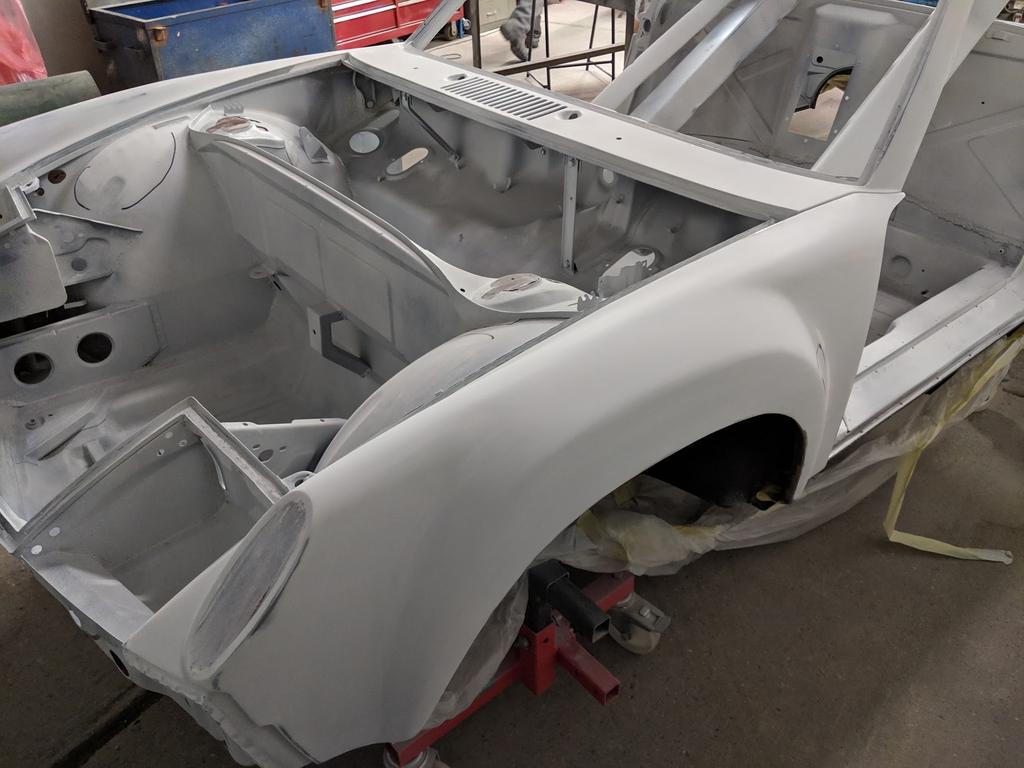
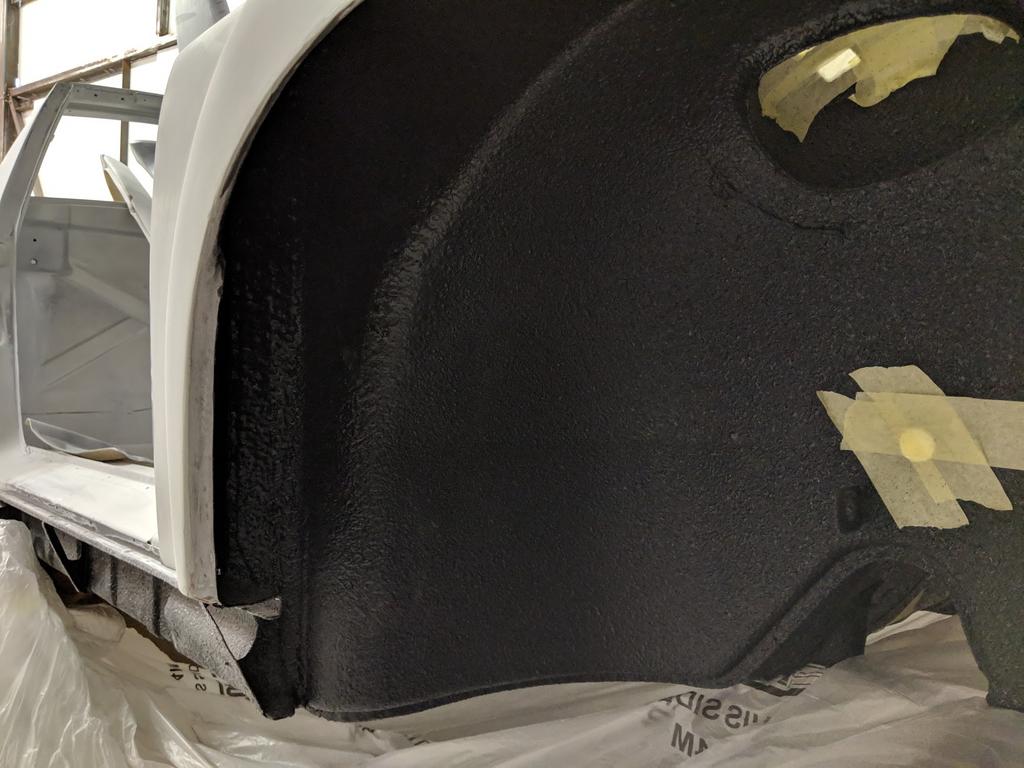
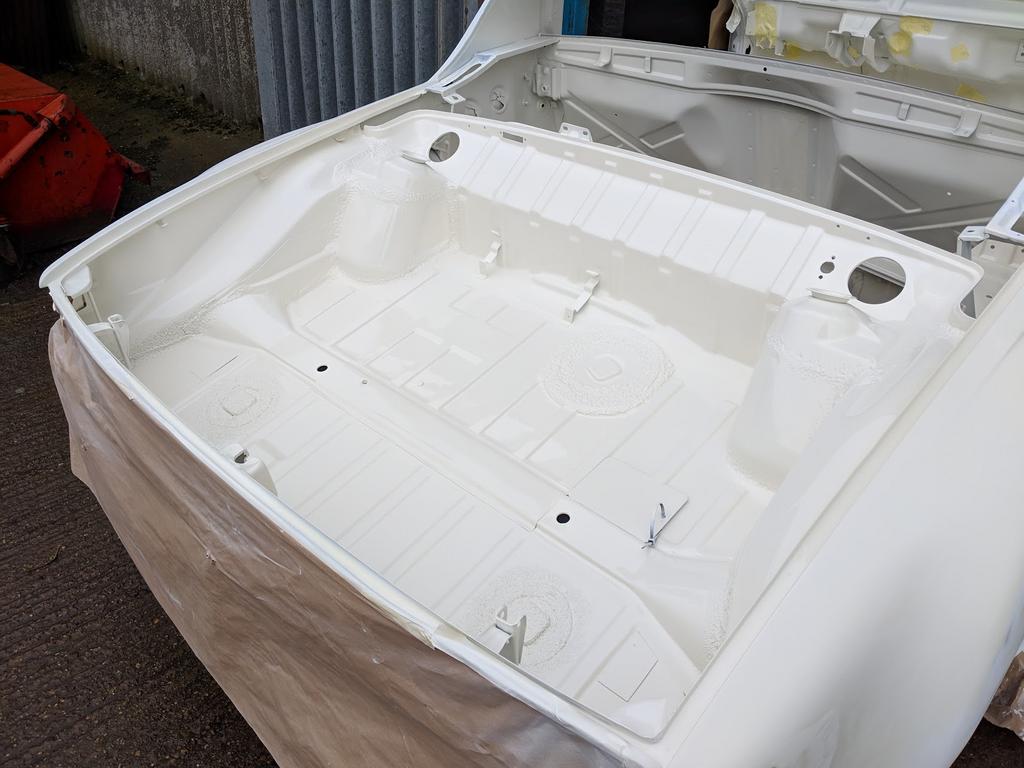
And finally a shot most purists wouldn't approved of. I decided long ago that if the car remained Light Ivory I didn't want the wheel wells to be that colour. Personally I'm not keen on seeing body colour in that area, although if the car was a darker colour I'd have probably left it or used an over-paintable product. So underneath and the arches have been sprayed with a black polymer sealer that actually has kevlar fibres mixed in it. It's strong stuff and will provide the level of protection and sound insulation I'm after.
Of course there's always a few not so nice bits too. Just a few small holes found in the door seal channel a a few pin holes on the boot lid structure. They'll all be welded up.
And finally a shot most purists wouldn't approved of. I decided long ago that if the car remained Light Ivory I didn't want the wheel wells to be that colour. Personally I'm not keen on seeing body colour in that area, although if the car was a darker colour I'd have probably left it or used an over-paintable product. So underneath and the arches have been sprayed with a black polymer sealer that actually has kevlar fibres mixed in it. It's strong stuff and will provide the level of protection and sound insulation I'm after.
QUOTE(defianty @ Oct 27 2018, 06:44 AM)
And finally a shot most purists wouldn't approved of. I decided long ago that if the car remained Light Ivory I didn't want the wheel wells to be that colour. Personally I'm not keen on seeing body colour in that area, although if the car was a darker colour I'd have probably left it or used an over-paintable product. So underneath and the arches have been sprayed with a black polymer sealer that actually has kevlar fibres mixed in it. It's strong stuff and will provide the level of protection and sound insulation I'm after.
car looks great, and the wheel wells look great also. I painted my wheel wells black for the same reason as you, although my entire pan and engine bay is also black.
It's refreshing to see even the pros use body filler.
Just wondering yesterday about your progress and hadn't seen anything for awhile.
This is a great shot!


Click to view attachment
This is a great shot!
Click to view attachment
Looking good!  Amazing how much work getting those last bits taken care of. After I thought I was finished welding except for "a few things to tidy up," I blew through 3/4 of a tank of MIG gas.
I debated with myself over whether to go black or body color on the wheel wells and undercarriage. My car left the dealer with black undercoat so I think you could argue that was original. I wound up going body color and really like it, but I think it's hard to argue against black if that's the preferred look. Can't wait for the next update!
Amazing how much work getting those last bits taken care of. After I thought I was finished welding except for "a few things to tidy up," I blew through 3/4 of a tank of MIG gas.I debated with myself over whether to go black or body color on the wheel wells and undercarriage. My car left the dealer with black undercoat so I think you could argue that was original. I wound up going body color and really like it, but I think it's hard to argue against black if that's the preferred look. Can't wait for the next update!
QUOTE(jmitro @ Oct 27 2018, 01:48 PM)
car looks great, and the wheel wells look great also. I painted my wheel wells black for the same reason as you, although my entire pan and engine bay is also black.
Thanks, yes I'm pleased with them. Although it was a decision that took me a while to make.
QUOTE(Lucky9146 @ Oct 27 2018, 03:36 PM)
Just wondering yesterday about your progress and hadn't seen anything for awhile.
This is a great shot!
I was wondering about the progress too Jim
 I haven't seen the car in three weeks. I'm sure to a lot of people it doesn't look like much has been done but to us guys you can see the hours that have been put in.
QUOTE(bbrock @ Oct 27 2018, 04:25 PM)
Looking good!
Amazing how much work getting those last bits taken care of. After I thought I was finished welding except for "a few things to tidy up," I blew through 3/4 of a tank of MIG gas.I debated with myself over whether to go black or body color on the wheel wells and undercarriage. My car left the dealer with black undercoat so I think you could argue that was original. I wound up going body color and really like it, but I think it's hard to argue against black if that's the preferred look. Can't wait for the next update!
Thanks Brent. My car was also black undersealed too on delivery so you're right, it's original

QUOTE(defianty @ Aug 27 2018, 01:42 PM)
Stephen - from your recent experience with the spit can you tell me exactly where the C of G of the car is vertically and relative to the bumper mounts - or the boot and trunk lips if that's easier ?
Thanks
Andrew
QUOTE(andrewb @ Oct 28 2018, 04:35 PM)
Stephen - from your recent experience with the spit can you tell me exactly where the C of G of the car is vertically and relative to the bumper mounts - or the boot and trunk lips if that's easier ?
Thanks
Andrew
I don't think I know the answer to that to be honest Andrew. I borrowed the rotisserie from a friend I only made the mounts myself. The painter said to me that it was difficult to roll the car over until he raised the car using the height adjuster built into the rotisserie so all I do know is the getting the center of gravity correct was key to this. Unfortunately I don't have any measurements but I do know it needed to be raised some than the photo I posted and you quoted.
QUOTE(defianty @ Oct 28 2018, 10:29 PM)
QUOTE(andrewb @ Oct 28 2018, 04:35 PM)
Stephen - from your recent experience with the spit can you tell me exactly where the C of G of the car is vertically and relative to the bumper mounts - or the boot and trunk lips if that's easier ?
Thanks
Andrew
I don't think I know the answer to that to be honest Andrew. I borrowed the rotisserie from a friend I only made the mounts myself. The painter said to me that it was difficult to roll the car over until he raised the car using the height adjuster built into the rotisserie so all I do know is the getting the center of gravity correct was key to this. Unfortunately I don't have any measurements but I do know it needed to be raised some than the photo I posted and you quoted.
OK cheers - I'll see what I can work out from the other pics. It would be a big help if you could tell me in which pictures the pivot point was coincident with the CG. Is that possible ?
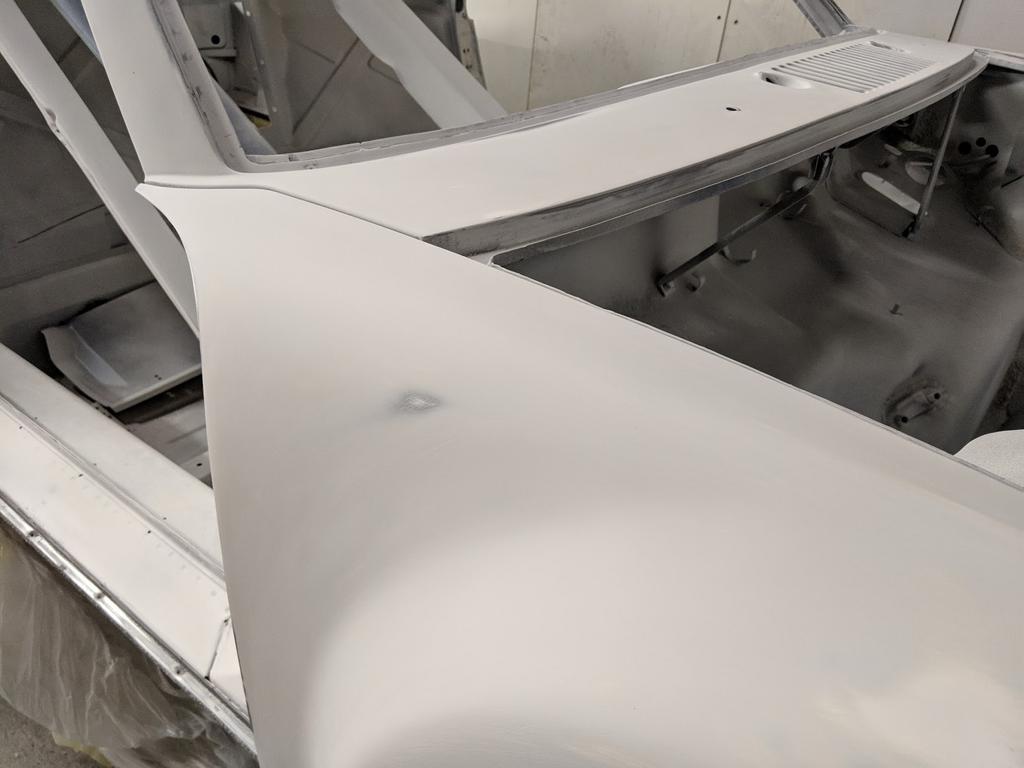
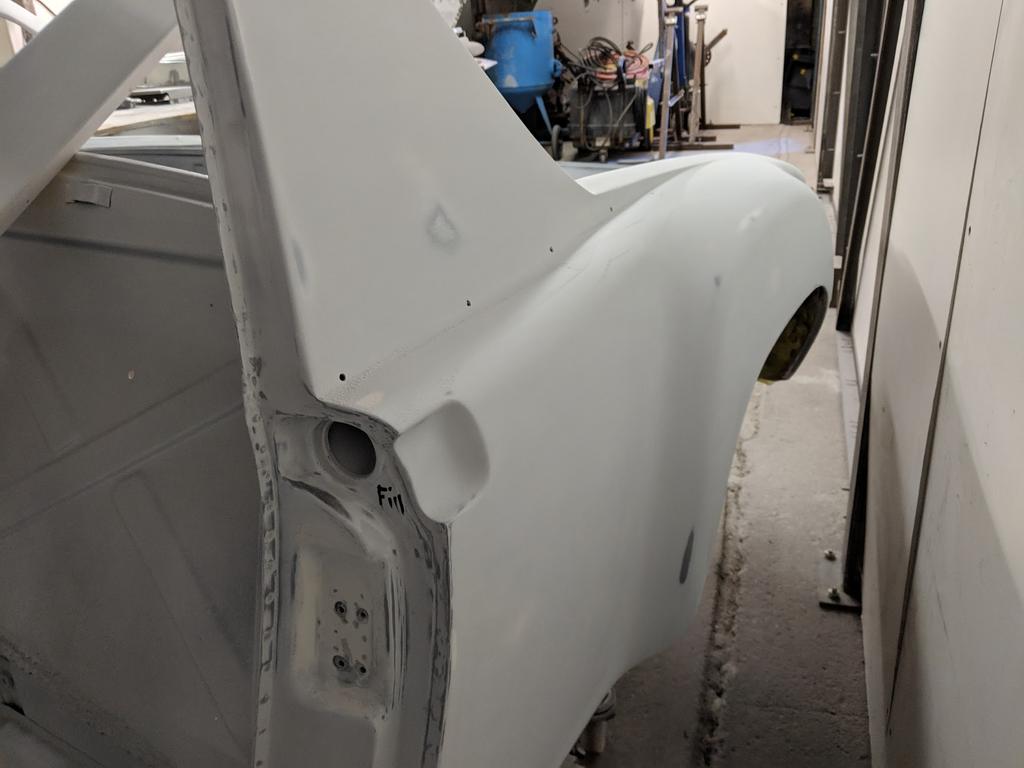
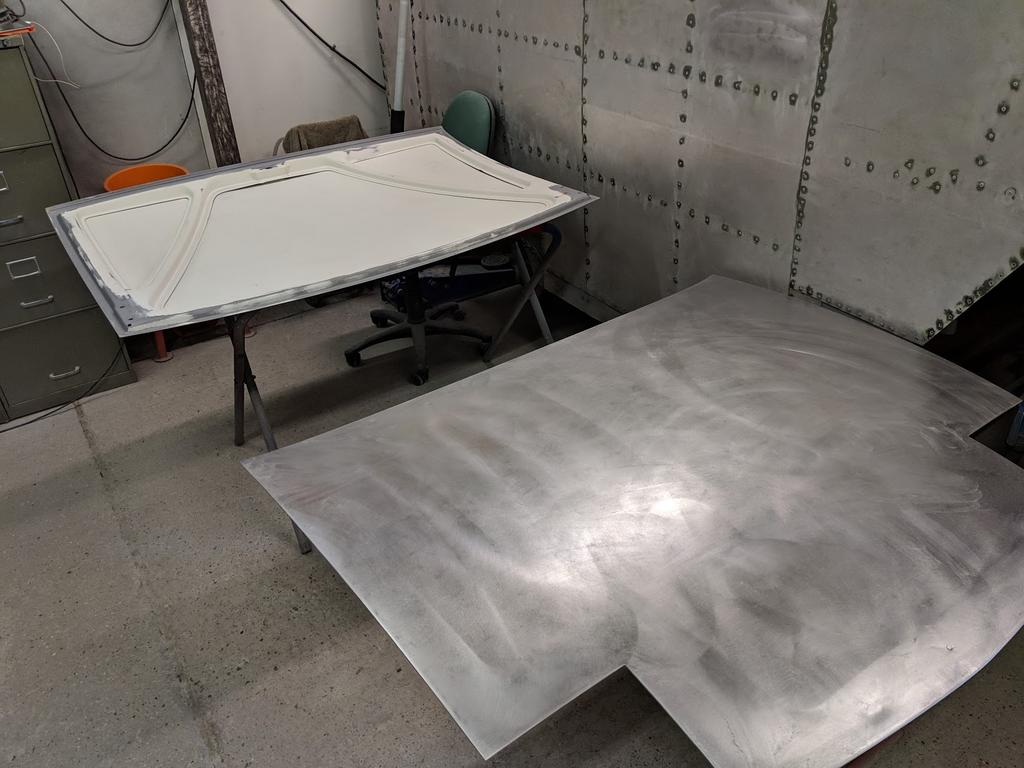
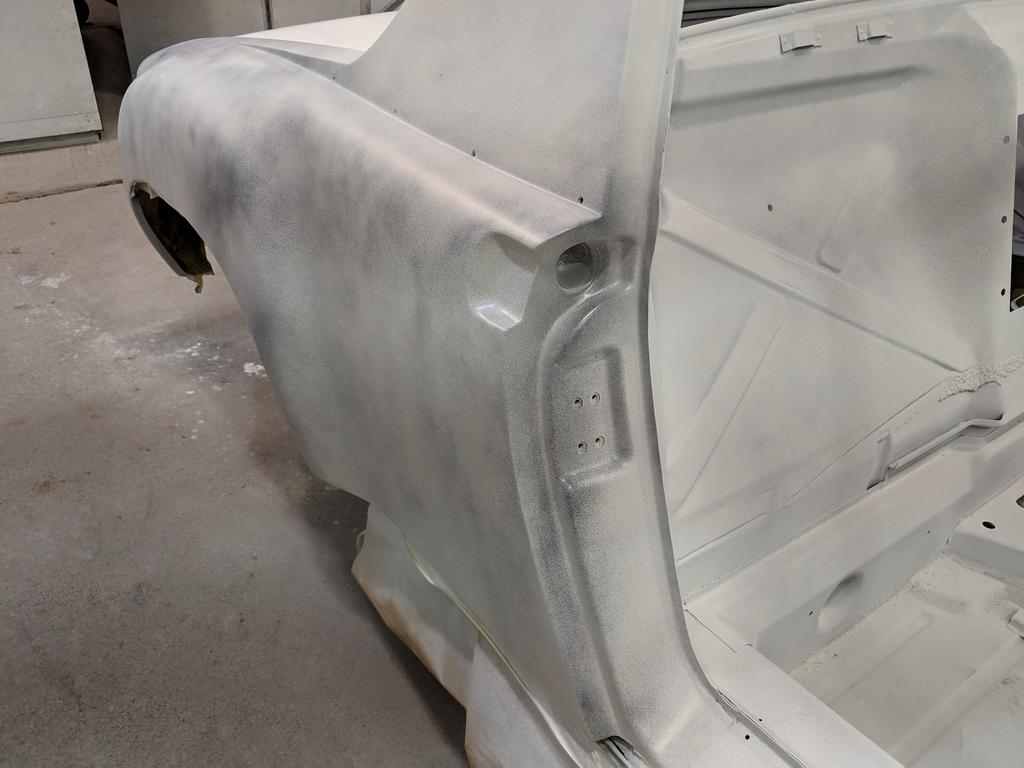
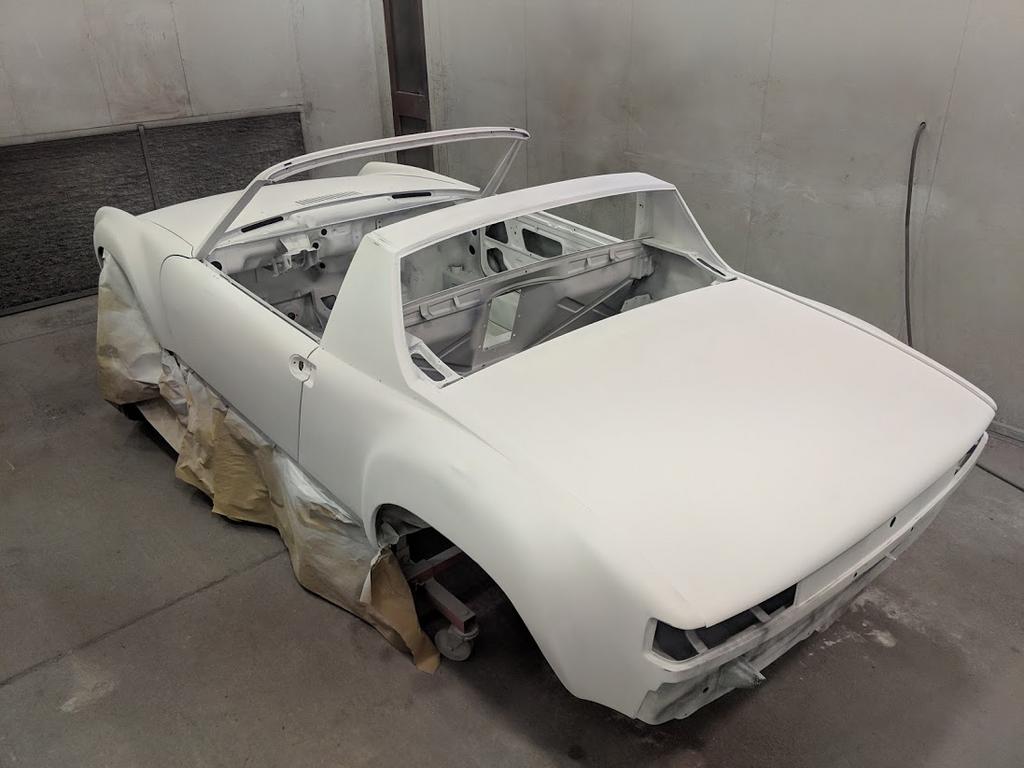
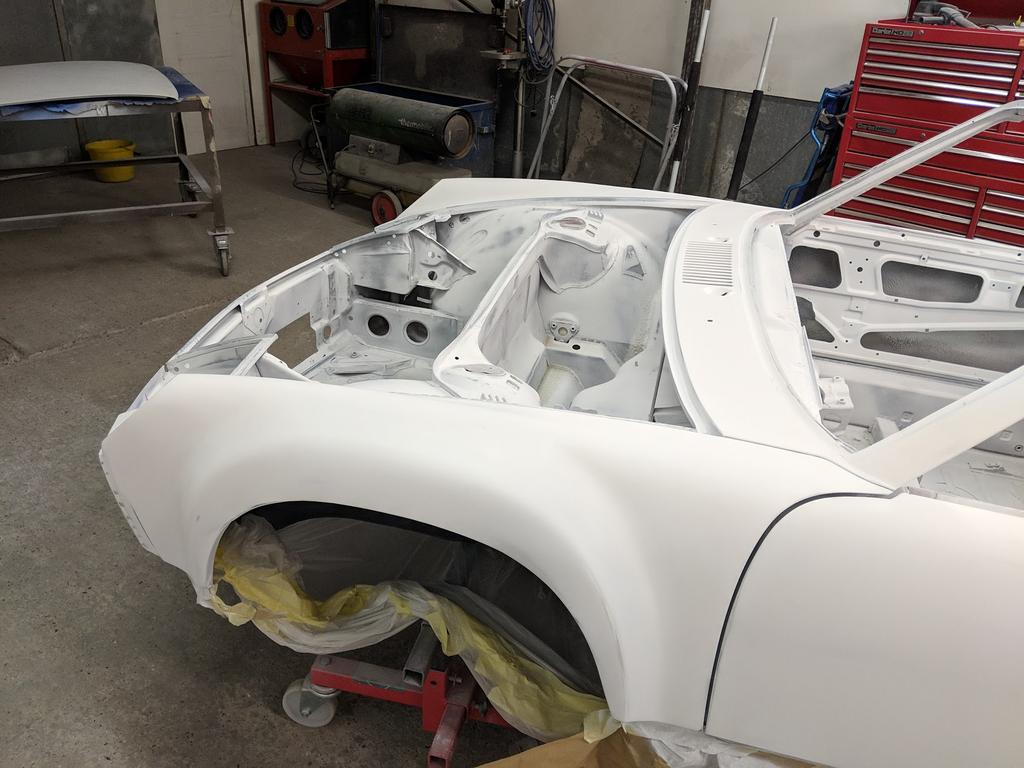
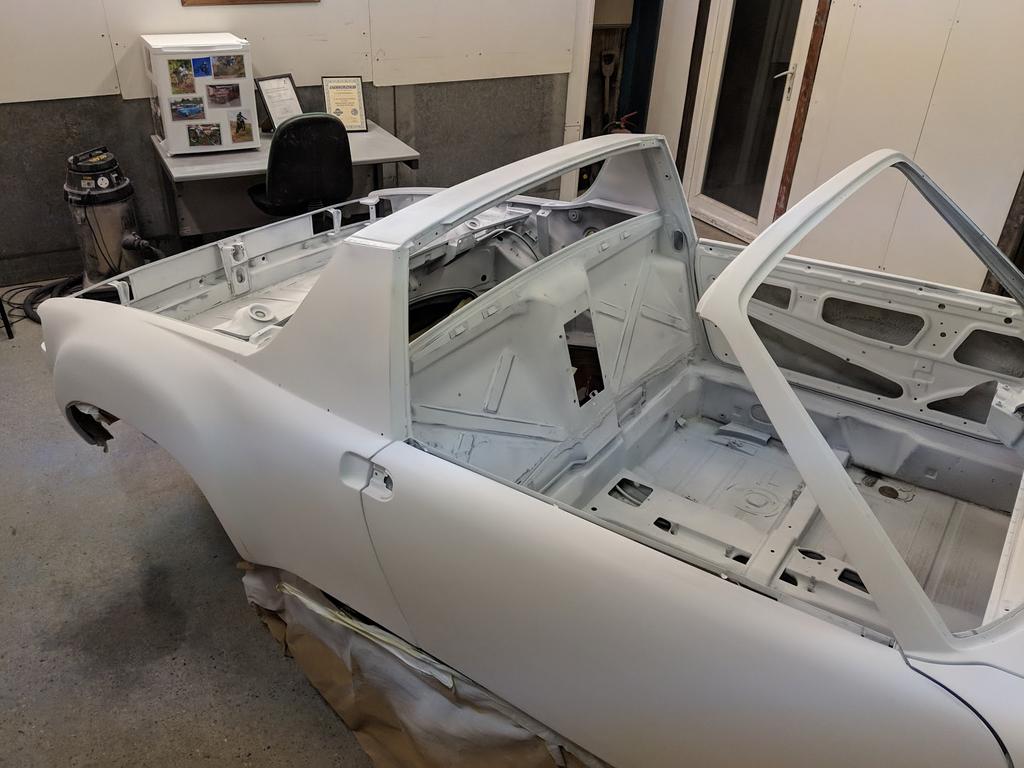
More progress this week as the outside is now at the high build primer stage. Looking great for it too.
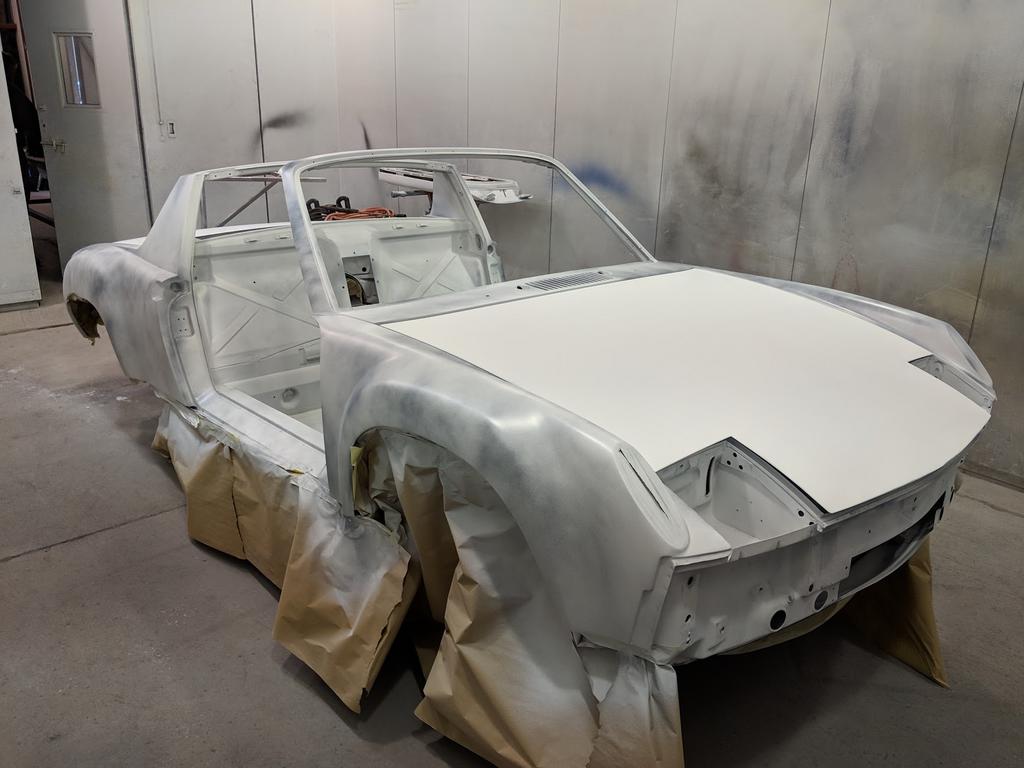

Rather frustratingly I noticed that when I replaced the sail panels I forgot to drill the holes for the rear sail trim. On my next visit I'll take the trim along with me and get those drilled before the car is painted.
Getting close now :cheers:
Rather frustratingly I noticed that when I replaced the sail panels I forgot to drill the holes for the rear sail trim. On my next visit I'll take the trim along with me and get those drilled before the car is painted.
Getting close now :cheers:
Your car is looking great.
Way to go Stephen. Exciting times now. Glad to see it close to paint!
I thinks it’s a smart move for black in the wheel wells with regards to all the debris
Kicked at them. I would only do colour if a car was only for show or a really all original.
Daily drivers and resto rods black all day...IMHO.
Keep
Posting!
I thinks it’s a smart move for black in the wheel wells with regards to all the debris
Kicked at them. I would only do colour if a car was only for show or a really all original.
Daily drivers and resto rods black all day...IMHO.
Keep
Posting!
I took a few minutes to re-read your thread. I appreciate you sharing all of this, I remember now where I got most of the inspiration to do some of the projects I have done on my car.
I will say your weld grinding/finishing skills and patience with it are fantastic. When I am grinding down mine I always get a spot or two where I slip and grind into the parent metal.
I will say your weld grinding/finishing skills and patience with it are fantastic. When I am grinding down mine I always get a spot or two where I slip and grind into the parent metal.
QUOTE(Cairo94507 @ Nov 18 2018, 01:18 PM)
Your car is looking great.
Thanks, appreciated
QUOTE(Dion @ Nov 18 2018, 03:06 PM)
Way to go Stephen. Exciting times now. Glad to see it close to paint!
I thinks it’s a smart move for black in the wheel wells with regards to all the debris
Kicked at them. I would only do colour if a car was only for show or a really all original.
Daily drivers and resto rods black all day...IMHO.
Keep
Posting!
Thanks Dion, that's exactly my thinking regarding the wheel wells. This car is going to be driven!
QUOTE(TravisNeff @ Nov 18 2018, 03:11 PM)
I took a few minutes to re-read your thread. I appreciate you sharing all of this, I remember now where I got most of the inspiration to do some of the projects I have done on my car.
I will say your weld grinding/finishing skills and patience with it are fantastic. When I am grinding down mine I always get a spot or two where I slip and grind into the parent metal.
Thanks Travis, it's nice to know I've inspired others as many have inspired me also on the World. That's one of the great things about this platform.
QUOTE(defianty @ Nov 18 2018, 01:34 AM)
More progress this week as the outside is now at the high build primer stage. Looking great for it too.
Paint guy looks to be doing a very thorough job and one that all your beautiful metal work deserves. The waiting must terrible but this is not the time to rush. Looking forward to the next installment!
QUOTE(Lucky9146 @ Nov 19 2018, 04:21 PM)
Paint guy looks to be doing a very thorough job and one that all your beautiful metal work deserves. The waiting must terrible but this is not the time to rush. Looking forward to the next installment!
Thanks Jim, he is indeed doing a fine job and yes the wait is terrible! However it's great to see progress every few weeks. Time has slipped a bit unfortunately but for the right reasons. I won't be getting the car back until after Christmas now and that means I'll be starting the rebuild in the coldest months.

Stephen, can you share with me some details about your grille material, wire size etc.? I am looking for mesh for mine and it is hard to gauge how big, small and wire size to choose.
QUOTE(TravisNeff @ Dec 4 2018, 02:51 PM)
Stephen, can you share with me some details about your grille material, wire size etc.? I am looking for mesh for mine and it is hard to gauge how big, small and wire size to choose.
Here you go Travis.
https://www.themeshcompany.com/products/-4-...-52.html#SID=59
After studying plenty of photos of original GT's this is stuff I went with. Hopefully from that spec you'll be able to find something close over there.
I called in this morning to see the car and things are progressing well. The doors have now been hung too and are lining up nicely.
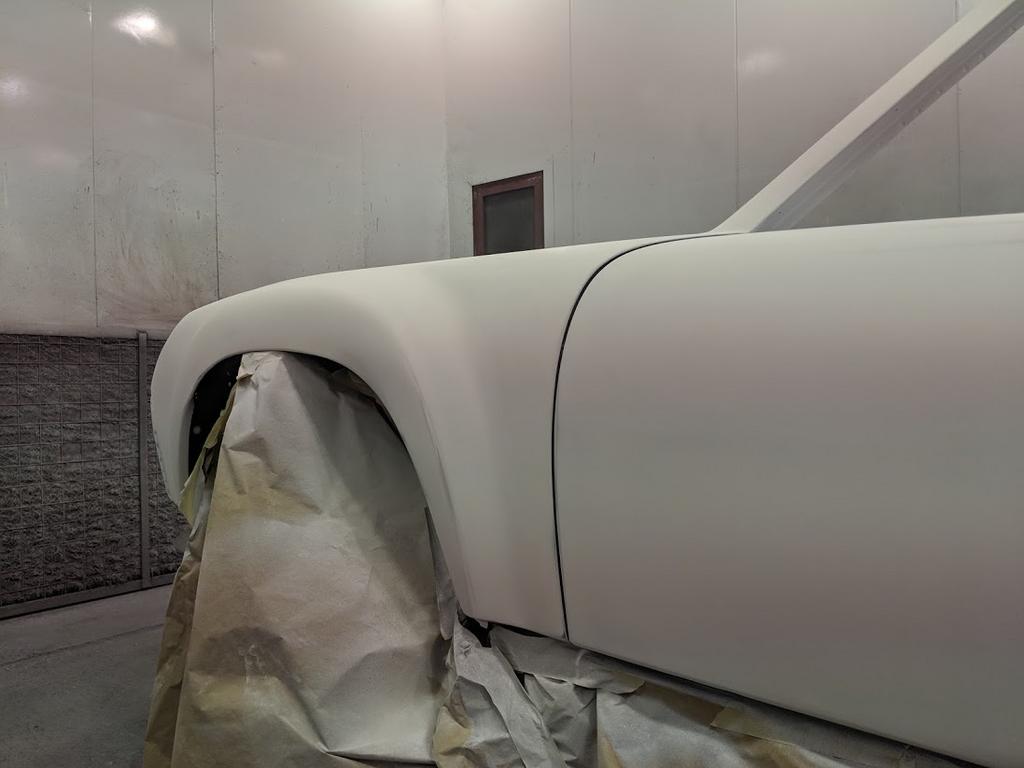
Getting the paint right hasn't been the easiest and I've always been a bit concerned that the car may come out a bit creamy. Colours change in different lights and I'm sure owners of light Ivory cars would agree that in some light the paint looks very creamy and in others, brilliant white.
Making the final decision on the colour. Obviously the picture bears no resemblance to the actual colour but it turned out to be visually identical to how the car was previously.
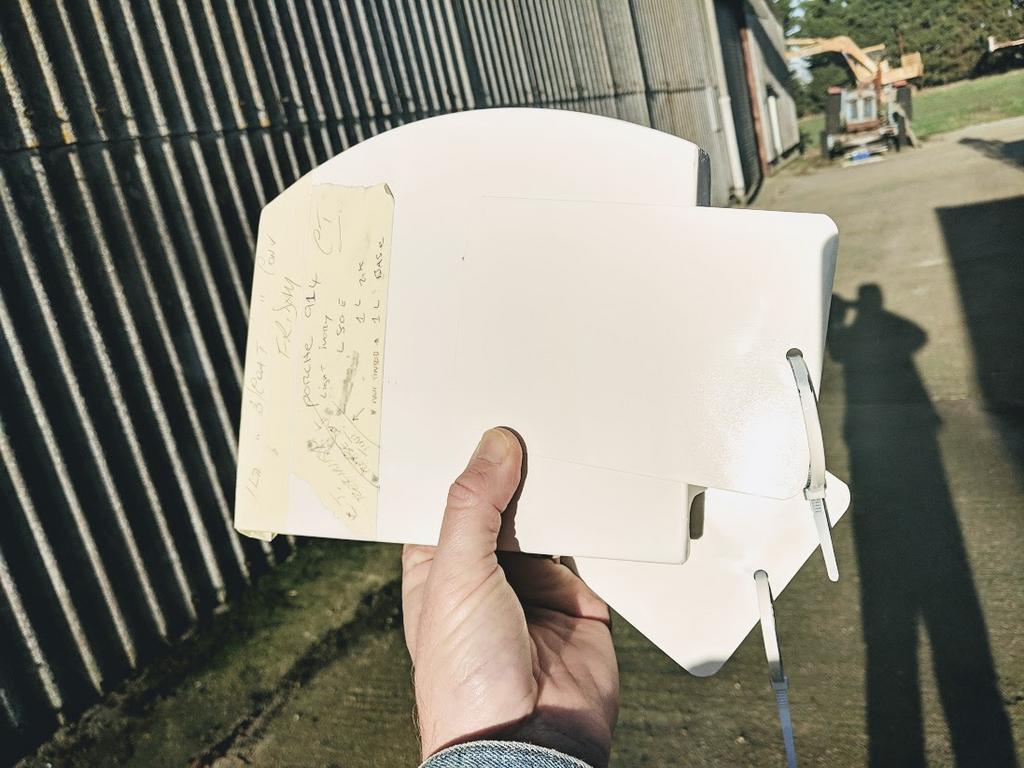
I was hoping to see the car in colour before Christmas but I'm going to have to wait a little longer now. However looking at the quality of the work so far I know it's going to be worth the wait.
Getting the paint right hasn't been the easiest and I've always been a bit concerned that the car may come out a bit creamy. Colours change in different lights and I'm sure owners of light Ivory cars would agree that in some light the paint looks very creamy and in others, brilliant white.
Making the final decision on the colour. Obviously the picture bears no resemblance to the actual colour but it turned out to be visually identical to how the car was previously.
I was hoping to see the car in colour before Christmas but I'm going to have to wait a little longer now. However looking at the quality of the work so far I know it's going to be worth the wait.
Light Ivory is a great color and was one of my top 3 choices. Your car is going to be beautiful. 
Stephen, your car is looking great! Keep those progress pics coming.
I know what you mean that "in some light the paint looks very creamy and in others, brilliant white". Being the owner of a light Ivory I experienced that very thing when parked near a much "creamier" Speedster just this past weekend. This was even more pronounced in person of course and from a distance it actually looked bright white!
Click to view attachment
I can assure you that when parked next to this arctic white it looked very creamy to be sure.
Click to view attachment
Thanks for those images Jim, they perfectly illustrate the colour against other shades of white.
I believe that 356 is ivory, much more yellow in it. Light ivory is definitely creamy. But then again, i haven't seen one in fresh color in a long time.
Light Ivory is a really solid color. Great choice, I approve.
In fact, your whole build is amazing and we wish you lived closer!
In fact, your whole build is amazing and we wish you lived closer!
Funny, my current project is a 6 getting flares/resto mod. Customer wants pure white, not Ivory.
Light Ivory is the best color ......ever 
QUOTE(IronHillRestorations @ Dec 13 2018, 01:33 PM)
Funny, my current project is a 6 getting flares/resto mod. Customer wants pure white, not Ivory.
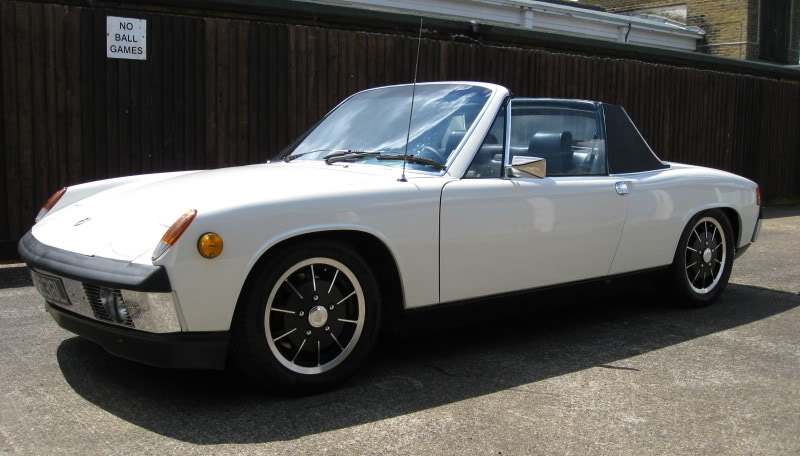
That will look like @Biggles car then. Seen below on my driveway. I think it's Grand Prix White.
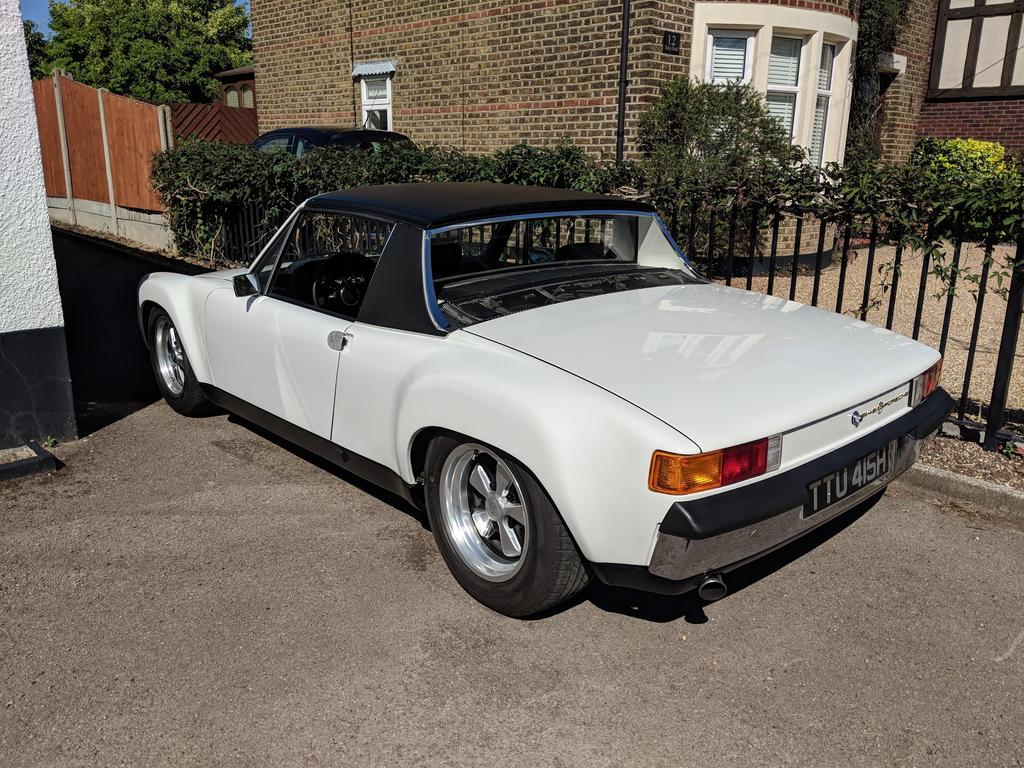
It's so difficult to capture in a photo as on my screen here it looks creamier than how my light ivory car was originally below.
QUOTE(Larmo63 @ Dec 13 2018, 02:56 AM)
Light Ivory is a really solid color. Great choice, I approve.
In fact, your whole build is amazing and we wish you lived closer!
Thanks Larmo, I'd love it if I was closer too. The thought of having my car over there for Rennsport Reunion or similar would be the ultimate!
Thanks for the update
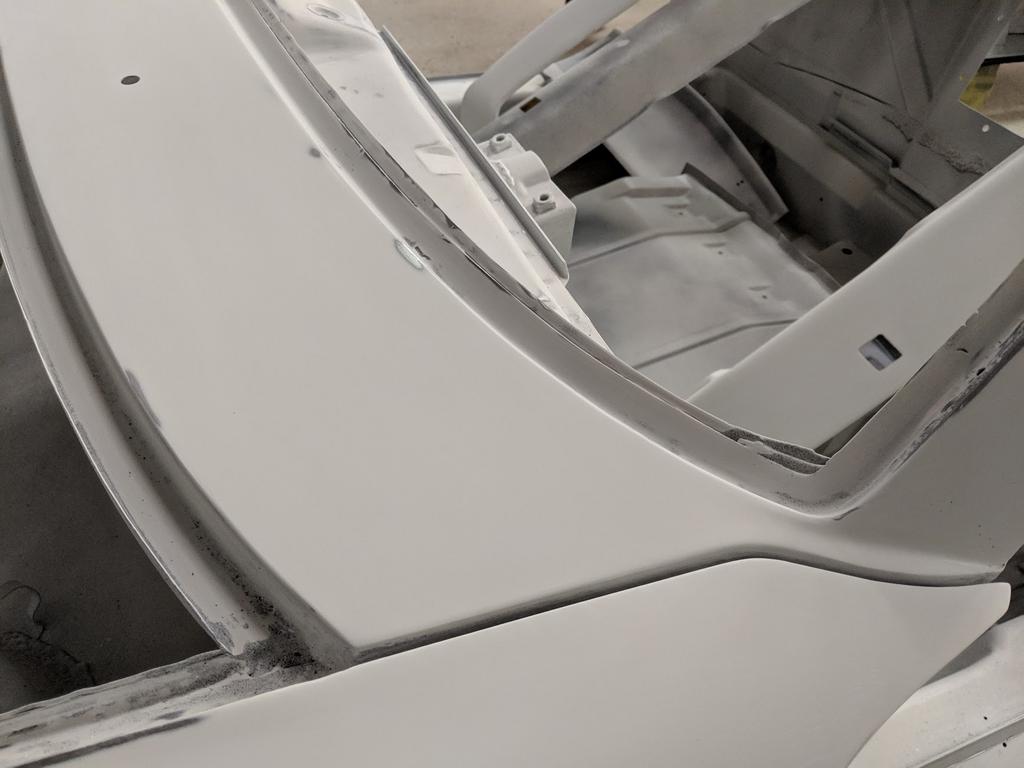
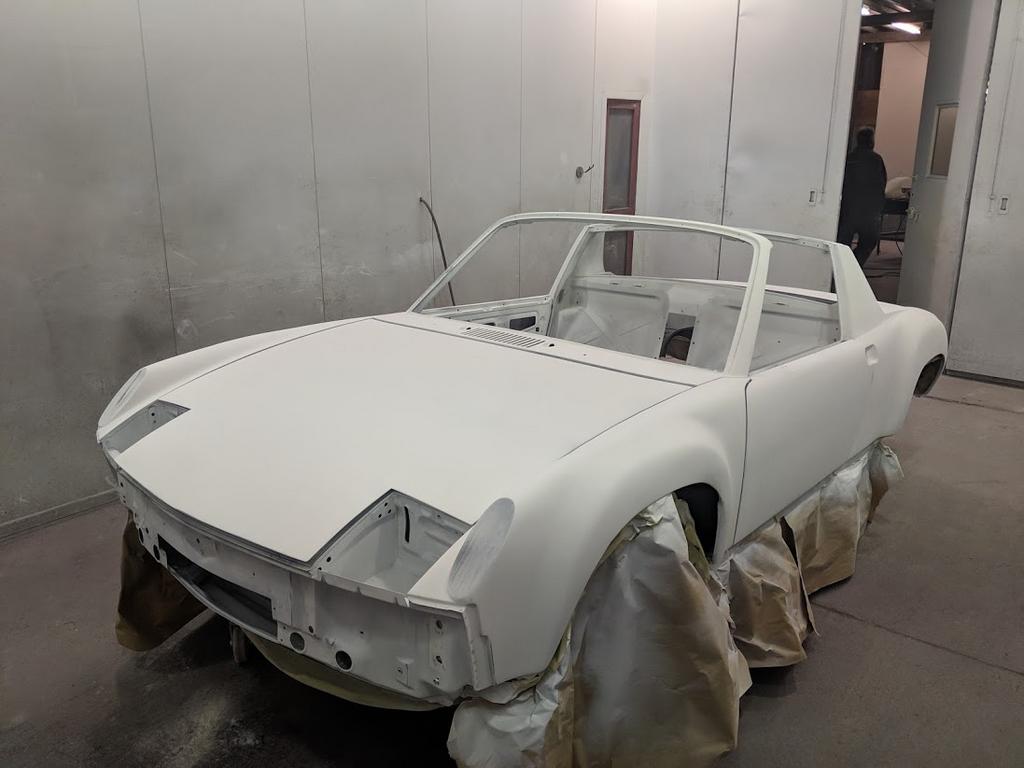
Today marked the last time I'll see the car in primer. Next week the interior, trunks and engine bay are going to be painted. So today was sign off day. The only thing outstanding now is to add the seam sealer as close to the factory look as possible. The painter has done a few test pieces and he's got it looking just right.

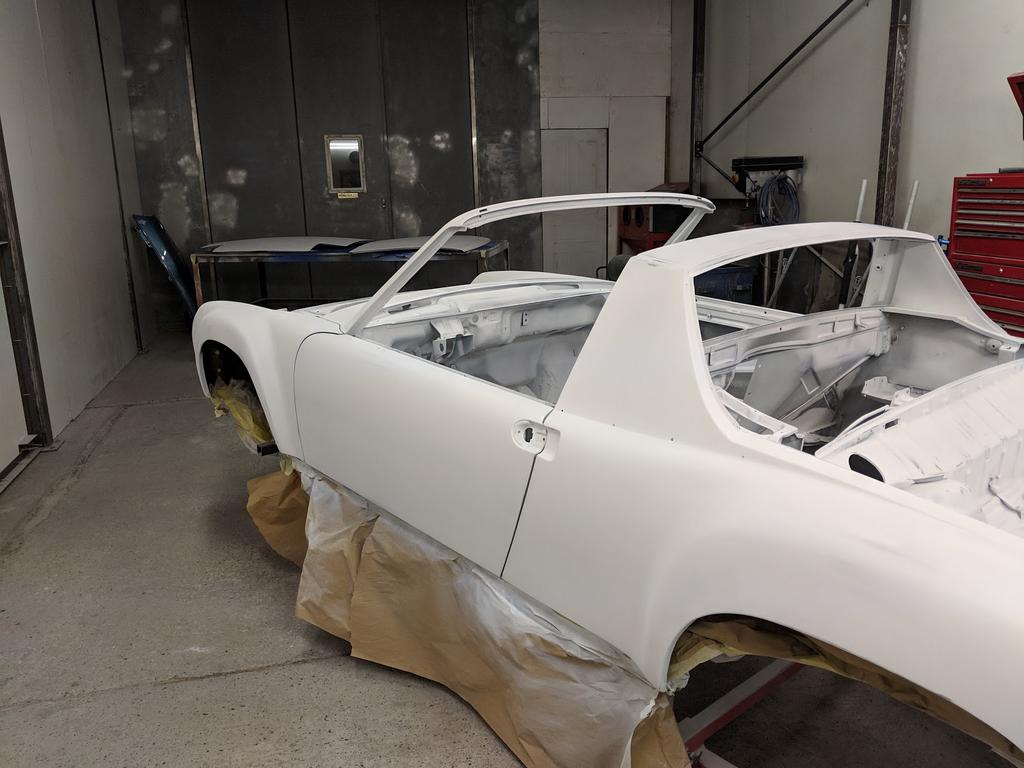
Really close now!
Next instalment we'll have some Light Ivory!
Really close now!
Next instalment we'll have some Light Ivory!
Awesome! ![popcorn[1].gif](http://www.914world.com/bbs2/style_emoticons/default/popcorn[1].gif)
Good to see the progress! Was just wondering the other day if your car had been sprayed yet.
Nice Gaps! Going to be spectacular!
Click to view attachment
Nice Gaps! Going to be spectacular!
Click to view attachment
With the imminent arrival of the car back from paint I really couldn't put off the job I've been dreading any longer. As it was the last thing to come out of the car so it'll be the first thing to install so now was the time to get on with it! 
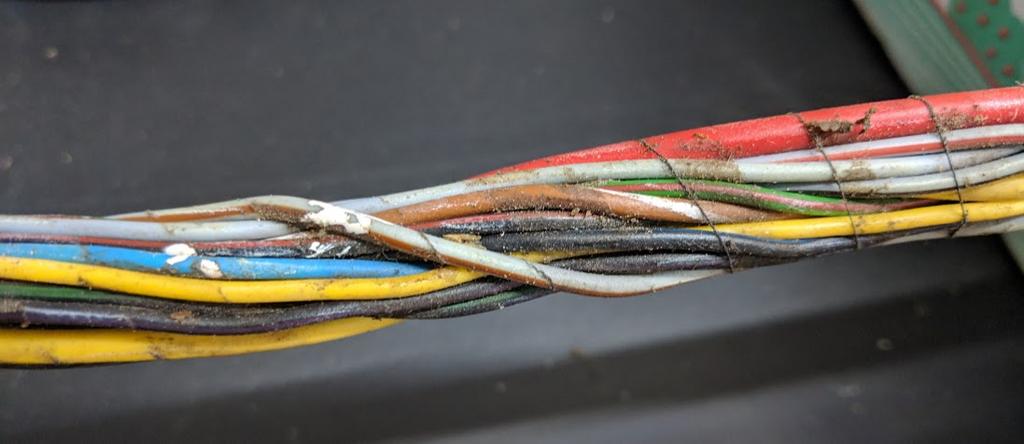
Let me introduce you to the rats nest that has been festering in the corner of my garage for the last 18 months.
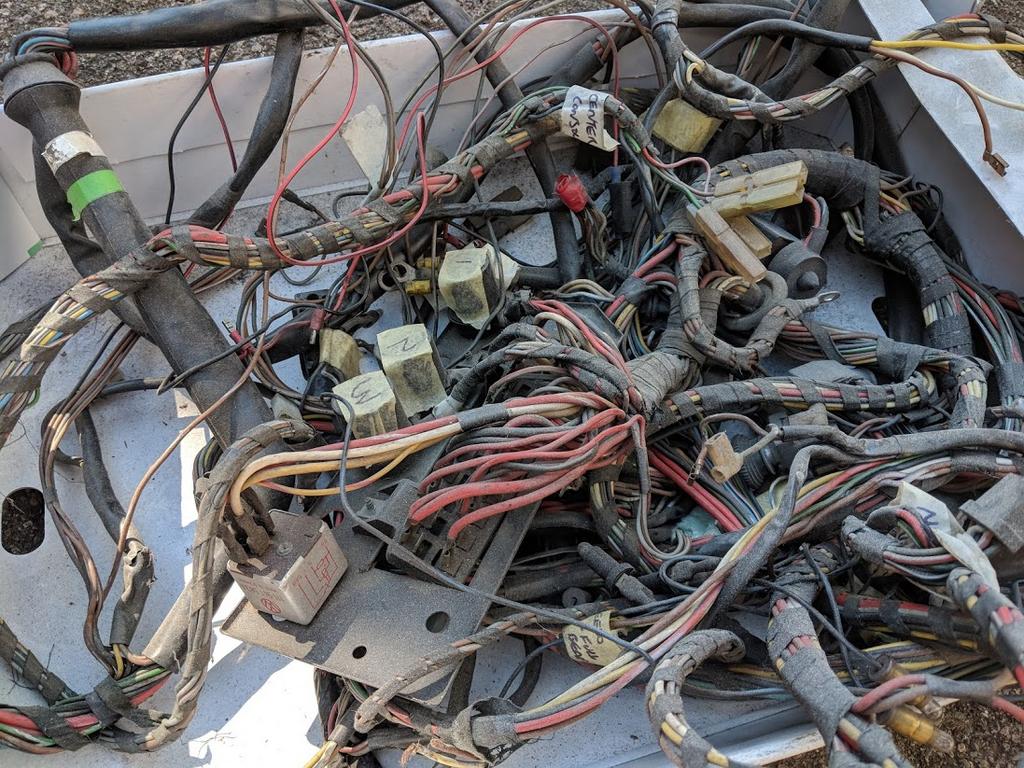
Despite and dreaming of magical electrical elves breaking into the garage one night and fixing it all this is what I had. It had seen plenty of abuse over the years but I was convinced if I took it a bit at a time I could raise it from the dead
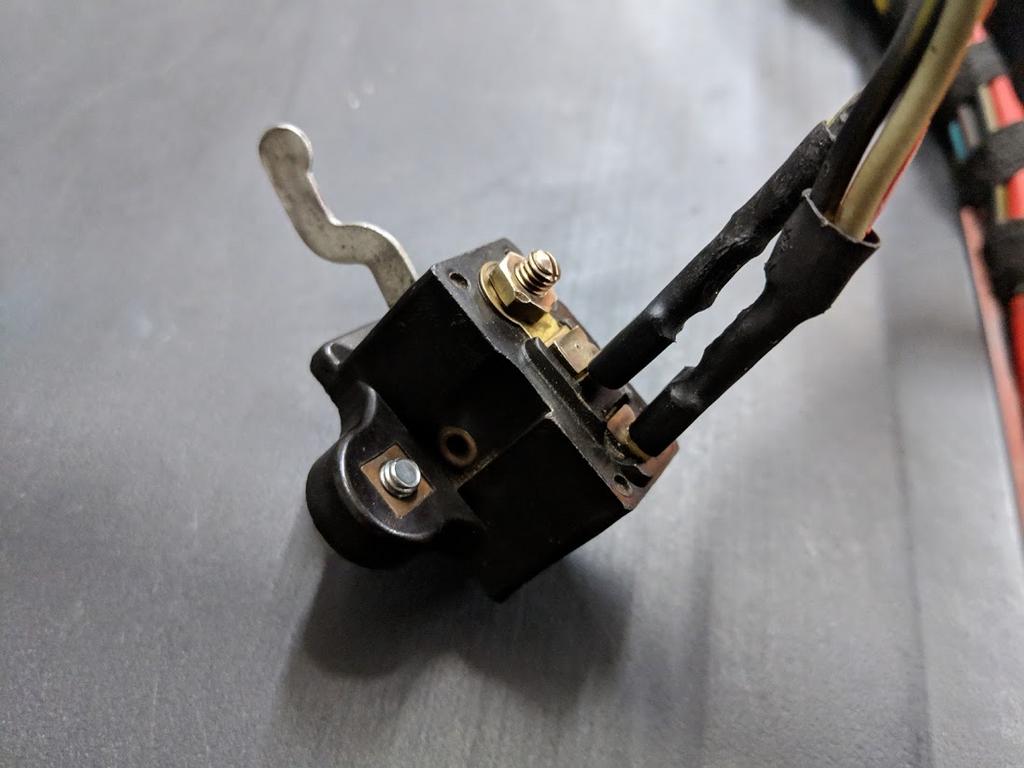
Closer inspection...
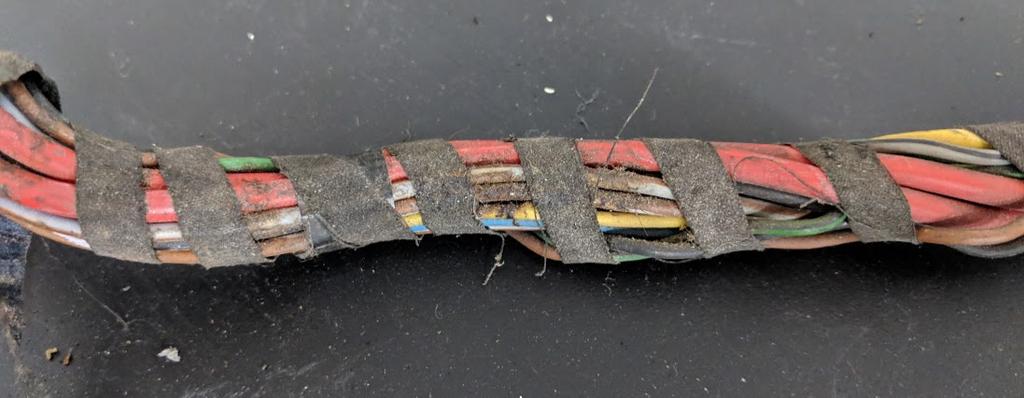

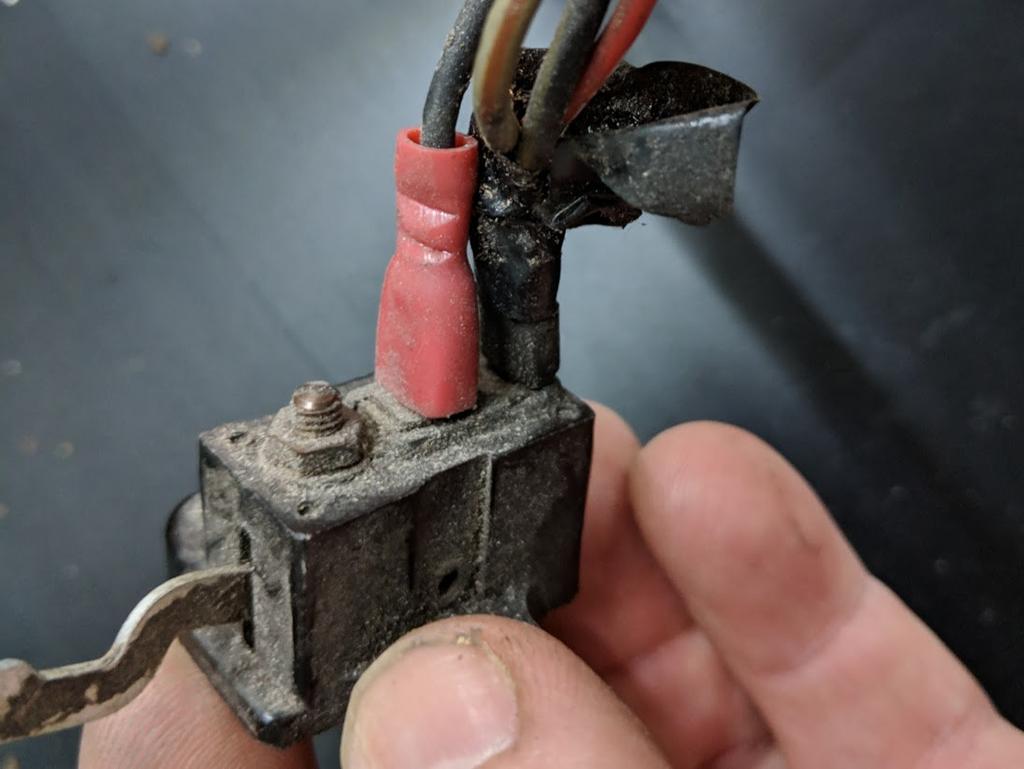
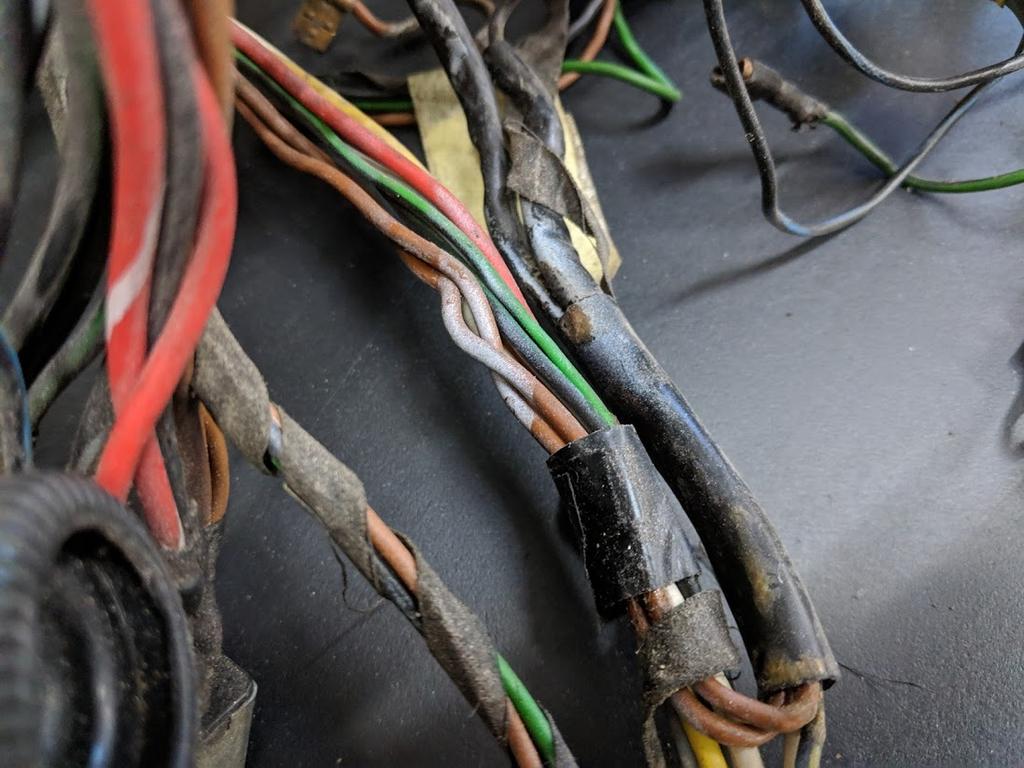
So plenty of dirt, grime, glue, overspray and previous dodgy repairs to deal with.
Let me introduce you to the rats nest that has been festering in the corner of my garage for the last 18 months.
Despite and dreaming of magical electrical elves breaking into the garage one night and fixing it all this is what I had. It had seen plenty of abuse over the years but I was convinced if I took it a bit at a time I could raise it from the dead
Closer inspection...
So plenty of dirt, grime, glue, overspray and previous dodgy repairs to deal with.
So out with the operating table
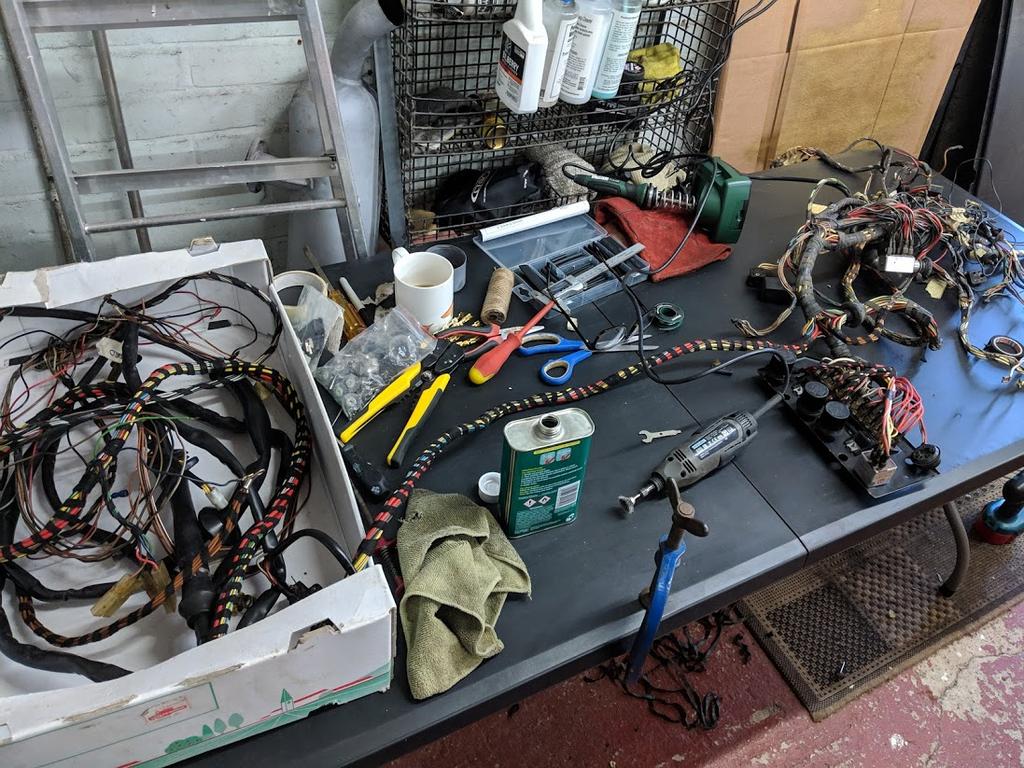
Slowly and wire by wire it started to come back to life and resemble something like a wiring loom. Sections were unwrapped, all connections and wires cleaned and all continuity tested.
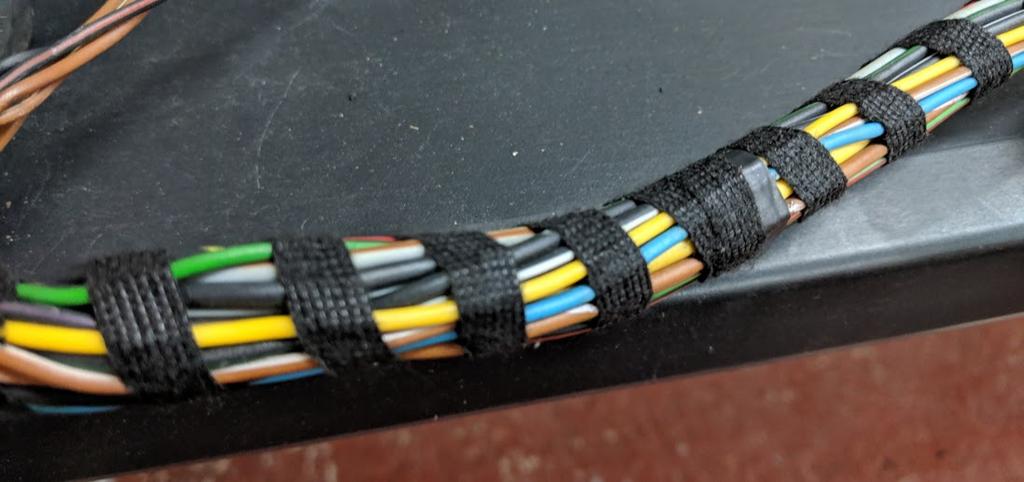
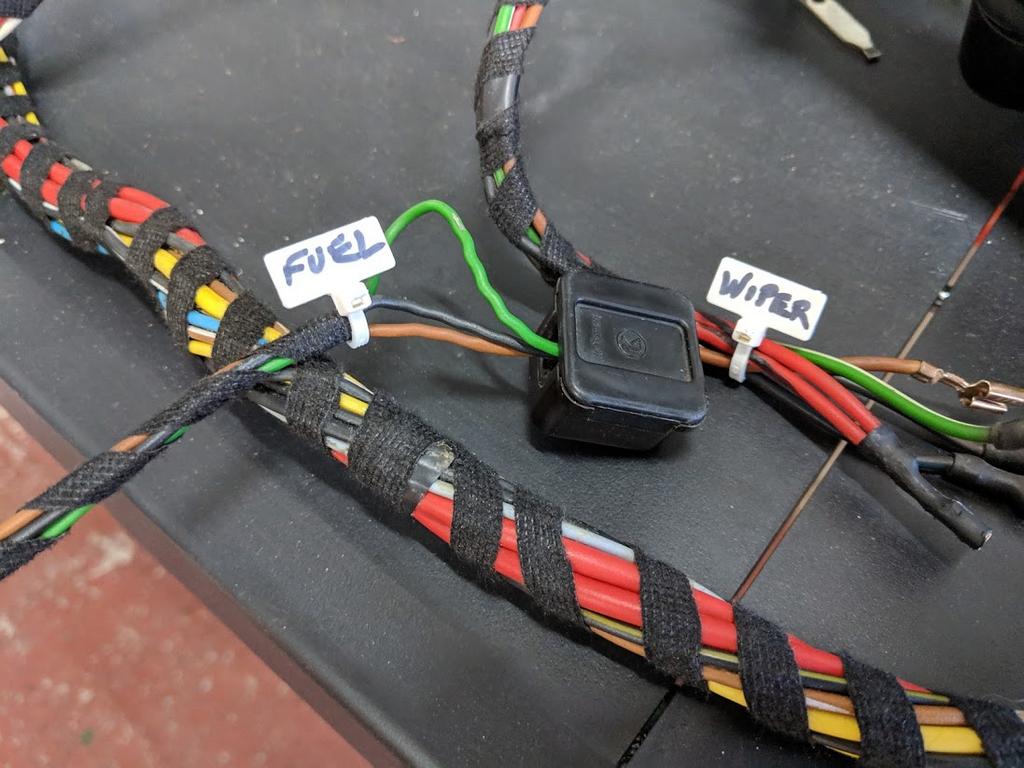

It's been a few long days but I finally have a loom fitting of the car it's about to go in. I've still got a few bits to sort out mainly due to a few missing grommets that need replacing but I'll do that once I've fitted the loom to the car.
I can finally tick it off the to do list!
Slowly and wire by wire it started to come back to life and resemble something like a wiring loom. Sections were unwrapped, all connections and wires cleaned and all continuity tested.
It's been a few long days but I finally have a loom fitting of the car it's about to go in. I've still got a few bits to sort out mainly due to a few missing grommets that need replacing but I'll do that once I've fitted the loom to the car.
I can finally tick it off the to do list!
Great job Stephen! Find any wires that need replacement along the way?
Your wiring harness "re-do" does look great.
Well done!
Well done!
QUOTE(TravisNeff @ Jan 17 2019, 08:37 PM)
Great job Stephen! Find any wires that need replacement along the way?
Thanks, fortunately not much. Someone had hacked in the rear numberplate lights with speaker wire so that needs replacing. I'm just waiting for the correct colour wire to arrive to fix that. Other than that it was just a big clean up job really and replacing incorrect modern terminals with as close to OEM as possible.
Luckily I have a new engine harness thanks to Perry so I didn't have to worry about that.
I like those tabs you used to indicate function.
What cleaner did you use on the wire?
Does anyone know of some good photos of a complete wire harness that would indicate which areas need loom tube or just tape? My harness is fairly thrashed.
I opened the box two nights ago to start rehab on my harness, this is giving me the motivation to power through.
Looks great.
QUOTE(djway @ Jan 17 2019, 10:45 PM)
I like those tabs you used to indicate function.
What cleaner did you use on the wire?
Does anyone know of some good photos of a complete wire harness that would indicate which areas need loom tube or just tape? My harness is fairly thrashed.
I opened the box two nights ago to start rehab on my harness, this is giving me the motivation to power through.
Looks great.
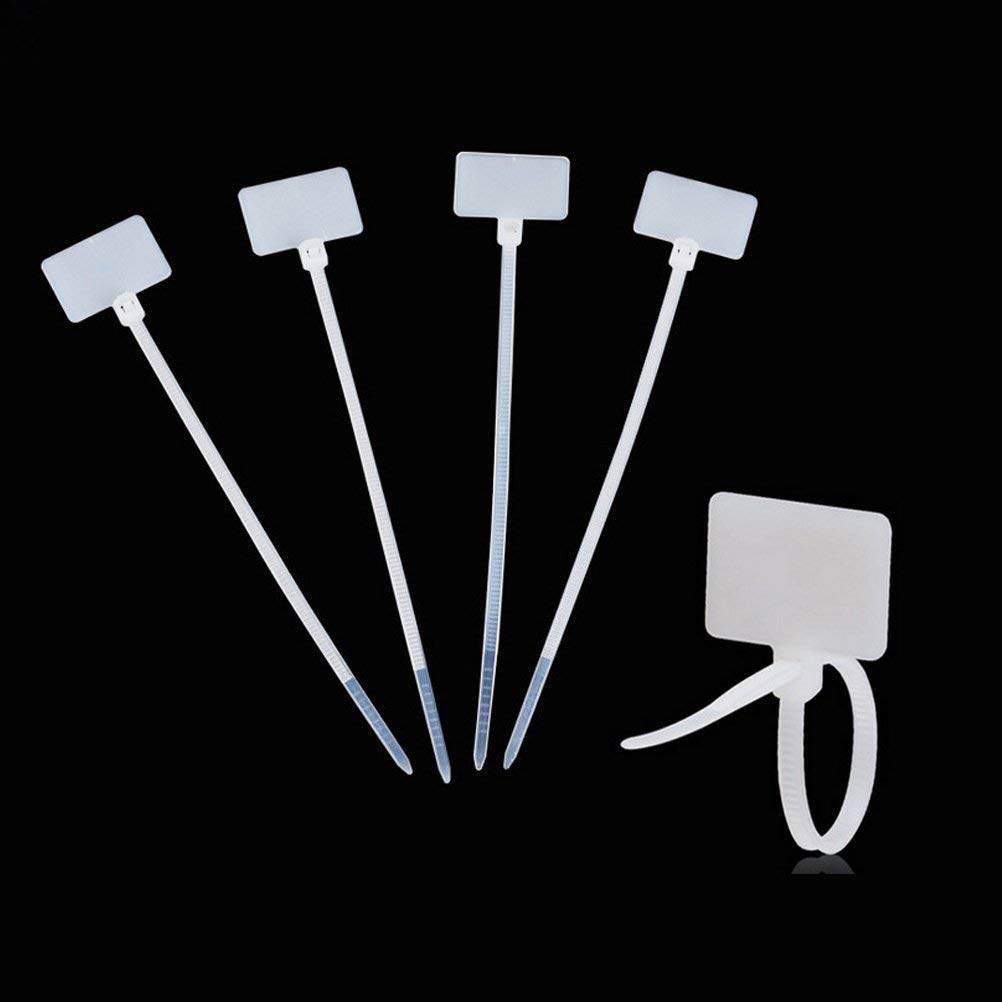
I saw the zip tags on ebay, just a couple of ££ and have proved handy. I need to get a finer marker though as they're quite small and writing on them is difficult.
I used a sparing amount of thinners on a cloth to remove the grime and paint. The dremel with the wire wheel attachment cleaned up the spade terminal to look as new in seconds.
QUOTE(defianty @ Jan 18 2019, 12:31 AM)
QUOTE(djway @ Jan 17 2019, 10:45 PM)
I like those tabs you used to indicate function.
What cleaner did you use on the wire?
Does anyone know of some good photos of a complete wire harness that would indicate which areas need loom tube or just tape? My harness is fairly thrashed.
I opened the box two nights ago to start rehab on my harness, this is giving me the motivation to power through.
Looks great.
I saw the zip tags on ebay, just a couple of ££ and have proved handy. I need to get a finer marker though as they're quite small and writing on them is difficult.
I used a sparing amount of thinners on a cloth to remove the grime and paint. The dremel with the wire wheel attachment cleaned up the spade terminal to look as new in seconds.
Mineral spirits, turpentine, acetone or? Thanks
Xylene based paint thinners.
QUOTE(defianty @ Jan 18 2019, 01:31 AM)
QUOTE(djway @ Jan 17 2019, 10:45 PM)
I like those tabs you used to indicate function.
What cleaner did you use on the wire?
Does anyone know of some good photos of a complete wire harness that would indicate which areas need loom tube or just tape? My harness is fairly thrashed.
I opened the box two nights ago to start rehab on my harness, this is giving me the motivation to power through.
Looks great.
I saw the zip tags on ebay, just a couple of ££ and have proved handy. I need to get a finer marker though as they're quite small and writing on them is difficult.
I bought my zip tags on Amazon: https://www.amazon.com/gp/product/B0153CAU2...=UTF8&psc=1
QUOTE(bbrock @ Jan 18 2019, 11:11 AM)
QUOTE(defianty @ Jan 18 2019, 01:31 AM)
QUOTE(djway @ Jan 17 2019, 10:45 PM)
I like those tabs you used to indicate function.
What cleaner did you use on the wire?
Does anyone know of some good photos of a complete wire harness that would indicate which areas need loom tube or just tape? My harness is fairly thrashed.
I opened the box two nights ago to start rehab on my harness, this is giving me the motivation to power through.
Looks great.
I saw the zip tags on ebay, just a couple of ££ and have proved handy. I need to get a finer marker though as they're quite small and writing on them is difficult.
I bought my zip tags on Amazon: https://www.amazon.com/gp/product/B0153CAU2...=UTF8&psc=1
I jut added to my cart. Thanks
QUOTE(defianty @ Jan 18 2019, 02:25 AM)
Xylene based paint thinners.
Thanks
Ordered thinner and tabs
Upon research Xylene and Toluene are basically the same but the xylene evaporates slower. Both should work but xylene should be easier as it evaporates slower and may be better on leftover adhesive.
Thanks for the inspiration
A day of mixed feelings today.
When I got up this morning I was so excited to see the car with some colour on it. The drive over to the painter seemed to take forever. When I arrived the car didn't looks as I'd imagined it too, in fact it looked exactly how I didn't want it to look and I must admit I felt sick to my stomach.
At first glance I simply didn't like the colour, it looked so creamy and nothing like I remembered. We immediately got the spray outs that were done and compared them - perfect match. I then realised the lighting was awful and I needed to see the car in daylight. After moving a rather nice early 911 out of the way we wheeled my car out into the light.
Outside the colour looked much better and indistinguishable from a sample of the original paint.
Months of build up and I'm now at home hoping I've chosen the correct colour. Not how I expected to feel.
Woohoo!  I can imagine the sick feeling in your stomach when you first thought the car was the wrong color. Glad to hear it worked out! Looks wonderful. Big Day.
I can imagine the sick feeling in your stomach when you first thought the car was the wrong color. Glad to hear it worked out! Looks wonderful. Big Day.
This is a "lo-fi" version of our main content. To view the full version with more information, formatting and images, please click here.