billh1963
Aug 13 2018, 08:22 AM
QUOTE(Philip W. @ Aug 13 2018, 10:17 AM)

making my final list of small stuff that need to be acquired to finish up( i'm sure other stuff will come up)
1. new accelerator cable - where can i get one fast?, new rear trunk insulation pad,
- engine compartment sound pad -
2. period correct radio - coming soon from 914sixer
3. front bumper- coming in from Chrome this week
4. install window triangle seal , ugh
5. run wires for the cylinder head tem gauge i bought
6. interior installation
7. figure out how to adjust drivers door striker to get door to line up, when latched its still out by 1/8" - passenger side is perfect.
8. Install motor!
what am i forgetting? - rear targa trim pieces- small upper side piece and the back curved trim part.
touch ups. ,
I can't wait to see the car at Okteenerest...it's going to look stunning!
DRPHIL914
Aug 13 2018, 08:32 AM
it took 2 days to pull the motor, interior and other trim and bits out, tank etc etc, and weeks to put back together! I wish i had more time. I will have to go back later and hit a few thinks like recover the original back pads, and insulate inside the doors, and touch up some areas like the door jams, but it will be 90% there( i hope)
I just hope the motor install goes smoothly. Its really close to being able to install it- i need to get the alternator harness this week and order a new accelerator cable- that was unexpected, but the outer sheath pulled out of the metal end at the firewall(other wise it is fine) and i don't know if i can get the end in it and re-crimp it.
I am really considering trailering it not driving this year- between road grime and bugs ugh- i didn't used to care about that ! I knew that would happen!- if i sell my Boxster this weekend, maybe i can find a driver project to beat around in -
DRPHIL914
Aug 14 2018, 09:17 PM
bumper mounted! not a perfect fit, but that will have to be adjusted later. new 914rubber bumper guard.
Shadowfax
Aug 14 2018, 09:37 PM
You’re making great progress! Car looks amazing so far. The new door handles make me a little envious

Rear bumper looks good. Did you use the rubber washers? I bought 10 from 914Rubber and am curious where they go. They weren’t present when I removed the old bumper tops.
DRPHIL914
Aug 14 2018, 09:53 PM
QUOTE(Shadowfax @ Aug 14 2018, 11:37 PM)
You’re making great progress! Car looks amazing so far. The new door handles make me a little envious
Rear bumper looks good. Did you use the rubber washers? I bought 10 from 914Rubber and am curious where they go. They weren’t present when I removed the old bumper tops.
i did not use those, not sure either. my adjustment later will be to adjust the mount holes, and move the bumper about a 1/8” to right. what is interesting is my other bumper fit perfect and didnt have to pull it in with the bolts to get it to line up properly like this one. for one thing 45 year old cars are not perfectly square or straight, have to live with that and make it work.
Shadowfax
Aug 14 2018, 10:09 PM
QUOTE(Philip W. @ Aug 14 2018, 10:53 PM)
what is interesting is my other bumper fit perfect and didnt have to pull it in with the bolts to get it to line up properly like this one. for one thing 45 year old cars are not perfectly square or straight, have to live with that and make it work.
Yep. Fit and finish didn’t seem to be a priority back then.
DRPHIL914
Aug 14 2018, 10:56 PM
it took me a long time to decide about the bumper back dating , about 2 years, but now when i look at it there is no doubt it looks so much better!
i am in it for about an extra $2000
DRPHIL914
Aug 15 2018, 06:14 AM
QUOTE(Shadowfax @ Aug 15 2018, 12:09 AM)
QUOTE(Philip W. @ Aug 14 2018, 10:53 PM)
what is interesting is my other bumper fit perfect and didnt have to pull it in with the bolts to get it to line up properly like this one. for one thing 45 year old cars are not perfectly square or straight, have to live with that and make it work.
Yep. Fit and finish didn’t seem to be a priority back then.
so Matt says the spacers are for helping fill in for irregularities in the top of the bumpers, some are not level or straight, have high or low spots so may need one or even 2 or 3 to level the topper- He sent me a few pics to show that- I didn't have to use any as my bumper is really straight and level . The only thing I have that is off a bit is the left side I have a larger gap between the bumper and the car than on the right. So either the car is not square(very possible ) or the bumper is not, it might have a slight twist? IDK, because the dogbone spacer is in there I have it bolted up tight. Another interesting issue here is that I have a different bumper that was going to be used. When the car was getting body work done and in primer I went up and test fitted that bumper and bolted it up and it was a perfect fit. This one when mounted up exactly the same way, is over to the left about 1/8", actually maybe 3/16" and that makes a big difference. The right side is tight to the body and the left side has a gap. If I was not on a time crunch here I would sell this bumper and sent off the one that was test fit in the first place and get it rechromed. I could put it on the car, it is an original never been redone with really nice finish , just a slight fade that you would expect in a 40 year old bumper, and a very small scratch not to metal but cant buff it out(and I have a buyer for it). So the other solution is to enlarge the mount holes to be able to move it over that 1/8'' , but even then the curve of this bumper on that side , the radius of it seems like its not as tight- cant decide. I think I will look at it and not be happy that its not the fit I want. I could modify the dog bone and trim it just a bit to let the bumper pull in a bit more on that side. suggestions are welcome here guys. For now it stays on, I don't have time to fool with it more. spent 3 hours last night trying to see what I could do to make it fit a bit more- as it was initinally the right side was so tight as I pulled it in it scraped some paint! SUCKS!! but that is covered up by the edge of the bumper but I will have to touch that up later. nothgin works like It should, well except my front bumper that was a perfect fit, but it needs to be redone as well. The look of the later chrome bumpers with the "tits" on is kind of growing on me - the other one I have had just rechromed is an early one and kind of looks bare with out those.
Well I didn't get the windows worked on last night, hope to tonight!! Mark and Matt have been helping me figure it out, I will try to detail what we do to get them to fit.
DRPHIL914
Aug 23 2018, 09:03 AM
no progress to report, posted the latest try on triangle window seal installation on the other thread, so far no go,
things that I need to do yet:
-window seals and window installation
- intall motor, gas tank front fresh air fan, alternator harness and new accerator cable, also the wiring for the new CHT gauge
- the whole interior
- targa bar vinyl and trim
-
I need a engine compartment back firewall sound pad-
running out of time!--------
DRPHIL914
Aug 25 2018, 05:44 PM
Today:
installed a new accelerator cable, and did the outer CV joint boots, got theses NOS from 914Sixer! Thanks! 4 holes not 6 so no more grease slinging! all repacked with new grease . AND got the new front chrome trim on the window , BUT NOT with out producing choice words ans a few scratches on my new paint- and i found out yes, you can put new clips in even with a window in place! due to poorly bent trim, we were very careful but i hd 3 brand new clips break or snap in half- this should not happen! there is no way they should be this brittle- my OEM ones that were 40 years old didnt even break taking the trim off!
914rubber, i think you can do better, and that is all i am saying about that!!(Forest Gump)
no i didnt get the motor in- lots of corrosion in the old alternator. took it out to put in new harness( new harness is awesome! thanks 914rubber) , so i ordered a new reman 75 amp unit that should be in by wednesday. might as well put in a whole new unit. turns out the old one was a 50 amp bus unit anyway
DRPHIL914
Aug 27 2018, 10:49 PM
new rear sway bar bushings yesterday,
tonight i went to work on the driver door again- first i decided to test a different seal. i pit the seal amd the wing vent glass on then lubed the track and slid it down from top, and then worked on gettimg that with it in the frame down into the door. this time i was able to get it in far enough that the glass did not hit the a-pillar and seal.
adjusted the height and angle of the glass, then installed the regulator mechanism and main glass. that was interesting, not as easy as it looks. but figured it out.
So the driver s door has seals and glass! now i await the targa trim chrome from Sunset Porsche. once this arrives i will do the new targa bar vinyl and trim. Layed out the carpet - tomorrow i will again fight the passenger door glass- i am waiting for the alternator and a few other bits before putting motor back in.
Mblizzard
Aug 28 2018, 06:02 AM
QUOTE(DRPHIL914 @ Aug 27 2018, 08:49 PM)
new rear sway bar bushings yesterday,
tonight i went to work on the driver door again- first i decided to test a different seal. i pit the seal amd the wing vent glass on then lubed the track and slid it down from top, and then worked on gettimg that with it in the frame down into the door. this time i was able to get it in far enough that the glass did not hit the a-pillar and seal.
adjusted the height and angle of the glass, then installed the regulator mechanism and main glass. that was interesting, not as easy as it looks. but figured it out.
So the driver s door has seals and glass! now i await the targa trim chrome from Sunset Porsche. once this arrives i will do the new targa bar vinyl and trim. Layed out the carpet - tomorrow i will again fight the passenger door glass- i am waiting for the alternator and a few other bits before putting motor back in.
That's a major victory!
DRPHIL914
Aug 28 2018, 06:20 AM
QUOTE(Mblizzard @ Aug 28 2018, 08:02 AM)
QUOTE(DRPHIL914 @ Aug 27 2018, 08:49 PM)
new rear sway bar bushings yesterday,
tonight i went to work on the driver door again- first i decided to test a different seal. i pit the seal amd the wing vent glass on then lubed the track and slid it down from top, and then worked on gettimg that with it in the frame down into the door. this time i was able to get it in far enough that the glass did not hit the a-pillar and seal.
adjusted the height and angle of the glass, then installed the regulator mechanism and main glass. that was interesting, not as easy as it looks. but figured it out.
So the driver s door has seals and glass! now i await the targa trim chrome from Sunset Porsche. once this arrives i will do the new targa bar vinyl and trim. Layed out the carpet - tomorrow i will again fight the passenger door glass- i am waiting for the alternator and a few other bits before putting motor back in.
That's a major victory!
Mike, you have no idea!, well maybe you do, you have been working on that megasquirt experiment lol!! well I will actually post a different thread, how and why this finally fell into place. I tried 3 different seals, and I will elaborate later. The seal in the window currently is not perfect either, but I did not have to modify it to get it in, but its not as tight in the back part as it should be, so there is that issue. I promised a complete and fair assessment of this seal and its comparison to oem and the 914rubber one I was fighting with for the past 2 weeks. This one is the URO one, and there are definitely things to be learned from how each of them fit or don't fit, and probably how to improve installation. Either way I now have one door ready for final adjustment and then the door panel and handles can be installed on this side.
is your car now running and ready to go Mike?? I hope to get the motor in the car and running this weekend, well I should rephrase that - I HAVE TO get the motor in and running this weekend!! (my wife will be out of town so I have a 3 day weekend to do nothing but work on this car !)
I do home my order from Sunset Porsche comes, I also have more goodies coming from 914rubber to help finish up a few things, like the fresh air box rebuild.
I bought a electric washer pump, so I am hoping to get that installed before the air box and the gas tank.
any advice on replacing the front stock swaybar drop link bushings?
billh1963
Aug 28 2018, 09:05 AM
Phil.....you changed your name. Why didn't you go for something unique like BACKCRACKER?


I almost didn't recognize you were posting
Mblizzard
Aug 28 2018, 09:16 AM
QUOTE(DRPHIL914 @ Aug 28 2018, 04:20 AM)
QUOTE(Mblizzard @ Aug 28 2018, 08:02 AM)
QUOTE(DRPHIL914 @ Aug 27 2018, 08:49 PM)
new rear sway bar bushings yesterday,
tonight i went to work on the driver door again- first i decided to test a different seal. i pit the seal amd the wing vent glass on then lubed the track and slid it down from top, and then worked on gettimg that with it in the frame down into the door. this time i was able to get it in far enough that the glass did not hit the a-pillar and seal.
adjusted the height and angle of the glass, then installed the regulator mechanism and main glass. that was interesting, not as easy as it looks. but figured it out.
So the driver s door has seals and glass! now i await the targa trim chrome from Sunset Porsche. once this arrives i will do the new targa bar vinyl and trim. Layed out the carpet - tomorrow i will again fight the passenger door glass- i am waiting for the alternator and a few other bits before putting motor back in.
That's a major victory!
Mike, you have no idea!, well maybe you do, you have been working on that megasquirt experiment lol!! well I will actually post a different thread, how and why this finally fell into place. I tried 3 different seals, and I will elaborate later. The seal in the window currently is not perfect either, but I did not have to modify it to get it in, but its not as tight in the back part as it should be, so there is that issue. I promised a complete and fair assessment of this seal and its comparison to oem and the 914rubber one I was fighting with for the past 2 weeks. This one is the URO one, and there are definitely things to be learned from how each of them fit or don't fit, and probably how to improve installation. Either way I now have one door ready for final adjustment and then the door panel and handles can be installed on this side.
is your car now running and ready to go Mike?? I hope to get the motor in the car and running this weekend, well I should rephrase that - I HAVE TO get the motor in and running this weekend!! (my wife will be out of town so I have a 3 day weekend to do nothing but work on this car !)
I do home my order from Sunset Porsche comes, I also have more goodies coming from 914rubber to help finish up a few things, like the fresh air box rebuild.
I bought a electric washer pump, so I am hoping to get that installed before the air box and the gas tank.
any advice on replacing the front stock swaybar drop link bushings?
The fronts are relatively easy. But for me, I have found that using a bit of grease and hand power and they go in easily.
If not, I recommend using a socket that you can rest the opening of the link on and inserting a bolt with a larger washer through the rubber bushing and the using a C clamp to force the bushing in. Something like this.
Click to view attachmentStruggled with my rear ones doing the heating and such but seems like brute force is the best way.
DRPHIL914
Aug 28 2018, 09:34 AM
QUOTE(billh1963 @ Aug 28 2018, 11:05 AM)
Phil.....you changed your name. Why didn't you go for something unique like BACKCRACKER?
I almost didn't recognize you were posting
too funny!! I could still change it , I just wanted to get rid of that space and then not have my name , - not very creative I know. - we already have "cracker" I guess that could be a double meaning, "backcracker"

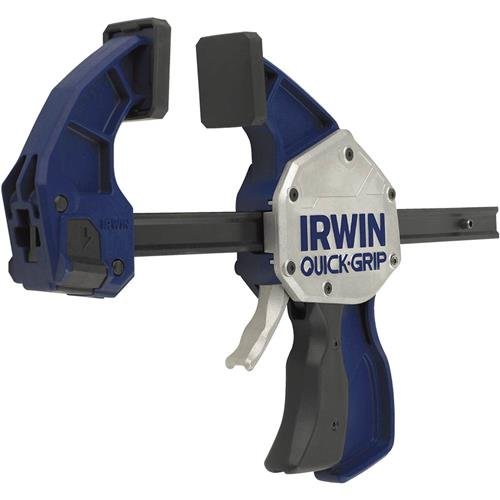
tomeric914
Aug 28 2018, 10:13 AM
QUOTE(Mblizzard @ Aug 28 2018, 11:16 AM)
The fronts are relatively easy. But for me, I have found that using a bit of grease and hand power and they go in easily.
If not, I recommend using a socket that you can rest the opening of the link on and inserting a bolt with a larger washer through the rubber bushing and the using a C clamp to force the bushing in. Something like this.
Click to view attachmentStruggled with my rear ones doing the heating and such but seems like brute force is the best way.

Irwin Quick-Grip is a little safer and easier IMHO. The one I use is capable of 300 lbs force.
DRPHIL914
Aug 28 2018, 07:44 PM
this arrived today, but i have to wait for my new back plate to get this installed- i hope it comes soon!
DRPHIL914
Aug 28 2018, 07:57 PM
old vs new- upgrade from 50 amp to 75amp,
they recommend a new VR , is the NOS one i just got from 914sixer.com
simonjb
Aug 28 2018, 08:37 PM
Looking really really nice !
DRPHIL914
Aug 29 2018, 04:35 PM
carpets! getting ready to install after putting the vinyl in place
DRPHIL914
Aug 29 2018, 05:50 PM
never run before 16x6”
914_7T3
Aug 29 2018, 07:25 PM
QUOTE(Philip W. @ Jul 9 2018, 08:48 AM)
do i dare put the PORSCHE script on the side again?
yes it was there before this, BUT .... not sure i want to do that....
i have brand new rockers and a set of nice redone ones that Mike painted, then need a sand down and one more coat, i could do either way, even thought about body color rockers but i like the look of the black rockers better.-
then also is the front valance- i have a LE style fiberglass one that was in Jim Hoylands car, but it was damaged in shipping , so i got a very nice stock metal pan that is repaintes black- SO Le was repaired and is in primer if i dont put it on i will resell it, ugh decisions!!
although we have been PMing regarding parts of late, not sure how I missed the part where the car came out of paint. She looks really great.

DRPHIL914
Aug 29 2018, 09:43 PM
QUOTE(914_7T3 @ Aug 29 2018, 09:25 PM)
QUOTE(Philip W. @ Jul 9 2018, 08:48 AM)
do i dare put the PORSCHE script on the side again?
yes it was there before this, BUT .... not sure i want to do that....
i have brand new rockers and a set of nice redone ones that Mike painted, then need a sand down and one more coat, i could do either way, even thought about body color rockers but i like the look of the black rockers better.-
then also is the front valance- i have a LE style fiberglass one that was in Jim Hoylands car, but it was damaged in shipping , so i got a very nice stock metal pan that is repaintes black- SO Le was repaired and is in primer if i dont put it on i will resell it, ugh decisions!!
although we have been PMing regarding parts of late, not sure how I missed the part where the car came out of paint. She looks really great.
yea, got her back in the garage about a month ago now (the second time)
and have been fighting the window seals and such. took your advice and sourced some onsale parts from Sunset Porsche, a few more from local dealer and i have one last order coming from 914rubber and one from Bruce Stone coming saturday. like you ive had a few things extra to do that i didnt plan on like new alternator. you will be glad you are doing those brakes! i did all of that stuff a couple yeara ago so i am glad that my brakes ans suspension are all sorted! one leas thing to worry about right now! i also just cleaned up my fresh air box, put in new seals , made sure circuits were good , resistors etc. that will go back in saturday too. keep posting , i enjoy watching some of the other builds like yours.
DRPHIL914
Aug 29 2018, 09:51 PM
took a break from it on Saturday and went out with our friends to Hiltons Head to the Salty dog Cafe, and marina for a evening dinner and cruise out on the intercoastal . it was high tide and a beautiful sunset and the harvest moon(sturgeon moon i think). This is moon and reflexion off the water next to Harbor Town light house.
DRPHIL914
Aug 29 2018, 10:03 PM
also arriving today were my oem Hella license plate lights from Kevin Powers , thanks Kevin!! and the turn signal euro conversion from Martin!!, and i picked up trim clips and the small top end targa bar trims from Hilton head porsche.
I still need a rear trunk insullation pad and a engine firewall sound pad!
914_7T3
Aug 29 2018, 10:27 PM
QUOTE(DRPHIL914 @ Aug 29 2018, 09:03 PM)
also arriving today were my oem Hella license plate lights from Kevin Powers , thanks Kevin!! and the turn signal euro conversion from Martin!!, and i picked up trim clips and the small top end targa bar trims from Hilton head porsche.
I still need a rear trunk insullation pad and a engine firewall sound pad!
Not sure that I want to mess up the engine bay by reinstalling my original firewall pad. Not sure what the solution is, but that will be for later.
DRPHIL914
Aug 31 2018, 10:27 PM
new alternator with new wiring, new back plate
DRPHIL914
Aug 31 2018, 10:31 PM
my newly powdercoated air box from Broce Stone came today, here is a test fit
Montreal914
Aug 31 2018, 10:33 PM
QUOTE(DRPHIL914 @ Aug 29 2018, 04:50 PM)
never run before 16x6”
Nice! What size tire is that?
DRPHIL914
Aug 31 2018, 10:35 PM
what is this screw down in middle of the picture? looks like you would mount something there? am i missing something?
DRPHIL914
Aug 31 2018, 10:37 PM
cleaned up after instal of the belt and tightening down the alternator.
how do i know if this belt is pulled tight enough??
DRPHIL914
Aug 31 2018, 10:41 PM
QUOTE(Montreal914 @ Sep 1 2018, 12:33 AM)
QUOTE(DRPHIL914 @ Aug 29 2018, 04:50 PM)
never run before 16x6”
Nice! What size tire is that?
these are Bridgesone Potenza 205/55 16, . they are a wide tire at about 8.5” wide - i had them on 7” rims but it was just too tight, so had the tires removed feomthe 7’a and put on these 6” rims ive had for a couple years still boxed up.
Johny Blackstain
Sep 1 2018, 07:46 AM
Wow Phil, looking great!


DRPHIL914
Sep 1 2018, 07:49 AM
QUOTE(Johny Blackstain @ Sep 1 2018, 09:46 AM)
Wow Phil, looking great!
thanks! getting close- hope to get the interior in today, maybe motor too, will see.
are you coming down from Va this year to Okteenerfest? have not seen you since Townsend TN- get that Six out of the garage and come on down!
Johny Blackstain
Sep 1 2018, 08:02 AM
QUOTE(DRPHIL914 @ Sep 1 2018, 09:49 AM)
QUOTE(Johny Blackstain @ Sep 1 2018, 09:46 AM)
Wow Phil, looking great!
thanks! getting close- hope to get the interior in today, maybe motor too, will see.
are you coming down from Va this year to Okteenerfest? have not seen you since Townsend TN- get that Six out of the garage and come on down!
Love to but I've got family coming up from Argentina to visit so maybe next year

DRPHIL914
Sep 1 2018, 02:17 PM
bo help showed up for engine install so i went to work on the interior—-
DRPHIL914
Sep 1 2018, 02:18 PM
new german loop carpet, center console in, rugs in
DRPHIL914
Sep 1 2018, 02:20 PM
more
DRPHIL914
Sep 1 2018, 02:22 PM
morerr
DRPHIL914
Sep 1 2018, 02:26 PM
one more
DRPHIL914
Sep 1 2018, 03:05 PM
carpets fit pretty good, Mark did a good job- slight alteration on the drivers side around the e-brake area, but turned out fine. i used up a huge can of spray stuff heavy duty, have to go back and get the stuff for the sail panel trim- Auto Zone does not carry the 3M 90, so i have to check out Advanced-
mepstein
Sep 1 2018, 03:17 PM
QUOTE(DRPHIL914 @ Sep 1 2018, 05:05 PM)
carpets fit pretty good, Mark did a good job- slight alteration on the drivers side around the e-brake area, but turned out fine. i used up a huge can of spray stuff heavy duty, have to go back and get the stuff for the sail panel trim- Auto Zone does not carry the 3M 90, so i have to check out Advanced-
The big box hardware stores usually have it.
DRPHIL914
Sep 1 2018, 05:51 PM
what order in reassembly do the targa bar pieces and interior trim fo in?
i have the seat belts back in, next is the side trim then back pad?
i have to put on the new sail panel teim and targa vinyl - so that first, then the bolster, anything else i am missing?
raynekat
Sep 2 2018, 02:26 AM
QUOTE(Philip W. @ Aug 13 2018, 07:17 AM)
making my final list of small stuff that need to be acquired to finish up( i'm sure other stuff will come up)
1. new accelerator cable - where can i get one fast?, new rear trunk insulation pad,
- engine compartment sound pad -
2. period correct radio - coming soon from 914sixer
3. front bumper- coming in from Chrome this week
4. install window triangle seal , ugh
5. run wires for the cylinder head tem gauge i bought
6. interior installation
7. figure out how to adjust drivers door striker to get door to line up, when latched its still out by 1/8" - passenger side is perfect.
8. Install motor!
what am i forgetting? - rear targa trim pieces- small upper side piece and the back curved trim part.
touch ups. ,
Did you ever figure out your driver's door being out by 1/8" (your #7 on the list above)?
I had a "ah ha" moment when adjusting mine.
On the driver side, I had the same thing as you....couldn't get the door in far enough.
Although I had the receiver in the door jam moved as far to the inside as possible.
I went to the passenger side and it was perfect....WTH?
Then I started playing with how the latches work when you closed the door.
On the passenger side, I had two obvious clicks or detents.
On the driver side, I had only one.
I wasn't getting the door in far enough to reach the second detent on the driver side.
So the lightbulb finally went off.
My receiver was too far in to allow the latch to get to the 2nd detent.
So I moved the receiver out (instead of in) and voila!
I was able to get to the 2nd click or detent, and the driver's door was finally aligned and flush.
Crazy but sometimes ya gotta think outside of the box.
How are those side windows coming?
I spent all of yesterday swapping over all of the parts that get glued/bonded to the window onto a "new" side window I received in the mail.
Ready to finish out my doors in the morning.
raynekat
Sep 2 2018, 02:31 AM
QUOTE(DRPHIL914 @ Sep 1 2018, 04:51 PM)
what order in reassembly do the targa bar pieces and interior trim fo in?
i have the seat belts back in, next is the side trim then back pad?
i have to put on the new sail panel teim and targa vinyl - so that first, then the bolster, anything else i am missing?
Sounds like you pretty much have the correct order figured out.
Go slow on that sail panel/targa vinyl.
Measure twice cut once for sure.
On all this stuff including the carpeting, I used a contact spray adhesive vs a spray glue.
This contact adhesive really holds things down, but you get one chance to place it right.
So alignment aids (like tape) really help.
Also having an assistant for the long piece that goes across the top was essential for me.
The side sail pieces you can do yourself.
Place the trim beforehand so you can see where that side sail vinyl needs to go so that it's covered up by the trim.
Then take the trim off and get that vinyl in there.
Good luck.
DRPHIL914
Sep 2 2018, 09:10 AM
QUOTE(raynekat @ Sep 2 2018, 04:26 AM)
QUOTE(Philip W. @ Aug 13 2018, 07:17 AM)
making my final list of small stuff that need to be acquired to finish up( i'm sure other stuff will come up)
1. new accelerator cable - where can i get one fast?, new rear trunk insulation pad,
- engine compartment sound pad -
2. period correct radio - coming soon from 914sixer
3. front bumper- coming in from Chrome this week
4. install window triangle seal , ugh
5. run wires for the cylinder head tem gauge i bought
6. interior installation
7. figure out how to adjust drivers door striker to get door to line up, when latched its still out by 1/8" - passenger side is perfect.
8. Install motor!
what am i forgetting? - rear targa trim pieces- small upper side piece and the back curved trim part.
touch ups. ,
Did you ever figure out your driver's door being out by 1/8" (your #7 on the list above)?
I had a "ah ha" moment when adjusting mine.
On the driver side, I had the same thing as you....couldn't get the door in far enough.
Although I had the receiver in the door jam moved as far to the inside as possible.
I went to the passenger side and it was perfect....WTH?
Then I started playing with how the latches work when you closed the door.
On the passenger side, I had two obvious clicks or detents.
On the driver side, I had only one.
I wasn't getting the door in far enough to reach the second detent on the driver side.
So the lightbulb finally went off.
My receiver was too far in to allow the latch to get to the 2nd detent.
So I moved the receiver out (instead of in) and voila!
I was able to get to the 2nd click or detent, and the driver's door was finally aligned and flush.
Crazy but sometimes ya gotta think outside of the box.
How are those side windows coming?
I spent all of yesterday swapping over all of the parts that get glued/bonded to the window onto a "new" side window I received in the mail.
Ready to finish out my doors in the morning.
drivers side is all in and works but does not close flush, might try your method and check the 2 clicks,
going to fight the passenger side later today, once i get the air box and gas tank in first!
got the carpet in , close to getting my back pad and seats .
DRPHIL914
Sep 2 2018, 04:24 PM
success! the air box is in
tested the fan works great but my controller may need to be replaced but not now, i took apart the blower and did new seals, cleaned it out and checked the resistors too, put it all back together and new seals between upper ans lower box, and at the top screen
DRPHIL914
Sep 2 2018, 04:26 PM
motor and transmission are in and CV’s hooked up! my friend Jim , the “way over-qualified UPS driver that is a certified air craft mechanic came over and helped and did the safety wire for me too!
DRPHIL914
Sep 2 2018, 04:29 PM
there is plenty to do yet but the goal is to finish off under the car now, so i can drop it down and tomorrow install all of the fuel and spark related stuff.
still waiting on some targa trim pieces, but i have plenty to do before that comes this week
This is a "lo-fi" version of our main content. To view the full version with more information, formatting and images, please
click here.