Help - Search - Members - Calendar
Full Version: Cary's 73 1.7 Rustoration Thread
914World.com > The 914 Forums > 914World Garage
Pages: 1, 2, 3, 4, 5, 6, 7, 8, 9, 10, 11, 12, 13, 14, 15, 16, 17, 18, 19, 20, 21, 22, 23
gifted914
Great SUPERINLAW.
welder.gif welder.gif welder.gif welder.gif welder.gif welder.gif welder.gif
cary
It feels like its taking forever ..............................
Thanks for the words of encouragement.

I'm hoping once both longs are attached things will pick up. I spend a lot of time checking and double checking the door gaps and the windshield to targa bar gap.

I don't remember if I mentioned that this car was a front clip repair. Which aligned well. But the workmanship was poor.

It's getting a little cold here in PDX. Next project is to replace a couple sections in the wood stove pipe.
cary
Here's the next piece we need to recreate. McMark called it the torque box.
The new outer long doesn't come with that piece.
In flipping thru the pages in the Body 914 manual. It looks like its a seperate piece.
Here's the new outer long from RD.
Click to view attachment
You'll see where the block and c-clamp is attached doesn't have the torque box.
Now you see the NOS door pillar. It doesn't contain the bottom of the torque box either.
Click to view attachment
But here's a picture with the door off.
Click to view attachment
Here's where we need to get too.
Click to view attachment
cary
As I wrote the last post I'm thinking I have a good piece for the drivers side that I took off of the long I bought from Perry @ 914 Network.
When I get to the shop I'll have to do some digging.

Nothing has been tossed yet.
cary
Post #123 & #124 show the piece I took off of Perry's drivers long.
Looks like it will need some patching.
Or maybe I'll make a new one and save this one for a pattern. Hmmm.
Click to view attachment
Here's the piece I'm looking for.
Click to view attachment
It has to be created like the factory piece so it will fit under the RD frame stiffener.

But after spending an entire day tinkering with the door alignment. This is one of the most important attachment points on the car. Very critical in the upper 1/2 of the door alignment.

I think I'll some research on the PET to see if the part exists.
Off I go to the shop ....................

cary
I stand corrected. The NOS part picture is the complete part.
The blue car looks like it has an RD 346 frame stiffener installed.
The primered car is Jeff Hail's 1st. class metal work.

It's interesting how these pieces are layered together.
If you would want to take this apart in the future you can't put any welds behind that torque box at the bottom of the a-pillar. Hmmmm.
cary
Time to fire up the heat...

Click to view attachment

Dr's ready to go to work.

Click to view attachment
cary
Nice to see that the door gap held up.

Click to view attachment

Would just need a small tweak to level up enough to weld the outer long in place.
cary
Found the part in the parts pile.

Click to view attachment

Here's the place that needs repaired.

Click to view attachment


cary
Here's the only patch I had to put in.

Click to view attachment

Pattern cut out of cardboard.

Click to view attachment

Patch ready to weld in. Old metal got a little religious on me.

Click to view attachment


cary
All repaired and ready to shoot on some Rustoleum.
I'm learning not to over grind the thin spots LOL

Click to view attachment

Click to view attachment

I posted on the Parts Forum that I'd like to horde a few of these parts for the future.
I'll need one of someone sawsall parts stash for the right side.
I also shot Pete from RD an email about maybe selling the end piece off the 346 frame stiffener.


cary
Had to uncover and fire up the shop car to go and pickup some parts for the college kids car. Dad, my cars running funny
Hadn't driven her in about six months. I had to be careful on the cold hard tires.
Though I enjoy driving my 914 more. Just passing the apex and mashing the pedal to the floor does put a shit eating grin on your face.

Click to view attachment

Off to Eugene to change out some valve cover gaskets and a coil pack on the kids Quattro.
cary
A little too cold here in PDX to head out to the shop.
Plus QTR. end stuff at work.

Some how I got to reading Nathans thread.
http://www.914world.com/bbs2/index.php?sho...3507&st=100
Nice work.

But that gave me some ideas about how to tie in the new passenger inner wheelhouse to the new inner long. JPG is where I'm at. Long is not welded in.

Click to view attachment

Looks like Nathan fabricated a new inner layer.
Thats over my pay-grade. Whoa.
But I do believe I will create piece that goes into the long.

Click to view attachment

The caveat is, is that the new inner wheelhouse is considerably thicker that the original piece. But I'd still like to be double layered.
cary
Didn't get much done yesterday. Spent the am putting in a new stove pipe. It was almost see thru. Helped the landlord with a frozen water piper.

Tacked in the front j-pipe on the drivers long.

Then I went digging thru the take off/ cut out parts that came out of the long I bought from Perry.
First I determined that I created one of the inner boxes to short. So it will have to be cut off and redone.

Click to view attachment
cary
Still stumped ................ I want to build an inner box to tie the wheelhouse and the long together after I butt weld it.

How would recreate the ridges with my primitive shop?

Click to view attachment

I feel the both the RD parts are 16 gauge so they are much thicker than the OEM parts and they are sized to be butt welded together. But with the car dissected as much as I have it. I know that is a hinge point for the whole body. So I want to build it stronger.

Need some suggestions.
nathansnathan
It's a lot of work to make not only the inner forward of the firewall with the relief for the floor, but the outer rear of the fw is a real pain with the engine shelf cut out and the radius, the bend, etc.

You might want to do it the way Jeff Hail did, kind of an in-between way, the corrugated piece stays on the outside. It would help to add the top and bottom to the inner that the template is representing there, 3-dimensionalize it for strength, like the factory, but not as elaborately shaped. Seems like He should have brought it forward more to double layer where the lower seatbelt nut is
IPB Image
cary
As I reread your thread about 3 times I'll have to ponder.
http://www.914world.com/bbs2/index.php?sho...3507&st=150
My original plan was to follow Jeff's example. Now you and Scotty have given me a couple more ideas.

I really don't want to weld on those ribs .............
I don't like the void that would be created by using a flat plate. Granted mine will be painted. Unlike they way we came from the factory. hmmm.

But you, Scotty and Jeff do beautiful and great work.
I do thinks its pretty cool that you recreated the factory part. I think if ever have to go this deep again. That's the route I'll go. Build it all on the bench.
cary
I'll be getting the contact info on the PDX Wurth Rep so I can buy a spray on seam sealer gun.
Running back thru Jeff Hail's Dead thread. It just looks right, and tidy.
cary
Still chilly in PDX. 32 degrees when I made it to the shop at 9:15.
Decided to put on my big boy pants and cut the door post.

Click to view attachment

BEFORE

Click to view attachment

AFTER

That will have to be cut in order to slide the inner rocker in place. Dumbass, I shouldn't have bothered seam sealing it.
cary
I went ahead and added to the inner portion of the wheelhouse extension.
Might be a bit too long ...................
Plasma cutter will make short work of it if need be.

Click to view attachment

Learned today I need to do a better job of making sure the pieces are perfectly flat before I weld them. That way I won't end up with the craters on the outer edge. mad.gif

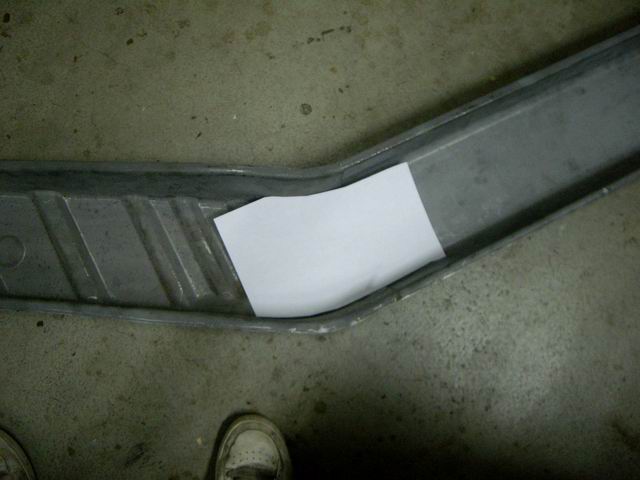
Then I test fit the outer wheelhouse extension over the inner. A little long on the top .............
Bottom right corner needs a little hammer work too.

Click to view attachment

End of the day shot ...............ready for a week and half's vacation starting Christmas day.
Hope to have it off the lift with the floor pans installed.

Click to view attachment

Now I start the Five Day Marathon of running a supermarket up till closing at 7pm Christmas Eve ................ I'll be back next Thursday .........


cary
On we go .............it's a little chilly in my non heated shop. 34 degrees and frozen fog.
Insulated boots and overalls.

Started with finishing up the left outer wheelhouse.

Click to view attachment

cary
Then we dug into the left hinge post and fender support.

Click to view attachment

Trying to figure how to patch the upper hole without removing the fender.
Sprayed down with Ospho

Click to view attachment


cary
Then went on to installing the right front inner fender corner.

Click to view attachment

Welding is getting smoother and smoother.
cary
Tool Whore Comment :

First time I've used the reinforced cut off wheel for the Dremel. Impressive.
So I bought a couple refills.
Works great when you want to peel back a double layered section.

Click to view attachment

The brown thin ones are a POS. I usually cant make it from the bench to the car without breaking one.
cary
Decided it was time to build up the right long. So I need to tidy up the heater pipes.

Click to view attachment

Time to use the blast cabinet. Just finished giving it a tune up. New hose, nozzles and shield.

Click to view attachment


cary
So I begin to prep the long. Come to find out the hole in the new long is 2". The heater pipe in 2 3/8". Dandy ..............

Click to view attachment

So time to hook up the plasma cutter. Getting a little better at setting it up and free handing it.

Click to view attachment

After a coat of primer. It's time for a couple coats of Rustoleum.

Click to view attachment
cary
Pipes all primered and painted with Rustoleum.

Click to view attachment

Long all built up and ready to install. Make sure you install the heater pipe before you mount the long.

Click to view attachment

Spent the rest of the day adjusting the left outer rocker position. I had to relocate the position I'd been using. Couldn't get the bottom of the hinge post lined up.
All in all, a good day. By myself, radios blasting the 70's & 80's station, and a pot of hot coffee.
A little chilly. But spent most of the time in the wood stove heated space.
cary
Still chilly and foggy.

Time to create a pattern to extend the hinge post that I'd already prepped. I cut out some cancer inside the left front fender. I used the Ed from Wheeler Dealer tape pattern technique.

Click to view attachment

Click to view attachment

Worked pretty good. Should have cut the pattern inside the lines.


cary
Spent quite a bit of time fiddling with the fit. Had a tough time creating the rounded out of site corner. Once I had it trimmed and fitted it was time to cut the bottom off so the inner rocker panel can be installed.

Click to view attachment

Click to view attachment


cary
Ended the day with tacking in the hinge post base. Tough duty welding material that can't be totally prepped. Backside

Click to view attachment

Spent the am working on the middle kids Explorer. New alternator, fuel filer, oil change, new wipers, and polish the headlight lenses.

cary
Big Day planned for New Years Day.
Going to install the right drivers long. Maybe get the wheel house and firewall tied in.

Finished up the left front fender inner patches yesterday.
Left the phone laying on the desk

Off we go ................
cary
Here's yesterday's repair. Making those little patches is a lot of fiddling..............

Click to view attachment
cary
Heading for the next point of no return. Attaching the right long.
Waiting for the Rustoleum on the inside of the fender to dry.

MEASURE, MEASURE, MEASURE .......................
Put the fender extensions back on just to make sure.

Click to view attachment

Click to view attachment

cary
I guess I was overly optimistic.
Too much fiddling and fussing to get the right long tacked in ...............

Couldn't get the front radius of the new long to seat into the inner fender flush and tight. mad.gif
Had to make some modifications. I'll shoot a couple shots tomorrow.
Fiddling & Fussing .........
cary
I started with trimming the flange off the firewall. I've decided I'll attach a backing plate to the firewall. It will grab 6" of the upper and 6" of the lower long. Not exactly CW but it will add strength and structure.

Click to view attachment

After I trimmed it off .............

Click to view attachment


cary
After I finished modifing the front end of the long.
I made the MONEY CUT .................
Only measured about 6 times.

Click to view attachment

Bad news. It will need more fiddling. The upper long is wider than the lower long. mad.gif
And the bottom radius of the upper long doesn't match the back lower radius of the lower long.
It will need more fiddling

Click to view attachment

cary
Ended the day with measuring the door vs. the long on the inside.

Drivers side, long already attached.

Click to view attachment

I'm real happy with that ...................... smilie_pokal.gif

The right side ............... not so much. Glad its not attached ......................

Click to view attachment

A little more fussing with that front end will lower the front a 1/4 inch.
sixnotfour
that seals the deal for me , I am going to salvage a right inner long for my project...Great Job Cary
cary
Here's where I struggled today.

This is how the front end of the RD piece comes.

Click to view attachment

I finally found the picture I was looking for.
Here's how it came from the factory.

Click to view attachment

Here's what needs to happen ..................

Click to view attachment

THEN it will slip into the inner fender like it should.
Waste of a 1/2 day. No wonder restorations cost $200k.
cary
QUOTE(sixnotfour @ Jan 1 2014, 09:18 PM) *

that seals the deal for me , I am going to salvage a right inner long for my project...Great Job Cary


If the front inner fender is in good shape. That's what I'll do next time too.
What we need is just the bottom with the inner rocker flange and about a 1 1/2" upright flange. That would take care of most rust damage repairs.
maddin
...what an incredible display of craftsmanship! :-)
cary
Here's the trimming I needed on the front end of the long.

Click to view attachment

Upper Trimmed
I needed to modify the curve to match the inner fender radius

Click to view attachment

Lower Trimmed

Click to view attachment

The Sharpie mark is where I finally cut off the lip too.
cary
Double Post headbang.gif
cary
Finally, the right long installed ............ smilie_pokal.gif smilie_pokal.gif smilie_pokal.gif

Click to view attachment

Tough welding, under the car. Arm stuck up throw a hole. Helmet all jammed up and twisted. Over did the weld ............... mad.gif mad.gif

Click to view attachment

Happy with the penetration though .............

I'll wait to tidy up the welding till after I remove the floor. welder.gif
Plus I'd like one more behind the heater tube.


cary
Here's the long seam weld. Should have been better looking.
Tried to pass thru the tacks. I should have knocked them down with the grinder before I finished the seam welding.

Click to view attachment

Click to view attachment


cary
Might want to build one of these clamps to squeeze the long into the right size.
Mine came a bit splayed open.

Click to view attachment

cary
Another Double Post .......... hissyfit.gif
cary
Ended the night with Super In Law building inner box.

Click to view attachment

Click to view attachment

We'll cut and add the upper and lower flanges in the am.
Needs a little trimming in that picture ...........


cary
Finished up the inner box fab.

Click to view attachment

Click to view attachment

Click to view attachment

It will be attached with predrilled holes and rosette welded.
cary
I'm thinking I might not use the stiffeners.

Click to view attachment

Coat them with WD 40 and shrink wrap them up.

This is a "lo-fi" version of our main content. To view the full version with more information, formatting and images, please click here.
Invision Power Board © 2001-2024 Invision Power Services, Inc.