Help - Search - Members - Calendar
Full Version: My 3.3L Subie Conversion Thread
914World.com > The 914 Forums > 914World Garage
Pages: 1, 2, 3, 4, 5, 6, 7, 8, 9, 10, 11, 12, 13, 14, 15, 16, 17, 18
76-914
QUOTE(Chris H. @ Aug 7 2014, 09:18 PM) *

BTW I will be re-taping the joints on the rad...had to remove the aluminum tape when I took the radiator out to seal up the threaded hole. Should be pretty air-tight.

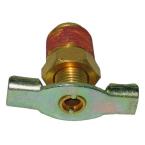
The one odd issue I am having is that it seems like the thermostat is acting weird. I tapped the return line for the reservoir at the lowest point right at the water pump.

Click to view attachment

Should be drawing a nice vacuum there. The temp sensor is on the return line side and doesn't register at all for a long time, then shoots up pretty high all at once. The return line gets VERY HOT and the pump doesn't seem to run until the engine is pretty hot. The lines under the car are cold for quite a while.

Might be air in the system...any thoughts?

According to Bob, that is an air pocket that gives the rapid rise in temp, Steam pockets. I called him before I got to that pointe and asked how would I be able to determine if I had an air pocket and he said I'd see what you just described! And no, I haven't connected my fans to the ECU yet. I will after I get my new cable. They sent the wrong one. I was running wired in low speed. My plan is to run it a few miles to get it up to temp then connect to the ECU. Hopefully they will fire right up, at high speed, confirming that the ECU connection is working. Then I will disconnect them, one at a time to determine which is hi/lo.
Chris H.
Well sheeeeit then...that's what it is I guess. Nothing, nothing, nothing....then it shoots up suddenly. I thought the gauge wasn't working, that's how long it was taking. Probably just have to run it a few times. I could run an overflow tank up front too, but would prefer not to.

Notice most of us had air pockets but we're all surprised we have them? Now that's funny. lol-2.gif

Hey Doug, you're farther along than you think. Get the turbo plumbing sorted and it'll fly from there. I still have a lot to do.

- cable shifter
- clutch reinstall
- fans install
- rear brakes re-do
- figure out how I'm gonna exit the radiator exhaust air
- install throttle cable

And a few other things I forgot I'm sure.
Jon H.
If you have a coolant system pressure tester you can use that to pressurize your system and get the air out. Thats how I bled my SVX/Vanagon swap, worked great.

Jon H.
rnellums
Harbor freight has a tool that uses compressed air and the Bernoulli effect to suck all the air out. Then you open a ball valve and the vacuum in the system pulls coolant in. I have also heard that backfilling the engine from the outlet is essential. It took me two weeks to get mine bled right.
BIGKAT_83
No problem with bleeding the air fom the system if you plumb it up like the picture. I have removed the small pin in the thermostat and drilled the hole out to 1/8th inch.

Fill it with the expansion tank. Make sure the recovery tank is about half full.

If the radiator has a air bleed at the top open until water starts to flow out. If not remove the top hose at the radiator(high pressure hose from the pump)reinstall hose or close bleed.Start the engine up and run it through a couple of heat cycles and add water if necessary. I have 8k miles on my EZ30 conversion now and have not added water or done anything to it since start up. Runs at the thermosat all the time 180 degrees.
Click to view attachmentClick to view attachment
mgp4591
And if you have or get a thermostat with the pinhole in it, make sure the t-stat is installed with that pinhole at the 12 o'clock position!
Chris H.
Bob,

Well, I do have the system set up that way for the most part. My only concern is that in some cases I'm pulling from the hot side instead of the cool side and vice-versa. Here's the situation...

Radiator is the Celica...no upper hose but there is an overflow outlet. I was wondering if I should install a bleeder there. I capped it off for now. Do I need one?

Click to view attachment

I have an overflow tank which is the water fill point.

Click to view attachment

I have topped it up several times after it cools down a bit so that tells me something is happening. The small line connected to the fitting coming off of the engine which is the high point.

Click to view attachment

I think that's similar to how you had it on your SVX engine, except I think you just tapped the water pipe on the engine itself. The only contradiction here is that this is the COOL SIDE when the diagram says it should be the hot side, but it's practically connected to the engine and it is the highest point which from my understanding is the most important part. I guess I could run one off that port on the radiator.... idea.gif

The larger hose on the overflow tank tees into a hose that connects to the water pump.

Click to view attachment

That's the lowest point in the system and also the best vacuum I'll get from the pump. Only concern here is that this is the HOT SIDE. According to the diagram the return line should be on the cool side, but again, I think the lowest point in the system is the most important thing. I think this is where you teed in to your EG33 also, so if it worked for you then I should be good. I did notice this line gets HOT pretty quick.

See anything I should change?

I'll probably drill the thermostat as well. Seems like a good idea. (And make sure it's at 12:00!)
BIGKAT_83
This is your problem. You have the small hose connected to the pressure release of the radiator cap.. You need to get this out of the system. What ever that is its not needed. Move the small hose to a high point on the line and you will have a constant flow of water.

Is the blue cap on the header tank a high pressure cap?
Click to view attachment
76-914
popcorn[1].gif
Chris H.
QUOTE(BIGKAT_83 @ Aug 9 2014, 07:36 PM) *

This is your problem. You have the small hose connected to the pressure release of the radiator cap.. You need to get this out of the system. What ever that is its not needed. Move the small hose to a high point on the line and you will have a constant flow of water.

Is the blue cap on the header tank a high pressure cap?
Click to view attachment


Aha! Got it. Thanks Bob. That explains a lot. So either run a long line from the radiator or tap in to the water pipe intake like you did. The blue cap is pressurized.
Chris H.
Bob, one more question....I just went out and looked and it seems like the radiator vent outlet that I capped off and the high spot on the engine where I thought I was venting before are very close to the same height. So technically I could probably use the radiator vent...

So the question is:

If I run a line from the radiator back to the overflow tank from the front it would obviously have to be routed down and then back up again. I'd probably run it down through the heater channel, through the long and out right under the overflow tank. Is that OK since the line diameter is so small (1/4" probably) or do you think I'd get some air trapped at the high point in the line? Seems like with a line that small the water pressure would push the air out pretty well. For less than $10 worth of hose I guess I can give it a shot and see what happens unless you really hate the idea. Let me know what you think. Thanks again.

Chris914n6
You want a bleeder at the top of the rad. No reason to do the whole return hose thing. If you can make a place for the air to collect.
I used one of these. rad air bleeder

IPB Image
Chris H.
Caught up with Bob. In order to be sure the system is continuously bled you need the return line. It will be high pressure, so I don't think the air in the line will be an issue. If it is I'll move it to the back and do a bleeder in front. The line is only 5/16.

In other good news, my rear calipers are completely functional. I thought they would be stuck or messed up in some way for sure. Just need to install new piston seals and muster up the energy to get DIRTY getting the brake dust off of them.

Now it's mostly hurry up and wait for all the parts I ordered today and yesterday! Got the throttle cable installed, so that's done, and I reinstalled the gauge pod. I moved the e- brake warning light to where the "CAT" warning light was. About 20 seconds with some nail polish remover and the CAT and EGR symbols rub right off. Pics tomorrow...battery is charging. Waiting for a strap wrench to reinstall the alternator.

EDIT....waiting for a strap wrench to tighten the crank pulley to 116 lbs, THEN reinstall the alternator so it will charge the battery itself biggrin.gif . Yeah..that makes more sense.
904svo
I order to burp a Subaru engine, what I found you have to do it the heater circuit
due to the way that they control the thermostat. Here is a picture of how I burp
my engine.

Click to view attachment
JRust
Burping is an art with these. With my v8 it was a bit of a chore to learn how to get all the air out of the system. I found making the high loin really high helped. I would jack up my ass end. Let it run & then shut it off. Crack the bleeder from the top in front. Took a little while to get it all out but I did. Running the extra return line Bob suggest is probably the most efficient way. Much less work to burp the system. Bob knows this stuff & you'll save time doing what he says over some dipshits (Myself shades.gif )
Chris H.
TBM= The Bob Method for cooling water cooled 914s Use it.

So I could tell right away that the system was working better even before I started the car.

Although my garage is pitched unfavorably to this so that the front end is higher than the back, I could hear the water moving through the system as I filled it up, which I could not hear as well before.


https://www.youtube.com/watch?v=pOmJoViuj9A


I removed the Yamaha filler cap and added a temp sender fitting.

Click to view attachment

And ran the 5/16 hose front to back.

Click to view attachment

I also removed the pin from the thermostat and drilled it to 1/8" (which was barely more than before).

When I started it it was clearly running differently, not nearly as hot. Before there was a lot of heat coming from the engine bay, now hardly any. Next week we (and by "we" I mean Kent, who is doing all the work) should have the clutch setup done and be able to take it out. I'm not waiting on him, he is waiting on my MC to show up from e-bay. Still need to do the rear brakes and cable shifter as well. Should be done just about the same time I get the stuff.

Chris H.
Just a little FYI if you have EGR and CAT lights...you can use one to relocate the e-brake warning light. The white lettering rubs off in about 20 seconds with any kind of thinner (I used nail polish remover). Probably use the other one for the CEL. I have a '95 so it's OBD 1. Uses a morse code type system apparently.


https://www.youtube.com/watch?v=aEwgdcRYfO0
JRust
QUOTE(Chris H. @ Aug 17 2014, 11:35 AM) *

TBM= The Bob Method for cooling water cooled 914s Use it.

evilgrin.gif I like it TBM agree.gif
Mike Bellis
QUOTE(Chris H. @ Aug 17 2014, 11:49 AM) *

Just a little FYI if you have EGR and CAT lights...you can use one to relocate the e-brake warning light. The white lettering rubs off in about 20 seconds with any kind of thinner (I used nail polish remover). Probably use the other one for the CEL. I have a '95 so it's OBD 1. Uses a morse code type system apparently.


https://www.youtube.com/watch?v=aEwgdcRYfO0


Why do you post a video that is private and can't be seen? confused24.gif
Chris H.
Oh you can't see it? It should be able to be seen by anyone who I share the link with, which should be everyone since I posted it. That's how all of mine are usually done. No one can see it? I'll change it if so.
Chris H.
OK try it now...not terribly exciting, but at least you can see it smile.gif
Mike Bellis
QUOTE(Chris H. @ Aug 17 2014, 01:51 PM) *

OK try it now...not terribly exciting, but at least you can see it smile.gif

beerchug.gif

Works now. Best 9 seconds of my life!
76-914
piratenanner.gif Way to go, Chris. Another one bites the dust. That punch list is getting smaller and smaller. Once your very close to completion that list will get a growth spurt. lol-2.gif BTW, I bled the last of the air out of the clutch line this morning and got a 6 min test drive. (I had cherry/banana nut bread in the oven and then it was off to do some shopping with the wife.) The system is working great. Release is about 4/5th's in, not to the floor as I told you earlier. My wife could drive this car.
Chris H.
Yeah Mike, for you that's video is child's play. Did you install that Porsche projector thing? How did the new cradle turn out? Easier on your CVs I hope.

Kent that's great news on your clutch. I ordered mine Friday but haven't gotten a shipping confirmation. If it doesn't go out tomorrow I'm calling. The clevis should get there tomorrow. Working on the cable shifter now!
Mike Bellis
QUOTE(Chris H. @ Aug 17 2014, 04:27 PM) *

Yeah Mike, for you that's video is child's play. Did you install that Porsche projector thing? How did the new cradle turn out? Easier on your CVs I hope.

Kent that's great news on your clutch. I ordered mine Friday but haven't gotten a shipping confirmation. If it doesn't go out tomorrow I'm calling. The clevis should get there tomorrow. Working on the cable shifter now!

I modified the cradle rather than rebuilding it. I did have to make new motor mounts to bolt onto the cradle.

BTW, I do like the "idiot" light. I was thinking the same thing before I decided to install the dash cluster. There have been plenty of one step forward and two back on my build. Most of those did not make it into my build thread(s). Now I'm getting ready to swap out the 6 speed for the 5 so I can send the 6 to Dr. Evil. Time for new bearings. sad.gif
Chris H.
New bearings? Man you are driving that thing like it should be driven aren't you?

Well the "idiot" light is perfect for me biggrin.gif . Apparently on the OBD 1 you can rig it to blink out the codes so you just have to find out what they mean. The nice thing is that it does not go into "limp mode".

I'm also installing a momentary switch where the block off plate for the rear defroster switch is. Got a 40 amp relay as well. My old Rabbit switch (it's what the factory used) frequently takes a couple turns to crank and I've read that the new ones are made in China. I know the Subie relay is easier on the ignition switch but I'd rather not dig into the steering column and swap it only to have the new one break soon after.

Got this:

Click to view attachment

It looks huge but it's not. It's the same size as the block off plastic piece. most people won't even notice it since it looks the same. If it ends up being a temptation for others to push I will use it as the windshield washer pump switch and get a different one later.
Chris H.
The good news is that I finally drove it... WOW is it fast!

The bad news is that 2 blocks away I snapped a CV headbang.gif . Didn't even get a chance to give it much juice really. No tire spin or anything, just snapped.

So the question is...do I use another 914 CV that I have stashed away or just upgrade to 951's now? Leaning towards the 951s.
Mike Bellis
Upgrade!

Then you can drive without worry. driving.gif
Chris H.
Yep, that's what I thought Mike. Just bought some from e-bay.

On a lighter note, this thing is sooooo much faster and more responsive than any 914 I've ever driven. I let the clutch out expecting one thing, and get something totally different! The noise it makes is pretty sweet too.
Mike Bellis
Drive over here so we can race. beer.gif
Chris H.
av-943.gif It ain't that fast Mike. Keep in mind it was pushing ~72hp before. Not used to having to AIM it first before I hit the gas.
mgp4591
QUOTE(Chris H. @ Sep 2 2014, 08:30 PM) *

av-943.gif It ain't that fast Mike. Keep in mind it was pushing ~72hp before. Not used to having to AIM it first before I hit the gas.

As another who is doing the EG33 thing that's great to hear! I'm looking into using a Subie front bearing instead of the Porsche so I can use the hub and axles designed for that power. Got some fabricating to do for it tho... idea.gif
76-914
Congrats on completing a very nice addition to the Suby Conversion Stable. first.gif If you move quickly you can be on the road again this weekend. piratenanner.gif OH, I almost forgot........... thisthreadisworthlesswithoutpics.gif
mgp4591
QUOTE(76-914 @ Sep 2 2014, 09:10 PM) *

Congrats on completing a very nice addition to the Suby Conversion Stable. first.gif If you move quickly you can be on the road again this weekend. piratenanner.gif OH, I almost forgot........... thisthreadisworthlesswithoutpics.gif

AND SOUND!!! aktion035.gif
Chris H.
QUOTE(76-914 @ Sep 2 2014, 10:10 PM) *

Congrats on completing a very nice addition to the Suby Conversion Stable. first.gif If you move quickly you can be on the road again this weekend. piratenanner.gif OH, I almost forgot........... thisthreadisworthlesswithoutpics.gif


I did put 2 miles on it but "completed"...well...technically! I HOPE the axles come before the weekend. I'll start dis-assembly tomorrow. Since the axle floats maybe I can wrestle the thing out without taking the whole axle off. The one thing I haven't been able to bring myself to do is cut the front trunk holes. Hopefully by Friday I'll get up the guts to get that done. Was looking at some other options but I think I'd better stick to the standard way. Kent, what size are your holes?

I'll get some video going when we get the axle back together. Right now it sounds a lot like Andyrew's "broken CV autocross video". Vrooommmm.....clunkclunkclunkclunkclunkclunk.
76-914
Well, while waiting on parts you could drag your camera into the garage and take tons of pics then post them here. biggrin.gif
Chris H.
Funny thing is I just realized I don't THINK I have to take the thing quite as far apart as I thought...The floating axle might make it fairly easy to remove/replace that CV... idea.gif I have two more 914 CVs... idea.gif...still gonna go 951's regardless but I'm pretty impatient. Might be Monday before they get here. I guess I'll see how easy it is to remove and go from there.

Kent, have you removed your axle pins (Subie side)? Assume I just need a punch (but NOT a wood punch). Also, what size are the OUTLET radiator vent holes (in the fender wells) on your car?
Chris H.
Whew I needed I good laugh.

Searched what size punch to use to get the roll pin out (3/16) over on NASIOC. A younger gentleman was having trouble getting his out. Plenty of great suggestions, then someone said "Try hitting it with your purse.". av-943.gif lol-2.gif
mgp4591
I took one of my longest and narrow necked punches with a flat tip and ground it down til it fit the pin size. The modified section is over 3 inches long and easily taps out the roll pin. When you put it back in, make sure the chamfered sides of the hub match the VERY SLIGHTLY chamfered side of the stub axle- that's the only way they'll go in. Plus the holes are offset from the centerlines so it makes it easier. Trying to pin it from the other side just creates frustration and releases language you haven't heard in years... may ruin the pin too. Great progress!!
76-914
QUOTE(Chris H. @ Sep 3 2014, 08:23 AM) *

Funny thing is I just realized I don't THINK I have to take the thing quite as far apart as I thought...The floating axle might make it fairly easy to remove/replace that CV... idea.gif I have two more 914 CVs... idea.gif...still gonna go 951's regardless but I'm pretty impatient. Might be Monday before they get here. I guess I'll see how easy it is to remove and go from there.

Kent, have you removed your axle pins (Subie side)? Assume I just need a punch (but NOT a wood punch). Also, what size are the OUTLET radiator vent holes (in the fender wells) on your car?

Not yet but they should push thru easily as new as they are. Get a set of drive pins at HF, <$5 and worth it. The holes are 1.5". beerchug.gif
Chris H.
The Harbor Freight 3/16 long punch (comes in a 5 pack) works perfectly. Bottom line is if you tap it good a few times and it doesn't move you're tapping the WRONG SIDE.

BTW got the axle out, pix pf the carnage are forthcoming. Thinking very seriously about throwing another 914 CV in there. OK I can wait...the 951's shipped today and should be here Friday. Why do it twice confused24.gif ?
ruby914
smile.gif piratenanner.gif beerchug.gif
Chris H.
Thanks Mike. I'd love to post pics of the CV carnage but there WAS NONE. Seems I must have been (un)lucky enough to twist the axle just right while the conversion was going on to work one of the bearings loose or something since the engine was installed/removed several times. No metal fragments at all, everything was just loose in there. Weird.

Anyway I have the thing apart and still need to finish a few things in the cooling system so might as well wait one more day and get the 951 CVs. After hearing from a few 6 cylinder/V8 conversion folks that the 914 CVs will inevitably fail I'd rather not worry about it.


76-914
Now we need to get a group buy on decals of your avatar. Anyone here make them?
CptTripps
QUOTE(76-914 @ Sep 4 2014, 10:49 AM) *

Now we need to get a group buy on decals of your avatar. Anyone here make them?


I'd rather put the effort into new lettering for the engine grill that says PORSCHARU.

biggrin.gif
Chris H.
I don't own that avatar BTW...found it somewhere. Like the ideas though.
76-914
QUOTE(Chris H. @ Sep 4 2014, 08:46 AM) *

I don't own that avatar BTW...found it somewhere. Like the ideas though.

Yeah, I found them on the net once. I think it was a bus conversion place. What do you wanna bet they don't own or have any copyrights on that bit of fusion. happy11.gif
Chris H.
Oh you don't think Fuji Heavy Industries and Volkswagen are OK with it? av-943.gif

mgp4591
QUOTE(Chris H. @ Sep 5 2014, 09:42 AM) *

Oh you don't think Fuji Heavy Industries and Volkswagen are OK with it? av-943.gif

Well, them 2 countries ain't known for their sense of humor... blink.gif
No disrespect intended... now their technology, that's another issue entirely! pray.gif
Chris H.
Well since the Subie boxer 4 bears a STRIKING resemblance to the type 4 VW motor I'm pretty sure the two companies aren't too friendly with each other either. Tonyakavw's thread has some cool photo comparisons I think.
This is a "lo-fi" version of our main content. To view the full version with more information, formatting and images, please click here.
Invision Power Board © 2001-2024 Invision Power Services, Inc.