Help - Search - Members - Calendar
Full Version: Andyrews Progress Thread
914World.com > The 914 Forums > 914World Garage
Pages: 1, 2, 3, 4, 5, 6, 7, 8, 9, 10, 11, 12, 13, 14, 15, 16, 17, 18
Andyrew
Final update for July:


Finalized the finishing work to the motor side of things. I plumbed and setup the intercooler cooling. As I had mentioned I had been running on essentially no intercooler, which was pretty impressive that I didnt have any detonating up top at 10psi. If anything it put a good about of strain on the motor which is good, Thats how I like to break in rings smile.gif.
Click to view attachment
I modified the stainless joiner pipes I had made so that they take account for most of the "U" turn on the radiator coolant hoses. Im happy with this decision as it makes for a cleaner engine bay as well as shorter hoses. That being said it appears as if I have one leak as well as the pump itself appears to leak a little. Im going to leave it for now and re-address it after 4 months when I pull the motor to clean things up and finish the metal work on the body firewall (I will address the oil leak at the front as well at that time and probably pull the pan and check the internals for premature wear).
Click to view attachment
I wired the water pump on the Audi's factory fuel pump wire (I have a dedicated 12ga wire for the fuel pumps), so it runs when the engine runs. However I have the small 4" fan wired up to my fan controller I bought for $12. I have the temp sensor taped to the intercooler and it works pretty well this way.

https://www.youtube.com/watch?v=tXcIDlWkGk0

If I needed to just have this work for say my radiator fans I would hook it up to a relay, but the amp draw on the 4" fan shouldnt necessitate that. Something for you homebrew guys to think about. This would work great for a dual fan setup running twin controllers at different temps. I currently have the fan setup for about 115degF turn on and it'll turn off at ~ 110. Its a small radiator and thus I imagine it could get hot, but on a quick test drive with a 1-2 pull I didnt even see the intercooler go up 5 degrees. It also pulled much stronger with the colder dense air.


I tried all weekend and late last week for my tuner to get to work on my tune but he is responding once and then ignoring me.. I might have to go to my back ups soon.

Click to view attachment
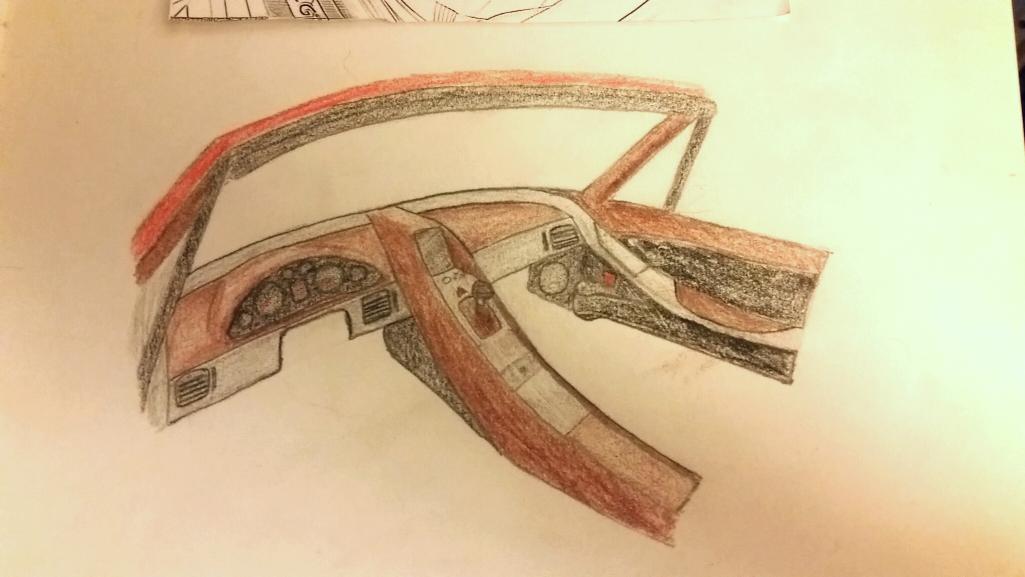
I also spent some time on the dash. I first worked on the "Mike Bellis Special" cardboard template but wanted a more solid foundation.. So I hacked up the stock dash base to fit.
The stock Audi dash cluster didnt have any provisions for bolting/mounting (apart from the front 2 flimsy ones) so I opened it up, clipped the noisy alarm charm, and put some bolts in the backside.

Click to view attachment
I'll grab some foam, tape, plastic, tin foil, and blades and start getting back to my "creative" side shortly. I hope to have the dash and center console completed by the time the competition is over. It would also be nice to have the rear firewall done but thats dreaming really tall....
whitetwinturbo
wub.gif wub.gif wub.gif
Mike Bellis
It's amazing how much stuff ends up in the engine bay with one of these conversions.

BTW, I think you can just put alcantera over the cardboard dash and be done. I'll drive it just like that... smile.gif
914forme
QUOTE(Andyrew @ Aug 1 2016, 03:43 PM) *


The stock Audi dash cluster didnt have any provisions for bolting/mounting (apart from the front 2 flimsy ones) so I opened it up, clipped the noisy alarm charm, and put some bolts in the backside.


you could not turn it off in software with a Vagcom?
Mike Bellis
QUOTE(914forme @ Aug 2 2016, 06:16 PM) *

QUOTE(Andyrew @ Aug 1 2016, 03:43 PM) *


The stock Audi dash cluster didnt have any provisions for bolting/mounting (apart from the front 2 flimsy ones) so I opened it up, clipped the noisy alarm charm, and put some bolts in the backside.


you could not turn it off in software with a Vagcom?

No. Vagcom only allows you to do "safe" things. You cannot flash out safety related features.
Andyrew
Some bad pics today...

I spent some time chasing the front end clunking that had me worried. Turned out to be the front strut collar holding the shock in. I had a suspicion that was the issue but didnt get to fixing it till this weekend. Luckily with my wheel well cutouts I could do the repair without even removing the wheel smile.gif Jacked up the suspension a foot, unbolted the nut, pushed the shock down and brought it to the cutout, removed the dust cover and bam, loose nut smile.gif

Cleaned up the wiring with some loom I bought and made everything ready for the interior redo forthcoming.
Click to view attachment

Mounted the passenger seat and seat belts and put the carpet dash cover on. Looks good enough I might just spend the next month driving it like it evilgrin.gif
Click to view attachment

Nah, Hopefully I get some time tonight to prep and lay down my first layer of foam for the dash.


Had a good 10 minute drive with the wife last night after going to Jeff Strouds celebration party. I didnt take the car to the celebration as there was some clunking in the rear that I cant ID. Im thinking its RR CV joint as the mounts are all good and it only happens on minor accel/decel transitions, it SOUNDS like the axles are clunking.
Click to view attachment


OH and heres a quick video from lunch Friday smile.gif

https://www.youtube.com/watch?v=hoWTgs0JoP4
Garland
driving.gif runs nice.
Mike Bellis
You took the long way to Taco Bell... smile.gif
Andyrew
Mid weekend update. NEED SOME ADVICE!


OK, so my tablet Idea was just to far fetched, I cant think of putting a tablet on this dash and it actually looking someone decent due to the size. That being said I am planning on having my phone on the dash to give me the same basic stuff but without the added bulk. That being said here is what were looking at. Am I just ruining the dash with the phone spot being where it is? Should I just have a little magnetic arm to put it on? The covered area gives it sun protection for glare as well as heat and IMHO gives it a more sleek uniformed look.

I'll put details on the build later but looking for anyone to comment on the current left side of the dash idea.

The right side will slope off the left side to be flat and will be separate for ease of installation.
Click to view attachment


Click to view attachment
Old pic to show where the phone goes, My work iphone, my regular S5 is bigger .
Darren C
Great project Andrew.

As your asking opinions (and everyone has one) mine would be to loose the bulk of all that foam. Great for a truck or bus.... but not a sportscar. Your dash mat a couple of post back looked better!

With the position of your gear lever I'd make a dash that has a pod/binnacle much leaner and similar to the original 914 or a Mazda Miata over your instruments and a sweeping centre console that looks like a Porsche Carrera GT.

http://images.gtcarlot.com/pictures/10017731.jpg

You could combine your i-phone insert in the centre console just below the gear lever in portrait or landscape above the gear lever. Audi TT style grab handles with combined knee pads either side of the i-phone insert (if fitted below the gear lever in portrait) would look real good.

http://justgermanparts.co.uk/ekmps/shops/6...7645-4021-p.jpg
Andyrew
Darren,

Thanks for the advice.

This is my original design concept.
IPB Image

Center console will remain. The two raised areas around the phone will flow down around the shifter and form the center console starting point.

I also thought about trimming the fat on the left side.

I agree its a bit bulky and truckish, thus my posting for some help. Let me see what I can do from here.
Darren C
Great sketch, thats exactly what I had in mind, but incorporating the TT kneepad grab handles for a little Homage to your donor.
Rather than re-inventing the wheel here, have you thought about cutting out the gauge pod/binnacle section of your donor dash and incorporating into your design rather than using the foam?
Andyrew
QUOTE(Darren C @ Aug 13 2016, 12:48 PM) *

Great sketch, thats exactly what I had in mind, but incorporating the TT kneepad grab handles for a little Homage to your donor.
Rather than re-inventing the wheel here, have you thought about cutting out the gauge pod/binnacle section of your donor dash and incorporating into your design rather than using the foam?

I have no donor dash.

Also the foam is just for me to template with, I will fiberglass the foam when done with the template an remove the inside foam, sand smooth and cover with vinyl.
veekry9
biggrin.gif
Click to view attachment

A huge job,one that is complex with many details to do right:
1 ) Attach polyurethane foam to naked dash base.
2 ) Shape,using surform and sandpaper to pleasing result.
3 ) Apply grp to create male 'plug'.
4 ) Attach 'returns' and mount details.
5 ) Finish to high polish,and apply 'release'.
6 ) Apply grp to build female 'mold'.
7 ) Detail and reinforce mold.
8 ) Apply epoxy grp/cf to create dash and console 'skins'.
9 ) Finish sand and built mounts,detail,aircons,defroster,iphone,satnav,stereo,instument cluster,switch panel and more.
10) Make patterns for padding and cladding in leather or synthetic materials.
11) Cut and sew the coverings,then staple,glue and screw over the multi layer foam underlay.
12) Design,fabricate and chrome or polish bezels and trim accents.
13) Install console and gear,ebrake,aircon,and the rest of it.
14) Install the wiring and switchgear with the trim bezels and panels.
15) Start on the doors,ceiling,floor and console.
16) Details that I've missed mentioning,and much more.

Here is the most beautiful custom work,done for mids,of an American origin.
The methods used,and demonstrated here are labor intensive,the results glorious and leather clad.
http://www.fiero.nl/forum/Forum3/HTML/000091-49.html
So,yeah,a custom interior is a ton of work,easy to get wrong,with crude results.
Sewing and stitching is involved. unsure.gif
happy11.gif
This is nice,even the early dash that I prefer,tho done in the two tone,the console narrow like the 14's.
https://www.google.ca/search?q=porsche+944+...HtQht90OLqLM%3A
evilgrin.gif
/
Andyrew
Lots of things going on at once.

It appears my timing belt is off a tooth, not causing any mechanical failures just enought to loose torque and cause a code. Thus my tuner is being a B and telling me to fix it before he does anything. Luckily I think I can do that with the engine in the car comfortably if I jack up the rear and drop the trans to the floor. Should give me great visibility and room.

Click to view attachment
I started making a shift knob, but alas cant find anyone with a lathe to turn it for me. If anyone here has a lathe and can turn a shift knob let me know!

Click to view attachment
Finalized what I want to do with the dash. I bumped my dash design up 10 years to give me a smoother sleeker look. It just worked out better for the fit issues I was working with. I think you guys will like it when you see the final product.


Random gas fill up this week smile.gif
Click to view attachment
76-914
QUOTE(Andyrew @ Aug 18 2016, 06:39 AM) *

Lots of things going on at once.

It appears my timing belt is off a tooth, not causing any mechanical failures just enought to loose torque and cause a code. Thus my tuner is being a B and telling me to fix it before he does anything. Luckily I think I can do that with the engine in the car comfortably if I jack up the rear and drop the trans to the floor. Should give me great visibility and room.


Damn it! I hate it when that happens. Only time that happened to me was on an Escort timing belt. It's more difficult to mis-match when dealing with timing chains, IMHO. Looking good kid. Keep it up. beerchug.gif
Andyrew
I'll post an update tomorrow, but heres a video of last nights ECU logging. My friend tagged along and took video while I logged.


https://www.youtube.com/watch?v=jk5V1cL0pbk
Mike Bellis
Cool video!
Chris H.
Did you fix the timing belt already? Hard to believe it was off a tooth when it was running so well. Nice vid. You got those wide tires to spin like a V8! Wait 'til you dial it all the way up driving.gif .
Andyrew
QUOTE(Chris H. @ Aug 25 2016, 08:41 PM) *

Did you fix the timing belt already? Hard to believe it was off a tooth when it was running so well. Nice vid. You got those wide tires to spin like a V8! Wait 'til you dial it all the way up driving.gif .


Timing issue was the wrong timing sensor pick up. Timing was dead on.

Actually I didnt really try to spin the tires... It will 100% light up the tires in first.
Andyrew
This past month has been full of a lot of driving. Im trying to get my tune going but Im still facing problems.

Lately it has been a hunting idle that my tuner is sure is a intake leak. I cant however seem to find it and its intermittent not consistent. Other tuners think its a tune issue.

Debating on working with another tuner or to tell my tuner to suck it up and leave the idle the way it is.

I've changed out my coils to a stronger type coil as well as changed out my plugs to plugs my tuner prefers. Also I installed a wideband AFR guage which is giving me a very lean idle reading which I can only imagine is incorrect (Calibrated correctly...)


On another note, I HAVE made some progress on the dash. See below. About 3 nights of fiberglass and 3 nights of bondo/sanding work to get it where I am OK with it.
Click to view attachment


Im laying out some test pieces of vinyl and will start sewing/gluing it down.

I have some special stuff coming in tomorrow which I am super excited to reveal as well smile.gif


And for those that like more video's. This is about 11psi in first (You can still hear it spin a bit) 13psi in 2nd and 3rd. I did a couple runs with ~16 just to test it out and it had a tire spinning all through second while pulling pretty hard (Not video'ed). Much faster than the v8 at this boost level I imagine that I will tune the boost for first at 10-11psi, second to ~15psi, and third/4th to about 20psi. 5th will probably be dropped down to about 15psi just for safety, but i'll tune the curve so passing rpm's still build enough boost to not have to have me drop a gear.

Also, I can assure you this vid was only up to the speed limit biggrin.gif

https://www.youtube.com/watch?v=eyvYJuyYtDI
914forme
sounds very good. Your tests runs are done with gearing reduction boxes blink.gif

On to the hunt.

Leak, yes very possible, but should also show up, when you apply boost, unless it seals under boost and then, opens under vacuum. Being said, 20 PSI will tend to pop somethings loose, If you have intake pressure tested plugs, I would install it, and run it up in PSI, and see what you get. Should have a noticeable leak, you can also draw vacuum on the test rig, if it holds vacuum and pressure, then no leaky. Pretty easy to see, a little shot of soapy water will clean the engine and tell you when you see bubbles you got a leak. Of course the huge sucking sound under vacuum might be a pointer also.

Beyond that, calibrate your wideband, and make sure it is not truly lean at idle. Your engine might be hunting for a real reason. Tuners are just like anyone else, they can be drawn in via their own biases, and not find the true answer. Or Ego steps in the way, and they do not want to admit their mistakes. Not a big deal, your just going to have to disprove all his issues first. Costing you time and money.

The flip side of the coin is like dealing with any contractor in the tech industry, we all have our opinions, and we are trained by the system to find whats wrong in others work, point it out, then do it our way. The true key is finding the tuner that can see the value in others work, and then add their knowledge to make the final product even better. Good luck with that hunt, these are a rare bird.
Chris H.
QUOTE(Andyrew @ Aug 25 2016, 11:10 PM) *


Timing issue was the wrong timing sensor pick up. Timing was dead on.


Yeah I knew it. It was running way too smooth. And the turbo would amplify the problem. That's an interference engine. They don't tolerate much.

Hunting idle is the WORST. I still have it occasionally. Are you using the stock ECU? If so I would lean towards tune. A sensor needs to be deleted, something like that.
Andyrew
Figured out my idle and top end fuel mixture issue...


Click to view attachment

Going to get new fuel injector seats and o rings, teflon tape the seats and try again.

I should be back on the road by 9/14 smile.gif


Also this just came in. I am extremely excited about it smile.gif Its my brown vinyl with the factory basketweave smile.gif Mark @914rubber did a great job on this and it looks fantastic! I dont think the impression is lasting enough to use as a seat bottom or back but I'll get a test sample and do a stress test on it. Im going to do the door panels, the dash accent, the center console sides and possibly the seat backing/bottom in it. w00t.gif
Click to view attachment


Mike Bellis
The instructions for the billet seats call for red locktite and no tape. I have the hex socket to remove the seats if you need one. Socket comes in the billet kit I bought. I also used larger (thicker) O rings to seal better. I found with the stock O rings, the injector can go to far in and trap the injector and loose the seal. Then you have to fish out the injector and hope the O ring does not pop off in the process. BTW, the O ring will be ruined if this happens...
Andyrew
Very interesting. Where did you get the larger O rings?
Mike Bellis
QUOTE(Andyrew @ Aug 31 2016, 06:26 PM) *

Very interesting. Where did you get the larger O rings?

FLAPS
Andyrew
Gotcha
Andyrew
Replacement injector seats came in. Broke the very first one getting it out... Im now going to vacuum the intake and then make sure the valves are closed and punch the plastic into the intake. The rest of them I used some PB blaster to make sure they didnt snag and break.
Click to view attachment


Side note, the dash is coming along. I got some glue coming in Monday hope to have it done for 9-14 presentation smile.gif

Click to view attachment
Andyrew
Last update for the 2016 Build Off Challenge. sad.gif


I tried to glue the vinyl to my dash down but the glue reacted with the primer I had down. It ate the primer thus making it a slipery mess.

I sprayed it with high temp spray paint and let it out to dry in the hot sun to bake, but I cant get call the dash as completed sad.gif. Soon, but just not now.

I did get the injector seats fixed. I stuffed some rags in the holes and chipped away at it. Then I attached one of my fuel hoses to the vacuum and sucked all the little pieces out and finally blew it with compressed air and sucked it again. After replacing I let the car idle for about 5 minutes. I put gobs of teflon tape on the injector seats and that seemed to solve 99% of it. I still have a pinhole leak but its so minor Im not going to bother with it. There is no way thats going to have any affect on the drivability of the car.


I spent about 3 hours with my tuner last night trying about 7 different tunes. We found a couple of issues, but in the long run not a single one did any changes. He's now starting me on a fresh tune and we'll tackle it again today. I have a feeling my huge injectors are the root cause of my issues.

At this point it runs, drives, stops, and makes super loud noises. We'll keep going on it till its perfect. I have a track day at Thunderhill West for mine and my dads birthday in November and I want to make a local autox this month to shake down the car.


Happy 9-14 day all!
Click to view attachment
Andyrew
So the glue came in and I gave laying down the vinyl a try. It took a few coats till it wasnt just spreading the paint around. Im not 100% happy with the result, I thought I would be able to do the dash but this was an extremely complicated piece. I might have one more go at it as well as put some foam/padding under it but we will see.

Also took it to a local show again, big hit with lots of interested people.

I have a leed on a local tuner that might be able to help me. My current tuner is basically giving me the cold shoulder, he helps me once a week maybe...
Andyrew
Got a new development. Were pretty excited about it smile.gif
Garland
piratenanner.gif

Congratulations!

mgp4591
This build thread is brought to you by PREGGO - the spaghetti sauce for expectant mothers... biggrin.gif
Congratulations! aktion035.gif
rktmn247
Congratulations!
914forme
Congratulations
Andyrew
Past couple months have been spent working on tuning as well as getting the car ready for my track day last weekend.

Things I did:
Spent a considerable amount of time on the steering linkage trying to get the notchiness out. I improved it but its still not right.

Replaced the 6 year old rear 400tw tires with some new Federal 595rs-rr tires. Went down from 285 to 275 but the tires are half an inch wider per side..... This meant I had to trim the rear fenders to prevent rubbing.
Click to view attachment
Before trimming

Got an alignment that didnt do anything

Replaced the pass side CV joint however to no avail, the knocking sound I feel and hear must be in the differential.

Tried as I could to help the trans shift better with adjustment and new fluid, but no luck. Im going to swap in my spare trani and open up this one. Not looking forward to the longer gears in the v6 trans. Its already really really tall gearing.

Did some more tuning on wastegate pressure, bumped up my redline to 7500. Going to bump it up to 8k as I feel the turbo still has lots of pull in it and it really likes the top end.

Changed the oil out from my break in oil to Royal Purple.

Nut and bolted it about 3 times..

Then I headed up to Thunderhill West with my dad coming down from oregon with his car. (I also brought 5 other drivers to the track day...)
Andyrew
Next we have some video of the track day. Remember I have an OBD2 port so I can pull live data to my phone. Used an app called Torque Track Recorder to record some of these. The data is delayed but it gives a good idea. Gforce data is on time though since the phone pulls that.

https://www.youtube.com/watch?v=Z30efFVRMwI


https://www.youtube.com/watch?v=pDDu7-iU92o


https://www.youtube.com/watch?v=ymyGqg5HoTE


https://www.youtube.com/watch?v=Mm5XFVJgrFs

Last run of the day, rear tires started to grip at this point. I believe they were designed for a much heavier car as I only have 20psi in them and they were not rolling over like they should. I had an inch of contact patch on each side of the tire that was not being used.

You can see the gforces are there, the car is decently quick, the braking and my lines could use work, but I really couldnt use any power through the turns as it would just spin the inside rear.

Note I have hankook street tires up front which are considerably less sticky than the rears, however I still felt the grip lacking in the rear vs the front.

Photos uploaded in a couple days.
dan10101
There are bad days, meh days, and good days, this was a Great day!
We need more Great Days!

The best part of the day was running with Andrew in the video above with his mother in my car going at it pretty hard for us. (we have a ways to go...) I thought I would have to baby it around a couple laps at best then she would call it quits. She didn't, I'm pretty sure she wanted to go faster. Next time we'll turn up the boost and see how she does.
Andyrew
Recent track day pics from Thunderhill West

Click to view attachment

Click to view attachment

Click to view attachment

Click to view attachment
I thought this was cool, My car in the pic above and my dads car in this pic in the exact same spot. I've spent an hour going between the two cars looking at the difference in the tire widths, the angles of the car, ect ect. Its pretty interesting.

Click to view attachment
Andyrew
Couple more.
Click to view attachment

Click to view attachment

Click to view attachment

Click to view attachment

Click to view attachment
Shot from my friend with an old 35mm film camera.
Andyrew
Last one for today.

Big reveal smile.gif
tygaboy
piratenanner.gif smilie_pokal.gif cheer.gif

Big CONGRATS
timothy_nd28
icon_bump.gif
Page 8 is gold. I'm currently fighting the 916 bumpers and trying to emulate the techniques you used with yours
Andyrew
QUOTE(timothy_nd28 @ Aug 14 2017, 12:52 PM) *

icon_bump.gif
Page 8 is gold. I'm currently fighting the 916 bumpers and trying to emulate the techniques you used with yours

At some point i'll finalize the bumpers.. For now, its all about the running gear. Fiberglass was just trial and error, work it till it works.
timothy_nd28
Trial and error is what I stand for! biggrin.gif I do like how you painted the bumpers black. It may look good against my future yellow tub, a bumblebee effect. Are they flat or semi black?
Andyrew
QUOTE(timothy_nd28 @ Aug 14 2017, 01:54 PM) *

Trial and error is what I stand for! biggrin.gif I do like how you painted the bumpers black. It may look good against my future yellow tub, a bumblebee effect. Are they flat or semi black?

Semigloss out of a can. Works really good, easy touch up. I really need to touch them up...
76-914
You baited me! biggrin.gif I had hoped it was an update. hissyfit.gif
Andyrew
HAHAHA!

I do need to post updates of the 4 months of "Progress" I have been working on recently biggrin.gif

Come back around 1pm smile.gif
Mike Bellis
***UPDATE***

Mine is sitting in the garage covered in boxes. headbang.gif
This is a "lo-fi" version of our main content. To view the full version with more information, formatting and images, please click here.
Invision Power Board © 2001-2024 Invision Power Services, Inc.