New Baby Girl Alina She is 4 months old now (Shows you guys how much I update you all)...
Also I picked up my dads 944 turbo. Love the car, and its got a back seat for Alina. Im working through some issues on the car but they are all fairly minor. This car will see mainly track time and canyon runs.
76-914
Aug 15 2017, 07:37 PM
Precious! Little girls are for Daddy's to spoil. I raised 2 girls. Wait until you see how aggressive you become once they hit dating age.
burton73
Aug 15 2017, 07:50 PM
Andrew,
Congratulations on having your little girl. She is very cute!
I have three little girls that are now all grown up. They love their dad. Clean your guns when they bring home a date. You have a long time till that time. You are a lucky man. Father hood looks good on you or your beard does.
Bob B
oakdalecurtis
Aug 15 2017, 09:53 PM
Just an experienced based tip for the future, Andy. When she's a teenager (sooner than you think), if she ever brings home a guy that makes you cringe, DO NOT follow your first instinct to grab his neck and throttle him! Instead, calmly go talk to the young man for a few minutes. Then go over and tell your daughter how happy you are that she finally found a guy you can relate to and become good friends with. She'll dump him in no time! Trust me on this, if dad likes him, it's the kiss of death!
porschetub
Aug 16 2017, 01:42 AM
First born a girl,now 23yr old ,left home 6mths ago, still helping her when she comes home cause that's what u do. My son has left too and living in the same city,when I crap out they will look after me .. My job over that time when they were little was 6 months oversea's ,regrets not being for them ,make the most if you can. Don't forget the stuff you enjoy when you have that small amount of free time...ok.
mgp4591
Aug 16 2017, 01:51 AM
Wow, what a little cutie! And I second all of the comments made by the other dads - I've got 4 girls and three successful marriages so far. I count myself a very lucky dad in that I've never been to prison...
Good luck when she hits 13 Andy! You’ll be handing her the car keys before you know it.
Andyrew
Aug 12 2018, 11:10 PM
Alina update: Shes doing great!!! Learning so quickly! She loves reading books, dancing to music, running around chasing our dog, and grabbing my glasses off my face.
House update: I moved in January. My wife wanted a pool (Shes been in it 5 times... I've been in it 20..), I wanted a 3 car garage (minimum), and we both wanted more house, newer, and in a nice neighborhood. We looked 3 years ago and should have bought then, but you live you learn.
I spent a couple months decking out the garage and building some shelving and a bench and such till it was suitable for me to actually work. I have loads more to do but I've french cleated all the walls so everything is modular which is nice and my main bench I made is on locking casters so it rolls around pretty well. I still need another workbench but this and my collapsible 50's style sawhorses will work well.
On the car front I've done SOME stuff but not much. I drove it for the last time last weekend and said its time to put it down for a while. I have been facing a hot start issue for almost 2 years which has stopped by tuning as well as any real progress on the car or driving. The issue is the car will not start after its any bit warm (Im talking 1 minute started). I've thought it was a crank position sensor as it acts very funny and will start once every 20 cranks ish randomly when warm, but after replacing it multiple times this lead nowhere. At this point I think something is funky with the wiring.
So I've removed all the wiring on the car and I'll be consolidating, testing and cleaning it up as best I can (There are way to many wires in the harness right now). I have determined I will not be using ABS on this car or traction control from the AUDI computer.
Worst case scenario if I cannot figure out I'll do what I should have done from the start and go MS3-Pro EVO. This will give me a lot of cool features that I cant do with my current setup (E85 flex fuel, Traction control, Self tuning)
My current issues that need to be resolved before the car touches the road again.
1. Solve hot start issue. 2. Rewire car. 3. Replace transmission (Current one shifts very bad, Thought it was clutch engagement but after adjusting that it shifts no different). 4. Fix steering binding 5. Pull engine and find out why it leaks so damn much with all new seals. Reseal everything if necessary.
Things that I want to do.
1. Clean up engine bay fuel lines 2. Build better intercooler reservoir (Stainless) 3. Finish building firewall. Note targa top needs to still fit. 4. Clean up trans mounts a bit, paint. 5. Clean up shifter cable holders. (They keep popping out due to excess strain shifting). 6. Clean up the center tunnel. Possibly cut it open and replace it Its messy, sharp edges, and needs some attention. 7. Weld in roll bar and start working on full cage. 8. Figure out what I want to do with the seats so I can get the interior laid out better. 9. Figure out what I want to do with the dash and instruments (Depending on if I can get the Audi stuff to work properly) 10. Start the damn interior...
Pics and video's tomorrow during lunch. Gotta get some sleep now.
PS, I've written this post like 6 times over the past couple months..
Mike Bellis
Aug 13 2018, 07:02 AM
I was having starting/dying problems with mine at first. I tracked it down to a loose wire at the temp sensor plug. This is a known issue on these donor cars. Remove the rubber boots from your connectors and tug on the wires. Pull hard. If they (wires) come loose, there's your problem.
Andyrew
Aug 13 2018, 08:19 AM
QUOTE(Mike Bellis @ Aug 13 2018, 06:02 AM)
I was having starting/dying problems with mine at first. I tracked it down to a loose wire at the temp sensor plug. This is a known issue on these donor cars. Remove the rubber boots from your connectors and tug on the wires. Pull hard. If they (wires) come loose, there's your problem.
Tried that, replaced the plug with no change. My coolant temp comes up like normal as well. Its all taken apart now ready for inspection/cleaning and continuity testing.
This is a video explaining the wiring. Note its a bit difficult to follow as it was about 12:30am and I was a bit tired.
Good to see that your "going back in", Andrew. That can be difficult sometimes. Looking forward to seeing you AND your 914 at some upcoming events. Also, looking forward to seeing some posts on your progress. :beer2
EDIT: Can't help but wonder if your ECU is locking out the Start circuit because it isn't receiving an OK from some system such as ABS sensor or Collision sensor system not functioning .
Andyrew
Aug 13 2018, 08:26 AM
House and Alina
Mueller
Aug 13 2018, 09:26 AM
Alright, progress on the car!
She is too cute, everyone needs a spaghetti meal picture of their kid!
I think I know what the problem with your harness is:
EDIT: Can't help but wonder if your ECU is locking out the Start circuit because it isn't receiving an OK from some system such as ABS sensor or Collision sensor system not functioning .
Possibly, but it wasnt that way from the beginning, I had 6 months of starting 1st or 2nd crank rotation every damn time. This issue popped up as I was working on the cooling system and spilled a bunch of water near the crank position sensor, so I figured I had fried something there.
Its one of the reasons why my backup is just to go with a megasquirt system.
oakdalecurtis
Aug 13 2018, 10:41 AM
Hey Andy, I don't see how you can work on your car at all when you're wrapped around Alina's fingers so tight!
Andyrew
Aug 13 2018, 11:16 AM
QUOTE(oakdalecurtis @ Aug 13 2018, 09:41 AM)
Hey Andy, I don't see how you can work on your car at all when you're wrapped around Alina's fingers so tight!
Thats why getting this far has taken so long!
76-914
Aug 13 2018, 12:08 PM
QUOTE(Andyrew @ Aug 13 2018, 08:46 AM)
QUOTE(76-914 @ Aug 13 2018, 07:26 AM)
EDIT: Can't help but wonder if your ECU is locking out the Start circuit because it isn't receiving an OK from some system such as ABS sensor or Collision sensor system not functioning .
Possibly, but it wasnt that way from the beginning, I had 6 months of starting 1st or 2nd crank rotation every damn time. This issue popped up as I was working on the cooling system and spilled a bunch of water near the crank position sensor, so I figured I had fried something there.
Its one of the reasons why my backup is just to go with a megasquirt system.
Ahh. We'll that's certainly logical. DNKT
Andyrew
Aug 16 2018, 08:34 AM
Got some new tools and consumables. Not pictured is more heat shrink (3:1), and a new butane torch.
Last night I spent an hour stripping the wires of tape(thread remover works great if your slow to avoid crossed wires) and cutting a couple unused plugs out. Probably a pound of wire removed. I'll weigh it all when done. I've got to do this real slowly to not cut anything critical out.
Mueller
Aug 16 2018, 08:51 AM
QUOTE(Andyrew @ Aug 16 2018, 07:34 AM)
Got some new tools and consumables. Not pictured is a new 60watt soldering iron with orange case , flux, solder, heat shrink terminal kit, and on the way is more heat shrink (3:1), and a new butane torch.
Last night I spent an hour stripping the wires of tape(thread remover works great if your slow to avoid crossed wires) and cutting a couple unused plugs out. Probably a pound of wire removed. I'll weigh it all when done. I've got to do this real slowly to not cut anything critical out.
More tools...nice!
Things I don't see in the picture....safety glasses, a carbon filter exhaust fan and a "third hand"
Andyrew
Aug 16 2018, 08:56 AM
QUOTE(Mueller @ Aug 16 2018, 07:51 AM)
QUOTE(Andyrew @ Aug 16 2018, 07:34 AM)
Got some new tools and consumables. Not pictured is a new 60watt soldering iron with orange case , flux, solder, heat shrink terminal kit, and on the way is more heat shrink (3:1), and a new butane torch.
Last night I spent an hour stripping the wires of tape(thread remover works great if your slow to avoid crossed wires) and cutting a couple unused plugs out. Probably a pound of wire removed. I'll weigh it all when done. I've got to do this real slowly to not cut anything critical out.
More tools...nice!
Things I don't see in the picture....safety glasses, a carbon filter exhaust fan and a "third hand"
Safety glasses are directly above the table.
That big ass fan isnt big enough for you? And nope, I dont have a "third hand" yet. Im thinking of putting a "T" track in the front of my table and putting a third hand in it. Havent gotten around to soldering yet, just thinning out the harness still (And probably for another couple weeks if I work on it every other night).
dan10101
Aug 16 2018, 09:00 AM
Finnegan's garage is giving away a $2500 worth of tools for wiring etc. https://www.youtube.com/watch?v=DNwjFWv3iNs All you have to do is comment something that catches his eye or his heart.
What you have looks good. Good tools are the key...
76-914
Aug 16 2018, 02:36 PM
Something I found invaluable was the dual range heat gun from HF ($14.99) https://www.harborfreight.com/1500-watt-dua...1112-62340.html and the helping hands tool ($4.99) https://www.harborfreight.com/Helping-Hands-60501.html The dual range heat gun is perfect for the Heat Shrink. Find the perfect temp setting for whichever style your using then set it and forget it. IIRC, 730F was perfect for melting the silicone in the Marine grade. The helping hands is that 3rd hand but doesn't let the wires move as we do by hand. Rather than twist the wires together I like to slide the exposed ends upon each other then push any stray wires back in before soldering. This way I don't end up with a knot or bulge after soldering. It's not important but looks a lot neater and I don't need the next larger size of heat shrink for it to slide over the hump. Does that make sense? I know that you know this but many guy's don't. A perfect resin core solder joint will shine when set. If the soldered object is allowed to cool too quickly (eg by blowing on it) or moves before it is set then the joint will appear cloudy indicating an improper solder joint. Before sure that you have a Cold Beer each evening afterwards so you can relax.
Mike Bellis
Aug 16 2018, 06:44 PM
QUOTE(Andyrew @ Aug 13 2018, 07:19 AM)
Tried that, replaced the plug with no change. My coolant temp comes up like normal as well. Its all taken apart now ready for inspection/cleaning and continuity testing.
This is a video explaining the wiring. Note its a bit difficult to follow as it was about 12:30am and I was a bit tired.
My temp came up fine too. The water sensor is a dual element. One goes to the gauge and one to the ECU. It was the ECU wire that had an intermittent connection.
Check all the plugs for every system and try to pull out the wire from the metal terminal. Pull hard. Don't be afraid to yank on it. Like I said, failure at this type of connection point is a known point of failure and run problems. I've even seen some crimps where they crimp over the insulation. This works for a while and then wiggles out of contact.
Mike Bellis
Aug 16 2018, 06:45 PM
What does you VCDS say the problem is? When was the last time you did a throttle body calibration?
Andyrew
Aug 16 2018, 07:01 PM
QUOTE(Mike Bellis @ Aug 16 2018, 05:45 PM)
What does you VCDS say the problem is? When was the last time you did a throttle body calibration?
I can no longer connect to the obd2. This happened about 3 months after the issue. Vcds showed bad crank position sensor, then it stopped showing an issue, then I could no longer connect to it. Another reason why I'm doing the wiring cleanup.
Andyrew
Aug 16 2018, 07:04 PM
QUOTE(Mike Bellis @ Aug 16 2018, 05:44 PM)
QUOTE(Andyrew @ Aug 13 2018, 07:19 AM)
Tried that, replaced the plug with no change. My coolant temp comes up like normal as well. Its all taken apart now ready for inspection/cleaning and continuity testing.
This is a video explaining the wiring. Note its a bit difficult to follow as it was about 12:30am and I was a bit tired.
My temp came up fine too. The water sensor is a dual element. One goes to the gauge and one to the ECU. It was the ECU wire that had an intermittent connection.
Check all the plugs for every system and try to pull out the wire from the metal terminal. Pull hard. Don't be afraid to yank on it. Like I said, failure at this type of connection point is a known point of failure and run problems. I've even seen some crimps where they crimp over the insulation. This works for a while and then wiggles out of contact.
I changed the sensor 3 times then changed the wiring twice. Another item I'll be checking while doing the wiring again. All the junkyard connectors we're junk. I haven't found a source for the connector new or else I would do that.
Andyrew
Aug 16 2018, 11:36 PM
Progress from tonight. More of the easy slow stuff. Removed about 10 connectors I don't need. Probably about 15 left to cut out throughout the harness, these were all in two simple clumps.
I am still leaving some wires to trim in case I find I make a mistake and need to solder one back. I'll power up the system and test it before I trim everything back and finish the looms.
Andyrew
Aug 18 2018, 02:25 AM
Cleared out some more wiring but as I was doing the light wiring I got worried that I was clearing out too much... So I removed the relay holder, the turn signal/wiper/headlight stalks and the ignition switch and my battery and set it all up on the bench. I was able to figure out the headlights but I didn't get the turn signals to work with a test light. So I'm going to finish up the wiring the best that I can tell for the lights and add some connectors at appropriate lengths and then I will put it in the car. I suspect that it needs more bulbs/resistance to work. The hazard switch works great and it's what holds the turn signal relay.
I spent a bit of time writing out all the wiring per the diagrams I have so I can confirm I did wire it up appropriately the first time. I have been having issues with one of the headlight fuses constantly going out so I suspect I have it on the wrong wire/ fuze/ something so that's one of my big things I'm working on solving with this wiring.
The loom is substantially thinner at this point, and I have a lot of wires I still can remove/trim.
Note I still have the engine harness to go through. I just decided to start with this as I'm going to be spending a considerable amount of time measuring and lengthening/shortening the wires for the engine harness.
Andyrew
Aug 22 2018, 08:42 PM
I did someore trimming a couple nights ago, no pics. I went over the lights and turn signal situation and I have a bit more to do but I think I have it figured out. I am ready to start trimming the engine harness and in doing so I'll be able to trim the chassis harness a bit more as well. After all the triming I'll size everything to proper lengths and move from there.
Monday night I was modifying some steel frames for work (I rarely do this kind of stuff in my position, but I needed it done faster than my shop was going to be able to do it) and I got a piece of metal in my eye. I didn't notice it till yesterday after work and thus made an emergency trip to my optometrist, who luckily is a family friend and I can typically pull strings when needed like this. Got it out and after a hard night last night I am feeling better. Still blurry but I'm dialated pretty good and he took a bit of material out as there was a little rust. However it's healing well (follow-up appointment) so no worries there.
Back on topic I decided to replace my failing welding helmet, and I took the advice of you guys and got a nice set of helping hands. I should have a little bit more progress this weekend. I should be testing the system sometime in the next month and then wrapping it for good.
dan10101
Aug 22 2018, 09:58 PM
Hmm, DejaView all over again.
Or was it me last time...
#Dadmodeon Wear your safety equipment!!! #Dadmodeoff
Glad you got it taken care of.
Andyrew
Aug 23 2018, 07:03 AM
I was wearing my good goggles.. damn dremmels just kick out a ton of debris. I'm getting a full face mask to use over my goggles. When I am using the dremmel it typically shoots the Sparks directly in my face, and I have to be very close to see perfectly
76-914
Aug 23 2018, 08:22 AM
Careful with those eyes. Replacement parts rival Porsche parts in price. Your heading down the right path. Should be a runner soon. Stay after it.
worn
Aug 23 2018, 12:47 PM
QUOTE(Andyrew @ Aug 23 2018, 06:03 AM)
I was wearing my good goggles.. damn dremmels just kick out a ton of debris. I'm getting a full face mask to use over my goggles. When I am using the dremmel it typically shoots the Sparks directly in my face, and I have to be very close to see perfectly
Have used the dremmel a lot and find that wire brush wheels are extremely dangerous. To the point where I had a piece of stainless brush wire pierce through my nose. Not really that keen on jewelry and it could have been my eye.
Andyrew
Aug 23 2018, 12:52 PM
QUOTE(worn @ Aug 23 2018, 11:47 AM)
QUOTE(Andyrew @ Aug 23 2018, 06:03 AM)
I was wearing my good goggles.. damn dremmels just kick out a ton of debris. I'm getting a full face mask to use over my goggles. When I am using the dremmel it typically shoots the Sparks directly in my face, and I have to be very close to see perfectly
Have used the dremmel a lot and find that wire brush wheels are extremely dangerous. To the point where I had a piece of stainless brush wire pierce through my nose. Not really that keen on jewelry and it could have been my eye.
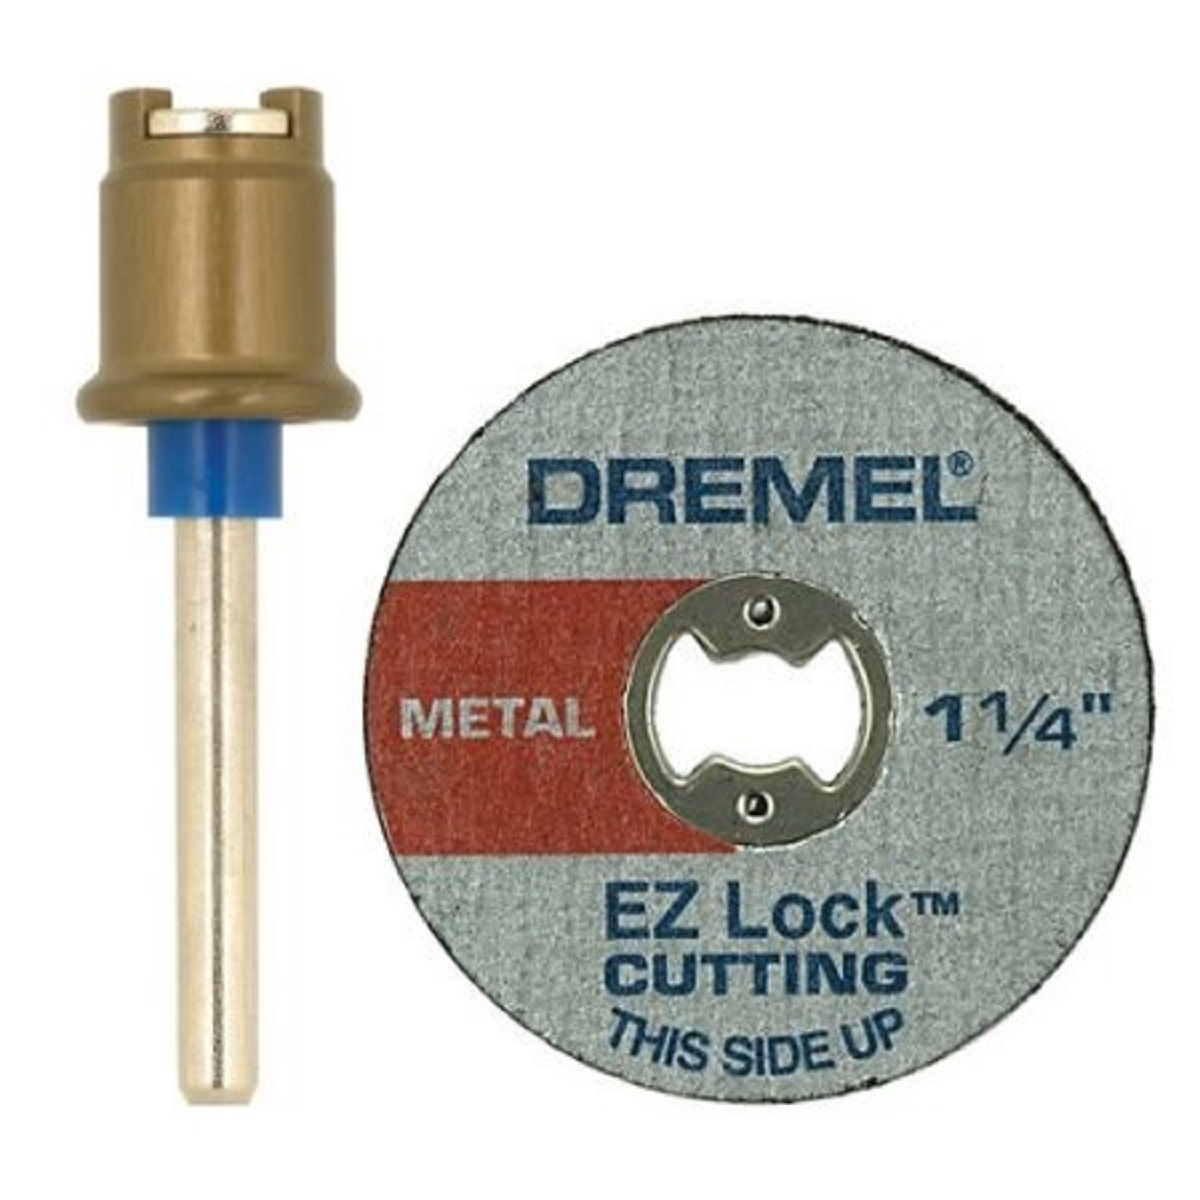
Wire brush wheels are not my favorite thing either.. This was the tiny cutoff wheels with the EZ lock connector. I like them, they cut well, but when they wear down they just throw debris and finally explode.
Andyrew
Aug 26 2018, 01:10 PM
Cleaned up a bit more. Working on the connections to the 914 body harness/lights. Decided to try the new connector hardware. Works pretty good but it needs the special tool or else it's pretty difficult to install. I soldered them when I was done with crimping them.
Helping hands was nice
Andyrew
Sep 11 2018, 10:57 PM
Been busy! Click to view attachment Click to view attachment I made the mistake of cutting out two connectors that ran to the rear of the car for lighting. The thing is when I cut things out I also cut the wires back as far as possible. I do however leave enough room to connect to the wire in the future if need be and put some heat shrink on each wire.
So after 3 nights of research testing and scouring for like wire colors and size to splice back in I got it back... In the end the job will be cleaner. Click to view attachment
I got as far as air dare go on the main harness and went after the engine harness. Click to view attachment If you remember I wanted to extend the harness. Well I found a way of routing it that I don't need to. I'm going to put a couple extra inches Into the engine bay and maybe extend a wire or two but I think I'll be ok. If I need to extend it I'm extending it like 3 feet to wrap around the engine bay and be completely hidden. The blue bucket is full of removed wires, relays and connectors from the engine bay harness. Not pictured are 3 sensors that have resistors that Ishortened and moved out of the engine bay.
A couple of pieces I got was a new temp sensor connector and sensor. I'm going to pray that this is the issue as I haven't found anything else wrong yet. I'll wire this in next. Click to view attachment
Next step is to cut the hole in the firewall out of plain sight (like I did last time) and confirm the wires are long enough. Then connect everying up and test it all and look for issues. I've been bench testing the lights and guage cluster but that's it so far.
Once everything is all good I'll finalize some connections run some wires for a pop up headlight switch, and finally wrap everything. I have some great wrap as well as some new super awesome heat shrink. This stuff is up to 2" wide!! When it's fully shrink it's about 1/8" thick! Click to view attachment Some connectors I pinned up and heat shrunk below. 3:1 shrink ratio is also awesome. Click to view attachment Click to view attachment Click to view attachment
76-914
Sep 12 2018, 09:05 AM
The temp sensor is the suspect, correct? Post a link to the 3:1 heat shrink. Is it marine grade? Stay after it.
Andyrew
Sep 12 2018, 09:41 AM
QUOTE(76-914 @ Sep 12 2018, 08:05 AM)
The temp sensor is the suspect, correct? Post a link to the 3:1 heat shrink. Is it marine grade? Stay after it.
Temp sensor is what Bellis thinks it is, I've replaced it a couple times but never had a good connector in the harness so hopefully this ends up being the issue. If not, more spares
My other thought is the crank position sensor, I havent gone through and checked the wiring on it yet but its on my short TO DO list prior to wrapping both harnesses.
Sorry, its 4:1 shrink tube https://www.amazon.com/gp/product/B07FNC7VW...=UTF8&psc=1 This supplier has lots of sizes, I ordered 4 feet of each size I needed that should cover any size needed (4:1 is NICE) and shipping was only $6 total for a total order of $42.
So far REALLY happy with it, I just need to shrink it on LOW heat with my heat gun as it melted my wrap on one of my wire bundles. Also when its cooled its almost completely stiff. It should do an amazing job protecting my connector wiring. Lastly its adhesive lined so it wont move on the connector.
Curbandgutter
Sep 12 2018, 02:01 PM
OK now I know who to turn to when I get to wiring my car. Your work is top notch. I'll be calling you to find out where to get all those fancy connectors and sheathing.
By the way this is the mask that I use, it may be helpful for you as well.
OK now I know who to turn to when I get to wiring my car. Your work is top notch. I'll be calling you to find out where to get all those fancy connectors and sheathing.
By the way this is the mask that I use, it may be helpful for you as well.
I put that one on my wish list My welding helmet has a grind mode and I found one of my old face shields (stuck in a box from moving) so Im going to try that for now. But this is on the short list to buy .
This is the connectors. The single review is from me I bought a second box as they only came with 2 of each size and I was out of one of them (And liked them for the money). But for the money I like them a lot. I end up doing a tiny dab of solder on most pins. https://www.amazon.com/gp/product/B07FTRV25...=UTF8&psc=1
I've had to commute in the 914 for the last 4-5 days. Today the car dropped into limp mode 4 times and has a check engine light. Each time I restarted and it came out of limp mode. Not sure what's going on. I'll hook my VagCom up to it tomorrow after work. Taking the wife's car tomorrow.
Matty900
Sep 13 2018, 12:02 AM
QUOTE(Andyrew @ Sep 11 2018, 09:57 PM)
Been busy! Click to view attachment Click to view attachment I made the mistake of cutting out two connectors that ran to the rear of the car for lighting. The thing is when I cut things out I also cut the wires back as far as possible. I do however leave enough room to connect to the wire in the future if need be and put some heat shrink on each wire.
So after 3 nights of research testing and scouring for like wire colors and size to splice back in I got it back... In the end the job will be cleaner. Click to view attachment
I got as far as air dare go on the main harness and went after the engine harness. Click to view attachment If you remember I wanted to extend the harness. Well I found a way of routing it that I don't need to. I'm going to put a couple extra inches Into the engine bay and maybe extend a wire or two but I think I'll be ok. If I need to extend it I'm extending it like 3 feet to wrap around the engine bay and be completely hidden. The blue bucket is full of removed wires, relays and connectors from the engine bay harness. Not pictured are 3 sensors that have resistors that Ishortened and moved out of the engine bay.
A couple of pieces I got was a new temp sensor connector and sensor. I'm going to pray that this is the issue as I haven't found anything else wrong yet. I'll wire this in next. Click to view attachment
Next step is to cut the hole in the firewall out of plain sight (like I did last time) and confirm the wires are long enough. Then connect everying up and test it all and look for issues. I've been bench testing the lights and guage cluster but that's it so far.
Once everything is all good I'll finalize some connections run some wires for a pop up headlight switch, and finally wrap everything. I have some great wrap as well as some new super awesome heat shrink. This stuff is up to 2" wide!! When it's fully shrink it's about 1/8" thick! Click to view attachment Some connectors I pinned up and heat shrunk below. 3:1 shrink ratio is also awesome. Click to view attachment Click to view attachment Click to view attachment
Looking good Andrew. One thing that caused me an issue on my Micro Squirt harness was the adhesive shrink wrap being too close to the plug at the main plugin. That had me replacing parts to try and hunt down the gremlin It put a lot of tension on the pins whenever we moved it in and out. It ended up opening up the pins at the outside (where the power wire was) just enough to cause a signal loss intermittently. I hope that makes sense. Anyway, keep up the good work
Andyrew
Sep 13 2018, 06:03 AM
Makes complete sense! I did however hot glue all the backsides of the pins so they won't move in the connector so I have a feeling that won't be an issue but you never know!
Mike Bellis
Sep 13 2018, 07:59 PM
You need your VCDS...
Figured out my limp mode. Still have to fix it but it's wiring somewhere...
See below. Low voltage and ABS are the normal codes. Throttle code was the cuase.
Only a couple wires to it. I have it fully blown out now if you want me to sent you any pics.
Yes I need to get my vcds (Obd2 reader specific to VW/Audifor those following at home) working. Maybe I'll hook it up tomorrow and see what issues I'm having.
Andyrew
Sep 16 2018, 02:34 AM
I stopped working on the engine harness as it's ready for me to test it. I went back to the dash harness (main harness) and added some more connectors.
Just as a side note, I'm pinning all these connectors by hand. It typically takes me 45mins per side to do these for say a 5 wire connector. It involves making sure the wires are long enough, adding if necessary then taping the wire leading up to the connector so they don't move, cutting them all to the same length, stripping 3/8" off each one (if it's a thick wire I can use my strippers, else I use a razor blade on the thin wires.) I then put the pin on and butt the second prong to the wire sleaving. Work the connection pins over with my tool so they will fold under each other or wrap the wire when crimped and crimp with my tool. Repeat for the rear pin holding the wire. Then squeeze up the insulating grommet. If it's a thin wire I fire up the soldering gun and tin the wires in the connector really quick. Once that's good I repeat for all the wires. Finally I tape them together at the ends and feed in the wire sleaving I use and cut to length burning the ends so they don't split. I throw some heat shrink down in multiples as well as my new super awesome 4:1 shrink in about a 2.5" length. I shove the wires in the connector making sure they go in all the way and click (Sometimes pulling them into place with a needle nose). Then push the weather seal into place by hand followed by a special tool I made to get them as deep as possible. Check to make sure all the pins are in the correct angle and hot glue the remaining space in the connector (1/4"). I slip the wire sleeve up to the edge of the connector while the glue is still hot and run one layer of tape to make sure it stays while heat shrinking. I apply the smaller heat shrink (both ends of the sleeping) and finalize it with the big heat shrink around the connector which takes some time and careful work with the heat gun. At this point I test the connections wait for the shrink to cool and admire my handiwork.
At this point I have been spending 10 hrs a week in the garage (typically from 9am to 1am, Friday and Saturday nights and a bit here and there. On this wiring for the past 5 weeks... I'm pretty tired of it now... It's relaxing and I can listen to some shows my wife and girl don't like but still.
daytona
Sep 16 2018, 05:28 AM
Hi Andrew, You are doing a great job. Makes me want to redo the harness in my car. Got a question: the braided sleeve you are using; is that heat shrinkable as well? Thanks, Bill.
bbrock
Sep 16 2018, 08:41 AM
QUOTE(Andyrew @ Sep 16 2018, 02:34 AM)
... and admire my handiwork.
As well you should! Fantastic work!
Andyrew
Sep 16 2018, 09:57 AM
QUOTE(daytona @ Sep 16 2018, 04:28 AM)
Hi Andrew, You are doing a great job. Makes me want to redo the harness in my car. Got a question: the braided sleeve you are using; is that heat shrinkable as well? Thanks, Bill.
Bill,
Not on purpose (it will shrink when it melts with direct high heat from the heat gun) ... The sleaving I'm using is the expandable sleaving, you push the ends together and it opens up, you pull it and it shrinks down. Think chineese finger traps.
My biggest issue with it I am often forgetting to put the sleaving on prior to the connector.. when that happens I have to use my split sleaving. I like the split a bit more, it's not as clean looking but it is so much more forgiving.
Problem is the split stuff is about 4x the price and hard to get it in long lengths. You also need more sizes as it only covers certain sized wires.
This is a "lo-fi" version of our main content. To view the full version with more information, formatting and images, please click here.
 She is 4 months old now (Shows you guys how much I update you all)...
  Precious! Little girls are for Daddy's to spoil.
  I raised 2 girls. Wait until you see how aggressive you become once they hit dating age.


 .
.


![popcorn[1].gif](http://www.914world.com/bbs2/style_emoticons/default/popcorn[1].gif)