Full Version: 914 GT 3.6 Ferrari Build
Pages: 1, 2, 3, 4, 5, 6, 7, 8, 9, 10, 11, 12, 13, 14, 15, 16, 17, 18, 19, 20, 21, 22, 23, 24, 25, 26, 27, 28, 29
Incredible…..
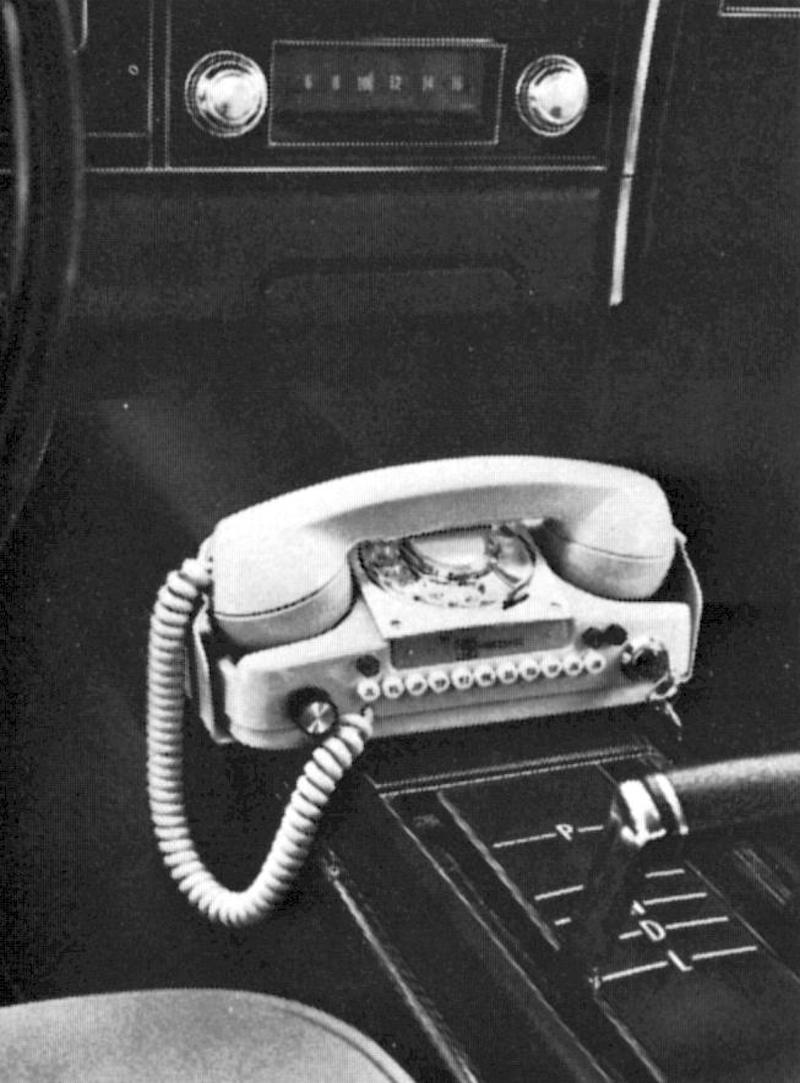
You should put one of these in the car when you're done ...

Hmm, a 914 with precise shifting is almost as crazy as a 914 with Ferrari power.
Chris - looking great. I have not seen the MB in a couple years - good to see you are biting off another project on top of the 914s. haha. Can't wait to stop by again for another look.
No words needed. Well, OK. But just these words:
This thing is ridiculous. It's even better in real life.
This thing is ridiculous. It's even better in real life.
Shifter porn.
I can’t understand why the aluminum is so thick! It looks like it should be a stressed member in the chassis lol!
Official drop on "At the Red Barn" YouTube channel will happen Saturday AM but I thought some of you might enjoy seeing the shifter being unboxed. Yeah, I know, I'm a little bit excited...
Edit on 8/26: Updated link to "official" version:
https://www.youtube.com/watch?v=cRRDEX4xP5w
Edit on 8/26: Updated link to "official" version:
https://www.youtube.com/watch?v=cRRDEX4xP5w
I can't wait to see that shifter in person; it looks amazing in the video. I can imagine it will shift like a rifle bolt. 
That's the OEM part? :wow:
QUOTE(jd74914 @ Aug 22 2023, 08:02 AM) 
That's the OEM part? :wow:
@jd74914 No. Finding OEM manual shifters/parts is essentially impossible. Ferrari no longer makes the components and not a lot of manuals were made back then. This is a billet aftermarket assembly from EAG out of Round Rock, TX. It's better than factory - so say the Ferraristas who know. It's spectacular.
Ahh, interesting. Explains the EAG thank you next to it.
That is a beautiful looking part! I'm sure it is better than factory, really looks quite incredible.
That is a beautiful looking part! I'm sure it is better than factory, really looks quite incredible.
Like a kid at Christmas.....surprised you didn't spend anytime playing with the box. 
Now to work out the location and orientation. I may add a bit of "up at the front" tilt. Among other things, that helps get the shift cables pointed where I want them. Once I'm settled on that, I'll work out a mounting system. And no, it won't include a headlight cover... 
But this is where it starts getting fun: I need to think as many steps ahead as possible and account for all the other systems that need to live under this shifter and be accesible for installation/service/replacement once everything is "done".
I think I'd like to preserve the factory tunnel vs total replacement like I did in my LS car. We'll see.
QUOTE(tygaboy @ Aug 22 2023, 03:19 PM)
Now to work out the location and orientation. I may add a bit of "up at the front" tilt. Among other things, that helps get the shift cables pointed where I want them. Once I'm settled on that, I'll work out a mounting system. And no, it won't include a headlight cover...
But this is where it starts getting fun: I need to think as many steps ahead as possible and account for all the other systems that need to live under this shifter and be accesible for installation/service/replacement once everything is "done".
I think I'd like to preserve the factory tunnel vs total replacement like I did in my LS car. We'll see.
You could do what I did and cut a hole in the top of the tunnel, then run the cables out the original holes for the shifter and the speedo cable.
That makes it easy to get through the firewall.
I love that shifter and Clay's idea for the cables.
QUOTE(ClayPerrine @ Aug 22 2023, 01:33 PM)
You could do what I did and cut a hole in the top of the tunnel, then run the cables out the original holes for the shifter and the speedo cable.
That makes it easy to get through the firewall.
@ClayPerrine Clay - The issue I (may) have is the Ferrari engine location requires I get the cables pointing to the right (passenger) side of the engine before they get through the firewall. I have to get back under the car and verify details now that the headers are in there but as I recall, I can't go under the engine. As with my LS car, the cables need to get past the crank pulley by going outside / above it. So now that I'm thinking about it, I may not want the front tilted up. It'll all work out, one way or another.
I like the re-use of the factory headlight cover 
Here's the plasma table earning it's keep cutting V1 of the shifter mount. Anyone surprised it looks a bit more complicated than "just a mount"? 
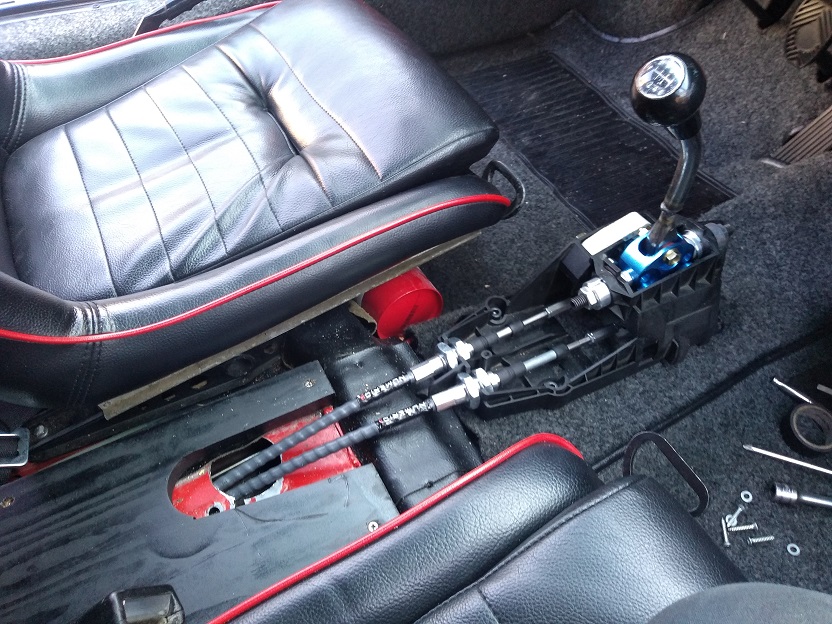
Initial mock up of the shifter base mount.
I figured future drivers of this car may prefer a bit different shifter location so...
There will be tabs welded to the chassis but this mount can rotate around that tab at the rear and tilt from flat to about 2" up at the front, enabled by the series of holes in the front tab.
Of course, when it's tilted, the knob moves up and rearward. So the mount also has a series of holes (you can see them just behind the front shift block mount) that allow for the entire shifter assembly to move forward / back, to best suit the driver. Here it's approximating the highest/most forward position.
Version II is on the drawing table but it's a bit more complicated (and potentially impractical) so it may never happen. It adds knobs to enable real-time adustment of tilt and fore/aft positions. Again, don't hold your breath.
Food for thought, I like my shifter to be on the same plane as the steering wheel. It makes movement between the two, smoother and more accurate.
QUOTE(Van B @ Aug 24 2023, 05:32 PM)
Food for thought, I like my shifter to be on the same plane as the steering wheel. It makes movement between the two, smoother and more accurate.
@Van B Great minds... When it's in neutral, the knob is in plane with the wheel.
QUOTE(tygaboy @ Aug 24 2023, 09:02 PM)
QUOTE(Van B @ Aug 24 2023, 05:32 PM)
Food for thought, I like my shifter to be on the same plane as the steering wheel. It makes movement between the two, smoother and more accurate.
@Van B Great minds... When it's in neutral, the knob is in plane with the wheel.
Yes!
I did a mod to my 996 shifter to bring it up and in line… then immediately wondered why I had the car for 10yrs before I made the change
It's just a mount for the shifter. I mean, how complicated could I make that?
https://www.youtube.com/watch?v=Kh0iLX7Aoak
https://www.youtube.com/watch?v=Kh0iLX7Aoak
QUOTE(tygaboy @ Aug 24 2023, 06:02 PM)
QUOTE(Van B @ Aug 24 2023, 05:32 PM)
Food for thought, I like my shifter to be on the same plane as the steering wheel. It makes movement between the two, smoother and more accurate.
@Van B Great minds... When it's in neutral, the knob is in plane with the wheel.
Hmmm. I located mine inline with the steering wheel too but I'm damn sure not going to claim a great mind on my part. It is more 914 like; rusty.

Jesus, if Chris manufactured the "Red Barn" model 914 I have to believe there would be a line of customers. The attention to detail is mind boggling. Love the details and of course a wonderful message for people to adopt a kitty.
Nice work! Big step forward figuring all the little details that I am sure took many hours to figure out.
Cool shifter location study. The side views on the videos really show what is going on. 
![popcorn[1].gif](http://www.914world.com/bbs2/style_emoticons/default/popcorn[1].gif)
I don't do the best at juggling multiple project but I am making progress. The past couple days has been noodling on the cooling system.
I've been looking at various mid- and rear-engined cars and how, in order to have some sort of frunk, they typically run a pair of radiators - one each in front of the front wheels.
Here's a 360 showing its rad.
I figure, if they can do it, I can do it!
After some closer eyeballing of the 914 chassis, I decided I'd give it a go.
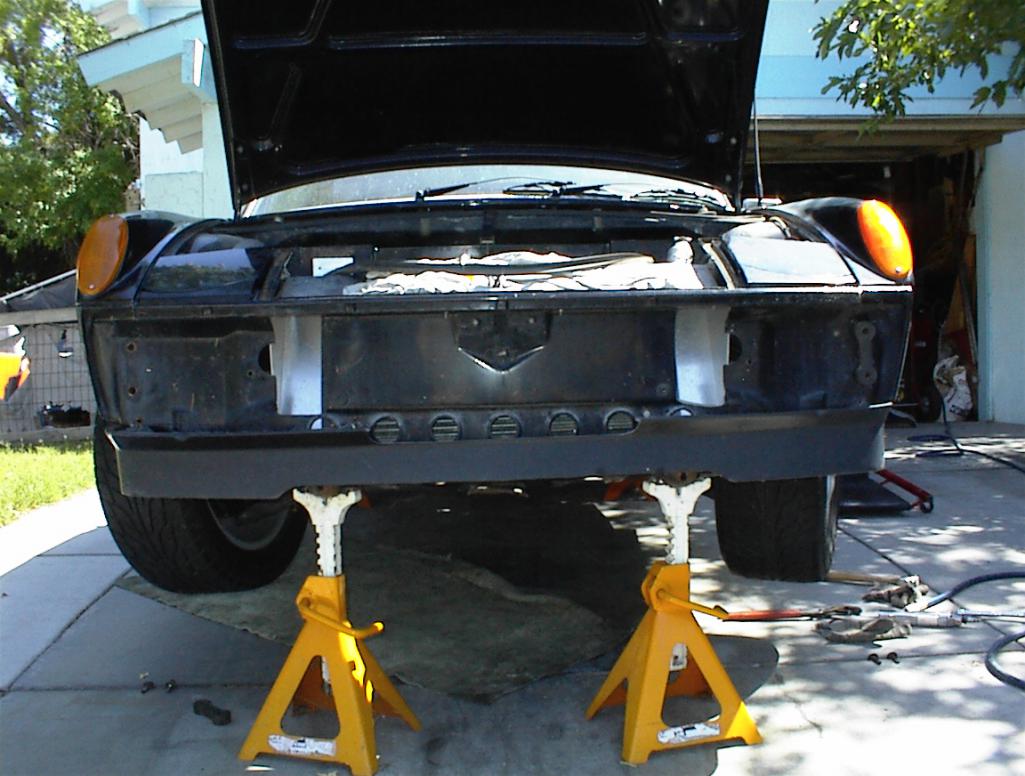
First step is a proof of concept. I decided to use a corner of the black donor chassis and started cutting. A few important points:
- I want to keep the pop-up look so no "lights in the turn signal buckets". I found a set of DOT legal hi/low LED lights that use 60mm beams in a 90 mm mount system. The plan is to mount them to the rear wall of what's left of the headlight bucket.
- this is a '75 BUB chassis but you can see that this approach preserves the area needed for the bumper mounts.
- looks like plenty of depth for a radiator and fan set up.
- the turn signal bucket is totally out of the way.
- depending of final available space, it looks like I can get maybe a 12x14 radiator in there.
The Renegade radiator in my LS car is 27" x 14" (378 sq. in.)
Let's go with worst case: I can only get two, 10"x12" or 240 sq. in. in there. I can get 5"x24" in the center for a total of 360 sq. in. So even worst case looks like it can work.
I'm enouraged! Now to find some radiators...
QUOTE(tygaboy @ Nov 17 2023, 12:47 PM)
First step is a proof of concept. I decided to use a corner of the black donor chassis and started cutting. A few important points:
- I want to keep the pop-up look so no "lights in the turn signal buckets". I found a set of DOT legal hi/low LED lights that use 60mm beams in a 90 mm mount system. The plan is to mount them to the rear wall of what's left of the headlight bucket.
- this is a '75 BUB chassis but you can see that this approach preserves the area needed for the bumper mounts.
- looks like plenty of depth for a radiator and fan set up.
- the turn signal bucket is totally out of the way.
- depending of final available space, it looks like I can get maybe a 12x14 radiator in there.
The Renegade radiator in my LS car is 27" x 14" (378 sq. in.)
Let's go with worst case: I can only get two, 10"x12" or 240 sq. in. in there. I can get 5"x24" in the center for a total of 360 sq. in. So even worst case looks like it can work.
I'm enouraged! Now to find some radiators...
996 turbo radiators?
Just such great work happening at the Red Barn.
You should base the cooling math on the Ferrari not the Chevy.... including air intake and exhaust hole sizes.
Also you don't have to see the rad from the front to cool it. Mine uses the horn grills as intakes plus most of the round holes from a spoiler trim, couple of additions to the back of the bumper to direct airflow, and I'm good.
Also you don't have to see the rad from the front to cool it. Mine uses the horn grills as intakes plus most of the round holes from a spoiler trim, couple of additions to the back of the bumper to direct airflow, and I'm good.
Love watching your videos and drooling over your work. Looking forward to my next visit.
I WANT TO SHIFT IT!!!!!!!!!

(Text me if the shifter is still attached)
(Text me if the shifter is still attached)
"I want to keep the pop-up look so no "lights in the turn signal buckets". I found a set of DOT legal hi/low LED lights that use 60mm beams in a 90 mm mount system. The plan is to mount them to the rear wall of what's left of the headlight bucket."
I've thought about this 996/987 style "side pod" radiator approach on and off - glad to see you noodling on it for this project. I think with the pop up lids and some physically smaller LED light units, you could get some extra ducted air in there at freeway vehlcle speeds - so the fan controller overrides the headlight lifter relay! (visual indicator for the driver to check engine temp!). The fan loading might be eased a bit. Active aero, dude.....
Also the lift angle on the headlight covers could be restricted to create a less severe angle when open with the smaller diameter units - I seem to recall a post here that someone had done this.
Fun stuff Chris - keep the posts coming!
- Tony
I've thought about this 996/987 style "side pod" radiator approach on and off - glad to see you noodling on it for this project. I think with the pop up lids and some physically smaller LED light units, you could get some extra ducted air in there at freeway vehlcle speeds - so the fan controller overrides the headlight lifter relay! (visual indicator for the driver to check engine temp!)
. The fan loading might be eased a bit. Active aero, dude.....Also the lift angle on the headlight covers could be restricted to create a less severe angle when open with the smaller diameter units - I seem to recall a post here that someone had done this.
Fun stuff Chris - keep the posts coming!
- Tony
I cut a mock-up mount for the Hella LEDs I'm considering. Mounting info in the pics. They're 60mm lenses, DOT legal, separate hi and low beam units. Looks like they'll work.
Bonus idea, thanks to @horizontally-opposed Pete, is that I think I can get them to sit fully behind the rear wall of the headlight bucket and rather than have the light covers pop up at the front, like stock, they'll hinge at the front and drop down at the back, exposing the bulbs.
Yes, it'll require permanently connecting the eyebrows to the covers and working up a new hinge system but, hey, if it were easy, everyone would be doing it.
QUOTE(tygaboy @ Nov 20 2023, 02:19 PM)
I cut a mock-up mount for the Hella LEDs I'm considering. Mounting info in the pics. They're 60mm lenses, DOT legal, separate hi and low beam units. Looks like they'll work.
Bonus idea, thanks to @horizontally-opposed Pete, is that I think I can get them to sit fully behind the rear wall of the headlight bucket and rather than have the light covers pop up at the front, like stock, they'll hinge at the front and drop down at the back, exposing the bulbs.
Yes, it'll require permanently connecting the eyebrows to the covers and working up a new hinge system but, hey, if it were easy, everyone would be doing it.
That will be so cool! I love that idea!
Hmm. Might have to watch the bumper top lip to make sure you get the beam close enough to the car? Like the idea though....
- Tony
- Tony
QUOTE(Retroracer @ Nov 20 2023, 04:30 PM)
Hmm. Might have to watch the bumper top lip to make sure you get the beam close enough to the car? Like the idea though....
- Tony
@retroracer Tony - That has been on the board as a possible challenge but I'm choosing to believe it won't be a show stopper. Partly because if it's dark a few feet in front of the car, I think I can live with that.
Plus, take a look at the 360 headlight position.
This "corner radiator" requires significant modification so I have to be sure it'll work. I'd really prefer a larger, better directed opening for the radiator inlet...
So here's the latest bad idea: copy the 914/8 headlight size/shape and widen the fog light grill opening to match. This would allow fitment of a nicely sized radiator and tidier airflow.
Plus, being a V8 swap, it'd be a neat nod to the factory 8-cylinder car.
It'd requires fabricating a new headlight bucket and covers, as well as some sunstantial mods to the hood. I think I'll try this on the other side of the donor chassis and see how it goes.
Would you then go with 2 5" headlights on each side?
QUOTE(Cairo94507 @ Nov 21 2023, 07:42 AM)
Would you then go with 2 5" headlights on each side?
@Cairo94507 Michael - no, I need all the space I can get for the radiators so no room to stow pop up headlights of any size. The plan would still be the small LEDs in the rear panel of the headlight bucket. The 914/8 design is about getting as much room for radiators and grill openings as I can. Plus the style points / tip o' the hat to the factory 8 car.
Love the thought process and the noodling through this. I had considered something similar for my Suby setup, but chickened out.
@tygaboy Thought’s on putting a clear Uvex or Lexan covers, somewhat like the Ferrari has?
If there is anything that I can help you with on the plastic, let me know. My Blue M Industrial oven is plenty big for these. Picture of Lambo with plex
Best Bob B
Click to view attachment
If there is anything that I can help you with on the plastic, let me know. My Blue M Industrial oven is plenty big for these. Picture of Lambo with plex
Best Bob B
Click to view attachment
How about the cover panels sliding back under the hood?
Now to start roughing out the size/shape. It's made a little more difficult because the factory car has those wonderfully unique turn signal lenses that change the perspective on where things are. I have a couple other pics I can reference and I have a ways to go before anything gets cut.
I think the covers are wider than what I've laid out - which is good because wider = more space for the radiators.
It's a process.
I think the covers are wider than what I've laid out - which is good because wider = more space for the radiators.
It's a process.
QUOTE(burton73 @ Nov 21 2023, 11:46 AM)
@tygaboy Thought’s on putting a clear Uvex or Lexan covers, somewhat like the Ferrari has?
If there is anything that I can help you with on the plastic, let me know. My Blue M Industrial oven is plenty big for these. Picture of Lambo with plex
Best Bob B
@burton73 Bob - thanks for the offer! I'm going to do all I can to keep the headlights covered and as 914-ish as possible. But I'll certainly keep you in mind. Thanks again.
This is a "lo-fi" version of our main content. To view the full version with more information, formatting and images, please click here.