Help - Search - Members - Calendar
Full Version: My Official Project thread
914World.com > The 914 Forums > 914World Garage
Pages: 1, 2, 3, 4, 5, 6, 7, 8, 9, 10, 11, 12, 13, 14, 15, 16, 17, 18, 19, 20, 21
RiqueMar
Ok, so once you open the wiring diagrams, and understand what you're looking at, it's not as hard as it looks. This is my first real experience with wiring, and I'm still rolling confident. Much thanks so far to the Cap'n, SLITS, and Perry Kiehl. Almost done assigning wires, just need to do the alternator and CD Box.

I'm also going through the harness which I have completely stripped, and soldering and shrink tubing ev-ery-thing

IPB Image

IPB Image

IPB Image

IPB Image
RiqueMar
Also, I think I'll be adding this Perma-Tune box, which just so happens to also have the original mounting bracket! Opened it up earlier and all the internals look pretty good.

IPB Image

IPB Image

IPB Image
RiqueMar
Small 'gift' from my Father....

IPB Image

IPB Image
Cairo94507
Very nice progress and work. I like that combo-gauge too; I definitely want to do a gauge like that on my car.

OH...is that the cousin getting into 914's? If so, and even if not, we are going to need a lot more pictures of her - she is a cutie.
Eric_Shea
QUOTE
is that the cousin getting into 914's?


av-943.gif You've opened up Pandora's box Enrique!

"Hey, nice build... got any more pictures of your cousin?" av-943.gif
RiqueMar
QUOTE(Eric_Shea @ May 11 2011, 06:11 AM) *

QUOTE
is that the cousin getting into 914's?


av-943.gif You've opened up Pandora's box Enrique!

"Hey, nice build... got any more pictures of your cousin?" av-943.gif


Hey, if toting her around at 914 events gets more people to come, then I guess it's a necessary evil!

We are trying to have a 'runner' for her for RRC. It's a longshot but still a possibility as she's not doing a full on project, just something that she can clean up.
RiqueMar
Alright, so this is where we are at so far with the wiring. Making a 'new alternator harness' that will be included within the engine wiring harness, like a /6....


IPB Image

IPB Image


I'll be running these to the alternator, I just need to figure out how to run the blue wire (idiot light) to the #2 pin on the 14-pin connector.

RiqueMar
Wired the alternator today. After all is said and done, if you are keeping the relay board on your /6 conversion, this is the correct way to wire the alternator (in laymen terms). I hope this helps anyone trying to do a conversion:

- The Black wire connects to the top 'DF' connector at the top of the Alternator, and goes to the left most connector, as seen in picture 2 and 3.
- The two Red wires (one thick, one medium) connect to the 'B+' connector. The thick Red wires goes to the Starter, which at the Starter connects to the battery. The thin(ner) Red wire goes to the Board as seen in picture 3.
- The Ground wire connects to the 'D-' part with one of the wires going to the board, and the others going to ground on the engine.


IPB Image

IPB Image

IPB Image
Cairo94507
Enrique: Please see the thread posted re the two rolling CA chassis, a '70 and a '75 (I think) that are in great condition by Thomas J. Bliznik. I was thinking of the '70 for your cousin unless she is looking for one that is already a driver.
RiqueMar
QUOTE(Cairo94507 @ May 13 2011, 06:12 AM) *

Enrique: Please see the thread posted re the two rolling CA chassis, a '70 and a '75 (I think) that are in great condition by Thomas J. Bliznik. I was thinking of the '70 for your cousin unless she is looking for one that is already a driver.


Hmmm, I'm not seeing the thread, is it in the classifieds?
RiqueMar
QUOTE(Cairo94507 @ May 13 2011, 06:12 AM) *

Enrique: Please see the thread posted re the two rolling CA chassis, a '70 and a '75 (I think) that are in great condition by Thomas J. Bliznik. I was thinking of the '70 for your cousin unless she is looking for one that is already a driver.


I did see that, but we are looking for something more complete and more local. Thanks for the heads up though! It's much appreciated!
RiqueMar
Buttoned up the Alternator today. I took my Dads advice, he said the Red and Grey on the fan and ring made the engine look like a fruit salad, so now they match the valve covers.

IPB Image

IPB Image

IPB Image

IPB Image

IPB Image
RiqueMar
Little lax on the updates, but I'm still working away! Got the /6 steering wheel out of it's storage bin, disassembled it, cleaned it, and it's now on the car. Same goes for the linkage. What a b**ch to get on the car though! Mostly because;A) The splines have to line up, and B) the ridge for the bolt has to match up. Much easier with the steering wheel off, and the seat out of the car.

The way I did it was pushing thew rod in first (with both U-joints attached to each end) and hooked it to the steering rack. Then I put in the /6 steering setup. A little trickier then doing it in reverse order, but much more comfortable as your looking down into the steering mount, rather than upside-down looking up into the dash.

IPB Image

IPB Image

IPB Image

IPB Image

IPB Image
RiqueMar
Note for those using the stick /6 motor mount with newer engines. You MUST either backdate the pulley ring (ie, find an older one) or 'shave' the current one you have. The newer ones will NOT work with the STOCK /6 mount, as they had an additional 'trench' for what I assume is a smog pump, AC, or something of the sort.

My Grandfather really likes being able to help me, as he is here with the lathe and the lower pulley wheel....


IPB Image


Also note: remember to not only 'shave' the pulley so that it will fit in the motor mount, but also to shave enough so you can fit the belt inside. Almost forgot about this, which would result having to pull the engine every time I would need to change the belt.


IPB Image
MDG
That would be for the AC; you can do what you did or go to the dealership and get a single pulley for a non-AC car like I did for my 3.2

Then it fits just fine.
RiqueMar
Few new updates later today, but for those of you who enjoyed hearing about the 'family business' I just created a Facebook page for our new division, DriveSkills.

We just launched our new racing sim, and I'd appreciate it if you would check it out!

Link to DriveSkills Facebook page....

IPB Image
mepstein
Enrique - Gonna be around this Sunday? Thanks, mark

Just got in to San Diego - God it's nice out here!!!
RiqueMar
QUOTE(mepstein @ Jun 2 2011, 05:10 PM) *

Enrique - Gonna be around this Sunday? Thanks, mark

Just got in to San Diego - God it's nice out here!!!


Mark, just saw your message, you'll hear from me soon!

edit: misspelled 'hear'
RiqueMar
'S' Calipers installed! Again, thanks to Eric Shea!

Thinking of doing a installation thread on these (?) as there are a few changes you have to make sure to do, I can honestly say I learned alot on this portion (trimming the shields, spacing, etc)


Trimmed shields before/after....

IPB Image

IPB Image


Checking to make sure the fitment is correct....

IPB Image


Again with the hub/rotor to make sure nothing is rubbing...

IPB Image

IPB Image


Pin, spring, pads, and clips!

IPB Image


Finished!

IPB Image

IPB Image
VOX
hurry up and drive it already! then come visit me! and help me finish mine lol.
RiqueMar
QUOTE(VOX @ Jun 7 2011, 11:51 PM) *

hurry up and drive it already! then come visit me! and help me finish mine lol.


lol, I'm givin' her all she's got Cap'n! I jus' don't have the power!!!! smash.gif sawzall-smiley.gif type.gif
RiqueMar
Also, forgot to mention that 051103-stupid4.gif

Had the carbs, manifolds, and linkage assembled..... and forgot to put in the isolators.... So of course, I have to take the entire assembly apart to put in the isolators and gaskets..... please learn from my mistake....

IPB Image


RiqueMar
Additionally, another lesson to learn from my mistakes....


I was getting a clearance issue that I didn't realize until I tried to put on my brakes. I had previously converted to 911 style suspension. Checked the bearings, all good. Tightened? Yeah, it's correct. Thrust washer? Check, got it. I was left there scratching my head until I got ahold of Eric Shea... within about 40 minutes I get a message back, and what do you know, he was right. I was missing the O-ring and spacer that you put on to the spindle FIRST, followed by the inner bearing, etc, etc.

IPB Image
RiqueMar
Ordered a bunch of stuff from PMB Performance today, rear brake resto, rotors, lines, etc. Man do I love ordering from Eric, everything is so simple, and I swear the man has infinite patients even for questions he probably hears 30 times a day from 30 different people.


While waiting on the stuff to arrive, I've decided to tackle my front Sway bar. I'm not quite sure the brand, but I do know it's a 22mm. I've already drilled one side, and am about to set up the other.

From what I understand about sway bars so far, is that it is better to have the type that 'sandwich' the fender well; that is, having the triangular supports on the outside and in the recess below the gas tank. Unfortunately, even though my sway bar is aftermarket and 'bigger', it either didn't have the inside support plates or the PO of the 73' I pulled it off of didn't think it necessary to install them.

IPB Image

IPB Image
RiqueMar
More on the swaybar installation....


I don't like the look of having a cut hole below the gastank (like they do on the Pelican board) If your going to cut into your body, you should patch it up, and do it right, just my opinion. I know now one will ever see it, but I'll still know its there...

Took this cut a little deeper and straighter. After everything fabricated up, I'll 'box' the sheet metal back in so that everything is nice and 'pretty' again. the hardest part was getting the 'seam' portion where the spot welds are, it's very tight in there, and not the best angle for working.


IPB Image

IPB Image

IPB Image
RiqueMar
On Friday for the last 2 hours of the day, I had my Grandfather and Uncle in the Machine Shop portion of the business was running this ignition part, sway bar plates I asked for, and setting up the tooling for the rear rotors to be drilled to 5 lug. I'm keeping the drilled hubs until I get on the road, then I'll be adding some 911 gear.

IPB Image

IPB Image

IPB Image

IPB Image

IPB Image

IPB Image
RiqueMar
Finished up the front sway bar and suspension!


IPB Image
RiqueMar
Here's the money shot! Thanks Eric!


IPB Image

IPB Image

IPB Image
Eric_Shea
Right On! smilie_pokal.gif

Happy to have some of my goodies on your car. thumb3d.gif
RiqueMar
QUOTE(Eric_Shea @ Jun 14 2011, 08:51 PM) *

Right On! smilie_pokal.gif

Happy to have some of my goodies on your car. thumb3d.gif


Thanks Eric! I was working on the rear suspension today new bearings, brake lines, etc. Your videos were very helpful! I've posted the link below. short, concise, great!

Click here


IPB Image

IPB Image

IPB Image
RiqueMar
Small vacation in Las Vegas, but I've still been working hard at the car!


Drilled the 5-lugs onto the new rotors. Thinking of offering this service if anyone is intersted? Also, call me anal, but I painted the rotors, and the rear suspension is complete.

IPB Image

IPB Image

IPB Image

IPB Image

IPB Image

IPB Image
RiqueMar
Hit a small 'speedbump' on the driverside rear suspension.... Apparently, between using the torque wrench on the passenger side, and the driver side, someone else used it and uped the setting..... causing the bolts to break "SONofaB****!!" headbang.gif

CHECK YOUR SETTINGS!!!! 18 Ft/Lbs on these!


IPB Image

IPB Image

IPB Image

IPB Image
RiqueMar
Trying to stay focused for tomorrow! Engine placement!!!


IPB Image

IPB Image
JRust
Looking way to good the Rique dry.gif . Could you throw some dirt on that stuff or something. It's hurting my eyes icon8.gif
PeeGreen 914
Lookin good beerchug.gif
RiqueMar
QUOTE(JRust @ Jun 28 2011, 11:31 PM) *

Looking way to good the Rique dry.gif . Could you throw some dirt on that stuff or something. It's hurting my eyes icon8.gif


QUOTE(PeeGreen 914 @ Jun 28 2011, 11:34 PM) *

Lookin good beerchug.gif


Thanks guys! Means alot coming from both of you! Hope you had fun at WCR! Where's the next one? Any chance it'll be closer to Meh-hee-co?!

Jamie: As for looking good, if you look closely where the bumber area is undercoated, you can see where the guys in the shop 'bumped' into it already... Not a big deal as it's just undercoating, but still. headbang.gif
RiqueMar
And I'm back in a 914!!! smilie_pokal.gif


Just picked up this 'old thing' from the guys at European Motorsports. They did a great job with a few problems that the 3.6 engine was having!


IPB Image


IPB Image
RiqueMar
Friday, Brent (wertygrog) and I took a small break....

IPB Image


As for this weekend, oil tank is in, and the brakes are hooked up Also, today I spent about 3 hours just cleaning all the dust that has accumulated. It's one of the downsides to building in the shop, with all the bondo, fiberglass and particles floating in the air. It's crazy how different the color is when it's clean! wub.gif

IPB Image

IPB Image

IPB Image

IPB Image

IPB Image

IPB Image

IPB Image

IPB Image

IPB Image

IPB Image
RiqueMar
Getting ready for this engine to go in this week, just as soon as I get the clutch/flywheel/pressure plate kit I ordered.

I'm loving the way that this engine sheet metal and Heat Exchangers came out. I think it goes to show that not everything has to be powder-coated and that painting isn't bad, as long as you do the prep work correctly.

IPB Image

IPB Image

IPB Image
IronHillRestorations
Looks very nice!
Cairo94507
Very nice progress; I can't wait to see that engine in the car and hear the video when you start it. Nice.
RiqueMar
QUOTE(9146986 @ Jul 4 2011, 10:45 PM) *

Looks very nice!


QUOTE(Cairo94507 @ Jul 5 2011, 05:47 AM) *

Very nice progress; I can't wait to see that engine in the car and hear the video when you start it. Nice.


Thanks guys, I'm pounding away here smash.gif smash.gif smash.gif and I'm hoping to have a video this weekend. As soon as I find a good flywheel/pressure plate/clutch package, I'll be in business and have this thing in.

All that's left after that is to finish the wiring under the dash, the gauges, and put on the hoods and glass.
RiqueMar
Sheetmetal? Check! piratenanner.gif

IPB Image

IPB Image
RiqueMar
Still waiting on the flywheel/clutch package I ordered dry.gif

Apparently, the guy I bought it off of on eBay wont ship it until he gets the check from the broker service (Moneybookers), even though that service confirmed I processed the payment on Tuesday, and here we are on Friday and it hasn't even been shipped. Nice. Asshole. jerkit.gif

Whatever. Yesterday, we where trying to look for other things to do, so we power bled the brakes and I hunted down the hard oil line that connects to the bottom of the engine.... only to find out it doesn't fit. Looks like braided lines it is....

IPB Image

IPB Image

IPB Image
RiqueMar
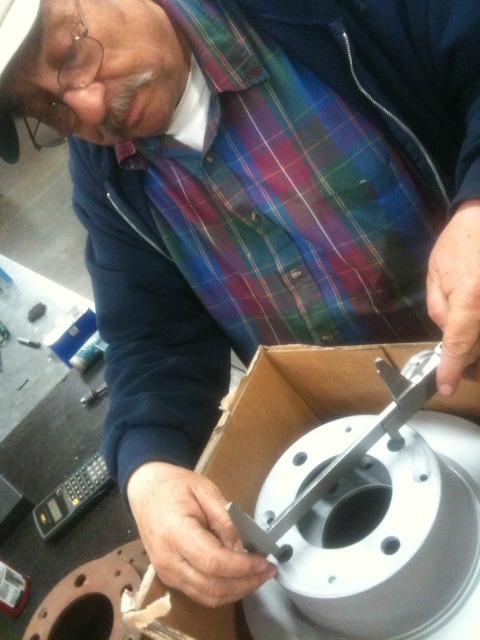
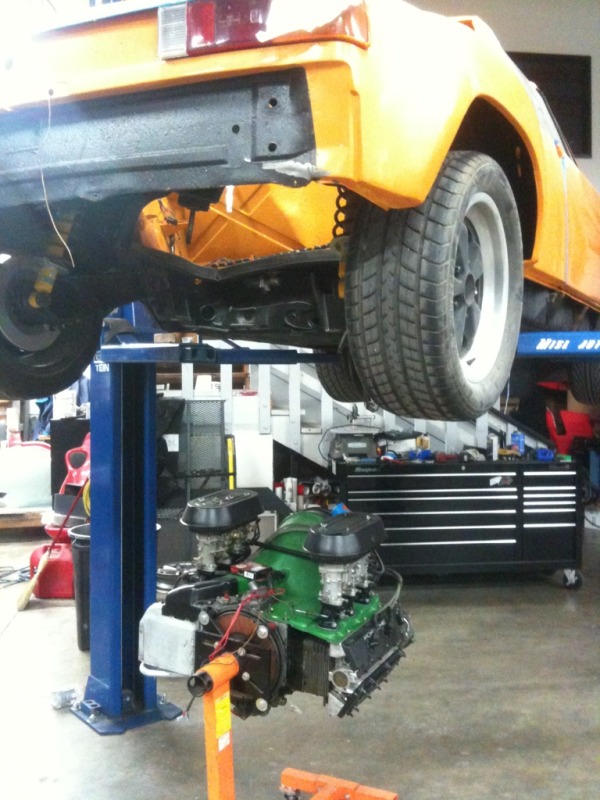
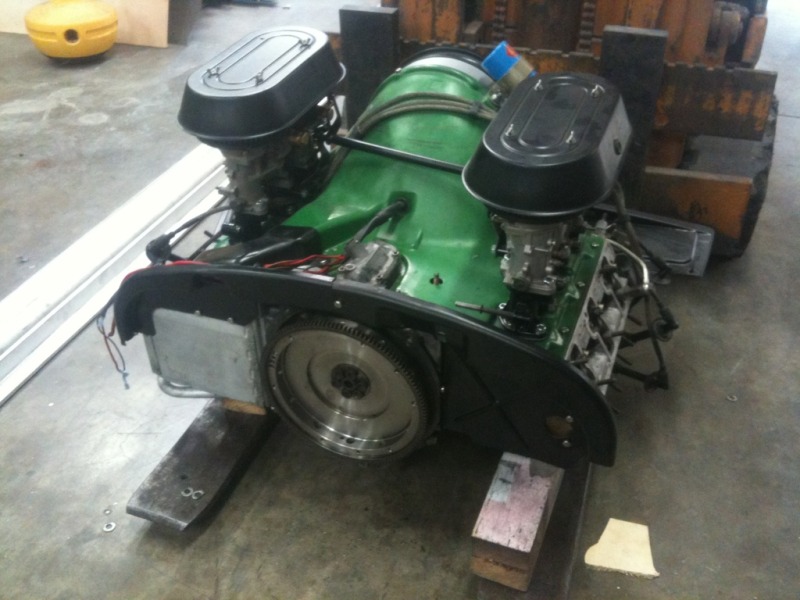
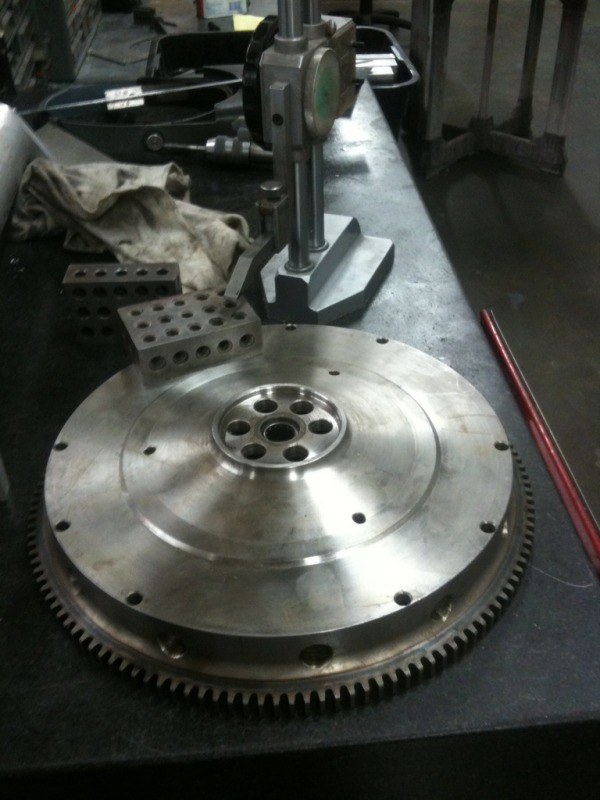
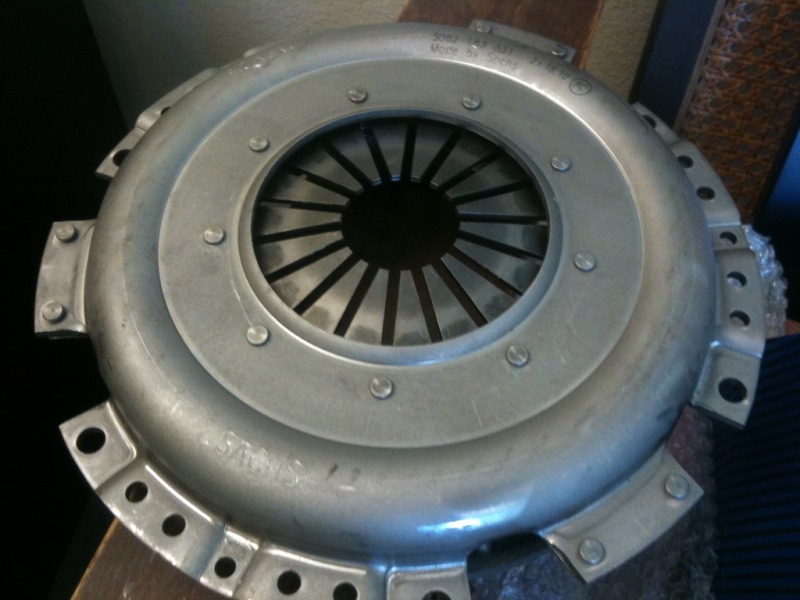
Finally got the Flywheel, Clutch, and Pressure Plate from the seller on eBay.

I can not stress this enough, but 'BUYER BEWARE" of a seller by the name of air.cooled.356.911, he is extremely rough, verbose, overbearing, and vague, trying to get you off the phone with the minimum details possible It took him 10 days to ship my product as he was 'waiting for the payment to clear'. Which I later found out by calling the payment company that it clears instantly. dry.gif

After multiple phone calls, and him finally having a 'cleared payment' (after 7 days) he agreed to ship the item.... until he claimed I had'nt paid shippign on the item that he listed as 'shipping free'. He further went on to swear that he had sent me an invoice, and when he could'nt find said invoice, he insisted that I had hacked into eBay, and deleted it from his messages, or that I was lying to him that I had it.

Eventually, after filing an eBay buyer protection case, he sent me a tracking number on Wedsnesday insisting that I send him an additional $18 for shipping after I received the item (however, he didn't ship the item until Thursday night). I later found out by looking at my online banking that he automatically charged me shipping, so whether it was free or I already paid for it, I suppose that little fact is irrelevant.

Either way, please dont make the same mistake I did, and simply don't purchase from this guy.
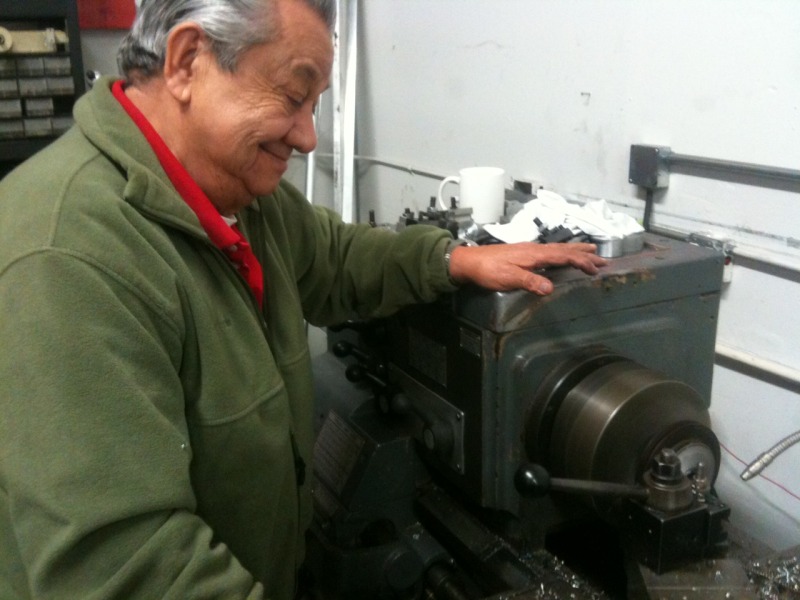


IPB Image

IPB Image
RiqueMar
Sidenote: it's 'weird' to see my engine off the engine stand! It's Saturday night, time to celebrate. beer3.gif drunk.gif

IPB Image
RiqueMar
It seems as though this seller is still maintaining that I owe him shipping. He has also 'insinuated' that he is sending his Son-in-Law to 'pay me a visit as he lives in my area.... To which I responded, "Will it take him 2 weeks to get here too?"

But in all seriousness, I truly did have to file a complaint against him, and insist he not contact me anymore, or I would call the Police and take it as a formal threat (I don't know who or how crazy this guy really is).
RiqueMar
Engine is in..... finally!

IPB Image
AZ914
aktion035.gif piratenanner.gif
RiqueMar
QUOTE(AZ914 @ Jul 29 2011, 06:57 AM) *

aktion035.gif piratenanner.gif


Thanks Jason, how's the 3.2 coming? I wanna hear all the details from you as that will be the eventual 'upgrade' for this car.

This is a "lo-fi" version of our main content. To view the full version with more information, formatting and images, please click here.
Invision Power Board © 2001-2024 Invision Power Services, Inc.