Full Version: The Doc's tranny waggin'
Pages: 1, 2, 3, 4, 5, 6, 7, 8, 9, 10, 11, 12, 13, 14, 15, 16, 17, 18, 19, 20, 21, 22, 23, 24, 25, 26, 27, 28, 29, 30, 31, 32, 33, 34
It was only $14 for the mount so no biggie. Where do I get the supportive mount for larger breasts, er, tires?
Hey Chris can you gat a pic of yours that has the supports ? Might not be too hard to make 
http://www2.cip1.com/ProductDetails.asp?Pr...de=C27%2DJ12975
Pricey for a bunch of fuchin flatbar but couldn't find anyone to get me dimensions on the samba. Plus the singleboob that sticks out that the tire mounts on doesn't stick out far enough for the tire to not rub on the paint. My paint sucks so I don't care. If you don't need it right away, I can totally get you some dimensions and recommended mods. I'm going to quit my job on the 11th and not start classes until sept 22nd so I'll have some free time. Hell I can build up a CAD model and make prints. Start fabbing and undercut CIP. Or you might be able to just wing it. I'll try to nab some pics this weekend.
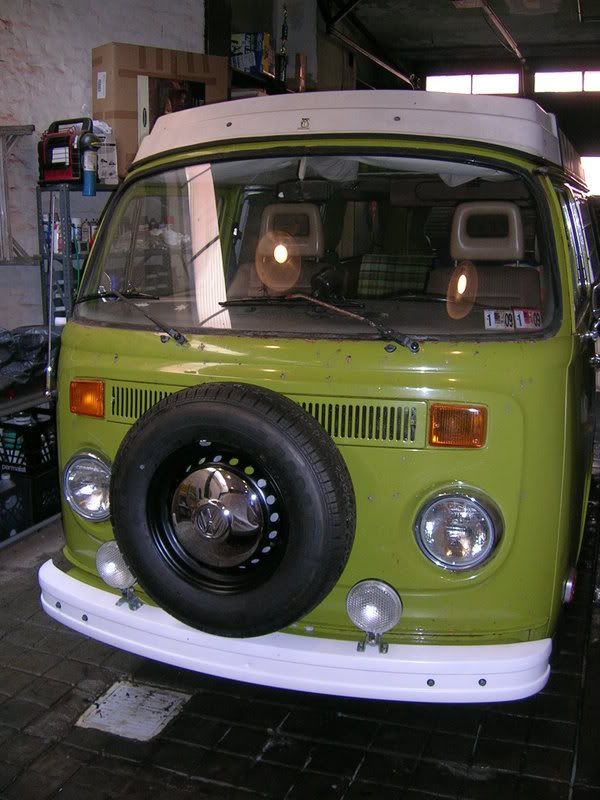
One of the clutch additions of this mount, along with the tie in to the bumper, are the two bars that tie in two each of the 4 mounting holes through the nose together. They mount on the inside of the bus, taking more of the stress off the skin.
I also like that it mounts the tire "shiney side out" so you can put a hubcap on it. The other ones mount the wheel backwards.
-Chris
Pricey for a bunch of fuchin flatbar but couldn't find anyone to get me dimensions on the samba. Plus the singleboob that sticks out that the tire mounts on doesn't stick out far enough for the tire to not rub on the paint. My paint sucks so I don't care. If you don't need it right away, I can totally get you some dimensions and recommended mods. I'm going to quit my job on the 11th and not start classes until sept 22nd so I'll have some free time. Hell I can build up a CAD model and make prints. Start fabbing and undercut CIP. Or you might be able to just wing it. I'll try to nab some pics this weekend.
One of the clutch additions of this mount, along with the tie in to the bumper, are the two bars that tie in two each of the 4 mounting holes through the nose together. They mount on the inside of the bus, taking more of the stress off the skin.
I also like that it mounts the tire "shiney side out" so you can put a hubcap on it. The other ones mount the wheel backwards.
-Chris
Sweet! How hard would it be to put some spacers and bigger bolts on it to keep it off of the paint? Just for the tire mounting bolts, not the rig itself. I would want to put some rubber gasket between the metal and the nose, too.
That aint too bad if it is stainless of galvanized.
What do you think, Scott, buy or build?
That aint too bad if it is stainless of galvanized.
What do you think, Scott, buy or build?
It is cad plated. I put rubber gasket material between all 6 mounting locations and between the back bars and the inside of the nose skin. Inevitably those areas of the nose skin are still going to flatten to follow the contour of the tire mount. If I did give a shit about the front of my bus I'd probably try to profile the areas where the mount touches the nose skin in hopes of minimizing the dents, but I think it will still be unavoiable.
As for spacing the tire further out, they way they have it the bottom inside sidewall of the tire touches the part of the mount that runs to the bumper before the wheel is fully seated on the mount. This kicks the top side in towards the bus and up against the paint. As you further tighten the wheel down, you just bend the wheel so I threw some washers in there to avoid it. A kind of crappy product. It may rely partially on having the tire rest on the paint, the old style mounts definitely did, I didn't think these had to though. Never messed with spacing it out further. It might be worth a shot, this mount is way more robust by itself than the old style one.
-Chris
Why not just leave the spare tire off altogether and get AAA?
Not much there to be fabbed  I can probably use the mount you alreadt bought as the front piece that the tire actually bolts to.
I can probably use the mount you alreadt bought as the front piece that the tire actually bolts to.
Right on. Can it be made out of stainless?
QUOTE(Dr Evil @ Jul 1 2008, 06:07 PM) 
Right on. Can it be made out of stainless?
If'n yer buyin it. Or I could do it in non stainless and get it powder coated for about 30.00 Yer call holmes.

The price is pretty negligible between the two, no? What would stainless cost me?
QUOTE(Dr Evil @ Jul 1 2008, 06:22 PM)
The price is pretty negligible between the two, no? What would stainless cost me?
Just a guess ?? Close to 60.00 ? I haven't bought any s.s. in a while so I'm not sure what the price is like right now. 1/2" flat stock, 1/8 - 3/16" thick should be fine for it
Scott, I have full confidence in your decision regarding this. If you think powder coat is good enough, then so be it Just let me know. I aint gonna question your wisdom on this body type o stuff.
Just let me know. I aint gonna question your wisdom on this body type o stuff.
QUOTE(scotty b @ Jul 1 2008, 05:48 PM)
Not much there to be fabbed
I can probably use the mount you alreadt bought as the front piece that the tire actually bolts to.Good call. I'd use some larger fasteners than those 1/4"ers if you aren't going to weld that already purchased mount to the stuff you are fabbing.
mo dun dis week 
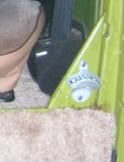
Mike these are the two factory holes I asked you about. You can see the two oversized ones I filled and the other two smaller ones. Whatchu wan dun wit dem mon ?
Might as well fill all the holes. I will use adhesive to mount anything to the door in the future.
Thanks man, looking great!
Thanks man, looking great!
Update from the machine shop today: cylinders have been cut down, block has been bored, current crank will need to be ground and I will see if my other one is better.
They admittedly said that they are not setting any records for getting this done, but they are hooking me up and doing it between better paying jobs.
Still needed to be done:
- Heads
- Rods
- Pistons
- Crank
They admittedly said that they are not setting any records for getting this done, but they are hooking me up and doing it between better paying jobs.
Still needed to be done:
- Heads
- Rods
- Pistons
- Crank
Oh you should just put the 2.7 six in it....lol 
Nothing exciting here, the Doc just needed a " fix " as he put it. Driver side rockers are done, entry step on pass side is done, almost all of the rust spots have been taken to bare metal, etched and primed, some dents are being filled, some are not  rear pass window frame is painted. I'm still going to strip under the gutter since it is a bit crappy looking in several spots, so that will be primed and the back hatch is ready to wet sand and paint. Pass outer rocker will probably go on this weekend and I'll try to finish up the welding on the inside
rear pass window frame is painted. I'm still going to strip under the gutter since it is a bit crappy looking in several spots, so that will be primed and the back hatch is ready to wet sand and paint. Pass outer rocker will probably go on this weekend and I'll try to finish up the welding on the inside
Too bad that louvered window has to come back out to have the metal under there painted since it is bare

Did my tires show up?
How much is going to have to be fabbed up for mounting the engine and tranny.
Wolfsburg west sells the complete seal kit for those lovered windows, only about 32 bucks. Includes the individual pane seals, etc. It is the correct gray color, not that it is a big deal. I just installed a new black one like it seems you have, it was a total bitch to get in. My guess is the Wolfsburg West one is much easier to deal with.
What color are you going to paint the wheels? I'm digging the satin black I did up on mine:
What color are you going to paint the wheels? I'm digging the satin black I did up on mine:
QUOTE(Dr Evil @ Sep 17 2008, 09:29 PM)
Too bad that louvered window has to come back out to have the metal under there painted since it is bare
Did my tires show up?
Almost nothing. I have a bar that mounts the engine to the original mounts, and a mount that mounts the tranny to an early VW tranny mount that will need to be installed. Other than that it is just getting the shifter cable and lever mounted correctly.
As for the wheels, that is exactly the color I am going to use.
Oh ya, the latest with the machine shop: all they have left to do is open the small end of the rods, and cut the heads...supposedly. The guy didnt know how far down to cut the heads.....but he didnt call me to ask. I told him to open them up at the same depth since with the aircooled set up you adjust at the bottom of the barrel. I could have had cheap, or I could have had fast, not both.
Latest with the machine shop; all that is left to do, supposedly, is to drill the holes in the barrel fins for the head studs to pass through....Hopefully next week.
Hey Chris if you get a chance copuld you take off your tire and get me a pic of the mount ? Mike got the better style, but before I start blindly drilling holes I'd like to have some idea of where the " feet " should be sitting.
Mike no the tires haven't shown up.Did you have them shipped to the house or the shop ?
Got a little more bondo work done today and got the pass rocker fitted and ready to weld in. Goor thing you said want the wheels black, I was gonna surprise you and do them white when I get the tires mounted
Mike no the tires haven't shown up.Did you have them shipped to the house or the shop ?
Got a little more bondo work done today and got the pass rocker fitted and ready to weld in.
Goor thing you said want the wheels black, I was gonna surprise you and do them white when I get the tires mounted
PM me next week to remind me, won't have time until then. In the meantime, this is what I did (didn't have instructions). I found the center of the bumper using the mounting bolts. I then centered the bracket mounts that go on the bumper around this line. Then I slid the bracket back to the front skin of the bus until it was touching the skin at all the mounts. Double checked distance from the upper mounts to the grill and a centerline from the grill, marked the holes, drilled, made some rubber pads for the mounts, bolted it on. Getting the backing bars on in the cabin is kind of a pain (access to the upper skin attachment is tough) , but I made the lower skin attachment first, tightened the bolt enough that when I spun the bar up towards the upper skin attachment point, friction kept the bar from falling back down. I could then fish the bar into position and install the upper mount bolts. It will make sense when you get to it.
My front is dented/screwed up anyway so I'm not sure how great the positioning is in the end.
-Chris
Hey Chris if you get a chance copuld you take off your tire and get me a pic of the mount ? Mike got the better style, but before I start blindly drilling holes I'd like to have some idea of where the " feet " should be sitting.
Mike no the tires haven't shown up.Did you have them shipped to the house or the shop ?
Got a little more bondo work done today and got the pass rocker fitted and ready to weld in. Goor thing you said want the wheels black, I was gonna surprise you and do them white when I get the tires mounted
My front is dented/screwed up anyway so I'm not sure how great the positioning is in the end.
-Chris
QUOTE(scotty b @ Sep 18 2008, 04:13 PM)
Hey Chris if you get a chance copuld you take off your tire and get me a pic of the mount ? Mike got the better style, but before I start blindly drilling holes I'd like to have some idea of where the " feet " should be sitting.
Mike no the tires haven't shown up.Did you have them shipped to the house or the shop ?
Got a little more bondo work done today and got the pass rocker fitted and ready to weld in.
Goor thing you said want the wheels black, I was gonna surprise you and do them white when I get the tires mounted
This build has me rethinking the old bays. I would love a split, but they are more money than I care to spend at the moment. Love it. Keep it up! 
Scotty, yer awesome
I had the tires sent to your house.....maybe they didnt ship them because they were waiting to get my OK to upcharge the actual shipping from what they quoted.
I'll let ya know.
I had the tires sent to your house.....maybe they didnt ship them because they were waiting to get my OK to upcharge the actual shipping from what they quoted.
I'll let ya know.
So any work being done on the teener yet?
QUOTE(ws91420 @ Sep 18 2008, 06:12 PM)
So any work being done on the teener yet?
Bus first, my bike 2nd ( briefly ) then Mike's 914
Ya, I need the bus first. That and Scotty is gonna want actual cash money to do the 914 

Rockers in and primed Pretty much finished up the last two bondo spots on the body. ALMOST ready to wet sand and shoot this boat. Still have the holes in the inner wheel wells to repair ( sometime this week ) and a few spots on the rear.
Where's my split ?? 
Pretty much finished up the last two bondo spots on the body. ALMOST ready to wet sand and shoot this boat. Still have the holes in the inner wheel wells to repair ( sometime this week ) and a few spots on the rear.Where's my split ??
Strong work, man!
I am still waiting for a time to meet with my friend to get some pics. IT aint going no where so far as I know. The guy is goign to have to clean out the whole barn to get it out and I dont think he is in a hurry.
I am still waiting for a time to meet with my friend to get some pics. IT aint going no where so far as I know. The guy is goign to have to clean out the whole barn to get it out and I dont think he is in a hurry.
You still putting the fiberglass top on?
Yup, but that is going to be later as I need time to go down and drill out days worth of spot welds so I am told.
Now ju seez it....now ju don
Got a bit done on my scooter tonight too Beer+ nice weather + Social D, Johnny Cash and Tool make Scotty productive ....and inibriated 
BTW Blue Moons fall brew is good shit
Beer+ nice weather + Social D, Johnny Cash and Tool make Scotty productive ....and inibriated BTW Blue Moons fall brew is good shit
Aw yeah! BTW, there is supposed to be a triangular piece in place of the wall that was removed. Exciting stuff, glad you got some work done on the scooter.
Indeed there is . . . and it is an excellent place to mount a bottle opener.
Looking good btw
Looking good btw
Damn, we are all up late.
1am late?
For most of these stiffs I am alone tonight as the woman has gone to CA to start the countdown to the wedding on Sat. I am one martini in and looking for the bed.
I am alone tonight as the woman has gone to CA to start the countdown to the wedding on Sat. I am one martini in and looking for the bed.
QUOTE(Dr Evil @ Oct 11 2008, 09:31 PM)
Aw yeah! BTW, there is supposed to be a triangular piece in place of the wall that was removed. Exciting stuff, glad you got some work done on the scooter.
Mike I saw no need for that piece to be there. It really wouldn't provide any bracing
If you want I could make something up pretty easily though. Let me know
I dunno, the piece VW put in there is pretty damn thick. 3/16 maybe. I could see that gusset distributing stresses in that sharp corner better when the whole bus twists along its length (ehh, maybe in a turn with a lot of stuff in it), you were carrying stuff on your roof (not likely with that camper top), or if the side of your bus was greeted with something non-forgiving (hmmm  ).
).
Personally I wouldn't second guess VW on it.
).Personally I wouldn't second guess VW on it.

Me neither. Plus, it is a good place for a bottle opener.
Consider it done. Chris if you get a chance could you get me some measurements on the piece ? Height, width, etc Thanks
Thanks
About 175mm tall, 55mm across the base, 2.3mm thk (okay, so 3/16" was an exaggeration), and a 10mm wide lip folded 90 degress over on the hypotenuse towards the front of the car.
Let me know if you need some pics
-Chris
Let me know if you need some pics
-Chris
QUOTE(type11969 @ Oct 12 2008, 02:47 PM)
About 175mm tall, 55mm across the base, 2.3mm thk (okay, so 3/16" was an exaggeration), and a 10mm wide lip folded 90 degress over on the hypotenuse towards the front of the car.
Let me know if you need some pics
-Chris
 mm's and hypontenuse ? Where the hell do you think you are ? Some sort of British social club ??
 Thanks Chris
Update on my end:
Engine - the shop would have been done with the engine this week except for one unforeseen problem that was of my creation. The valve springs were too big for their seats and keepers and this led me to think I had the wrong springs.....nope The special heads that I got and that were advertised as 110 heads were in fact 80-90hp low compression heads. I thought this was gonna be a problem, but I had them CC one of the pockets and at 46cc it is within my limits as I need 60-64cc in the chamber when done for a 9:1-9.4:1 CR. I also found that the guy with the corvair aviation site used the same heads with good results. All that needs to be done to the heads now is to have the valve seats opened up for the bigger springs. More waiting
Carb - I am awaiting some pieces on my carb still, but I am about done with its rebuild today and it is looking good. I really enjoyed rebuilding it and saved a bunch of cash.
Tranny - all I have left to do on the tranny is to clean out and reseal the diff. I did the auto part very easily and saved another grip of money. This is the first auto I have rebuilt and I must say it was very easy and like the carb it was very enjoyable. The rebuild kit was like $150
Next I need to get the damn engine parts so I can clean them up and start the assembly process. This will likely take me into Dec as I am going to be in York for the month of Nov. If you get hurt in York in Nov, look me up in the ED at the hospital
Engine - the shop would have been done with the engine this week except for one unforeseen problem that was of my creation. The valve springs were too big for their seats and keepers and this led me to think I had the wrong springs.....nope
The special heads that I got and that were advertised as 110 heads were in fact 80-90hp low compression heads. I thought this was gonna be a problem, but I had them CC one of the pockets and at 46cc it is within my limits as I need 60-64cc in the chamber when done for a 9:1-9.4:1 CR. I also found that the guy with the corvair aviation site used the same heads with good results. All that needs to be done to the heads now is to have the valve seats opened up for the bigger springs. More waiting Carb - I am awaiting some pieces on my carb still, but I am about done with its rebuild today and it is looking good. I really enjoyed rebuilding it and saved a bunch of cash.
Tranny - all I have left to do on the tranny is to clean out and reseal the diff. I did the auto part very easily and saved another grip of money. This is the first auto I have rebuilt and I must say it was very easy and like the carb it was very enjoyable. The rebuild kit was like $150
Next I need to get the damn engine parts so I can clean them up and start the assembly process. This will likely take me into Dec as I am going to be in York for the month of Nov. If you get hurt in York in Nov, look me up in the ED at the hospital
This is a "lo-fi" version of our main content. To view the full version with more information, formatting and images, please click here.