Saying "hell no" to the Hell Hole Had a very satisfying weekend working on the car. First up was some house keeping in the engine bay. I reworked the butt weld for the RD inner wheel well patch to make sure there was complete weld penetration along that seam, and fill any pinholes. I also replaced a couple hold down straps that had seen better days.
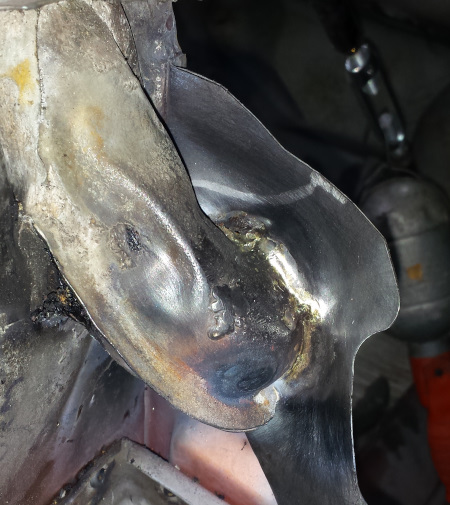
Click to view attachmentI also smashed a piece of copper pipe flat to use as a welding backer so I could clean up the edge of the passenger side engine lid brace that looked like a shark had taken a bite out of it thanks to some clumsy use of a 7" grinder when a younger me hacked in a new trunk hinge pivot oh so many years ago.
Click to view attachmentThen it was time to have some fun by installing the new RD engine shelf piece. It took some time to get the piece adjusted for a good fit, but not too bad. Sadly, I forgot to take a pic at this stage, so that will have to wait.
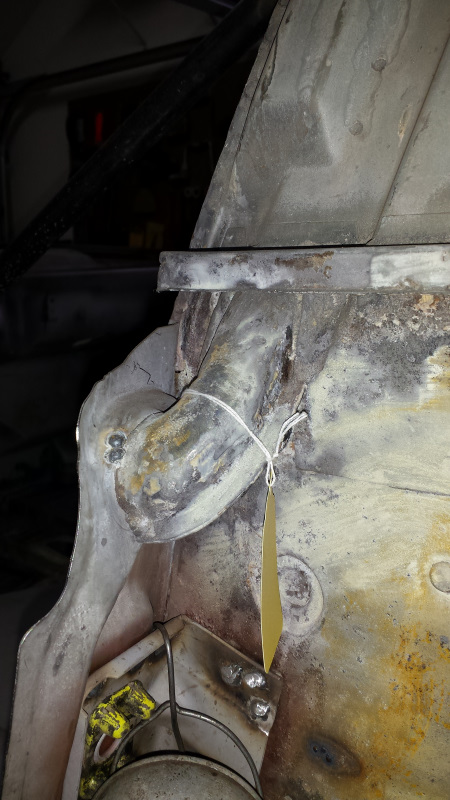
Now it was time to prep for the battery tray. You'll be shocked to learn there was metal corrosion on the wall behind the battery tray

So a patch had to go in. The pitting was restricted mostly to the flat area where the battery shelf attaches, but it did extend downward where the wall bends. I decided to clean up the area below the bend the best I could and just zap a couple of the worst pits with the welder. I didn't think the pitting was bad enough to justify the added work of trying to form a new patch to match those curves and risk not getting it right. You can see the outline of the new patch here.
Click to view attachmentClick to view attachmentI welded the patch from the outside. It went well except a little blowout at the bottom where I ran into some of that oxidized metal. I ran out of 40 grit grinding discs which I like to use to knock down the welds before finishing with finer grit, so I'll save grinding of the outside for later.
Click to view attachmentThe inside got cleaned up though to make ready for the batter tray.
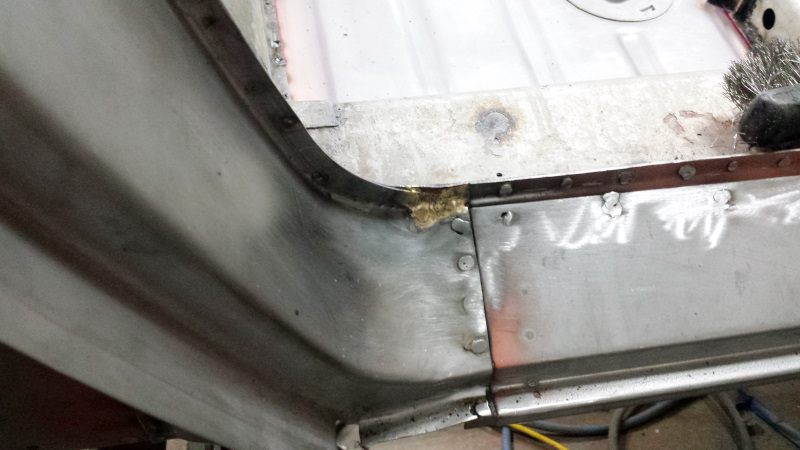
Click to view attachmentClick to view attachmentNow the battery will have a solid wall to lean against, but I wasn't ready for the tray yet. I needed to patch in the area behind the trunk pivot while there was good access. You can see the patch laid in in the last pic. And here it is welded in. Again, I'll save grinding until I get more discs.
Click to view attachmentI was finally ready to install the tray. Time to get really nit picky again. RD's installation video suggests welding the tray to the support before installing in the car. That fine, but I didn't think I'd be able to weld that inward bent weld flange after the tray was on. There it is on the left side of this pic.
Click to view attachmentAn alternative would be to weld in the support, then add the tray. But... yes, I'm picky and I wanted to hide the plug welds under the tray. I wouldn't be able to access the rearward flange from the bottom with the support in place. So I came up with a third option. First, I welded the tray on just at the rearward flange.
Click to view attachmentSee how pretty the top looks? Almost like factory.
Click to view attachmentNext, I welded the support to the chassis, and now for the hat trick...
Click to view attachmentI bent back the tray so I could reach in and weld the inner flange. I'll admit this worked more elegantly in my head, but it did work.
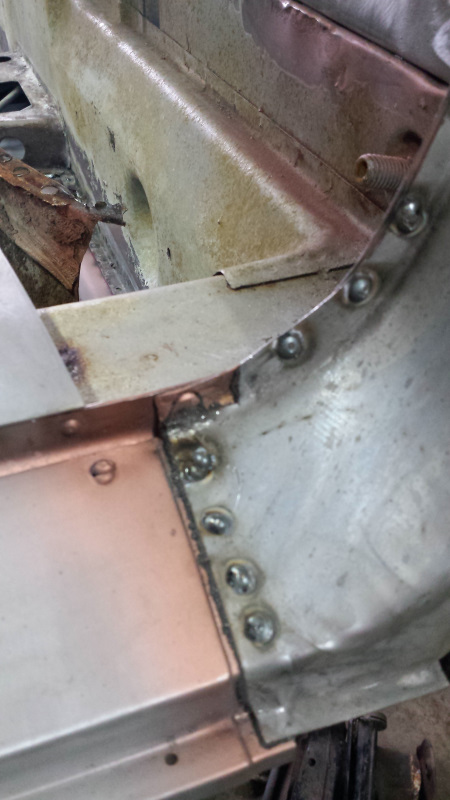
Click to view attachmentThen it was easy enough to plug weld the rest of the tray flanges.
Click to view attachmentJust a couple tacks to attach the tray to the newly refurbished wall.
Click to view attachmentAnd with that... the Hell Hole was now a heavenly place with all the repairs complete!
Click to view attachmentClick to view attachmentAnd look how pretty those welds on the battery tray are. Well worth the effort since this is the first thing anyone looking at the car will notice.
 Click to view attachment


 says:
says: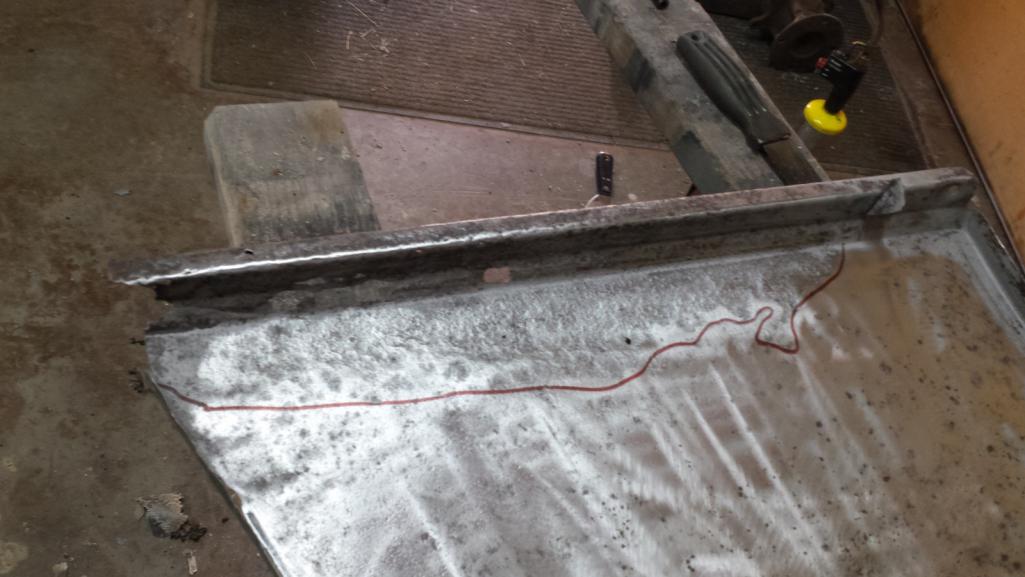


 on that. I picked up one of 914rubbers new plastic backpad cards and their vinyl kit on their Black Friday sale and finally got around to the project. I ran into a detail that isn't covered in Nick Mironov's excellent upholstery tutorial and a couple others that are peculiar to the plastic backpad card. I'll post a few details this evening. I just wanted to see who was paying attention.
  Yes, this is a meander from the project, but it's life, and the two are interwoven.
 This time, they had to break out the drill to get it out but I felt robbed because there were no psychedelic colors. Doctor said it had started to rust in there. I even took my fairly new, and very expensive prescription safety glasses in to get an opinion. The doctor said they looked like good glasses. Just bad luck I guess. I might need a frequent purchaser punch card myself. Not sure how much work I'll be able to accomplish this weekend.

 before the weekend is over.
 I've never been a fan of the 3M upholstery products. Too lightweight, IMHO. An auto upholstery supply is the best bet but I doubt there is one on that mountain top. My favorite was made by Eagle but I haven't seen a can of that since I moved to CA. If your not in big a rush you might start a post asking if anyone is traveling from AZ or CA to Montana that could bring you some doors for a little gas money. Happens all the time here.