euro911
Jan 7 2021, 10:47 PM
Just got around to reading all 65 pages of your amazing project, Bob. Fantastic job so far !!!

Subscribed to see the finishing touches come about
![popcorn[1].gif](http://www.914world.com/bbs2/style_emoticons/default/popcorn[1].gif)
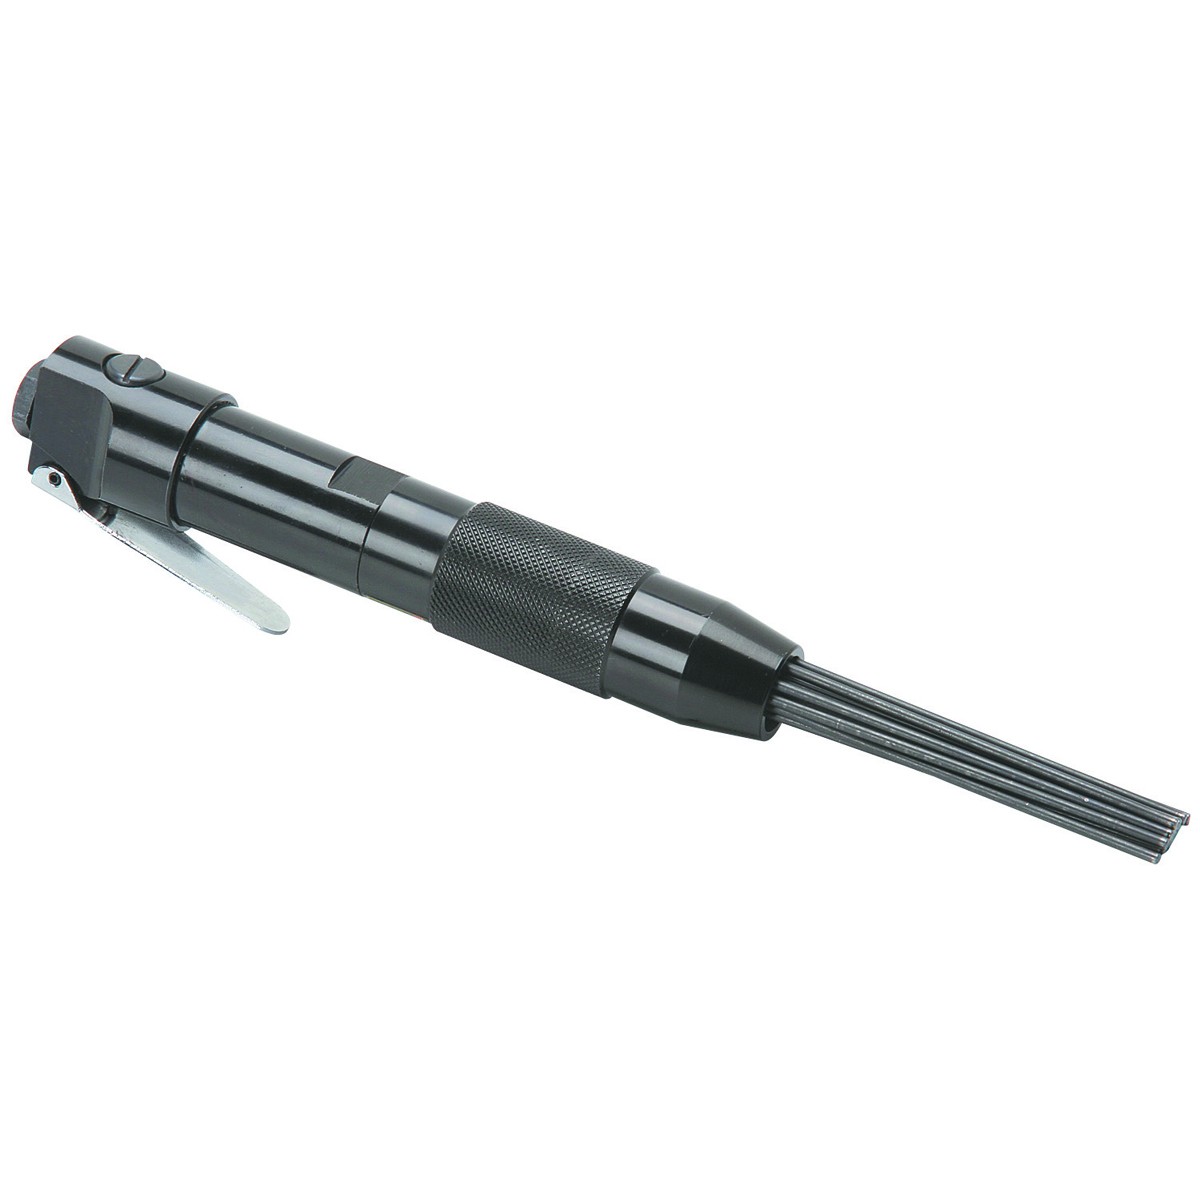
Question ... what is this tool called?

73-914
Jan 7 2021, 11:58 PM
QUOTE(euro911 @ Jan 7 2021, 11:47 PM)

Just got around to reading all 65 pages of your amazing project, Bob. Fantastic job so far !!!
Subscribed to see the finishing touches come about
Question ... what is this tool called?
Air needle scaler
bkrantz
Jan 8 2021, 07:43 PM
QUOTE(euro911 @ Jan 7 2021, 09:47 PM)
Just got around to reading all 65 pages of your amazing project, Bob. Fantastic job so far !!!
Subscribed to see the finishing touches come about
Question ... what is this tool called?
Thanks, Mark!
Interesting tool. Could be useful.
bkrantz
Jan 8 2021, 07:44 PM
More shiny new bolts arrived today, from Belmetric.
bkrantz
Jan 8 2021, 07:44 PM
Now the tie rods have bolts.
bkrantz
Jan 8 2021, 07:46 PM
And more pretty bolts now for the underside, just to make the purists happy.
bkrantz
Jan 8 2021, 07:50 PM
I then tried to torque the ball joint retainer rings. I used a floor jack to keep the socket from slipping, but still could not get the big torque required (25 map or 180 ft-lbs). Any suggestions?
bkrantz
Jan 8 2021, 07:53 PM
Following on from testing electric motors yesterday, I started cleaning crud, overspray, and undercoating.
bkrantz
Jan 8 2021, 07:54 PM
Heater blower components.
bkrantz
Jan 8 2021, 07:56 PM
And the wiper system, before cleaning off 50 year old grease.
bkrantz
Jan 8 2021, 07:56 PM
And after.
raynekat
Jan 8 2021, 10:37 PM
QUOTE(bkrantz @ Jan 8 2021, 05:50 PM)
Click to view attachmentI then tried to torque the ball joint retainer rings. I used a floor jack to keep the socket from slipping, but still could not get the big torque required (25 map or 180 ft-lbs). Any suggestions?
That's the same method I used.
Struggled with it, but got it to work and tighten up the ball joints some how.
bkrantz
Jan 9 2021, 09:06 PM
More prep on the wipers. I found one broken wire.
bkrantz
Jan 9 2021, 09:08 PM
Soldered, and I treated the fabric insulation and seals where the wires enter the motor housing with 3M liquid rubber.
bkrantz
Jan 10 2021, 07:39 PM
Wiper gear installed, from the top.
bkrantz
Jan 10 2021, 07:40 PM
And the bottom.
bkrantz
Jan 10 2021, 07:42 PM
Getting started on the headlights. These are in the same state when I took the car apart. Into the acetone bucket!
bkrantz
Jan 10 2021, 07:43 PM
The motors need cleaning up, too, with PO undercoating and messed up wiring.
bkrantz
Jan 10 2021, 07:45 PM
And getting started on the fresh air stuff--also with undercoating and overspray.
djway
Jan 10 2021, 09:32 PM
Have a swear jar handy when you put that box in......
wonkipop
Jan 10 2021, 10:03 PM
have you got a screen for fan/vent box?
good idea (later cars) - helps keep leaf muck out.
iankarr
Jan 10 2021, 11:29 PM
Looking great as usual. I'm working on the same stuff here. Did the headlight buckets today and plan on tackling the motors this week. Any advice or wires I shouldn't cross

?
@djway is right about the airbox install. I learned a few tricks which will hopefully save you a few pennies in the swear jar...
https://youtu.be/Uhs6pedBOXM
bkrantz
Jan 11 2021, 08:12 PM
QUOTE(djway @ Jan 10 2021, 08:32 PM)
Have a swear jar handy when you put that box in......
I already have one working (see later posts).
bkrantz
Jan 11 2021, 08:13 PM
QUOTE(wonkipop @ Jan 10 2021, 09:03 PM)
have you got a screen for fan/vent box?
good idea (later cars) - helps keep leaf muck out.
Thanks--I got one with the new gaskets.
bkrantz
Jan 11 2021, 08:19 PM
QUOTE(iankarr @ Jan 10 2021, 10:29 PM)
Looking great as usual. I'm working on the same stuff here. Did the headlight buckets today and plan on tackling the motors this week. Any advice or wires I shouldn't cross
?
@djway is right about the airbox install. I learned a few tricks which will hopefully save you a few pennies in the swear jar...
https://youtu.be/Uhs6pedBOXMThanks, Ian. I like your method--will give that a try.
bkrantz
Jan 11 2021, 08:23 PM
More progress on the fresh air box. Disassembly.
bkrantz
Jan 11 2021, 08:27 PM
And then the tedious, PIA removal of undercoating.
I know I have ranted about this before, but WTF was the PO thinking? I am not a fan of legal restriction, but I would like to outlaw cheap undercoat spray. OK, rant over.
So far, GoofOff seems like the best solvent. It does eventually remove the undercoating (with lots of rubbing) and (almost) does not react with the plastic.
bkrantz
Jan 11 2021, 08:29 PM
I needed a break, and also to take care of things that will be blocked by the air box. That includes the grommet for the 3 heater cables. This was also a bit of a pain.
bkrantz
Jan 11 2021, 08:31 PM
Enough annoying work for today. Instead I got together all the parts for the heat blower.
bkrantz
Jan 11 2021, 08:32 PM
Much more fun to put clean and shiny parts together.
bkrantz
Jan 11 2021, 08:33 PM
And mount it in the engine compartment.
bkrantz
Jan 11 2021, 08:34 PM
I just need one of these for the connection. (borrowed photo)
bkrantz
Jan 12 2021, 08:09 PM
Still working on multiple components at the same time. Making progress with stripping overspray, undercoating, and (unfortunately) the original paint from the headlight brackets.
bkrantz
Jan 12 2021, 08:12 PM
And progress on cleaning the blower section of the fresh air box. I got most of the undercoating off, and then tackled the fossilized duct tape that the PO used to keep the power plug in place.
bkrantz
Jan 12 2021, 08:14 PM
This was not coming off with any solvent, at least that would not erode the plastic housing, so I tried shaving, using several new razor blades and lots of patience.
bkrantz
Jan 12 2021, 08:14 PM
Mostly successful, with just a little damage.
bkrantz
Jan 12 2021, 08:15 PM
After wiping with GoofOff, which reacts slightly with the plastic, the shine cam back.
bkrantz
Jan 12 2021, 08:17 PM
Next, I opened up the blower section so I could replace the baffle rings. Somehow the PO got undercoating in here (see baffle on the left).
bkrantz
Jan 12 2021, 08:18 PM
The baffles are easy to take apart.
bkrantz
Jan 12 2021, 08:19 PM
New rings, part of the 914 Rubber kit.
bkrantz
Jan 12 2021, 08:22 PM
Since I was getting ahead of myself with the fresh air box, since I need to install the dash control levers and cables first, and that means I need to install the dash. And before doing that, I need to replace the top padded vinyl and the face vinyl. Note what seems to be a buckle along the lower edge.
bkrantz
Jan 12 2021, 08:24 PM
Another view of the lower dash edge. This should be straight, right?
kroelofsen
Jan 13 2021, 11:01 AM
So much progress... Much of what you do is a very good reference for me later this year... Keep posting with many pictures!

Kansas 914
Jan 13 2021, 11:04 AM
QUOTE(kroelofsen @ Jan 13 2021, 10:01 AM)
So much progress... Much of what you do is a very good reference for me later this year... Keep posting with many pictures!
I agree - great reference.
Has anyone (admins) considered this for the "Classics" thread?
bkrantz
Jan 13 2021, 08:17 PM
QUOTE(kroelofsen @ Jan 13 2021, 10:01 AM)
So much progress... Much of what you do is a very good reference for me later this year... Keep posting with many pictures!
Will do!
bkrantz
Jan 13 2021, 08:20 PM
Got the fresh air box back together. The little circle clips are a PIA. And, yes, I did break off one of the plastic tabs.
bkrantz
Jan 13 2021, 08:25 PM
I also cleaned up the control levers. Quite a bit of dirt and some corrosion.
bkrantz
Jan 13 2021, 08:25 PM
Cleaned up.
bkrantz
Jan 13 2021, 08:26 PM
I used some fine emery paper on the contacts.
raynekat
Jan 13 2021, 09:57 PM
Check this fresh air fan switch for continuity on all 3 speeds before installing. I didn't so didn't have all the fan speeds once installed and had to remove the switch again with all the associated cuss words to sort the issue.
Looking good.....
This is a "lo-fi" version of our main content. To view the full version with more information, formatting and images, please
click here.