Full Version: Rebuiding Inside-out
Pages: 1, 2, 3, 4, 5, 6, 7, 8, 9, 10, 11, 12, 13, 14, 15, 16, 17, 18, 19, 20, 21, 22, 23, 24, 25, 26, 27, 28, 29, 30, 31, 32, 33, 34, 35, 36, 37, 38, 39, 40, 41, 42, 43, 44, 45, 46, 47, 48, 49, 50, 51, 52, 53, 54, 55, 56, 57, 58, 59, 60, 61, 62, 63, 64, 65, 66, 67, 68, 69, 70, 71, 72, 73, 74, 75, 76, 77, 78, 79, 80, 81, 82, 83, 84, 85, 86, 87, 88, 89, 90, 91, 92, 93, 94, 95, 96, 97, 98, 99, 100, 101, 102, 103, 104, 105, 106, 107, 108, 109, 110, 111, 112, 113, 114, 115, 116, 117, 118, 119, 120, 121, 122, 123, 124, 125, 126, 127, 128, 129, 130, 131, 132, 133, 134, 135, 136
Then sprayed DAP Weldwood Landau adhesive on the targa top.
And the back side of the vinyl.
With the adhesive tacky, I put it on top of some masking paper sheets while I got it in position.
Rubbed down and trimmed.
For the sail, I masked off the panel.
Test fitting the vinyl, and making reference location marks.
More DAP spray on the sail...
And on the vinyl.
Vinyl stuck on, smoothed out, and initial trim.
 that looks nice... have to do this myself somewhere this year...
Looks so nice. Keep the posts coming.
Thanks, guys. Not a hard job but it takes patience and luck.
Got the left sail done.
And installed the lower trim. This is a new (repro?) Porsche piece, but took some tweaking around the curve to get it to lie flat.
Same on the right side.
Test fit of the original targa pad. Its in pretty good shape, except for a couple of small cracks and a slight bulge in the middle. Have to see if I can improve this.
I got out all the interior padded trim pieces. Got some clean-up to do.
looking soooo good!! fun to watch others do this, i took almost same approach for the sail panel installation with the reference marks for alignment , i have done mine several time and it took the 3rd to do it right and look great. it’s almost a 2 person job to get that long top targa bar piece in place, did you have help? love the attention to detail, and that black/yellow combo is awesome! did you rebuild the fresh air defrost fan housing? 914rubber now has all the parts to do it.
QUOTE(DRPHIL914 @ Mar 14 2021, 05:55 AM) 
looking soooo good!! fun to watch others do this, i took almost same approach for the sail panel installation with the reference marks for alignment , i have done mine several time and it took the 3rd to do it right and look great. it’s almost a 2 person job to get that long top targa bar piece in place, did you have help? love the attention to detail, and that black/yellow combo is awesome! did you rebuild the fresh air defrost fan housing? 914rubber now has all the parts to do it.
Thanks, doc. I was alone, but got the position right with the inter-leaved paper sheets (and some good luck). The color combo is what I dreamed about, and happy to see it real--and I still like it.
I cleaned, rebuilt, and tested my fresh air fan and housing, with the 914Rubber kit. That should be going in soon.
I installed the steering shaft, after I realized this should have gone in before the dash. It was a bit fiddly, but I got it. I was waiting until I got the carpet installed, but that will be a while since I have not made up my mind about color.
On the sail panel vinyl - what is the correct way to trim it and not scratch into the nice new paint?
Very nice.
Very nice.
QUOTE(DdHavtech @ Mar 14 2021, 06:19 PM)
On the sail panel vinyl - what is the correct way to trim it and not scratch into the nice new paint?
Very nice.
I used several new single-edge razor blades, and cut width moderate pressure--trying to cut the vinyl and only score the paint. I thought about pre-cutting the lower edge, but could not figure out how to make sure I glued it on exactly right.
A productive couple of hours today. I started with the fresh air control panel. It looks a little shabby but I cleaned and tested all the contacts.
Control panel in place, but at first I could not recall how to keep it in place.
Then I found (and remembered) the single bolt that goes through a bracket on the back side of the control panel and into the bulkhead. Also note the wires connected.
And the 3 cables fed through the 3-hole rubber grommet.
Now its time for the dreaded fresh air box. I rebuilt this with the 914 Rubber kit, tested all the circuits, and have the new upper rubber gasket and plastic grill.
Now I know I am getting old. I got tired of climbing into the frunk for better access, so I got out my ladder.
OK, step one was attaching the control cable (from upper lever) to the box, and adjusting the position to match the lever throw.
Then the cable connector. I replaced the broken one that the PO had duct-taped in place.
Ready for my first attempt, with the rubber gasket and grill in place.
1st attempt: I muscled the box into place but the gasket and grill were no longer in position, and no chance of getting my fingers in close to fix that. Notice the dirty foot print on the right.
2nd (or maybe 3rd) attempt: I used some long zip ties to hold the gasket and grill in place.
I had enough muscle left to pull up on the cowl panel while pushing the box into place. So old, but not too old. 
Now for the last part: lifting the box against the new rubber gasket to align the side holes with the mounting brackets and get the bolts in place. I got the right side in with more muscle power, but could not get the left side without assist. For that, I used a 2x4 lever and my wonderful wife. I pulled on the lever while pushing the box to the rear, and she got the bolt started. Note that I pried against the lower corner of box, and not against the drain outlet.
All I had to do was snip the zip ties and pull them free, with some soapy water to help.
Success! At least until I test it all later on.
QUOTE(ElCee @ Mar 12 2021, 01:20 AM)
You better paint these two spots black.Click to view attachment
Aren't there a couple of plastic vent outlets that fit in there?

QUOTE(bkrantz @ Mar 12 2021, 07:29 PM)
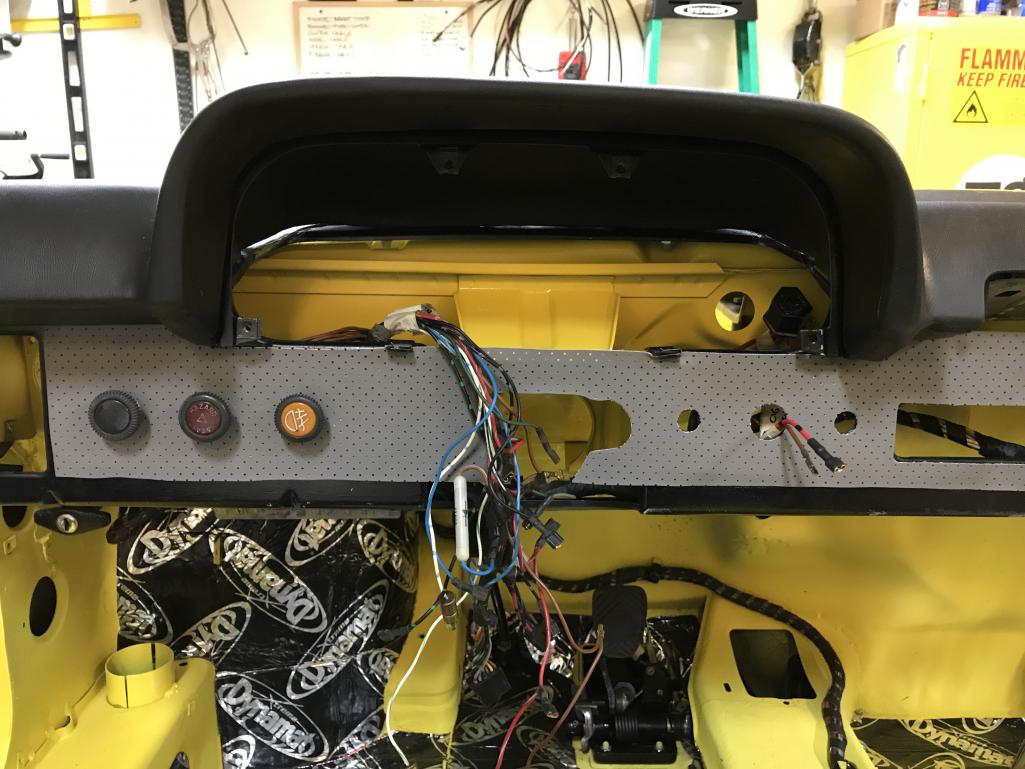
After I mounted the front plate to the dash frame, I cut out all the holes in the dash face, without thinking. On my car, switches fill the 3 holes left of the steering wheel, and the cigarette lighter goes in the big hole on the right. But now I have 2 extra holes!
Maybe you could install a couple of auxiliary electrical toggle switches with the bomber type safety covers to fill the extra holes... ? (They look cool)
Click to view attachment
Had to chuckle a bit when I saw the step ladder.
Thank goodness I've got long arms and did this all while leaning over the fenders. Ha
Yeah, that 2 by 4 brought back some memories.
And the dreaded screen on the top of the airbox.
Now if you just don't have to remove the airbox 2 more times like I did for various stupid reasons.
Looking good there Bob.
And for one of the extra holes in the dash....might I suggest a rear fog light.
Click to view attachment Click to view attachment
For the other, you could add one of those slick dual USB charging ports.
Click to view attachment
QUOTE(raynekat @ Mar 16 2021, 12:33 AM)
Do you have a link for where to buy one of these? That looks ideal to fix 2 issues I'm having. Voltage display and USB charging.
QUOTE(bkrantz @ Mar 15 2021, 06:43 PM)
Now I know I am getting old. I got tired of climbing into the frunk for better access, so I got out my ladder.
Love those t-shirt fender guards

QUOTE(CptTripps @ Mar 16 2021, 09:20 AM)
QUOTE(raynekat @ Mar 16 2021, 12:33 AM)
Do you have a link for where to buy one of these? That looks ideal to fix 2 issues I'm having. Voltage display and USB charging.
Got mine on Amazon I'd deleted the cigar lighter
Barefoot
Nice work, as always! Your airbox method is similar to mine...only I used rubber bands and squeeze clamps instead of zip ties and a 2 x 4. The knowledge you're sharing in your build thread is fantastic.
https://www.youtube.com/watch?v=Uhs6pedBOXM
https://www.youtube.com/watch?v=Uhs6pedBOXM
QUOTE(raynekat @ Mar 15 2021, 09:33 PM)
Had to chuckle a bit when I saw the step ladder.
Thank goodness I've got long arms and did this all while leaning over the fenders. Ha
Yeah, that 2 by 4 brought back some memories.
And the dreaded screen on the top of the airbox.
Now if you just don't have to remove the airbox 2 more times like I did for various stupid reasons.
Looking good there Bob.
And for one of the extra holes in the dash....might I suggest a rear fog light.
Click to view attachment Click to view attachment
For the other, you could add one of those slick dual USB charging ports.
Click to view attachment
My arms are pretty long, but with the car still up on the dolly, I needed to stand in the frunk for leverage. I fought with the box for a good ten minutes before I got the 2x4.
I don't want to hear about removing the damned thing.
And we think alike about more switches. I tracked down a rear fog light switch and a rear window defrost switch on Ebay.
As for USB ports, I have a different plan.
QUOTE(Puebloswatcop @ Mar 16 2021, 06:50 AM)
QUOTE(bkrantz @ Mar 15 2021, 06:43 PM)
Now I know I am getting old. I got tired of climbing into the frunk for better access, so I got out my ladder.
Love those t-shirt fender guards
The shirts are a bonus from my powder coat shop. They use them to wrap the parts after coating.
QUOTE(barefoot @ Mar 16 2021, 07:07 AM)
QUOTE(CptTripps @ Mar 16 2021, 09:20 AM)
QUOTE(raynekat @ Mar 16 2021, 12:33 AM)
Do you have a link for where to buy one of these? That looks ideal to fix 2 issues I'm having. Voltage display and USB charging.
Got mine on Amazon I'd deleted the cigar lighter
Barefoot
No lighter? Then where to plug in the period accessories?
QUOTE(iankarr @ Mar 16 2021, 07:27 AM)
Nice work, as always! Your airbox method is similar to mine...only I used rubber bands and squeeze clamps instead of zip ties and a 2 x 4. The knowledge you're sharing in your build thread is fantastic.
https://www.youtube.com/watch?v=Uhs6pedBOXM
Thanks, Ian. I did watch your video and the clamps wound have been next. I was a bit worried about pressing against the cowl, so tried the 2x4 first.
Trying to get the air system finished up. Here is the left control box, with the cables from the control panel connected. I did an initial adjustment to make sure the baffles went from full open to full closed as the control left went left-right.
I got out the new gaskets for the defroster vents.
Then attached the left side vent.
This is a "lo-fi" version of our main content. To view the full version with more information, formatting and images, please click here.