Full Version: what did you do to your 914 today
Pages: 1, 2, 3, 4, 5, 6, 7, 8, 9, 10, 11, 12, 13, 14, 15, 16, 17, 18, 19, 20, 21, 22, 23, 24, 25, 26, 27, 28, 29, 30, 31, 32, 33, 34, 35, 36, 37, 38, 39, 40, 41, 42, 43, 44, 45, 46, 47, 48, 49, 50, 51, 52, 53, 54, 55, 56, 57, 58, 59, 60, 61, 62, 63, 64, 65, 66, 67, 68, 69, 70, 71, 72, 73, 74, 75, 76, 77, 78, 79, 80, 81, 82, 83, 84, 85, 86, 87, 88, 89, 90, 91, 92, 93, 94, 95, 96, 97, 98, 99, 100, 101, 102, 103, 104, 105, 106, 107, 108, 109, 110, 111, 112, 113, 114, 115, 116, 117, 118, 119, 120, 121, 122, 123, 124, 125, 126, 127, 128, 129, 130, 131, 132, 133, 134, 135, 136, 137, 138, 139, 140, 141, 142, 143, 144, 145, 146, 147, 148, 149, 150, 151, 152, 153, 154, 155, 156, 157, 158, 159, 160, 161, 162, 163, 164, 165, 166, 167, 168, 169, 170, 171, 172, 173, 174, 175, 176, 177, 178, 179, 180, 181, 182, 183, 184, 185, 186, 187, 188, 189, 190, 191, 192, 193, 194, 195, 196, 197, 198, 199, 200, 201, 202, 203, 204, 205, 206, 207, 208, 209, 210, 211, 212, 213, 214, 215, 216, 217, 218, 219, 220, 221, 222, 223, 224, 225, 226, 227, 228, 229, 230, 231, 232, 233, 234, 235, 236, 237, 238, 239, 240, 241, 242, 243, 244, 245, 246, 247, 248, 249, 250, 251, 252, 253, 254, 255, 256, 257, 258, 259, 260, 261, 262, 263, 264, 265, 266, 267, 268, 269, 270, 271, 272, 273, 274, 275, 276, 277, 278, 279, 280, 281, 282, 283, 284, 285, 286, 287, 288, 289, 290, 291, 292, 293, 294, 295, 296, 297, 298, 299, 300, 301, 302, 303, 304, 305, 306, 307, 308, 309, 310, 311, 312, 313, 314, 315, 316, 317, 318, 319, 320, 321, 322, 323, 324, 325, 326, 327, 328, 329, 330, 331, 332, 333, 334, 335, 336, 337
Hmmm. Details?
QUOTE(mepstein @ Nov 18 2017, 12:03 PM) 
QUOTE(Mikedrevguy @ Nov 18 2017, 11:56 AM)
(is it SOP for the turn signals, when key is off to power the respective running light?)
Yes
Thank you much.
QUOTE(Boomingbeetle @ Nov 18 2017, 05:30 AM)
Got new custom exhaust mounted to A1 header!
Very nice exhaust! It looks like it’s pretty loud. I’d love to hear it!
QUOTE(lonewolfe @ Nov 19 2017, 04:26 AM)
QUOTE(Boomingbeetle @ Nov 18 2017, 05:30 AM)
Got new custom exhaust mounted to A1 header!
Very nice exhaust! It looks like it’s pretty loud. I’d love to hear it!
Very loud... it’s a 2.4 liter. I went driving with the open headers a few times and the new exhaust is only *slightly* quieter. Just deeper


Further along the road to completion
Wish I could say I've done something but here is a pic of my new twin plug heads for my 2.7 6 conversion
Click to view attachment
.Joe at Series 9 is doing the work.
Thanks Joe!
Click to view attachment
.Joe at Series 9 is doing the work.
Thanks Joe!
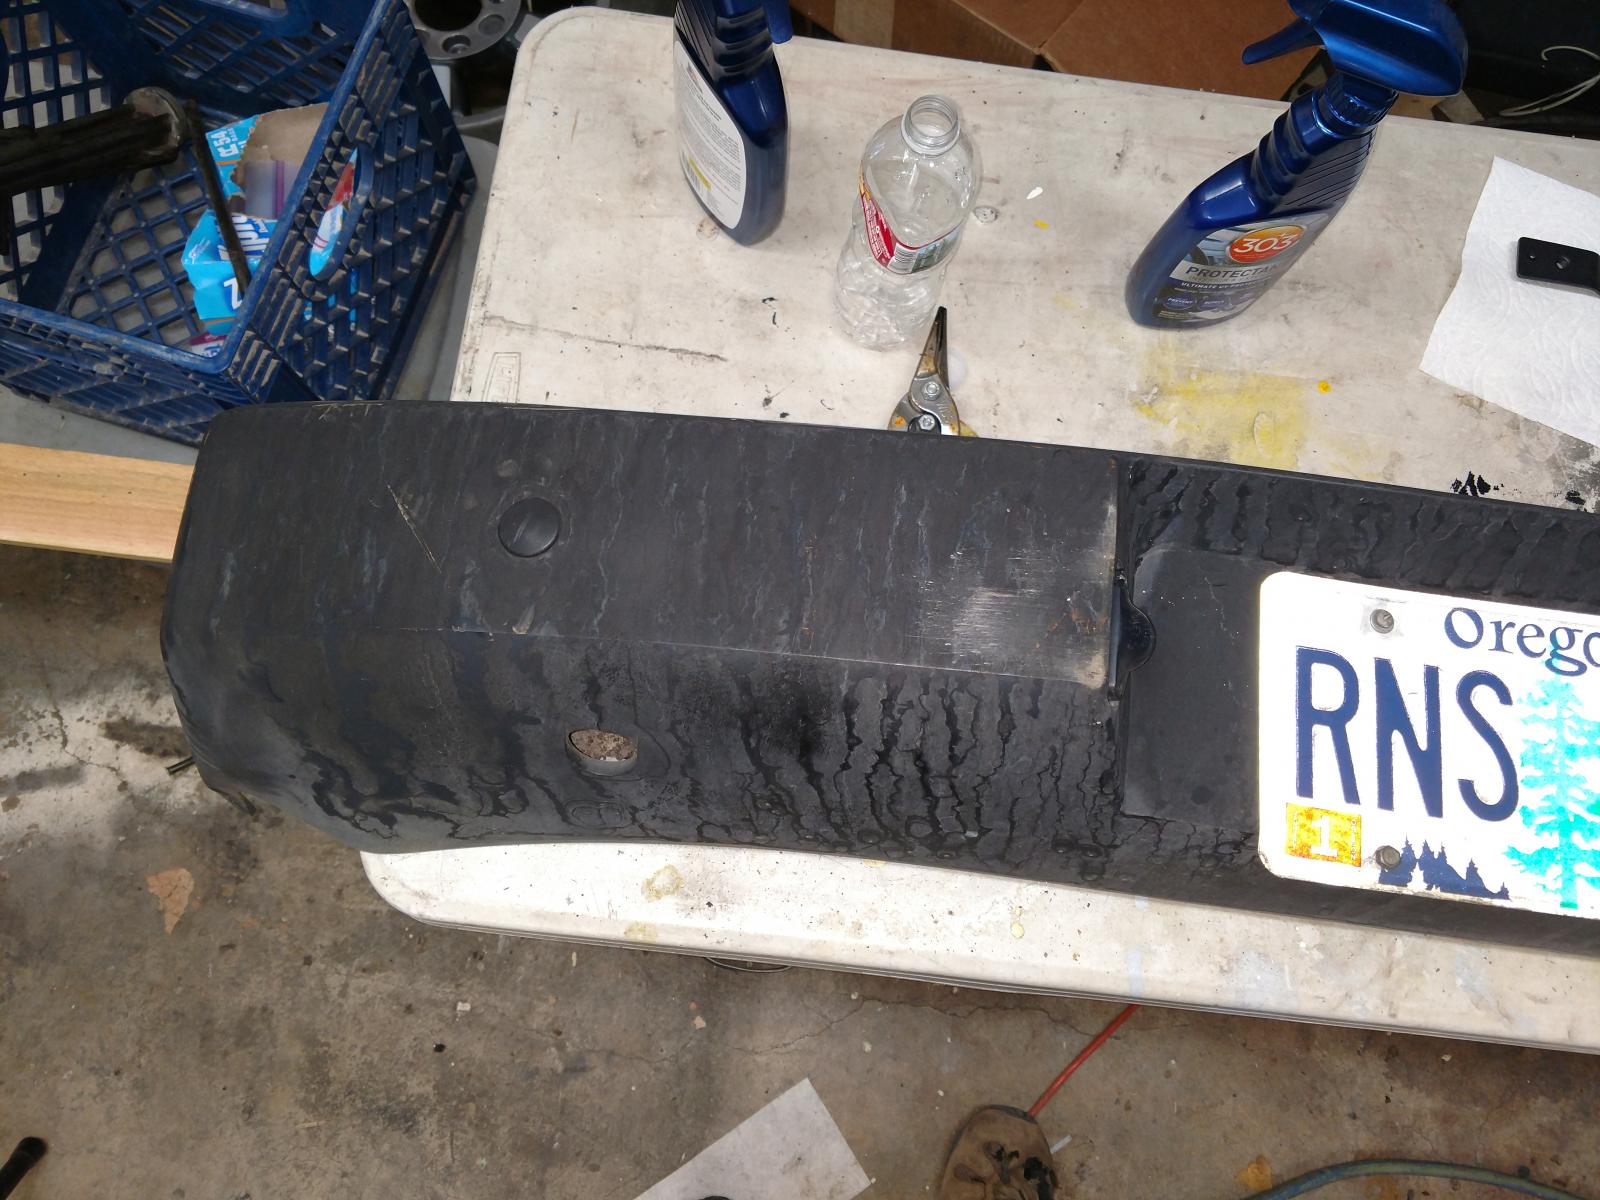
I test fit my used Dan Gurney's that I bought, after buying the longer Gurney lug bolts ...the steelie bolts are shorter and don't have the washer-like flat piece that fits into the Gurney seat.
Also, dropped the front about 2.5 inches or so by using the torsion bar adjuster bolt. I'll probably raise it back up later by about a 1/2". Just want it to have a slight rake.Click to view attachment Click to view attachmentClick to view attachmentClick to view attachment
Also, dropped the front about 2.5 inches or so by using the torsion bar adjuster bolt. I'll probably raise it back up later by about a 1/2". Just want it to have a slight rake.Click to view attachment Click to view attachmentClick to view attachmentClick to view attachment
Before
After 303
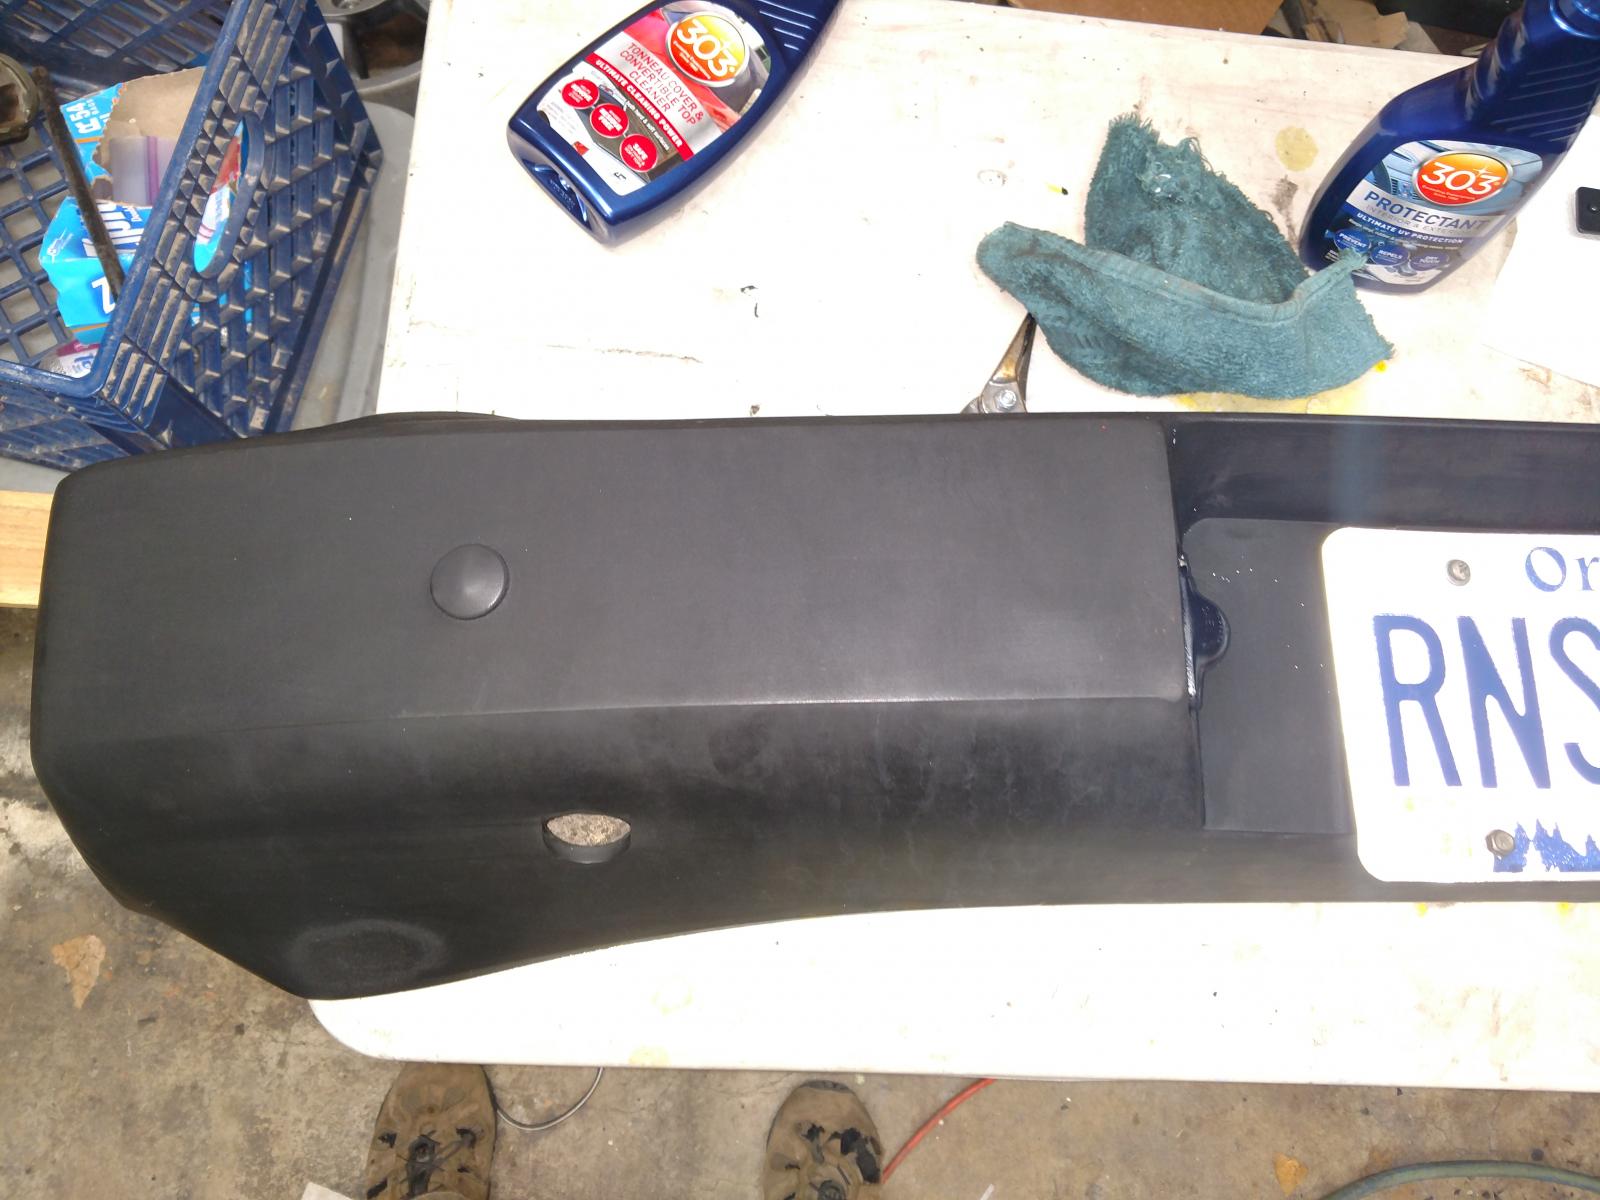
After 303
QUOTE(Mikedrevguy @ Nov 19 2017, 08:44 AM)
Further along the road to completion
Like that hood.

QUOTE(Mikedrevguy @ Nov 19 2017, 08:44 AM)
Further along the road to completion
Like that hood.
Seat covers or a Scottish kilt??
Click to view attachment
Completed enough of the engine build to move it to another stand and start grinding,blending and priming..
Completed enough of the engine build to move it to another stand and start grinding,blending and priming..
Did a 2 day white vinegar bath on my brake rotors to clean off the rust. Looking way better now.
Click to view attachment
Click to view attachment
QUOTE(Costa05 @ Nov 20 2017, 12:21 PM)
Did a 2 day white vinegar bath on my brake rotors to clean off the rust. Looking way better now.
Do those studs just screw in from the back of the rotor? Where did you get the stud kit?
Today was a 40 + mile drive to Queen Valley from Scotttsdale / Way out there in the desert. Way out there...... Open range skeet shooting with my electric clay pigeon flinger and 12 gauge Citori O/U. Unbelievable territory and most likely the first time a 914 has been in this part of the planet.
Video attached...... if i can figure out how to do that......... two tries / nope... locked up my iPhone / help needed to upload a vid from iphone to 'world please.
Video attached...... if i can figure out how to do that......... two tries / nope... locked up my iPhone / help needed to upload a vid from iphone to 'world please.
QUOTE(forrestkhaag @ Nov 20 2017, 03:57 PM)
Today was a 40 + mile drive to Queen Valley from Scotttsdale / Way out there in the desert. Way out there...... Open range skeet shooting with my electric clay pigeon flinger and 12 gauge Citori O/U. Unbelievable territory and most likely the first time a 914 has been in this part of the planet.
Video attached...... if i can figure out how to do that......... two tries / nope... locked up my iPhone / help needed to upload a vid from iphone to 'world please.
I'm hanging out in Buckeye through Friday, 11/24, going to see a friend's band (CCR cover band [Fortunate Son']) play at Casino Arizona in Scottsdale Friday night, then heading up to Payson after the show.Video attached...... if i can figure out how to do that......... two tries / nope... locked up my iPhone / help needed to upload a vid from iphone to 'world please.
There's a shooting range a little N/W of Buckeye too ...
 ... might try so squeeze in a visit there before the end of the week
New seals installed, door latches installed, drivers door shimmed to correct sag presumed to be left over from an accident in a prior life as there isn’t any rust that would cause that.
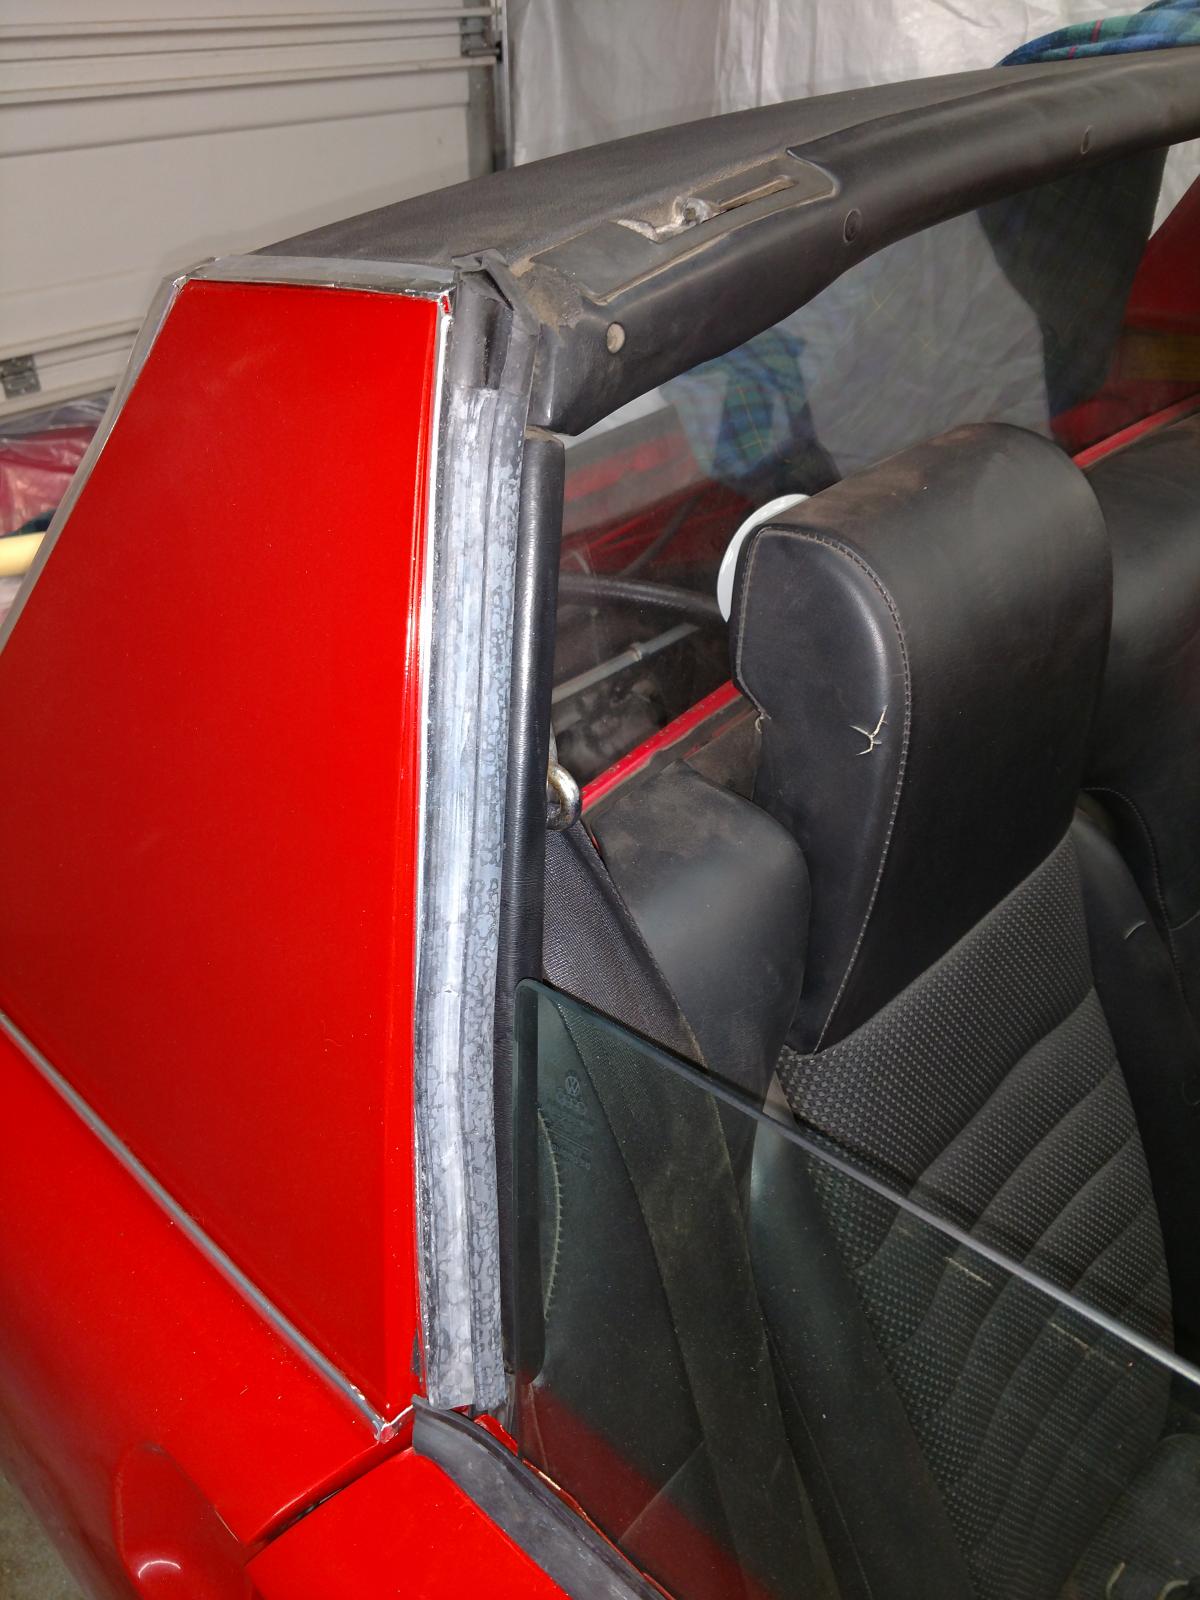
New stop seal installed . Didn’t really respond to a mallet, though my index finger really did. Channel locks worked well to,compress the steel teeth.
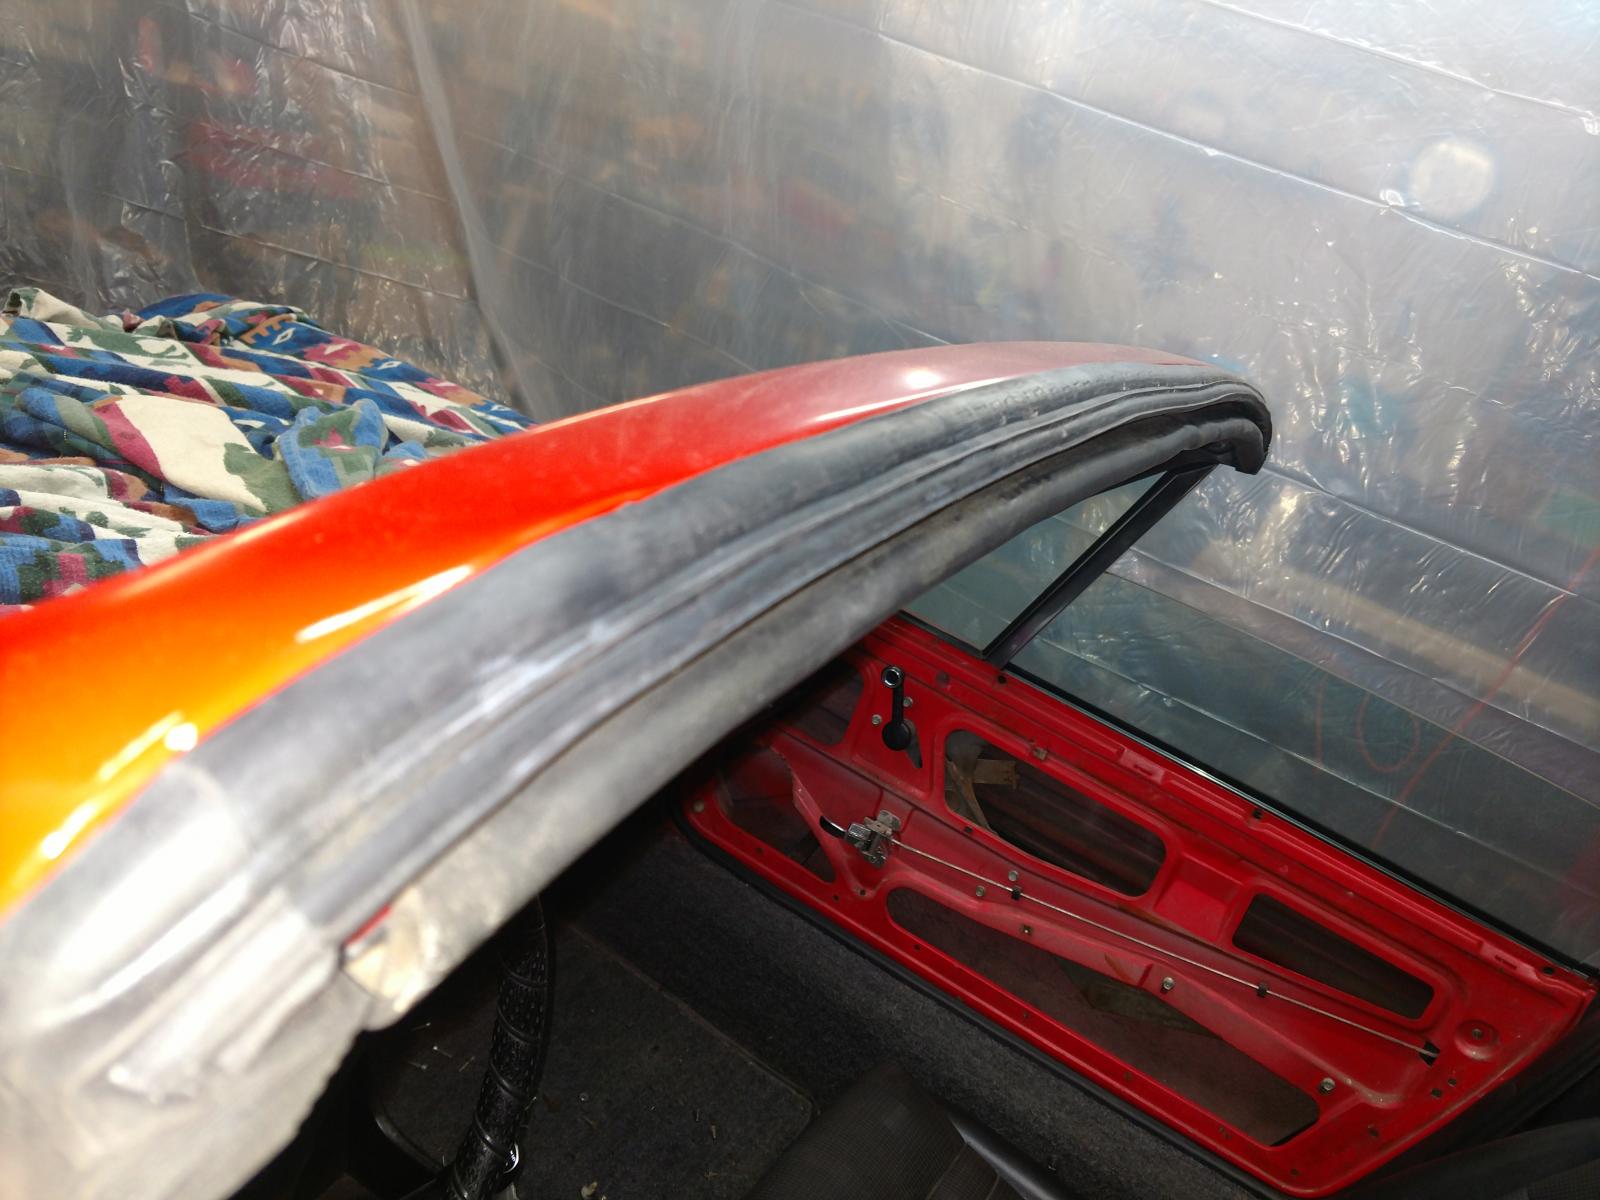
Rocker panels installed.
[indent]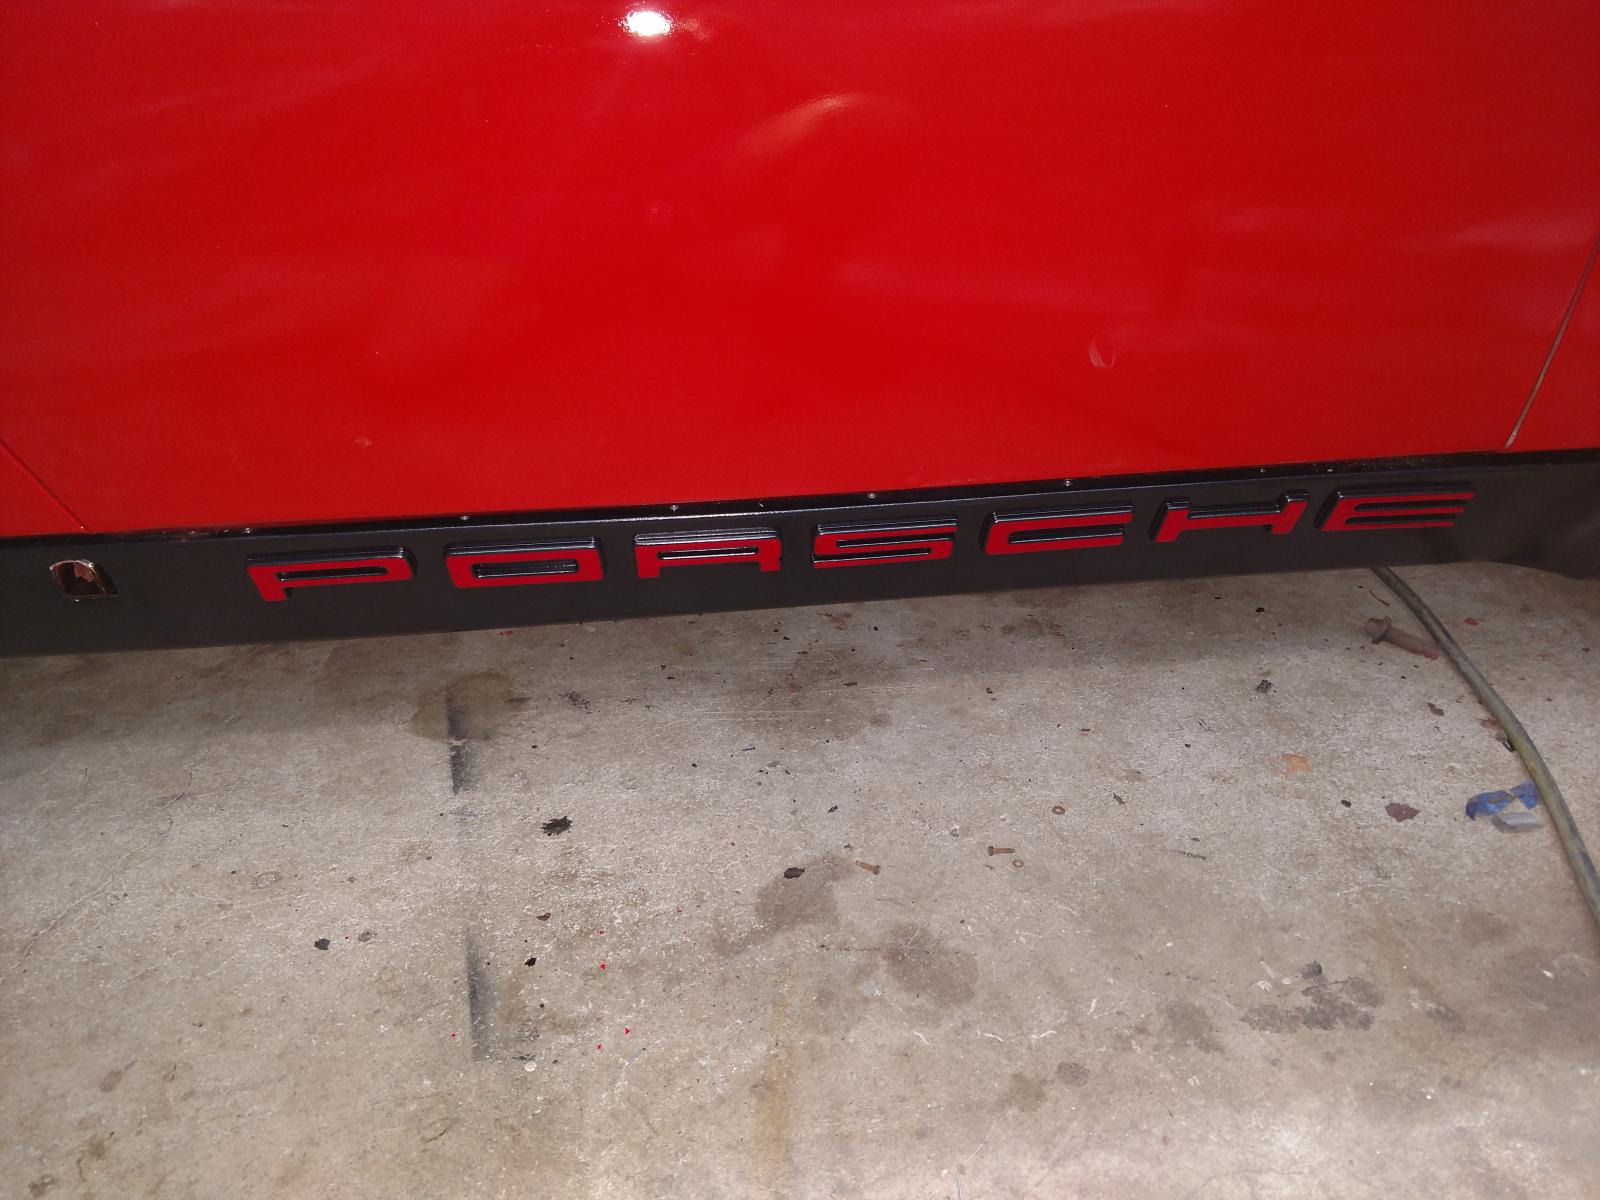
Hood seal and headlight covers will come after I replace the fresh air blower, gas tank and other sundry u Dee the hood things.
New stop seal installed . Didn’t really respond to a mallet, though my index finger really did. Channel locks worked well to,compress the steel teeth.
Rocker panels installed.
[indent]
Hood seal and headlight covers will come after I replace the fresh air blower, gas tank and other sundry u Dee the hood things.
QUOTE(Steve @ Nov 21 2017, 12:46 PM)
What do you do with a worn out office chair? Make a 914 seat office chair.
Way to go Steve....adding tilt mechanism?
I just may have to copy your idea....my home office chair was on its way out.
Oscar
i just did this with my 911-993 seats! sourced chairs from Habitat store
QUOTE(ValcoOscar @ Nov 21 2017, 01:43 PM)
QUOTE(Steve @ Nov 21 2017, 12:46 PM)
What do you do with a worn out office chair? Make a 914 seat office chair.
Way to go Steve....adding tilt mechanism?
I just may have to copy your idea....my home office chair was on its way out.
Oscar

Latest pictures of the respray in Palma Green Metallic.
It should be ready for the summer
It should be ready for the summer
I scored a set of early chrome bumpers yesterday. The chrome is excellent on the rear "square corner" bumper, the front bumper, not so much. A strange anomaly is that on the front bumper, in middle area where the squarish holes usually are, they are not stamped out. They look like they came from the factory this way and never were punched out. These weren't welded up, either. I can knock them out if I want, I suppose.
Has anybody seen this before?
Weird.
Click to view attachment
Has anybody seen this before?
Weird.
Click to view attachment
Here's the rear bumper. It's not perfect, but it is laser straight. Pretty good for a 48 year old part. Both rubber tops are amazing too.
(the black spot is a reflection)
Click to view attachment
(the black spot is a reflection)
Click to view attachment
I'd get a rear like that just to have- nice find. Have the original bumpers on both my 914's, for some reason I like the early rear bumper design better. Not sure why they bothered to change it...
QUOTE(Jett @ Nov 23 2017, 09:30 AM)
Latest pictures of the respray in Palma Green Metallic.
It should be ready for the summer
Looks great. What size tires are you running on the 2.0Fuchs?
Getting ready to build the box, I think I can get all that in there without letting the smoke out.
Click to view attachment
Everything but the turn signals works.
Click to view attachment
Everything but the turn signals works.
QUOTE(Larmo63 @ Nov 23 2017, 09:37 AM)
Here's the rear bumper. It's not perfect, but it is laser straight. Pretty good for a 48 year old part. Both rubber tops are amazing too.
(the black spot is a reflection)
Wish I could find a set of bumpers that nice around here.
Started the day with installing the new 914 Rubber front control arm bushing kit with the new install tools. Super In Law and I shot about 50 pictures to be used for the install instructions. Here's a glimpse.
Click to view attachment
You'll need to purchase some all-thread, washers, nuts and liquid hand soap. I would probably use a double washer set on the nut that I'm driving in the push guide tool.
This is done with only hand tools. The 20 ton press 10 feet away went unused. LOL.
Click to view attachment
Tampered guide tool.
Click to view attachment
Push tool.
Click to view attachment
3/4" ratchet wrench
Click to view attachment
Jack and I were almost laughing on how easy it was ............
Click to view attachment
Click to view attachment
You'll need to purchase some all-thread, washers, nuts and liquid hand soap. I would probably use a double washer set on the nut that I'm driving in the push guide tool.
This is done with only hand tools. The 20 ton press 10 feet away went unused. LOL.
Click to view attachment
Tampered guide tool.
Click to view attachment
Push tool.
Click to view attachment
3/4" ratchet wrench
Click to view attachment
Jack and I were almost laughing on how easy it was ............
Click to view attachment
Then on to Mike's (Warpigs) side shift conversion.
1st piece was the GPR oilite shift console bushing. Brian's piece takes no modification to either the rod or console.
Click to view attachment
Click to view attachment
Then on to installing Tangerine Racing's fire wall bushing.
Click to view attachment
Mark did drop off one of his new front strut top bushing kit.
Click to view attachment
Great day. Mike will be back at 9am and we'll keep going.
Thanks. They are old tires that came with the rims. IIRC 185/15/70
Added pics of the new tires.
Latest pictures of the respray in Palma Green Metallic.
It should be ready for the summer
Looks great. What size tires are you running on the 2.0Fuchs?
Added pics of the new tires.
QUOTE(Mikedrevguy @ Nov 24 2017, 09:04 AM)
QUOTE(Jett @ Nov 23 2017, 09:30 AM)
Latest pictures of the respray in Palma Green Metallic.
It should be ready for the summer
Looks great. What size tires are you running on the 2.0Fuchs?
Got the COA today. Drove the car to celebrate. I swear this thing adds at least 10 hp! 
Click to view attachment
Click to view attachment
QUOTE(cary @ Nov 24 2017, 09:30 PM)
Started the day with installing the new 914 Rubber front control arm bushing kit with the new install tools. Super In Law and I shot about 50 pictures to be used for the install instructions. Here's a glimpse.
You'll need to purchase some all-thread, washers, nuts and liquid hand soap. I would probably use a double washer set on the nut that I'm driving in the push guide tool.
This is done with only hand tools. The 20 ton press 10 feet away went unused. LOL.
Tampered guide tool.
Push tool.
3/4" ratchet wrench
Jack and I were almost laughing on how easy it was ............
When will these be available?
First time on the car for a while. So I got the refurbished rear arm fitted then the new disc & pads on the driver's side. Luckily I found the e brake cables which I thought I had thrown out, so they were fitted. It was too cold to spray the rear exhaust so will do it when I push the car out hopefully tomorrow.
Didn't have an on off pedal pusher today so bleeding will happen tomorrow.
Didn't have an on off pedal pusher today so bleeding will happen tomorrow.
Finally got a chance to fix an exhaust leak. Somewhat small leak turns into a large, loud, and smelly leak when this happens:
Click to view attachment
The offending gasket was on #3. I've suspected a small leak for a while, but it became obvious about 10 days ago. Working on the VW exhaust system is a real "joy" . Having a lift to do this now helps a lot, but it's still an "interesting" design. Using a shop vac up the tailpipe in blower mode is a great way to both find which cylinder(s) is the problem as well as a good way to test to seal if things seal up. Lining up the exhaust studs and making sure the muffler will connect takes some negotiating, but it's all good now.
Runs, sounds, and smells much better
Click to view attachment
The offending gasket was on #3. I've suspected a small leak for a while, but it became obvious about 10 days ago. Working on the VW exhaust system is a real "joy"
. Having a lift to do this now helps a lot, but it's still an "interesting" design. Using a shop vac up the tailpipe in blower mode is a great way to both find which cylinder(s) is the problem as well as a good way to test to seal if things seal up. Lining up the exhaust studs and making sure the muffler will connect takes some negotiating, but it's all good now.Runs, sounds, and smells much better
Picked up my new to me PMB Performance rebuilt calipers down at my PO box. I got a deal that was too hard to pass up in our classifieds section.
Almost too nice to install on my 914....
Click to view attachment
Almost too nice to install on my 914....
Click to view attachment
QUOTE(mb911 @ Nov 25 2017, 11:22 AM)
When will these be available?
Wasn't discussed. You'll need to give them a call. I believe all they were waiting for was the tools to be tested. They passed with flying colors.
Working on Mike's (Warpigs) car. He's chomping on the bit to be back on the road.
Next stop. Fuel pump relocated to the front. This will be the 3rd 75+ fuel cover/mount I've cut out and installed with nutserts. Three port pump takes a little larger hole.
Click to view attachment
Nutserts, front and back.
Click to view attachment
Click to view attachment
Re-Routing the fuel pump wires thru the snorkel. Today I'll create a red and black 2 wire harness to run with the tunnel harness.
Click to view attachment
This morning I'll dig into the hellhole with multiple wire brushes and see how much of rust I can remove. Plus create the patch in the engine tray where the fuel pump used to be hanging by a thread.
Click to view attachment
More wireing... 
QUOTE(cary @ Nov 26 2017, 05:38 AM)
Working on Mike's (Warpigs) car. He's chomping on the bit to be back on the road.
Next stop. Fuel pump relocated to the front. This will be the 3rd 75+ fuel cover/mount I've cut out and installed with nutserts. Three port pump takes a little larger hole.
Nutserts, front and back.
Re-Routing the fuel pump wires thru the snorkel. Today I'll create a red and black 2 wire harness to run with the tunnel harness.
This morning I'll dig into the hellhole with multiple wire brushes and see how much of rust I can remove. Plus create the patch in the engine tray where the fuel pump used to be hanging by a thread.
Cary its been a while since I looked at a 75 mount but curious why people don't go the 911 route and mount under the steering rack? By the way I love all of your threads..
Wheel wells today. One side at a time. Bigger garage would help a ton.
Click to view attachment
Click to view attachment
QUOTE(cary @ Nov 25 2017, 12:39 AM)
Then on to Mike's (Warpigs) side shift conversion.
1st piece was the GPR oilite shift console bushing. Brian's piece takes no modification to either the rod or console.
Looking good, Cary!
I installed one of those oilites and it needed to be flipped so the flange was inside the console to allow the shift rod full range of motion. You may want to check that before you button it all up!
Sort of 914 related, made a new shelf for my jack stand collection. Used all parts I had laying around so no extra money spent.
Click to view attachment
Click to view attachment
nothing ON it since the body is at a shop having old respray paint taken off and the under coat on floor pan and back trunk underside as well, - however started a bit of clean up of parts and sourcing what is needed for all to go back together, so what I did FOR her was buy LOTS of parts on the 914 rubber.com Black Friday sales!
- Phil
- Phil
A little update on the weekends work on Mike's (Warpigs) car.
Added lift rings to his engine for easier lifting too and from the table and engine stand.
I added an extension to the front one. I think I'll have them lazer cut on the next batch that Rothsport does.
Click to view attachment
Removed the 1/2 shafts and ran the hubs thru the parts washer.
Mike's going to rebuild the half shafts during the week.
That's not water. Sprayed them down with WD40 to keep them from rusting instantly.
Click to view attachment
Did a temporary repair on Mike's Hell Hole. Car will get restored/rebuilt into a GT in couple years. Patched and treated with OSPHO after this shot. A couple holes starting in the wheelhouse wall, but I didn't touch them. Not in the scope of work on this project. They'll get a dab of seam sealer and the entire area will get sealed up with Eastwood HD Anti Rust.
Click to view attachment
Primary Sunday project. Creating and installing relocated fuel pump harness. In the snorkel and lays with the harness and speedo cable.
Click to view attachment
Need to determine point of entry into the tank cavity and solder on the OEM connector when the final length is determined.
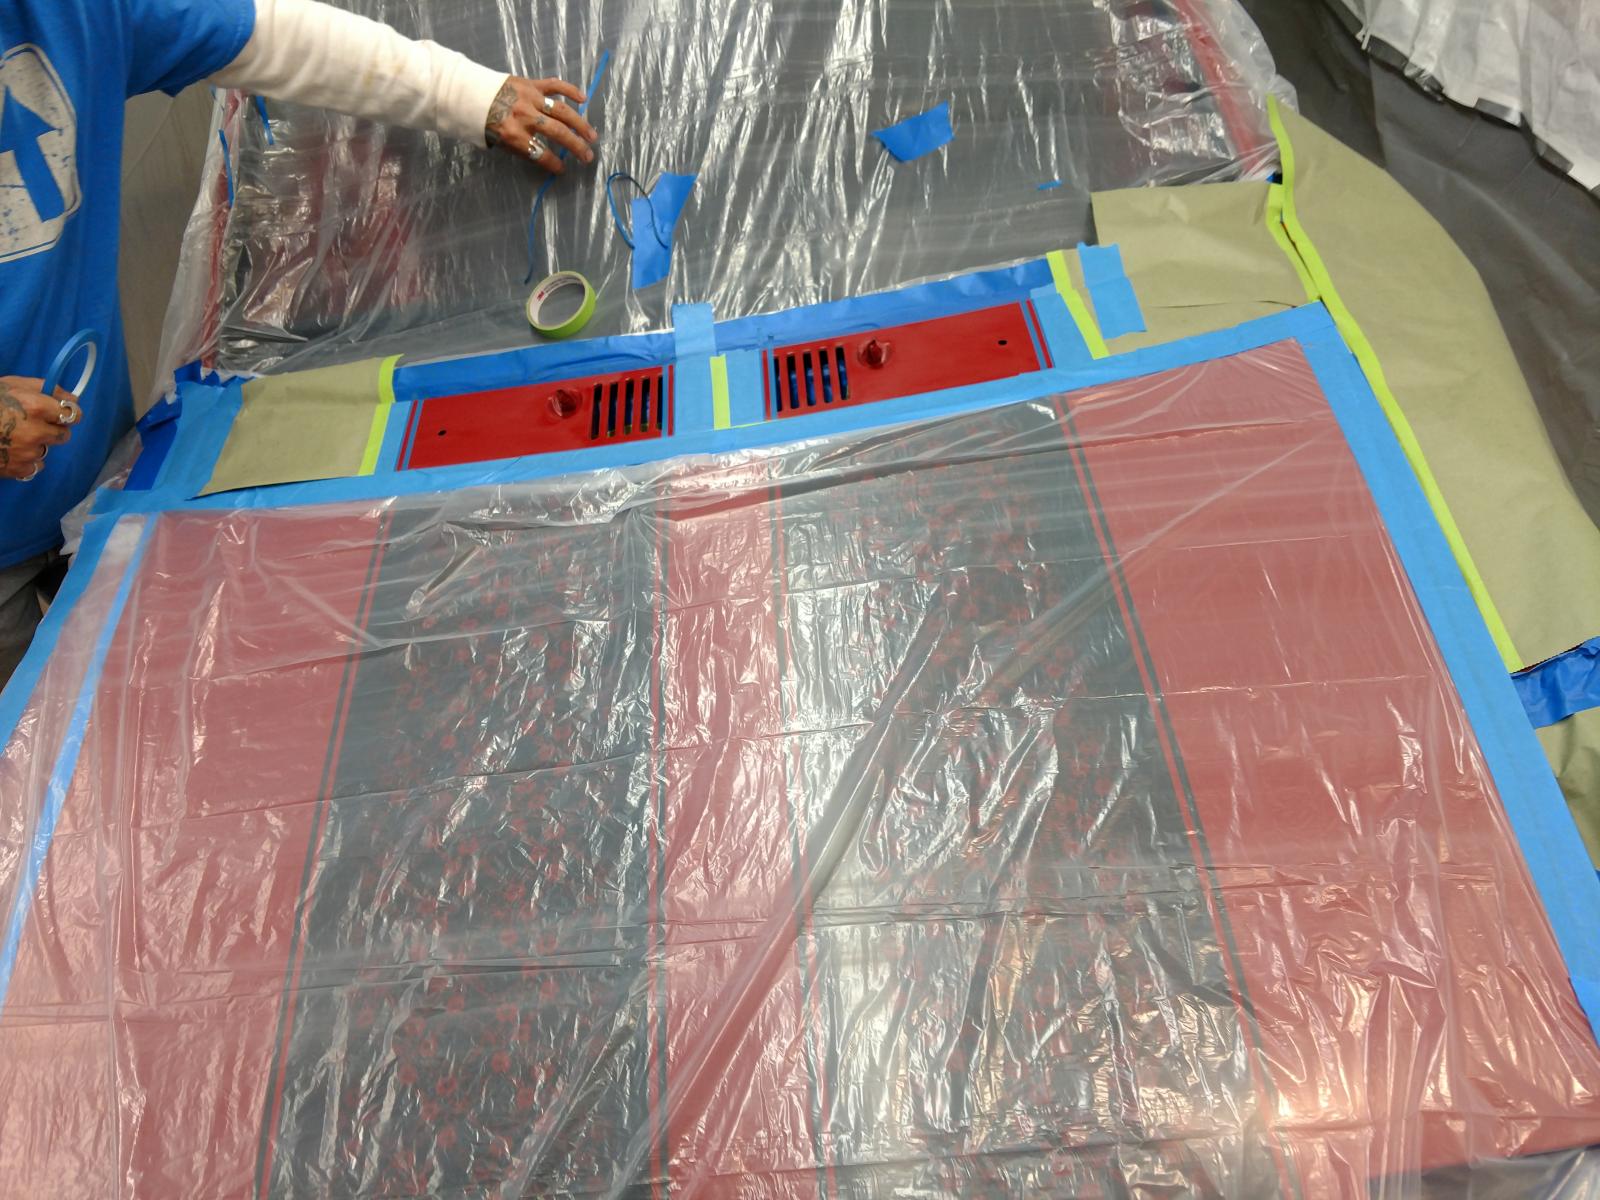
Made a cover for the GT engine compartment lid to keep out water when washing or get caught in a sudden downpour. I cut a piece of brown tarp to fit, then attached 4 small rare earth magnets to the cover to keep it in place HD has the magnets.
Just a little time today for car work. I started by spraying the muffler with Matt black but paint. Never used it before and it seemed a little thin at times but it's finished pretty good.
Then I cleaned the oil off the heat exchanger and refitted that. Hopefully the rocker cover doesn't leak on it again.
Lastly I lined up the gear shifter and without the engine running I think I have all 6 gears selecting.
Lastly I saw the gear change rod underneath had paint runs in it. I used the leftover caliper paint to paint it. Hopefully I will be able to flat the runs and polish it up again.
Possibly first time drive tomorrow
Received my goodies from the 914Rubber Black Friday sale and installed them. The door seals are very nice! Got a set of the silicon heater tubes in hopes of using them for my 911 heat backdate but they might be a little too small.
This is a "lo-fi" version of our main content. To view the full version with more information, formatting and images, please click here.